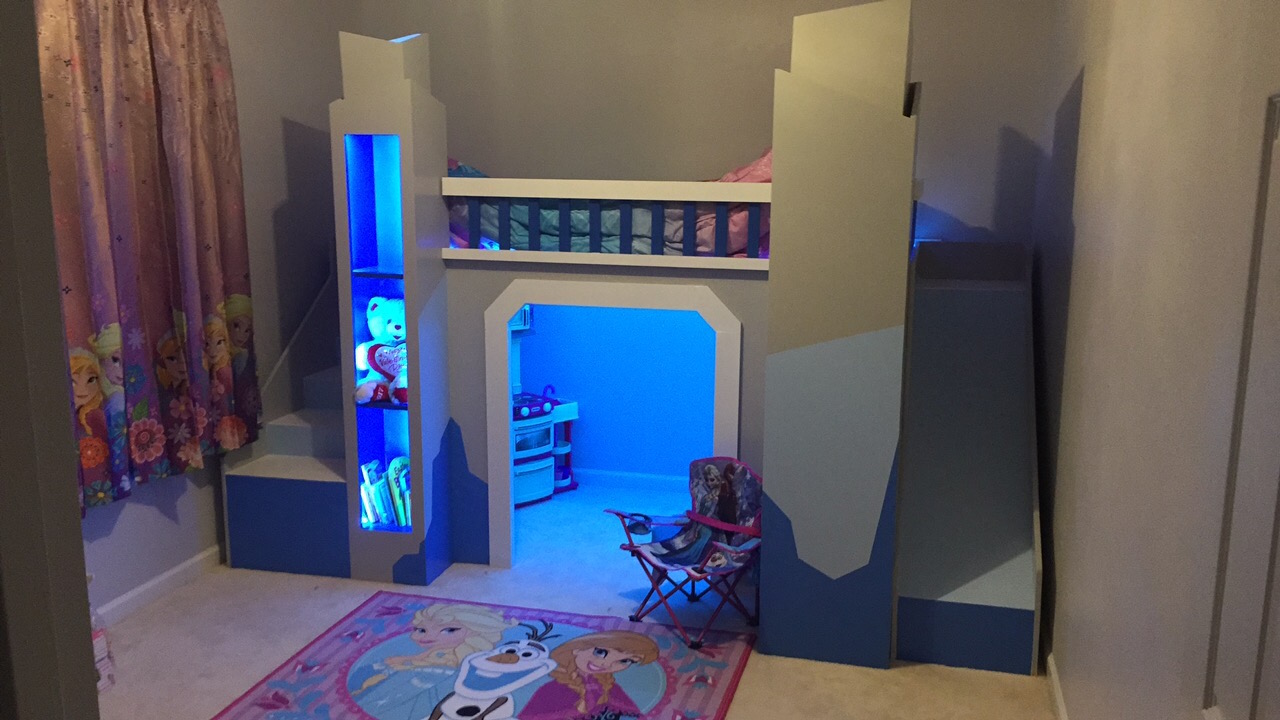
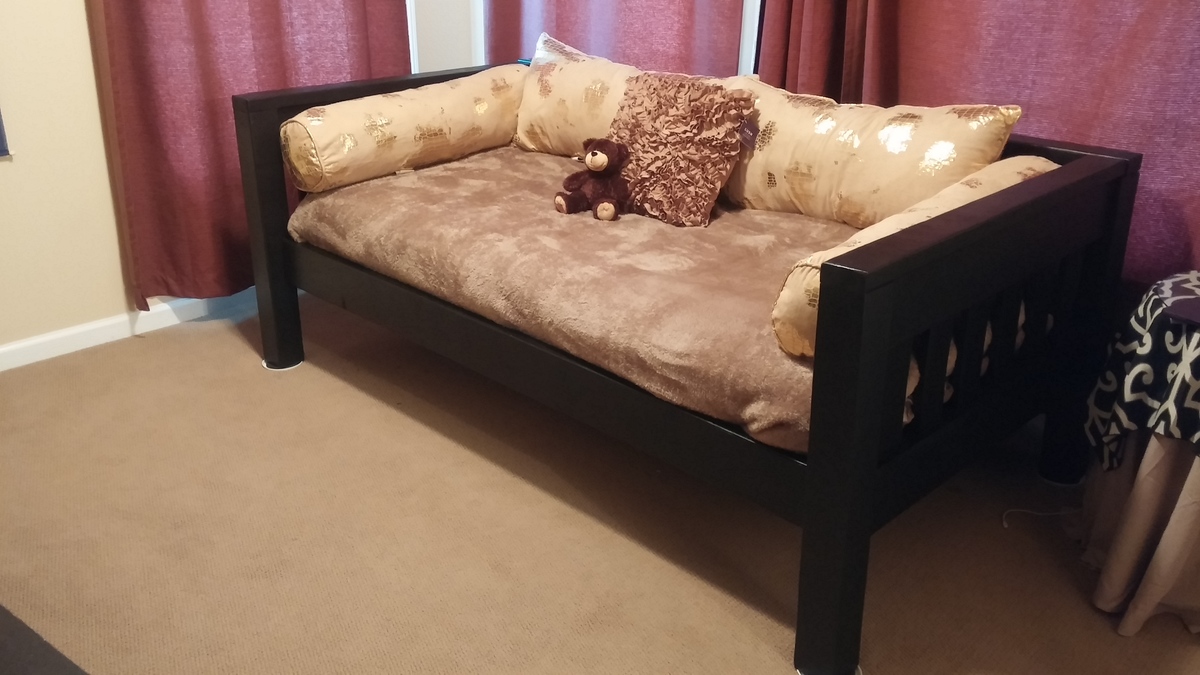
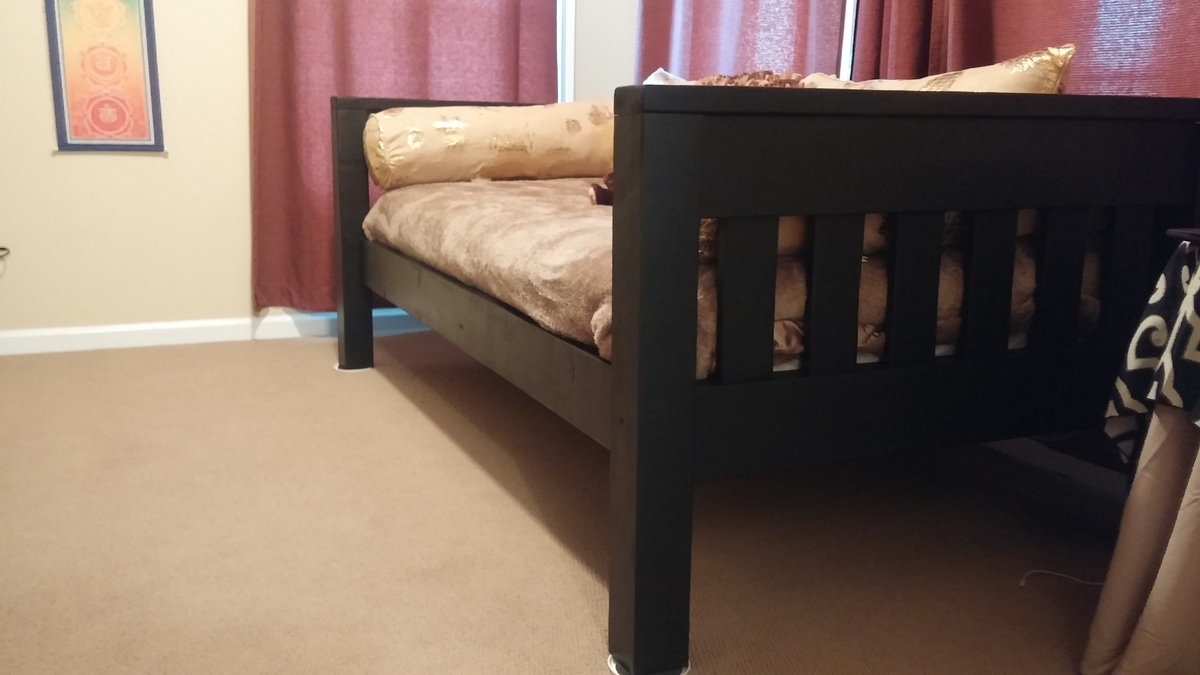
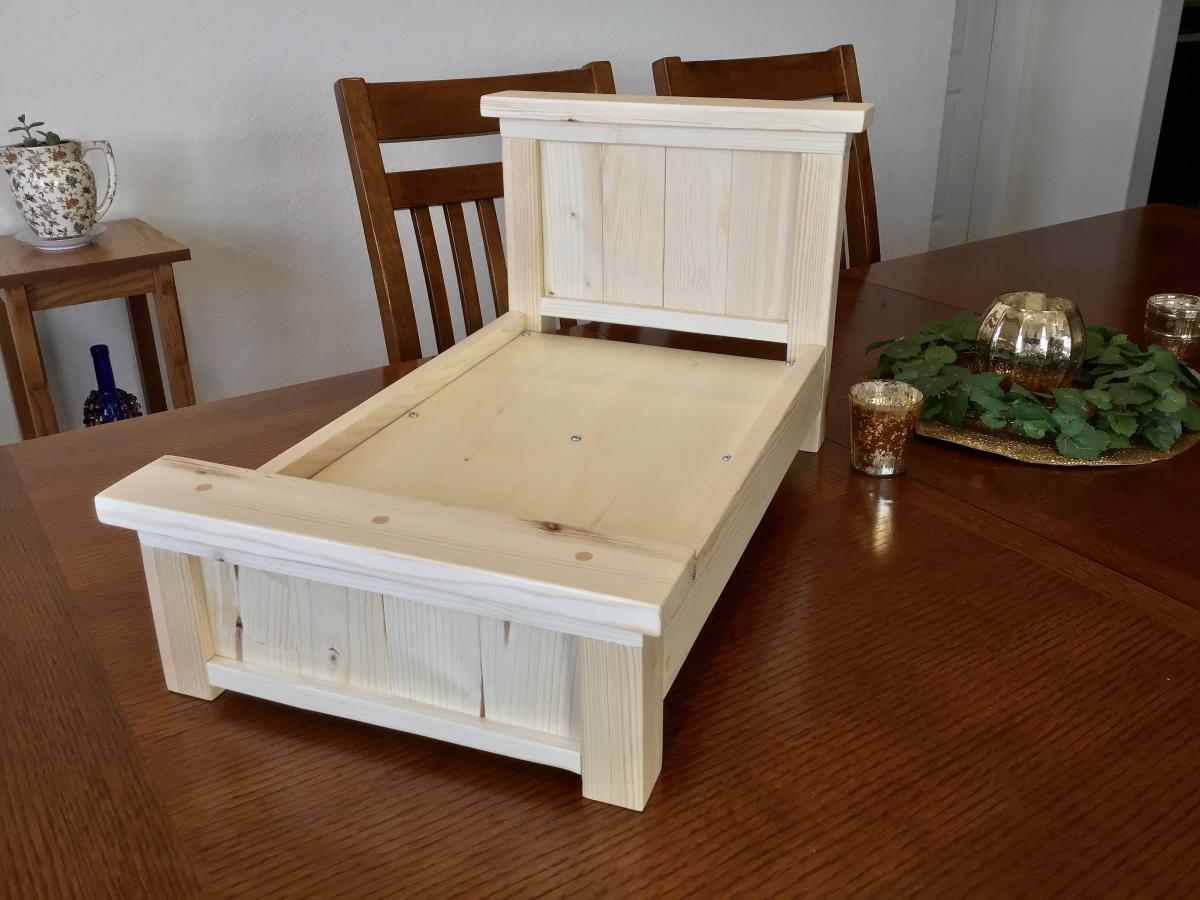
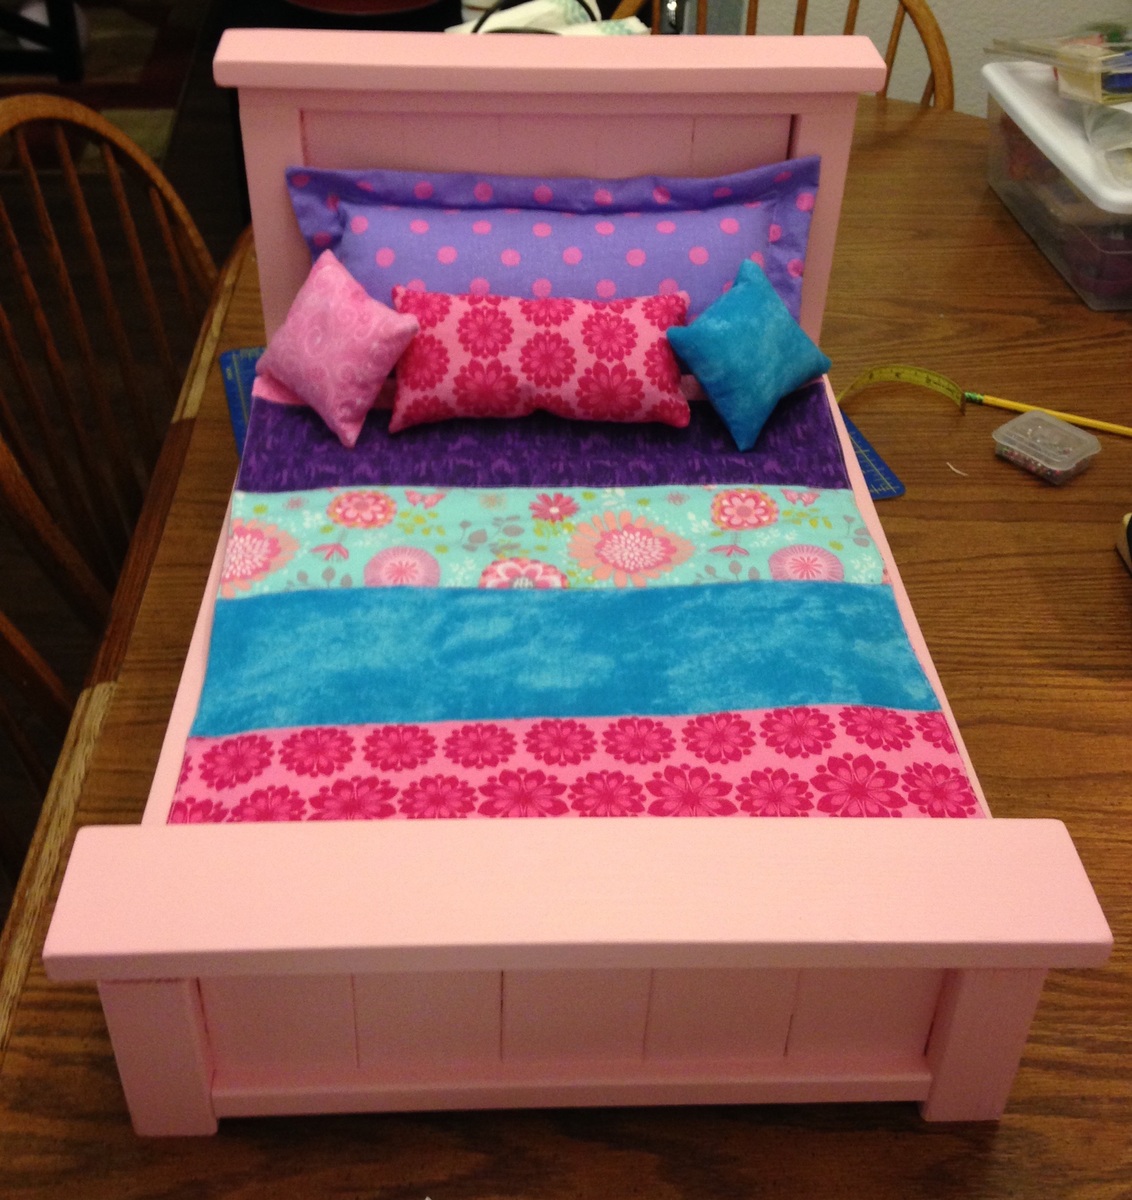
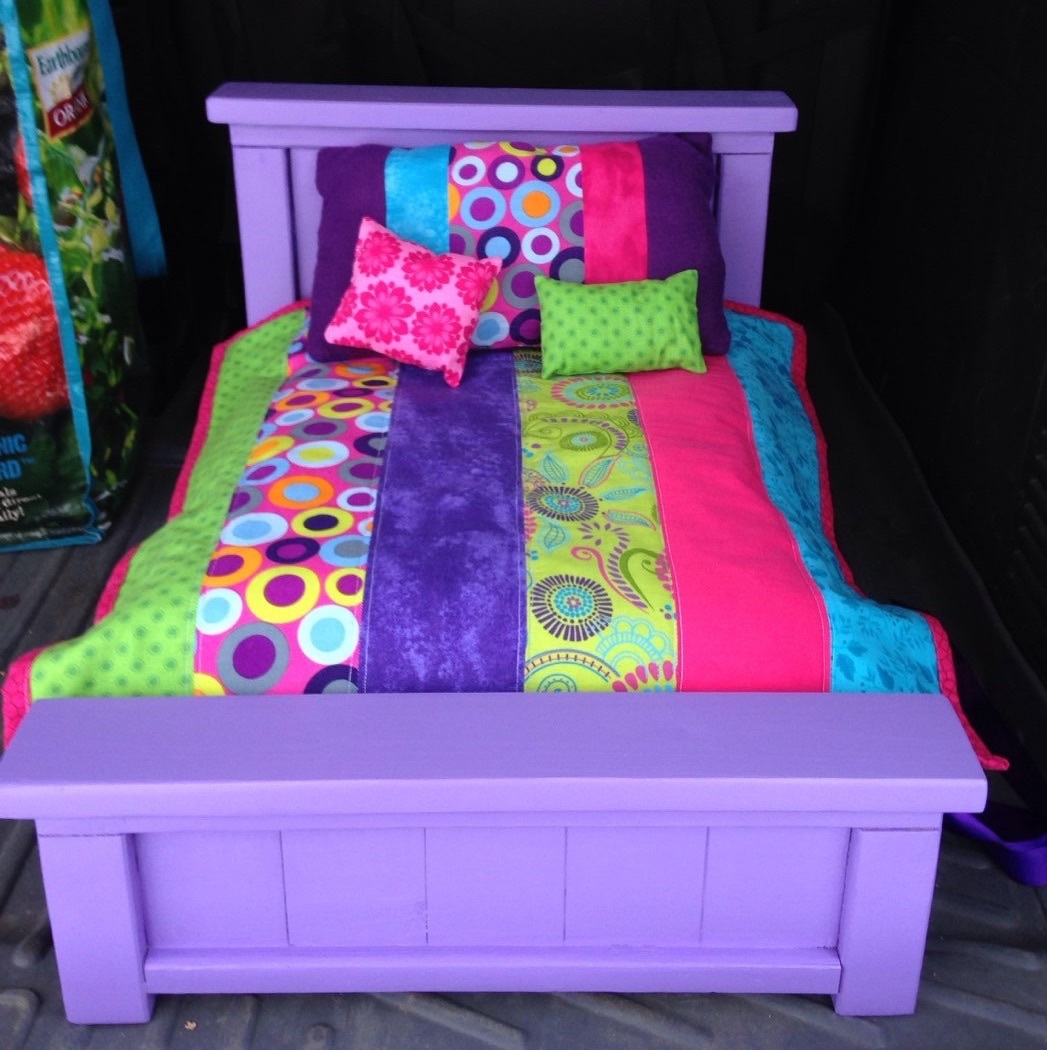
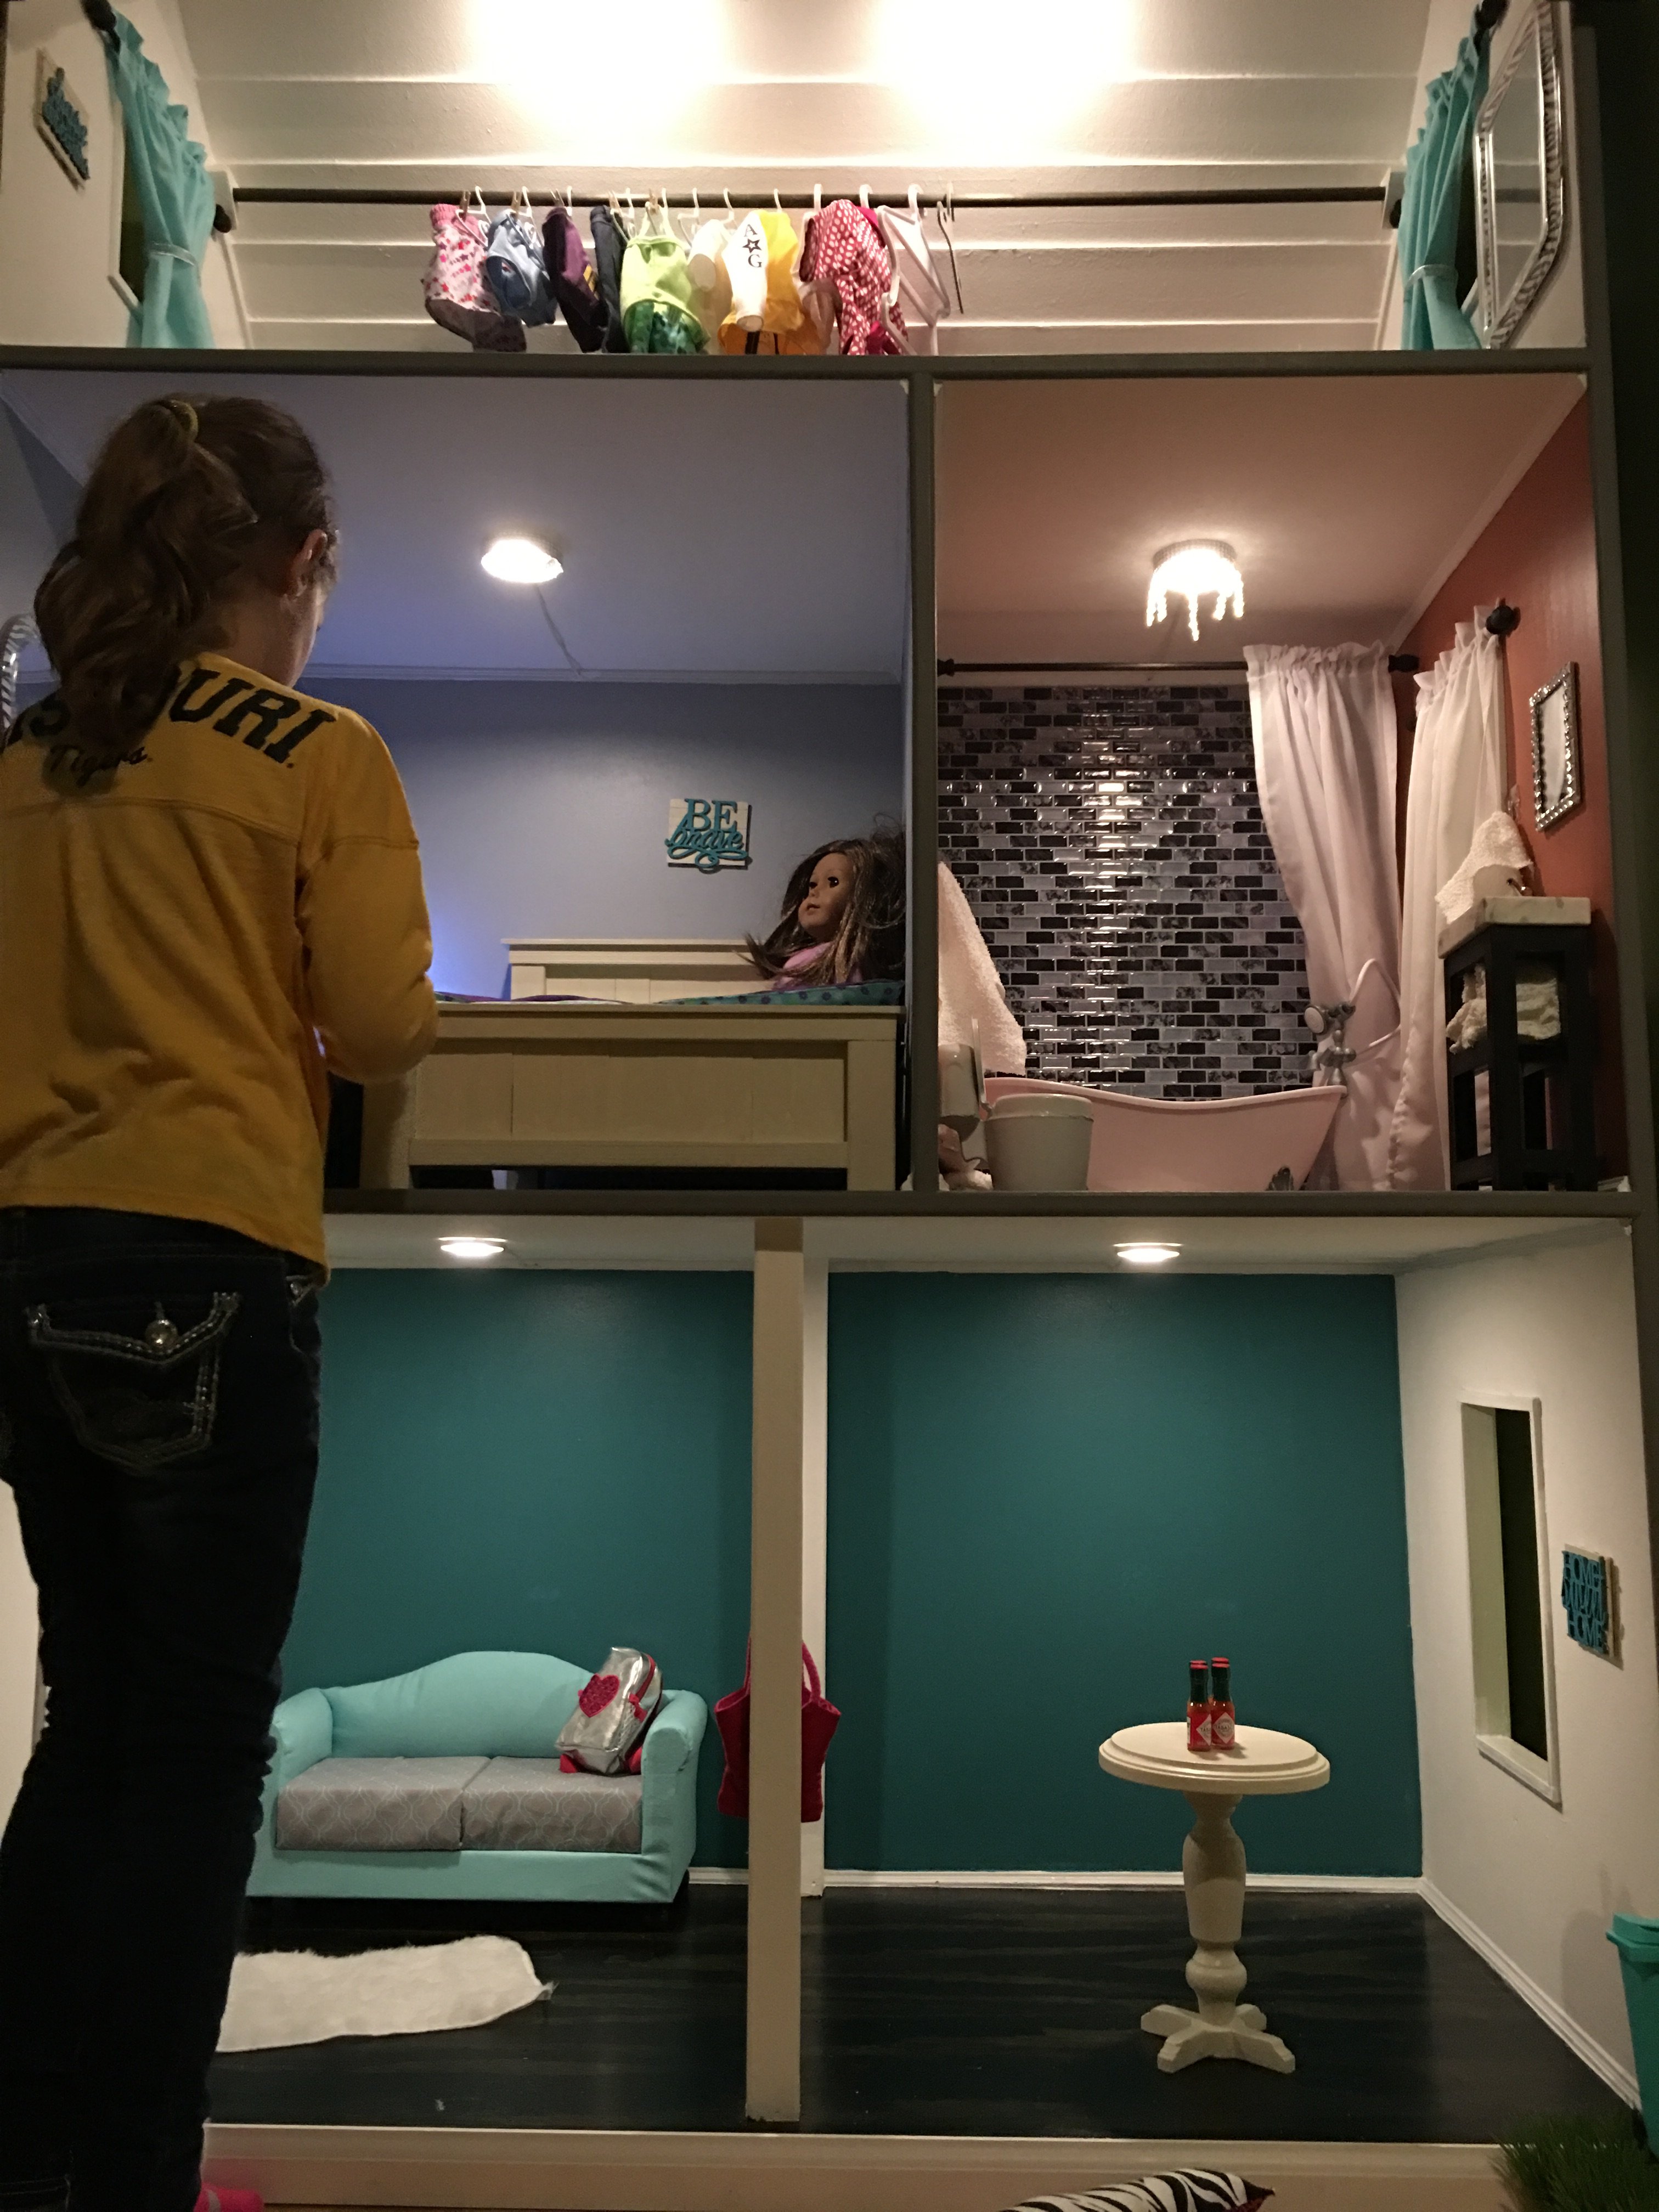
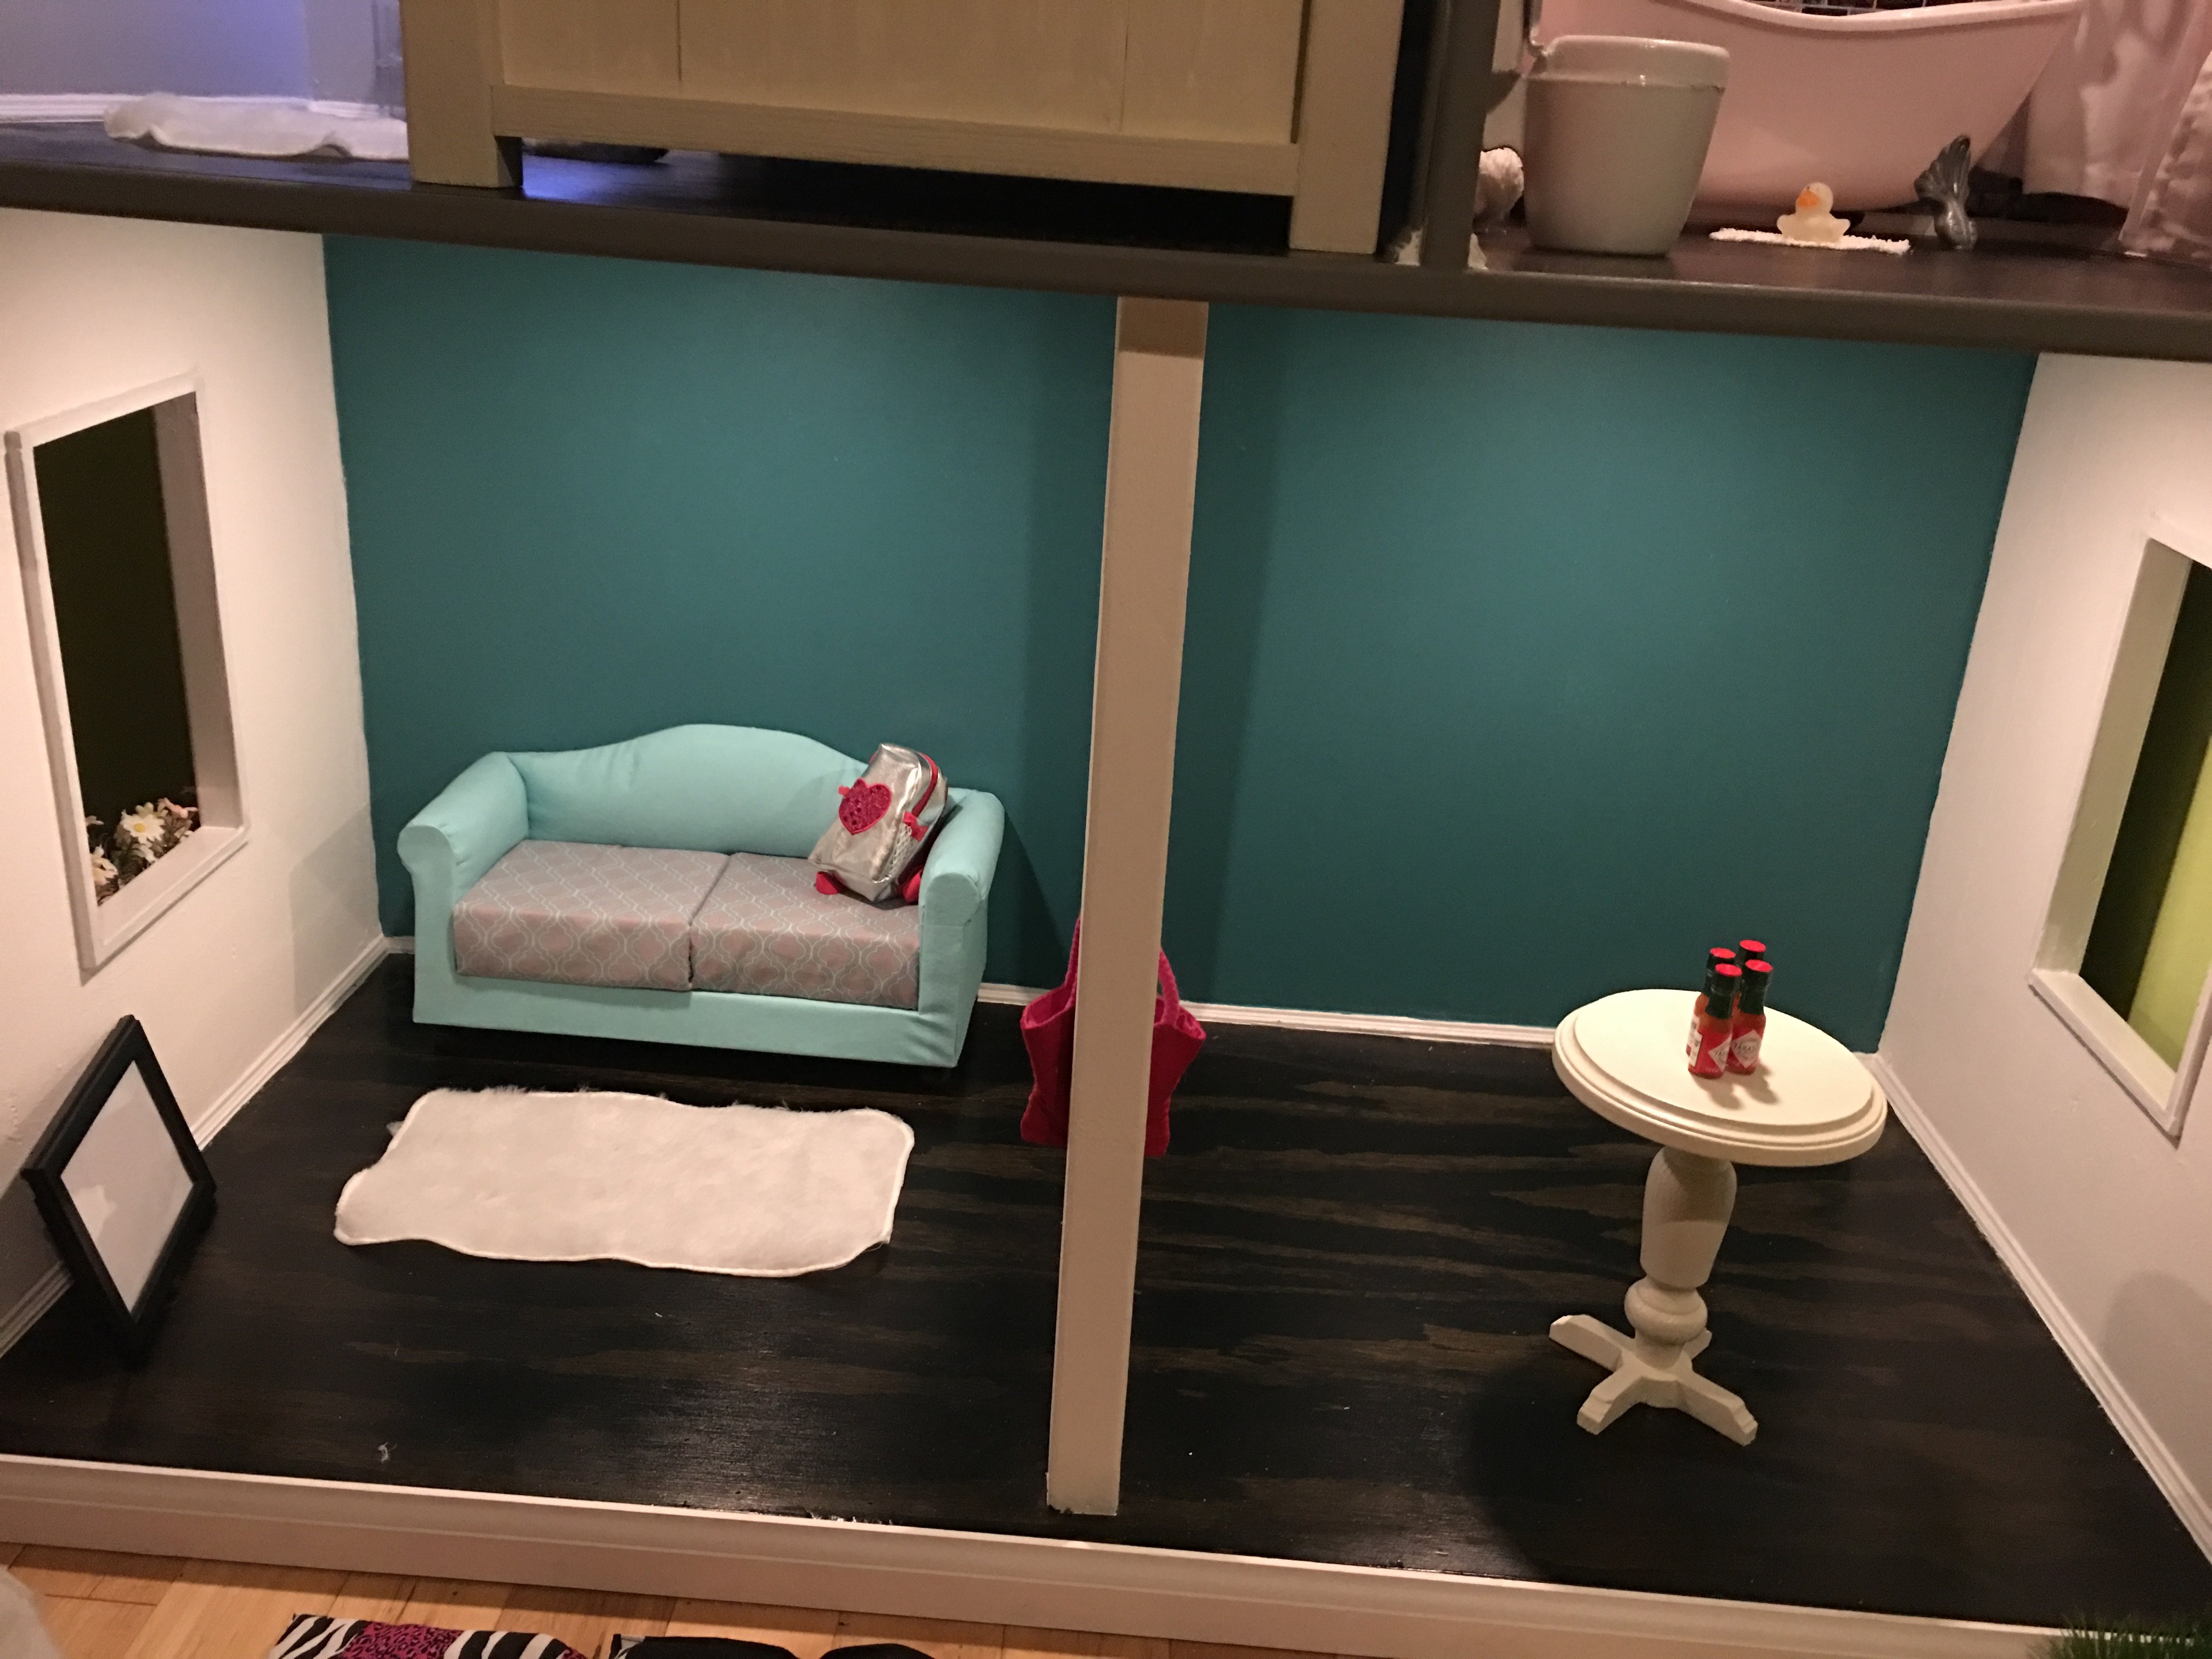
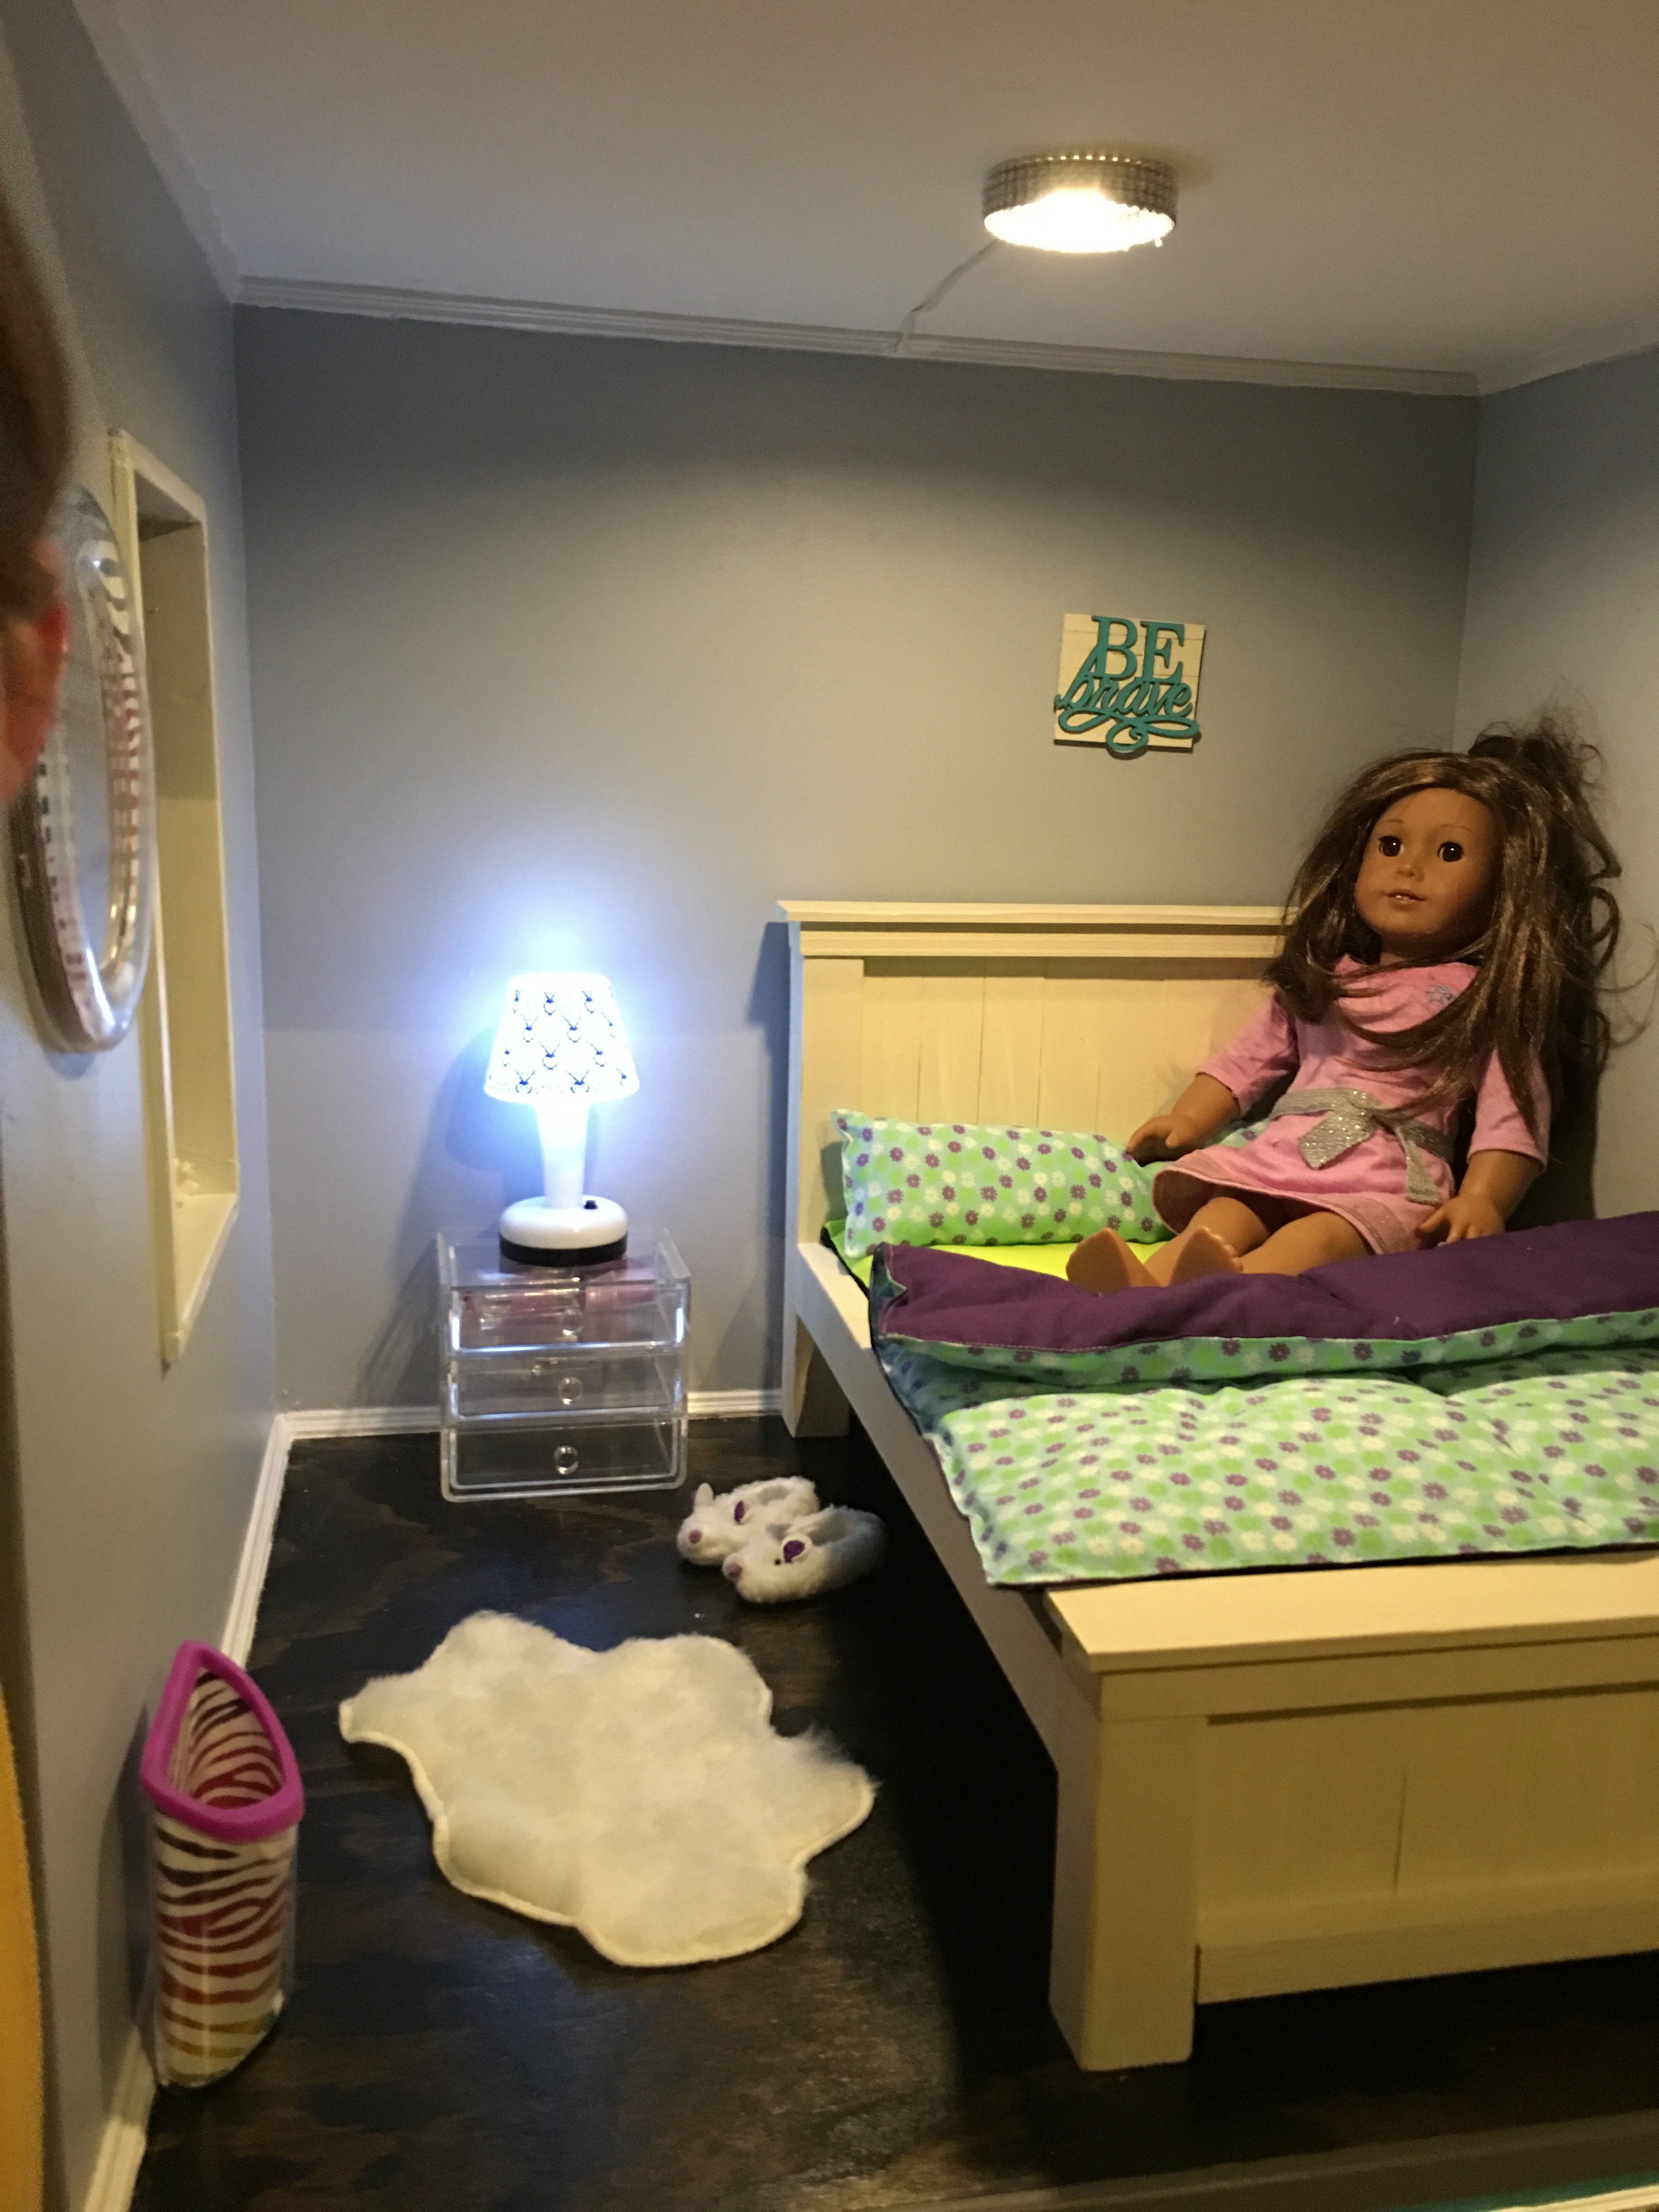
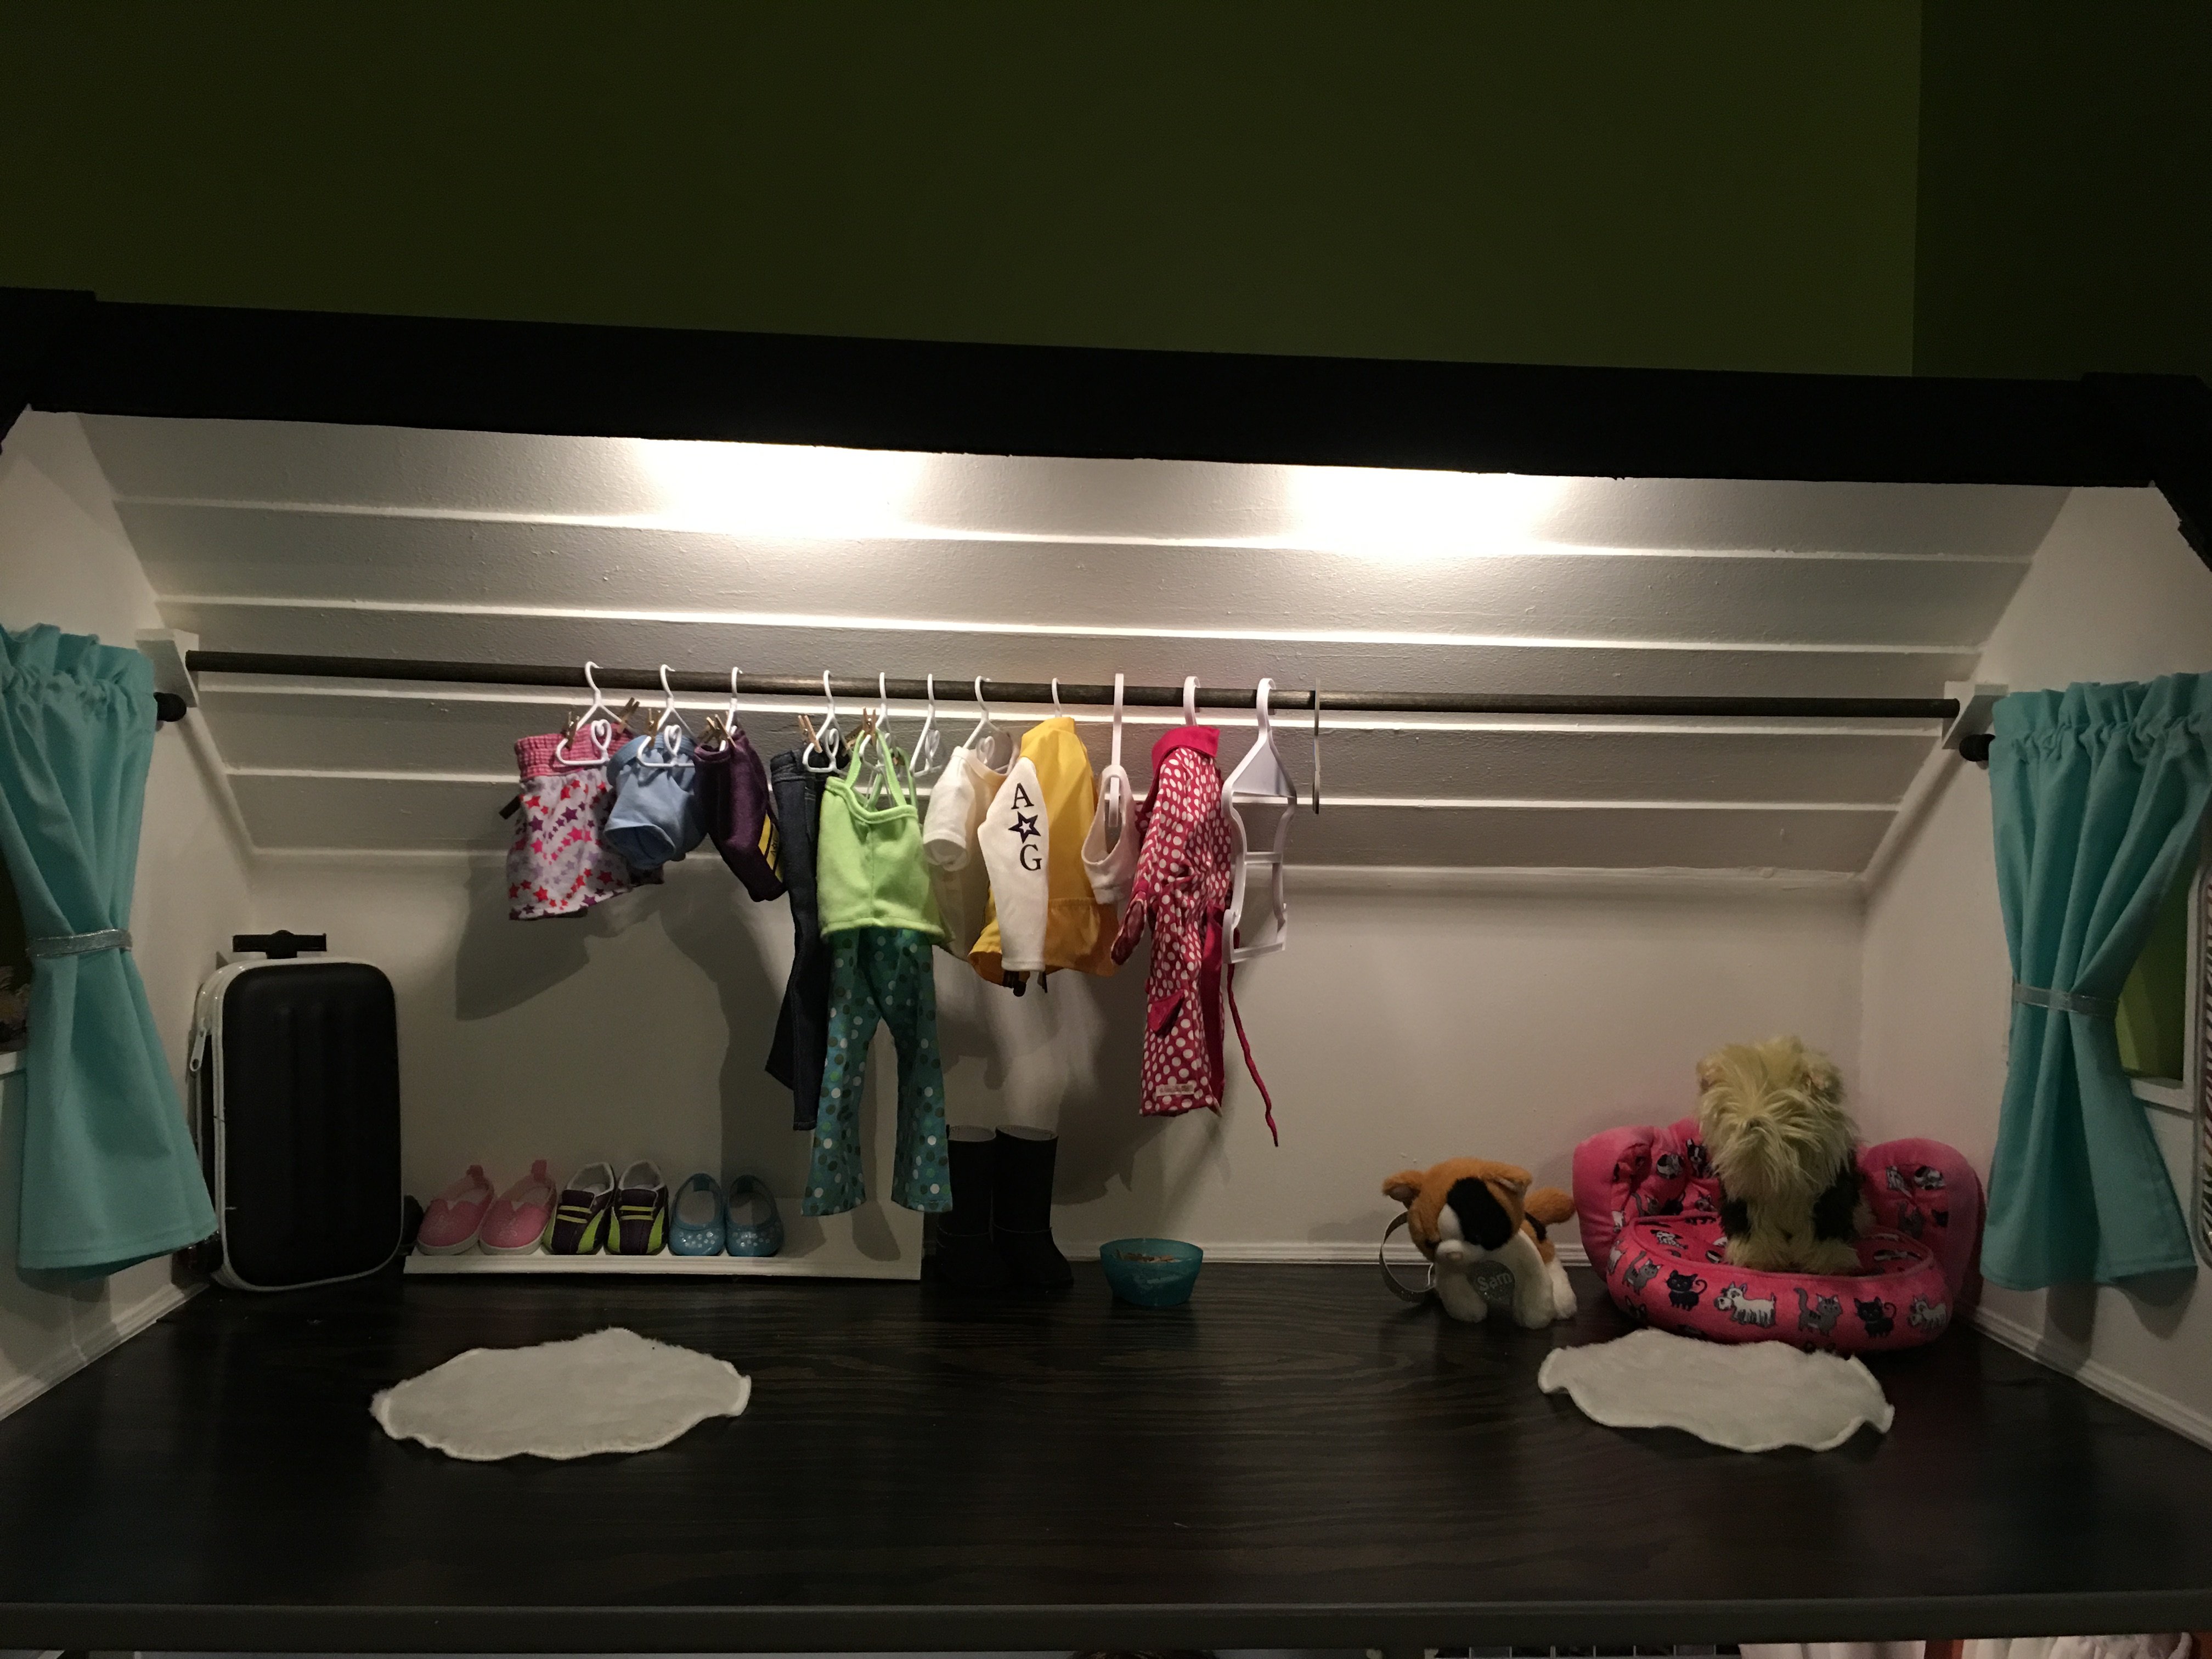
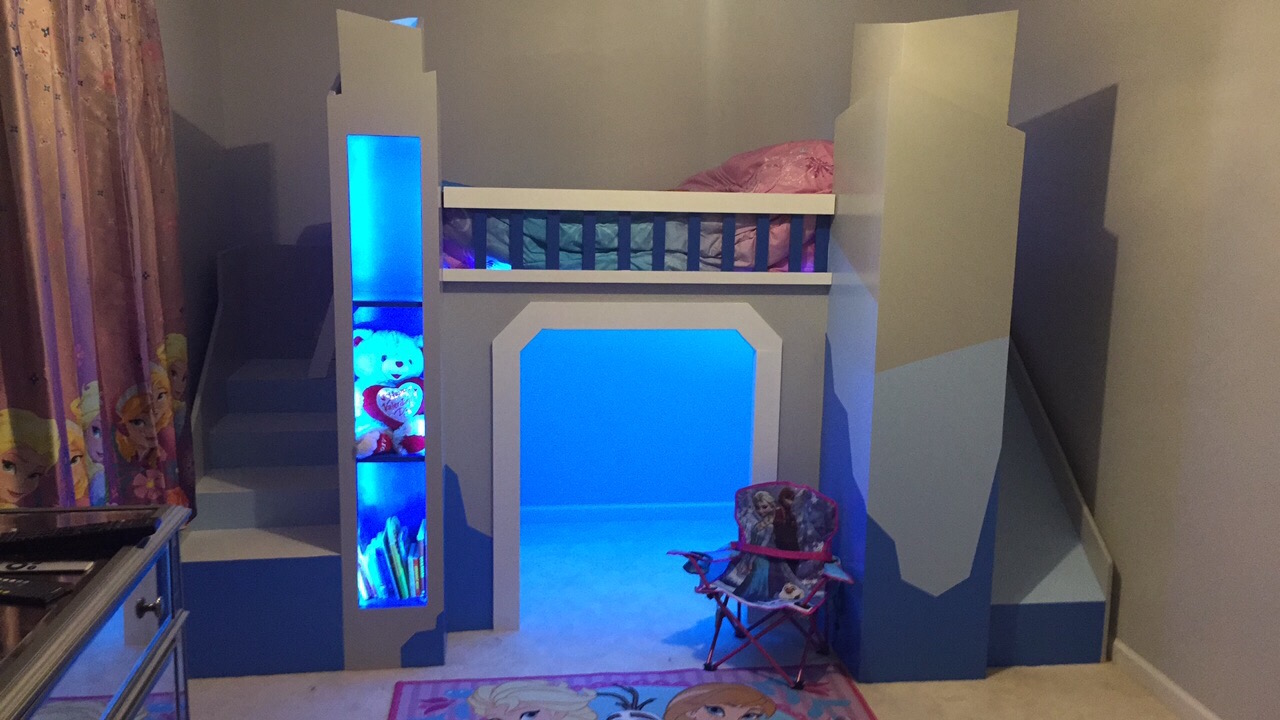
Community Brag Posts

Tiled top kent wood nightstands

Submitted by Mlippelman on Tue, 06/17/2014 - 21:36

I followed the basic plans for the kent wood nightstand but made a few changes. I made paneling out of 3/4" plywood for the sides and door/drawer and routed a 1/2" by 1/2" channel into the face frames to slide the panels in. I added a drawer and made the door smaller. Instead of using the strips of wood for the top I framed it with 1x3's and inset a piece of Wedi tile underlayment. Wedi is a closed cell foam that is coated with a cement membrane. It is pretty durable and completely waterproof. I then used white thinset mortar and set 3x6 tumbled travertine in a herring bone pattern using a 3/16" v notch trowel. Grouted the top of the tile and caulked with color matching latex caulk where the tile meets the wood frame.

Estimated Cost
$350-$400 for both
Estimated Time Investment
Week Long Project (20 Hours or More)
Finish Used
1 coat of Min Wax provincial wood stain. After 24 hours 1 coat of Min Wax polyurethane was added. After 24 hours I sanded the irregularities and put a second coat on. I used 3x6 chiaro tumbled travertine with poly blend linen grout and sealed it with 2 coats of miracle sealants impregnator sealer enhancer for porous stone
Recommended Skill Level
Intermediate

Farmhouse Bed - Full

Submitted by pcarroll on Fri, 09/16/2016 - 19:14

Built using the Farmhouse Bed - Queen plan, making adjustments for the Full size matress.  The finish is a blue milkpaint over a white base and distressed with a sanding pad. 

Built from Plan(s)
Estimated Cost
$200
Estimated Time Investment
Week Long Project (20 Hours or More)
Finish Used
Blue milk paint over a white base. Distressed with sanding pad throughout.
Recommended Skill Level
Beginner

New work from home desk!

Submitted by Anonymous (not verified) on Tue, 06/30/2020 - 09:13

Thanks to the pandemic I needed to whip up a quick (and cheap!) home office. This desk was the perfect fit! I made the top out of an 8-foot rough pine board...Just cut it in half and attached it lengthwise with wood glue and pocket screws. Finished the top with a dark stain, and the bottom with some white trim paint we had laying around. The whole thing cost about $20, versus the $200 I would have had to spend. Very happy with how this turned out!

Estimated Cost
$20
Estimated Time Investment
Afternoon Project (3-6 Hours)
Recommended Skill Level
Beginner

Waterfall Console

Submitted by Anonymous (not verified) on Fri, 04/19/2024 - 12:29

This is the 52 inch waterfall console. I fell in love the it and thought it might be a great way to store my bed pillows when they aren’t in use. I modified it to be shorter and taller, to fit my space and needs. This was my first time using a kreg jig and brad nailer… tutorials on those would be great, but I figured it out! And I’m so excited I did - this is a game changer for my building projects!

Ashlie Alaman

Built from Plan(s)

King Sized Headboard

Submitted by ecsorah on Mon, 08/27/2012 - 11:35

I did not edit this project, except the original project plan called for the bed to be turned sideways, I made this with the bed facing the right original way. The longest part of this project was waiting for the stain. It is not included in the estimated build time.

Estimated Time Investment
Day Project (6-9 Hours)
Finish Used
Minwax Provincial
Recommended Skill Level
Beginner

Distressed console

Submitted by dmather82 on Sat, 06/21/2014 - 17:33

This project was nearly the emotional equivalent of pure hell. I began this as a buffet for someone who decided midway that they no longer wanted it. Secretly I was happy because I fell in love with it. The problem was it was started in late fall and this winter in ohio was more Ana's norm than ours. My I heated garage created a warped piece and an untenable workspace for a few months. I'm pretty happy all and all.

Built from Plan(s)
Estimated Cost
$600-$700
Estimated Time Investment
Week Long Project (20 Hours or More)
Finish Used
Antique white pine distressed and stained over with rustoleum cherry and walnut. The top is some crazy mix of stains and finishes.
Recommended Skill Level
Advanced

Comments

Cedar chest with black walnut

Submitted by mike - c on Sun, 07/05/2020 - 11:32

My first furniture project. My daughters birthday gift. Made my own patterns and sized as I went. With the materials I had. A few learning mistakes but it’s personal and she loves it. The sides and bottom are 3/4 stock but the top and the base is all 1 1/2 stock.

The Cadar was all ripped from 2” stock and planed to suit. The black walnut was rough, resawn and planed to suit.

Was a many Saturday winter project as my shop is at my camp, had to heat up with the wood furnace each weekend , especially for gluing and finishing.

Estimated Cost
$50 worth of hardware, had the wood.
Estimated Time Investment
Week Long Project (20 Hours or More)
Finish Used
Natural stain and spar varnish
Recommended Skill Level
Intermediate

Playroom Tents

Submitted by macymoon on Thu, 06/26/2014 - 10:34

I built these fun and easy tents for our playroom. They are perfect for reading, or for an indoor camping trip.

Built from Plan(s)
Estimated Cost
Under $10 per tent
Estimated Time Investment
Afternoon Project (3-6 Hours)
Finish Used
No stain. Just light sanding.
Recommended Skill Level
Starter Project

A different take on the Brandy storage bed.

Submitted by Anonymous (not verified) on Mon, 09/26/2016 - 12:25

Made this storage bed but altered it some.  Still a queen size bed, changed the depth of the side boxes to accomate a suitcase so we could get luggage out of the way.  Built this for our cabin in Maine.

Estimated Cost
150-200
Estimated Time Investment
Weekend Project (10-20 Hours)
Finish Used
Lowe's chalk paint and antiquing wax.
Recommended Skill Level
Intermediate

Comments

Mail Boss

Submitted by Drspear98 on Mon, 07/06/2020 - 16:38

After scouring the internet for a piece of furniture that could hide my shredder and act as a filing cabinet, I decided to look here, and lo and behold, Ana had posted this project the week before. It was literally an answer to prayers!

I had a lot of leftover plywood that I cut to size to build this project. The drawer slides were the most expensive part of this project. It was pretty tough and I made a lot of mistakes, but I am very happy with it. It was just what I was looking for. Installing the drawers was the hardest part of this project. I made the shredder compartment to fit my specific shredder, and it barely fits. I already had drawer pulls and paint.

Built from Plan(s)
Estimated Cost
$50 (I had a lot of wood and hardware on-hand)
Estimated Time Investment
Weekend Project (10-20 Hours)
Finish Used
dark chocolate milk paint on top, antique white latex paint; polyurethane finish
Recommended Skill Level
Intermediate

Comments

Shoe Rack

I needed a compact way to organize and store my running shoes. As you can see in the pictures above, the answer was relatively simple. My google search led me http://www.notmartha.org/tomake/shoerack/ . I simplified the idea using 1x2, 1x3, and 1x4 boards. You can see the simple shape these make holds the shoes by the toe. I used a 1x2 board for a spacer between the two levels. On a whim , I added another spacer board and topped it all off with another 1x4 which fit perfectly as a shelf.

Before I assembled the pieces, I predrilld holes across the 1x2 boards. When I installed them piece by piece, it was only a matter of leveling and installing drywall anchors.

Estimated Cost
$30
Estimated Time Investment
Afternoon Project (3-6 Hours)
Recommended Skill Level
Beginner

Second Build - Six Cube Storage Units

Submitted by seiseman on Sun, 06/29/2014 - 12:17

Very excited to have finished my second build! My daughter was so excited about these shelves, too. She even helped pick up her play area so we could get a nice picture. I only have a small wagon, so all the big cuts were done at Home Depot. Best part of this project: with the cuts completed in-store, this project took about the same amount of time to put together as a similar IKEA shelf, only no Allen wrenches were involved.

Built from Plan(s)
Estimated Cost
$80 and some leftover paint
Estimated Time Investment
Afternoon Project (3-6 Hours)
Finish Used
White paint
Recommended Skill Level
Beginner

My city farm

My friend and I bought all of the materials for about $350. We started Friday afternoon and he worked most of Saturday on it. The plans were super helpful! My four little silkies are enjoying their new home. 

Estimated Time Investment
Weekend Project (10-20 Hours)
Finish Used
Sherwin Williams exterior paint in Alabaster. Lots of pumpkins and mums from Lowe's.
Recommended Skill Level
Intermediate

Comments

Seasonal And Holiday

Outdoor chairs

Submitted by carlablock on Tue, 07/07/2020 - 10:14

My first project. Good learning experience and they turned out great!

Comments

Completely Free Workbench!

Submitted by MrsVwal on Tue, 09/04/2012 - 07:31

2 wood pallets, 1 2x4 from an old wall teardown, and an old door we were going to pitch = 1 free workbench!

(used the extra pallet wood to make the decor sign. I wanted to make it girly. :) )

Built from Plan(s)
Estimated Cost
$0
Estimated Time Investment
Day Project (6-9 Hours)
Recommended Skill Level
Beginner

Grandy sliding door console

Submitted by dkarinen on Wed, 10/05/2016 - 18:01

This was a perfect build for my brother's farmhouse style home. The build itself wasn't too difficult but getting to doors to slide properly was definitely challenging. We had originally spray painted the hardware oil rubbed bronze but found the it kept rubbing off when we slid the doors so we ended sanding everything back down to the original color.

We also bought multiple pulleys based on the tutorial we found but they really didn't work great. We finally found these 1.5 inch pulleys (http://store.riggingcentral.com/15-in-2-in-25-in-3-in-35-in-sheaves-p36…) and used (2) 5/16 bolt nuts inside the pulley to center the cleaves pins and secure. 


Built from Plan(s)
Estimated Time Investment
Week Long Project (20 Hours or More)
Finish Used
Behr Burnished Clay paint and Atlantic stain
Recommended Skill Level
Intermediate

Farmhouse Toy Box

Submitted by Samwise73 on Wed, 07/08/2020 - 17:13

Worked the farmhouse style toy box with two colors of stain. Try and square this up BEFORE you add all the sides. I made that rookie mistake and was 1/8” off; not a huge deal overall but it made for a super snug fit when I put the bottom board in. Overall, super sturdy and I like how it turned out.

Built from Plan(s)

4x4 truss beam table and bench

Submitted by Joagirard on Fri, 07/04/2014 - 20:24

We needed a big sturdy table for 8-12 persons for our big dinning room but didn't want to pay 3000$ for it. Then i found Ana-white's site and thought "why not!". It's my first project, i started whit the bench and then made the table. All buy myself, my husby doesn't even know how to use a saw. He help me carry it inside thought ;) The plans were realy easy to follow. Somebody stop me, i'm refurnishing my hole house, i can't stop! In 2 months i'v made 2 dinning tables, 2 patio tables, 1 coffe table, 5 benches. So if i can do it, you can too!

Estimated Cost
300$
Estimated Time Investment
Weekend Project (10-20 Hours)
Finish Used
1 coat of dark walnut varathane in gel applied with an old t-shirt followed by 2 coats of varathane professional finish in satin applied with soft brush. I sanded between the 2 finished coats.
Recommended Skill Level
Starter Project

Diy fireplace reface and mantel

Submitted by Anonymous (not verified) on Sat, 10/08/2016 - 23:21

It's decorated now, but looks amazing without as well. The build plan was easy, definitely need to have some knowledge about woodworking. Just have fun and be creative.

Estimated Cost
$100.00
Estimated Time Investment
Weekend Project (10-20 Hours)
Finish Used
After a good sanding, I stained with a dark walnut followed by dry brushing with a true white. After it dried, sanded with steel wool.
Recommended Skill Level
Intermediate
Back