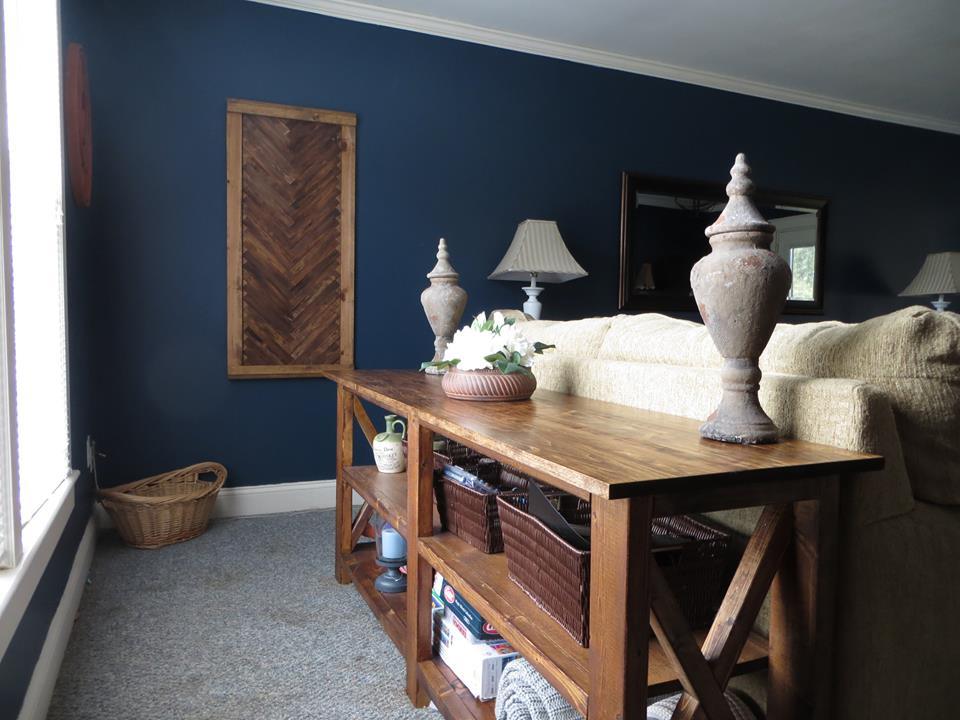
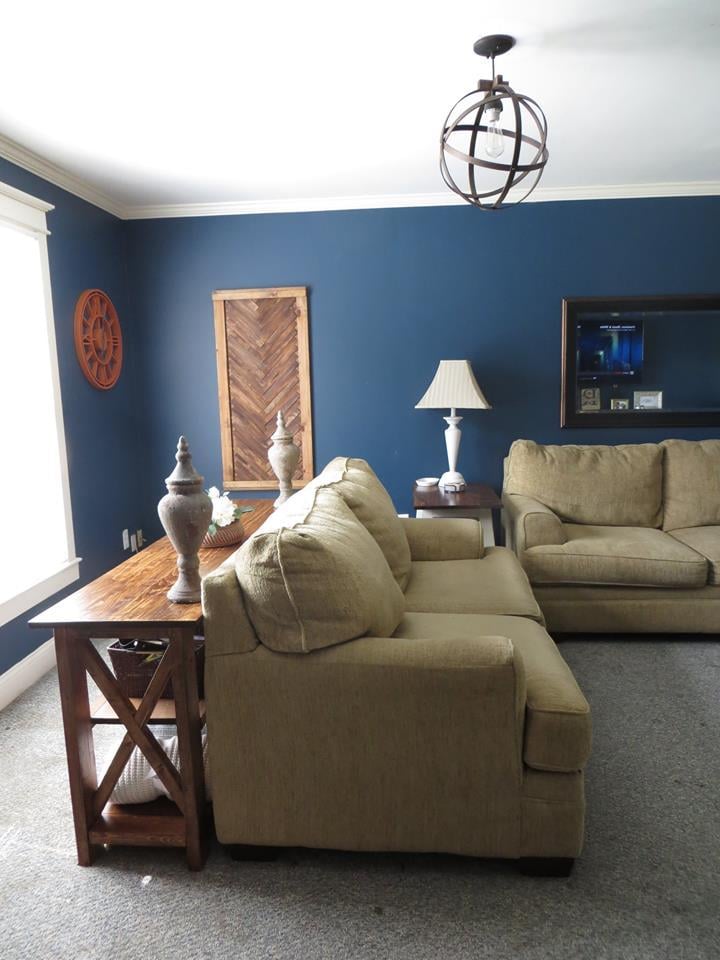
Naked wall no more!!
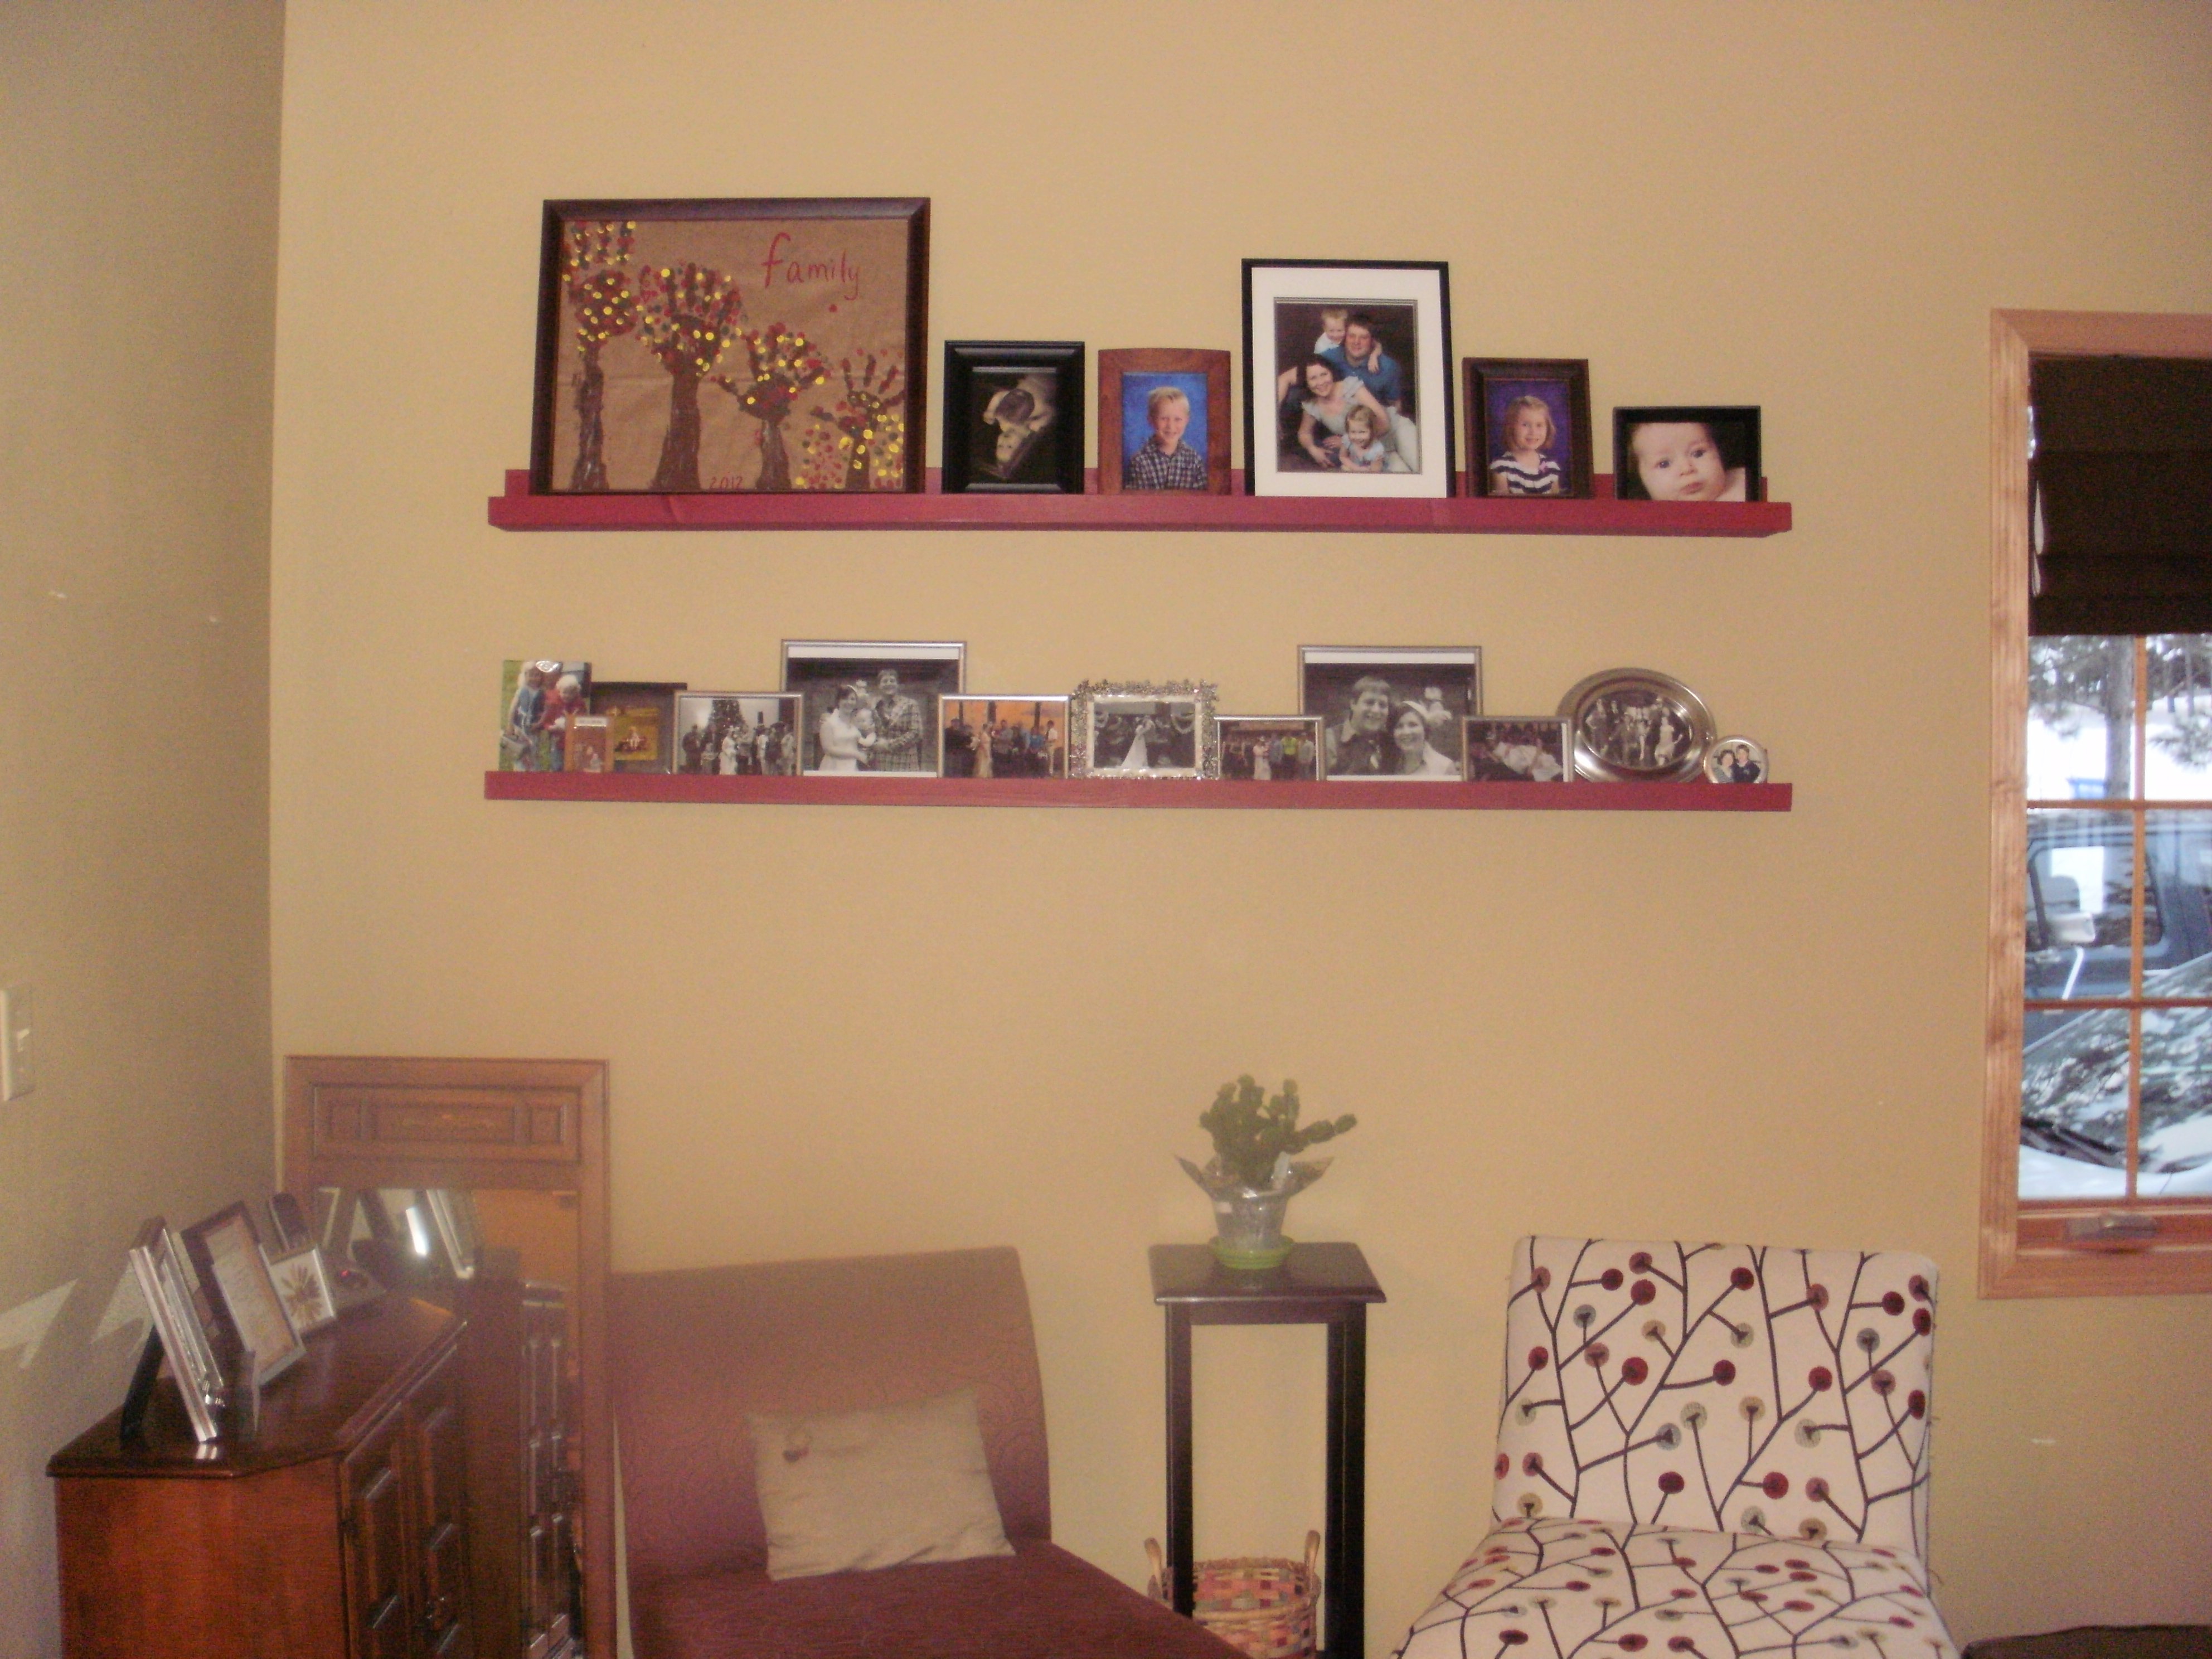
I had a wall in our living room that was bare for almost 4 years. SO happy with the results of my "Ten Dollar Ledges"!!
Estimated Cost
$20
Estimated Time Investment
An Hour or Two (0-2 Hours)
Finish Used
RUST-OLEUM, AMERICAN ACCENTS; Colonial Red Smooth Satin Finish.
I'm a lazy painter, I didn't sand or prime my ledges and only applied one coat as I loved that I could still see the wood grain through the paint. (8oz can covered both ledges with one coat, still have half the can left!)
I'm a lazy painter, I didn't sand or prime my ledges and only applied one coat as I loved that I could still see the wood grain through the paint. (8oz can covered both ledges with one coat, still have half the can left!)
Recommended Skill Level
Starter Project


Comments
rhettar
Mon, 02/04/2013 - 10:59
very nice...
I was wanting to make a small one under my bathroom mirror, but wondered if it would be too bulky. Seeing yours, I can see they look pretty sleek and I am probably going to go for it. (if I don't like it, I am sure it will get use somewhere)
I love how you admit you are a lazy painter, I am getting more patient the more I am building...hehe
mybartmart
Mon, 02/04/2013 - 13:22
love the colour
The colour you chose is really nice. They shelves look great on that wall, I am making some for a hallway with 1 x 3 instead to make them stick out less.