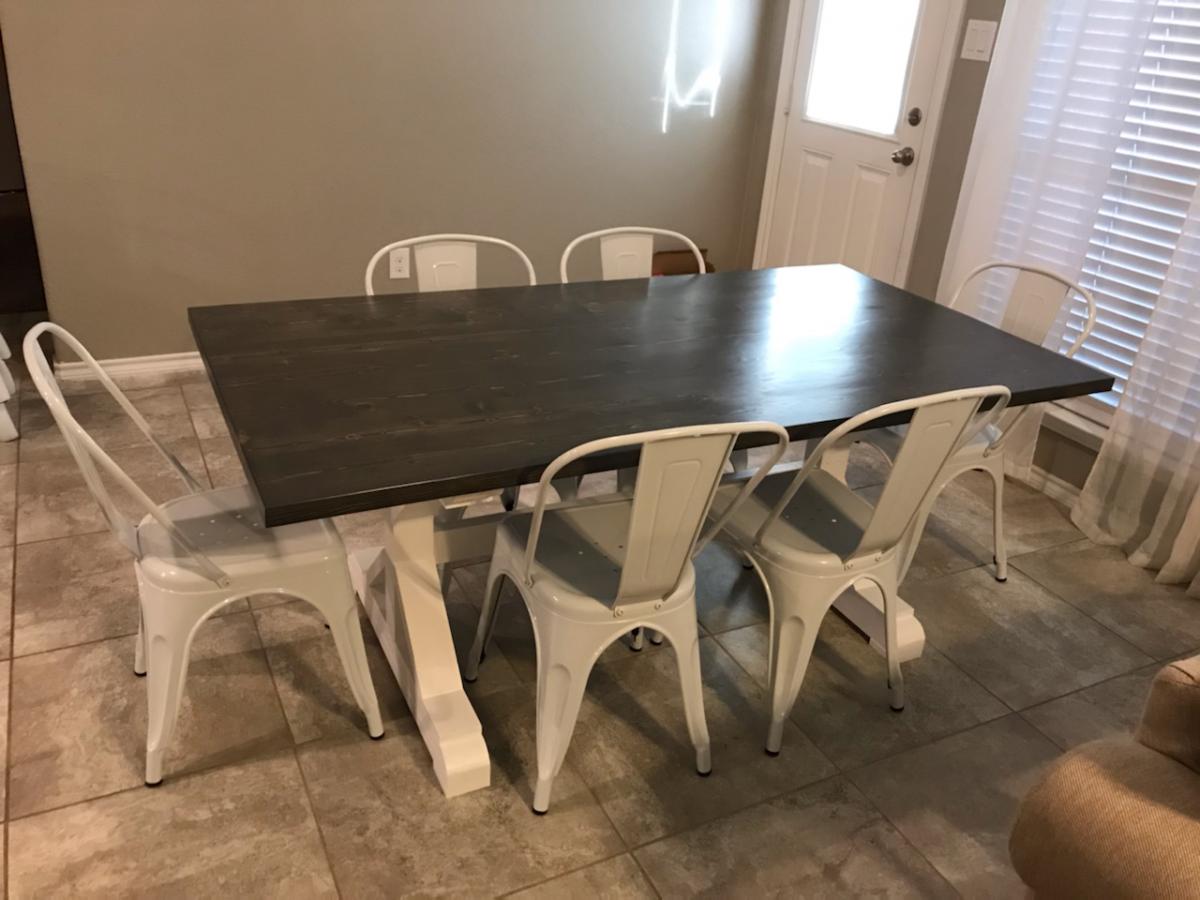
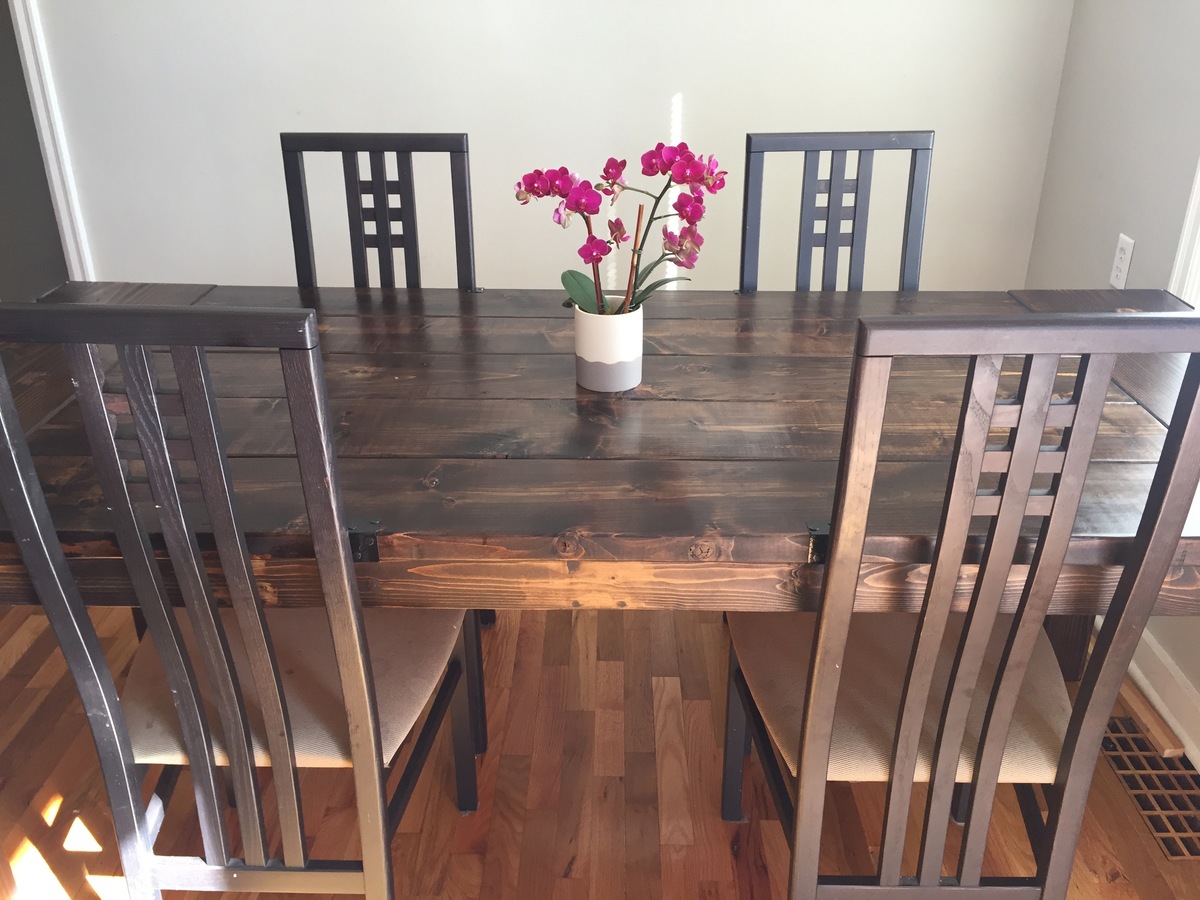
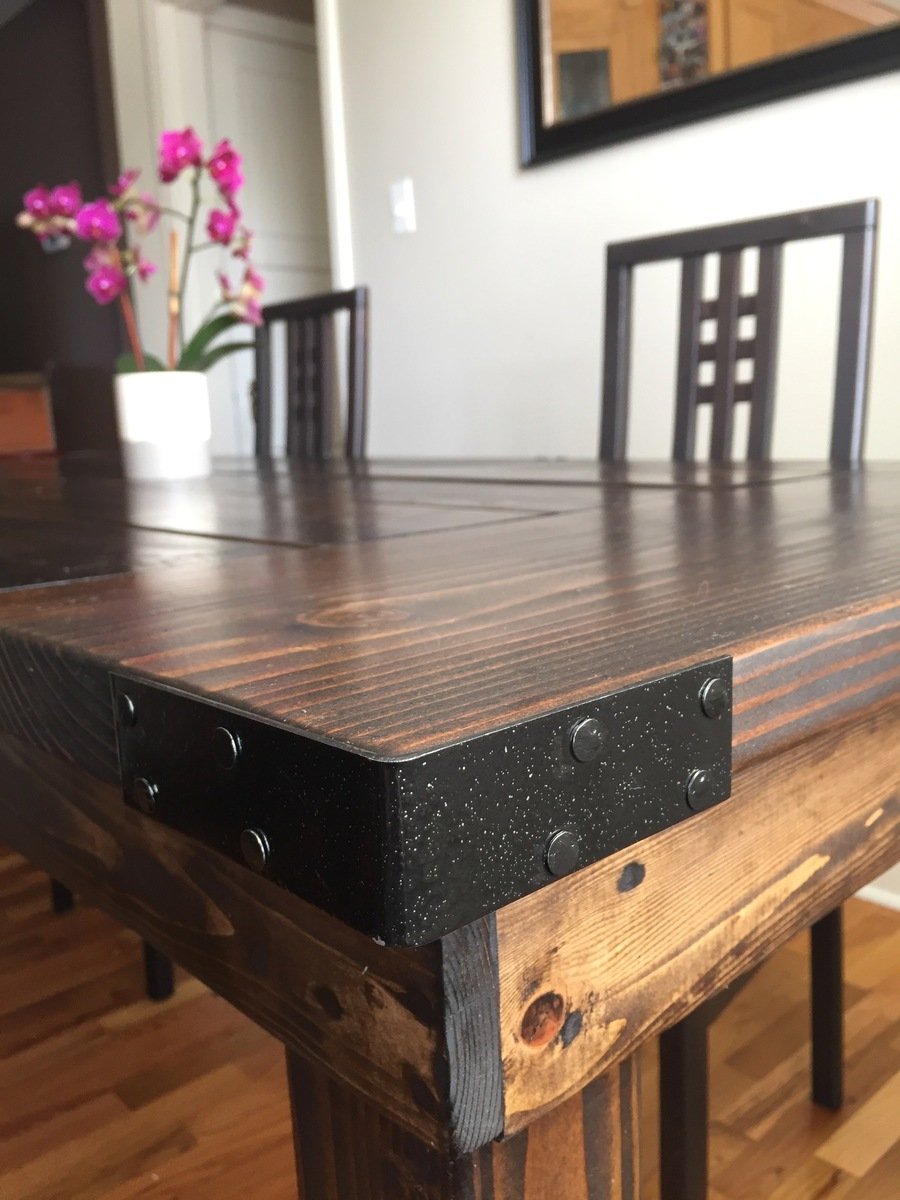
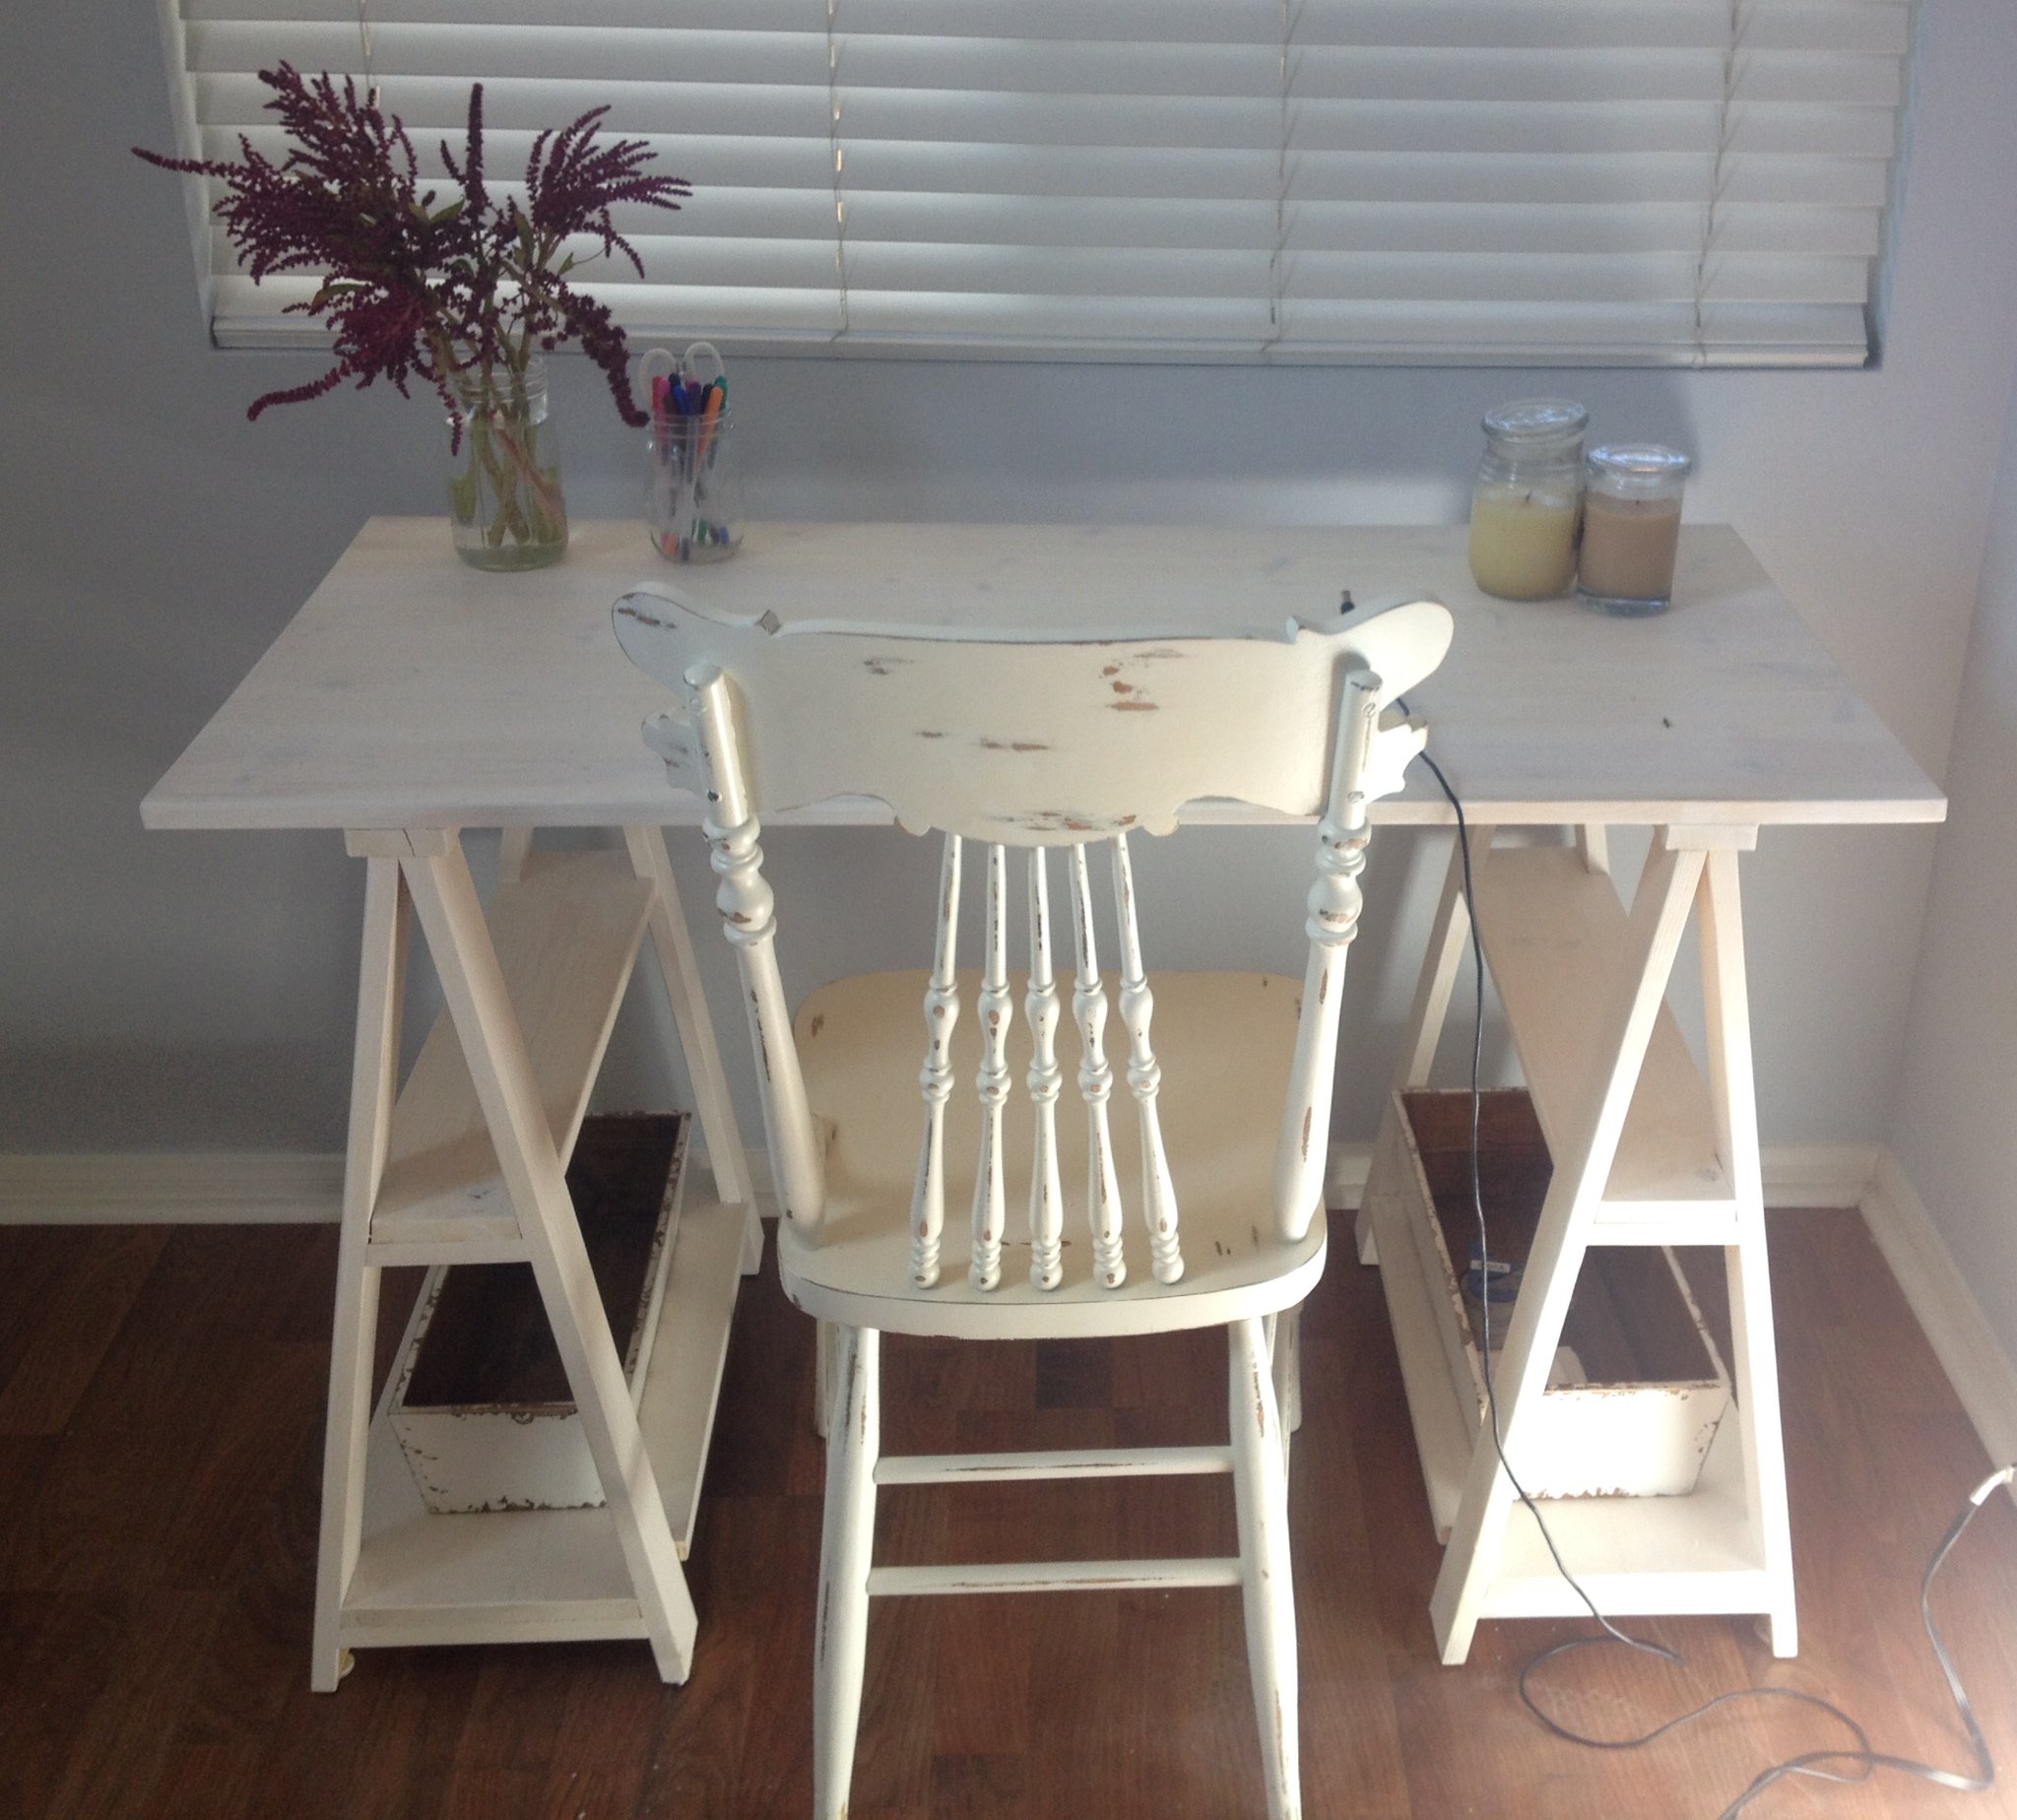
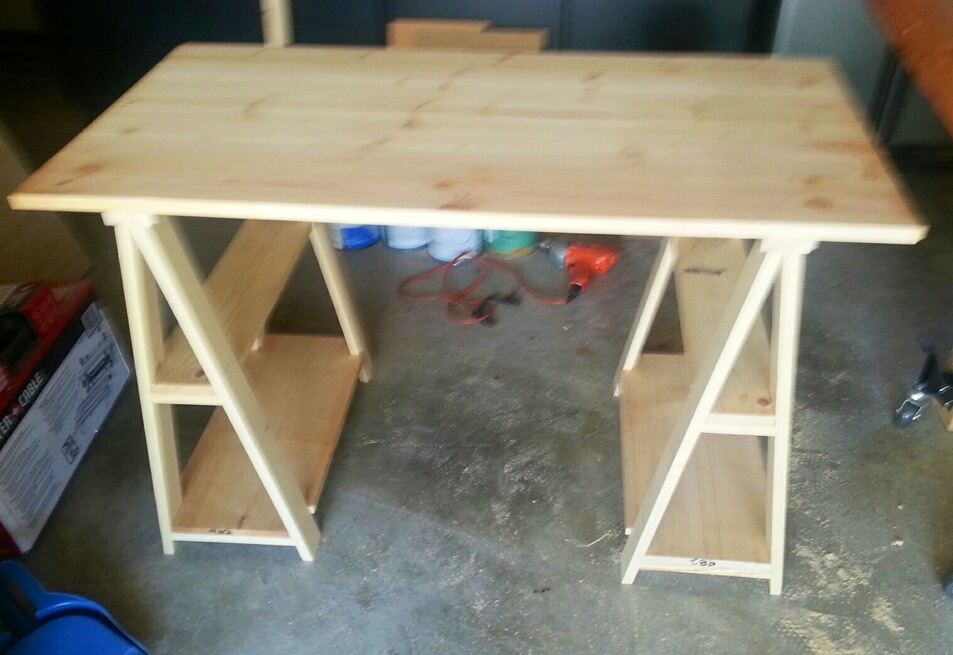
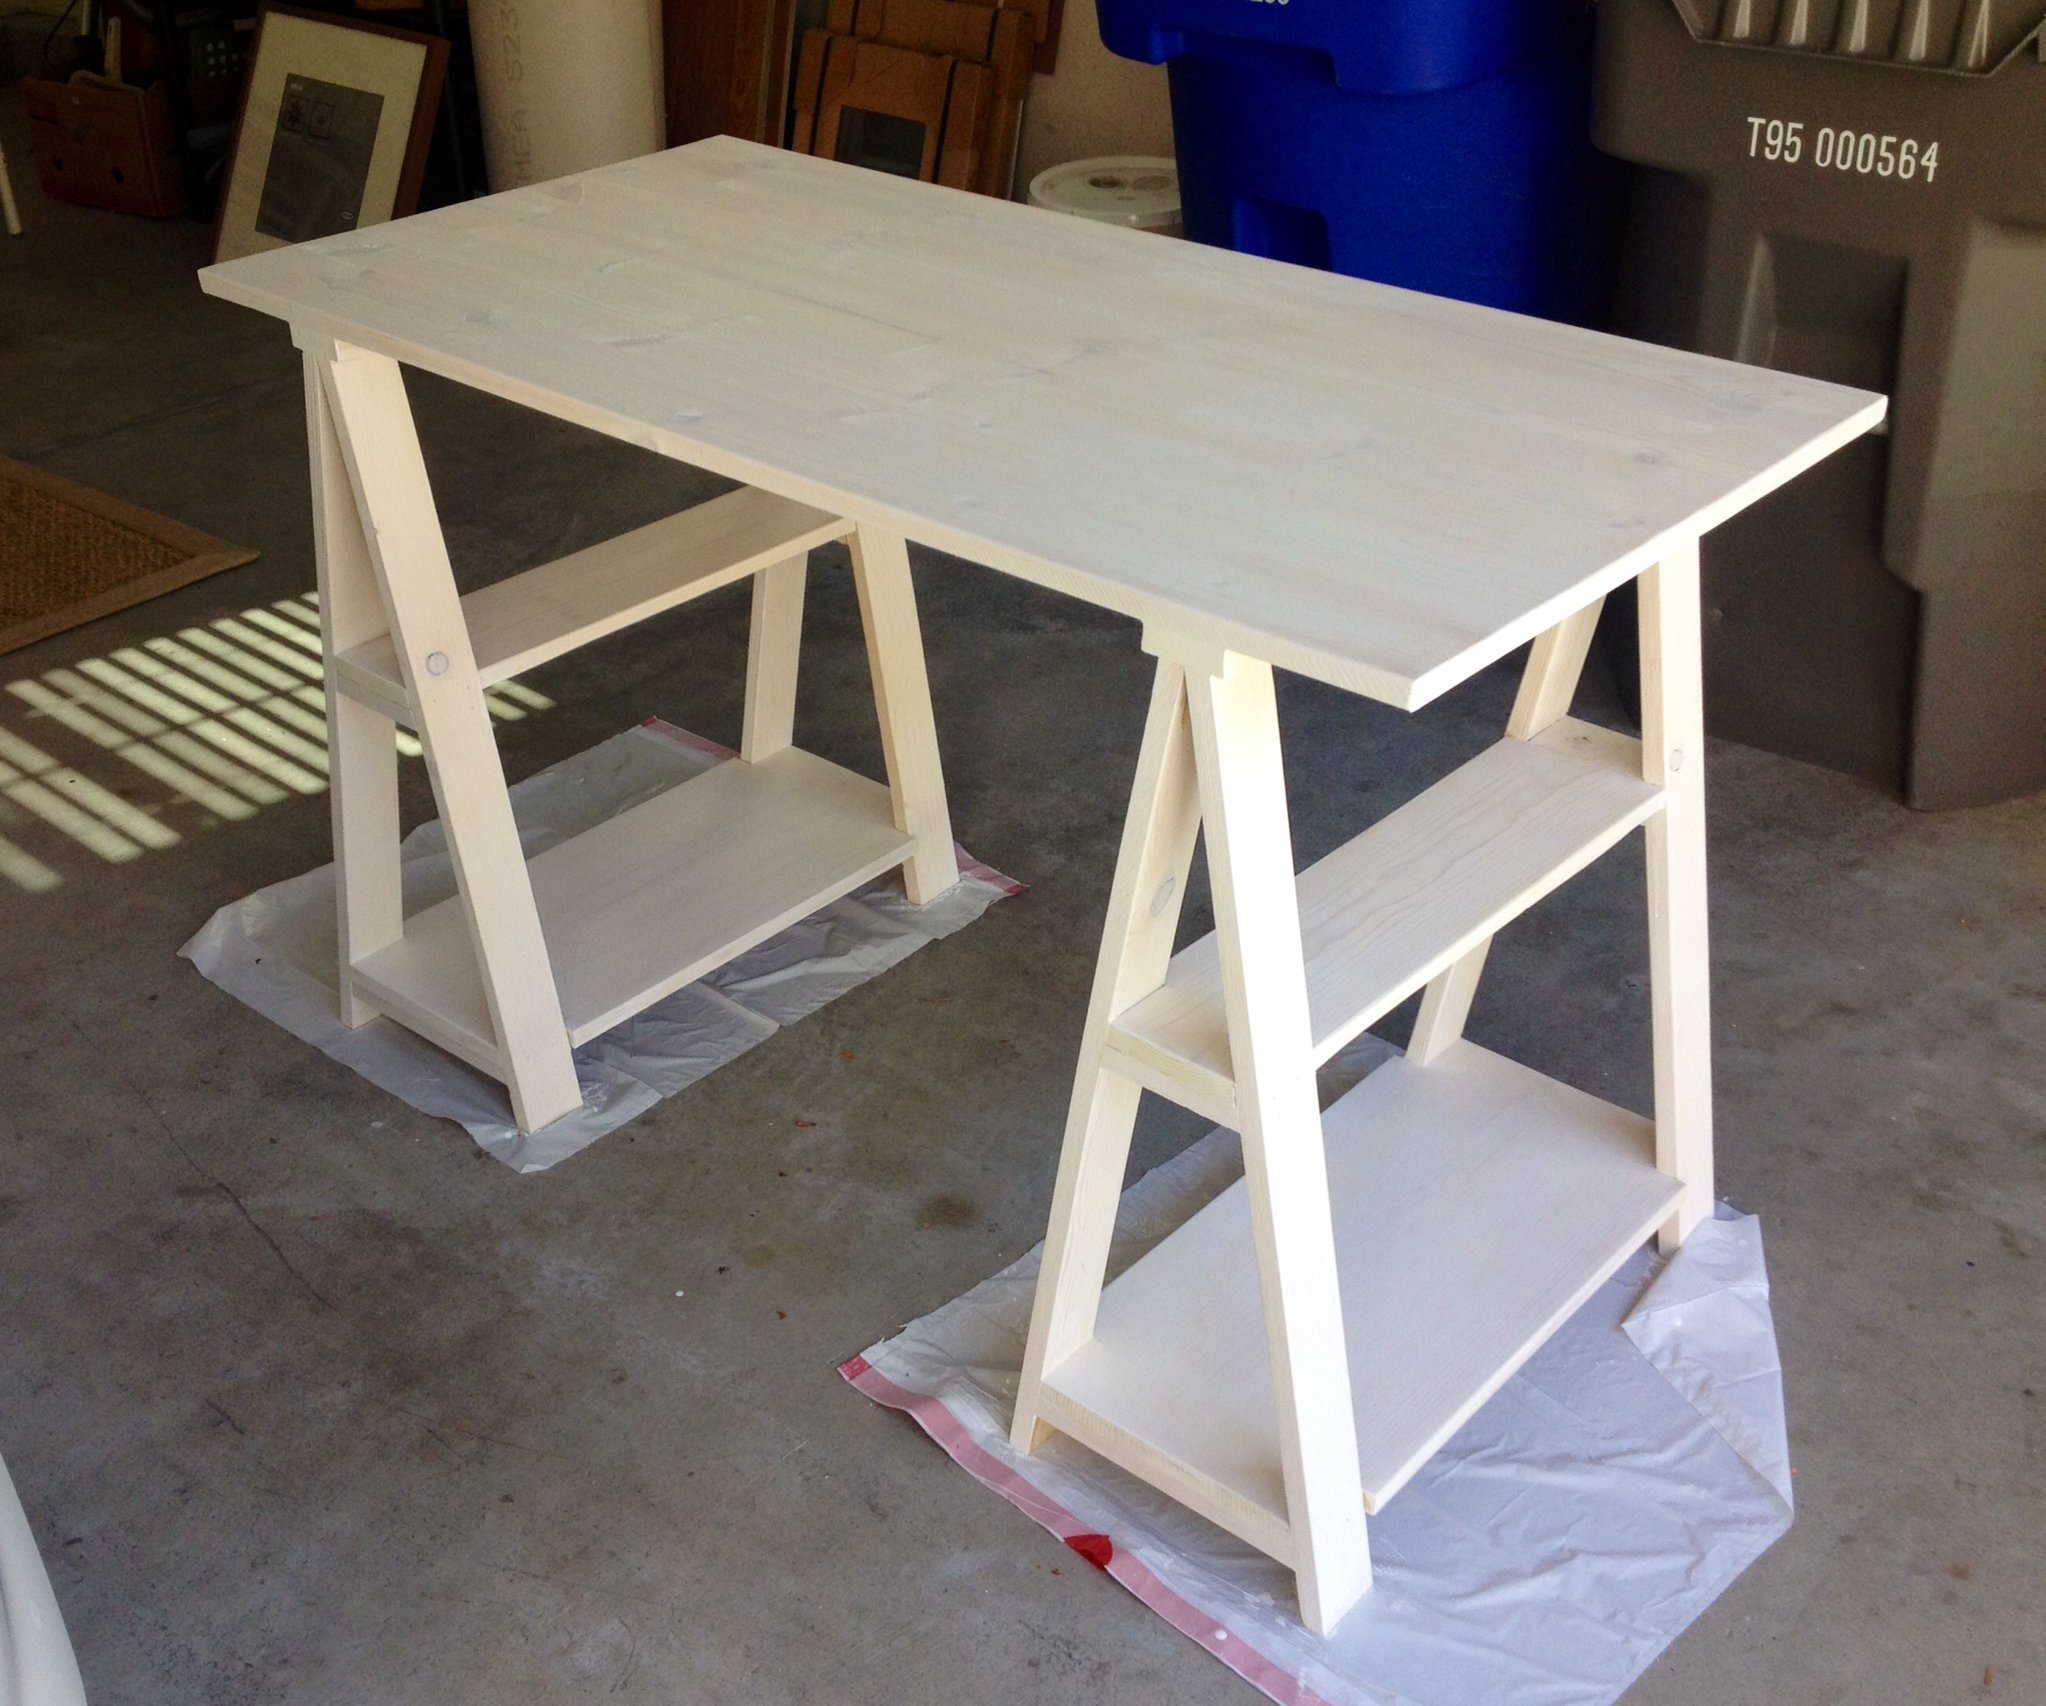
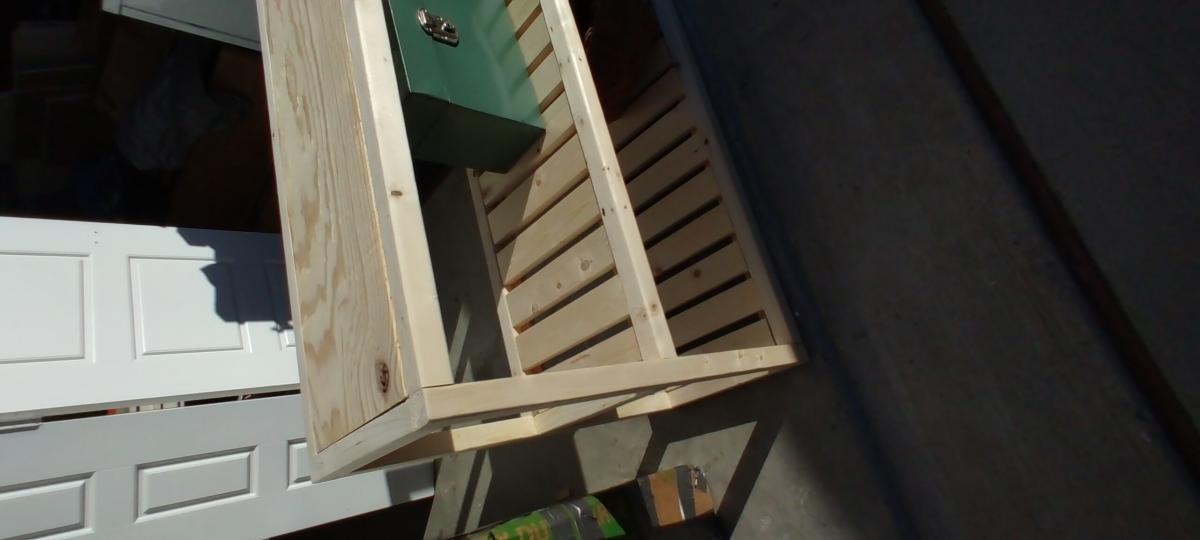
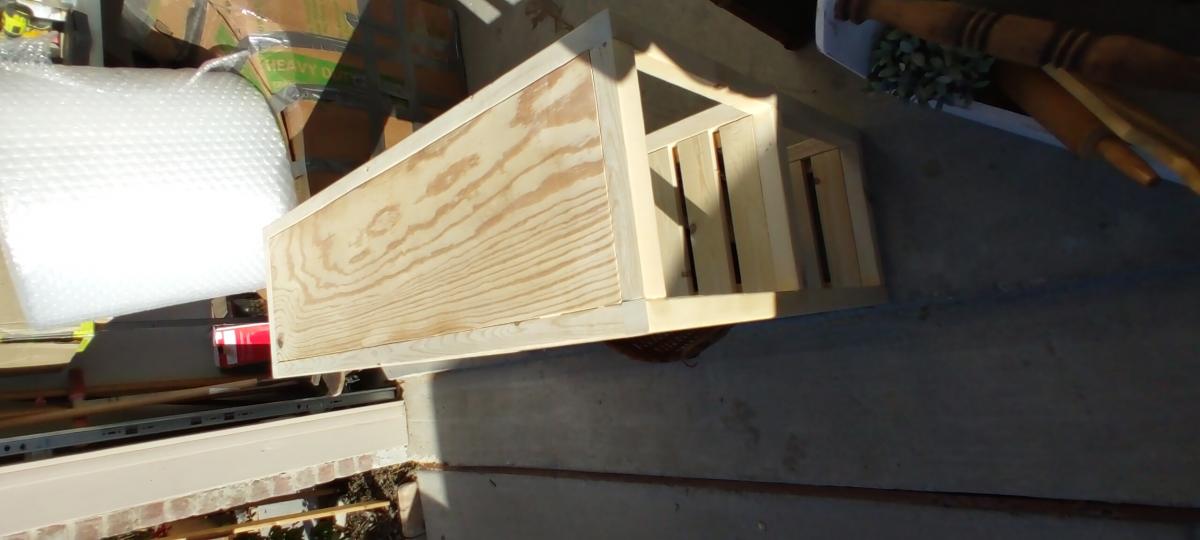
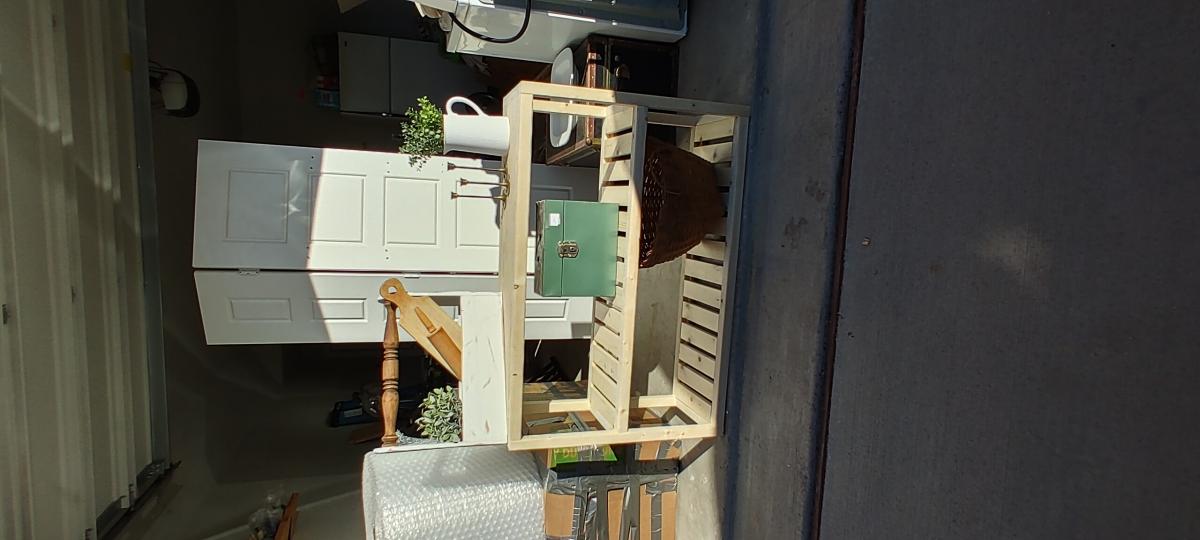
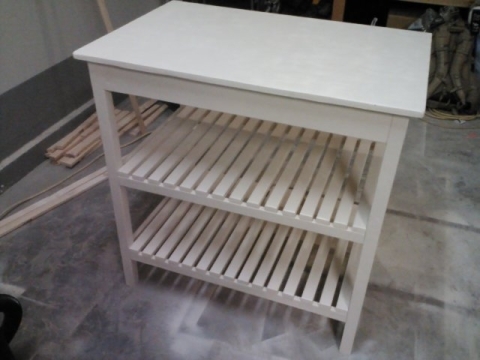
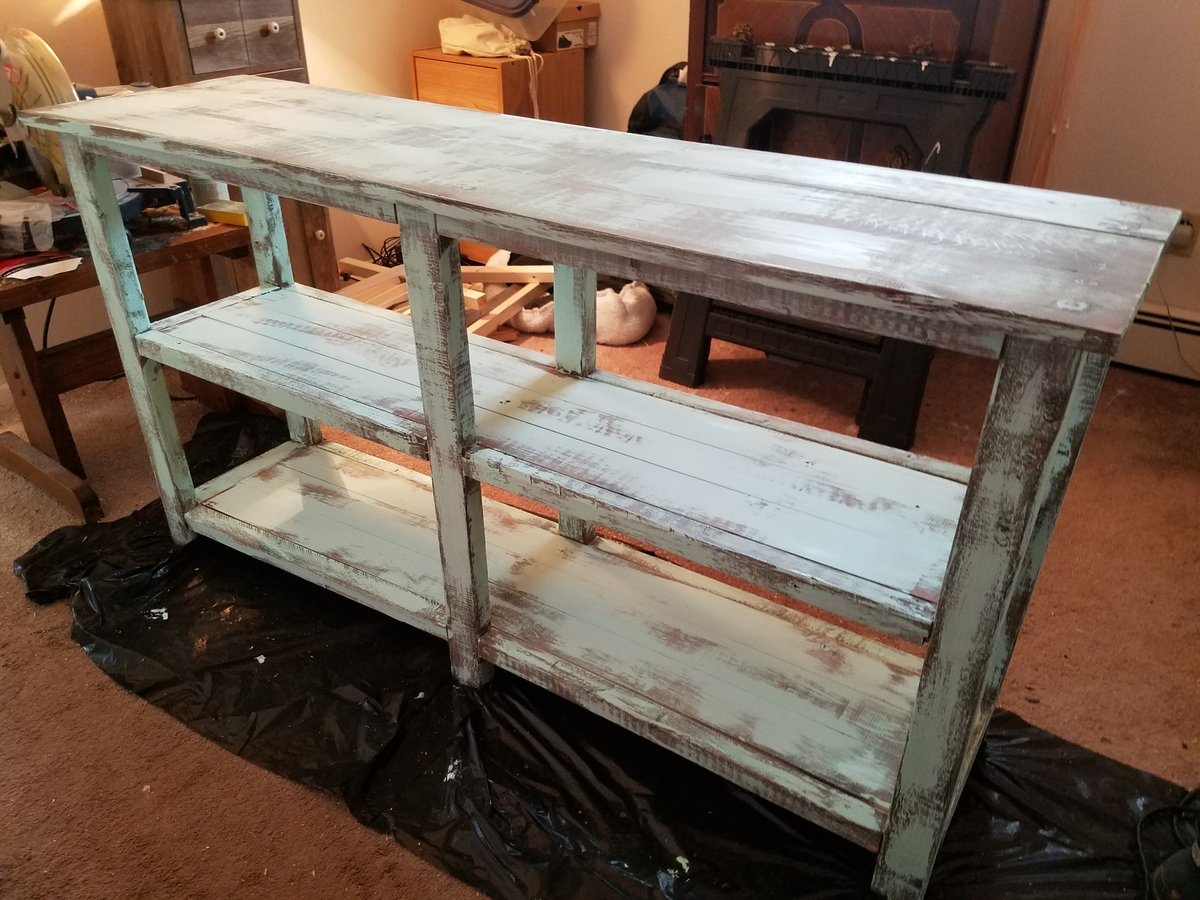
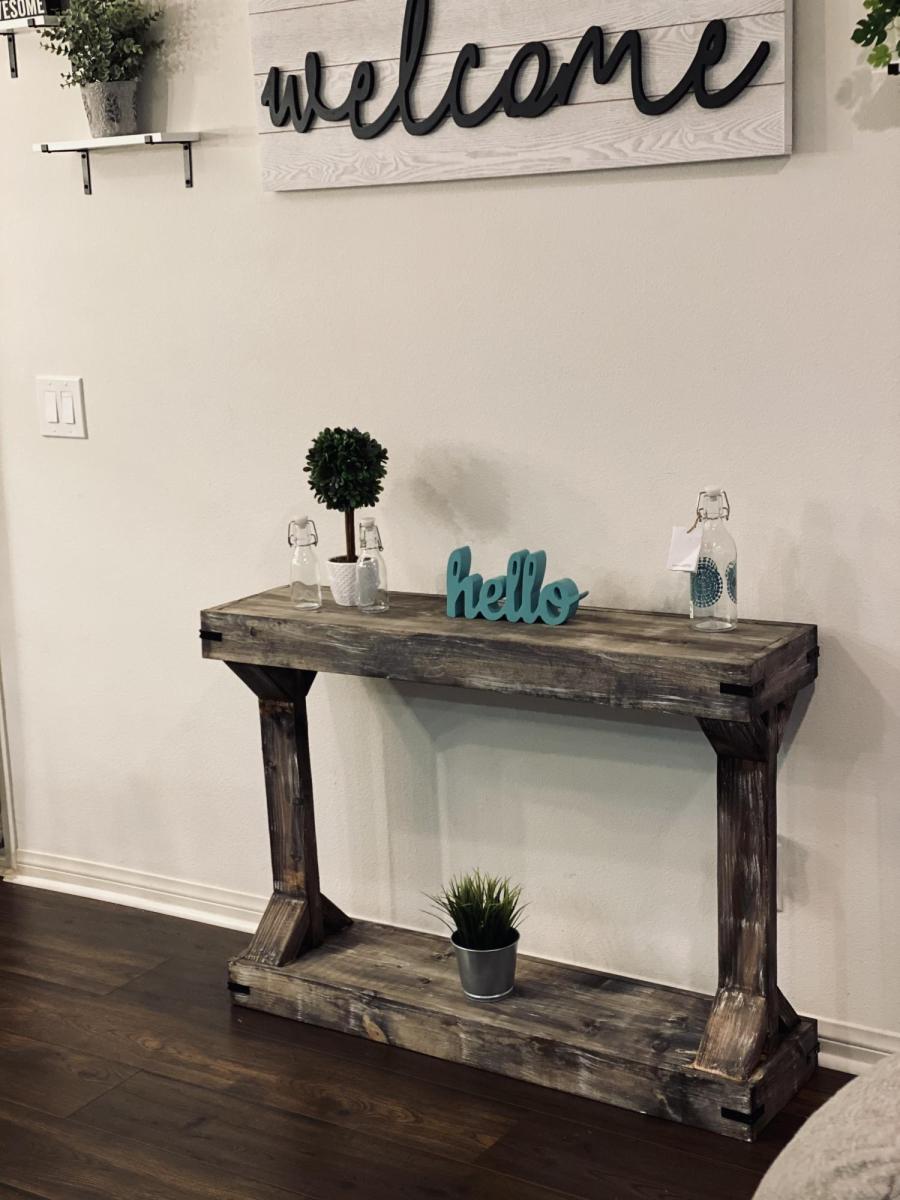
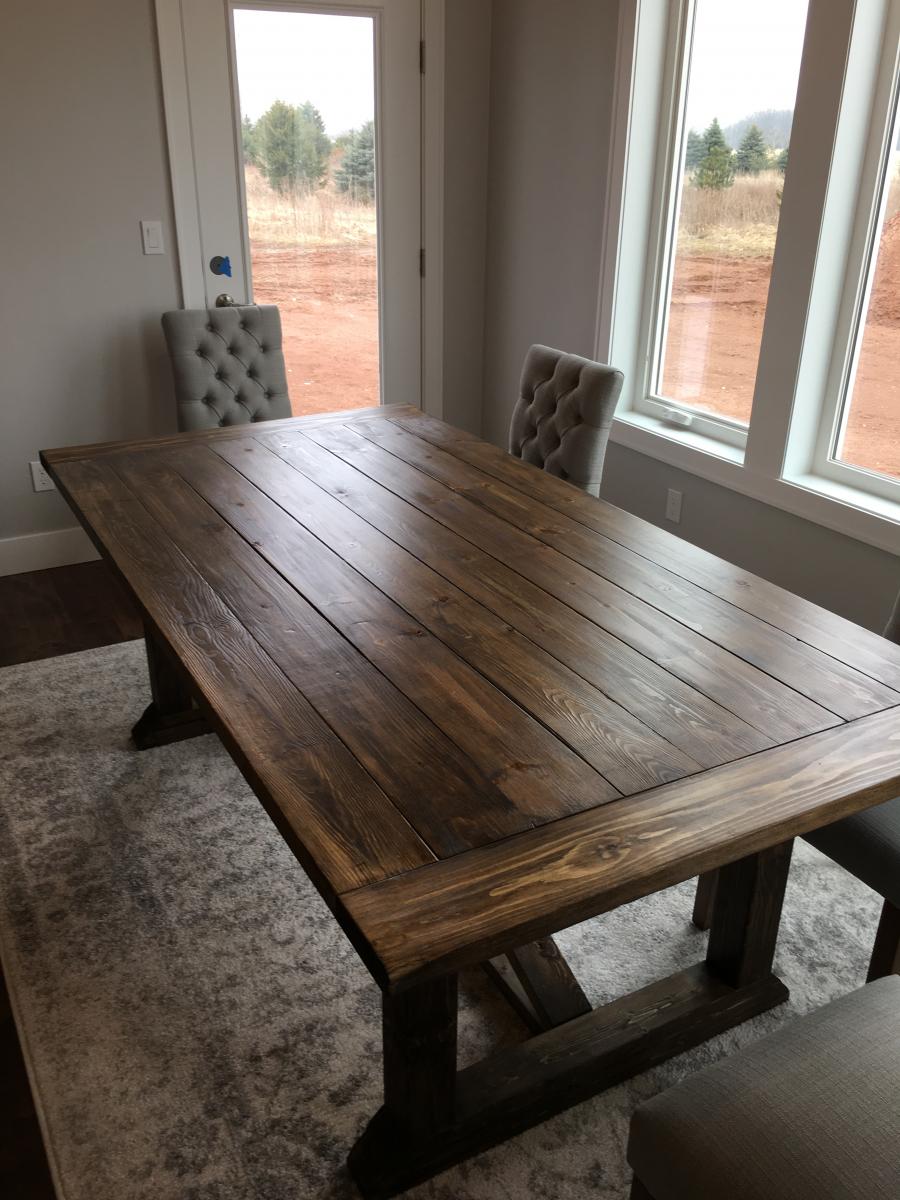
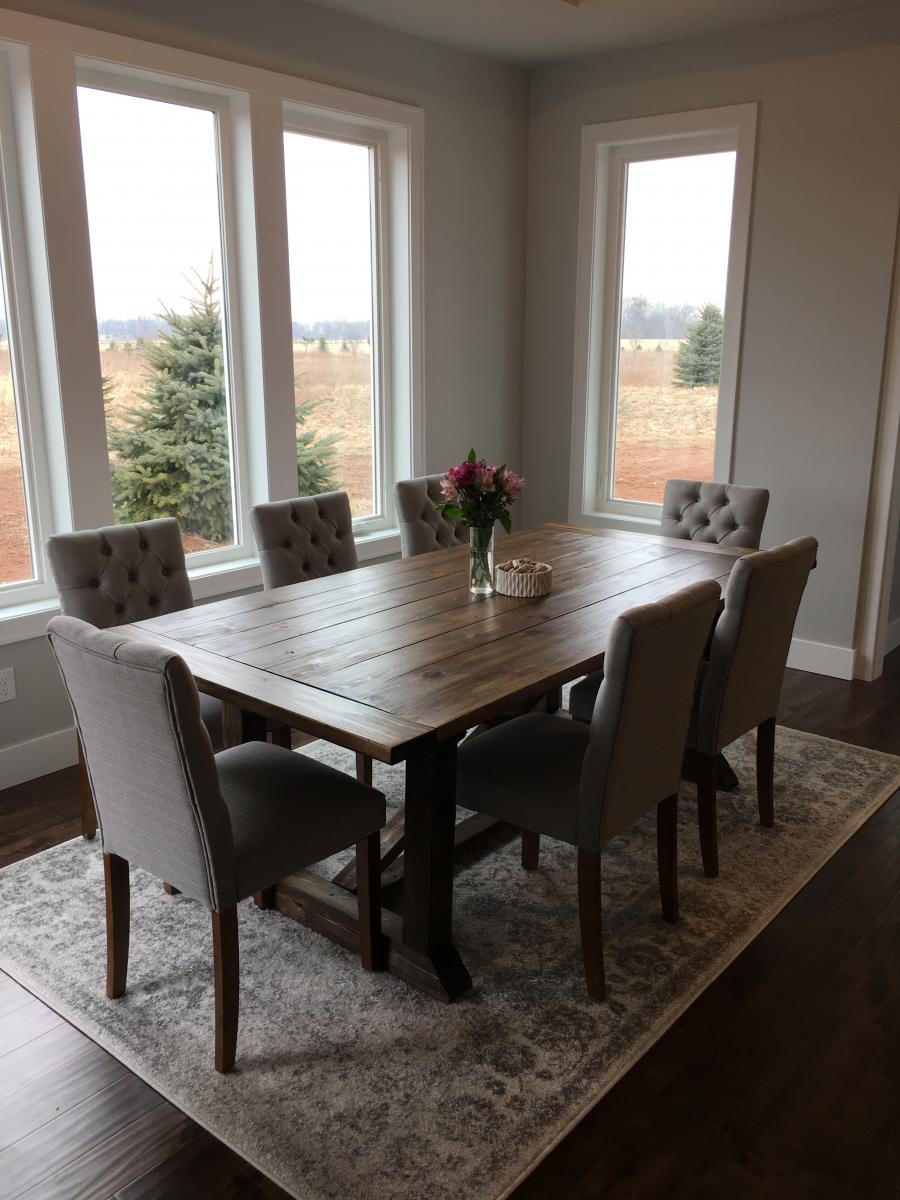
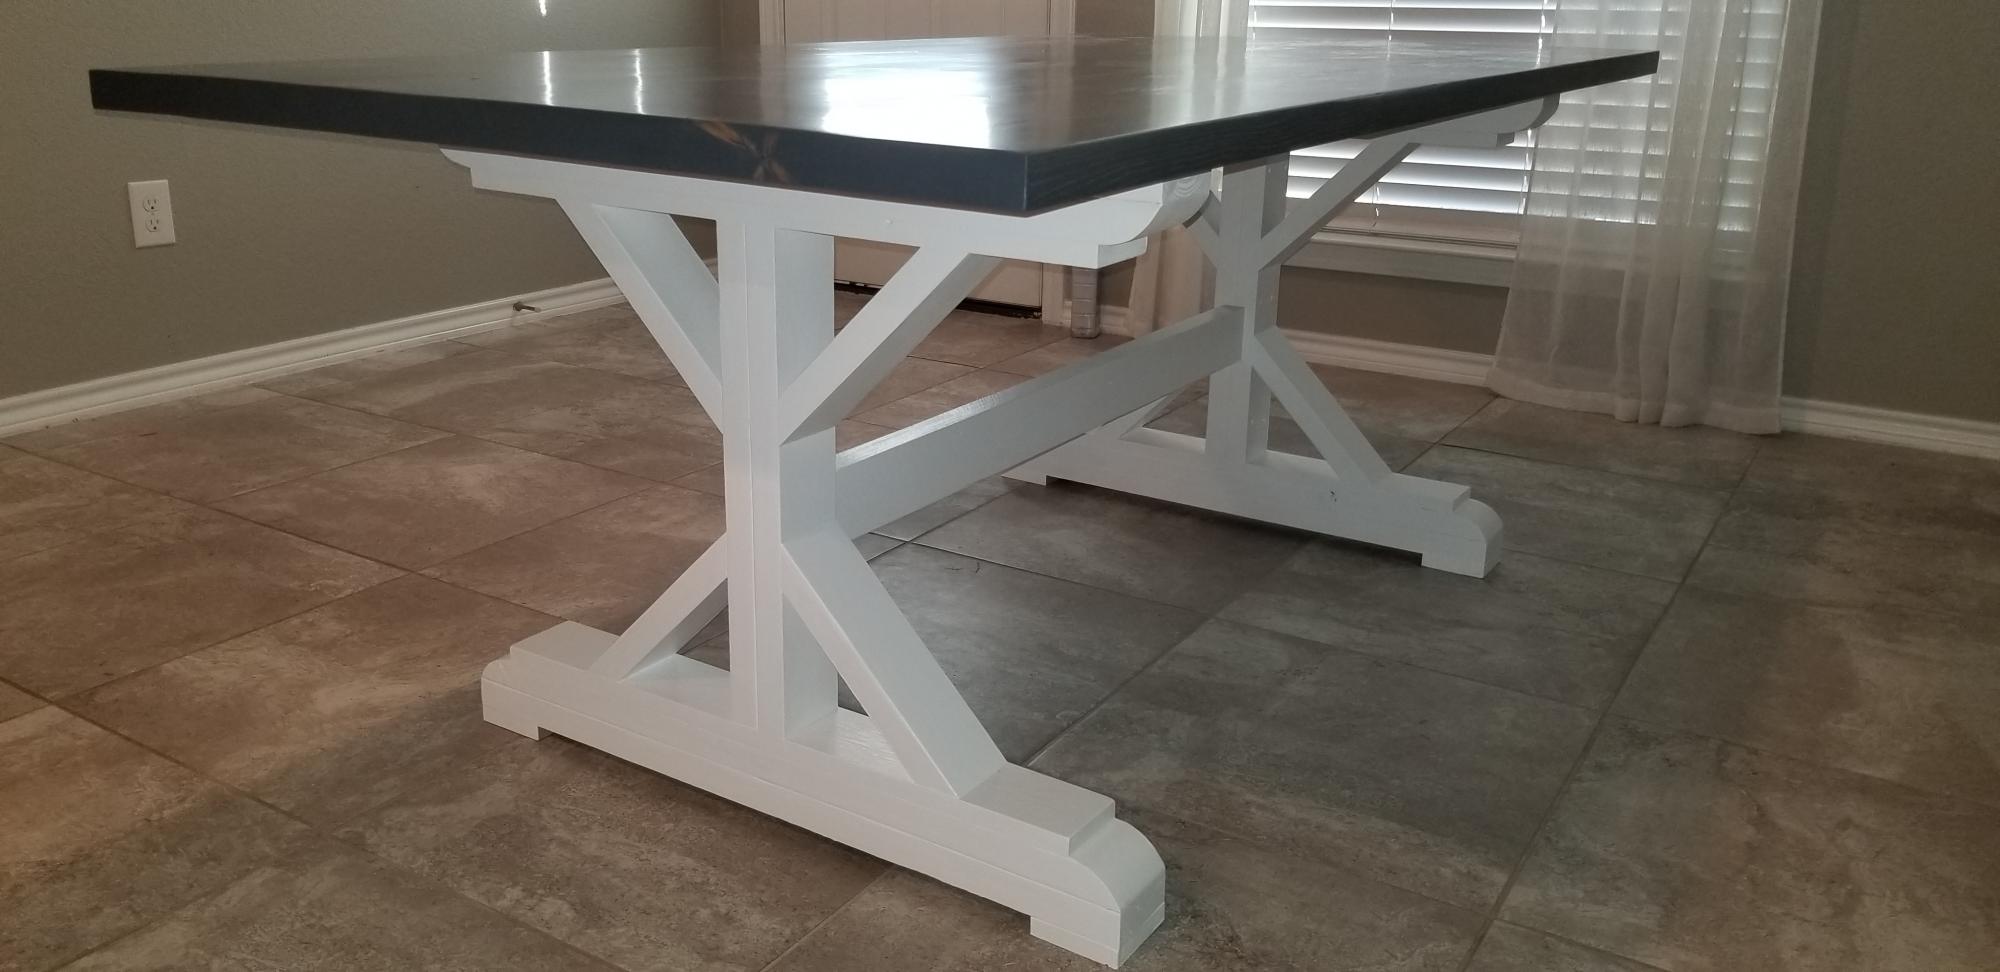
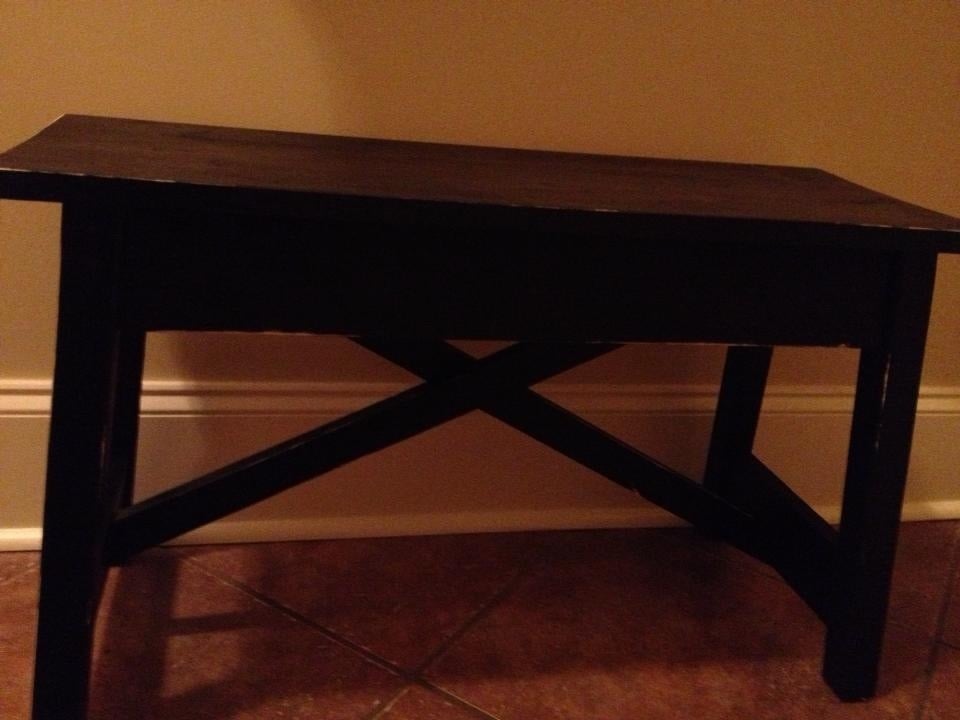
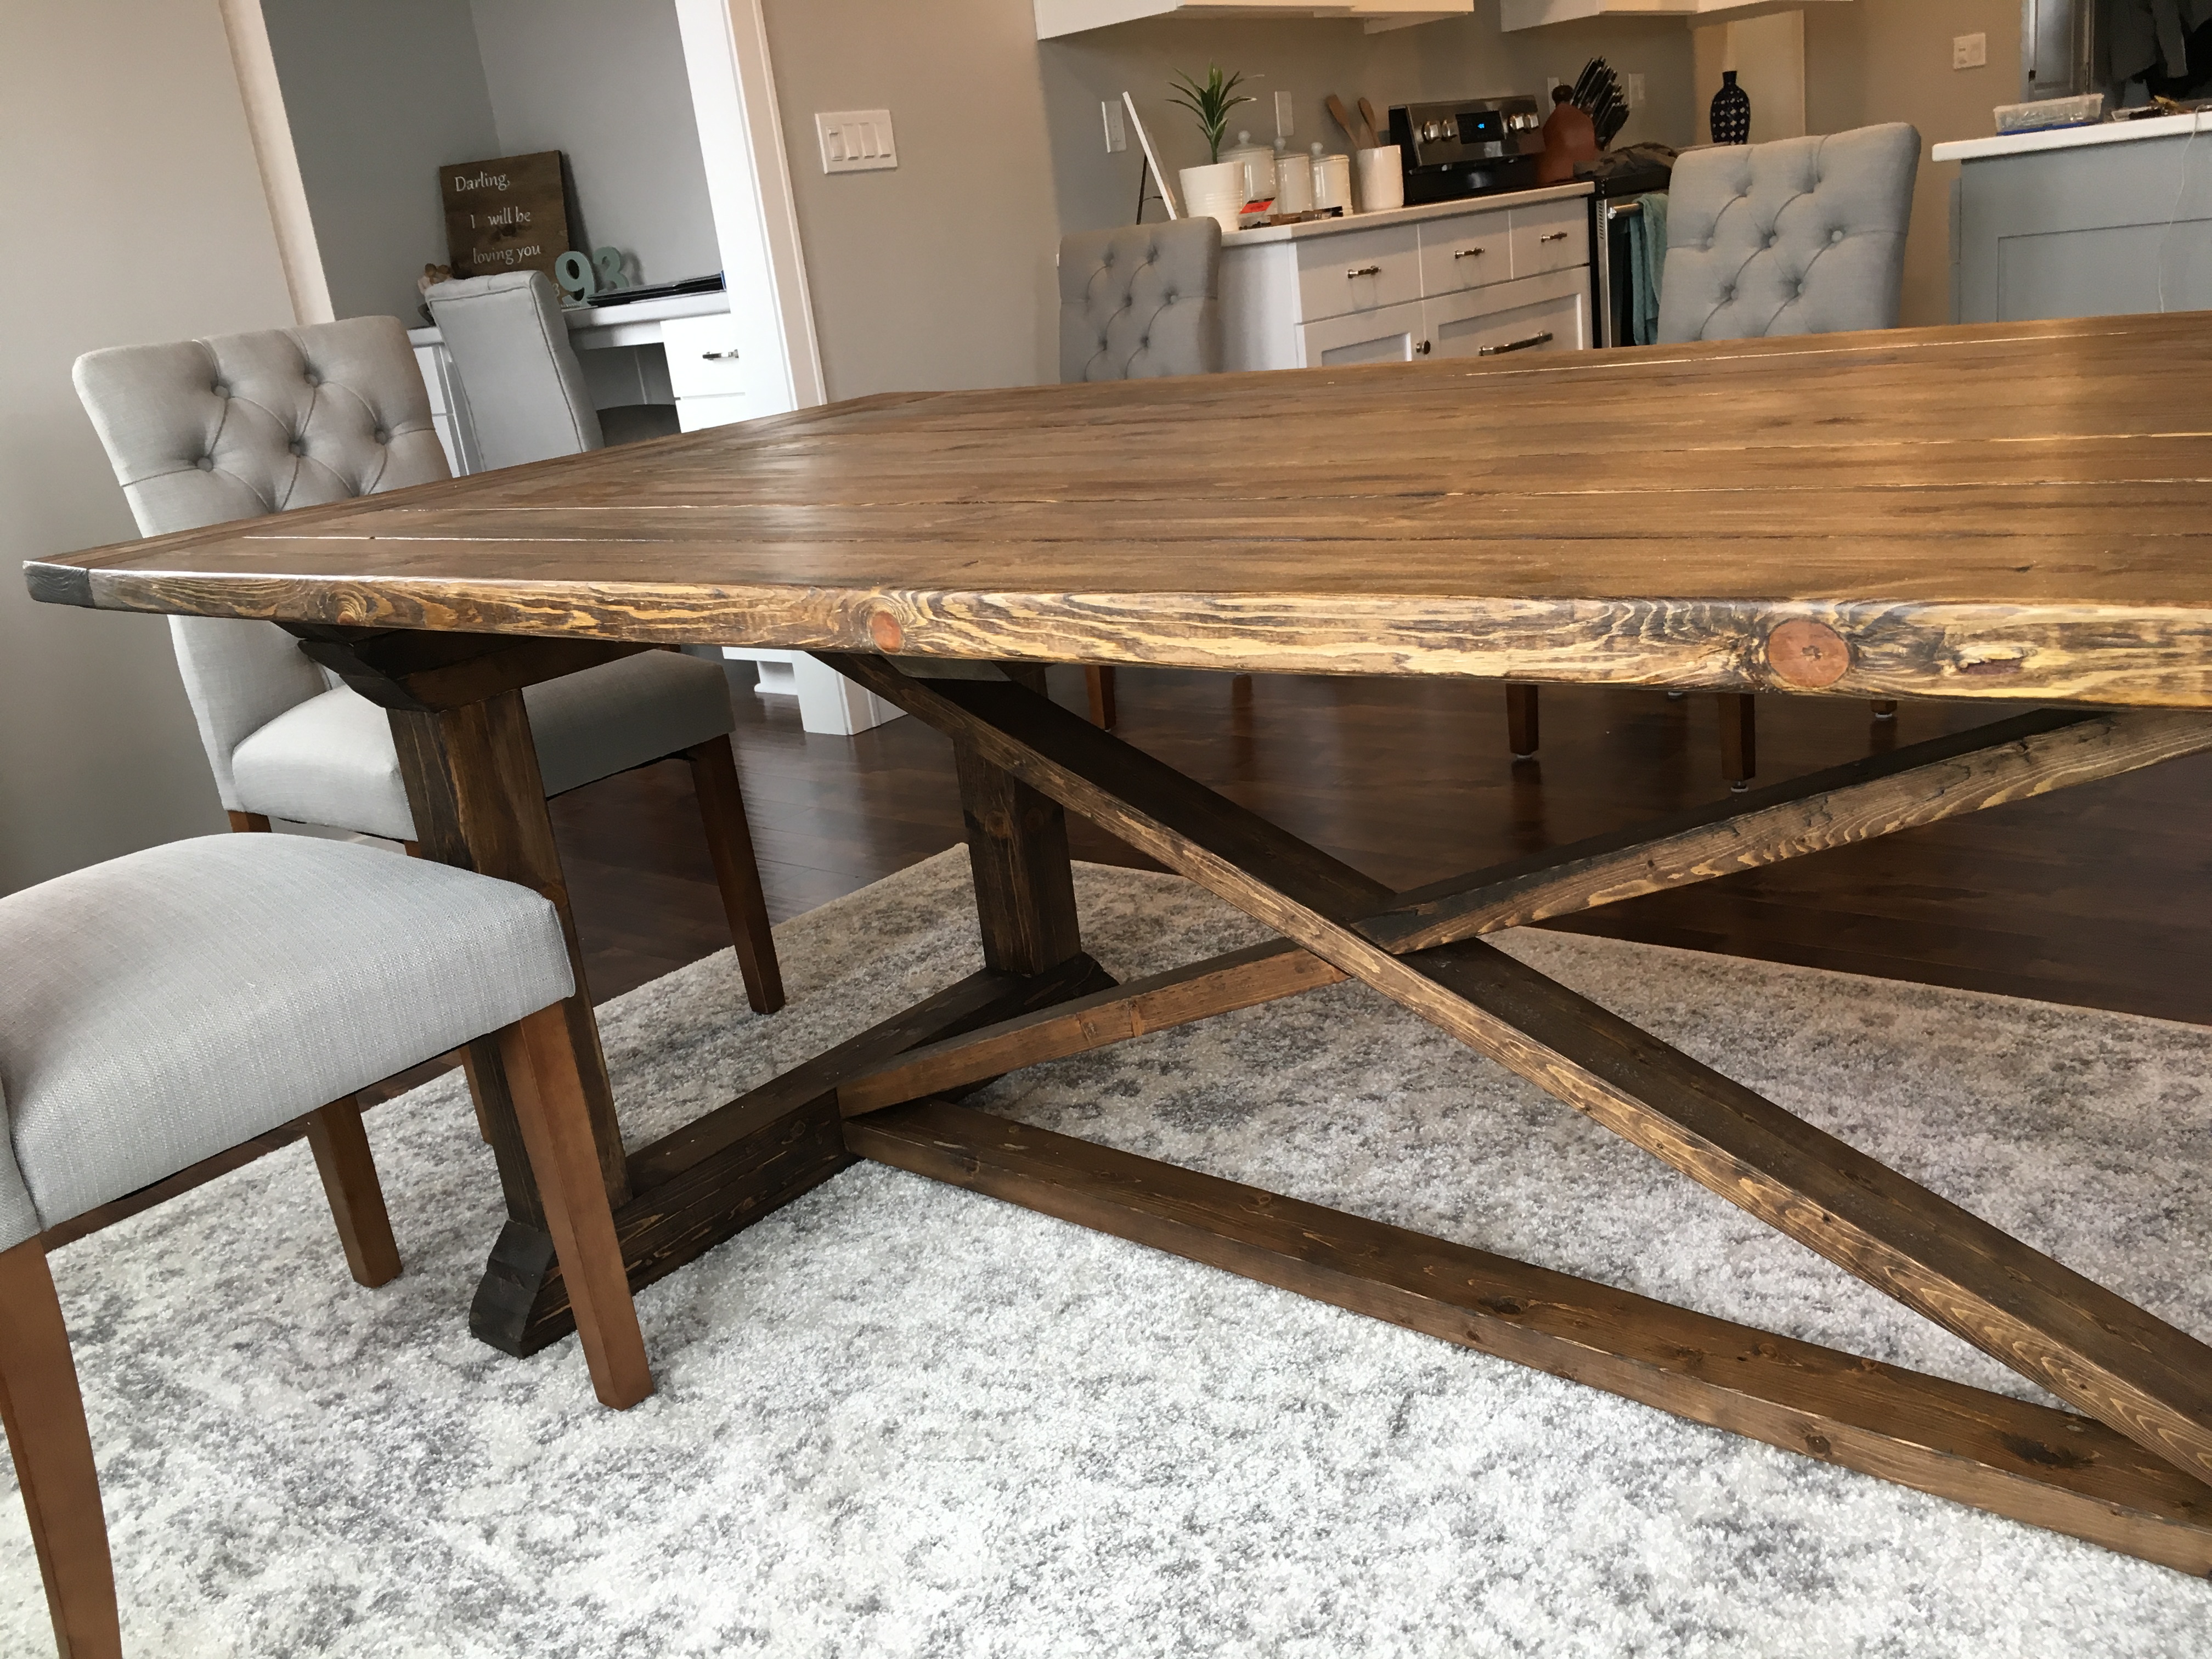
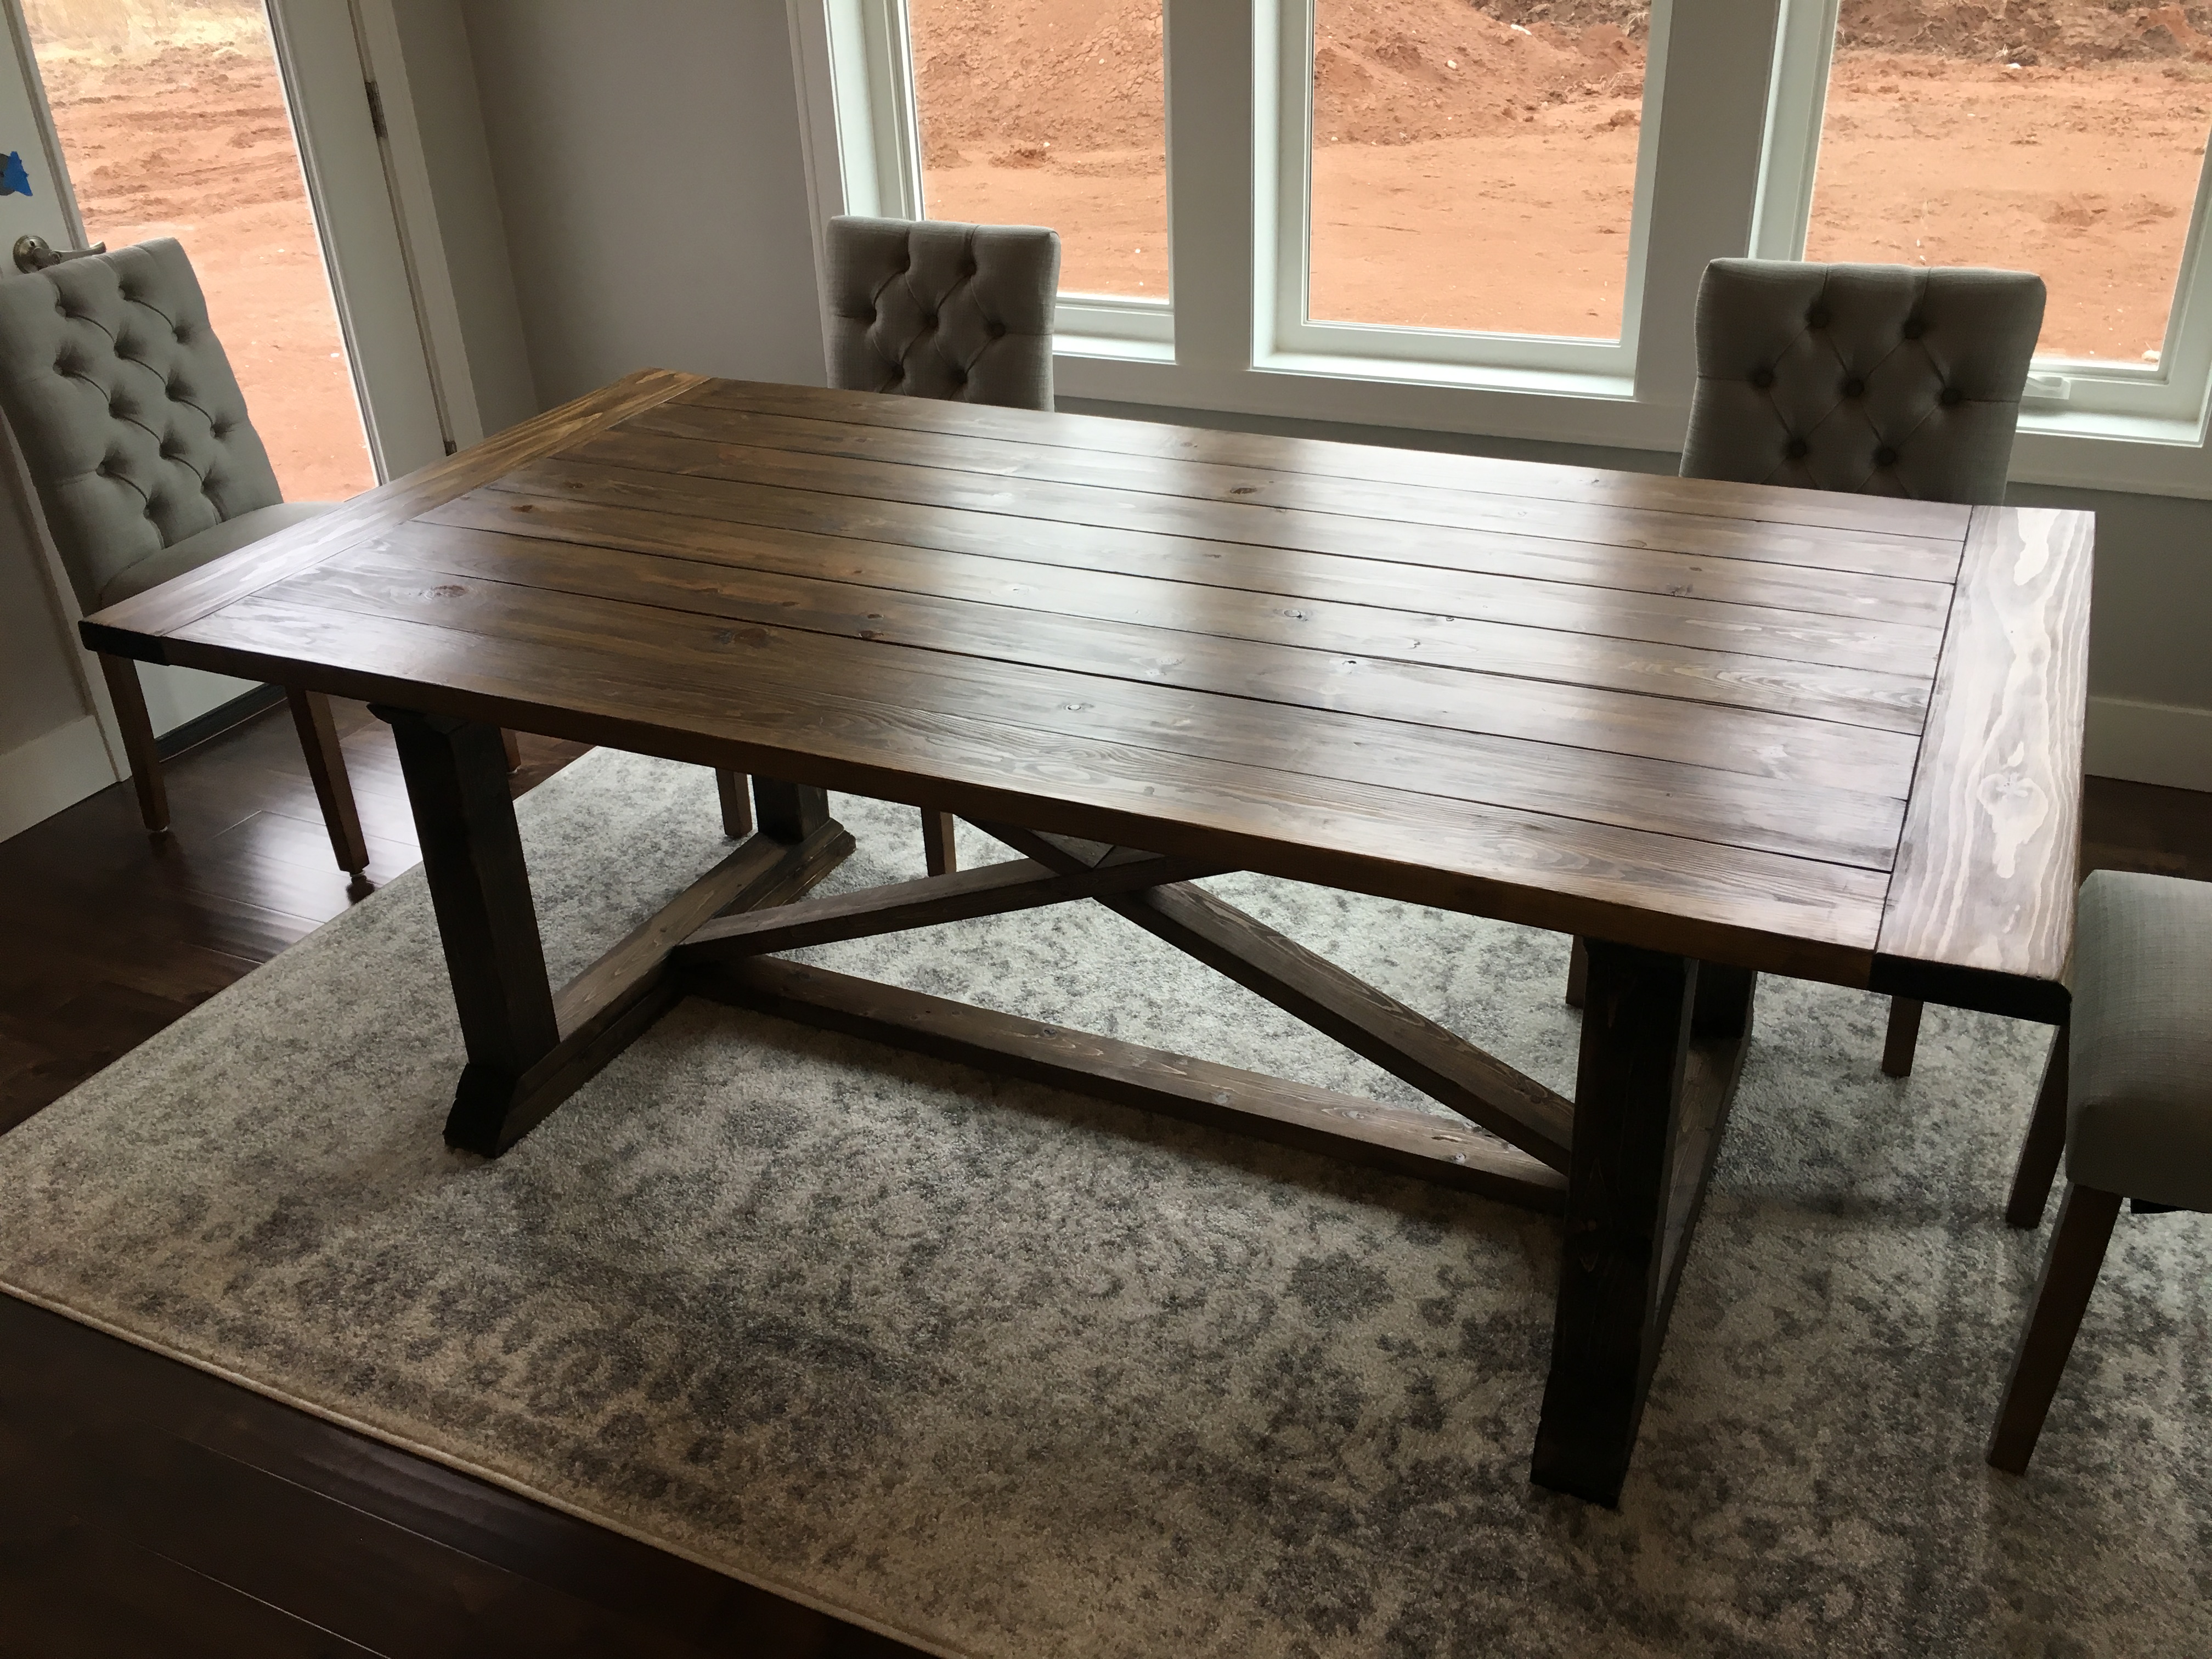
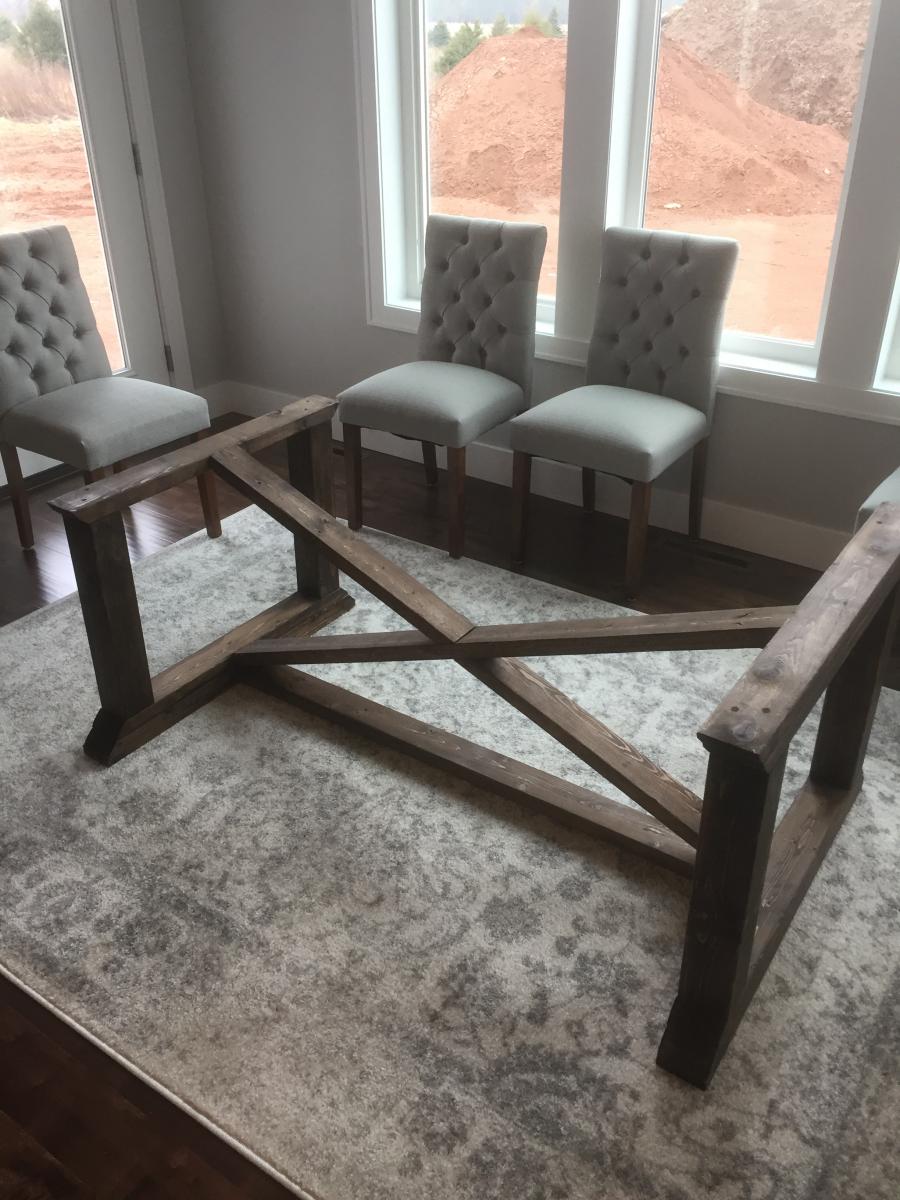
Community Brag Posts

Bedside tables

Submitted by Anonymous (not verified) on Fri, 04/14/2023 - 04:01

Made for my granddaughter. First time doing multiple drawers.

Comments

Craft table

I used the plans for the cfaft table top and shelf but changed a few things. On the left side table i made a shelf/cubby hole for wrapping paper and some small shelves I think it came out good!

Estimated Cost
85
Estimated Time Investment
Weekend Project (10-20 Hours)
Finish Used
java bean semi gloss on top sides sherwin williams mocha
Recommended Skill Level
Advanced

Faux Fireplace

I tweaked the plans to fit the spot I had in mind- It's a little skinnier, but still super cute!

I eliminated some of the extra trim, but I don't think it suffers any for it.

It's super cute!

Estimated Cost
50
Estimated Time Investment
Day Project (6-9 Hours)
Finish Used
I sealed the knots with kilz primer and then used a paint and primer in one that I had laying around for the white.
Recommended Skill Level
Beginner

Comments

jackiemacrae

Mon, 11/11/2013 - 14:47

Thanks Ana!
I have this set up in my photography studio. The floors are just ripped 1/4 inch plywood painted brown, then the crackle stuff, and then a top coat of white, and a poly to seal it.

Pam the Goatherd

Thu, 11/14/2013 - 09:50

The "fireplace" looks really good! And I'm glad to hear how you did your floor. I've been trying to convince my hubby to do a 1/4" plywood floor in our trailer as a temporary fix until we can either afford to put down "real" flooring or build the house we have been intending to build on this piece of property for the past 17 years. I've pointed out that we can replace the almost 30 year old, worn-out vinyl and carpet in the living room, kitchen and main hallway for less than $300 including paint/stain and polyurethane. But he thinks it will look tacky. I'm going to show him your picture so he can see for himself that it can look pretty doggone good!

jackiemacrae

Thu, 11/14/2013 - 10:37

Hi Pam- try googling plywood floors if you haven't already. I know I've seen some bloggers use plywood floors in their laundry room , and rec rooms.

Upholstered Coffee Table/Ottoman

Submitted by Anonymous (not verified) on Wed, 01/27/2016 - 10:15

I built the plans exactly as given (minus the top of course) but in hindsight I would have reduced the height by three inches to accommodate for the three inch height of the upholstery foam. I am still very happy with it!

Built from Plan(s)
Estimated Cost
$100 approx.
Finish Used
For the base, I painted them with Rustoleum's Hammered in copper. (The quart, NOT the spray paint) I did two coats. When applying, go quickly and don't over brush the paint. I did spray on a light clear matte finish to tone down the shiny finish of the paint.
Recommended Skill Level
Beginner

Comments

Loft Bed

Submitted by BGBuild on Tue, 07/16/2019 - 07:30

This is the first bed I built for my daughter when she was about 3 years old and we were living in Colombia. I was able to get the people at the hardware store to cut most of the wood for me which helped since we were in a very small apartment and I put everything together was a $40 starter drill kit. In the end it came out great and she was very happy with it. When we moved back to the US and I had access to more tools and workspace I built her a Little Cottage Bed which was a much harder build but worth it.

Built from Plan(s)
Estimated Cost
$150
Estimated Time Investment
Weekend Project (10-20 Hours)
Recommended Skill Level
Beginner

Outdoor Sofa plus ottoman came out GREAT!!

Submitted by Robster on Tue, 04/18/2023 - 12:30

Inspired by outdoor sofa plan I saw on the Ana White website... wanted to customize by using larger cushions (29" wide) adjusted the plans for wider cushions and more relaxed sitting posture so pushed the back support angle further back by 4 inches. Added legs since we were wider. My wife is super pleased and build came out really nice. Thanks Ana for the inspiration!!

Comments

kids table & chairs

Clara table with one piece top and chairs modified with 2x2 legs and one piece seat.

Built from Plan(s)
Estimated Cost
$20
Estimated Time Investment
Afternoon Project (3-6 Hours)
Finish Used
Table:
1. One coat primer
2. Two coats Behr swiss coffee
3. Distressed and sealed Minwax clear satin poly
Chairs:
1. One coat primer
2. Two coats Benjamin Moore summer shower
3. Distressed and sealed Minwax clear satin poly
Recommended Skill Level
Beginner

Toddler Day Bed

Not bad for our first project...We love it and so does our daughter! Followed the directions except we did 1x10's instead of 1x6's and we left one inch to hold the mattress on instead of the 1/2 inch it called for since we bought her a foam mattress it needed a piece of plywood for extra support.

Built from Plan(s)
Estimated Cost
$120 total. The wood alone was $90. We had the sheet and crib skirt.
Estimated Time Investment
Weekend Project (10-20 Hours)
Finish Used
Headboard was fitted with a velour crib sheet. Bottom of bed we used her crib skirt that was made of tulle.
Recommended Skill Level
Beginner

Comments

JoanneS

Thu, 11/14/2013 - 16:19

This is just darling! Absolutely beautiful. Congratulations on a terrific first project!

Laundry Pedistal

Submitted by Anonymous (not verified) on Sun, 01/31/2016 - 09:09

Been waiting to tackle this project for months. This was more for a place to put our laundry baskets while our laundry was being washed and dried. We come through our laundry area from our garage and so do most of our guests as our front door is a long way from parking. Tripping over empty laundry baskets no more. The opening for baskets is 11.5", which also elevated the opening to clear the dryer exhaust out and allow our units to push back a little closer to the wall. The floor and top were framed using 2x4's cut at 26" and a kreg pocket hole jig. 4x4 posts 11.5" were attached using the kreg jig and L brackets. 3/4" plywood sheeting the top and bottom cut at 55"x29". I did save a little money by only using one sheet of plywood. Full cut for the top, pieced together on the base in the back using excess from one sheet. 3.875" base moulding was used on the top and bottom to cover the seam where the 3/4" plywood sheet for the top and bottom meet the framing. The moulding on the top was inverted, and raised 5/8" over the plywood sheeting top to create a lip so the machines would not slide off the pedistal. Didn't want too much dressing up, I like clean, straight lines. A coat of primer, and 3 coats of semi gloss white paint. I put a sheet of the black rubber runner from Home Depot in the carpet roll area like Chris did, for some noise dampening to prevent our washer from walking at all. Tacked down with black carpet tack nails. The hardest part of the whole project was hooking the washer and dryer up in the tight space we have after getting the units on the pedistal. The dryer exhaust vent pipe in the wall is behind the washer, so I used adjustable rigid exhaust vent elbows to route the flexible exhaust duct through the pedistal, tacked it up to the underside of top with zip tie's and then up and around the side of the pedistal to the dryer exhaust port. All and all a very fun and rewarding DIMyself project. Thanks Sausha....

Estimated Cost
2x4's 10 @ $3=$30
4x4 $7
3/4" Plywood sheet $30
Rubber runner $10
L brackets $3
Drywall screws & paint already had $0
Total out of pocket cost $80
Estimated Time Investment
Day Project (6-9 Hours)
Finish Used
Kilz Primer Glidden semi gloss white
Brushed and rolled on
Recommended Skill Level
Beginner

Comments

bclute

Sun, 01/29/2017 - 16:40

Great looking build, thanks for the detailed photos!

Modern outdoor chair and loveseat

Modified chair plans to build loveseat. Chairs took one day and loveseat took one day. 

Estimated Cost
Lumber is way more expensive where I live. The chairs were $85 in lumber for both and the love seat was $40 because I had some leftover from the chairs.
Estimated Time Investment
Weekend Project (10-20 Hours)
Finish Used
Red mahogany stain, then a coat of polyurethane
Recommended Skill Level
Beginner

Comments

jessicawhitlock

Wed, 07/15/2020 - 11:33

I love how you set the cushion down in the seat. What type of cushion did you use? Is it comfortable this way? This looks exactly what I am picturing in my head, but I worry the bar on your legs might be uncomfortable.

Marvel Comics Scooter

Submitted by Anonymous (not verified) on Mon, 04/24/2023 - 20:47

I built this per your plans for my grandson that turned 2 last week. He loves it! I used Mog Pog to affix the comic pages that I printed from the internet. However with the 4 caster wheels, it seems to tip over too easily. I am going to swap the two rear wheels with non-castering ones and see if that helps. Great plans....Great details....thanks for sharing!!!!

Gary G.
Athens, Alabama

Comments

Doll Farmhouse Bed

Submitted by kne16415 on Thu, 12/29/2011 - 12:53

Farmhouse doll bed with adorable bedding made

Estimated Cost
10.00
Estimated Time Investment
An Hour or Two (0-2 Hours)
Recommended Skill Level
Beginner

My new and amazing outdoor bench

Submitted by ישראל on Sat, 11/16/2013 - 21:57

Thank you for the easy and fun bench plan.
It was really easy to install.
Even my 2 little daughters had fun (-:

Estimated Time Investment
Afternoon Project (3-6 Hours)
Finish Used
Bondex walnut
Recommended Skill Level
Starter Project

Comments

Chachamation

Thu, 10/02/2014 - 07:21

This is absolutely amazing!

This "ישראל" person is super talented comes to the final touches!!  From now on, I will start following your work...

Door Spice Rack

Submitted by Anonymous (not verified) on Wed, 02/03/2016 - 07:39

I found the plans for this spice rack several months ago but did not have the time to build it. The spice rack was very easy to build with the provided plans and with the use of the Kreg Pocket Hole jig. My wife loves it. Thankssmiley

Estimated Cost
$40
Estimated Time Investment
Afternoon Project (3-6 Hours)
Finish Used
None
Recommended Skill Level
Beginner

Chick Brood Box Enclosure & Steps

Submitted by Anonymous (not verified) on Sun, 04/30/2023 - 11:28

We have our new chicks in a 2’x4’ stock tank as a brooder. Since it’s outside on a covered porch, I wanted something to keep predators out, but also to allow our kids to reach in and hold the chicks—they love holding them! I built the 32”x54”x32” enclosure with 2x4s and hardware cloth. The bottom and sides are sealed with wire and the top has a lid that closes securely with a latch on either side. The steps are perfect for our kids to stand on so they can reach in to refill the food and water and pet or hold the chicks.

Comments

Marlee's Kitchen "Just Like Grammie's"

Submitted by Laura Fama on Mon, 01/02/2012 - 06:05

I started this project months ago... hoping to give this to Marlee for her 3rd birthday... that was September. Here it is... 99.99% complete... 3.5 months past the deadline... Just in time for Christmas. I used the plans for Grace's Kitchen pieces with some modifications. I extended the cabinet for the sink... gave her a farmer's sink... and extra counter space. What kitchen doesn't need additional counter space??? I left it open storage for now... I wanted to add doors... but ran out of time... ha ha... The oven I added the drop down door below the oven compartment for additional storage. I painted the burners on her cooktop.. just like Grammie's... I couldn't find the handles I wanted in black... I had to buy the stainless ones and prime and spray them black... that was pricey ... The fridge has 5+ coats of magnetic primer under the stainless steel paint. I got a pic of an icemaker/water dispenser from the web and Mod Podged it to the freezer door. I had just as much fun shopping for her supplies as I did making the kitchen. Most of the food products are from Melissa & Doug... and mostly all made of wood!! Too bad she's only here a couple nights a month.... maybe I might have to have my own friends over to play when she's not here!!! Thank you Ana... once again I owe it all to you!!!!

Estimated Cost
$150-$200
Finish Used
Rustoleum Magnetic Primer
Rustoleum Stainless Steel Paint
Sherwin Williams Caviar paint
Recommended Skill Level
Beginner

Comments

laurakc181

Mon, 01/02/2012 - 08:31

This is probably the best one I have seen! Honestly - the fridge is fantastic and that sink is insanely awesome! I am jealous now lol....I am sure she loves it and who says YOU aren't allowed to play with it while she is not there ;)

Laura Fama

Mon, 01/02/2012 - 19:12

Thank you. That's very nice of you to say, there are many beautiful sets on here. Yours is very nice too. I love the grill on your stove. That's a great addition.

Jaque (not verified)

Wed, 01/04/2012 - 21:06

THAT IS AMAZING I LOVE IT!! I may take some ideas for myself I have 2 little girls and I think the extra space would be perfect for them so they dont fight over a little space. I JUST LOVE THIS!!!

Laura Fama

Thu, 01/05/2012 - 18:31

I think the extra space is going to work out well. My granddaughter is already using it and if she didn't have it, I suspect she'd make my play sandwich on the floor!! I would like to make another piece, for additional storage and maybe a microwave, but I'm running out of space in her room!!!

Guest (not verified)

Mon, 02/06/2012 - 19:08

Could you please tell me the dimensions of your sink & counter? Thanks,

Lotus (not verified)

Sun, 08/19/2012 - 10:30

Where did you find that cute sink? Id love to make this for my daughter, you did a great job.

Laura Fama

Sun, 08/19/2012 - 18:35

Thank you, I built the sink. Just made a box and painted it with stainless steel paint. I really winged it with the sink. The counter top is two boards that were scrap from the fridge joined with pocket holes. I splurged and bought the faucet.

DSalvagni

Fri, 08/23/2013 - 09:22

I love your kitchen set at first i thought it was the real deal. the stainless on black looks amazing what paint did you use to get the stainless color? also what did you use for the stove knobs they look real Great job.

Laura Fama

Thu, 01/08/2015 - 07:20

Sorry this reply is so late...I used Rustoleum stainless steel paint. It's awesome. The knobs are real. They're replacement knobs for a range, sold at Lowe's. I was able to work with them and they actually turn.

Farmhouse Table

Submitted by upsidedown on Fri, 02/05/2016 - 07:21

This version of the Farmhouse Table was made with fir and finished with Varathane Early American stain. It is by far my favorite item in the house! Love it!

Estimated Cost
$250
Estimated Time Investment
Weekend Project (10-20 Hours)
Finish Used
I stained the table with Varathane Early American, and then finished it up with 3 coats of Minwax Polycrylic (gloss).
Recommended Skill Level
Intermediate

Comments

Shaunnyp

Sat, 02/06/2016 - 08:25

I absolutely love this table.  I have a small kitchen and would like to build it counter height (36 inches...including the casters) measuring 30x54 inches. This will allow me to move the table as needed to get it out of the way or move closer to my stove and use as additional prep space as needed. Any recommendations or suggestions to make a safe, sturdy, movable table would be greatly appreciated.  Also any warnings if you see any potential pitfalls I should be concerned with. Thanks in advance.

Hanging bed

Submitted by Anonymous (not verified) on Wed, 08/14/2019 - 18:32

I used the hanging bed plans to do a hanging bed that's attached on one side to the wall. Then created a ladder and side rail.

Built from Plan(s)

Beginner Farm coffee table

Submitted by Anonymous (not verified) on Fri, 05/05/2023 - 05:27

I haven't done much wood working but I found Ana White's plan and followed along with her video. Was able to easily assemble this beautiful table in one afternoon. Next step, sanding and finishing. I'm definitely going to try more projects.

Comments

Squared2 Headboard

Submitted by amysparkie on Wed, 01/04/2012 - 16:24

I build Anna's version of this popular store's headboard. I love it! Cost includes wood and paint. I would have used poplar for the entire bed but my hardware store only had 2x2s and 2x4s in white wood.

Estimated Cost
$75
Estimated Time Investment
Day Project (6-9 Hours)
Finish Used
The paint color is pond by eddie bauer color matched at benjamin moore. I used a HVLP paint sprayer to paint and a semi gloss paint thinned with a water based product (you can just use water and floetrol).
Recommended Skill Level
Beginner