Community Brag Posts
Small Cedar Woodshed
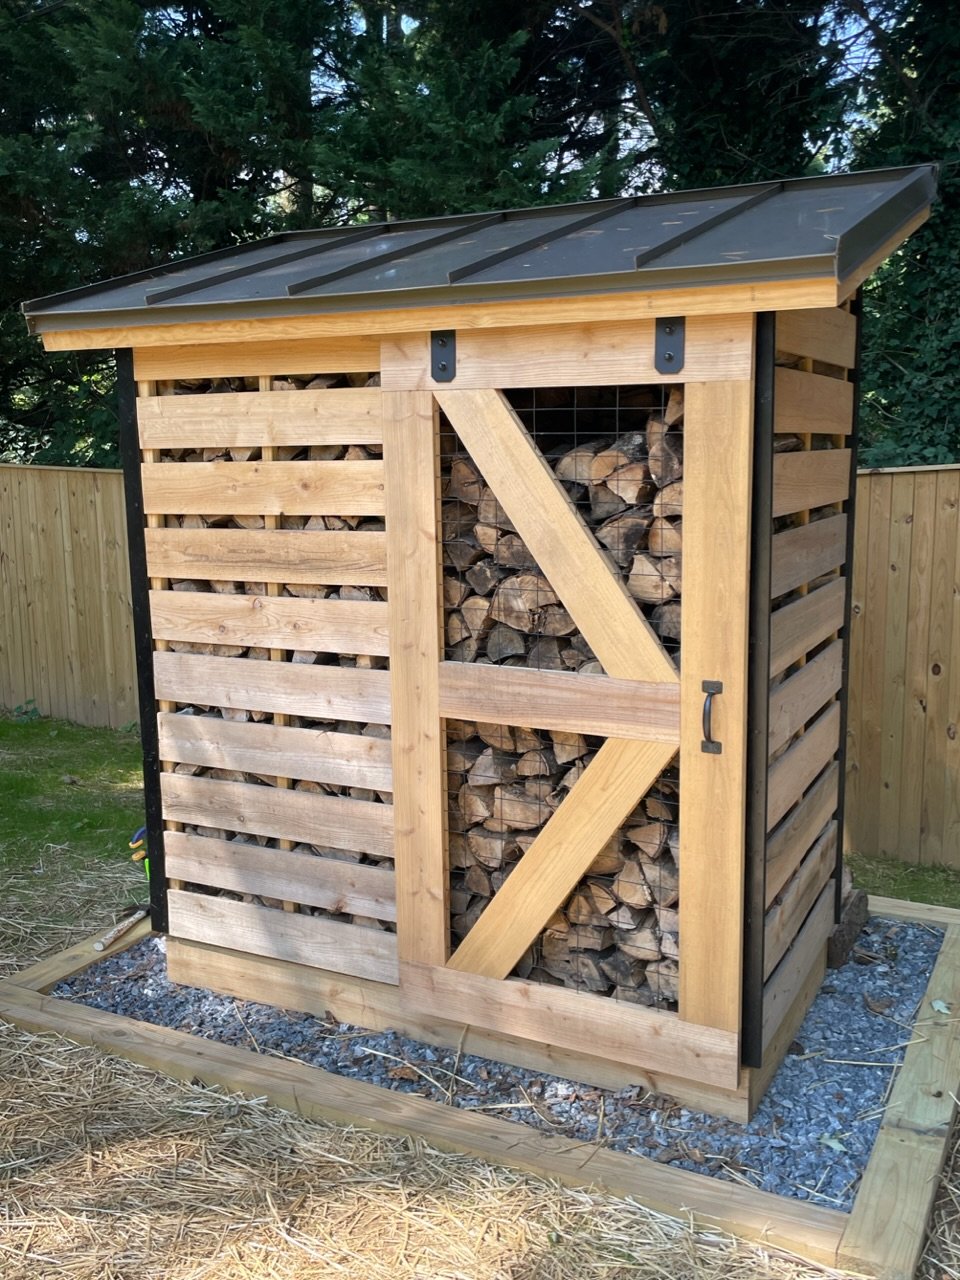
Spaced out the boards to allow airflow; did a sliding barn door and metal roof. Thanks for the plans!
Built from Plan(s)
Comments
Wed, 10/19/2022 - 08:23
Outstanding!
This is totally awesome, way to think outside the box! Thanks for sharing.
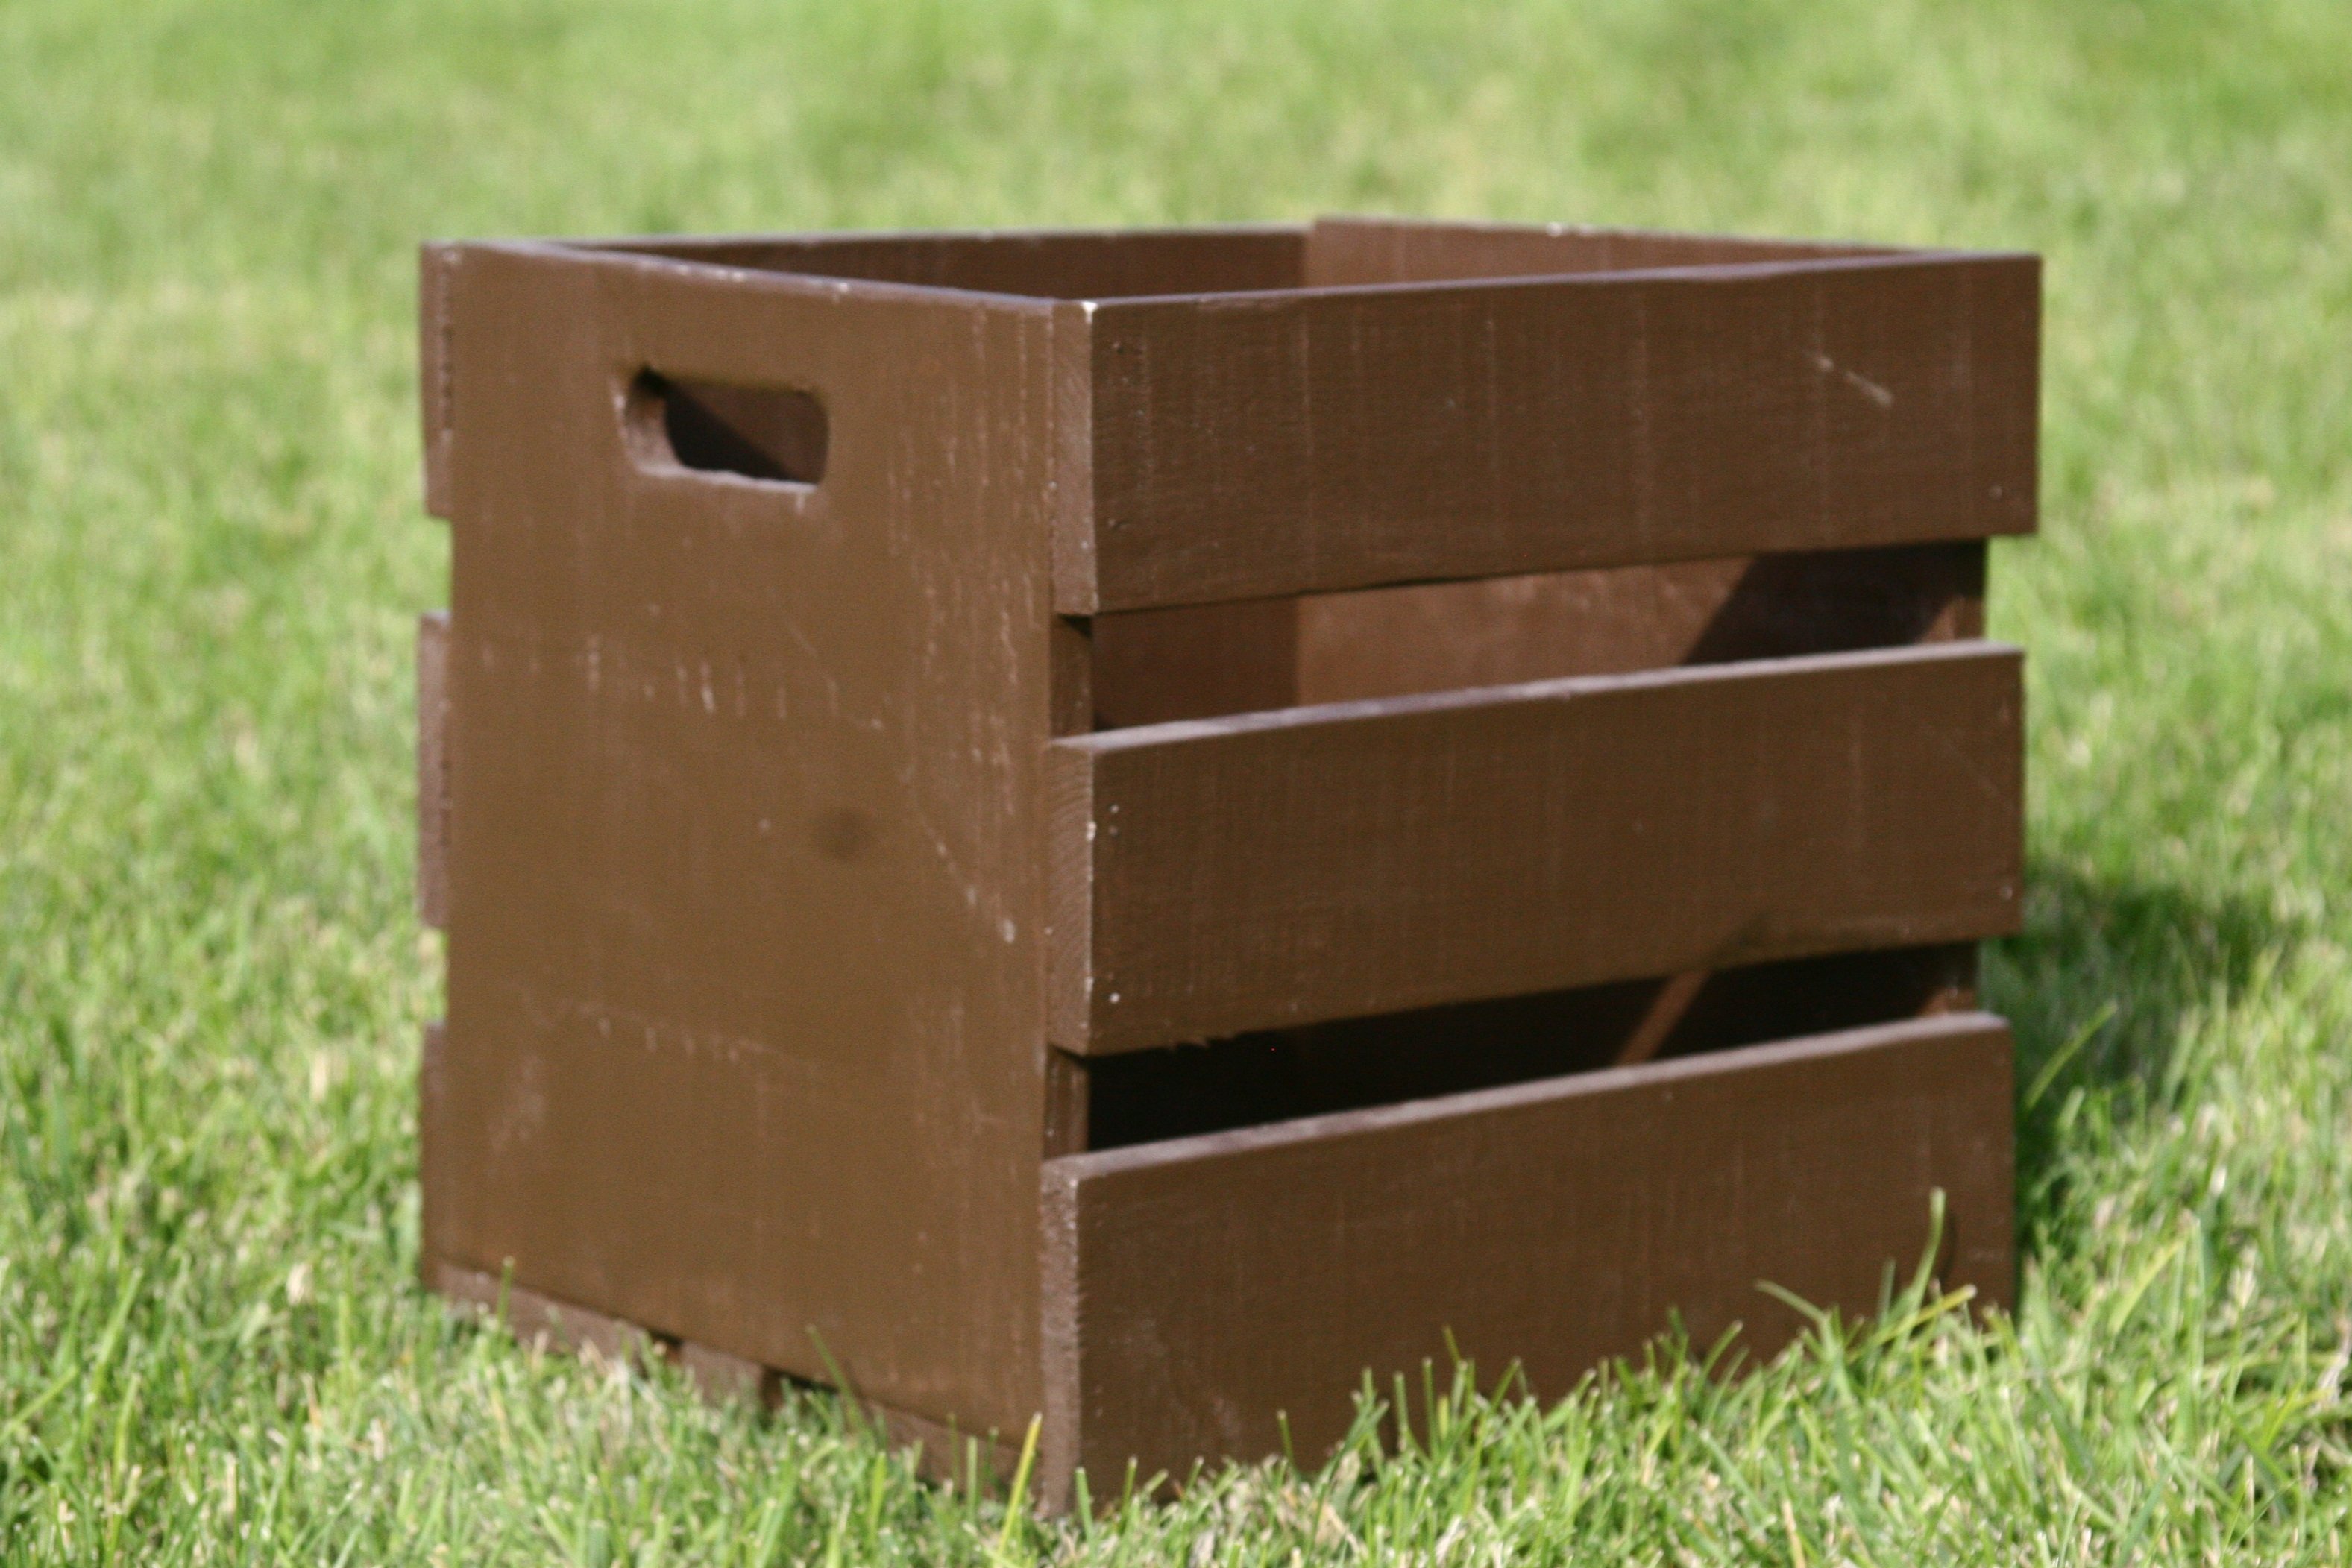
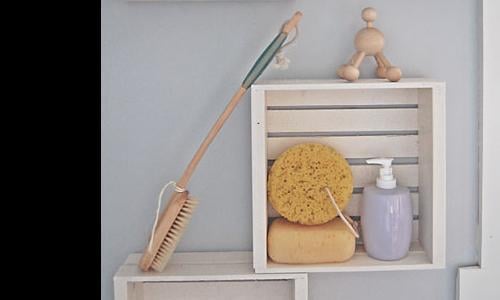
Shoe crates
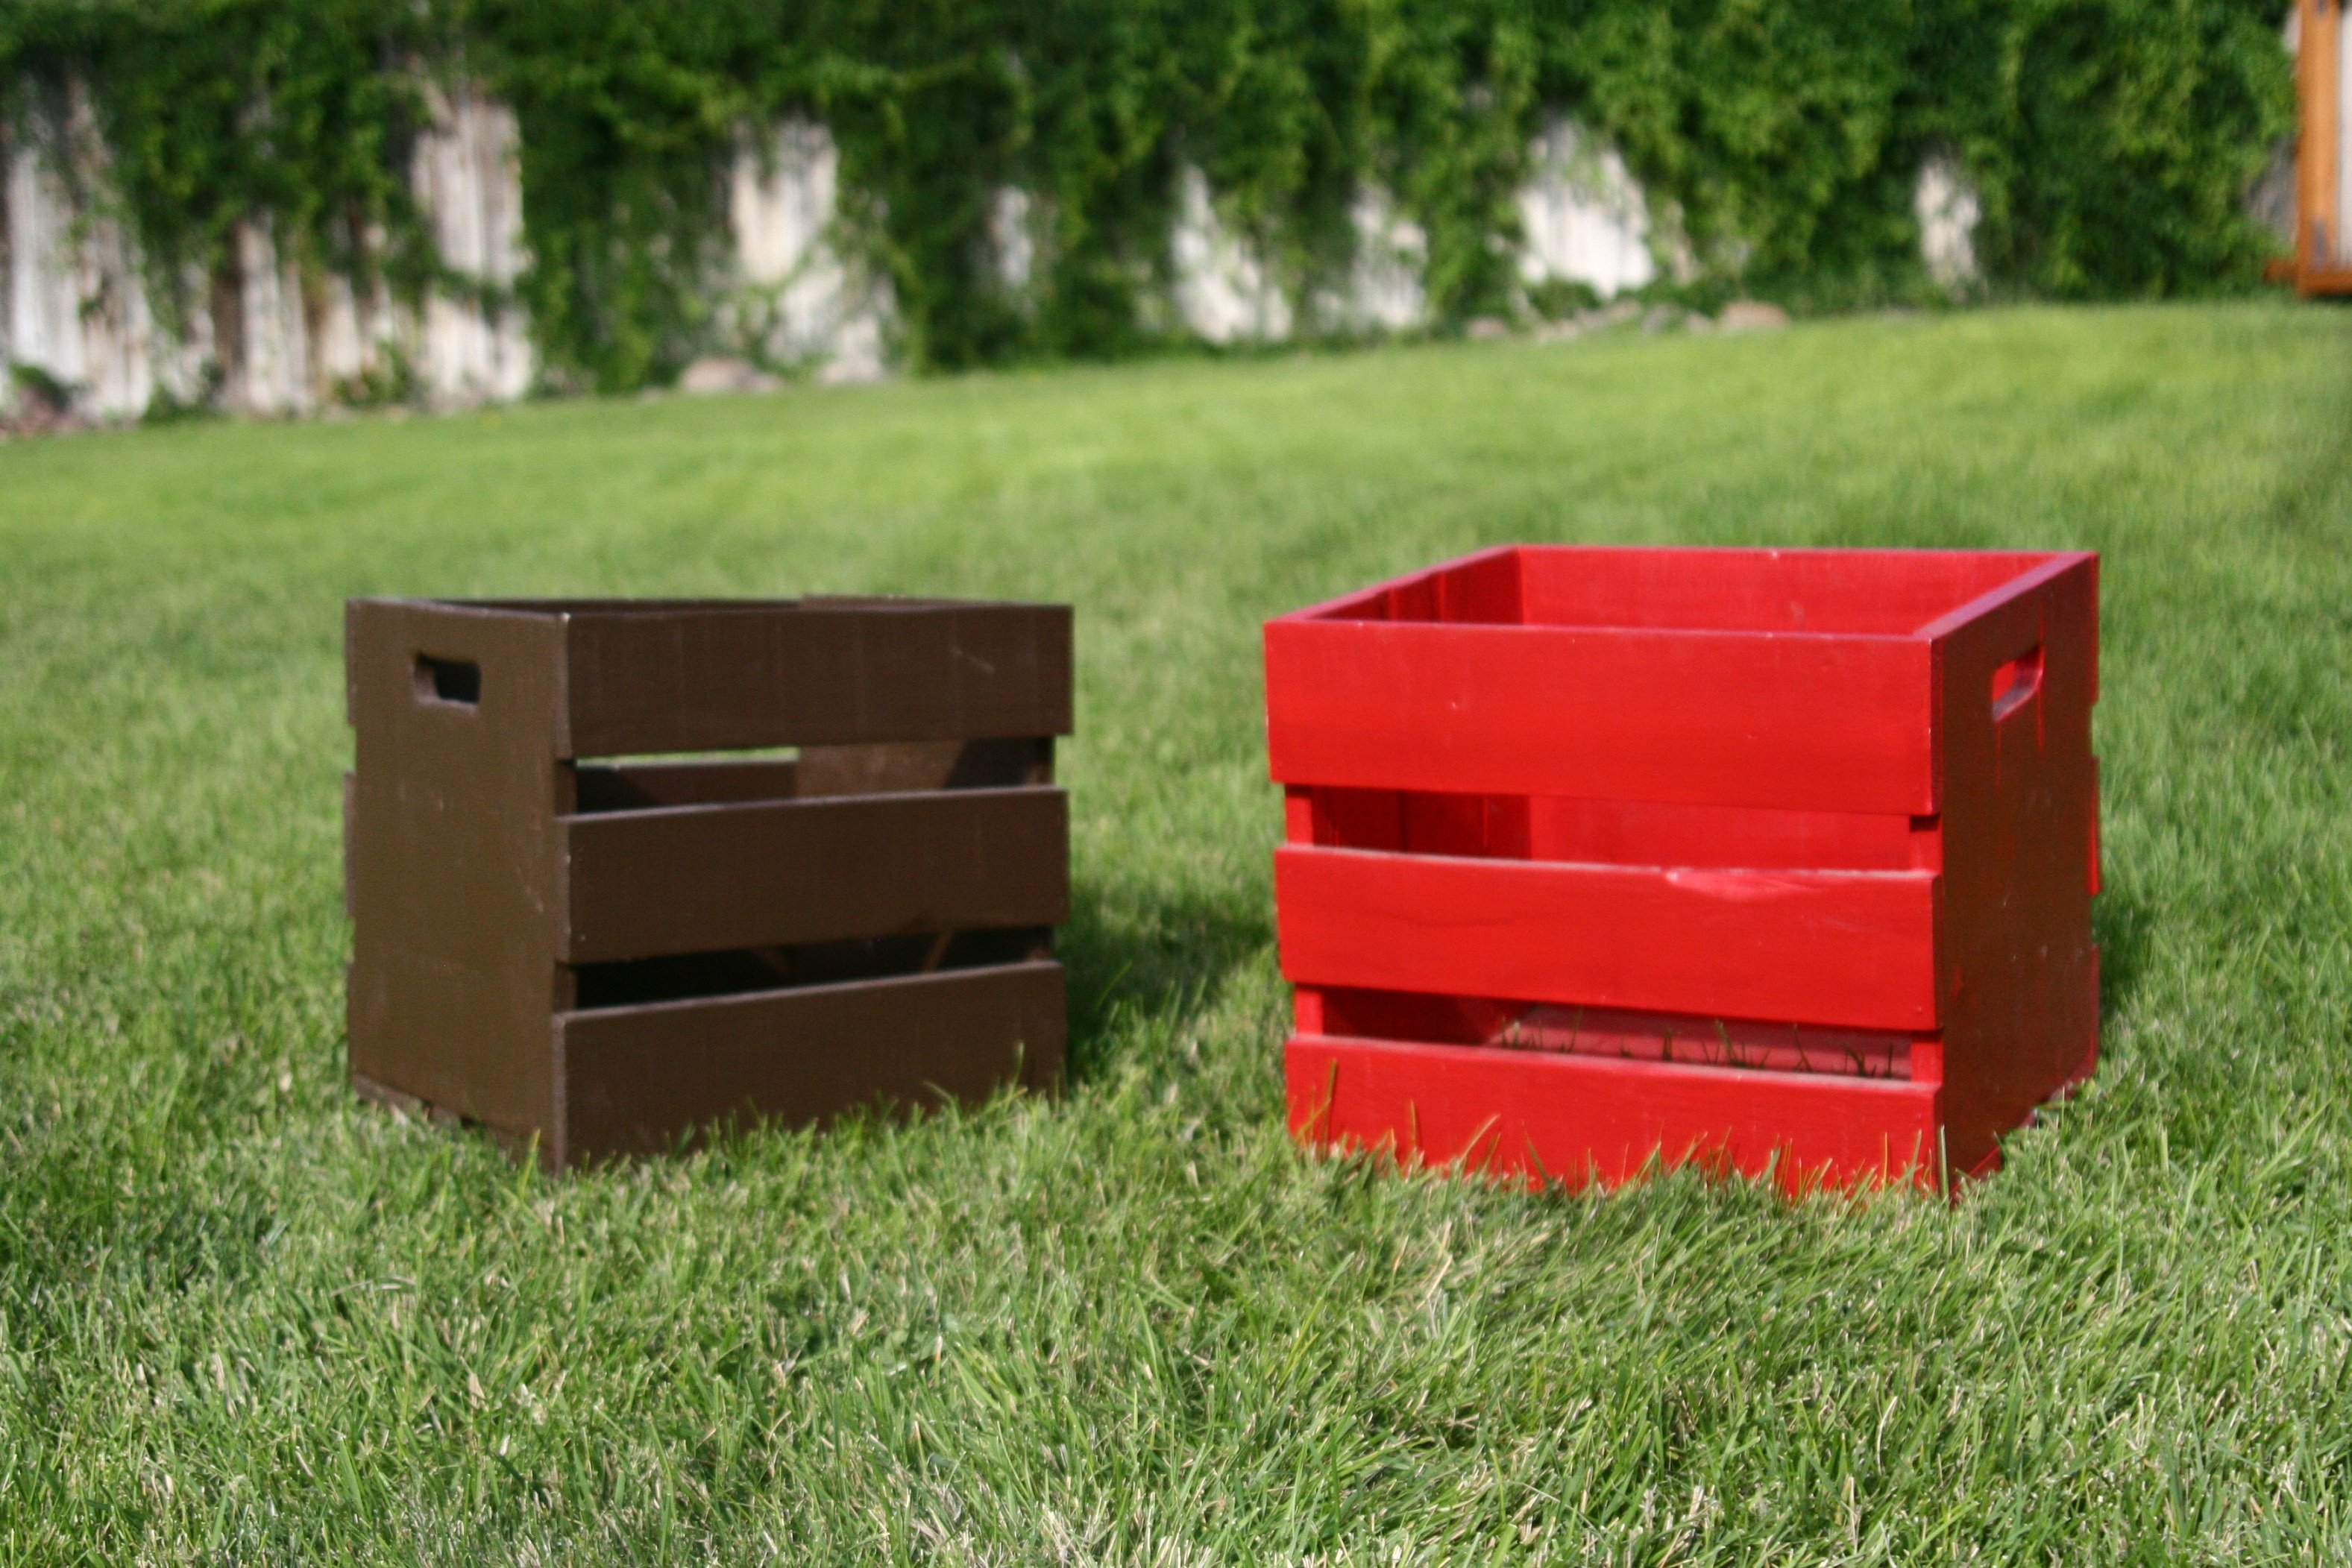
We desperately needed something next to the door to put shoes in. I didn't quite yet have the courage to attempt the shoe dresser (http://ana-white.com/2011/01/shoe-dresser) and there are lots of scraps in our shop from my husbands projects. I tried these crates out and they were super easy and super fast to throw together during nap time. I primed and painted because I used plywood instead of 1x12.

Built from Plan(s)
Estimated Cost
FREE!!!!!
Estimated Time Investment
An Hour or Two (0-2 Hours)
Finish Used
primed and painted with left over paint we had from misc. projects.
Recommended Skill Level
Starter Project
Comments
Fri, 09/09/2011 - 08:54
I loved the vintage crate
I loved the vintage crate plans but hadn't thought of a good use. We have a shoe problem in our house too. With 3 kids, they all get mixed up and it drives me crazy! We've tried an over the door shoe organizer; but that hasn't been especially helpful because the 2 youngest would need a stool to reach anything about the bottom 2 rows. I think I just found my weekend project - one for them each in a different color should do the trick. Thanks for sharing
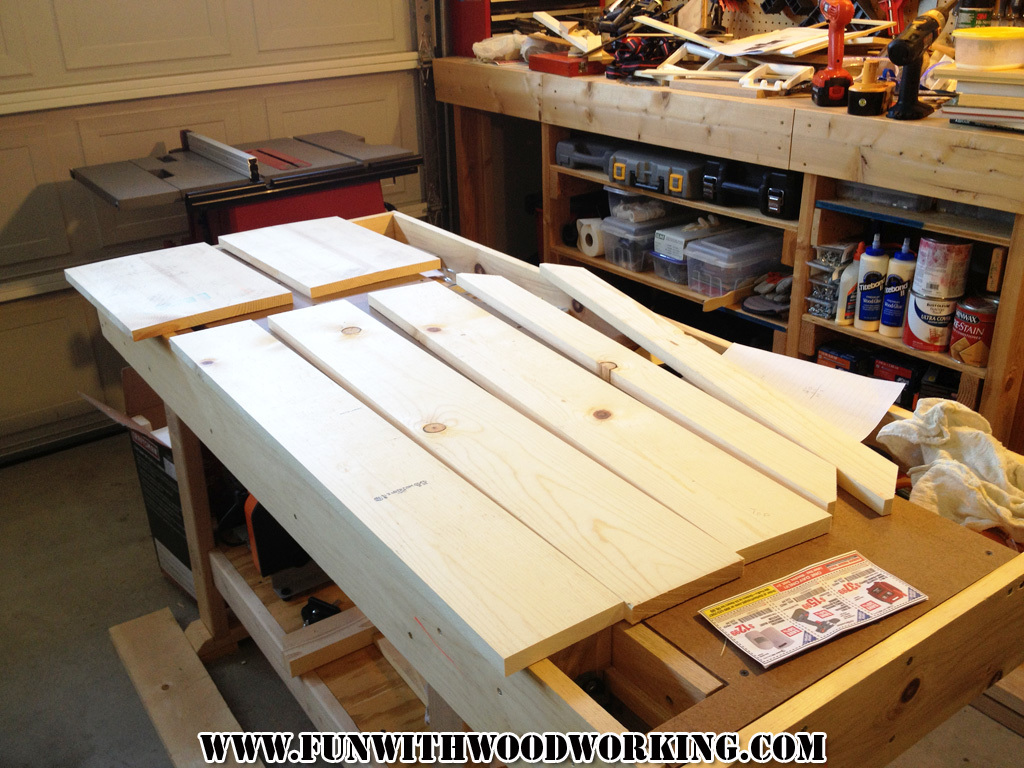
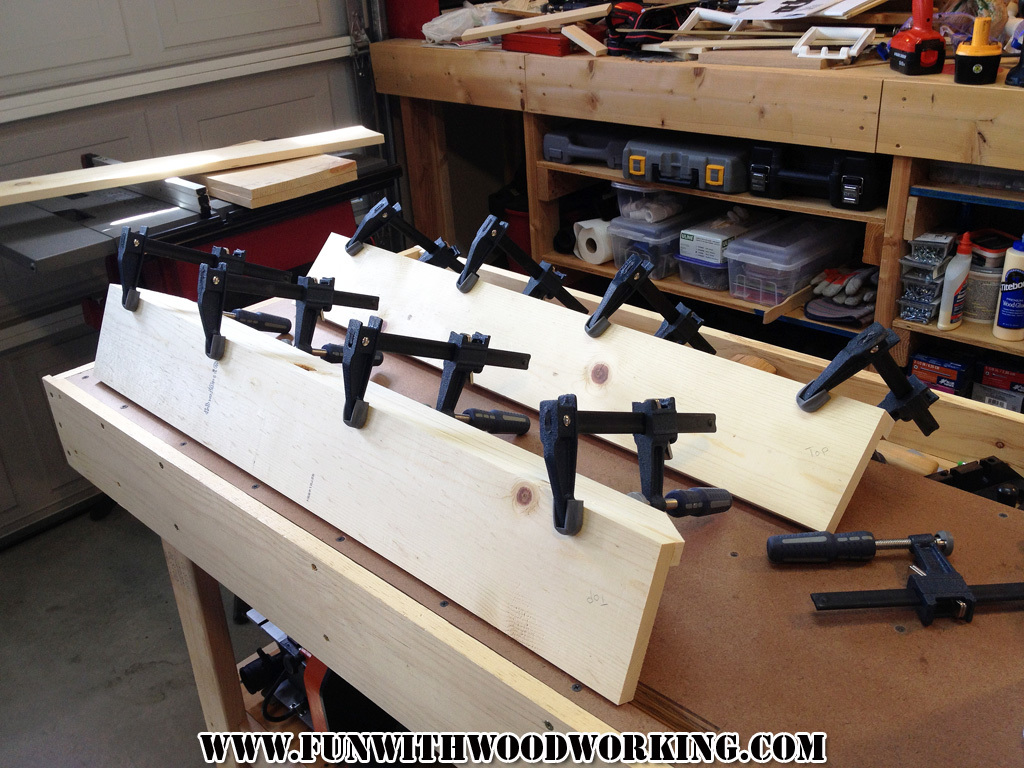
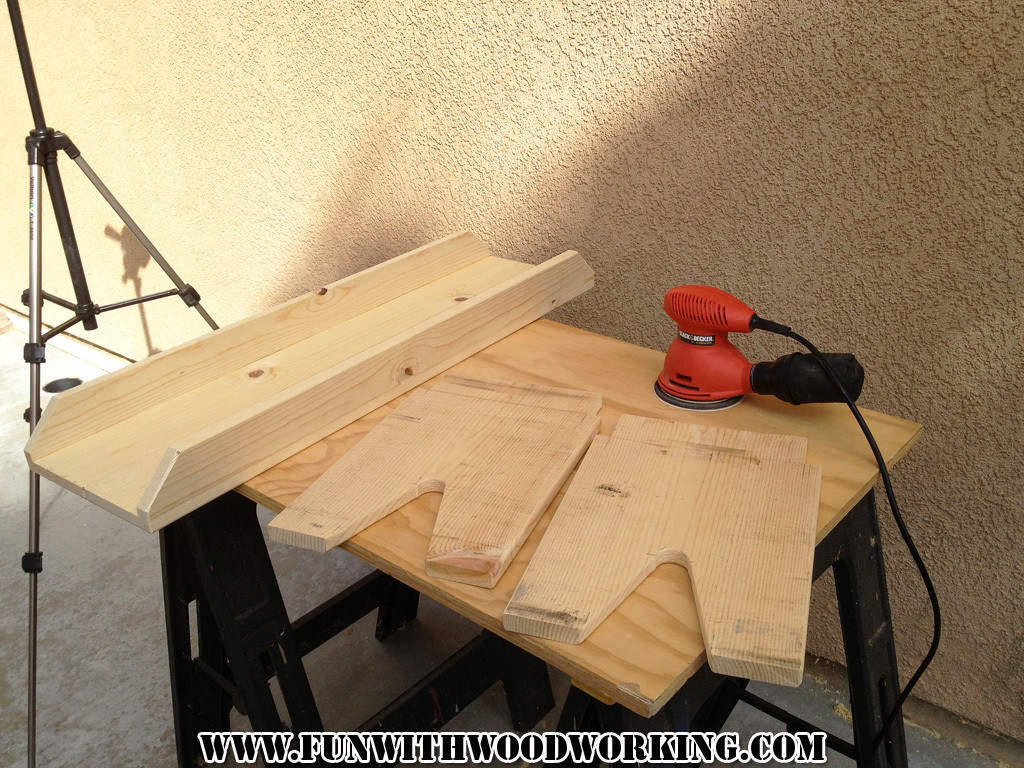
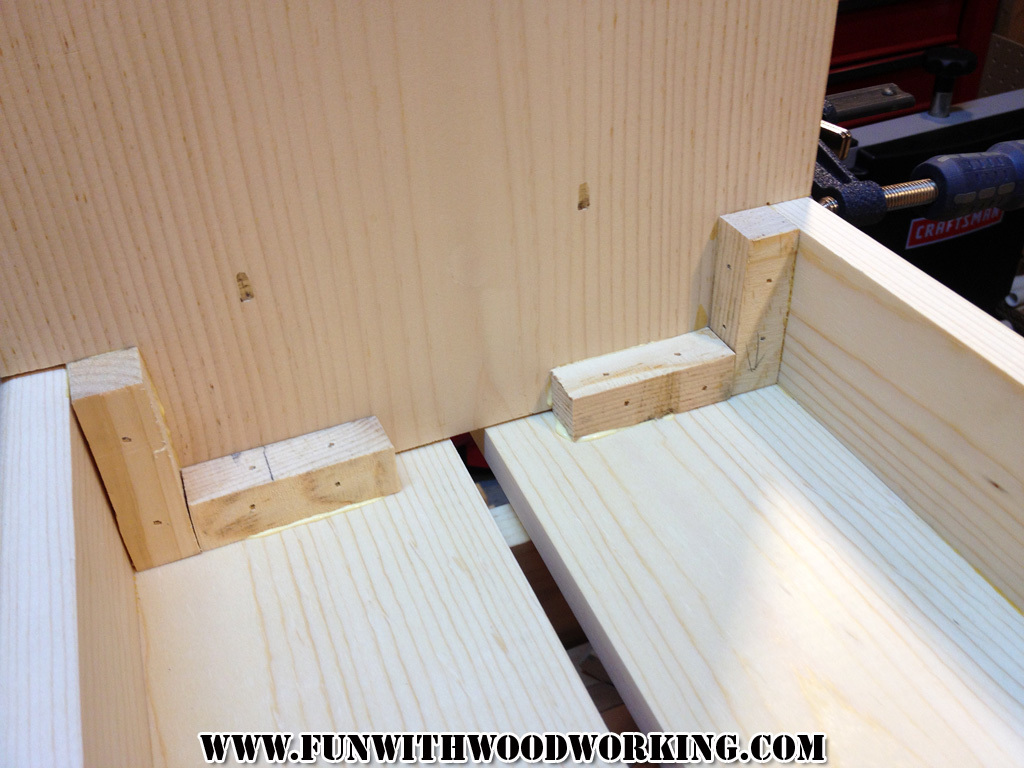
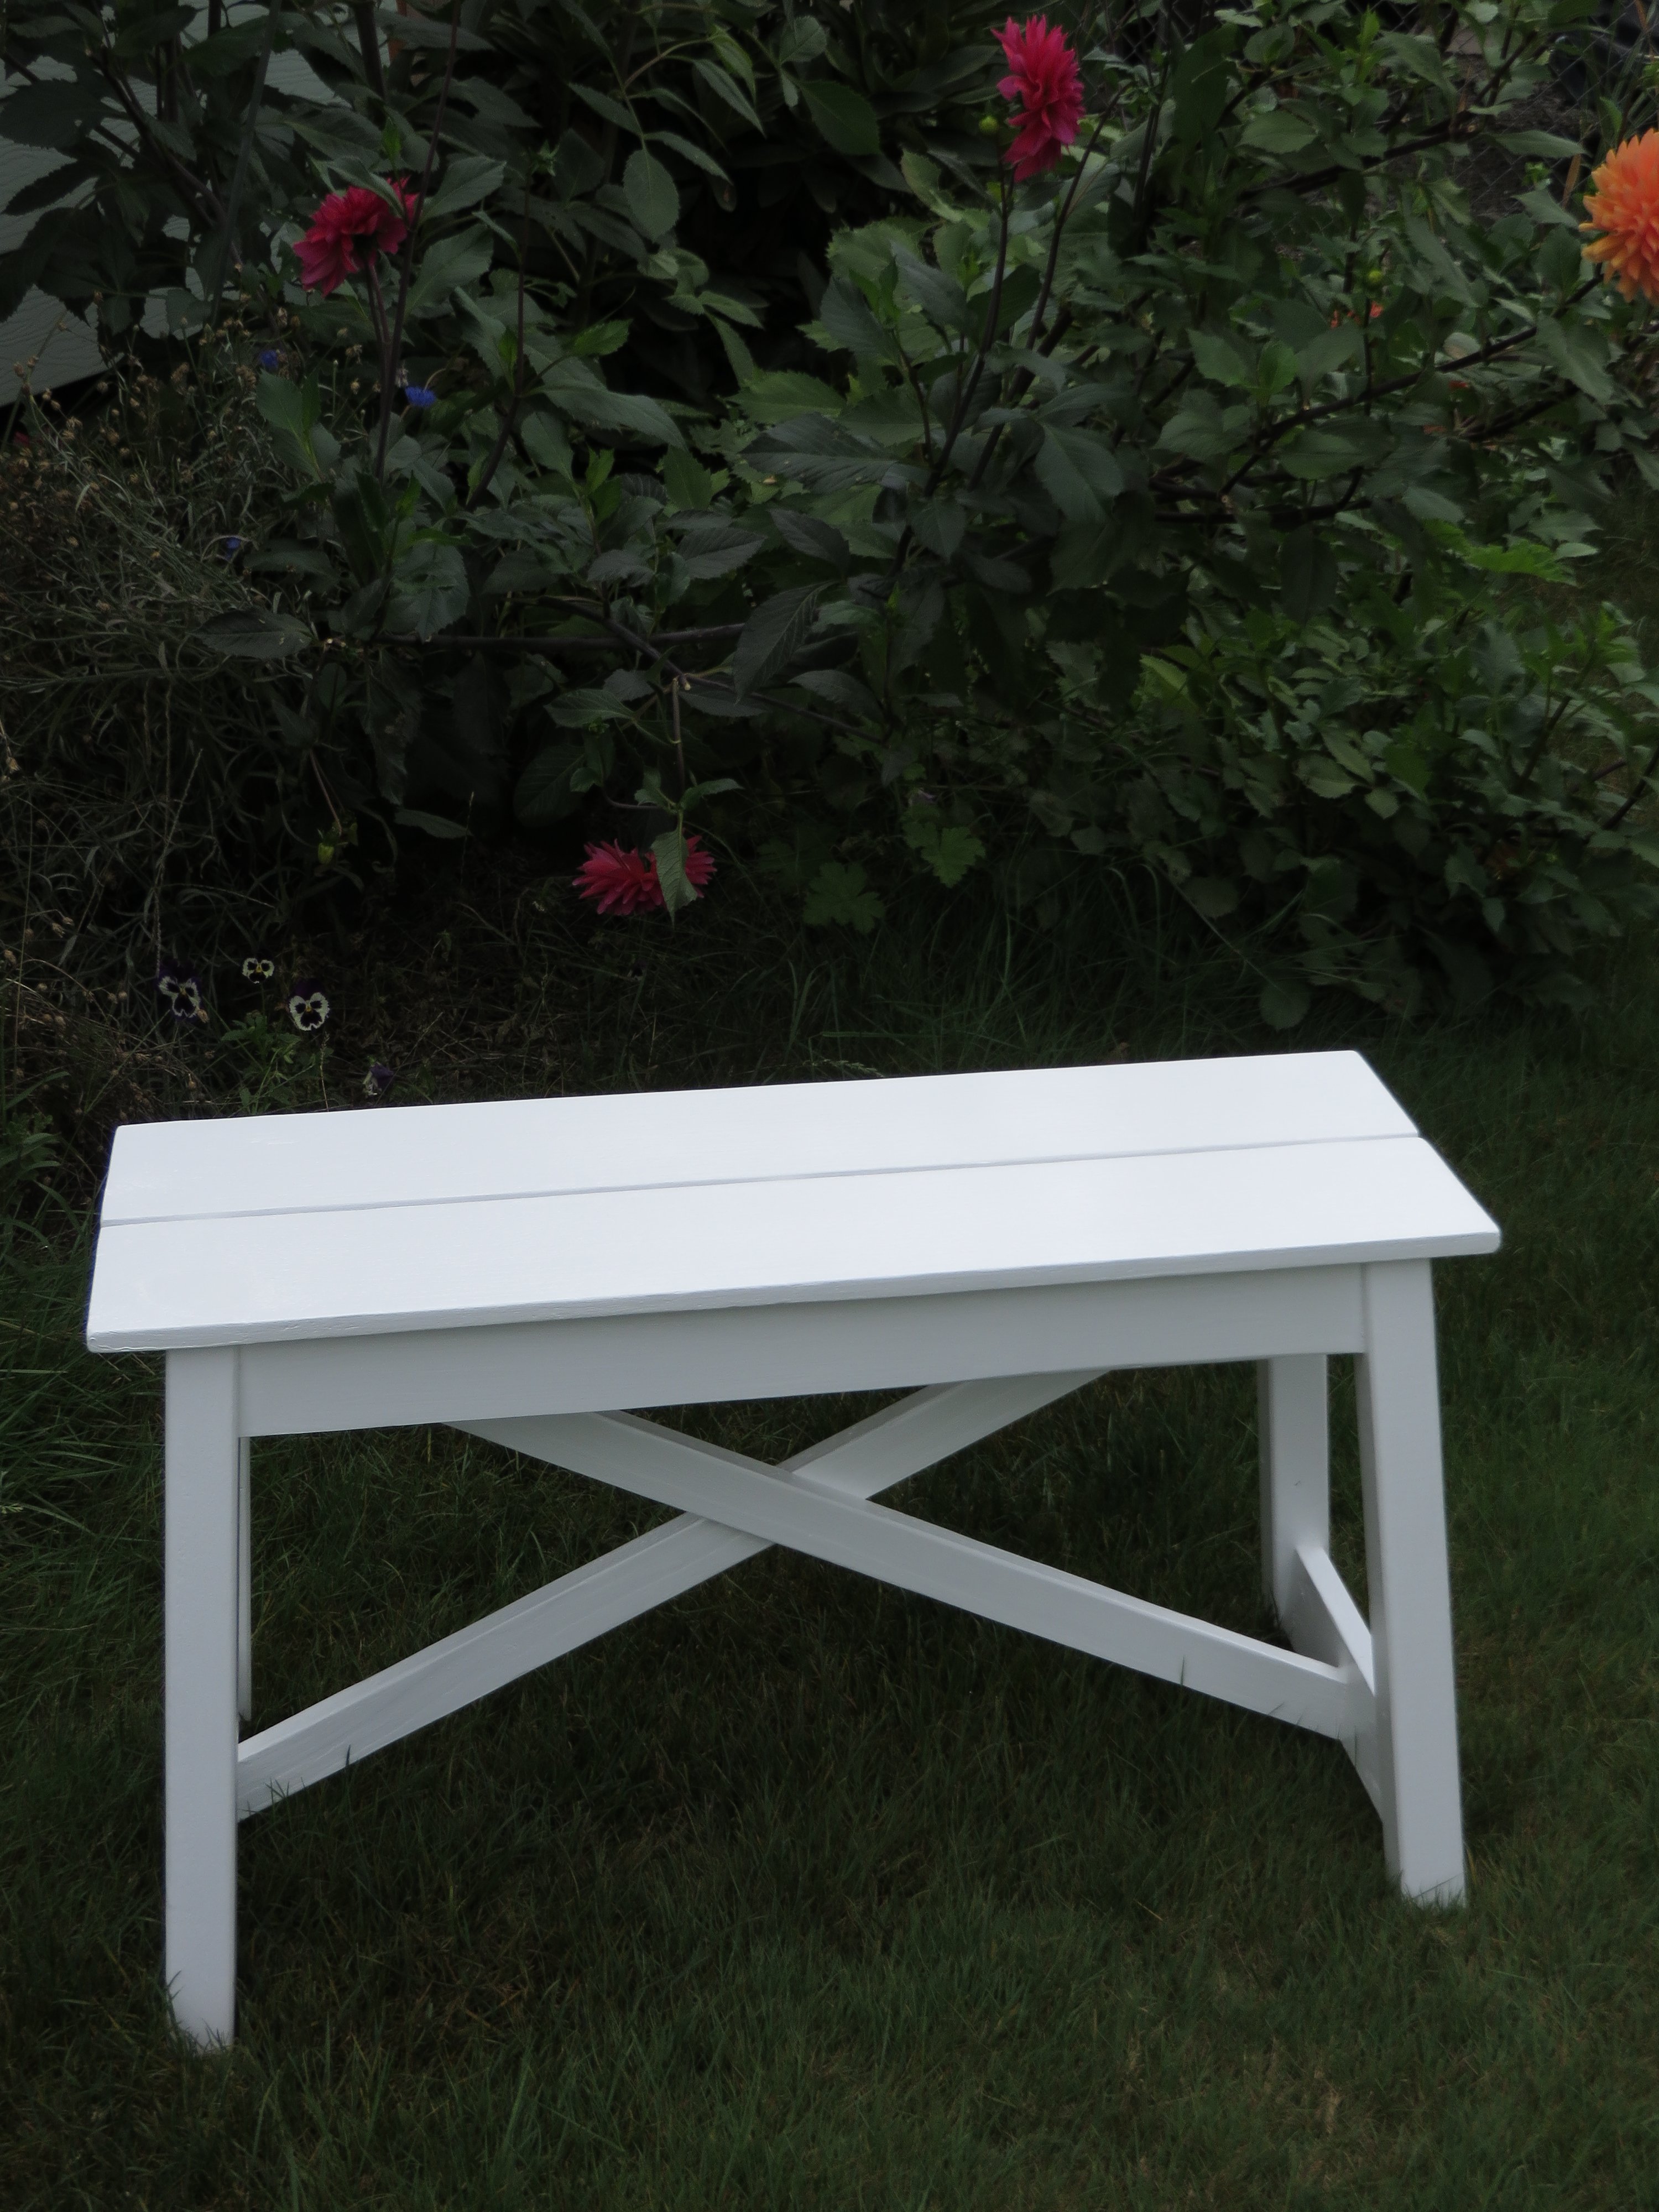
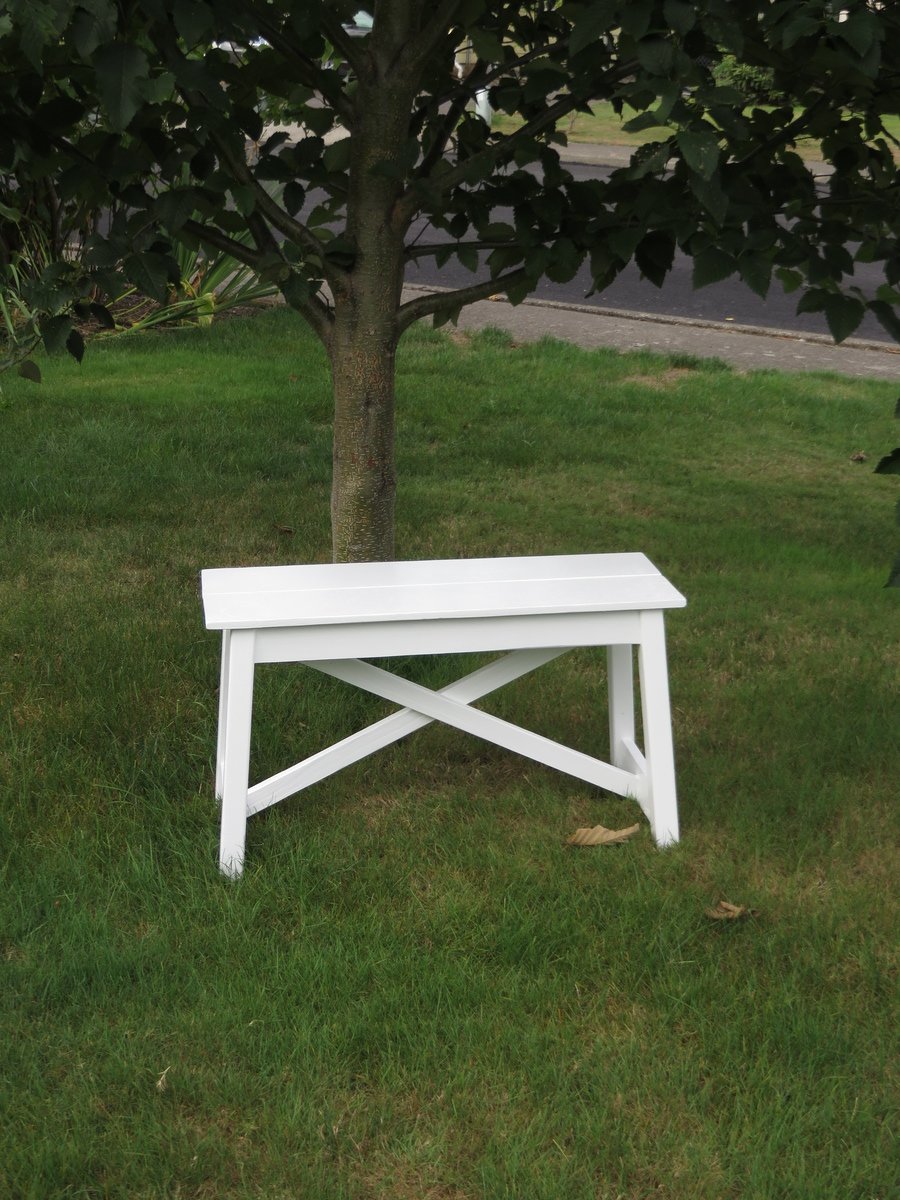
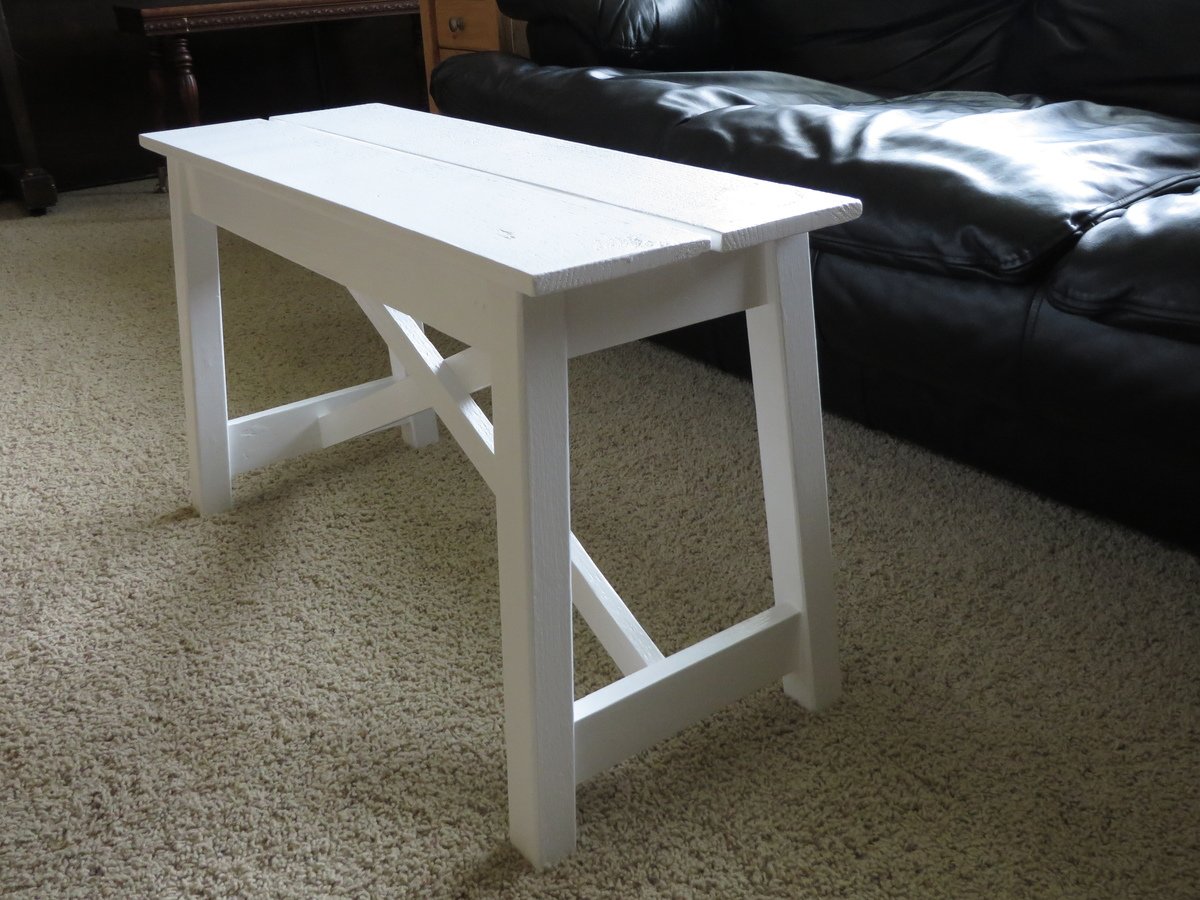
5 Board Bench
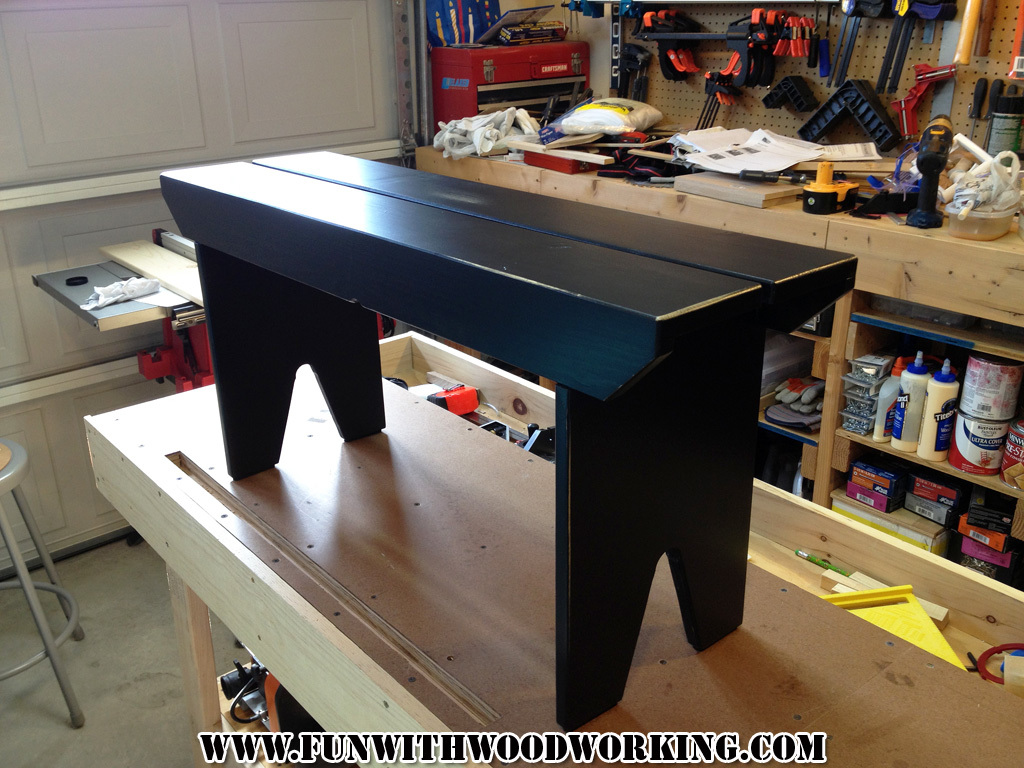
I was looking for a plan for a 5 board bench so naturally I came to your site. I made your basic design but made it a little bit smaller in all dimensions and I put a half inch split down the middle of the top. I built it out of pine and painted it flat black. I gave the legs and underneath 3 coats of satin polyurethane and the top and sides received 5.
You can follow the build on my blog at :
http://funwithwoodworkingtoo.blogspot.com/2013/09/project-how-to-build-…
You can also watch a video of the build on my YouTube page at:
http://youtu.be/1_hz2n7v9ss
Thanks for the free plans!
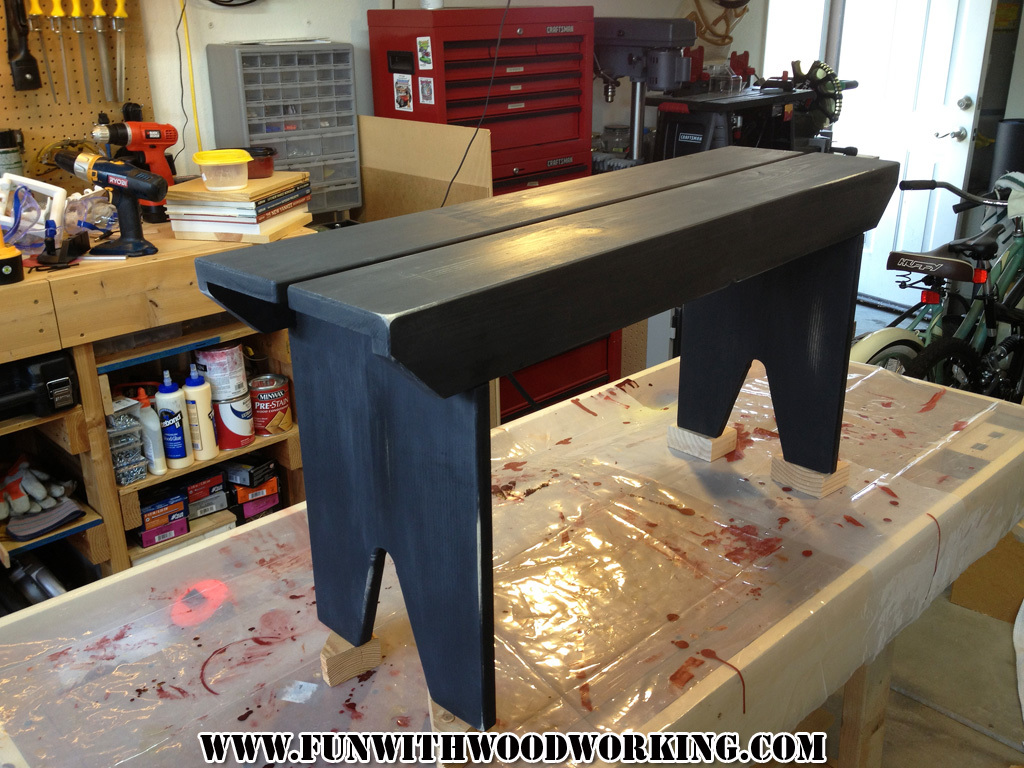
Estimated Time Investment
Day Project (6-9 Hours)
Finish Used
MINWAX water based satin polyurethane
Recommended Skill Level
Beginner
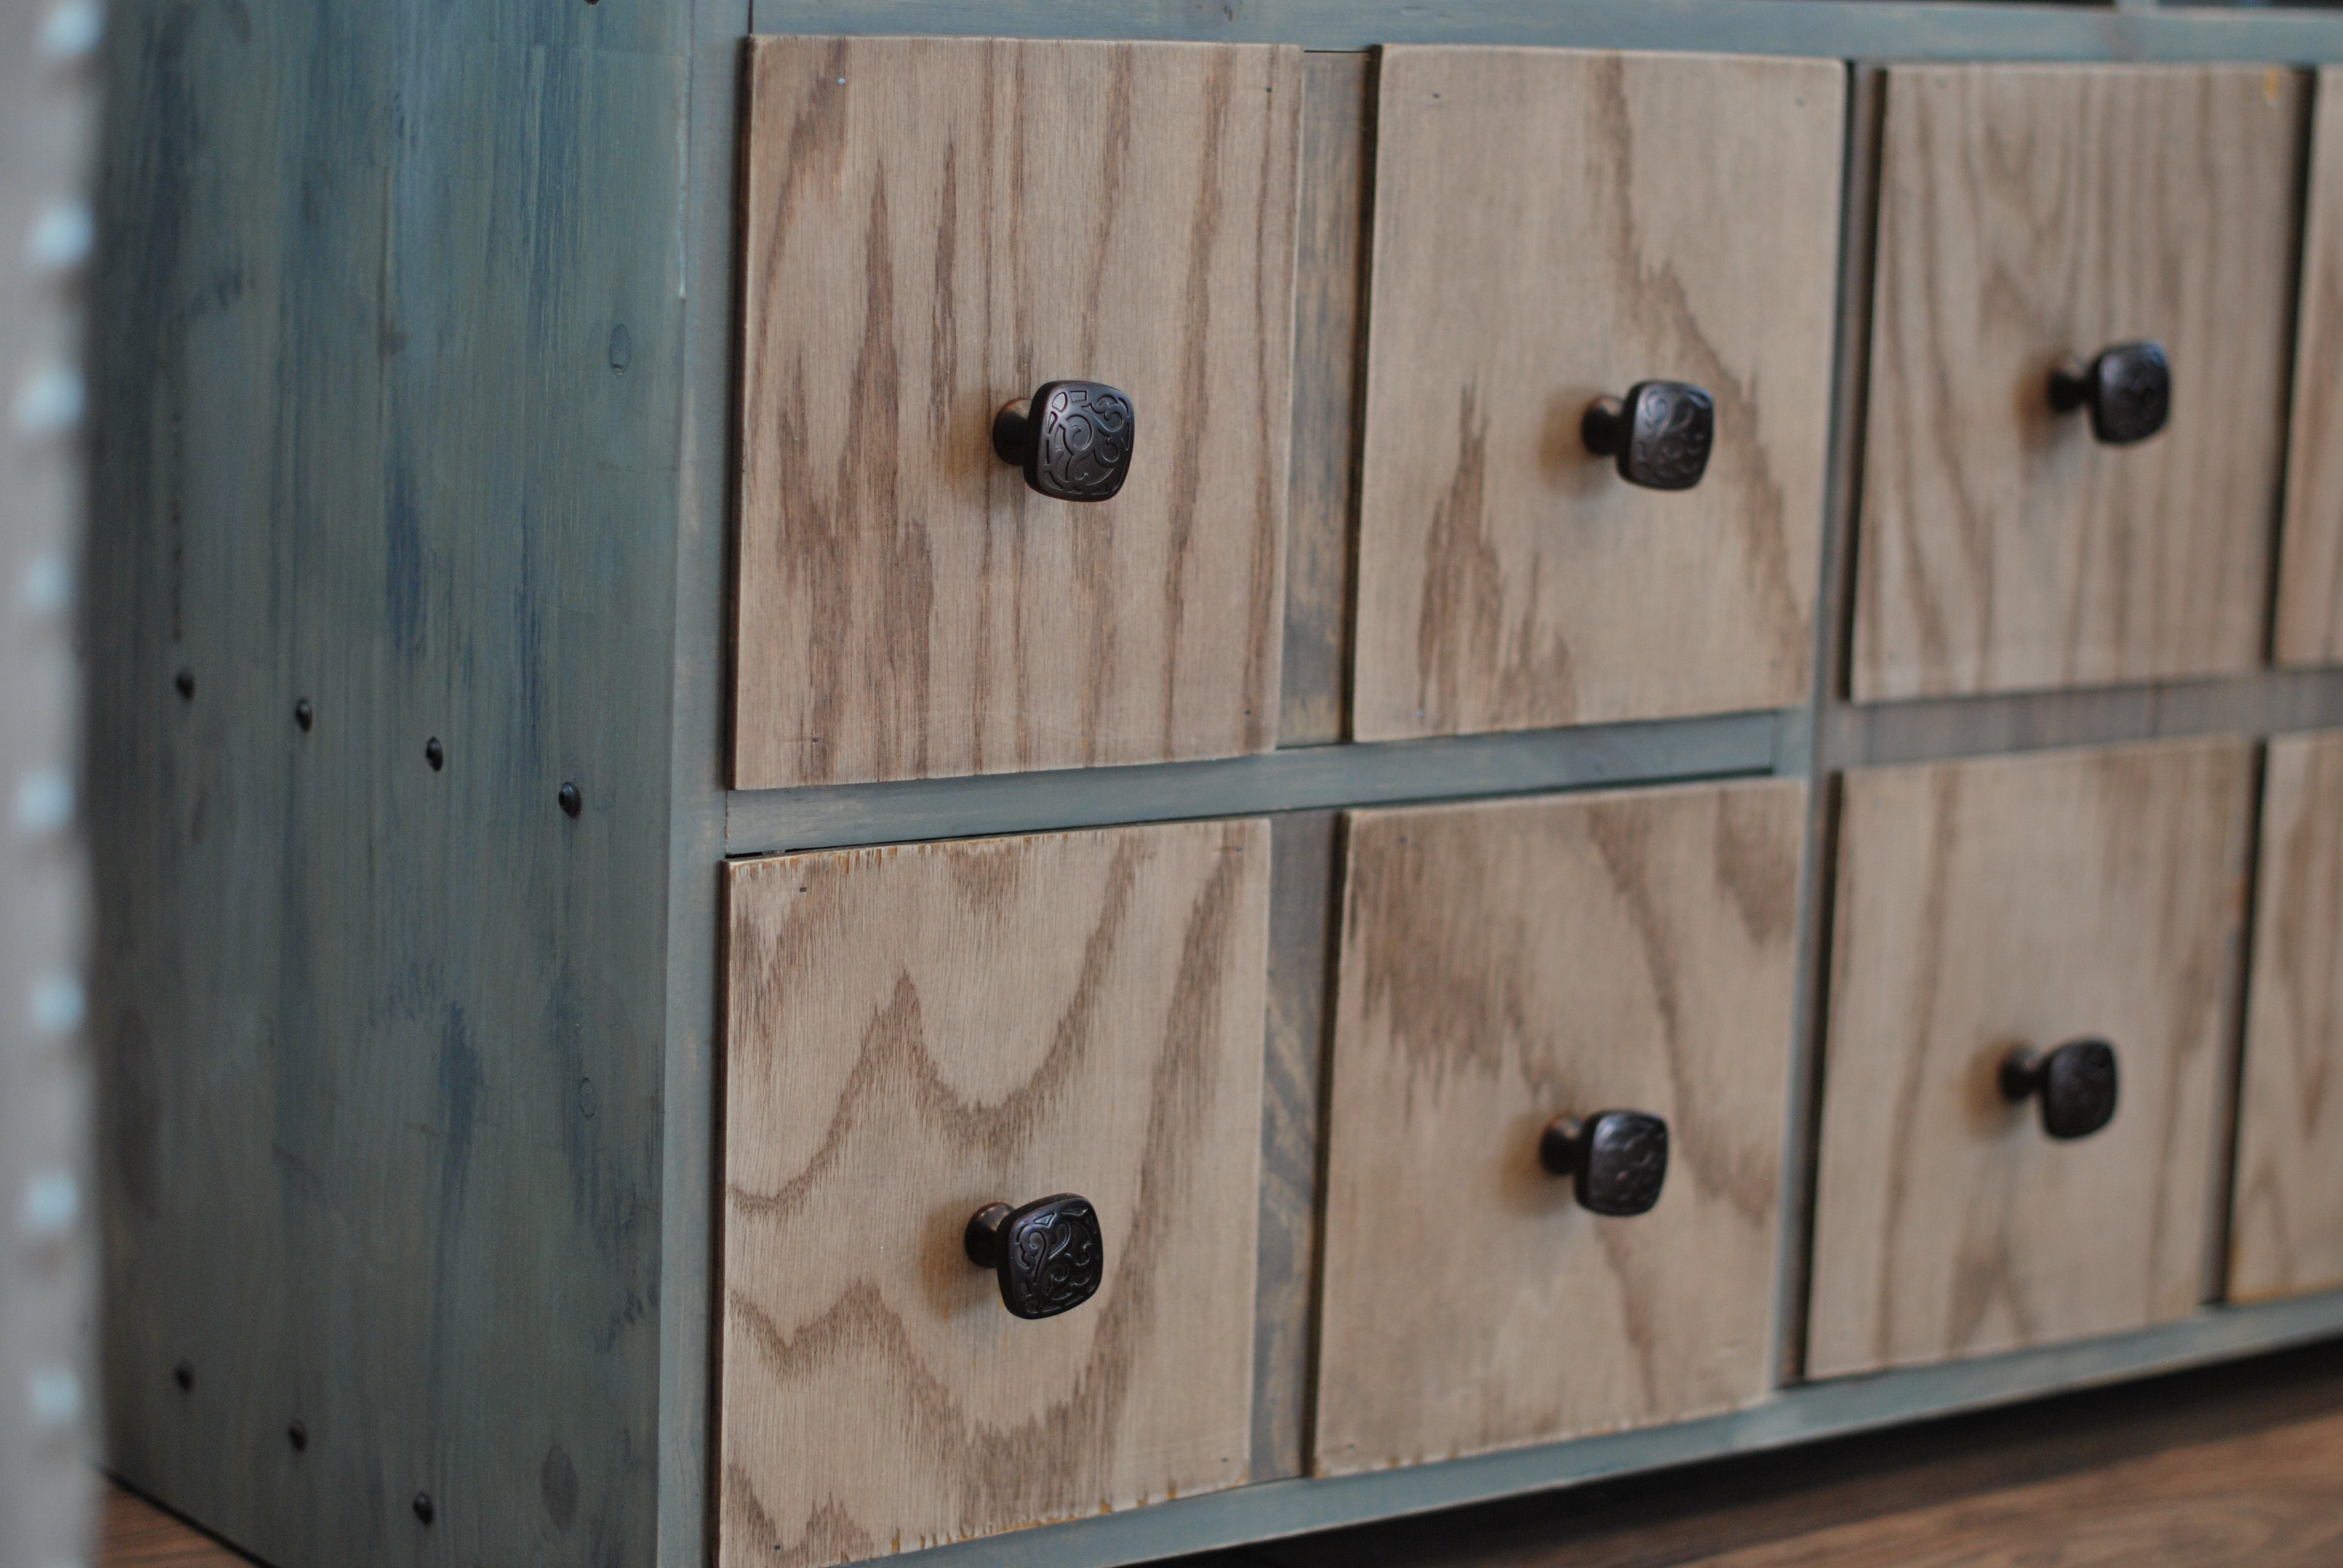
Apothecary Media Console
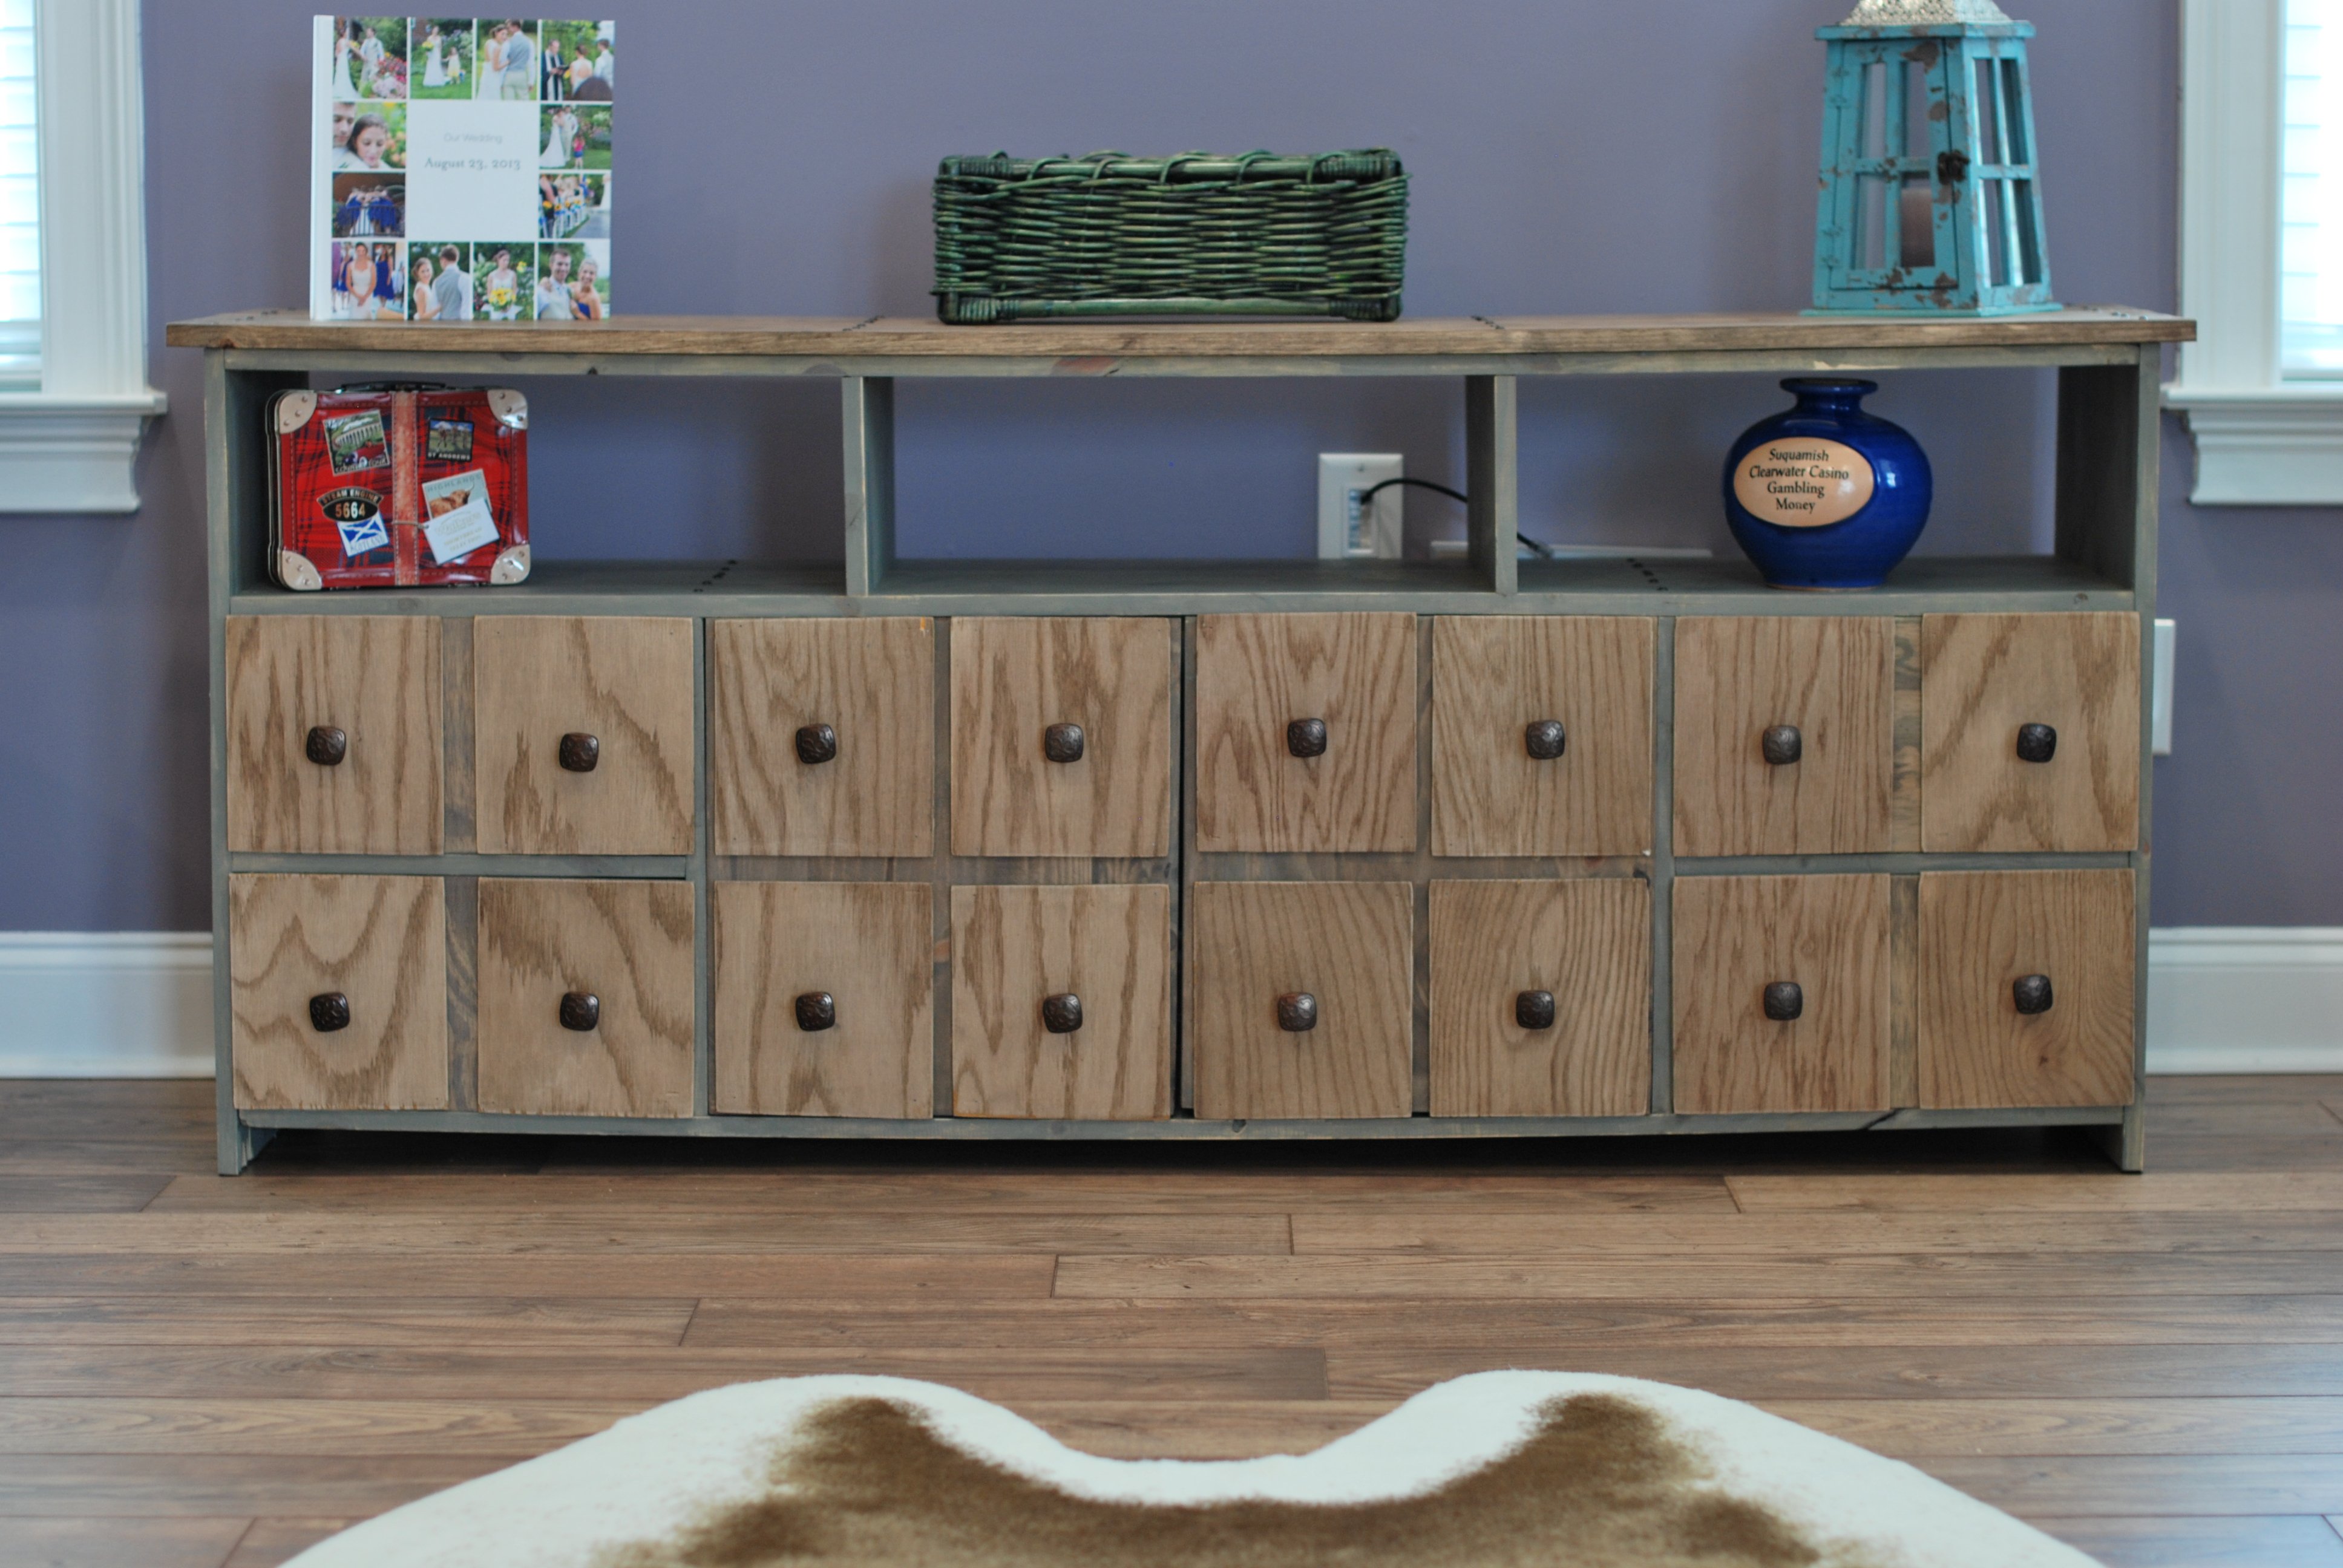
This project was made from Ana White's apothecary media console plan. The finish is Minwax Special Walnut on the drawers and top. On the sides is a finish technique I found on thehouseofsmiths.com - Faux Barn Wood Painting Tutorial.
Built from Plan(s)
Estimated Time Investment
Weekend Project (10-20 Hours)
Finish Used
I used an Olympic Brand Weathered Barnwood stain first. Then I used a shade of light grey, dark grey, and black paints (all Valspar brand) that I bought at Lowe's. I used one color at a time - and used a dry brush technique to put each color on. Then I did a quick sanding and after I wiped it down, another coat of the weathered barnwood Olympic stain. One more sanding and it was done!
Recommended Skill Level
Intermediate
Bookcase
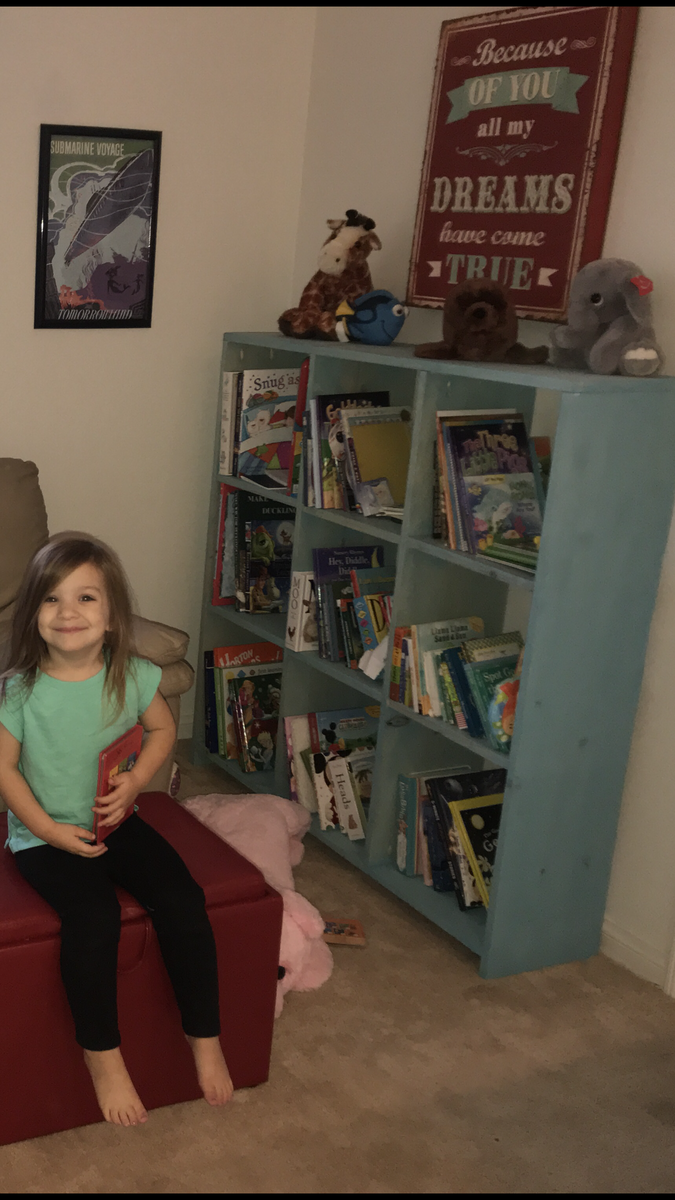
To be honest, not my favorite build but my daughter loves it. Just one of those projects plagued with problems
Built from Plan(s)
Estimated Cost
60
Estimated Time Investment
Day Project (6-9 Hours)
Finish Used
Vintage aqua stain
Recommended Skill Level
Beginner
Small Gable Roof Greenhouse
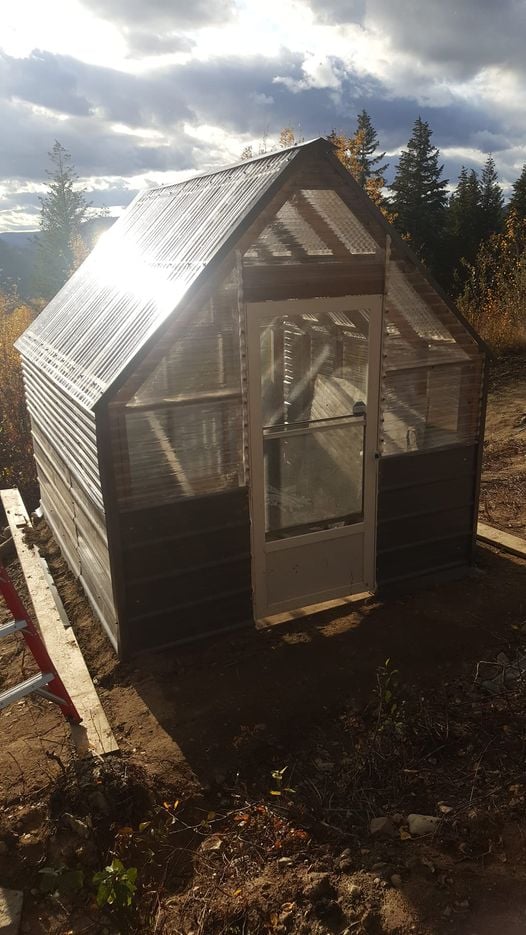
Ana's plans are so easy to work with. This greenhouse was build with all recycled materials from our home build, except for the corrugated plastic (total cost approx. CAN $1,000). I did have to make it a little bit smaller as the area that was leveled was a bit smaller than planned. I'm planning to add raised beds inside, add a solar panel so that I can have light in the evening and a fan during the day. I'm planning to attach some gutters and a rain barrel.
This is my second project, based on Ana's plans (first one: https://www.ana-white.com/community-projects/indoor-firwood-console). Next, I'm planning to make the fancy X farmhouse table and bench with storage. Stay tuned.
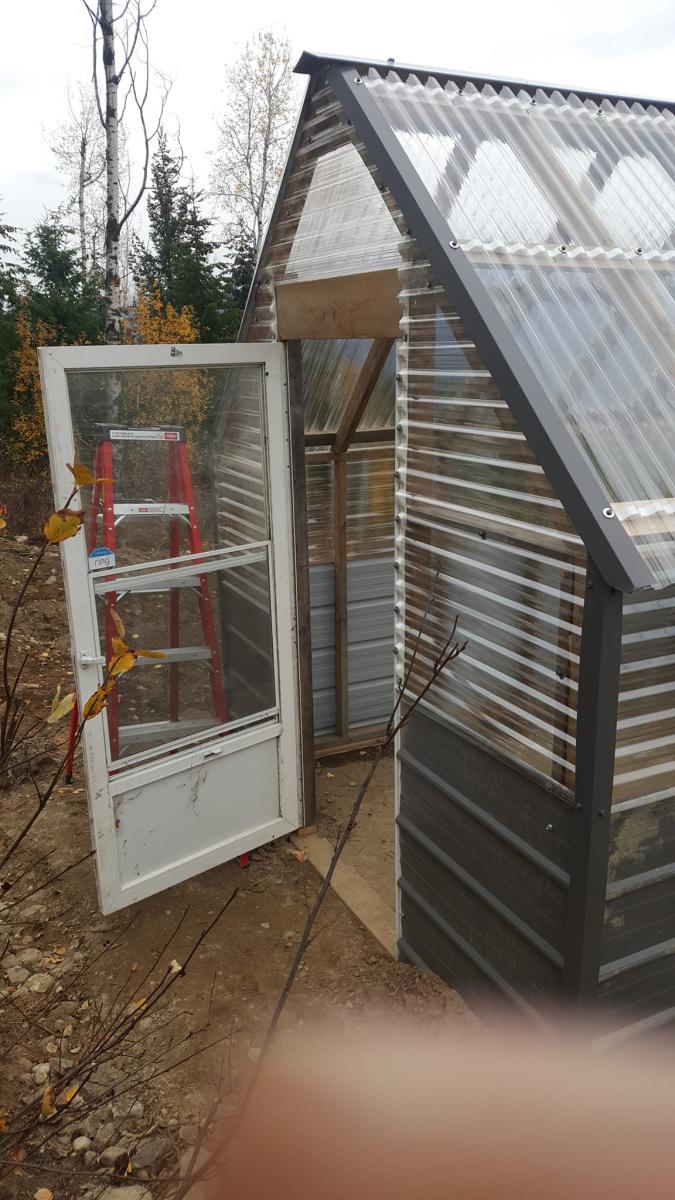
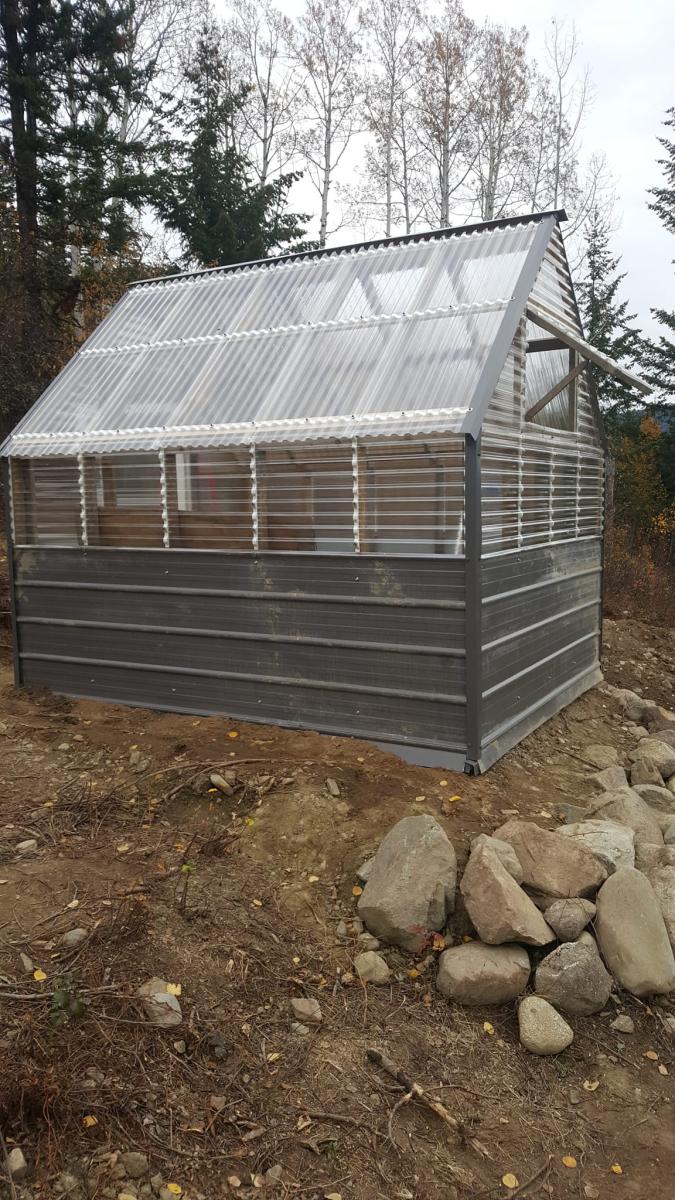
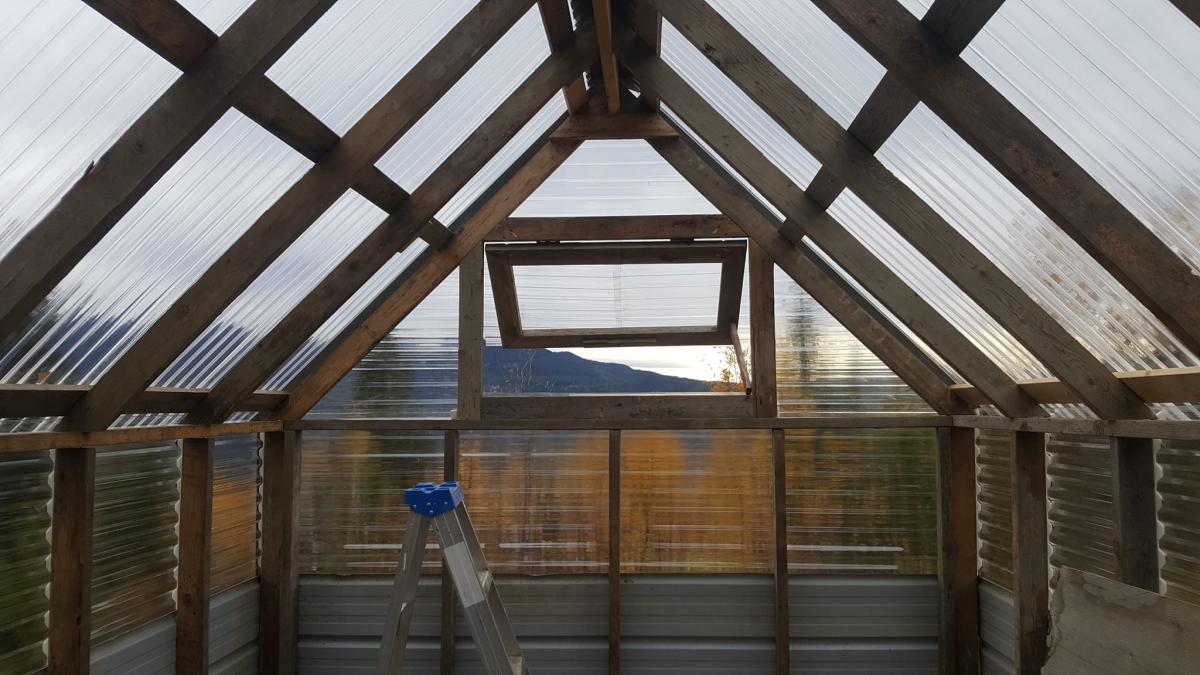
Built from Plan(s)
Rustic Bench
I wanted a simple bench for my yard during the summer. This was a fun, simple build with a little bit of extra style. I used a fence picket for the seat and added a center support underneath, since it was a bit bendy. Sanded the top really well before finishing. Built with Kreg jig.
Built from Plan(s)
Estimated Cost
$20
Estimated Time Investment
Afternoon Project (3-6 Hours)
Finish Used
The finish takes way more time than the building. Sanded first with 60, then 150 grit paper. One coat water-based primer, two coats white Behr enamel, two coats clear spray-on lacquer.
Recommended Skill Level
Beginner
Clara table and chairs with chalkboard and cubbie
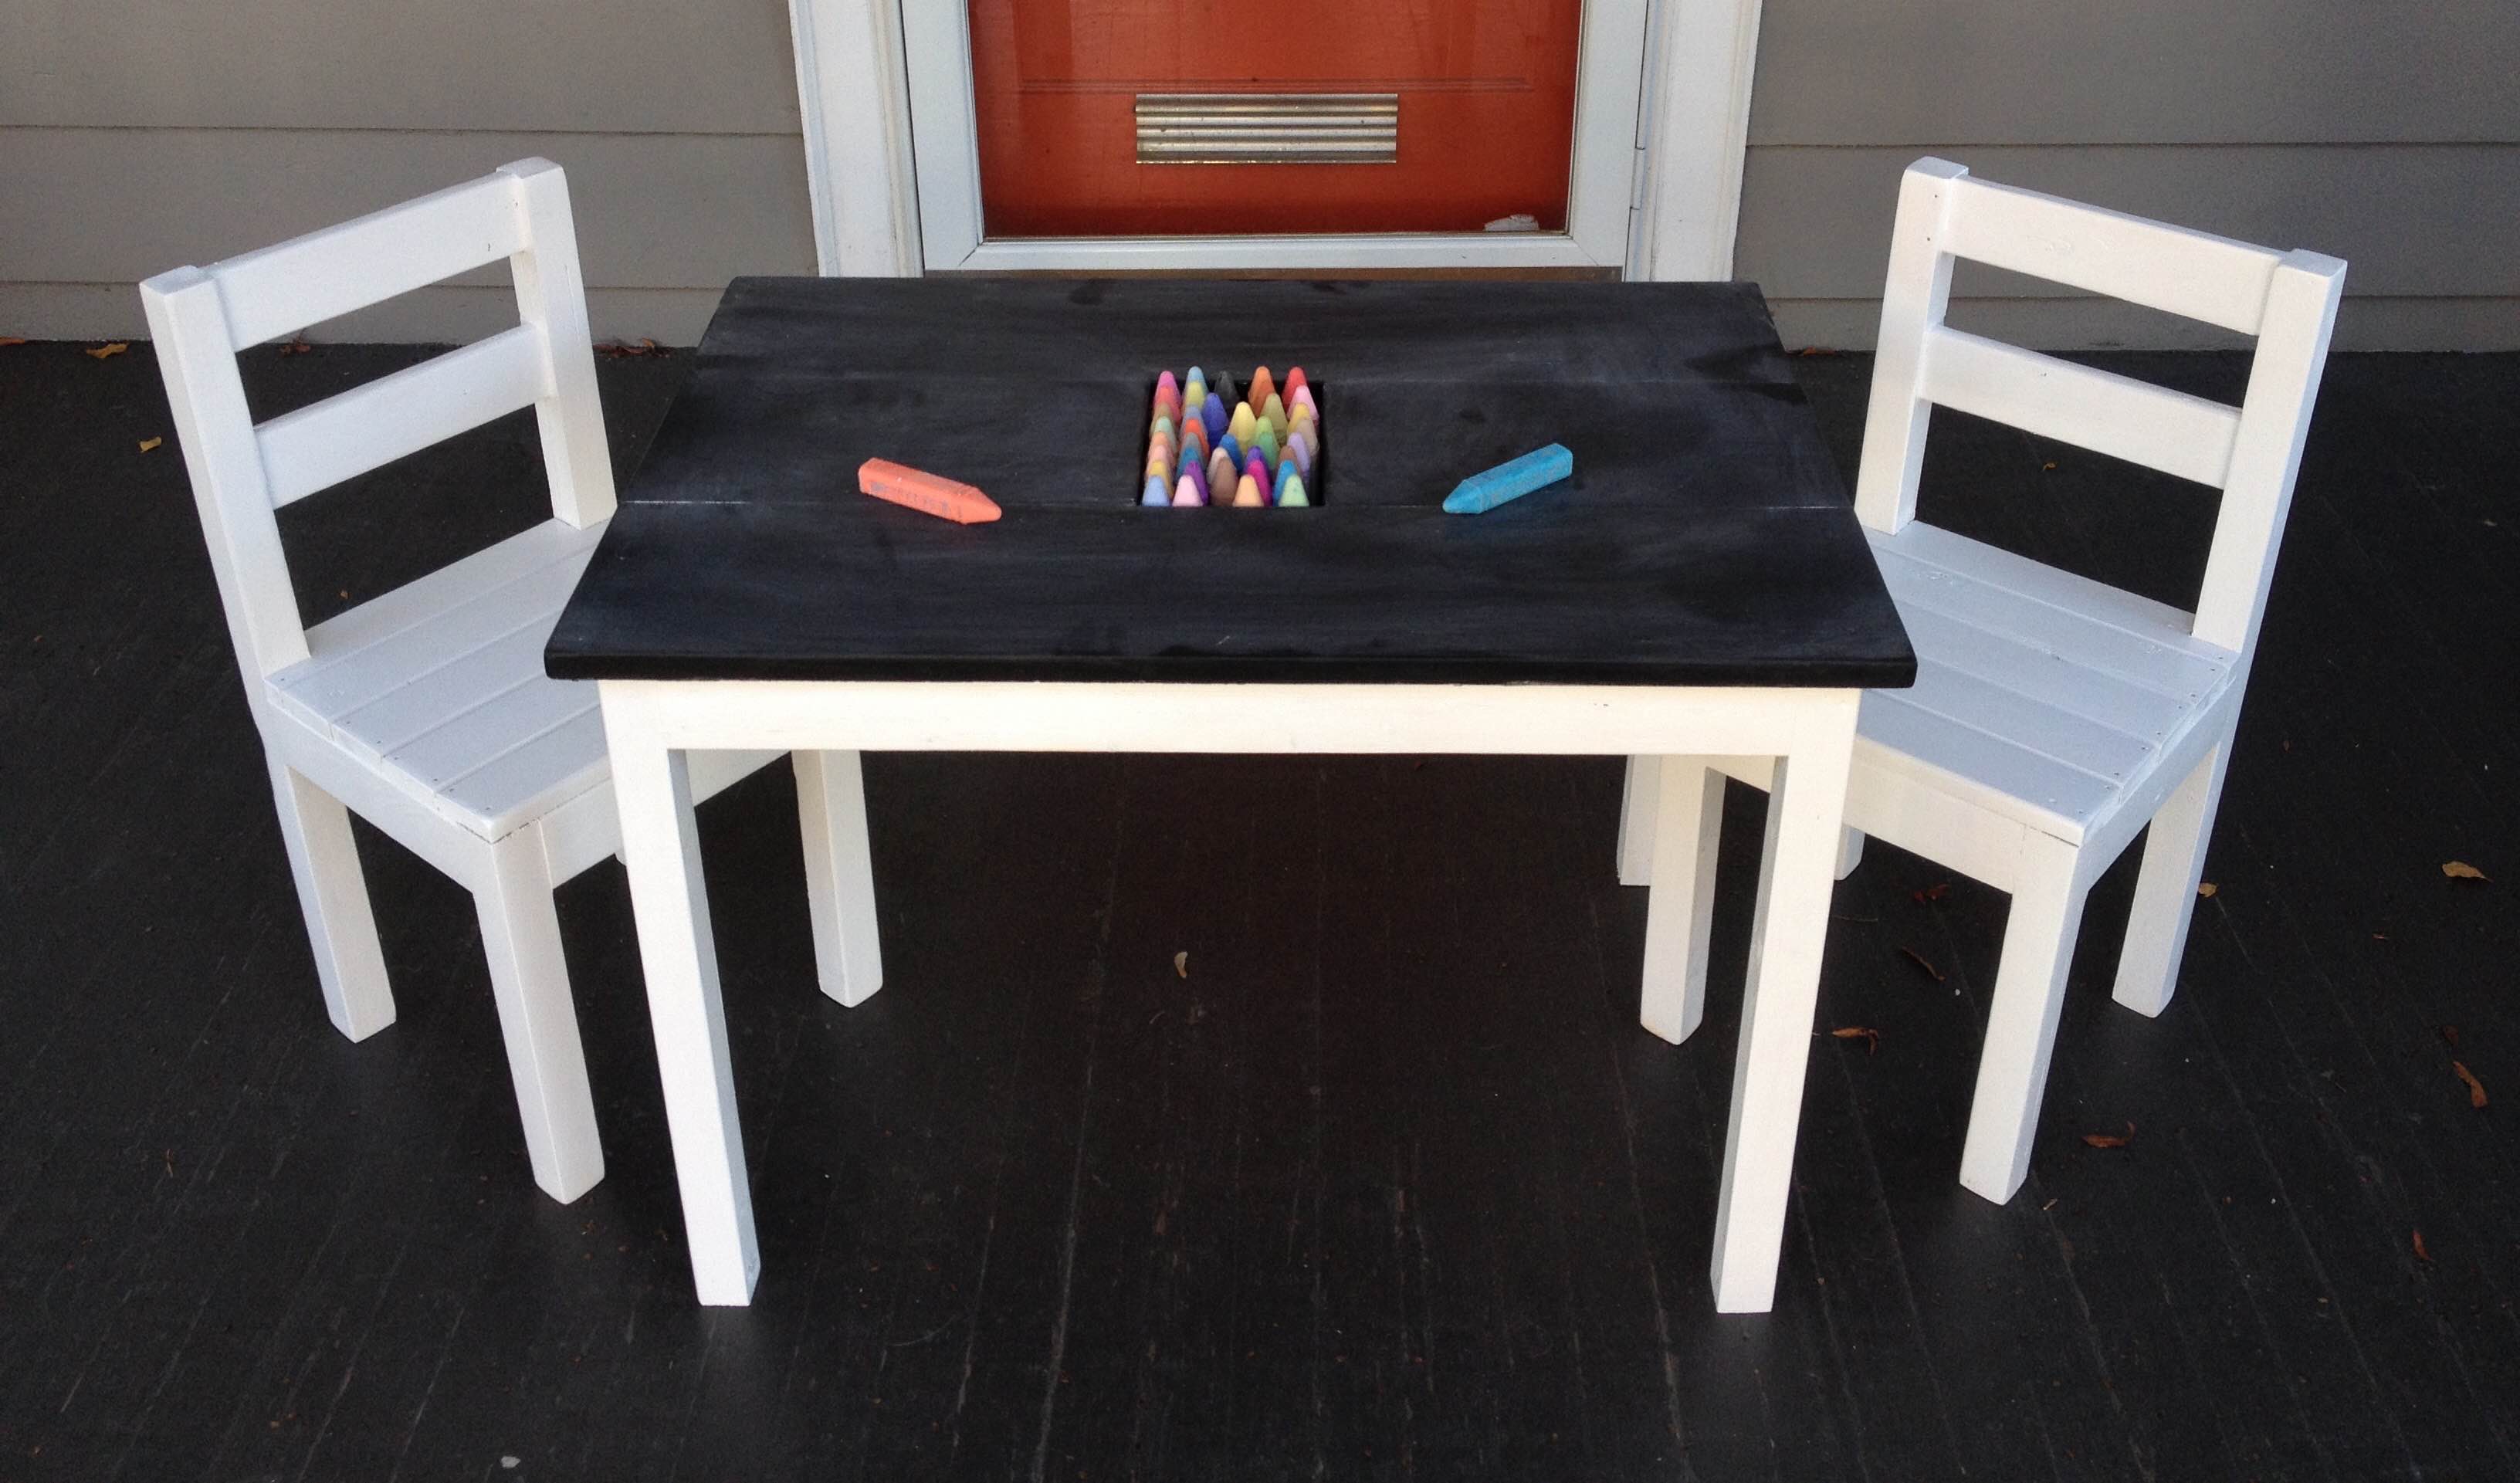
I made a few changes to the chairs and the table plans. Most notable, I added a storage box for chalk for the chalkboard table top. The build was incredibly easy. You could assemble the table and chairs in just a few hours.
Built from Plan(s)
Estimated Cost
$35
Estimated Time Investment
Afternoon Project (3-6 Hours)
Finish Used
Rust-Oleum Chalkboard paint. Two coats and some touch up.
Recommended Skill Level
Beginner
Farmhouse Table

Had a great time making this table! Can’t wait to make some benches to go with it!
Estimated Time Investment
Afternoon Project (3-6 Hours)
Recommended Skill Level
Beginner
Comments
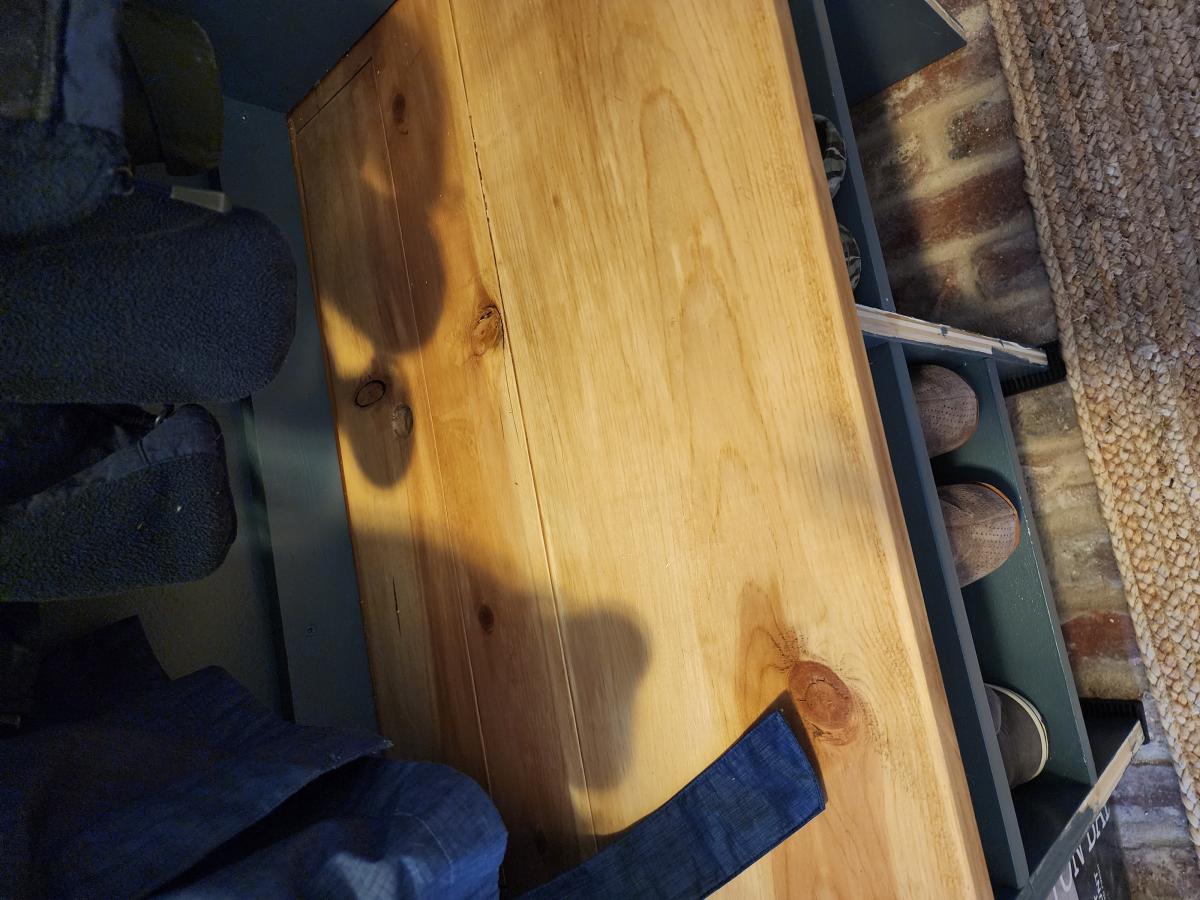
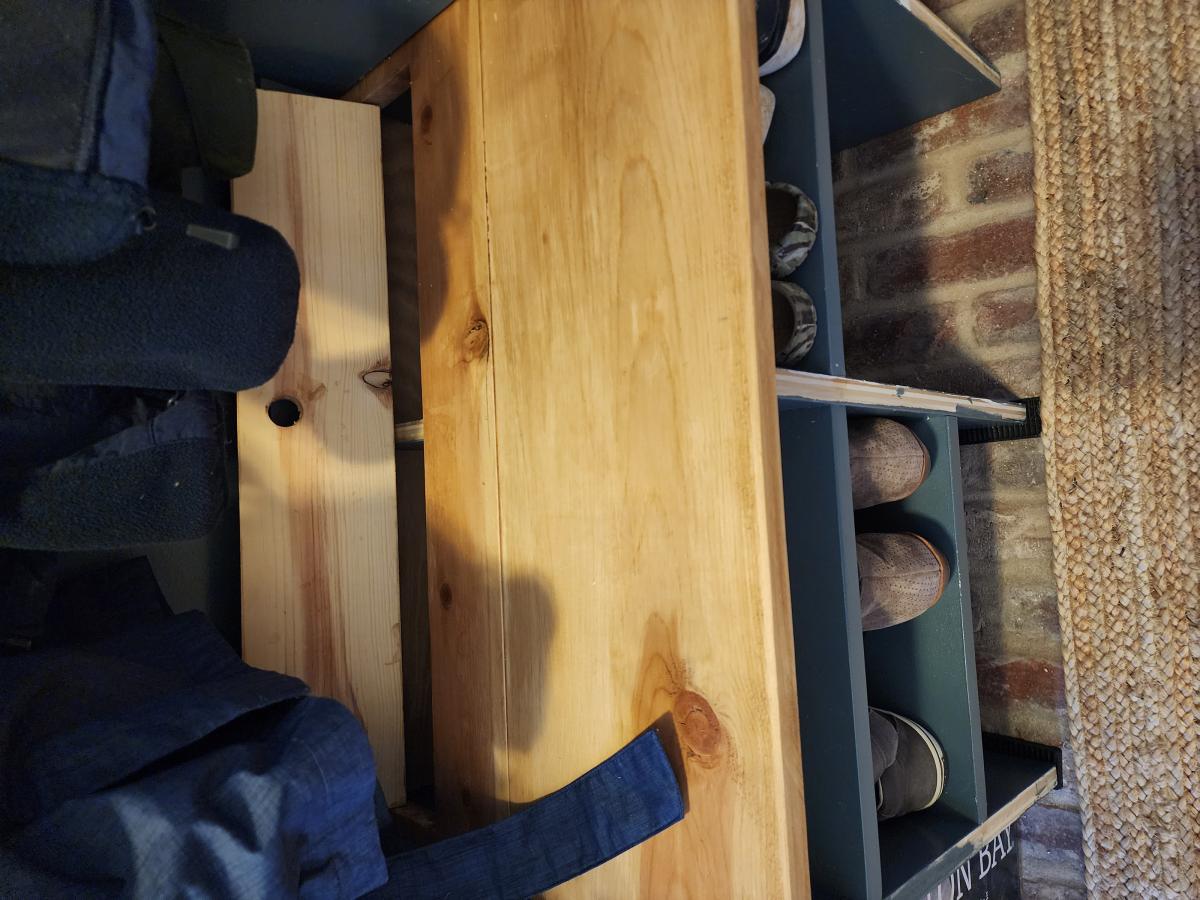
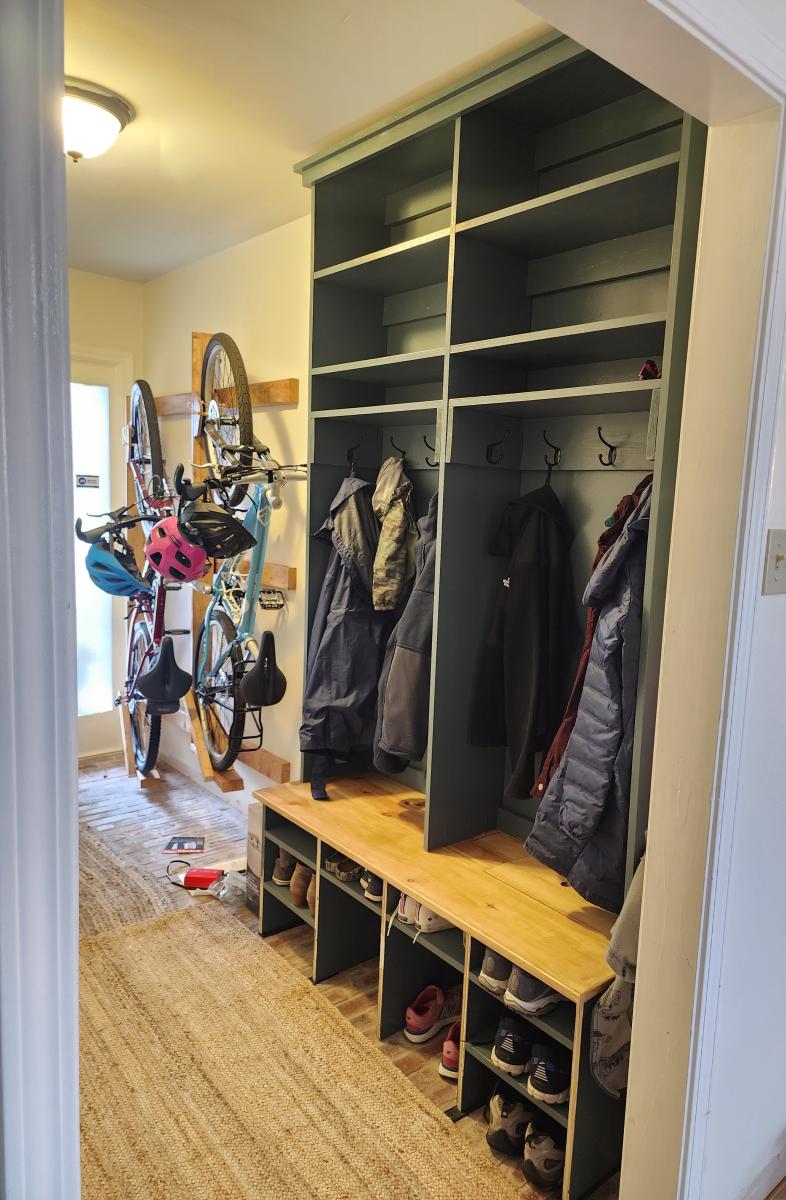
Mudroom Hutch
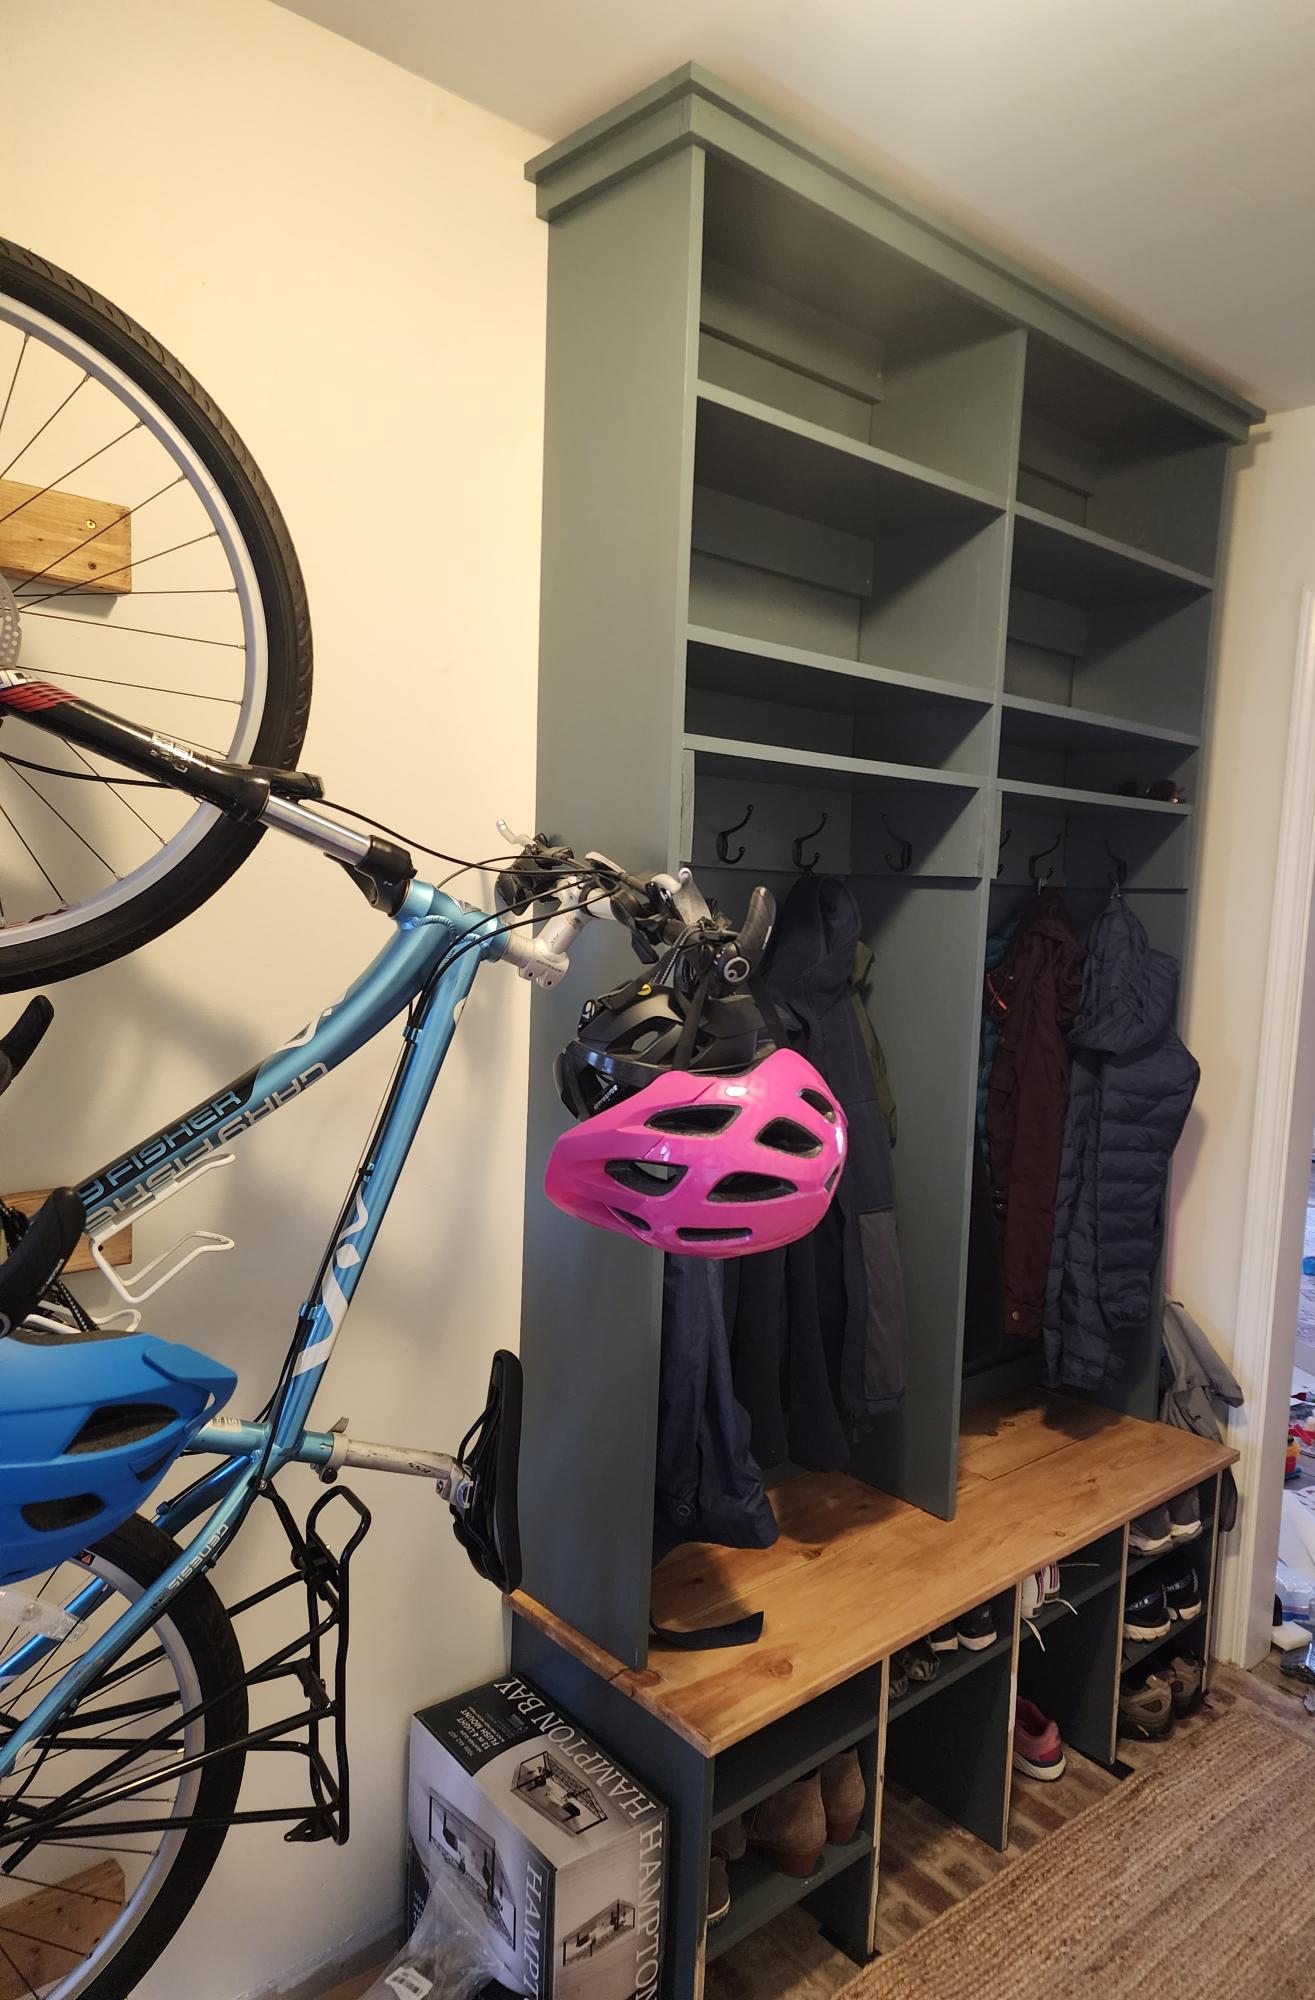
I have been dreaming of this project for YEARS! I used shelfhelp to design the shelf size and the open bottom mudroom plans with matching hutch and the plan with lift up boot storage for inspiration. I still need to add trim but I'm so excited I couldn't wait to say THANK YOU for all the inspiration and help! We absolutely LOVE it!!
Comments
Sun, 11/20/2022 - 12:36
Thanks for using Shelf Help!
Love the color choice, and the build is phenomenal! Thank you so much for sharing.
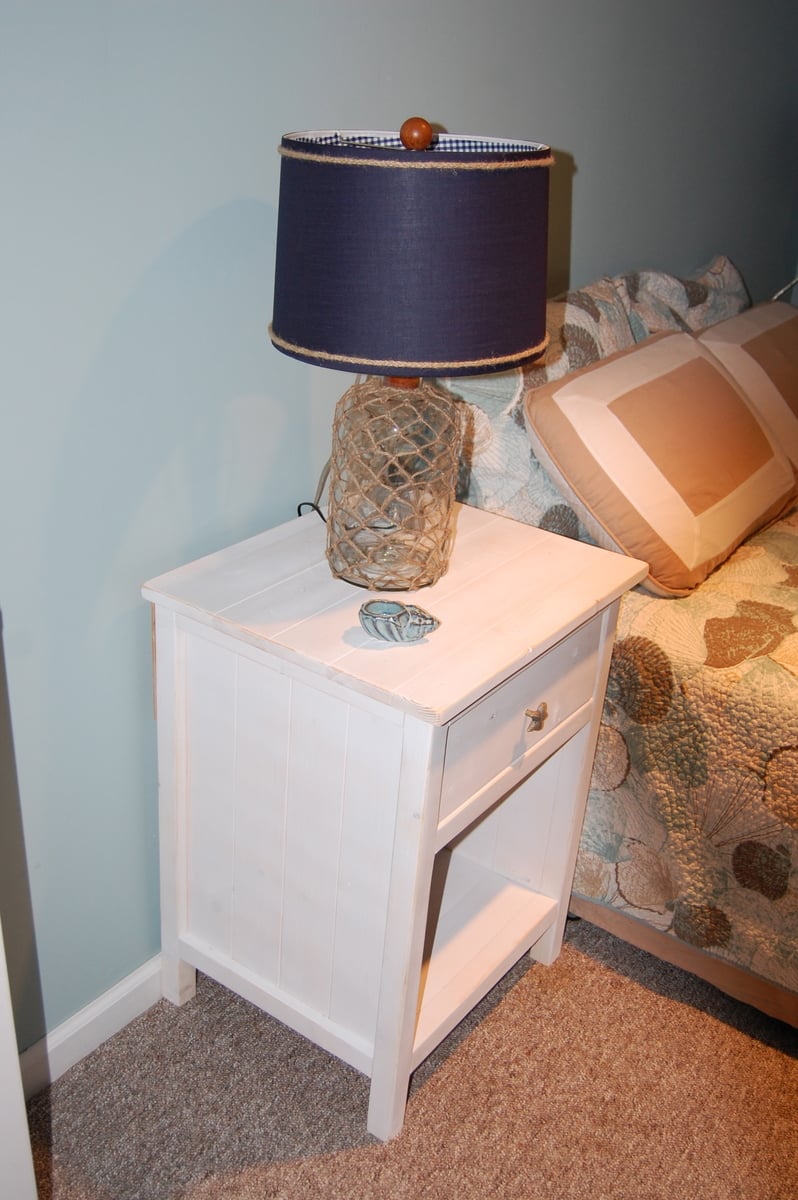
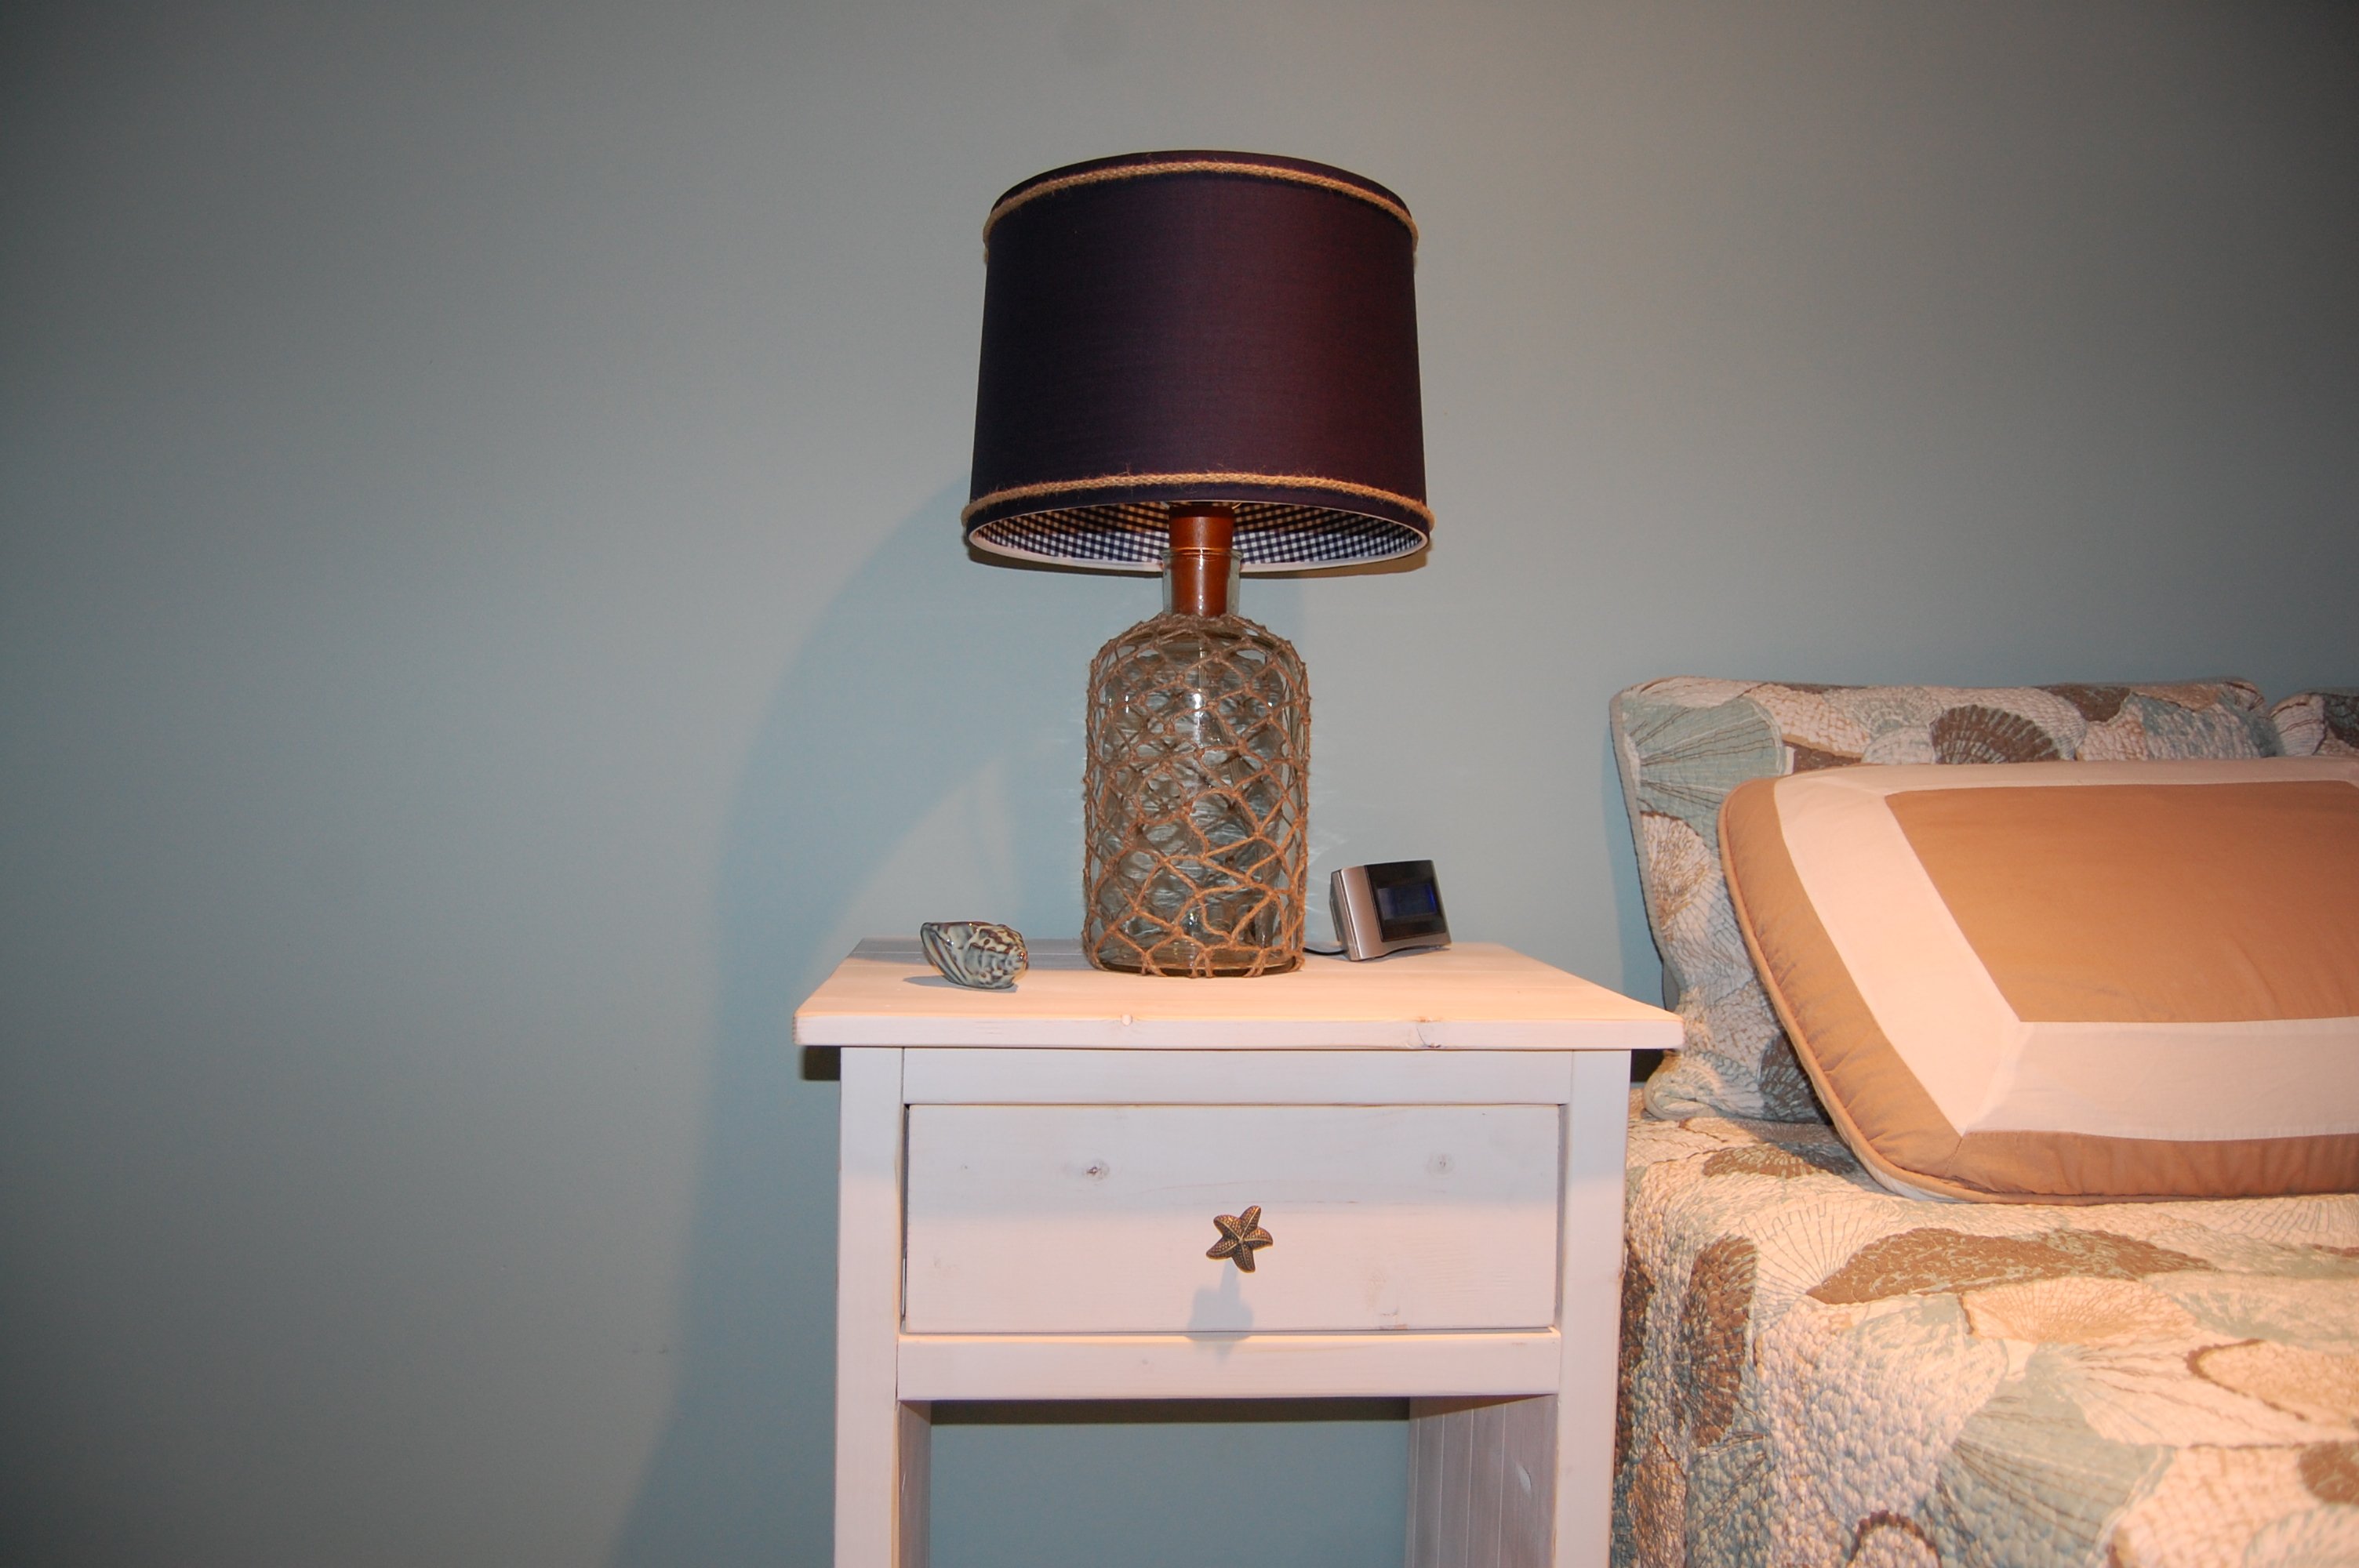
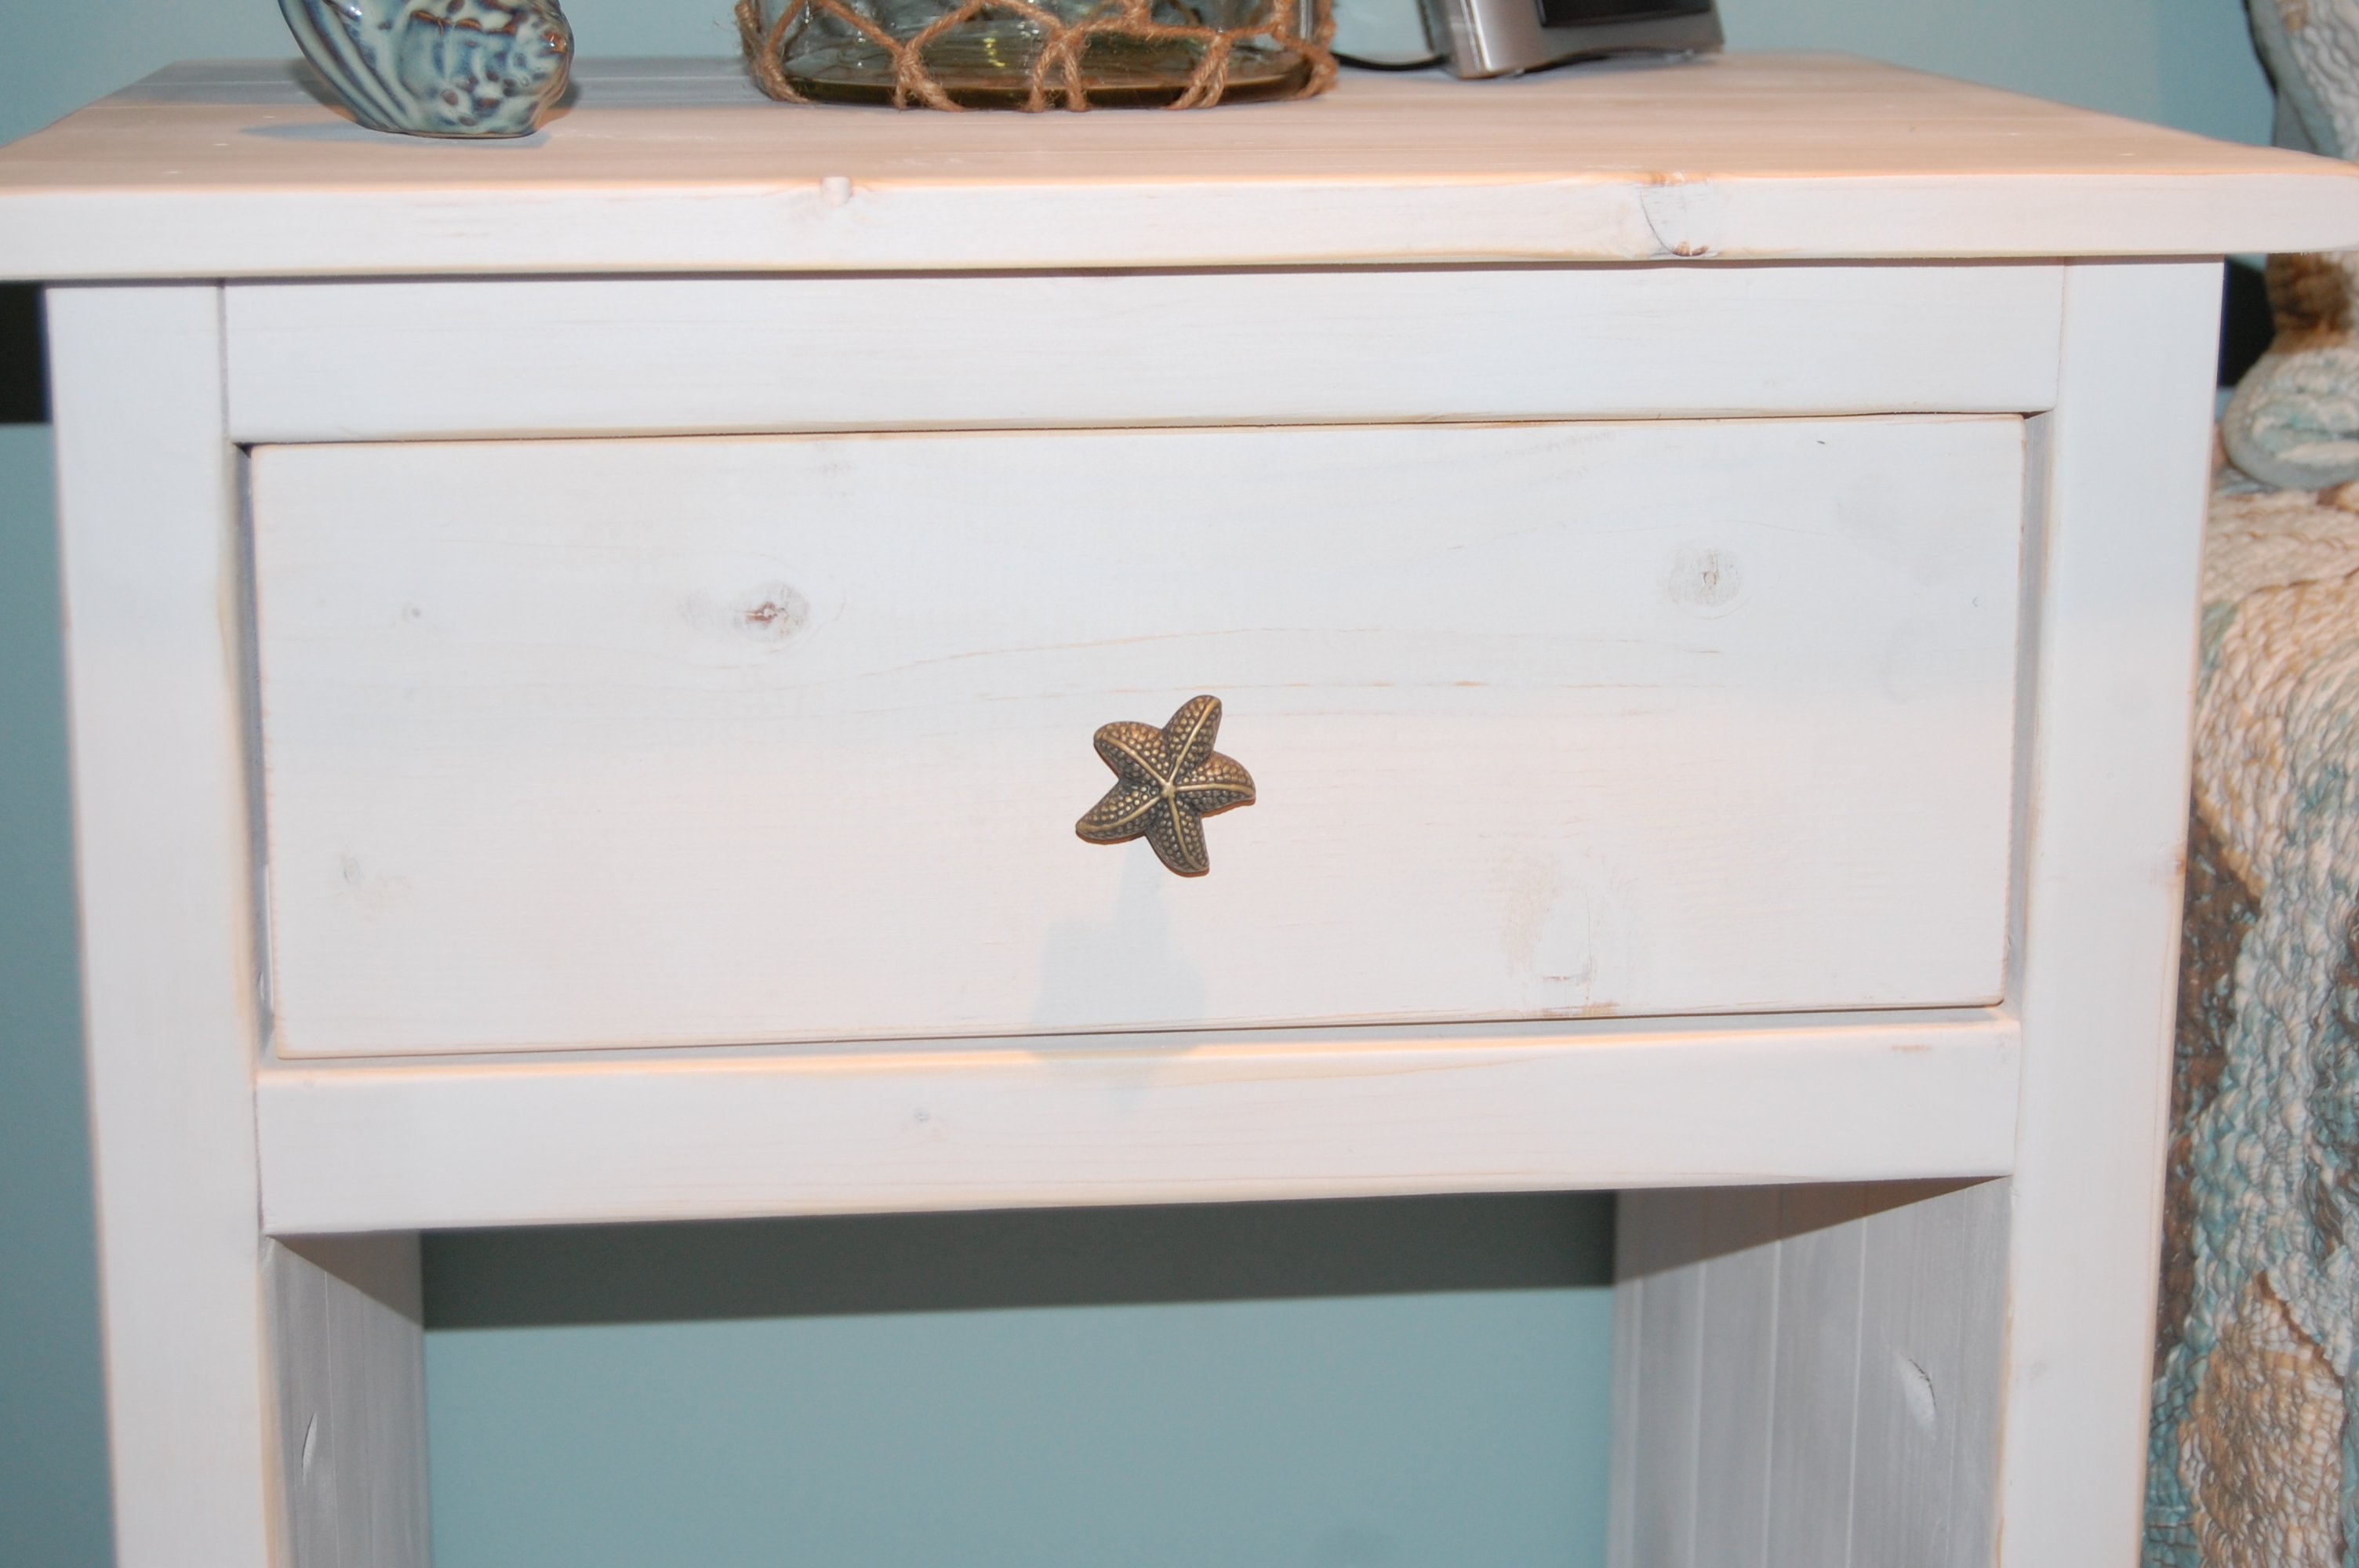
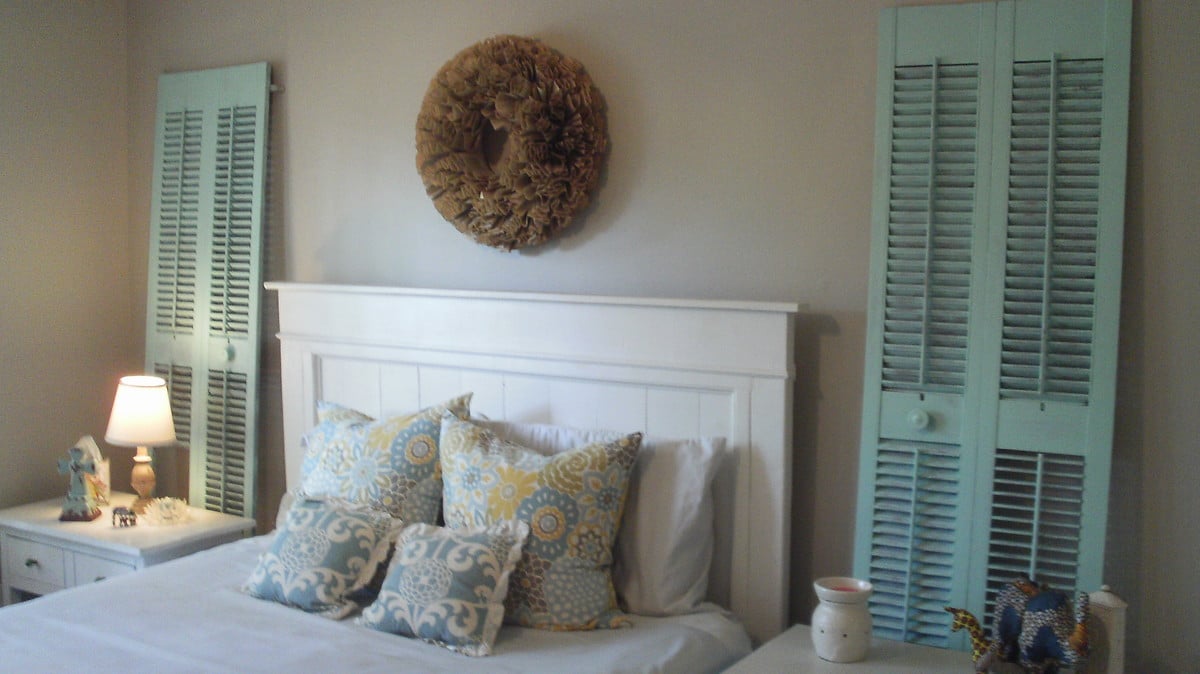
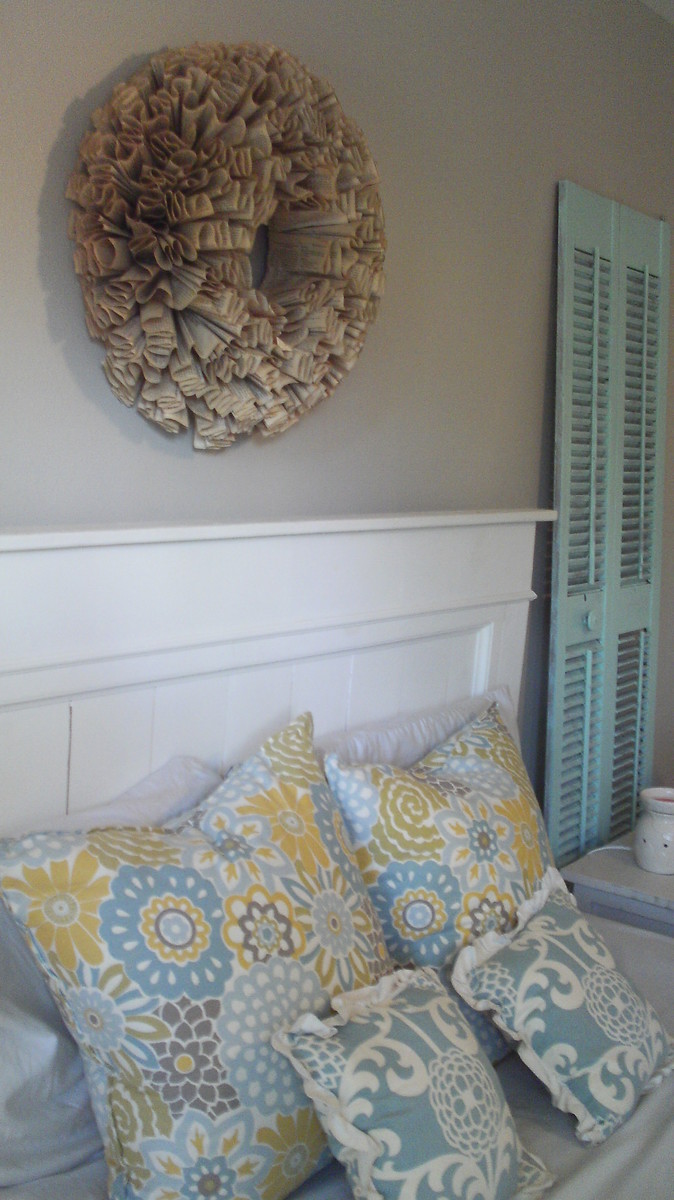
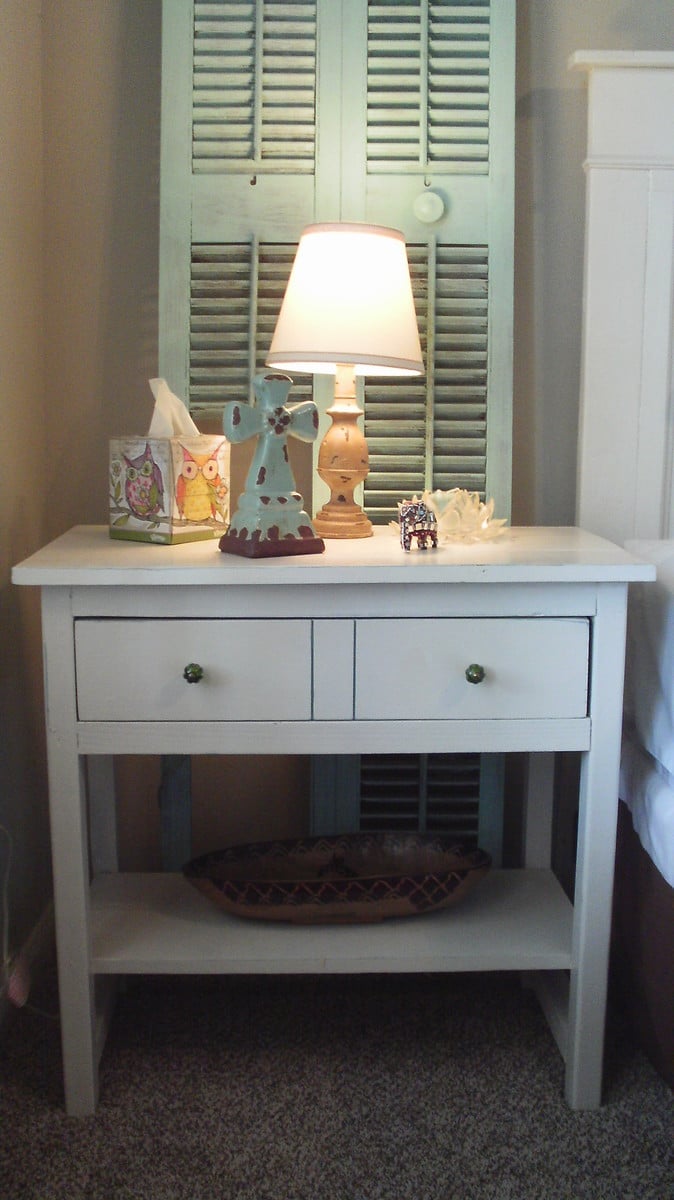
Reclaimed Wood Look Bedside Table - Modified
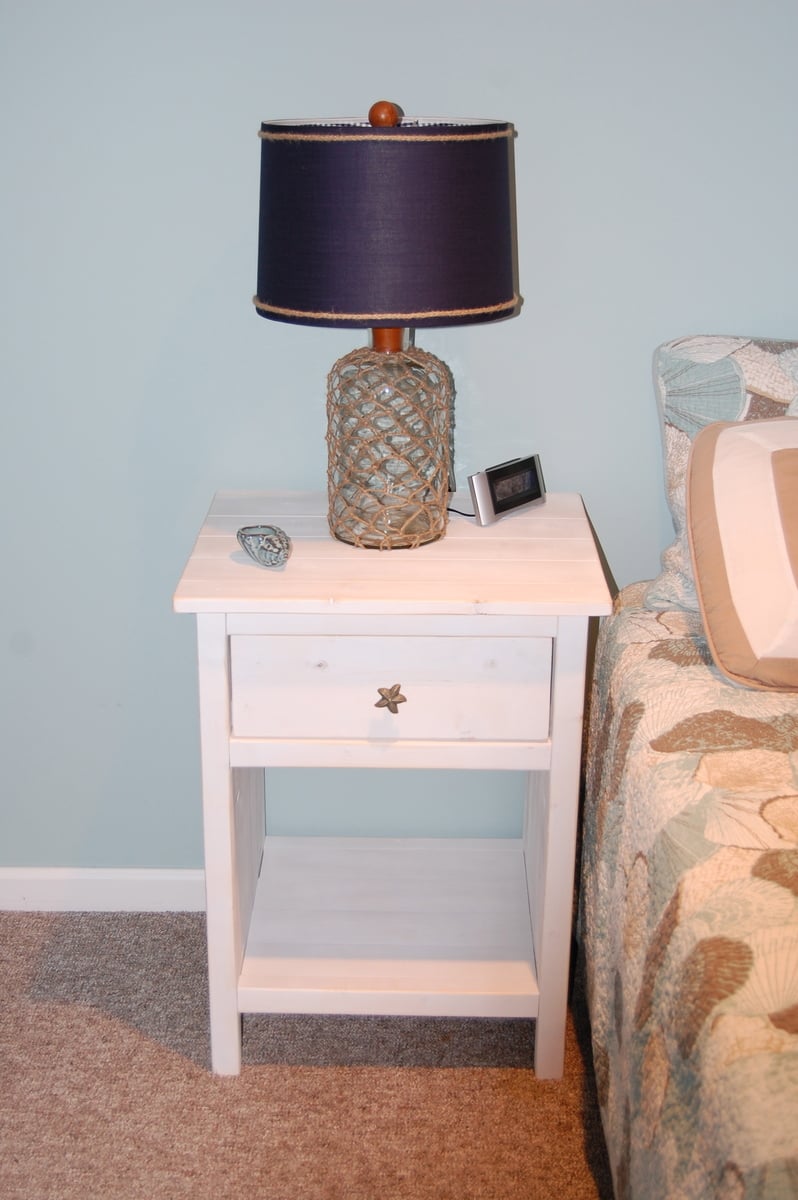
I built the reclaimed wood headboard for our master bedroom, and then found some awesome reclaimed-look stools at Pottery Barn on sale. About a month after that, Ana came out with her reclaimed wood bedside table plans. I was slightly bummed that I already had these cool stools, but then I realized that I had a whole guest room that I could build for! My guest room has a beach theme so I painted my tables white. The room is also kind of small, so I decided that I would put in one drawer and put in a shelf on the bottom. That way it wouldn't look so huge in the room. I love it! And I found these cool bronze starfish knobs at Lowe's. I got a little overzealous at times and I have pocket hole screws in places that are visible, but not that visible. It could be better. All in all, I'm very happy with the way it turned out.
Built from Plan(s)
Estimated Cost
$60 (for two)
Estimated Time Investment
Day Project (6-9 Hours)
Finish Used
Valspar Flat White Spray Paint and Valspar Clear Flat topcoat. I sanded all the edges with 150 grit sandpaper before applying the topcoat. After the topcoat dried, I lightly sanded it again with 220 grit sandpaper to smooth out all the bumps.
Recommended Skill Level
Beginner
Comments

Thu, 09/01/2011 - 19:21
I like just having the one
I like just having the one drawer...looks awesome!
Wed, 09/07/2011 - 04:55
Thanks - it works out really
Thanks - it works out really well for this tiny room!
Wed, 09/07/2011 - 13:49
Love the starfish knobs -
Love the starfish knobs - really want to build myself some like this!
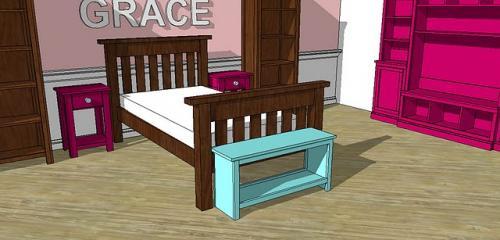
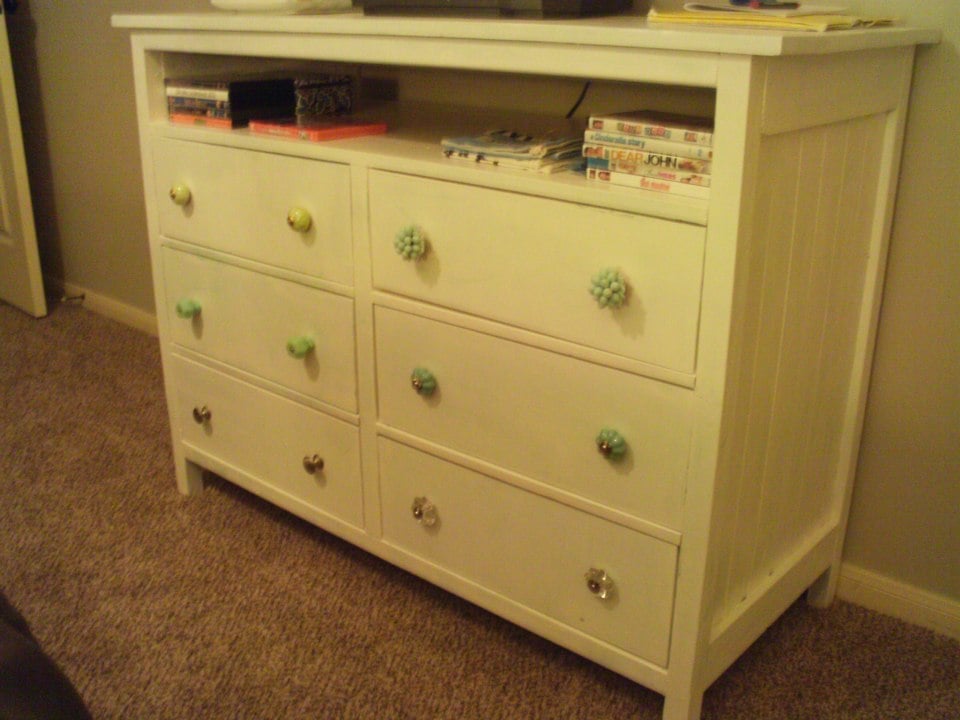
Sarah's Room
I actually made this bed for my daughter about a year ago, but recently finished a few other projects in my daughter's room, so I wanted to share. Bed is Ana's "Mom's Fancy Headboard" and end tables are Farmhouse Bedside Tables (modified) and then I made a dresser, loosely based on the Hudson dresser, but utilizing as many scraps and free wood as I could.
Built from Plan(s)
Finish Used
Paint and slightly distressed
Recommended Skill Level
Intermediate
Comments

Marshall's Dresser / Changing Table
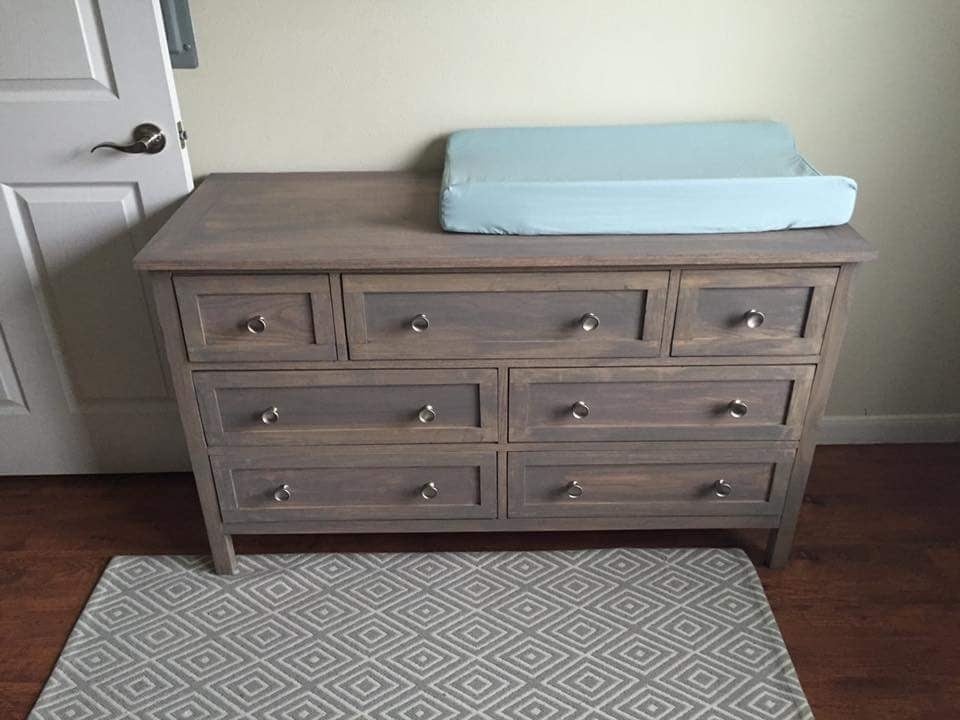
Delivered the nursury Furniture and have a ver satisfied daughter preparing to bring our Grandchild into the world. From Ariel "My sweet baby boy has the most beautiful nursery I've ever seen! I am so thankful for my father who hand built this furniture. It is definitely made with love and it's everything I dreamed of. I'm also thankful for my husband and brother in law who set up this entire nursery for me this morning. Thank you" For this project built with a lot of love, I give a lot of credit to Ed and his very well written plans. http://www.edhart.me/2015/05/how-to-build-a-kendal-extra-wide-dresser/ I followed the plans from Ana-White with Ed's varriations almost exactly except I added Blum undermount glides. This item may 300 pounds but it is well built. #anawhite
Built from Plan(s)
Estimated Cost
Blum glides and assorted hardwood drove this project cost up. However this project is better than the item that I was asked to build at a retailer with a price tag of $1,200. My cost was about $500. #anawhite
Estimated Time Investment
Week Long Project (20 Hours or More)
Finish Used
Sherwin Williams Custom Stain.
Recommended Skill Level
Intermediate
Comments
Thu, 02/22/2018 - 07:23
How did you get the middle
How did you get the middle drawer to be bigger and the sides smaller?
Fri, 06/08/2018 - 13:04
Thanks for the mention!
Your dresser looks fantastic! I really like the stain you used on it.
Ed
Distressed finish fireplace
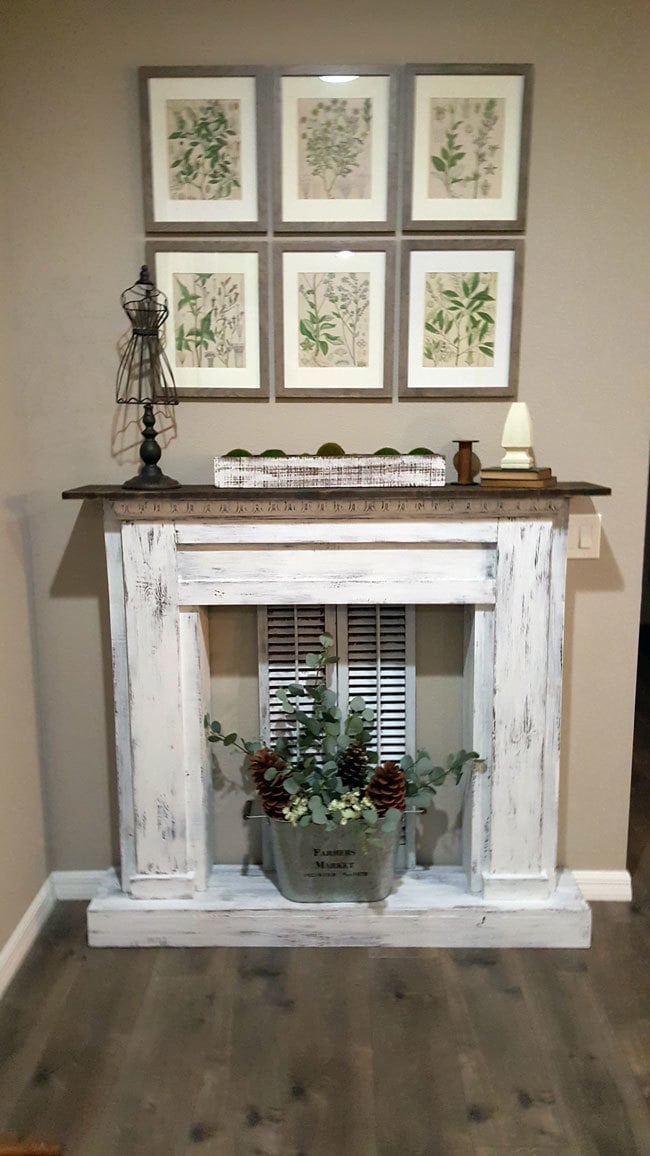
This was a great plan to use! We changed some of the measurements to fit our space and added a simple base to the bottom. My inspiration was a picture of an old chippy mantle from a flea market.
Built from Plan(s)
Estimated Cost
$100
Estimated Time Investment
Weekend Project (10-20 Hours)
Finish Used
I stained everything first then lightly rubbed vasoline over some areas. Used a white paint (rustoleum white linen chalk paint)and dry brushed on until distressed look was achieved.
Recommended Skill Level
Beginner
Shoe Dresser
Modified the shoe dresser dimensions to fit the space.
Built by Janae
Built from Plan(s)
Dress Up Cart
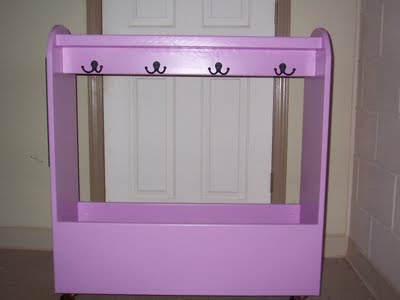
We used the Dress Up cart plan, but altered it in a few ways. We added additional storage up top and used hooks instead of a bar with hangers. We also added a mirror on one end and wheels. Visit our blog for more photos!!
http://bearrabbitbear.blogspot.com/2011/09/sneak-peak-natalees-dress-up…
Estimated Cost
$30-40
Estimated Time Investment
Weekend Project (10-20 Hours)
Recommended Skill Level
Beginner
Comments
Mon, 11/21/2011 - 06:29
hooks instead of hangars? nice!
What a great modification! i want to make this for my boys but even though they're ranging from 2 to 6 trusting them to hang things on hangars is a ridiculous request. maybe it's too time consuming for their busy little lives? who knows! but this is a great alternative! will definitely be using this plan!
thanks!
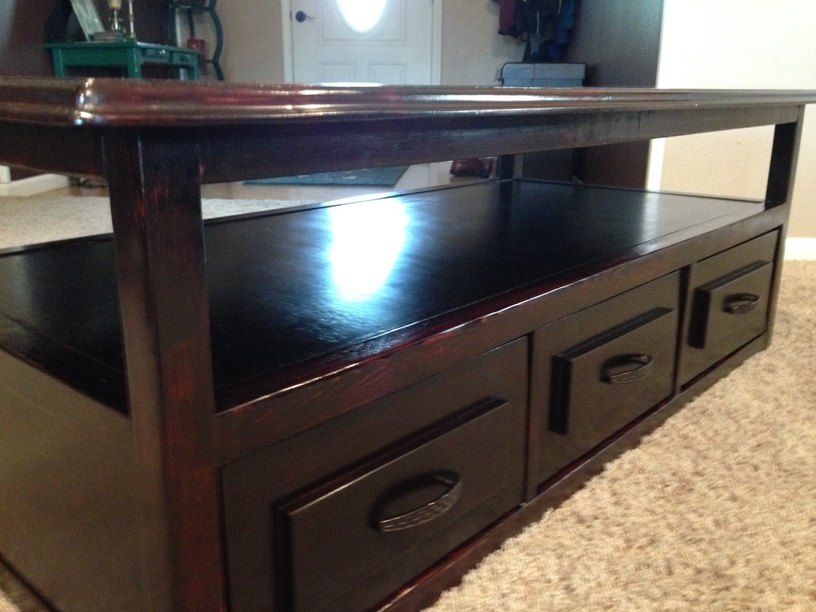
Coffee Table
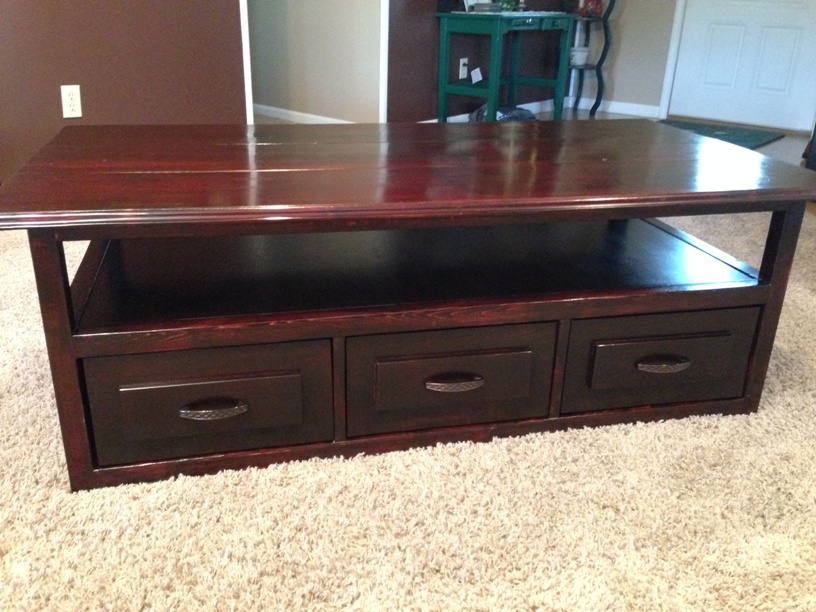
This a coffee table I built that is based on Pottery Barn's Rhys Coffee table and features and open shelf and six drawers. I modified the plans to include a top and changes to the drawer fronts. The original plans can be found here at Ana White's website: http://ana-white.com/2012/02/plans/rhyan-coffee-table
Estimated Time Investment
Week Long Project (20 Hours or More)
Finish Used
Minwax - Red Mahogany
Recommended Skill Level
Beginner
Adirondack Stool using Metric Units
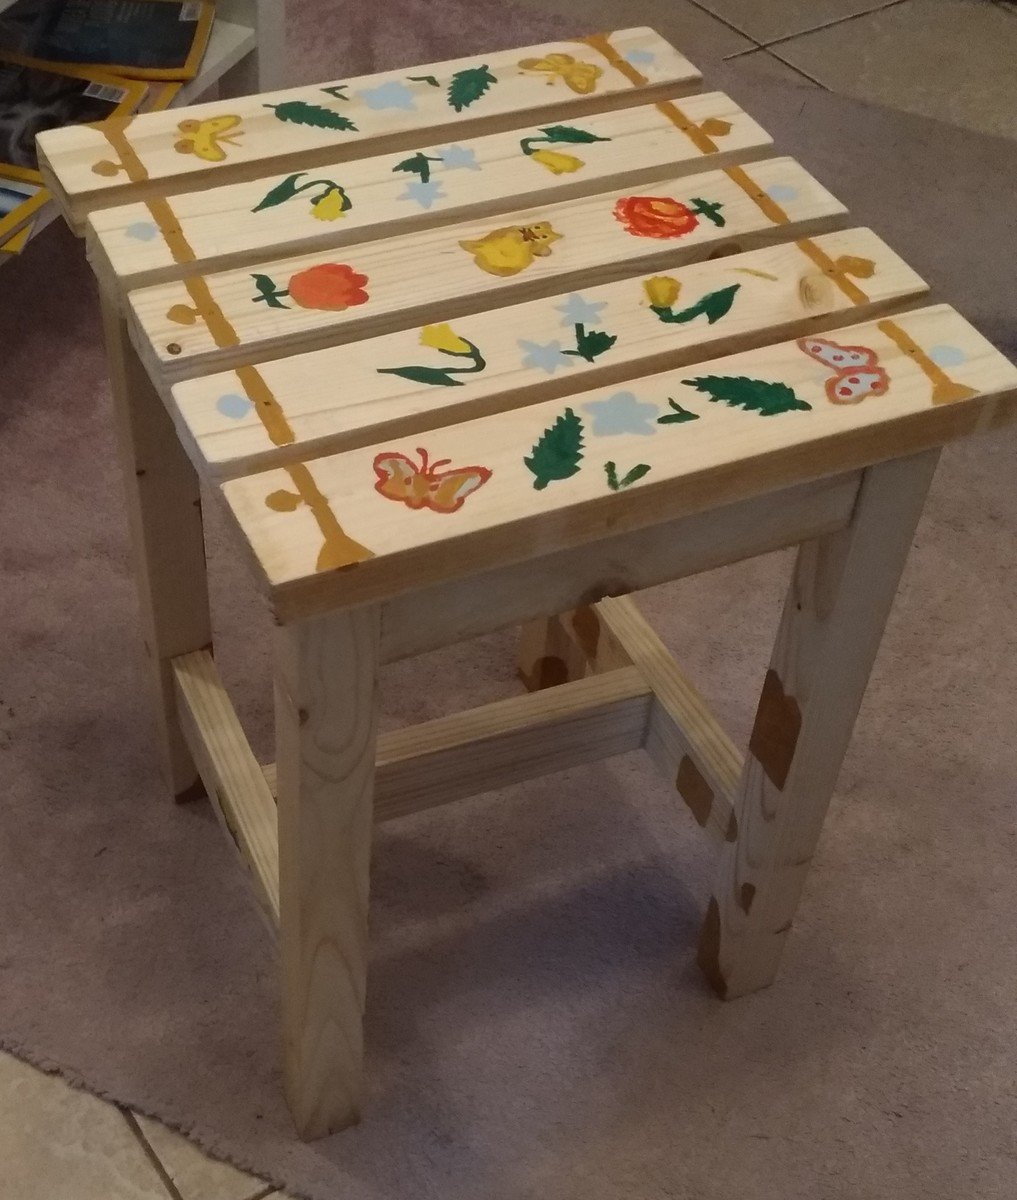
My very first woodworking project. Had to convert all plans to metric units and adapt to available wood stocks in Bucharest. If you want details, don't hesitate to contact me.
Built from Plan(s)
Estimated Cost
15 EUR (excl. tools)
Estimated Time Investment
Week Long Project (20 Hours or More)
Finish Used
insulation primer + varnish
Recommended Skill Level
Starter Project
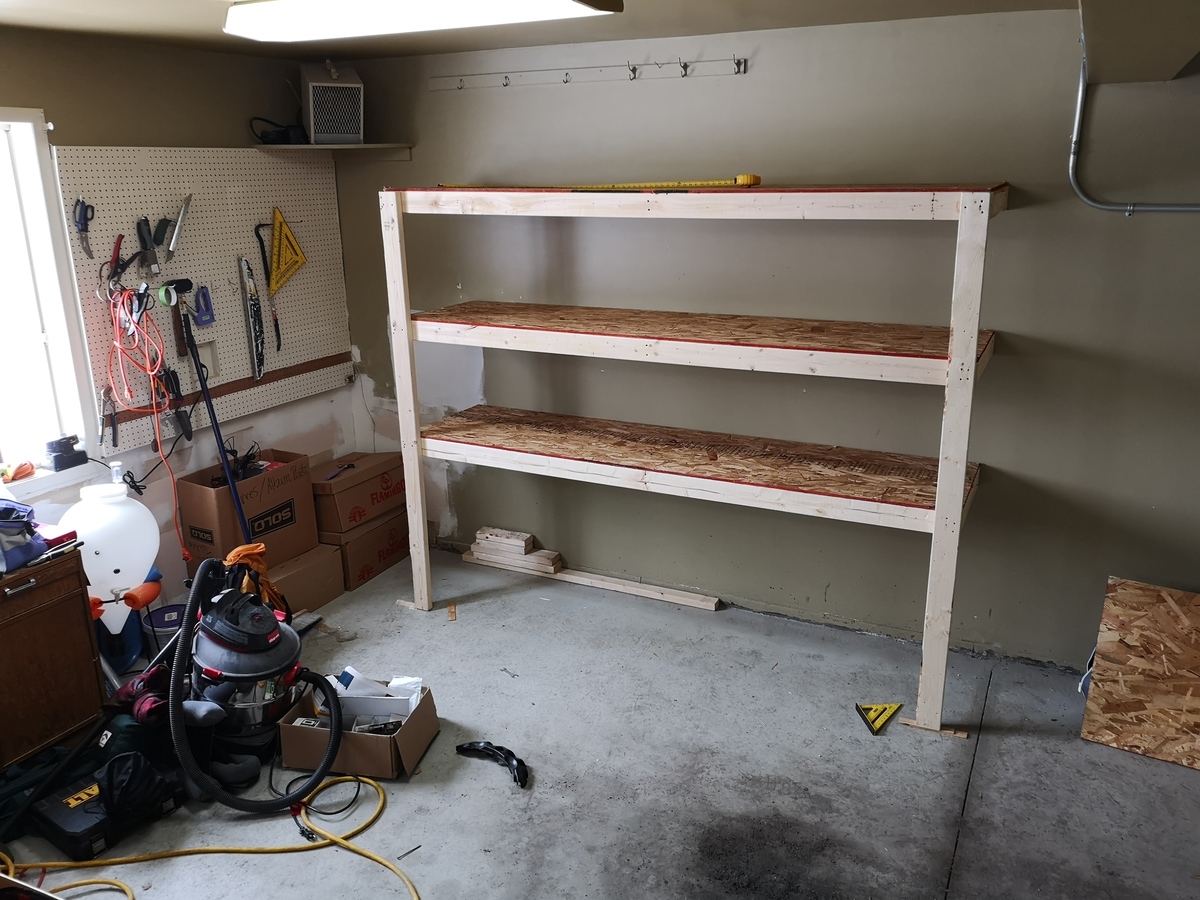
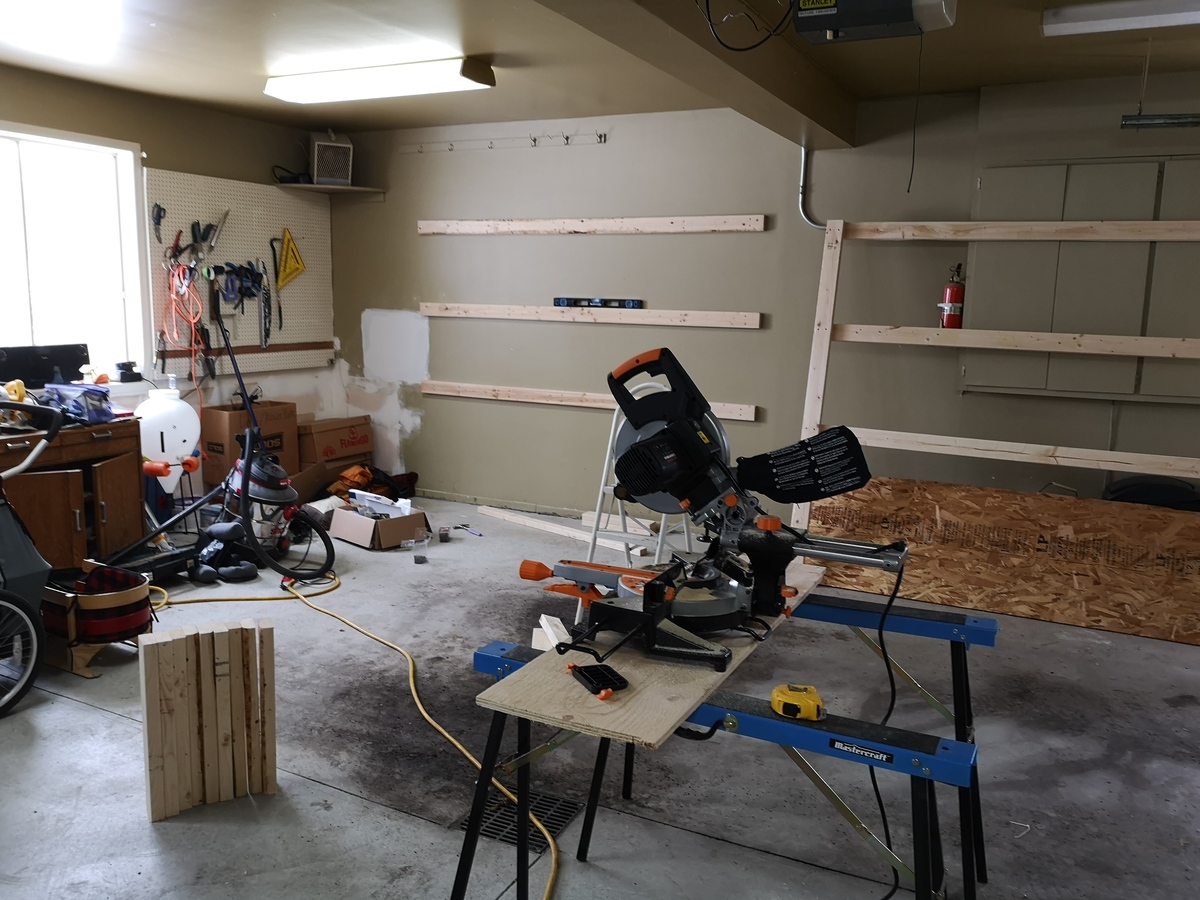
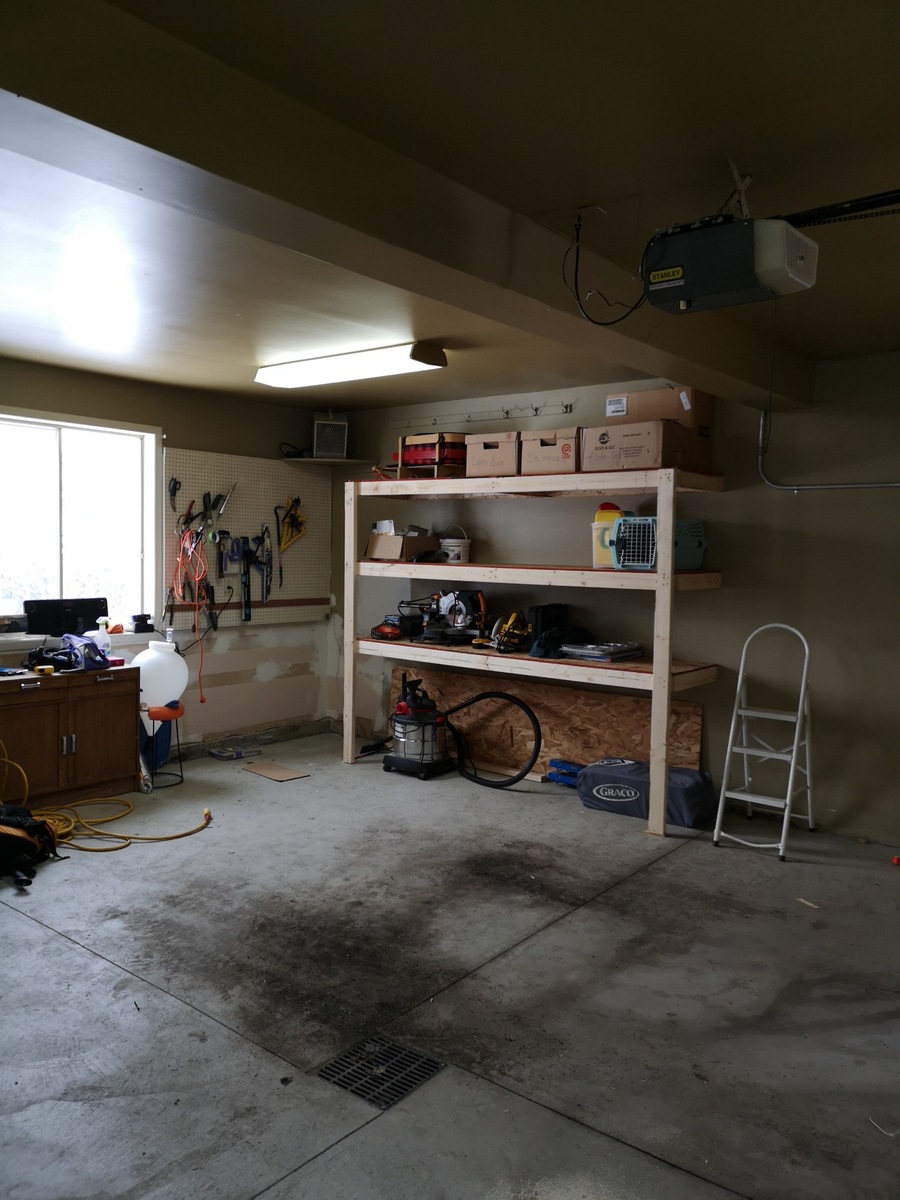
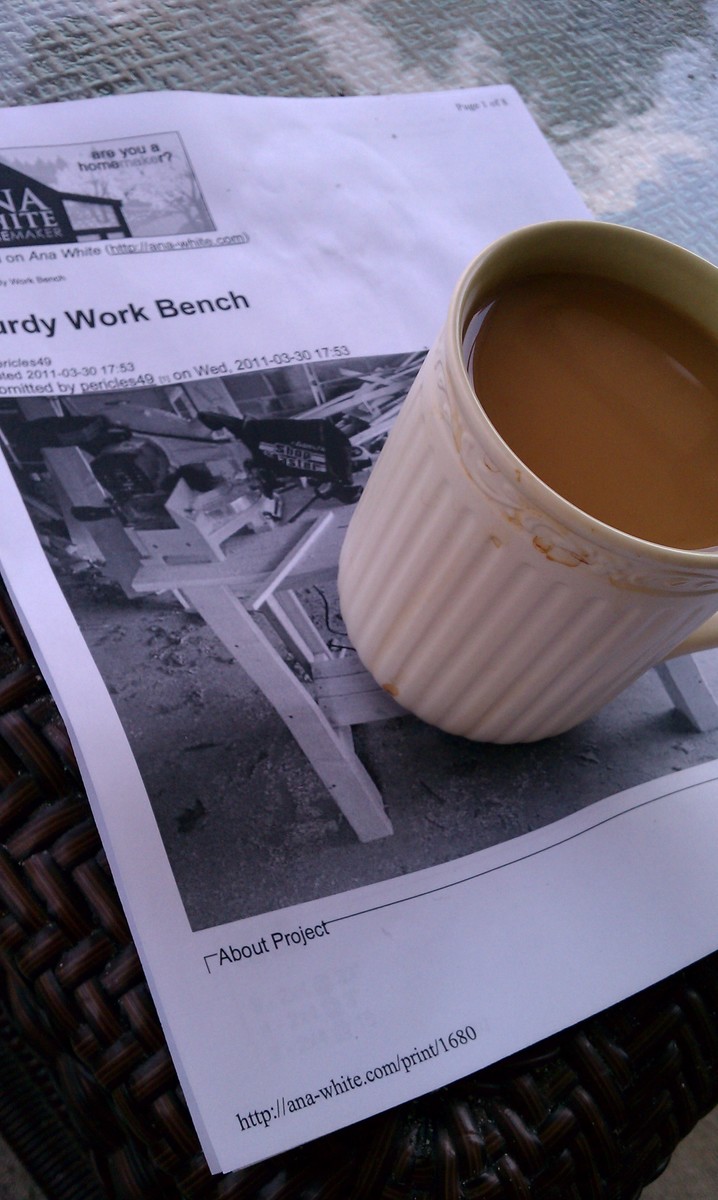
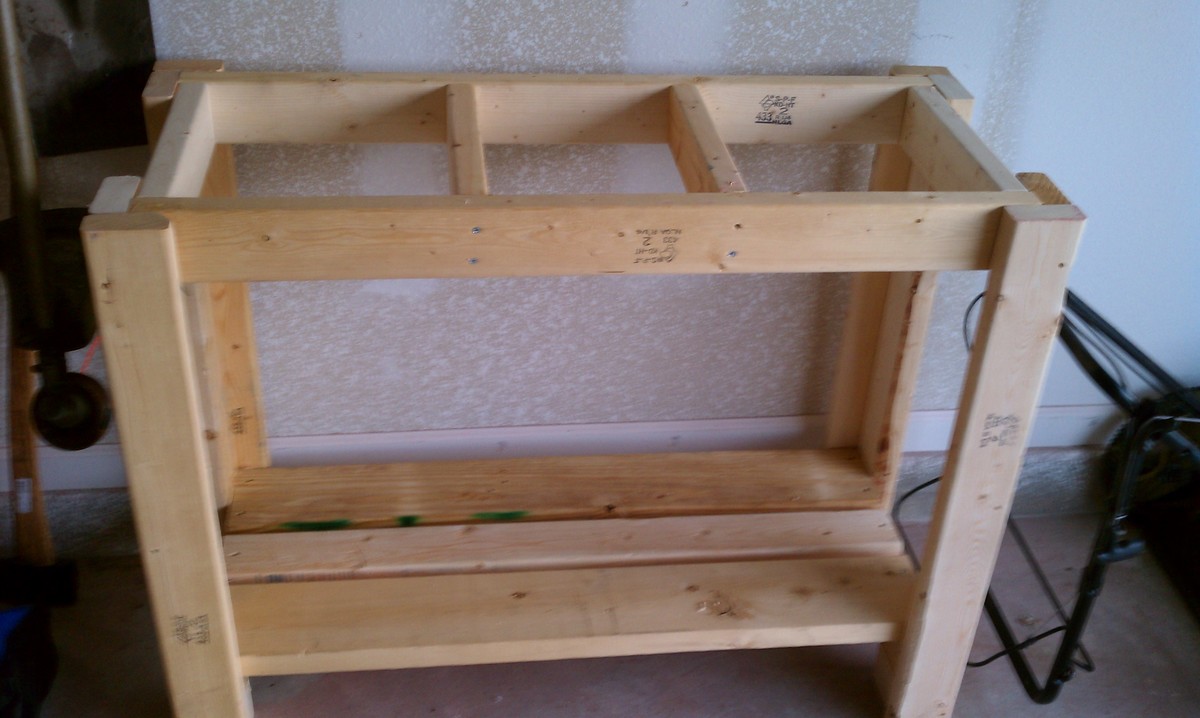
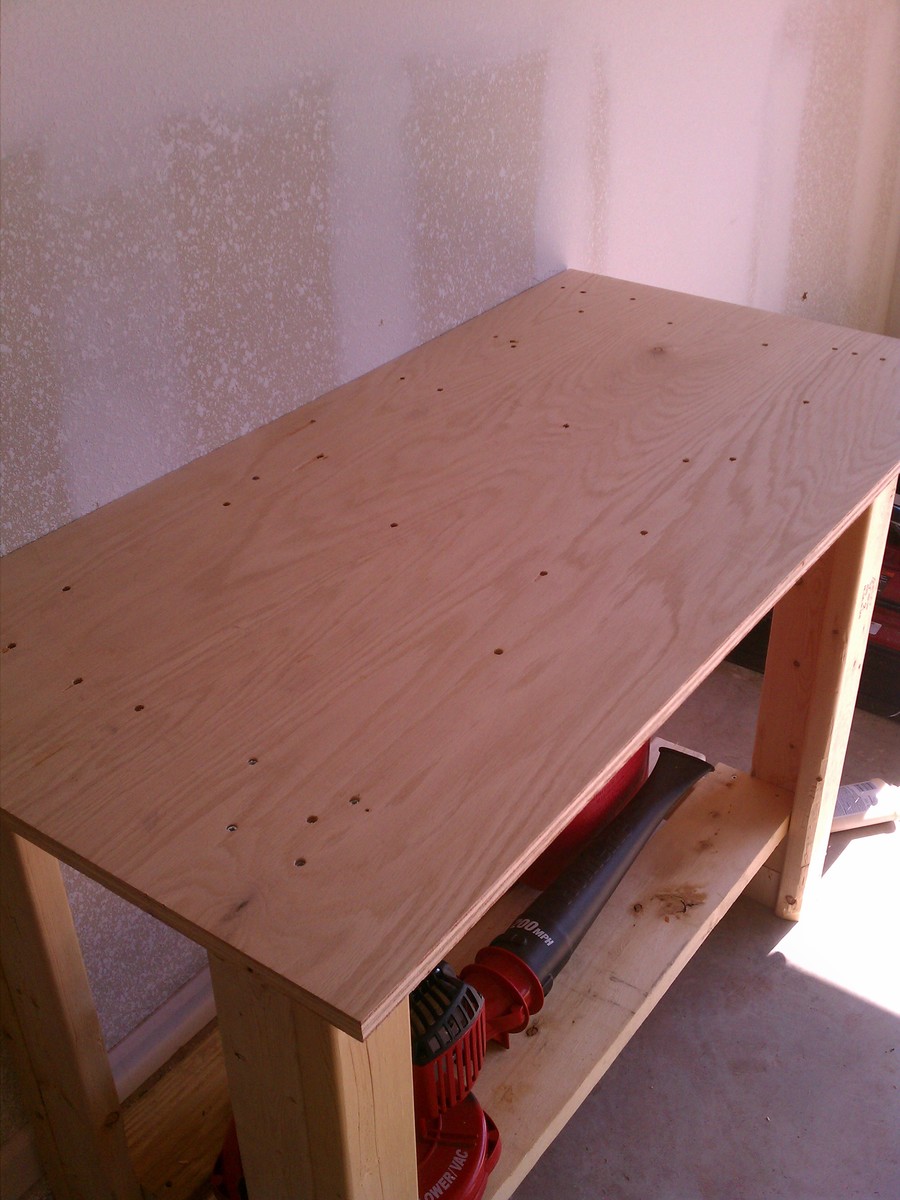
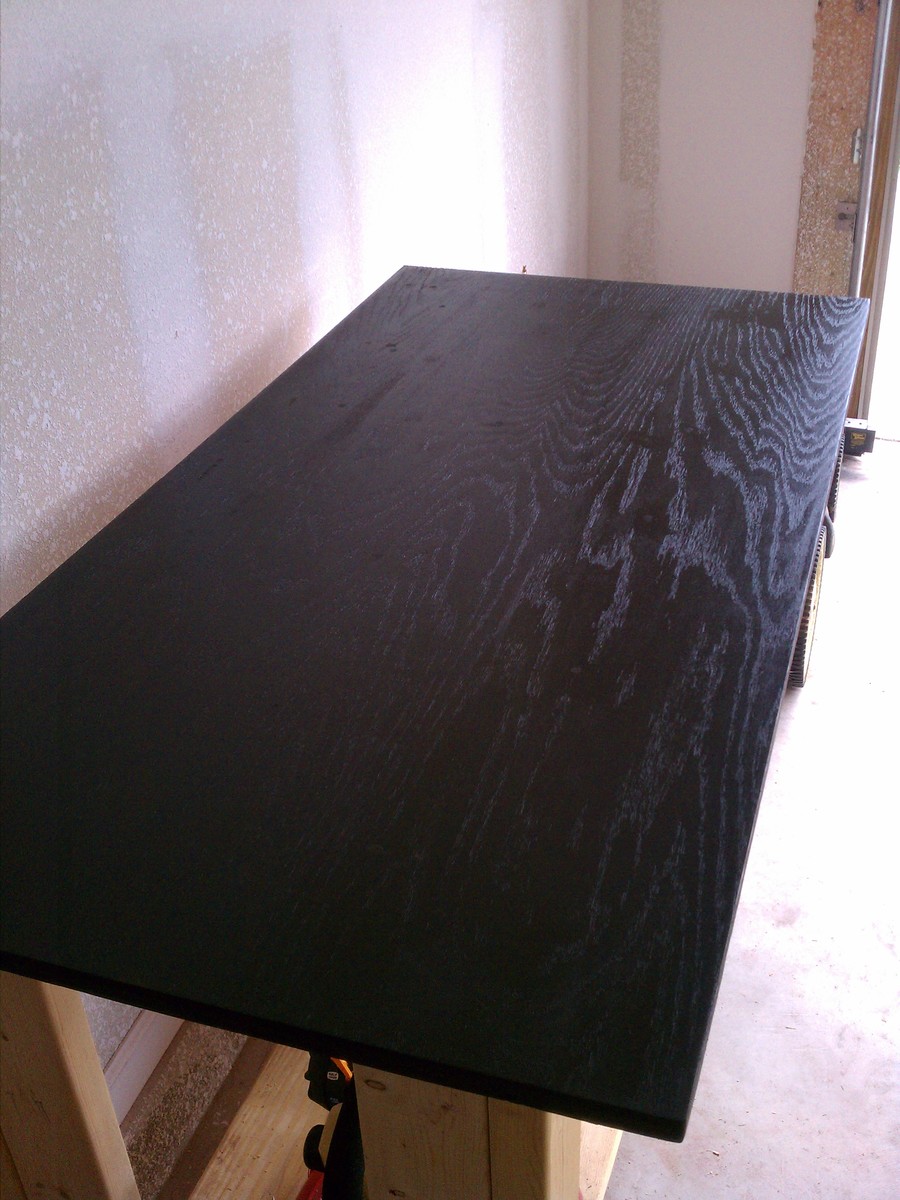
workbench
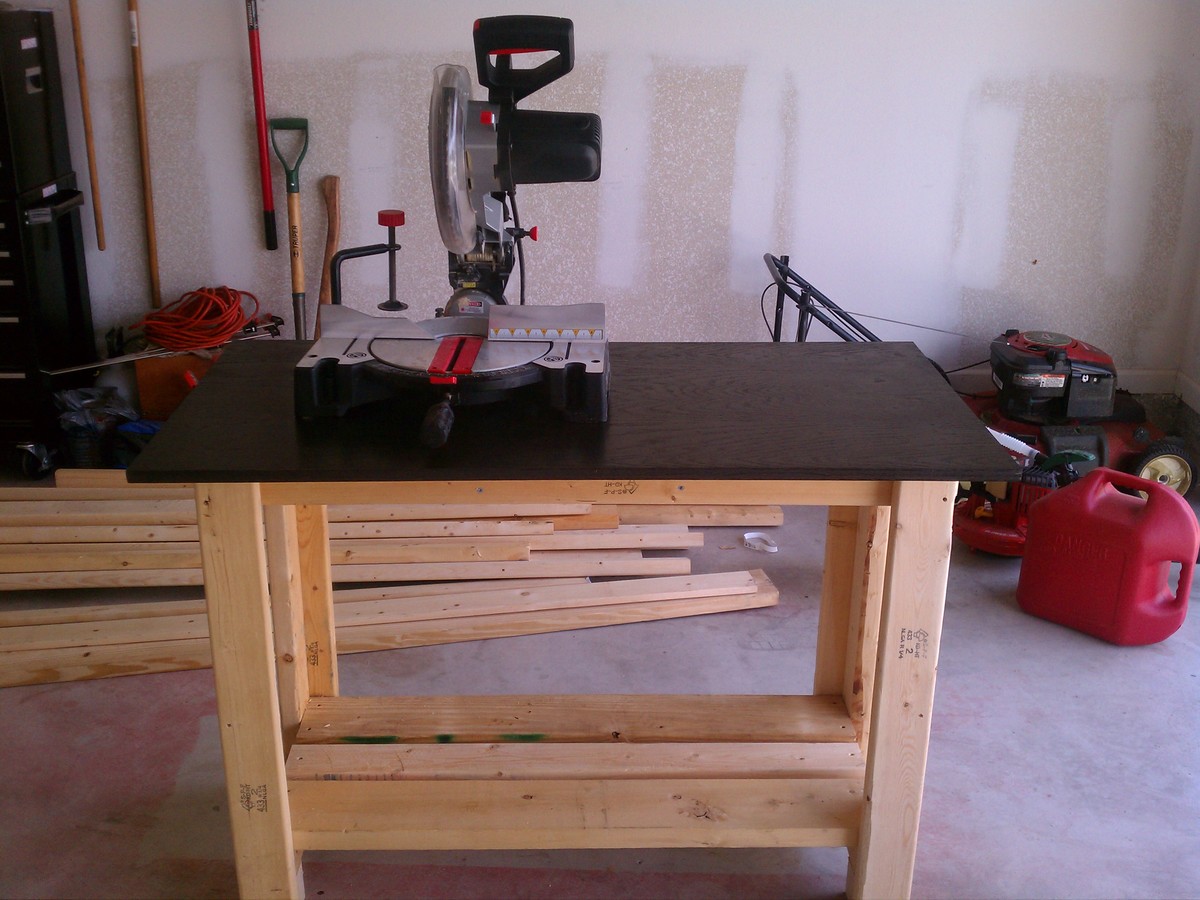
Built two of these workbenches using 2x4's I found in the dumpsters around my neighborhood. Tested out rustoleum stain for the tops. Covered really well in just one coat.

Built from Plan(s)
Estimated Cost
$30
Estimated Time Investment
An Hour or Two (0-2 Hours)
Finish Used
Rustoleum stain in kona
Clear lacquer
Clear lacquer
Recommended Skill Level
Beginner
Comments
Fri, 09/09/2011 - 20:45
Nice workbench
Looks great, I like the look of the dark top, but it might make it harder to see small objects.
Tue, 02/21/2012 - 18:52
Beautiful!
I love how you took it one step further and stained the top. So beautiful!

Mon, 05/06/2013 - 06:49
Wow. Thank you for those
Wow. Thank you for those unbelievably kind words. I am not an architect though. My main profession was a service manager and now I'm unemployed and partially disabled. I just love to be creative and use my hands. I also love photography. I did all my work on nights and weekends. Again, thank you for the kind words.
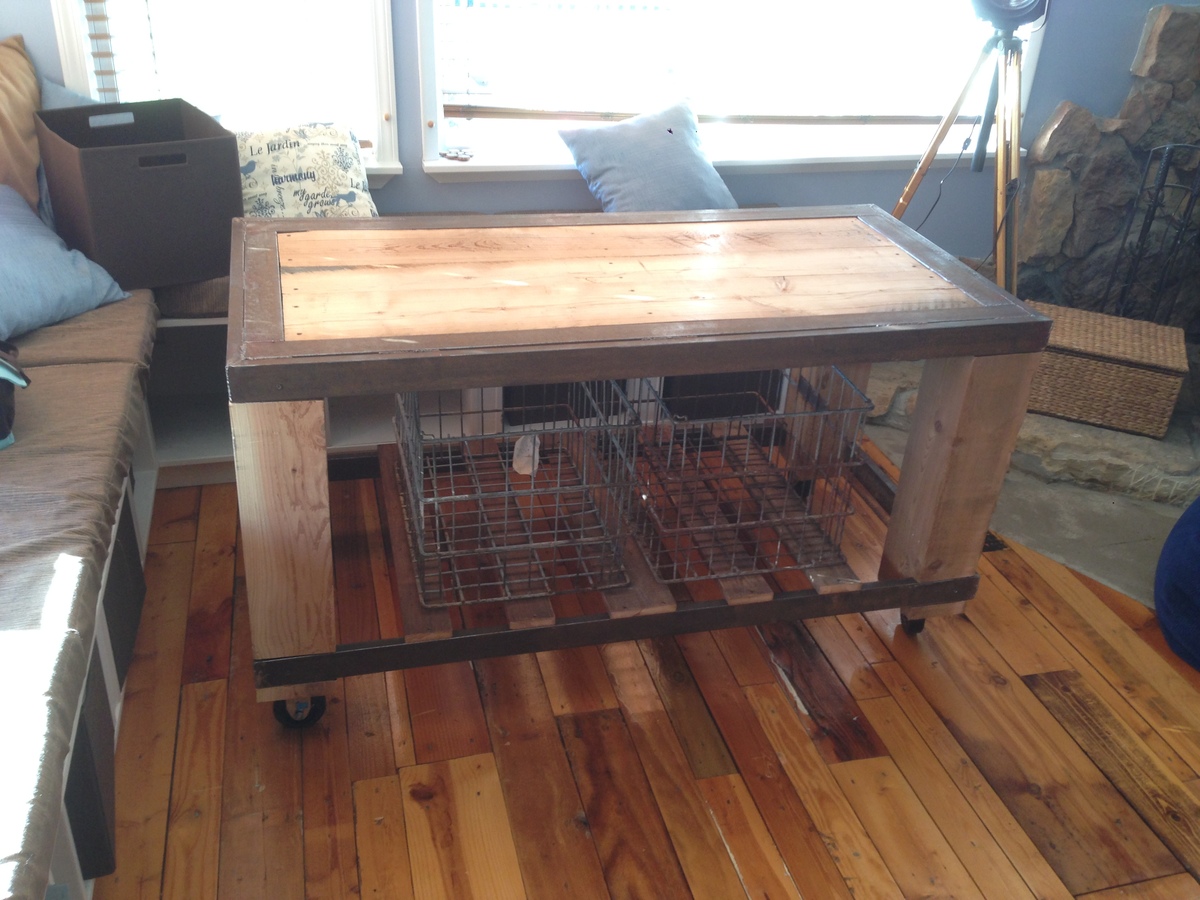
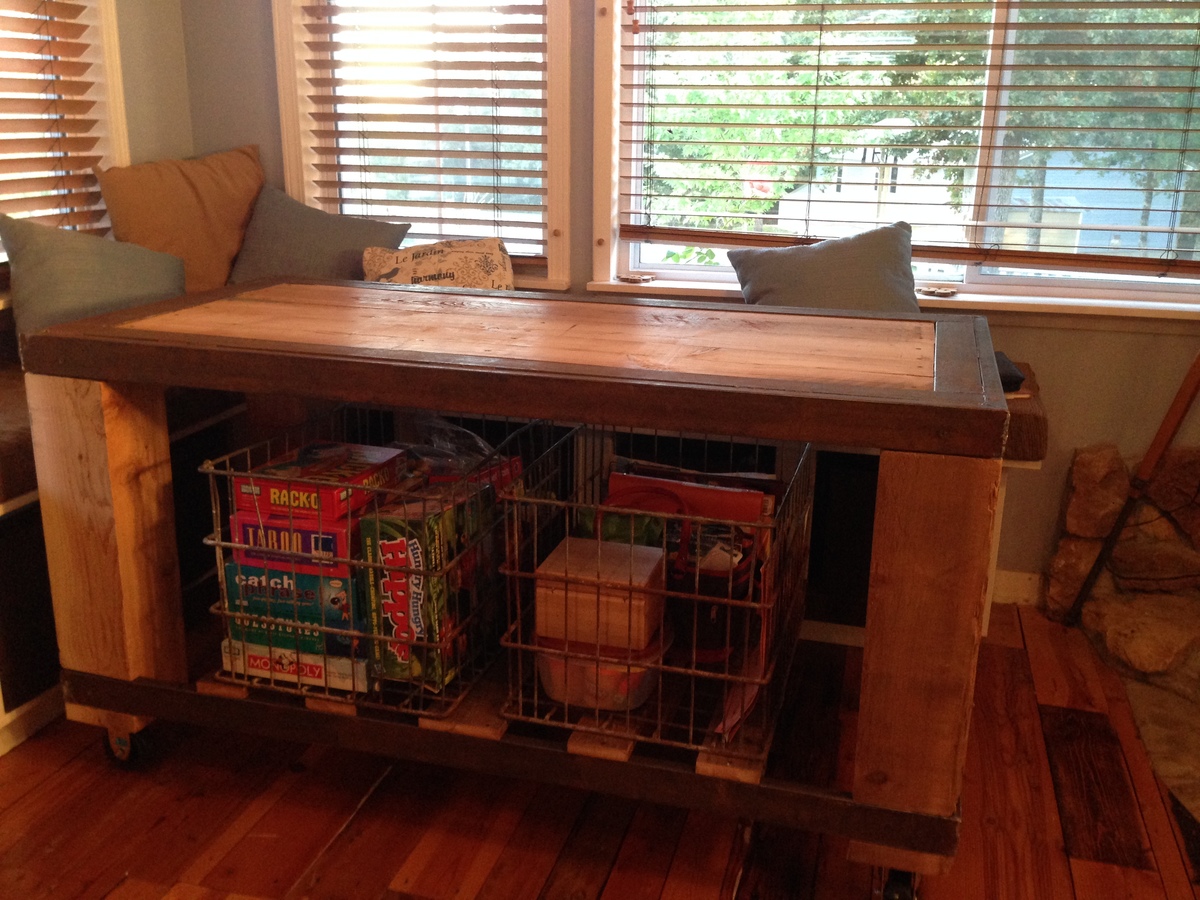
Family Work Table

This was a project that I messed up and it actually turned out much better than the original idea. I wanted to to make a buffet/side-table for our dinning room but ended up measuring wrong and this turned into what it is now.
I am happy with the way it turned out. It was pretty simple to make as far as the design is concerned.
The woodwork involved was planing, cutting, sanding, etc and then there was bit of metal work like cutting and welding.
I love how the milk baskets tie things together.
Estimated Time Investment
Day Project (6-9 Hours)
Finish Used
Miniwax wipe on polyeurethene
Recommended Skill Level
Intermediate