Community Brag Posts
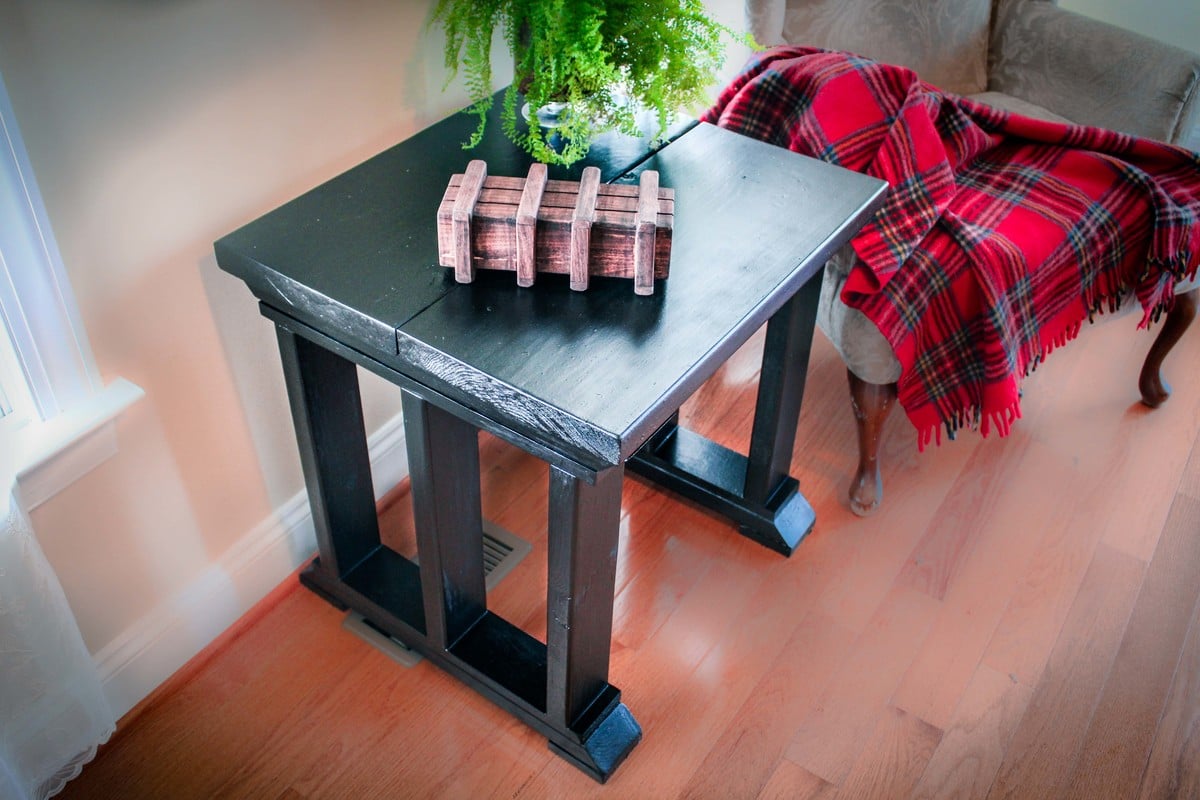
Rustic End Table
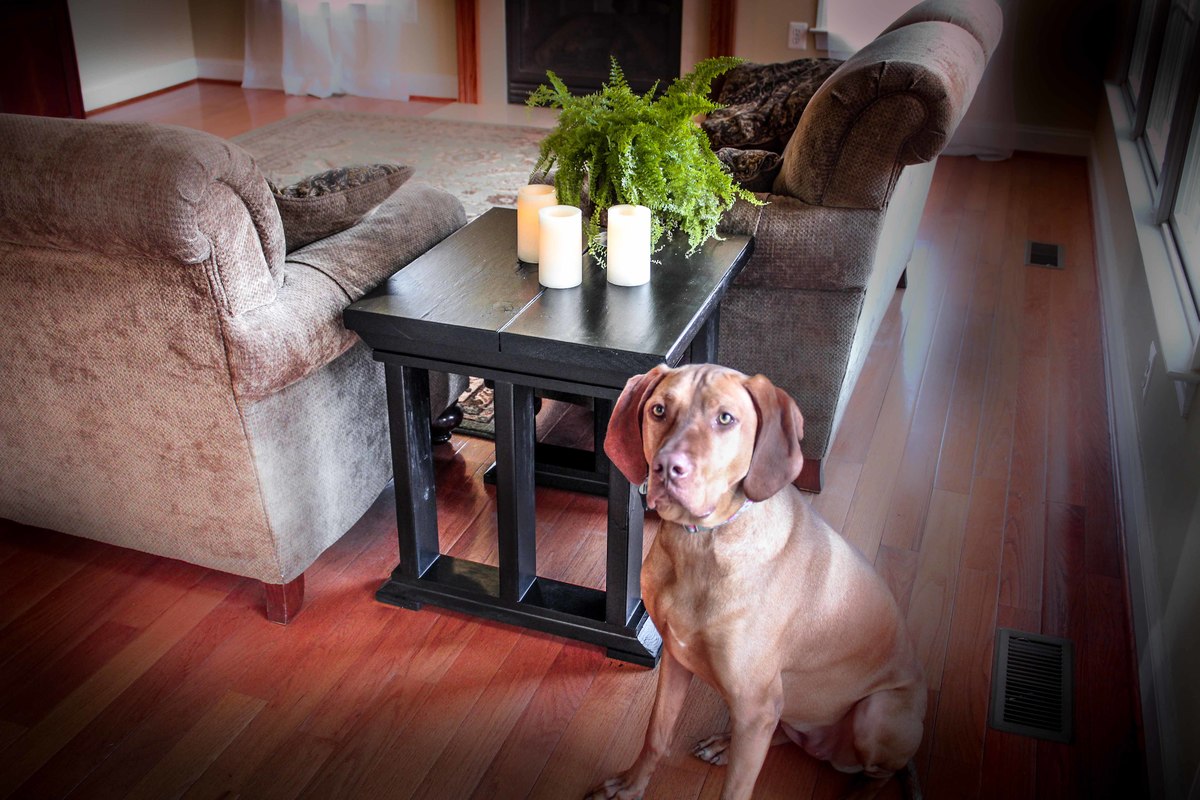
This End Table matches the shelf from a few weeks ago which is my attempt of matching the $55 Fancy Desk from Ana White. As with the shelf, the design is simple, easy to make and is relatively low cost (under $25).
Estimated Cost
$25
Estimated Time Investment
Afternoon Project (3-6 Hours)
Finish Used
PolyShades Classic Black Satin Stain and Polyurethane from Minwax
Recommended Skill Level
Beginner
Comments

Sun, 03/22/2015 - 10:24
Video of the Build
Video:
https://www.youtube.com/watch?v=4wwlcqBMEa4
Build Instructions:
http://www.instructables.com/id/Rustic-End-Table/

House signs
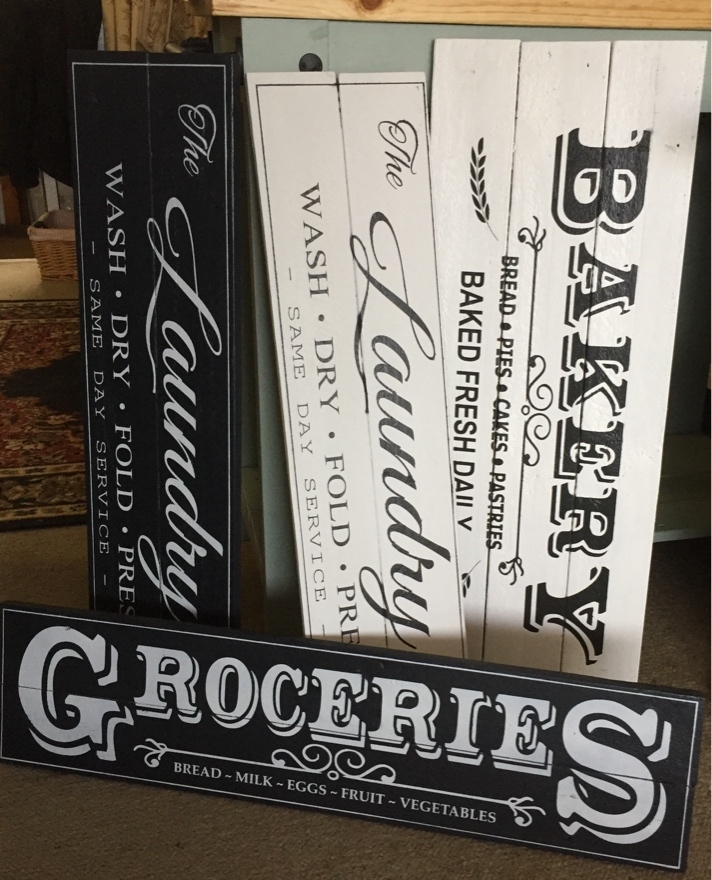
Made from pallet wood.
Painted and stencilled.
Estimated Cost
$0
Estimated Time Investment
An Hour or Two (0-2 Hours)
Finish Used
chalk paint and clear coat
Recommended Skill Level
Beginner
Comments


Sat, 06/24/2017 - 06:17
Thank you. I made the
Thank you. I made the stencils myself using my silhouette cameo.
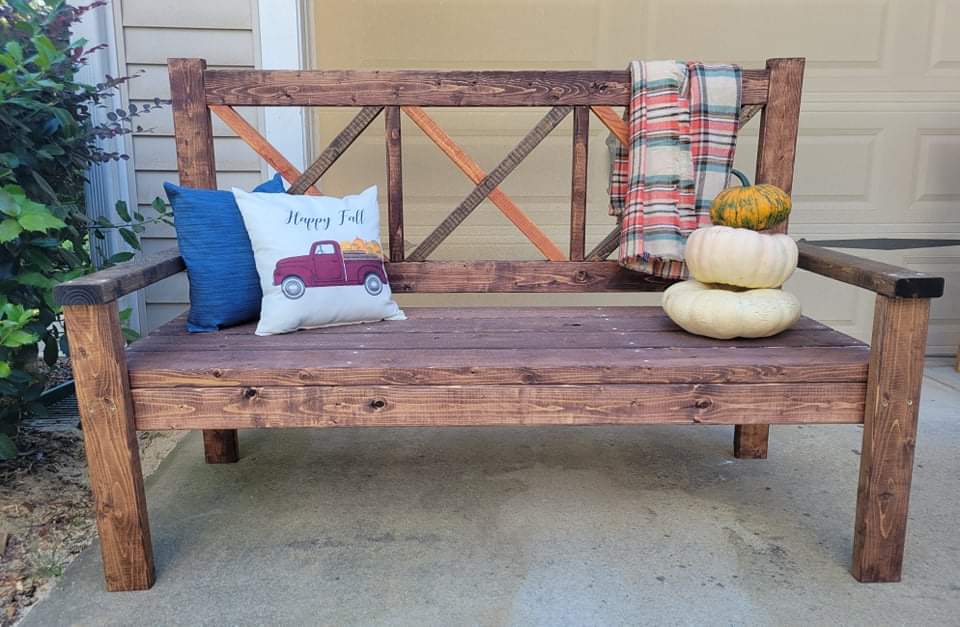
Large porch bench
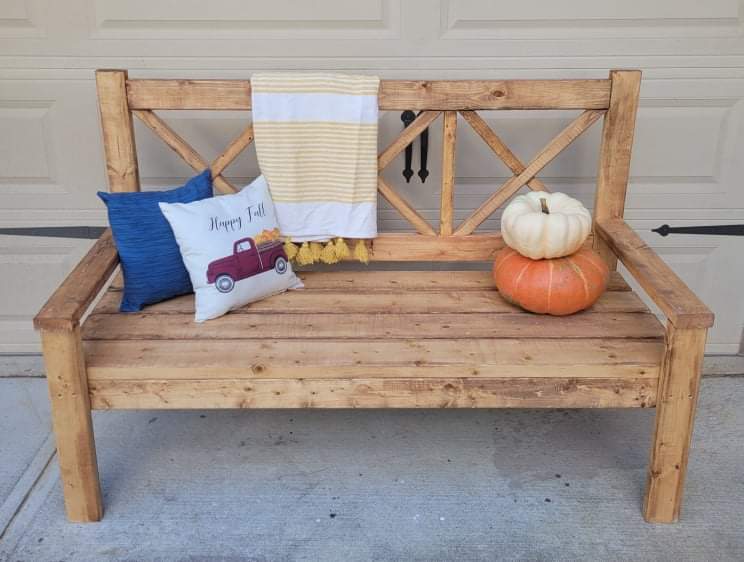
What a fun project, and great bench. We had someone ask us if we could make this for them, and we decided to make 2 while we were at it.....now we just need to find a spot big enough for the second one at our house. Loved this build, and look forward to sipping coffee on it on a cool morming.
Built from Plan(s)
Comments
Seasonal And Holiday
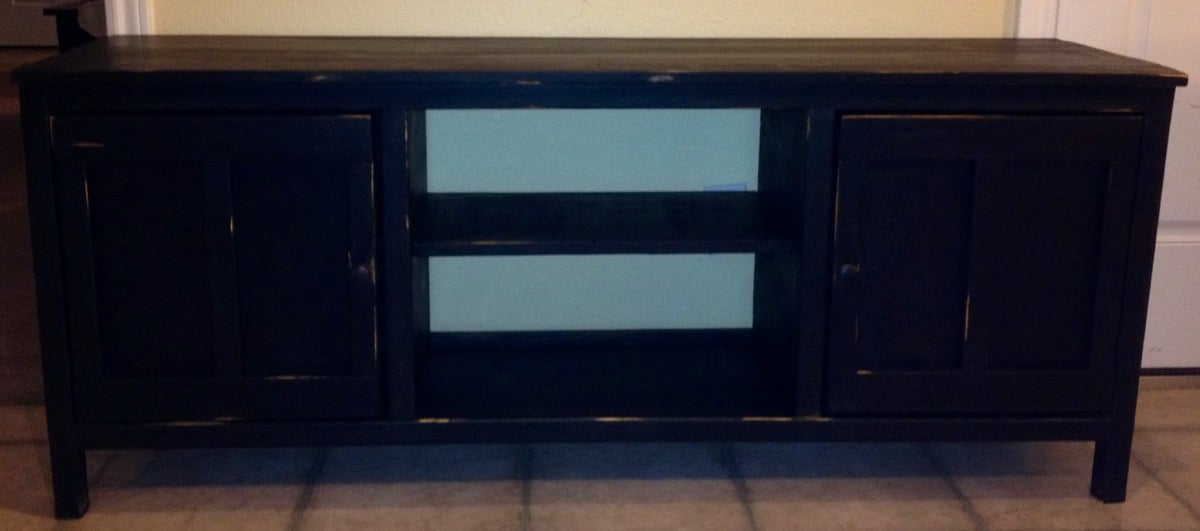
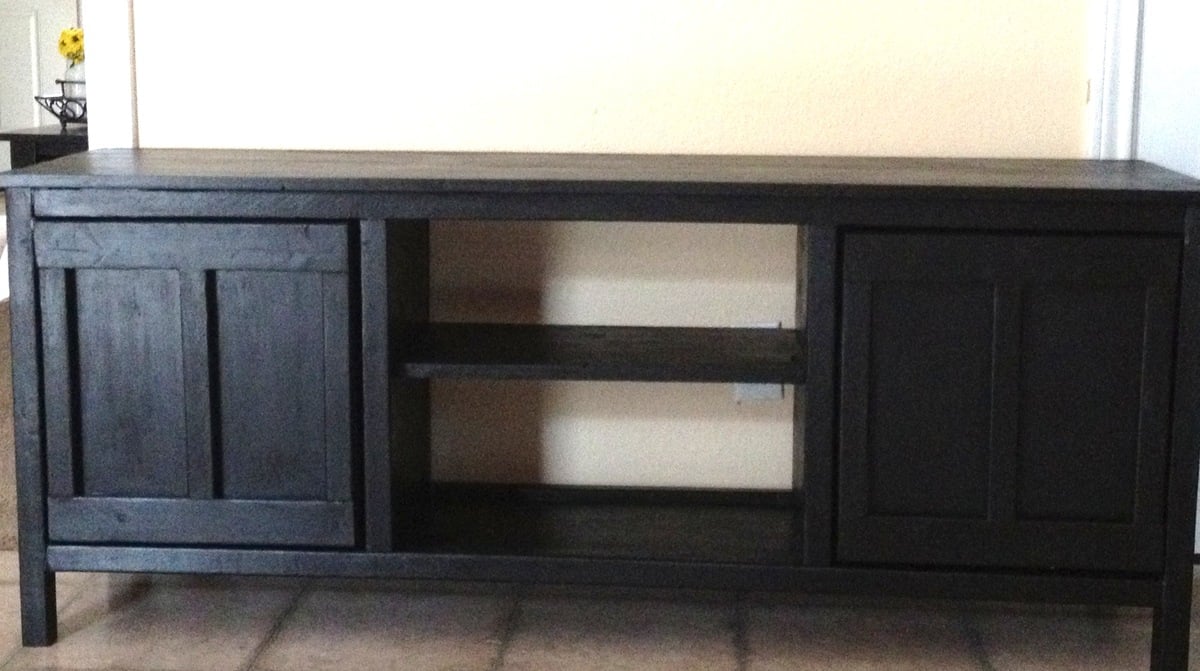
media console
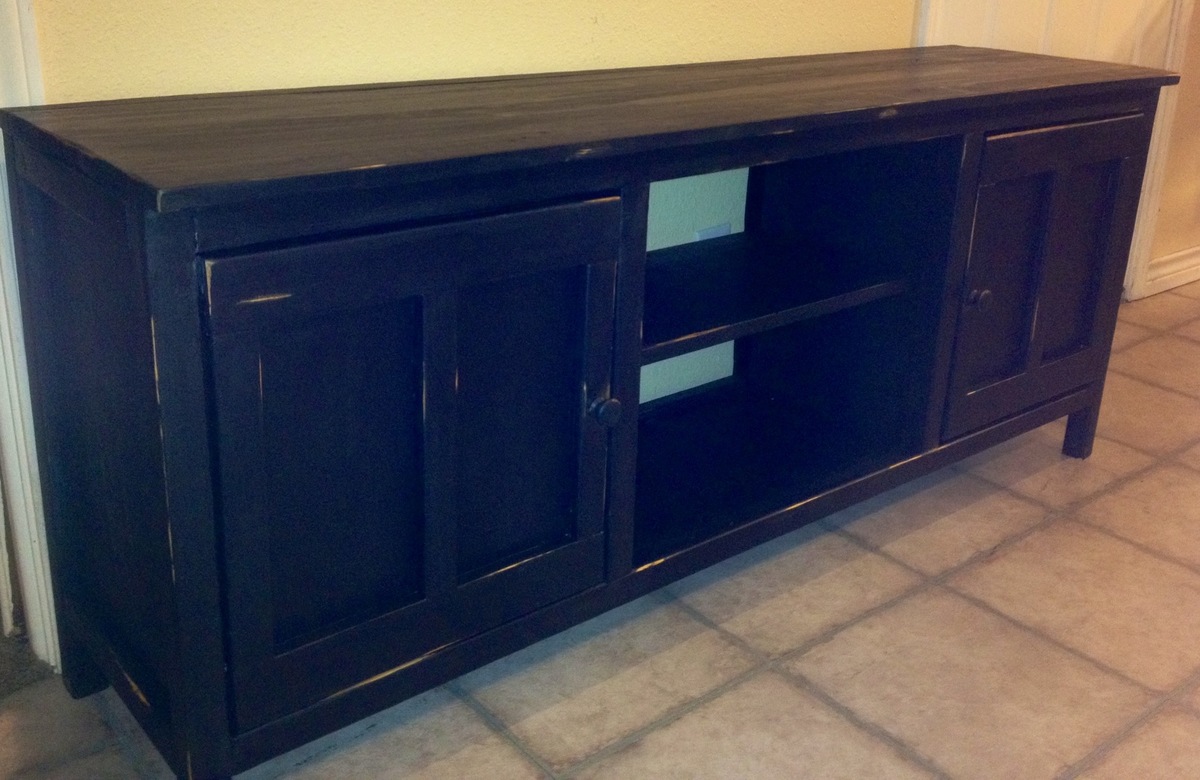
This was built using Ana's media console plan with slight modifications. I decided to forego the drawers for simples shelves, like so many on the brag posts did. I also added shelves in each of the cabinets for extra storage. And, I added some scrap 2x2s for vertical trim on the cabinets. I opted for knobs instead of handles, because I thought it looked better and they were recycled from another project of mine.
I painted black, since that's my thing and it's seemingly safe, but distressed with my sander and used a q-tip to stain the "weathered" parts. For whatever reason, I let my husband select the stain and he chose the Minwax Classic Gray. This is a gorgeous stain, but do not use it on black as a distress stain. This color takes a bit of manipulation, as it doesn't take on certain pieces of wood as it does others (Ana does a tutorial on this color--watch it and you'll see what I mean). From there, if you get any excess on the black paint, it looks a sloppy mess--I had to wipe it down with a wet cloth as best I could, repaint it, sand it, and restain with Rustoleum Summer Oak (I personally prefer all Rustoleum products to Minwax, but that's my preference).
Also, I wish I had used higher-quality wood and/or spent more time finding better cut pieces. I used pine, and some of the pieces (especially the 2x2s) were very wonky.
This was my first "big" project and it took a really long time because I made a ton of mistakes. But, it's wood, and mistakes can be corrected. Just like life, mistakes are learning experiences--some more costly than others. While this isn't the most beautiful piece of furniture, it was a great learning experience, and that's why this console is so valuable to me.
Estimated Cost
$65 (including paint/stain)
Estimated Time Investment
Week Long Project (20 Hours or More)
Finish Used
Valspar Black Satin paint and Rustoleum Summer Oak
Recommended Skill Level
Advanced
Comments
Sun, 05/05/2013 - 07:08
Very Nice!
LOVE the console. Any "wonkiness" just gave your piece character!

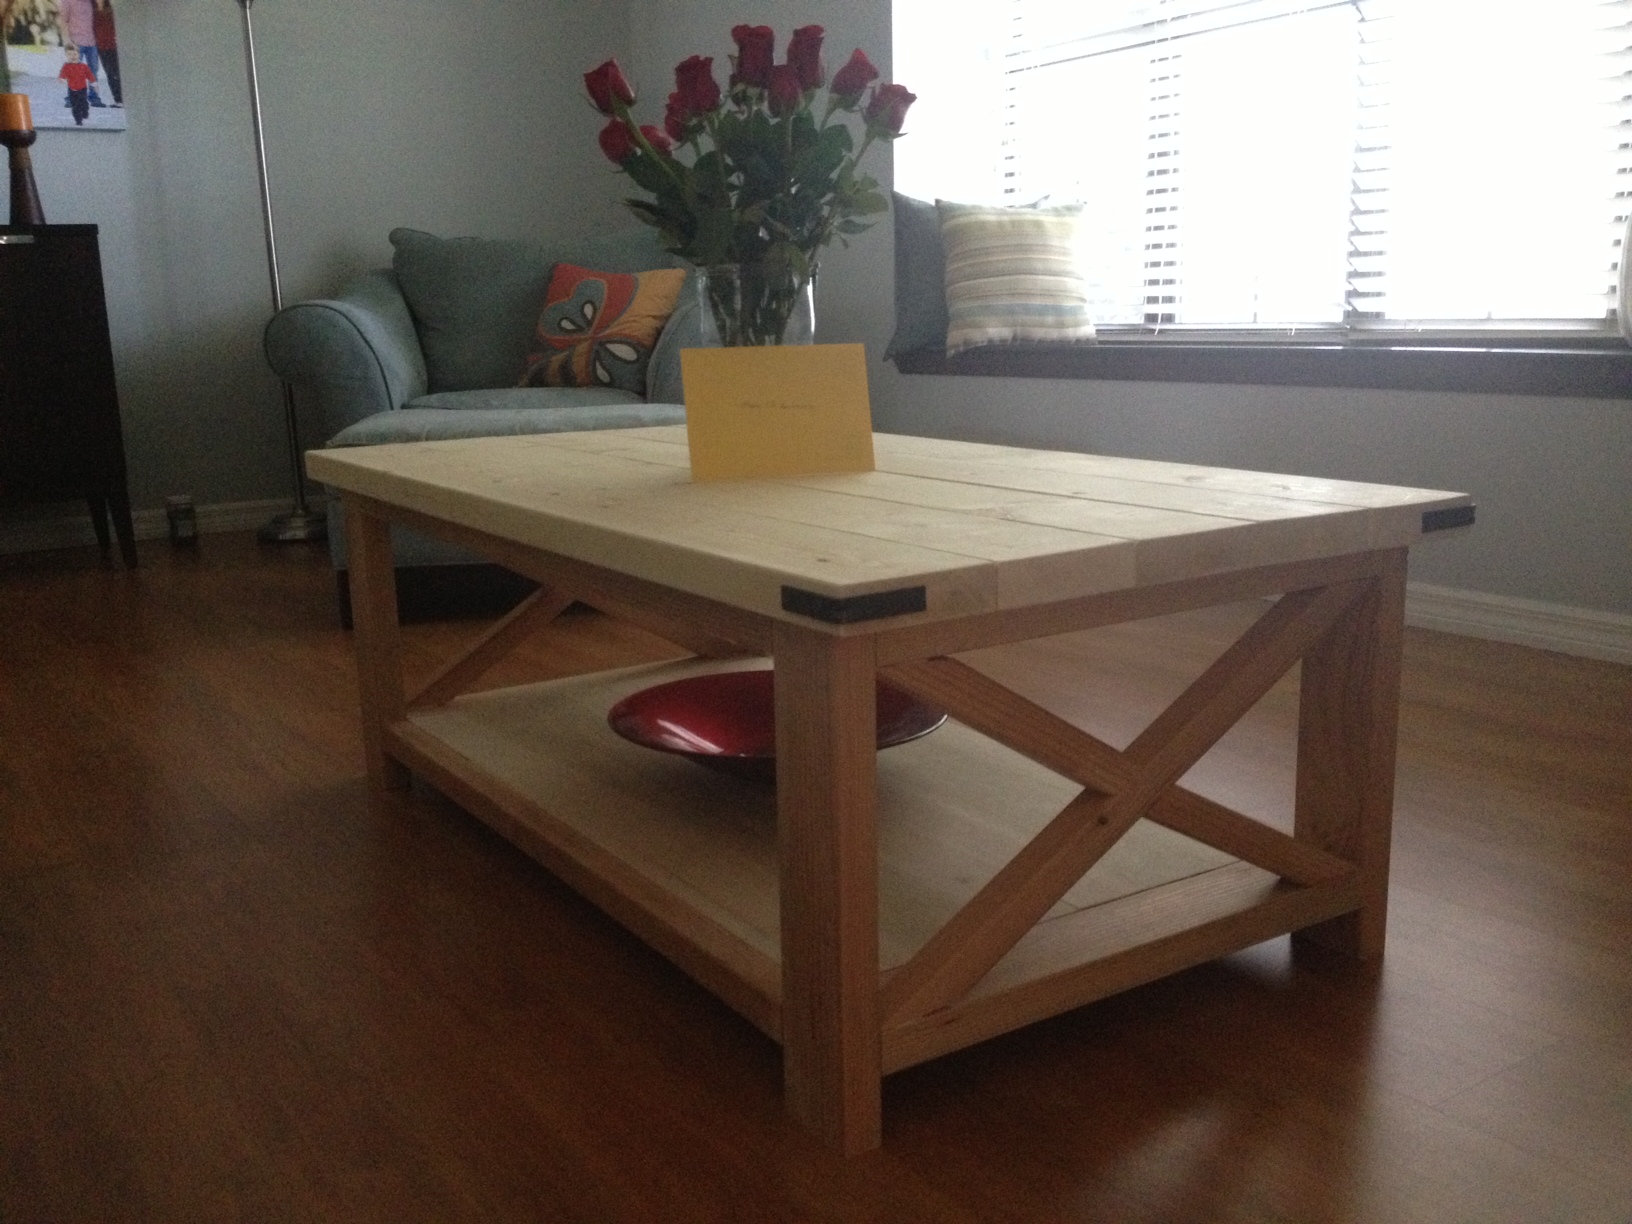
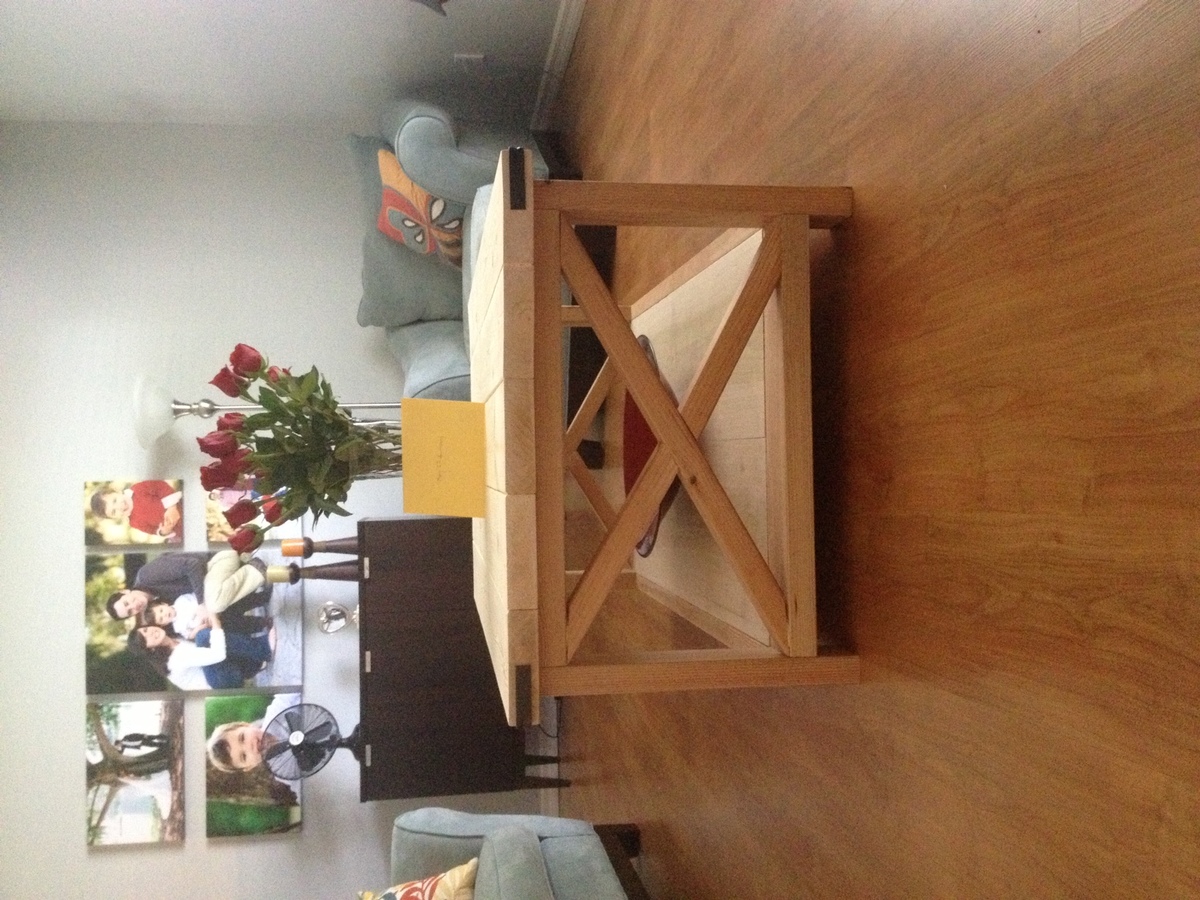
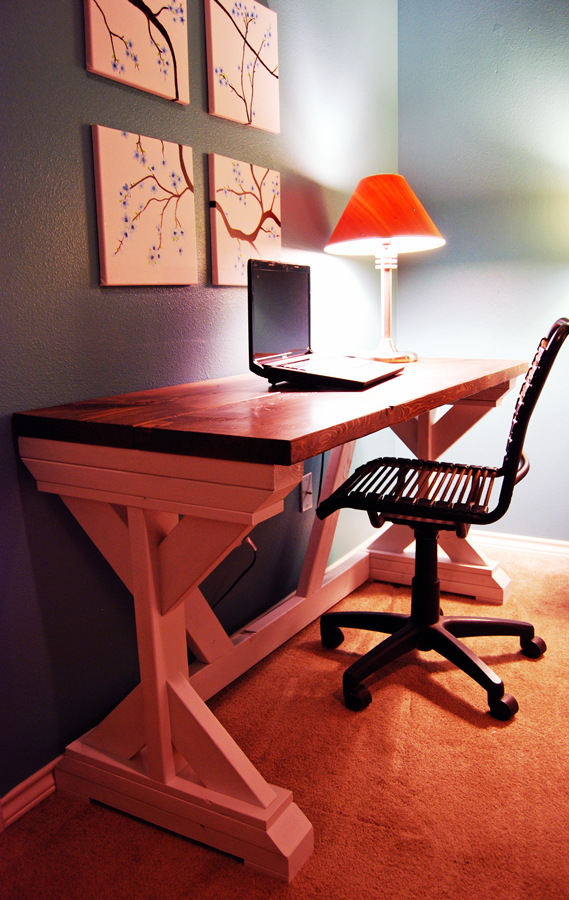
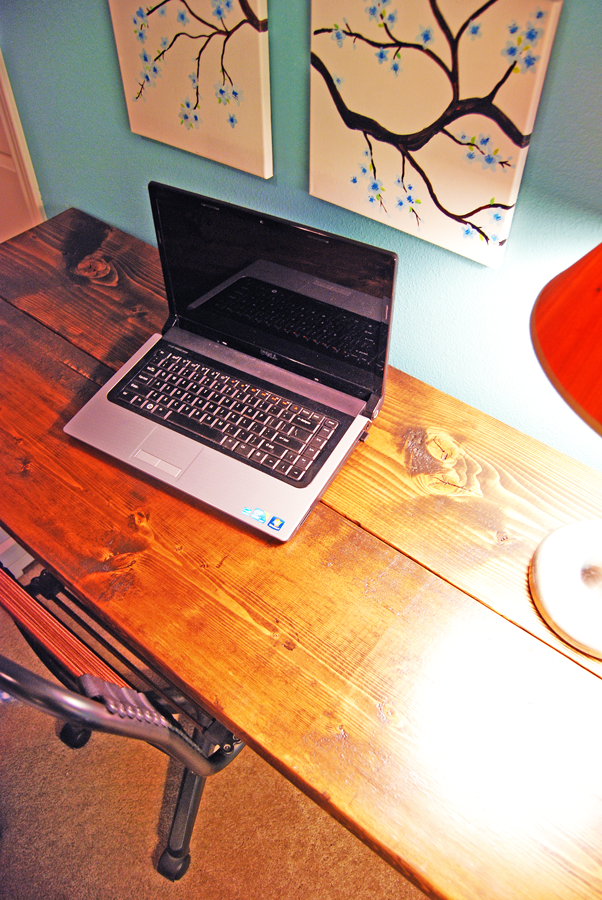
X Desk
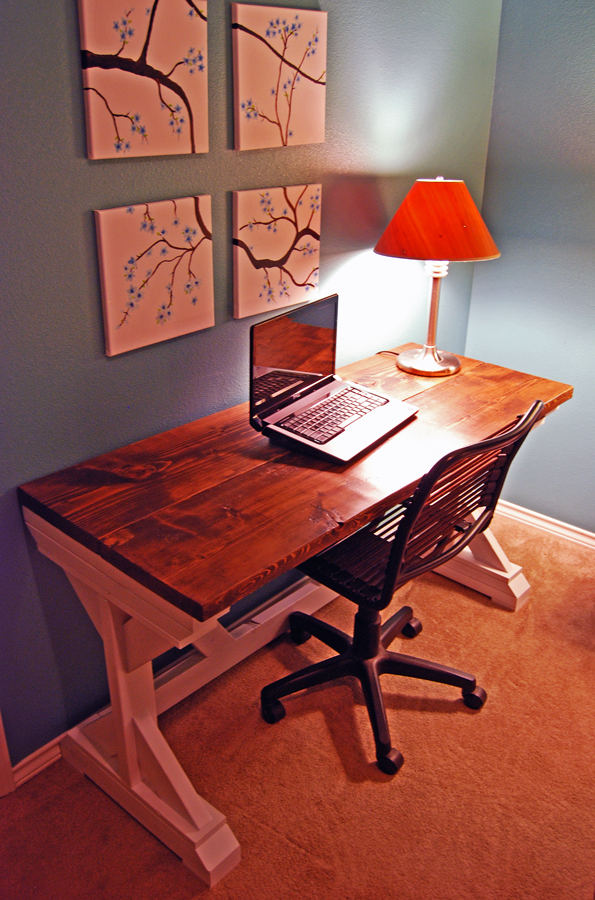
Pretty straightforward build, fun to use and build!
Built from Plan(s)
Estimated Cost
$70 ish
Estimated Time Investment
Afternoon Project (3-6 Hours)
Recommended Skill Level
Beginner
Comments
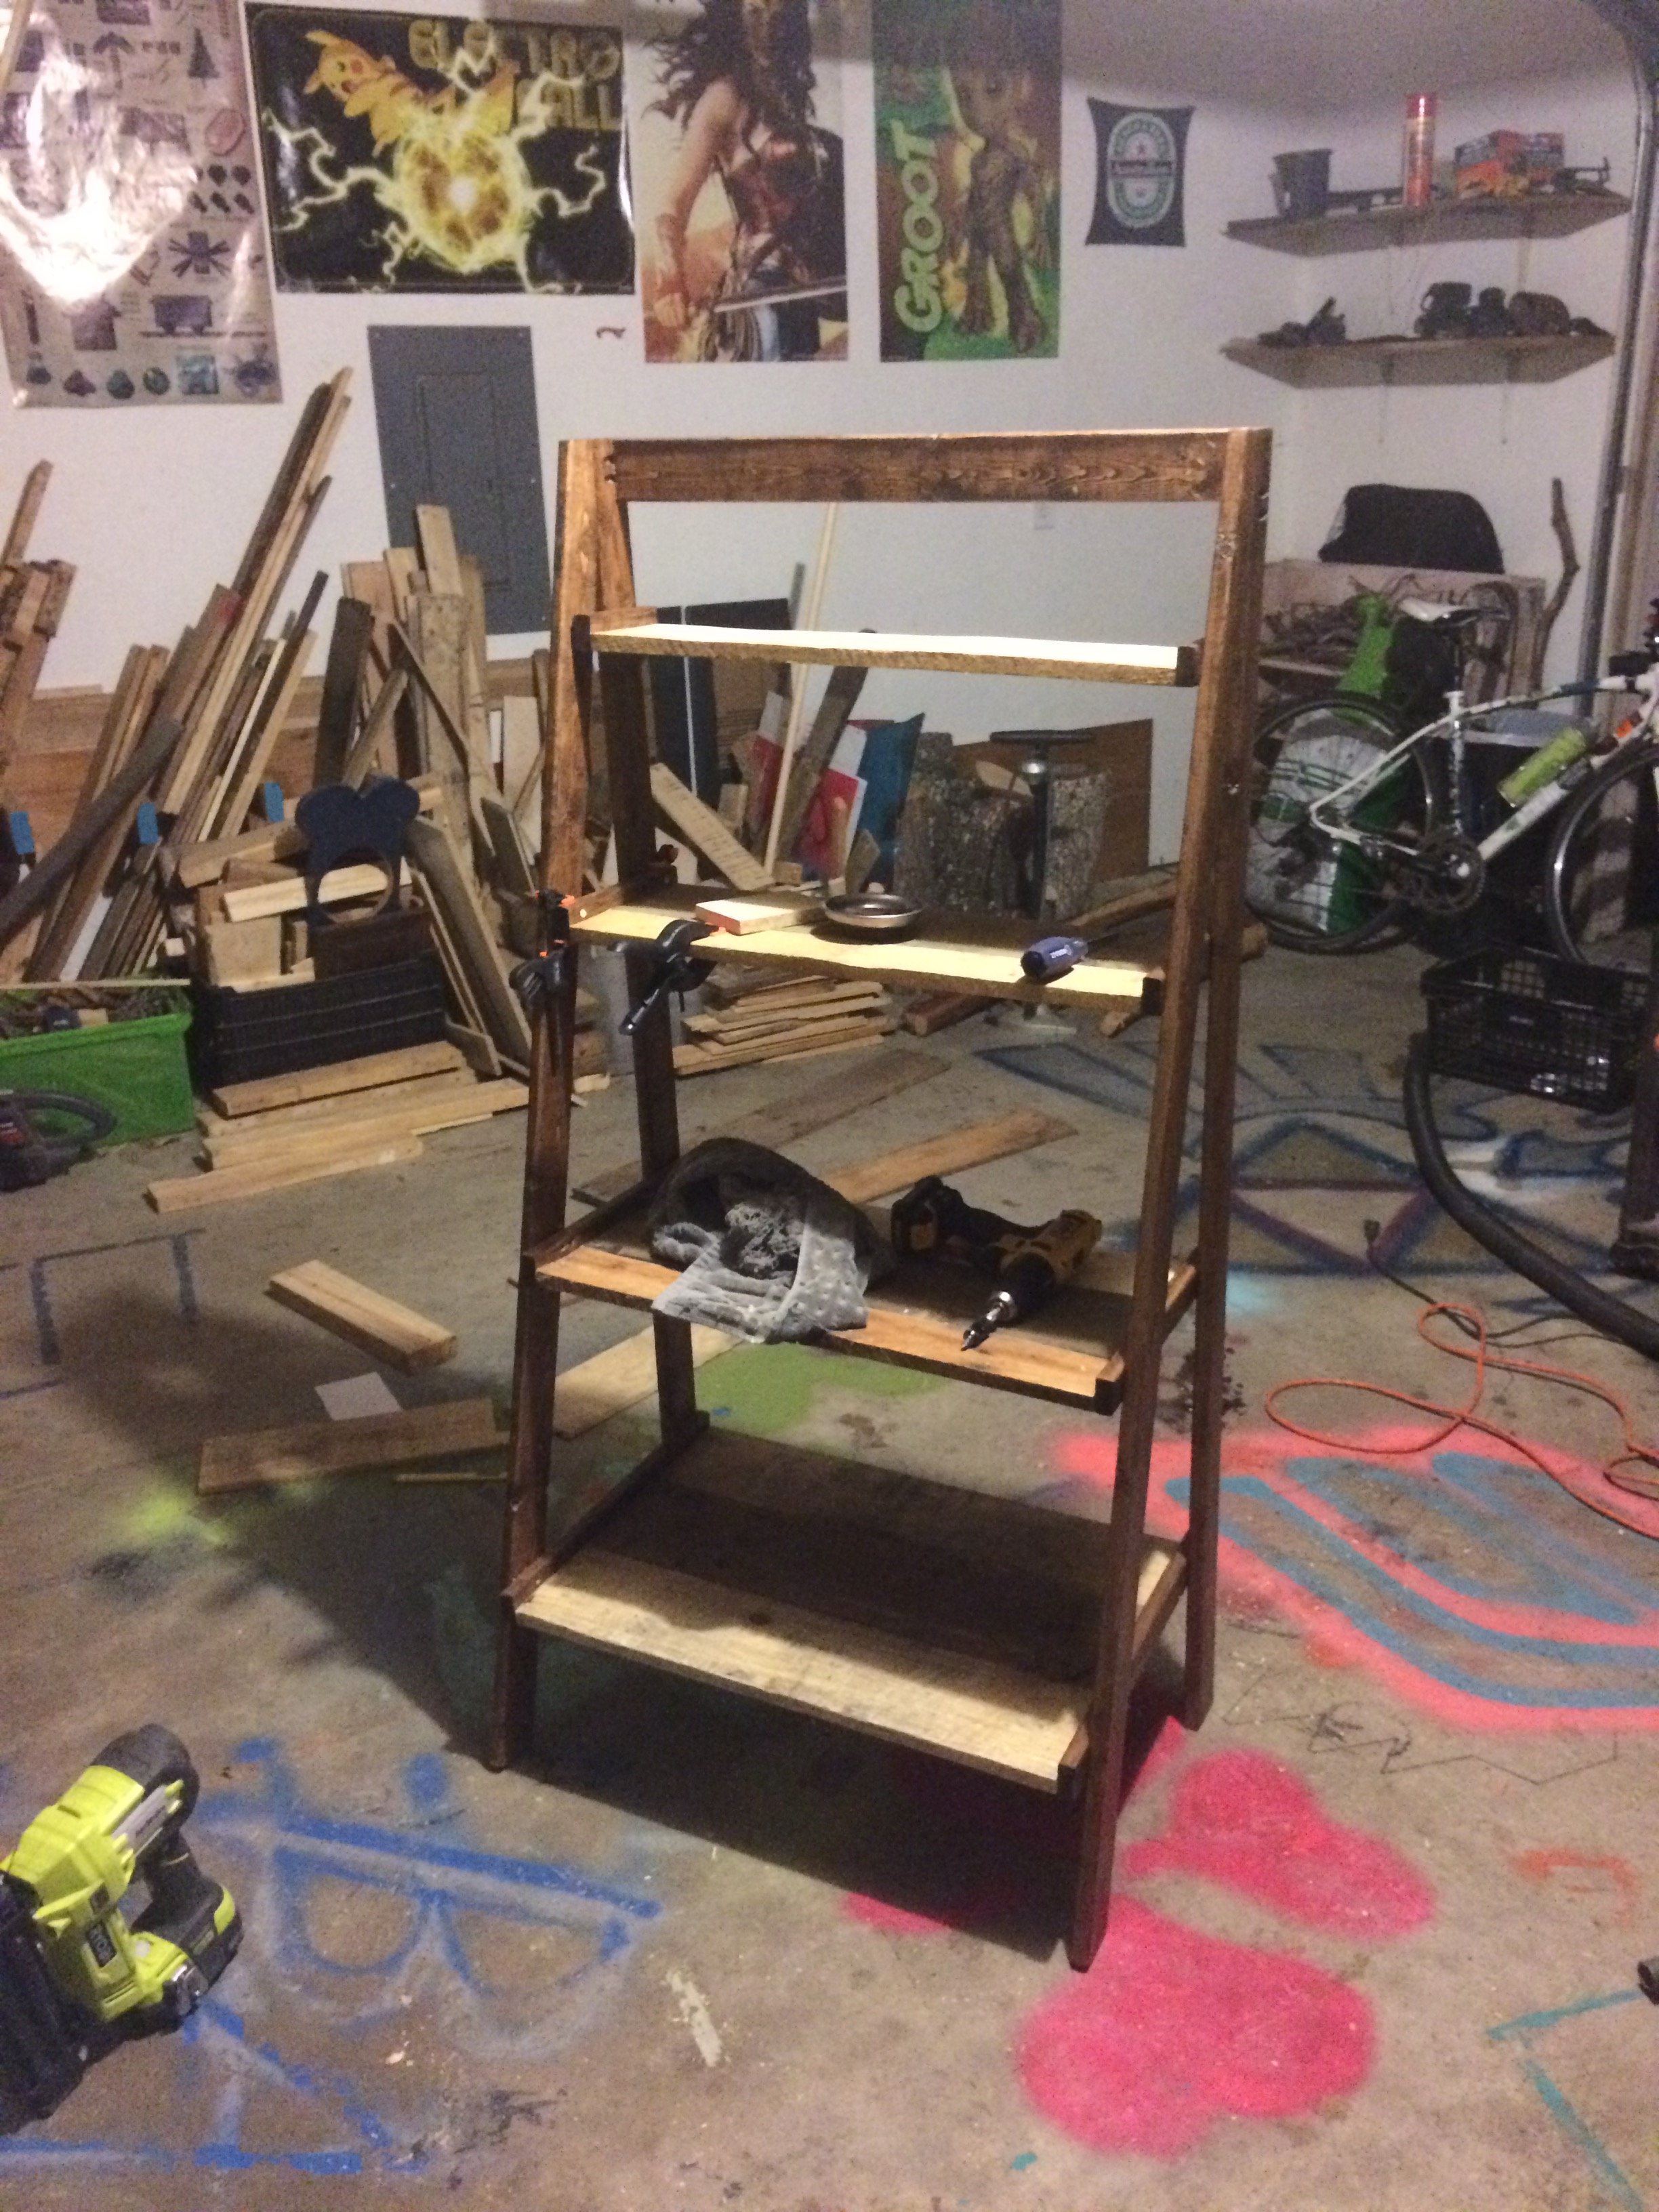
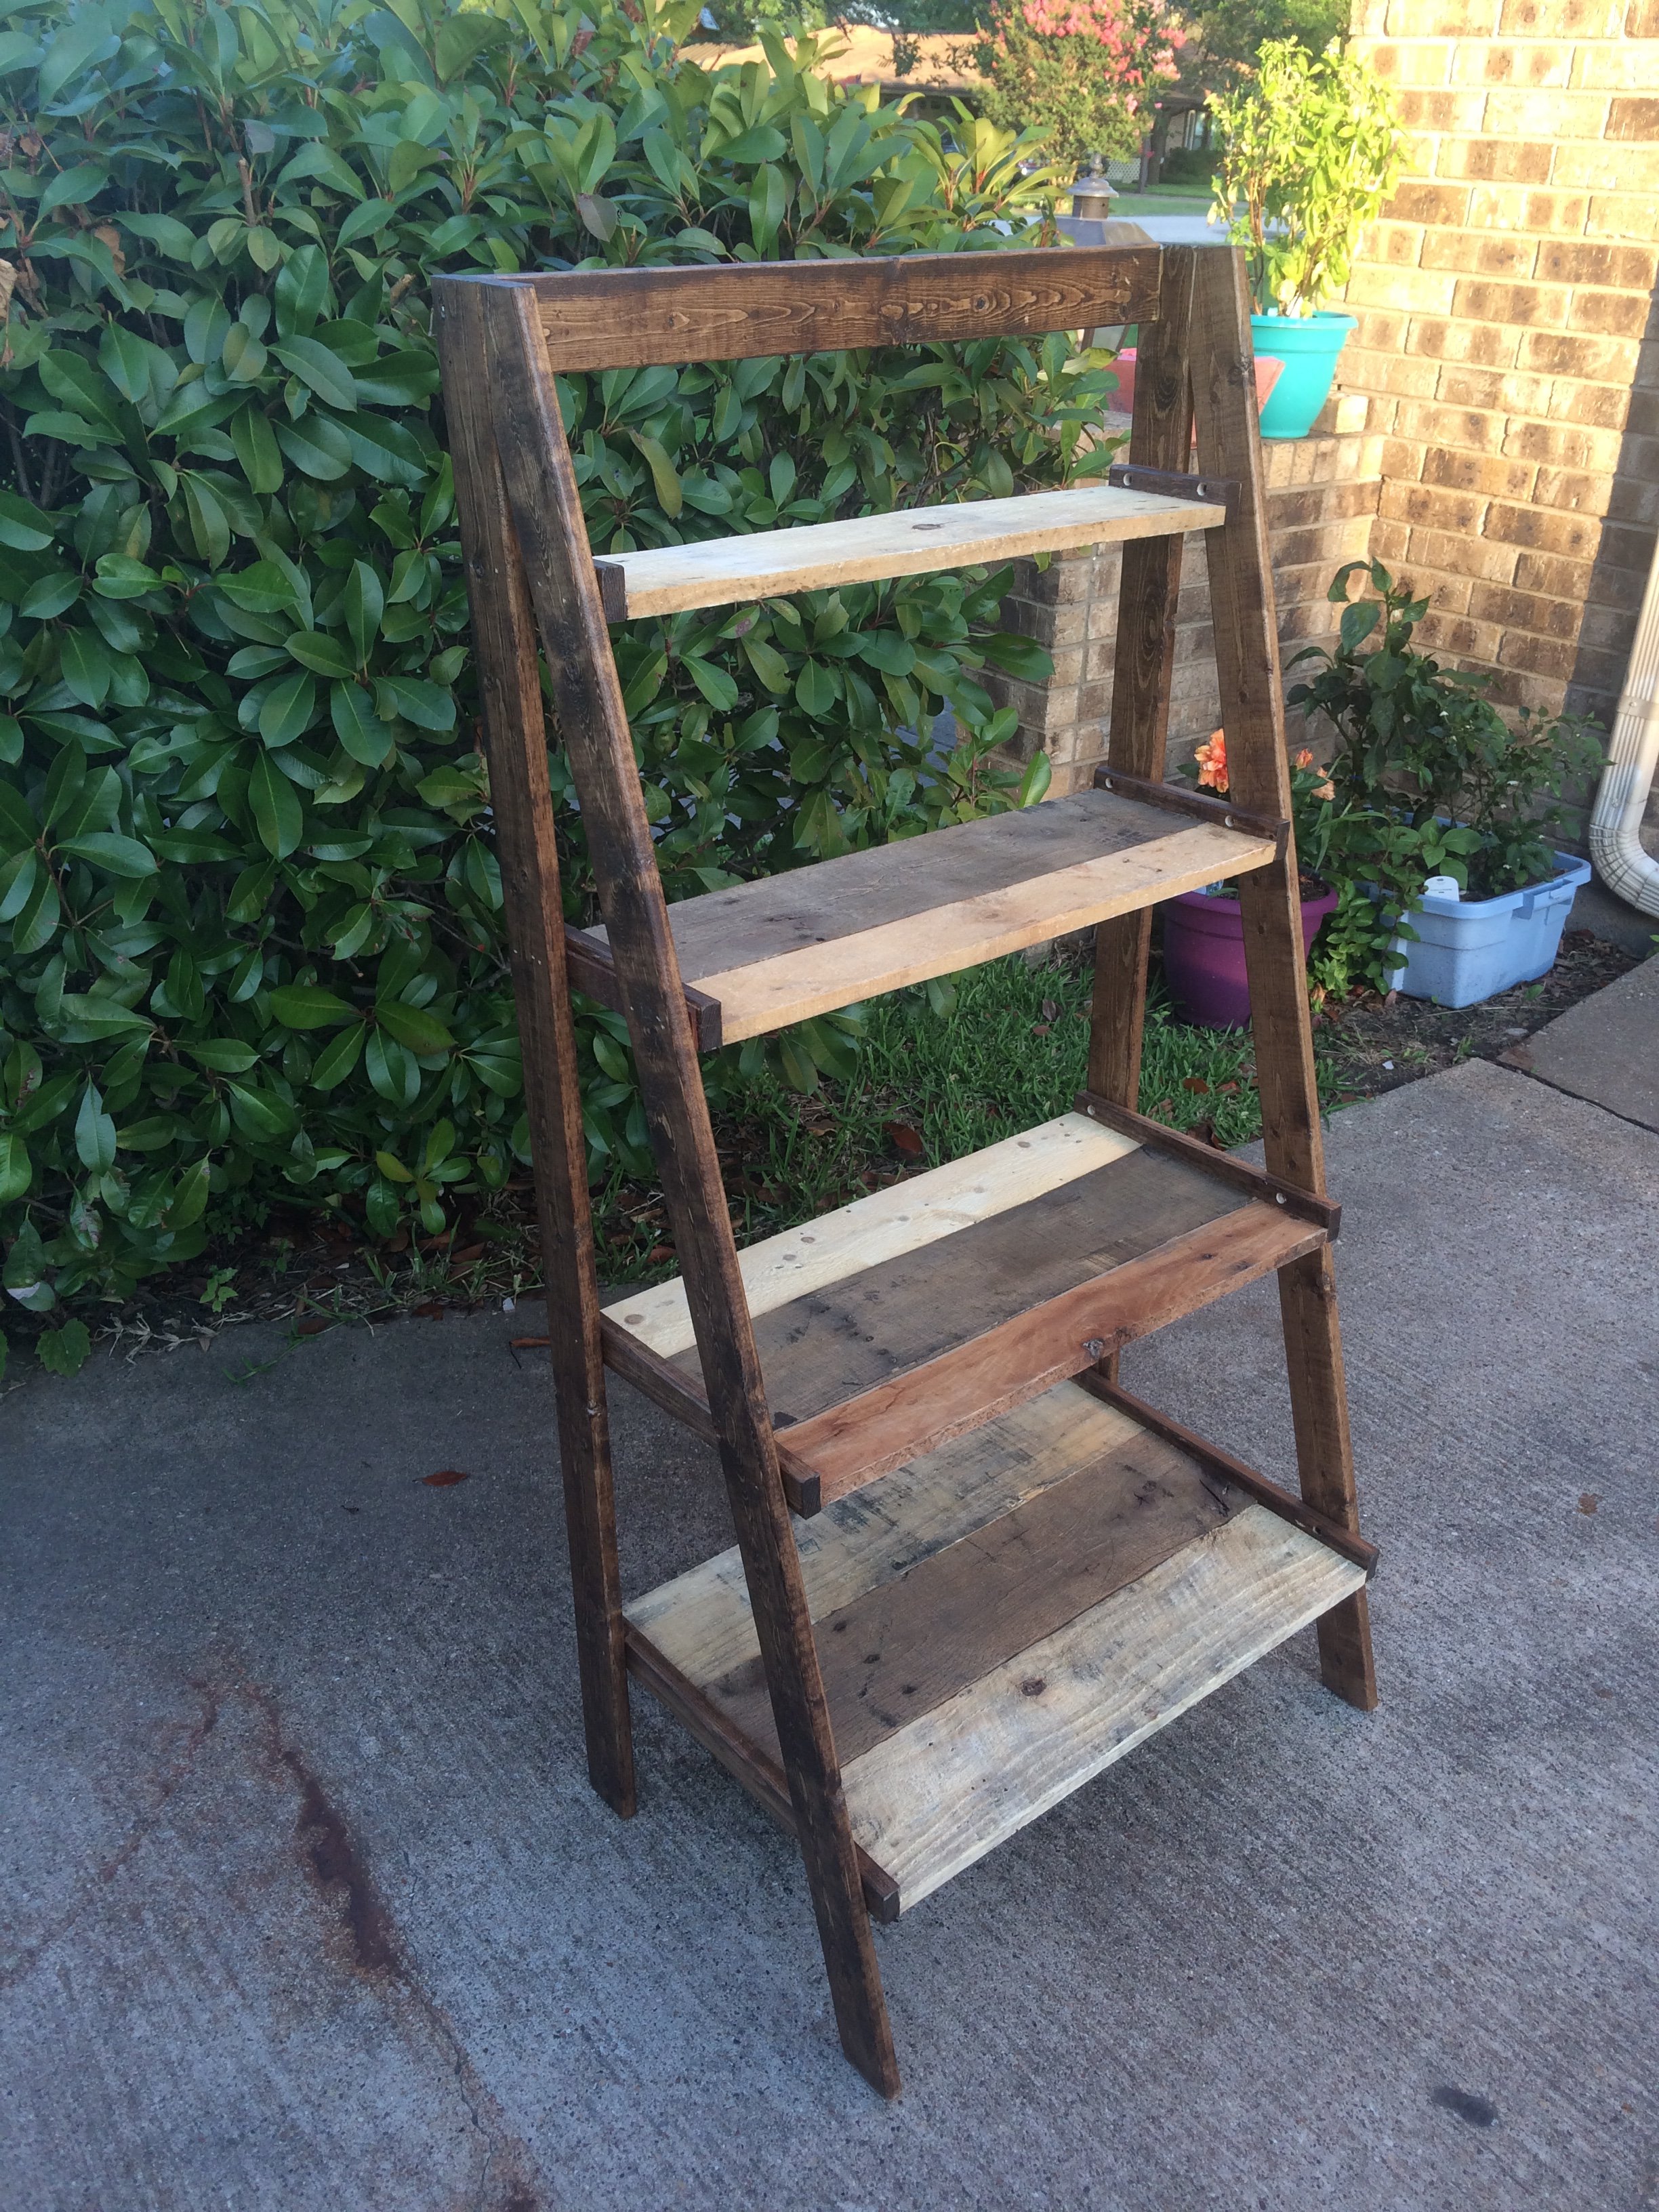
Pallet wood painter's ladder shelf
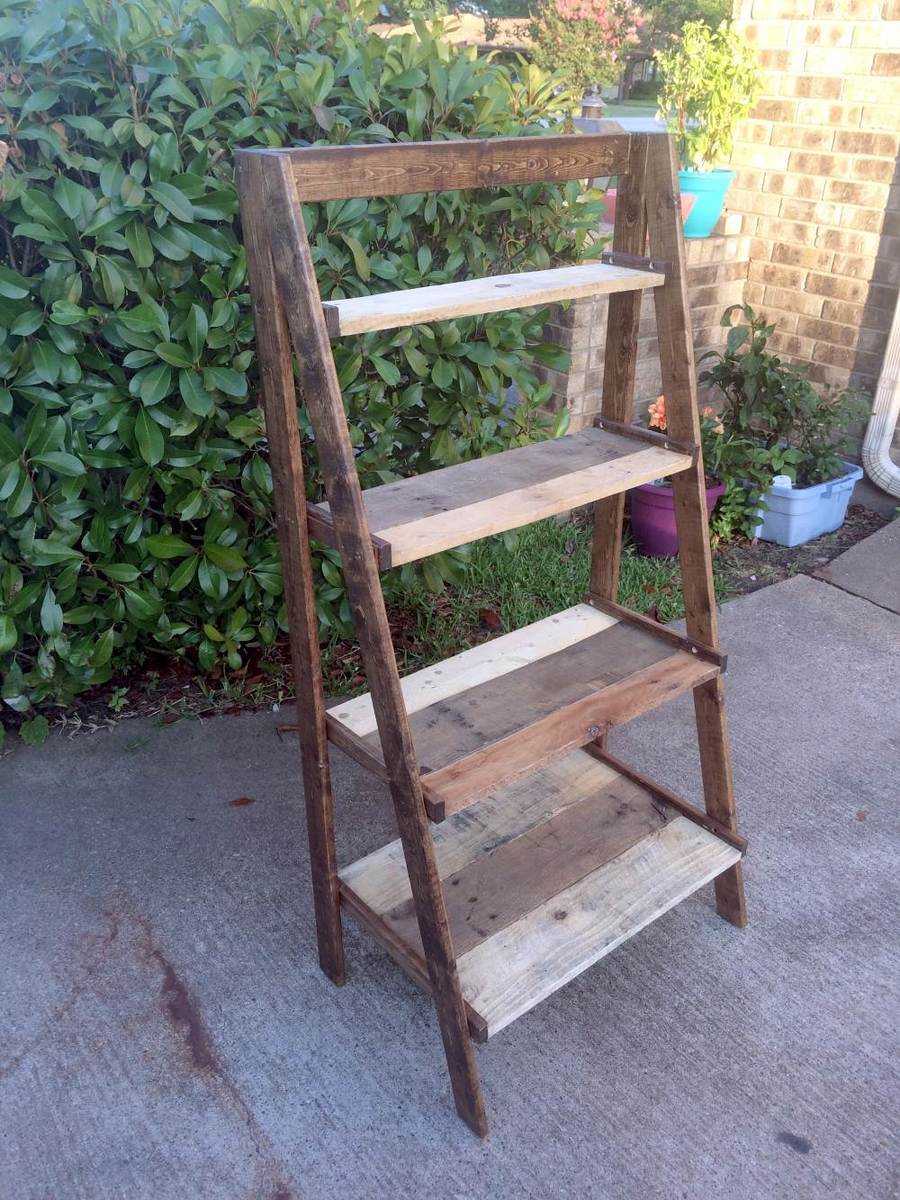
Made this one with shelf edges/trim just on the sides. Somehow my top shelf didn't span the width so had to add a little shim on each side but it all worked out! We had all the pallets and used 1x3s for the frame because some of my pallet wood was heavy hardwood. It was not without frustration because I was working with uneven/warped pallet wood but it hits the rustic look. I am happy with how it turned out.
Built from Plan(s)
Estimated Time Investment
Day Project (6-9 Hours)
Finish Used
English chestnut minwax stain and matte interior sealant
Recommended Skill Level
Beginner
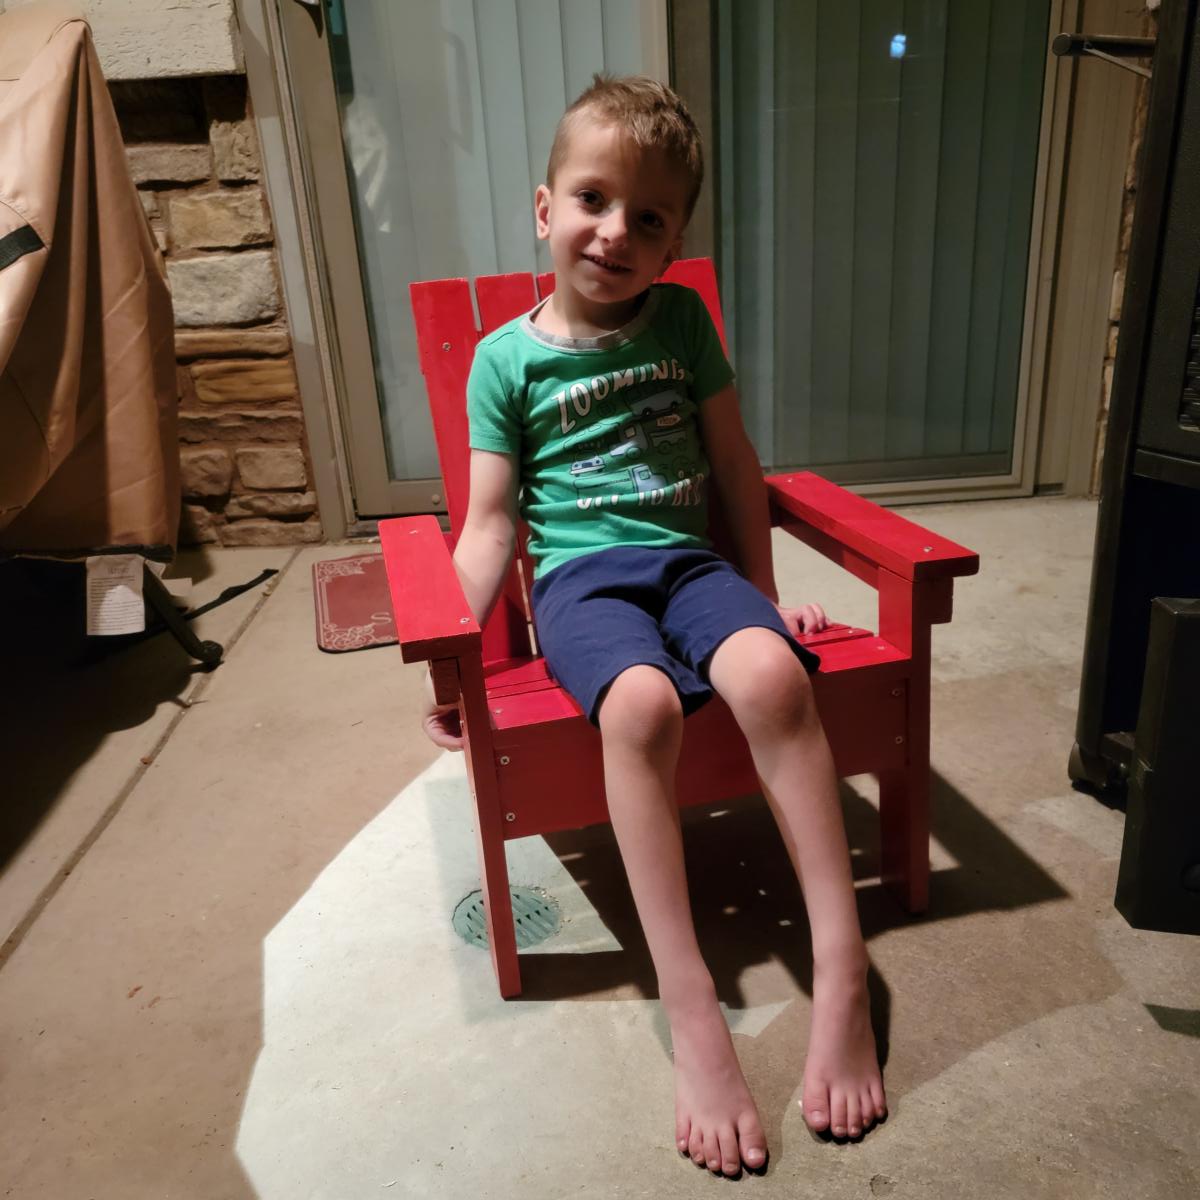
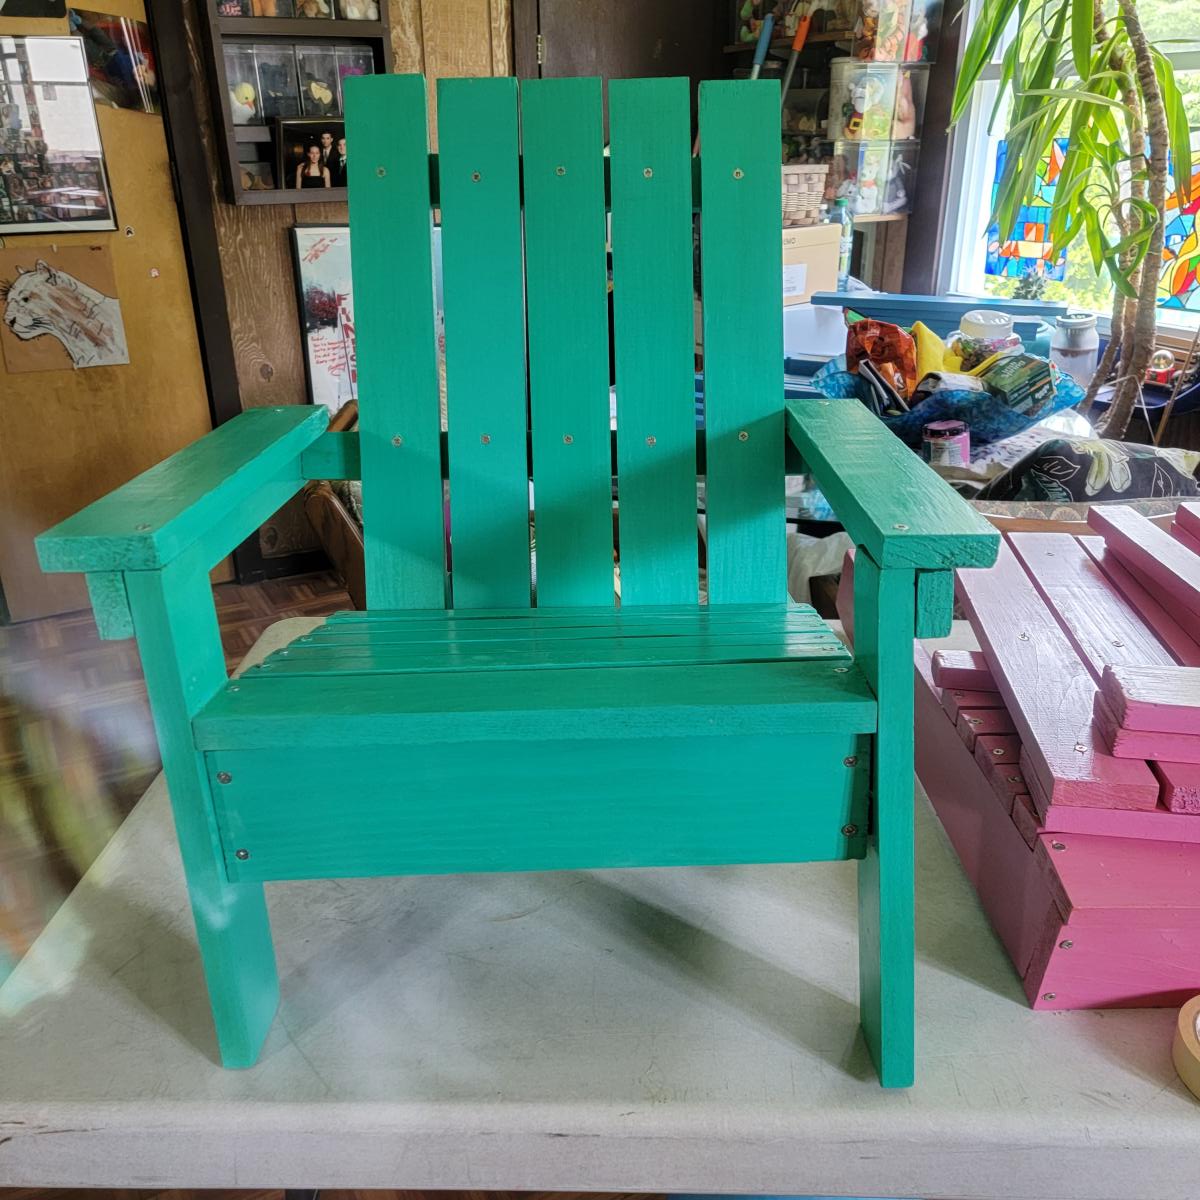
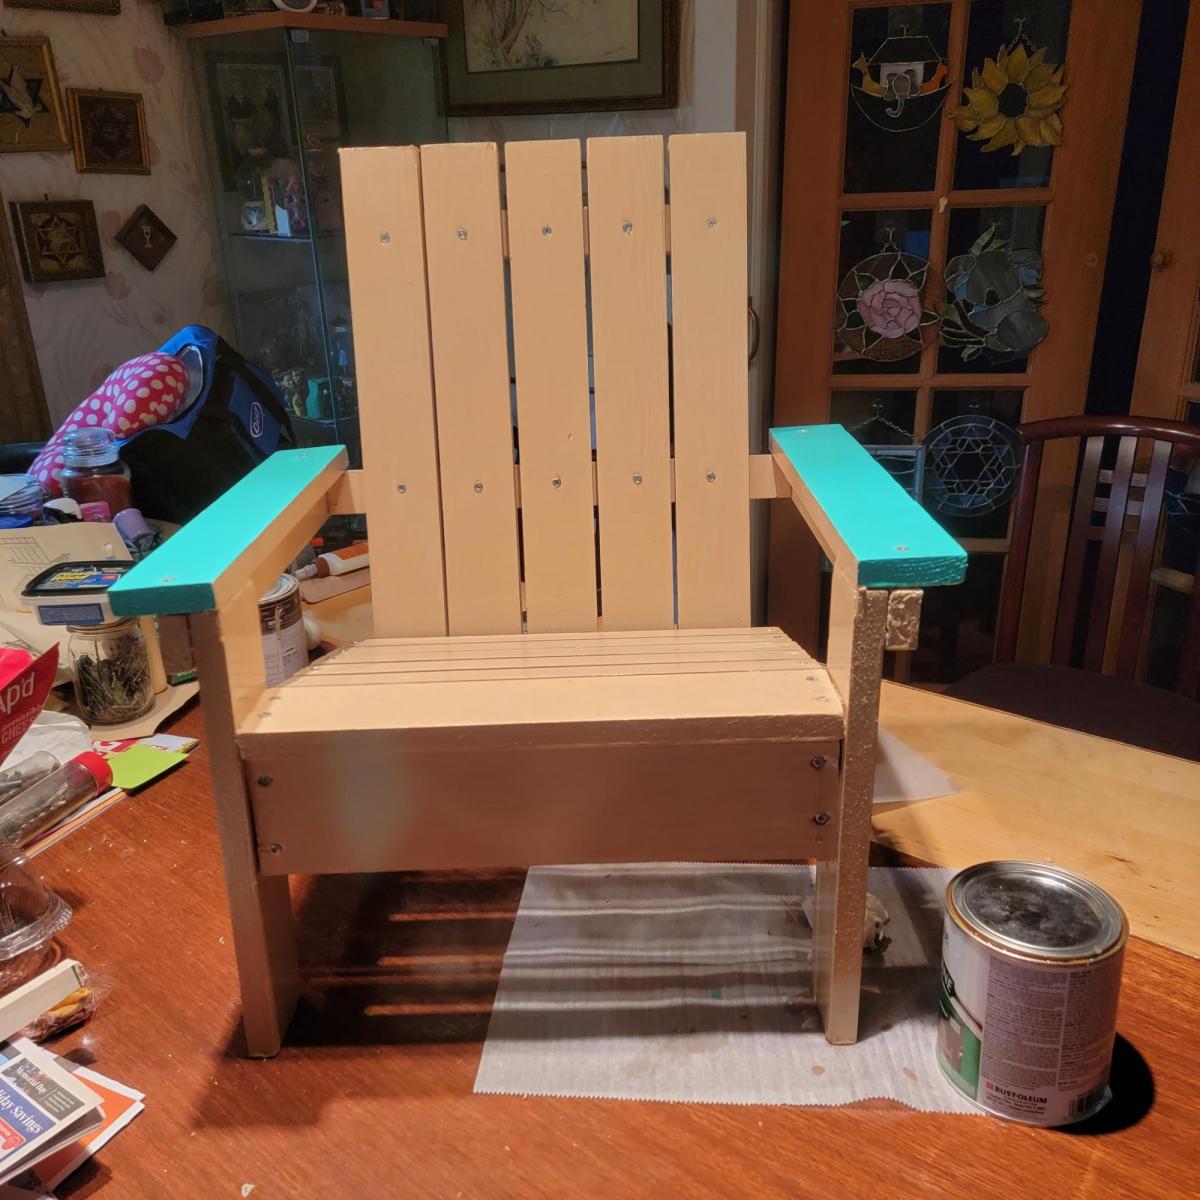
Adirondack chairs
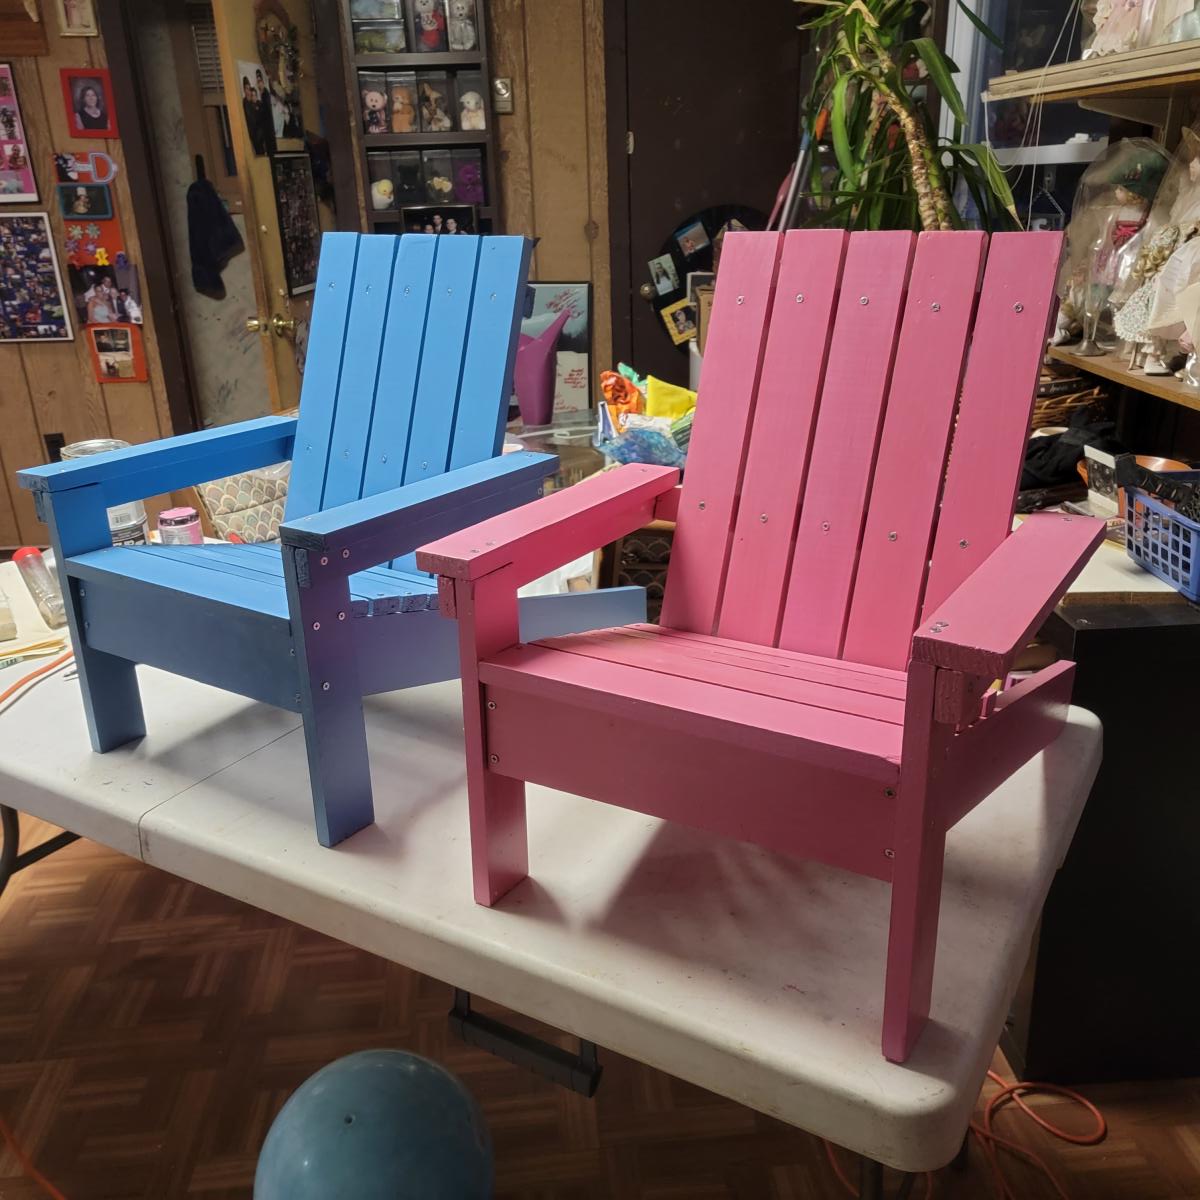
I have 5 grandchildren that I made chairs for
Built from Plan(s)
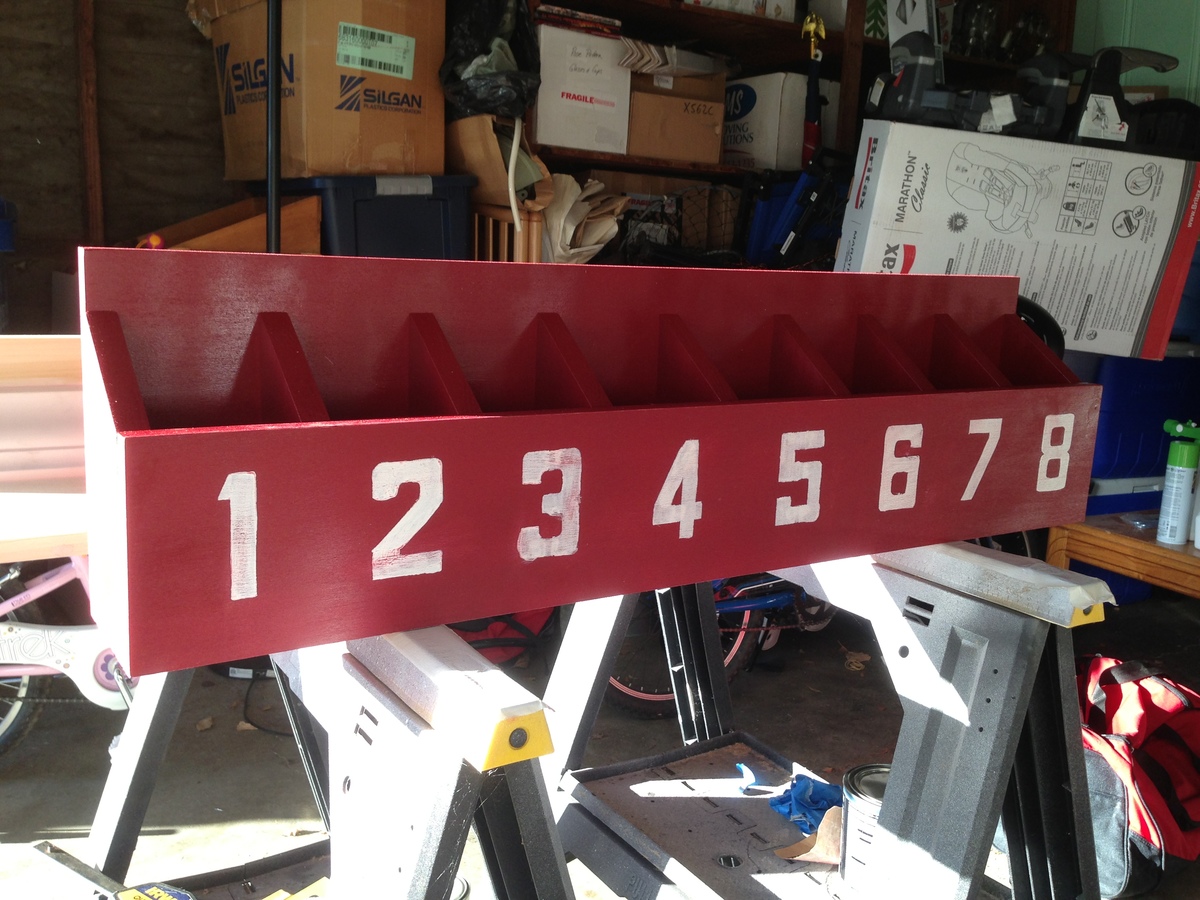
My version of the simple cubby for the wall.
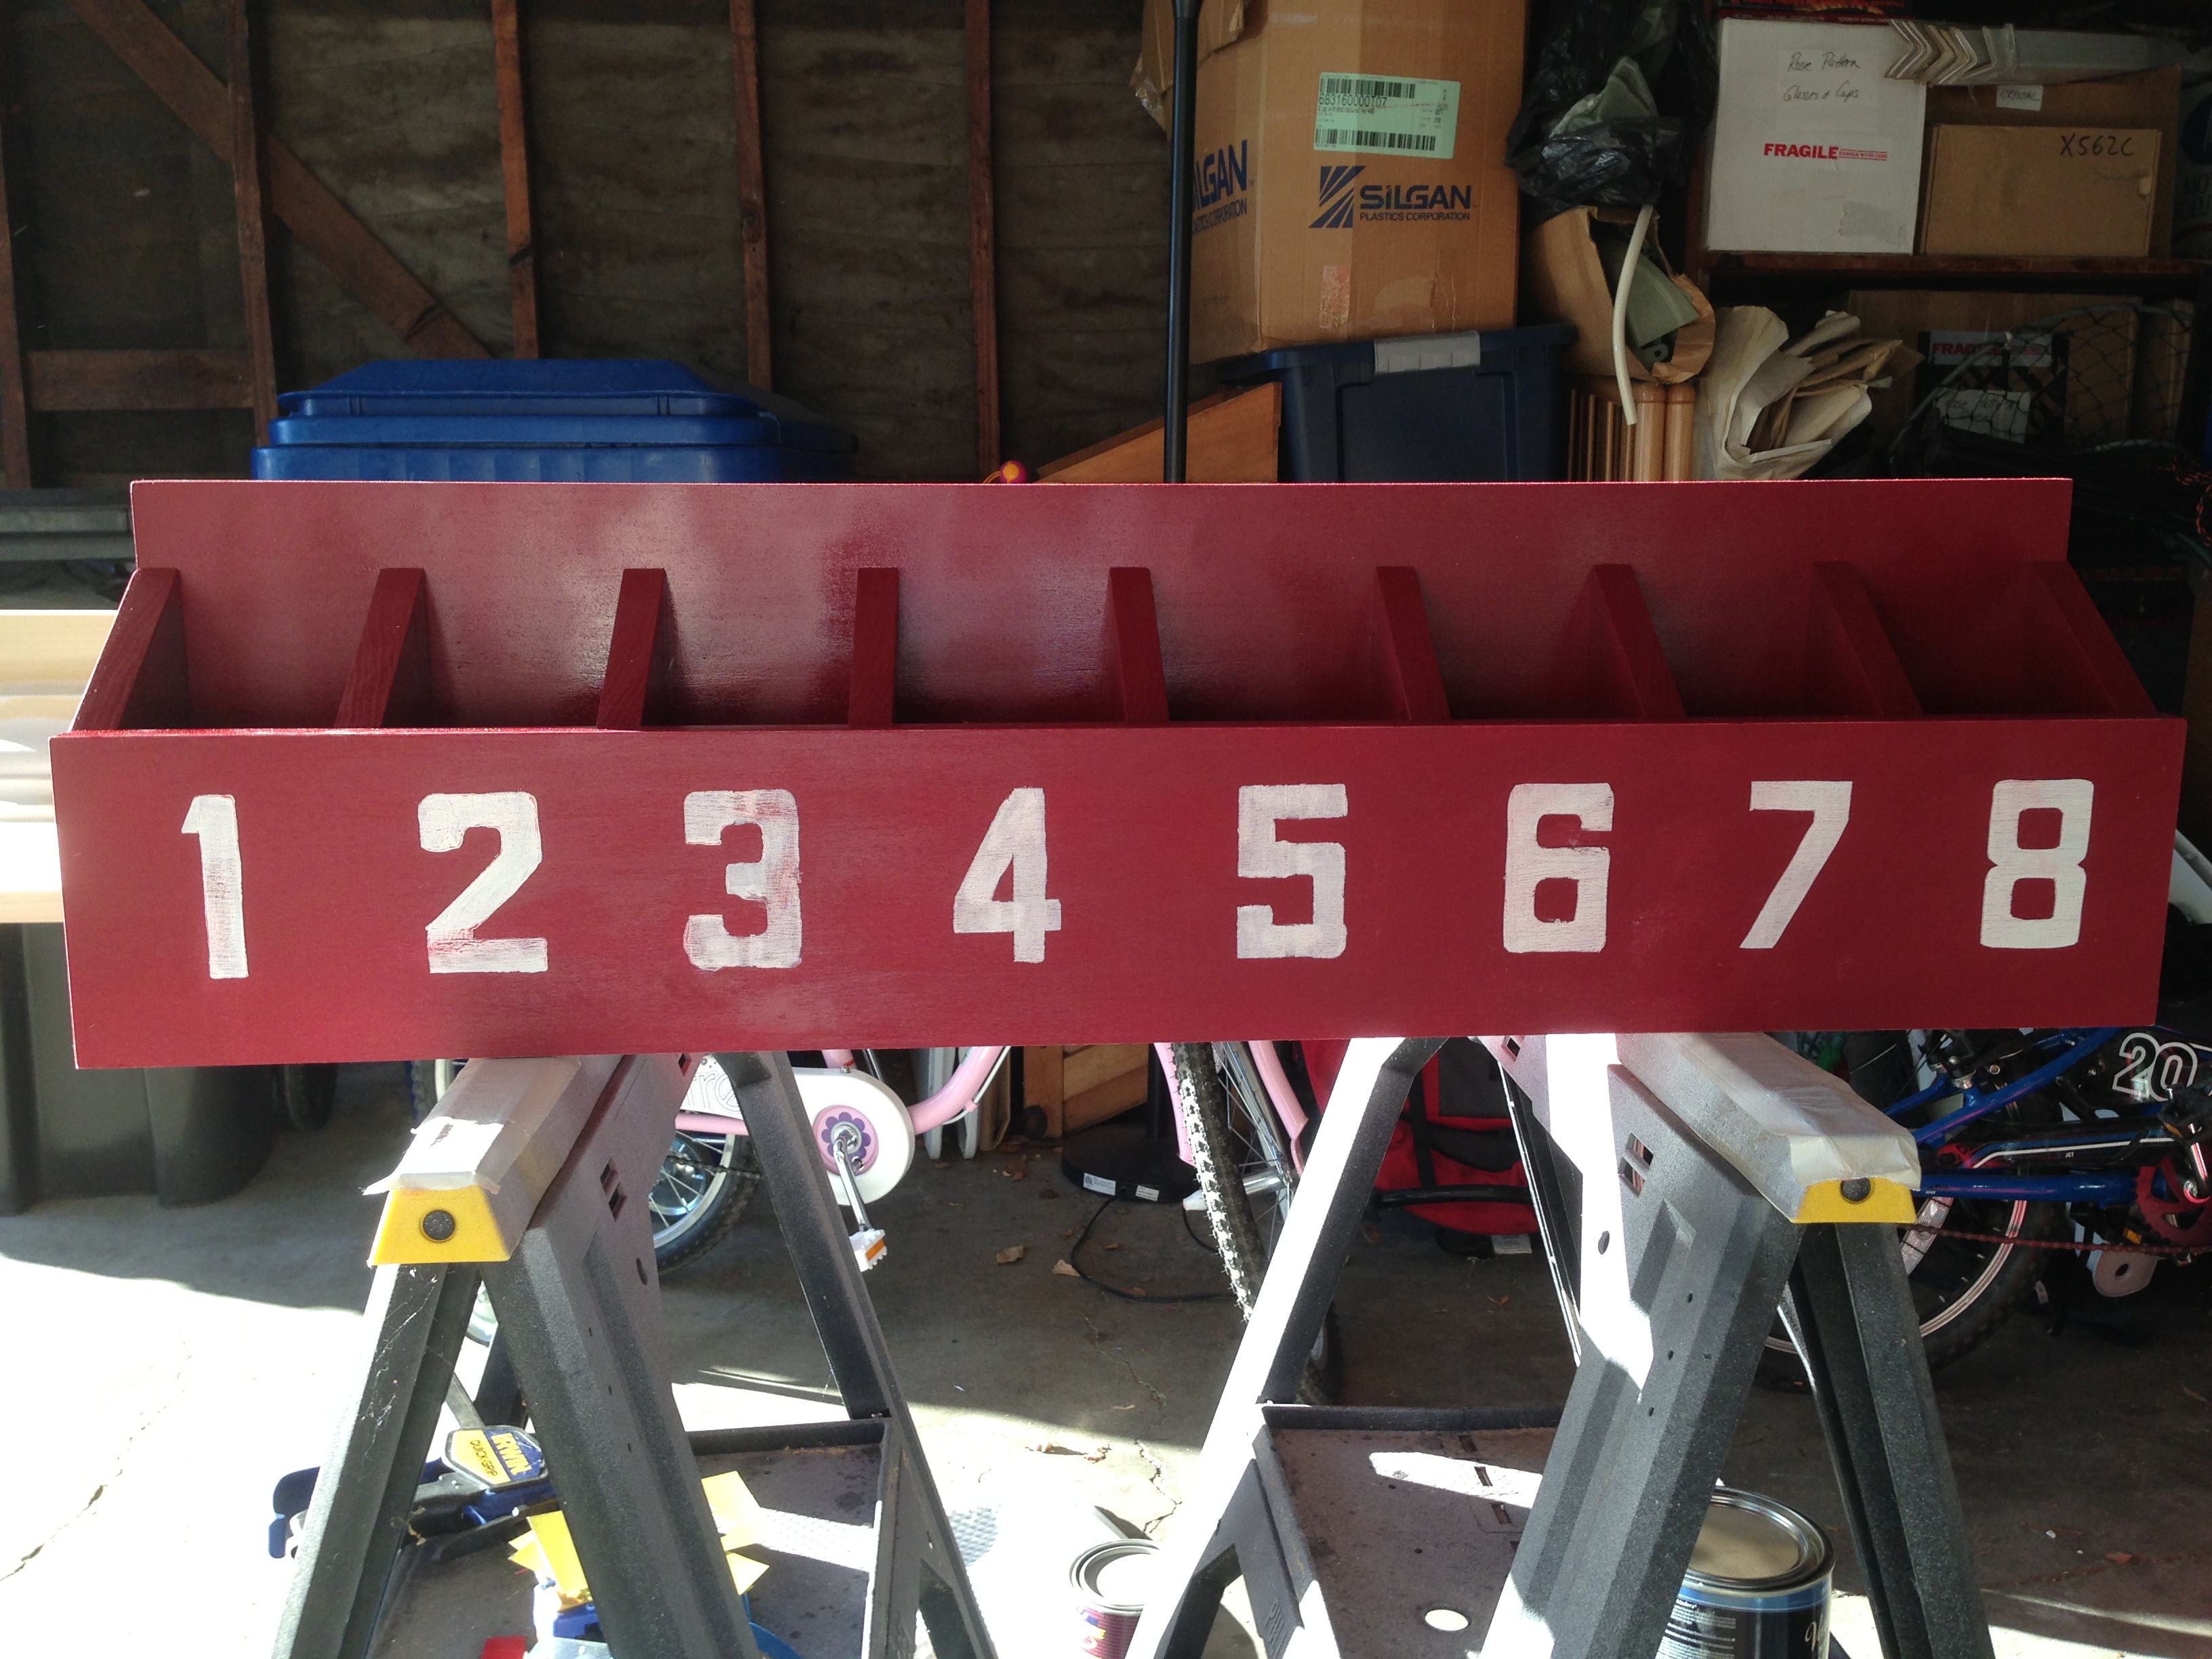
I saw this project on this site and thought it would be a great item to build and to store my kids art supplies. The 8 cubbies are perfect for glue sticks, pens, crayons, and scissors.
Estimated Time Investment
Afternoon Project (3-6 Hours)
Finish Used
Spray Paint: Cardinal semi-gloss (had it in my tool shed)
Recommended Skill Level
Beginner
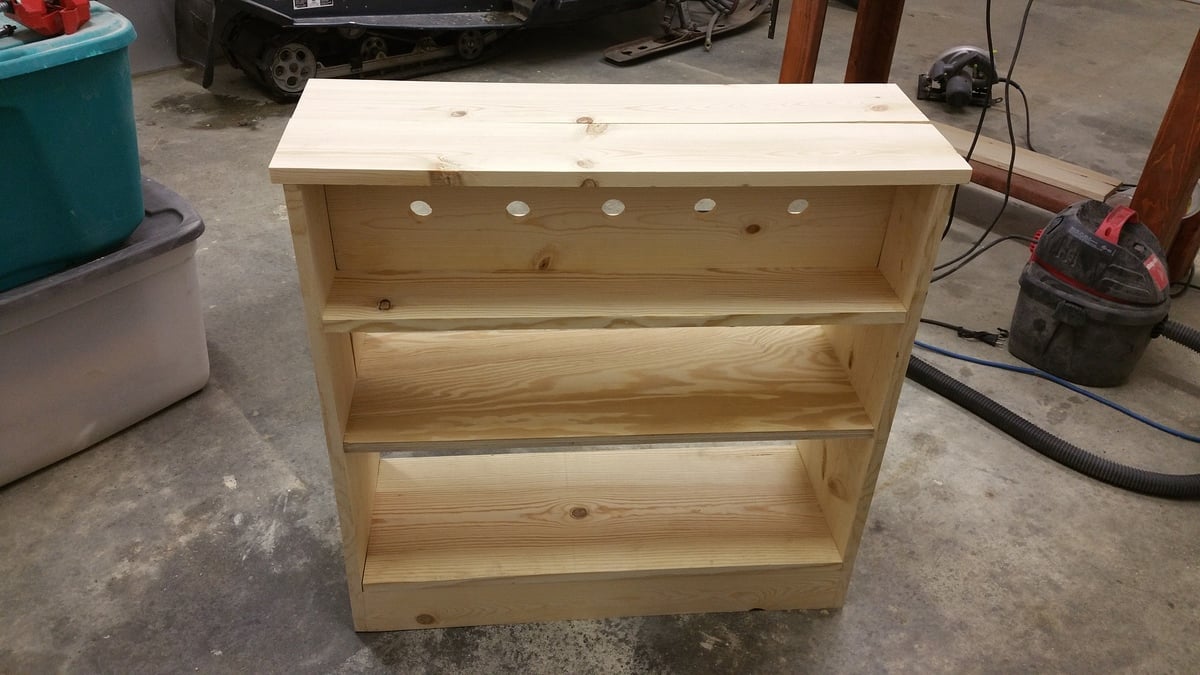
Charging station/nightstand/bookshelf
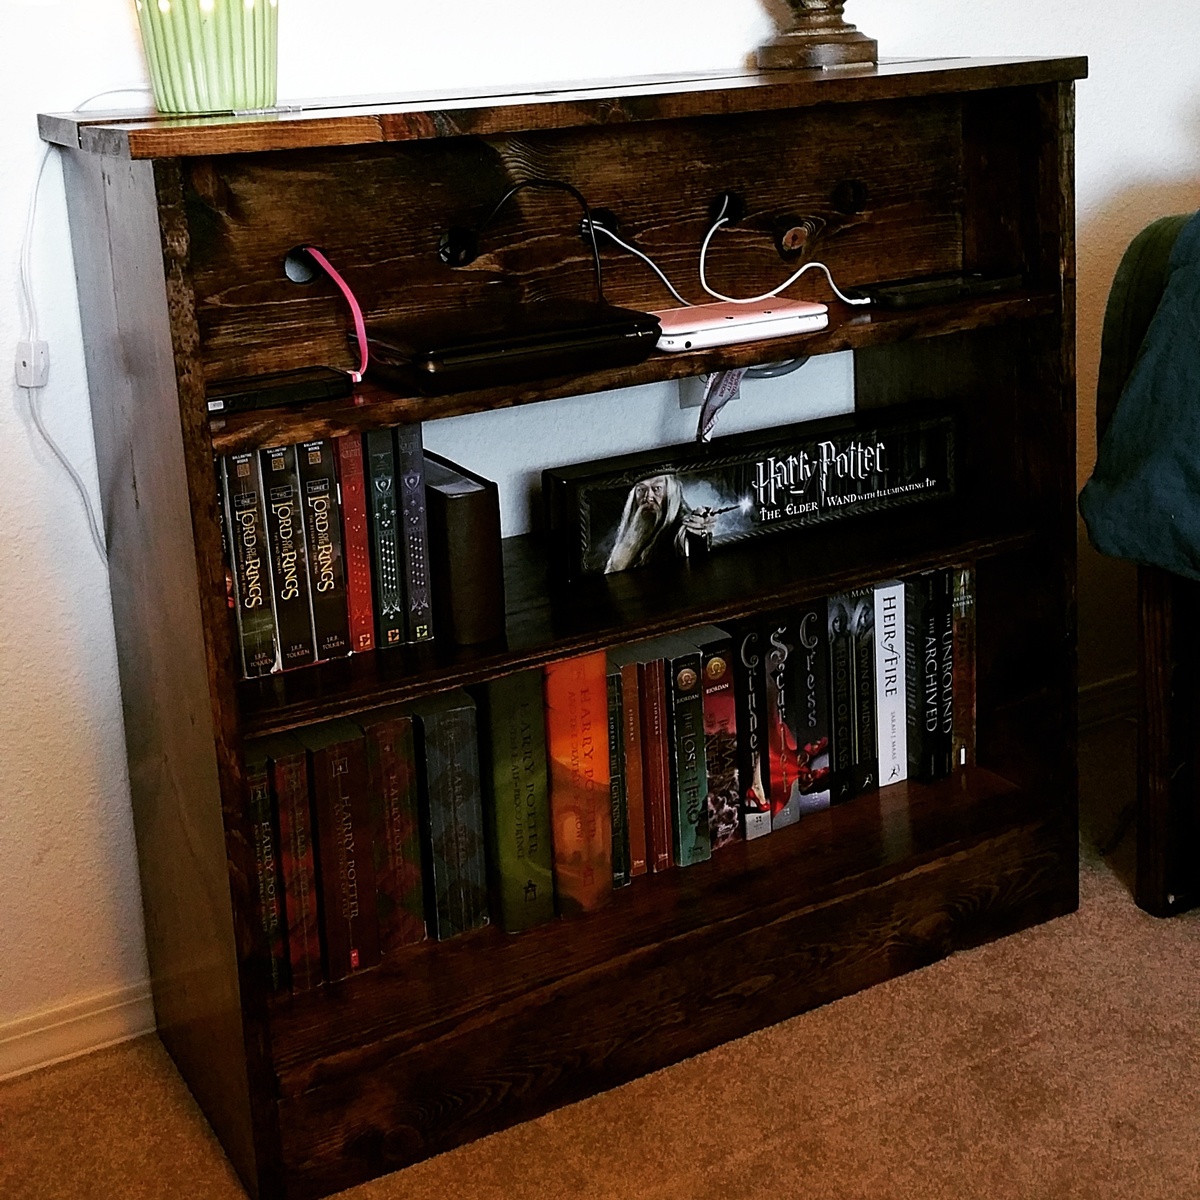
I made this a little bit taller and left off the doors since what we really needed was more bookshelf space. I'm very happy with the way it turned out!
Built from Plan(s)
Estimated Cost
$50
Estimated Time Investment
An Hour or Two (0-2 Hours)
Finish Used
Dark walnut and two coats of semi-gloss polyurethane
Recommended Skill Level
Beginner
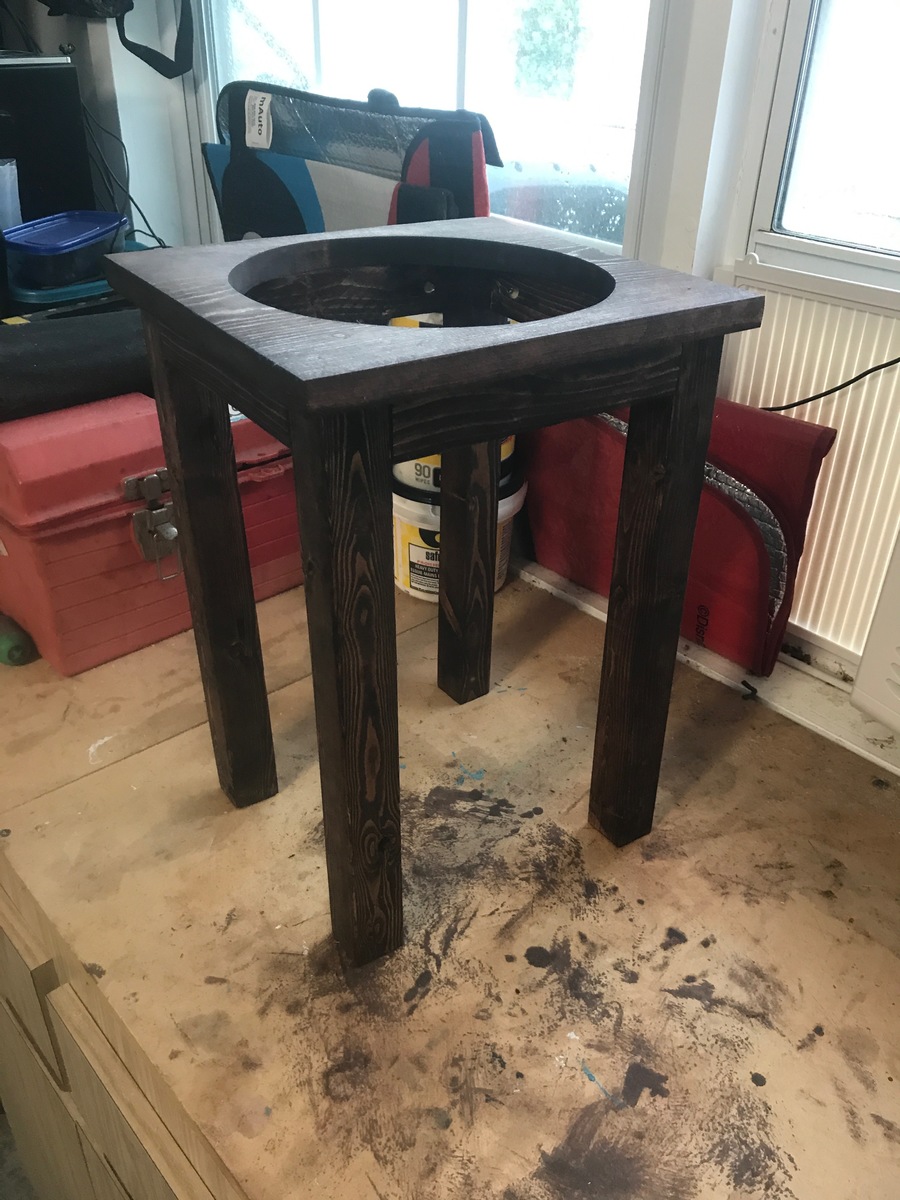
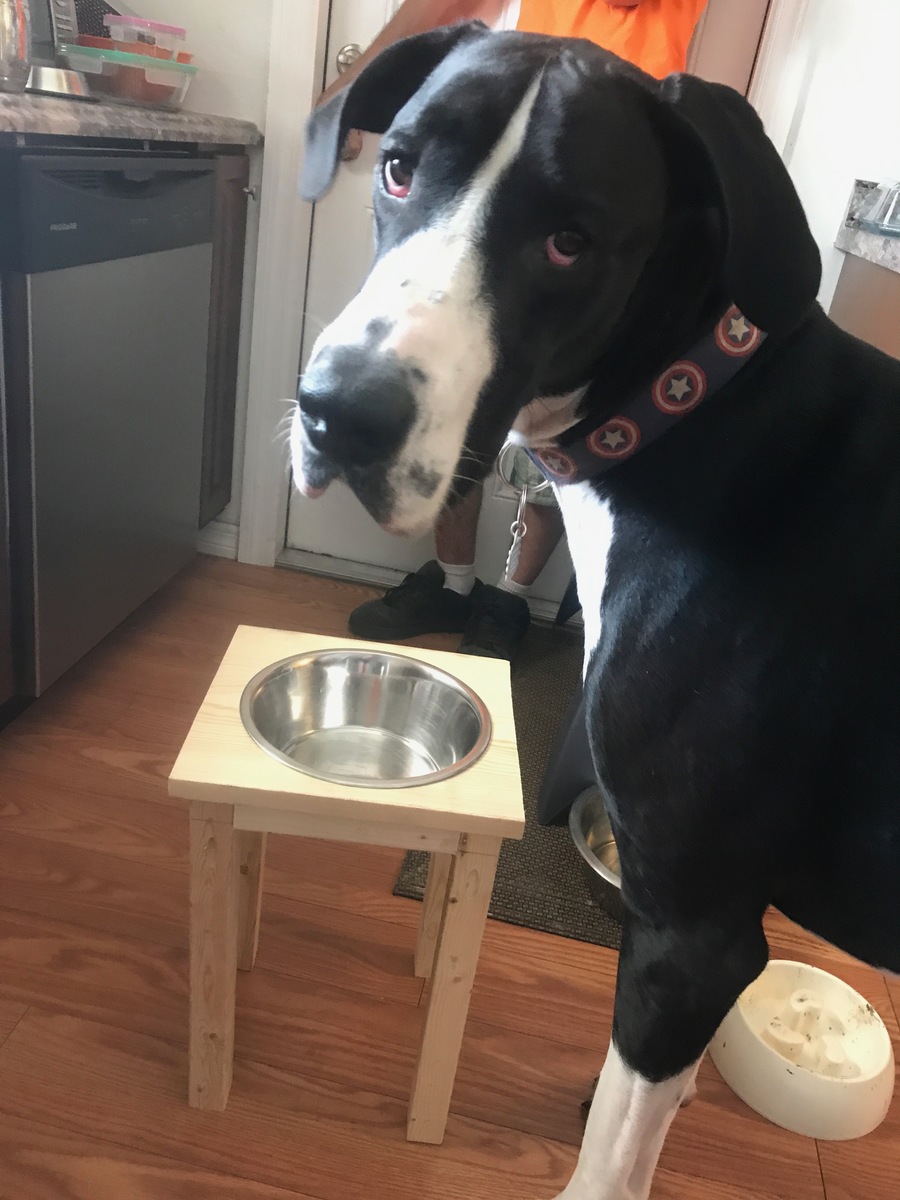
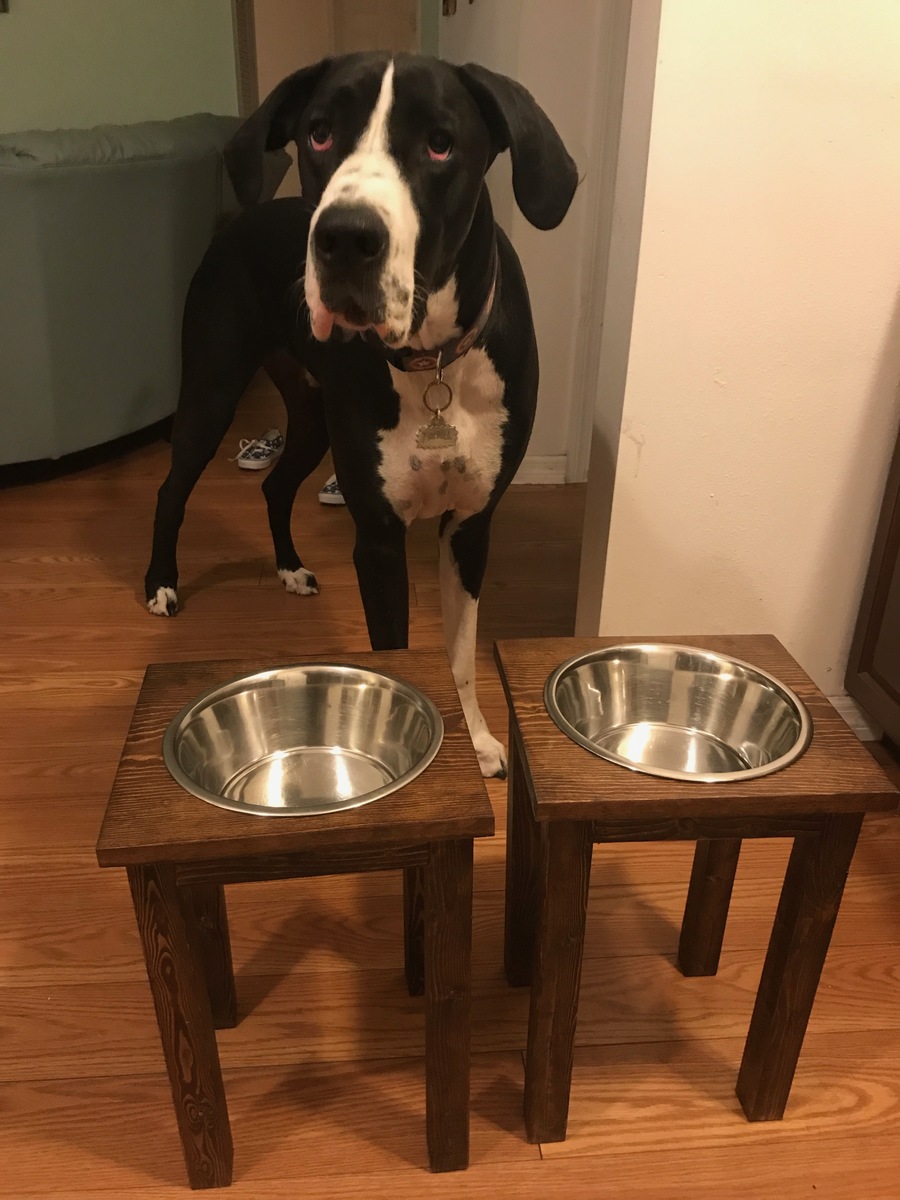
Works great for a Great Dane!
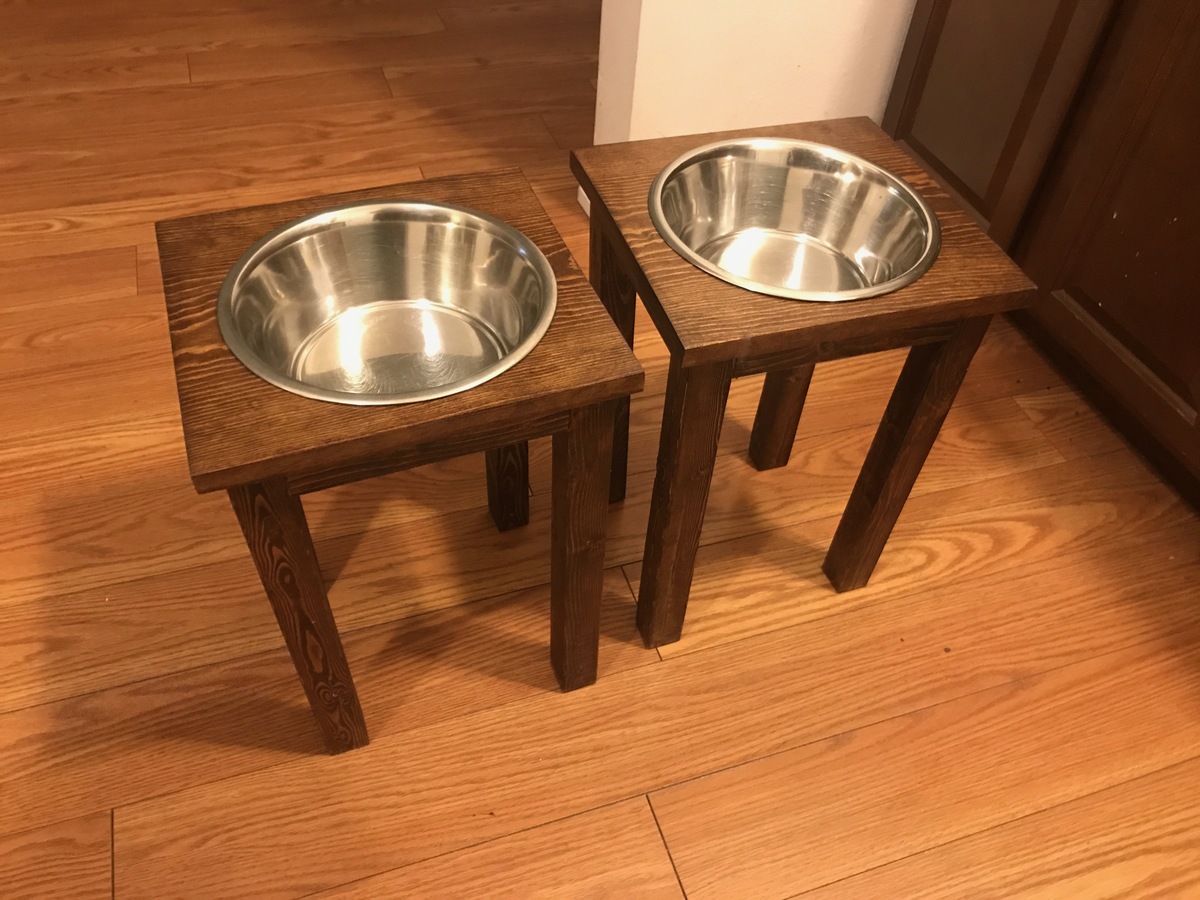
This was a really fun project! We increased the leg height to 16" to work better for our Great Dane. Also, there's a typo in the "to buy" list. It says you should buy 1X2 @30.5" but they really mean a 1X3 since they refer to a 1X3 the rest of the time. It still works with a 1X2, but we used 3 pocket drilled holes instead of the 5 they suggested.
Estimated Cost
$50
Estimated Time Investment
Afternoon Project (3-6 Hours)
Recommended Skill Level
Beginner
Planter
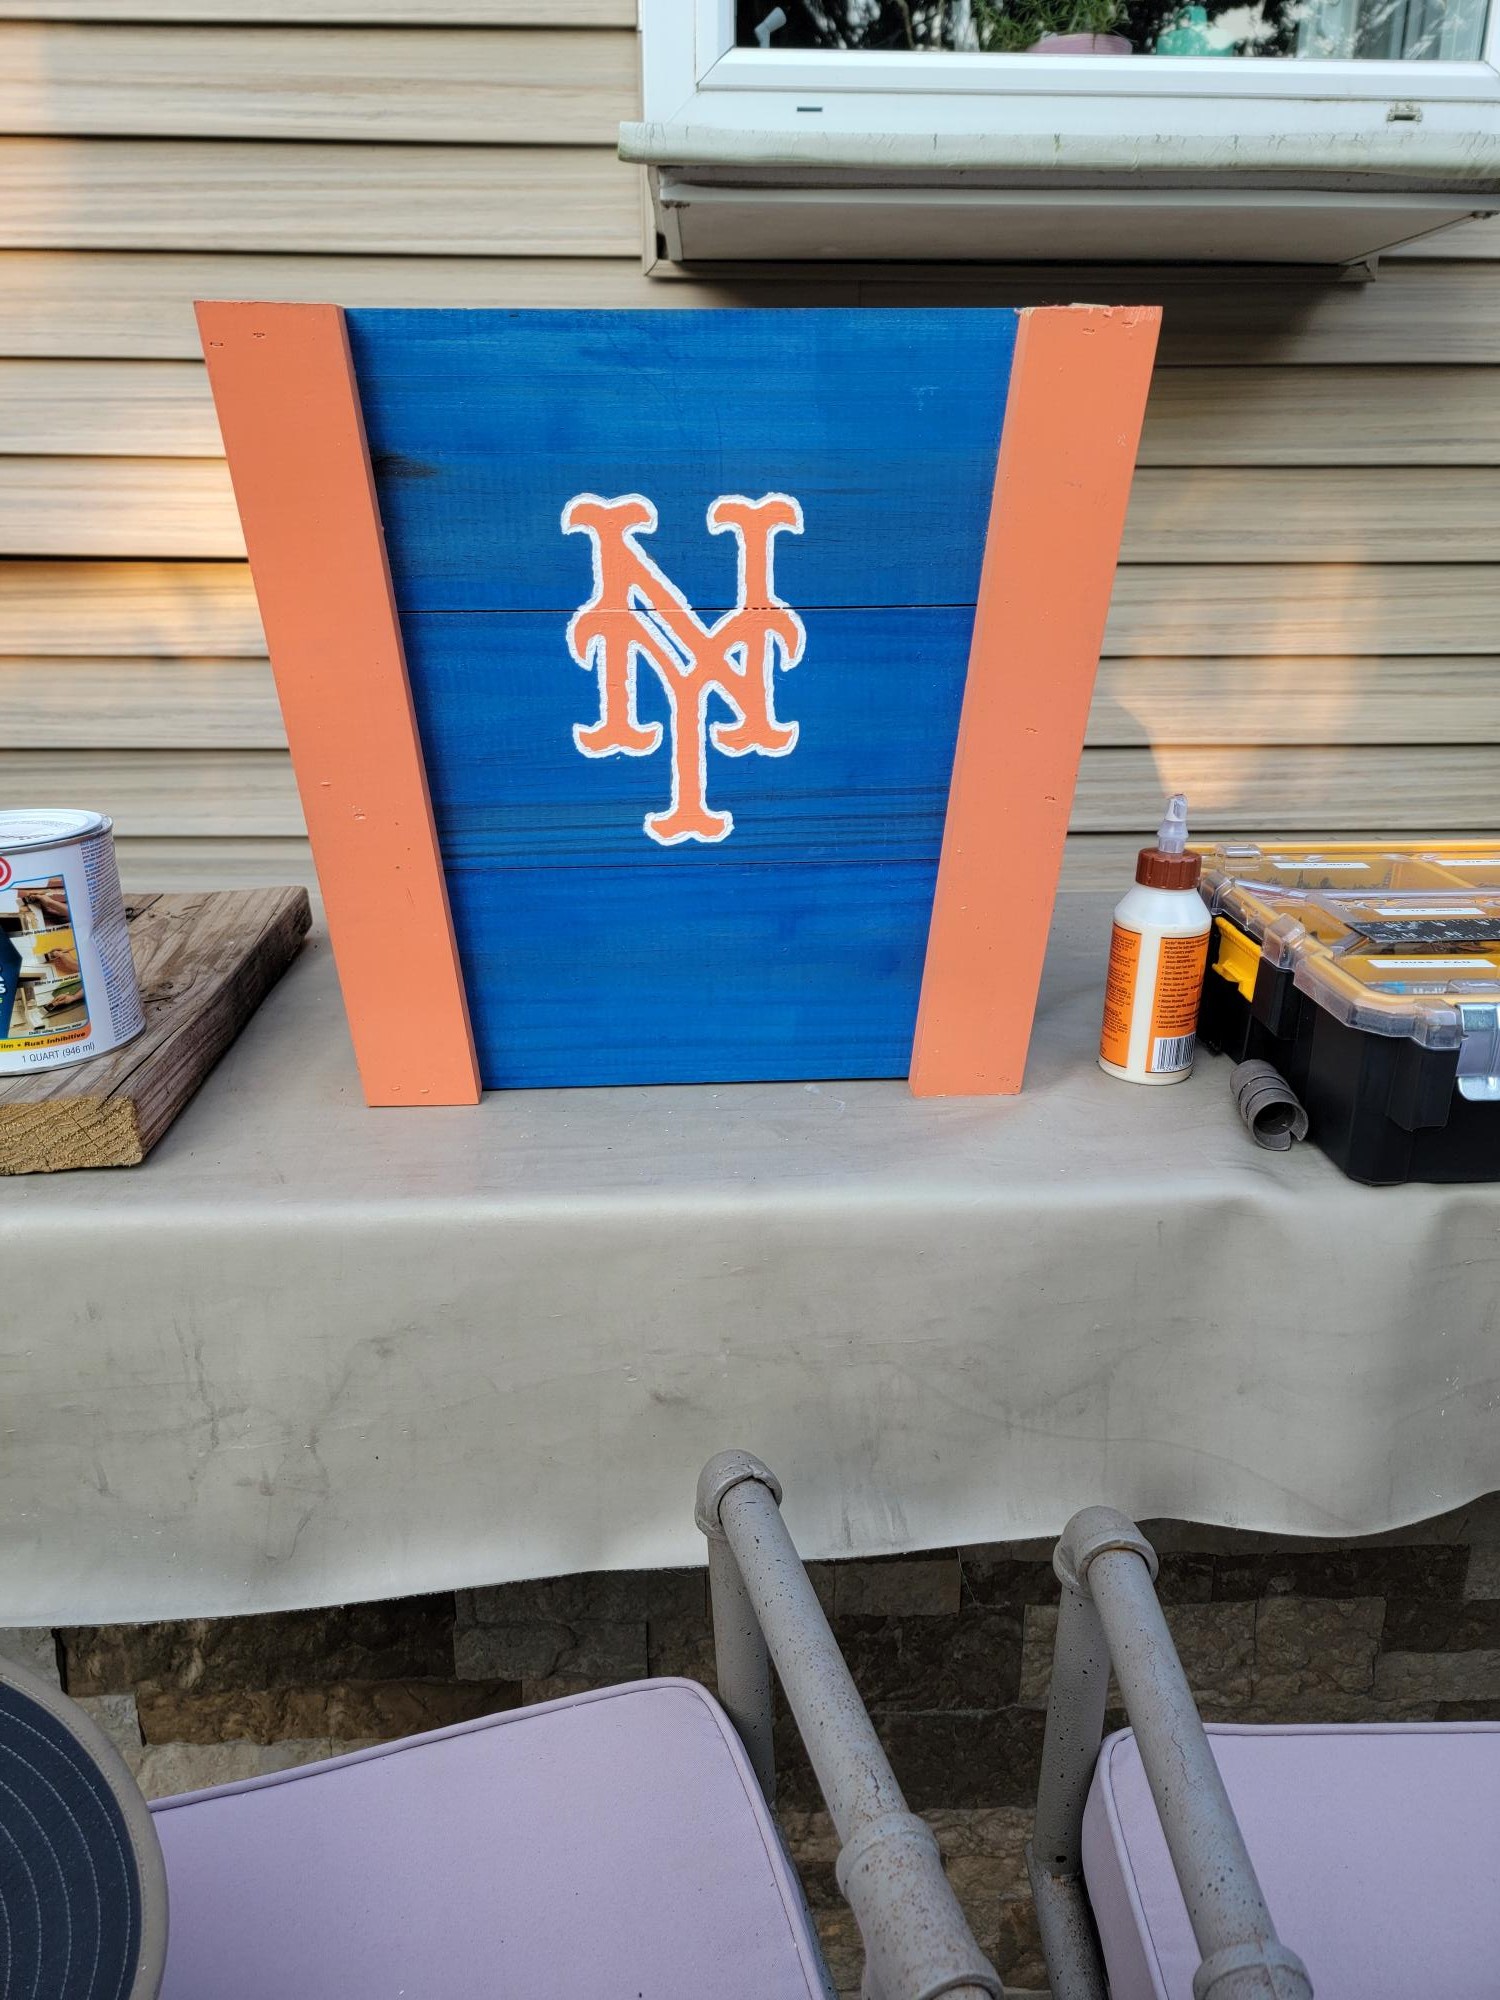
Started with the 3 plank plans from Anna's project, then dremeled the logo.
Built from Plan(s)
Comments
another Little Helper Tower
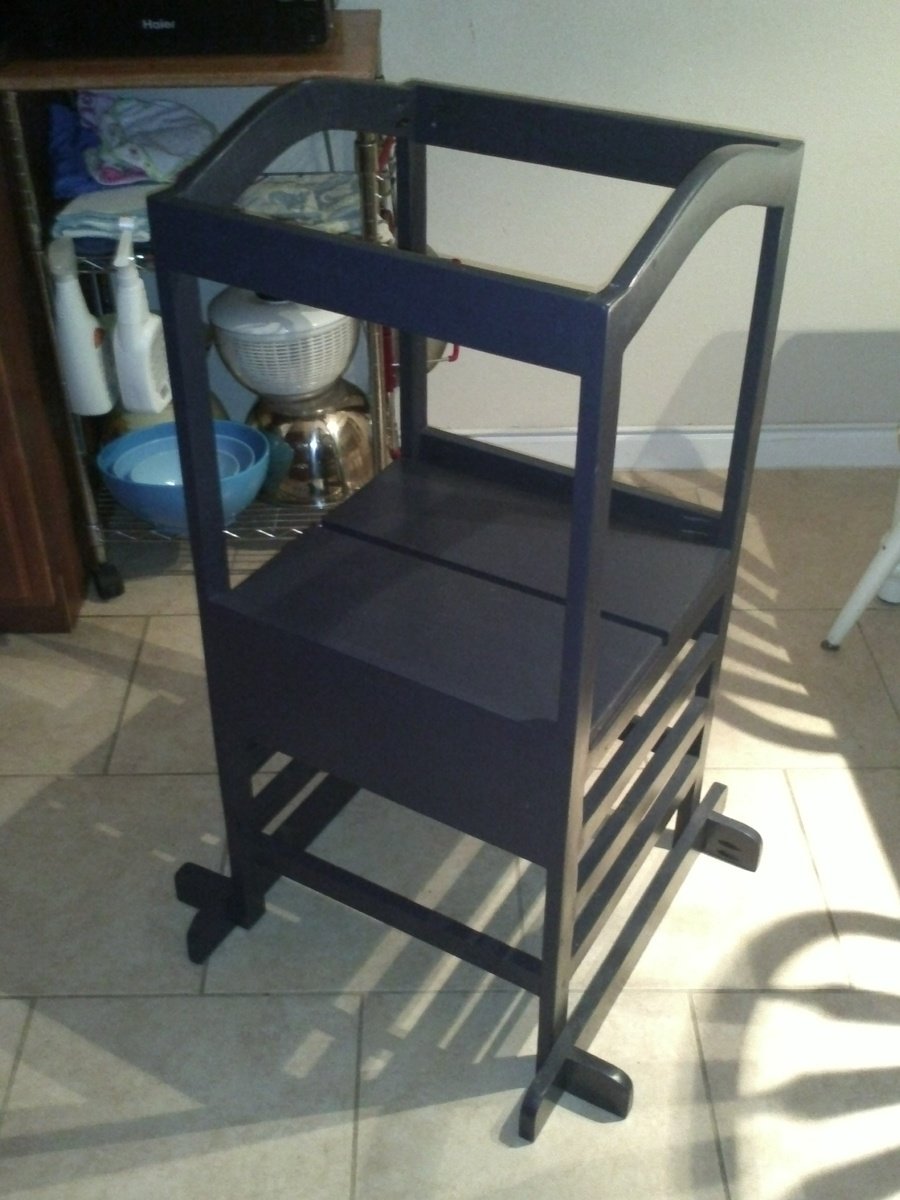
Built this for my daughter this past Christmas, she was 15mo then and not too enthusiastic about being in the tower. Now at nearly 20mo she demands her "towah" when it's time to "wash a hans" and she doesn't mind being plopped in it while we do things in the kitchen (as long as its not for TOO long...) We're looking forward to many years of use out of the tower, thanks for the plans! This was my first project with the Kreg pocket screw jig, really liked it and wished I'd had it for some of my past projects.
Built from Plan(s)
Estimated Cost
$50
Estimated Time Investment
Afternoon Project (3-6 Hours)
Finish Used
interior latex paint; bathroom/kitchen type
Recommended Skill Level
Beginner
Benchmark Storage or Media Tower
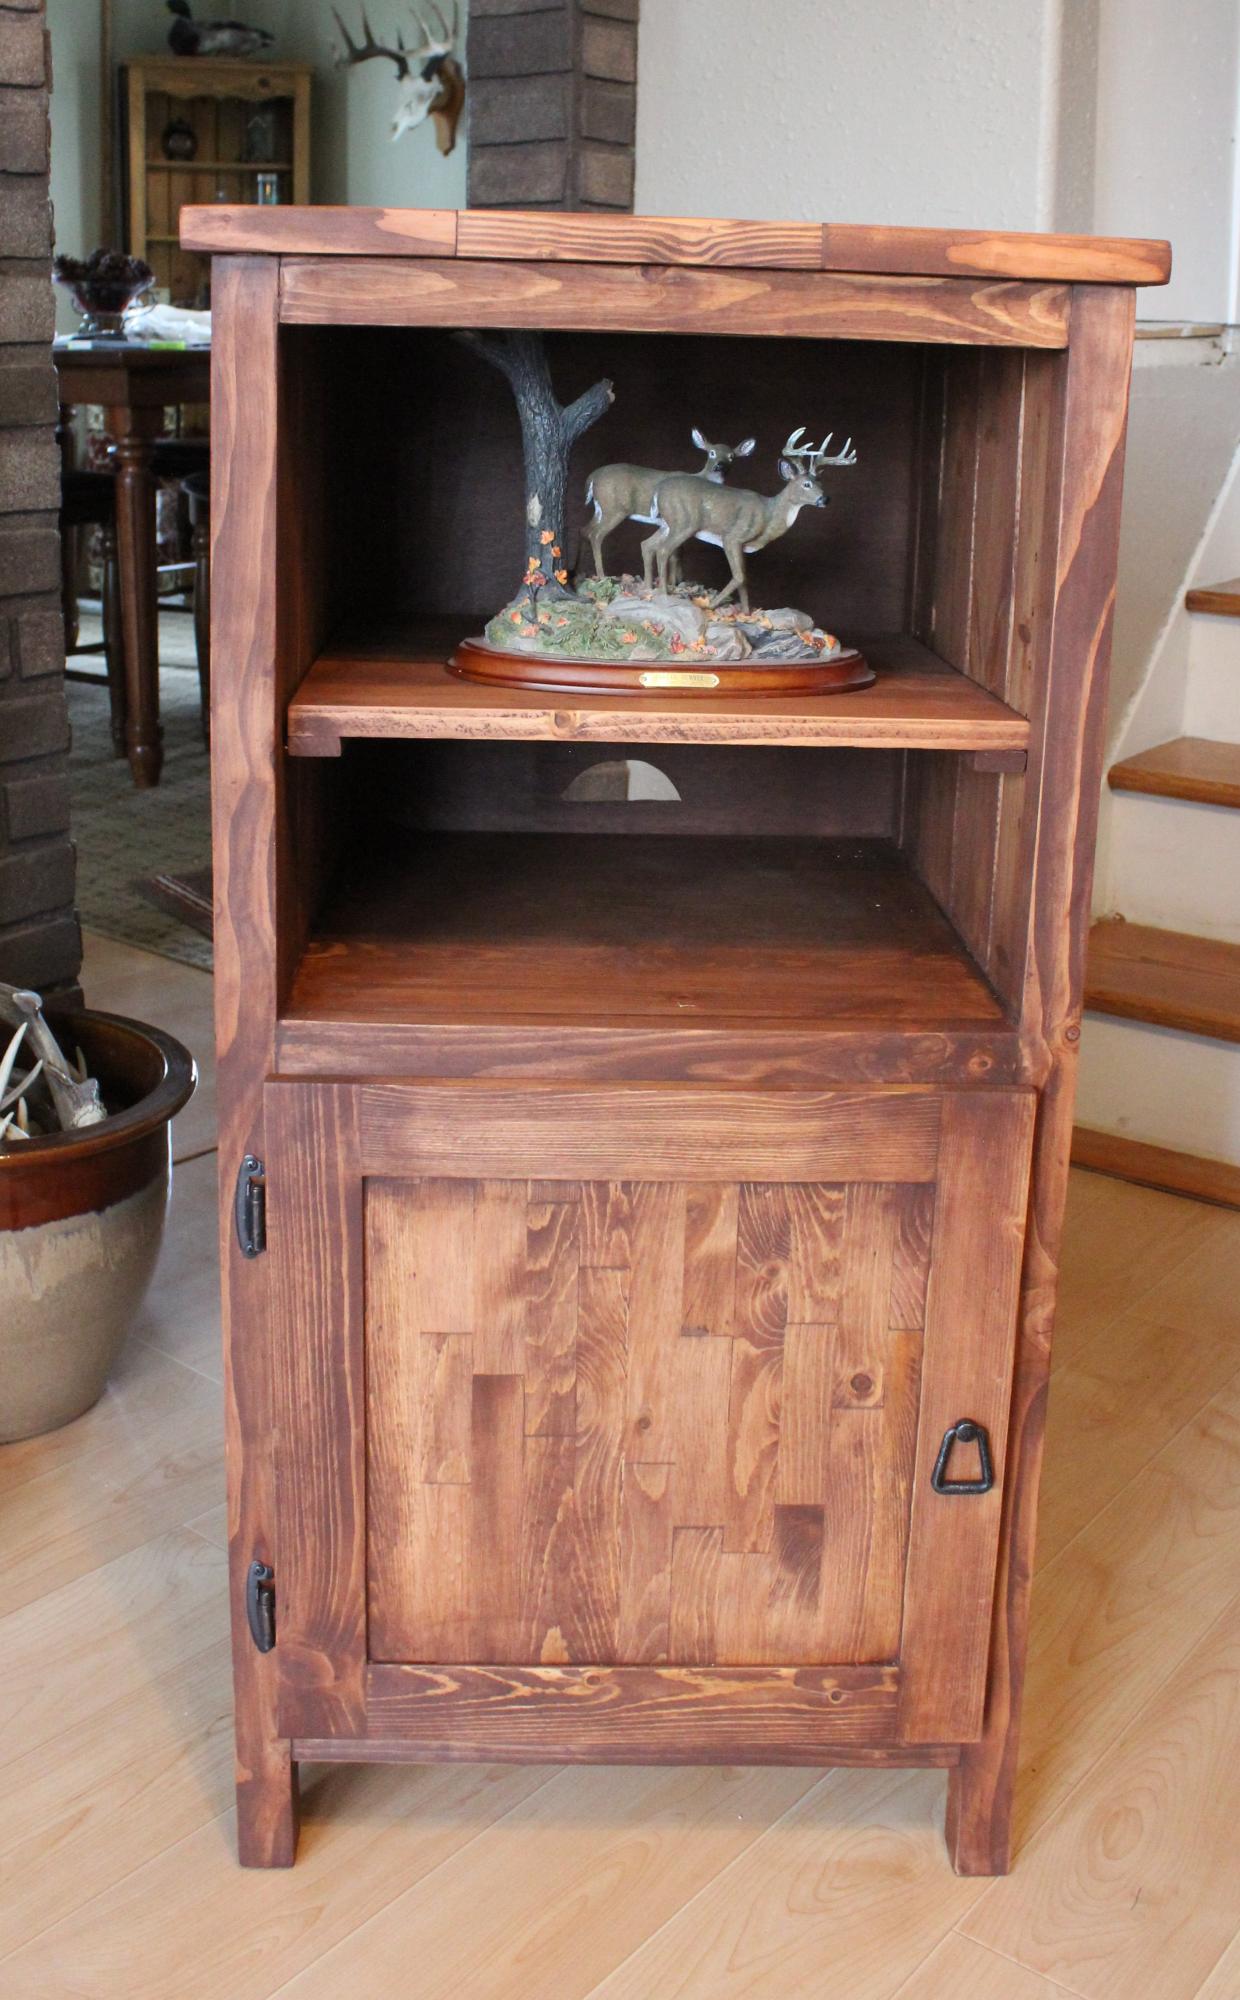
I built this Benchmark Storage or Media Tower as I was looking for some thing to put beside our fire place. I wanted to build some thing that would be about the same height as our fire place so it stands 40 1/4" tall. Also, this month was a the contest to build things from scrap lumber so I took 2 x's that I had laying aorund and cut them down to 1 1/4", then glued together and planed down to make butcher block for the door and top. The sides were actually built from 1 x 6. I also ended up purchasing a Kreg shelving jig so that I could change the shelving. A tool that I highly recommend if you are going to build alot of these projects with shelving. One down and one to go!
Built from Plan(s)
Estimated Cost
$30
Estimated Time Investment
Week Long Project (20 Hours or More)
Finish Used
Old Masters Stain with Minwax Helmsmans Spar Erethane
Recommended Skill Level
Intermediate
Comments


Mon, 03/30/2015 - 20:45
Thanks Ana....fun looking at
Thanks Ana....fun looking at your website and have built many things the last two years from this...and finally signed up w a profile! Thanks again!
play table
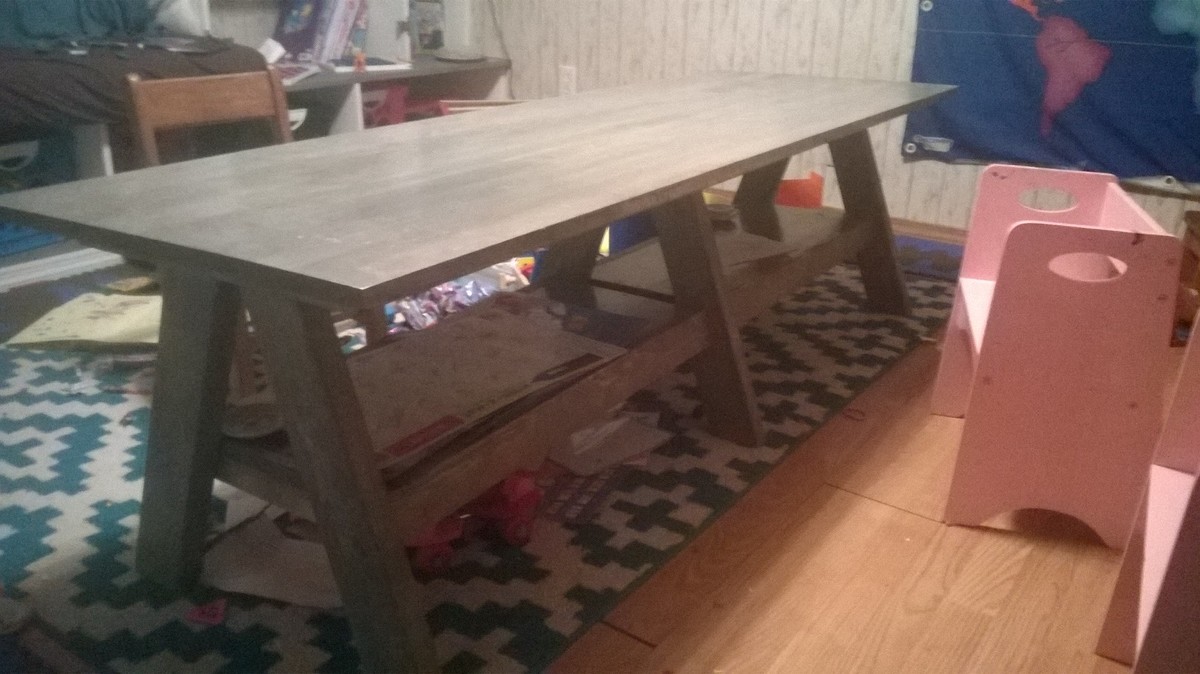
This one was fun to build. I feel in love with it when I saw it. I used weather grey stain from rustoleum and I love how it turned out.
Built from Plan(s)
Estimated Time Investment
Day Project (6-9 Hours)
Finish Used
weather grey stain from rustoleum, with 3 coats of gloss clear coat
Recommended Skill Level
Beginner
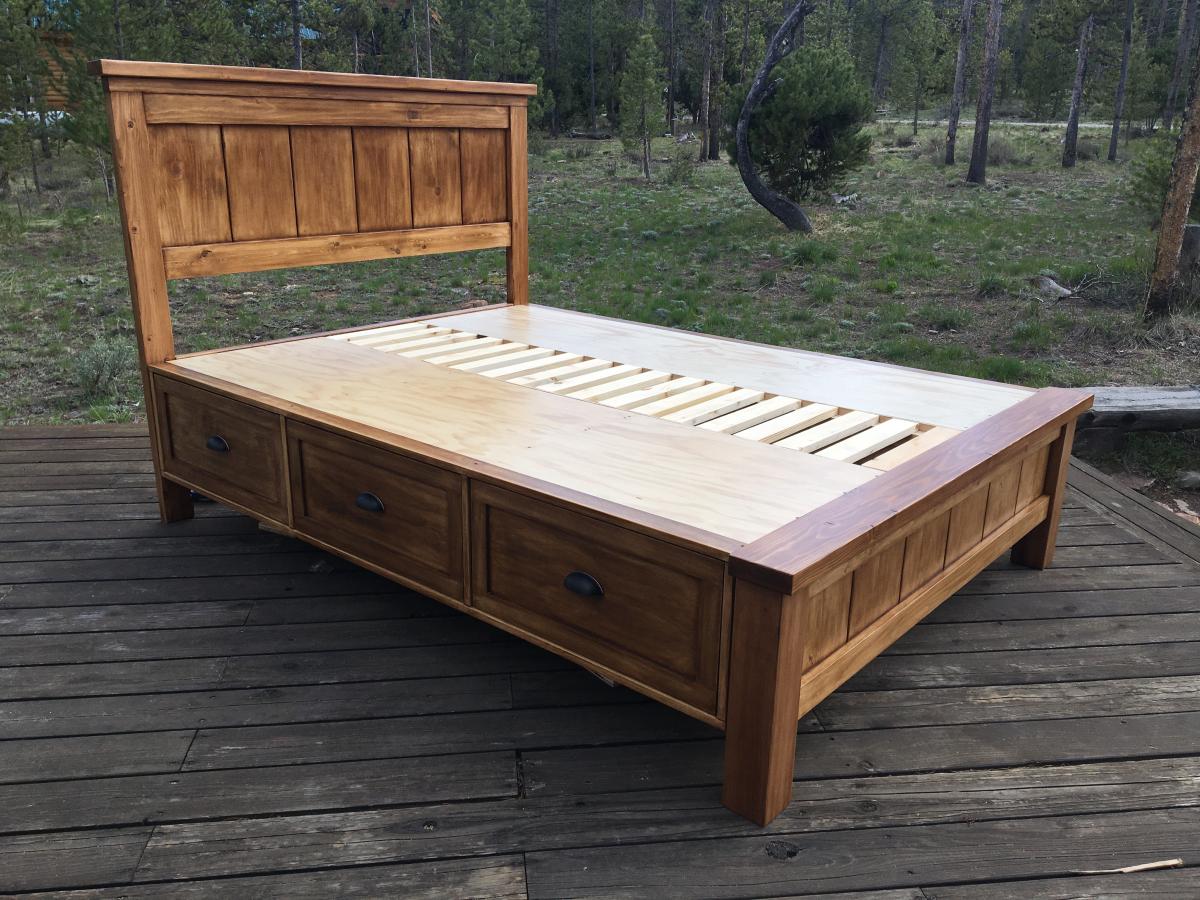
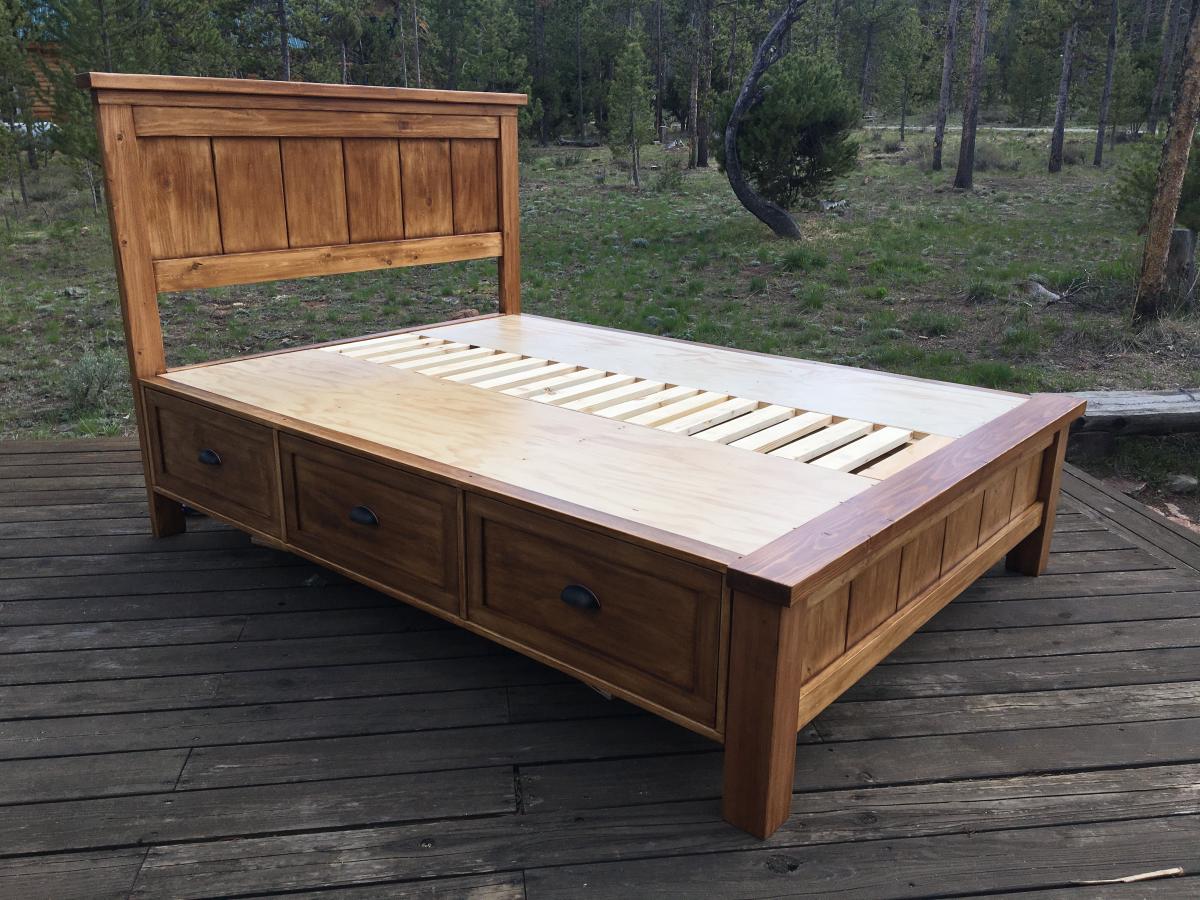
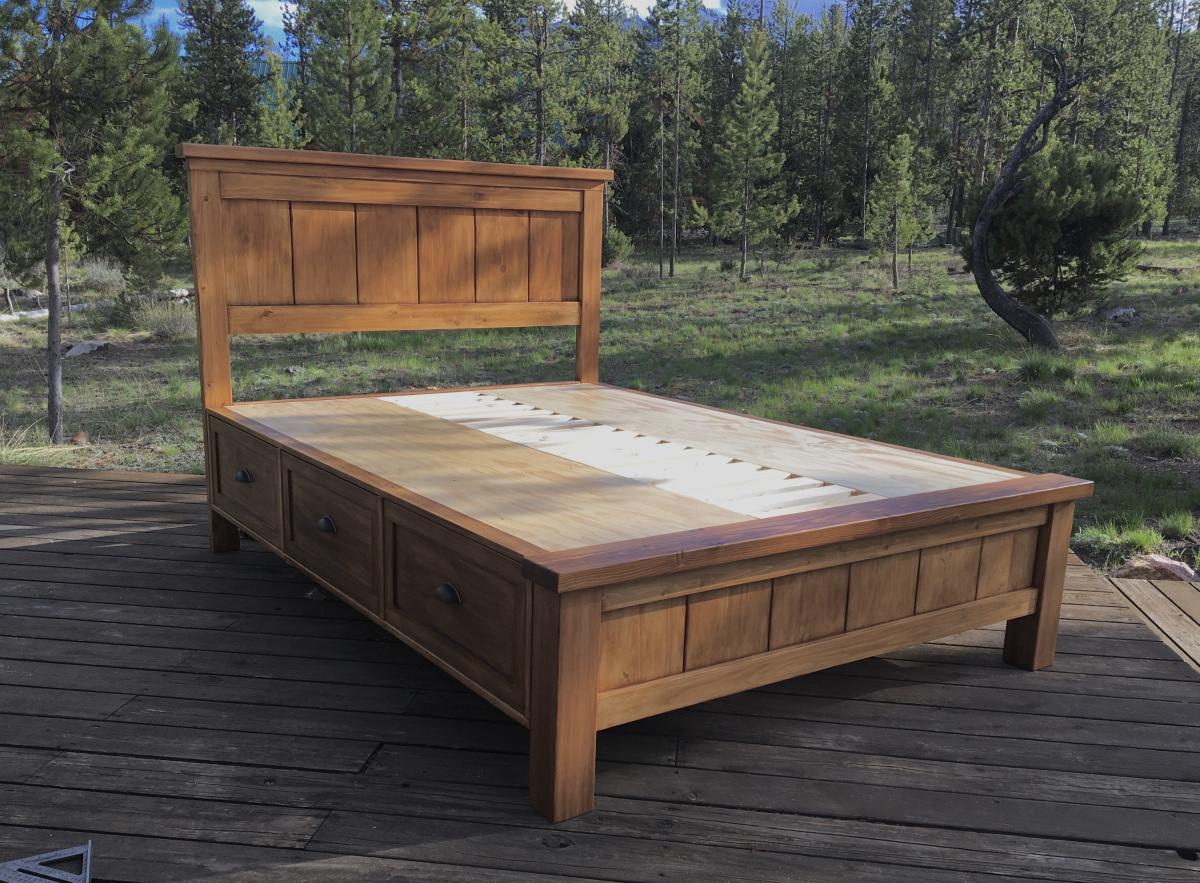
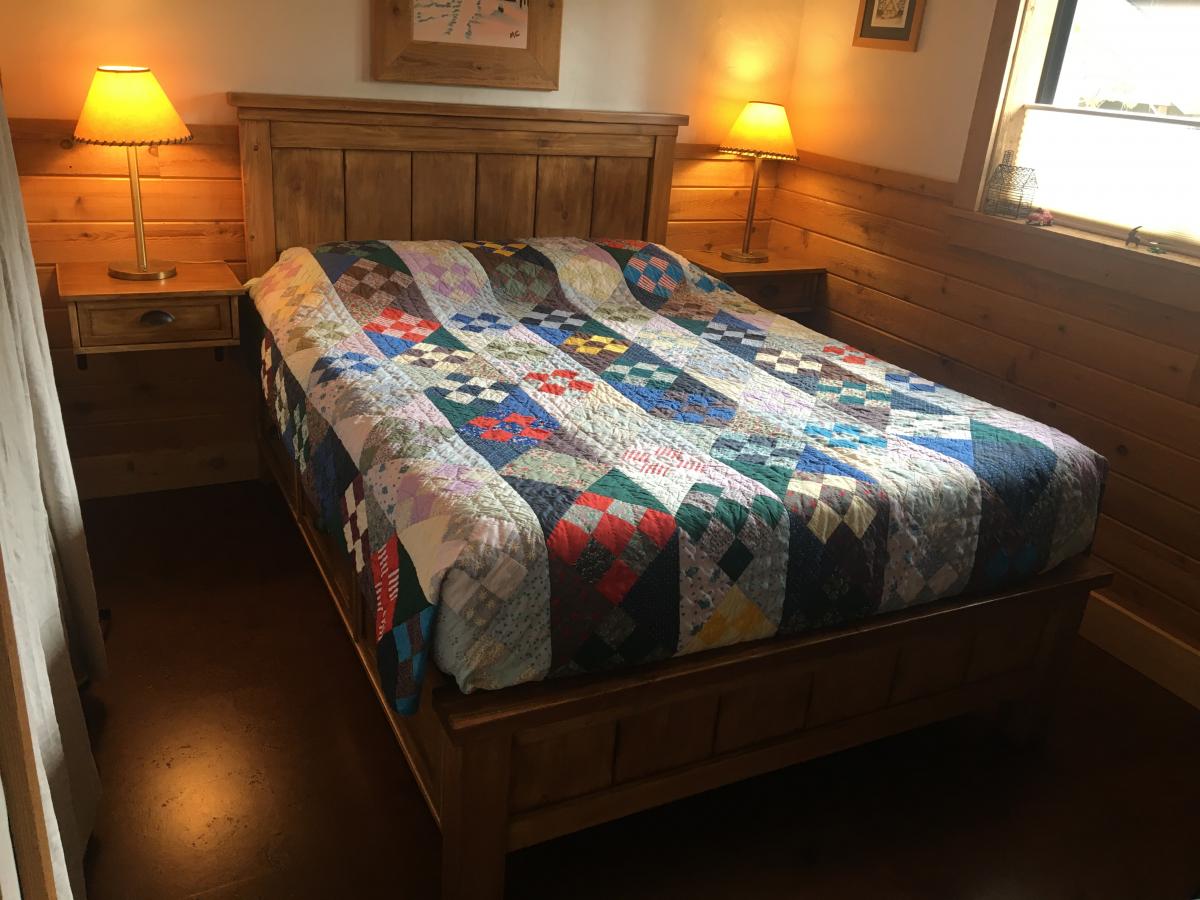
Farmhouse Storage bed with platform modification
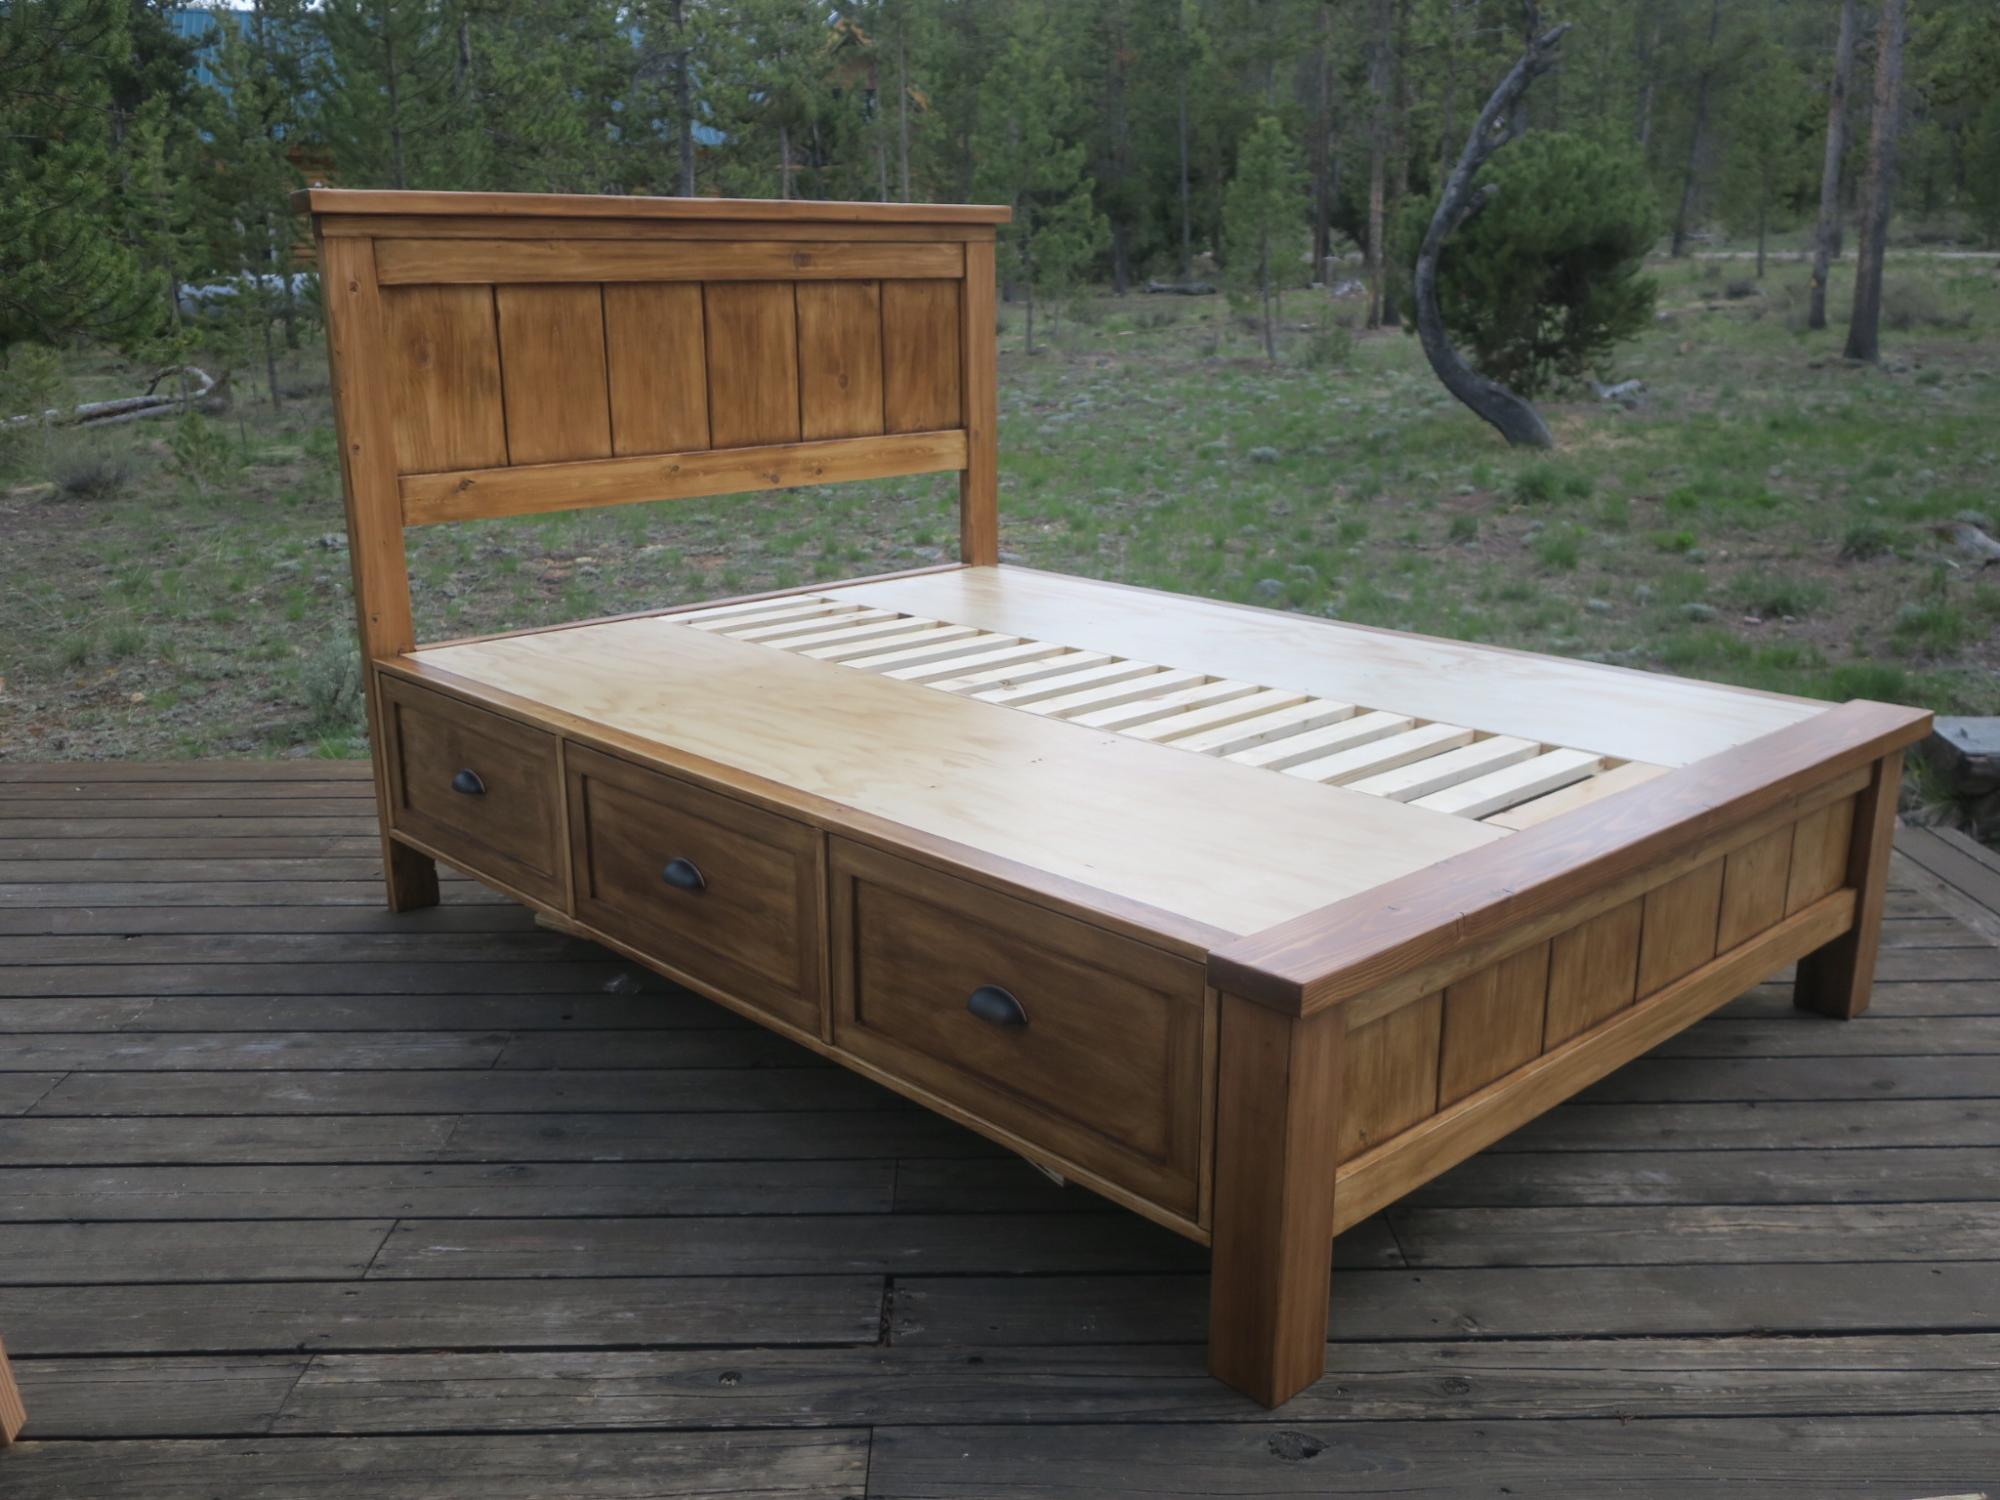
Hi, I’m Joe and love working on my cabin in Stanley Idaho. I needed a queen size bed on the ground floor but the room is small so I incorporated the footboard into into the platform to gain 6 inches of space in the room. It took a couple months working off and on but all fun. I also made the drawers deeper front to back to maximize storage. I did this at the peak of lumber prices and spent like $900 on lumber. It came out great, my Airbnb guests love it!

Built from Plan(s)
Comments
Wed, 10/06/2021 - 14:28
I could not get logged in to…
I could not get logged in to Ana-white.com on my phone where my pictures were, but now an logged in on my laptop. Is there any way to register this brag post on my account? This is Fitzanthony, [email protected]
Joe
Planked Wood Headboard- King
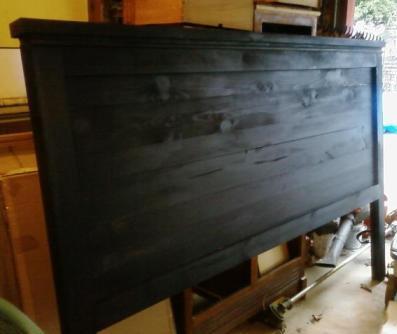
I made this in an afternoon as a wedding gift for my brother and soon to be sister-in-law. This was my first project using Ana's plans and I can't beleive I got it finished in a day. The hardest part was getting everything filled in and painted since I used paint grade pine. I did add a length of half round to the top just under the ledge for a little more decorative effect. I didn't realize how huge and heavy it would turn out. Guess that's just what happens when you build something entirely out of wood
Built from Plan(s)
Estimated Cost
$120.00
Estimated Time Investment
Day Project (6-9 Hours)
Finish Used
Satin finish Valspar paint in black.
Recommended Skill Level
Starter Project
Doll House Book Case

doll house book case with a Hot Pink Roof, also trimmed/painted the doors and window frames. Marking this as a week long project as I was only able to work on it in the evenings, however I believe this could be tackled in a weekend
Built from Plan(s)
Estimated Time Investment
Week Long Project (20 Hours or More)
Finish Used
PPG's HPC Pink and HPC White sprayed with gun
Recommended Skill Level
Beginner
Comments

Fri, 05/10/2013 - 07:19
Doll House Book Case
Wow, that is one happy little girl! And no wonder, what a beautiful job you did! Looks like a great gift for grandkids, too!
Cabin Bunk System

I made this bed for my son. I was a beginner with little to no experience before I started this project. I learned a LOT along the way and now I'm addicted to building things. It wouldn't have taken me so long if I had a little more experience. Staining was difficult, especially when you have two kids wanting to help. My drawers slides were absolutely impossible! Next time I will use a different method for the drawers. I still need to make the ladder. I haven't come across any plans for that so I'm going to wing it. The bed is not perfect by any means but my son doesn't care.
Built from Plan(s)
Estimated Cost
$300-400
Estimated Time Investment
Week Long Project (20 Hours or More)
Finish Used
I used one coat of Safecoat DuroStain, water based, Walnut color, low odor. For the poly, I used two coats of Vermont Natural Coatings, PolyWhey, water-based, clear satin. I should have used three coats of the poly but I ran out of energy. It took me 8 hours to sand the entire bunk system and apply the second coat. I like these products because they are not toxic and green.
Recommended Skill Level
Beginner
Outdoor sectional

Our version of the outdoor sectional. We couldn't find 24" wide pillows so we modified the design to accommodate 22"x24" ones. We also added a 1x8 held on with pocket screws to provide some additional support on the back and help keep the pillows from falling through.
Estimated Cost
$110 in wood
Estimated Time Investment
Weekend Project (10-20 Hours)
Recommended Skill Level
Beginner
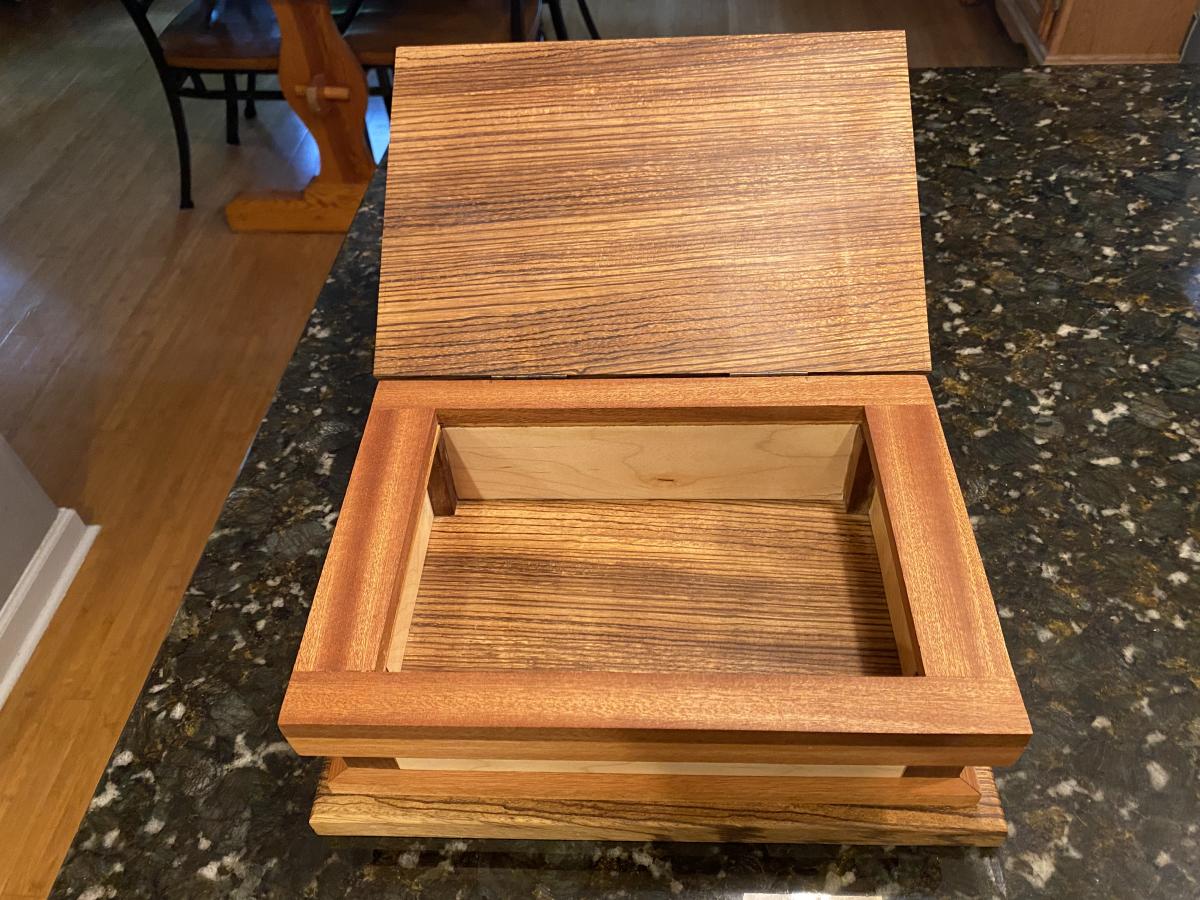
Keepsake Box
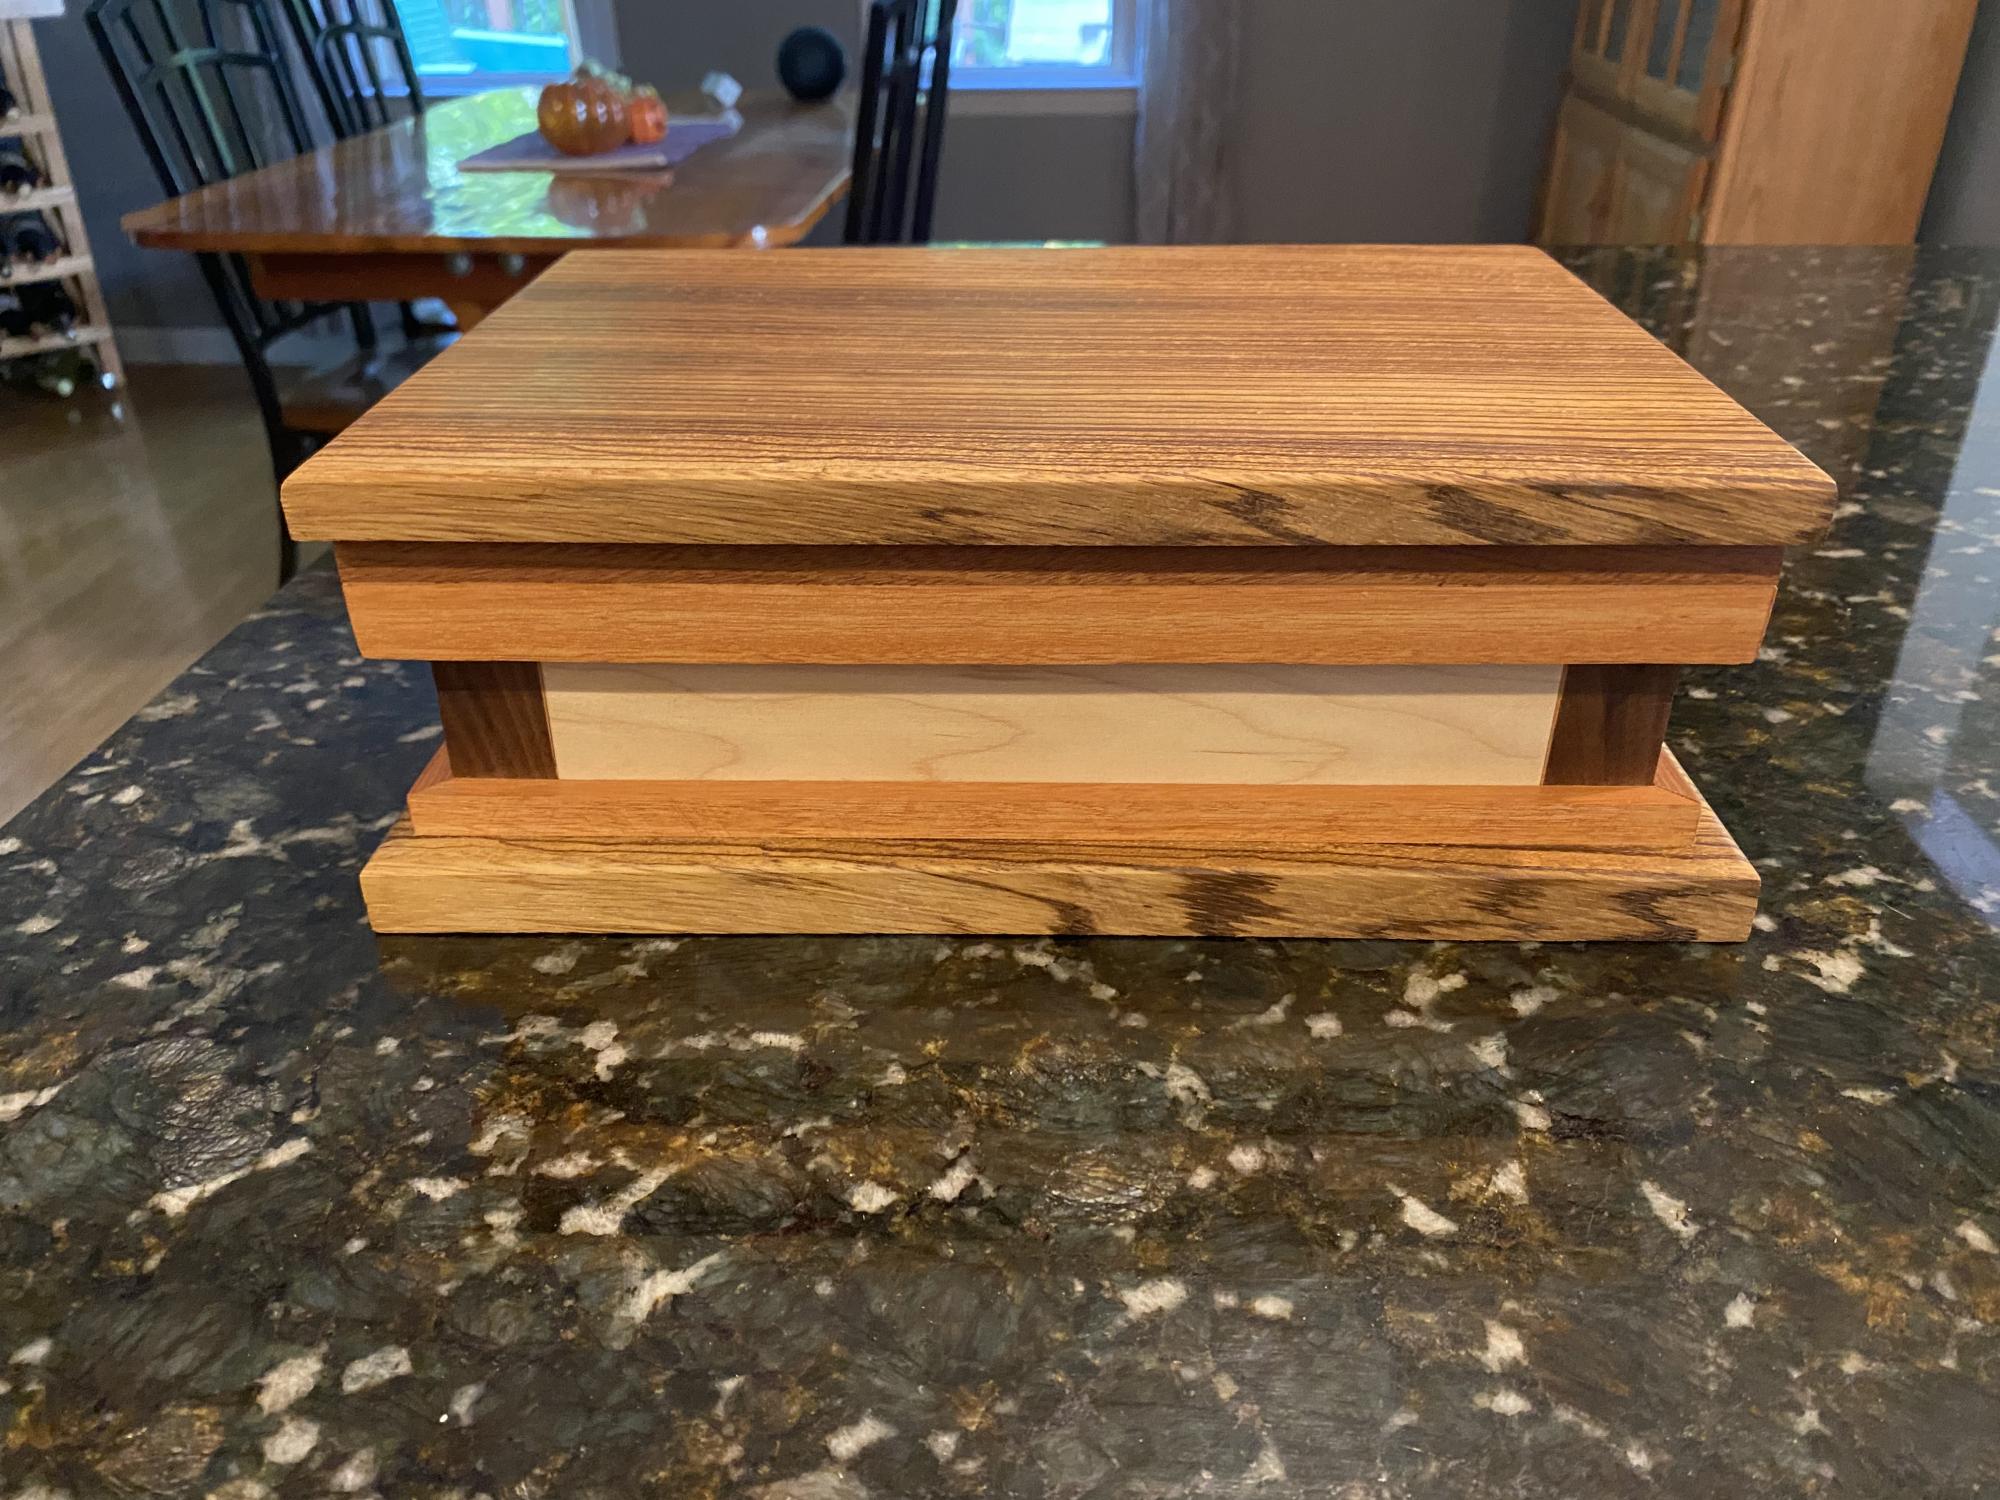
Keepsake box made of maple, black walnut, mahogany and zebra wood.
Comments
spiceylg
Thu, 05/02/2013 - 07:32
:)
Awesome gift! Great job.
hhoward
Thu, 05/02/2013 - 13:07
Metal hardware
Where did you get the metal hardware you added?
jbayer80
Thu, 05/02/2013 - 15:11
Metal Hardware
Lowes. I had to spray-paint them to get the color I wanted. I think they are called corner brackets.
YankeeBelle
Thu, 05/02/2013 - 17:58
Beautiful job
The table looks lovely, and I love the "au natural" finish!! ;-)