Community Brag Posts

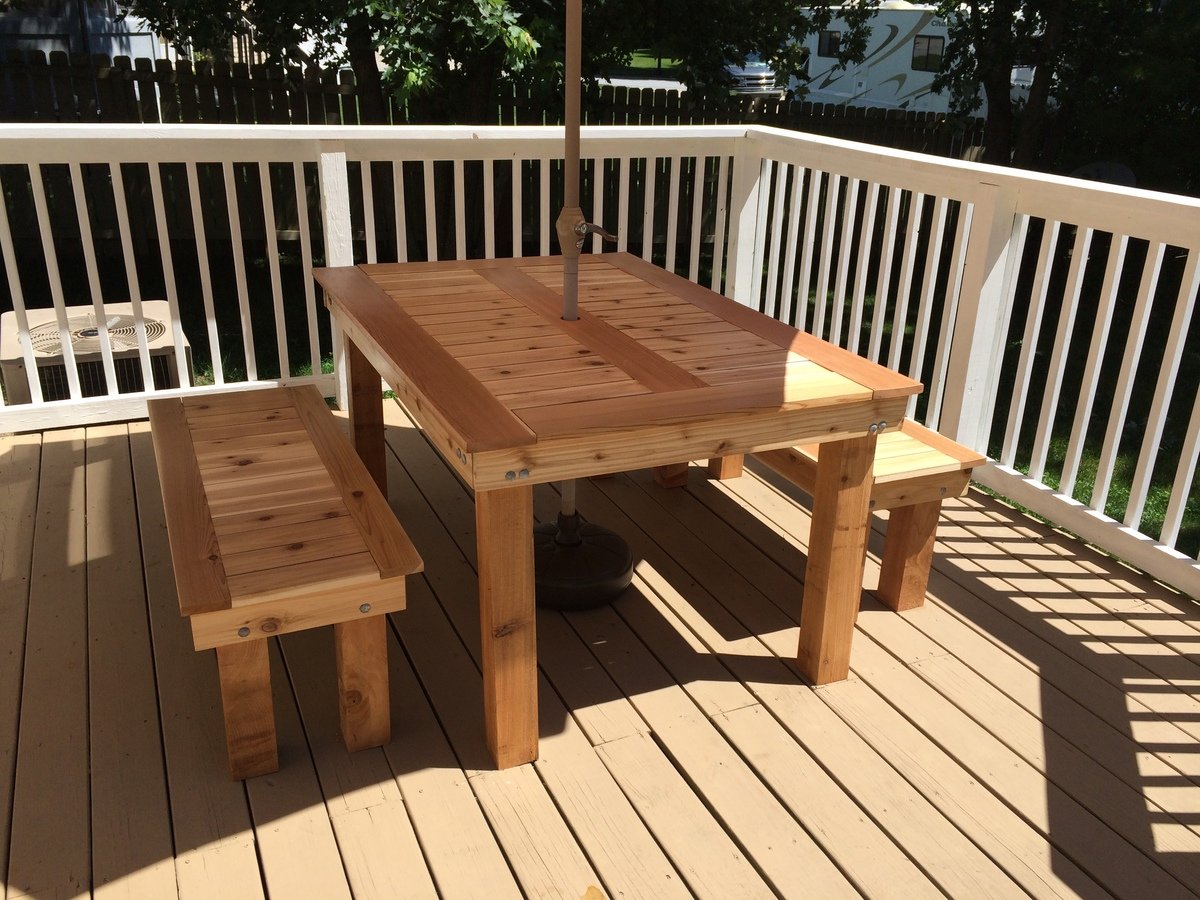
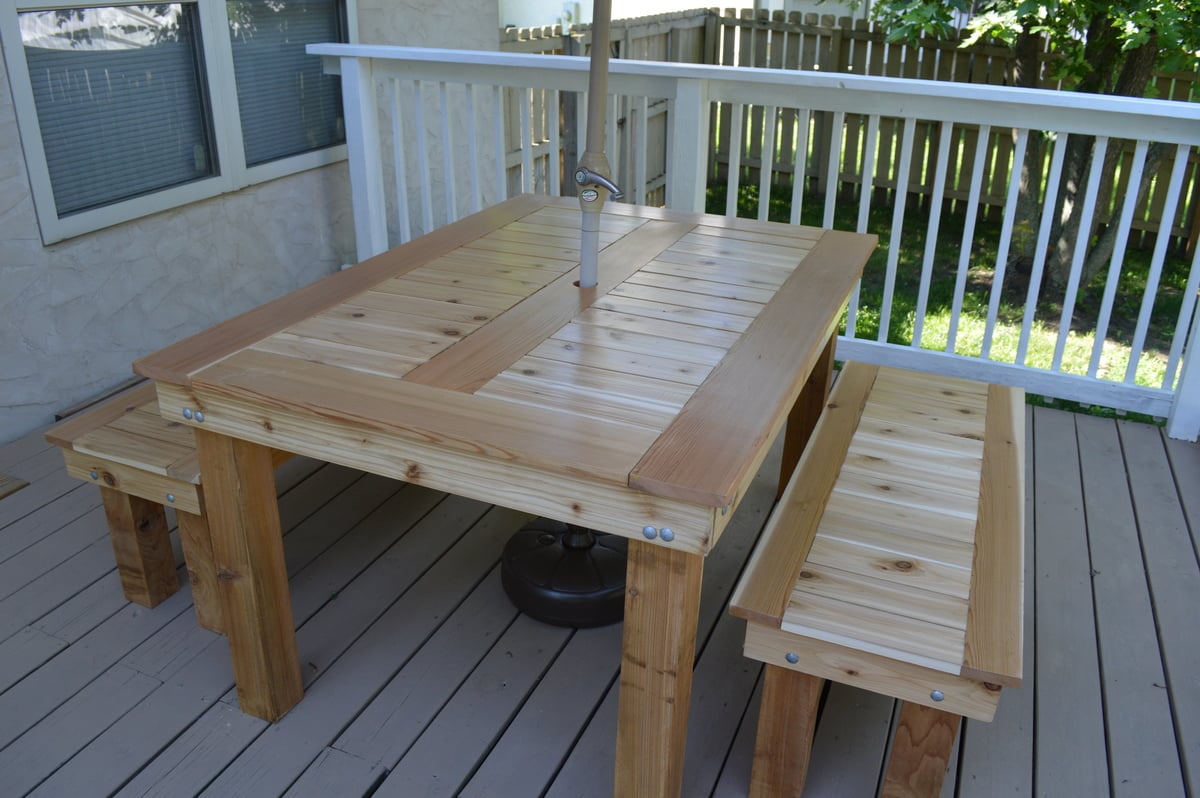
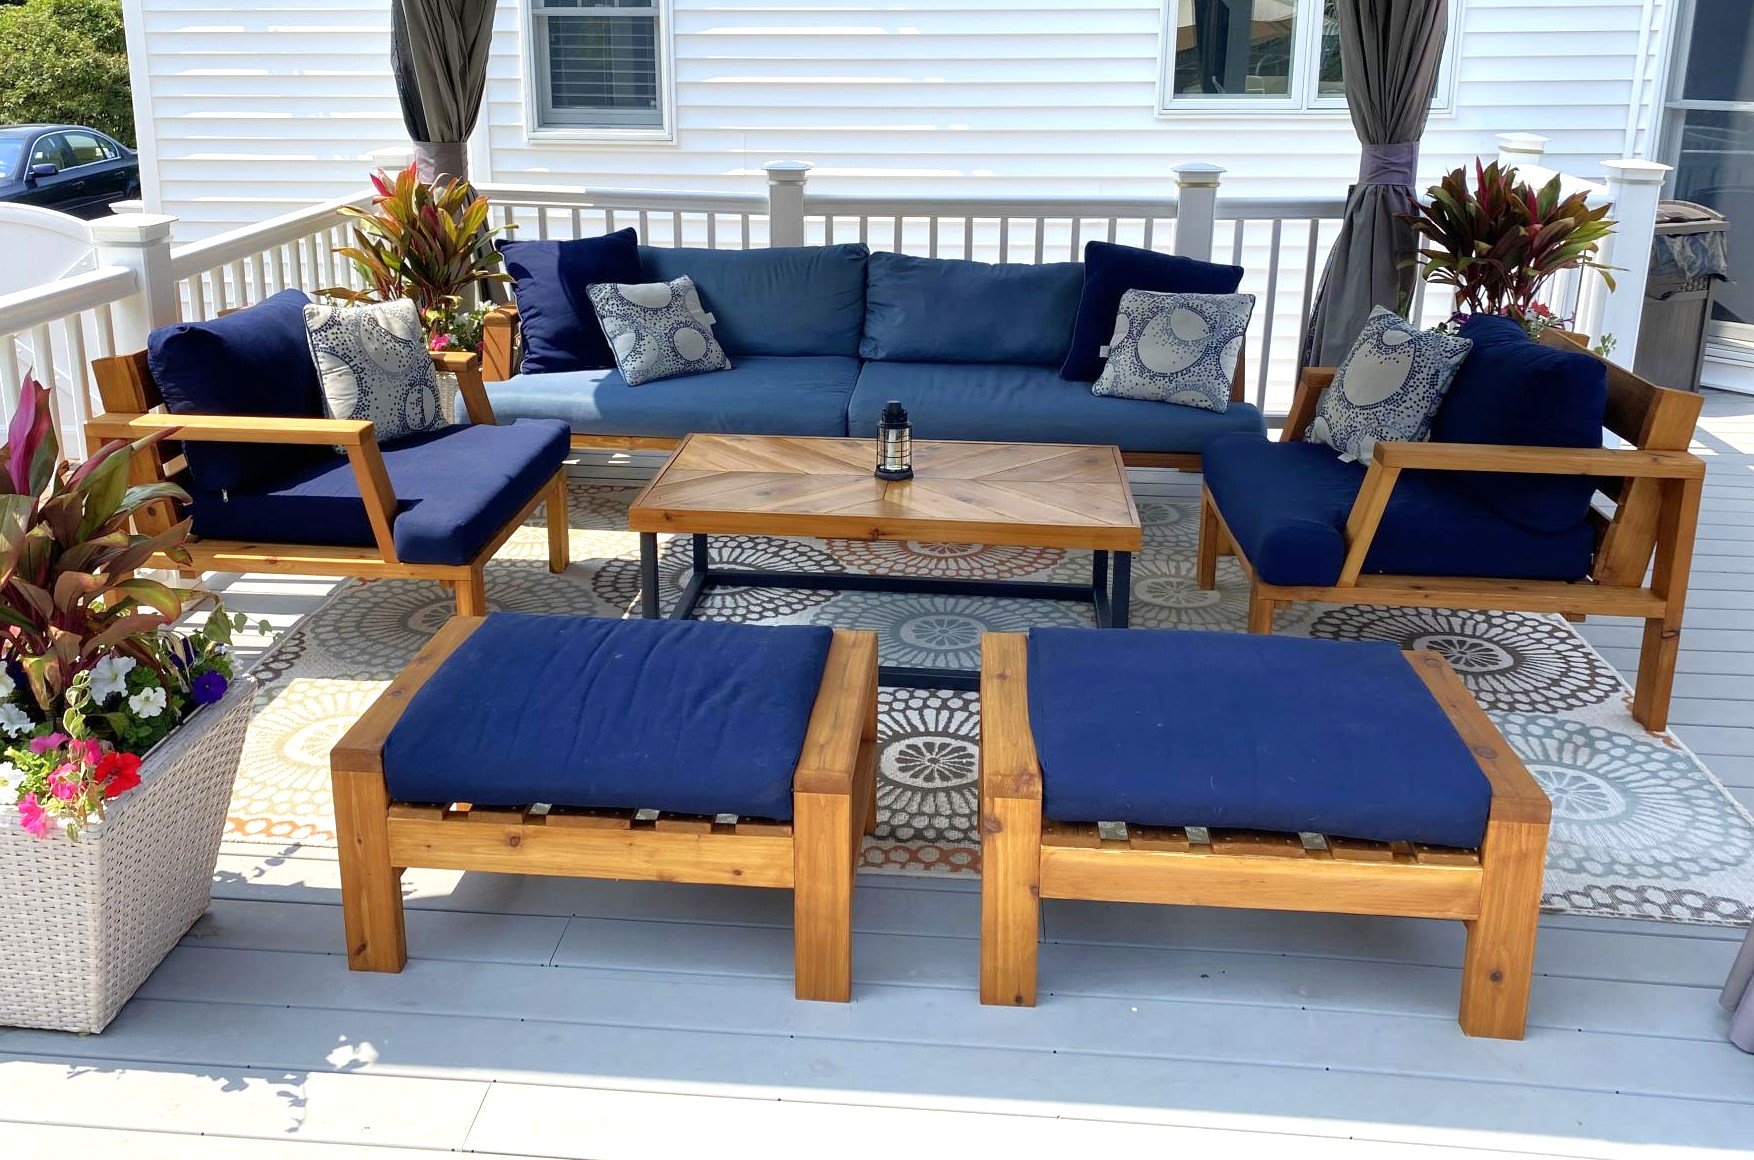
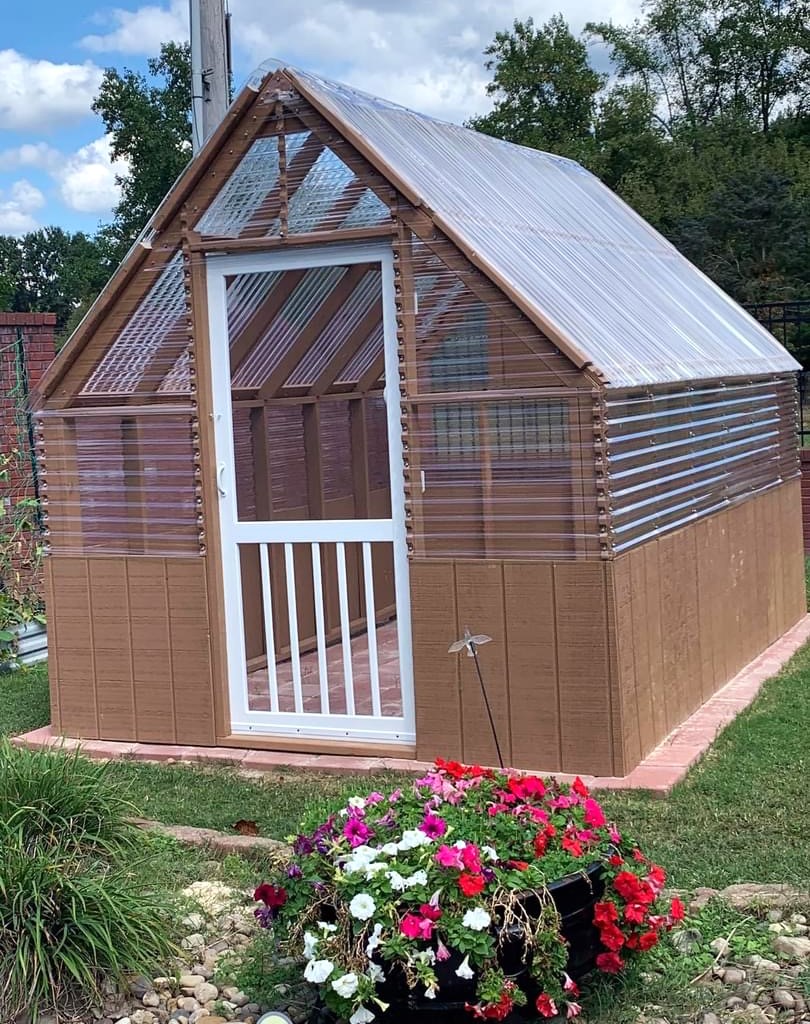
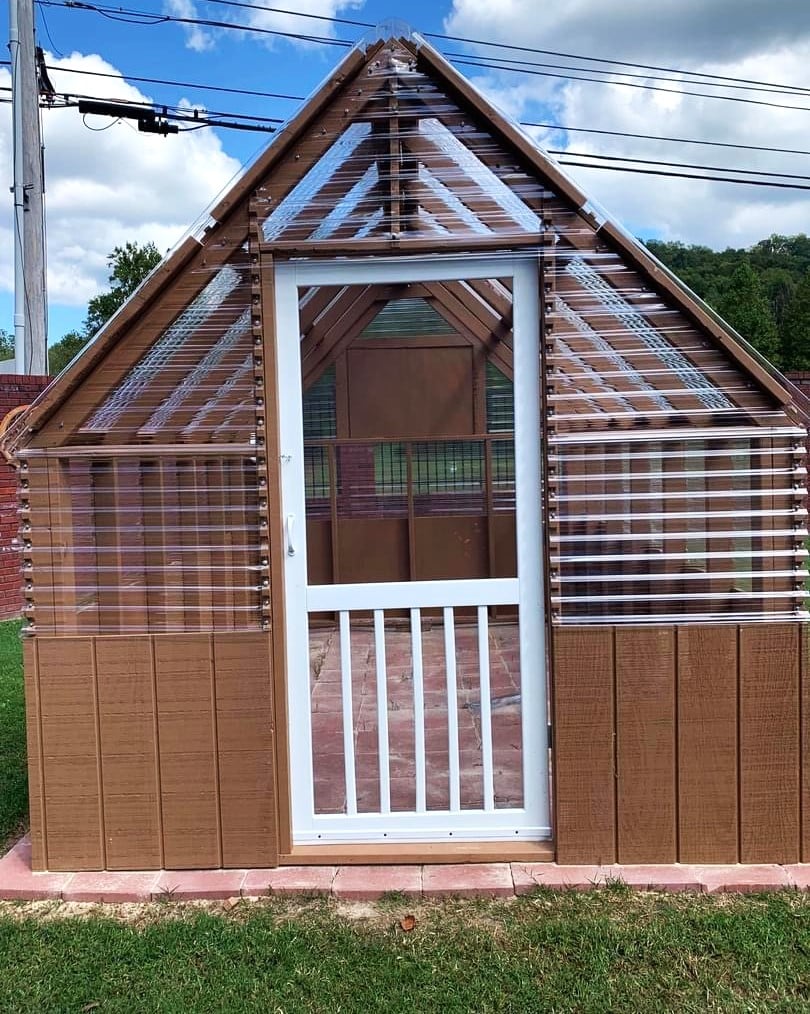
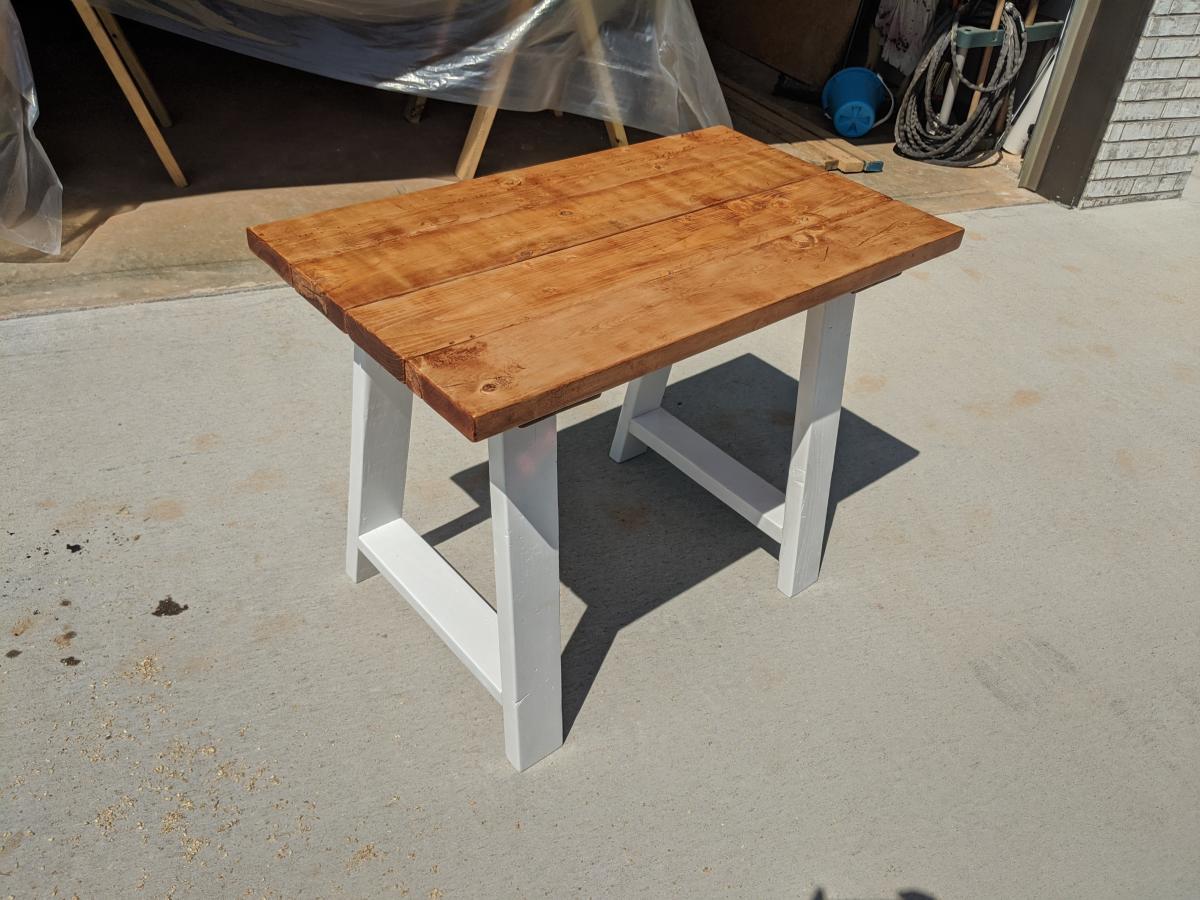
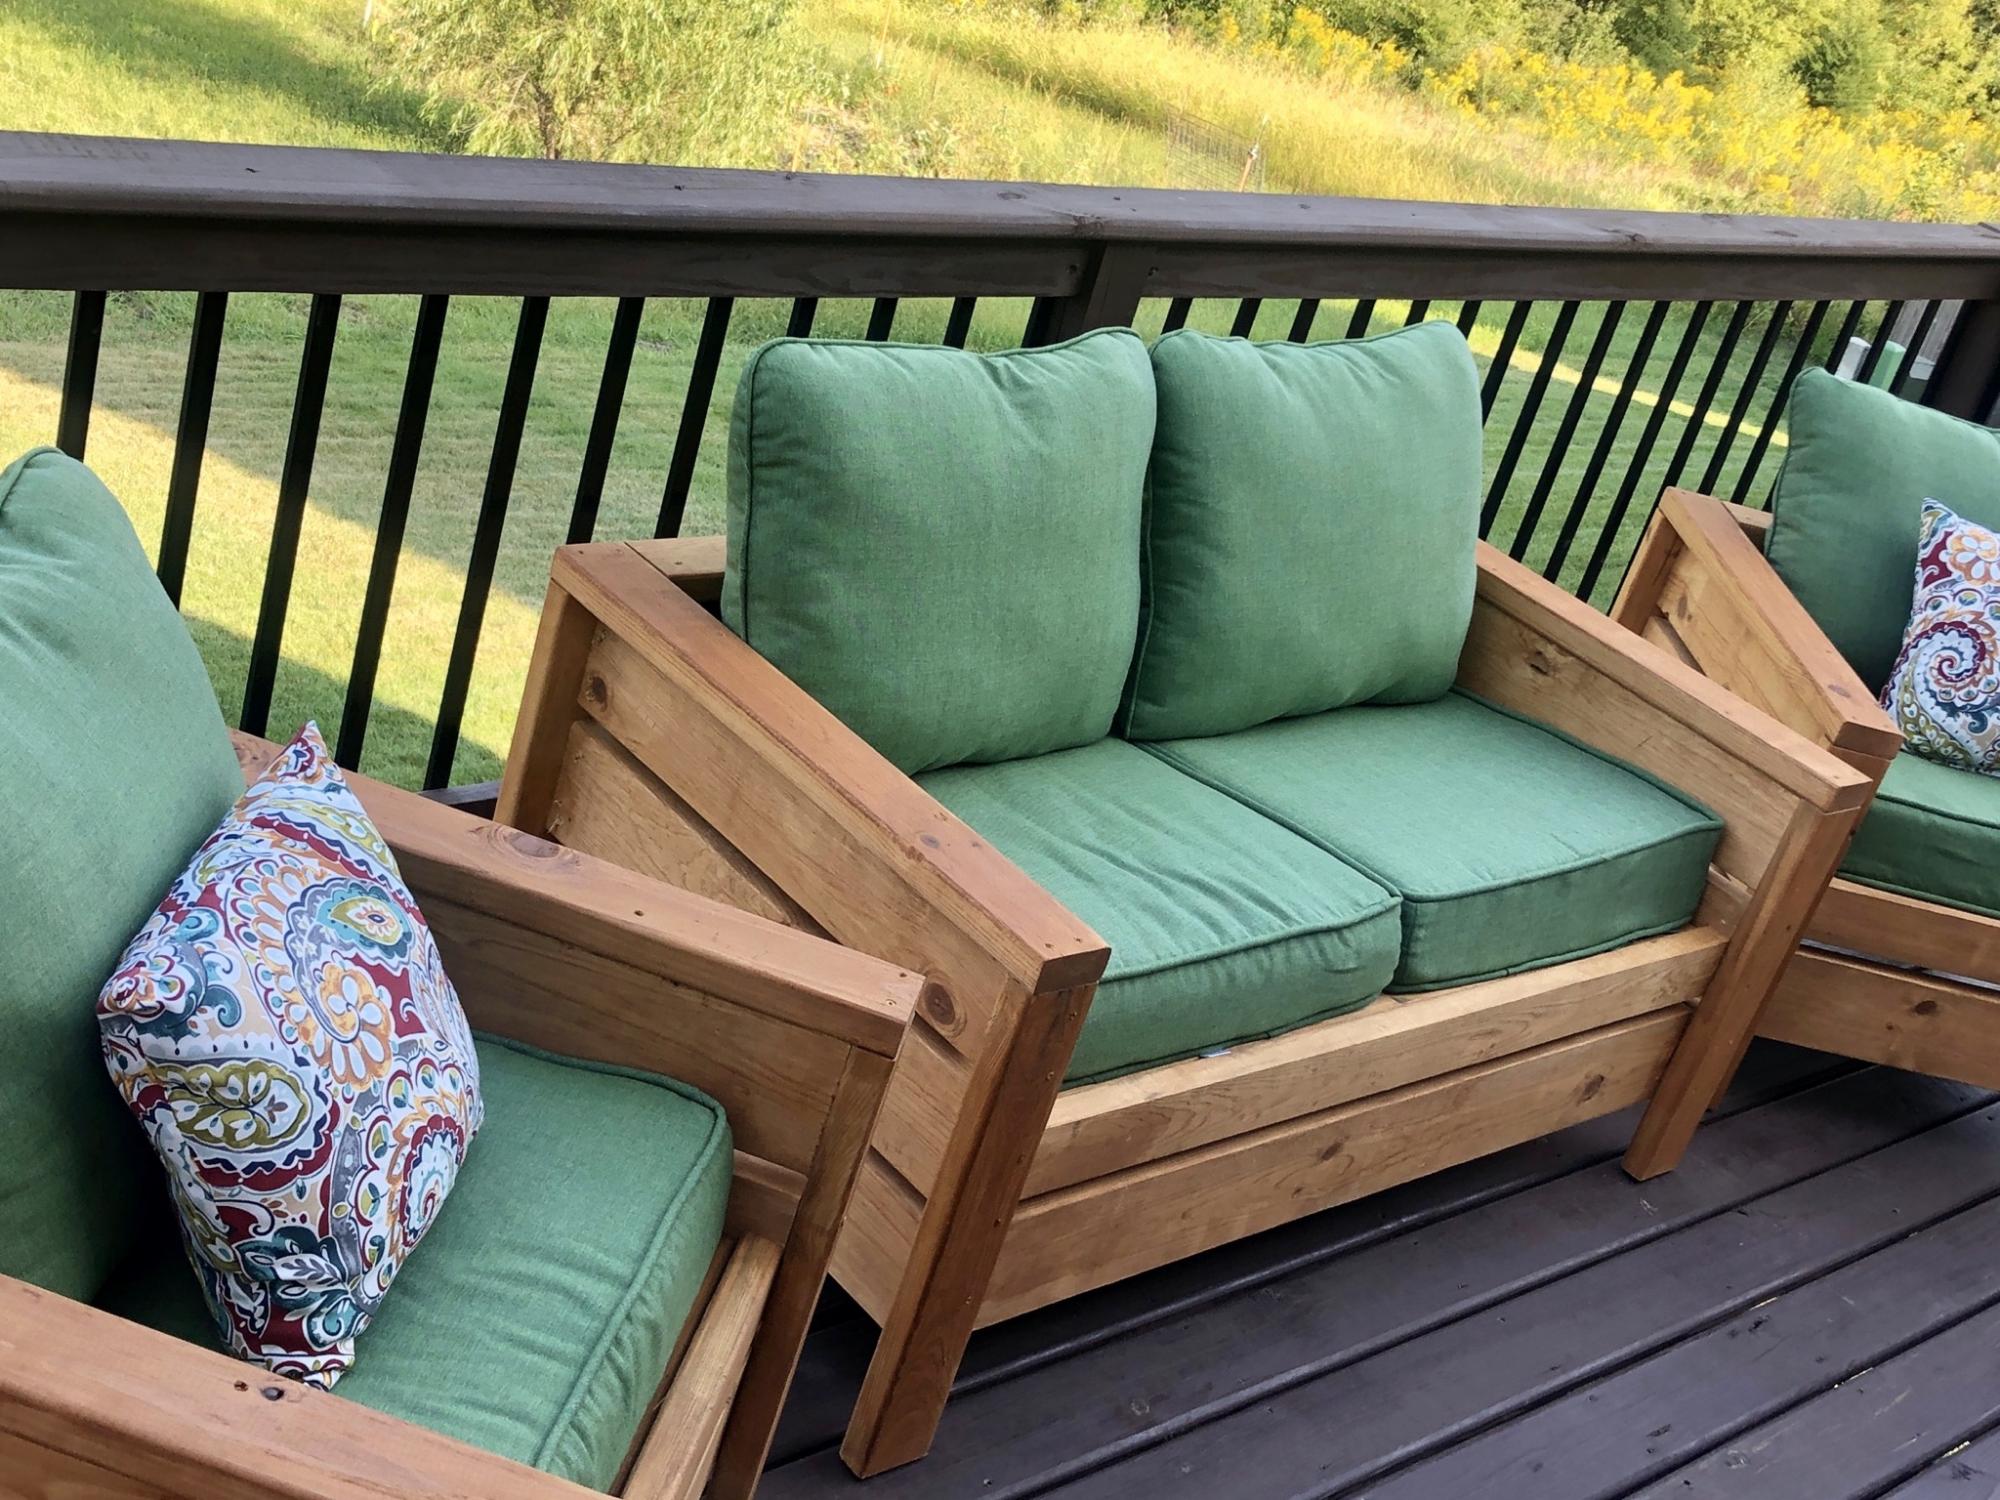
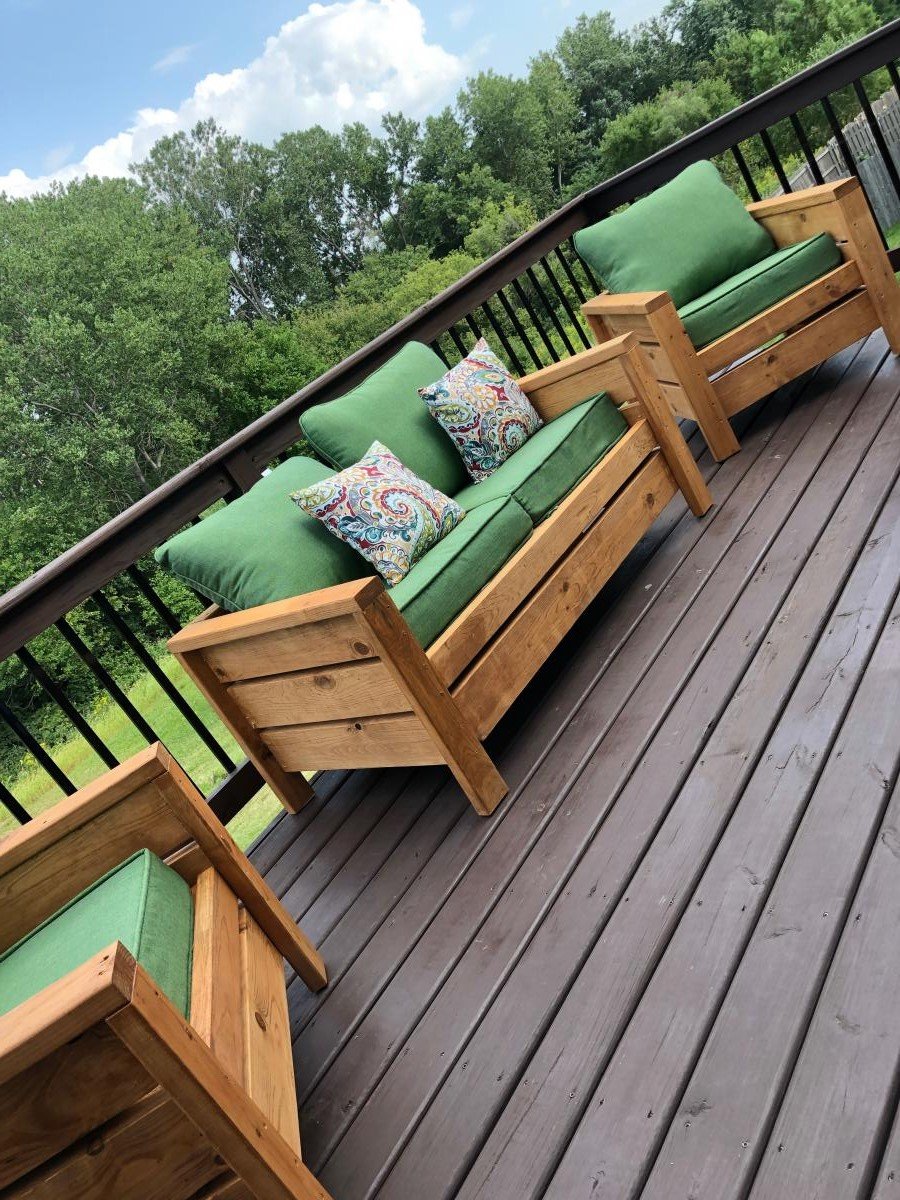
Cedar Outdoor Dining Table and Benches

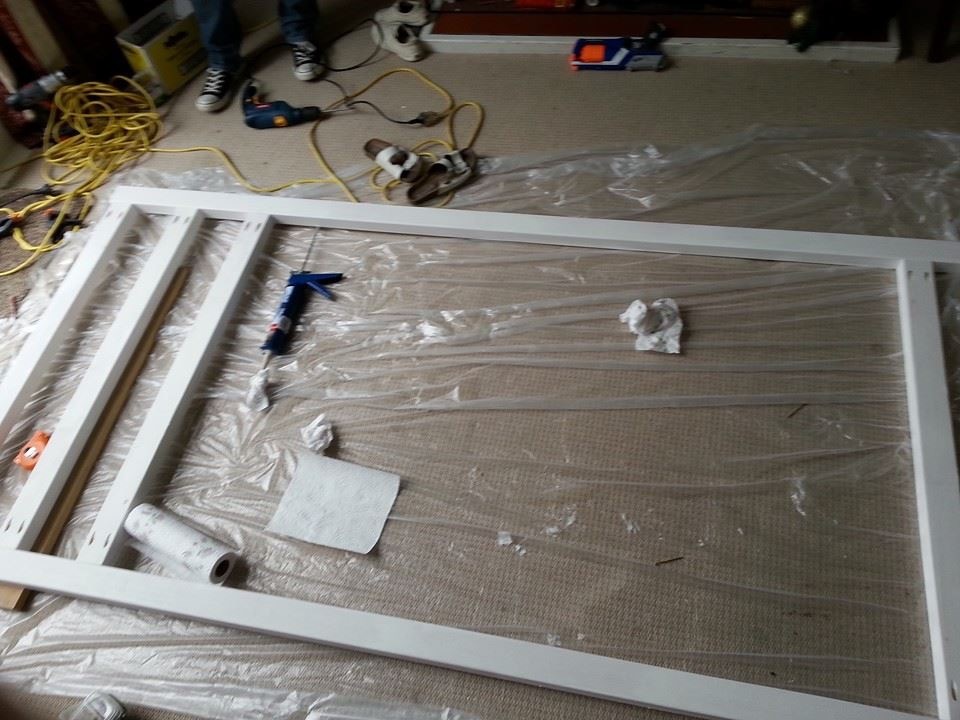
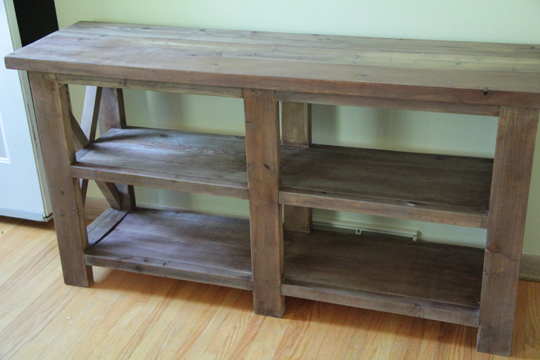
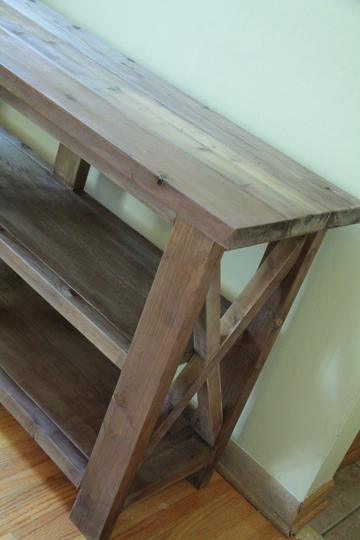
My wife and I loved the version that Finns-Dad made but we wanted it to be rectangular. The top is 1x6s around the edges with 1x4s in between. The frame is 1x4s. The bench tops are all 1x4s with 4x4 legs. There are 3/8 inch lag bolts in the legs. We did 4 coats of the urethane.

This was my first major project, and while there are many things that I would do differently if given the opportunity, we're still very pleased with it.

Built from Plan(s)
Estimated Cost
$350
Estimated Time Investment
Weekend Project (10-20 Hours)
Finish Used
Rust-Oleum Varathane Classic Clear Water Based Outdoor Spar Urethane Semi Gloss
Recommended Skill Level
Beginner

Comments

Garden shed

Submitted by Anonymous (not verified) on Sat, 11/28/2020 - 13:19

Our take on the small garden shed. Ours is 4 1/2 by 7 feet. We used cedar fence pickets and 2x4 construction. Left over shingles from when our house was built. We are definitely not roofers or framers, also chasing around a 3 year old didn't make things easier. Turned out beautiful for what we want it for. Just rustic enough. Great intermediate project.

Built from Plan(s)
Estimated Cost
$400
Estimated Time Investment
Weekend Project (10-20 Hours)
Finish Used
Thompson's clear water seal will be applied this summer.
Recommended Skill Level
Intermediate

Comments

Seasonal And Holiday

Shoe organizer

Submitted by Liz H. on Wed, 06/01/2011 - 21:26

I took the 25 cubbies plan and changed the dimensions to fit shoes. I made a simpler version for my husband too. This project went together quickly and was so fun to build.

Estimated Cost
$10
Estimated Time Investment
An Hour or Two (0-2 Hours)
Finish Used
White paint
Recommended Skill Level
Starter Project

Lift Top Coffee Table

Submitted by JJones0925 on Fri, 03/16/2018 - 20:48

Instead of attaching the top to the coffee table base as done in the plans, the top is attached using a set of coffee table lift top hinges. 

Built from Plan(s)
Estimated Time Investment
Weekend Project (10-20 Hours)
Recommended Skill Level
Beginner

Comments

Faux Fireplace with hidden storage cabinets

Submitted by Wccox on Mon, 11/16/2015 - 20:50

Very nice project built in a day. 

Estimated Cost
$250
Estimated Time Investment
Day Project (6-9 Hours)
Recommended Skill Level
Intermediate

Comments

Seasonal And Holiday

Cedar Yard Tool Shed

Submitted by Mad's Dad on Sun, 12/06/2015 - 09:43

I changed the plans just slightly. I used 2x4's for framing and enlaged the shed somewhat and added a floor. I also used a different type of roof to handle the amount of rain in my area.

Built from Plan(s)
Estimated Cost
$450.00
Estimated Time Investment
Week Long Project (20 Hours or More)
Finish Used
Natural Cedar stain
Recommended Skill Level
Beginner

Comments

L shaped loft beds

Submitted by AbiCurrie on Wed, 01/13/2016 - 00:49

We have 12 foot studs in our house so I wanted to make use of the height of our ceiling to provide more space on the floor for the boys to play! With two boys sharing a room, the beds were going to take up a lot of valuable floor space. I found the bunk bed plans in Ana's book and decided to modify them to make loft beds. We had to do two so decided on an L shape so we could fit them into the room! Once we made the first bed we decided we should put only one set of stairs in to save space. The safest way we could think to do this was to place the stairs against the wall so the boys were less likely to fall. The stairs double as book shelves. The coloured rope was an added safety feature we thought up and gives me peace of mind! This was a fun, relatively easy build for two non-builders making their first big project. I bought a Kreg pocket hole jig for this project and it was a life saver. I can't imagine doing this build with out it!!! We completed it in about two to three days while my brother was down on holiday. It was fun and good brother sister bonding time! I am about to embark on phase two of the boys room, this time by myself , adding a storage dresser under one bed. I will modify Ana's laundry dresser plans to fit some plastic storage boxes. Then a day bed/sofa under the other bed using Ana's Alaska cabins day beds plan and finally (if I'm still standing) a shorter version of the craft table for the middle of the room! That's my year planned! Hope you enjoy the pictures, the beds are so big and high it's very hard to get a good photo. 

Estimated Cost
$300-400 NZD
Estimated Time Investment
Weekend Project (10-20 Hours)
Finish Used
Dulux - White paint matte finish. I painted all the wood before assembly, I highly recommend this. It needs another coat post build but I can confess I haven't gotten around to it yet!!!
Recommended Skill Level
Beginner

My wife built a bed.

Submitted by AKMan279 on Sun, 06/02/2019 - 20:45

We looked for a simple plan for a bed and found this one on Ana’s site.  Easy to build in a weekend.

Estimated Cost
$140 with all lumber and stain.
Estimated Time Investment
Weekend Project (10-20 Hours)
Finish Used
Poly stain
Recommended Skill Level
Beginner

Comments

Outdoor Patio Furniture

Submitted by Anonymous (not verified) on Tue, 06/20/2023 - 09:32

Our outdoor furniture from Costco was falling apart but the cushions were still in great shape so I decided to design the furniture around the existing cushion dimensions. I used all Cedar wood and stained it with Australian Timber Oil Honey Teak stain. The table design was from a picture I saw on another site.

Comments

Seasonal And Holiday

Cubby Bookcase for a big girl!

Submitted by ferbit on Mon, 04/09/2012 - 18:36

My youngest needed a new bookcase so bad! All she had was an old baby bookcase that hardly fit her books anymore. I was so excited to see Ana's plans for the simple cubby bookcase. Yay! I made it a smidge narrower to fit the space and taller so she could have more adjustable cubbies. :)

I used pine 1x12 boards for the box and pine 1x2's for the trim. I used my Jig-It Adjustable Shelving Jig and drilled every other hole. Didn't feel like I needed quite as much "adjustability" for books. :-)

I wanted a more rustic look, so I left a lot of brush strokes on purpose and didn't fill any obvious knots in the wood. I really like how it turned out. :) When we were putting all of the shelves in, my daughter was so cute - she made sure all of the knots were facing OUTWARD so she could see them. She thought it looked neat that way.

Estimated Cost
$60
Estimated Time Investment
Day Project (6-9 Hours)
Finish Used
Behr semi-gloss off-white
Recommended Skill Level
Beginner

DIY Gable Roof Greenhouse

Submitted by Anonymous (not verified) on Wed, 10/11/2023 - 10:42

I love my new Ana White designed greenhouse! It was amazingly easy to build and the material shopping list ensured there was very little waste or materials leftover after the build. I can’t wait to get started using it.

Bill Crabtree

Built from Plan(s)

King size Farmhouse Bed

Submitted by Anonymous (not verified) on Sun, 04/19/2020 - 15:59

This is a plan that My 16 year old son chose to do for a project to fulfill a goal to learn some woodworking skills during our unexpected downtime from School.
Mom is thrilled with the new space.
He adjusted different sizes based on what lumber we already had. He used 1x7’s and routed a 45deg on the edges to give the tongue and groove look. Posts are 4x5 and top railing is 2x7.

Estimated Cost
$40 in paint and supplies. Wood was free from a friend.
Estimated Time Investment
Weekend Project (10-20 Hours)
Finish Used
Valspar Furniture Enamel.
Color - Web Grey
Recommended Skill Level
Beginner

Comments

My Rustic X Console

This is my third project from this site (ok, third project EVER). I was coming on to look for doll bed plans, and the Rustic X Console showed up on my screen....I loved it instantly, and knew I had to try it. My husband ran out and picked up a Kreg Jig for me, and we spent a couple evenings on it. Had lots of fun, though now I know why Ana says to make sure you buy straight boards--the middle shelves were not straight, and that was frustrating to work with but we made it work! Now I just need to figure out what I'll be using it for.

Built from Plan(s)
Estimated Cost
$50
Estimated Time Investment
Weekend Project (10-20 Hours)
Finish Used
Just like the original, I used the steel wool & vinegar mixture. I did two coats of this, which amounted to about one and a half cheese whiz jars full. Then my husband lightly sanded it (I really, really hate sanding) and we sprayed it with two coats of Minwax satin finish varathane. We'll probably still add one more coat of that.
Recommended Skill Level
Beginner

Comments

Barn Door Console with Drawers

Submitted by Anonymous (not verified) on Mon, 05/06/2024 - 13:27

Being a newby to woodworking, I wasn't sure if I could tackle this build. I saw pictures on your website and decided to give it a try. However, my wife wanted drawers so I made the doors a little shorter in order to add the 4 drawers but keep the height at 36". Thanks for your inspiration. I'm getting more comfortable everyday.
 

Louis Villarrubia


Adirondack Chairs for new Fire Pit area

Submitted by TonyLiddic on Thu, 08/06/2020 - 09:58

We've been talking about adding a fire pit and seating area for awhile. Our oldest daughter's graduation party combined with extra available time due to Corona presented a perfect opportunity to try something new. I've never built anything like this and have very limited experience with woodworking but I came across these chair plans when searching for chairs to buy. Not too bad for a first project! Started digging up sod about a month before the Grad Party. Worked on it a couple hours a day and maybe 3 full weekend days. Came out great and is a wonderful addition to our backyard.

Estimated Cost
$900
Estimated Time Investment
Week Long Project (20 Hours or More)
Finish Used
1 thin coat of Thompson Timber Oil (Cedar Semi-Transparent) applied before assembling each chair. Used about 2/3 gallon for all 5 chairs and light posts.

Modern Outdoor Patio Set

Submitted by dlangford on Sat, 09/05/2020 - 16:08

Built this over the weekend for my girlfriends sister. It was a great project and the whole family was able to work together on it, sanding and waterproofing it before assembling. The loveseat plans need a little tweaking. We ran ran the slats the same direction as the chair plans call for so we added a middle support for extra stability. We also pitched the seating down towards the back by 5* to make a more natural sitting position.

Estimated Cost
$300
Estimated Time Investment
Weekend Project (10-20 Hours)
Finish Used
Behr Cedar Natural Tone Waterproofing Stain and Sealer
Recommended Skill Level
Beginner
Seasonal And Holiday

Master Bath Barn Door

Submitted by Anonymous (not verified) on Fri, 03/17/2017 - 16:34

Created this door with pine wood tongue and groove lumber and pine wood planks. Purchase barn door hardware / track from Jet.com and door handles from Hobby Lobby. 


This replaced my Master bath door and I think came out pretty good. Thank you for the ideas!!!  Jeff M.   Brownstown, Mi

Estimated Cost
Wood 55.00
Handles 2 for 8.00
Stain ( left overs)
Barn door track 54.00

Total $117.00 and 10 % Military discount at lowes
Estimated Time Investment
Weekend Project (10-20 Hours)
Finish Used
Minwax. Mix of Kona and Driftwood Grey
Recommended Skill Level
Intermediate

A twist on Modular Family Entryway Mudroom System - Pullout Rolling Bench Cart

This is a twist on the Modular Family Entryway Mudroom System - Pullout Rolling Bench Cart . There have been many posts on the net for a mudroom locker set such as the one I have. In our case we had a mudroom with a closet, not much room to move when sliding the doors open, and as well we have kids that need a place to sit in order to put boots/shoes etc on. I took advantage of my husband's work assignment out of the country to rip back the closet,to 20 inches deep and open it up and added a bench for seating, baskets above for out of season/rarely used stuff, and used rolling cubbies below, but in my case I wanted storage bins instead. My thinking was so that I could make it look clean pretty quickly by just chucking every thing in to the bin... These are tall enough for our boots. In the bottom of the bins I put a piece of outdoor carpeting, then a plastic grid, and over that another layer of outdoor carpeting so if the footwear is wet it will drain and dry-no biggie to vacume or sweep out. Best deal: I can simply roll them out of the way when I want to sweep underneath! I measured cubby space to basket size above, and made the bins below after doing the bench and middle supports, to ensure a good fit. The bench top is an old piece of pine board I sanded, stained and used 4 coats of marine varnish so it would take lots of wear and tear.

Estimated Time Investment
Week Long Project (20 Hours or More)
Finish Used
minwax walnut stain, and marine varnish benchtop
behr marshmallow paint
Recommended Skill Level
Intermediate

Comments

2 x 4 Garage Shelves Built into Basement Storage!

Hello Everyone! This is my FIRST brag post here on Ana-White.com - but not the first project that we've built from her awesome plans. :) 

We have an unfinished basement that desperately needed some shelving because 1. It's our workshop in the Winter and 2. We don't have an official 'storage' room in the basement of our split level home. When I saw these plans I immediately thought they could be modified to fit our space and get my stuff off the floor! 

I modified the plans just enough to fit our space. After reading through them completely, I realized for an 8 ft wide space (beside the stairs) I only needed three supports for the shelves. Easy! The only trick was fitting the shelf into the space AFTER installing the shelves. Because I had walls on two sides (unlike the tutorial) I couldn't do the shelves as the last step. 

I LOVE how these turned out! They are a strong as a ladder (we tested them... :)) and they hold everything I need them to, and a little bit more. It's a definite improvement on my previously messy, cluttered, saw-dust covered space ... :) 

Estimated Cost
Our space was 8ft tall by 8ft wide, so we ended up purchasing about $60 worth of 2x4s to complete the project. We also used 2.5" screws, which are around $4 per box of 75.
Estimated Time Investment
Afternoon Project (3-6 Hours)
Finish Used
None - we left the wood bare and natural because it's just for storage - not for looks. :)
Recommended Skill Level
Beginner
Back