Community Brag Posts

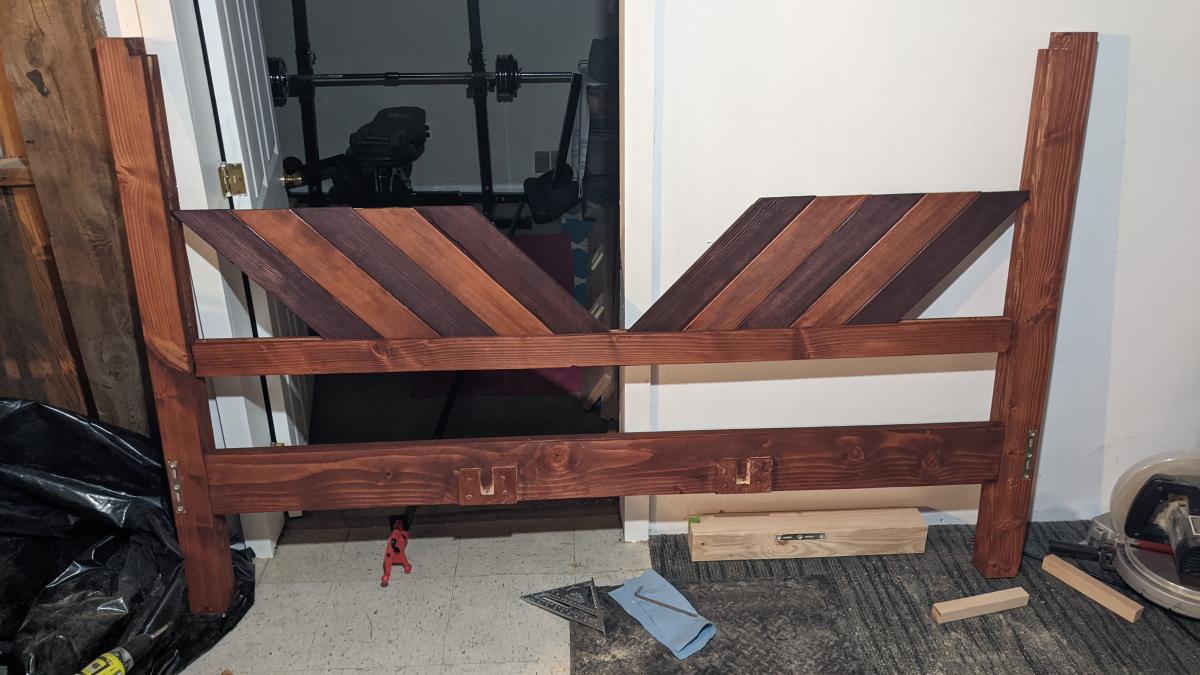
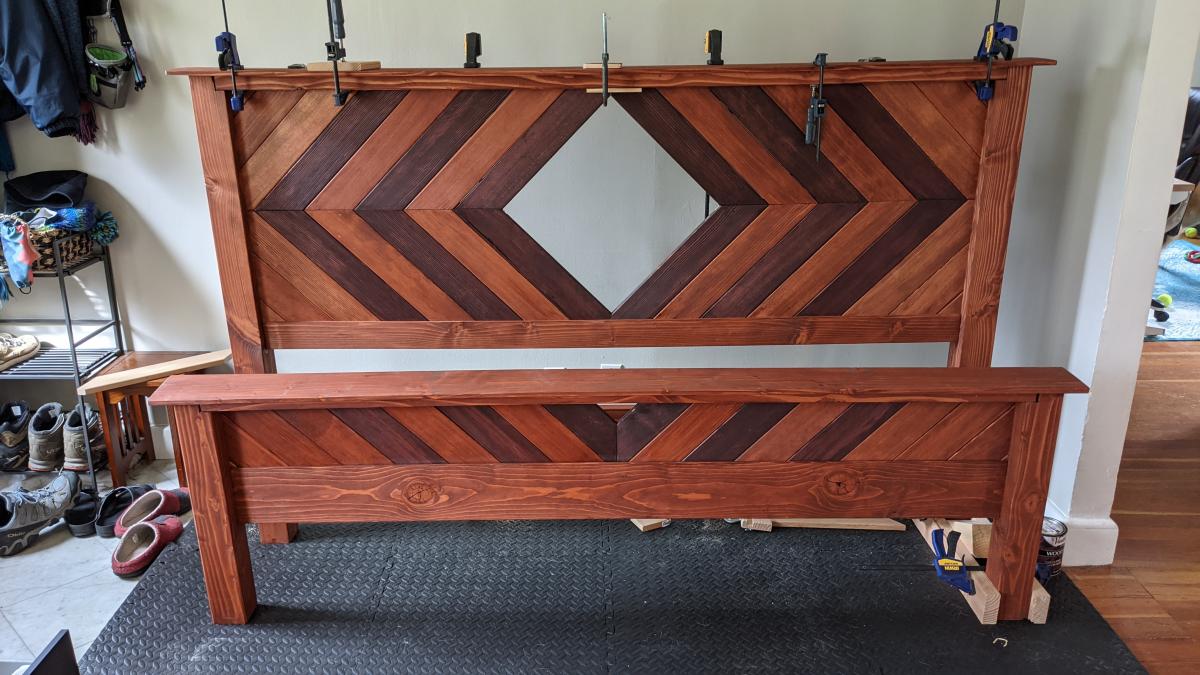
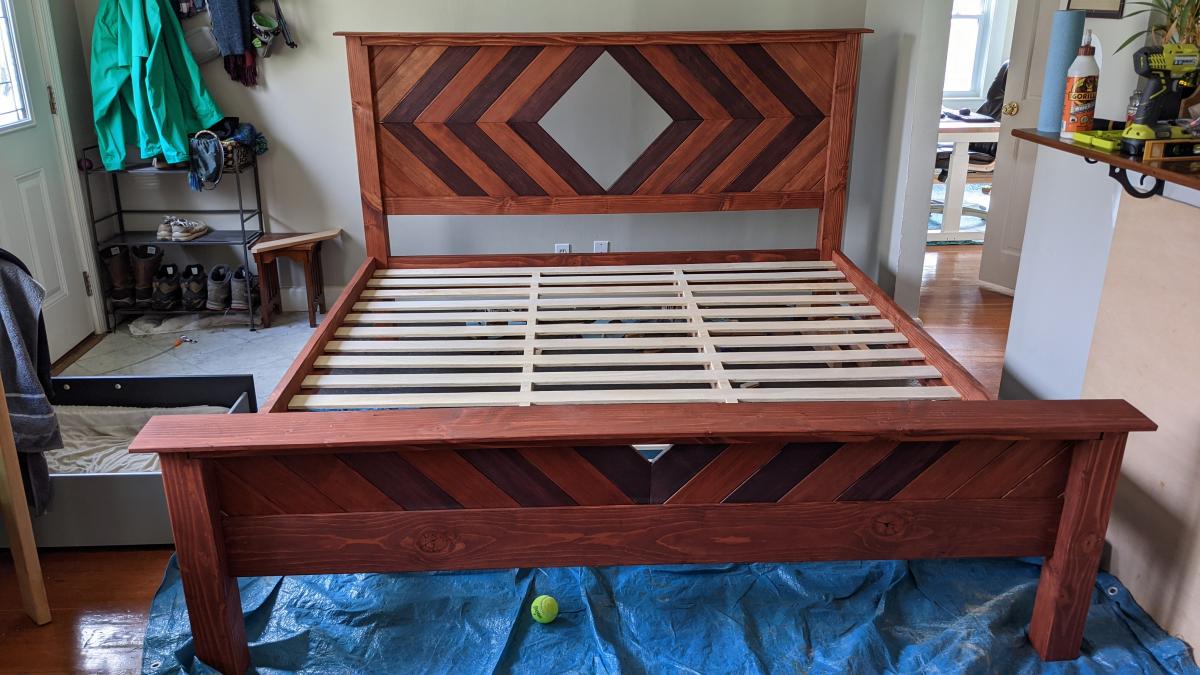
Modified King Farmhouse Bed

Submitted by Anonymous (not verified) on Tue, 04/20/2021 - 15:31

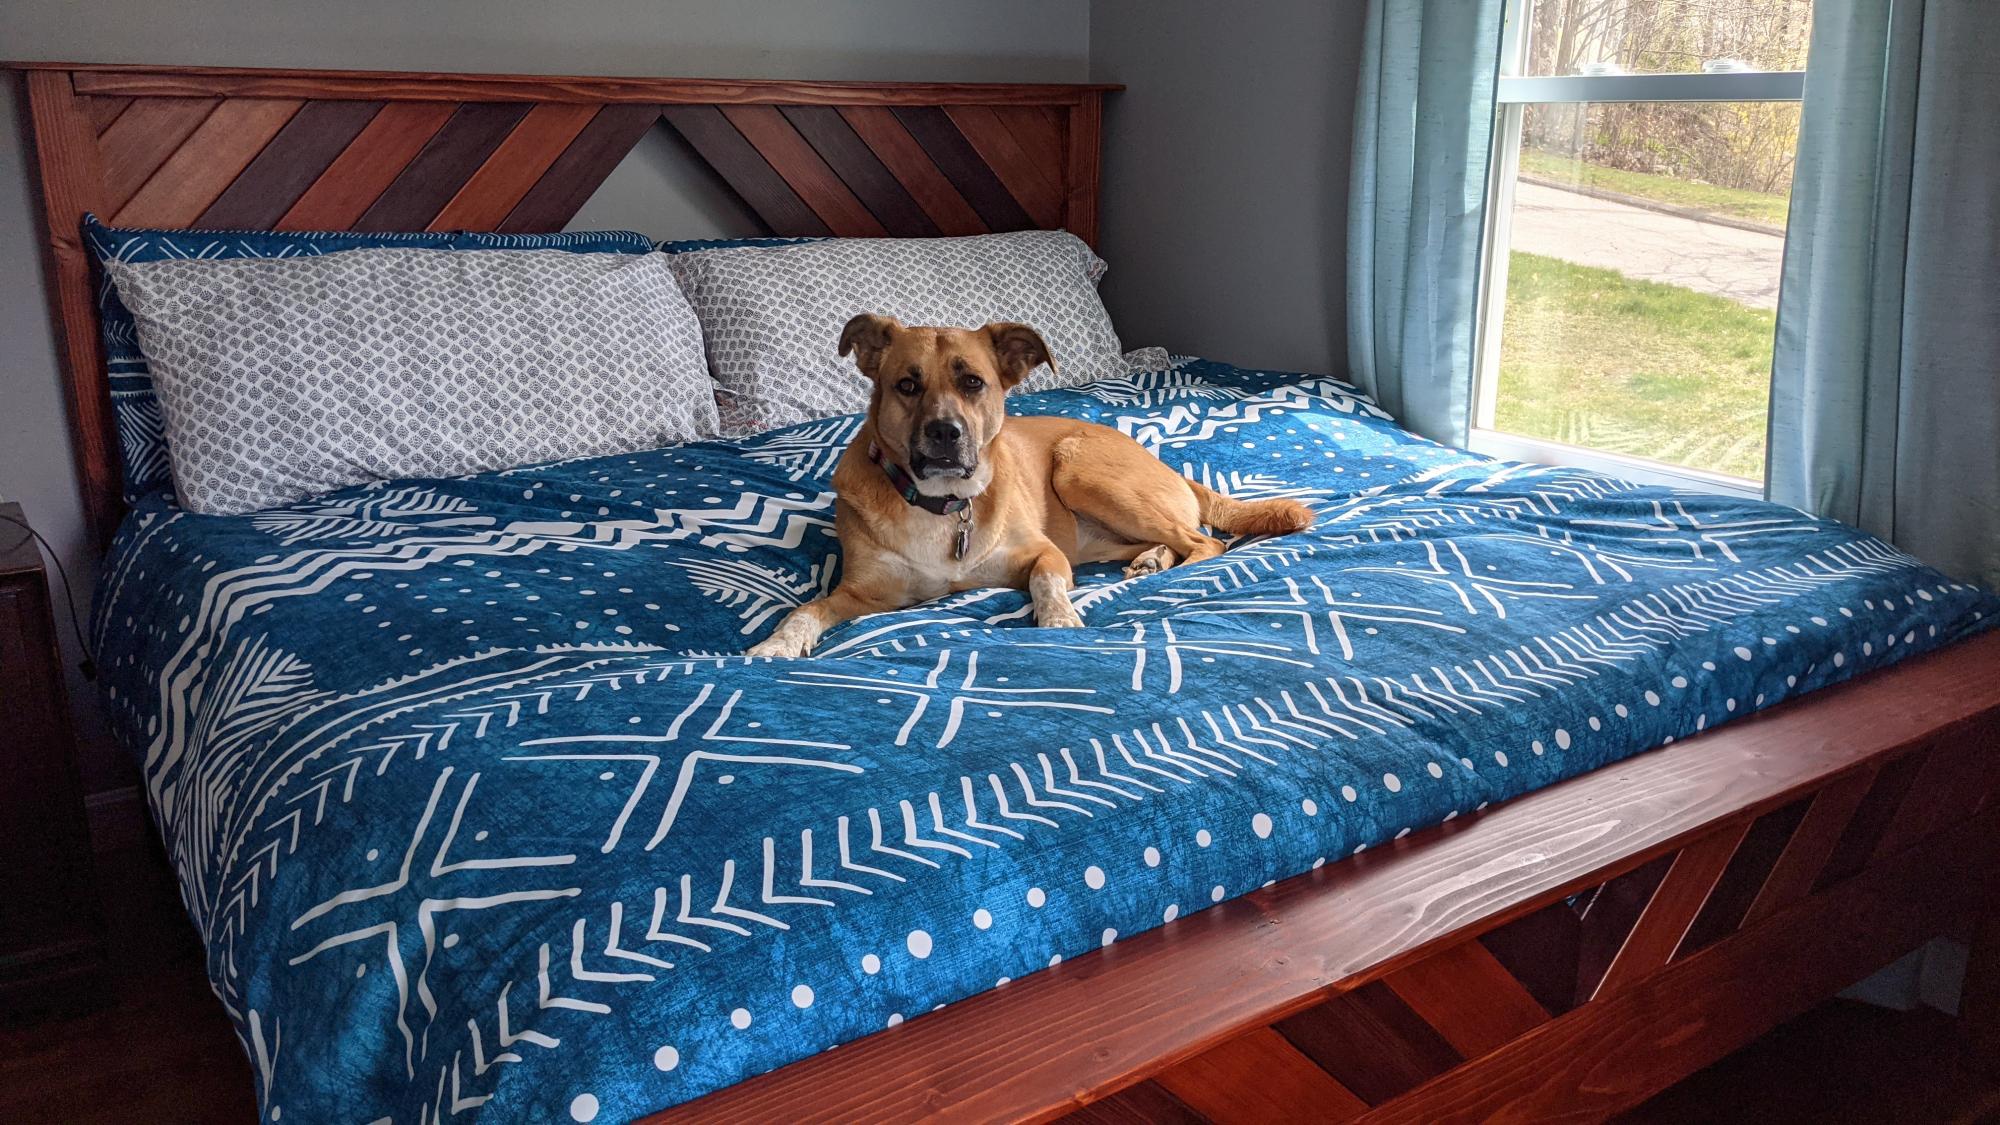
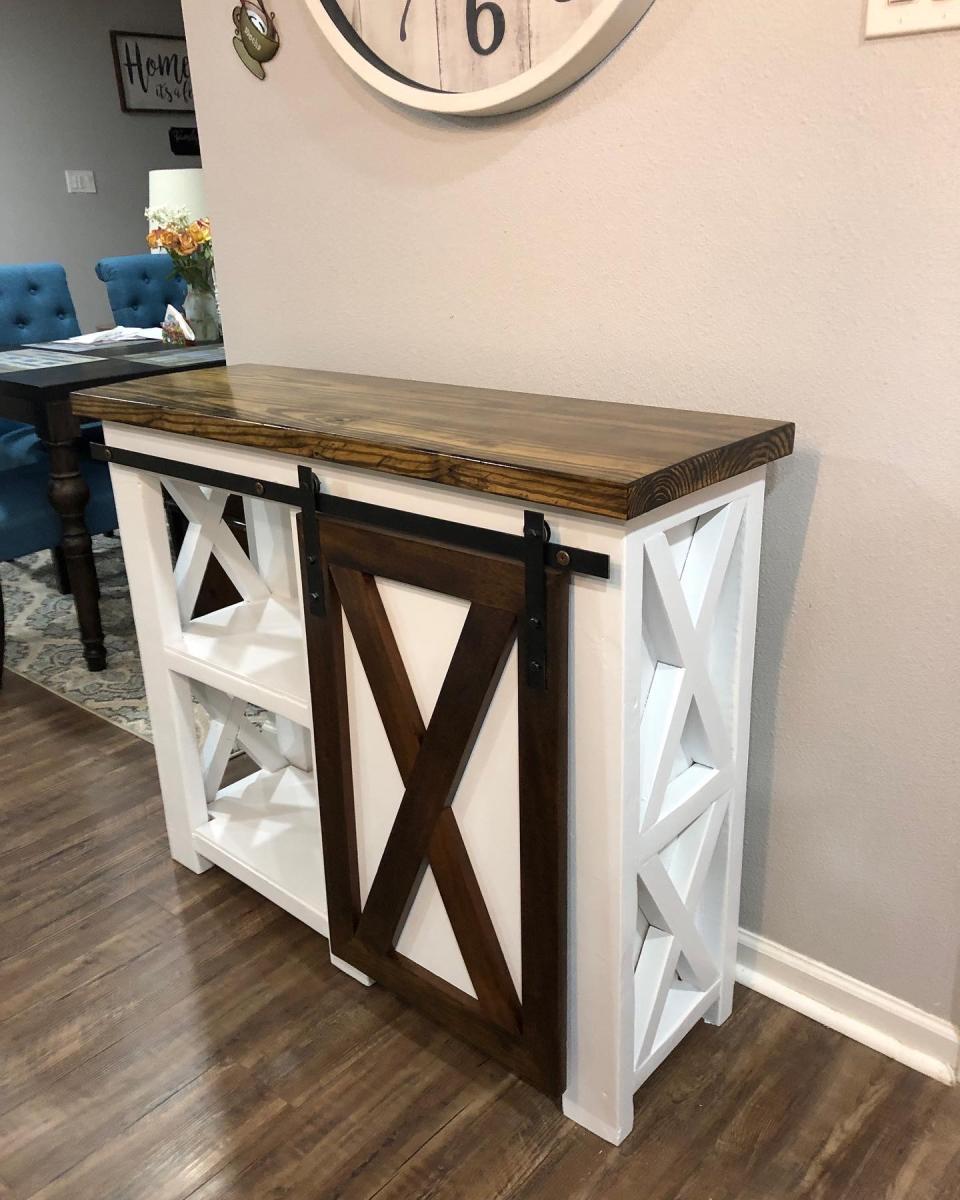
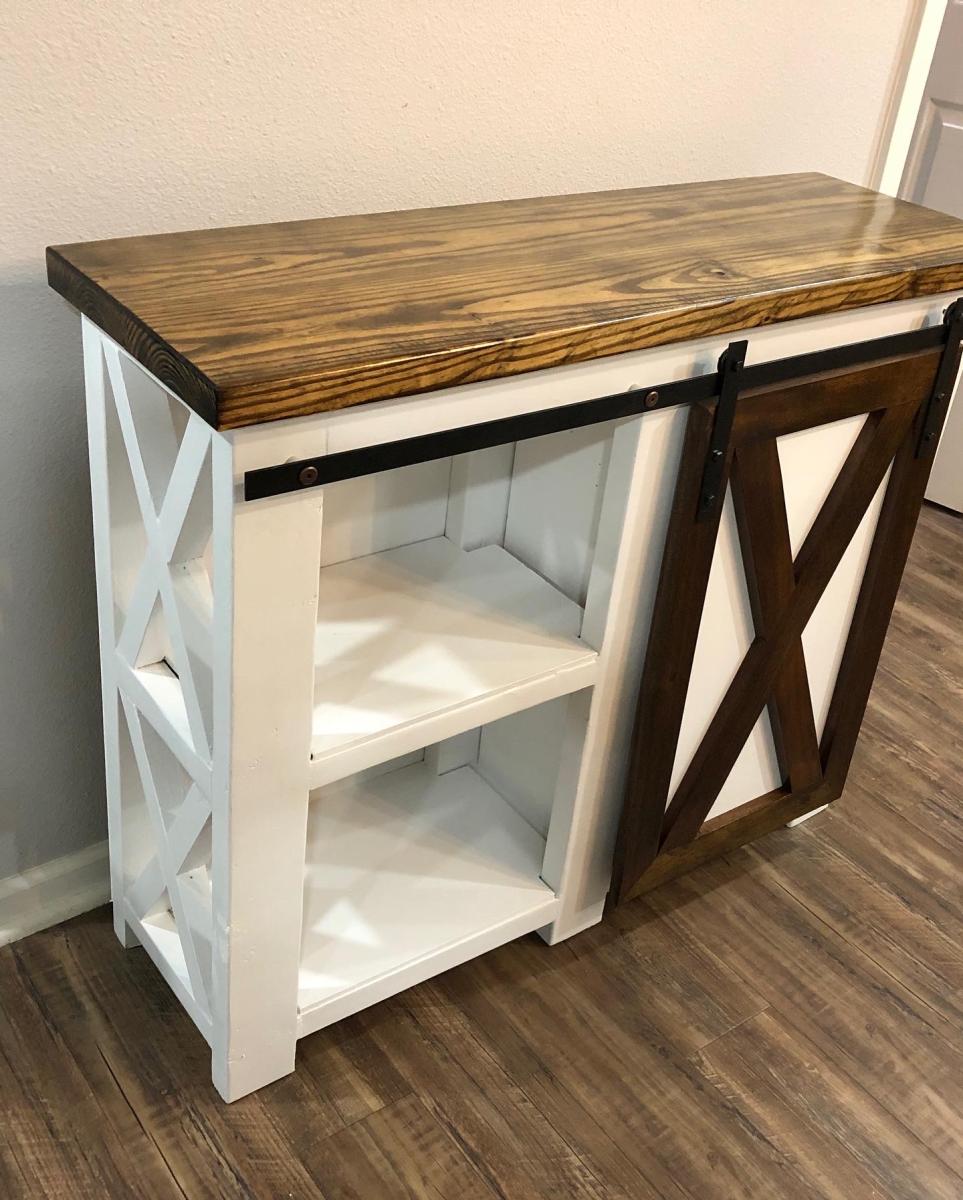
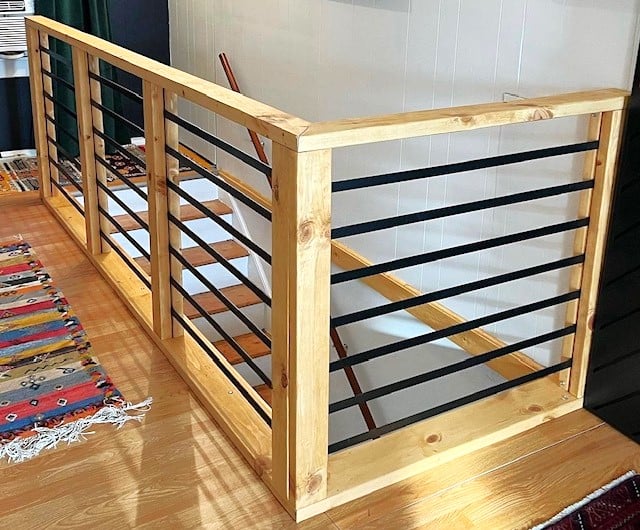
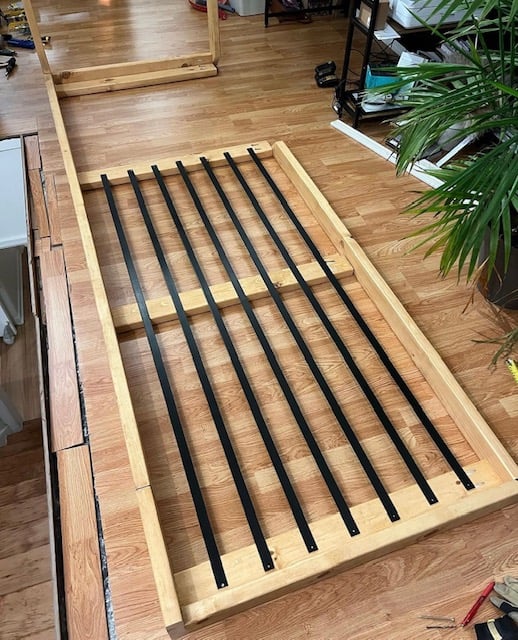
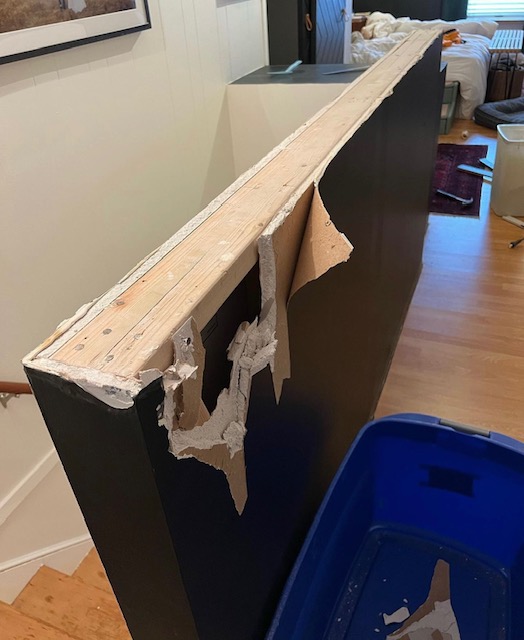
We ended up deviating more than we were originally intending from the Farmhouse Bed plans. We started off planning to modify so that it was able to be disassembled (used metal brackets and to fit storage drawers at the foot of the bed. The my finance got a router, so we ended up with a lot of mortise and tenon and tongue and groove joints, and a fancier headboard. I LOVE the end result but we were definitely in over our heads at times!

Estimated Cost
400
Estimated Time Investment
Week Long Project (20 Hours or More)
Finish Used
Traditional Cherry and Black Cherry Oil Stain, Black Tea as Wood Conditioner and Poly Finish
Recommended Skill Level
Intermediate

Comments

Zach's new desk

Submitted by dinifam on Sat, 04/13/2013 - 13:28

I built this desk so my son would have a place for his old school tv and to do his homework! It was super easy and I love how the finish came out! His room is a huge work in progress but this is the first step:)

Built from Plan(s)
Estimated Cost
20.00 as I had scraps and finish supplies
Estimated Time Investment
Afternoon Project (3-6 Hours)
Finish Used
I sprayed the bottom with satin black paint The top I painted white then sanded it down with 80 grit and rubbed on then rubbed and wiped minwax poly espresso stain until I got the look desired. Easy!!!
Recommended Skill Level
Beginner

Kid’s Adirondack Chair Project

Submitted by David_1962 on Tue, 07/20/2021 - 07:54

This little chair turned out really well. The only significant changes I made to the plans were to cut the back slats in an arch, round the corners on the arm pieces, and round-over all of the exposed edges.

Built from Plan(s)
Estimated Cost
None, built from scrap deck boards
Estimated Time Investment
Day Project (6-9 Hours)
Finish Used
Ipe is an extremely heavy, dense tropical hardwood. It’s primarily used for making decks but is also excellent for outdoor furniture. I just sanded lightly, and applied a penetrating oil branded “Ipe Oil.”
Recommended Skill Level
Beginner

Comments

Mudroom Bench with Hutch

Submitted by calliher on Sun, 09/12/2021 - 18:45

This is my laundry room and it is about 12x10. It looked so bare with only the washer and dryer. So I thought making this a mudroom also. I live in the mountains and have snow 3 to 4 months a year. This will be perfect. I purchased an IKEA cabinet built it in and added the Ana White plans with two bays.

Comments

The Modern Fire Pit

Submitted by prelude on Mon, 10/04/2021 - 13:20

I started out several years ago building the Modern Adirondack Chairs using Ana White's plans. Customers loved the modern design and I was able to fulfill orders in any color or stain. Customers even asked if I could make a children's and adult size chair. These pans are available upon request.

As the trend towards outdoor living increased due to the pandemic, I expanded my product line to tables, benches and patio planters. I even created my own design for a fire pit rack and bench based upon Ana's designs.

Today, I have a thriving business for commercial and residential fire pit furniture and accessories.

I continue to follow Ana White for inspiration and ideas, George

Comments

2x4 Rustic Outdoor Bench

Submitted by Anonymous (not verified) on Thu, 11/09/2017 - 09:46

Submitted by Carla Santiago on Facebook - 


We did a bench, I got your plans off Pinterest. We just put a slight slant to the back and we love it. Thanks for the great plans.

Built from Plan(s)
Recommended Skill Level
Beginner

Dream Bookshelves!

Submitted by Anonymous (not verified) on Sun, 12/26/2021 - 12:32

When supply issues made buying lumber for my dream shelves nonsensical, I turned to Ana's Shelfhelp and Voila!! I built the base on my own and added my own moulding, but without Ana's sites, I would not have made this dream come true. THANK YOU!

Comments

Coffee Bar with diy barn door

Submitted by dnieves33 on Tue, 01/11/2022 - 08:57

Built this coffee bar with the diy barn door hardware. Wife loves it. This is made of about 80% reused / repurposed wood. Thank you Ana for the great videos and simple to follow plans.

Comments

Pantry Bin Storage

Submitted by vendo on Tue, 01/18/2022 - 10:21

I used Shelf Help for the plywood pieces, then planked the sides with some 1x's, and added a face frame for the top edge. Casters allow for it to be moved easily and cleaned under. This is a great way to add extra storage under the pantry shelves and this design is super easy to modify for any size and height!

Comments

Doll Picnic Table

Submitted by dhrider33 on Sun, 05/22/2011 - 18:09

My 10 yr old son and 8 year old daughter really loved helping make this for their cousin. They've never been so excited to give a gift!

Built from Plan(s)
Estimated Cost
~ $15 ... although I had various scrap wood laying around from other projects
Estimated Time Investment
Afternoon Project (3-6 Hours)
Finish Used
Sanded / Primed / Painted
Recommended Skill Level
Beginner

Curved Bench

Submitted by stevez8420 on Sat, 08/08/2015 - 13:41

I followed your idea but i think my bench is a touch smaller. I decided to add arm rests on each end, I kept the top beverage ledge or "Bever-ledge" as I call it and ofcourse I added rope lighting along the underside. This was my first ever DIY project.

Estimated Cost
150
Estimated Time Investment
Weekend Project (10-20 Hours)
Finish Used
I used a Cedar Tone semi-transparent finish which turned out a little more orange than i though but it still looks good!
Recommended Skill Level
Intermediate

$10 Dresser Made Over Using Only RECLAIM Beyond Paint!

Submitted by rjcleaver on Wed, 07/31/2013 - 12:12

Bought a dresser for $10 from a garage sale by my house, and thought it would look great redone. As I was looking around for different methods online, I found a product called RECLAIM Beyond Paint while Googling DIY methods and products.
I picked up a small can from their Home Shopping Network page, and gave it a try.
The claims that there were no priming, sanding or prepping were pretty surprising. They do recommend cleaning, though.
The results pretty much speak for themselves. The project took a total of about an hour or so, including removing the hardware and spray painting it with a metal like paint I got from Home Depot, and then reattaching it.
I have to say the results were more than impressive. I had only used about an 1/8th of the can, so I'm going to try it on a few other items!
If you'd like to know more, I found it at www.reclaimbeyondpaint.com

Estimated Time Investment
An Hour or Two (0-2 Hours)
Finish Used
Just used the RECLAIM as directed on the can. Very simple roll-on product.
Recommended Skill Level
Starter Project

Ocean/Mermaid themed full size version of Sweet Pea Bunkbed

Submitted by agarant10 on Mon, 11/12/2018 - 10:13

This is a ocean/mermaid version of the sweet pea bunk bed. I had to add an additional section above the original plans in order to accommodate for the slide. I also forwent the bottom storage and opted to just put a bigger door, which allowed more headroom inside and the ability to put both a mattress and box spring on the bottom bunk. I used real shingles and painted them gold. The slide came from Home Depot. The octopus door handes I got off of Etsy for about $5 each. I found a doorbell on an old plastic outdoor house set laying around. I added some seaweed from Joann Fabrics. The steps are made out of 2x6 boards vs 1x boards. I also changed the plans so both beds are full size instead of twin size. The top bunk has so much support...it was tested with 600 lbs up there and held up fine!

Estimated Time Investment
Week Long Project (20 Hours or More)
Recommended Skill Level
Intermediate

Comments

SoCalMom

Mon, 11/19/2018 - 12:09

That bed is amazing! My daughters would never ever sleep and my 3 year old said when I showed her "mama, I wanna go there"... 

Lumber Storage

Submitted by Anonymous (not verified) on Sat, 08/20/2022 - 15:44

We are so excited about have an organized way to store our lumber and scraps. We only had to purchase 4 2x4’s for this project and were able to use a lot of on-hand scrap pieces. The plans were so clear and easy to follow. Thank you for sharing!!

Comments

Fireplace with hidden Mantle storage and side bookshelves

Submitted by ibseenu on Thu, 12/01/2022 - 14:30

Thank you Ana for you Fireplace design as it was exactly what I needed! We’ve lived in our house for 3 years now and I’ve wanted a fireplace ever since. Your plan was perfect and with a few modifications I made it come to life. My 9yr daughter as I was almost done building thought there should be a shelf for books and movies below the fire place. It gave me the idea of adding storage on the sides. I had already had the idea of the mantle storage and just used a floating shelf idea and made that. This was a lot of fun!! It took me a little over a week to build. But can’t wait to build something else for our house… like the mudroom!

Amy

Comments

jtemperley

Sun, 01/08/2023 - 19:02

That looks awesome! My husband and I are planning on doing this as well. I do have a question, as I see you have carpet just like us. Did you cut out the carpet where you built out, and if so how did you go about that, or did you just build on top of it?

My Very First Project

I modified one of the cubby book shelves for storing my sewing machine, altered the plan to have only 1 drawer since it will be against the wall and added dowel pegs to the drawer to hold thread spools.
This was very challenging but well worth it. I am excited because I was able to make this. Thank you!

Estimated Cost
$320
Estimated Time Investment
Week Long Project (20 Hours or More)
Finish Used
Wood stain and enamel paint
Recommended Skill Level
Beginner

Comments

deskchairnow

Tue, 10/08/2013 - 02:53

My first project was really very tough. When we work on raw furniture or old home furniture, then we should take care about the damage of our important or valuable furniture items. It is really very exciting and good feeling time for all beginners.

Indoor Playhouse

Submitted by Alaskagirl on Thu, 02/28/2019 - 12:47

Husband and I built this beauty over a rainy weekend. He had cut the wood a few weeks before, then we had to wait for a free weekend to assemble. We switched the placement of the walls around so the bed wouldn’t go over a heat vent and had to trim a few inches off the legs to fit with our lowers ceiling. I painted the back wall with chalkboard paint and we added shelves to the side like shown in the blogpost linked on the build page. We added a light above and Christmas lights below to brighten things up. A book sling and pulley with basket added the perfect finishing touches. All our boys love this magical new addition to our youngest son’s room and gave already spent many hours playing there. 

Built from Plan(s)
Estimated Cost
$200
Estimated Time Investment
Weekend Project (10-20 Hours)
Finish Used
Haven’t finished yet, waiting for drier weather, then will add two coats clear polyurethane to keep the natural look.
Recommended Skill Level
Intermediate

rustic baby crib

Submitted by KL728MX on Tue, 01/05/2016 - 12:32

my wife and I had our first son, Mason, over the summer and I was in love with the idea of building his crib. It was a lot more work than I had anticipated but it was well worth the hard work. it came out beautifully. I made a 2X4 spacer that we can remove as he gets older to lower the mattress height. i used all pine lumber for the crib.

Estimated Cost
$250
Estimated Time Investment
Week Long Project (20 Hours or More)
Finish Used
rustoleum American walnut
Recommended Skill Level
Intermediate