Community Brag Posts

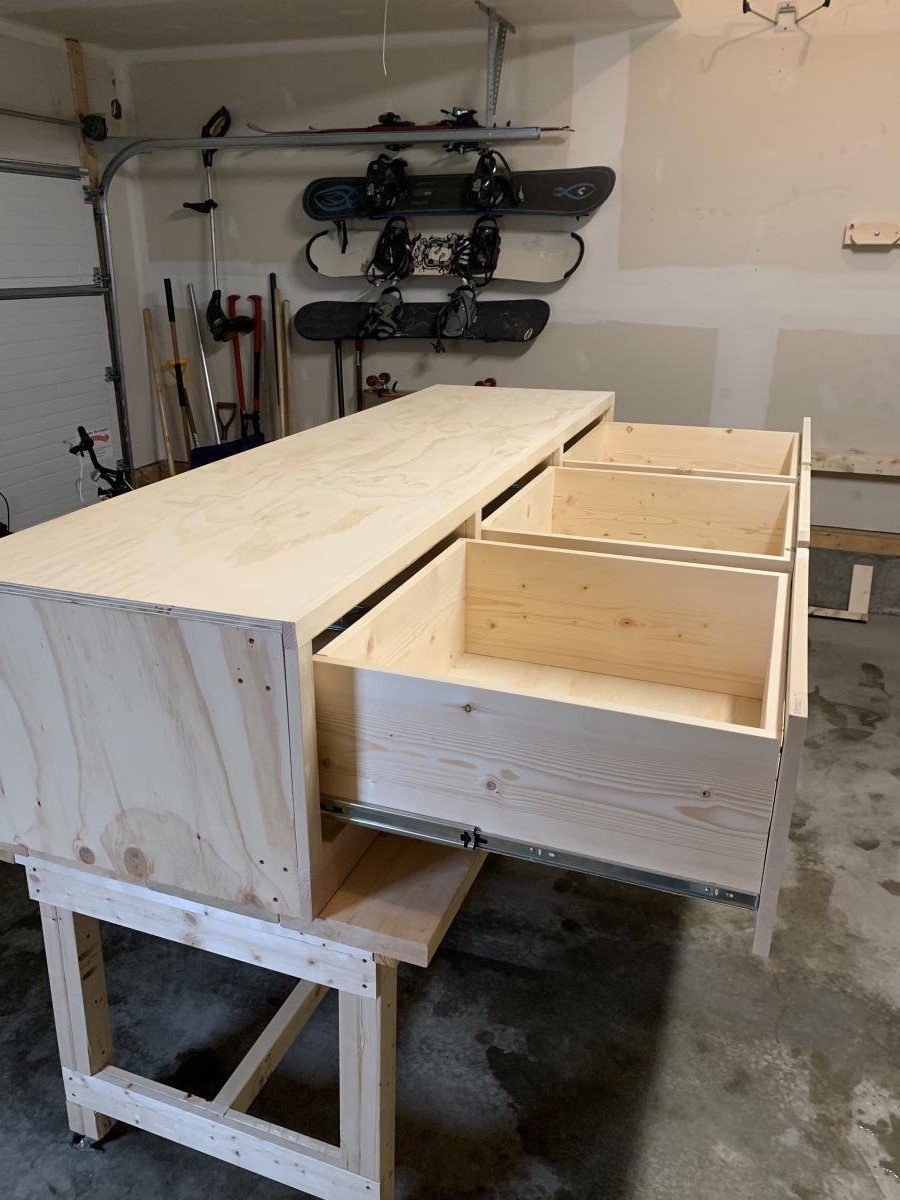
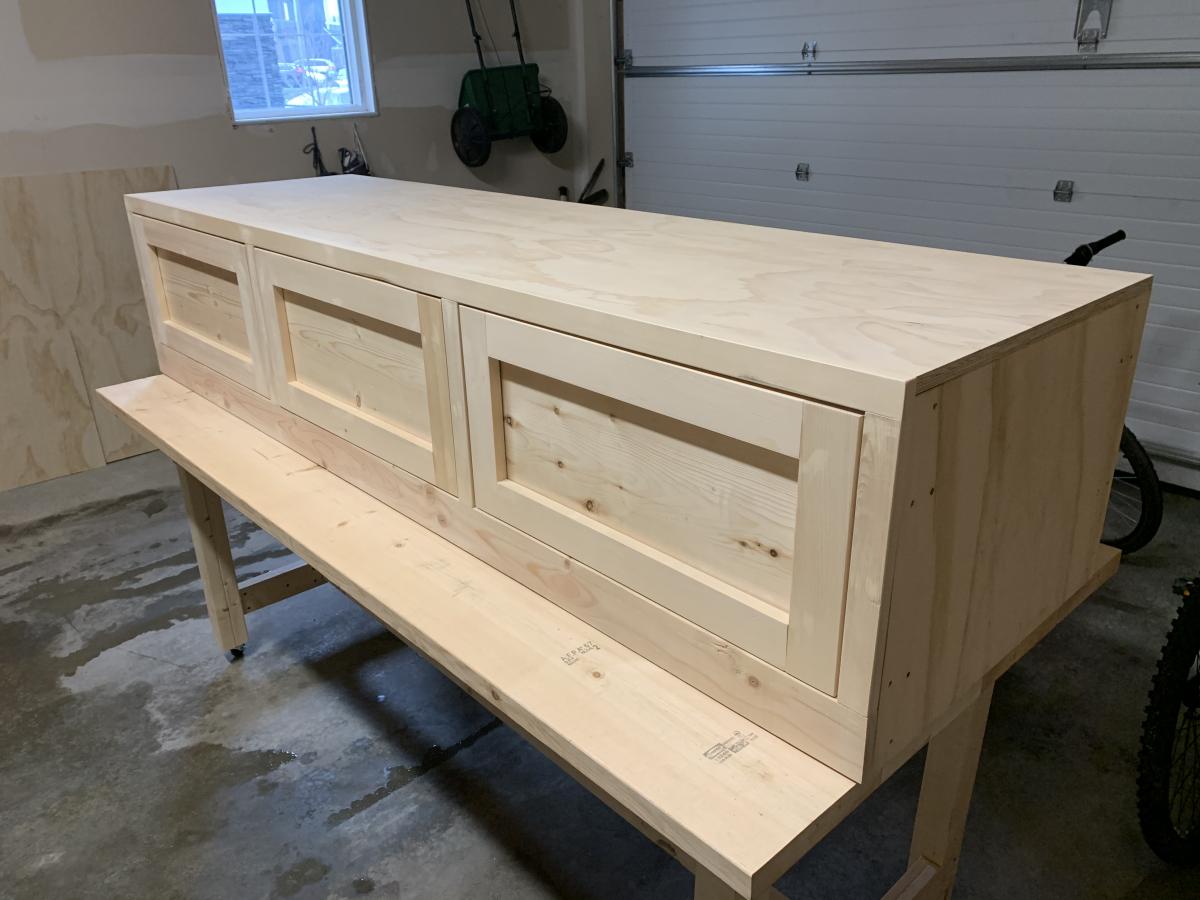
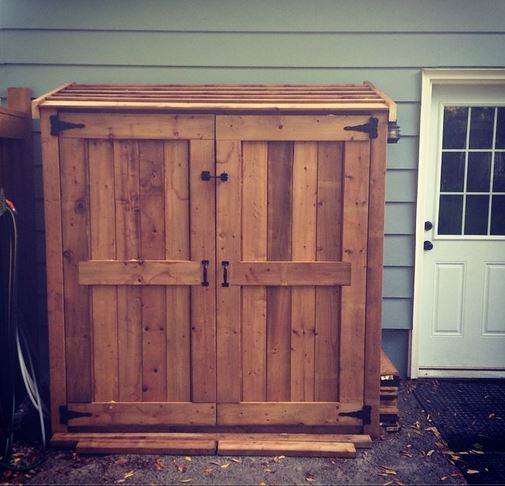
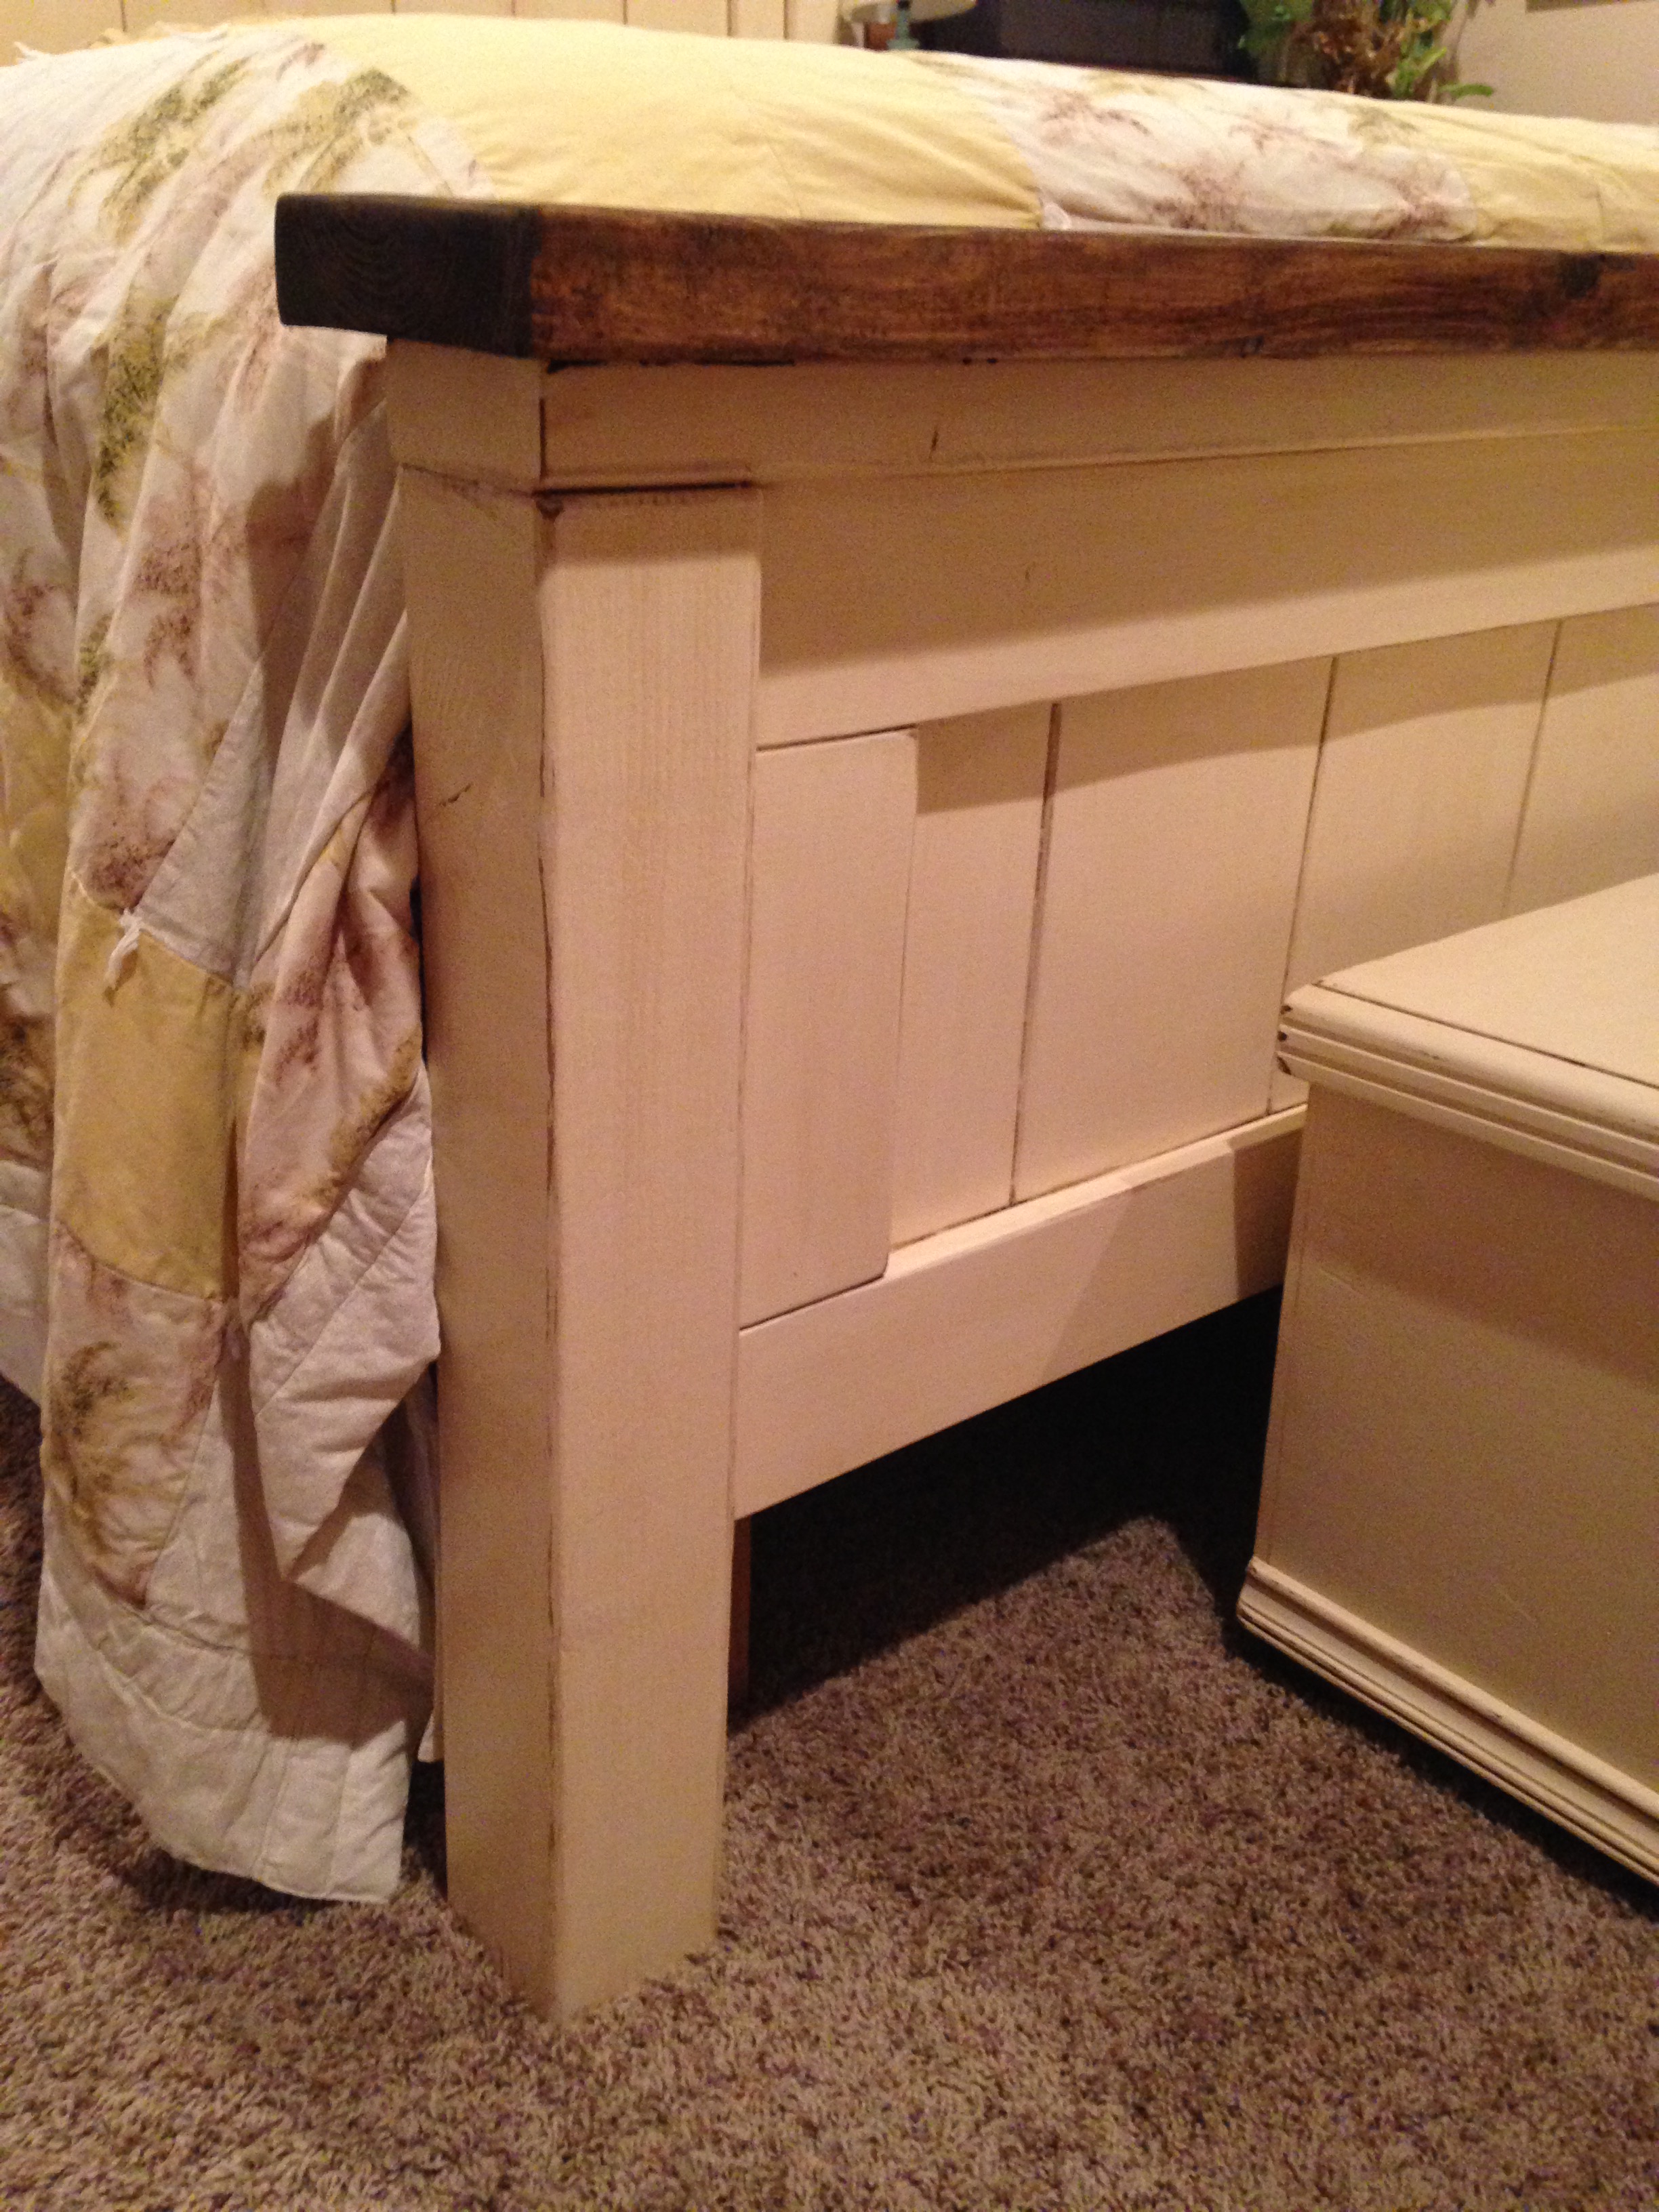
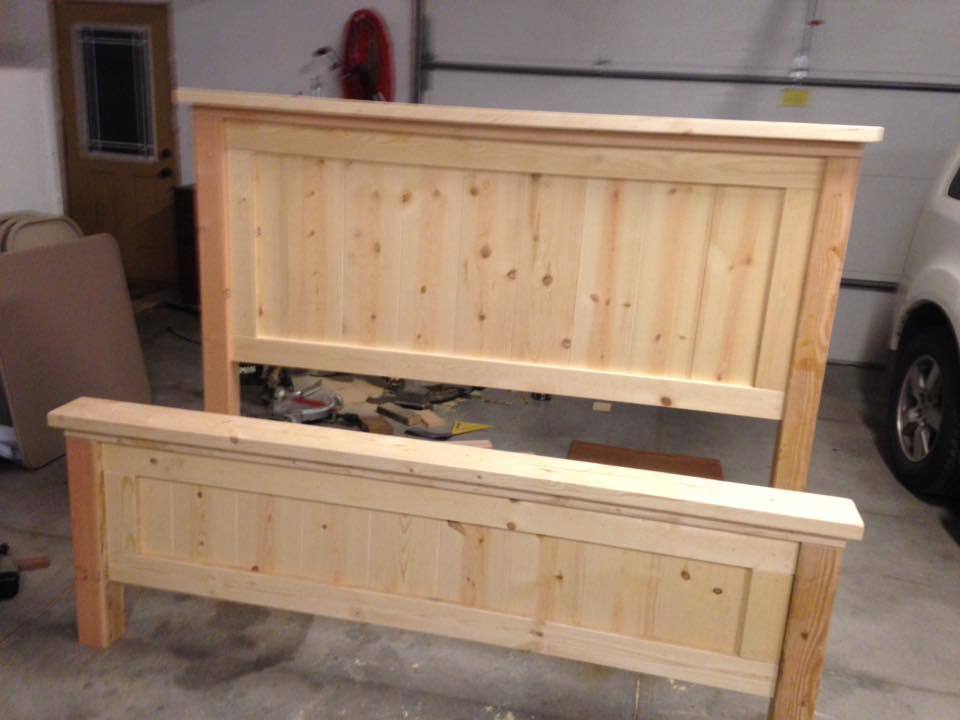
Garage Storage Cabinet

Submitted by AndyH on Tue, 08/05/2014 - 18:57

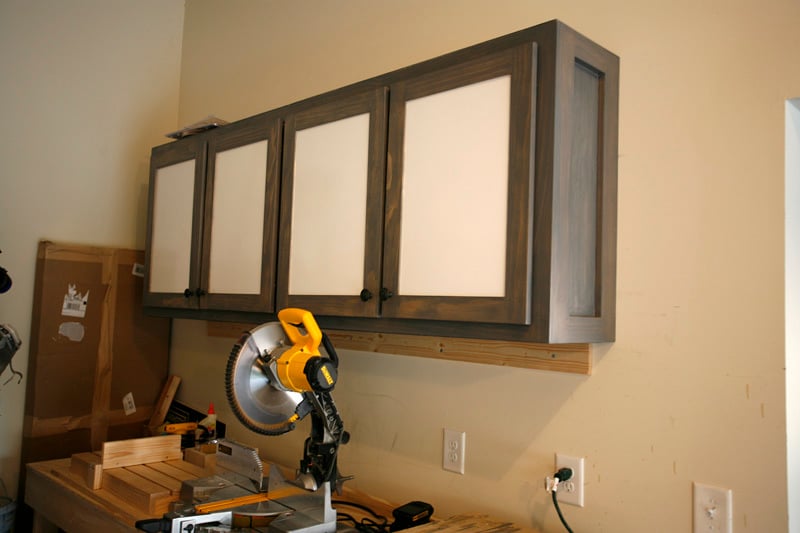
First part of garage storage system complete. 7.5 foot cabinets with whiteboard marker board doors inserts.

Next step to build new bench with storage cupboards to keep dust out and a central dust extraction/containment area.

Then put some tool board and a charging station above the two outlets.

Estimated Cost
$100
Estimated Time Investment
Weekend Project (10-20 Hours)
Finish Used
Minwax Classic Gray
Recommended Skill Level
Beginner

Comments

TaylorMade1205

Wed, 08/06/2014 - 05:51

What plans did you use to build the cabinets? I'm currently re-doing my garage and I was looking for something like this.

AndyH

Wed, 10/08/2014 - 19:20

Hi.  I drew the plans myself to make it fit the space I needed.  Happy to share the google sketchup file with you if you want to send me your contact (if that is allowed on here!).  Sorry for the delay in replying but not logged on here for a while. 

SAWL27

Sun, 12/13/2020 - 05:04

These are perfect for what I'm working on. Do you still have the plans that you're willing to share?

thank you ana you inspired me to begin with this!

Submitted by Anonymous (not verified) on Fri, 11/18/2016 - 18:13

Thank you Ana because you were my inspiration. I would've never dreamed of building my own furniture before I saw you doing it. I loved doing it I loved outside the US and the machines and jigs are difficukt and expensive here but I've managed to get the basics. this is my 5th project and was a lot of work because the woods here are exotic but not dried in kim and come with lots of imperfections but are beautiful..anyways thanks again! 

Estimated Cost
250 usd
Estimated Time Investment
Week Long Project (20 Hours or More)
Finish Used
wood sealer then 240 sand paper then polyurethane high gloss the same finish used for cars.
Recommended Skill Level
Intermediate

Flip Top Storage Bench

Ana's Flip Top Storage Bench. I made this ASAP, after I saw it in the book, and then online. I thought it was going to be longer and was thinking it would go great in the mudroom, but after it was finished it turned out to be the perfect size for a fireside seat.

This is my first time using hinges....are they supposed to show? By the time I got them on and working I was pooped and didn't want to test my luck. Maybe I'll have to get some more decorative looking ones!

Used my Kreg Jig, still had splitting issues.
Used finishing nails around the shelves to secure a bit.

Oh and HD didn't have a 1x12x12 so I had to get three 1x12x6 . Bet that cost more, but I'm happy to have some more scrap wood to play around with.

Thanks Ana!

Estimated Cost
Lost my reciept....maybe that's a good thing?!
Estimated Time Investment
Afternoon Project (3-6 Hours)
Finish Used
minwax color expressions walnut, about 2/3 of the tube.
Recommended Skill Level
Beginner

Comments

Maira (not verified)

Sun, 10/21/2012 - 09:27

You did a great job on this table. What color stain did you use? And did you put a coat of poly on it?

Yes, the hinges are supposed to show. I made this table about two years ago when Ana first posted the pans, but I don't use it as a table. I use it as a bench in my entryway to hold gloves, hats, etc. It's held up great all these years, and now I'm thinking of building another one for by my garage door, since that's where we come in and out most times.

ValerieMcClintick

Sun, 10/21/2012 - 09:38

Thanks, I used Minwax color expressions in walnut, I haven't put poly on it yet, I thought I might just put a wax over it to make it a bit smoother. I don't really know what I'm doing quite yet, so I'll have to learn my options!

I'm thinking of making the longer version for the mud room....should go quicker on round two right!

:) Valerie

abbpim

Mon, 10/22/2012 - 09:06

I think in order to get your hinges to be more minimally showing you can inset them by using wood chisels to shave a rectangle of wood from the surface where the hinge lays. I've used hinges on a couple things so far and that's what my husband said to do but I was being to lazy to get some chisels. You can get them at any hardware store for pretty cheap I think. Now I'm not positive on any of this since I haven't been doing this hobby for too long. Your bench looks great by the way!

Haven Turned leg Coffe table

Submitted by creegs7882 on Thu, 08/07/2014 - 10:25

My wife does puzzles and most of her school work on a coffee table. We had bought one from that large blue and yellow warehouse furniture store. I liked its size but never the materials. When I saw the Haven Turned Coffee table, I knew I could make that. Using the pocket screws made this an easy build. I made the top out of 1 x 8's and used biscuits to hold them together. I attached the top using a series of cleats around the inside edge. I stained it with an cherry Minwax stain and polyurethaned the top. Project took about four days on and off not including the staining and urethane.

Estimated Cost
~ $ 125.00
Estimated Time Investment
Week Long Project (20 Hours or More)
Finish Used
Minwax Cherry Stain and Polycrylic Polyurethane (gloss)
Recommended Skill Level
Intermediate

My version of a farmhouse table

Submitted by Anonymous (not verified) on Tue, 11/22/2016 - 13:19

I found this plan through a YouTube video unrelated to DIY. It has been to long since I had done any woodworking and I knew we needed a table. I modified the plans some and made the table wider and the benches to fit under when not in use. I bought the wood and ended up with yellow pine top and Douglas fir bases. It was what that had at my Home Depot. But the contrasting woods gave me the idea for the finish I ended up with. Love the outcome. Hope you all like it too. Now on to the next project. 

Estimated Cost
I probably have 400 in materials in the table and benches.
Estimated Time Investment
Week Long Project (20 Hours or More)
Finish Used
Minwax gel stain mahogany
Just one application

Minwax fast drying polyurethane
Recommended Skill Level
Beginner

Bench with soft-close drawers for Front Entry

Submitted by drickstan on Tue, 08/11/2020 - 10:43

We needed a bench to fill the space in our front entry and provide some storage for seasonal gear. We couldn't find anything to buy that would work for us, so when my wife found these plans, I had to try it! Couldn't be happier with the results. We widened the bench by a foot to 84" to fill the space. Basically, it just made each drawer 4" wider. Everything else was built to plan. The most expensive thing was the soft-close 24" drawer slides (~$100). As soon as you go above that 24" depth, they get pricier! It was also tricky to get the drawers to catch properly on the soft-close mechanisms, but I made sure to take the time to get it right before closing it all in. Now I just open and close the drawers for the pure satisfaction of it! I used premium pine plywood for the top and I find it still doesn't give that smooth finish I like, even after sanding. I think I'll create a new top out of joined knotty pine planks later and just attach it to the top.

Built from Plan(s)
Estimated Cost
$300 CAD
Estimated Time Investment
Week Long Project (20 Hours or More)
Finish Used
Primer and pearl finish paint.
Recommended Skill Level
Intermediate

Little Blue Bed

I used scrape wood for the headboard to save money. Wood cost approx $15, paint from oops section $3 and screws from my Kreg jig box set.

This was my first real project and I'm hooked.

Thanks Ana!

Built from Plan(s)
Estimated Time Investment
Day Project (6-9 Hours)
Finish Used
Olympic One in Semi-Gloss Teeny Bikini
Recommended Skill Level
Starter Project

Adjustable sawhorse craft table

Submitted by Oldmanguge on Sun, 08/10/2014 - 20:03

Built from MODERN INDSUTRIAL ADJUSTABLE SAWHORSE DESK TO COFFEE TABLE. I used a solid table top reinforced underneath so my wife can can use the table as a craft table. I also used 3/4 in allthread

Estimated Cost
100.00
Estimated Time Investment
Afternoon Project (3-6 Hours)
Finish Used
Unfinished
Recommended Skill Level
Beginner

End table (pre sanding)

Submitted by S Woodland on Sat, 11/26/2016 - 09:05

This was the first project my husband requested to help with! It was a great for teaching easy cuts with a miter saw and pocket holes with a kreg jig.  Thanks to this end table we now build things together! 

Estimated Cost
$30
Estimated Time Investment
Day Project (6-9 Hours)
Finish Used
Stain on top and chalk paint on the bottom
Recommended Skill Level
Starter Project

Hexagon Table

Submitted by hgordon on Sat, 08/15/2020 - 08:08

Great build for the patio!

Built from Plan(s)
Estimated Time Investment
Weekend Project (10-20 Hours)
Finish Used
Varathane Early American
Cabot waterproofing
Recommended Skill Level
Advanced
Seasonal And Holiday

My Mom's King Fancy Farmhouse Bed

Submitted by thehallway on Fri, 10/26/2012 - 08:28

I built this bed for my parent's guest room at my sister's house. It is very similar to a bed mom had been wanting. They wanted a king size so I had to do some modifications to the original plan - primarily adding 16" to all width measurements. I also used 10 - 1x8s for the headboard panels. That made the panels slightly too wide, so I had to rip a little bit off the 2 end panels.

The hardest part of the project was getting it in her house! The legs made it about 1/4" too wide to fit it thru the door. We were about to remove the legs (which would have been a disaster since they were glued, screwed and painted on) when we finally figured out the right angle to squeeze it in. I had to touch up the paint in a few spots once we got it in position, but that was much better than having to remove legs and put them back on. We still need to get plywood for the mattress to sit on and I'm going to add a middle leg for extra support since it's a king. I will probably eventually build nightstands to go with it. Overall, I'm pretty happy with how it turned out since this is my largest and "fanciest" project so far.

Estimated Cost
~$250
Estimated Time Investment
Weekend Project (10-20 Hours)
Finish Used
Valspar Satin Latex Enamel in White
Recommended Skill Level
Intermediate

Comments

bran2511

Tue, 04/09/2013 - 12:41

I really love this bed, however, being military we move quite often. Is there a way that you would recommend I could alter it so that it can be broken down a little to make it easier for moving? Thank you much :D

bran2511

Tue, 04/09/2013 - 12:41

I really love this bed, however, being military we move quite often. Is there a way that you would recommend I could alter it so that it can be broken down a little to make it easier for moving? Thank you much :D

jlouki01

Sat, 08/24/2013 - 18:31

I just posted a brag post with this bed in black. I will see if I can upload a photo of how I built this bed for very easy break down. I looked at all the brackets etc.. with this being built out of pine I was not 100% confident in the Rockler / Wood craft brackets. I used a forstner bit and a 4.5" bolt with some washers.

My version of the SMALL CEDAR FENCE PICKET STORAGE SHED

Submitted by dalbrough on Wed, 08/13/2014 - 08:53

We needed something to hold our garbage cans and recycling.
We made this little shed with fence board floor and fence board roof a lot shorter in depth and height - We also used 2x4's as we already had them - fits perfect and was amazingly easy to do.

Looks fantastic in our yard - we are still working on the yard so ignore the extra fence boards and 2*4s laying next to it.

Thanks so much for the great plans.

Estimated Time Investment
Weekend Project (10-20 Hours)
Recommended Skill Level
Beginner

Fireplace

Submitted by Anonymous (not verified) on Tue, 11/29/2016 - 13:30

My husband and I have little wood-working experience, and were able to assemble this in an afternoon. I love how it came out!

Estimated Cost
Roughly $100 for wood, paint, and stain.
Estimated Time Investment
Afternoon Project (3-6 Hours)
Finish Used
Walnut stain; white Benjamin Moore paint, pearl finish
Recommended Skill Level
Beginner

Bench

Submitted by cmacias22 on Mon, 08/17/2020 - 07:40

This bench was meant to be used around our fire pit in the back yard which is where is it for now. This is only our second wood build. This bench turned out great and seems to be to nice to be outdoors.

Built from Plan(s)
Estimated Cost
$35
Estimated Time Investment
Day Project (6-9 Hours)
Finish Used
Special Walnut Stain and white chalk paint
Recommended Skill Level
Beginner

Back Door Shelf and Coat Rack

Submitted by rjh2006 on Tue, 10/30/2012 - 13:26

We wanted something by the back door for our jackets and hats'n' mittens. This came out better than we thought!

Recommended Skill Level
Starter Project

Garden Enclosure

This was a fun project.  The plans are written so that many of the boards don't need to be cut.  It's made from cedar that (thank goodness) was on sale.  I made the raised beds twice as deep as was called for in the plans because I wanted to minimize bending while I garden.  That added to the cost of the lumber and the soil.  I also like the way it looks.


I found it helpful to measure and cut the boards as I went.  This was crucial for fitting the door.  The most difficult part for us was working with the hardware cloth and trying to make it as smooth as possible.


It has been effective keeping deer and rabbits out of the garden.  Things that can fly in are another issue.  

Built from Plan(s)
Estimated Cost
>$500
Estimated Time Investment
Week Long Project (20 Hours or More)
Finish Used
None
Recommended Skill Level
Intermediate
Seasonal And Holiday

Laundry Dresser

Submitted by rosiejane on Fri, 11/02/2012 - 23:32

Really happy with the final product and the hubby is glad I have finally finished a project. This project was an answer to the piles of washing crowding our small laundry. I found 3 sturdy family sized (huge) rectangular laundry baskets for $10ea at Kmart and then used Sketchup to adjust the plans to allow for the bigger baskets (Sketchup is so much fun to use). I ended up having to buy an extra piece of wood for the top because I forgot to allow for the thickness of the sides when measuring the top and base. (I know, I know, measure twice cut once...) I used the piece I had cut for the top as the base and then got a new piece for the top. When I finally got all the pieces cut to size it all went together pretty quickly. I used melamine for the box because it was cheap and I wouldn't have to paint it. It did chip a little bit along the edges when I cut it but it's not too bad. I used 30 x 30mm pine for the basket supports and had to countersink the screws 1cm so I could use 30mm screws. I used iron-on melamine edging to finish the exposed edges of chipboard and used paint on the back and supports. Actual construction didn't take long but the painting took about a day by the time I'd done one basecoat and two top-coats.

Built from Plan(s)
Estimated Cost
$40 (AUD) incl. screws. Already had the paint.
Estimated Time Investment
Day Project (6-9 Hours)
Finish Used
Dulux Prepcoat & Dulux Aquanamel White on back and basket supports. The rest was white melamine.
Recommended Skill Level
Beginner

Comments

rosiejane

Mon, 11/05/2012 - 01:06

Thanks for the feedback. I cut the melamine myself. I clamped a straight edge on top of the melamine (allowing for the distance from the edge of the saw to the blade) and then used my jigsaw to cut. My local bunnings didn't seem too interested in cutting specific sizes. They were happy to just cut lengths down so I can fit them in my car but said their saw could be inaccurate up to 10mm from one end of the cut to the other. (Personally I think the guy just couldn't be bothered) Since I wanted my project to be square I figured it was much easier to just do it myself.
With sketchup I just play around and learn as I go. I got the hang of it pretty quickly although I'm still figuring out some of the more complicated stuff like using the protractor tool to do angles etc.

Npledger

Thu, 01/01/2015 - 22:05

I love this. These baskets are very sturdy. Is there anyway you can post the measurements. I have never made anything but this looks perfect. I have never used sketch up. Please let me know if you are able to post the measurements. Thanks!

Step-up Side Table

For my second-ever project, I built the step-up side table! It actually came together much faster than the "updated simplest console," which is listed as a starter project. However, I learned the importance of keeping square on this build!

I don't have a Kreg jig, so I followed the steps in a slightly different order since I couldn't do pocket holes. I also avoided ripping plywood to make 1x16s by using 1x12s instead. The dimensions fit my narrow space between two chairs better this way.

I LOVE this easy build and modern design. I'm pretty sure the cats are going to try to take it over, though. Thank you, Ana!

Built from Plan(s)
Estimated Cost
~$45 in lumber with lots of scrap
Estimated Time Investment
Day Project (6-9 Hours)
Finish Used
3 coats Valspar paint + primer already owned (custom mixed color), 2-3 coats Minwax gloss polycrylic (3rd coat only applied to horizontal surfaces and back)
Recommended Skill Level
Beginner

King Farmhouse Bed

I have loved this bed since I first saw it probably 8 years ago. Hubby finally got it built for me. It took him one weekend day. I was able to get the finishing done in a couple of days with plenty of dry time between coats of finish. Thank you Ana for this amazing plan!

Estimated Cost
$160
Estimated Time Investment
Weekend Project (10-20 Hours)
Finish Used
Primed wood with Kilz primer,
Painted with an oops off white color of Valspar High Gloss Enamel,
Glazed with a 1:1 mix of Valspar Clear mixing glaze and Minwax Gel Stain in Aged Oak,
Stained top boards in Minwax Gel Stain in Aged Oak
Recommended Skill Level
Beginner