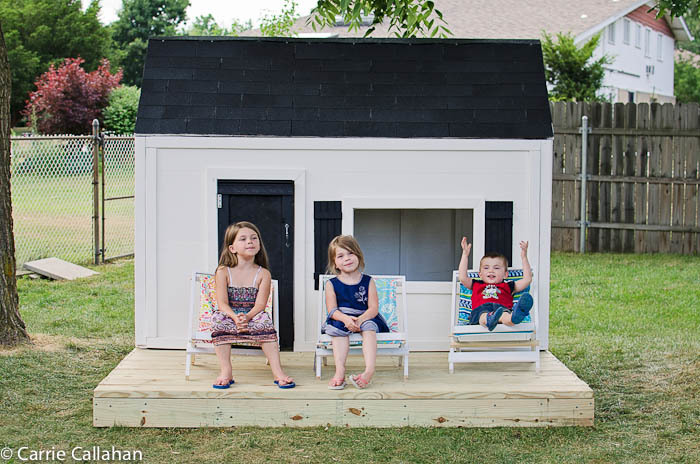
Community Brag Posts

Playhouse big build

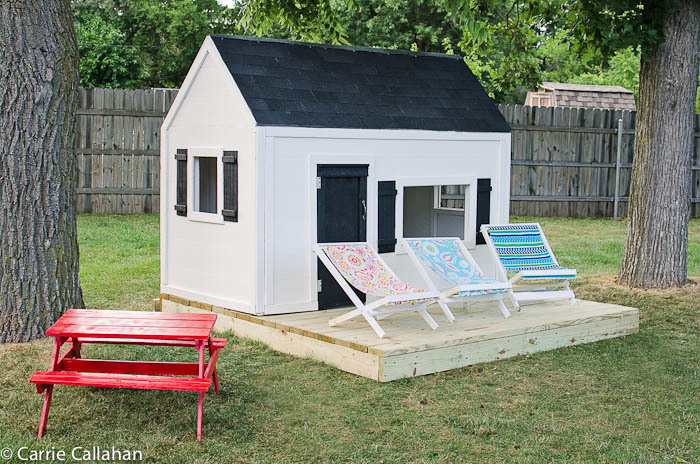
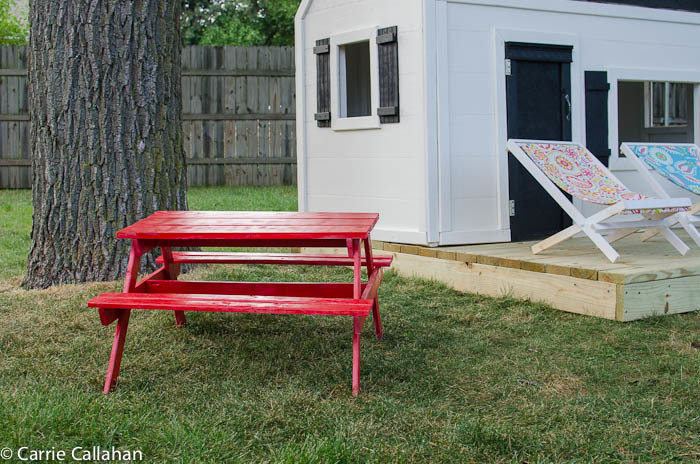
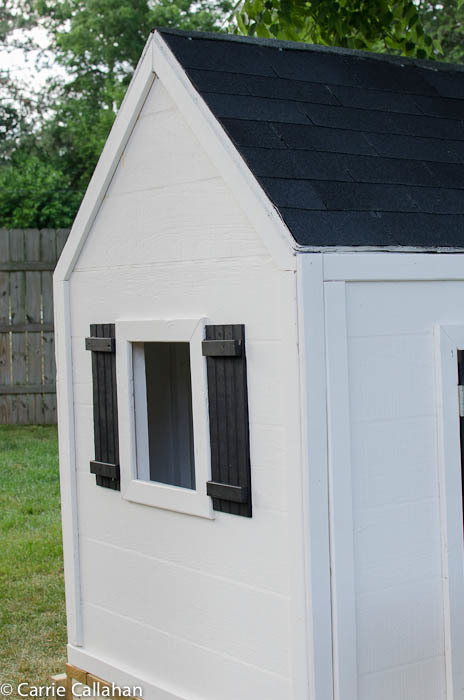
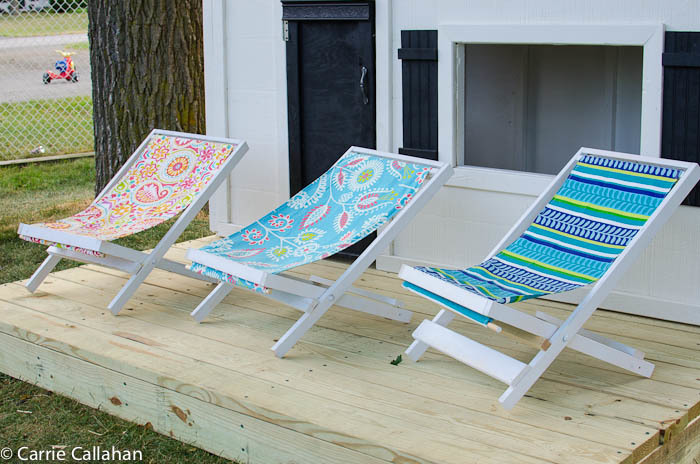
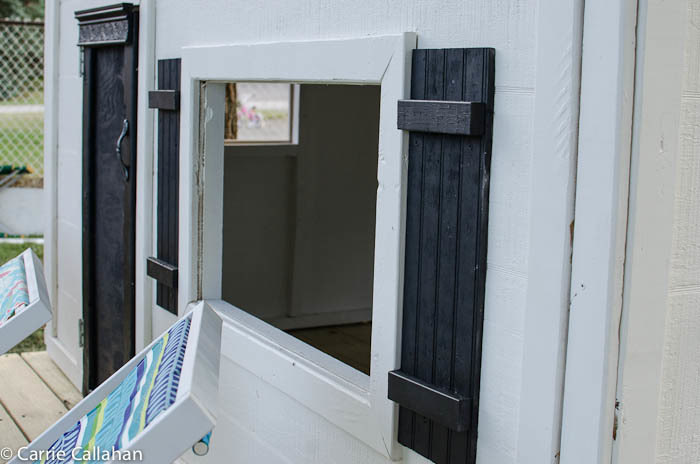
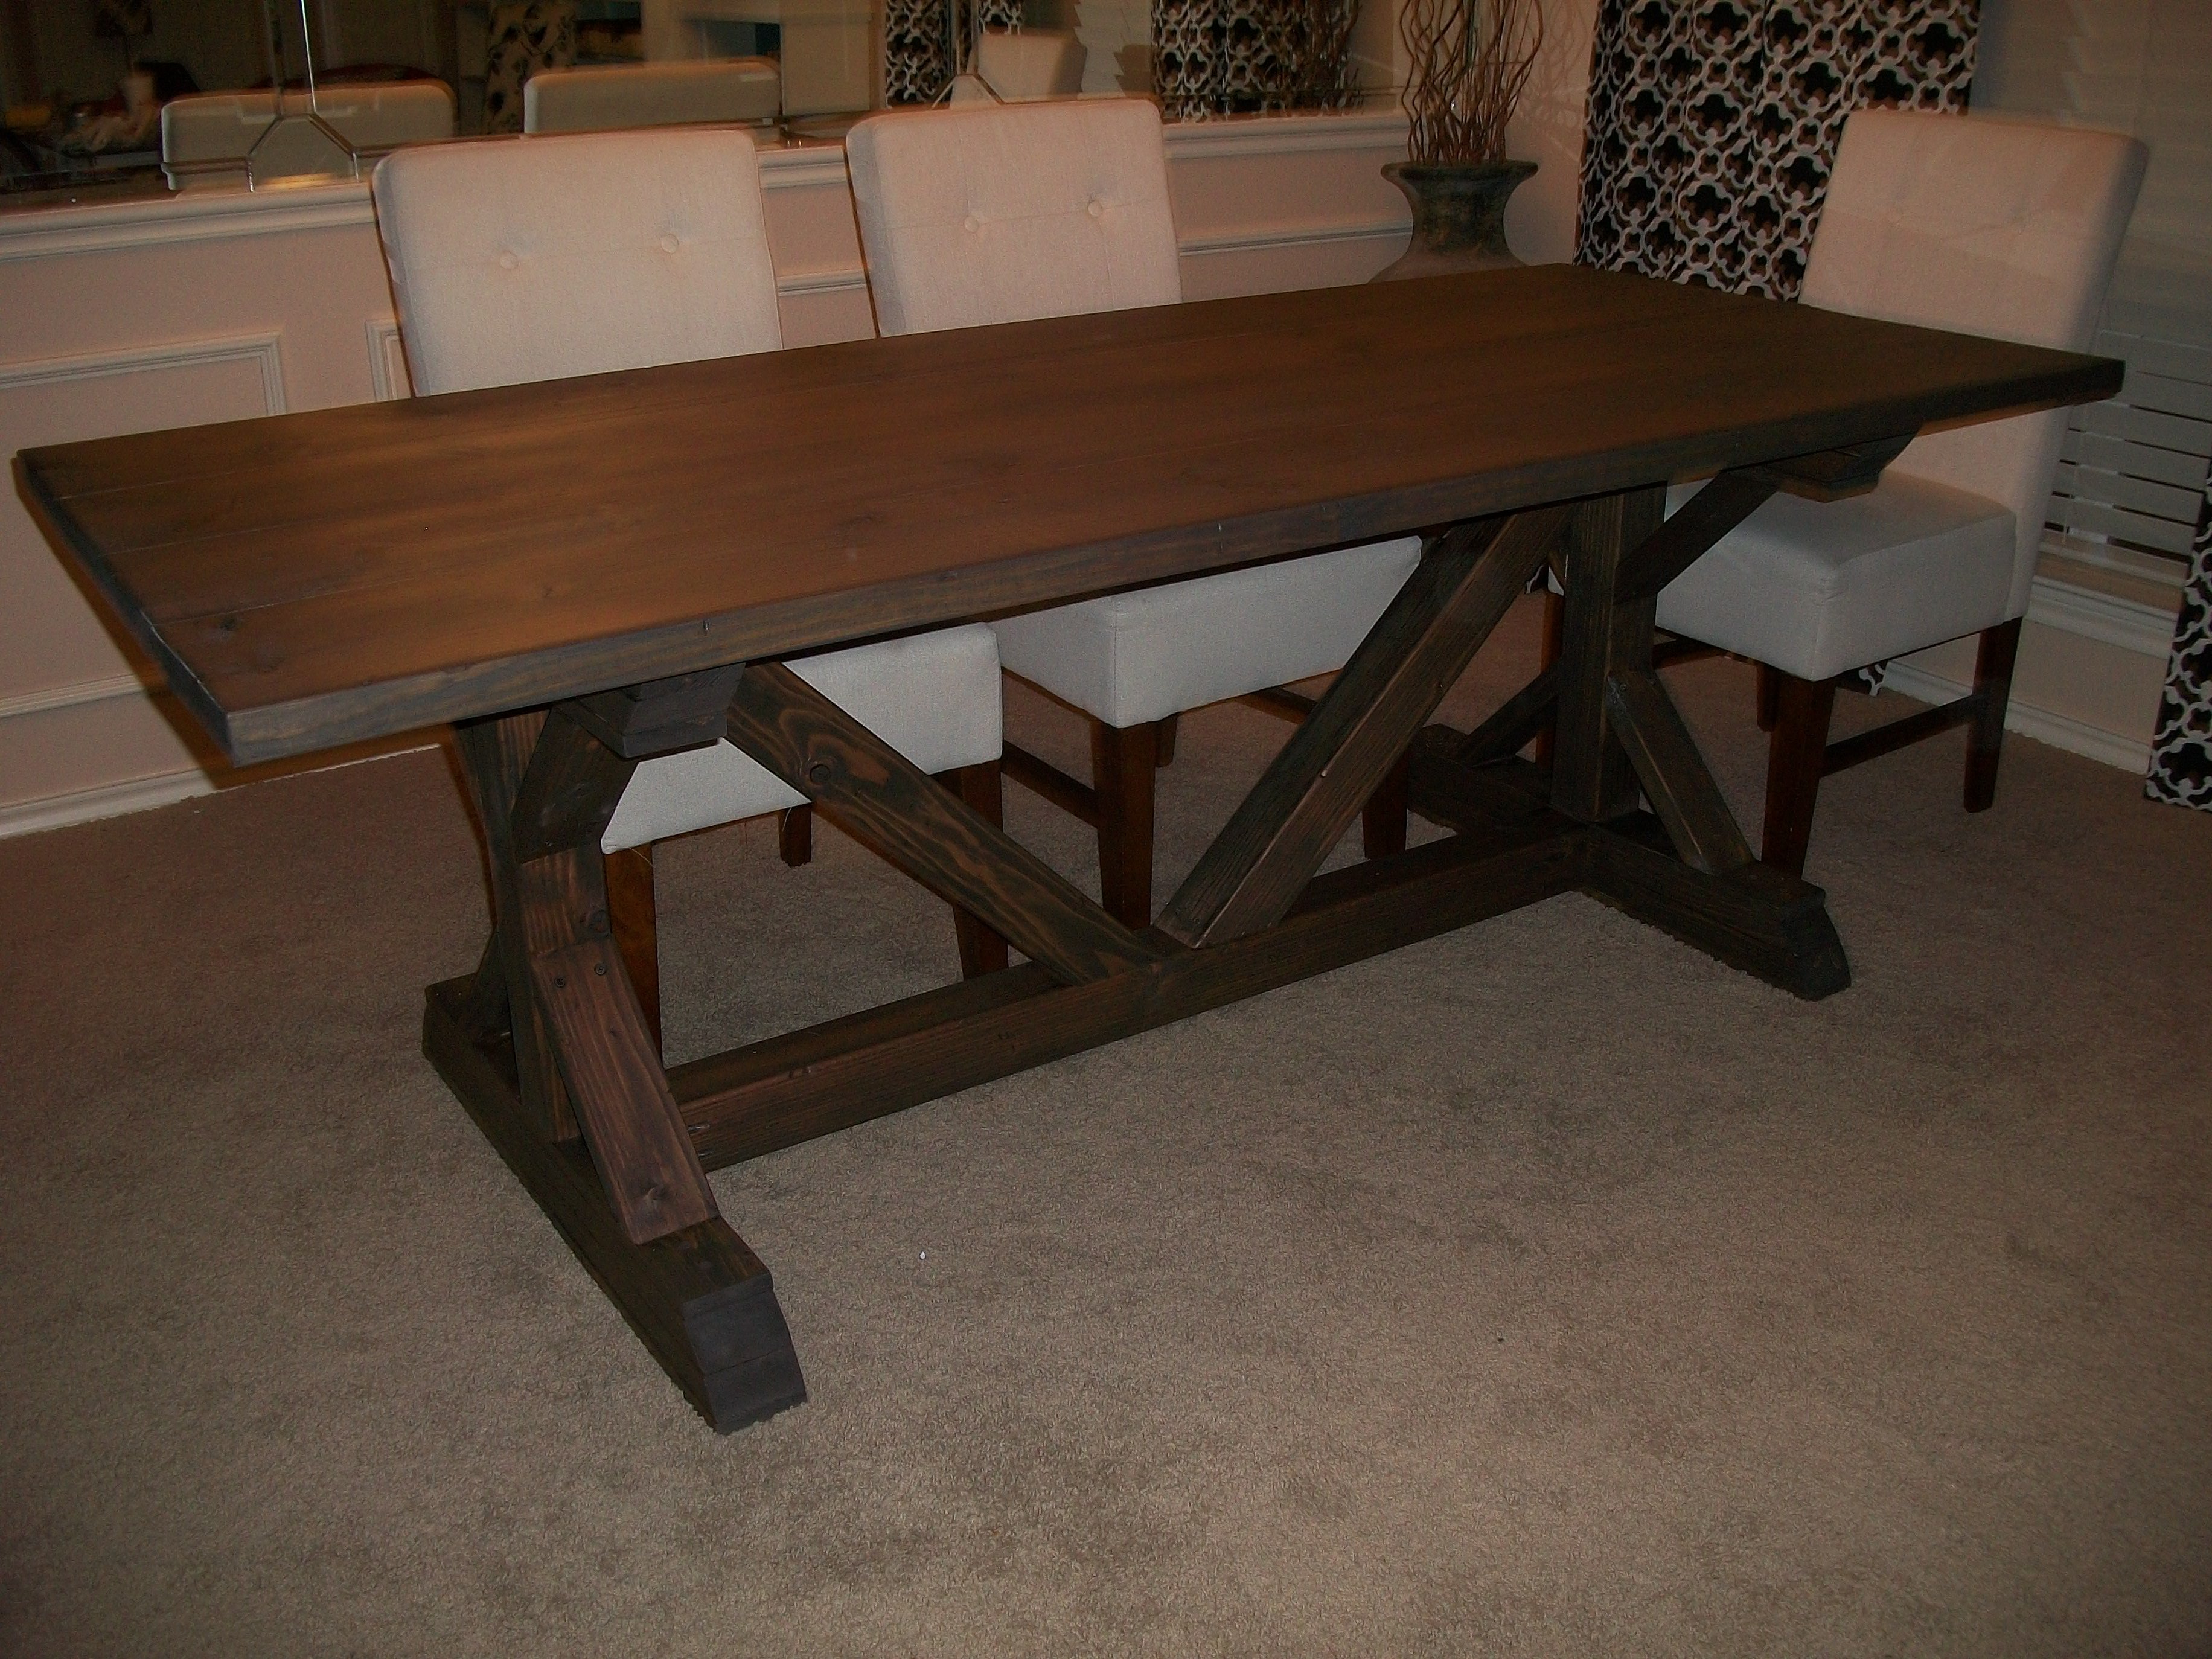
I went a little out of control on the week of the 4th of July - I set out to build a picnic table, 4 sling chairs, a deck and a playhouse - and I did!!!! I owe Ana a great debt of gratitude for these amazing plans and empowering me to do it! I built the picnic table and the sling chairs as I was waiting for primer and paint to dry on the frame, inside and outside of the house. For the shutters - I scrounged around the garage and found some leftover wainscoting, and put a leftover 1x2 on them. The door frame wasn't straight - so I added a piece of leftover trim from my daughters bed I built. My only next step is curtains for the windows. I even moved the full kitchen set I built the kids a few christmas's ago into their. They have only been playing with it for 2 days and I can't drag them out of it!!!

Estimated Cost
$500-$550
Estimated Time Investment
Week Long Project (20 Hours or More)
Finish Used
Primer and paint
Recommended Skill Level
Intermediate
Seasonal And Holiday

childrens garden arbor bench

Submitted by jarsofclay on Sat, 05/03/2014 - 17:55

I been wanting to make this for a long time and today I just went out to my work shop and did it. It was fun to make. I didnt have any 1x6s so I used 9 1x4 and 1/8" spacing it worked and looks amazing!

Built from Plan(s)
Estimated Time Investment
Day Project (6-9 Hours)
Finish Used
I used a pale green. Unintentionally the exact same color as picture.
Recommended Skill Level
Intermediate

King Size Platform Frame

Submitted by EndGrain on Wed, 07/18/2012 - 08:46

I based my bed off of the Fillman Platform Bed plans. Just bumped the dimensions up to fit my mattress and added the mid supports. The frame was built using 2x6 boards taken from a fallen barn. I ripped 2 2x6 boards down the center to make the the supports for the slats. My feet are 3 2x6's screwed together and then attached to the frame. Next time I will cut a notch out of the feet so that I can rest the bed on them and then try to find some old lag bolts to attach them to the bed. The frame was put together using a Kreg Jig. I put the Cedar boards on to dress the front and sides up some and to help keep the slats from showing when the sheets were tucked in. My finish is 1 coat of Linseed Oil and 2 coats of Teak Oil.

Let me know if you have any further questions on this build. As soon as I find some doors I will be building a head board for this bed.

Estimated Cost
$150 ish
Estimated Time Investment
Afternoon Project (3-6 Hours)
Finish Used
Linseed and Teak Oil
Recommended Skill Level
Beginner

Fancy X Farmhouse Table - modified

We used the wonderful Fancy X Farmhouse table plan with modifications. We needed the table to be shorter for our space, so we shortened it by 12" - this brought the angled pieces closer - we chose to do this instead of altering the angles. Also, we used 4 X 4 posts for the double 2 X 4's and also the cross pieces and angled pieces. I posted two blog posts about the process with lots of pictures, including how we rounded the ends per the plan. The finish is a equal mix of dark walnut and classic grey, finished with Trewax.

Great plan - we are so pleased with the results, and the price tag!!

Built from Plan(s)
Estimated Cost
$150
Estimated Time Investment
Weekend Project (10-20 Hours)
Finish Used
Equal mix of Minwax Dark Walnut and Classic Grey. Finished off with Trewax and buffing.
Recommended Skill Level
Beginner

Comments

Dananichols

Thu, 07/19/2012 - 07:45

Thanks Whitney - we are lucky to have access to untreated 4 X 4's at our local orange store. I tend to buy an extra one every time as I am afraid they will stop carrying them!

Barbara burns (not verified)

Mon, 07/23/2012 - 15:12

I am a newby to wood working and am in love with this table. I have all the pieces cut for the sides, will also be changing the length and will make those cuts later. I am a little insecure on the nailing/screw directions...placement, size, where to hide?, etc. would love to know where yours are placed and what you used. (I did purchase a Kreg jig for pocket screws).
Thanx for any support you might have.

Barbara burns (not verified)

Mon, 07/23/2012 - 15:14

I am a newby to wood working and am in love with this table. I have all the pieces cut for the sides, will also be changing the length and will make those cuts later. I am a little insecure on the nailing/screw directions...placement, size, where to hide?, etc. would love to know where yours are placed and what you used. (I did purchase a Kreg jig for pocket screws).
Thanx for any support you might have.

Dananichols

Mon, 07/23/2012 - 18:31

Barbara -

I posted a link above to my blog - I have two posts about the table and lots of pictures, including pics of where I placed the screws. The only place I used the pocket screws (great purchase by the way, have used mine so much!) was to attach the 4 X 4 cross beams (you can use them on 2 X 4's as well if you are following the plan). Hop over and have a look - lots of pictures - and hopefully that will help with you questions!

Thanks - and have fun!

Dana

Kristine Faldik (not verified)

Mon, 07/30/2012 - 03:37

Dana,

This table is just gorgeous! My husband and I are building a house and have been looking to find the perfect table for weeks now. Just stumbled upon yours and fell in love! We are going to try and use your modifications to the original plan as well, thank you so much for sharing. Hope we can do this too!!!!!

Thanks!

Kristine

valery (not verified)

Sat, 10/27/2012 - 06:45

NEED one of these...
I've NEVER done a project like this and i'm not even near crafty but this is the first thing I see on Pintrest that made me even want to attempt doing it!

Is it wide enough that the cross beams don't annoy you when you are sitting?

TammyLGK

Wed, 02/12/2014 - 11:20

Dana thanks to your informative blog detailing what you did for the rounded legs you have saved my project! I really did not want to resort to the the angled leg cuts. I just could not figure out the 30 & 45 degree cuts. I as well was originally trying to make them on the same piece. THANK YOU!

Board & Batten Inspired Headboard

Our guest room finally has a headboard! I put together this queen size headboard using what I had learned building my daughter's headboard (and consulting the plans for the Reclaimed Wood Headboard) using the remainder of the plywood sheet from her headboard project, 2x3s for the legs, a 2x4 to join the legs (and connect to the metal bed frame), furring strips, and a 1x3 to top it off.

Our plywood had been cut to fit our car, so the first vertical furring strip was placed to hide the seam where I joined the two pieces back together. Then we evenly placed them from center as just looked right to us.

We had a great time seeing this come together as we didn't follow a specific plan, but were able to be a bit more creative inspired by various plans.

Estimated Cost
$45 including hardware & paint
Estimated Time Investment
Afternoon Project (3-6 Hours)
Finish Used
We painted with Martha Stewart's Stratosphere in a flat finish, distressed and rubbed on Minwax Provencial stain. Unfortunately, the stain gave the headboard a very green tint, so after a lot more sanding, we were able to finish the project with two quick coats of Minwax water based Poly.
Recommended Skill Level
Beginner

Comments

Canned Food Storage

Submitted by Anonymous (not verified) on Mon, 03/04/2024 - 11:46

Made this for my dry closet. Super easy to construct and it works perfect. I just wish there was something similar to use for paper towels.

Built from Plan(s)

King Farmhouse Bed

Submitted by Anonymous (not verified) on Fri, 06/26/2020 - 05:51

My husband built this beautiful king frame and we stained it with Minwax semi-solid pure white. He made a few tweaks- used tongue & groove pine in the headboard and footboard to decrease the likelihood of any gaps we may get from subpar wood at the big box store. The night stands are From the Farmhouse bedside table plans.

Estimated Cost
$300
Estimated Time Investment
Weekend Project (10-20 Hours)
Finish Used
Minwax Semi-Solid pure white
Recommended Skill Level
Intermediate

DIY Craft Table with Storage

Submitted by Anonymous (not verified) on Sat, 04/13/2024 - 12:39

Your plans were easy to follow. Made our DIY so much easier. Material sheet was perfect. Made a few small modifications and used a butcher block for the table. Finished product turned out great. Thank you again.

Lisa A.

Built from Plan(s)

Comments

$12.00 Cedar Fence Picket Planter

I followed the plans exactly. The only difference is I used my Ryobi Airstrike brad nailer instead of stapler. Lowes was slightly higher in price than the $10.00 on Ana's post but at $11.97 it wasn't too far off!

Estimated Cost
11.97
Estimated Time Investment
An Hour or Two (0-2 Hours)
Finish Used
No finish
Recommended Skill Level
Starter Project

Revised Dog Crate

Submitted by mecoda on Mon, 08/04/2014 - 09:26

First project made from scratch....took me a while but glad it is finished! Will try to do one more of a larger size for my other dog.

Estimated Time Investment
Week Long Project (20 Hours or More)
Finish Used
SafeCoat Durostain (birch and walnut)
Vermont Natural Coatings for the topcoat
Recommended Skill Level
Starter Project

Comments

$10 Ledge for the Bathroom

Submitted by hmagnani on Tue, 08/19/2014 - 12:14

I built a ledge from some scrap wood laying around but had to buy a 1X6X8 for the bottom. It took about an hour to build from cutting to finish and then another couple hours to paint. I needed this in our bathroom because we have no bathroom storage and I needed to get medicines and such up away from busy little hands. Awesome plans, great little shelf!! Thanks, Ana!

Built from Plan(s)
Estimated Cost
$15
Estimated Time Investment
Afternoon Project (3-6 Hours)
Finish Used
One coat of primer and then two coats of semi-gloss white interior latex paint.
Recommended Skill Level
Starter Project

Camp Loft Bed with Stairs, Slide and Fort

Submitted by bmas99 on Wed, 12/26/2012 - 14:35

I'm a beginner at this, so for the most part I followed Ana's plans to building the Camp Loft Bed with Stairs. I made a few tweaks, including adding a slide to the front, putting the stairs on the other side, raising it by 7" (since there is a toddler bed underneath), and using hemmed shower curtain to create a fort underneath.
I made all the cuts with a miter saw and sanded all the wood down. I then glued and screwed the stairs, platform, and end pieces together. All the wood then got 1 coat of primer and paint. Then on Christmas Eve the bed was assembled in the kids' room. The sanding, priming, and painting took the longest. Cutting it and putting it together didn't take long.
For the railings, I did all screws from the outside to give a stronger hold than the pocket holes, and used 3 3/4" screws for the weigh bearing pieces. I counter sunk all the screws and added buttons to cover them (not yet painted in the photos). I also mounted the 45 degree 2x6 cuts in the 4 weight bearing corners to add extra bracing (not pictured). To brace the slide, I glued and bolted a 4x4 on the front of the bed. The curtains are just 2 off the shelf shower curtains that got hemmed to the correct height, and then were mounted using small teacup hooks. I plan to add an eyehole to each side, so they can be pulled back and hooked open.

Estimated Cost
$150 (all material except slide and curtains)
Estimated Time Investment
Weekend Project (10-20 Hours)
Finish Used
Primer and 1 coat of ultra white semi-gloss paint. For the most part it was painted prior to being fully assembled. Only the parts that were glued were put together before being painted.
Recommended Skill Level
Beginner

Comments

dcostillo

Mon, 05/27/2013 - 13:35

Bmas, this is AMAZING! As we get ready to move to a new home, it's a great excuse to build the new kids bed and kitchen table I've had on the back burner.... Where did you get your slide if we wanted to go the same route?

Thanks,
David

dcostillo

Mon, 05/27/2013 - 13:36

Bmas, this is AMAZING! As we get ready to move to a new home, it's a great excuse to build the new kids bed and kitchen table I've had on the back burner.... Where did you get your slide if we wanted to go the same route?

Thanks,
David

Vegetable Bin

Submitted by Anonymous (not verified) on Fri, 10/16/2020 - 07:02

My first Anna White build. Easy and fun. I made this for my Grandmother for Mother's Day 2019. She absolutely loved it.

Built from Plan(s)
Estimated Time Investment
Weekend Project (10-20 Hours)
Recommended Skill Level
Beginner

Tall Secretary Cabinet with Mail Slots - Tilt out Trash/Recycling

Submitted by Anonymous (not verified) on Wed, 10/28/2020 - 08:55

First "real" wood-working project in the books. I combined two of your plans so that we would have space in our kitchen for recycling and trash, as well as shelving for pots/pans and all the mail that piles up. We had a narrow section, so made this out of 10" boards, instead of 12". I will possibly add the secretary door at some point, if for no other reason than to hide all the snacks! Thanks for having so many amazing plans available, they keep me dreaming of endless possibilities.

Estimated Cost
$160
Finish Used
Dark blue paint to match kitchen base cabinets.

Comments

Light Wash Balustrade Coffee Table

Inspired by the RH Balustrade Salvaged Wood Coffee Table.

Built from Plan(s)
Estimated Cost
250
Estimated Time Investment
Day Project (6-9 Hours)
Finish Used
General Finish Milk Paint (color: Linen) custom wash. Finished with glaze in Van Dyke Brown.
Recommended Skill Level
Beginner

Farm House Table

Submitted by Anonymous (not verified) on Mon, 02/13/2017 - 13:42

I am not a carpenter, I do not even have a tape measure. I got tasked by my leadership dothan class to build a farmhouse table for the academic dream room which is part of the Bright Key Program. Which is being renovated at Honeysuckle Middle School. Found your plans and got inspired. One glitch they wanted this table to be able to sit fourteen chairs. So I had to make a few adjustments like increasing the main boards to twelve foot. Because of your plans, many urban middle schoolers will have a place to get tutored considering cafeteria tables are so expensive. I am a believer of your plans. The positive feedback I received was well worth my time and would not of been a sucess without your plans. I did mine with pocket holes as well. 

Estimated Cost
146.37
Estimated Time Investment
Weekend Project (10-20 Hours)
Finish Used
American 230 and the middle a bluish grey.

Spent an hour picking out lumber. All boards are not the same length. Ran through a planer and I found it eliminates the need to sand. But remember not to plane them to different heights. Pocket holes are great but I found some really nice table joints at Lowes that looked classy with the kreg screws.
Recommended Skill Level
Beginner

Comments

The Perfect Fit for our Little Girls Closet

Submitted by RBoesch on Sun, 11/16/2014 - 13:41

Thank you Ana! The Just My Size Closet was the perfect solution to my little girl's closet. I had recently found myself in a daily battle with my three year old. She wanted to be independant and dress her self. I desperately wanted her to stop getting a step stool and yanking her clothing off of the hangers. The yanking resulted in a dozen or so half handing shirts, a pile of broken hangers, and a mother daughter show down first thing in the morning and last thing at night. Enter the Just My Size Closet !!! The plans were super easy to follow, WAY less expensive than the ready made customizable units at the hardware store, and hubby had it whipped up in half an afternoon! The design is thoughtful and will grown as her needs change. :) We are all very pleased with the result. Instead of melt downs (both her's and mine), my little girl is taking pride in being able to hang up her clothing and dress herself. She makes everyone who visits come in her room to see her new closet. It is adorable :) Thanks Again!! 

Built from Plan(s)
Estimated Cost
<$100
Estimated Time Investment
Afternoon Project (3-6 Hours)
Recommended Skill Level
Beginner

Farmhouse Bed - Queen Sized

Submitted by Anonymous (not verified) on Mon, 02/20/2017 - 09:06

This was super easy to build and cost me about $150.  I made both my headboard and footboard 6" taller than the plans specified, and used Minwax classic grey stain for the finish color.  I used 1x10 pine boards from home depot in the untreated premium wood section.  They were about $12 for 10ft boards.  I spent some time carefully choosing the ones I liked the best.   I went to the local lumber mill to find untreated 4x4 posts... not easy to find.  Fortunately they sold them to me for $10 a 10ft piece - Only $20 total for those.  

The bed is solid and amazing looking.  I couldn't be happier with it.

Estimated Cost
$150
Estimated Time Investment
Day Project (6-9 Hours)
Finish Used
Minwax classic grey
Recommended Skill Level
Beginner

Plant Stand

Submitted by Farmer Kim on Tue, 12/09/2014 - 14:46

I loved this plan when I first saw it.  I did make mine with metal that was 36 inches for the legs, it was the length available at my local hardware store and it also allows me to have plants on two levels and still be high enough for sunlight (unplanned bonus).

Estimated Time Investment
Afternoon Project (3-6 Hours)
Finish Used
Weathered Gray Stain
Recommended Skill Level
Starter Project

Kitchen Spa Bench

There is no seating in our small kitchen and this spa bench was the perfect solution. Adds just the right amount of space for someone to keep a chef company while cooking or baking.

Estimated Time Investment
Afternoon Project (3-6 Hours)
Finish Used
I used Sherwin Williams’ “Sheraton Sage” in a semi-gloss. Also sanded the edges a bit to create a distressed look.
Recommended Skill Level
Beginner

Comments

Back