Outdoor Sectional
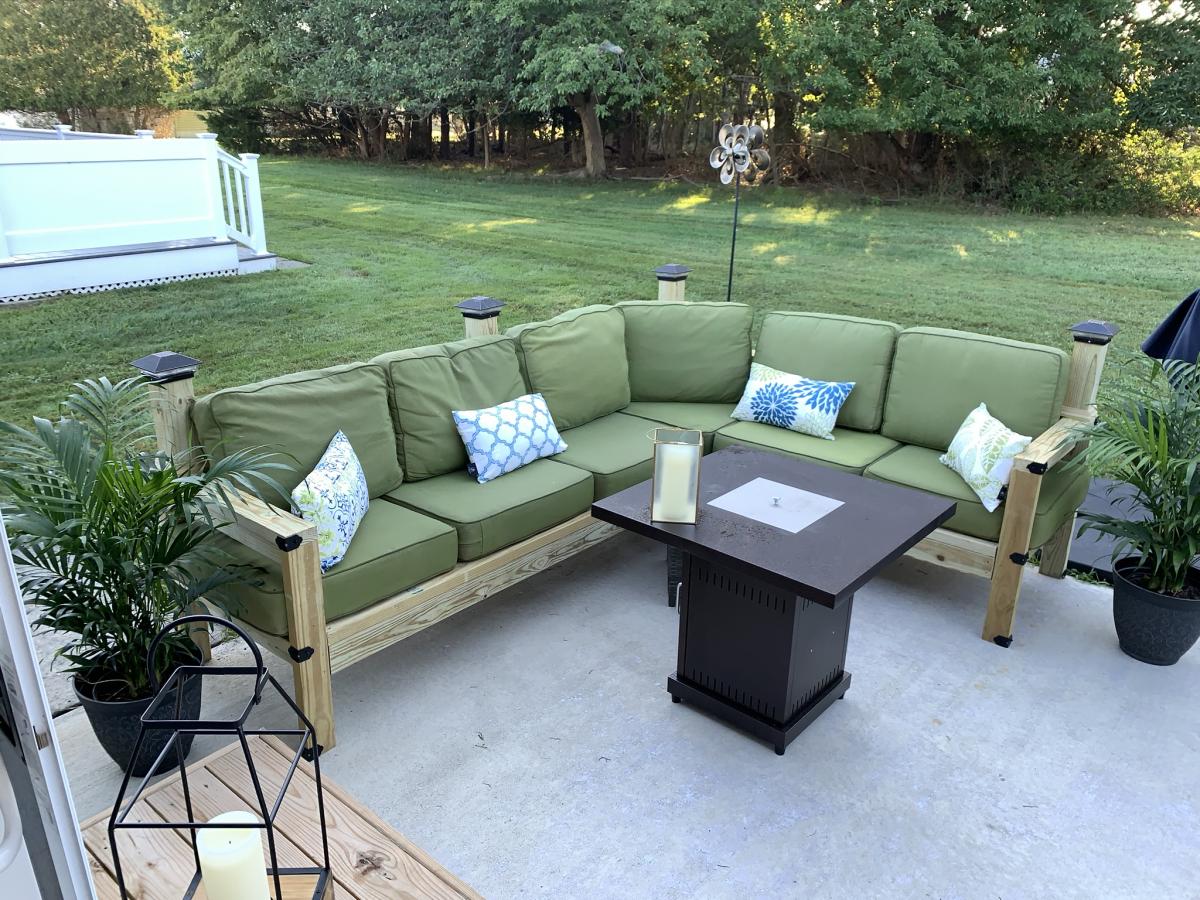
Build an outdoor sectional easily with these free plans.
Built from Plan(s)
Build an outdoor sectional easily with these free plans.
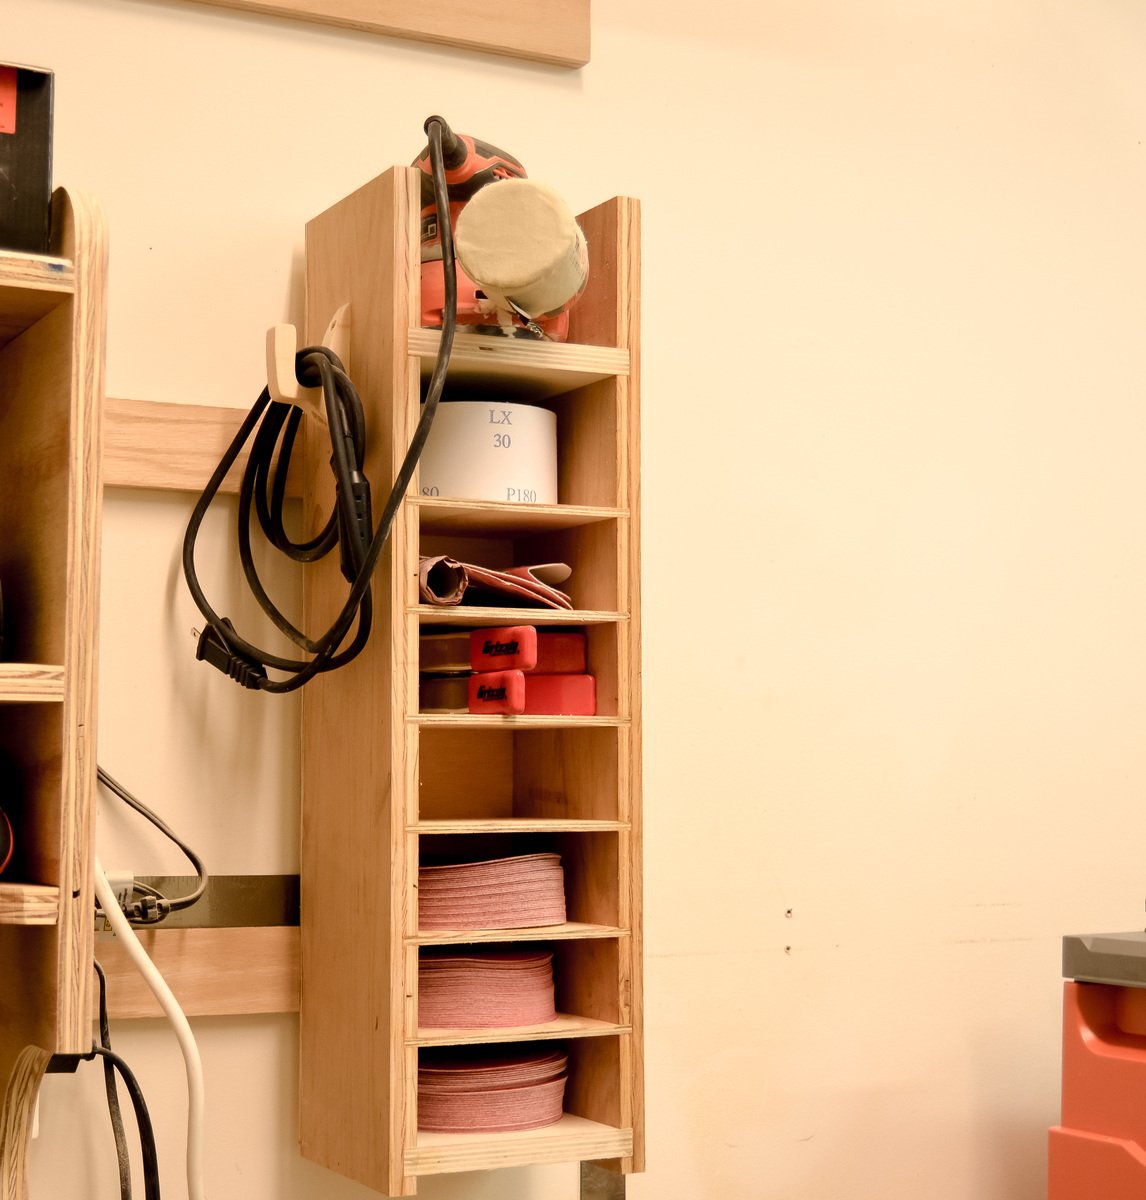
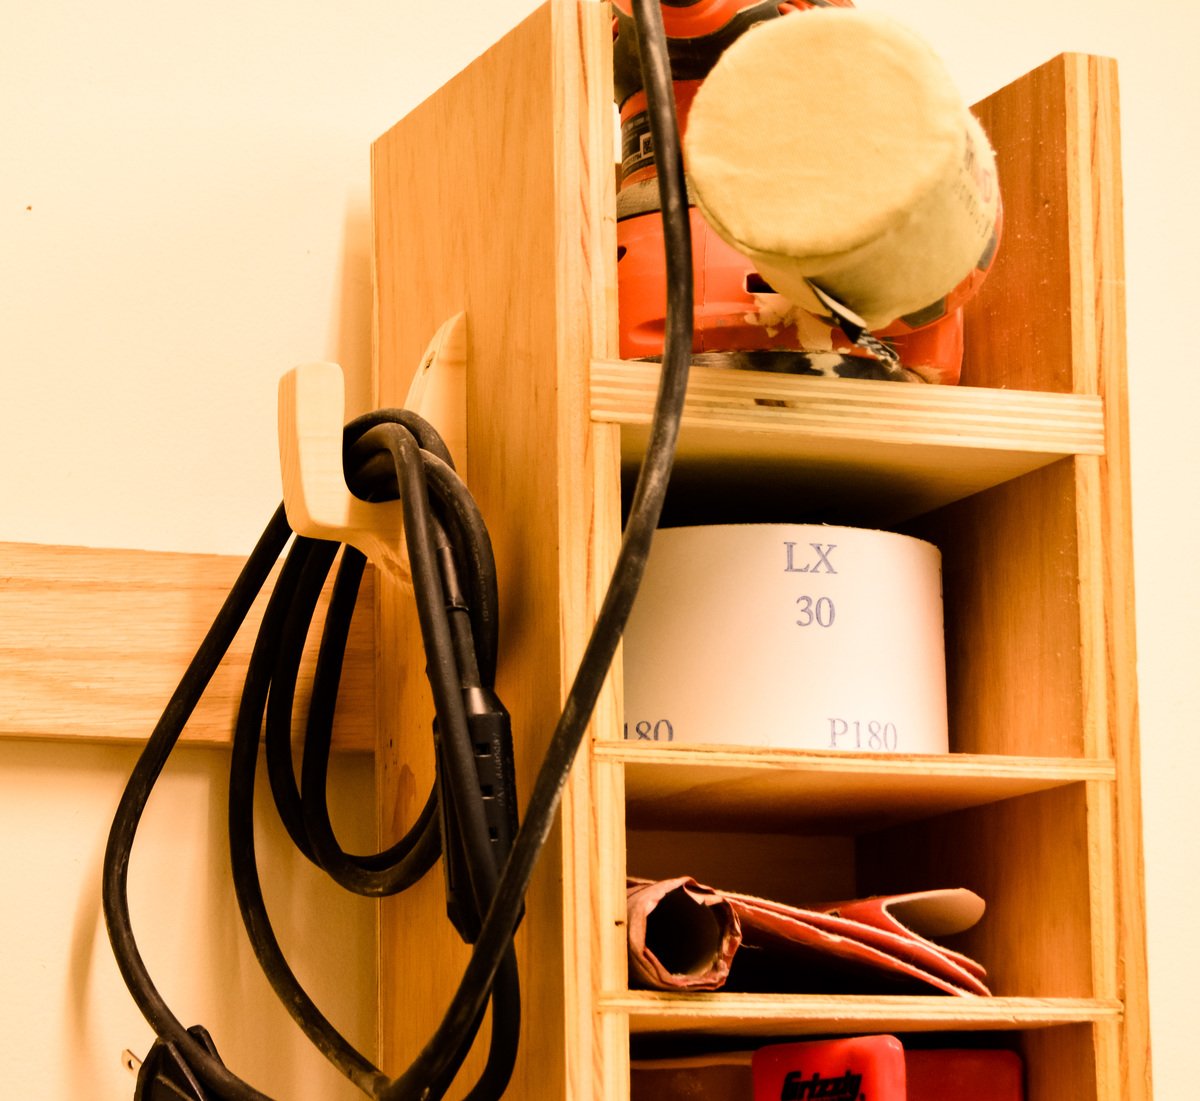
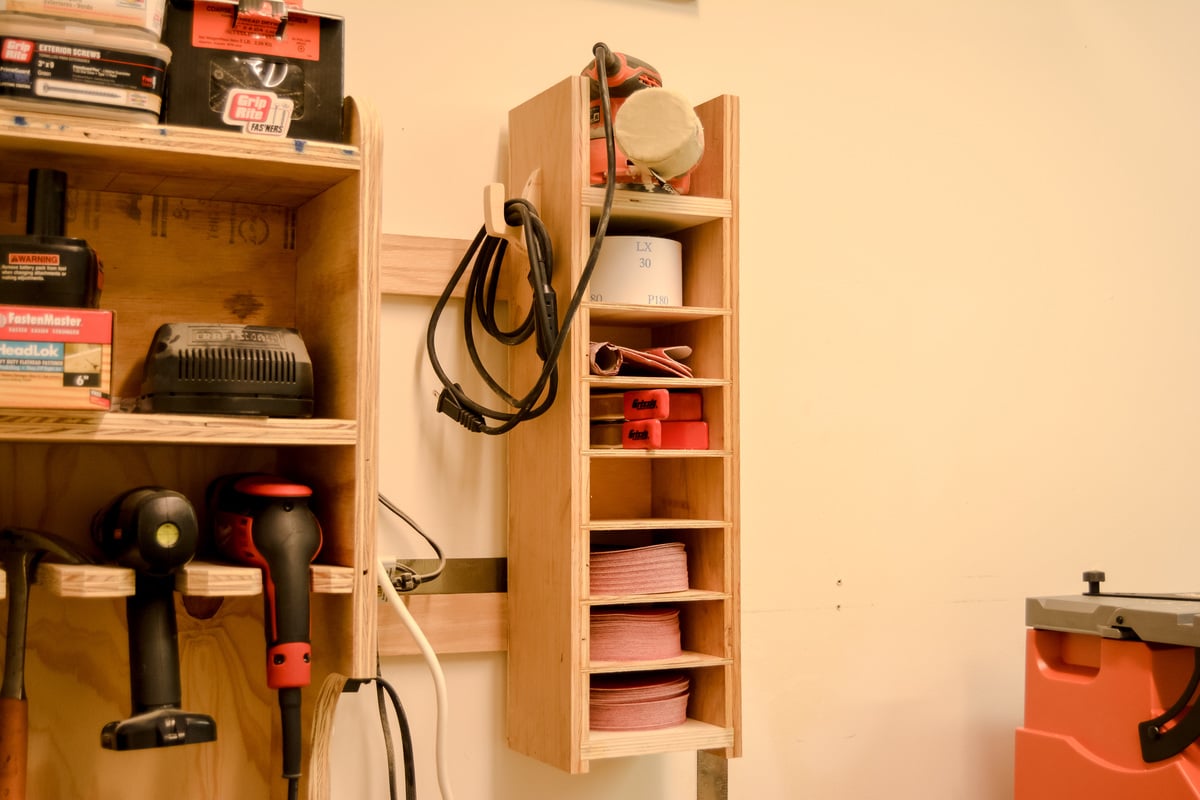
This week I built a french cleat sanding station to house my orbital sander and sand paper!
Blog: http://www.lanebroswoodshop.com/2015/04/french-cleat-sanding-station.ht…
Plans: https://drive.google.com/file/d/0B_RQfvQzkmz3OENtUWdmMENCYlk/view?usp=s…

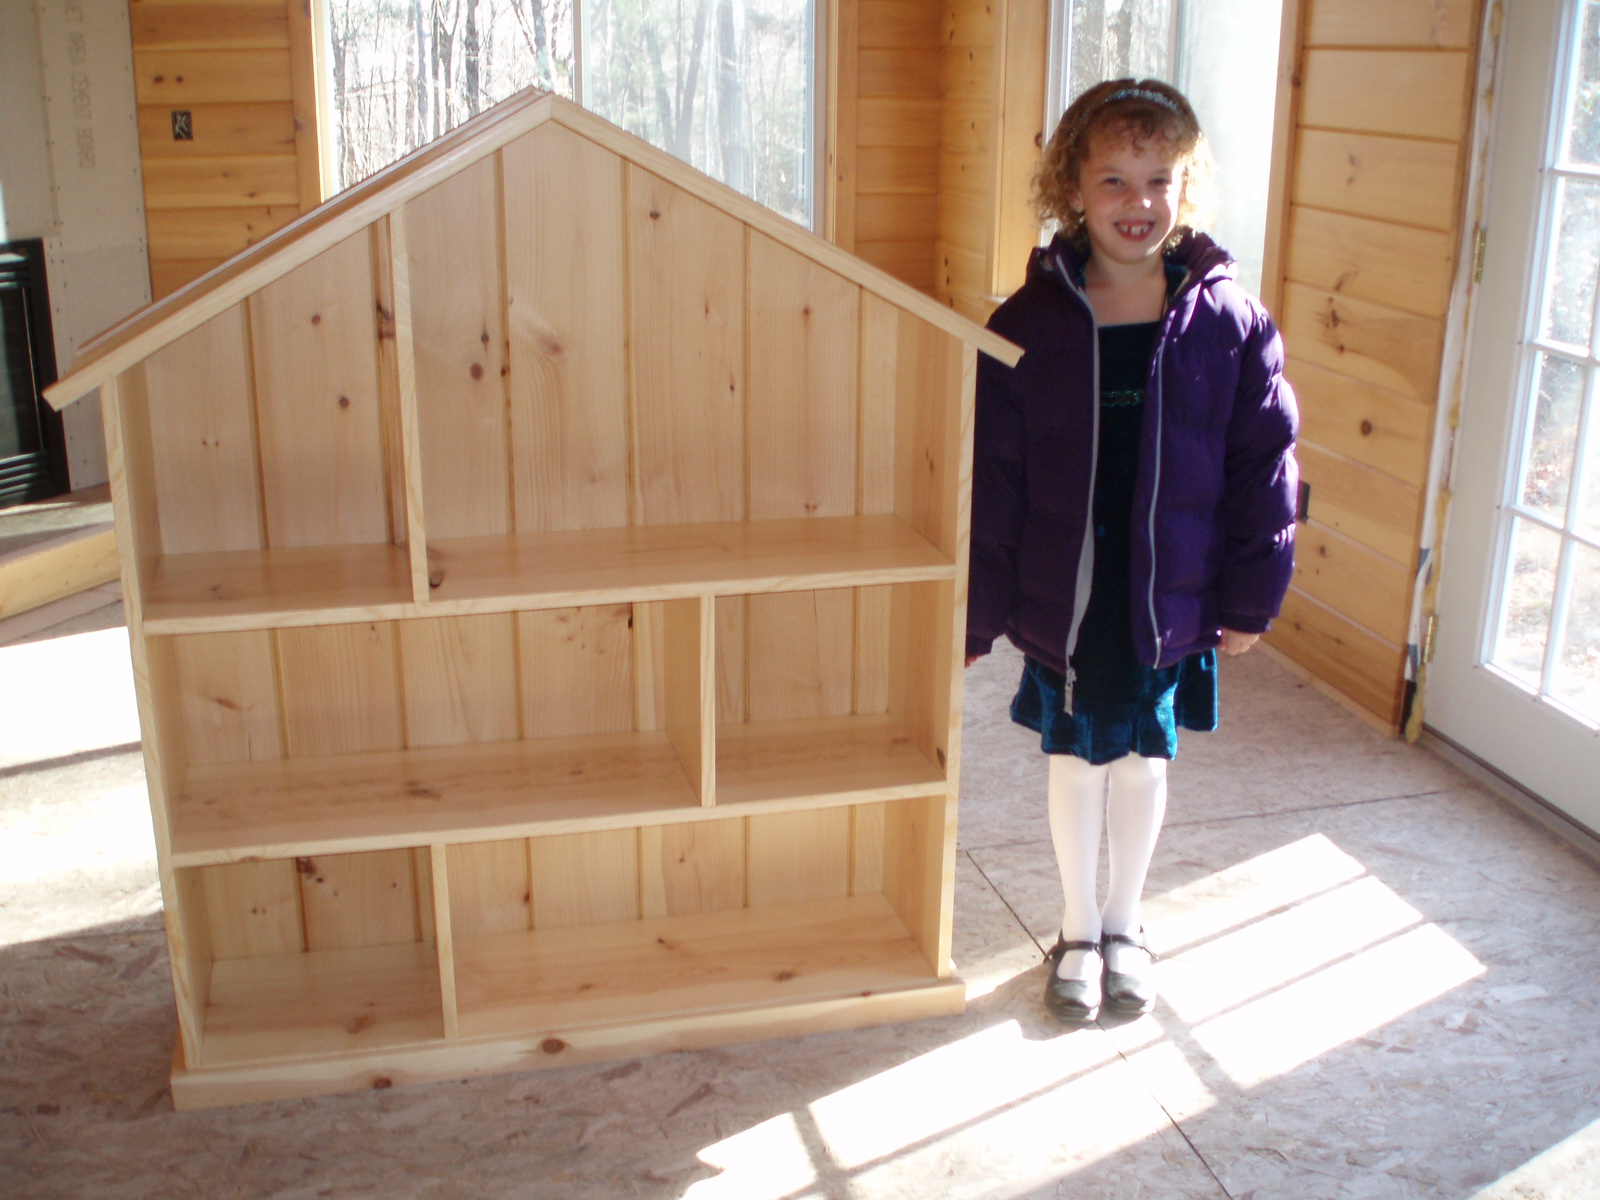
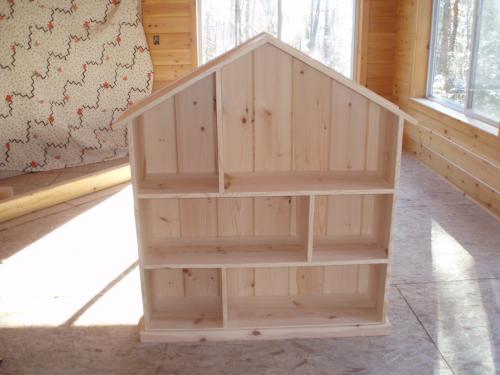
I built this doll house bookcase for my little girl for her Birthday. And she loves it!
I used white pine. I did not want to use paint. I did 5 coats of clear stain. I like the look of the natural wood and the knots to show.
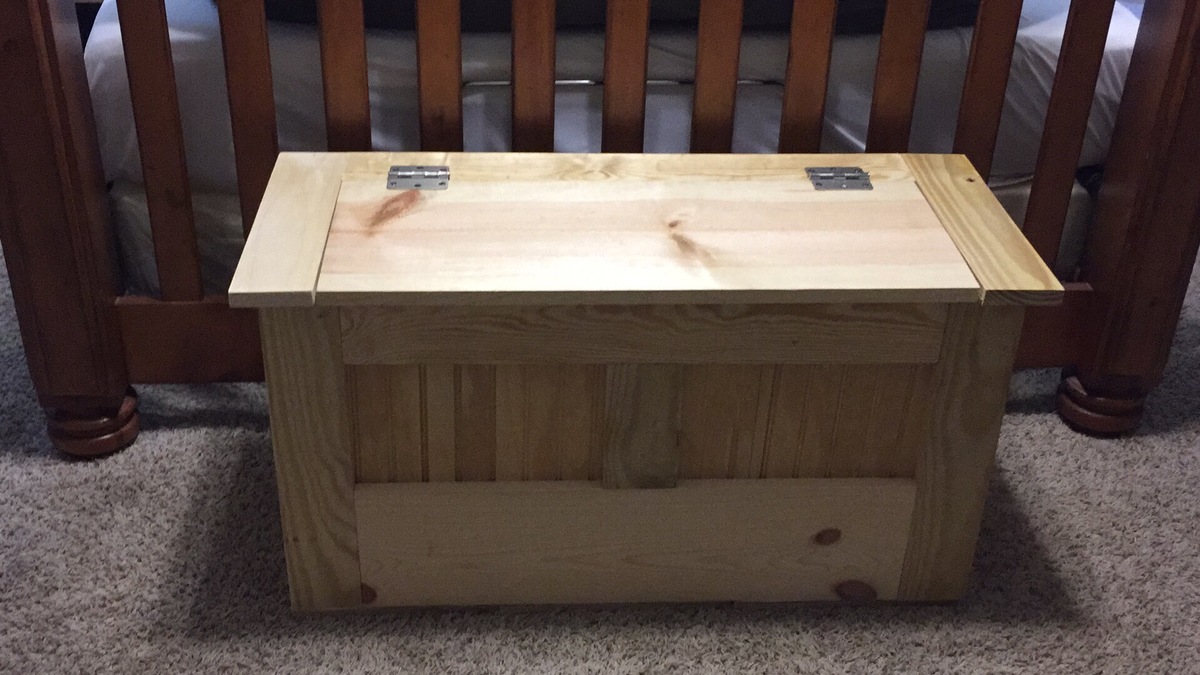
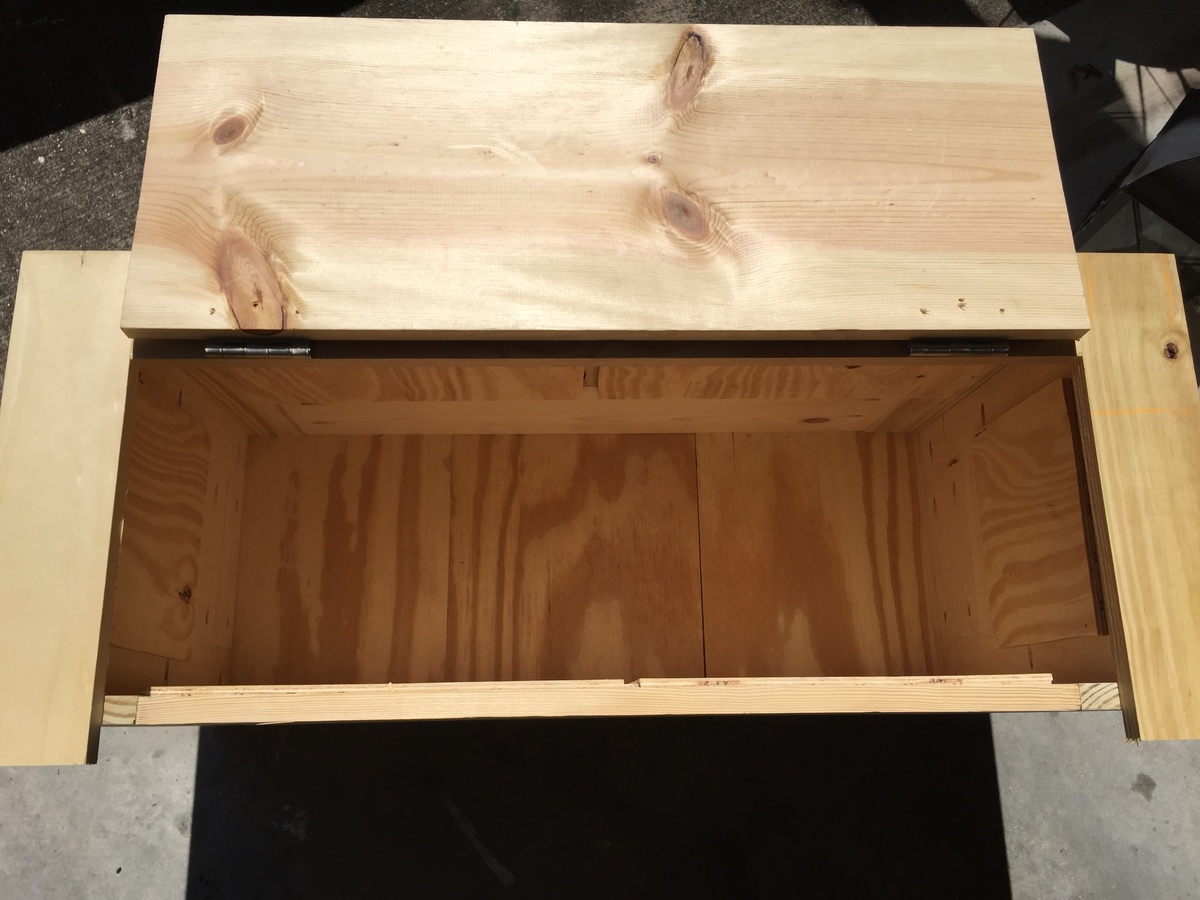
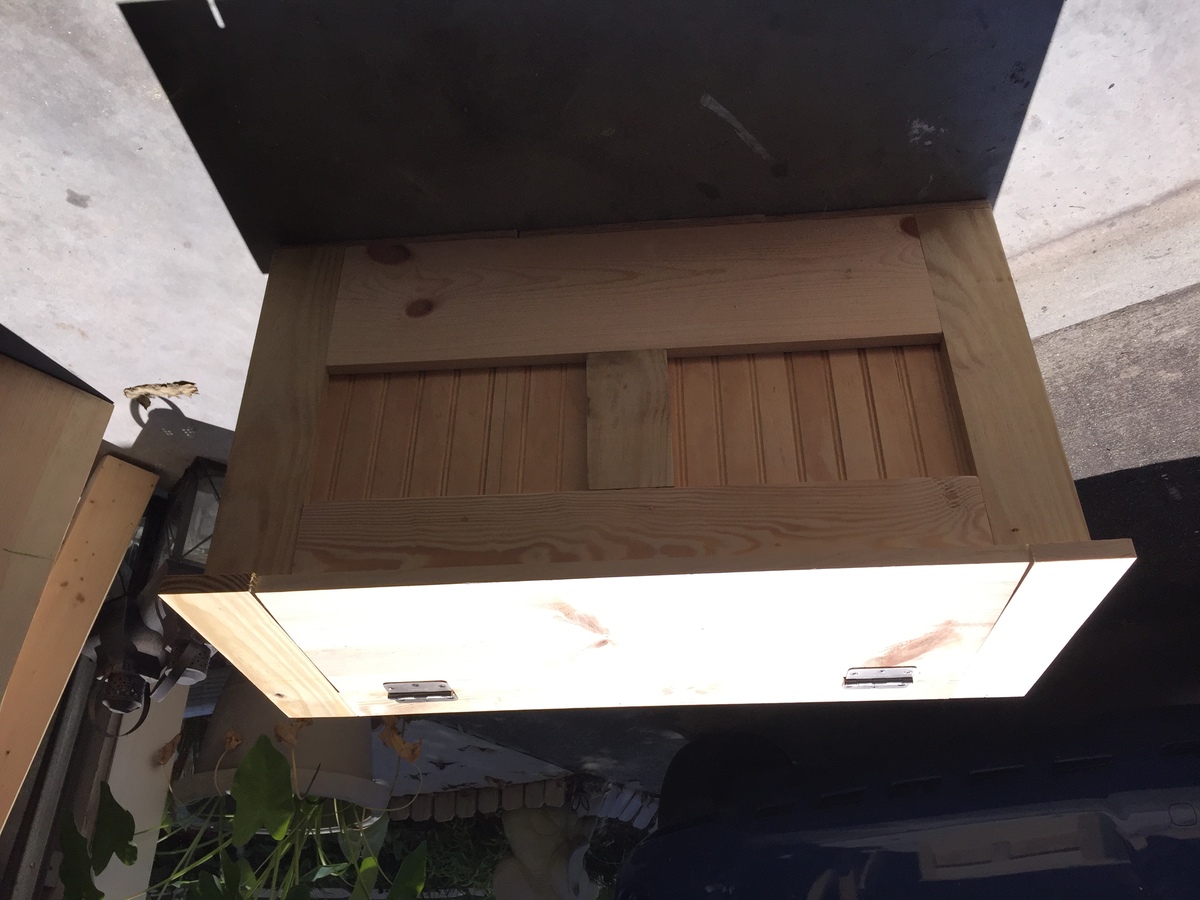
I've been wanting a storage bench for my bedroom to store bed pillows and blankets while we sleep so that the dogs don't take them over during the night on the floor. This is perfect. Just need to finish painting or staining. I did add a plywood bottom. I may add trim to the bottom as well. My first larger project without my husband's help!

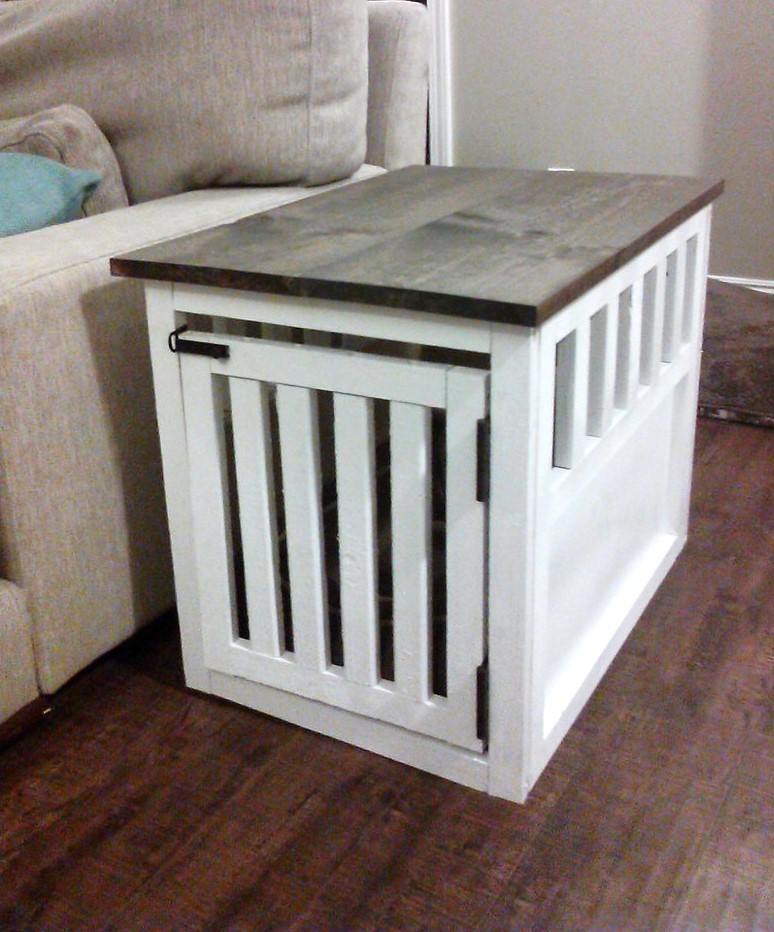
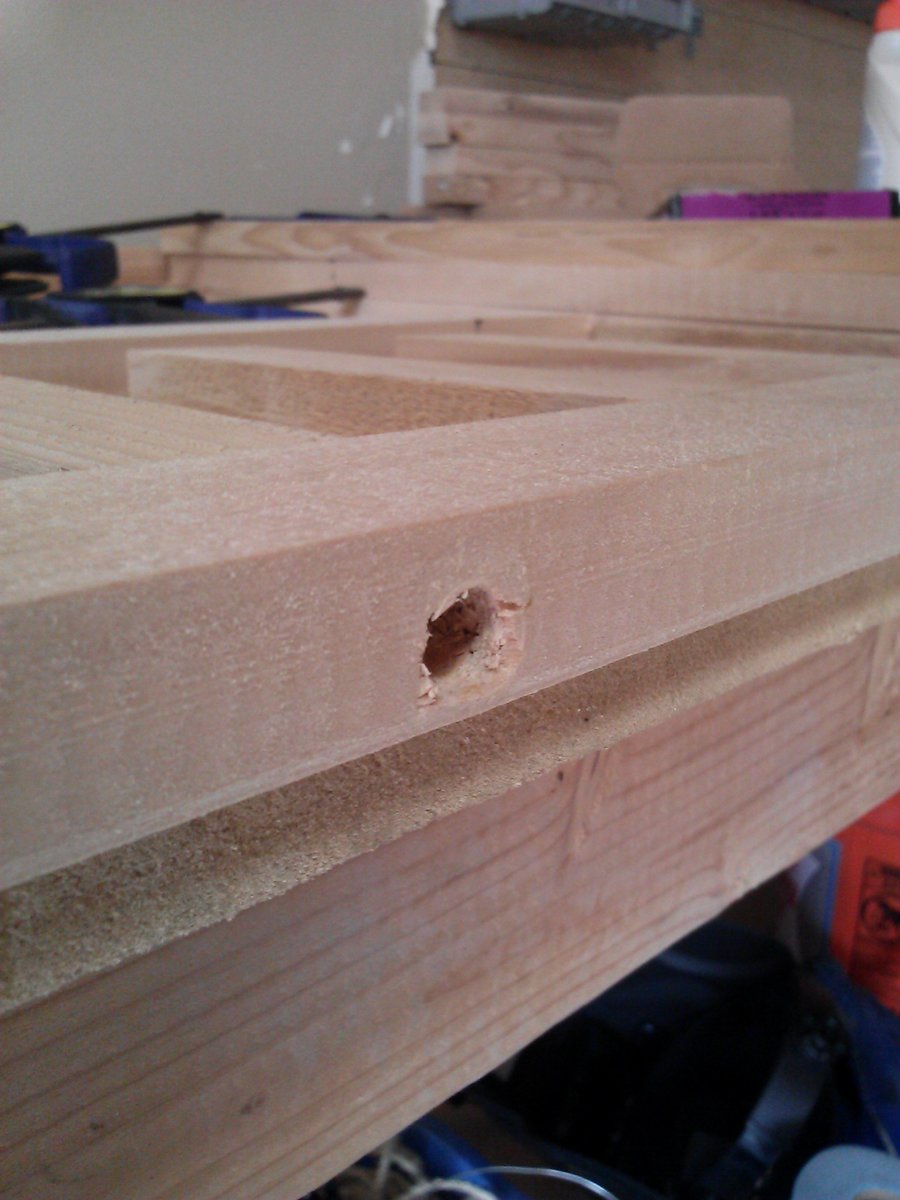
I loved the look of the crate, but my dog is a small Lhasa Apso - Poodle mix, so I had to cut down the size of it. To figure out the approximate sixe that I wanted to make the crate, I measured his current (ugly) wire crate. I forgot to take into account that a 1x2 is acutally .75x1.5 ish so my measurements were slightly off but the only thing it mattered for was the door. I used 1x2s for everything. I did not have a jig, so I predrilled holes and did it a little differently. I would have prefered to have the jig, but Home Depot doesn't cary the mini in their stores and I would have had to wait a few days for it. I built this on my own (I am a 22 year old girl) while my boyfriend is out of town as a surprise for when he gets home, and I am more then pleased with how it came out! Here are my measurements: 21 inches high (the walls are 20 inches high, and the top gives it about an extra inch) 26.75 inches long (24.5 inches excluding the overhang of the top) 18.5 inches wide (17 inches excluding the overhang of the top) I needed: 6 - 8' 1x2 1 - 20 inch wide pine board, 5 feet tall (for the top) Corner brackets to connect the walls Hinges Latch Screws Tools I used: Table Saw Drill Hope that this helps anyone who wants to build one for their little dog!

Tue, 06/04/2013 - 08:14
This looks great!! Thanks for the measurements. I was working on the size for ours because we have a chihuahua and the large one was way to big. The only thing I am doing different is having a retractable door. I found the hardware and will have to add a little to the width to accommodate for it.
My first woodworking project. The plans were fantastic and easy to follow. Thanks!

Mon, 05/04/2015 - 14:53
Dirkmonster,
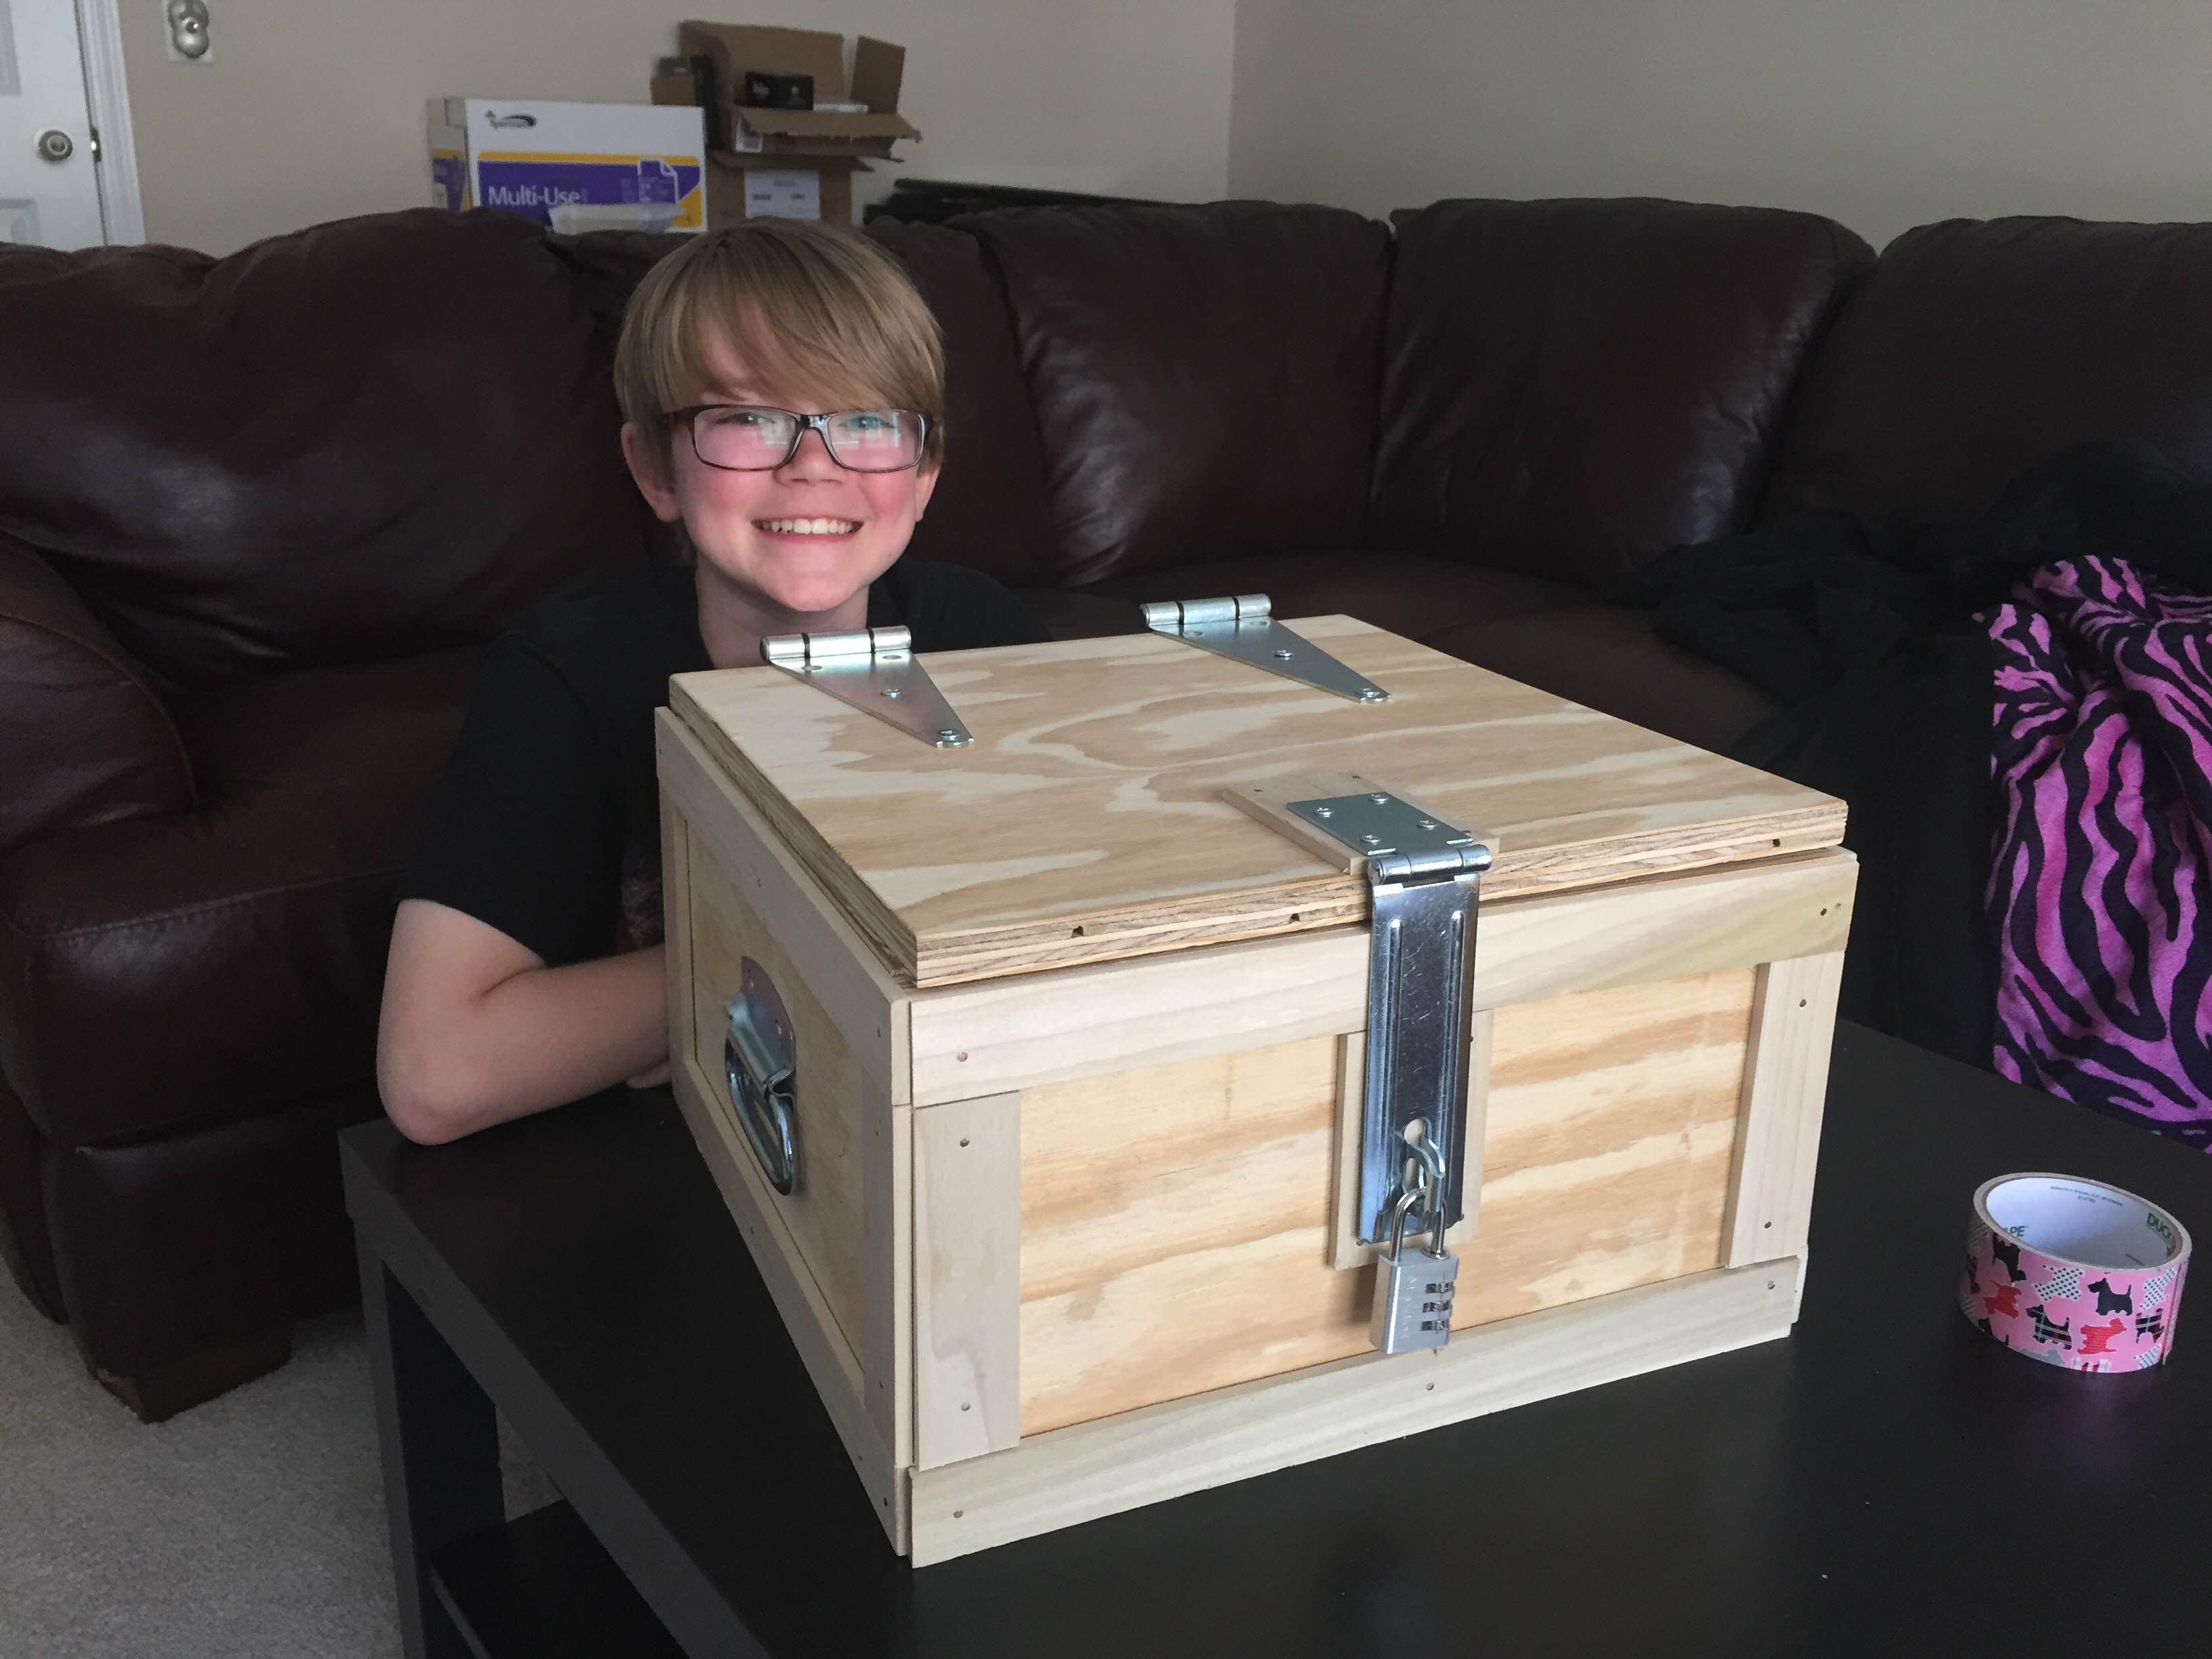
You did an awesome job! Congrats on a great first project! Thank you for the shout-out! Love the addition of the hinges, handles and lock. Looks like a happy young man there! :)
JoanneS
First attempt ever at building anything! Probably took me a lot longer than it should have, but I'm very proud of the result
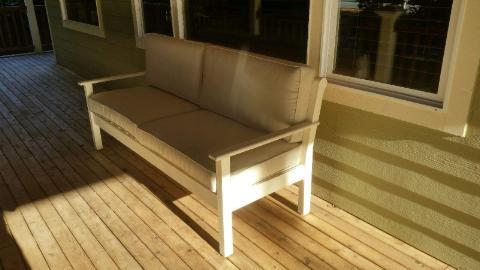
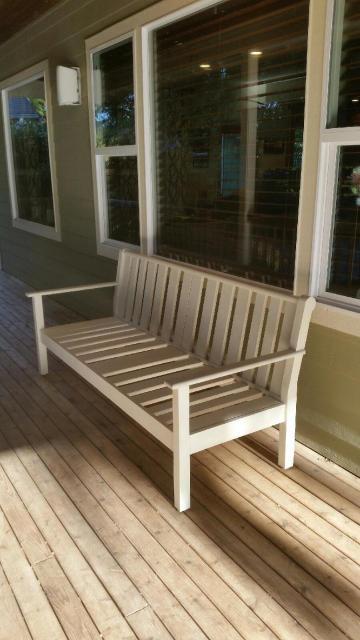
I made this porch bench for my daughter-in-law 's birthday. She purchased bench cushions from Pottery Barn and asked if I would build the corresponding bench. Using the dimensions of the cushions and examining online photos I was able to build the framework and tried my best to duplicate the
Chatham series bench. Not quite ready to tackle the curved bench rest and arms but after watching YouTube on how to make curved woodworking items I might just take a shot at it next time.
She really loves the bench and I am pleased with how it turned out.

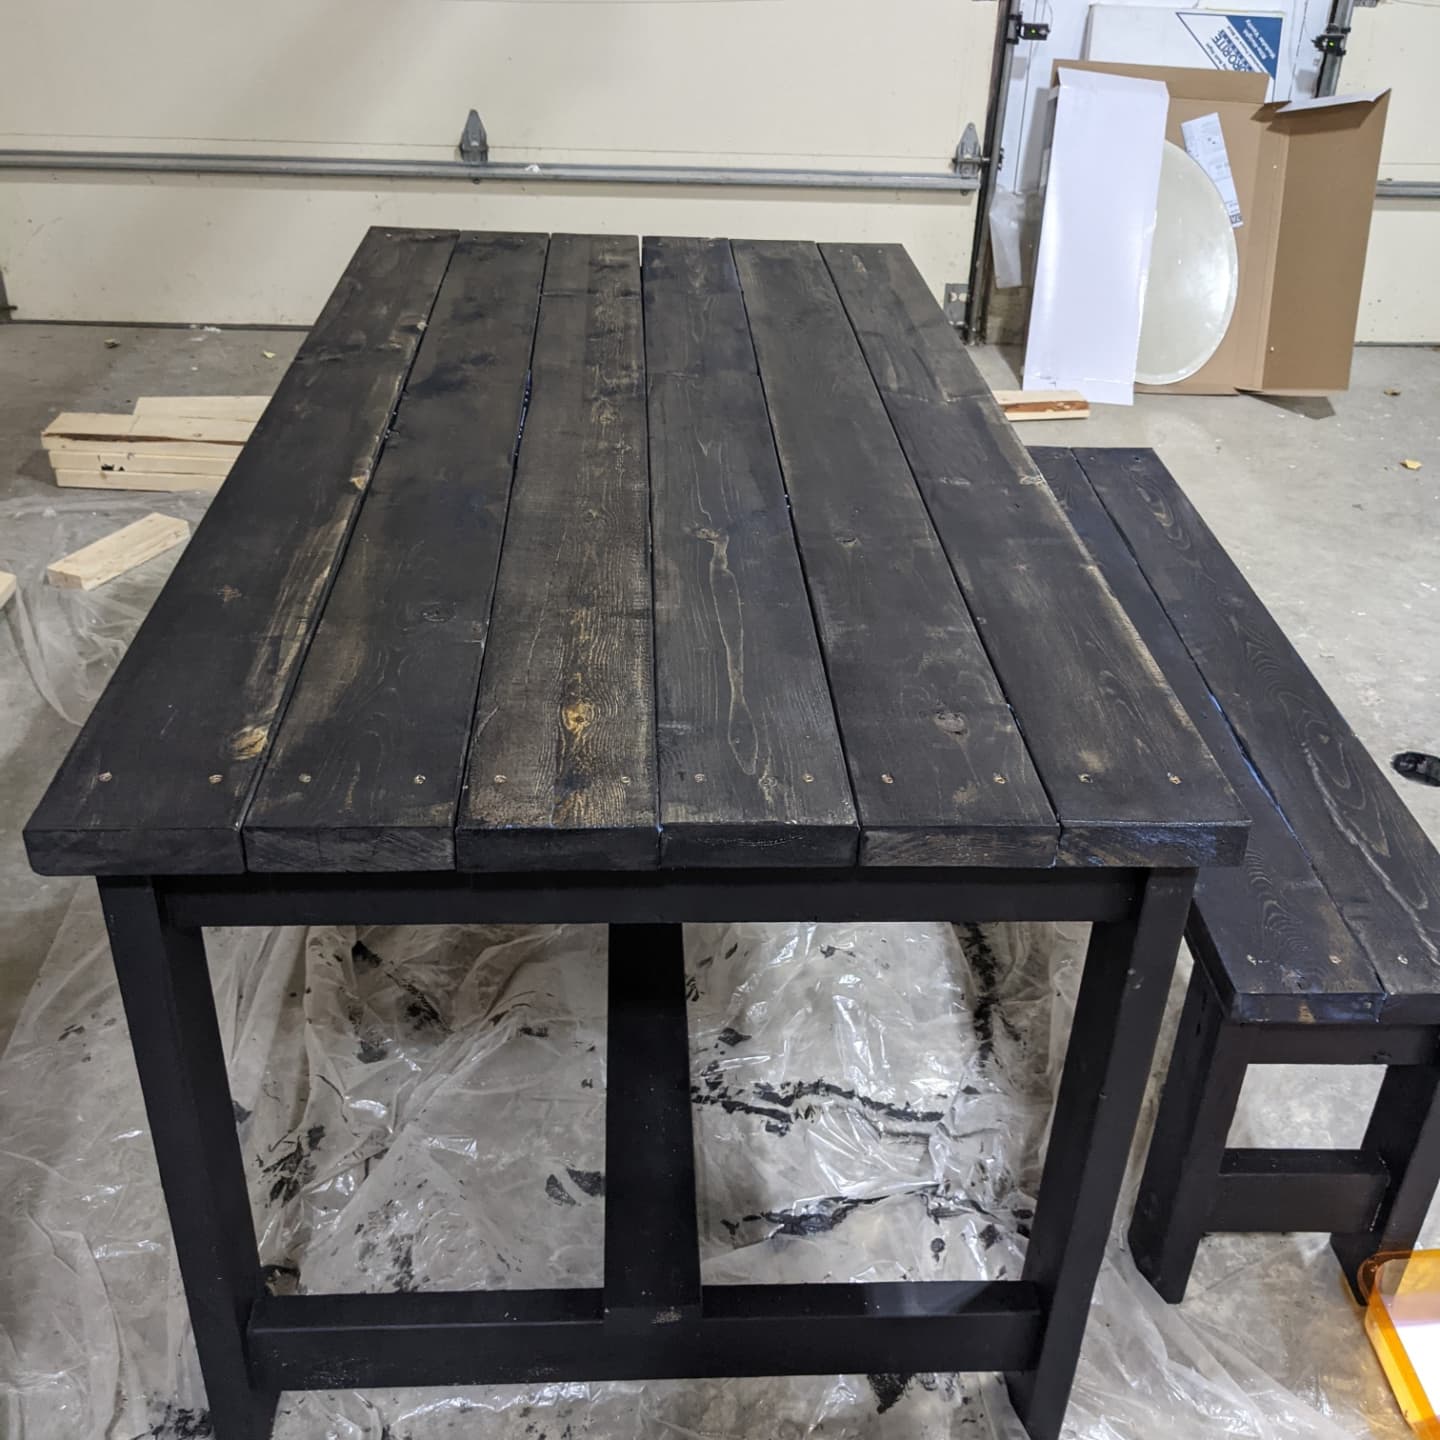
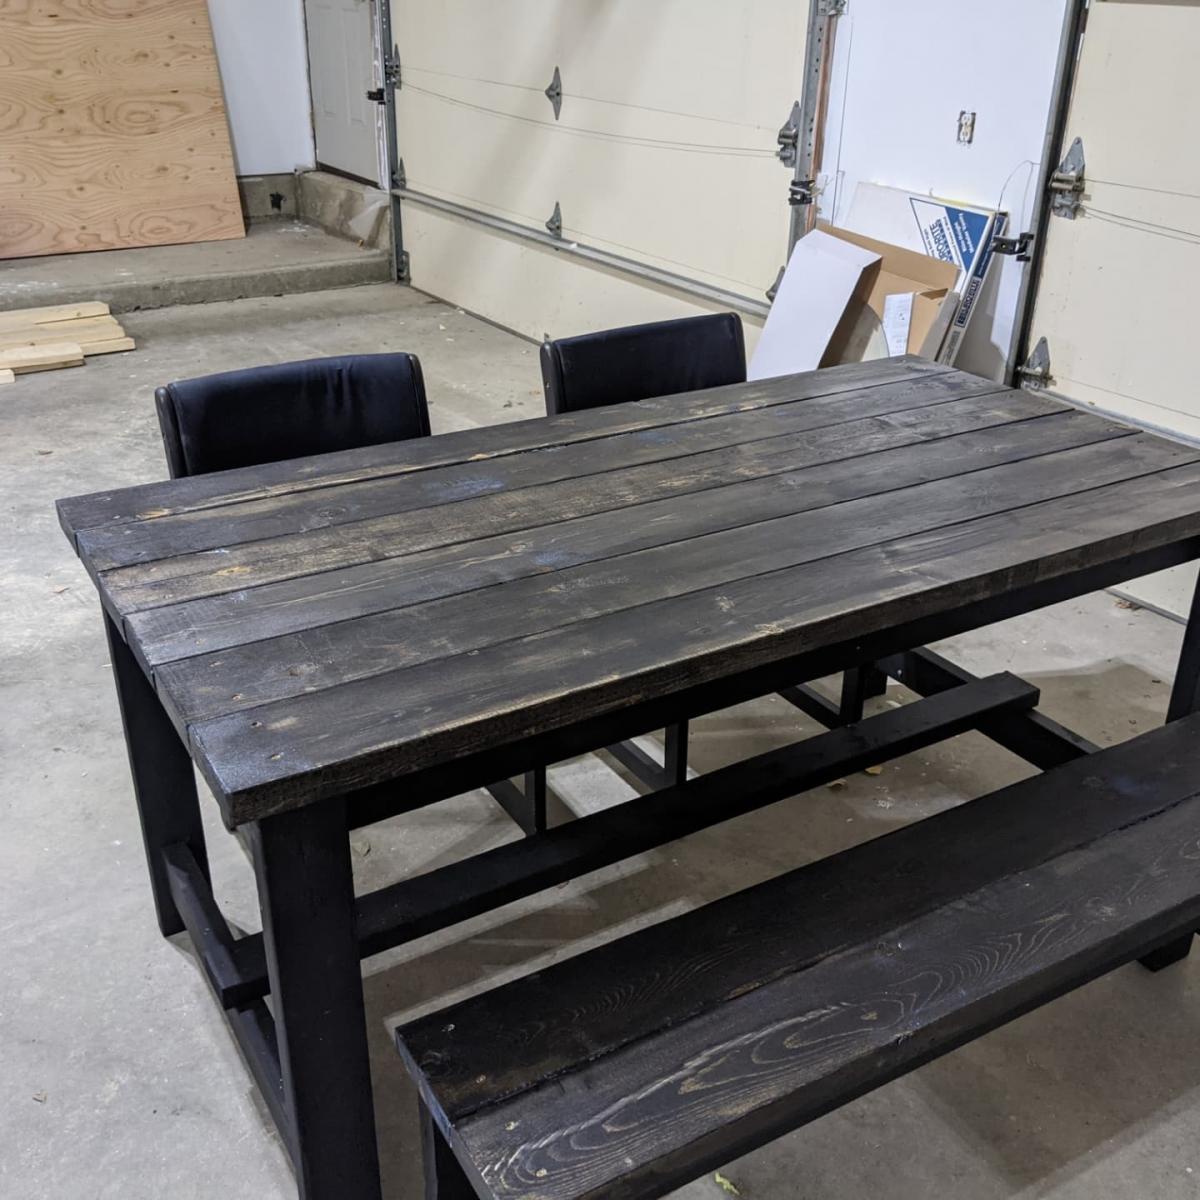
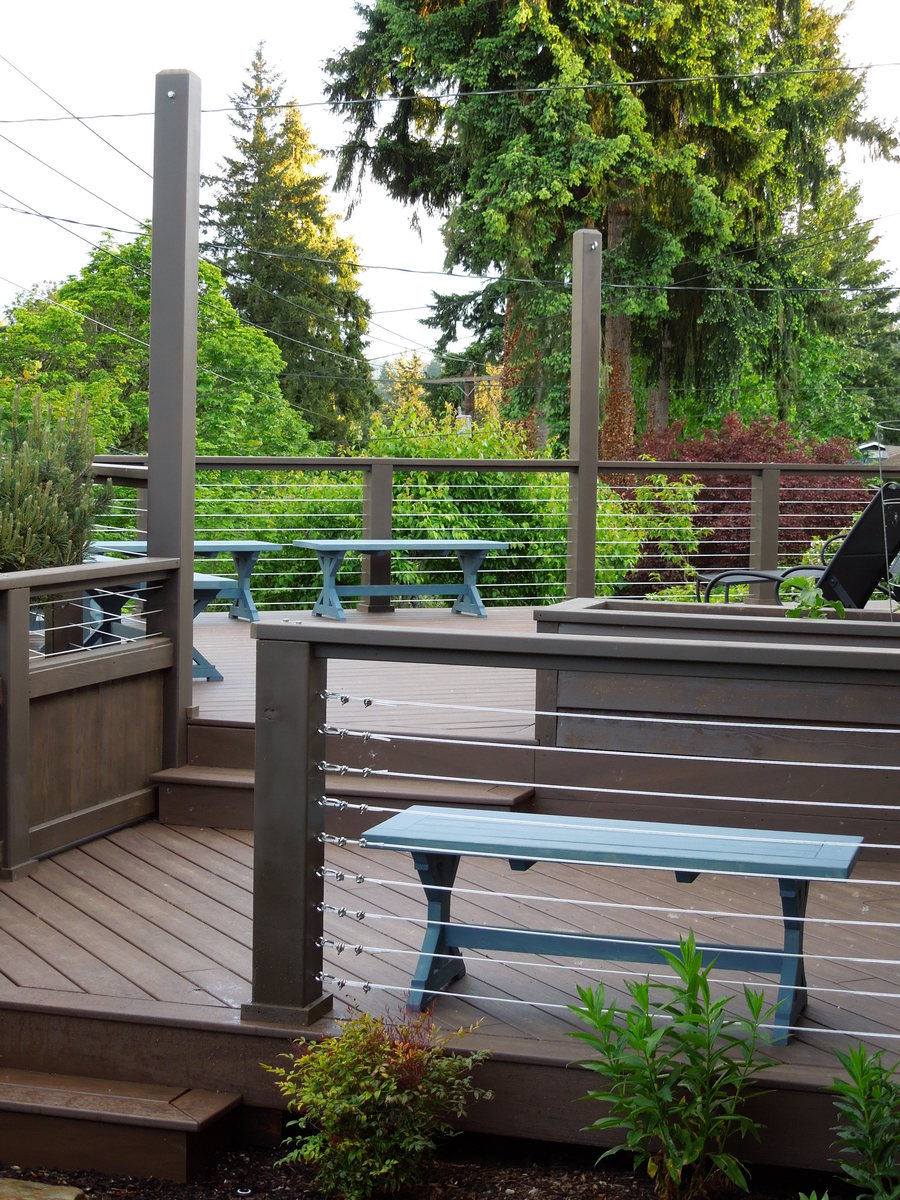
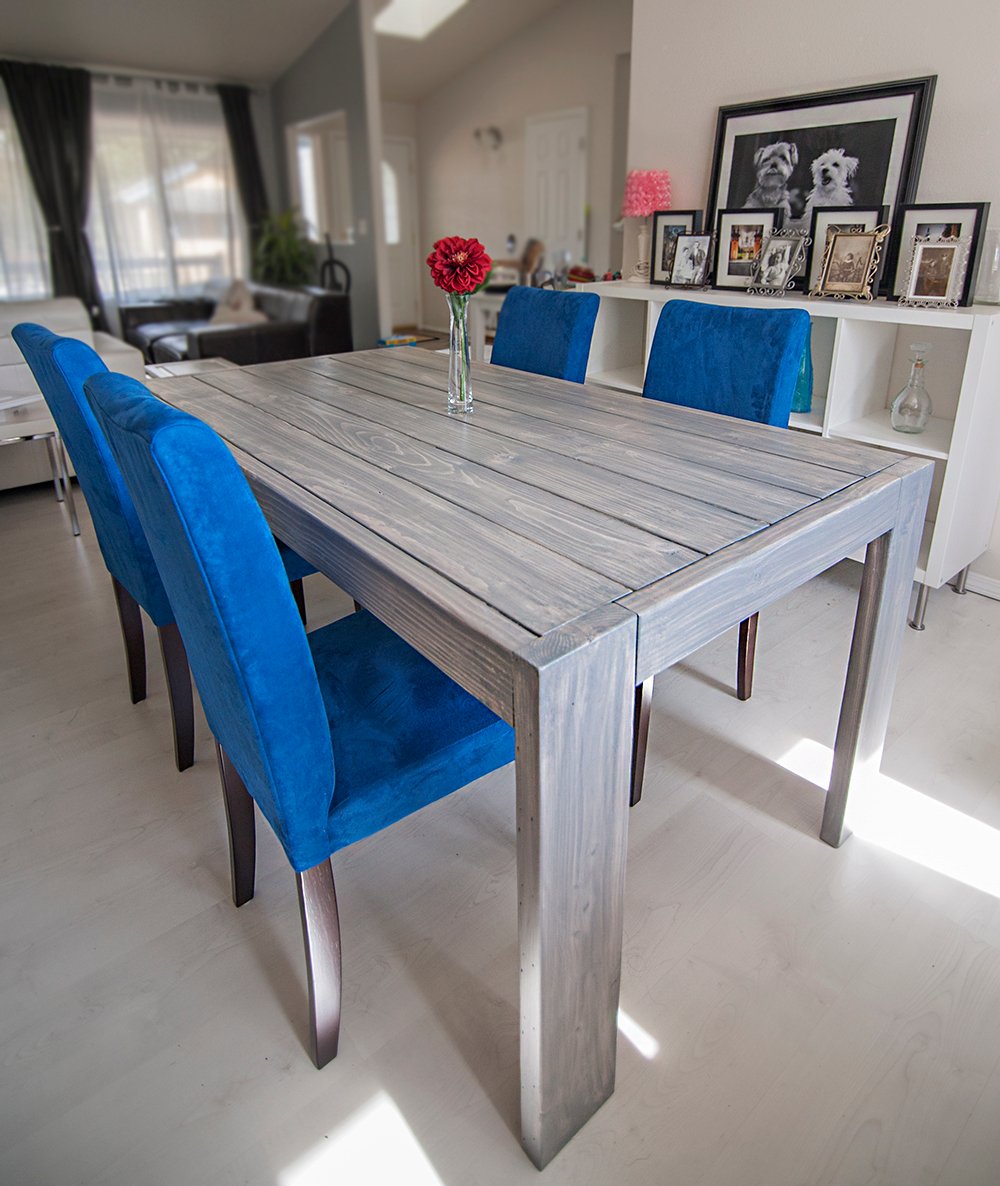
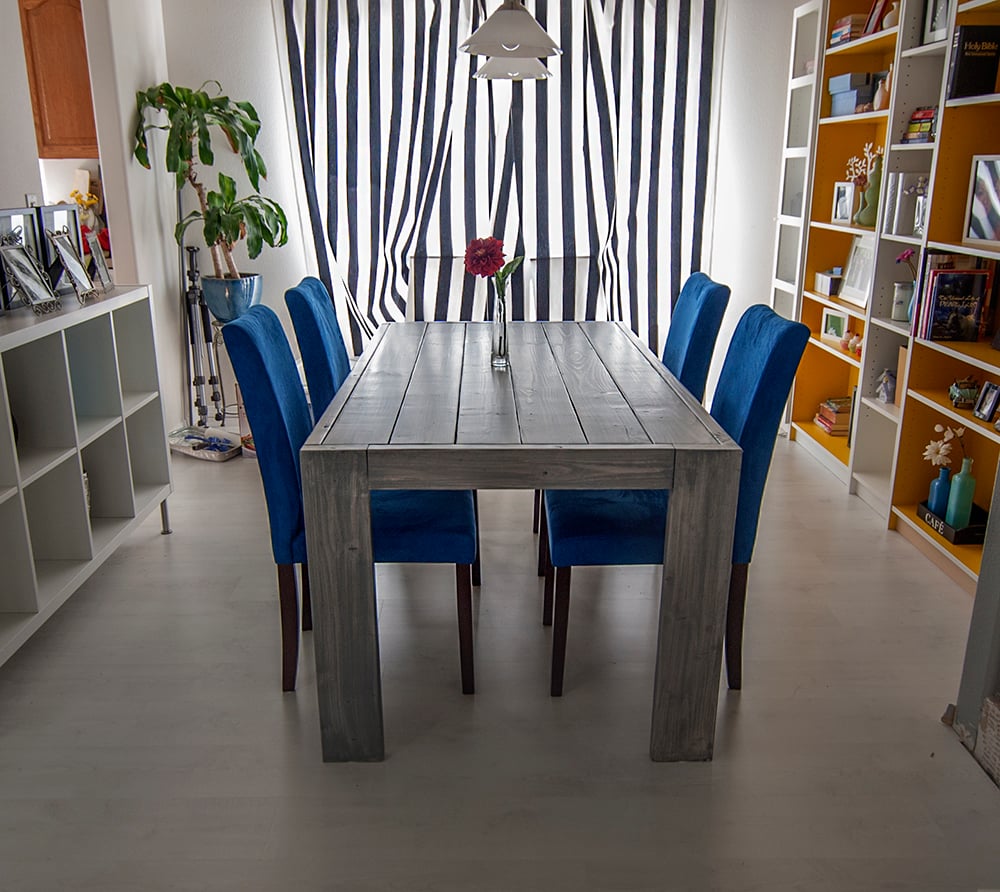
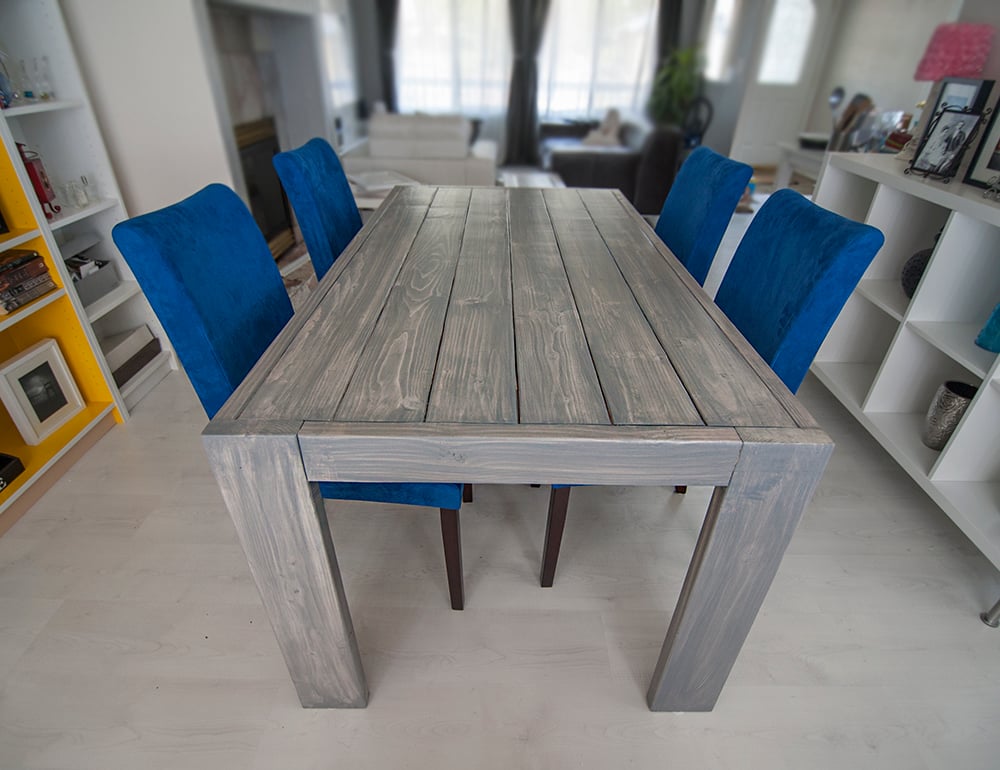
When we resurfaced our deck last year we had to remove the built-in benches due to code regulations, so I knew I would get to make new benches this year. We wanted them to be a flexible size so we could rearrange the deck easily for eating, entertaining, enjoying the sun and the shade. Based on the size and shape of our deck, a square table for 6-8 people was going to be the best option.
After looking at a couple design plans, I decided to combine a few plans to get exactly what we wanted. To get a mid-sized square table I used the leg structure of the Fancy X Table with the construction method and the stability from 2x6s of the Square Pedestal Table. The top is joined from seven 45.5" lengths of 2x6 and two lengths of 2x4s. It ends up being 52.5" square. It is snug for eight people, but comfortable for six. We didn't end up using the skirt boards so there would be more knee room. The base is mounted on the diagonal for the same reason.
For the benches, I used the supports from the Fancy X Benches, with the bordered top from the Triple Pedestal Farmhouse Bench, since it would match the table top better. The benches are 48" long, and only two supports were used for each, inset 5" from the end of each bench. Likewise, I used a single stretch of 2x4s for the seats rather than seam them in two parts like the 106" long original plans. I did add an extra 2x2 support board under the seat platform to keep the 2x4s even over time. Overall, I made five benches - four for around the table and one for next to the BBQ. They are blue so they provide some color against the brown deck and green tree tops that surround the deck.
For both the table and the benches, I pre-stained the surfaces that make up the inside of the Xs. It made it easier to get good coverage there.
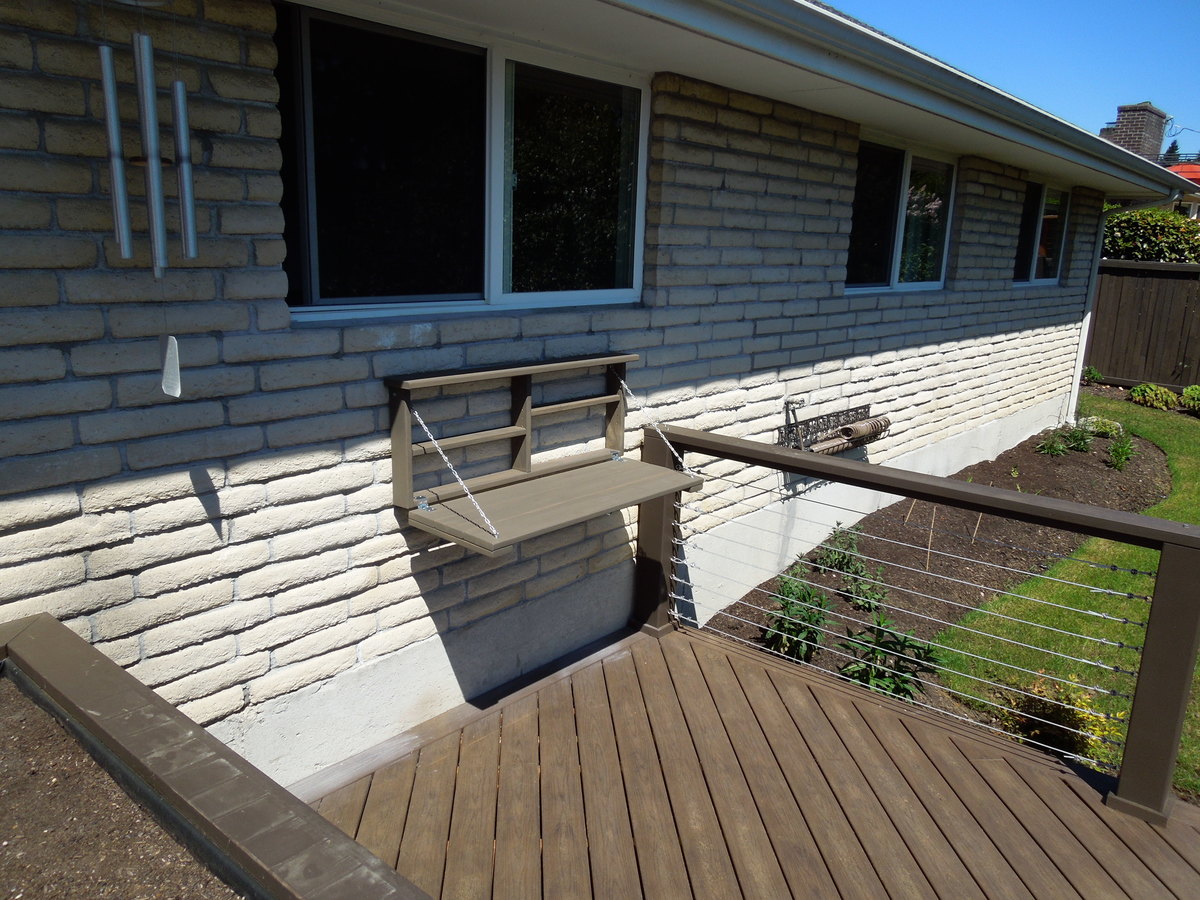
I also made a quick flip-down BBQ prep station, on similar lines to the Flip-down Wall Art Desk out of two 5/4x6 and two 5/4x4 cedar boards. The shelves are on adjustable pegs.
The costs broke down - with all hardware, screws, putty, sandpaper, stain, etc. - as: $90 for BBQ station (lots of hardware), $200 for 5 benches, and $155 for the table. I did a lot of sanding and filling to get the rough 2x4s smooth. In the end, there was about 50 hours in the benches, and 20 in the table. The BBQ station was less than a day, including mounting.

Thu, 09/24/2015 - 14:14
Nice! Did you use 2x4s or 2x6s for the X braces on the pedastle? I was thinking about a similar variation, but I wasn't sure if 2x4s would be sturdy enough?
Mon, 08/19/2019 - 22:39
Sorry, I haven't logged in in ages and didn't see a note. The table has 2x6 braces. I hope yours turned out well!

Submitted by Valeria Green -
My husband built this table and bench for my son and his wife. He is presently building another by request for a young couple.
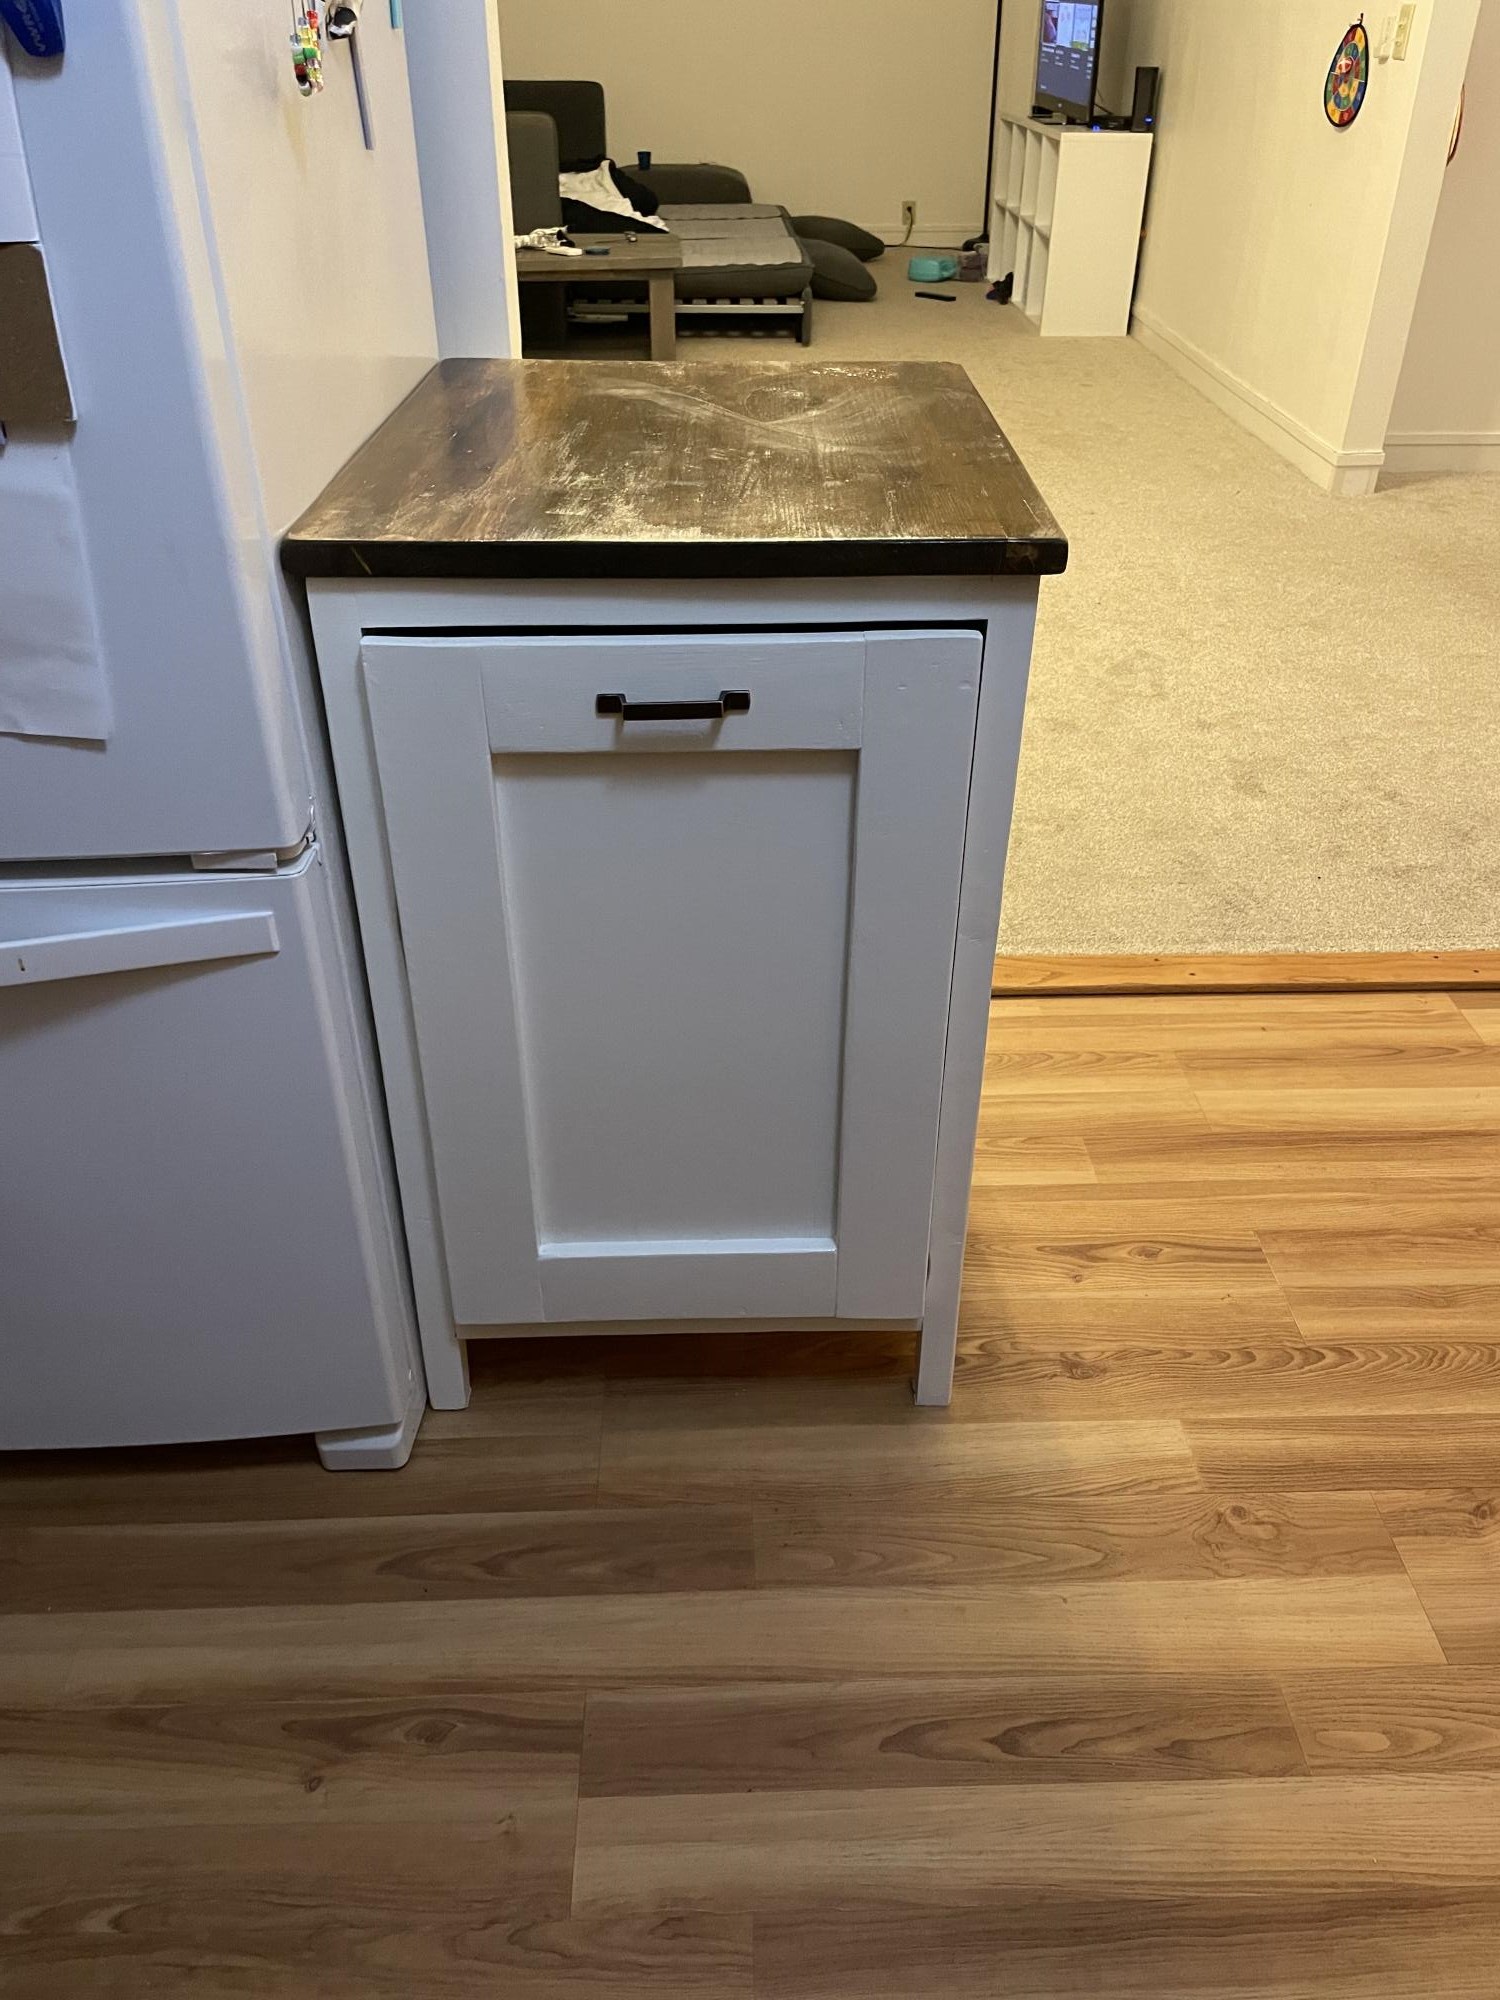
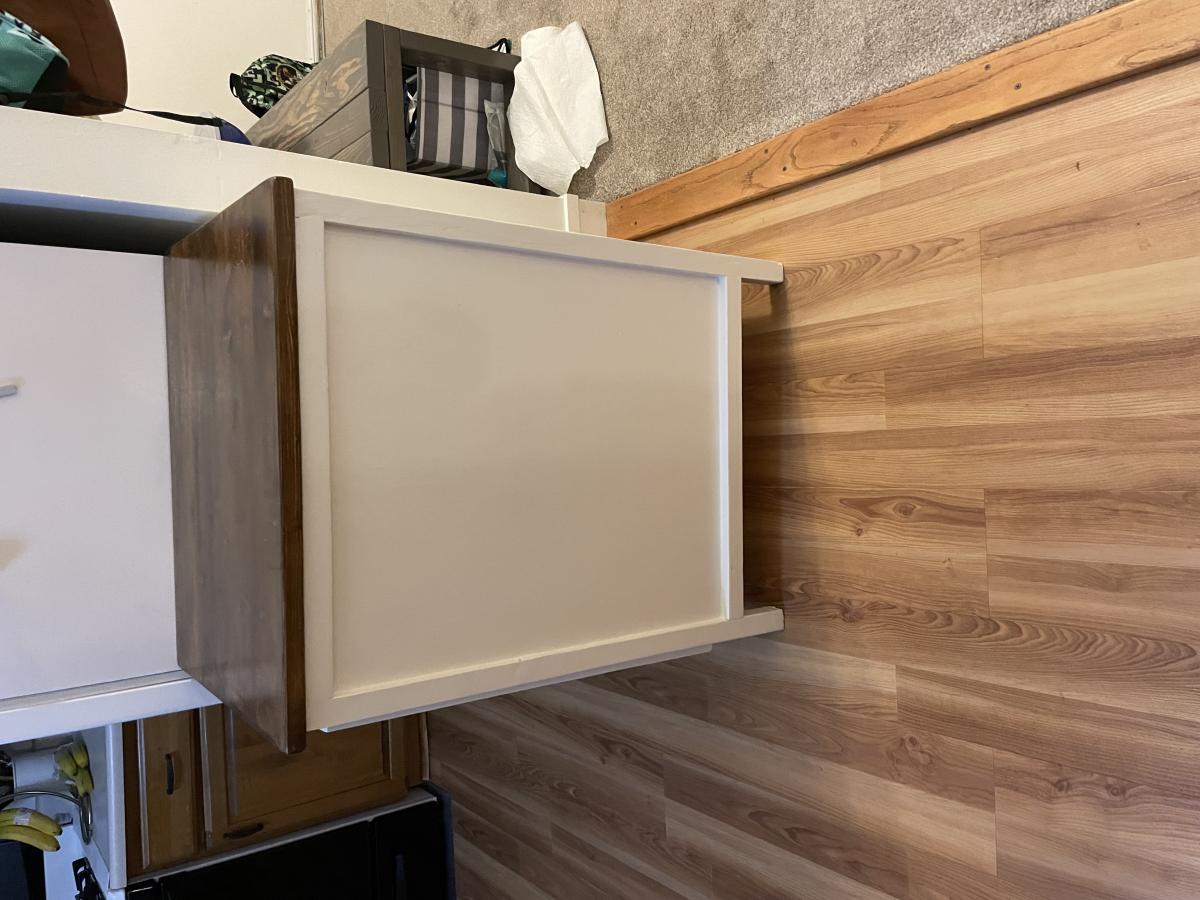
I absolutely love this kitchen island/trash storage/prep station. I had so much fun building this with my father in law who is a professional carpenter. I had built several other projects, but with this project and his help, I feel that I can finally say I am an "advanced" builder :)
I had so much fun with this, and I can't believe how it turned out.
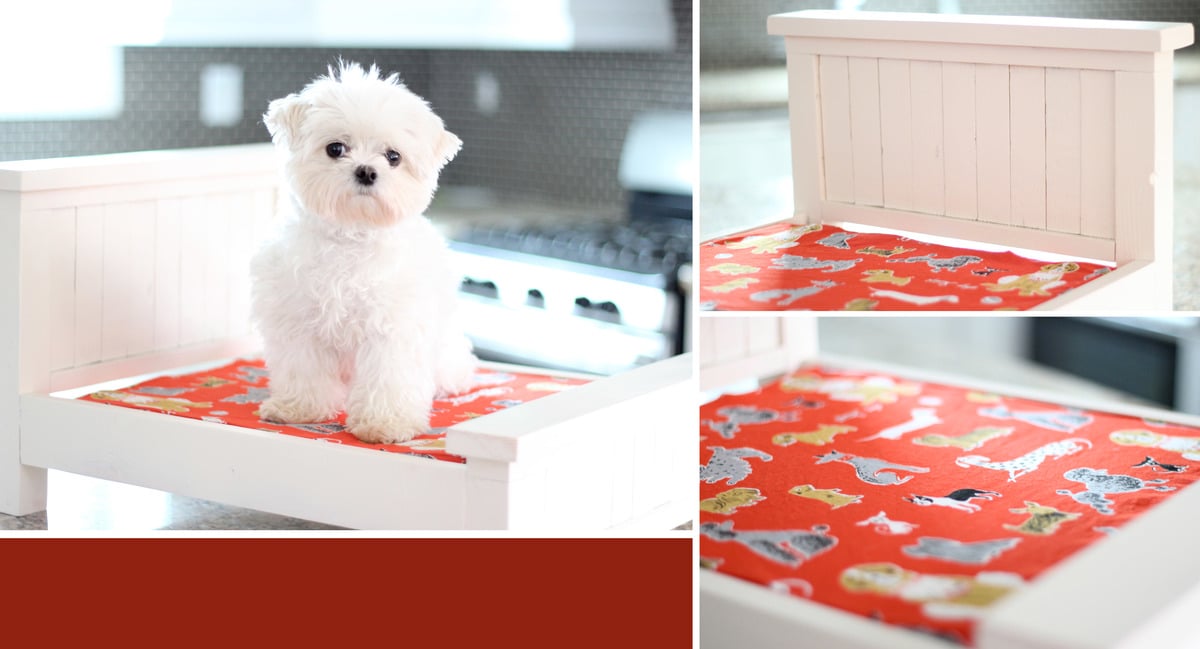
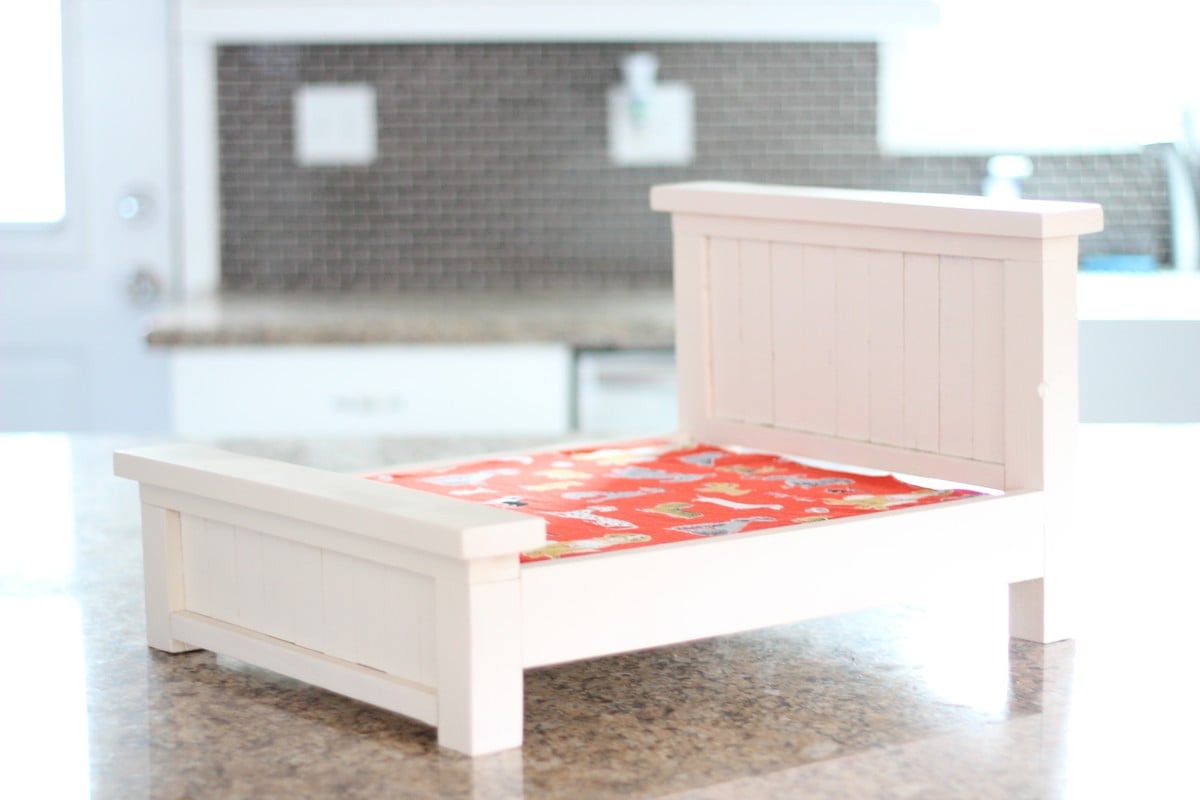
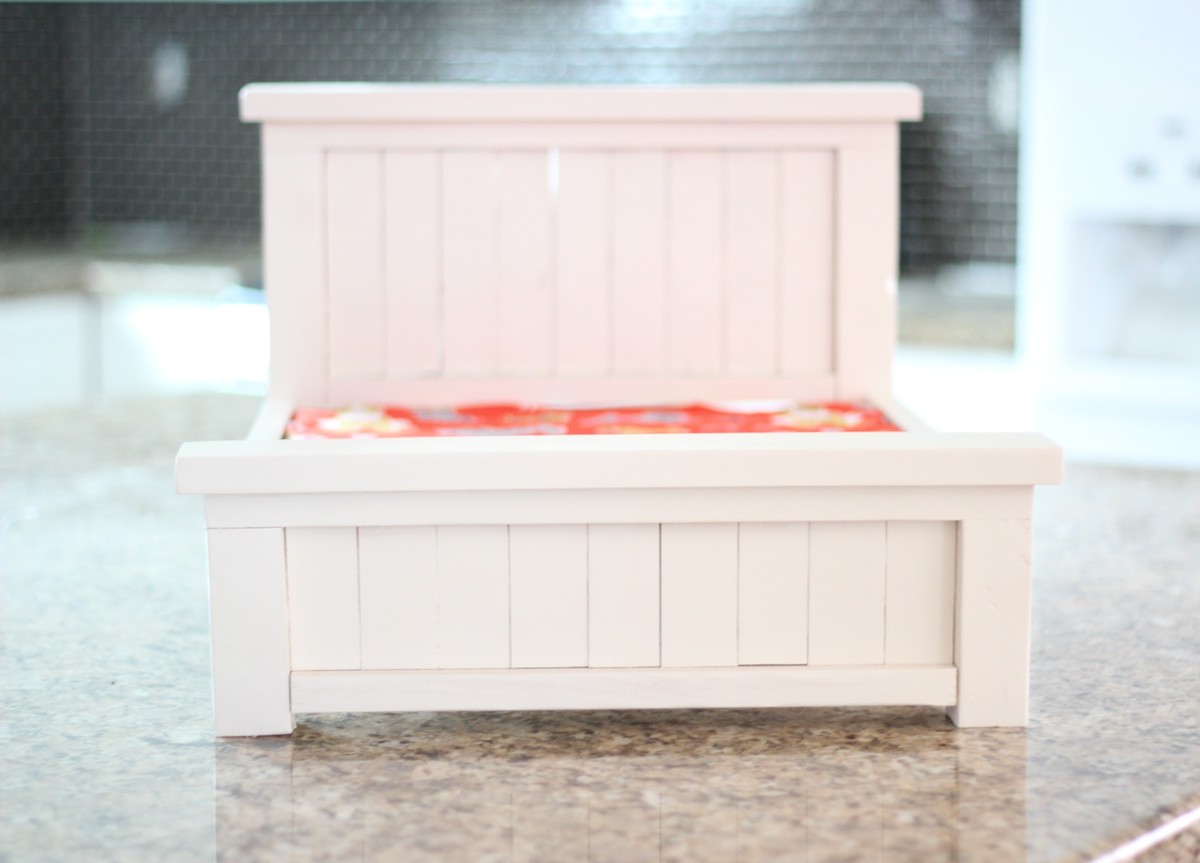
My mom really wanted me to build her a bed for her dog and was coming to visit in a week, so I jumped on the project immediately. (Although it is for her pup, mine is modeling the bed:-).) I took the Farmhouse Doll Bed plan and used that as a base for a modified version. I went to Joanns and grabbed a standard 15"x17" piece of 2" medium density foam for about $5 and built around it. Instead of using the 1x3s for the headboard, I used 9 1x2s to even out the space. This was also my first time ever sewing, so that was probably the most time consuming part of the project! (That's what took it over the edge from being an "hour or two project" to an "afternoon project".) I also modified the plans for Ana's Outdoor Cushions to fit the smaller piece of foam. (I fell in love with the dog fabric from Tonic Living, so I HAD to make my own!) I finished it off with 2 coats of spray paint.

This project goes together very easily. Had my adult son come by and make it for his daughter.
Did make one adjustment ... the supporting bar on the small frame ... the one that determines the opening angle ... at 6" the chair was too open ... at 6 1/2" it was more comfortable for the little ones. We used glue and air-gun brads for joining ... once dry I was able to sit in the chair without collapse!
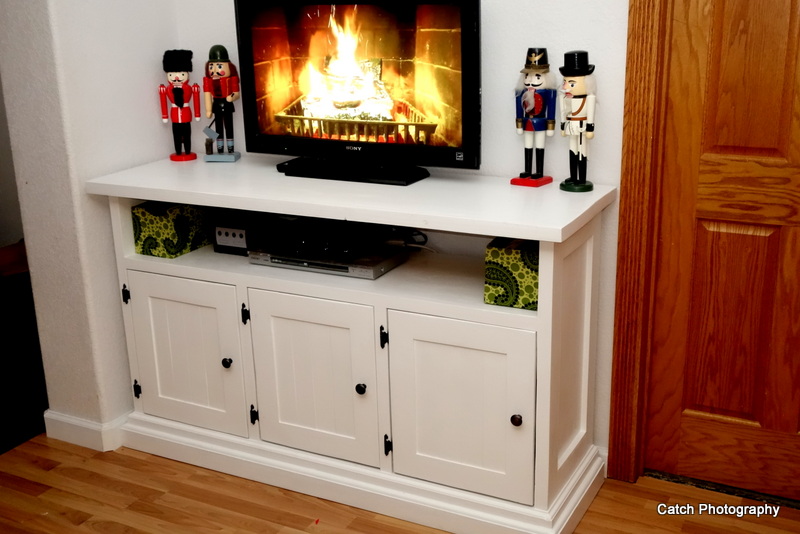
This was loosely based on one of the media cabinets on this site. I built it to fit this spot exactly and used many of the same design elements as in the Leighton media Suite I built several years ago. One thing I want to mention I did with this design that is a FABULOUS idea in all media units. Inset the back of your lower section. I hate not being able to run the top of my "counter" flush with the wall because the back of my unit or bookcase is running into all the plugs in the outlet. I left a little larger of an overhang than I normally wood to clear the baseboards and I inset the backing of this peice about and inch inward to leave lots of room for all the chords to just hang there but be hidden. They are much more accessible and now the top of my unit is flush to the wall.


I recently published my first foldable farmhouse table last week here: http://ana-white.com/2013/06/foldable-farmhouse-table The first one I made was very heavy because I used 2x6 tops and 4x4 legs. I decided to make another one that would be lighter and easier to transport. The plans are basically the same just instead I used 1x6 for the top and put 2x4s together for the legs. I also shorted the length by about a foot. The only issue with making the table shorter length is that the legs don't fold completely flush. You could easily make the legs short enough to fold flush, but then the table was a little too short from the ground up for us. The same as before I simply used kreg joints to join the top boards together. I then made a 2x4 frame and attached it to the bottom. I made each of the legs separately by joining 2x4s together and sanding everything down. Everything was stained before putting the legs on using Miniwax Dark walnut stain. I used 2 coats of Miniwax water based clear coat to seal it. A notch was cut out on each of the bottom 2x4 supports on the legs and I glued in a small piece of wood cut to size. These are so I can put in a 2x4 support board under the table so that the legs do not fold in on themselves when it is standing up. The legs are just attached using door hinges you can buy in packs in the hardware section. Be careful when screwing into the 1x6 top not to use too long of screws or else you will over screw and have them come through into your table top. Table design was by Amber Veatch Designs and photographed by Andi Mans Photography


Tue, 07/07/2015 - 06:41
We have built something very similar and we have a good bit of wobble at the top, even though the stretcher down the center of the table is holding solid in there and secred with clasps. Were thinking of some sort of sliding pin into the top of the leg to the apron. Anyone run into this before?

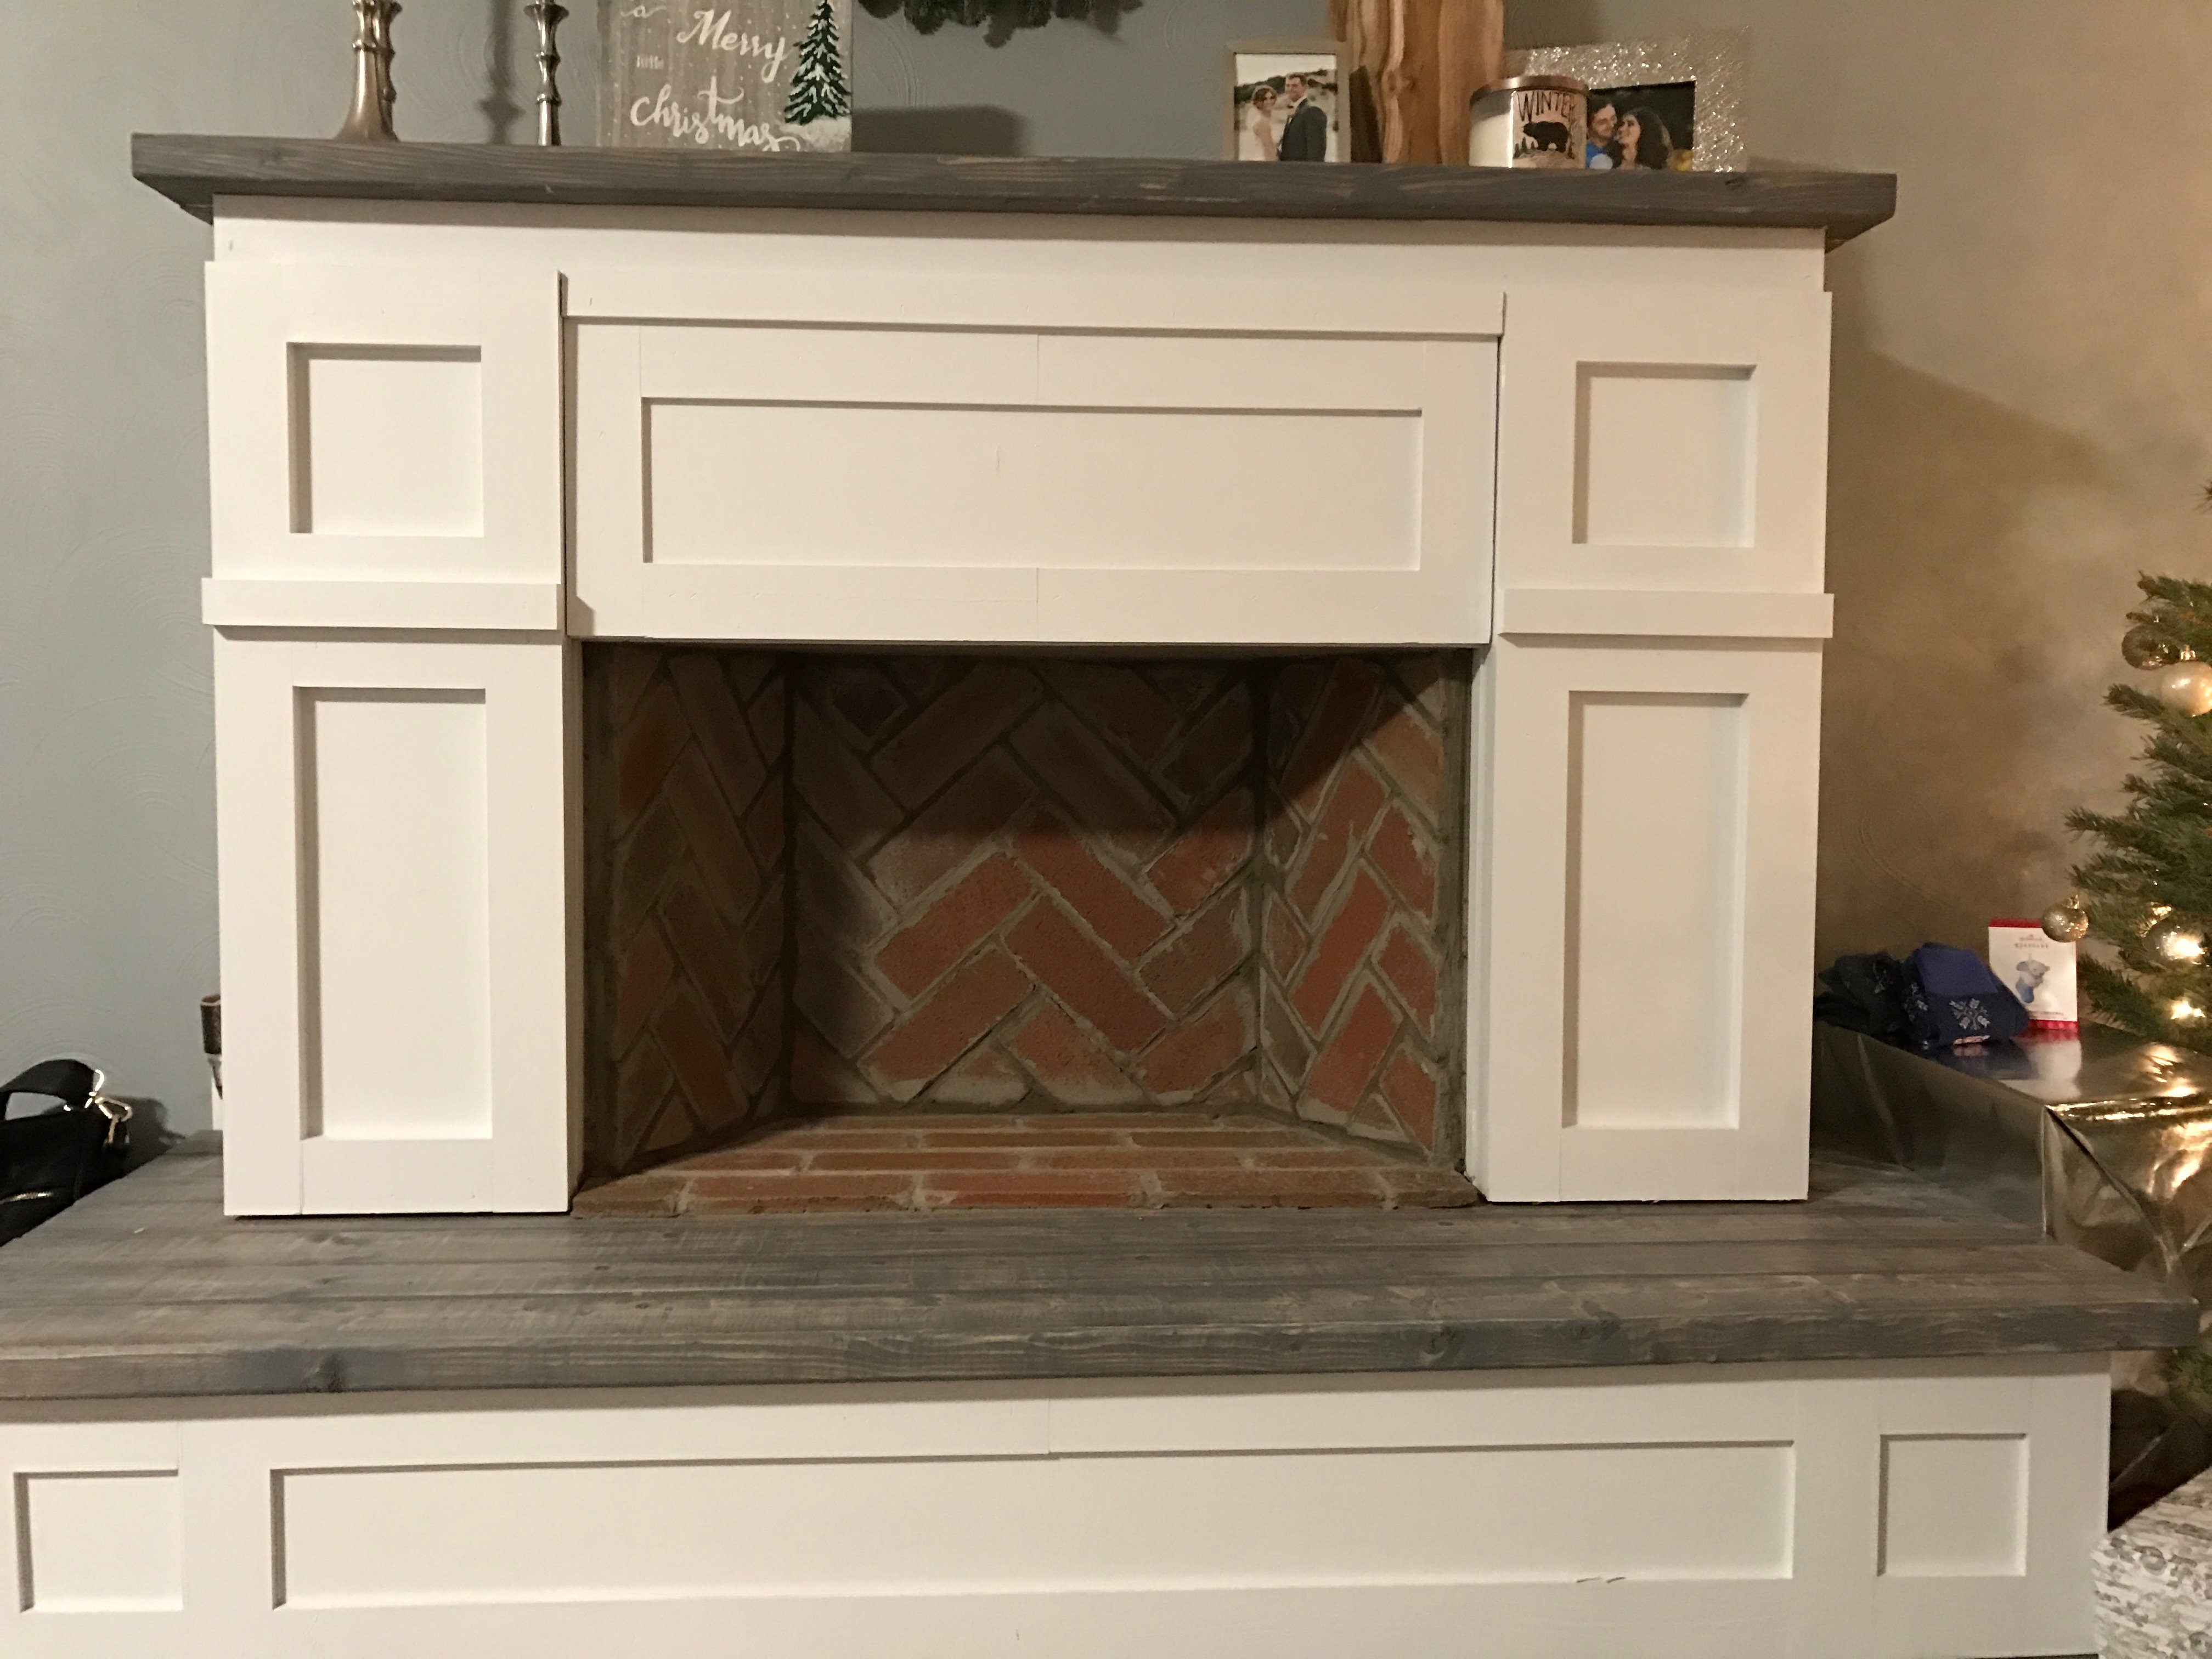
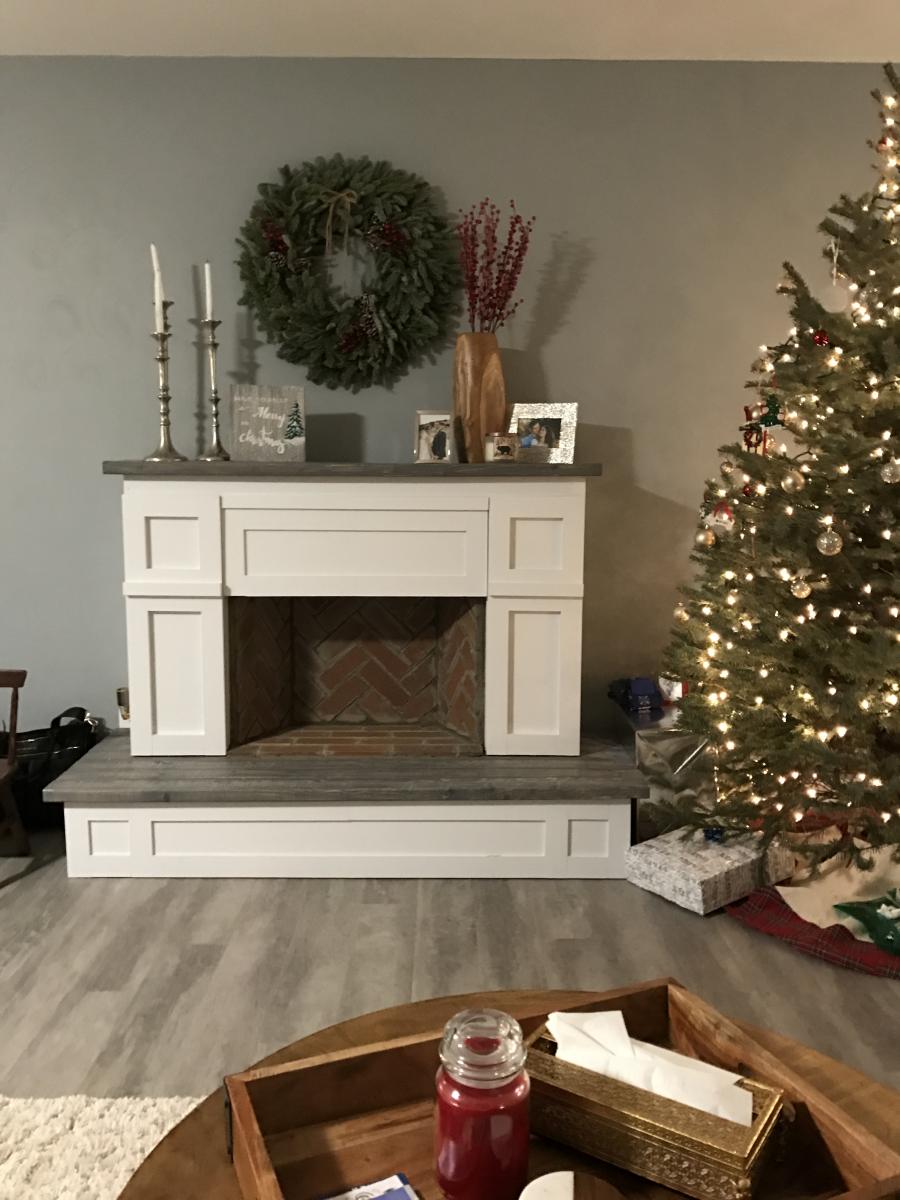
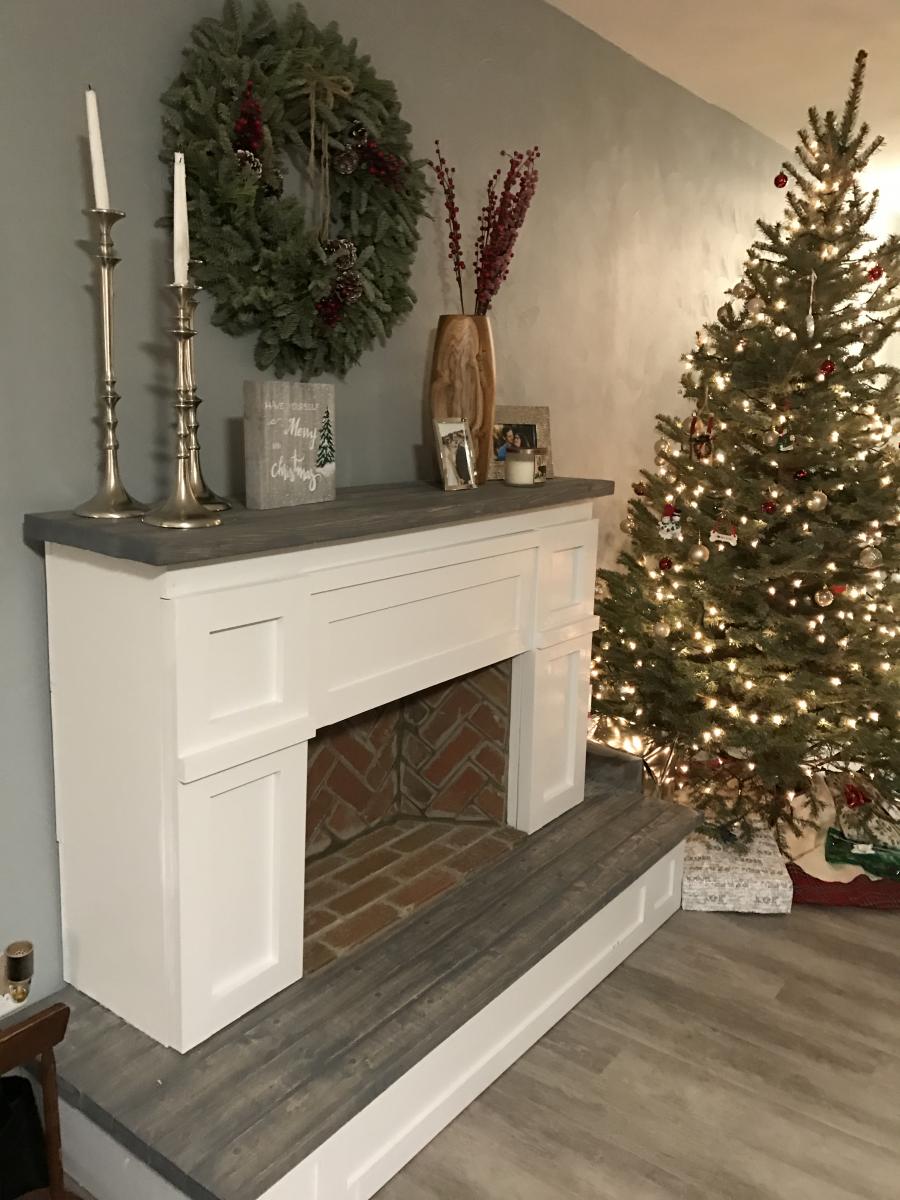
We made some modifications by adding a hearth for additional height (the room we have it in is very large and open) and joining 2x4s for the mantel and base which I stained grey for contrast. We decided to use thin brick for in the "firebox" to make it look more realistic. We also have a newborn and spent over two months putting it together a little at a time in our free moments so I'm not sure how long it would actually take to do at once, but cutting and putting up the brick was very time consuming.
Thu, 08/27/2020 - 11:16
This looks great! I'm actually in the middle of this build with the hearth as well. Couple questions....
How did you connect the two pieces? Also, did you connect to the wall? I'm assuming you didn't leave the 5 1/2 inch gap on the bottom of the fireplace and connected direct to the hearth. Let me know, thanks!
Mon, 10/26/2020 - 06:55
Absolutely beautiful and what i have been searching for!! Can you send me the plans for this?
Sat, 11/14/2020 - 21:06
Did you receive the plans? If so, can you please share!
Sat, 11/14/2020 - 21:06
Do you have the plans for creating this fireplace with a hearth? Would love to build over thanksgiving break!
Sat, 11/21/2020 - 21:16
Very nice fireplace would you happen to have the plans for it?
Thu, 04/01/2021 - 21:27
Would it be possible to send the plans for this beautiful faux fireplace?
My first real project, can't wait to do another one.
Mon, 06/01/2015 - 20:57
Thanks! Yeah the finish was a bit difficult but finally came out nice.
Thu, 06/02/2016 - 11:00
I know this is an old post. But just wondering about your finish as well. So when u say white wash what did you use?
Beautiful by the way!
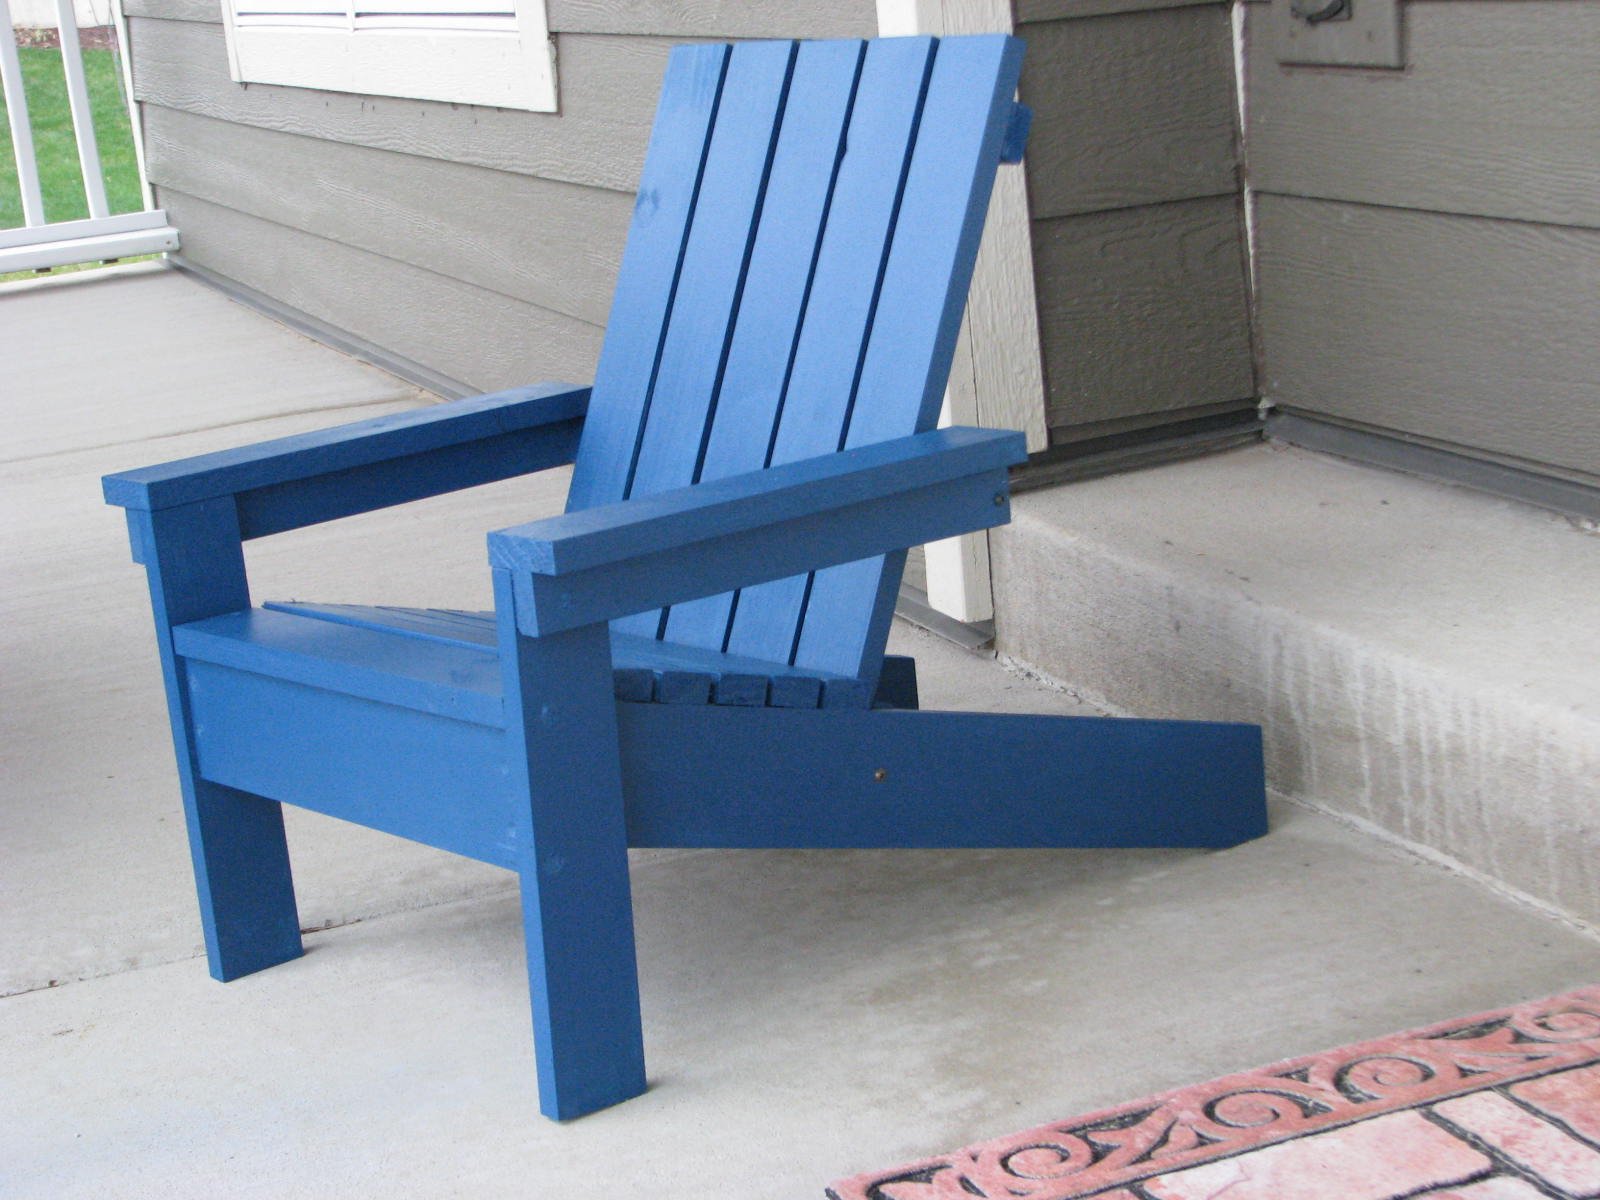
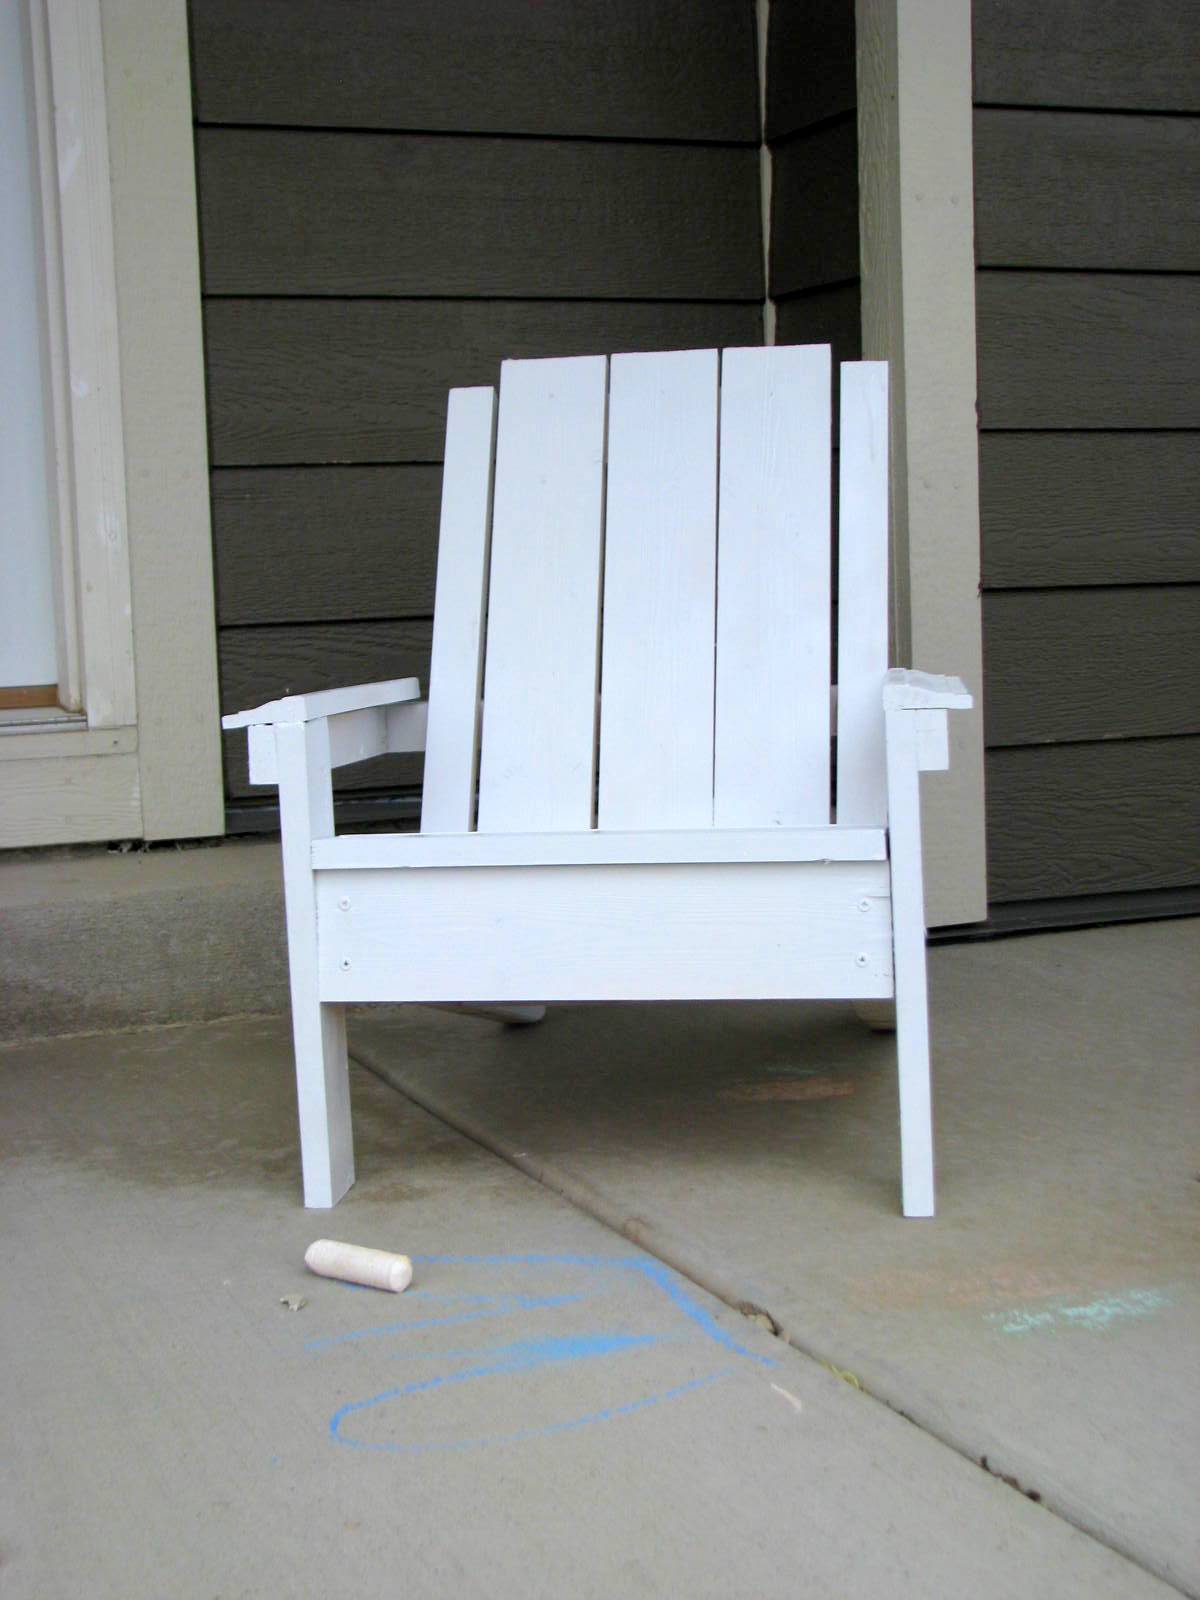
Love these chairs. Simple to construct. most important thing is to predrill! These boards will most definitely split if u don't. I always have 2 drills out when I'm building.
Not sure on how to finish yet. Whether o paint brightly or use a deep poly finish. I'll keep you posted!
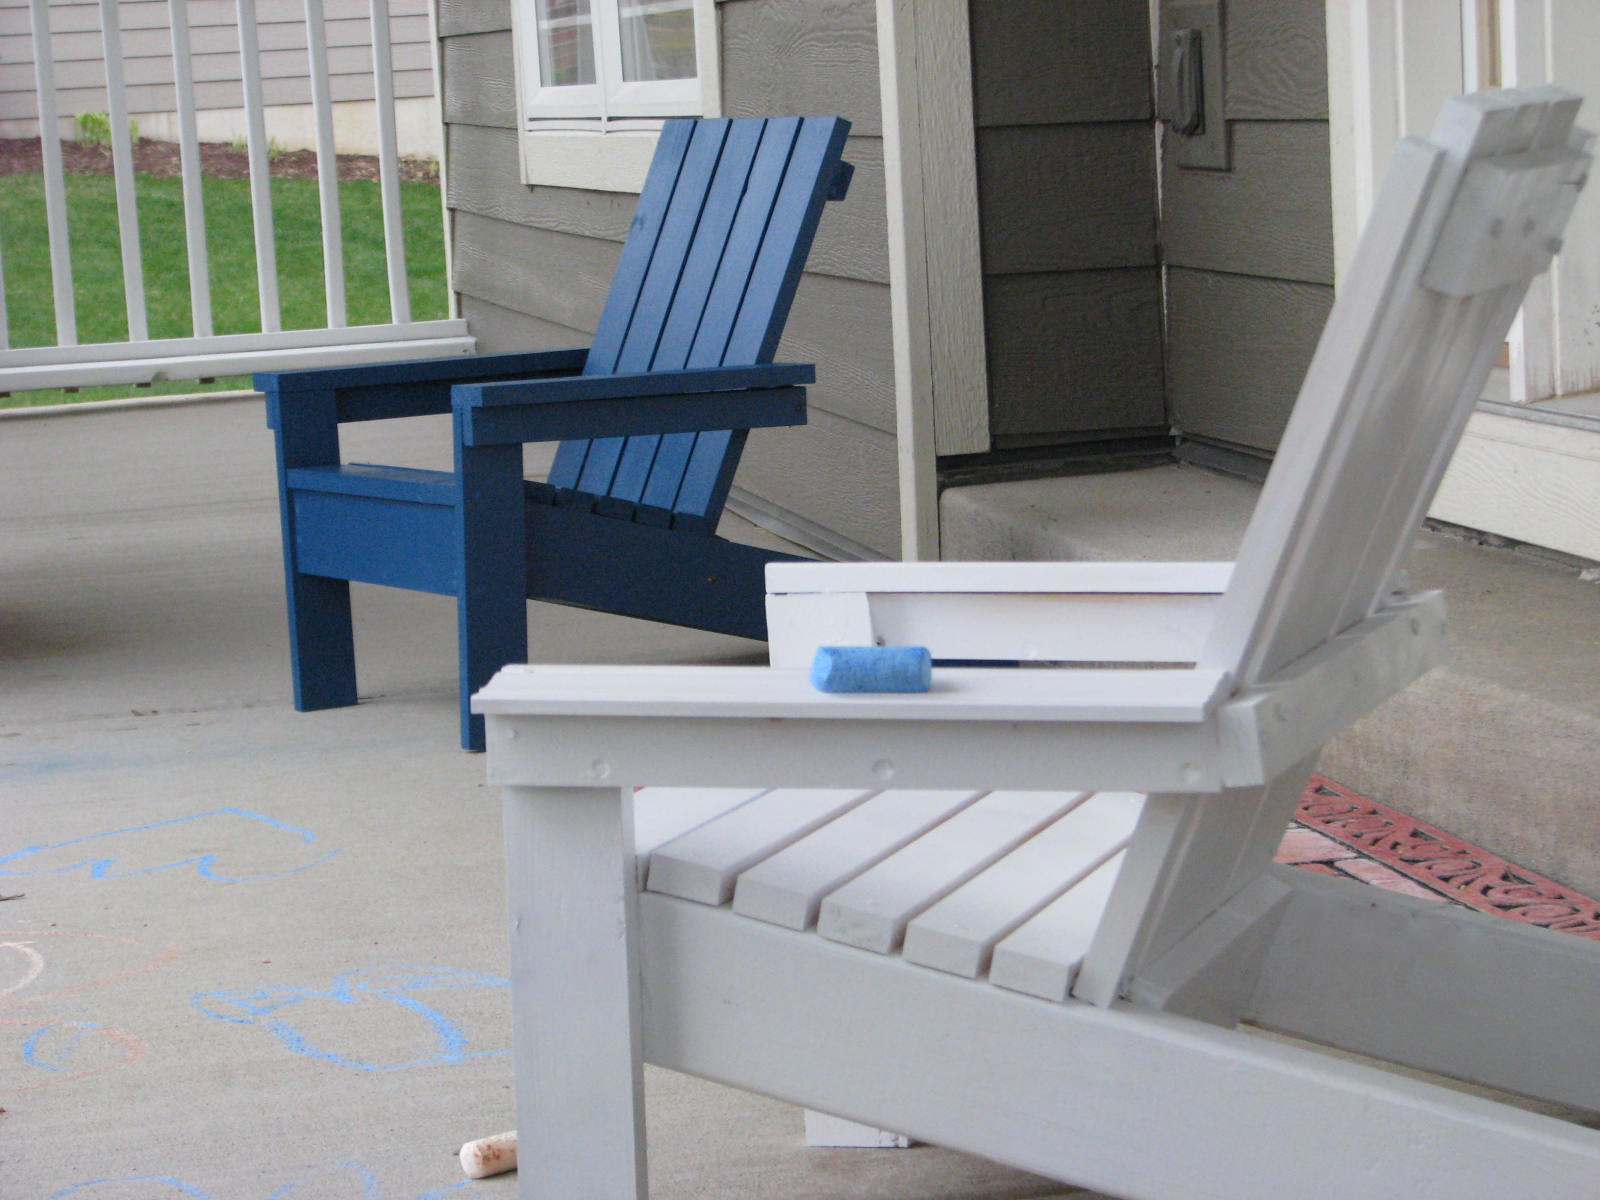
The first one I built (the white one) was a terrible failure because I rushed through it and didn't read directions! Also, I used only scraps that I had on hand. The blue one went smoothly because I used the right materials and took my time.
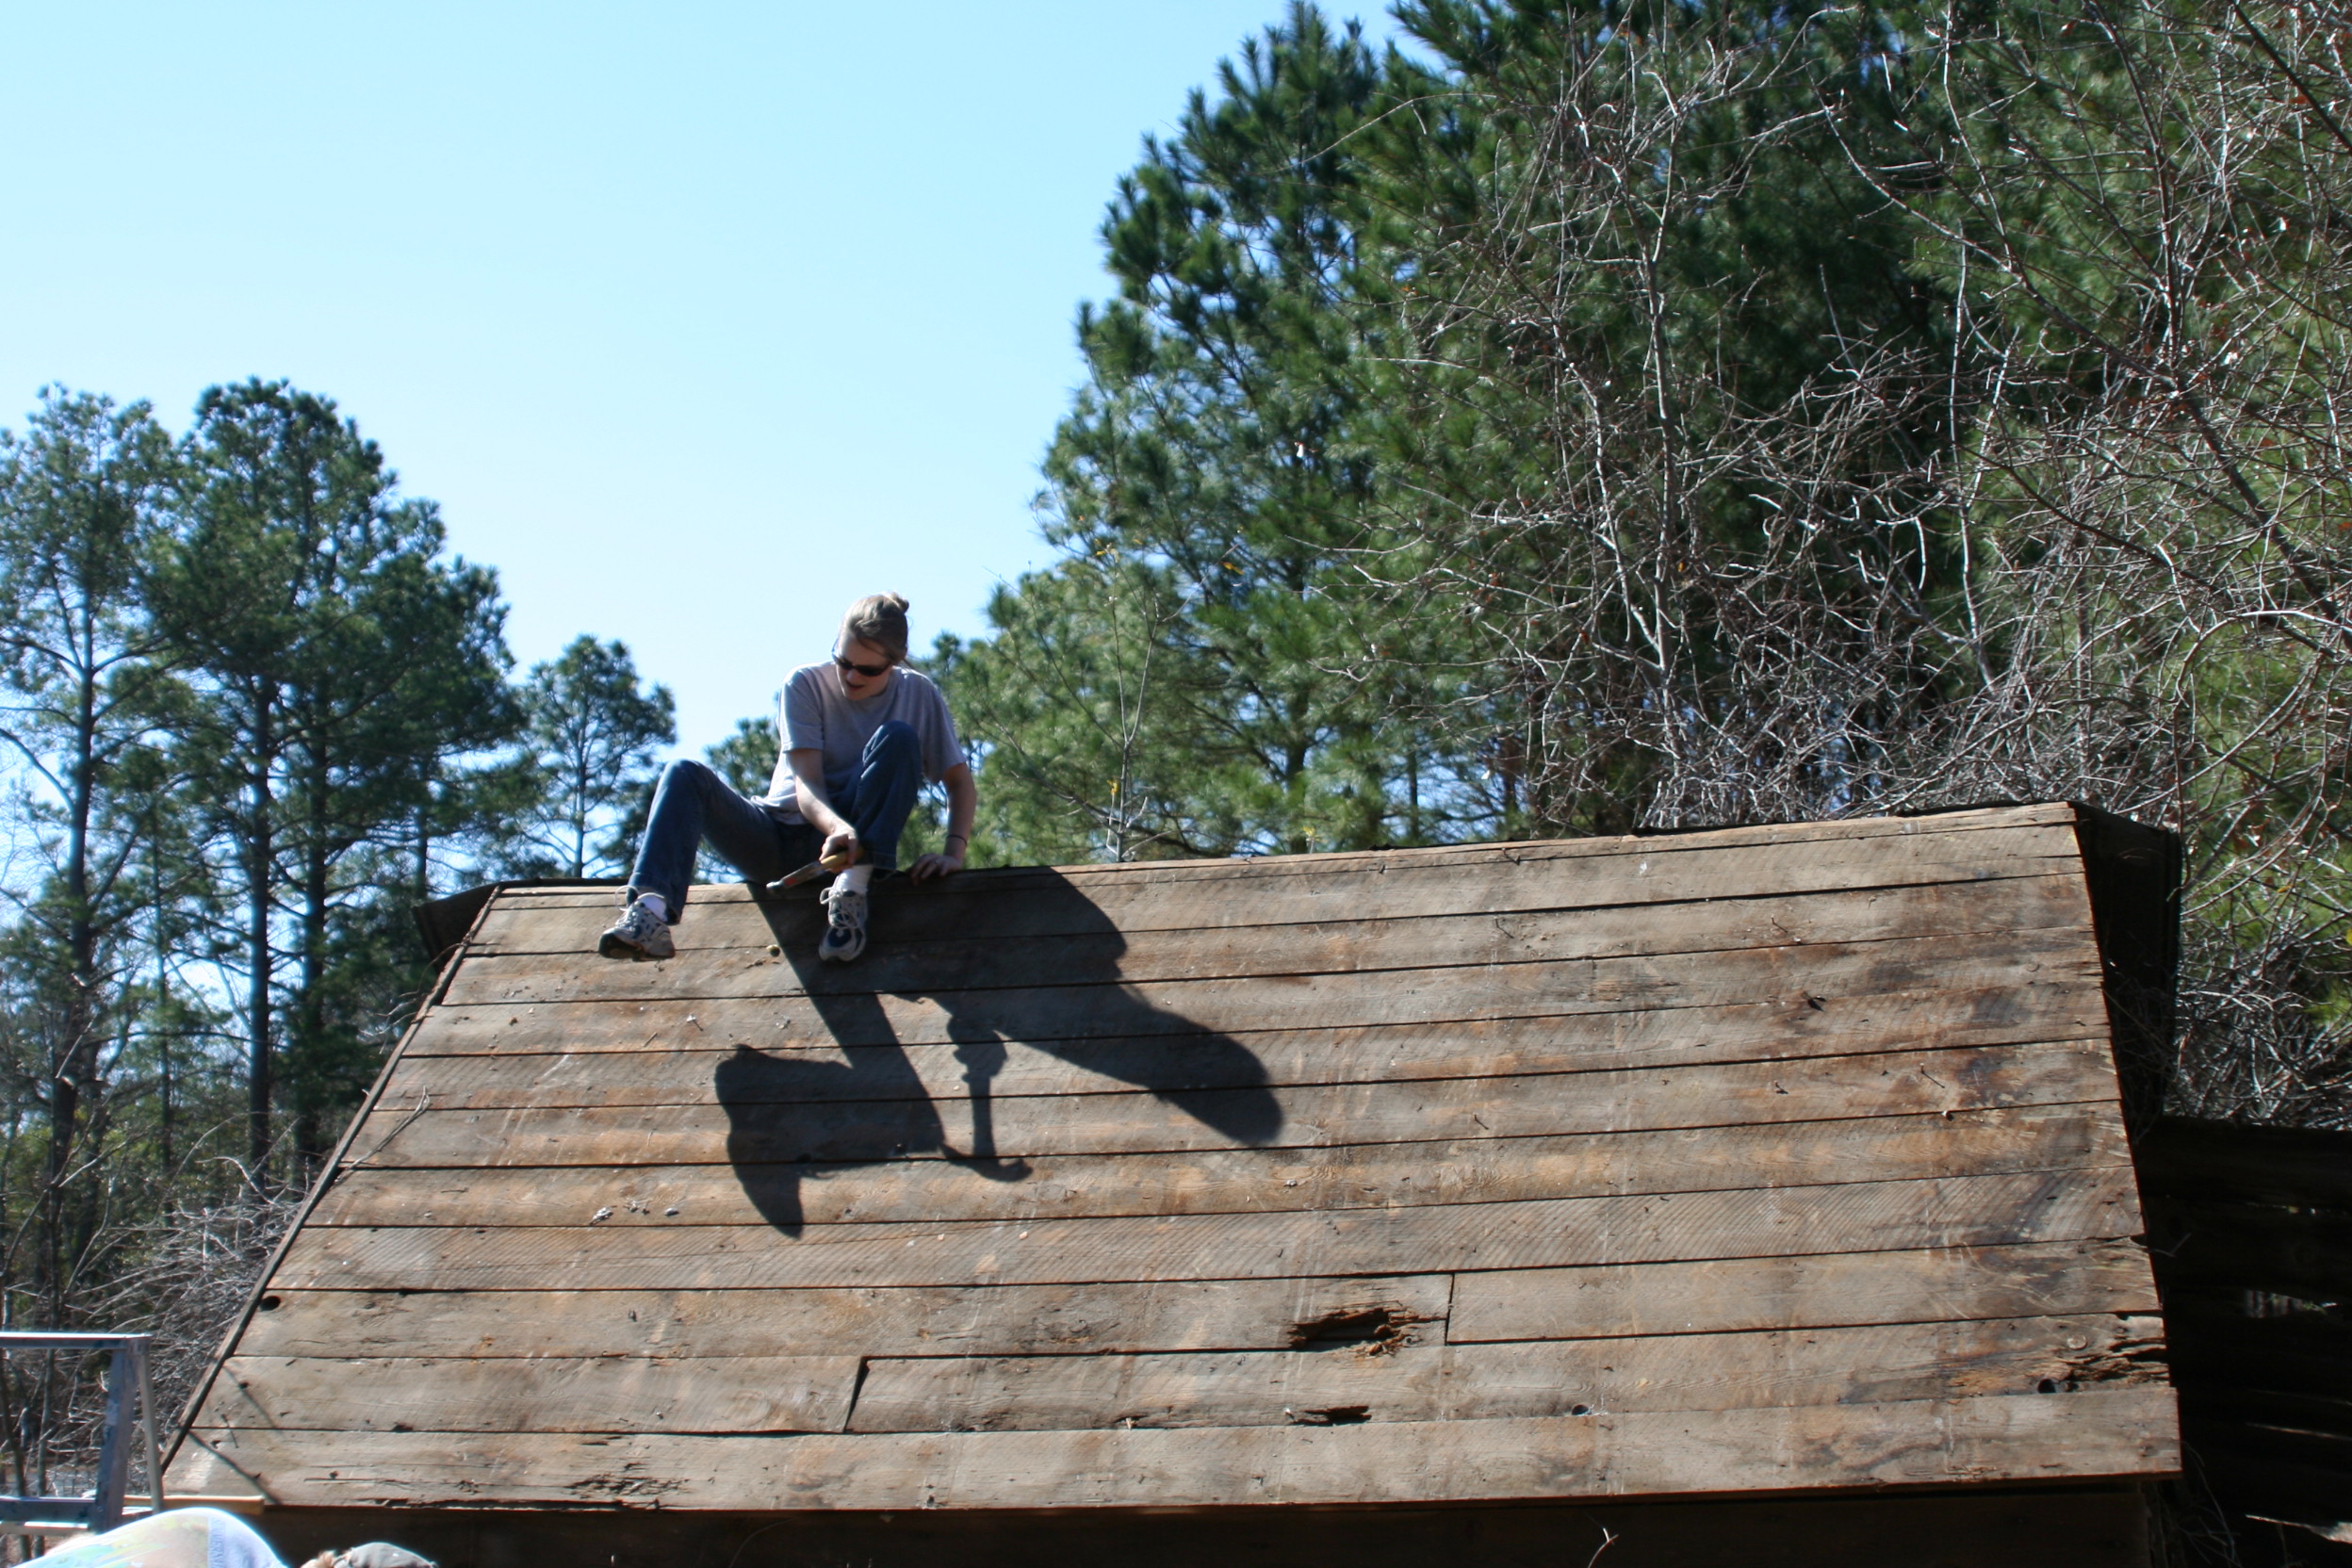
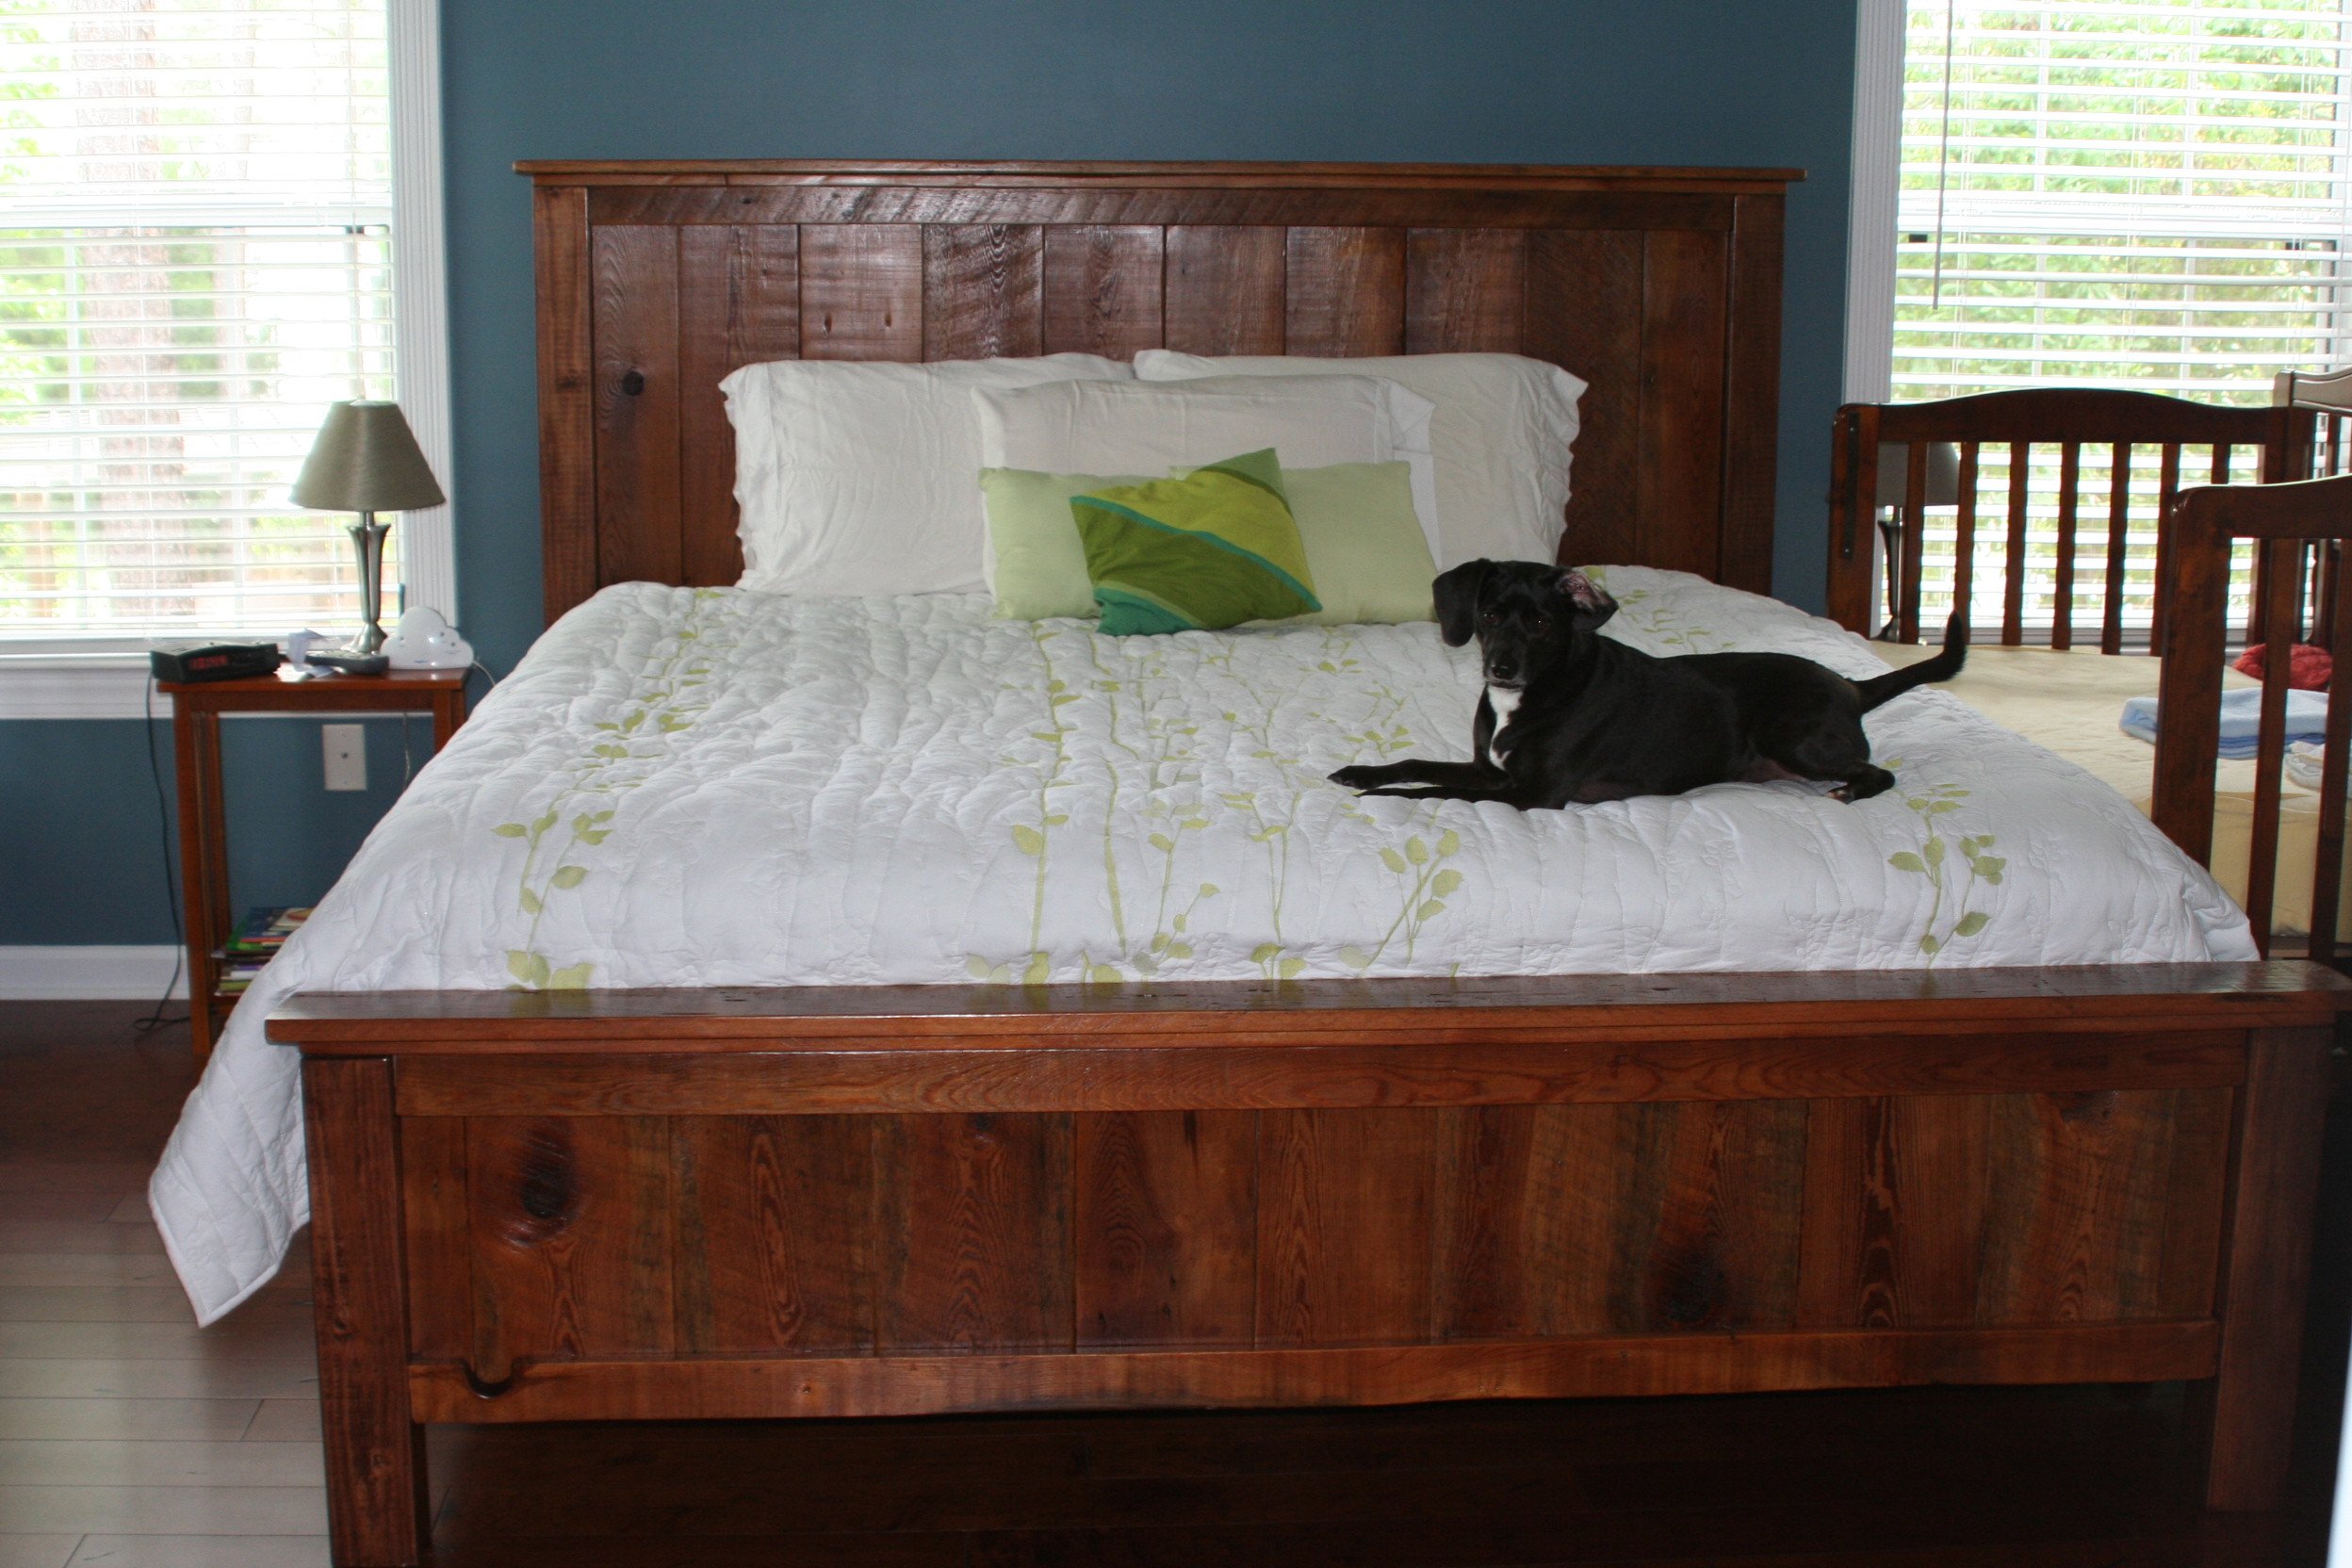
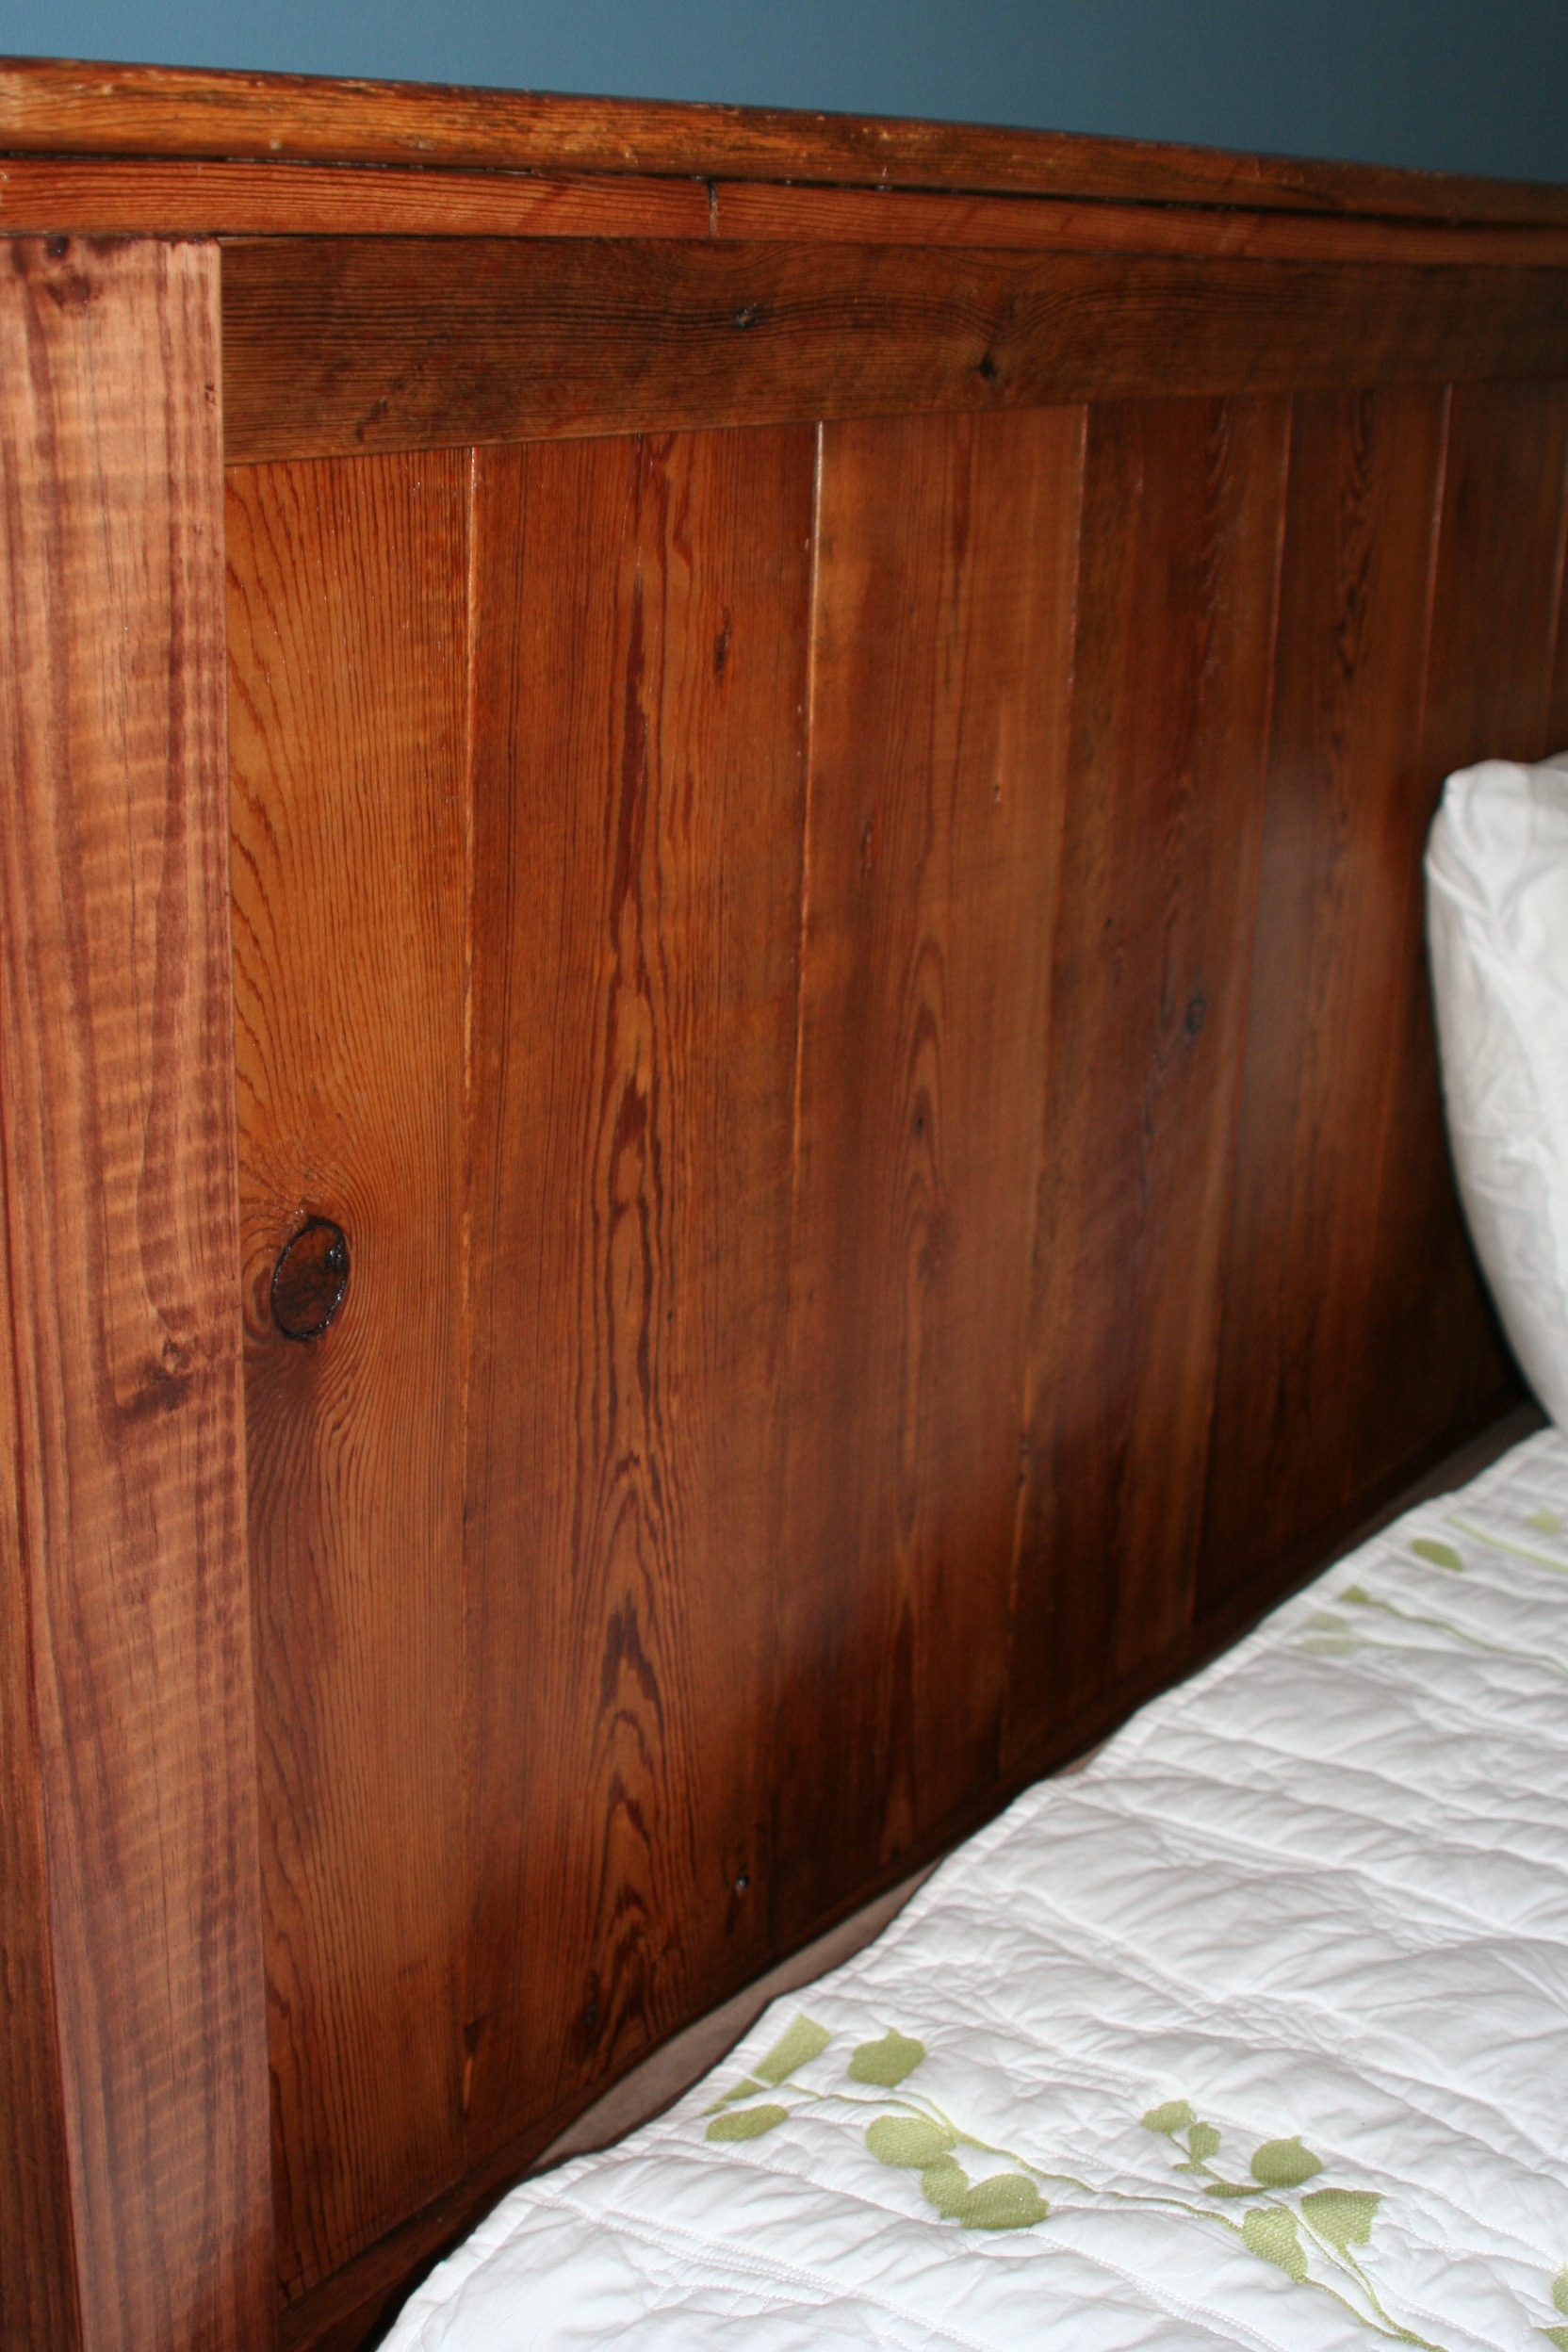
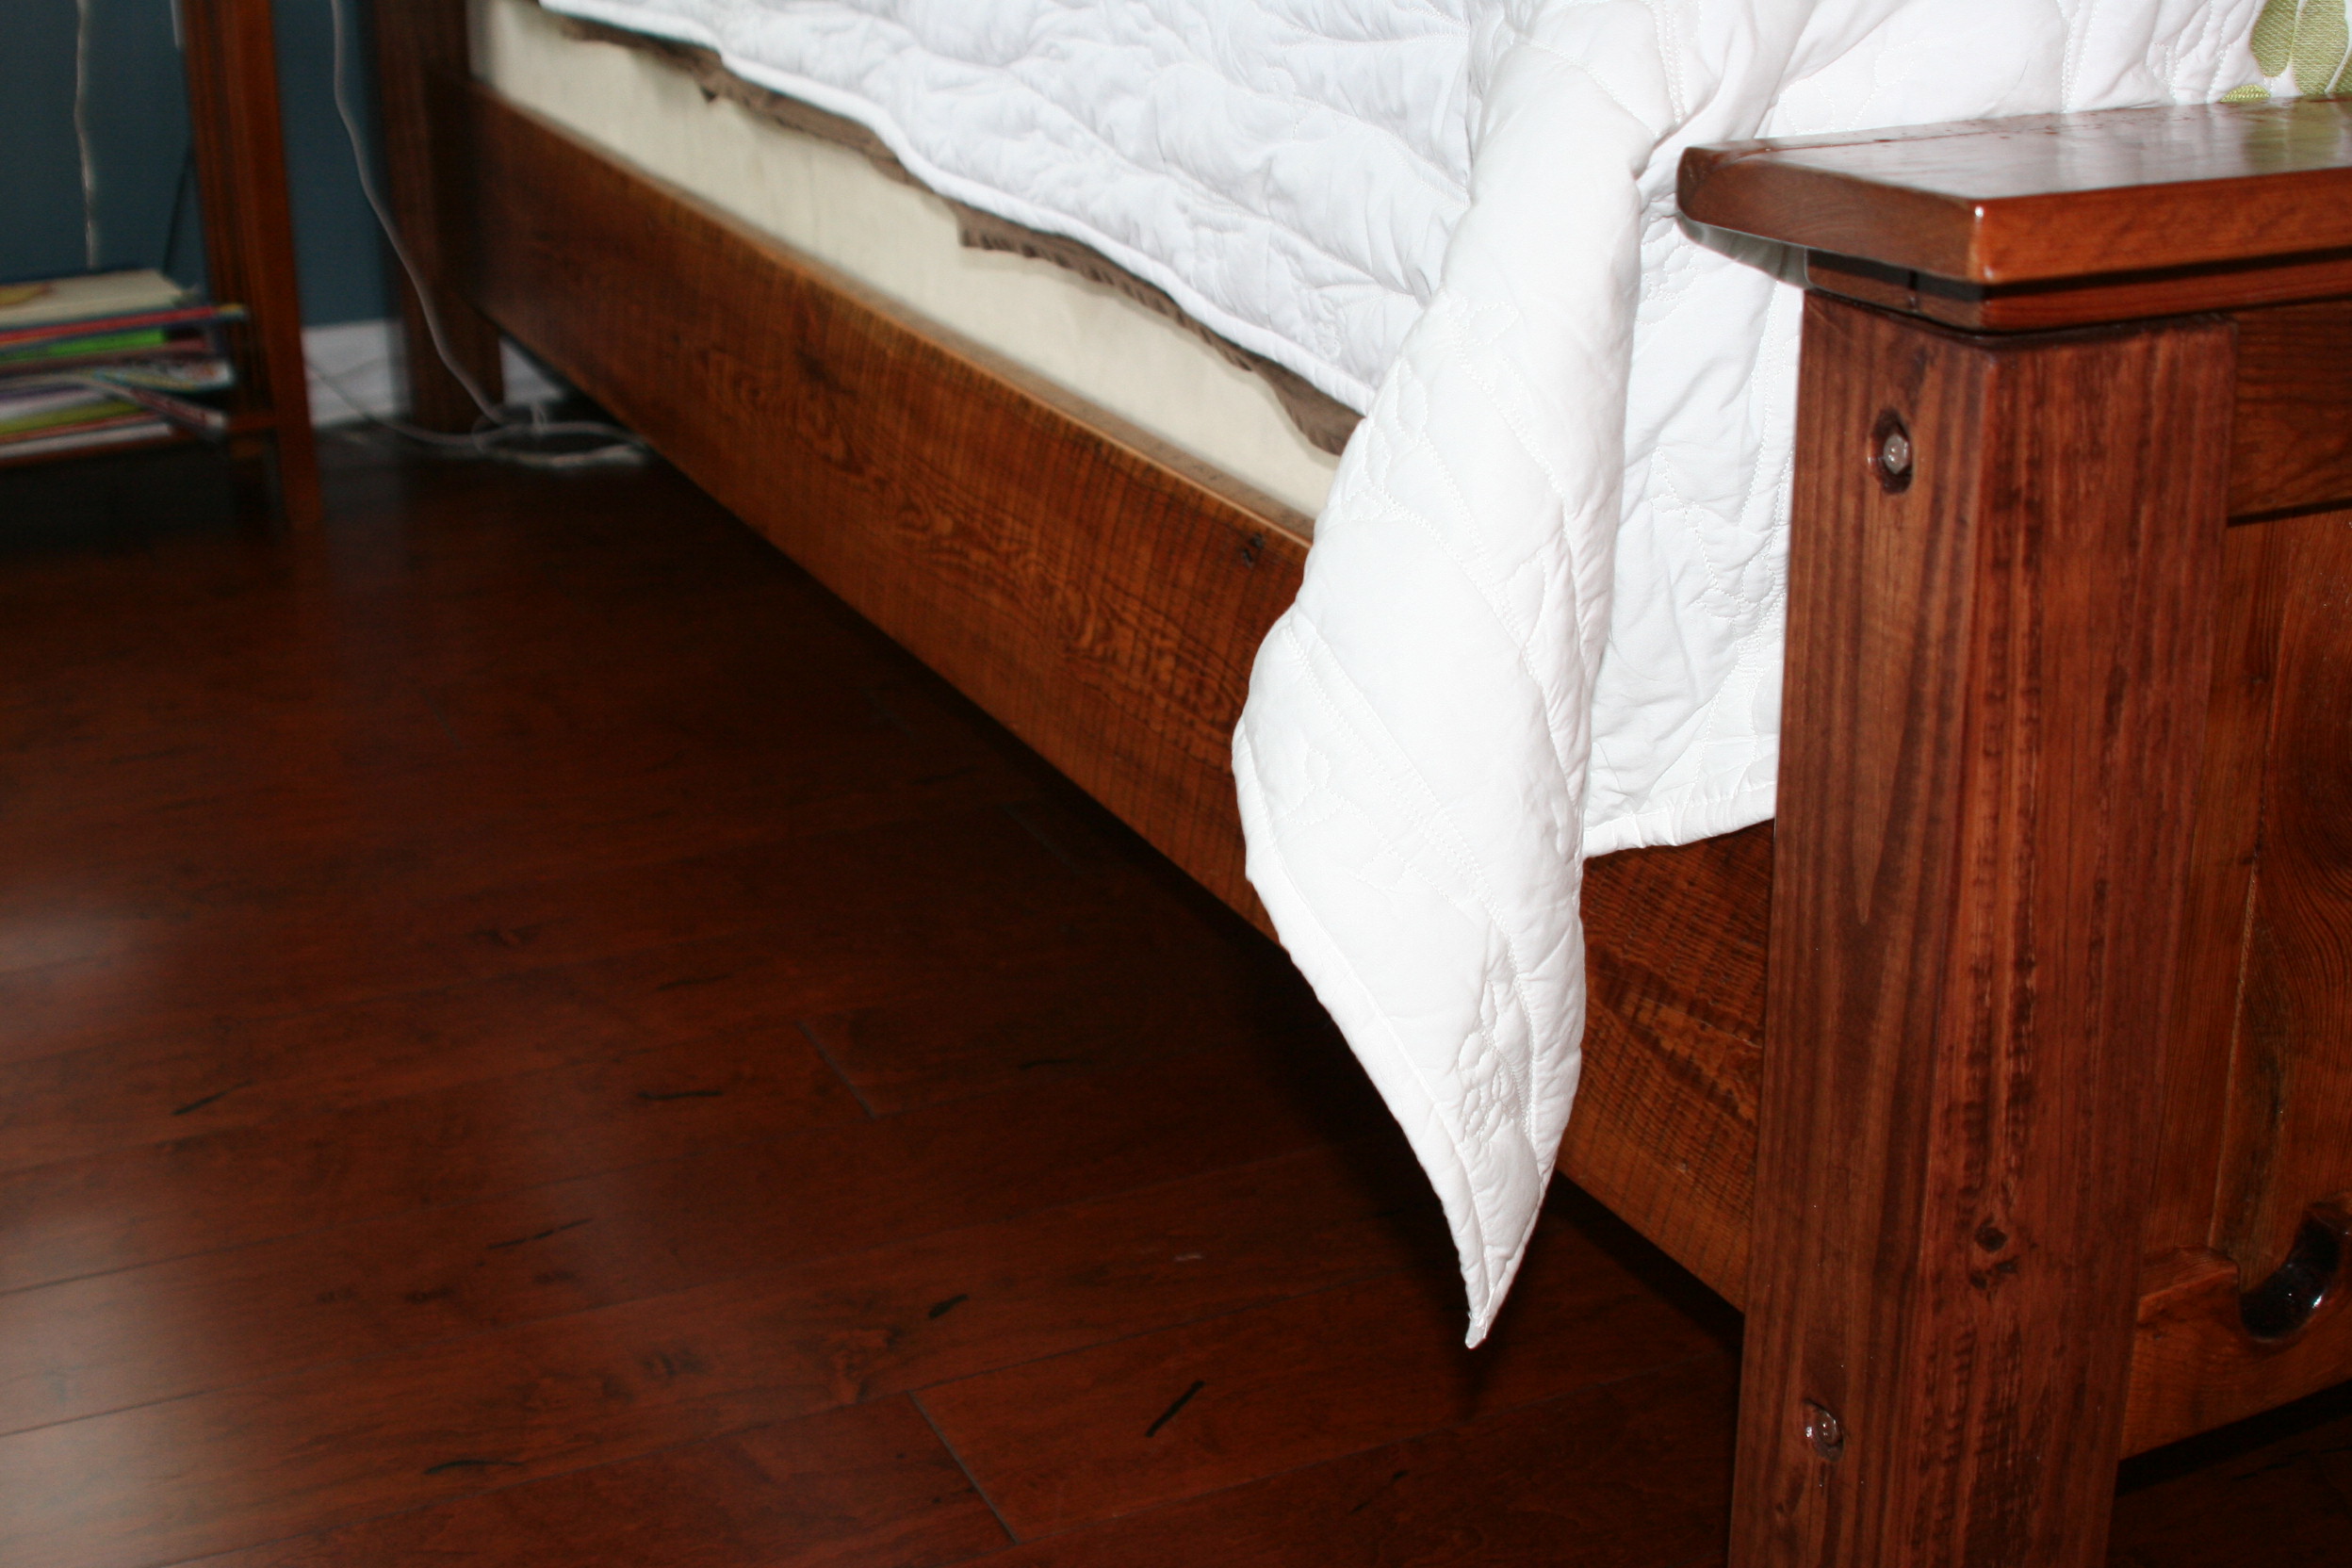
We removed the roof off an old chicken house in the heart of South Carolina. 100+ year old heart pine was the treasure we were able to use! Had to buy the 4x4's but we were able to use the old pine for the rest. Use natural oil stain on the heart pine and had Sherwin Williams do a custom stain to match the new 4x4 posts. Plus 2 coats of polyacrylic and sanded with extremely fine paper after stain and both coats for a wonderfully smooth finish.
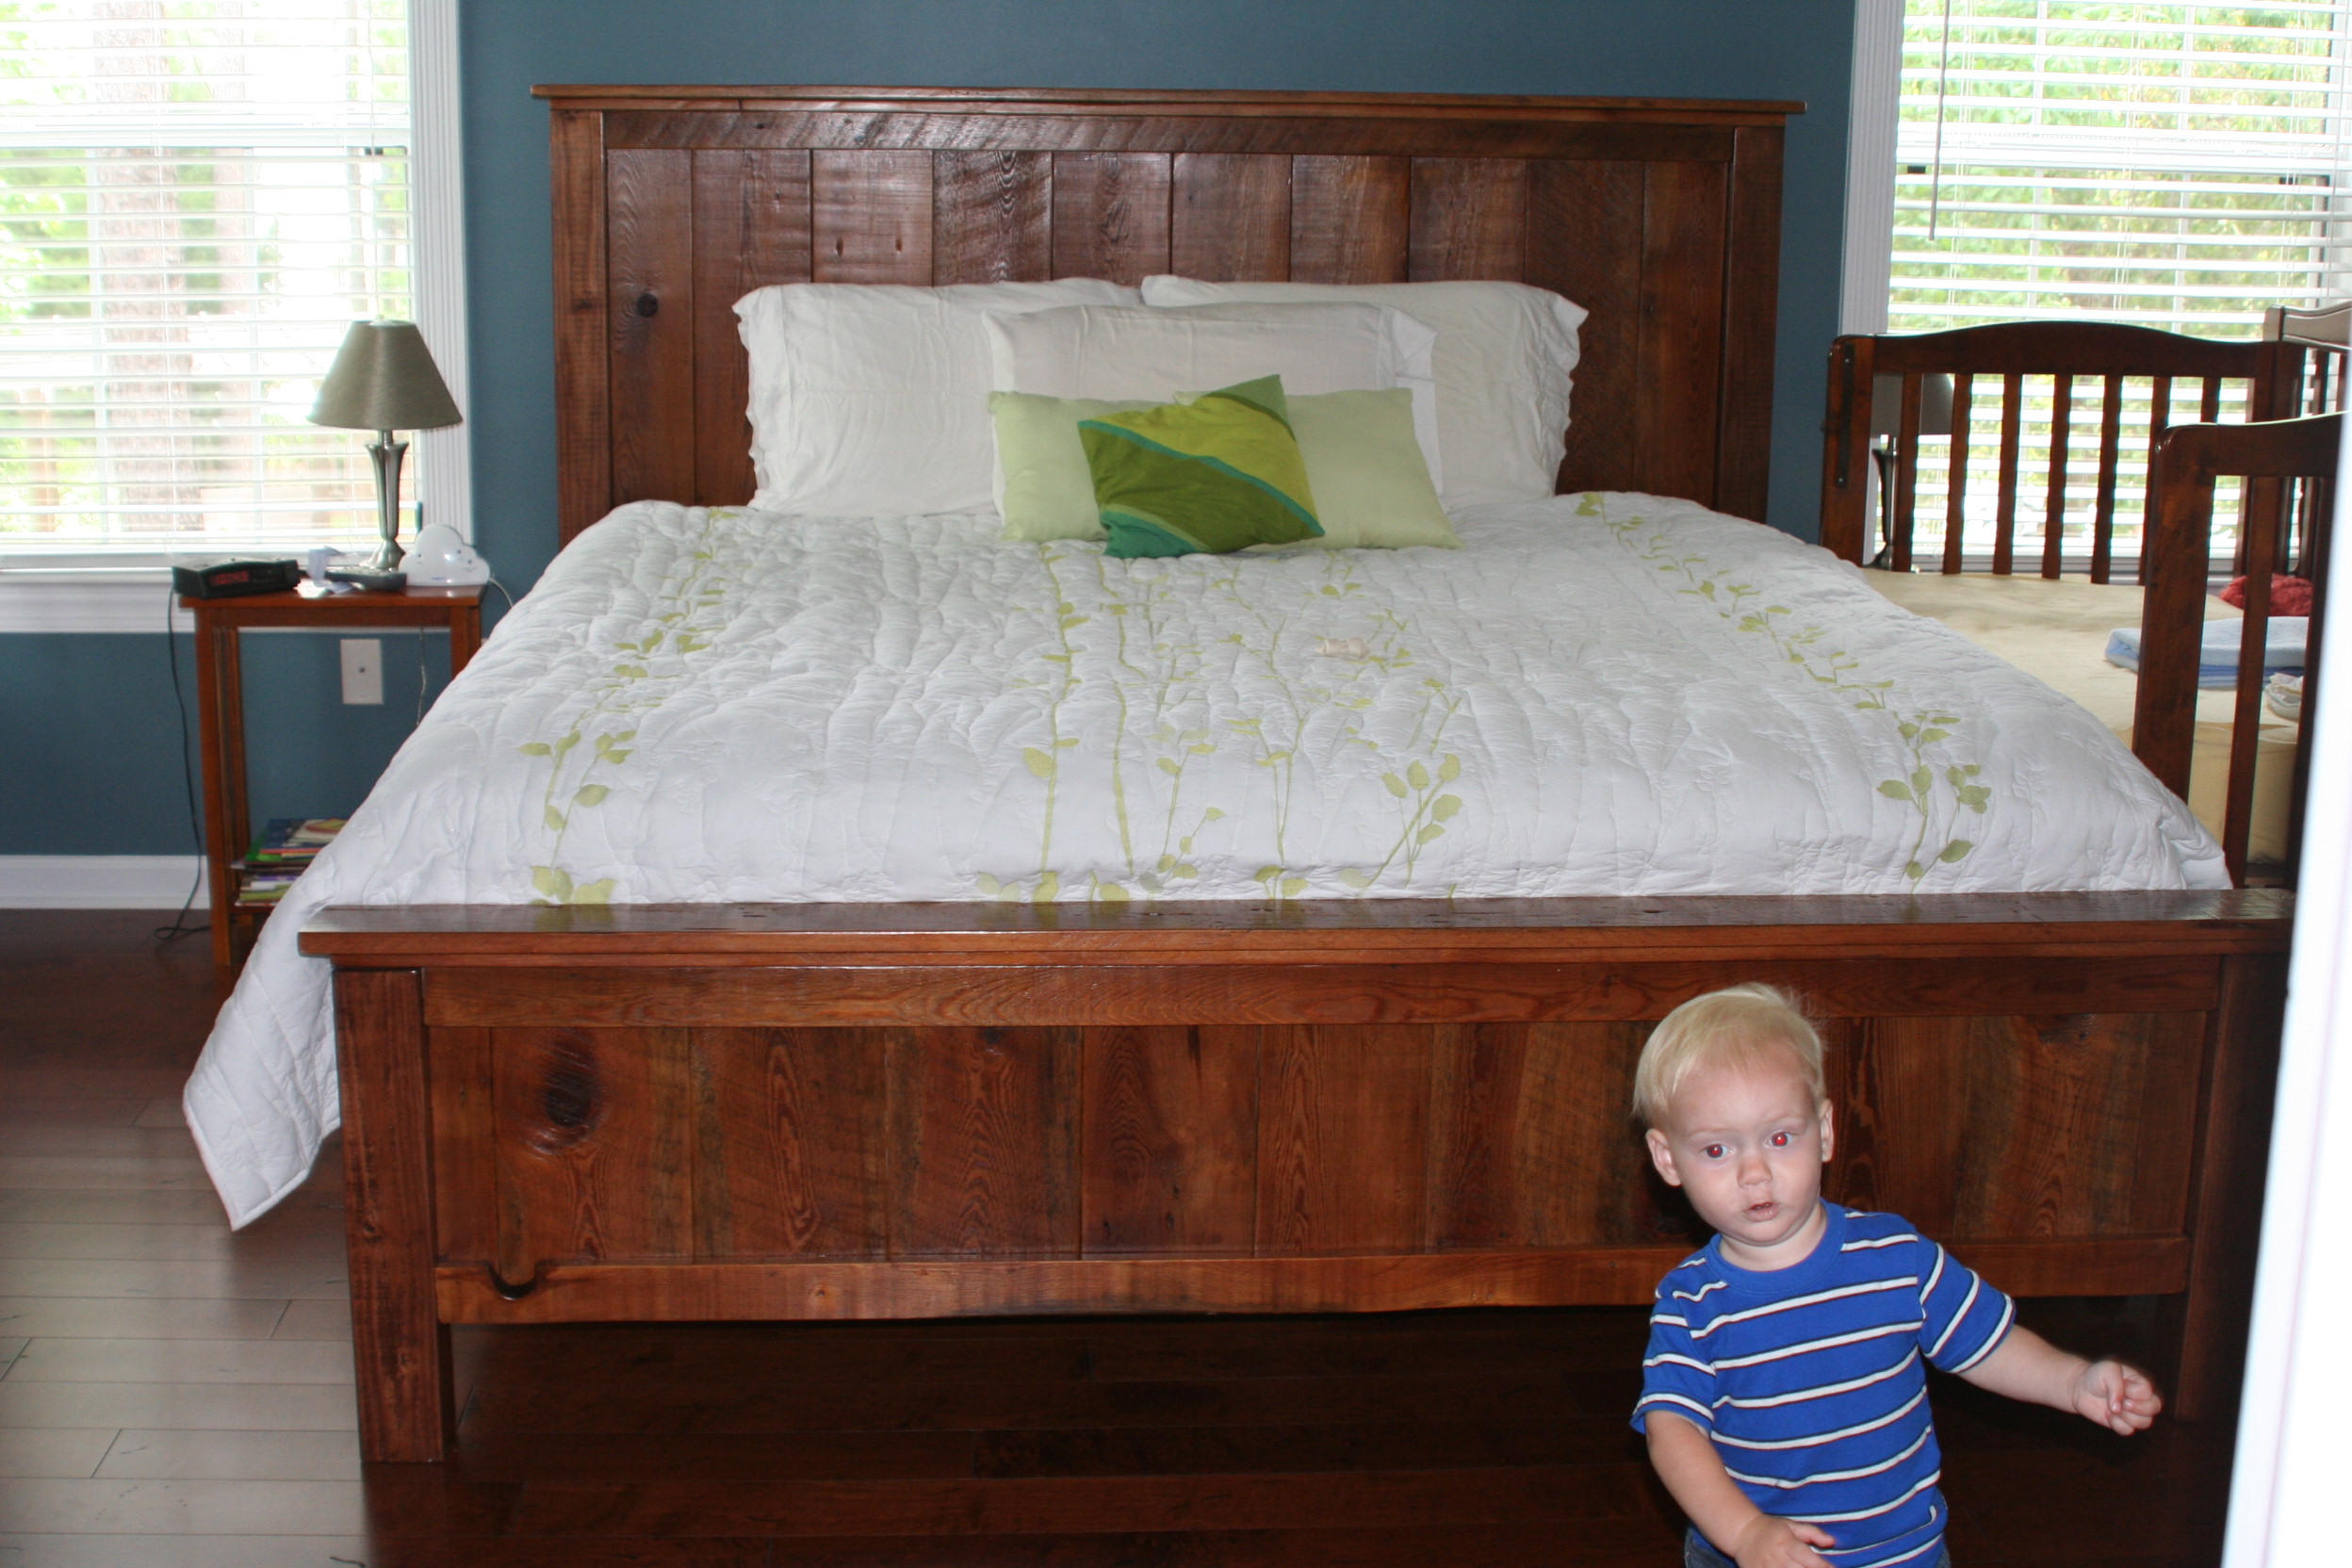
And then attached our son's sidecar cosleeper back to the bed) that's what is over to the side.