Community Brag Posts

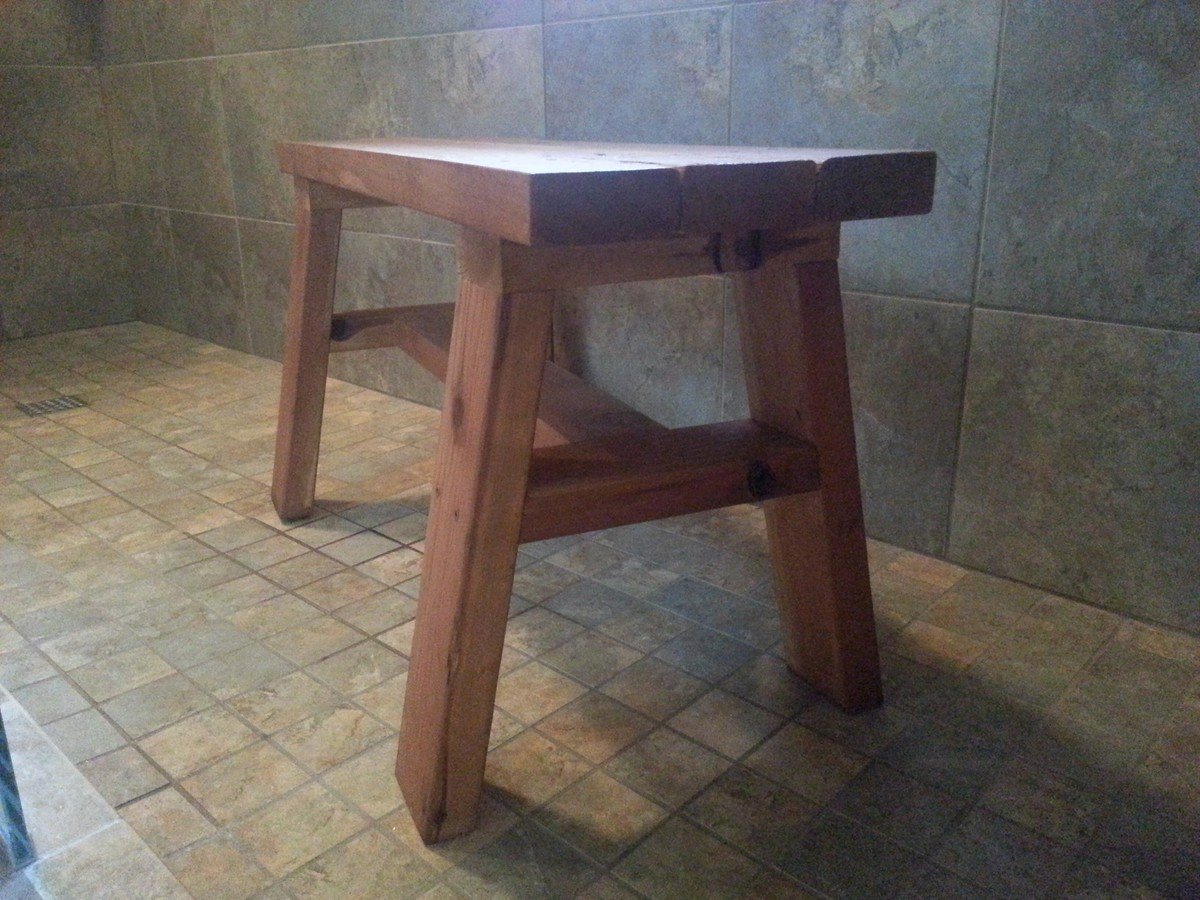
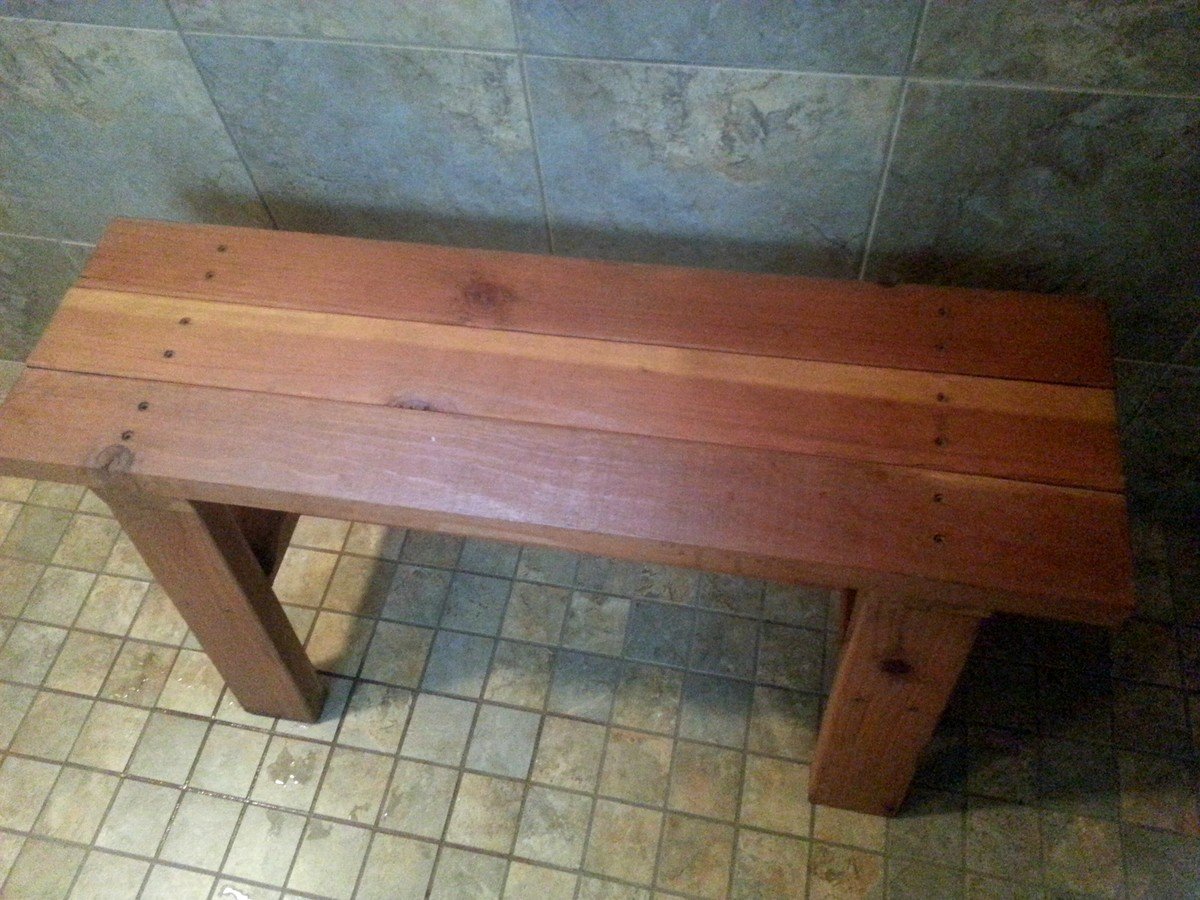
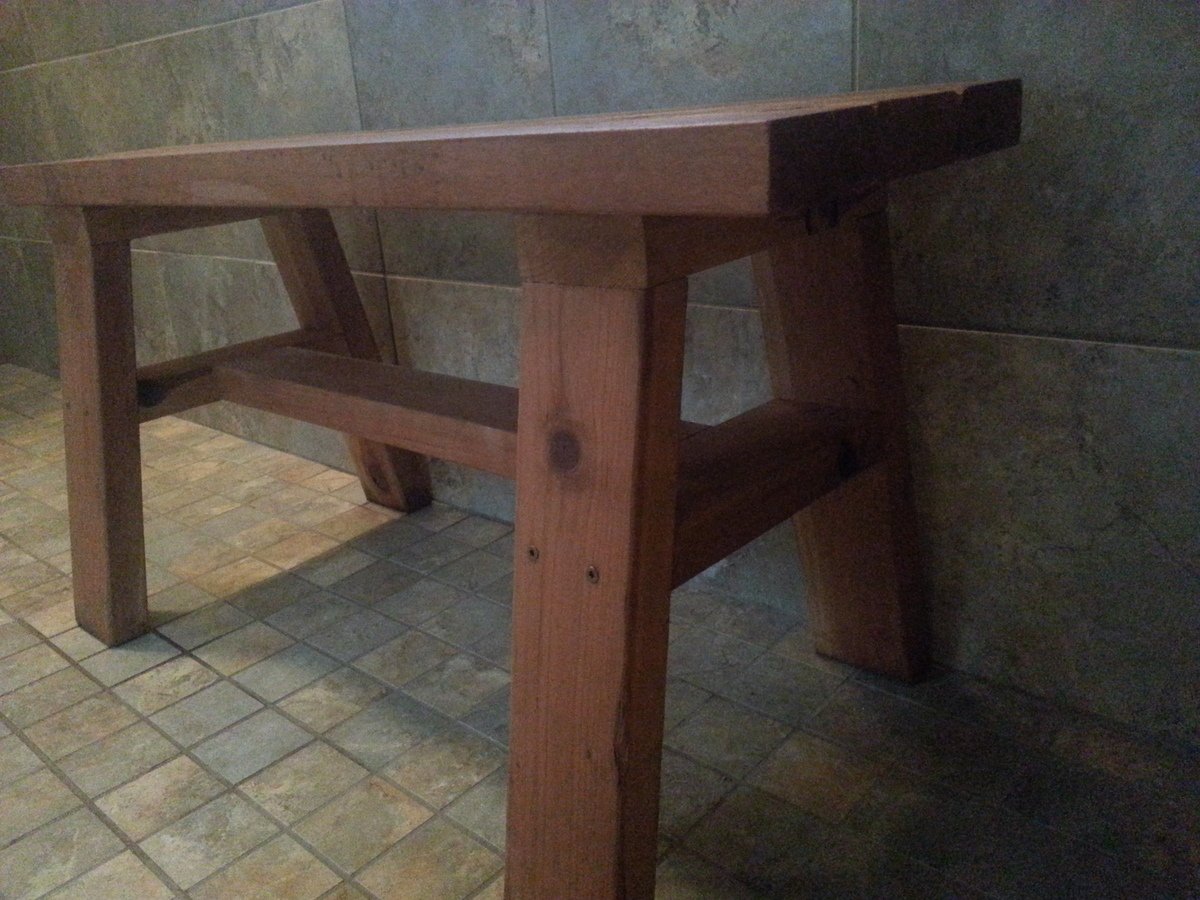
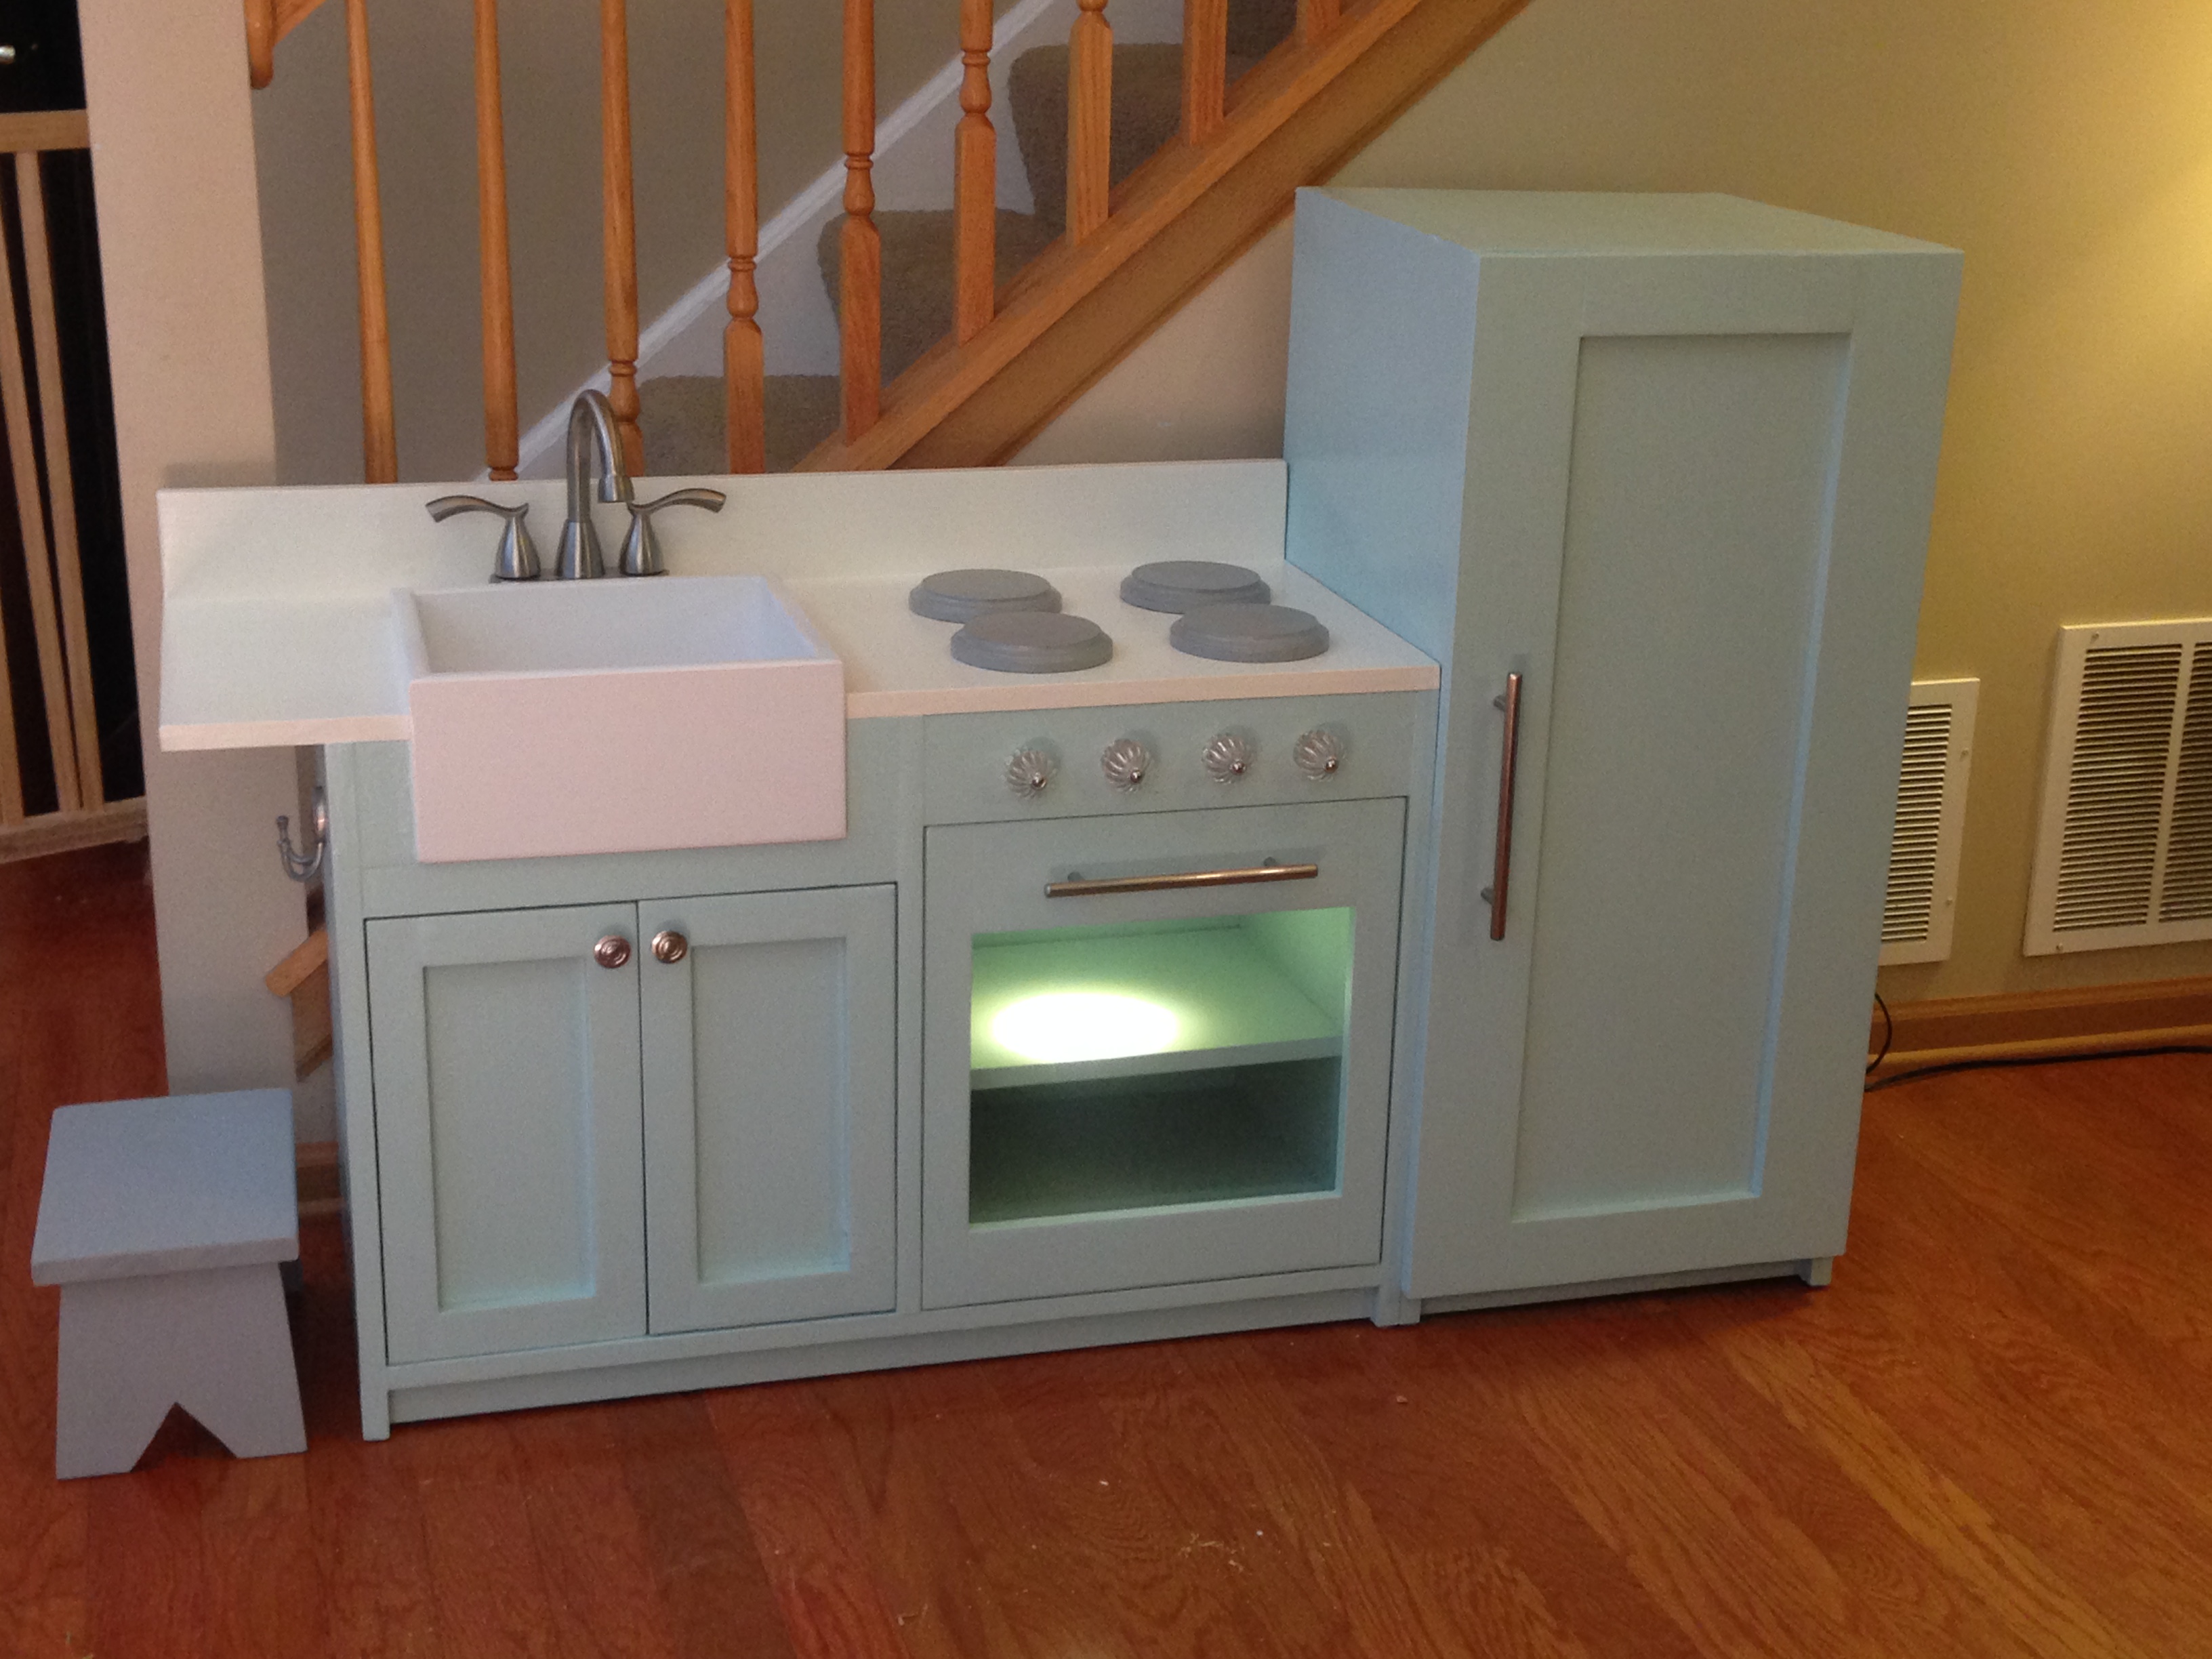
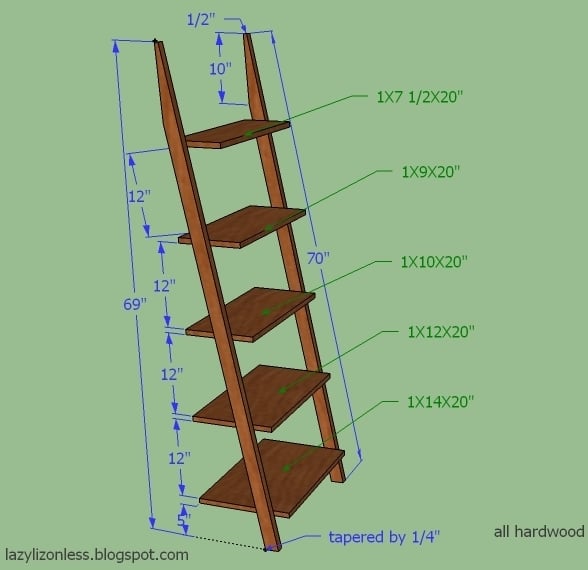
Redwood Shower Bench

Submitted by lwarteman on Sun, 10/20/2013 - 08:33

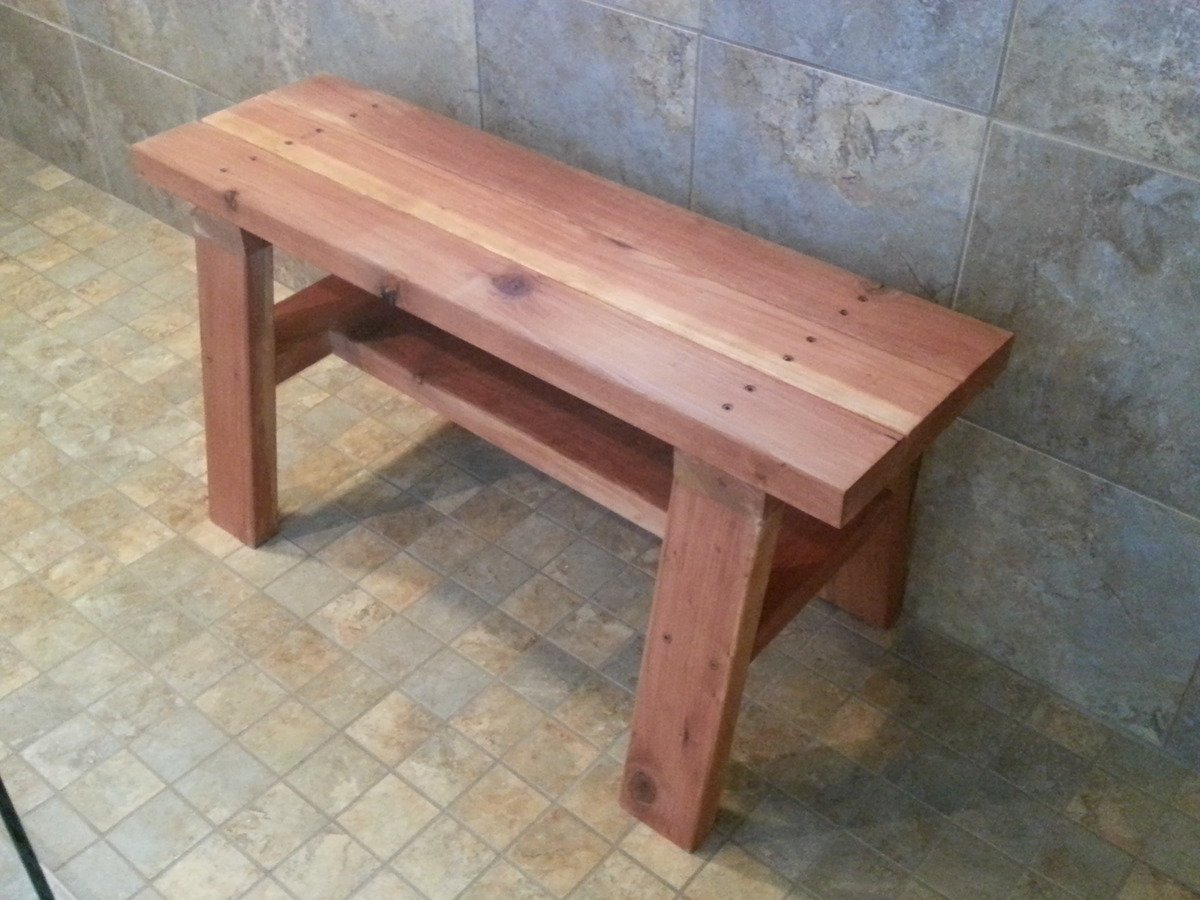
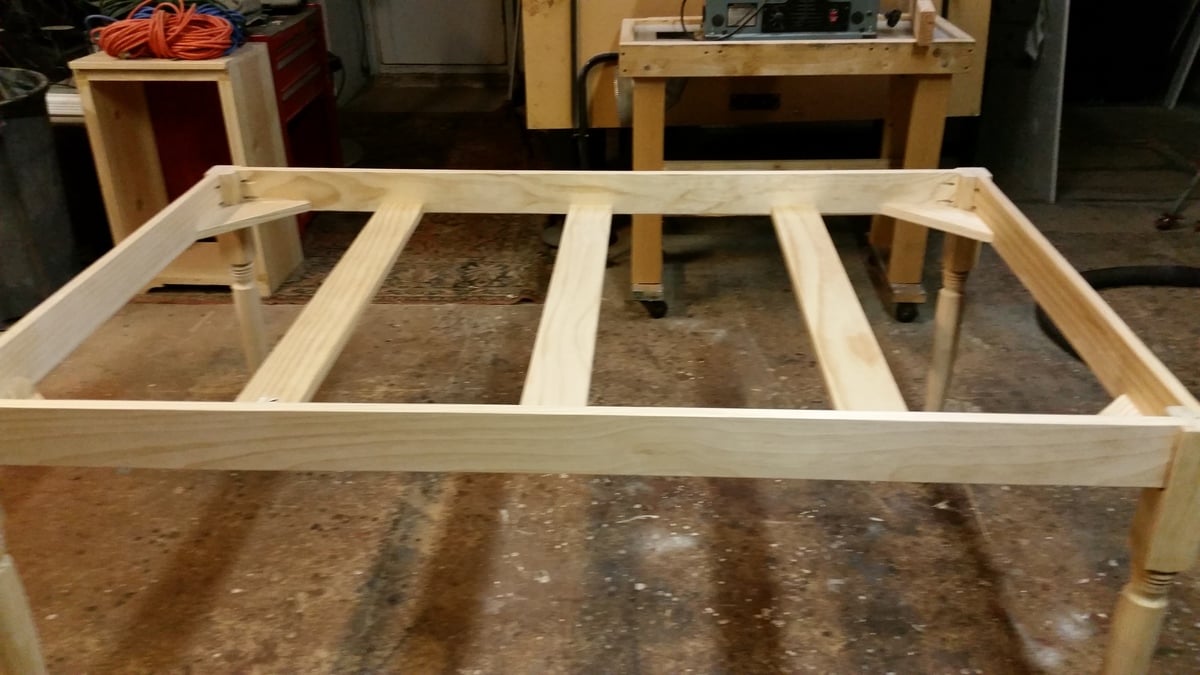
I wanted to build a small shower bench. I used the Providence Bench Plans and just made it a bit smaller with a few adjustments. This bench is 35" long and 18" tall. I did not use the cross supports on the bottom because it was so short. Also, you will see that I turned the bottom stretcher and side supports flat/horizontal. I put the screws for the seat boards through the top down just because this was the easiest way for me to do it. The plans did not show in detail how to attach the seat boards from the underside. It just said "finally, the seat boards." I guess they probably used a pocket jig. I bought a pocket jig and used it in the couple of places, but this was my first time using it. I used brown, coated decking screws in the places I did not use the pocket screws. This was my first attempt at building anything and my first time to use a pocket jig. I used a natural wood stain and Behr Weather-Proofing since it will be in a wet area.

Built from Plan(s)
Estimated Cost
$20
Estimated Time Investment
An Hour or Two (0-2 Hours)
Finish Used
Behr All-in-One Stain and Weatherproofing in Cedar Naturaltone (No. 5533). Because this is going to be in a wet area, I put 2 coats on and let each one dry 12-24 hours in between and before getting wet.
Recommended Skill Level
Beginner

Twin Storage Beds with corner unit

When we moved into our new house, I figured it was time to replace my girls's mattresses on the floor with actual beds. so I set about making the twin storage beds with corner unit. I primed all the wood prior to cutting and assembling, and that made things go much faster. Assembling the corner unit was tricky, since i really didn't want to have sanding and much paint in their bedroom. (i loaded in the beds first and the corner unit a week later). I added trim that wasn't on the plan, and also used the magnetic paint on the center area, although it makes a weak magnetic surface. All in all, I LOVE the way it turns out and no one can believe that I built it and didn't buy it... (although it seems obvious to me when you look closely LOL)

Built from Plan(s)
Estimated Cost
~$500?
Estimated Time Investment
Week Long Project (20 Hours or More)
Finish Used
paint
Recommended Skill Level
Intermediate

Comments

tannisg

Fri, 11/04/2011 - 11:42

It looks great, and I love what you did with the walls! Free hand with paint, or decals? Either way, its darling and clearly gives each girl her own space.

We have the same lamps - quite popular :)

I am trying to figure out a clever way to put three girls in a (huge) room and I think something like this or a bunkbed combo would make it fun and new for them..

Guest (not verified)

Sun, 01/08/2012 - 18:36

Where can I find the plans for the top half of the corner unit.? Your beds are exactly what I want for my girls. Thanks for sharing.

Overhead Garage Storage

This project was born out of desperation for some way to organize our garage. It is not difficult to build, and it went pretty quickly with two of us. It probably didn't take more than four hours tops for each section. I've seen the prices for garage storage components and some of them are staggering! We have removed a tall chrome shelf, and moved a ton of stuff onto these shelves, creating a hundred square feet of floor space! And for only $25! Come on over and check it out on my blog! Val

Estimated Cost
$25 per 8 foot section
Estimated Time Investment
Afternoon Project (3-6 Hours)
Finish Used
Whatever white paint we had left over from various projects.
Recommended Skill Level
Beginner

Comments

Mudroom bench with easy drawers

Submitted by barben1976 on Mon, 06/10/2019 - 13:17

Not as easy at it seems... but also, this was one of my very first woodworking projects.

Built from Plan(s)
Estimated Time Investment
Week Long Project (20 Hours or More)
Recommended Skill Level
Starter Project

Comments

Snack Cabinet to fit dormer

Submitted by Anonymous (not verified) on Sat, 03/25/2023 - 10:05

Our son and his wife wanted a snack cabinet in their bonus room dormer. My husband and I used your Farmhouse Desk plan and tweaked it with your Barn Door Cabinet plan. They love it! It was a first cabinet build for us and we were proud! You are our go to for ideas and plans. Thank you!

Comments

Patio couches

Submitted by Anonymous (not verified) on Thu, 04/27/2023 - 19:14

This project was fun to build with hubby said the shopping list and the cut list was perfect! Love all your designs! King bed is next!

Comments

Seasonal And Holiday

Breakfast bar with reclaimed top

Submitted by Anonymous (not verified) on Sat, 08/24/2019 - 19:36

Our son was moving into his first college apartment. The dining area is small and he thought a breakfast bar would be perfect in this spot. We built the base using Ana’s Counter Height Farmhouse Table for Four plans. We modified the plans to to fit the table top - which was originally the top of a desk. We purchased the desk at our local Habitat Restore. We planed to use the base of the desk for another project- so using the top for this breakfast bar was perfect! The breakfast bar was a perfect fit!

Estimated Cost
$35
Estimated Time Investment
Day Project (6-9 Hours)
Finish Used
Paint and poly on bass. Gunstock stain and poly on top.
Recommended Skill Level
Beginner

Outdoor Planter Steps or Bench

Submitted by Anonymous (not verified) on Wed, 06/14/2023 - 19:16

This was my first time doing a big project like this . Thank you for the plan for this.

Comments

Seasonal And Holiday

Double Shed Coop

Submitted by Anonymous (not verified) on Sat, 08/05/2023 - 09:31

Our family decided to raise chickens but needed a place to keep them safe at night. We used your shed plan and adapted it to create necessary venting for the chicks.

Since we had 16 chickens we knew one coop would not be enough space so we built two. We created a vented tunnel between the two coops so the hens could go back and forth between them as they wished while still being protected. The girls are very happy in their new space!

Thank you for your great plans.

Holly

Built from Plan(s)

Ultimate lumber and plywood storage

Submitted by Anonymous (not verified) on Thu, 01/02/2020 - 16:00

I followed the plans for the wood storage rack pretty closely. The shelf brackets made from 2x4's are quite sturdy. The entire rack is easy to move around on the 4 inch casters. This project took about 4 days to build and was well worth the time and money. All my wood is in one place now- sheets, long boards and short boards. Everything is easy to find and my shop is a lot neater, now.

Estimated Cost
$100
Estimated Time Investment
Week Long Project (20 Hours or More)
Finish Used
unfinished
Recommended Skill Level
Intermediate

Dining / Gaming Table

Submitted by bette9182 on Mon, 04/25/2016 - 13:18

My wife and I were looking for a new dining table, the one we had was a bar height which worked well for our daughters high chair, but she was going to be transitioning to a booster seat . We shopped around and had sticker shock at the cost of a dining room set. We enjoy playing board games and I had been looking into possible buying a board gaming table, but those more expensive and some had long lead times as well. I tossed out the idea that I could make our table and my wife agreed but gave me a deadline. I had built a few smaller pieces before but nothing like this. I based my plans off the farmhouse table for the top and used store bought legs. The top needed to be sturdy since it is not attached to the base, I did add blocking on the back so the top doesn’t move around and it is heavy enough that it doesn’t flip up if you lean on it. I moved the typical supports down to the bottom of the side rails and added a ¾” piece of MDF that I had for the gaming top. We used spray adhesive to attach some batting and used blue suede for the gaming surface since we are fans of Doctor Who. I added handles to the top on the inside to help when it is moved off the table for gaming. I built the bench too and made it so we could slide it under the table to save on space when we did not need it. The other chairs are hand me downs and Salvation Army finds that we spray painted. The only addition that I have to make is to build some sort of cup holders.

Estimated Cost
$150 - 200 with all the chairs and fabric.
Estimated Time Investment
Week Long Project (20 Hours or More)
Recommended Skill Level
Beginner

Comments

Our new garden beds. Thank you!

Submitted by Anonymous (not verified) on Wed, 05/04/2016 - 07:00

I'm only moderately handy and these were fun and pretty easy.

Learned a lot and got better as I went along.

I found ways to make it as cheap as possible, probably did all three projects for 150 bucks.

Estimated Cost
Around $150
Estimated Time Investment
Afternoon Project (3-6 Hours)
Recommended Skill Level
Beginner

Laundry Basket Dresser

Submitted by KaraBoo on Mon, 05/07/2012 - 10:18

I modified the tall and lengthwise laundry basket dresser a bit to make this shorter version. I also combined it into a single dresser instead of it being two separate dressers side by side. I put the dresser on casters so that I can roll it around my laundry room. I can tuck it away in the closet area or roll it out and use it as a folding counter.

Estimated Cost
$100
Estimated Time Investment
Afternoon Project (3-6 Hours)
Finish Used
Behr Ultra, Enchanted Evening
Recommended Skill Level
Beginner

Comments

spiceylg

Mon, 05/07/2012 - 12:41

Love that it was combined into one and on casters. Very smart. Cool color, too!

Jenna Meagher (not verified)

Sun, 05/13/2012 - 09:02

I would love to do this modified version! Can you share your dimensions?

KaraBoo

Sun, 05/13/2012 - 19:35

Jenna, I used 3/4" MDF and these are the dimensions:

1 Back piece - 37 1/4" x 37 1/4"
2 pieces for top & bottom - 37 1/4" x 25"
3 pieces for sides and middle - 35 3/4" x 25"

I used the same dimensions for the 1x2's as are in the original project and pretty much assembled it following the steps as she has written. Just remember to add 1x2's on both sides of the center divider and you're good to go! Hope that helps and if you have any questions, I'll be happy to try to help. :)

Aimee Comte (not verified)

Tue, 08/07/2012 - 09:41

Do you know what kind of laundry basket you used & where you got them? Based on the pictures they look like the sterilite 2 bushel ultra however the dimensions look too big. Did you have to modify the plans to make them wider?

Thanks!

Ladder shelf

Submitted by lazyLiz on Thu, 05/10/2012 - 13:43

Since I used hardwood (red oak) I have to modify the plan and eliminate the sides of the shelves. Modifications and measurement is on the additional photo. Thanks again Ana, you're the best!

Built from Plan(s)
Estimated Cost
$30-$50
Estimated Time Investment
Afternoon Project (3-6 Hours)
Finish Used
minwax red oak and poly
Recommended Skill Level
Beginner

Comments