Community Brag Posts

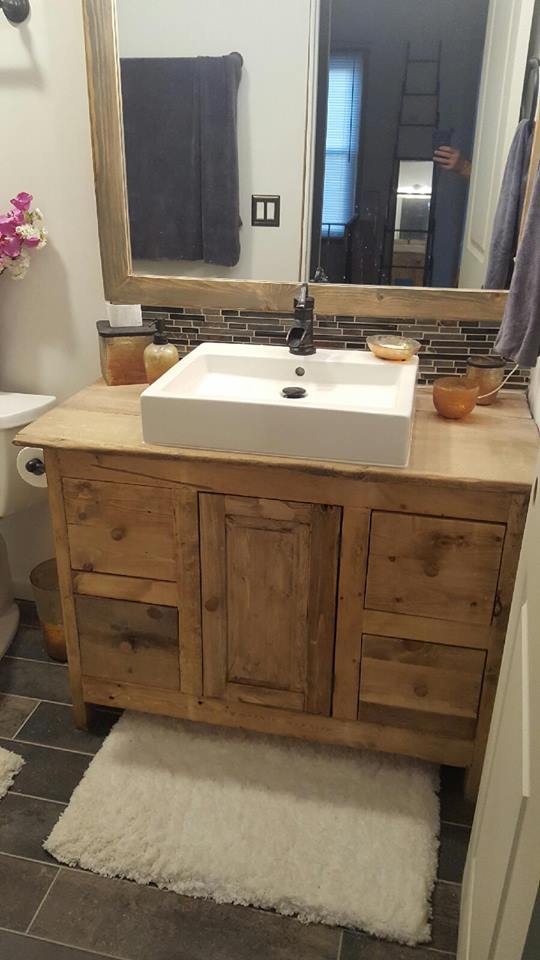
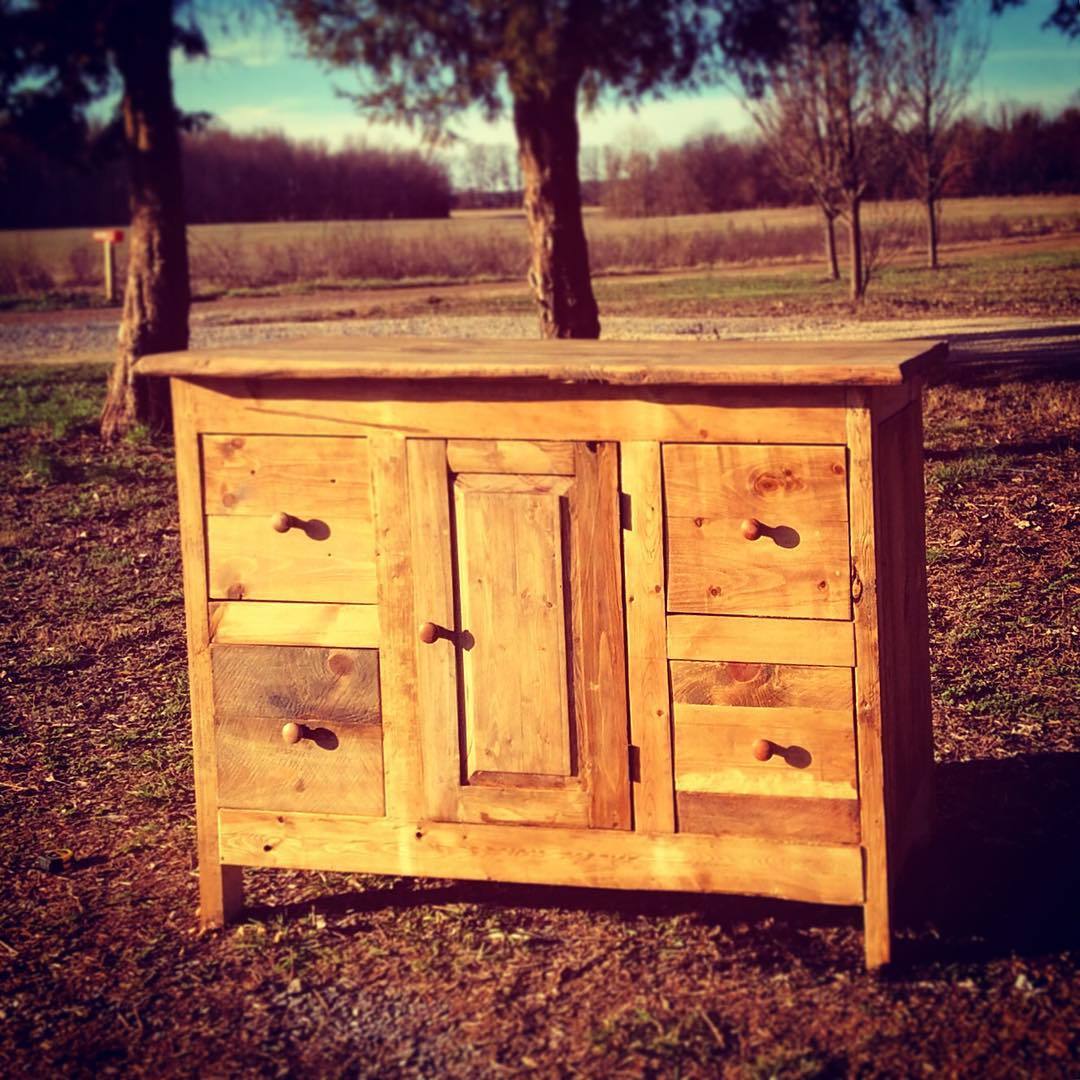
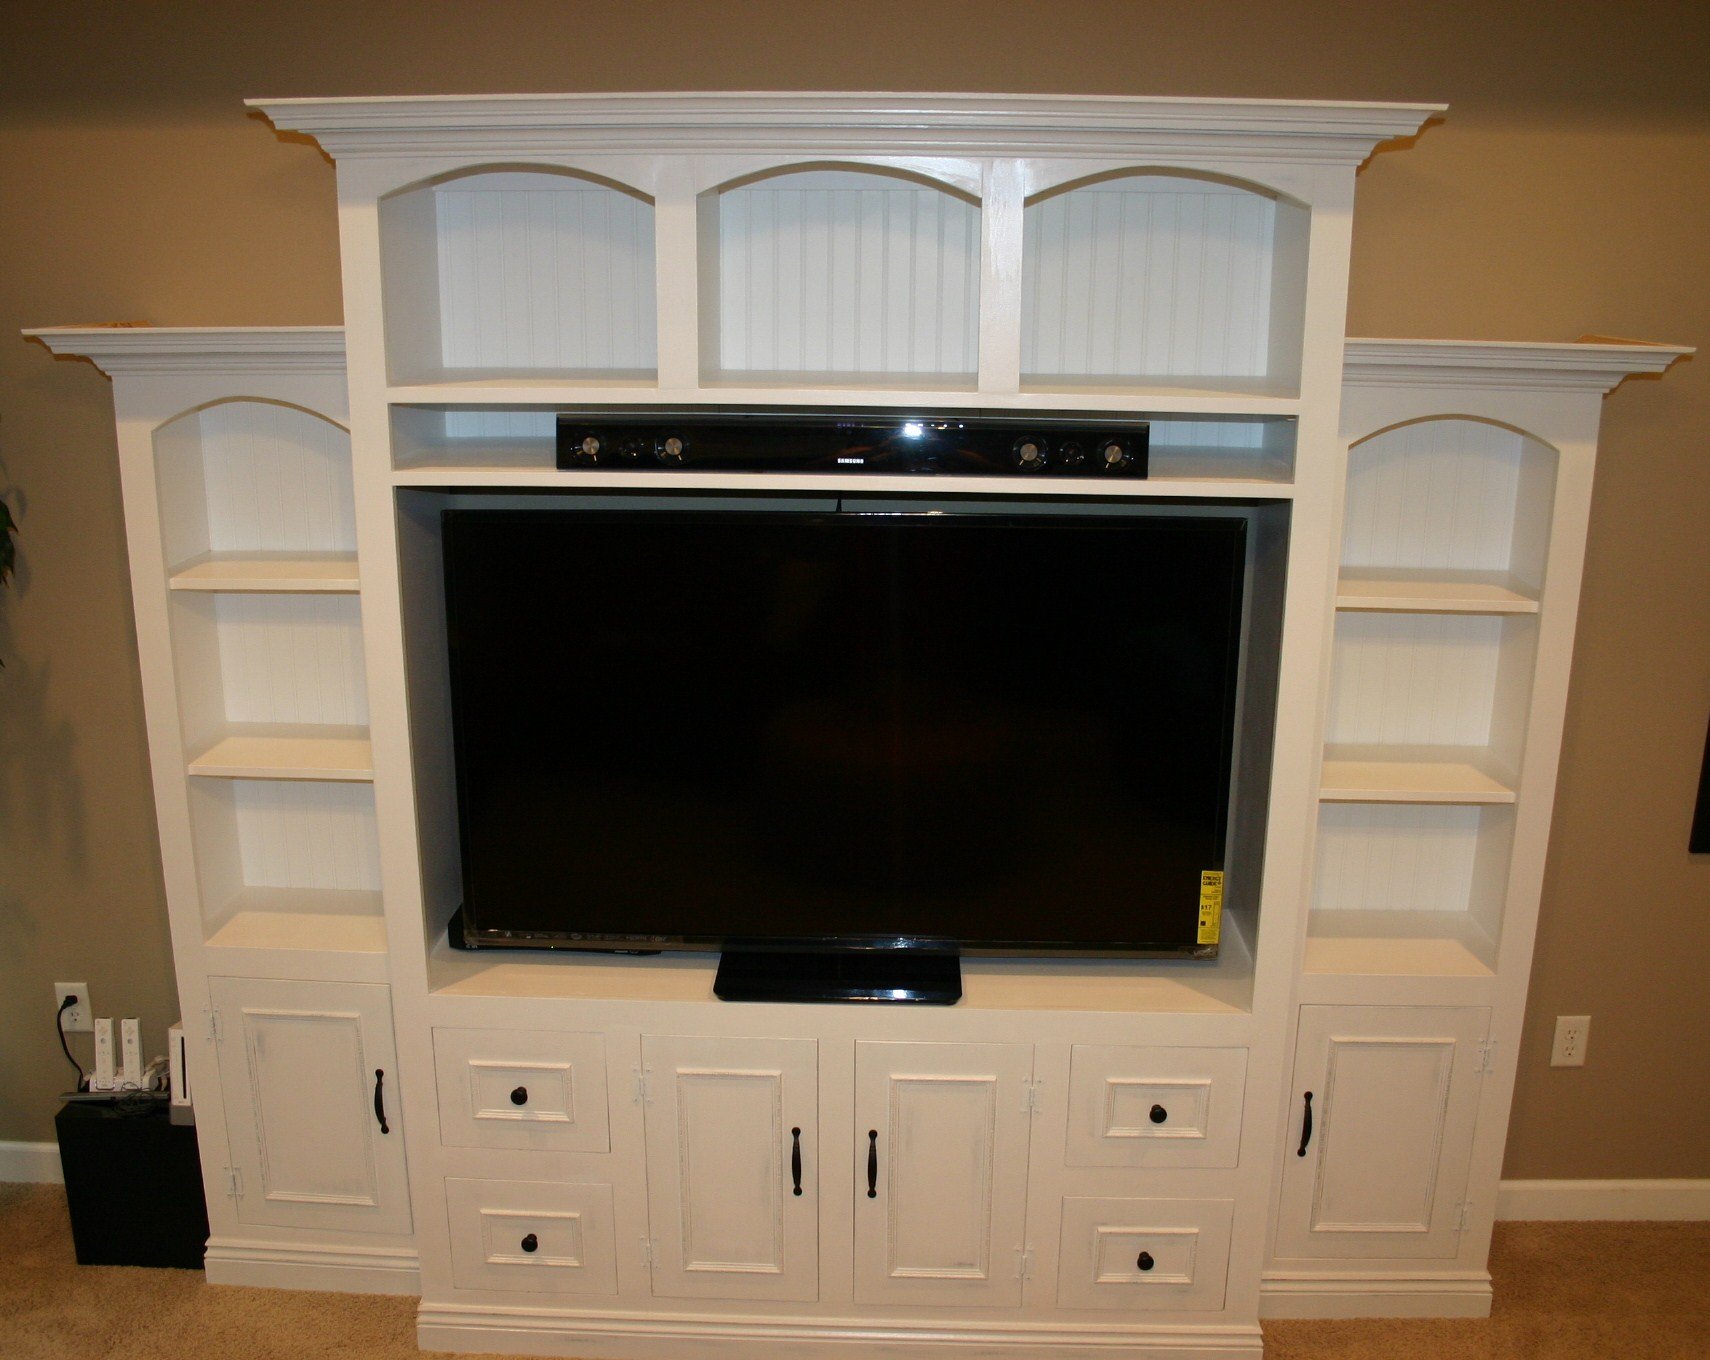
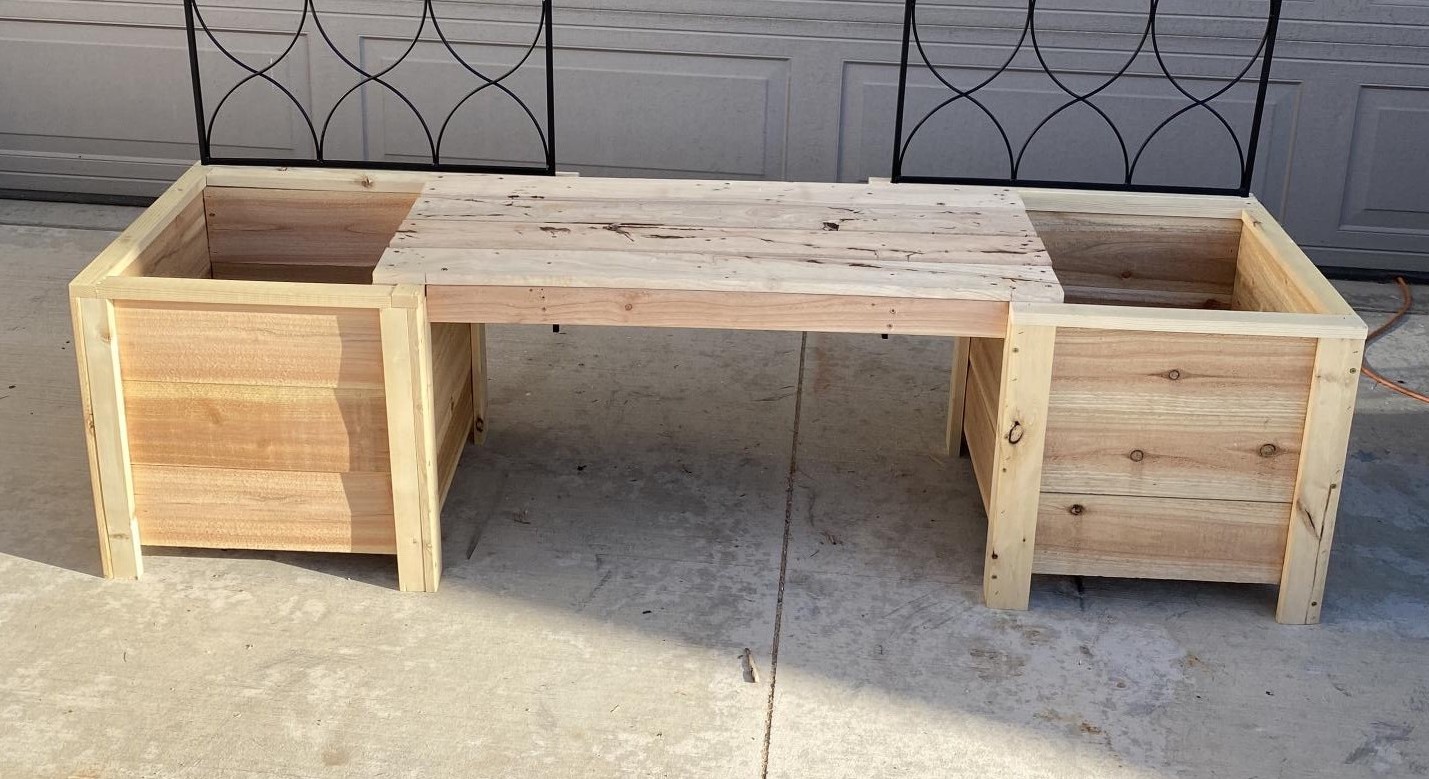
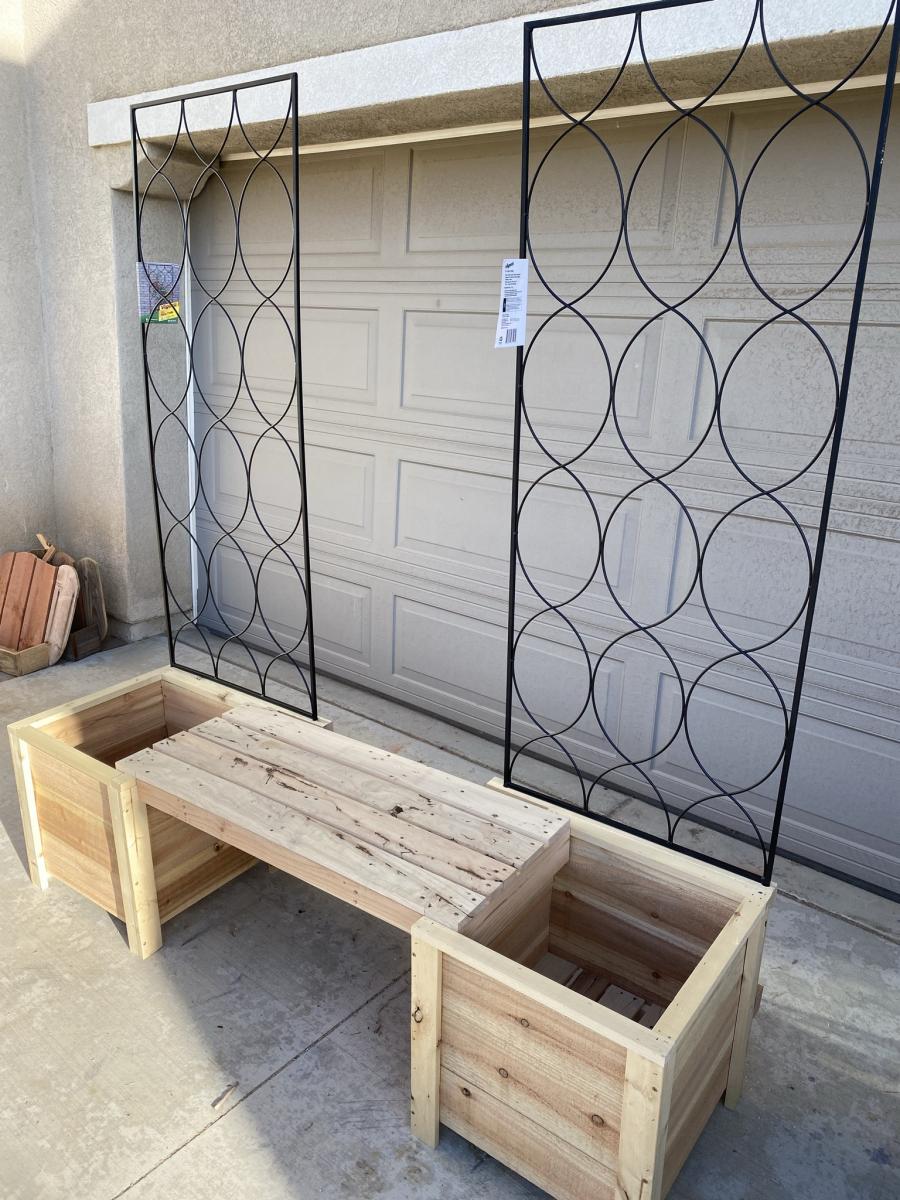
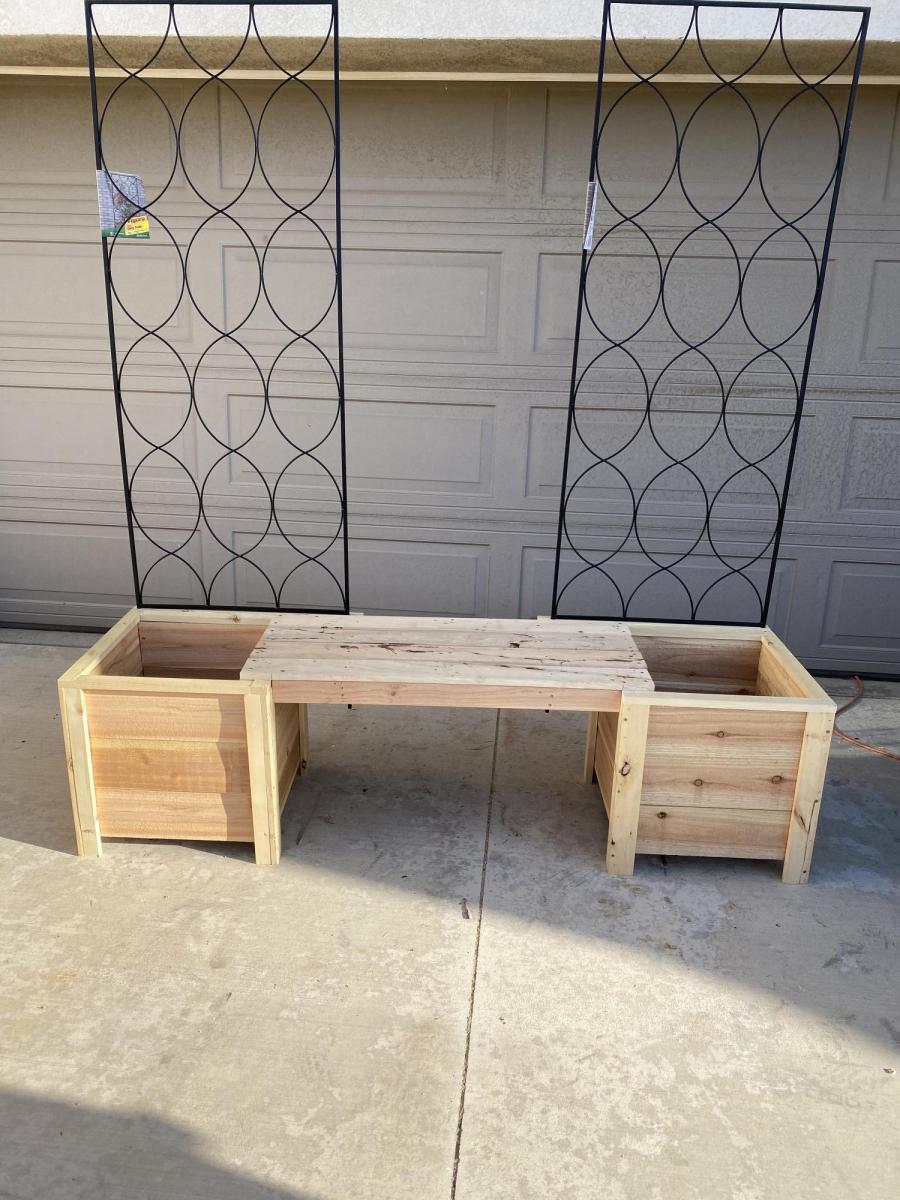
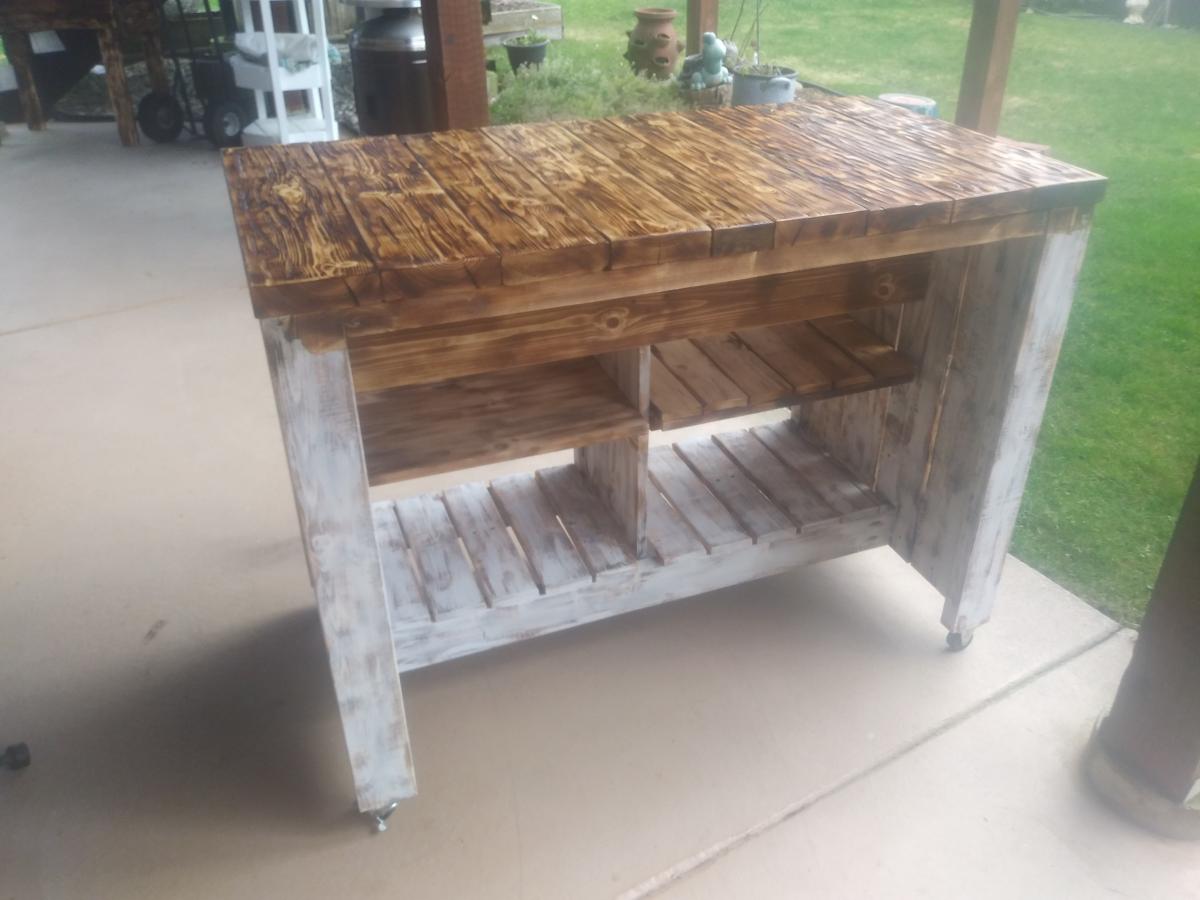
Kitchen Island with pallet wood

Submitted by Anonymous (not verified) on Sat, 01/23/2021 - 19:35

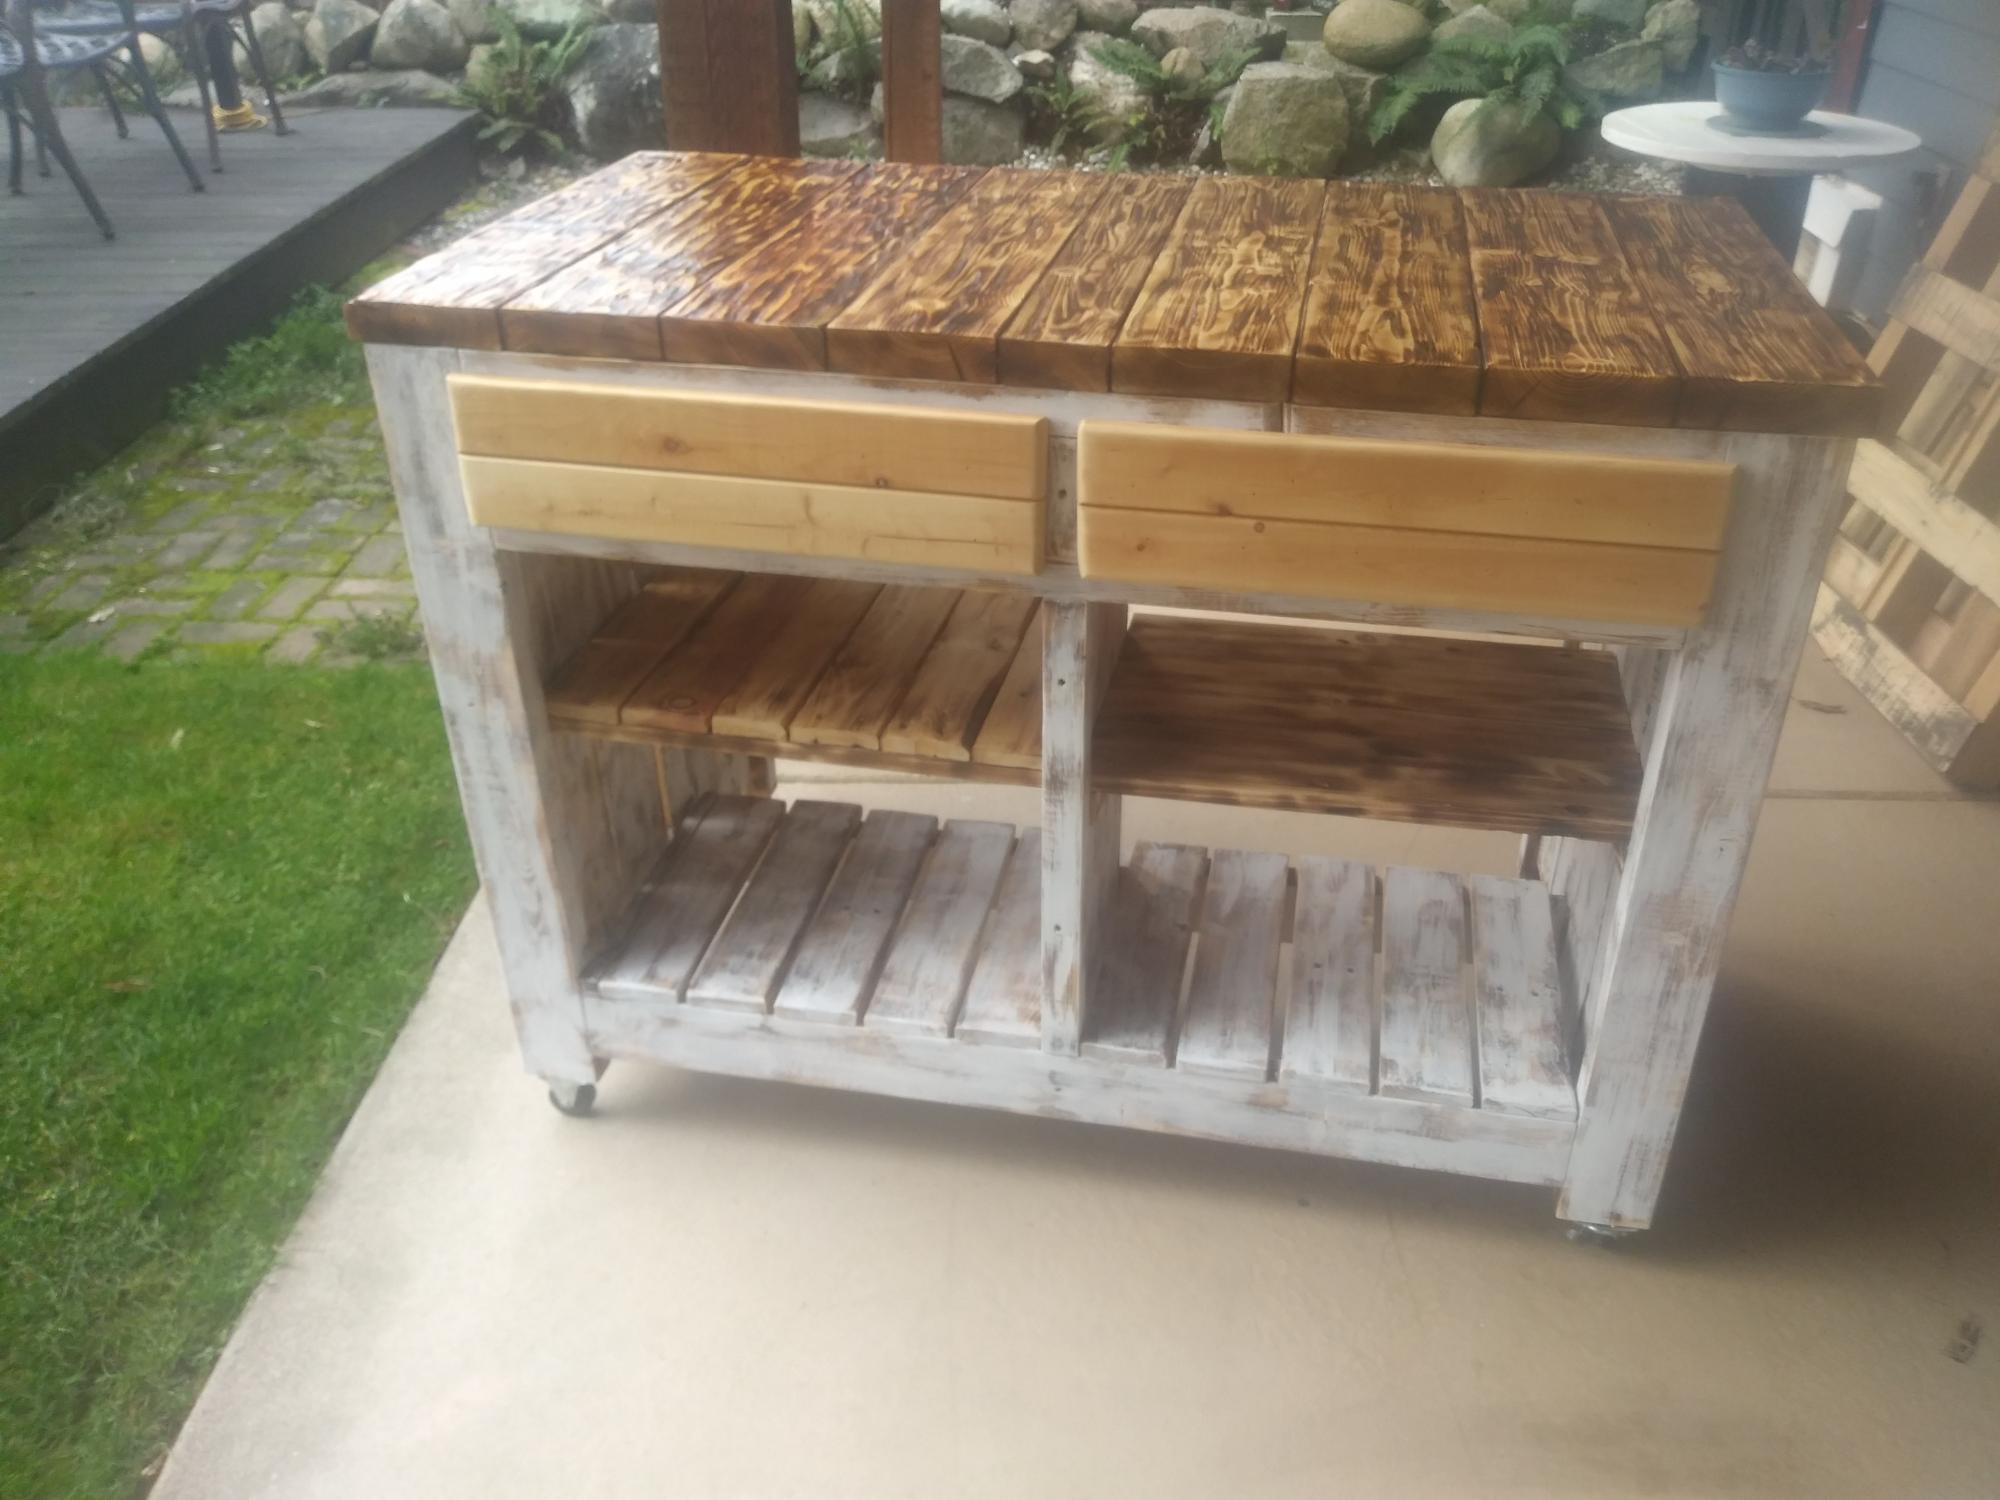
After following Ana Whit and other bloggers for a long time i figured my skills were at a level to try an advanced build like the Kitchen Island.. But i also wanted to challenge myself even more and was determined to make it from as much reclaimed wood as i could, mainly pallet wood.
With a lot of modifications to make it work i think I got a good result from these plans.

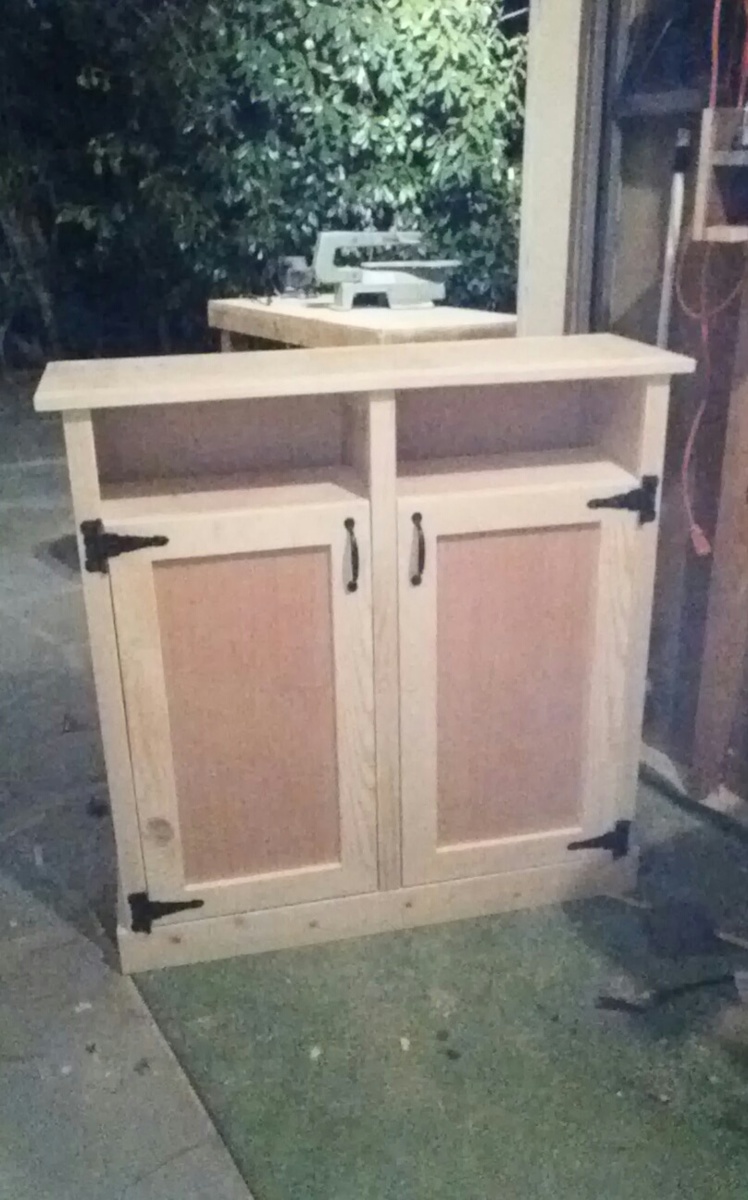
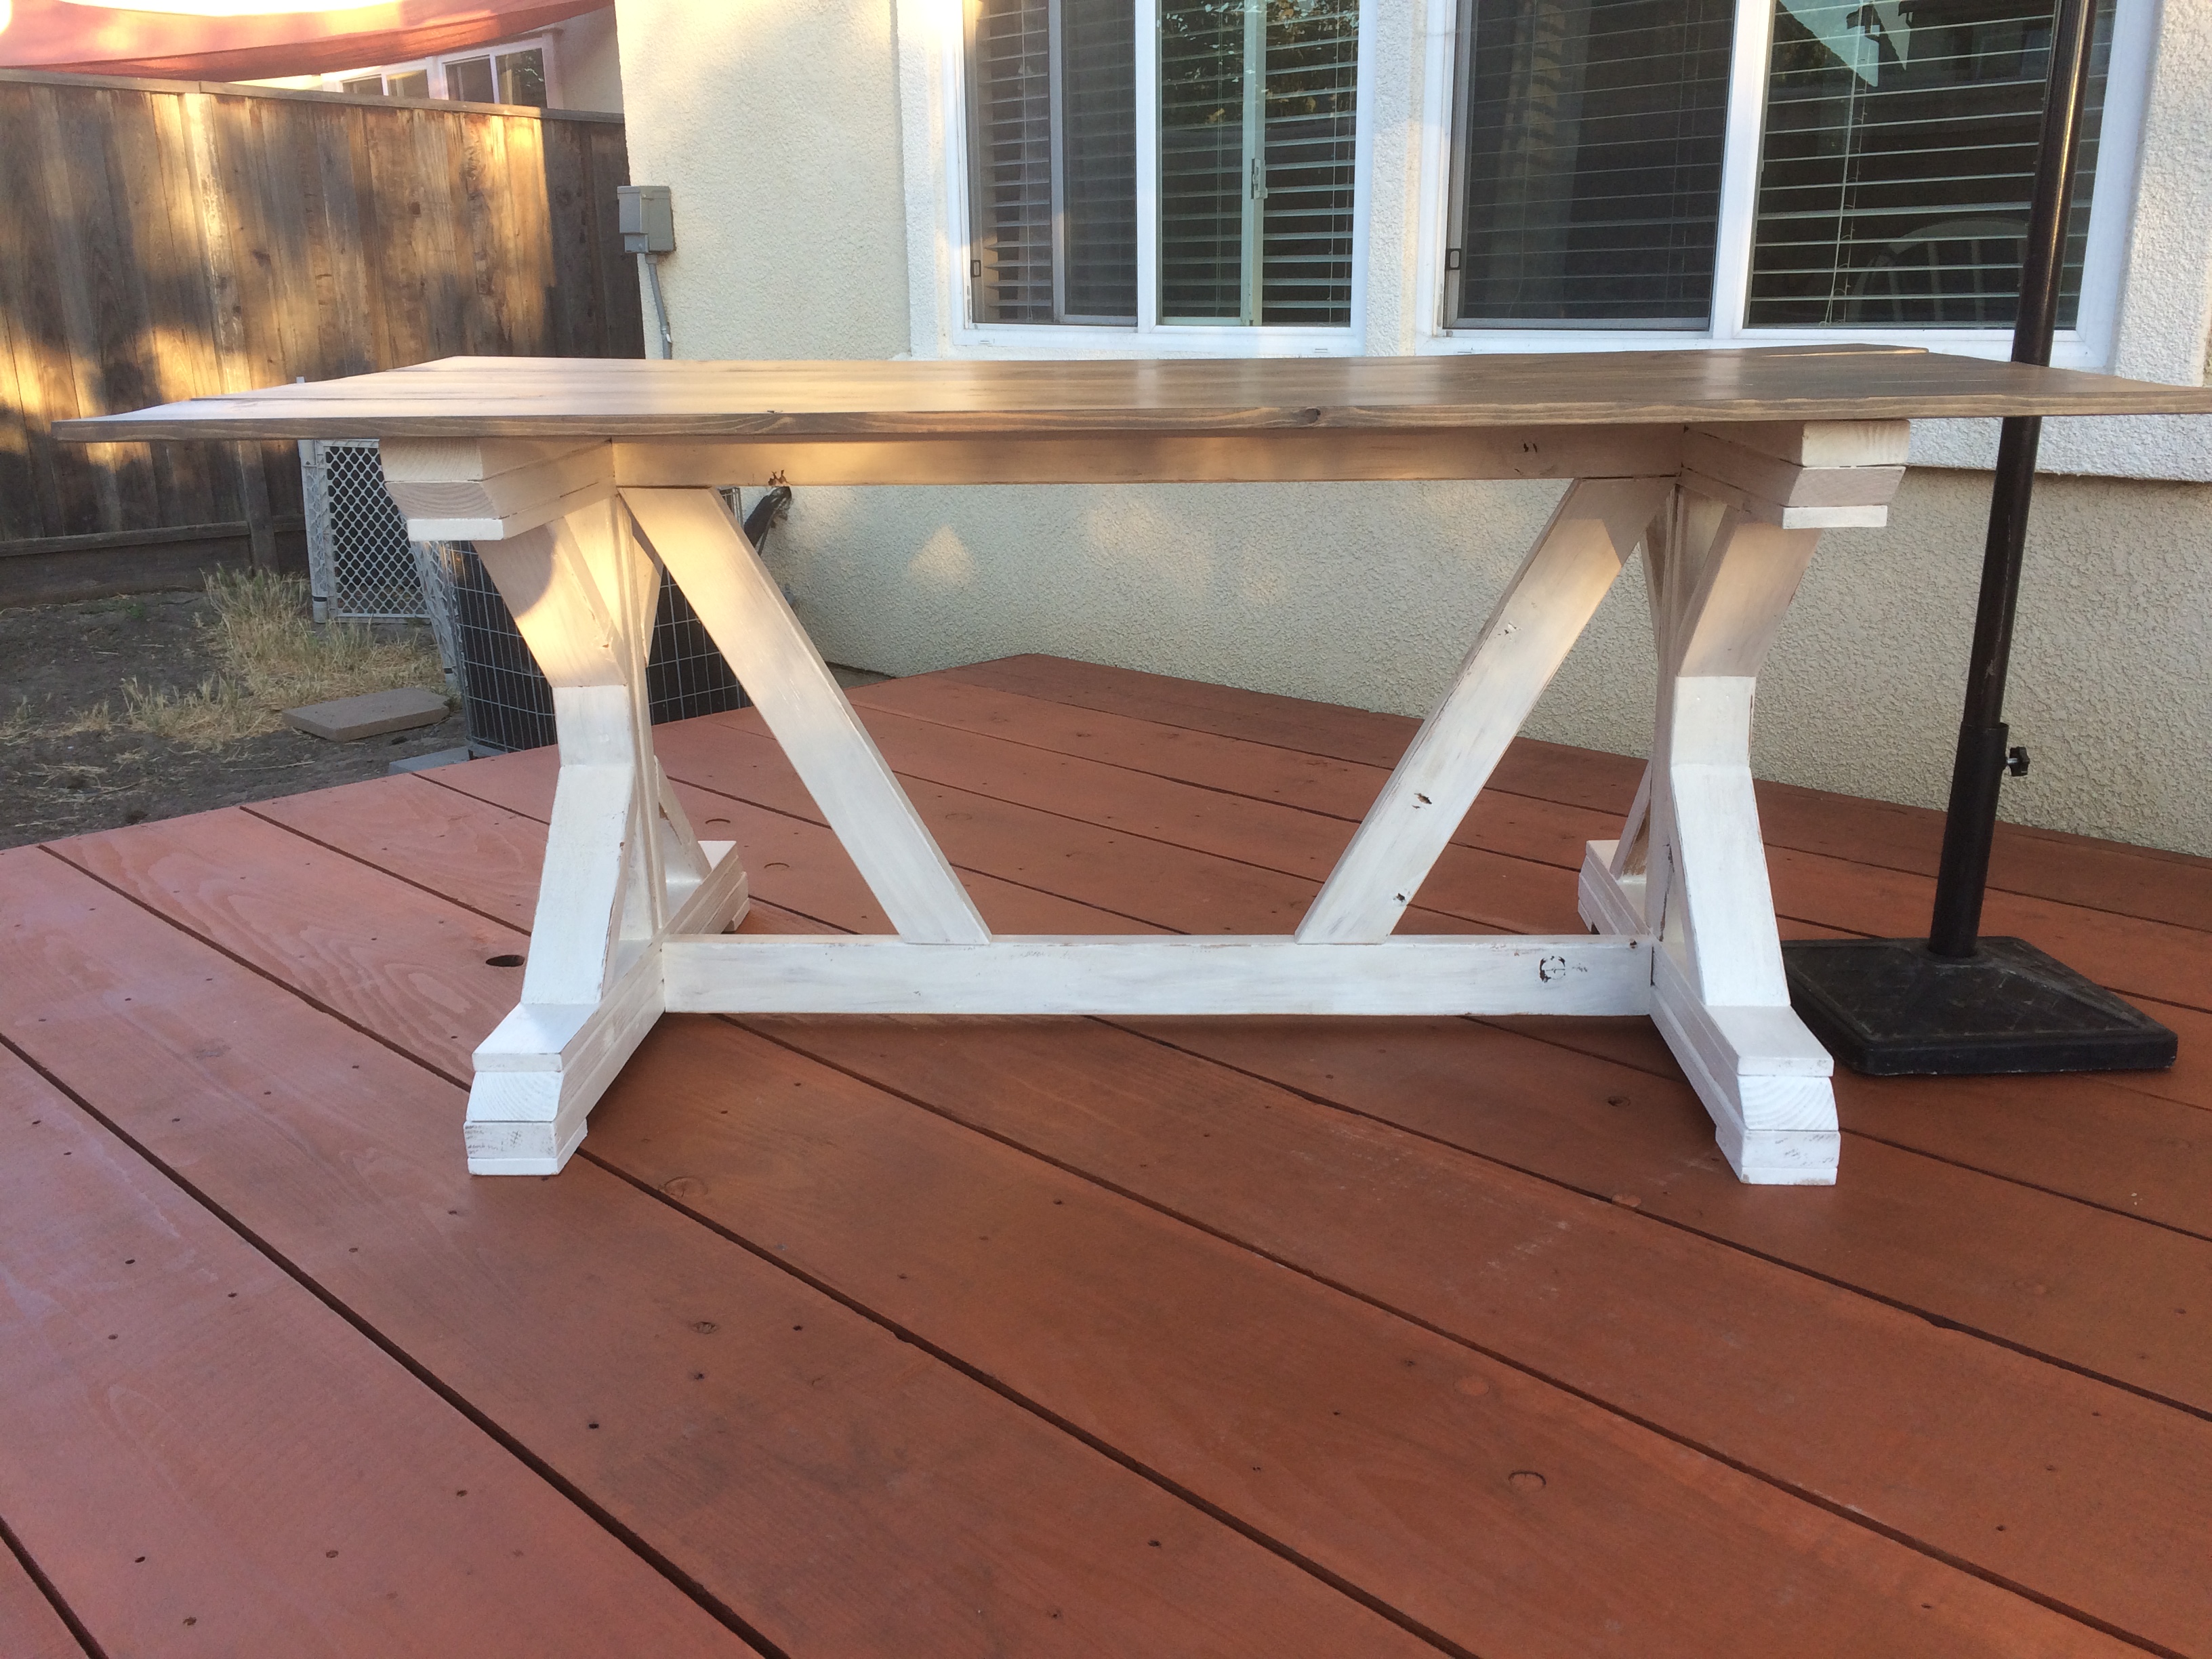
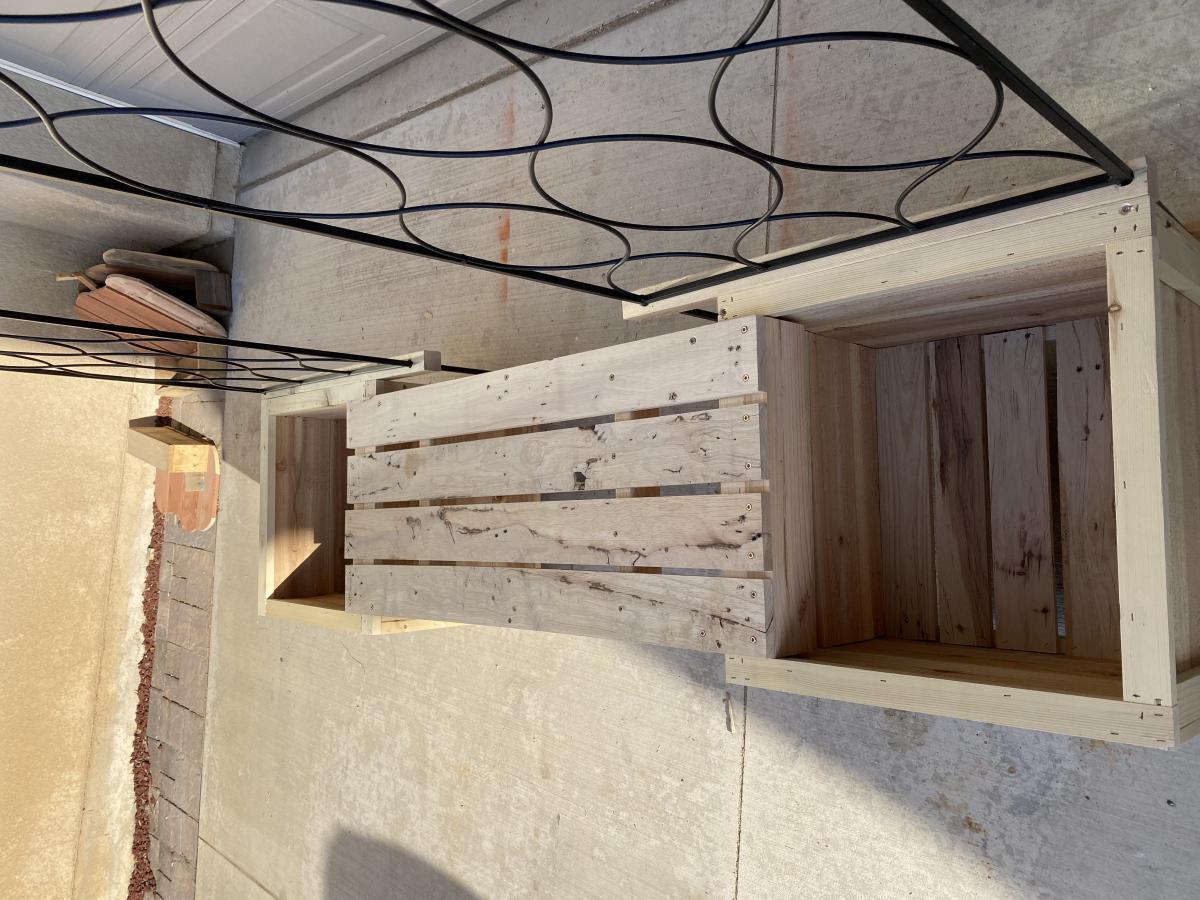
While i used as much reclaimed wood as i could, i still needed some clean 2x4's , 2x2's

Built from Plan(s)
Estimated Cost
$50
Estimated Time Investment
Week Long Project (20 Hours or More)
Finish Used
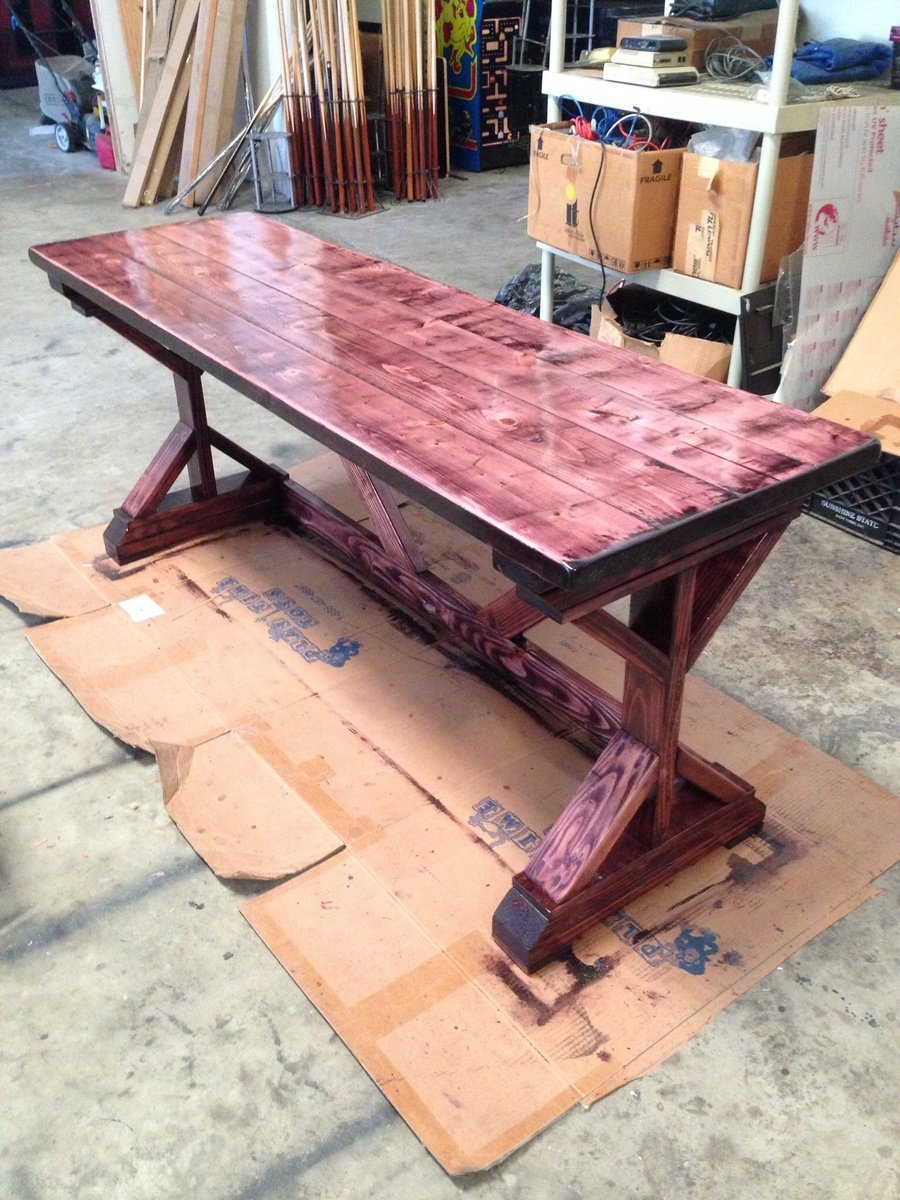
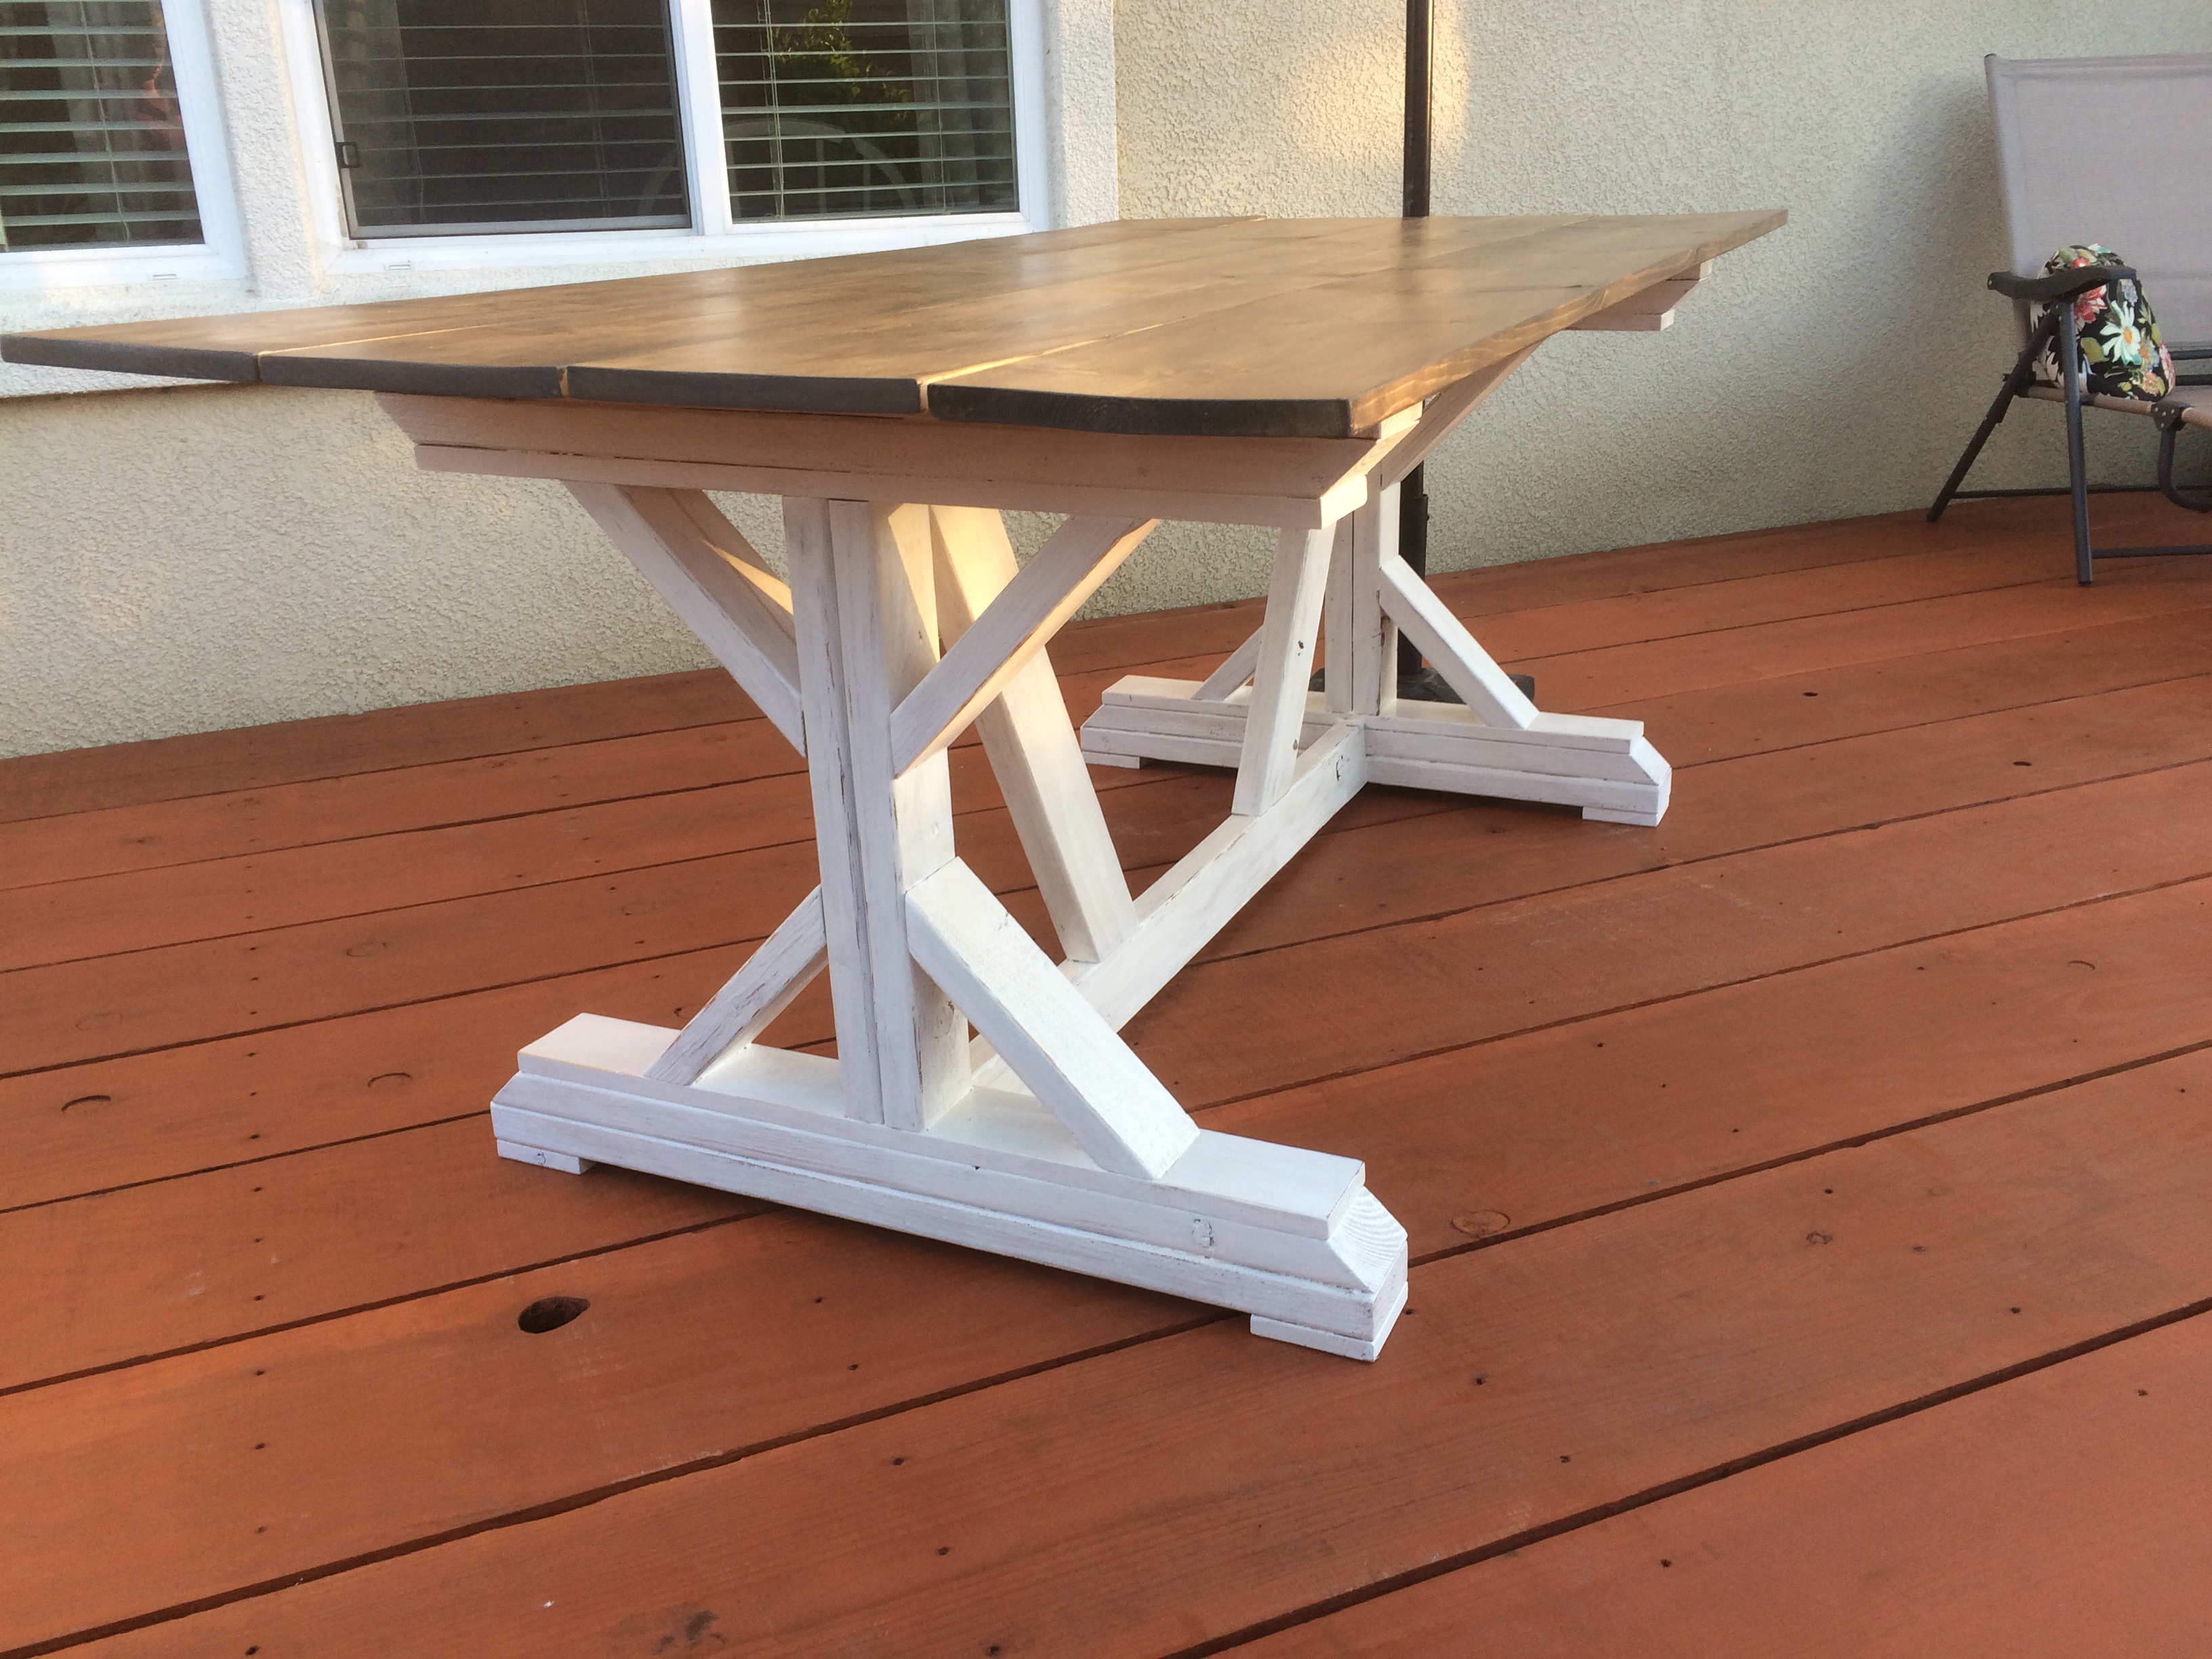
I burned the top and used a cup wire brush on an angle grinder to get the effect of barn wood. then a couple coats of lacquer on the top. And a spray finish of polyacrylic for everything else.
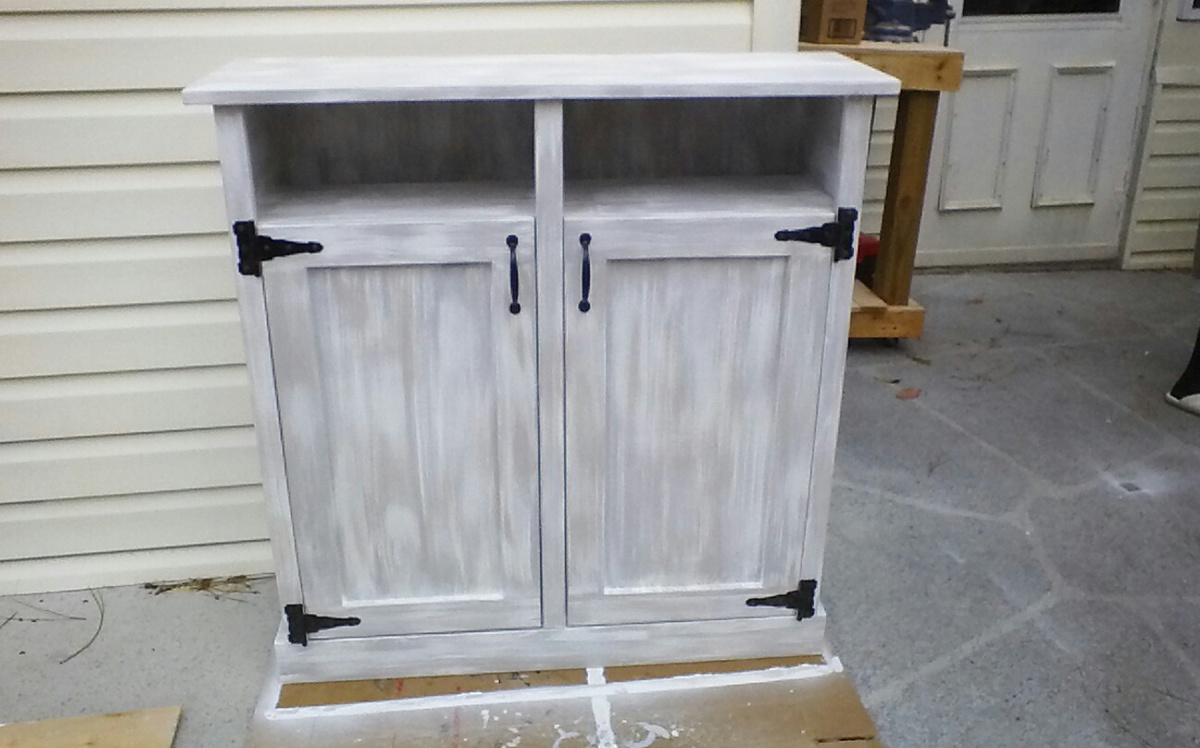
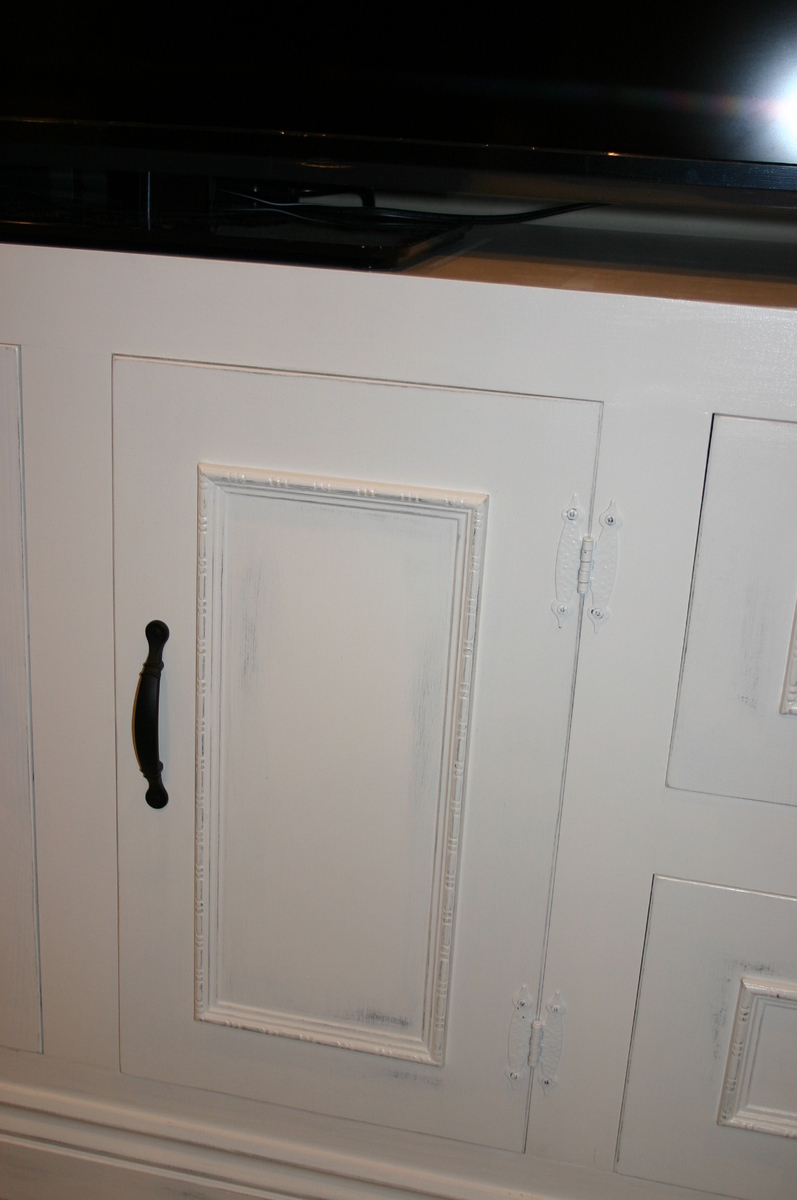
chalk pain ( linin) to do the White wash
Recommended Skill Level
Advanced

Rustic X Console Table

This console table was exactly what I wanted! We changed the measurements and made it a little smaller to fit in the corner of the room. My brother built this table for me and he was able to build it in 2 hours. The directions were easy and informative. Thank you so much Ana! I love your furniture!!!

Built from Plan(s)
Estimated Cost
The total cost including lumber and stain was $160.00.
Estimated Time Investment
Afternoon Project (3-6 Hours)
Finish Used
I used Milk Paint in the color "Curo" but watered it down to use as a stain.
Recommended Skill Level
Beginner
Seasonal And Holiday

Toddler Sized Cabin Bed (Crib Mattress)

Submitted by Anonymous (not verified) on Sun, 03/26/2017 - 19:35

Loved the twin sized cabin bed but my grandson is a few years away from needing a big boy bed.  Husband scaled down the plans and this  is what we came up with. 

Built from Plan(s)
Estimated Cost
$150
Estimated Time Investment
Weekend Project (10-20 Hours)
Recommended Skill Level
Intermediate

Anna's Bedside tables

Made these for my niece as a wedding gift. These were one of the first of many of these I have made.

Built from Plan(s)

Comments

Backyard Bliss!

Submitted by kdins31 on Mon, 01/12/2015 - 09:26

I built this outdoor play area for my kids this past summer.  The area under that portion of the deck was always messy and muddy and so I wanted to make use of it.  I built the deck and anchored it with lag bolts to the deck supports.  On the one side I used rubber mulch and on the other there is play sand.  I dug holes in various locations and filled with gravel to allow for drainage under the sand and mulch.  For the awning I used plain cedar shingles.  I added a shower that is just regular 1/2" metal pipe with a hose adaptor.  The shower wall and fence are just old pallets that I had for a while, cut to size, which was pretty much random but they came out great.  I added a misting system under the awning that works great, the kids love the cool mist on the hot days. Overall, a heavy job ripping up the grass, moving the wood, gravel, stones, sand and mulch, but a fun deck build and even better experience doing this with my kids by my side!  

Estimated Time Investment
Week Long Project (20 Hours or More)
Recommended Skill Level
Intermediate

Comments

Einman10

Tue, 12/29/2015 - 17:10

I'm extremely interested in the plans for the bathroom vanity with the step stool that pulls out for kids to be able to reach the sink.  Is there a way I can get those plans?

Counter height 4'x4' square footage gardening planter boxes

Submitted by Anonymous (not verified) on Tue, 04/18/2017 - 07:01

4' x 4' x 32" planter boxes perfect for square footage gardening. Added pre-made trellis to back for tomatoes and melons/cucumbers. Had to use pressure- treated 4x4 for legs but wrapped them in plastic so not near the soil. 4" lag screws holding just fine with 5 horizontal strapping bars on bottom and 1 vertical 2x4. 

Estimated Cost
$150 for 2
Estimated Time Investment
Afternoon Project (3-6 Hours)
Recommended Skill Level
Beginner

rustic vanity and mirror

Submitted by abbpim on Sat, 04/29/2017 - 11:00

I built this vanity and mirror out of pine and finished it in a variety of stains to get a reclaimed look.

Recommended Skill Level
Intermediate

Fancy X Desk

My first big project. It turned out great! There are a couple of issues with the plans but nothing a little common sense couldn't resolve. Also, for any beginners out there, make sure when you're going through your cut list, start with the larger pieces first then work your way down to the smaller cuts. You'll end up having to take another trip to the hardware store if you cut the smaller pieces first. Great plans Ana White! I built this as a Christmas gift for my girlfriend. She was blown away! She absolutely loves it!

~Justin~

Built from Plan(s)
Estimated Cost
Wood cost: $45.95
I did end up spending a lot more on stain, polyurethane, hardware, sandpaper.. The list goes on. But most of these items are things I can reuse for future projects.
Estimated Time Investment
Weekend Project (10-20 Hours)
Finish Used
Black Cherry Stain and then a clear polyurethane.
Recommended Skill Level
Beginner

Comments

Kitchen Hutch

I've built a lot of things...mainly corn hole boards for friends and family but this is my first furniture build. My wife's Valentine present! Now I'm thinking my new big screen tv sure could use a nice Apothecary media cabinet.

Built from Plan(s)
Estimated Cost
I used expensive 3/4 in birch plywood so around $130
Estimated Time Investment
Weekend Project (10-20 Hours)
Finish Used
CHALK Paint with a chalk varnish for a protective finish
Recommended Skill Level
Beginner

Comments

Entertainment Center for 60" Flat Screen LED TV

I used the plans from JRLwoodworking and the pictures from AZCA33 and combined them to create an entertainment center to hold my new 60" flat screen tv. I priced new entertainment centers at furniture stores for a nice entertainment center to hold a large tv and the price was around $2000. I looked around online and found a couple of websites of handmade entertainment centers and decided to give it a try. I had never made anything remotely his large or detailed, but with the plans and some patience, I was able to bring this thing to life. I couldn't have done it without the help of this website or jrlwoodworking. I am very proud of this piece of furniture and plan to cherish it for a long time....

Estimated Time Investment
Week Long Project (20 Hours or More)
Finish Used
Black latex paint (satin), white latex paint (satin), and Polyacrylic (satin)

We painted the bare wood with the white latex paint first. After a couple of coats, my wife used the black paint on the areas that she planned to look distressed. We painted over the black with the white until fully covered. She sanded the white until the black came through like she wanted and then we coated the entire thing with a polyacrylic coat.
Recommended Skill Level
Intermediate

Comments

NimbleShopper

Mon, 04/22/2013 - 13:51

Wait a moment, that is a super WOW!

Really nice work. The piece is worthy of a magazine cover. Very well done.

kristenlotz

Sat, 06/01/2013 - 19:21

Hi RAZORBACKFAN, I am so excited to see this build from our plans at jrlwoodworking.com! This is absolutely beautiful. It looks like a very difficult project, but with the step by step instructions and going through it a few times, it really can be done by a handy do-it-yourselfer. I hope you enjoy yours as much as we enjoy ours. The best part of it is telling everyone you built it. Nobody would believe it unless we had the pictures to prove it.

Fancy X

Submitted by Anonymous (not verified) on Tue, 06/13/2017 - 21:10

Second time building this table. Made it smaller, cutting support pieces to 45 rather than 60. Also tried 1X10 for the top.

Built from Plan(s)
Estimated Cost
$70
Estimated Time Investment
Day Project (6-9 Hours)
Finish Used
Swiss coffee white on base, lightly distressed. Top is Mix Wax Weathered Oak then watered down layer of Briarsmoke.
Recommended Skill Level
Beginner

Small Dresser

Submitted by Smokeydog on Wed, 03/18/2015 - 16:31

I made this dresser for a young lady who has never had any furniture unless it came from IKEA. Time to mix it up a little.  She was very delighted. The bulk of the dresser is poplar plywood with decorative birch trim.  I had trouble matching the paint color she wanted so I experimented by buying paint as close as I could find to the shade of grey she wanted and then mixed it with paint I had in the shop until I got the desired result.  I'm  no master at mixing paints.  I simply got lucky.  I traced out the decorative top using my wife's China serving platter and then routered the edge. Turned out OK and my wife was none the wiser.


Built from Plan(s)
Estimated Cost
130.00
Estimated Time Investment
Weekend Project (10-20 Hours)
Finish Used
Satin Paint
Recommended Skill Level
Intermediate

Comments

pde00311

Thu, 03/19/2015 - 13:00

The finish turned out amazing. How did you get the two toned effect on the drawers? Did you paint the grey face and the white molding separately? Also, is the molding flush with dresser frame?

Smokeydog

Thu, 03/19/2015 - 14:04

Thank you for your nice comment. The drawer face and trim were painted separately. The drawers are flush with the frame but the trim is not. The trim is attached to the drawer face and protrudes out from the frame. I liked the shadow effect that this created. I also decided to put white quarter round on the base of the dresser. This additional trim really makes it pop! I'll update the photo when this is completed.

Thanks again!

Evie's Garden

Submitted by Anonymous (not verified) on Tue, 06/20/2017 - 21:20

   This was a great weekend project with help from my two nephews. My 4 year old daughter had been asking to grow a garden and has really enjoyed watering and watching everything grow!! She makes sure to check on everything daily!! Fun project!!

Built from Plan(s)
Estimated Time Investment
Weekend Project (10-20 Hours)
Finish Used
None
Recommended Skill Level
Beginner

Fancy Farmhouse Bed

Submitted by henryholub on Tue, 05/07/2013 - 13:16

With a child on the way, our house has been undergoing some changes. We were in need of a guest bedroom for family members and needing to store my wife's childhood twin bed with a hidaway twin underneath that was set up in the room that would become the nursery. We also needed to clean all the backpacking gear out of the closet in the nursery room to get ready for it to be taken over by all the baby stuff. I decided a "King-sized" bed out of the two twin mattresses would be a good solution as it would keep us from "storing" the two mattresses and meet the guest bed need. After I came across the plans for the fancy farmhouse bed, I knew if i just added some height to it, I could meet the storage need too! There's 14'' on my version of the fancy farmhouse bed between the carpet and the rails, plenty of room for medium sized plastic tubs to slide in and out (as seen with the "test tub" in the picture. Under my bed there are currently 9 tubs, two large suit cases, a PA speaker, Power speaker head, a large double sleeping bag, and a little room for more. I'll try to add pictures when I finish the room out with night stands (wine crates mounted to the wall), a bedskirt, lamps, and a headboard. Once I got the wood home, it was a fast build. The slowest part was painting

Built from Plan(s)
Estimated Cost
$75
Estimated Time Investment
Afternoon Project (3-6 Hours)
Finish Used
Flat white valspar paint
Recommended Skill Level
Intermediate

Comments

Planter Boxes

Submitted by Anonymous (not verified) on Mon, 10/04/2021 - 12:53

I made the boxes from plans, but added bench and trellis from my own design.

Built from Plan(s)

Comments

Seasonal And Holiday

Outdoor Chairs

Submitted by Anonymous (not verified) on Wed, 07/12/2017 - 09:04

These were a fun build and pretty easy to put together.  Certainly need to pre-drill pilot holes or risk splitting your boards.

I contemplated putting a back rest on the chairs but didn't end up needing them due to close proximity to the walls.  Having the cut-list on hand was super handy as I just set a stop on my miter saw and was able to cruise through the cuts quickly.  

Estimated Cost
60 dollars for materials, not counting cushions and pillows.
Estimated Time Investment
Day Project (6-9 Hours)
Finish Used
Olympic Deck Stain (709 in color) semi-transparent. Likely will seal with a clear coat later.
Recommended Skill Level
Beginner

Adirondack chair

Submitted by Gsmit96 on Sun, 05/19/2013 - 18:38

The only thing I did different to the plan was add 4.5 inches to the back slats so I could round the edges and 3 inches to the right arm rest so I could cut out a track to rest a wine glass. One thing I highly recommend is to create a stencil of the stringer. I did and now I have it for the next one so the next chair will be consistent. Thanks Ana white, this site is very therapeutic for me. Already built 3 projects in the last month.

Estimated Time Investment
Afternoon Project (3-6 Hours)
Finish Used
Haven't painted yet, will paint white soon
Recommended Skill Level
Beginner

Comments

sorese

Thu, 06/06/2013 - 06:38

The mods on this make me now want to build a set of these, the wine glass holder is genius! love the rounded front and back, so much better than original plans, thanks for inspiration!

Printer's Coffee Table

Submitted by jbolson21 on Tue, 04/07/2015 - 16:09

Coffee Table

Estimated Cost
Can't remember
Estimated Time Investment
Week Long Project (20 Hours or More)
Finish Used
poly
Recommended Skill Level
Intermediate

Comments

Patio chair

Submitted by Anonymous (not verified) on Mon, 10/04/2021 - 16:56

I chose to make the chair which came out great although the plans were only for one chair I thought it waa easy to do.

Comments

Seasonal And Holiday

Scrapbooking Table!

Submitted by seesaw on Wed, 03/09/2011 - 18:21

This is my favorite piece we have in our home. We added a wood edging around the desk top to give it a nice finished look. We had a hard time locating the right size drawer slides and ended up buying a lot of them online, so if anyone needs a set of drawer slides, please let me know lol.

Estimated Cost
$120
Estimated Time Investment
Day Project (6-9 Hours)
Finish Used
An antique white
Recommended Skill Level
Intermediate

Modern Farmhouse Bed

Submitted by Anonymous (not verified) on Mon, 10/04/2021 - 19:17

My husband and I made this for our son and daughter-in-law. They absolutely love it!
The project took about two days to build, and about three days for the finish (stained and weathered). The photos do not show the slats that support the mattress.

Built from Plan(s)

Comments

nyyankeegrl38

Sun, 10/10/2021 - 21:43

*Edit to original post*
The only thing I wish we had done differently with this bed, was to count how many “tongue & groove”panels to attach to the headboard. We used 5 as stated in list, but 6 would have been preferred.
Solid bed for certain.