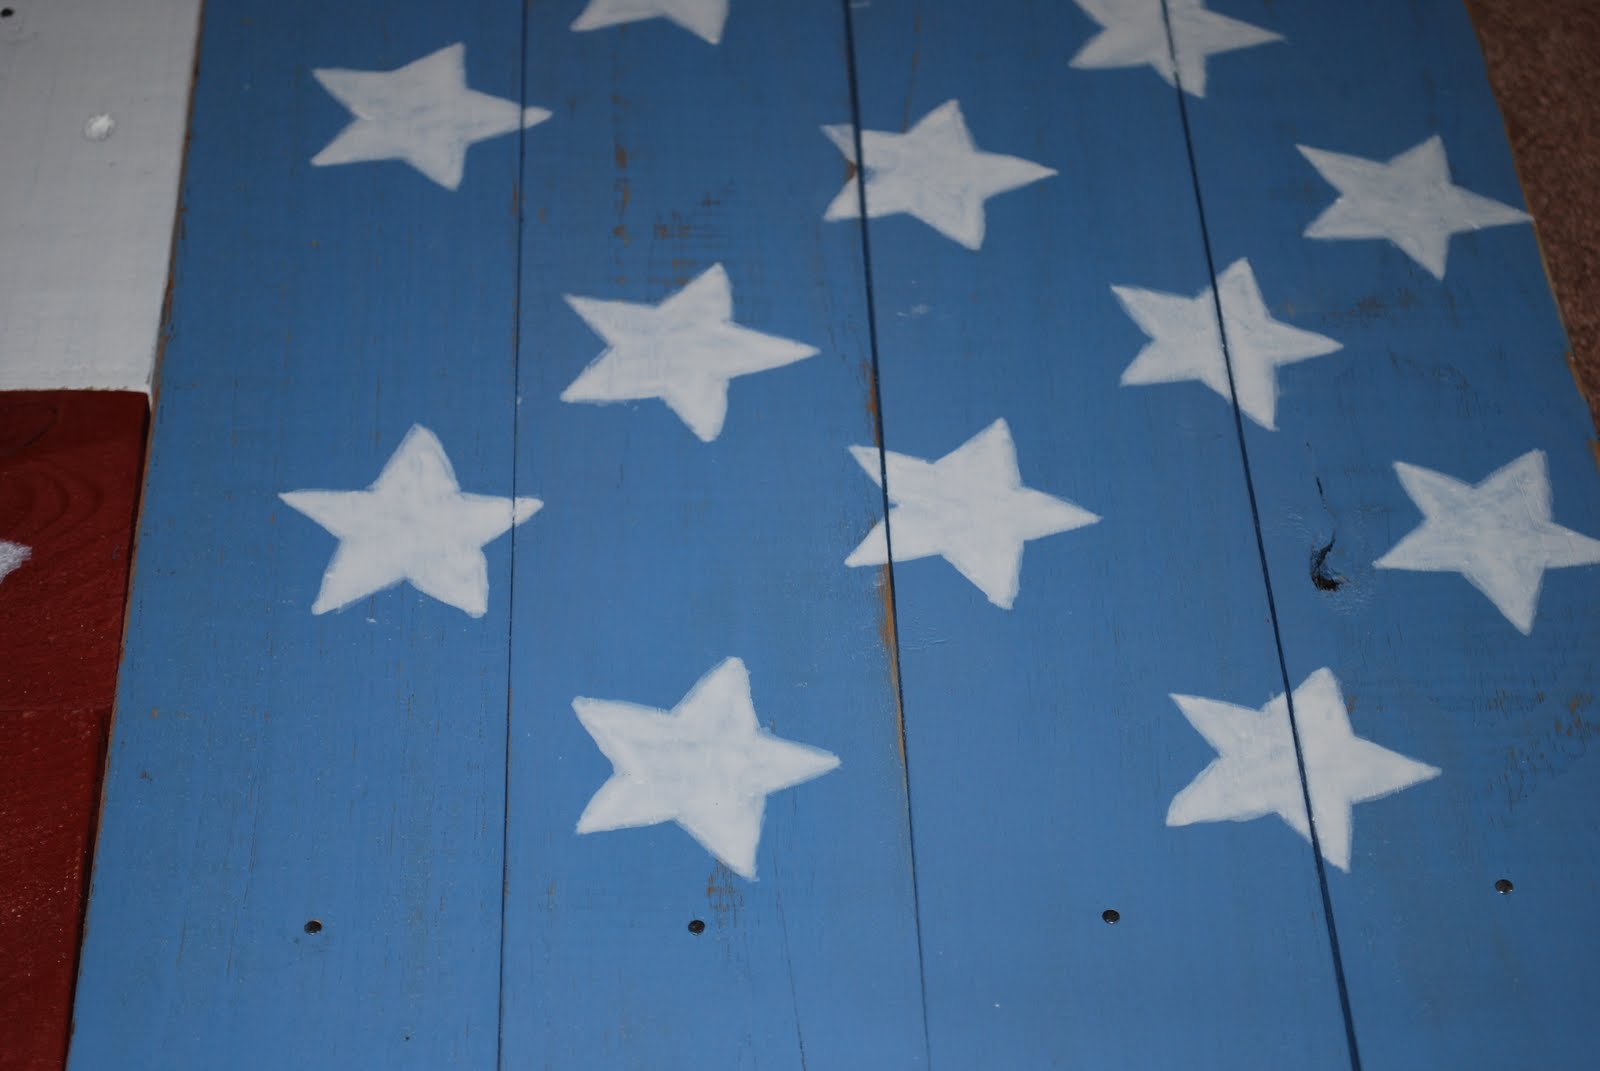
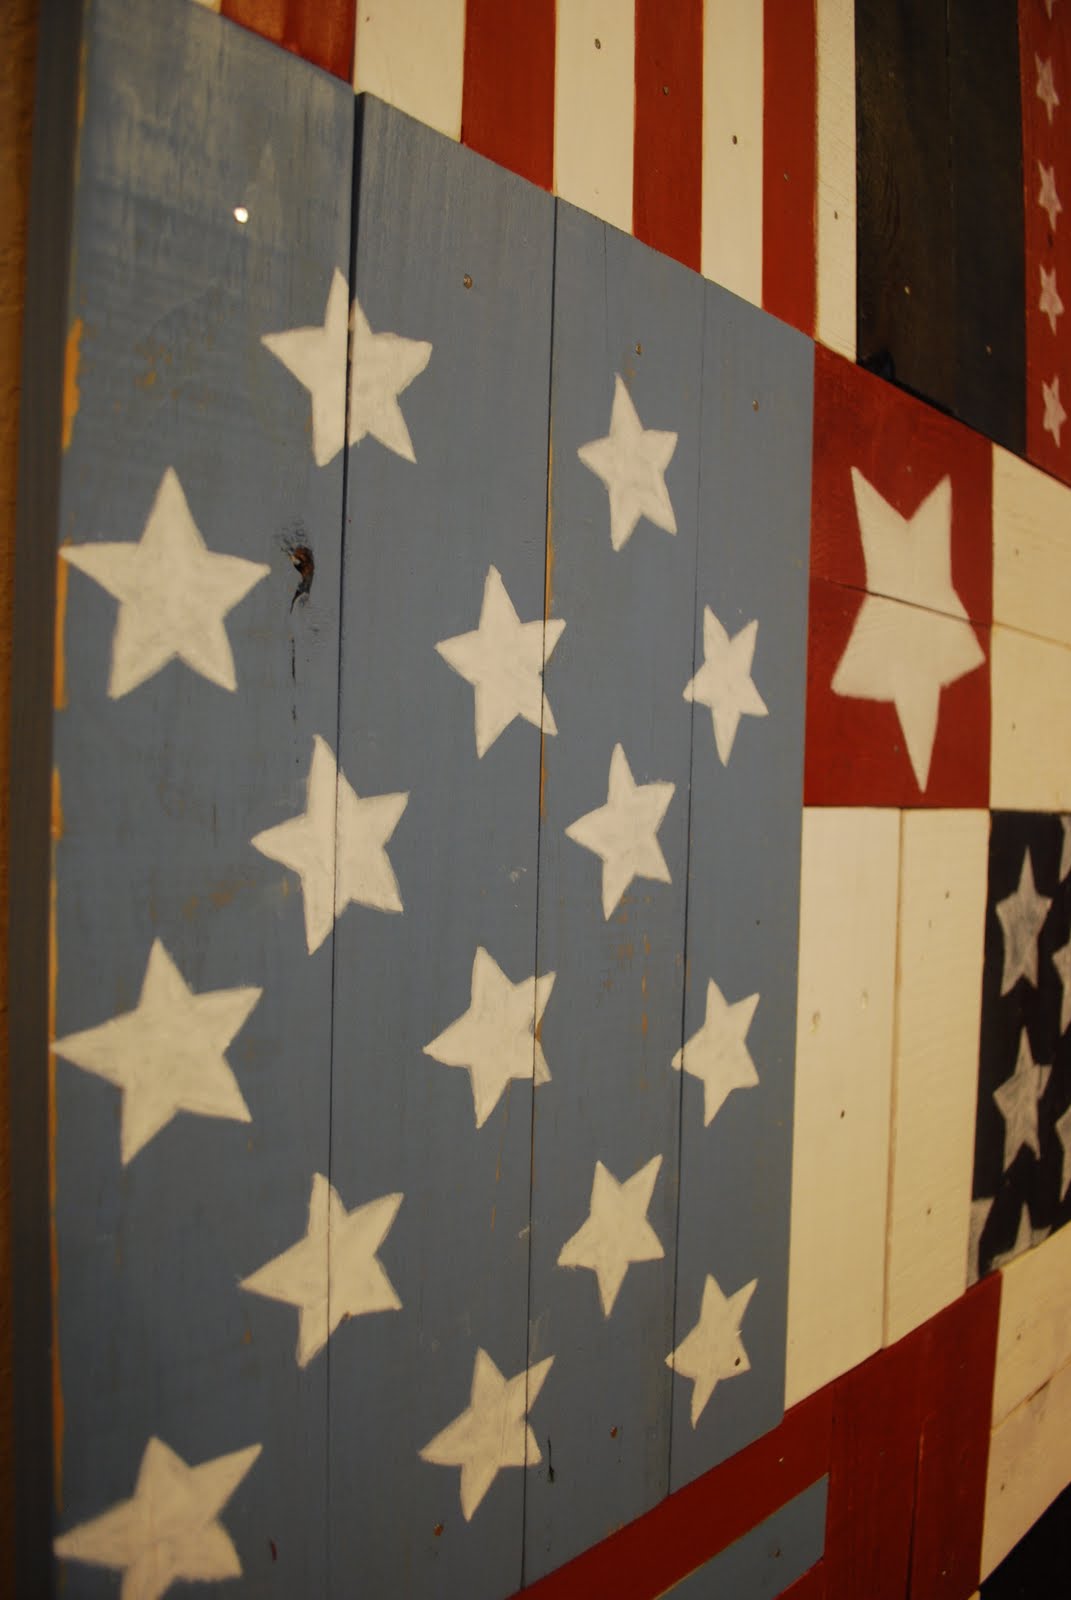
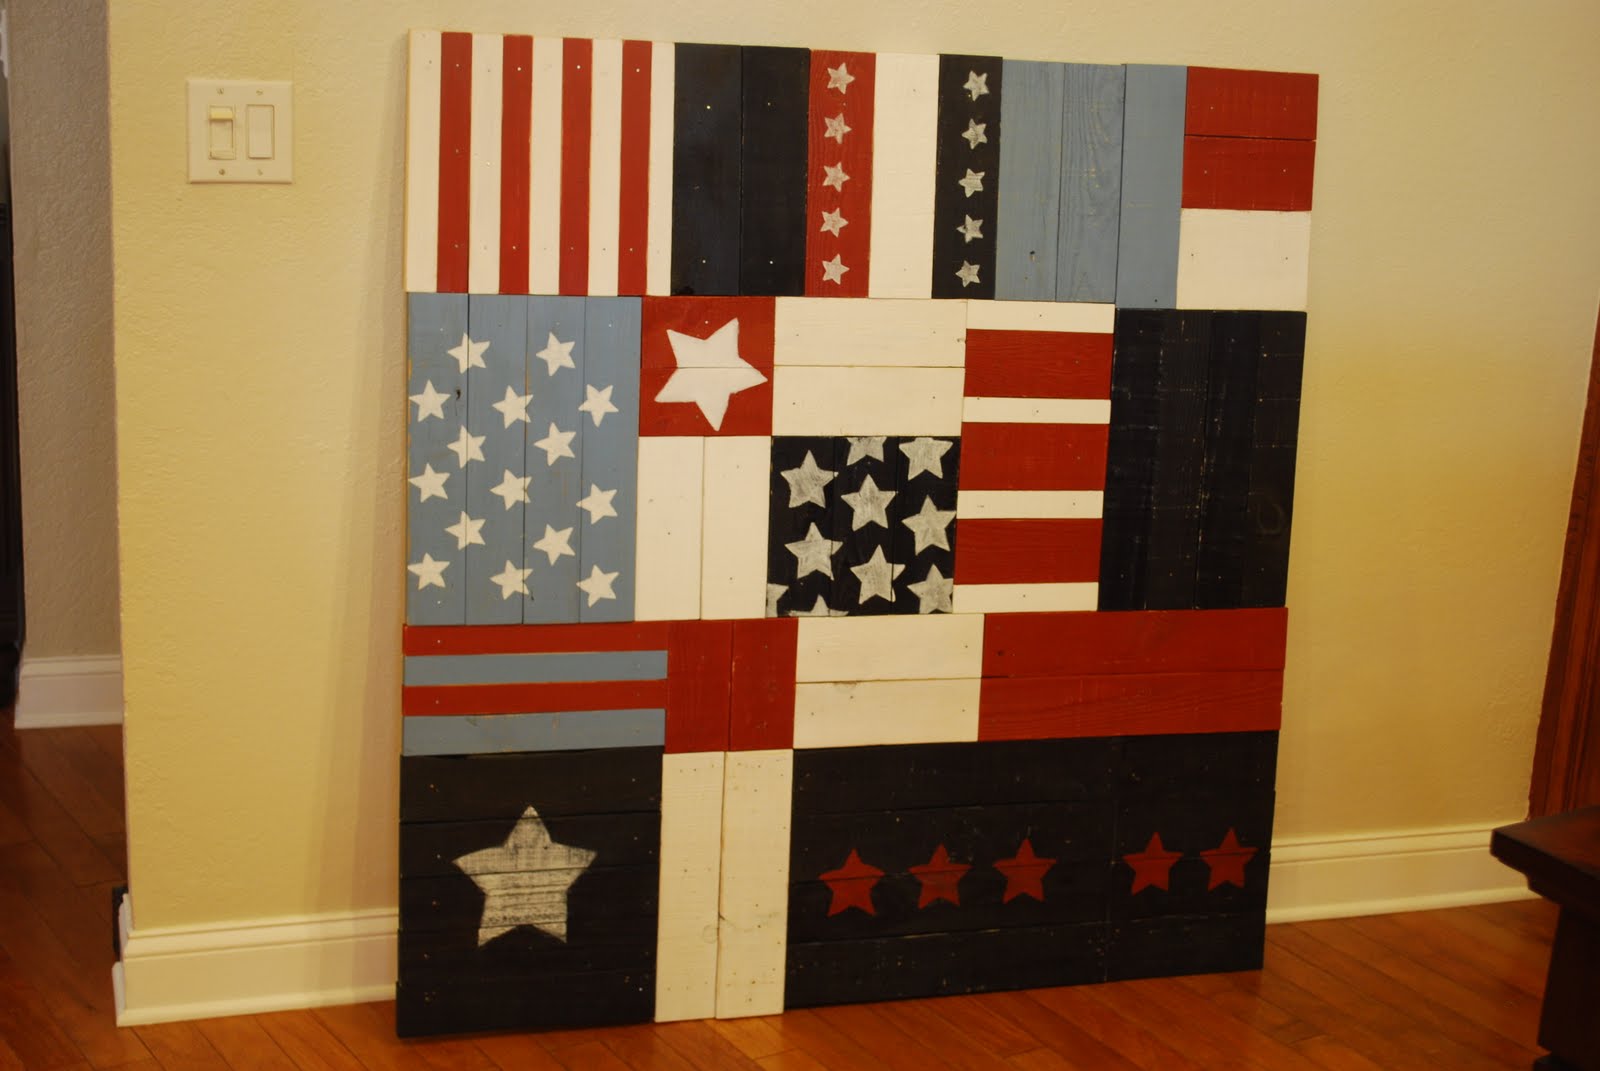
Community Brag Posts

Liberty Wall Art

Submitted by karahart on Wed, 05/11/2011 - 09:09

I built this after going dumpster diving for pallets. We went through and broke up all of the pallets and basically made this entire big piece for the cost of the stain, nails, and backing.

Estimated Cost
$30
Estimated Time Investment
Afternoon Project (3-6 Hours)
Finish Used
I used minwax's water based stain in red, white, and blue.
Recommended Skill Level
Starter Project

Farm House Table

Inspired by Ana and driven by a desperate desire to nest, I made this table in my first-trimester. We live at this table. It's where we eat, play, and craft. On special occasions we stand on top of it, and sometimes we even eat under it. We love the way it looks in our mid-century ranch house with modern chairs. Thank you, Ana!

Estimated Cost
$100
Estimated Time Investment
Week Long Project (20 Hours or More)
Finish Used
natural water-based poly
Recommended Skill Level
Beginner

Comments

Child Picnic Table

I modified this plan quite a bit. I chunked up all of the wood for a sturdier table. I also did braces on the underside of the table and benches so there would be no nail/screw holes on the top. For the D, I taped a chip-wood letter from Hobby Lobby to the wood while I burned over the entire top.

Built from Plan(s)
Estimated Cost
$20
Estimated Time Investment
Day Project (6-9 Hours)
Finish Used
Burned the wood and sealed with outdoor polyurethane.
Recommended Skill Level
Starter Project

Rustic X mixed with a Triple Truss Coffee Table

I considered myself pretty good at cutting and assembling, less when it comes too filling, sanding, and staining. I could not figure out the X for the life of me! Luckily I could figure out the Tuss table :D

Estimated Cost
$80-100
Estimated Time Investment
Afternoon Project (3-6 Hours)
Recommended Skill Level
Beginner

2x4 outdoor furniture collection

Submitted by Anonymous (not verified) on Mon, 04/11/2022 - 18:21

My husband made 4 pieces from the 2x4 outdoor collection. It was his first time doing a wood working project. The step by step plans made it easy and manageable!

Comments

Garden/Storage Shed

Submitted by Smokeydog on Mon, 08/03/2015 - 06:48

Building a storage shed was quite a jump for me but because of the confidence and experience I gained from Ana's  site I decided to give it a shot.  I acquired the plans online. It has 8 foot high walls and 3 feet of "attic space".  The shed is 8'x12'.  I used cement board lap siding.  It took about seven weeks to finish working a few hours here and there.  I really like it.  Even has a little window flower box.

Estimated Cost
2100.00
Estimated Time Investment
Week Long Project (20 Hours or More)
Finish Used
Benjamin Moore Paint
Recommended Skill Level
Intermediate

Comments

Kentwood Bookshelf

Submitted by worrow on Tue, 08/11/2015 - 17:33

I loved this from Ana's site so much we tacked one. Please note I glued, screwed and dowel ed the holes. I hate kreg jigs. We also made ours taller to add an extra shelf.

Estimated Cost
$90.

Provincial stain and triple coat poly
Estimated Time Investment
Weekend Project (10-20 Hours)
Finish Used
3m triple coat in 1 semi gloss not pictured. My image is stain at this point
Recommended Skill Level
Beginner

Comments

Pecan top dining table

this was the second table built using Anna's fancy x plan. The first used regular 2x6 pine boards for the top and was given to my son for a housewarming gift. This second I built for my wife and changed up the top by using 1x6 pecan we had milled and then I planed down myself. The outer edges were left with a live edge to give it more rustic character. I used slotted "L" shaped metal about 6" long to secure the top of the table to the supports underneath, to allow for any expansion in the boards. I recently made a new kitchen island to match.

Built from Plan(s)
Estimated Time Investment
Week Long Project (20 Hours or More)
Finish Used
Semi gloss black paint for legs and support. Minwax semigloss polyurethane on the top.
Recommended Skill Level
Intermediate

Comments

AlexO

Tue, 08/25/2015 - 16:53

I love working with Live edge stuff!  Not this talented though!  Very Nice

Fancy x farmhouse table... my version!

My version is a 7' table. I made the distance between legs 60" with a 8" overhang on each side. The stain is Olympic Driftwood. I also added 1 x 2 pcs on the ends for a more finished look & to secure the 2 x10's. One last thing, I used a router to round out all the outer edges of the table top and the legs.

Highly recommend....

I used some T braces/plates on the bottom of the table to connect legs with 60" pcs. Otherwise there is nothing to keep the legs square with the table.

Love the look...thanks so much for the plan!

Other notes: I used treated lumber so it's VERY heavy.

Built from Plan(s)
Estimated Cost
$130 ($100 lumber, $30 stain)
Estimated Time Investment
Day Project (6-9 Hours)
Finish Used
Olympic Driftwood
Recommended Skill Level
Intermediate

Comments

stepdiva

Sat, 08/30/2014 - 19:33

hi there..your table is great! can i ask if u think there is enough room at ends of table for a chair with the 8 inch overhangs that u did? i would like to do the same. thanks so much!!!
Tanya

Sliding Barn Door Loft Bed

Hi friends!

Jen Woodhouse here, super excited to share our latest DIY project with you - a Sliding Barn Door Loft Bed! We built this full-size loft bed for our 7-year-old daughter because we wanted to make the most of her small bedroom. And as an Army family, we move around every two years or so, so I drew up the plans so that the bed can be easily disassembled. We all love it so much and hope you do too! I'd love to see you build one for your kiddos (or yourself - no judgement!). Be sure to tag me @jenwoodhouse if you share photos of your build on social media!

And because some people have asked:

  • Our ceilings are 9 feet high.
  • Plans are for a full-size mattress, but I'll be drawing up plans for a twin size shortly.
  • Changing the sheets and making the bed is super easy because we use Beddy's (affiliate link) - Beddy's is an all-in-one fitted/flat sheet/blanket/comforter bedding set that zips up. It really is a game-changer!

Get all the details and the plans on JenWoodhouse.com!

Estimated Cost
$550
Estimated Time Investment
Week Long Project (20 Hours or More)
Finish Used
Benjamin Moore's Simply White latex paint, Varathane's Golden Oak wood stain, General Finishes Arm-R-Seal
Recommended Skill Level
Intermediate

Shanty Patriotic Square Planter

Submitted by Sue Hill on Sun, 05/20/2018 - 13:50

I loved the design of this planter and have been making wood quilts. This was a natural combination, incorporating a red, white & blue Americana quilt design into the front panel. The only modification I made was that the boards were 14" long instead of 15 3/4".  This way the 1x4 boards could create square sides. I also made the 2x2 corner posts 20" high.

Built from Plan(s)
Estimated Cost
$15.42 not including the paint.
Estimated Time Investment
Afternoon Project (3-6 Hours)
Finish Used
Rust-Oleum spray paint, I used painters tape to mark off the design for each color.
Recommended Skill Level
Beginner

Comments

Ana White

Tue, 06/05/2018 - 14:48

Love the paint on this planter!  Thanks so much for sharing a brag post, much appreciated! Ana

Seasonal And Holiday

Morgan's Farmhouse Bed

Both of my children have moved into new homes within the past year.  So it looks like I will be busy building things they need for them.  Enjoy being able to do this for them!  Thanks, Ana for the inspirations!

Built from Plan(s)
Estimated Cost
$160 to $200 which includes the bed rail brackets used for side rails and middle support.
Estimated Time Investment
Weekend Project (10-20 Hours)
Finish Used
A gray stain then flat white paint distressed then Glossy clear Acrylic coat
Recommended Skill Level
Intermediate

Comments

Easy Peasy Garage Shelves

Submitted by NickInHB on Mon, 09/07/2015 - 13:12

This was such an easy project to complete although it did take some time to measure and cut all the boards.  I could only transport 2x4s at 8' so after cutting the height to 6' for the braces I used the extra 2' for the shelf width.  The extra width really helped with some of my storage totes.  I made the first section at 5' in length to handle the heavier totes, and the second section I used the full 8' board with a brace in the middle.  I wish my garage was a little deeper to handle 16' of shelves as it would have saved me a good bit of time.  I'm also glad I have an extra ryobi battery to charge while I assemble.  Gotta love how fast those things charge.  Can't wait to try another one of your plans.

Estimated Cost
Around $130 from the Depot. 2x4 at 8' $2.73 a piece and two boxes of screws.
Estimated Time Investment
Day Project (6-9 Hours)
Finish Used
none
Recommended Skill Level
Beginner

Comments

alipettaway

Sun, 05/31/2020 - 22:32

Awesome job!! I’m wondering if plywood can be used for shelving instead of more 2x4s like on the non free standing garage shelves?

Craftsman playhouse - in shades of blue

Submitted by richsea on Sat, 06/11/2022 - 21:58

I’ve been working on building up to this playhouse for a while. Just got the doors on and am pretty pleased with what’s my first project of any size. Built on top of a modified version of the playhouse deck with a to be added (hopefully) swing in front. Color selection by the end customer (who’s 8). Modified to add 12 inches for a 5’ doorway. Thankfully I caught that at the last minute for the kiddo. Still a menace if I forget to duck. But super roomy once inside.

Comments

Seasonal And Holiday

Dining room buffet

Submitted by jwillo on Tue, 09/29/2015 - 19:49

This was my husband's and my second furniture build, and the first with doors! We went ahead and followed the dimensions in the instructions, and even with wood that was 3.5, we still had doors that were a little short. I figure it adds character. Hinges were a little difficult for us, as we are new to woodworking DIY projects, but I'm very happy with the final project. Edge banding, magnetic clasps, and stain throughout really makes it look like a nice, finished piece. Thanks, Ana!

A side note on timing, for us this was a long weekend project that took us in to the next week. For others, I am sure it could go much quicker. That time also included finishing.

Estimated Cost
$200, not counting the new nail gun we purchased. :-)
Estimated Time Investment
Week Long Project (20 Hours or More)
Finish Used
Minwax English Chestnut--one coat.
Recommended Skill Level
Intermediate

Comments

Hockey Equipment Stand

Submitted by Anonymous (not verified) on Sun, 09/18/2022 - 12:52

Ana, Thank you for the idea and plans. I made the stand a little taller and the base a little bigger to accommodate future growth of my Grandson. He loves it by the way.

Thanks again!

Built from Plan(s)

Comments

Farmhouse Table with Reclaimed Lumber Top

We found this beautifully chippy lumber on the side of the road and snagged it knowing it would make a perfect table top someday.  When I decided to build a table for our back patio makeover, I knew exactly what I had to make the top out of.  

This was my very first build and the pocket hole plans made it so much easier than I thought it would be!  I built the top first then modified the cut list dimensions based on the top.  I also flipped the ends around so the braces would show on the inside instead of the outside.  

I seriously can't get enough of the top, it's so pretty and I don't have to worry about it at all since it's already wonderfully rustic.  The table fits six chairs perfectly.  We are looking forward to having many evenings around this table with family and friends!

Estimated Cost
$100
Estimated Time Investment
Weekend Project (10-20 Hours)
Finish Used
On the base, I applied two coats of Sherwin-Williams' SuperDeck solid stain in "Caribou" then sealed it with Minwax Spar Urethane clear satin with a sprayer.

For the top, I sealed the underside with Thompson's Water Seal clear waterproofer, and have plans to seal the top with Miss Mustard Seed's Tough Coat Sealer (http://missmustardseed.com/2015/09/cleaning-sealing-chipping-antique-pieces/)
Recommended Skill Level
Beginner

Comments

Modern Outdoor Chair from 2x4s and 2x6s

Submitted by Anonymous (not verified) on Sun, 10/09/2022 - 10:11

My second project turned out nice. I built one chair to see if it was nice. Now I’m going to build a second used behr semi transparent chocolate stain. Cushions are temporary until we can find some that fit.

Comments

Rustic X Bookshelf--Short

I've loved the Rustic X series from the first plan (the console table) but none of them were things I needed for my home. So when I saw the Rustic X Tall Bookshelf I was thrilled since I have been needing a cookbook shelf in my kitchen, and had been trying to design my own using some form of the X construction. I still needed to customize it, but it was much easier to do from the existing plan. I made it half the height since I wanted it to be flush with my counter, and also wanted it narrower. I had leftover 1 x 12s from another project so I used those, and decided to make two Xs instead of one because of the narrower width. I cut the X's to fit, and used wood glue and 2" nails to secure them from the bottom. Perfect fit for my space!

Built from Plan(s)
Estimated Cost
$25 in new wood, plus leftovers for shelves
Estimated Time Investment
Weekend Project (10-20 Hours)
Finish Used
I used a technique for oxidizing wood which I read about at The Friendly Home. Hillary does a great detailed tutorial (http://thefriendlyhome.blogspot.ca/2012/07/how-to-oxidize-wood.html) on how to use tea, vinegar and steel wool to give new wood an aged weathered look. Cheap and beautiful! I will absolutely do it again! But it was a bit lighter than I wanted, so I used Minwax Polyshades in Tudor to darken them up and seal the wood.
Recommended Skill Level
Beginner

Comments