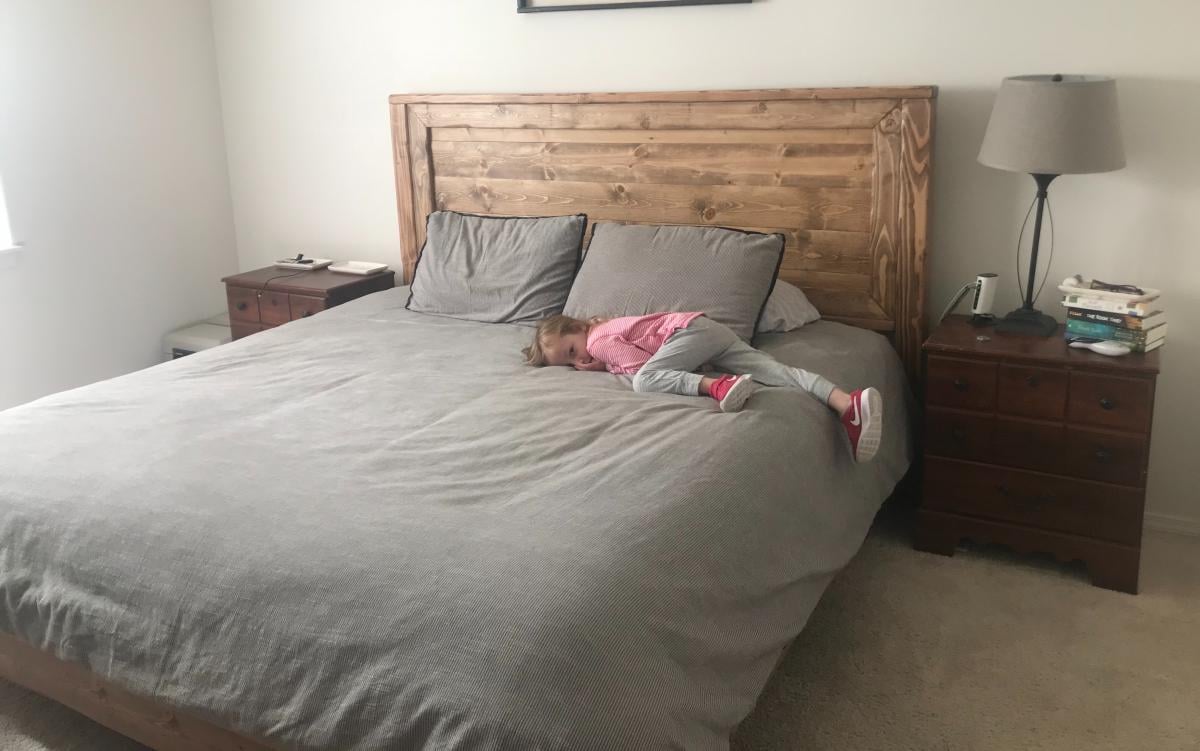
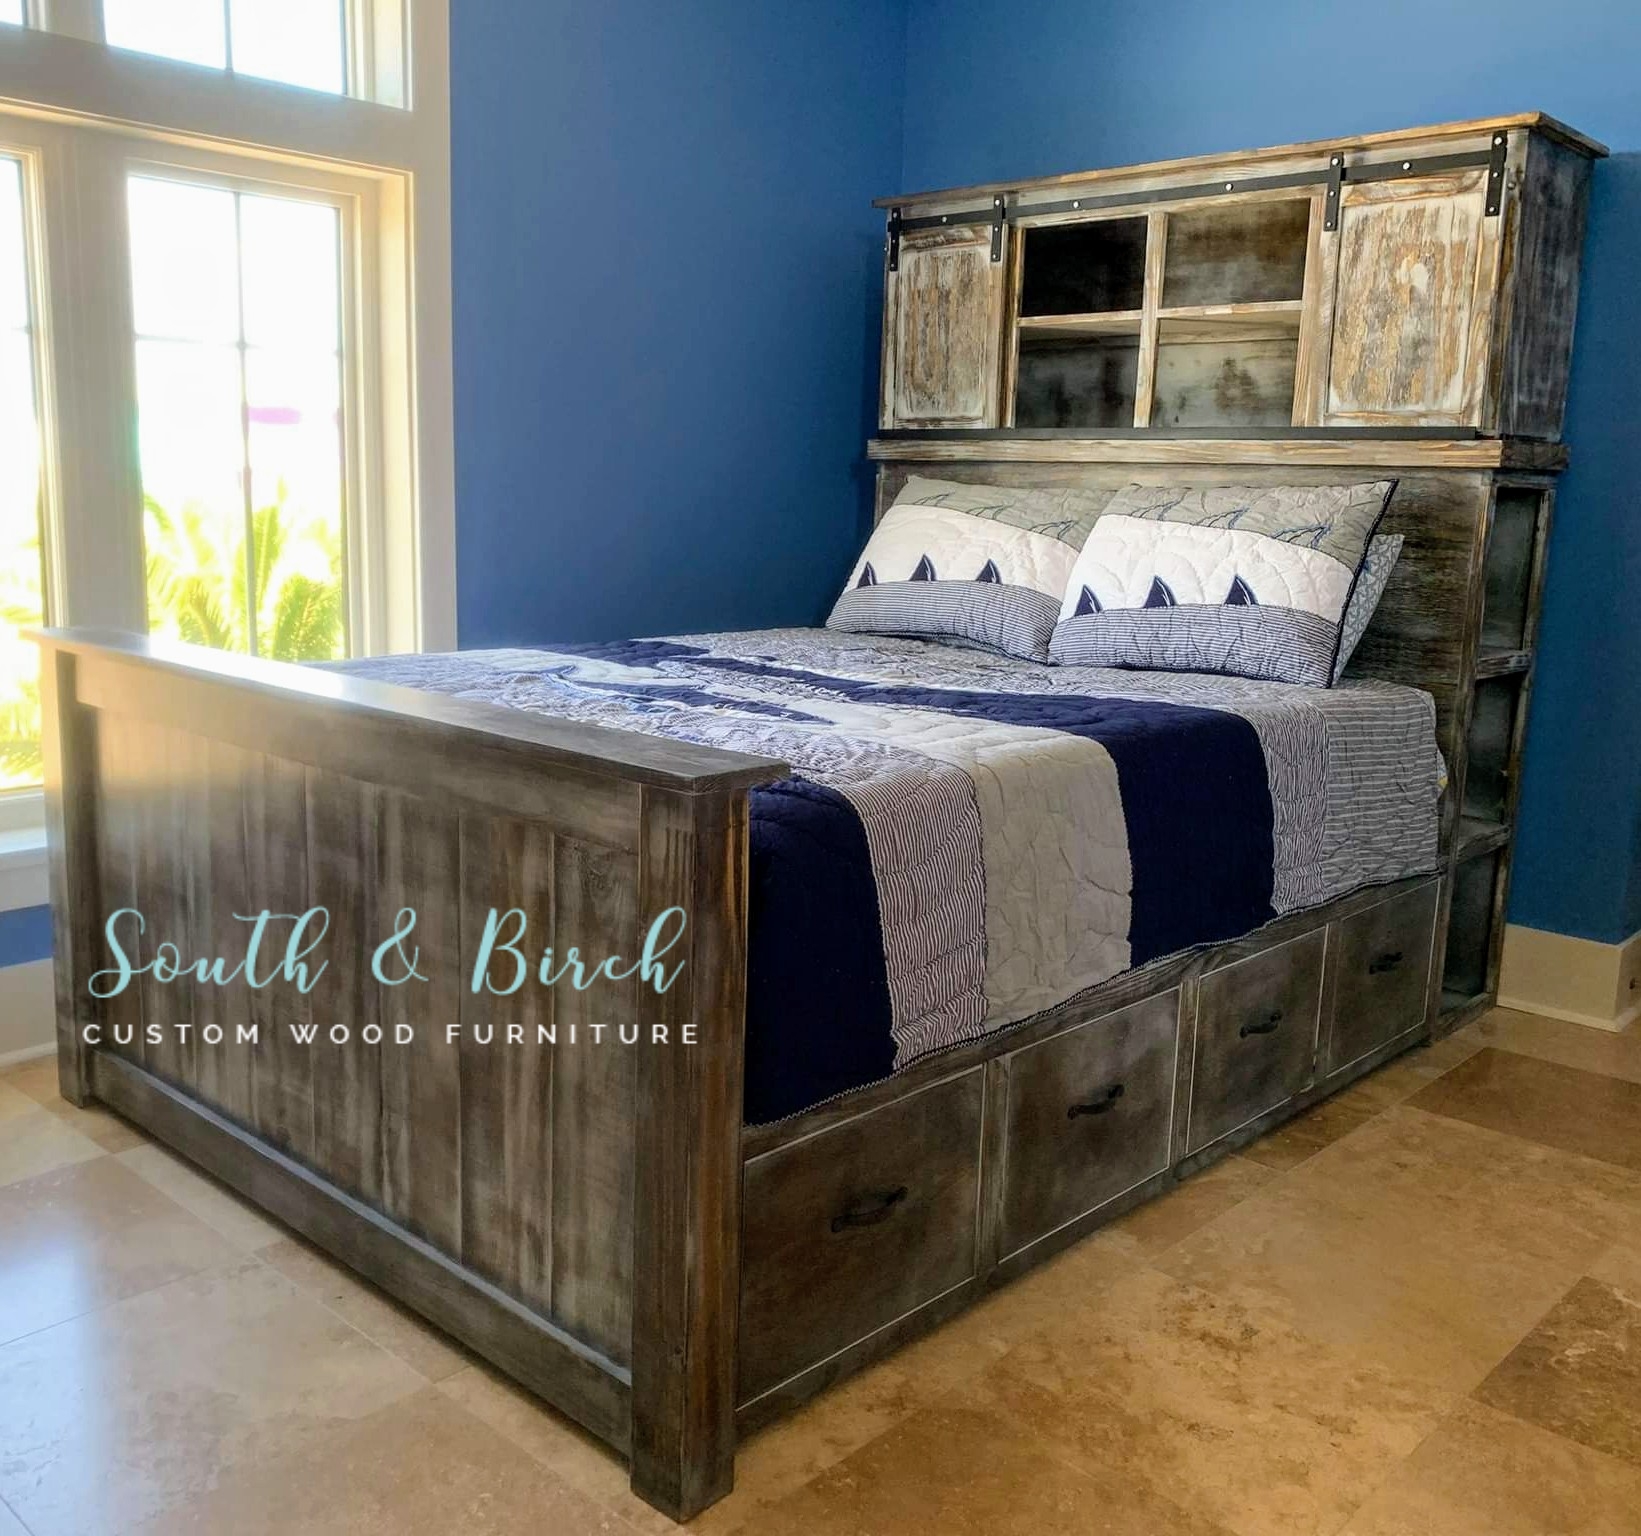
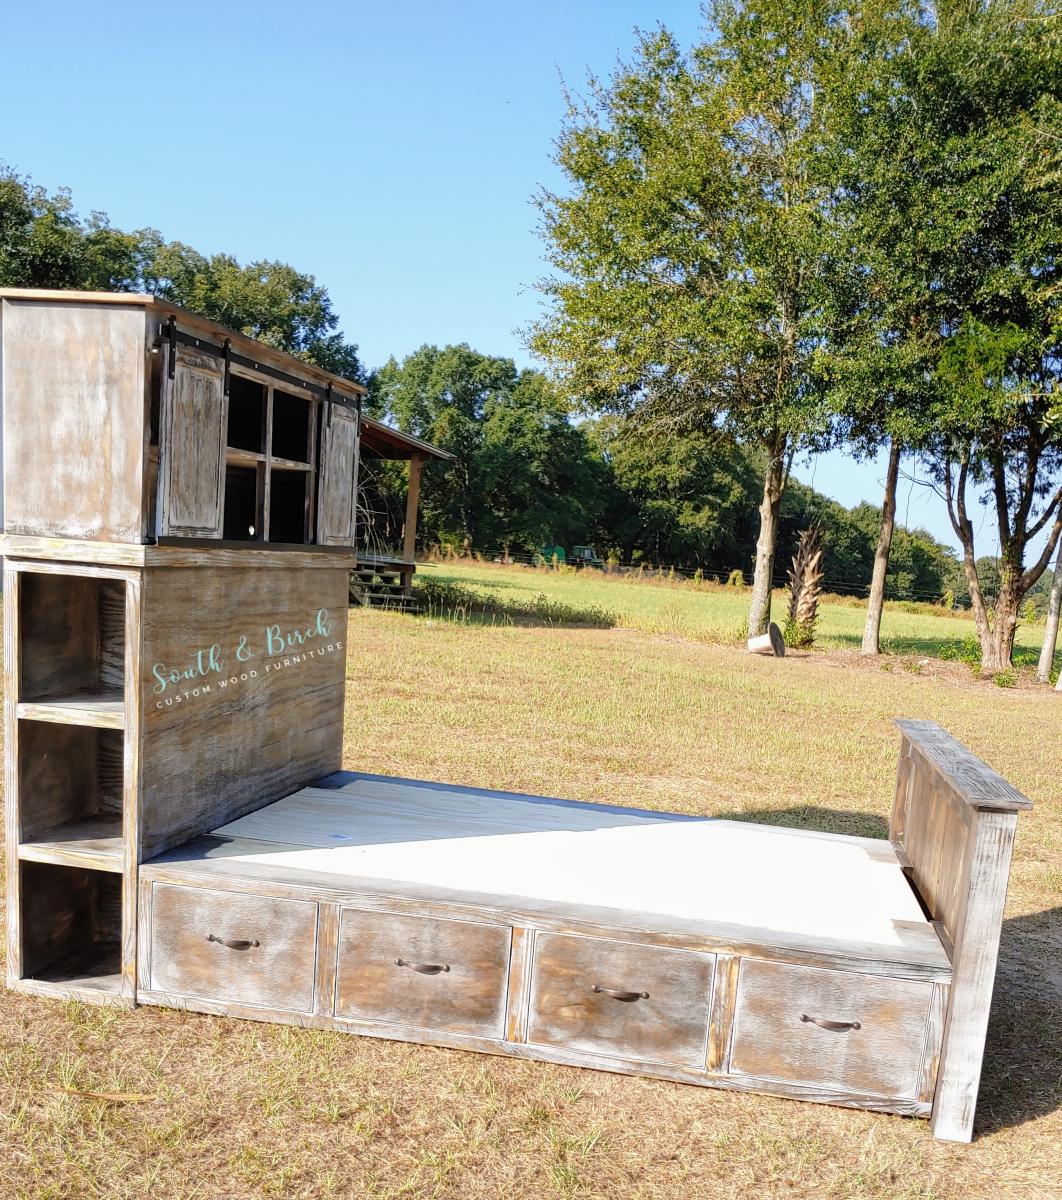
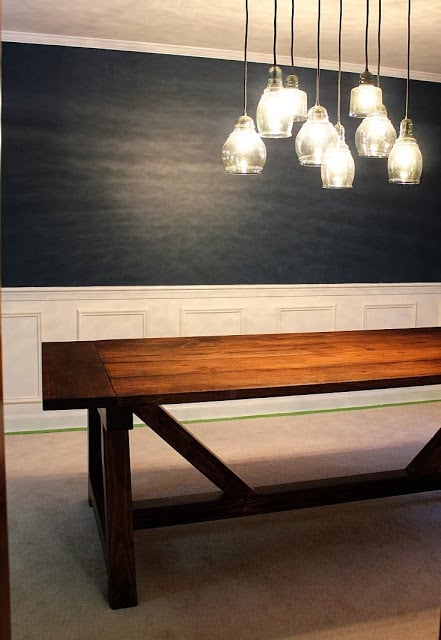
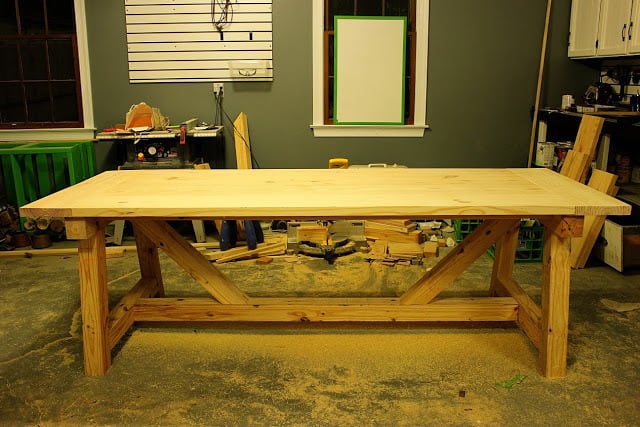
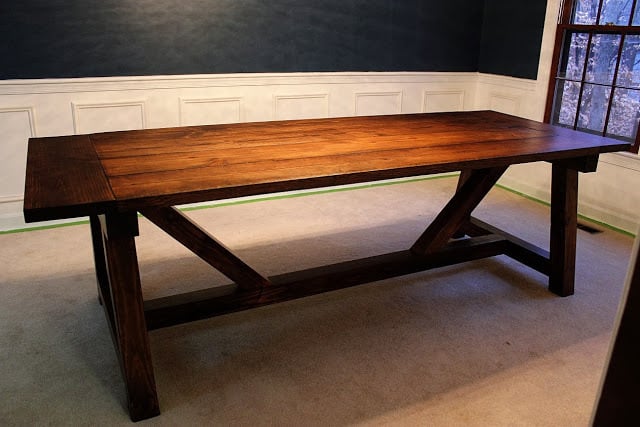
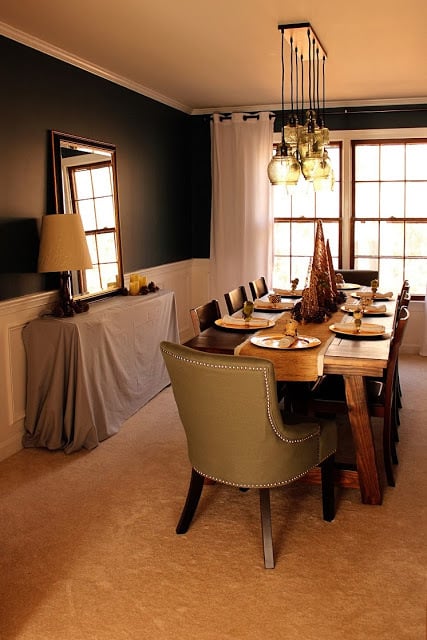
Community Brag Posts

New farmhouse bed

Submitted by Anonymous (not verified) on Thu, 10/03/2019 - 11:51

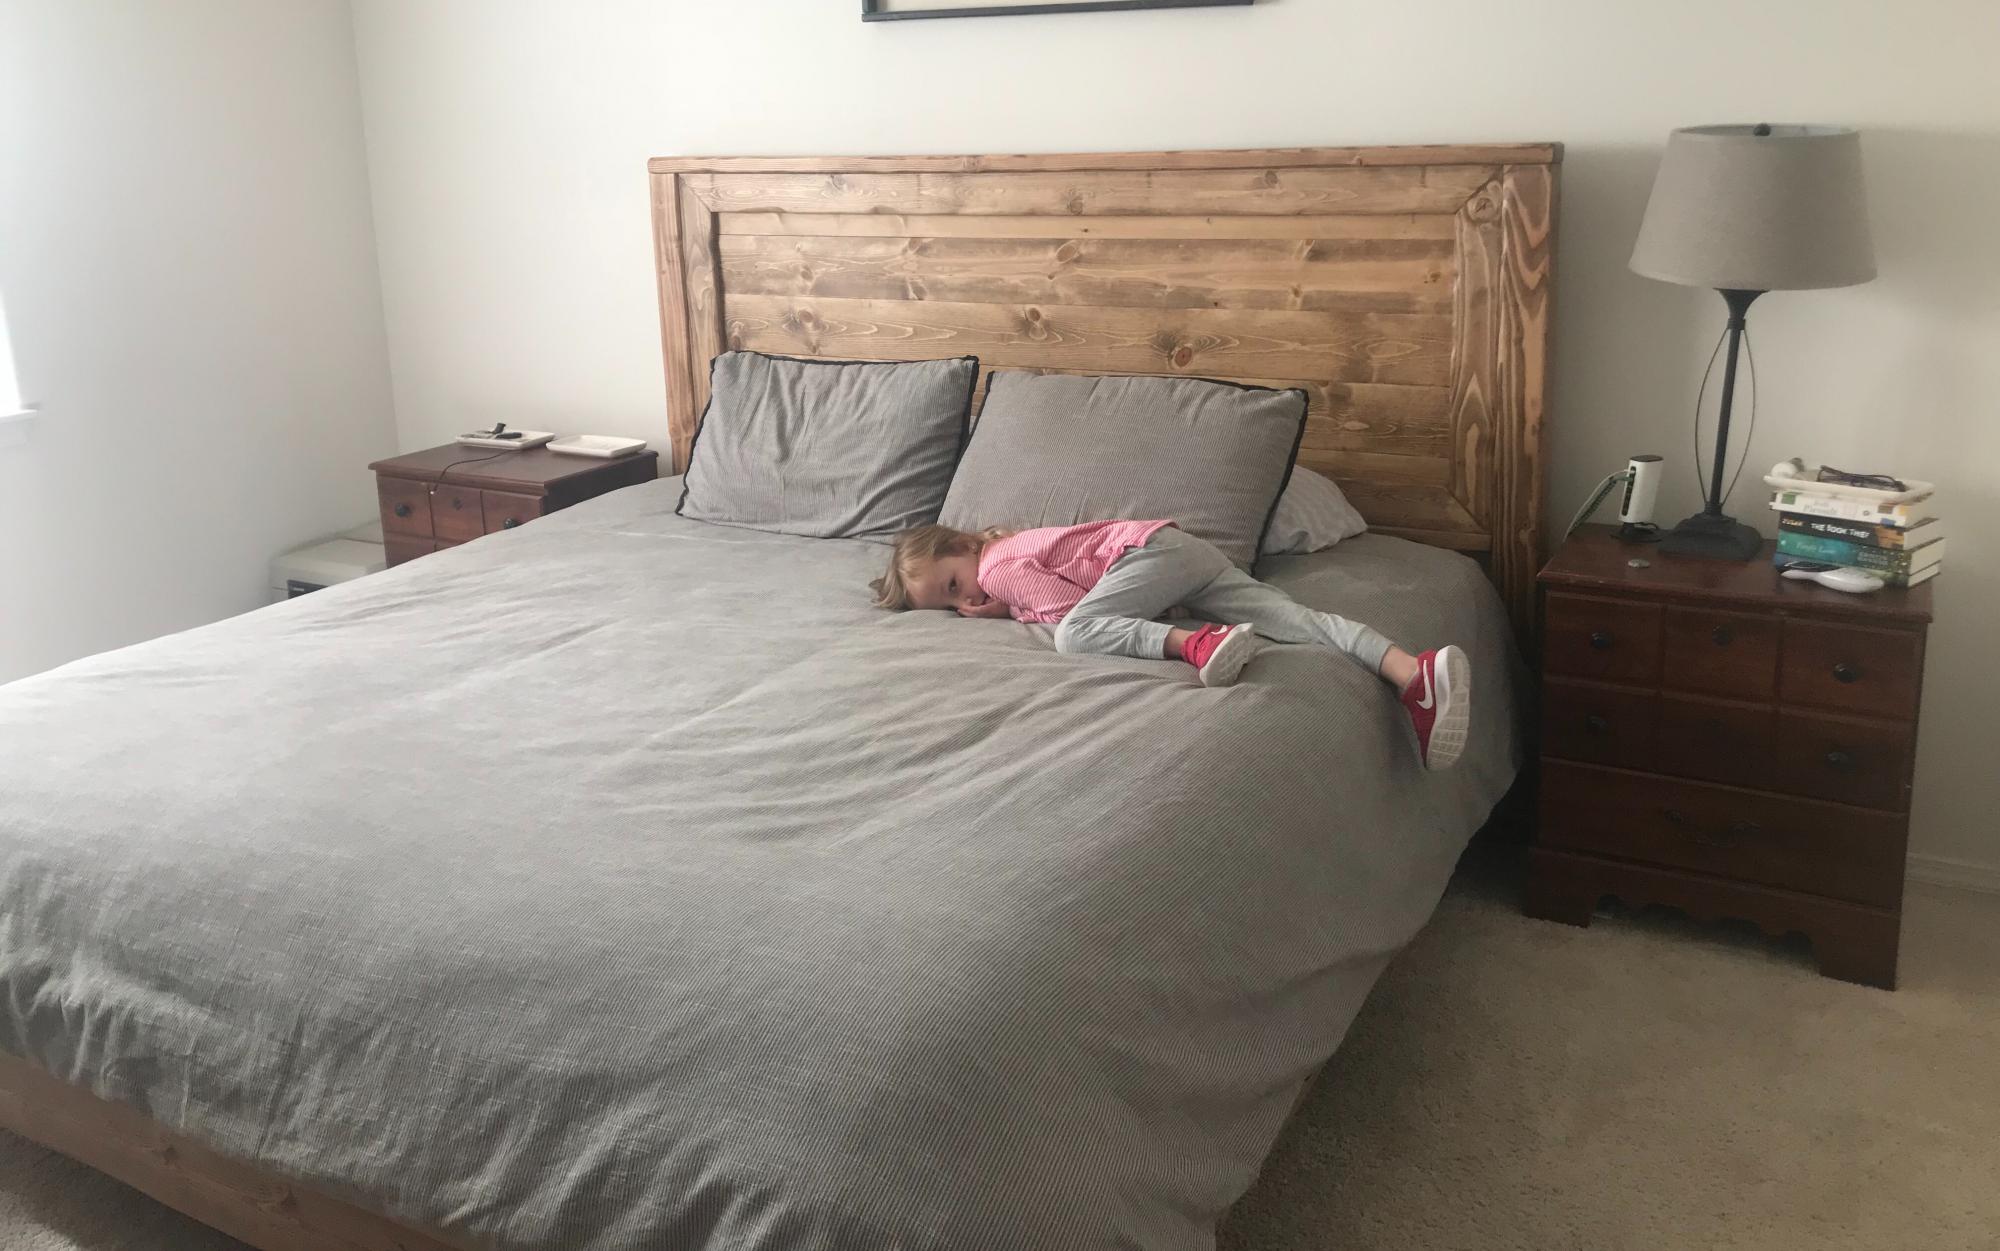
I needed to replace my bed quickly. I could not sleep in my old one anymore. Unfortunately I did not have the money to buy a new one so I turned to Ana white and a short time later I had a new bed and a fresh start. My kids and I love this bed. It’s hard to get them to sleep in their own beds now!

Built from Plan(s)
Estimated Cost
$200
Estimated Time Investment
Weekend Project (10-20 Hours)
Recommended Skill Level
Intermediate

Comments

4 sided picnic table

Submitted by Anonymous (not verified) on Fri, 06/16/2023 - 13:59

4 sides for the whole family to sit.

Built from Plan(s)

Comments

Seasonal And Holiday

Media Console

Submitted by Donnalu on Fri, 02/03/2012 - 17:54

Media Console--My first build! Read all about it at http://isthisloadbearing.com/2012/01/15/media-console/

Built from Plan(s)
Finish Used
Behr Swiss Coffee
Recommended Skill Level
Beginner

Comments

jfmiller17 (not verified)

Mon, 02/06/2012 - 13:31

The details really make the piece unique. The additions of the lattice panels and the legs look like simple additions, but they make a bigg difference. It looks great.

RandyE (not verified)

Mon, 04/09/2012 - 15:40

Did you follow Anna's plans for this? Some other comments on the plan had suggested the measurements were off. Did you find this was the case?

Thanks,
Randy

lizzlysamsinson

Mon, 05/06/2013 - 03:58

I like the idea you have in there. It is quite simple but it expresses such coolness and neatness to the place. Simplicity is beauty. It is better that you make your media console not occupied with a lot of stuff.

------------------------
dragon city hack

Simple Work Bench

Submitted by Medickep on Sat, 12/14/2013 - 21:50

This is my spin on the sturdy work bench. I needed some more work space for building projects and for a few tools I acquired. My main work bench always seems to be covered in stuff so the extra space is great!

The first one I made I matched the height of the rollers for my chop saw, so I would have room for longer pieces of wood. I also put it on casters, so I can roll it onto the driveway when do things that should be done outside! The second one is fixed at the same height!

I used 2x4's with MDF on the shelves. I covered the bottom shelf and top with masonite, so it could easily be replaced when it gets nasty!

Built from Plan(s)
Estimated Cost
40-50??? (extra for casters)
Estimated Time Investment
Afternoon Project (3-6 Hours)
Finish Used
None
Recommended Skill Level
Starter Project

Benchright Coffee Table

Submitted by brass2005 on Thu, 02/25/2016 - 19:27

This was my first build other than some outdoor chairs. I learned tons while building and I got to spend time with my sister doing it. Also learned about chalk paint and other finishes from big sis. 

Estimated Cost
$75 I used 1 4' x 8' sheet of pine cabinet plywood for everything but the top to bring the cost down from $150.
Estimated Time Investment
Weekend Project (10-20 Hours)
Finish Used
General finishes Georgian cherry gel stain. Blue coral chalk paint. minwax early American stain with general finishes gel topcoat for top.
Recommended Skill Level
Beginner

Comments

Grandy Barn Door Console Headboard with Farmhouse Storage Bed

This is a really cool build with a few of Ana's most popular builds combined!  I used the Grandy Barn Door Console plans and added the farmhouse storage bed plans for a stunning bed with plenty of storage!

Estimated Cost
$600
Estimated Time Investment
Week Long Project (20 Hours or More)
Finish Used
This is a custom stain I create. I start with a layer of Minwax Dark Walnut. Allow 48 hours to dry. Apply Minwax Whitewash Pickling with a rag. It will streak but that's ok! After allowing 24 hours to dry sand down to desired distressing.
Recommended Skill Level
Intermediate

Comments

LEMONADE STAND

Submitted by Anonymous (not verified) on Fri, 06/23/2023 - 15:09

My granddaughters took this home today and had a sale right away. SO MUCH fun to build this for them! Can’t wait to start another project! Thank you Ana!!!

Built from Plan(s)

Comments

Modified Fiona Chair, we call it a Nintendo Chair

Submitted by angiemicn on Wed, 02/08/2012 - 01:36

Started out making the Fiona Adironback doll chair, and when my niece saw it in this state, she dramatically screamed, STOP! she's 8, lol. She brought it in to the house, sat her doll in it next to her game chair, gave her dolly the game controller, and began to play 2 player Nintendo, Wii, and xbox.
I've built 5 of these, all for friends of hers, who see her and Sarina (her Doll) playing video games together.

Built from Plan(s)
Estimated Cost
20
Estimated Time Investment
Afternoon Project (3-6 Hours)
Finish Used
sanded and sprayed with clear polyurethane to protect it in case dolly spills her drink
Recommended Skill Level
Beginner

Plant Stand with Casters

I have 3 very large house plants that are a pain to move, say when you want to put your Christmas tree up in your largest window, which is usually where they sit. Two of them are so large that I cannot move them without fear of hurting myself or my house, so I decided to build my own flower pot stands with casters.

I used one 1x3x8 and one 1x2x8 of yellow, 5 1x3 cut to 18in. and 4 1x2 cut to 18in.

When she was all put together, I applied Minwax's Golden Pecan with 2 coats of Polyurethane to seal it from any water mishaps. I struggled between just sealing it and adding a little color with the stain. I think the Golden Pecan did the trick, highlighting the pretty wood grains of the top pieces, even though my big ol' pot will cover up most of it.

More pictures and a tutorial are available on my blog.

Estimated Cost
$15-20
Estimated Time Investment
Afternoon Project (3-6 Hours)
Finish Used
Golden Pecan, 2 coats of Polyurethane
Recommended Skill Level
Beginner

Great Plan & just what I had been looking for

Very small kitchen with extremely limited storage. I made this taller than the plan at 48" and narrower at 23-1/2" to fit the available wall space. I added one extra shelf and left off the overhang from the top. As you can see from the photo, there isn't room for an overhang. I plan to put cup hooks under the bottom shelf.

Shelf space is 12" for the top two and 8-1/4" for the bottom ones.


Next project; a trash cabinet to sit on the floor underneath the plate rack and look like a mini Welsh Dresser  :)

Built from Plan(s)
Estimated Cost
$16 including stain, screws, nails and sandpaper. (I already had the stain and this used maybe 4oz)
Estimated Time Investment
An Hour or Two (0-2 Hours)
Finish Used
Minwax Classic Grey, no pre-conditioner, rubbed off and blended after 5 minutes.
Recommended Skill Level
Beginner

Coffee table and console table

Submitted by Anonymous (not verified) on Mon, 10/07/2019 - 14:07

Made for daughter from your plans,made console longer and a little higher.

Estimated Cost
$80 for coffee table,$60 for console table
Estimated Time Investment
Weekend Project (10-20 Hours)
Finish Used
VarathaneBriarsmoke and wax Cloth application one coat then finishing wax
Recommended Skill Level
Beginner

Repurposed Demolition Trunk

I had an old chest I had gotten from the Army many years ago that was used to pack explosives. I had been using it to store some tools until I built a new tool shed. I went ahead and power washed it and then stripped it. I gave it a good sanding and then applied 2 coats of Minwax Antique Maple gel stain. I then top coated it with 2 coats of Minwax fast drying polyurethane. It turned out better than I expected. One of my sons uses it to store his book bags from school.

Estimated Cost
$30
Estimated Time Investment
Weekend Project (10-20 Hours)
Finish Used
2 coats of Minwax Antique Maple stain. 2 coats of Minwax fast drying polyurethane. I applied the stain with a brush. After 15 minutes I wiped it with a cotton cloth. The poly was applied with a brush. I used 320 grit sandpaper between coats. I stripped the old paint off with a cheap paint and varnish remover I purchased at Walmart. I did have to power wash it first because it had quite a bit of oil/grease that was in the wood. I dried the trunk by placing an electric heater next to it over night.
Recommended Skill Level
Starter Project

Comments

missinfwb

Thu, 03/01/2012 - 02:28

Just wondering, I always use 3 coats of Minwax fast drying polyurethane on my furniture builds or refinishes. The trouble that I have is the lingering odor. I recently built my son a bed and then finished it and he cant stand the smell and refuses to sleep in it and it has been about 2 weeks or more. Any ideas on how to get rid of the smell quicker. Everything that I have read says it just takes time but surely there has to be a quicker way!! Any suggestions from anyone would be greatly appreciated.

claydowling

Thu, 03/01/2012 - 06:39

At least, that would be my suggestion for him. The smell will dissipate when the smell dissipates, and that's all you can do. You can speed that if the bed is stored in a very well ventilated space for a while, but it's just a matter of the urethane needing to fully cure. That manufacturer estimates four weeks for full cure.

Urethane has a distinctive smell. You can avoid it by using an acrylic finish instead (the water-borne finishes), but acrylic has its own smell that's probably equally offensive.

windjamer812

Sat, 03/10/2012 - 02:27

It does take a little time to cure and eliminate the odor. Any oil based finish; poly, paint, etc. does have a little stronger smell than water based. Try an open box of baking soda. An open window also works wonders. Ever notice how wonderful sheets smell whenever you dry them outside?

Mason Jar Centerpieces

Submitted by bludevil35 on Tue, 12/24/2013 - 05:55

We decided this year to make gifts for our family's Secret Santa!

Thanks again for the plans!

Built from Plan(s)
Estimated Cost
$4 for the handles
Estimated Time Investment
An Hour or Two (0-2 Hours)
Finish Used
2 coats of Minwax Dark Walnut
Recommended Skill Level
Starter Project

Pantry

Submitted by Anonymous (not verified) on Fri, 03/04/2016 - 19:17

I copied my design from another brag. 48" wide, 14" deep, and 76" tall.

Estimated Cost
$200
Finish Used
Jacobean stain
Satin polyurethane
Recommended Skill Level
Intermediate

Closet remodel Shelves

Submitted by Anonymous (not verified) on Sun, 10/13/2019 - 13:15

My master closet was a mess when I moved in and something needed to be done. I moved the doorway to create more space in my bedroom and closet. I found this lan and modified it try needs. It works great!!

Note: It is much cheaper to purchase the long pipes and have Home Depot cut them down to the right length.

Estimated Cost
150
Estimated Time Investment
Weekend Project (10-20 Hours)
Finish Used
Water based poly
Recommended Skill Level
Intermediate

Mimi’s Entryway Storage Bench&NarrowHall Tree Hutch

Submitted by Anonymous (not verified) on Tue, 07/04/2023 - 20:37

This was a two week project. The width was modified smaller than the plans. The panels on the bench were fitted into dado joints rather than inserting an entire panel on the inside. Also used pocket hole joints where some nails were suggested.
This was my first attempt at a project like this and turned out amazing. My wife loves it too.

Hudson Dresser

Submitted by ktrinity on Mon, 02/20/2012 - 15:04

Took us about three weeks mostly working on weekends. We could only work when our child was sleeping. A worth while project if you have the time, space and tools needed. It weighs a ton when done. Our higher cost is due to using a higher wood quality and $125 for the eight ball bearing drawer slides. All the plywood is birch, the top is an Aspen panel and the rest is select pine.

Built from Plan(s)
Estimated Cost
$500
Estimated Time Investment
Week Long Project (20 Hours or More)
Finish Used
Latex Paint
Recommended Skill Level
Advanced

Comments

KyleV (not verified)

Thu, 10/25/2012 - 11:44

I'm about to start building this and I was wondering how you installed the drawer slides.

Thanks!

Walnut Truss Beam Dining Table

Eight foot Truss Beam Table built out of pine, for about $250 for all of the lumber, pocket screws, stain and poly.

This was my second project, and I found it easier than the Benchright Coffee Table, except for the lifting of the wood. It was so heavy that I needed my husband's help to move the table top after it was pocket screwed together, and we waited until we brought the table inside to attach the base and the table top, due to weight and size.

More photos of the build process: http://thehandcraftedlife.blogspot.com/2013/11/dining-room-progress-diy…

Built from Plan(s)
Estimated Cost
$250
Estimated Time Investment
Weekend Project (10-20 Hours)
Finish Used
Rust-Oleum Ultimate Wood Stain in Dark Walnut (one coat, left on for 5 minutes before removing) + Rust-Oleum Ultimate Polyurethane in Satin (2 coats). Looks nice with a little Old English every once in a while.
Recommended Skill Level
Beginner

Comments

Rebecca.Marie

Sun, 01/25/2015 - 16:26

Gorgeous table, and it's now on my to-do list for this summer, but I also love the light fixture! Was this a DIY project as well? I've seen plenty of similar projects using mason jars but I much prefer the variety and shape of the glass covers used in this piece, are they upcycled? Any details I can get would be appreciated!

Back