Adirondack chairs
Super easy to follow your plans. Had to modify a bit as lumber yard was out of 1x10s.
Piece of cake compared to building the table. Added hardware and stain, just have to put on the finish.
Sun, 12/30/2012 - 06:51
That looks great! I want to make this bench very soon then also make the matching table... where did you get the hardware for it? Thanks!
This is a loft style bunk bed. the original plan has the bottom mattress resting on the floor. instead of leaving the mattress on the floor we raised it up to the level of the bottom ladder. In the original plan the bed frame is only 48" high and we changed it to 58".
This was my first "major" furntiure project. I used the plans and modified for a 36" fireplace insert.
Thrilled with how this turned out!!! Thank you!
Very easy to follow plans and I cut then down for shallow shelves.
Play Deck and Swing
Wed, 09/03/2014 - 07:35
You have a BEAUTIFUL view from your yard! Just curious, where do you live? I assumed somewhere in Europe due to the currency. The play area looks fantastic. What lucky kiddos!
Wed, 09/03/2014 - 08:21
Thanks. Lovely part of the country outside Omagh, Northern Ireland
A couple of years ago I built the farmhouse dining table with matching bench, so when I showed my wife a picture of the Corona Coffee Table, she was all about it. I lengthened the coffee table by about 6"-8" inches to fit our space better. The entire table is yellow pine. I used 2x6 for the top. Ordered the legs from Osborne, $30 each plus shipping (searched for other supplier to compare pricing, but had no luck finding that leg anywhere else). For aprons I used 1x4. Instead of plywood for the base I used 1x4 furring boards (the furring boards were only aprox. $1.50 each for 1"x4"x6', and they had rounded edges which helped add more texture when completed). For the middle and end pieces of the base I use 1x6. Assembly was completed using wood glue and the Kreg Jig for pocket holes. Top was stained using an old t-shirt with aprox. 5 coats of Early American stain, 2 coats of Jacobean, then 2 coats semi-gloss poly spray. Base finished with 2 coats of Spa White by Amy Howard chalk paint (Annie Sloan competitor sold at Ace Hardware, seems to work the same, still costs around $30+ per quart). At this point my wife took over. She roughed up the base with my sander, applied the clear wax that protects the chalk paint, then she went back over the sanded edges with brown wax to complete the aging.
Ana doesn’t have a plan for a catio but she does for a playhouse and a cedar shed made from 2x2’s. I sort of combined my knowledge from making her plans over the last 10 years and came up with this for my cats. It was fun to make!! My baby kitten is loving it. I used garden fencing and stapled it to the outside and pocket holes for the walls. I made each wall individually like the playhouse then connected them once in place.
Wed, 06/09/2021 - 12:36
Thank you for sharing! My daughter wants a cat for her birthday but it can't be inside due to our son's allergies. Roaming outside isn't really an option because we have coyotes. We are going to use one of these in combination with an underground electric fence.
So I bought this print, sized 16" x 20", from an independent photographer. My husband said I could get it only if I built the frame, so I was on the hook.
I used pine boards and glued and clamped the outside part since I don't have a nail gun. I sanded the really rought parts, but probably could've sanded more. Finished with Valspar's black spray paint and used mirror clips and 1" wood screws. Blue had glass pieces in 16" x 20" for less than $6. Hung with D rings and picture hanging wire.
Time estimate includes time for paint to dry and rigging up all the hanging hardware.
I used the Seaten Console Plan as the basis for this project. I made the legs longer to raise the desk up to the height of a computer desk. I also added extra sections to the top to proved extra storage areas for books, etc.
Sat, 09/06/2014 - 18:30
Did you build this to be the height of a standing desk? It looks great either way! I am looking for a good plan to modify. I like the staging of Ana's website on the monitors. :)
Sun, 09/07/2014 - 08:26
No, it is still a regular height desk. The legs are actually 28 1/4 inches. This makes the desk right at 29 inches. I set the monitors up on the top because I like them a little higher and it frees up the desk space. It makes them comfortable viewing for me. I appreciate your nice comments. If you want a nice but simple desk, this is the perfect plan. I started building this one right after I saw it on the site.
Thanks for the plans! This dollhouse is great, my daughter loves it. I changed the plans slightly to make an 'open floor plan on the bottom and added a column in the front for support.
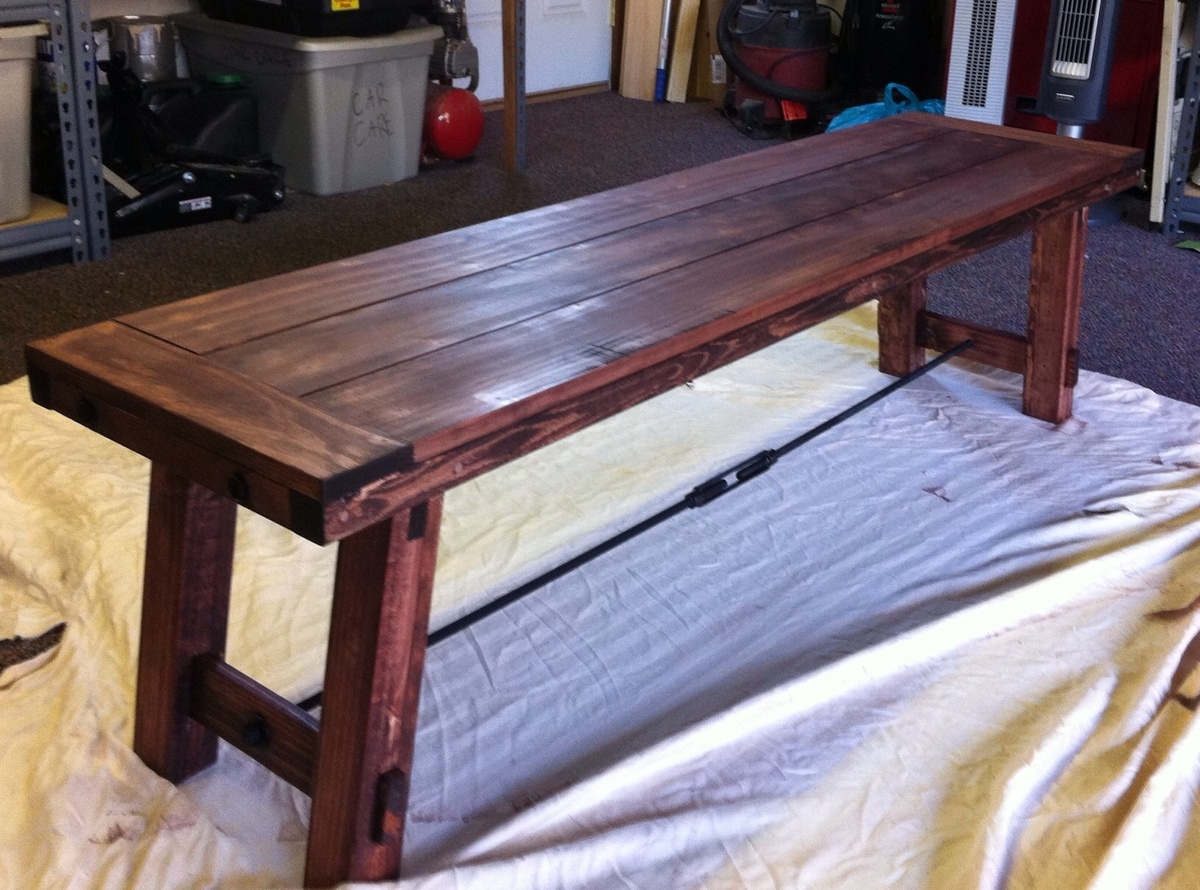
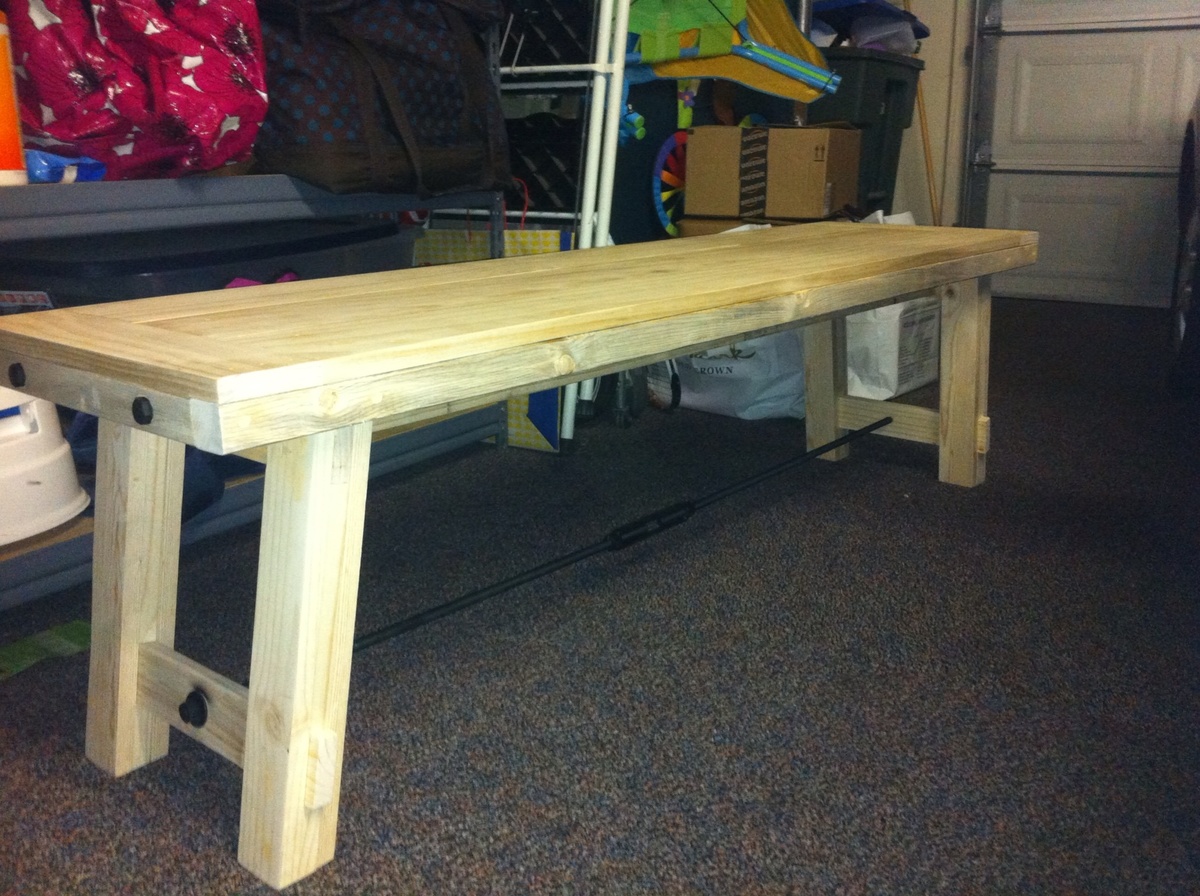
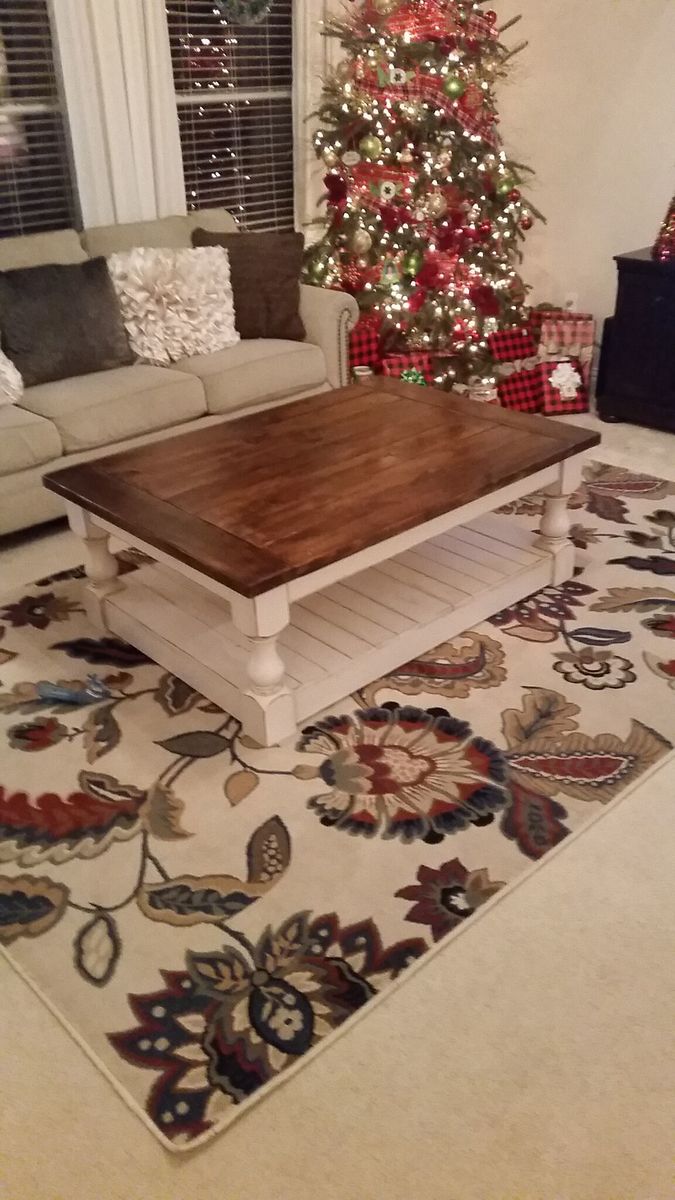
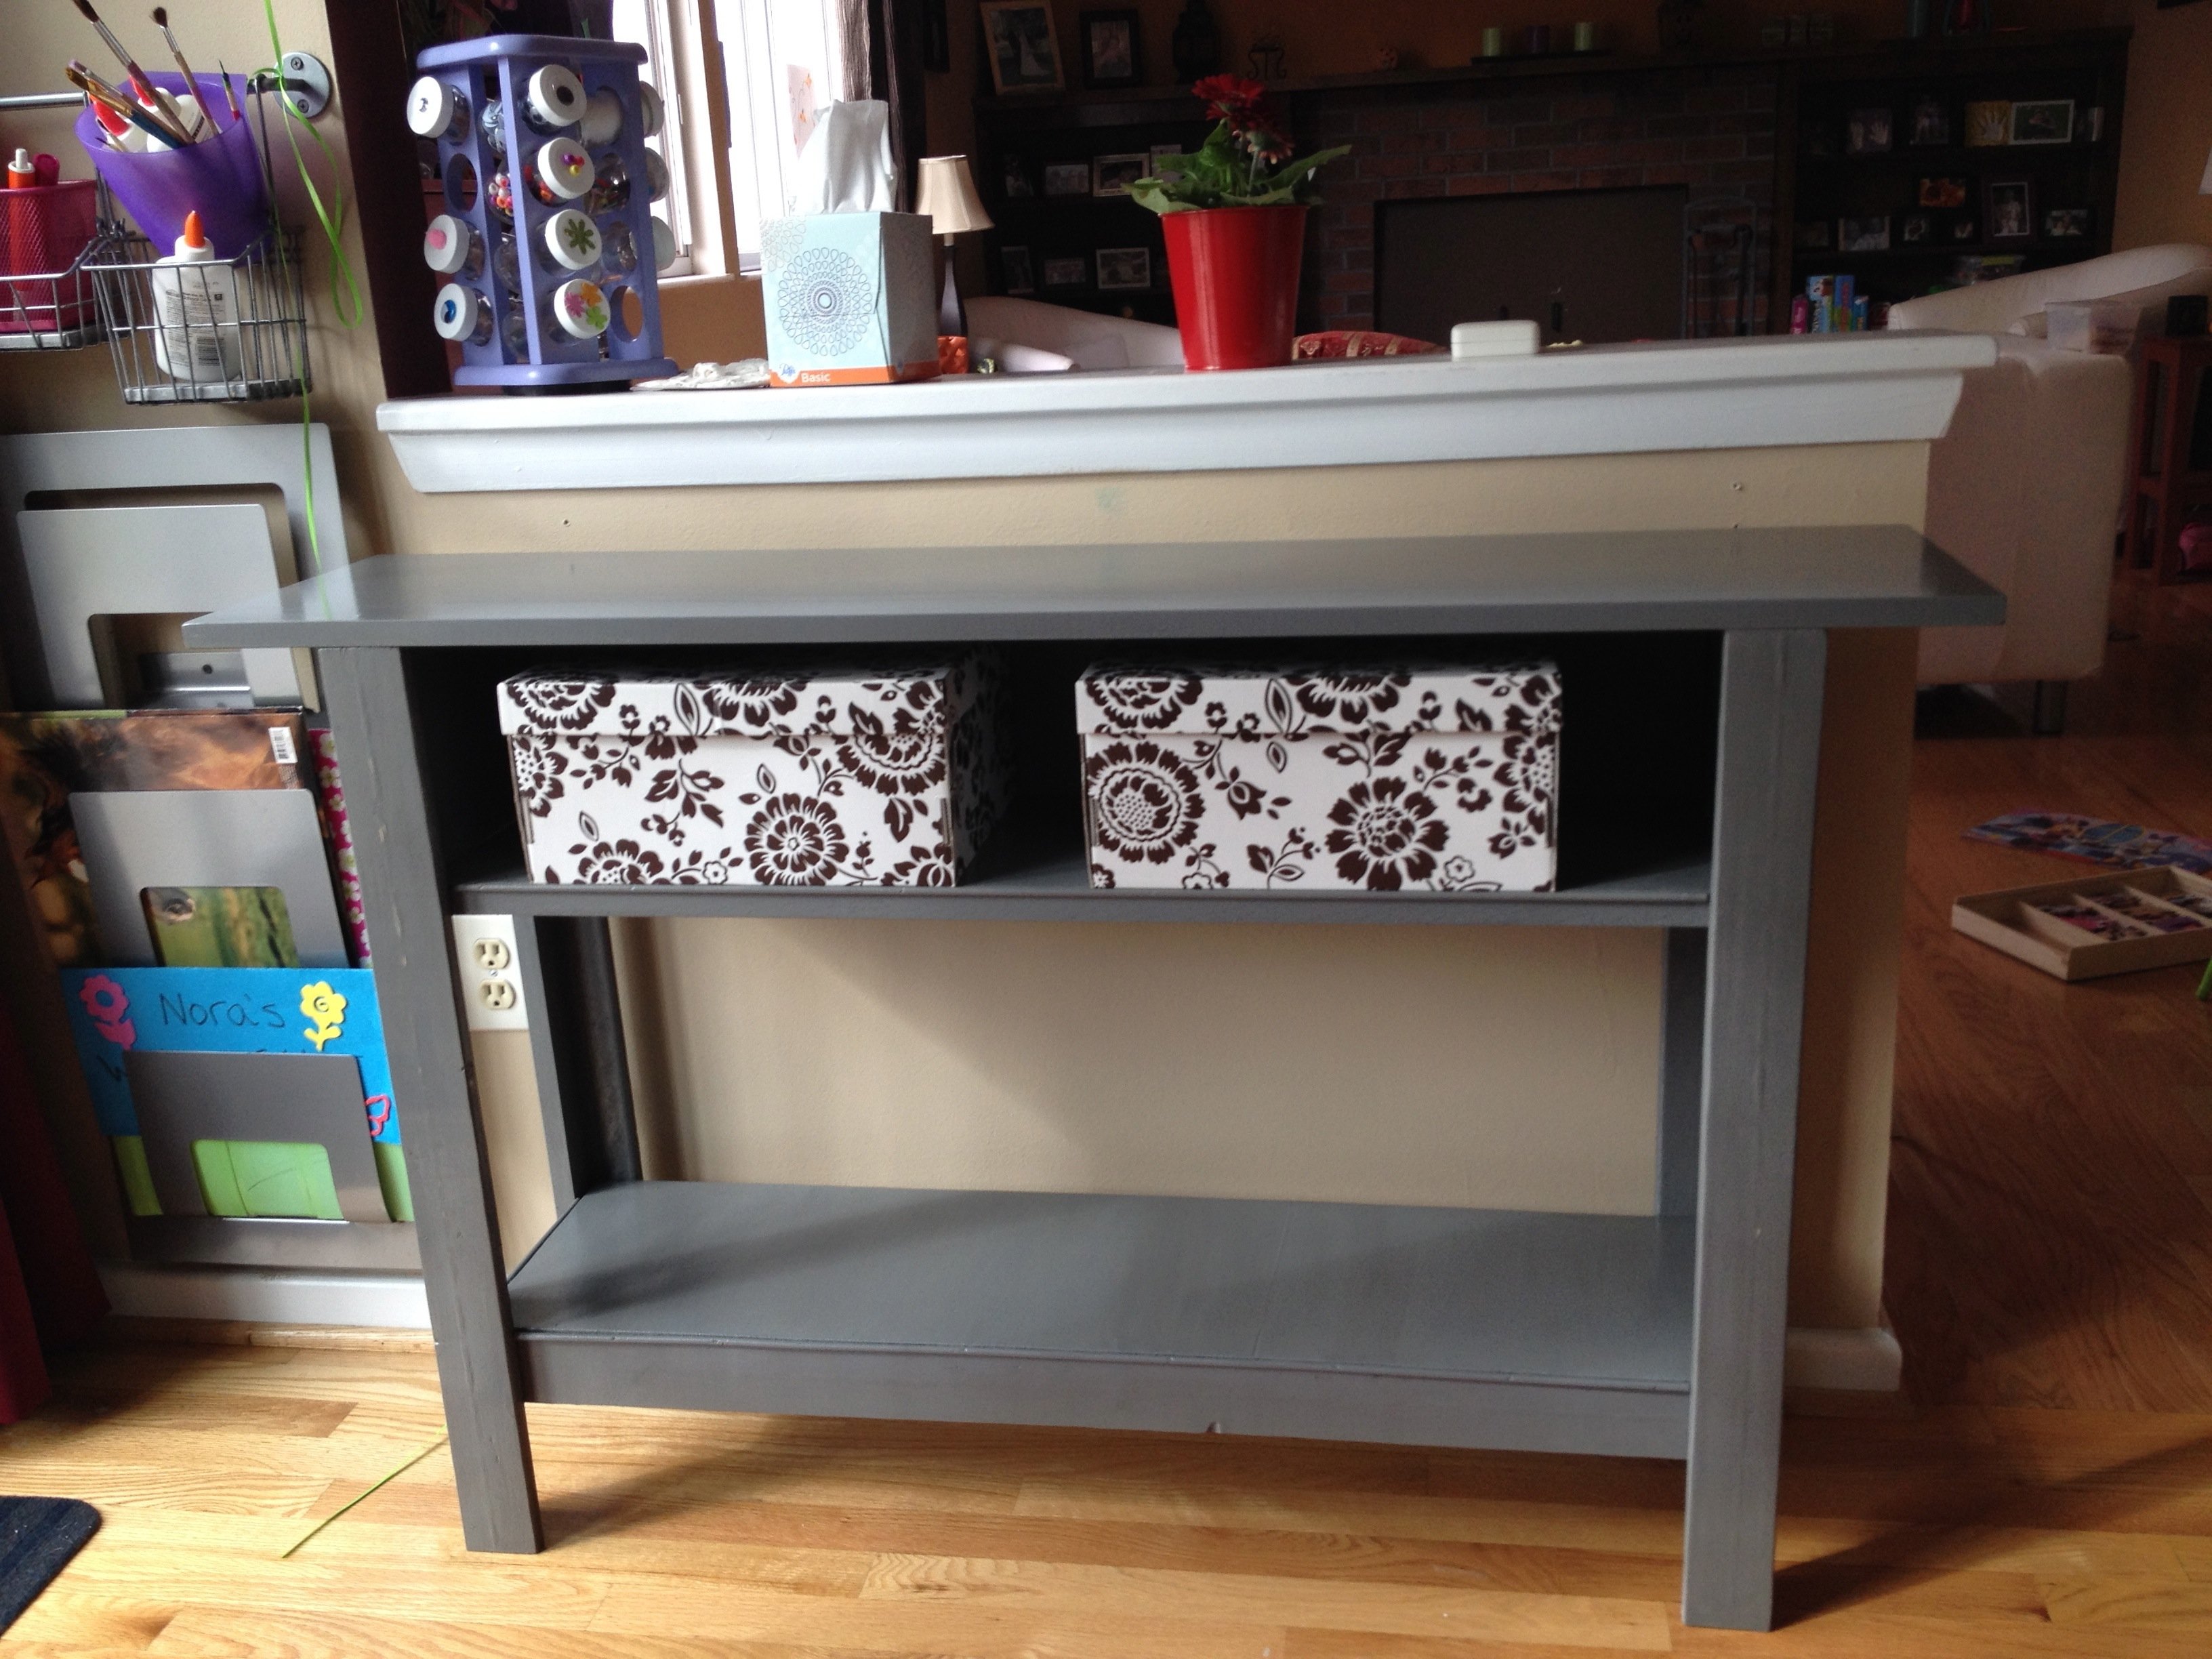
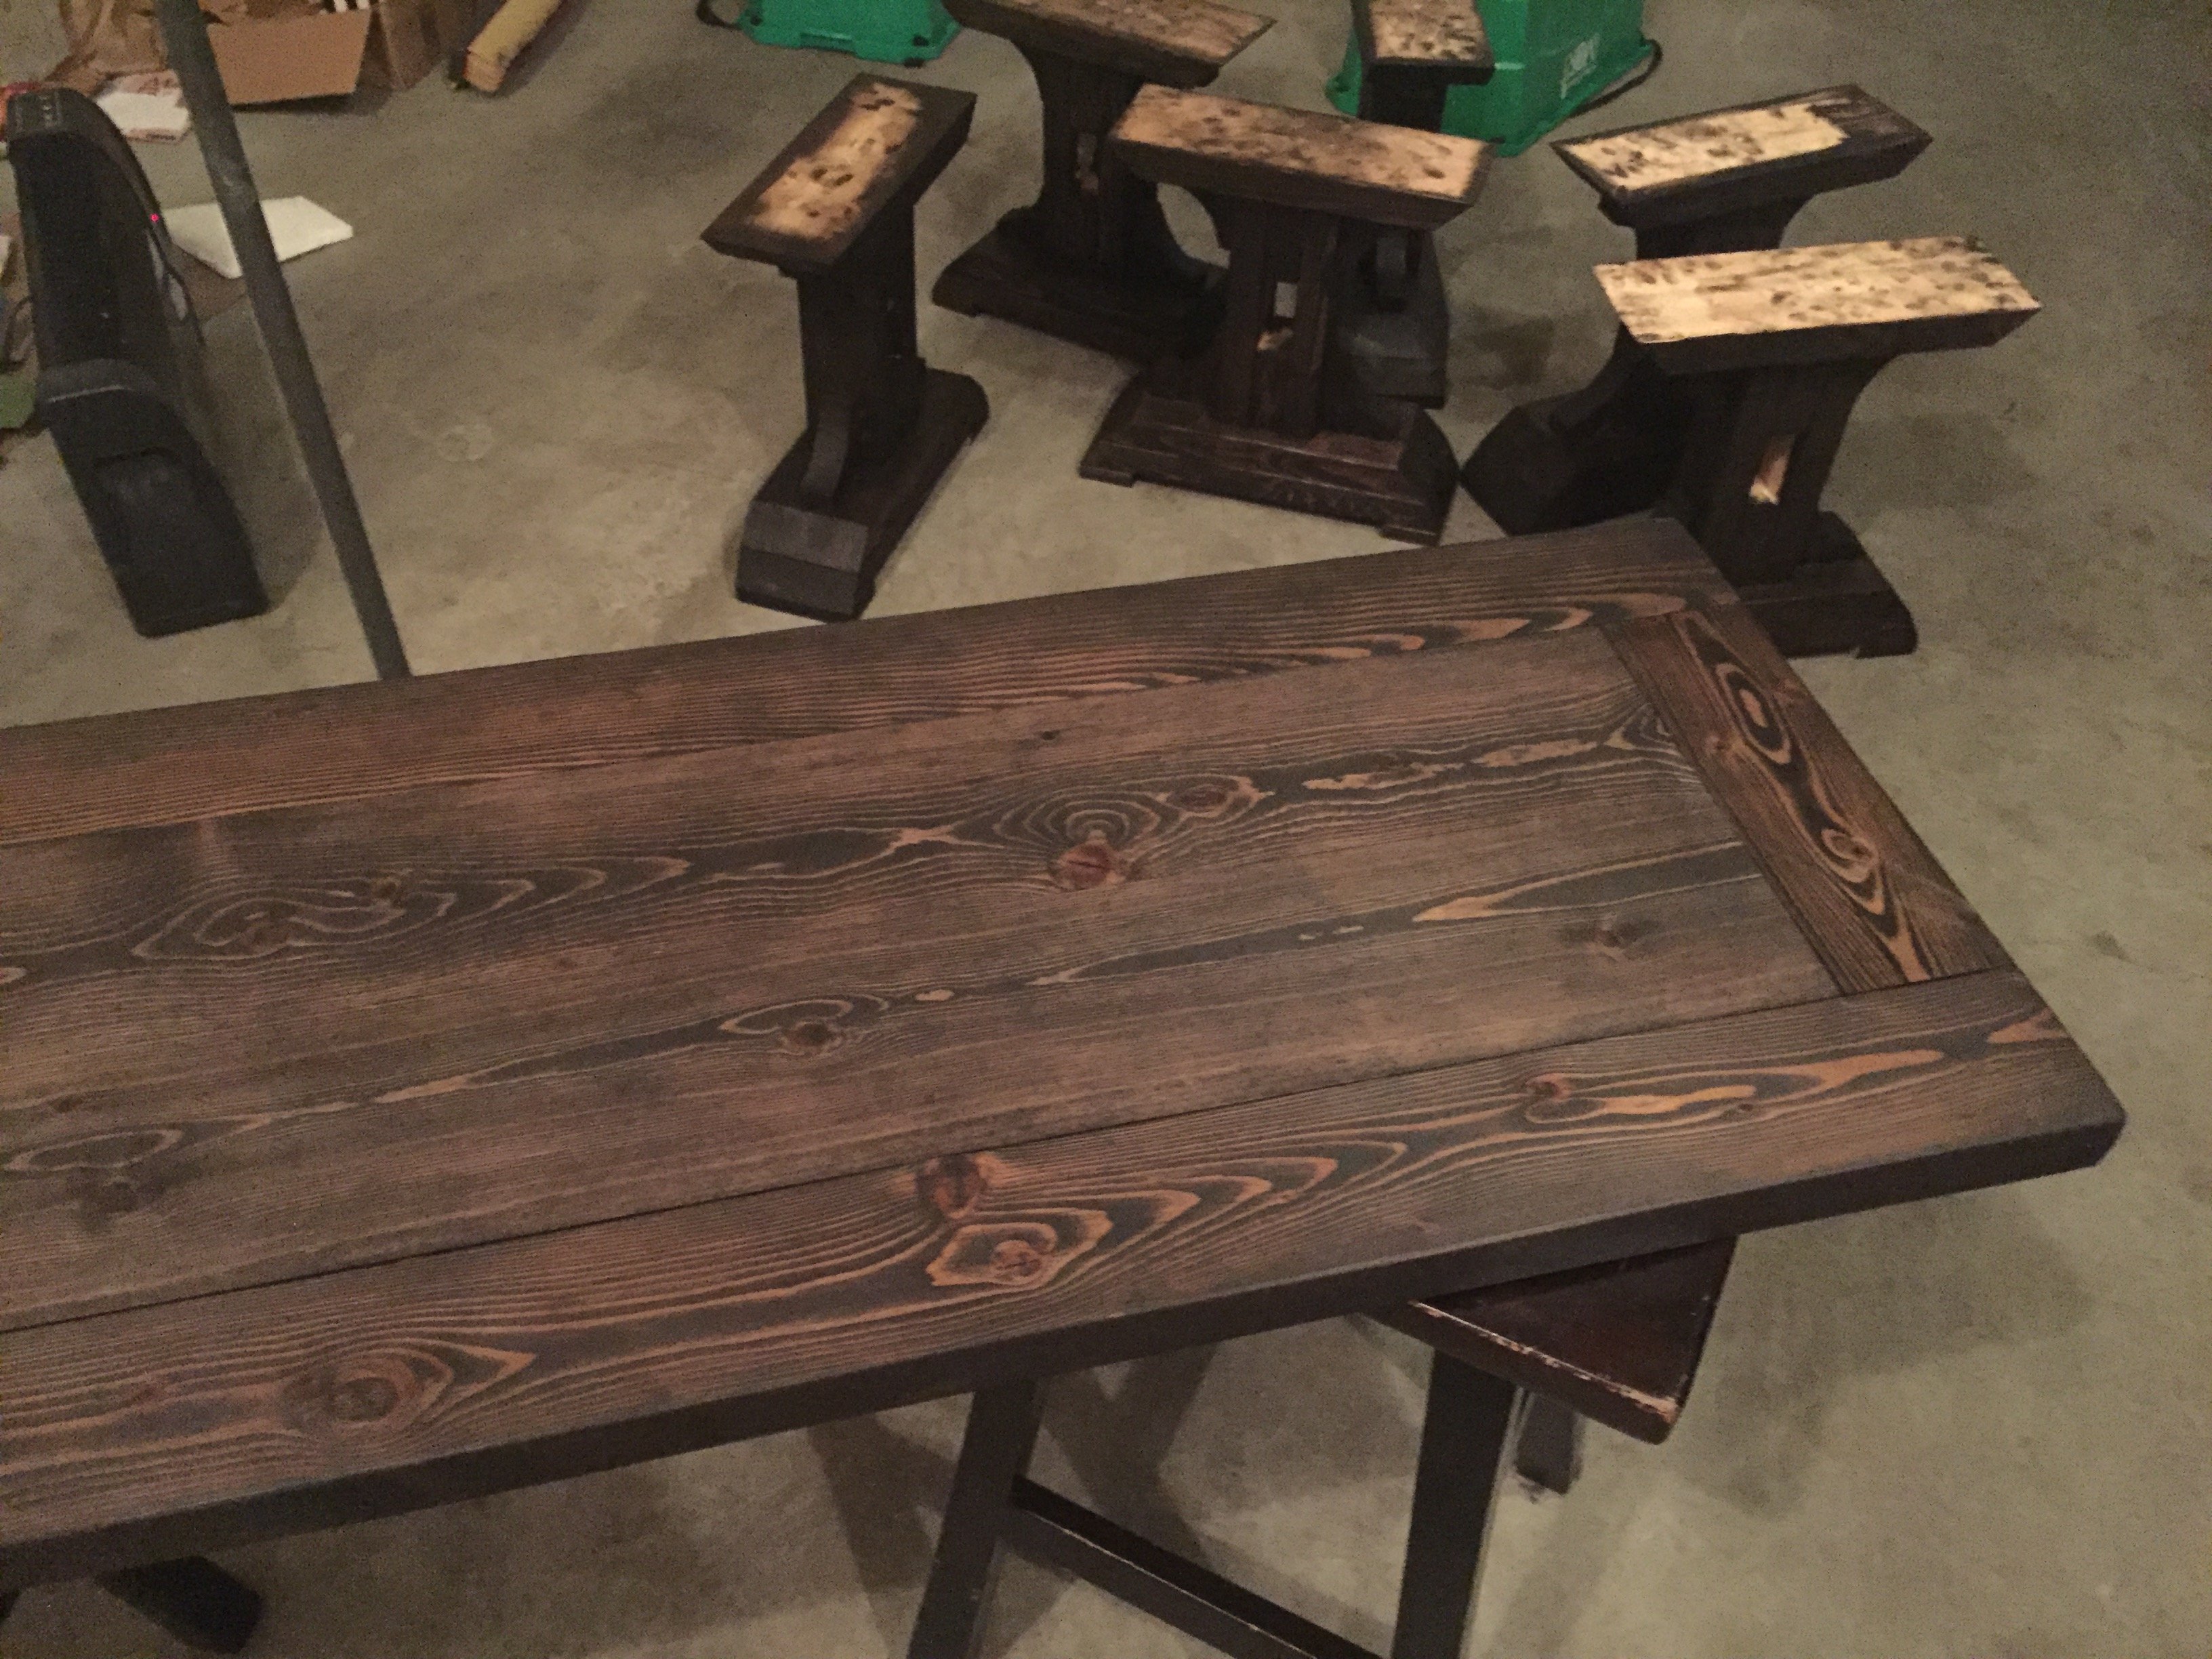
I wanted a side table that was not too wide to fit under a window and the Tryde Console Table really fit the bill. I built it exactly to the plan dimensions but I altered the process a little.
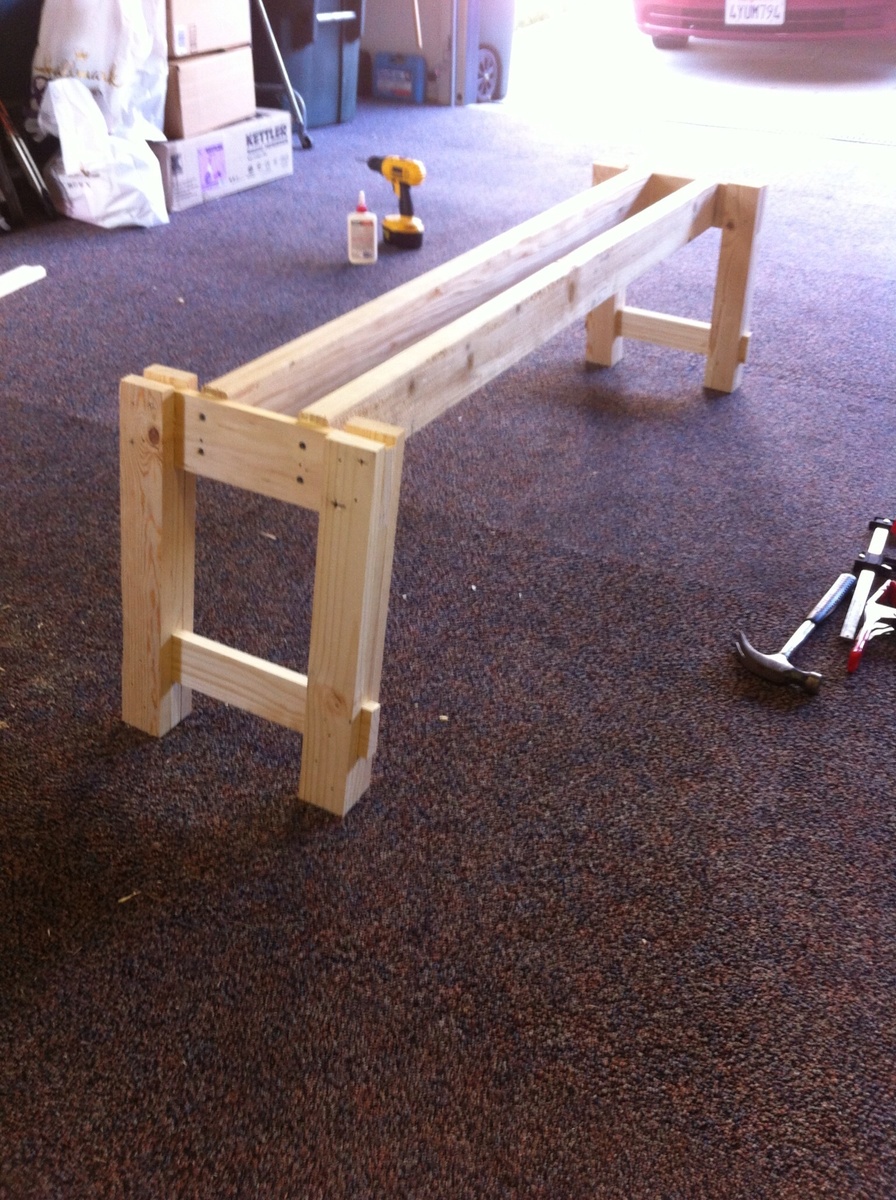
1. First I built the leg assemblies including the side apron, top leg support, and the bottom stretcher. I used PH screws for the side apron and bottom stretch.
2. Then I attached the two leg assemblies together with the front and back aprons and the bottom stretcher.
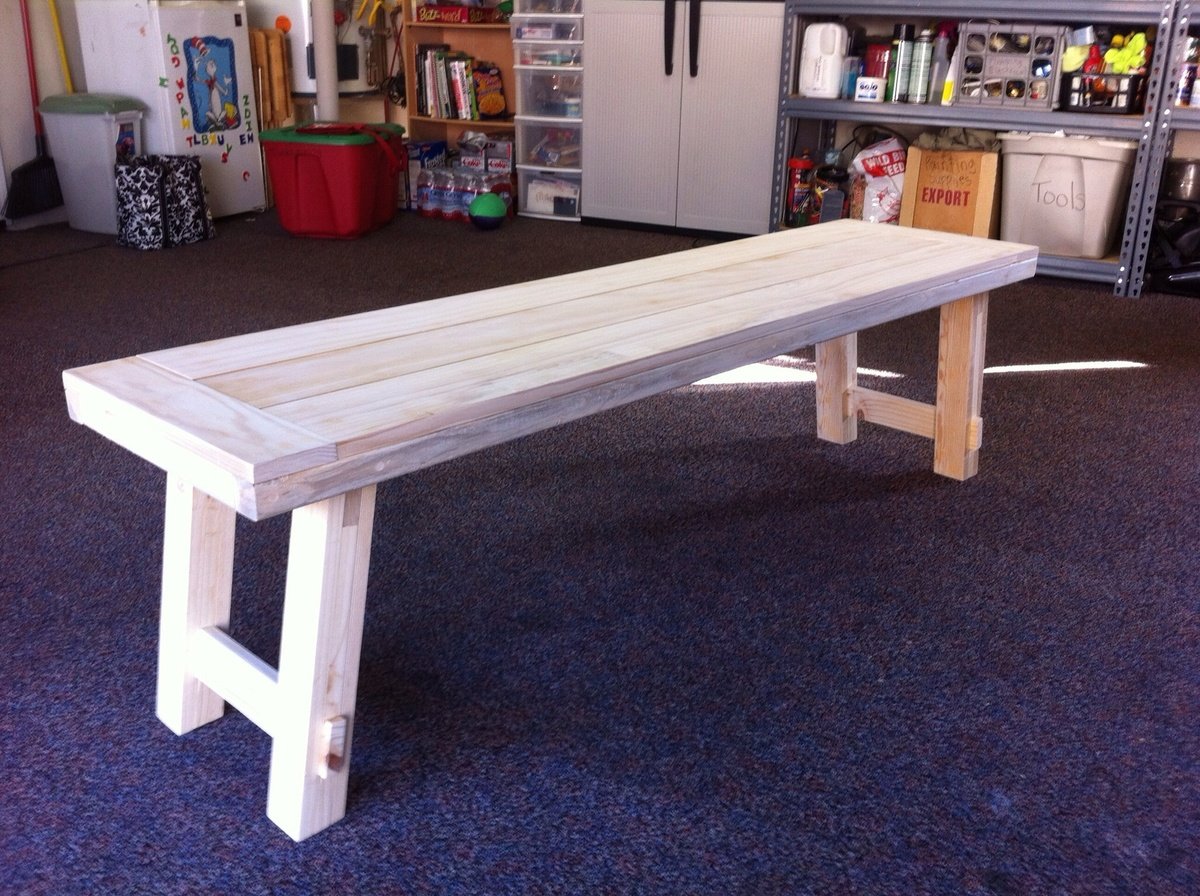
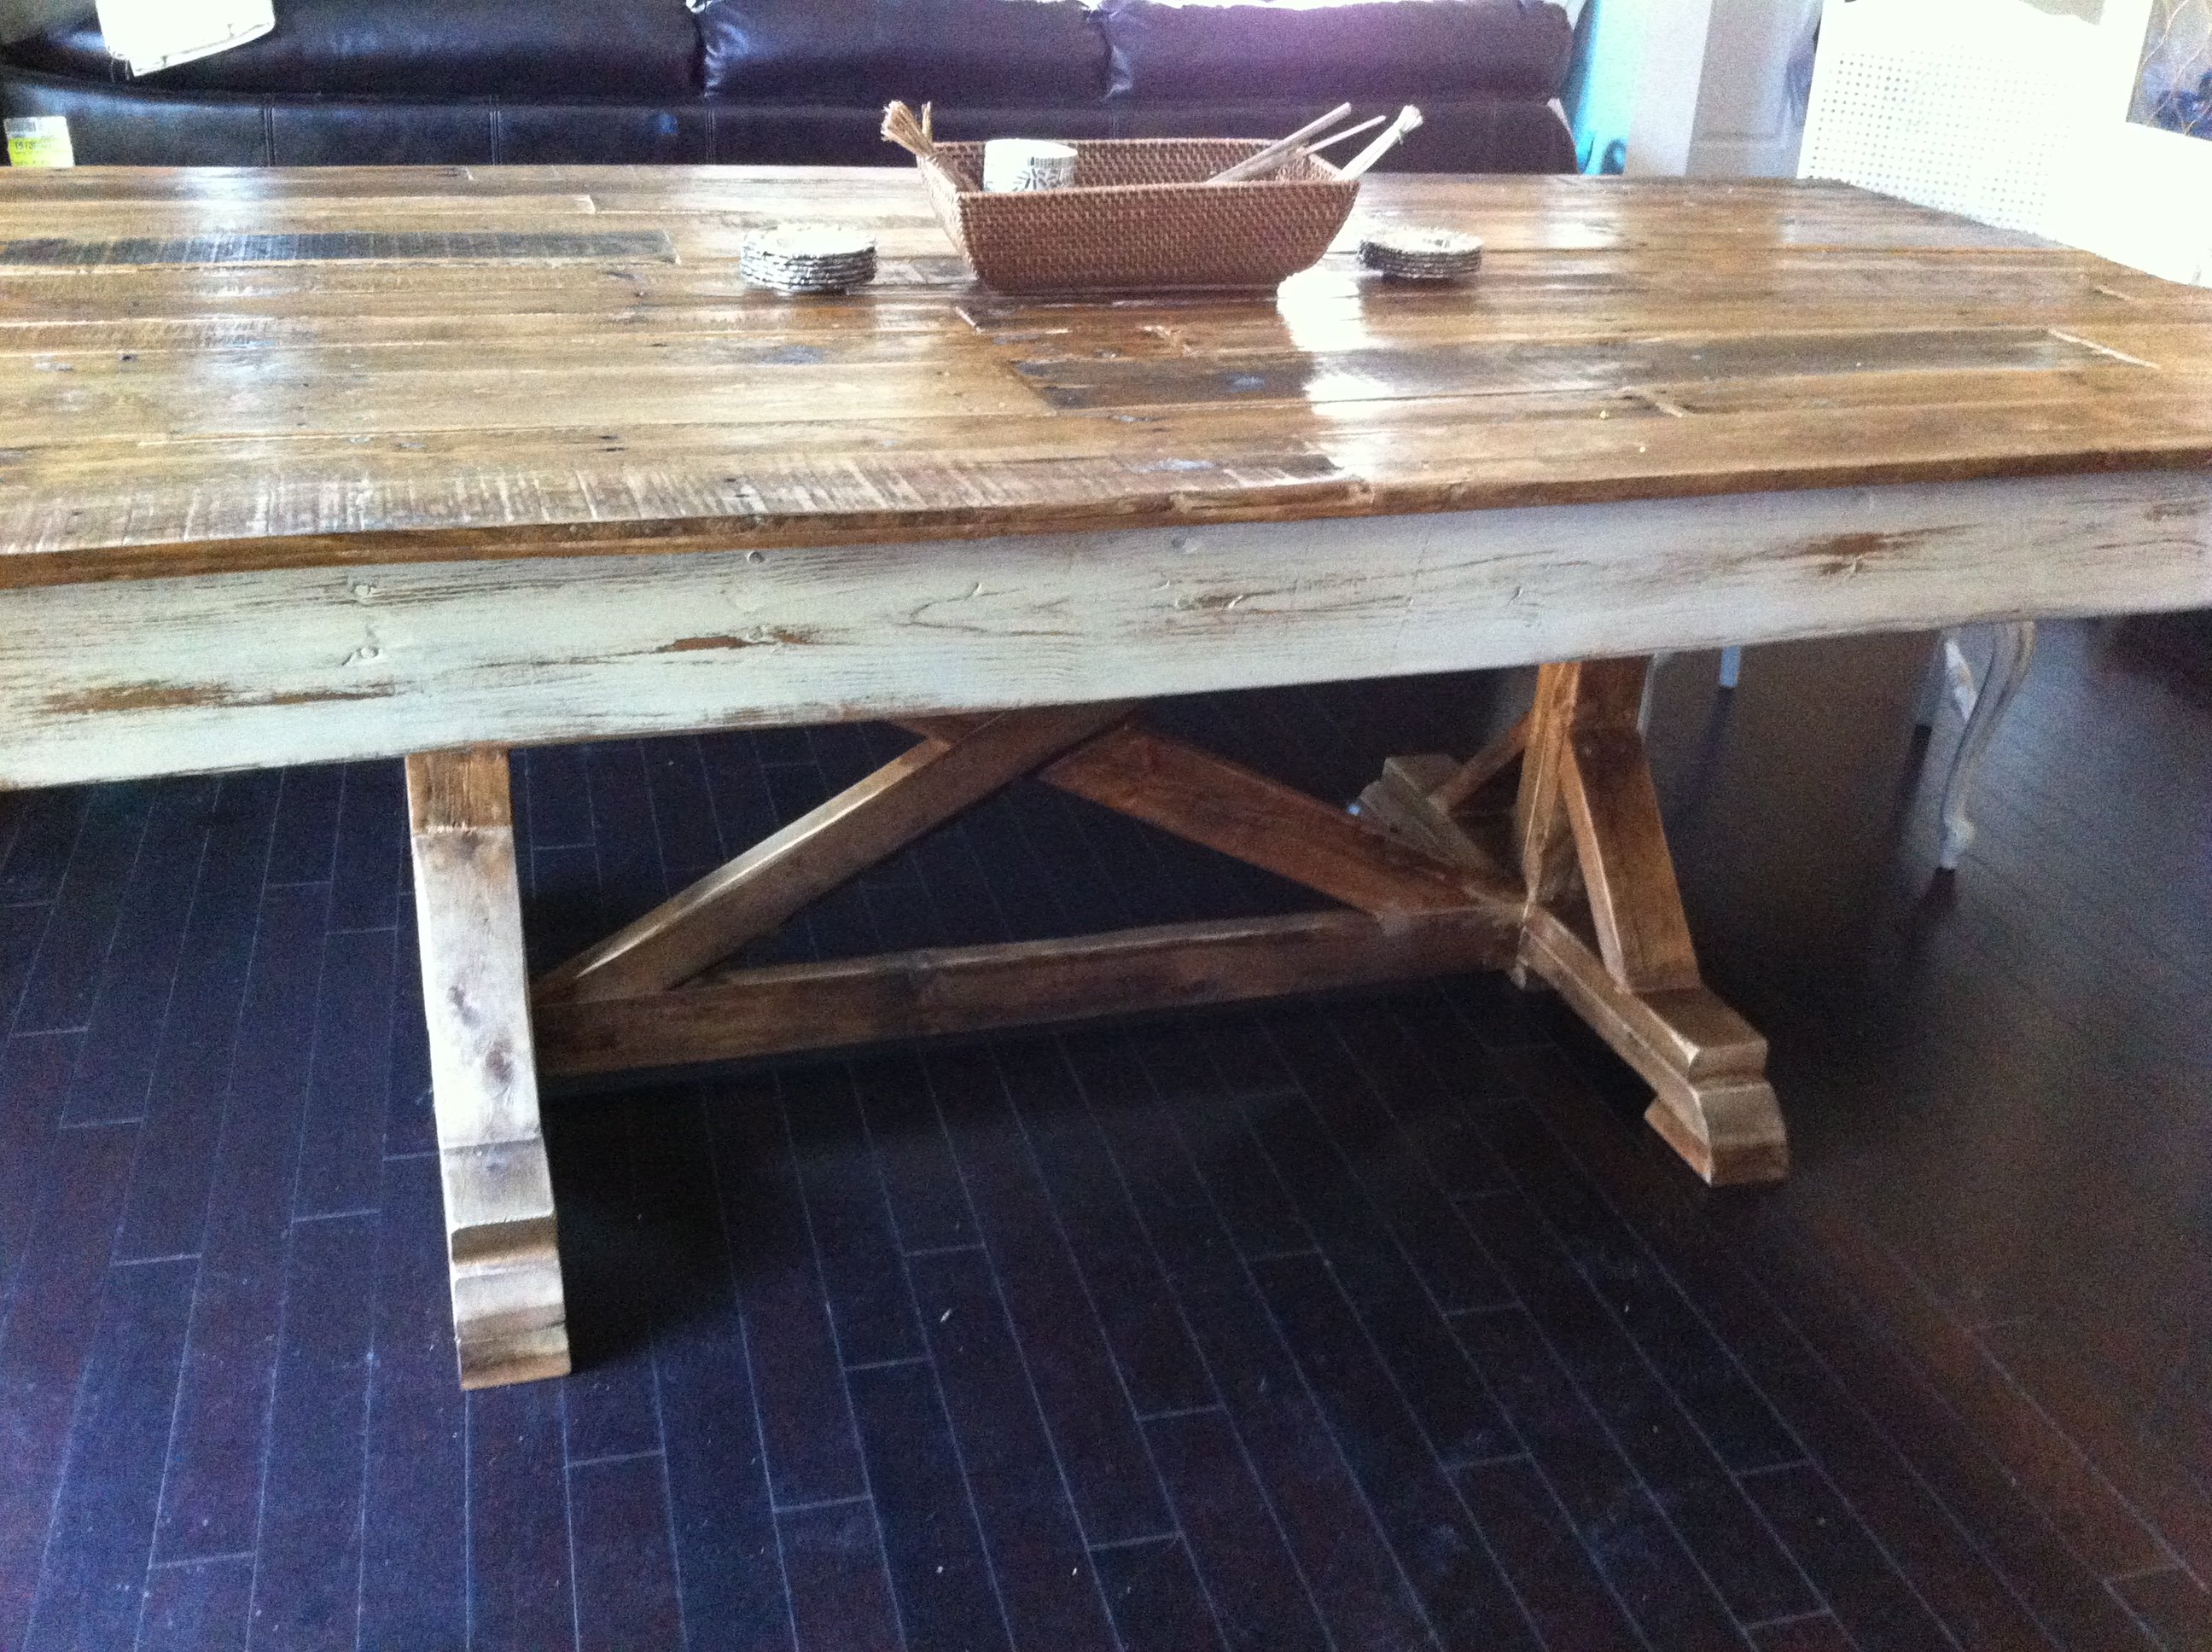
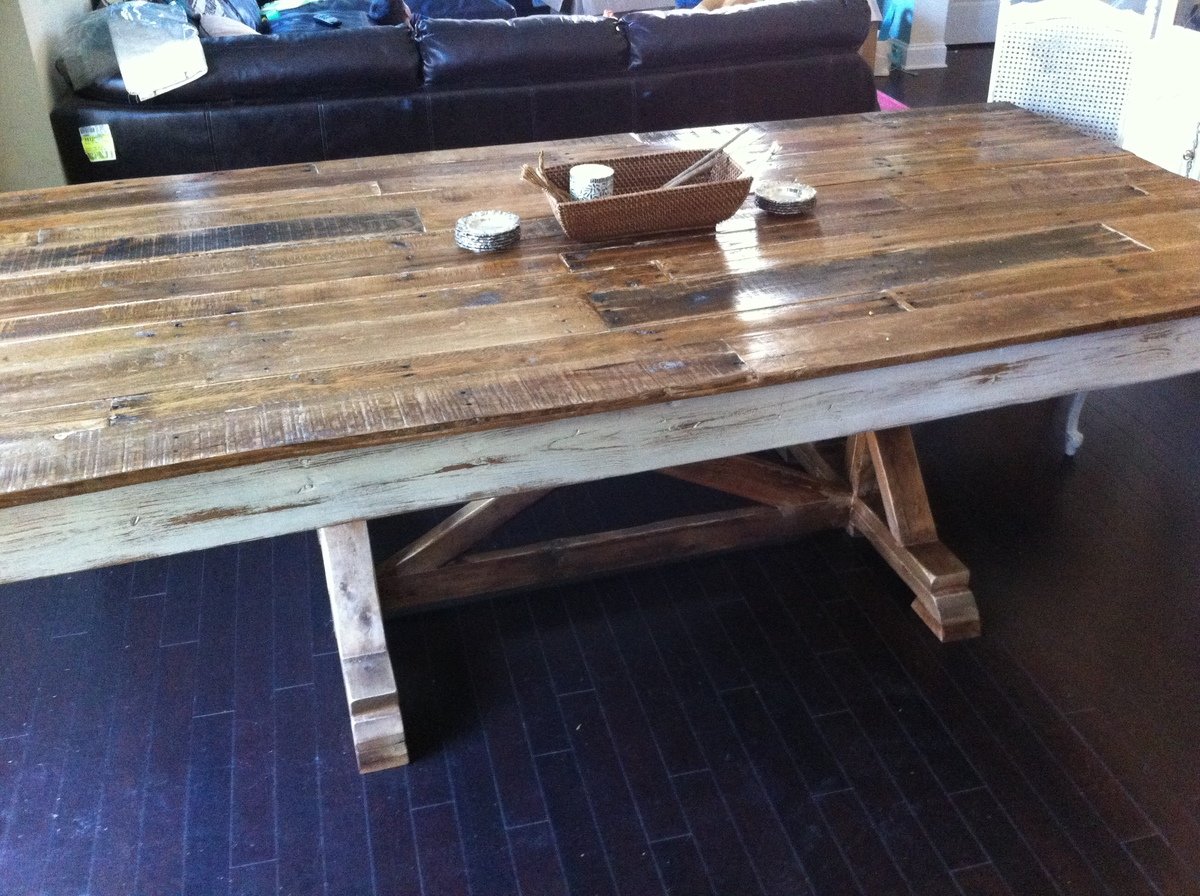
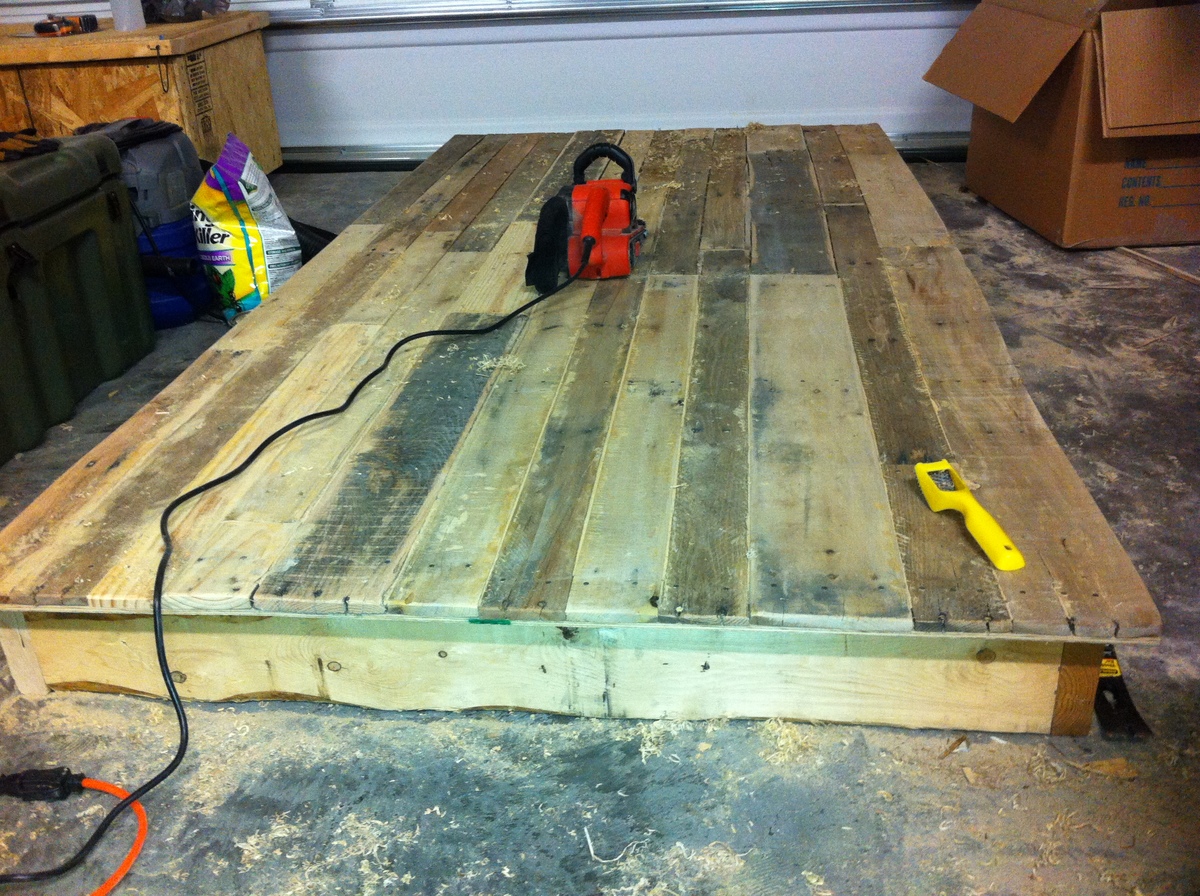
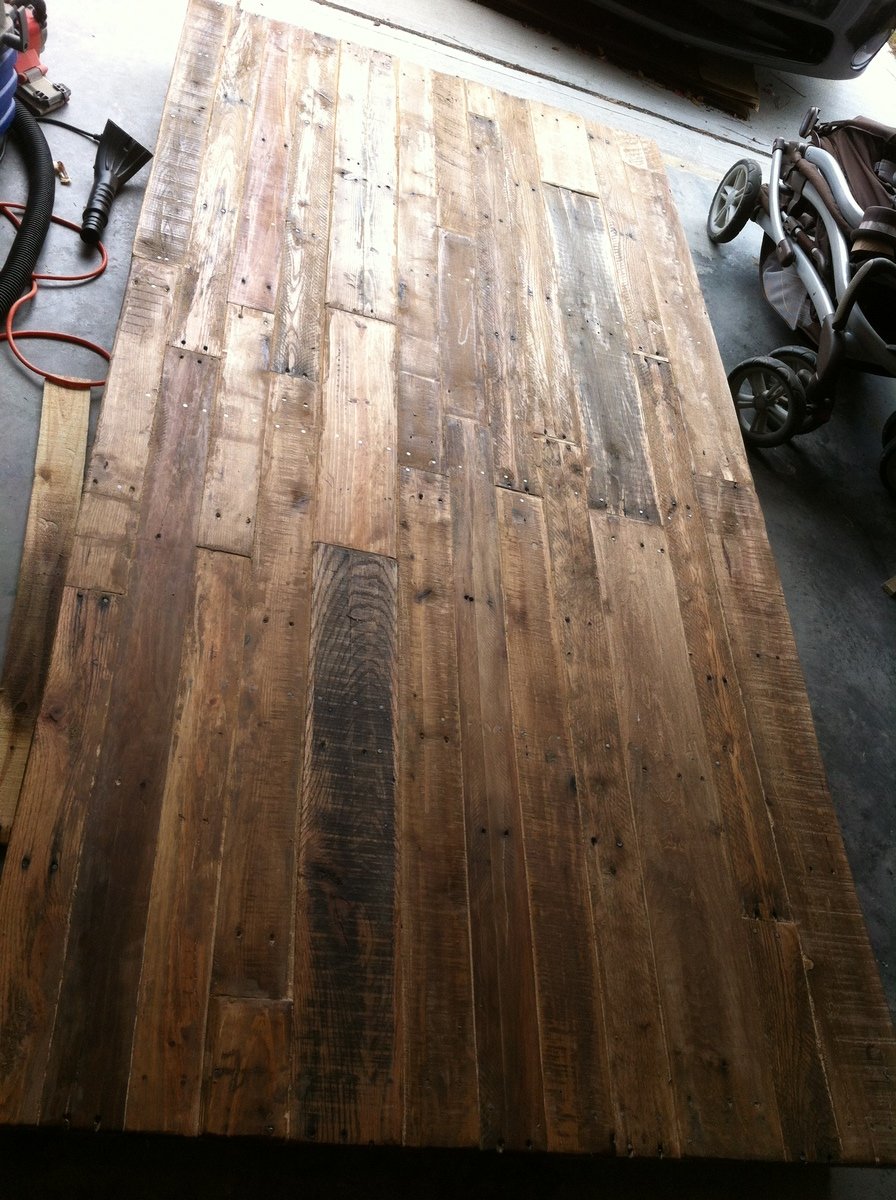
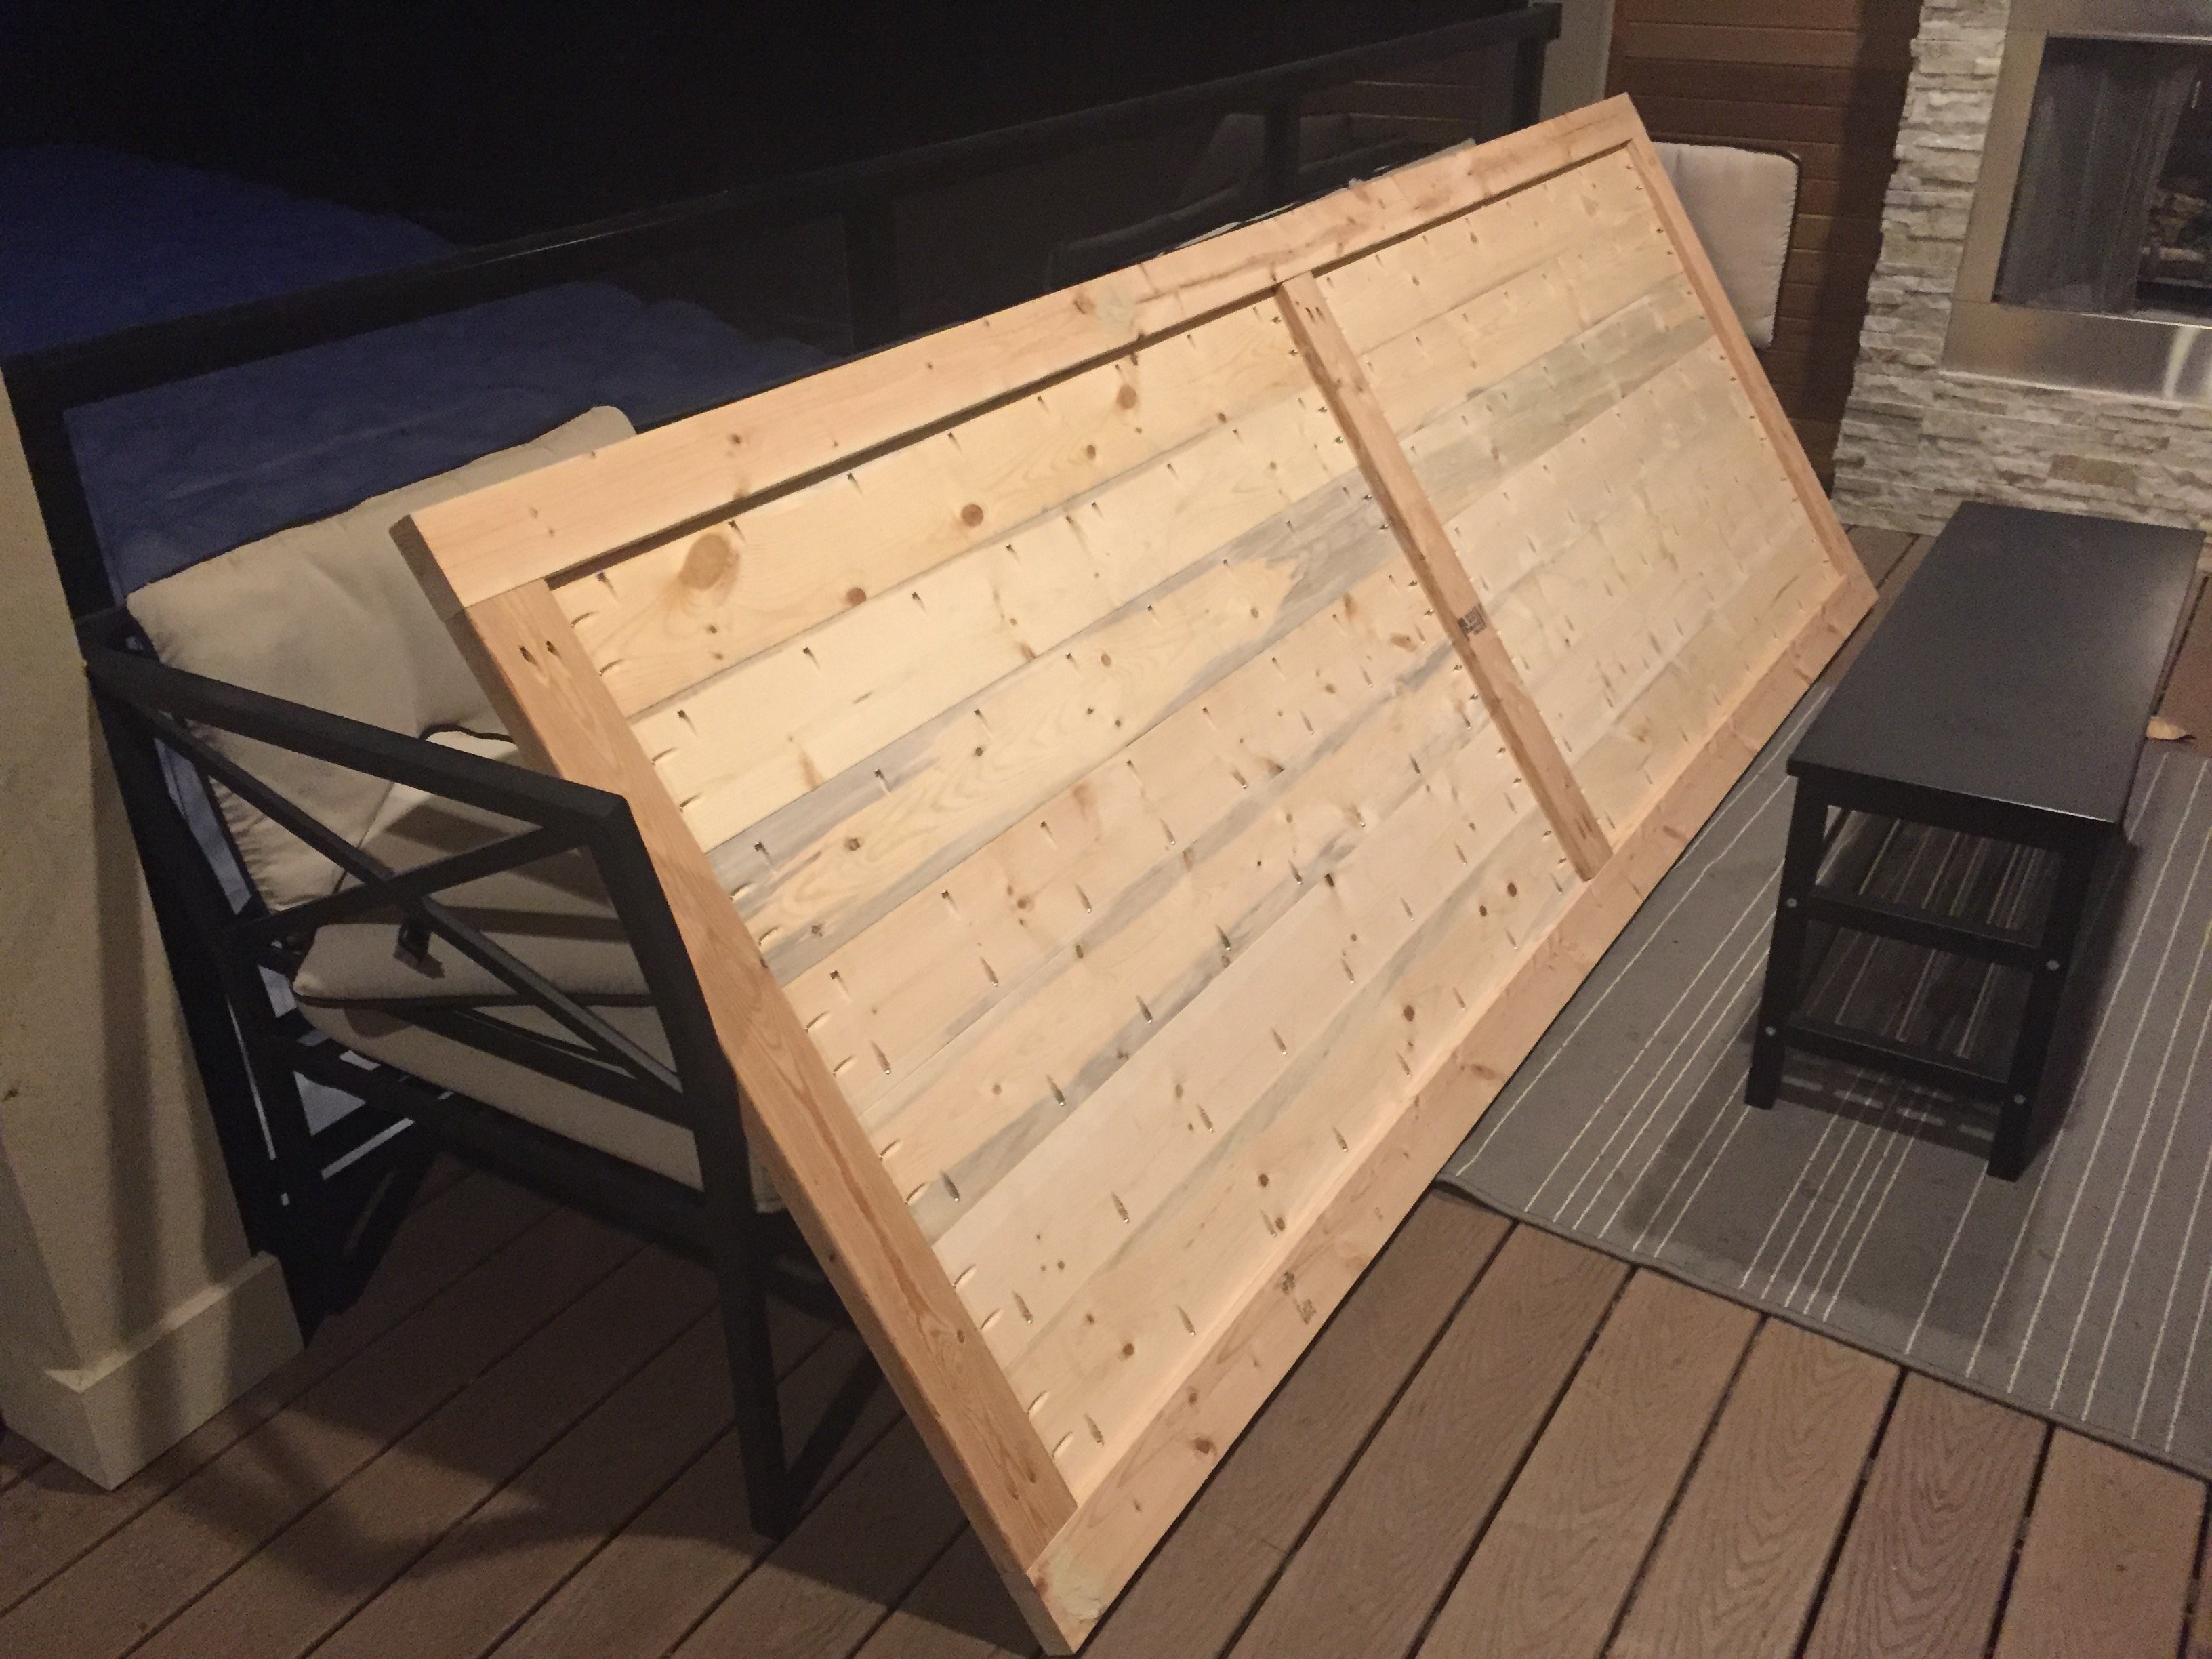
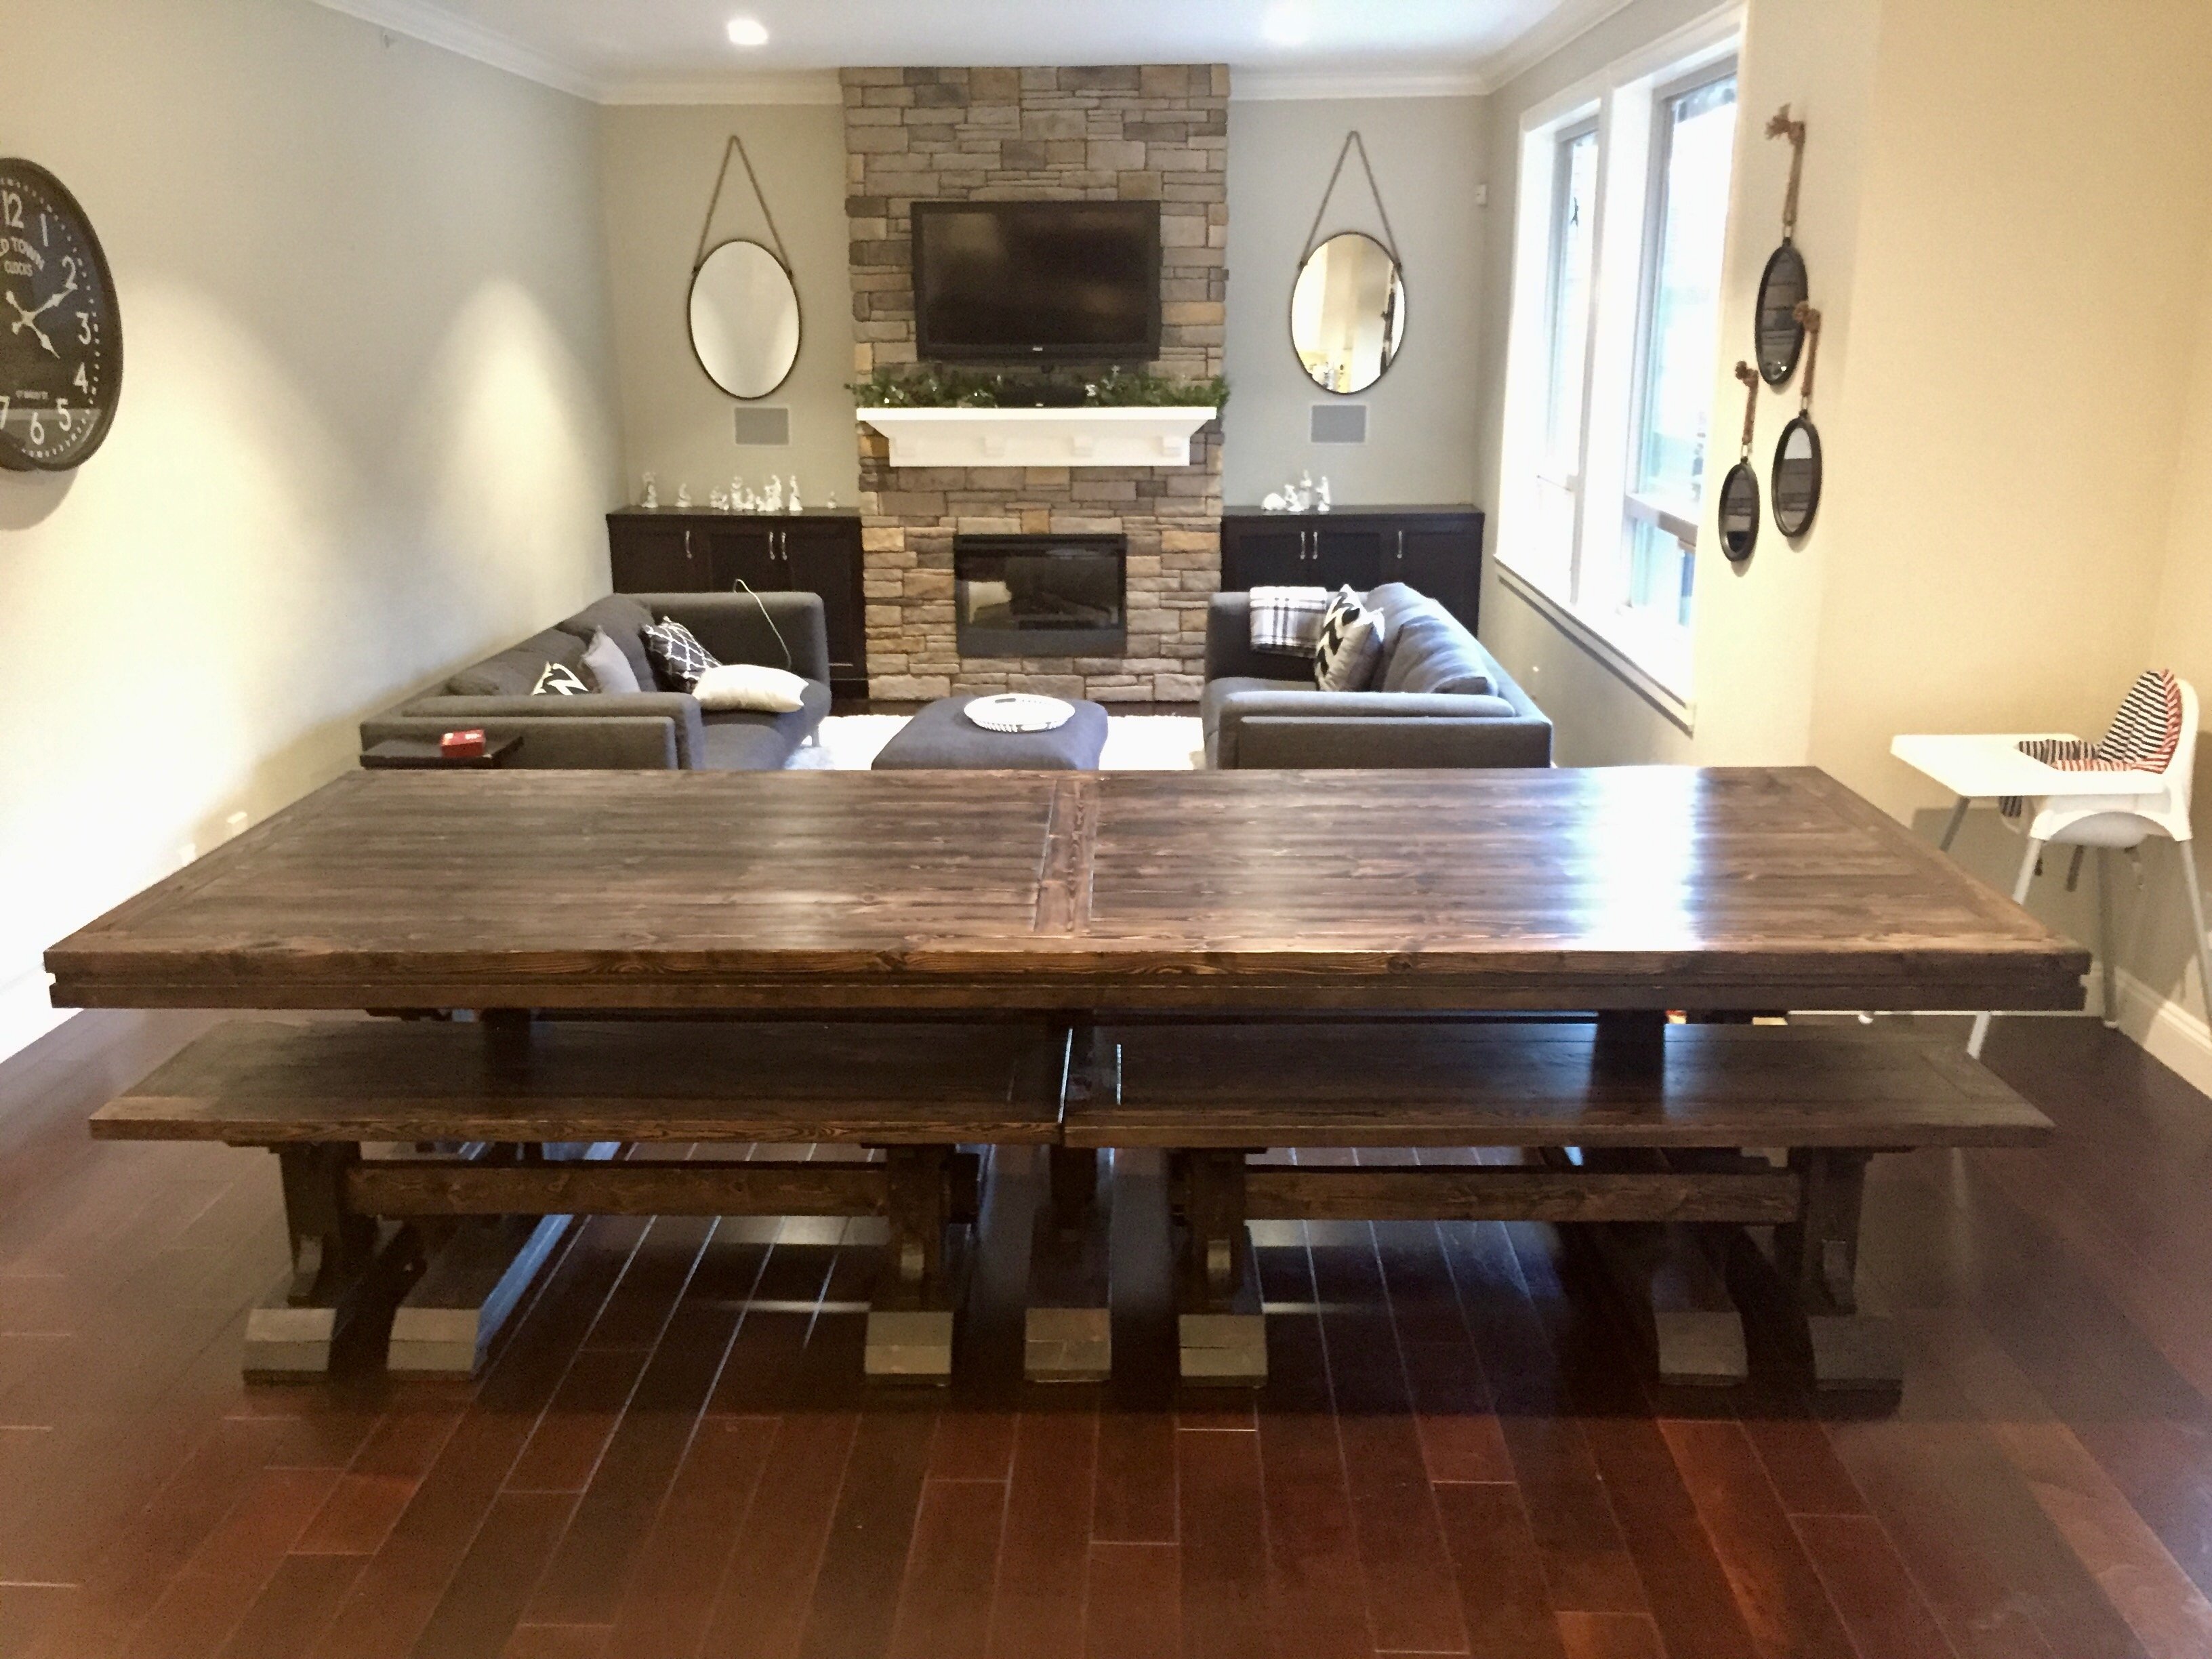
3. Separately I constructed the top including the breadboards using PH screws. The tabletop boards are connected to the breadboards with eight PH screws each. The table boards are held together with PH screws.
4. Once the initial sanding and staining was completed I attached the top to the bottom assembly using eight screws through the tabletop supports from the bottom and then eight screws through the top into the top leg supports. Note I did not attach the breadboards directly to the legs as instructed as they are secured to the top with the PH screws. I can always add the screws later if necessary.
Instead of countersinking the screws to the top leg supports I used black (3 1/2 ") PH screws and let the screws remain visible on the top of the table. I think it looks nice and sort of industrial.
5. Then final staining, rubdowns, and touch-ups.
Note: I did not glue the top to the base just so repairs will be easy to make should over time the boards warp or crack. Just remove the eight top screws and lift the top off, make the fix, and screw it back on..
It took a couple of days but it is worthwhile spending the time for accurate measurements, squaring, and finishing. The results are first-class.
Thanks for the plans Ana! I used a black cherry paint wash for the color, I wanted the wood grain to show. I used 150 grit sandpaper to distress it, and then poly on top to protect it. I also used a 2x6 on the bottom so I can use it as a shelf. Sturdy and functional, looks fantastic on the front porch next to my yellow door! In the winter I'll keep it at the foot of my bed.
Tried to post this under Old Man's pub table post, but couldn't load a photo in the comments section. This is a similar table, but a 2x6 shorter and breadboards are one ripped 2x6, not two 2x6s. Final dimensions were 43" high by 39"x36.5". Built the top with Kreg Jig and screws like most tables on the site. Base is 4x4s with 2x4 I-beams Kreg jigged into 4x4s.
My wife needed a bigger desk for her home office so built one. I used the modular office desk designs. I had to modify it, my wife wanted the 90 degree cut in where the two desk to meet. I built two open shelves and fastened then together and built one narrow shelf with drawers. Built mostly out of MDF with the top being melamine. Waiting on the edge banding to ship. Also, installed some rope lighting for indirect light.
After seeing the Fancy X Farmhouse Table on pinterest we wanted to try and build one ourselves, but using the pallets we gathered from the new construction next door and the scrap lumber they were throwing away. The only thing we had to purchase was a sheet of 11/32 plywood to attach the pallet strips to for more stabilization, Screws, Nails, Wood Putty, Stain, and Polyurethane. I filled in all of the cracks to child proof food messes. We used Minwax Provincial Stain on the top with two coats of poly and a distressed antique white paint around the egdes to give it a more french look. The base was one coat of privincial stain with a good rasp/sanding of the edges to age the piece. Our goal was to build something that looked over 100 years old to match all of the china that will be sitting on it when we entertain! I think it looks very stately! This was our first project! :D
Wed, 11/28/2012 - 11:03
This table is extraordinary! I love the pallet top!
Mon, 04/21/2014 - 10:32
hi there - This is so so cool and I went out first thing this morning and collected a bunch of pallets from all over to start! I was wondering how you got your pallets apart without destroying them? I am finding that very difficult!
Modified the plans only slightly - to make it fit perfectly in the space, and to add a shelf. Great plans, I love my table! Thank you, Ana!!
As my first furniture project I was impressed at how straight forward this was.
I expanded the plan to fit our family of 10. I also decided that splitting the benches into two and extending the overhang on the ends would allow us to tuck the benches all the way in without the legs colliding. The table is 120" with trestles centered at 20", 60" & 100". I did some math to make sure that this wouldn't cause the table to be tippy and I should be able to stand on the very edge (like a diving board)
Biggest fail was not keeping the top level. This created far too much sanding for my liking. Any tips on how to avoid the pocket hole joins from shifting? Would be appreciated. My clamps don't have a deep enough mouth to reach the joins and I guess the kids aren't heavy enough to hold it all in place.
Hardest part was cutting the curve for the benches decorative pieces.
The base of our playhouse felt like the perfect spot to use the sandbox plan with built-in seats. The bench seats actually fold flat to create a lid for the sandbox when it’s not in use. I followed Ana’s plans exactly and used the list of materials she provided. The only modification I made was eliminating the back supports. It was not necessary for me to add the back supports since we have the playhouse posts to support the back of the bench.