Community Brag Posts

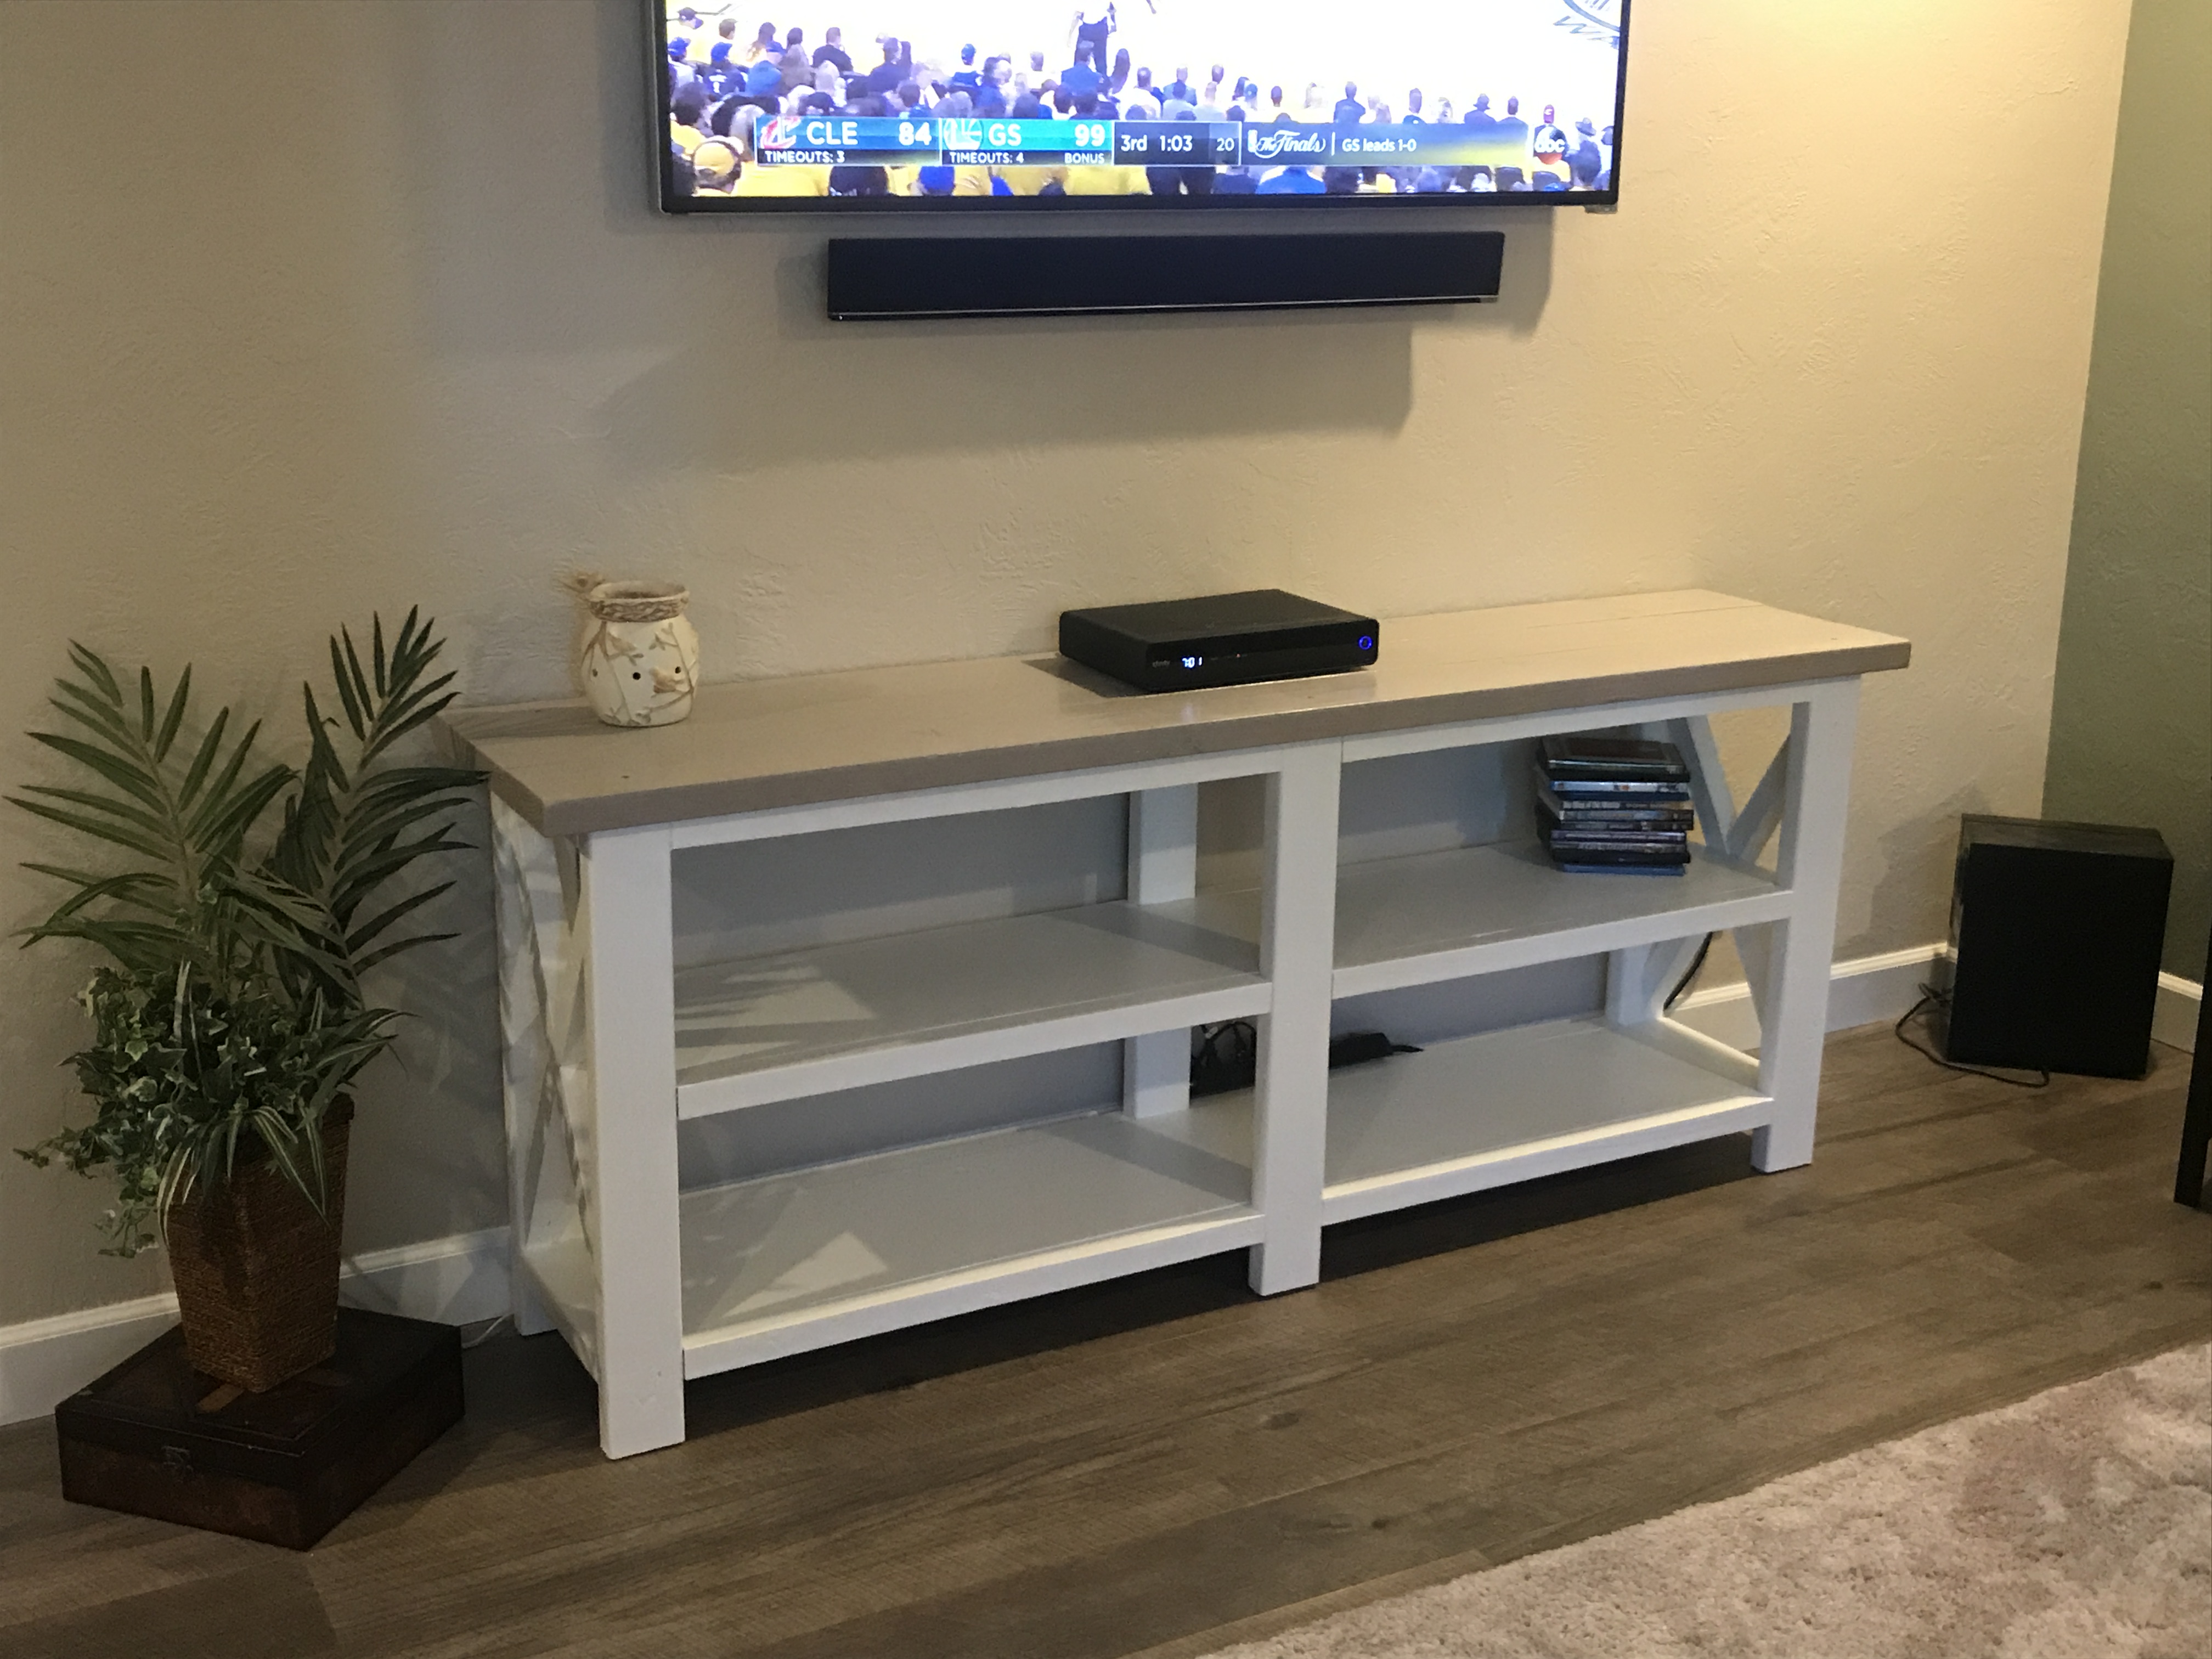
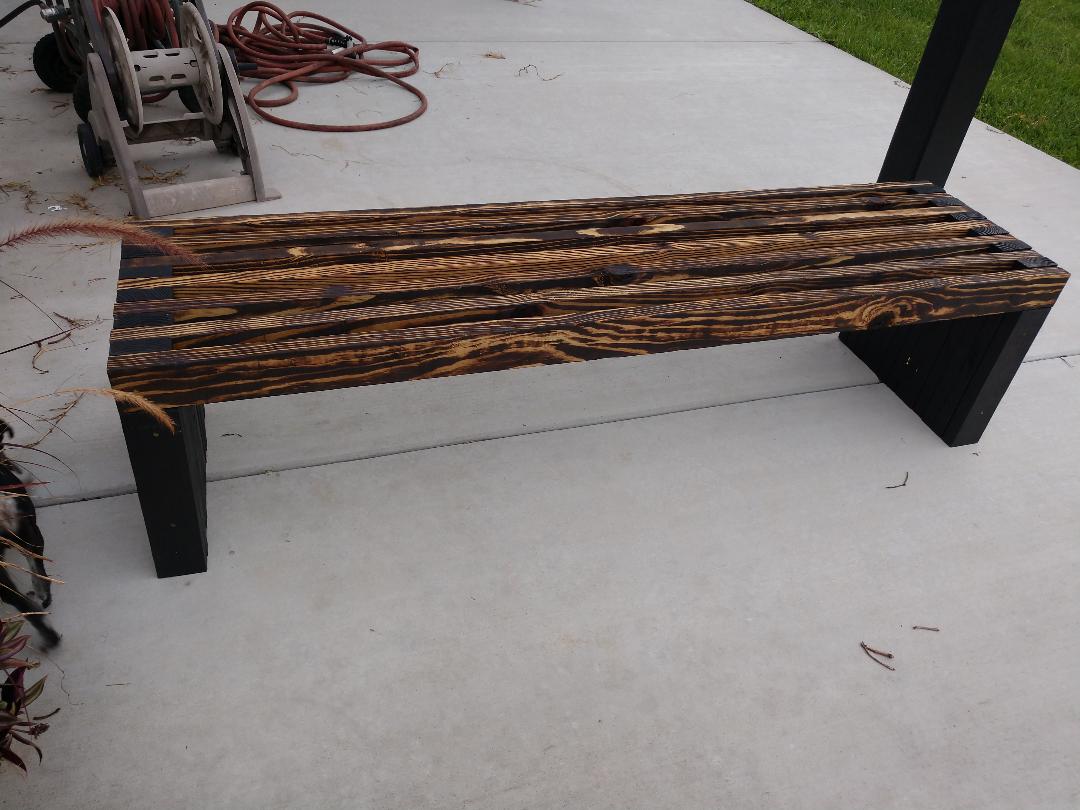
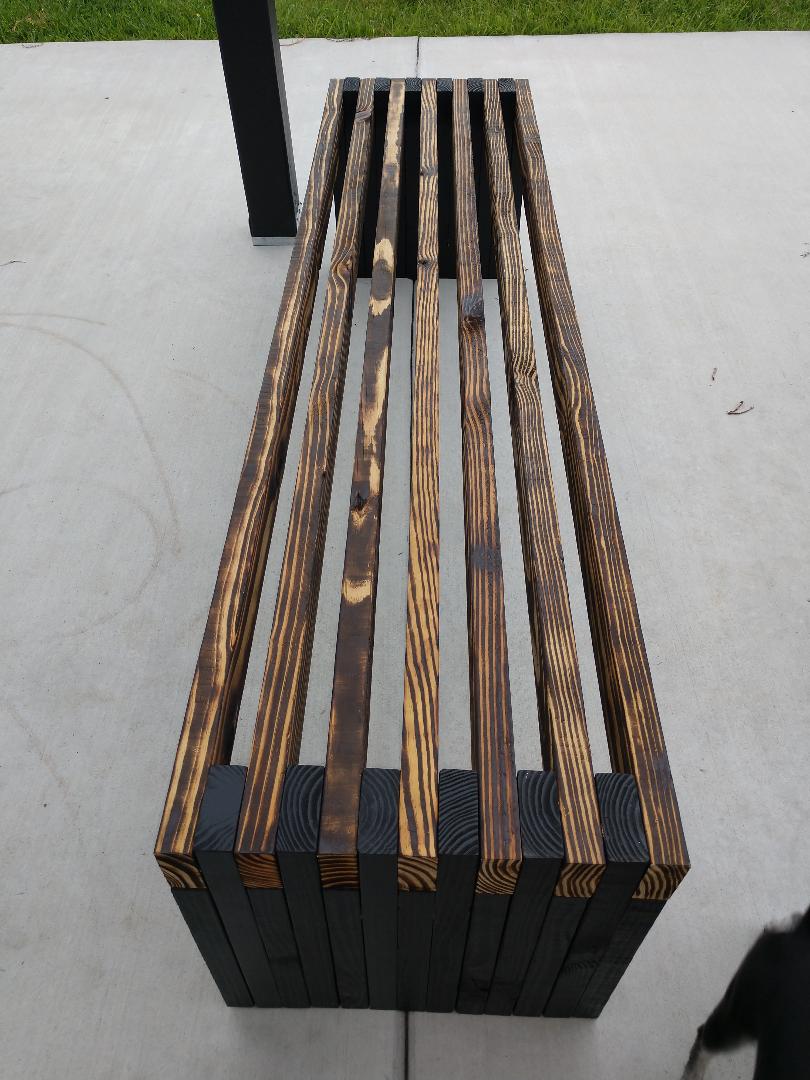
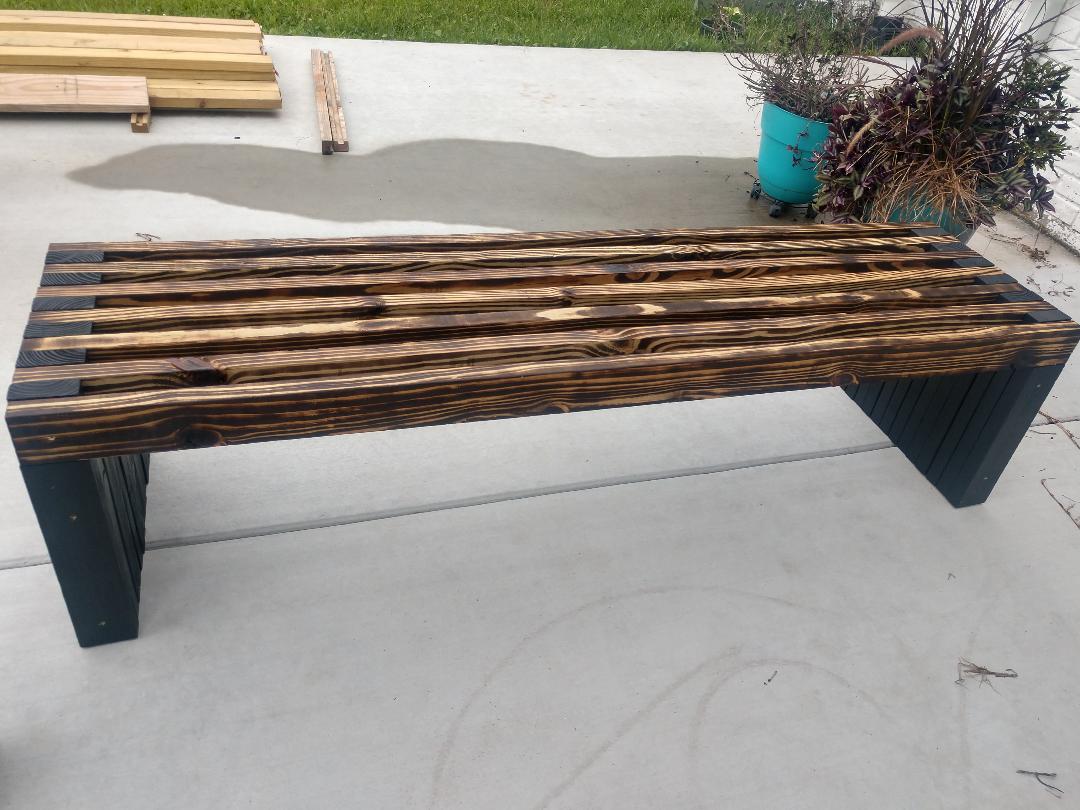
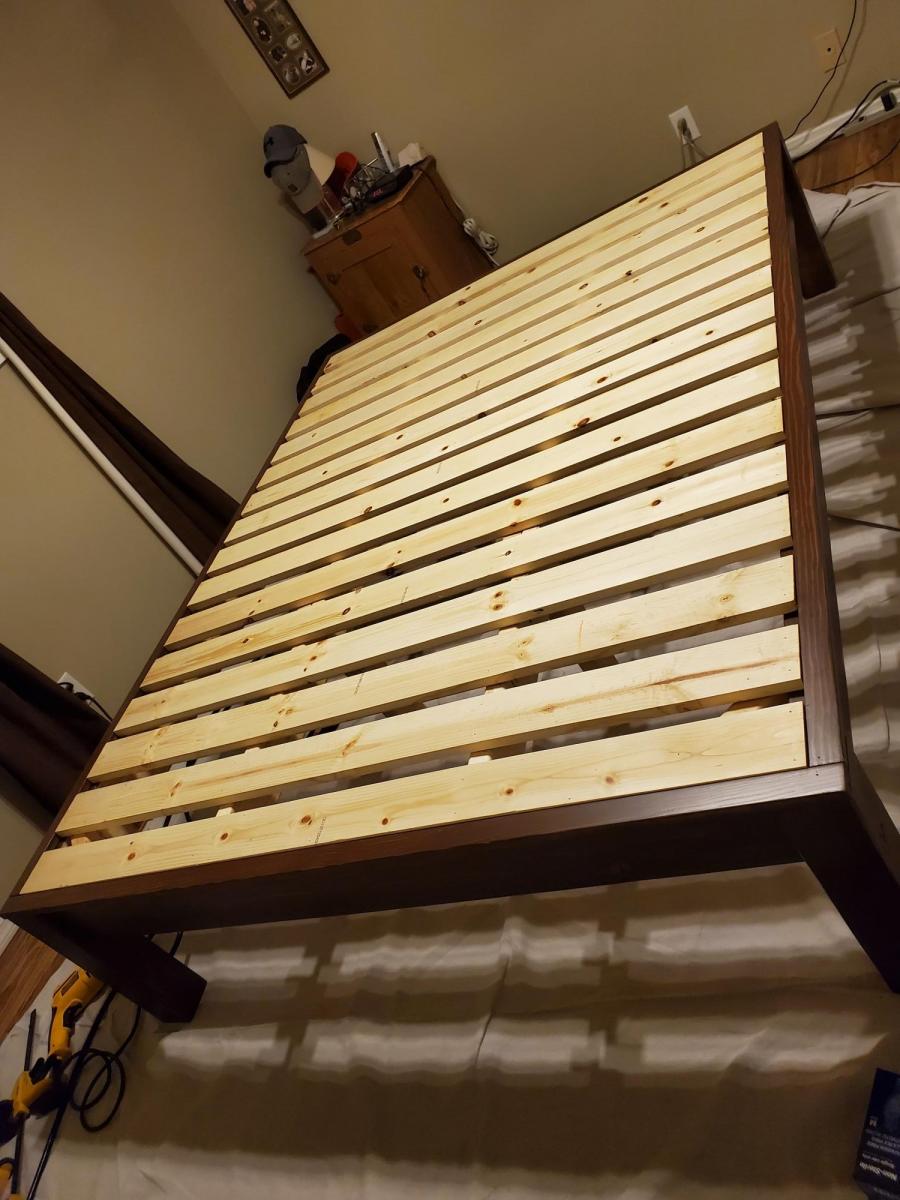
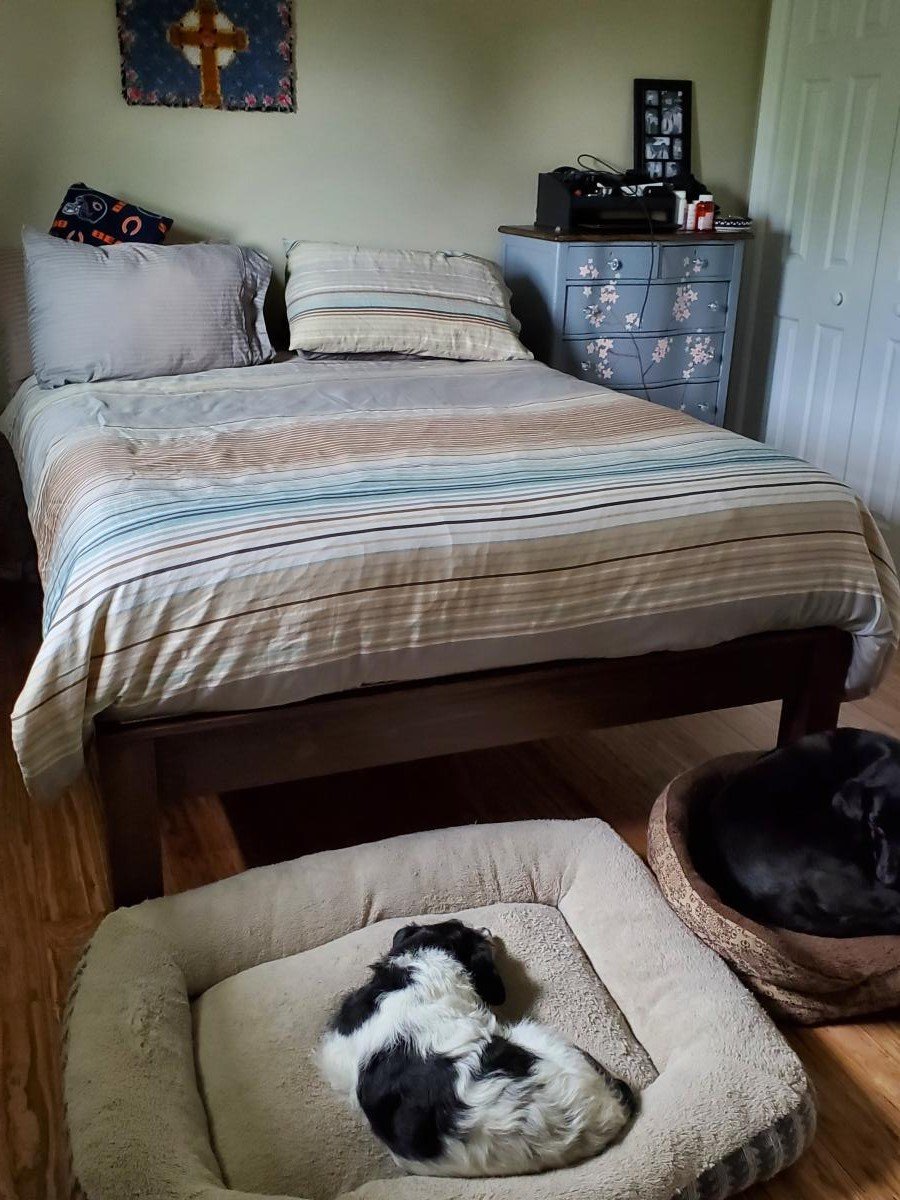
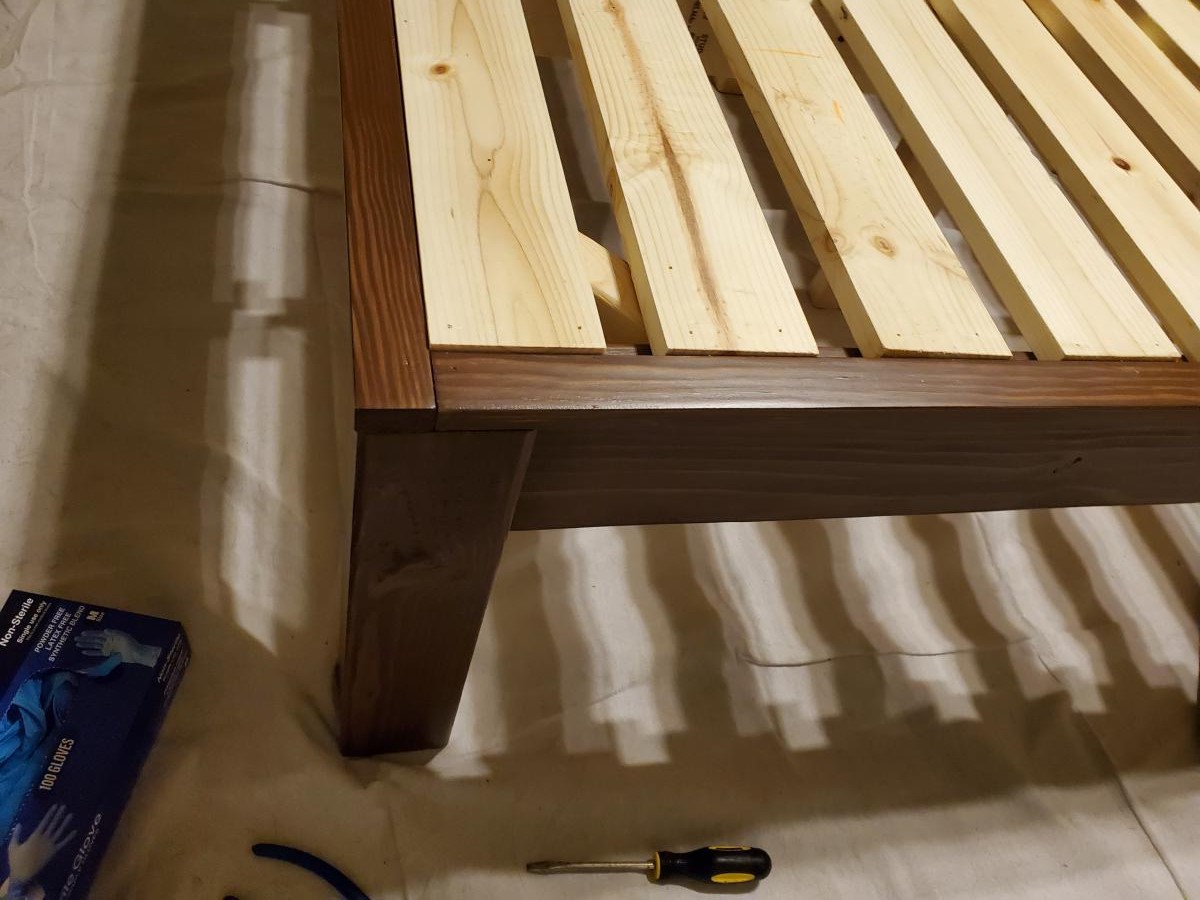
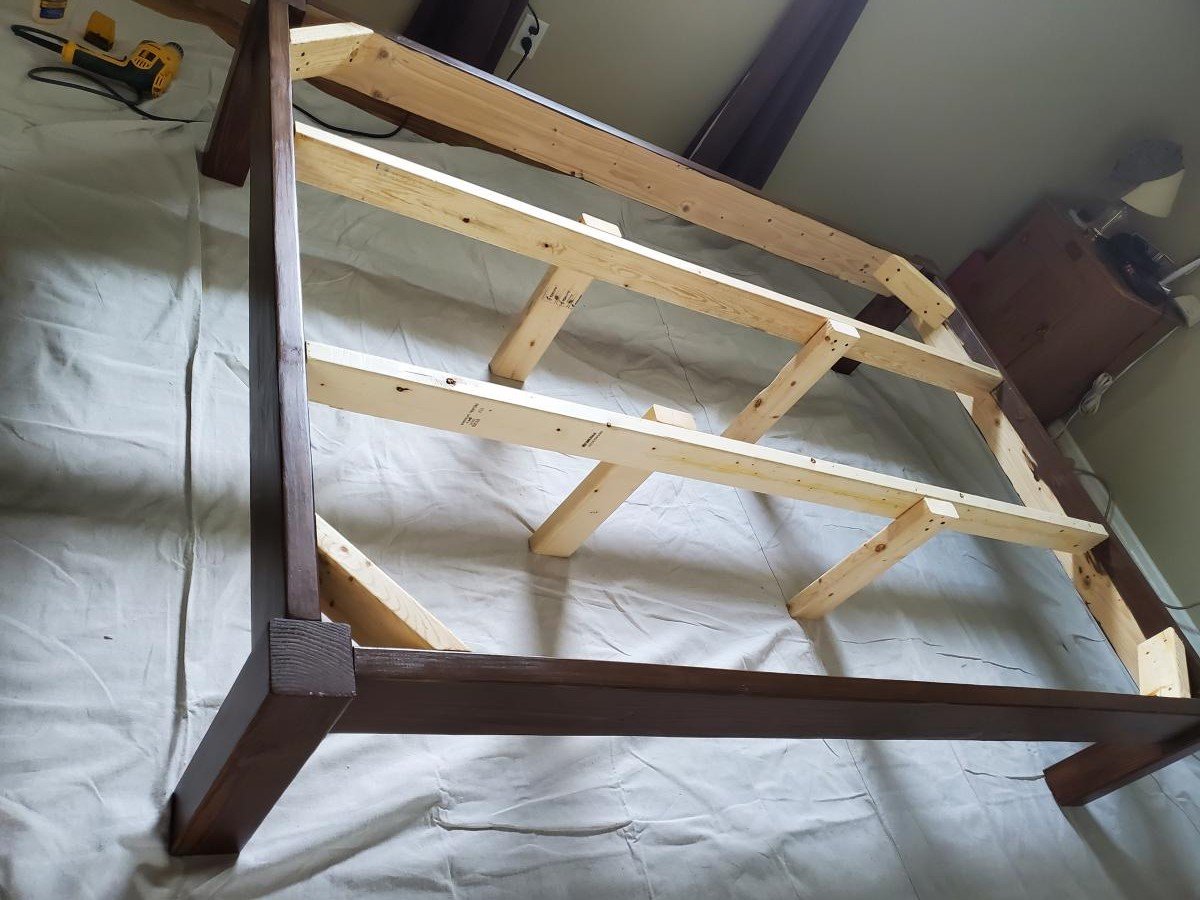
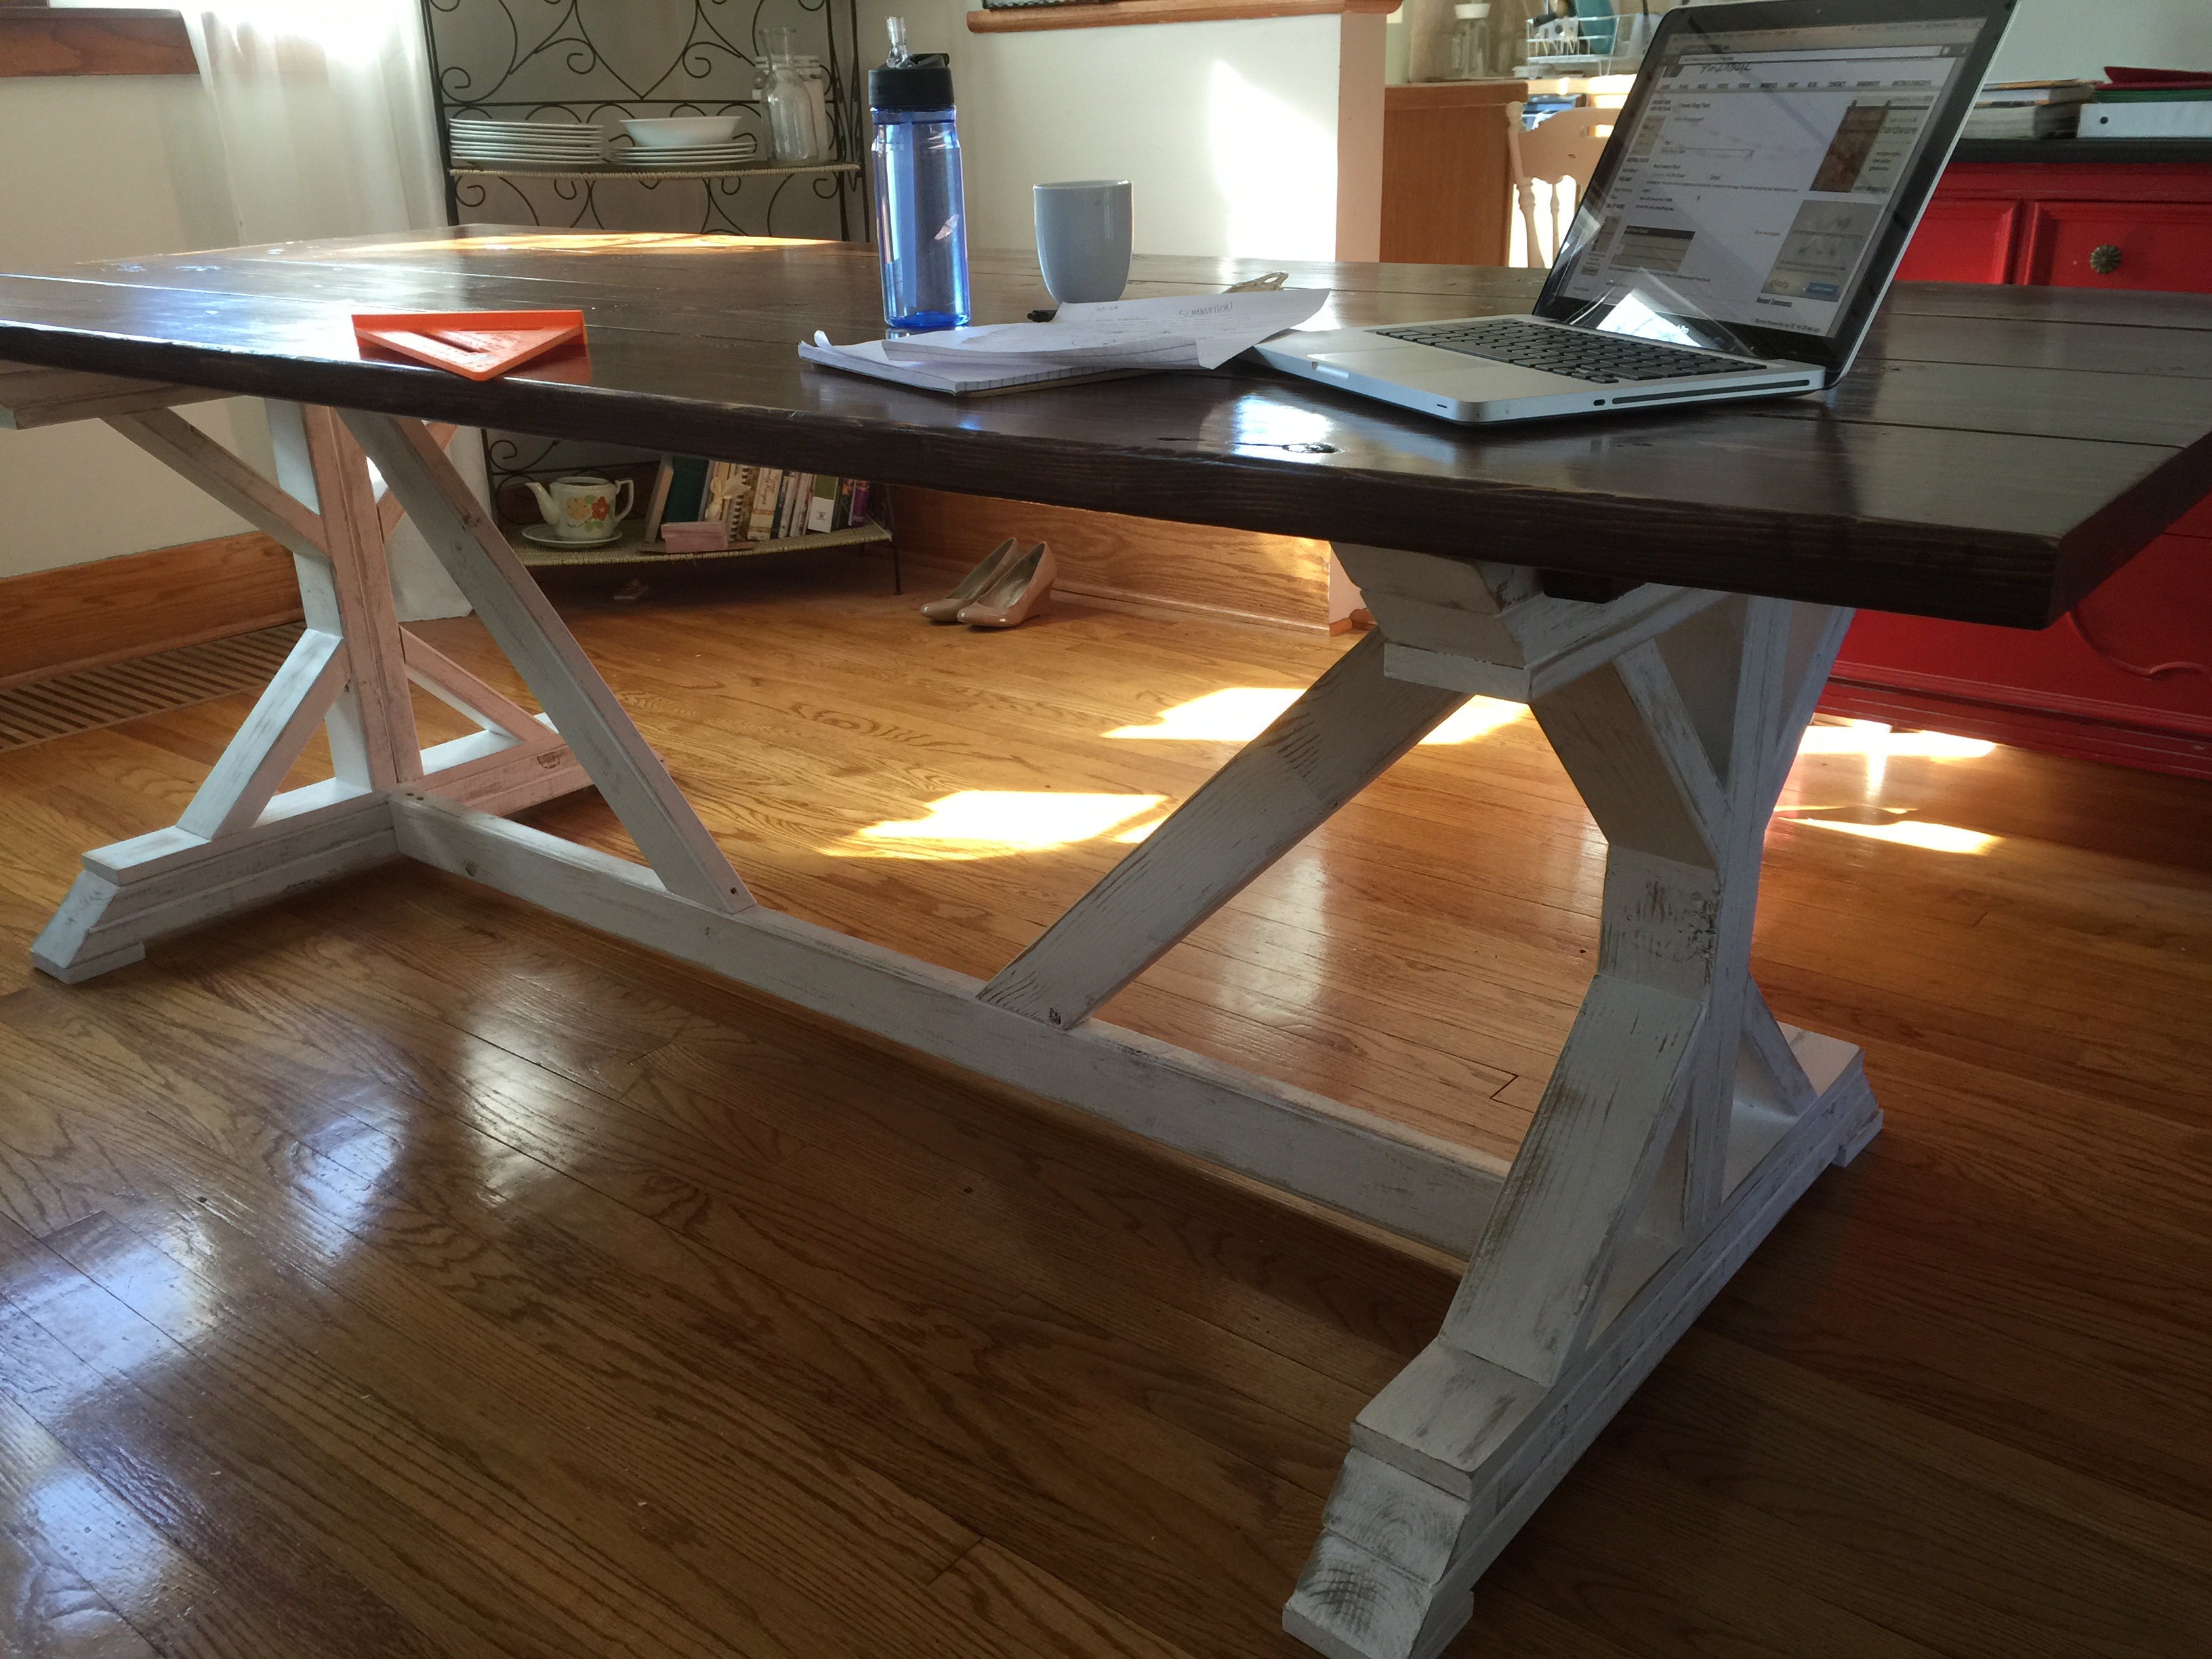
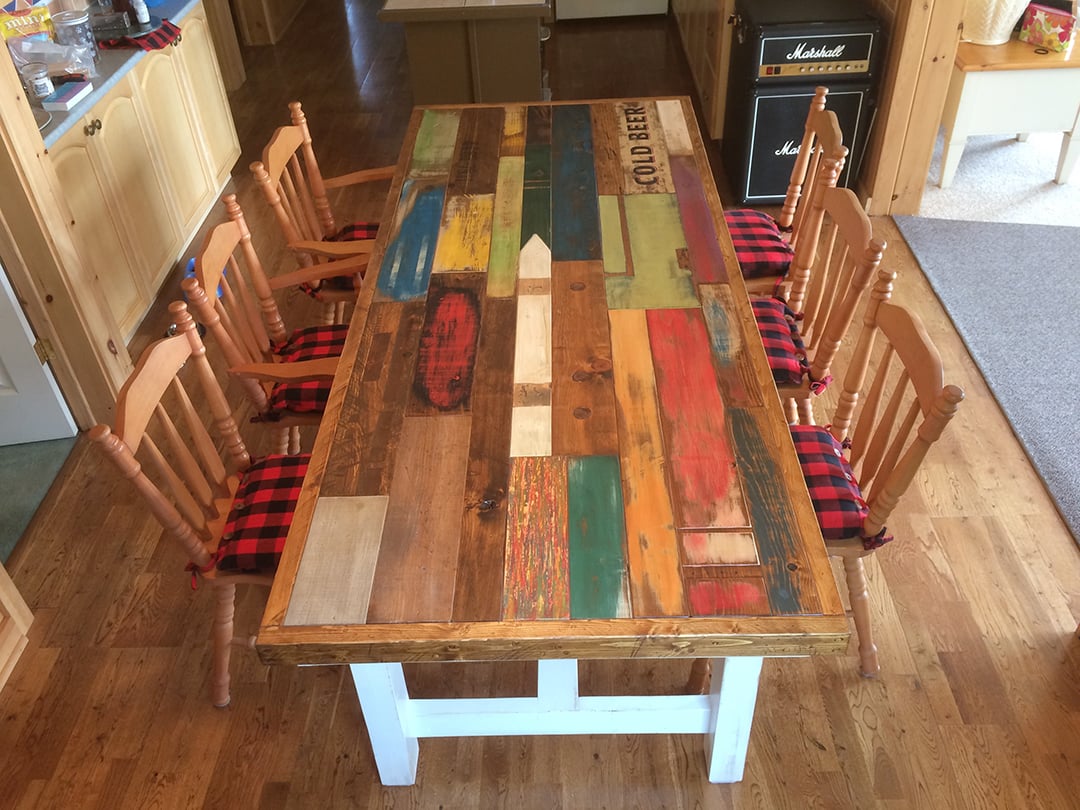
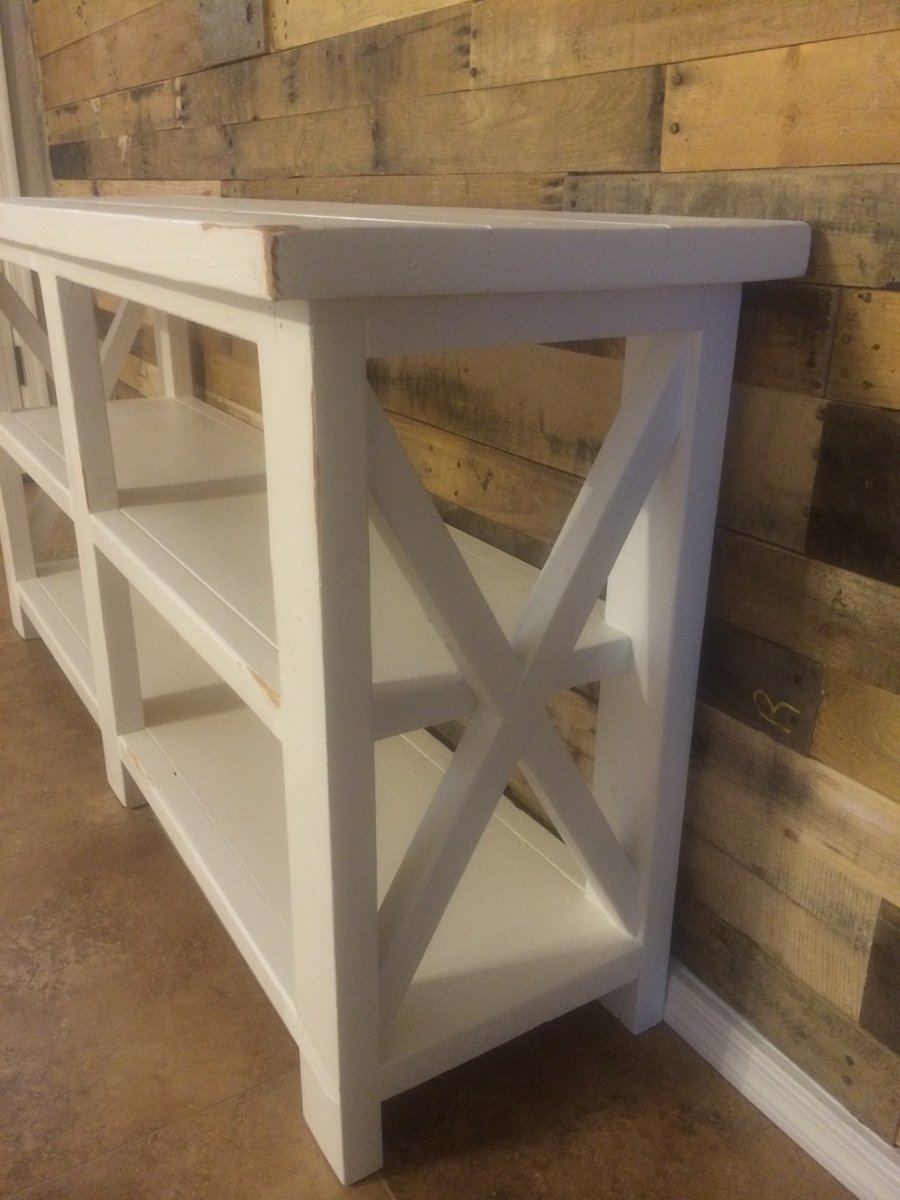
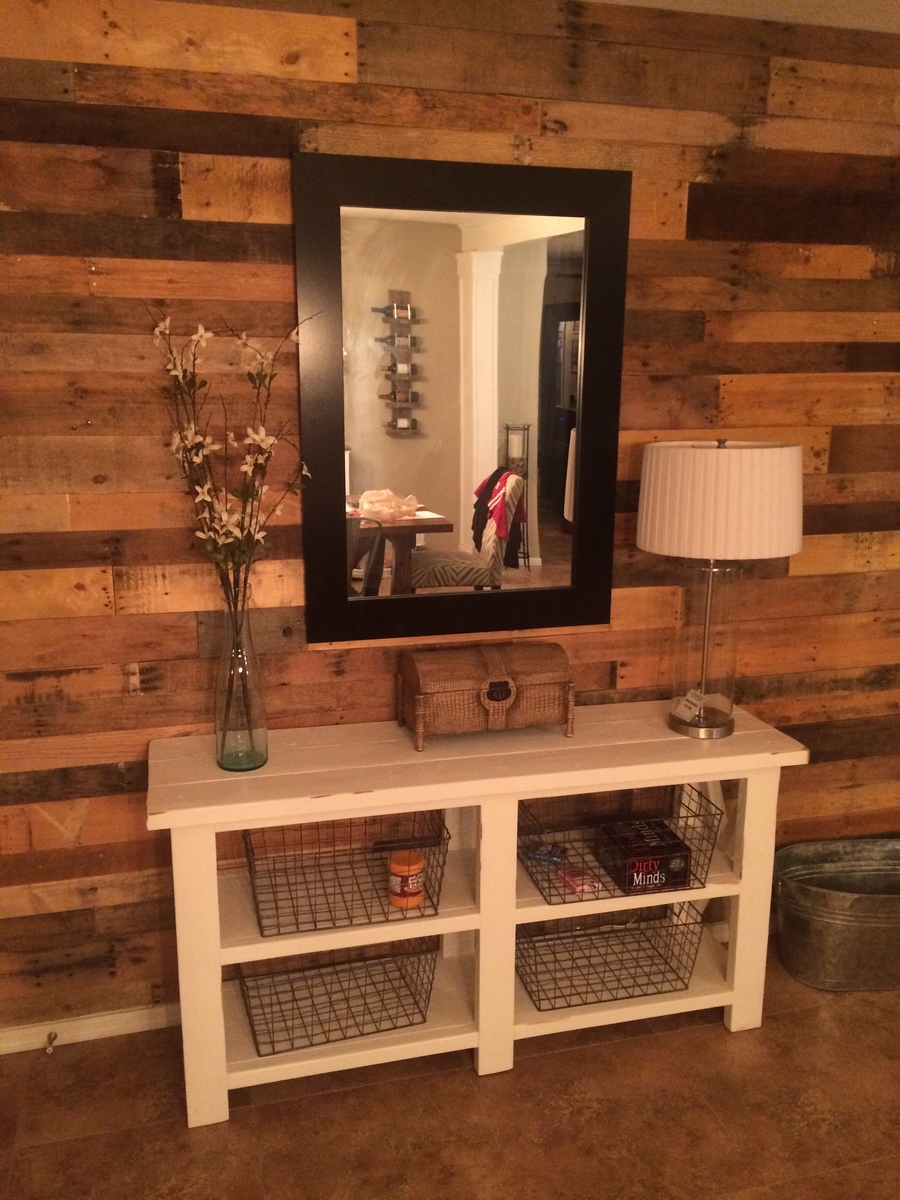
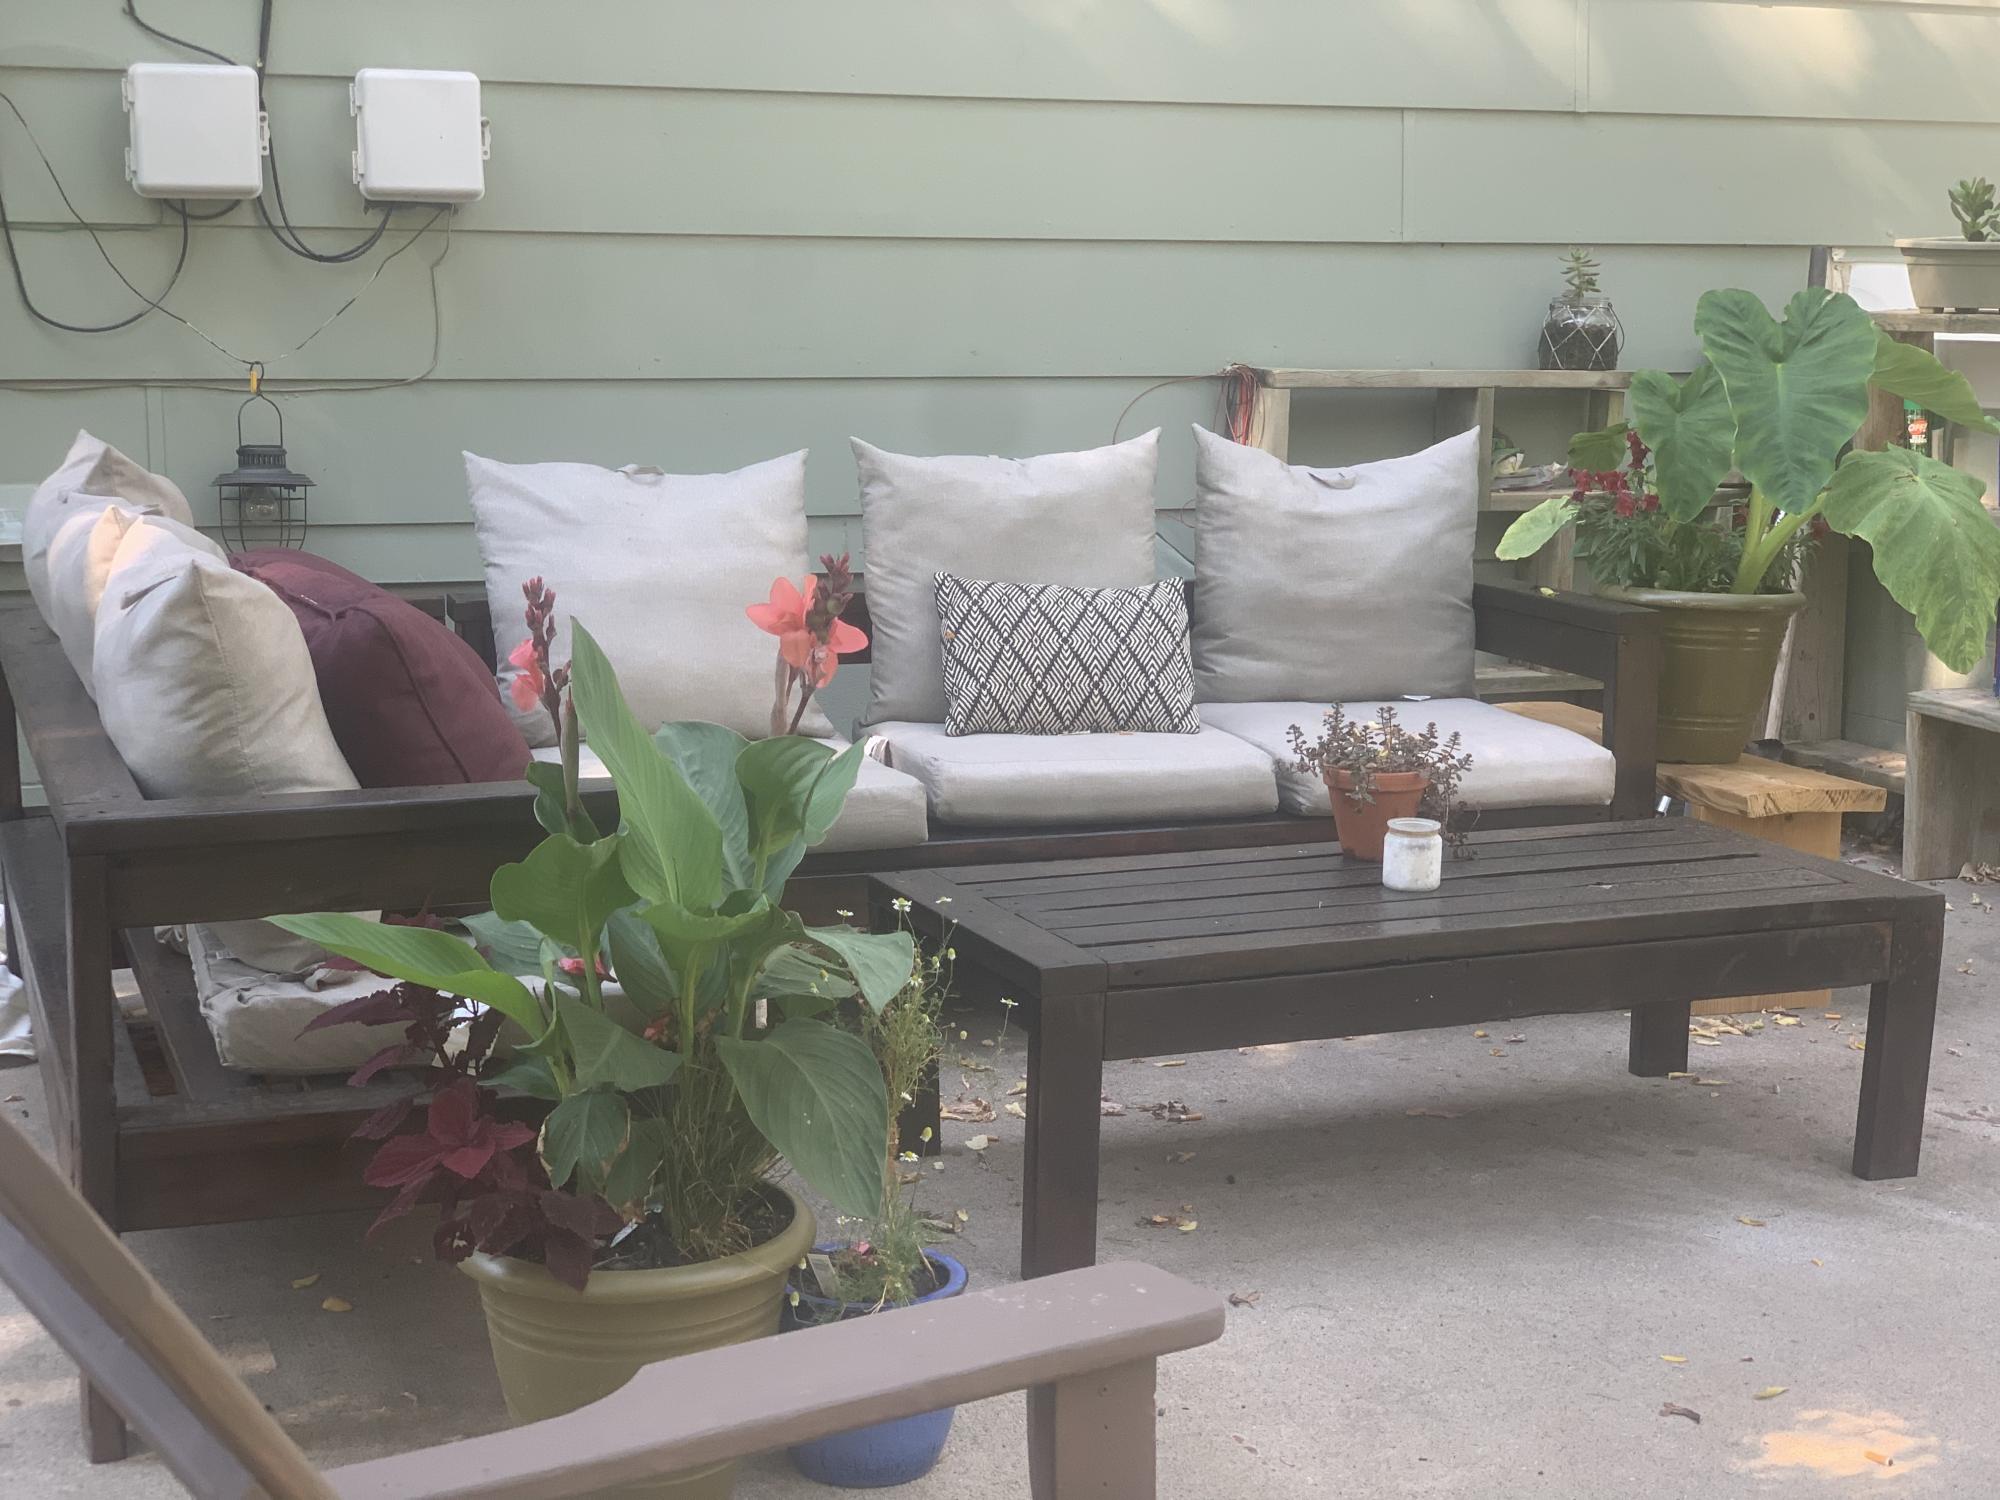
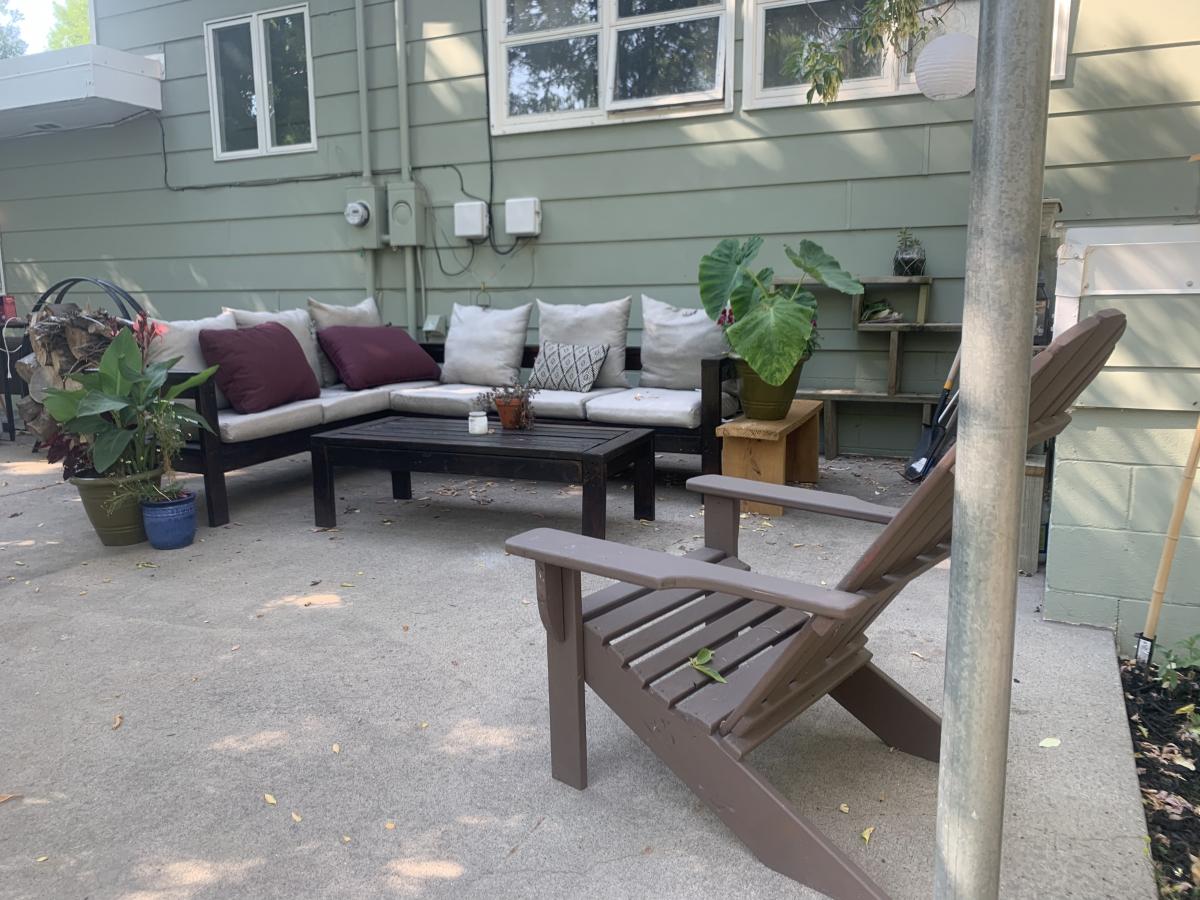
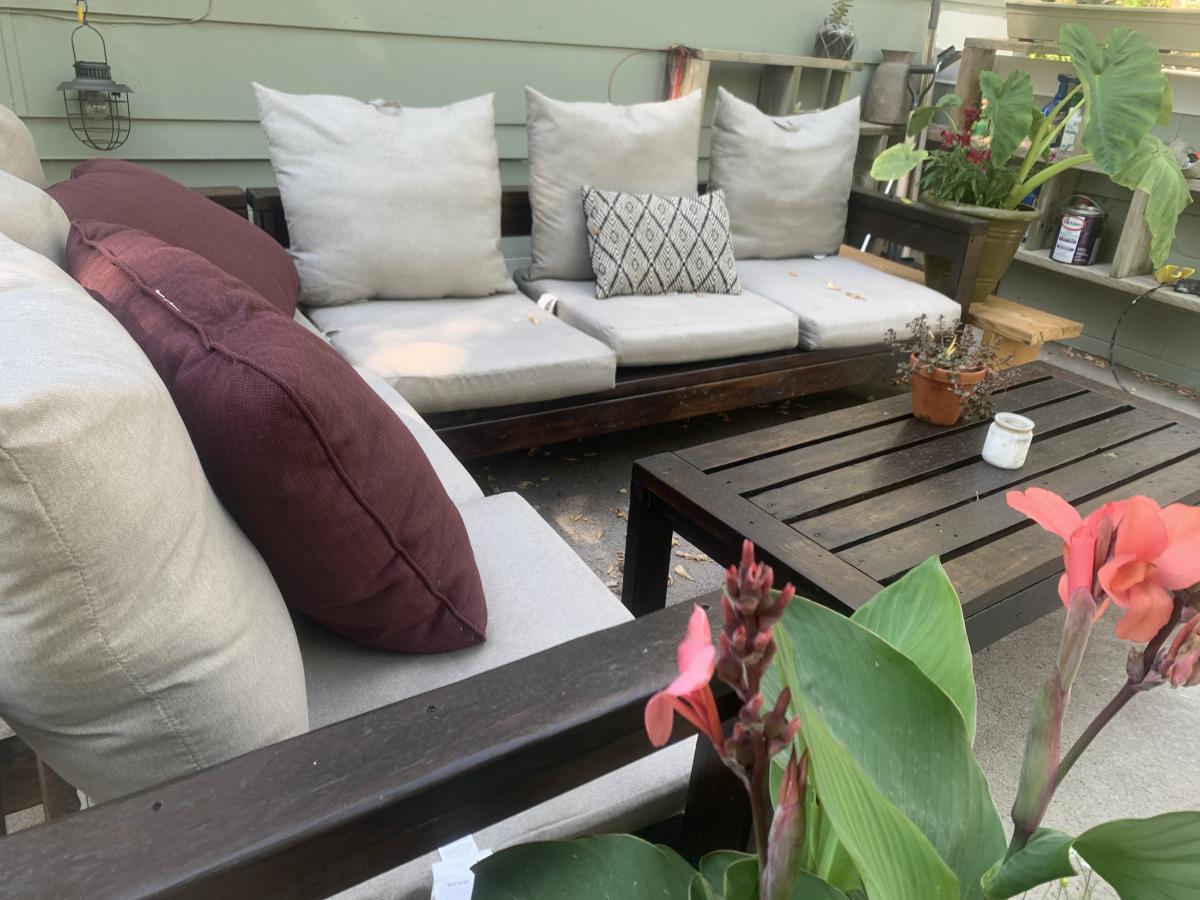
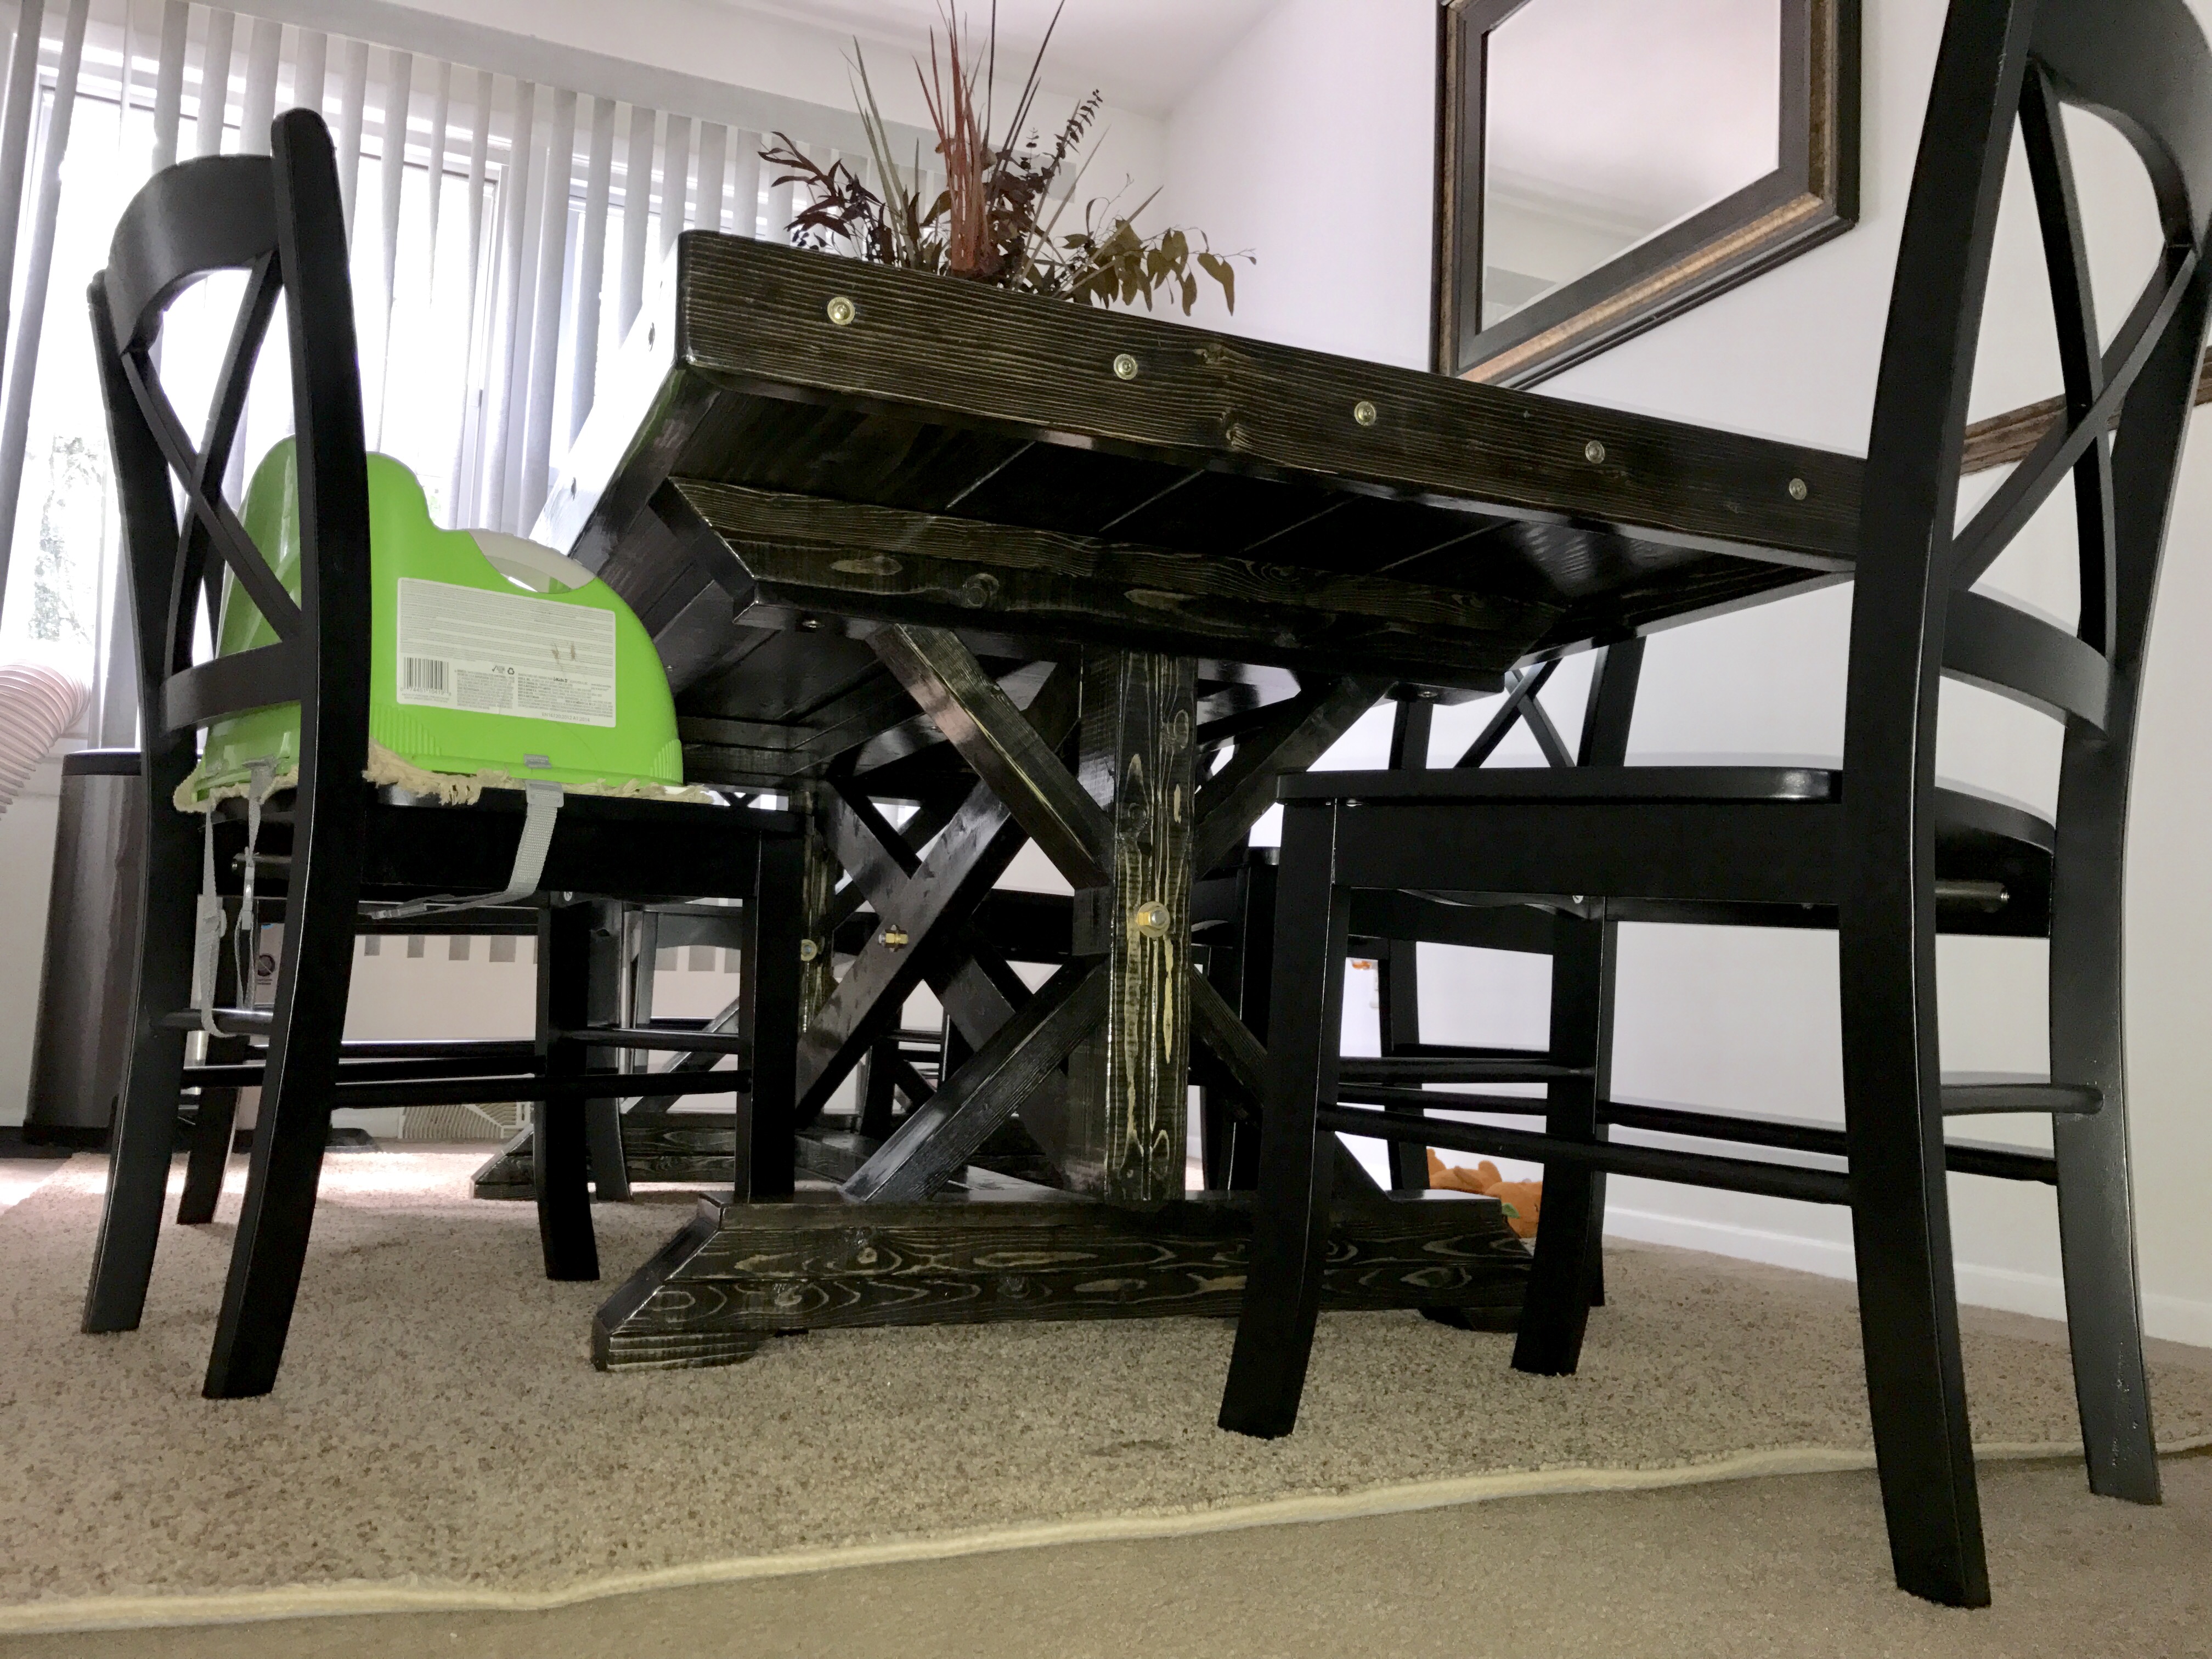
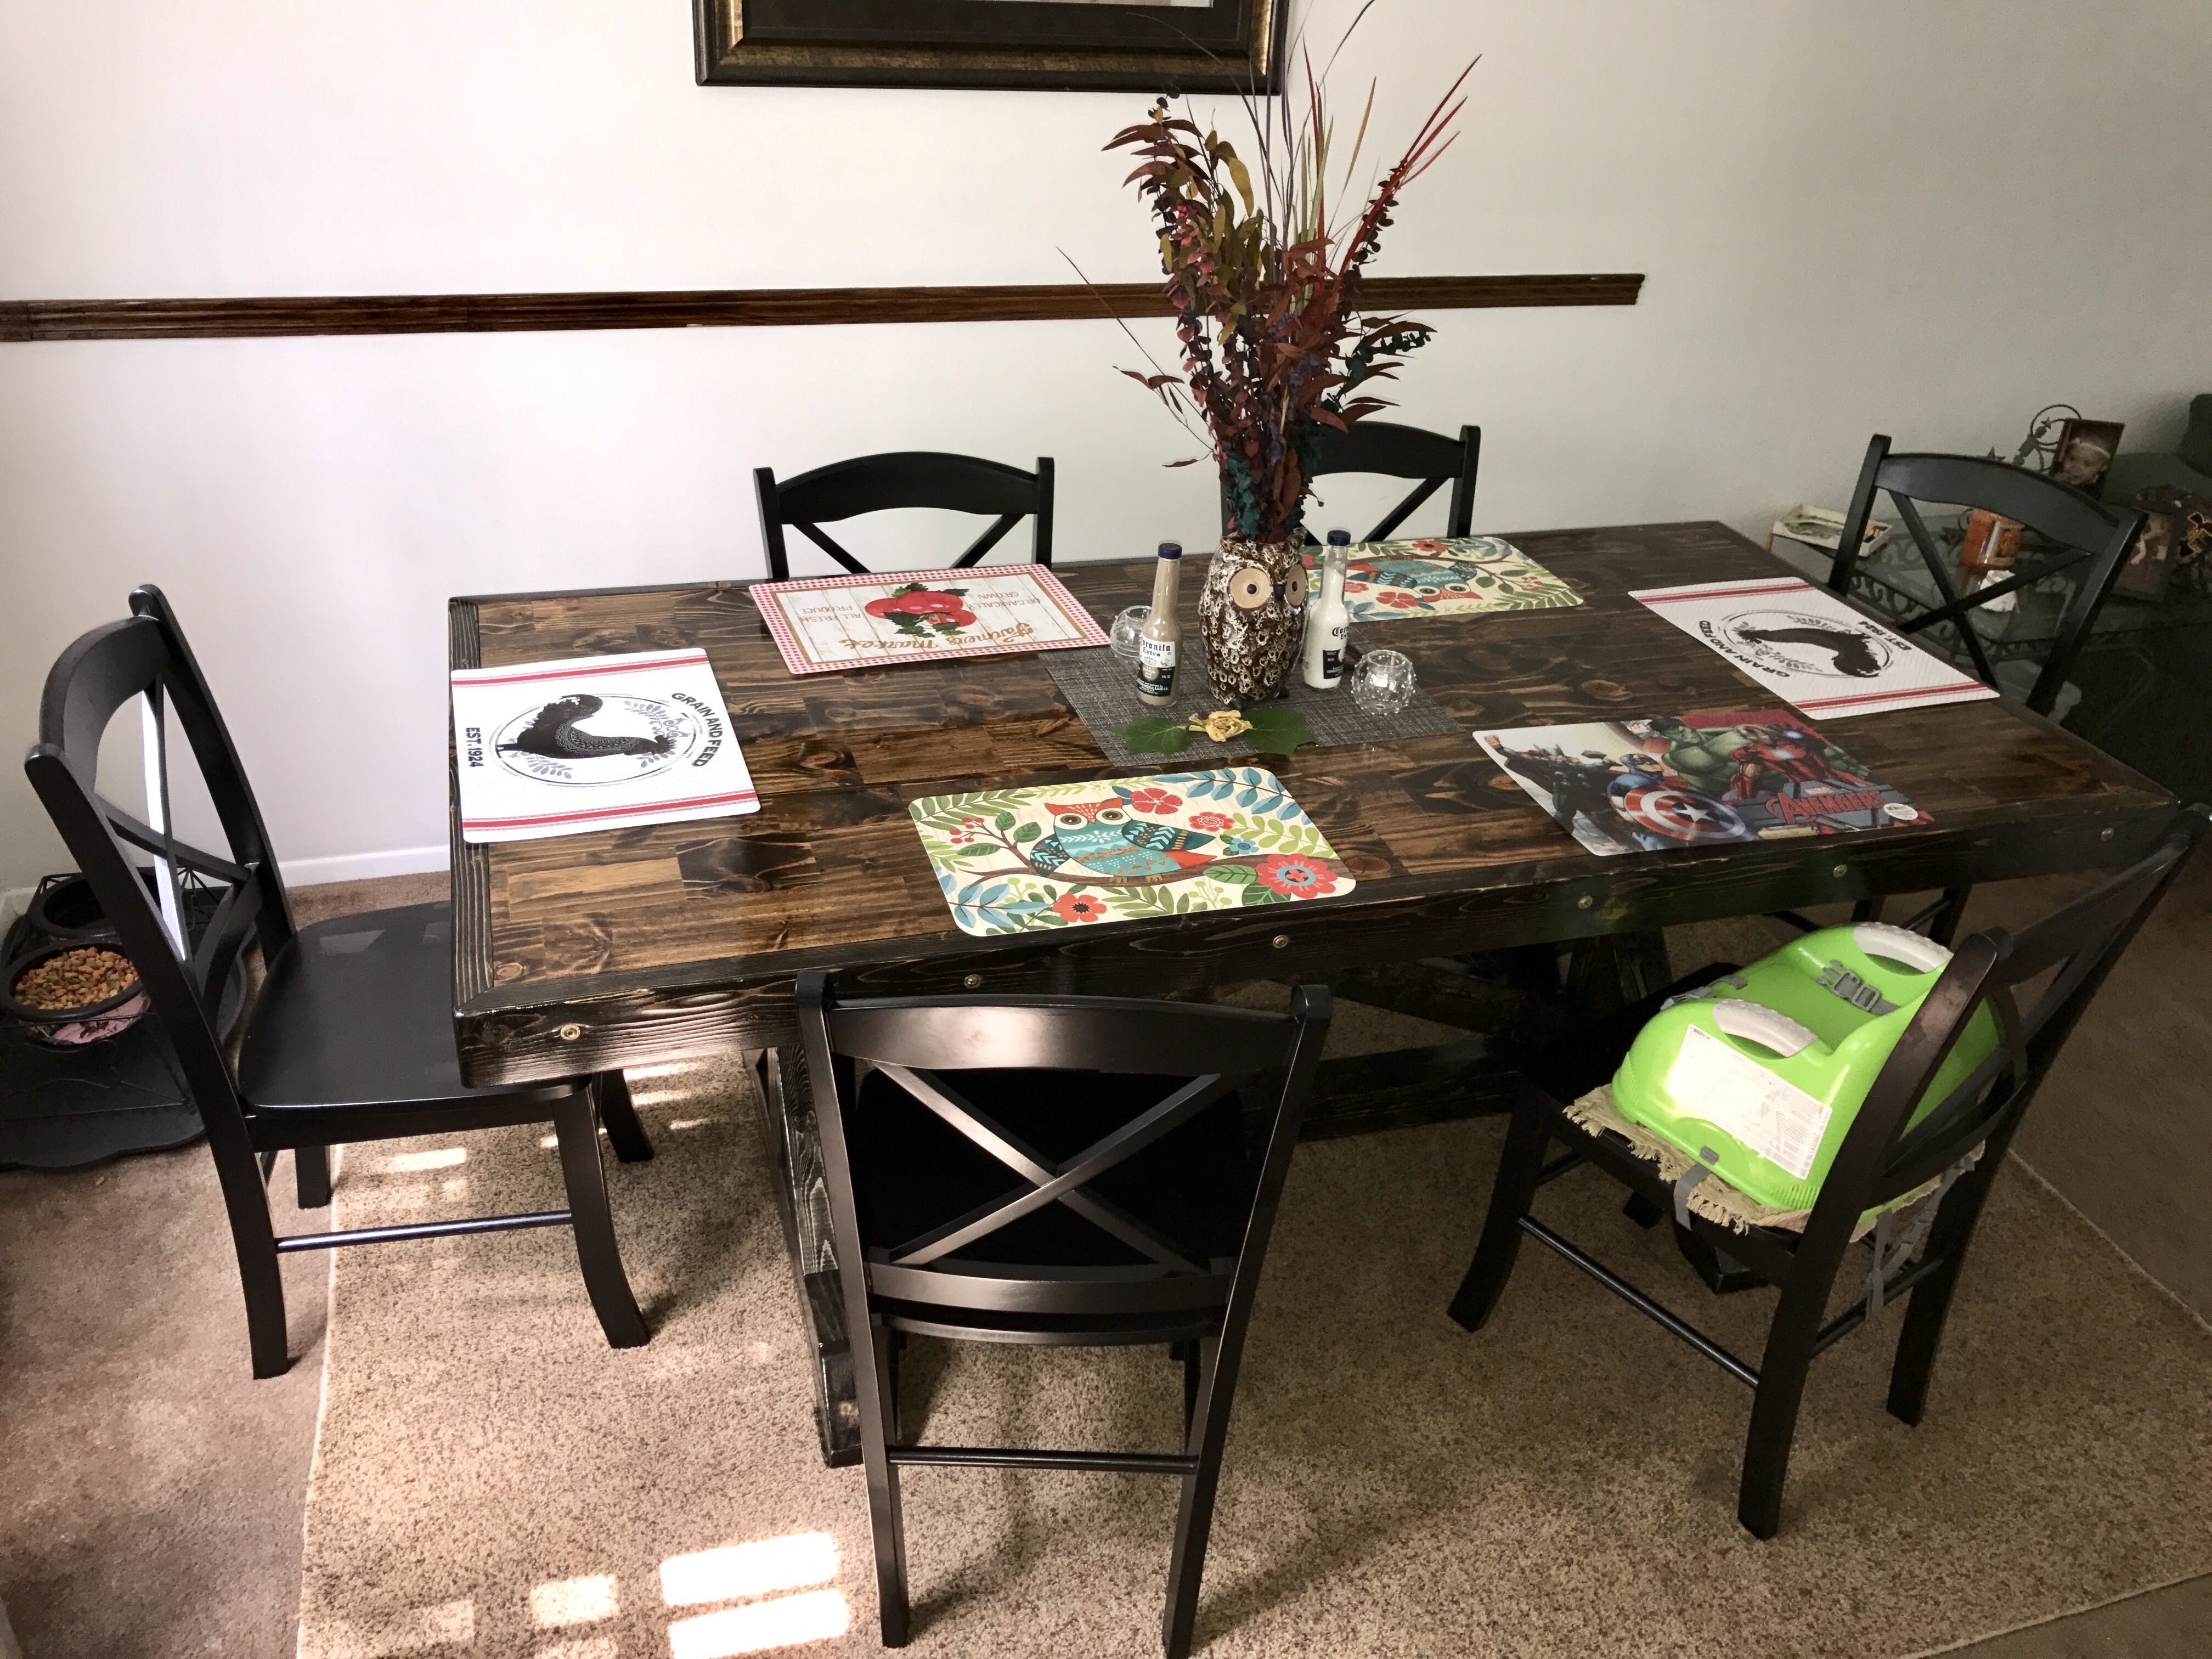
Fancy X Farmhouse Table tweaked

Submitted by Anonymous (not verified) on Fri, 06/02/2017 - 12:01

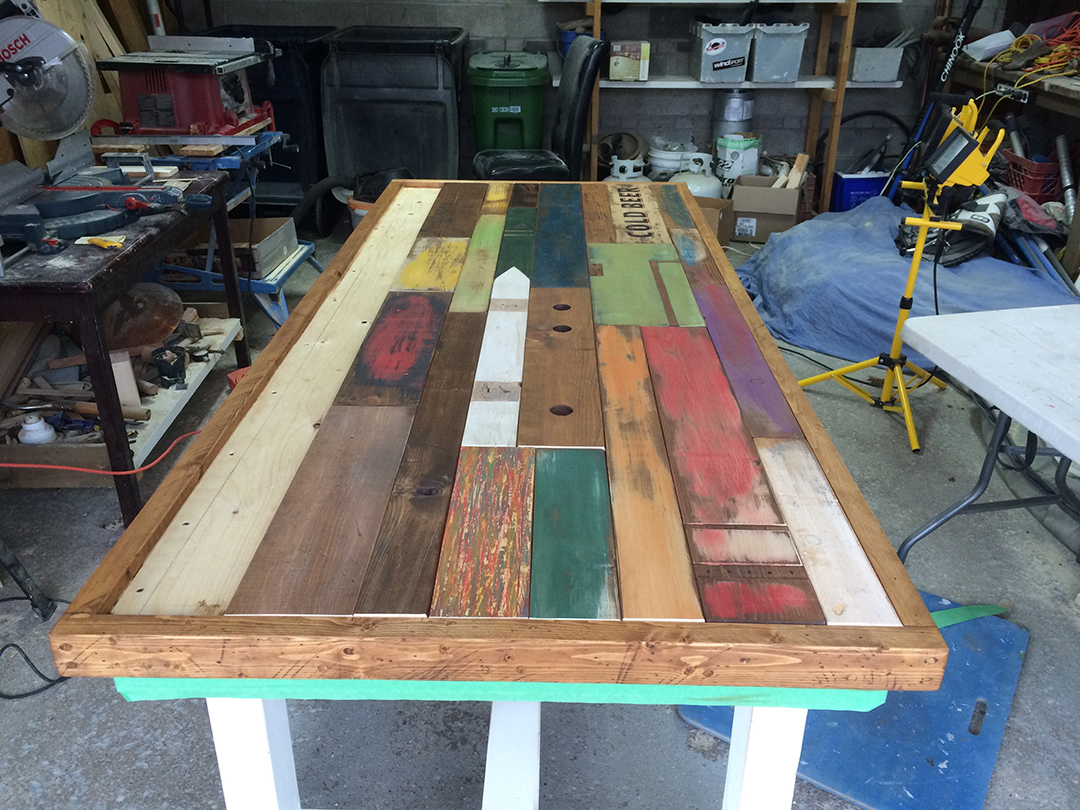
Thank you for your plans on the Fancy X Farmhouse Table. Those where the foundation from which I built this new table for my family. Although tweaked a little my inspiration was a direct result of the beautiful table you built. 

Built from Plan(s)
Estimated Time Investment
Week Long Project (20 Hours or More)
Finish Used
Ebony for base and too framing. Espresso used for top.
Recommended Skill Level
Intermediate

Tree house bed

Submitted by Anonymous (not verified) on Sat, 07/10/2021 - 07:51

I wanted to post my sons tree house bed I made inspired by you I changed a few things to make it my own but I couldn’t have done this without following your framing and measurements :) thanks so much

Comments

Washer and Dryer Pedestal

This thing is awesome! The access to my crawlspace was conveniently put under the dryer, but with both the washer and dryer on the pedestal I can slide it forward by myself if I need to get into the crawlspace. Bonus! I couldn't find any basecap so I used a plain old piece of trim. I also had some 1/8 inch plywood that I ripped to trim the front and sides. Very happy with how it turned out.

Estimated Cost
50 (but I had spare OSB for the bottom, so I only bought 1 4x8)
Estimated Time Investment
An Hour or Two (0-2 Hours)
Finish Used
Sealed with Kilz and then Painted with Valspar white.
Recommended Skill Level
Beginner

King Bed

Submitted by sawdust on Sat, 03/07/2015 - 15:10

I made this bed frame without the headboard, I just put the same legs on all four corners. This is one sturdy frame, but watch it, when you stub your toe, the bed doesn't give!

Built from Plan(s)
Estimated Cost
$60.00
Estimated Time Investment
Weekend Project (10-20 Hours)
Finish Used
white wash pickling stain- minwax
Recommended Skill Level
Beginner

TV Console

Submitted by Anonymous (not verified) on Mon, 06/05/2017 - 16:39

I built this for my younger brother and his wife for their new home.

Built from Plan(s)
Estimated Cost
$80
Estimated Time Investment
Weekend Project (10-20 Hours)
Finish Used
Paint, stain, and polycrylic protective finish
Recommended Skill Level
Intermediate

All Season Stand

Followed the plans pretty much to the letter, made the sign reversible so it works for summer or winter.
3d printed the words instead of cutting out or purchasing wooden letters

Estimated Cost
20
Estimated Time Investment
Afternoon Project (3-6 Hours)
Recommended Skill Level
Beginner

Comments

TV Stand

This is my very first project. This is a cross between the Rustic X console and the Tryde media console. I liked the top of the Tryde, but the ease of the Rustic X.

I painted the trim in slightly off-white, the sides, top and shelf are done in a satin polyurethane.

I was amazed at how easy this was to make following your plans. The hardest part was getting my husband to let me use the power tools (most of which I have either bought for him as gifts or I owned before we got married). He says, "I thought you were afraid of the table saw?" Only when you use it, dear!

This took a day to build, and then forever to finish (it was like waiting for paint to dry ;)

Thank you for all of the amazing plans you have on this site. You may just be my new hero Ana!

Next up, a dining room table for my daughter, then the farmhouse bed for the other daughter. With a few tools, a little patience and couple of bags of O negative blood on standby, there is nothing you can't DIY. (I kid, I hurt myself with hand tools, never power tools).

Estimated Time Investment
Weekend Project (10-20 Hours)
Finish Used
CIL semi-gloss in Silk Moon for trim, Minwax satin finish polyurethane for shelves, top and sides. Three coats.
Recommended Skill Level
Beginner

Comments

Sonyah27

Fri, 02/19/2016 - 07:29

love the table. what size boards did you use for the top and shelves? same as rustic x console? thanks!

Shoes shoes used everywhere.

Submitted by Stevomul on Wed, 03/11/2015 - 12:34

Really enjoyed making this.. Shoes used to be everywhere, and really annoyed me. Great area to store away seasonal or occasional shoes.

Estimated Cost
£40
Estimated Time Investment
Day Project (6-9 Hours)
Finish Used
White satin wood
Mahogany stain
Recommended Skill Level
Beginner

Comments

Love your site!

Submitted by Anonymous (not verified) on Fri, 06/09/2017 - 15:55

I'm so glad I found your blog/website. It is exactly what I was looking for. I'm going to tackle the farm table & benches next and then adjust the porch swing plan to make a bed swing for a friend. Thanks for the great ideas!

Built from Plan(s)
Estimated Cost
$30
Estimated Time Investment
Afternoon Project (3-6 Hours)
Finish Used
Stain/Sealer
Recommended Skill Level
Beginner

Modern Slat Top Outdoor Wood Bench

Submitted by Anonymous (not verified) on Tue, 08/03/2021 - 06:31

Love your easy instructions! I used all 2x4's because it was made with left over wood from another project. I burned the top pieces to get the grain to stand out and painted the legs. I think they turned out beautiful. I also used your 2x4 Adirondack Chair Plan to match the bench.
Thanks,
Yvette

Recommended Skill Level
Beginner

Comments

Lemonade Stand

Submitted by Anonymous (not verified) on Mon, 06/12/2017 - 07:42

My daughters decided they wanted to do a lemonade stand at their Nana's yard sale.  I'm a beginner when it comes to woodworking projects so when I came across Ana's plans for the fence picket lemonade stand, I just HAD to give it a try!  This was a fun project and the plans were extremely helpful and straight-forward.  I would definitely recommend if anyone is looking for a cute lemonade stand for their kiddos!  Side note - my girls raised $75 for the Alex's Lemonade Stand Foundation to help fight childhood cancer! So proud! 

Built from Plan(s)
Estimated Cost
$30
Estimated Time Investment
An Hour or Two (0-2 Hours)
Finish Used
Minwax Dark Walnut stain with Sherwin Williams Alabaster dry brushed over the top once stain dried.
Recommended Skill Level
Starter Project

Essential platform bed - Queen

Submitted by kimsteps on Tue, 08/10/2021 - 17:52

I can't thank you enough for these easy to follow plans. I'm not an experienced builder at all, but was able to build this queen size platform bed. I used Douglas Fir for all visible parts, and finished with minwax semi-transparent stain in walnut. I followed this with three coats of poly-acrylic. No one can believe I was able to build this myself, and frankly I can't either. What a confidence boost!

Estimated Cost
$175
Estimated Time Investment
Weekend Project (10-20 Hours)
Finish Used
Minwax semi-transparent water based wood finish in walnut followed by 3 layers satin poly acrylic.
Recommended Skill Level
Beginner

Comments

Side Street Bunk Beds

Submitted by ananda473 on Fri, 04/26/2013 - 07:45

We built these beds Nov/Dec 2012 for our boys ages 2 & 4. This was our first furniture project. It was fairly easy but I did learn a few things along the way. They may seams dumb to most of you, but being our first project we encountered a few problems. My #1 tip is to cut your pieces, THEN SAND THEM. Before constructing the beds. We sanded afterwards, and trying to sand in the little gaps between the slats was hard. Like other posts, we had some trouble with the ladder. The side pieces were not long enough. We just re cut them and added another "rung". The finish is Valspar's Fly By Night blue. It is a very deep navy. Although I sanded my heart out and used a whole tub of wood filler they are still made using 2x4s and have dings and nicks that just come with soft woods. Our boys love them, and no they're not perfect but I think it will work to our advantage. Now when the boys act like boys I'm not away or stressing or any little dings they might be creating to the bed.

Built from Plan(s)
Estimated Time Investment
Week Long Project (20 Hours or More)
Finish Used
Valspar Fly By Night
Recommended Skill Level
Beginner

Dining Room Table

My first woodwork project from the DIY on this website and I'm very happy with how it turned out!

Built from Plan(s)
Estimated Cost
$90
Estimated Time Investment
Weekend Project (10-20 Hours)
Finish Used
English Chestnut for the Table Top
White Paint, distressed then coated with Weathered Oak stain for base
Recommended Skill Level
Beginner

Comments

Half furniture/half art farmhouse table

Submitted by Anonymous (not verified) on Wed, 06/14/2017 - 12:29

For the most part I followed the plans for the legs and base structure as suggested. In our area the 2x4s are sold with rounded corners. To avoid a very obvious seam on the legs, I used 2x6s which I screwed and glued together then cut back to 3x4 (1.5x2) x 4 to make the legs and cross beams a little beefier with little or no seem on the legs. As I decided to build the top from reclaimed wood I framed in the top with 2x4 ripped down to approx.. 2x3 with a sheet of plywood to support top boards. As I don’t have a planner to level any reclaimed top boards I could find, I decided to make my own faux reclaimed boards out of ¾’ x 9’ – 8’ planks. I distress the wood using a chain, rocks my table saw, hammer, nails, blowtorch and bow saw. In hindsight, I wish I had distressed a little more vigorously but everyday use will augment it over time. I continued to paint, distress and sand on the fly, using paints I had left from previous projects. In some cases, I mixed paints to get additional colour varierty. All boards were stained at the to colour bare areas which as a bonus added a slight yellow hue making the paint look older. I did some scraping and blowtorching of semi-dry paint and stain to get a variety of looks and textures. I dry fit the boards and reorganized the puzzle pieces to get a random but organized look – controlled chaos. Once I was close I glued and screwed the board down clamping as I went to keep the boards tight. This paid-off later as the tighter seams allow less food to fall in-between. I cut down the last row from over sized pieces to get a tight fit in the last row. I finished with 11 coats of poly to toughen up the pine and again to seal the seams from food. My wife suggested painting the legs off-white as our cottage already is max-ed out on natural wood. We will follow by painting the existing chairs the same off-white and adding a little distress for age. Cost was approx. $175 to 200. The plywood alone was $45, paint I had. Time was easily 50 hours as the artistic on the top, time although fun, was time consuming.

Anna’s website is great I have had many compliments on my table. I have pointed many people to the site for direction on their own projects. Thanks for the great plans.

Sandy

Estimated Cost
$175-200
Estimated Time Investment
Week Long Project (20 Hours or More)
Finish Used
Latex paint
Varathane Premium woodstain – Tuscan
Minwax® Polycrylic® Protective Finish – Satin
Recommended Skill Level
Intermediate

Rustic X Entry Table

Submitted by tedgray86 on Wed, 03/18/2015 - 22:01

Rustic x end table build

Built from Plan(s)
Estimated Time Investment
Afternoon Project (3-6 Hours)
Recommended Skill Level
Beginner

Comments

Weekend Project King Bed

Submitted by Anonymous (not verified) on Sun, 06/18/2017 - 10:26

First ever wood project. Under $200 in materials! Less than a weekend of work (for two people). Beautiful results!!!!! Built from plans on Ana-White.com The only change we made to the build was adding some additional support legs in the middle of the bed. 

Built from Plan(s)
Estimated Cost
$200
Estimated Time Investment
Weekend Project (10-20 Hours)
Finish Used
Satin Medium Walnut
Minwax water based poly stain combo
Recommended Skill Level
Beginner

Baby Changing Table for First Granddaughter

Submitted by Anonymous (not verified) on Sun, 09/05/2021 - 19:09

We are expecting our first granddaughter in October 2021. We used Ana White’s plans for a baby changing table as our inspiration and this design was the outcome of our efforts. We surprised our son and daughter-in-law and they were elated!

Built from Plan(s)

A Pair

We built a pair of these for our kids. Wanted to surprise them with a little shelf for each and it was really easy to do. Kids never saw them until it was all done since we bought the wood for this at the same time as we bought the wood for our own bed that we made.

Spray painted them using Krylon spray paint had more trouble locating appropriate paint (needed pink & purple seems most places didn't have this actually in stock!) than we had making the actual shelves. Took quite a few coats of paint though to get them looking nice.

Biggest complication that we actually had was finding the wood in suitable straight pieces. Ended up taking quite a while to select suitable pieces since most were bowed or warped to the point of being useless for our needs.

Final result though looks great and the kids absolutely love them. They are perfectly sized for water bottles and both kids had them in usage within mere minutes of them going up on the wall.

Built from Plan(s)
Estimated Time Investment
An Hour or Two (0-2 Hours)
Finish Used
Krylon Spray Paint
Recommended Skill Level
Starter Project

Comments

Rustic Lanterns

Submitted by naomi on Fri, 06/23/2017 - 06:17

I always have heaps of scrap wood so I decided to make some lanterns.

These lanterns are larger than the last lanterns I made.

They are huge and they make a great statement.

I used old rusty fencing wire for the handles.

I also added some alluminium sheet to the 'ceilling' of the lantern so that there is no risk of burning.

The only cost was for the candles.

Estimated Cost
$0 made from scrap wood.
Estimated Time Investment
An Hour or Two (0-2 Hours)
Finish Used
walnut stain
Recommended Skill Level
Beginner

Scrap twisted stud outdoor sectional and table

Submitted by kaciejo on Wed, 09/15/2021 - 10:17

What to do with leftover twisted wood? Utilitarian single moms I straightenand make the outdoor sectional and table. Been wonderful.

Comments