Community Brag Posts

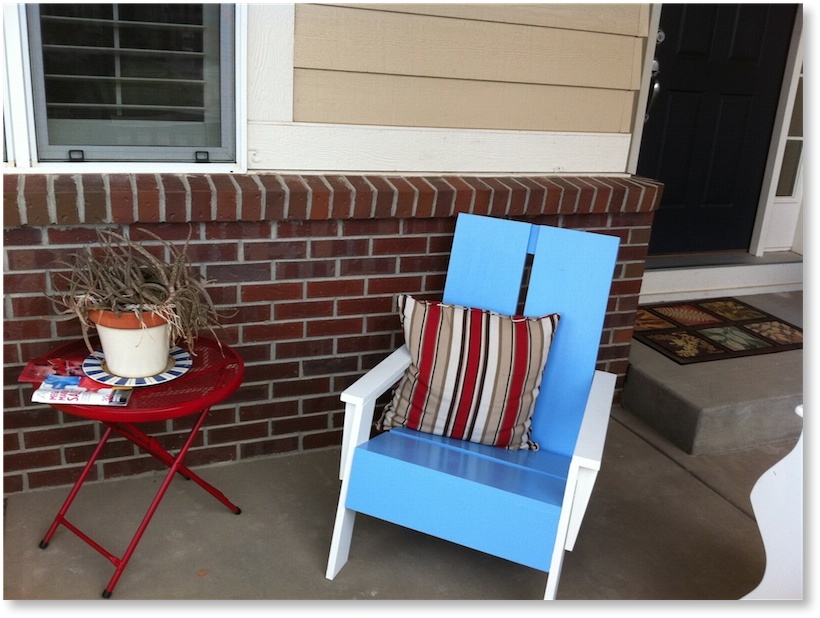
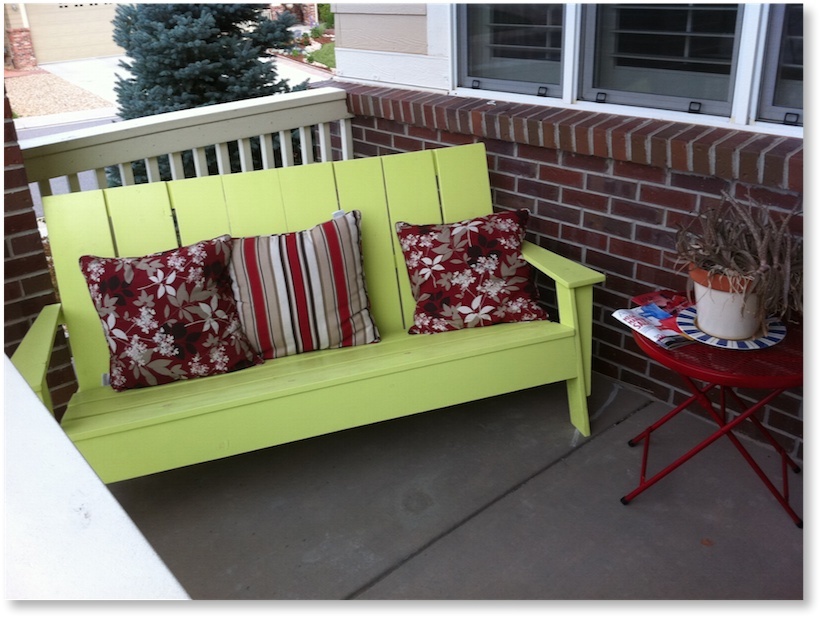
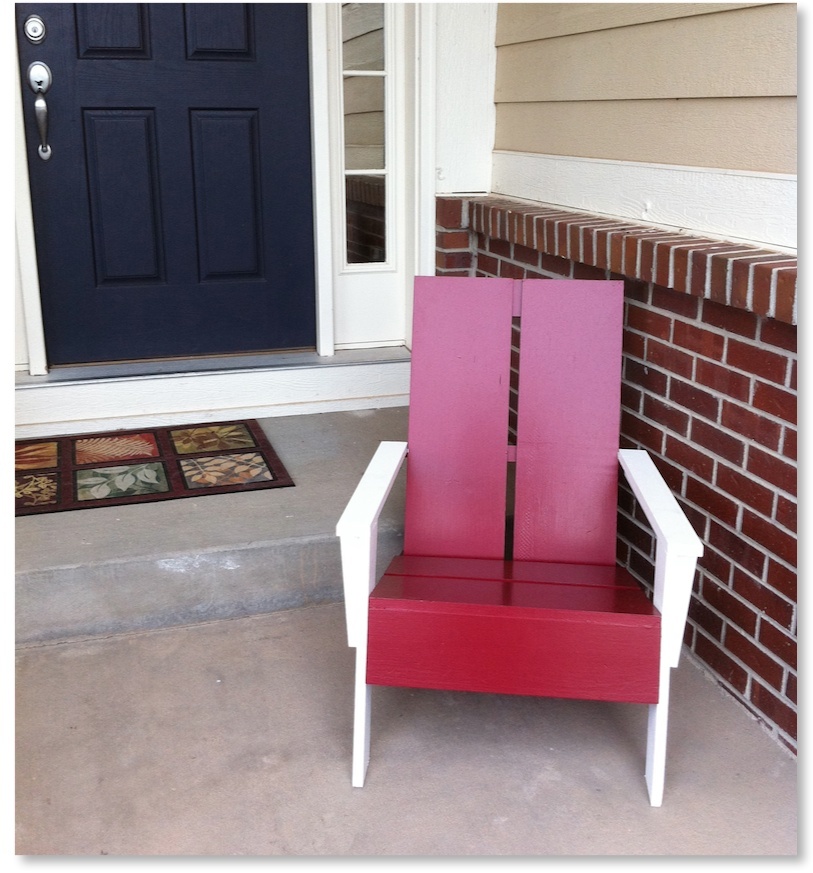
Chairs, Chairs Everywhere!
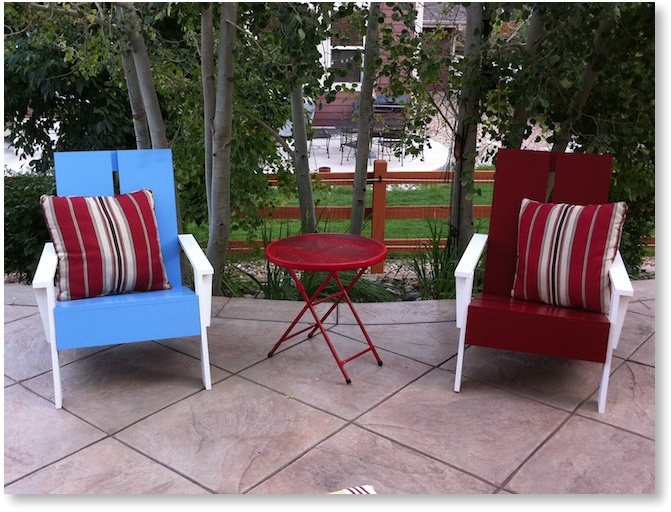
I started about a year ago building my bench. It has been on Ana's Site before- especially for the color- Citron from Orange. I also modified the arm supports to look more modern and changed the boards to be 10" on the seat and 12" on the backs.
This year my neighbor who is a painter and I teamed up and built 6 chairs and another bench! I cut all the wood, then my neighbor primed and painted all sides except one flat. After assembly, another 2 coats of paint went on all surfaces.
It was about $400 in material for 1 bench and 6 chairs (bought from Blue)
Oh- BTW. The table is from Target with a coat of red Rustoleum!

Built from Plan(s)
Estimated Cost
$400 + paint (1 Bench & 6 Chairs)
Estimated Time Investment
Week Long Project (20 Hours or More)
Finish Used
Zinzer Primer
Outdoor Laytex Gloss
Outdoor Laytex Gloss
Recommended Skill Level
Intermediate
Comments
Easy Whiteboard
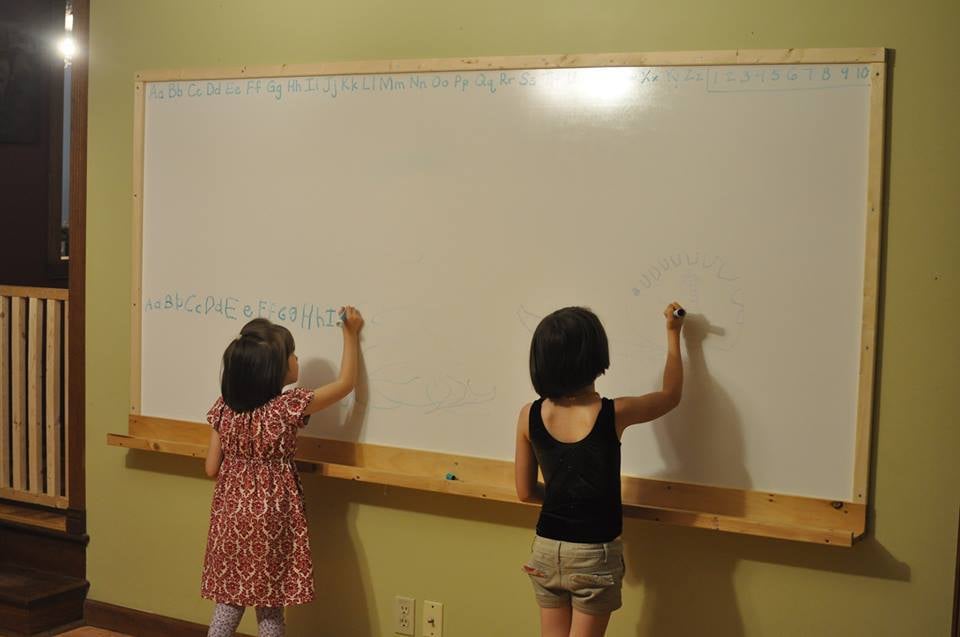
We wanted to put up a whiteboard to use for homeschooling and were amazed at the cost of even a small one. We got some shower board from Lowes that measures 8 feet by 4 feet, put 1x2" boards over the top and side edges and screwed through them into the wall studs, and added a Ten Dollar Ledge shelf we'd already been using for the kids' books. Super easy and it looks great!
Built from Plan(s)
Estimated Cost
Less than $30
Estimated Time Investment
An Hour or Two (0-2 Hours)
Recommended Skill Level
Starter Project
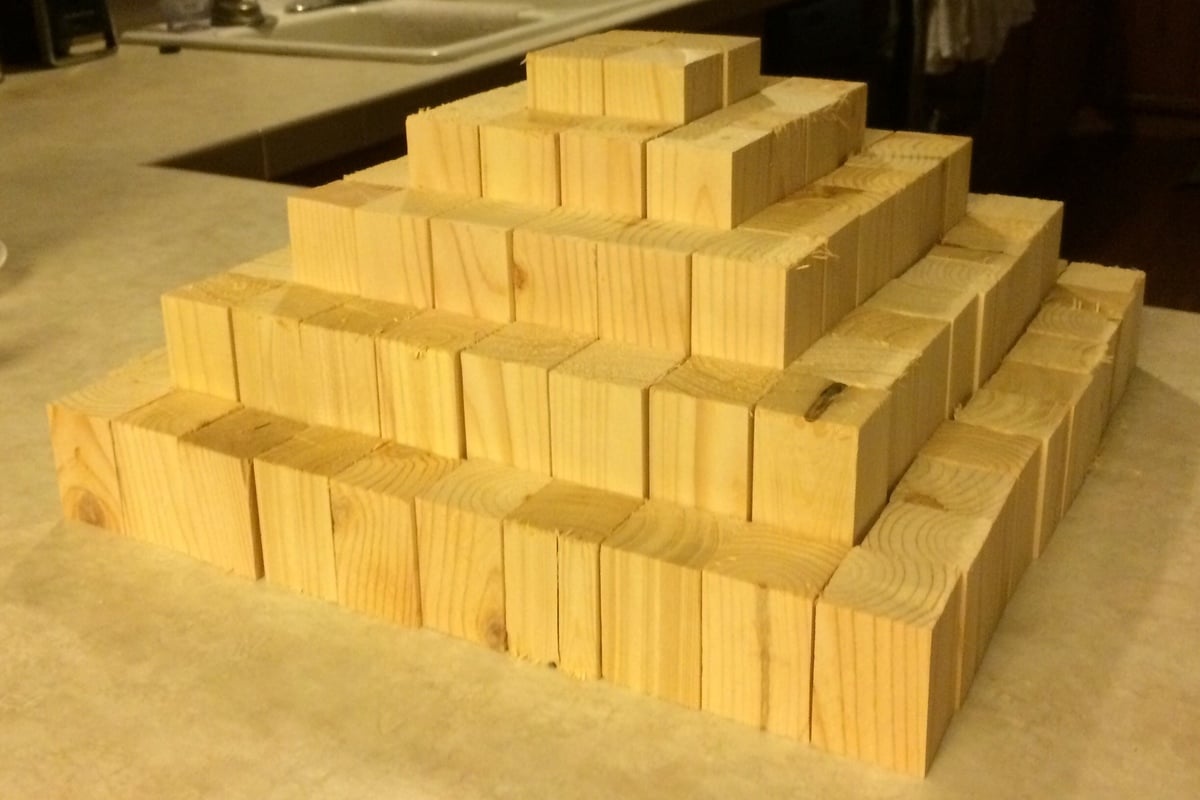
Building Block Pyramid
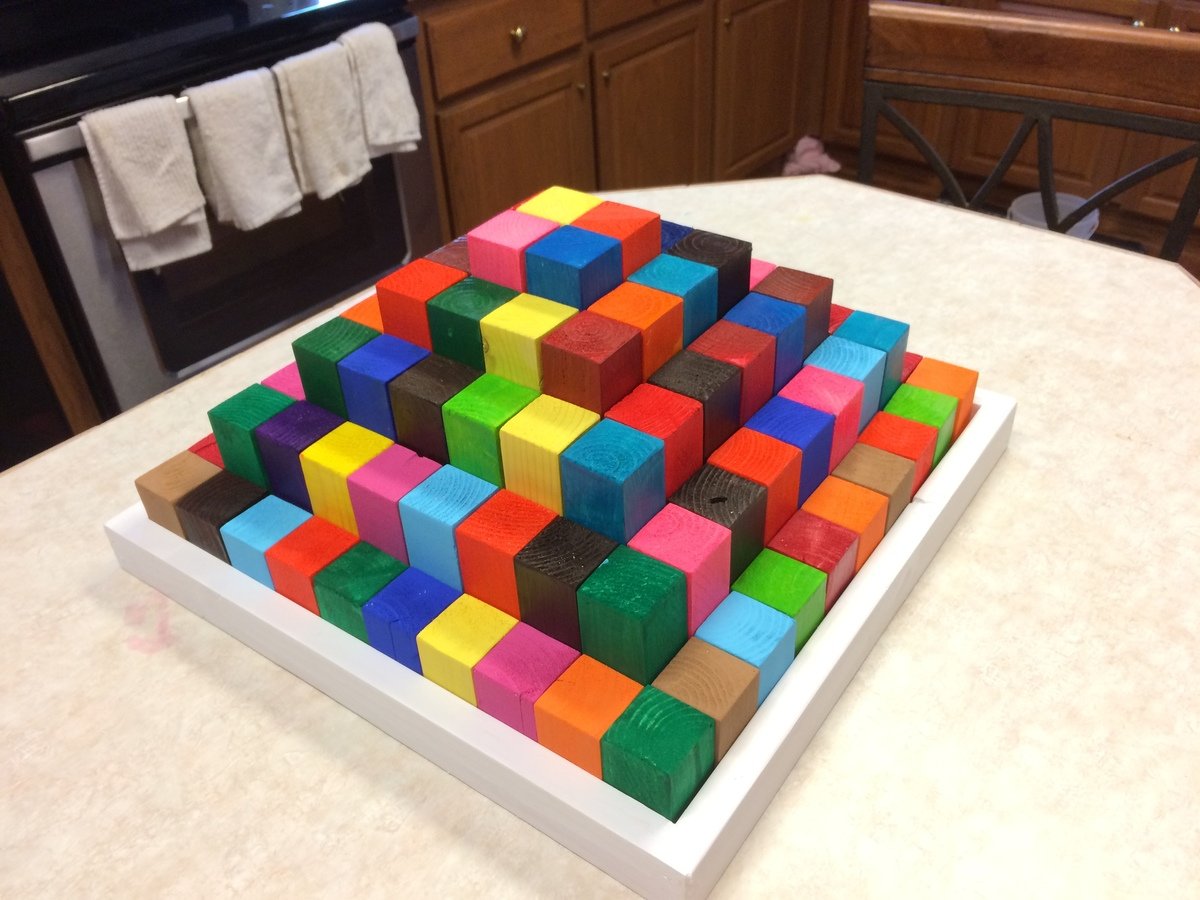
I used the homemade holiday plans to make this as a Christmas gift for my 2-year-old great-niece and it worked out really great!
Built from Plan(s)
Estimated Cost
$35-40
Estimated Time Investment
Weekend Project (10-20 Hours)
Finish Used
I finished the blocks with kid-safe, non-toxic acrylic paint and the tray with interior, latex, semi-gloss white paint.
I’ve used food coloring on blocks in the past, making toys for my rabbits, and it works well, but I was short on time and never would have gotten good coverage, thus the swap to acrylic paint.
I’ve used food coloring on blocks in the past, making toys for my rabbits, and it works well, but I was short on time and never would have gotten good coverage, thus the swap to acrylic paint.
Recommended Skill Level
Beginner
Comments

Fri, 01/04/2019 - 13:21
What a beautiful set!!! This
What a beautiful set!!! This will be treasured for sure! Thank you so much for sharing a photo, it is much appreciated. Happy New Year, Ana
Threshing Board Table

I wanted a character filled leave outside table for my pergola. I wanted to use reclaimed boards of some kind. I got estimates starting at $1,000 and I wasn't even sure I liked them. Then - hurray - I found your blog and started browsing through the DIY plans for farmhouse tables. I had a couple of ideas. First, I needed to find the wood. I found the gorgeous (still caked with manure) 2" thick barn threshing boards for a very reasonable price and they were long enough, at 8 feet, for my dream table to start taking shape.
The idea of creating with wood has always appealed to me, but I have never had any idea how to begin. Enter your plans + my lovely friend Lisa and her miter saw. As per the easy to follow instructions I went shopping for the wood. I chose a lovely cedar board which I think will weather nicely without taking away from the great patina on the top of the table.
Again - as per the easy to follow instructions - my friend and I put together the table, cleaned up and popped a bottle of sparkling wine to toast - all in about 3 hours!
BIG thanks to you and your inspiring work!


Built from Plan(s)
Estimated Cost
$40. for bottom of table, @$250. for reclaimed wood
Estimated Time Investment
Afternoon Project (3-6 Hours)
Finish Used
Top finished in a clear marine varnish.
Recommended Skill Level
Beginner
Comments
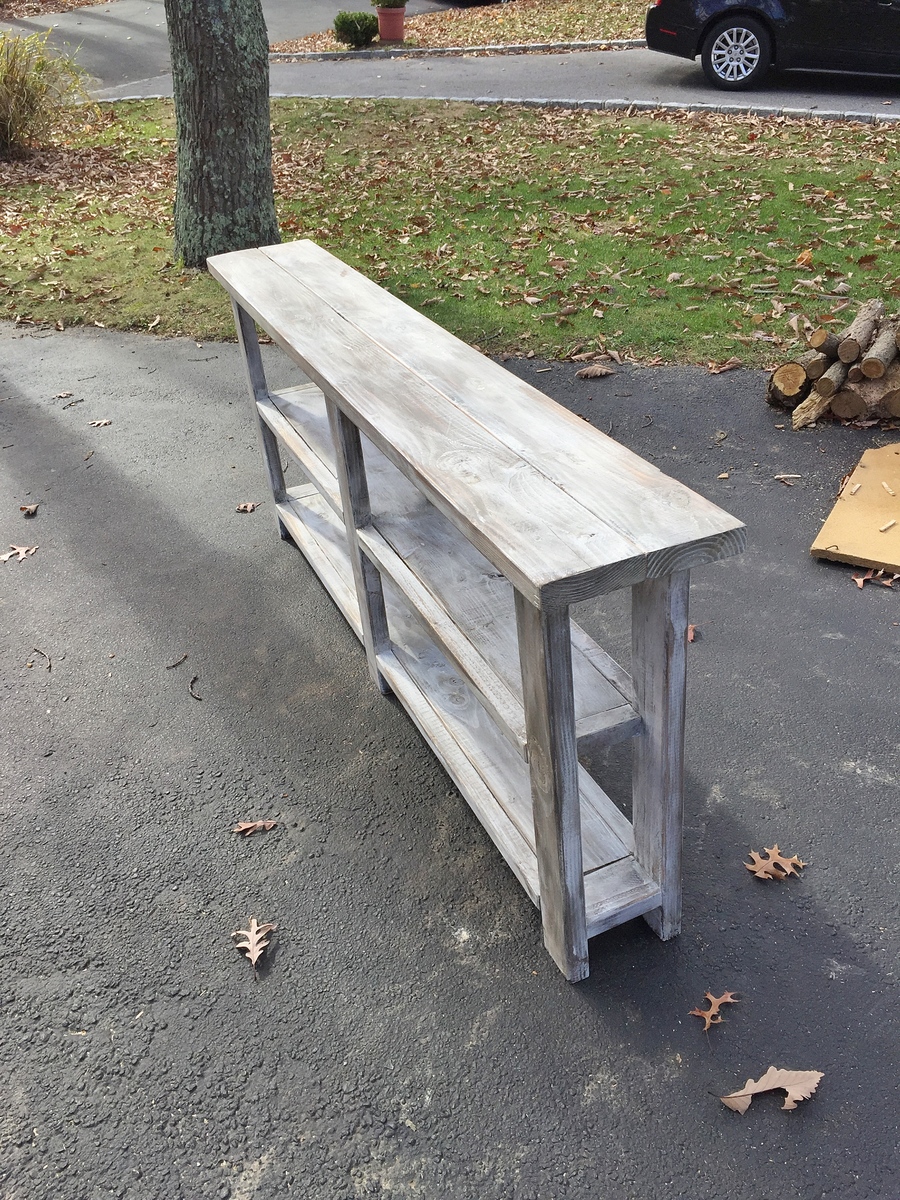
Console/sofa table
I made this table top with 2-2x6 boards to make it more narrow. I used 1-2x6 for the shelf and just adjusted the plan accordingly. The finish is dark walnut stain, then painted with rustoleum chalked linen white paint, distressed then covered with Minwax finishin wax in natural color.

Built from Plan(s)
Estimated Time Investment
Afternoon Project (3-6 Hours)
Finish Used
Minwax Dark Walnut stain
Rustoleum chalked linen white chalk paint
Minwax finishing wax natural color
Rustoleum chalked linen white chalk paint
Minwax finishing wax natural color
Recommended Skill Level
Intermediate
Comments
Mon, 03/14/2022 - 08:23
Do you have plans for the…
Do you have plans for the table you made? This is exactly what we need for our entryway!
Bookcase Dollhouse

My aunt wanted to get her grandaughter a dollhouse for Christmas. I came to Ana's website and found this plan. It was tedious and time-consuming, but it was worth it. This was such a great confidence builder and has led me to build a lot more things for other people. I can't wait to see what the future holds. Used these plans...http://www.ana-white.com/2012/07/bookcase-dollhouse

Built from Plan(s)
Estimated Time Investment
Weekend Project (10-20 Hours)
Finish Used
White paint
Recommended Skill Level
Intermediate
Planters
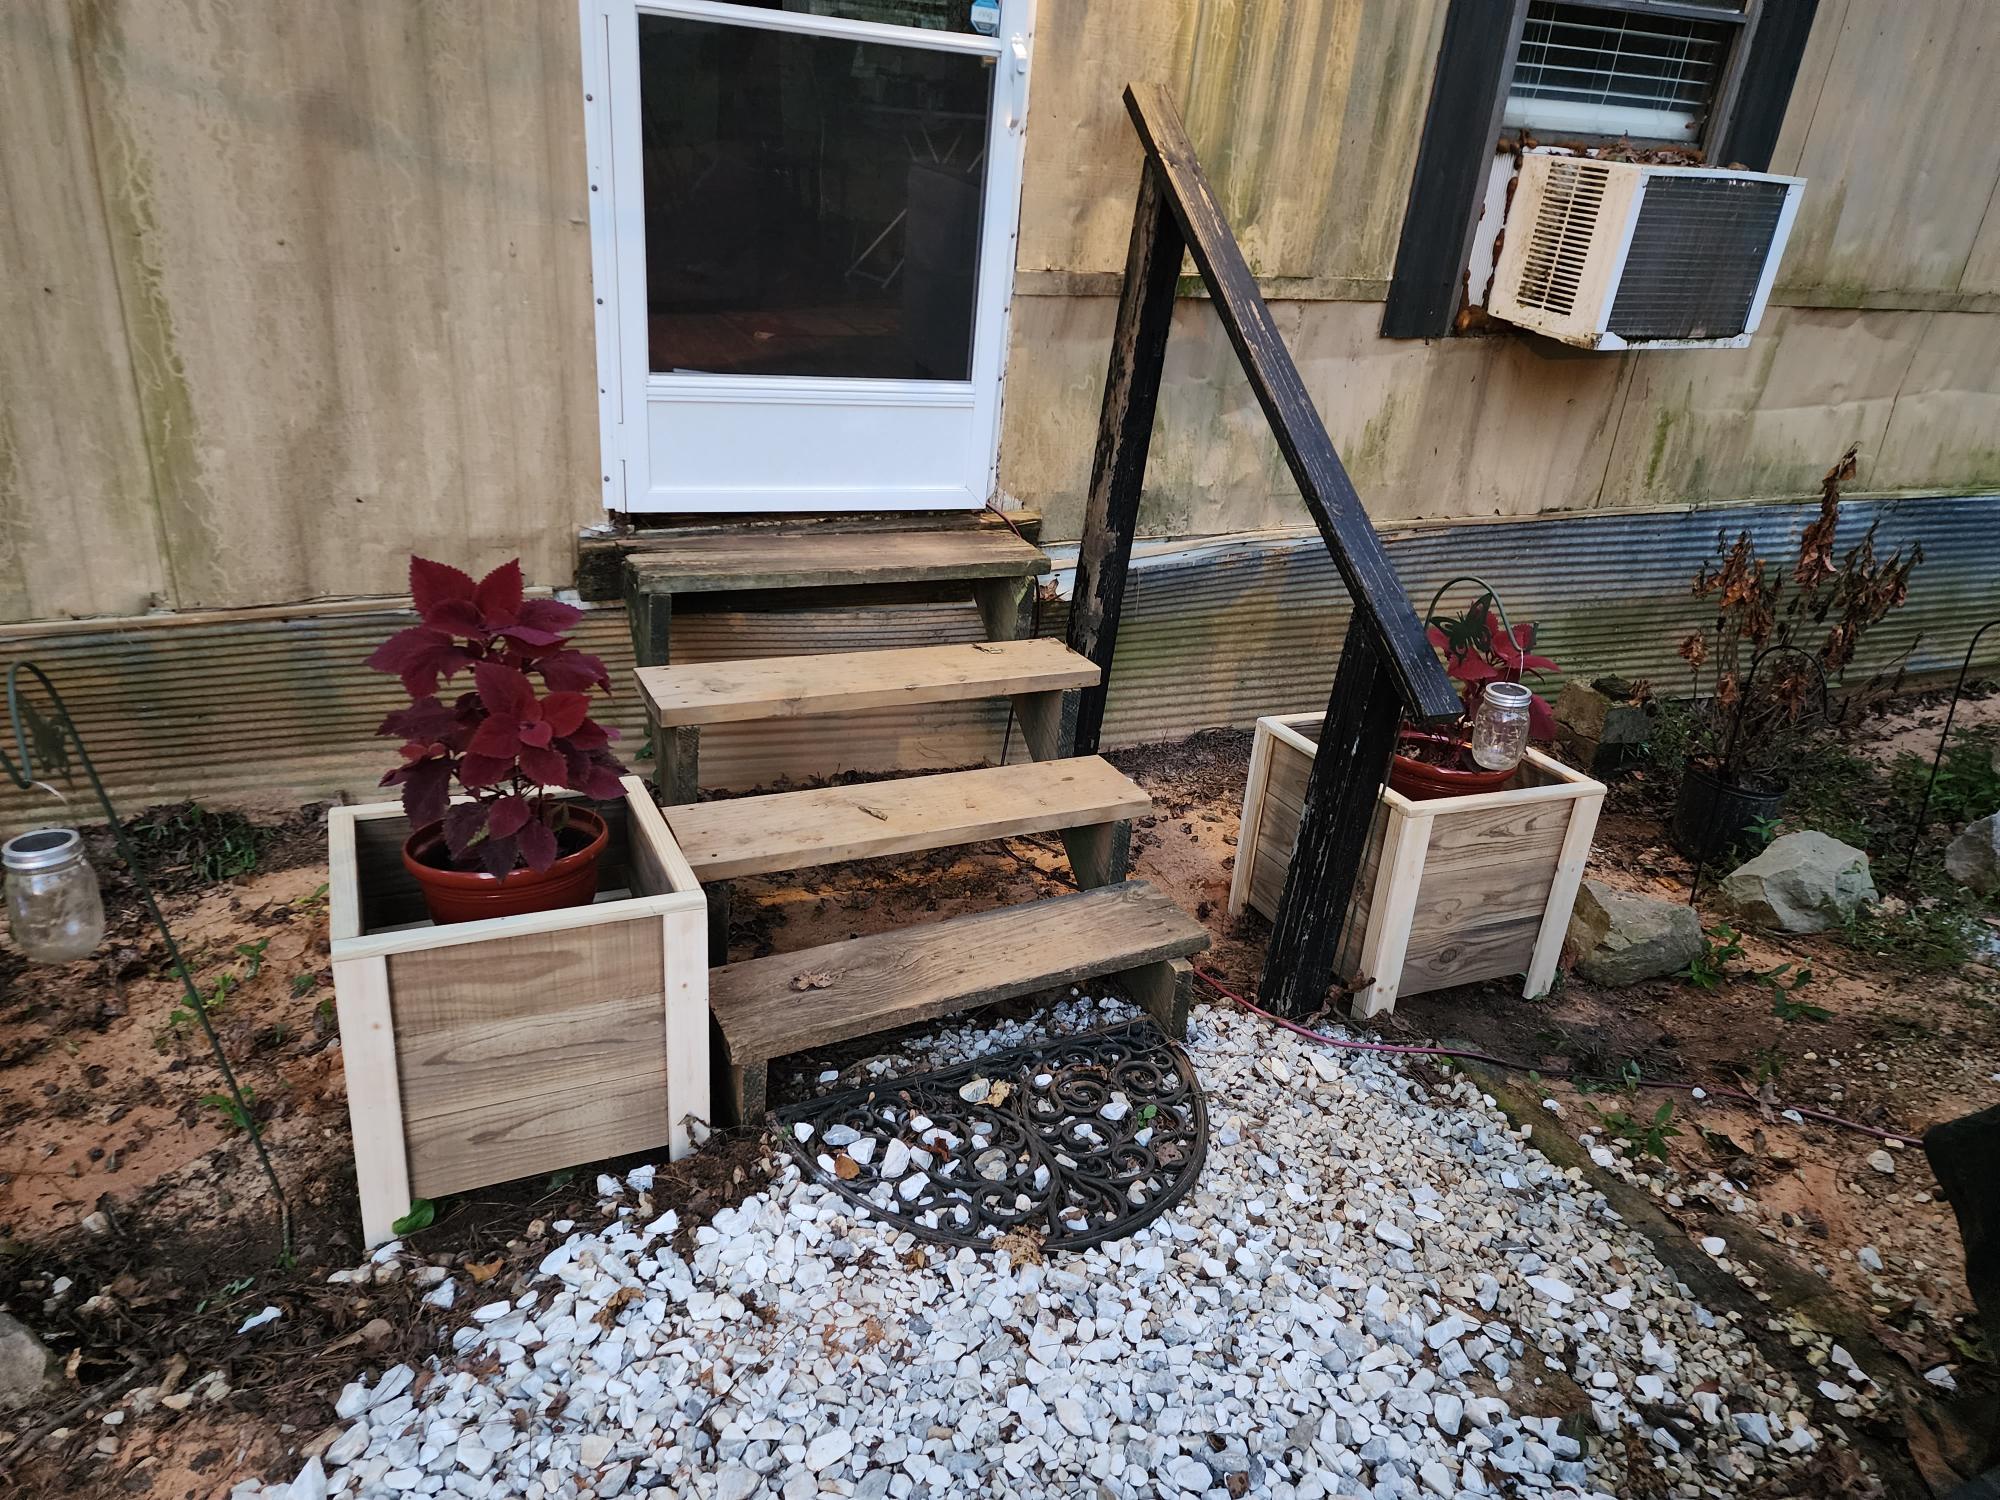
Just made these planters. I haven't painted them yet but I had to post it. They came out perfect. Thanks Ana for easy to follow plans.
Built from Plan(s)
Comments
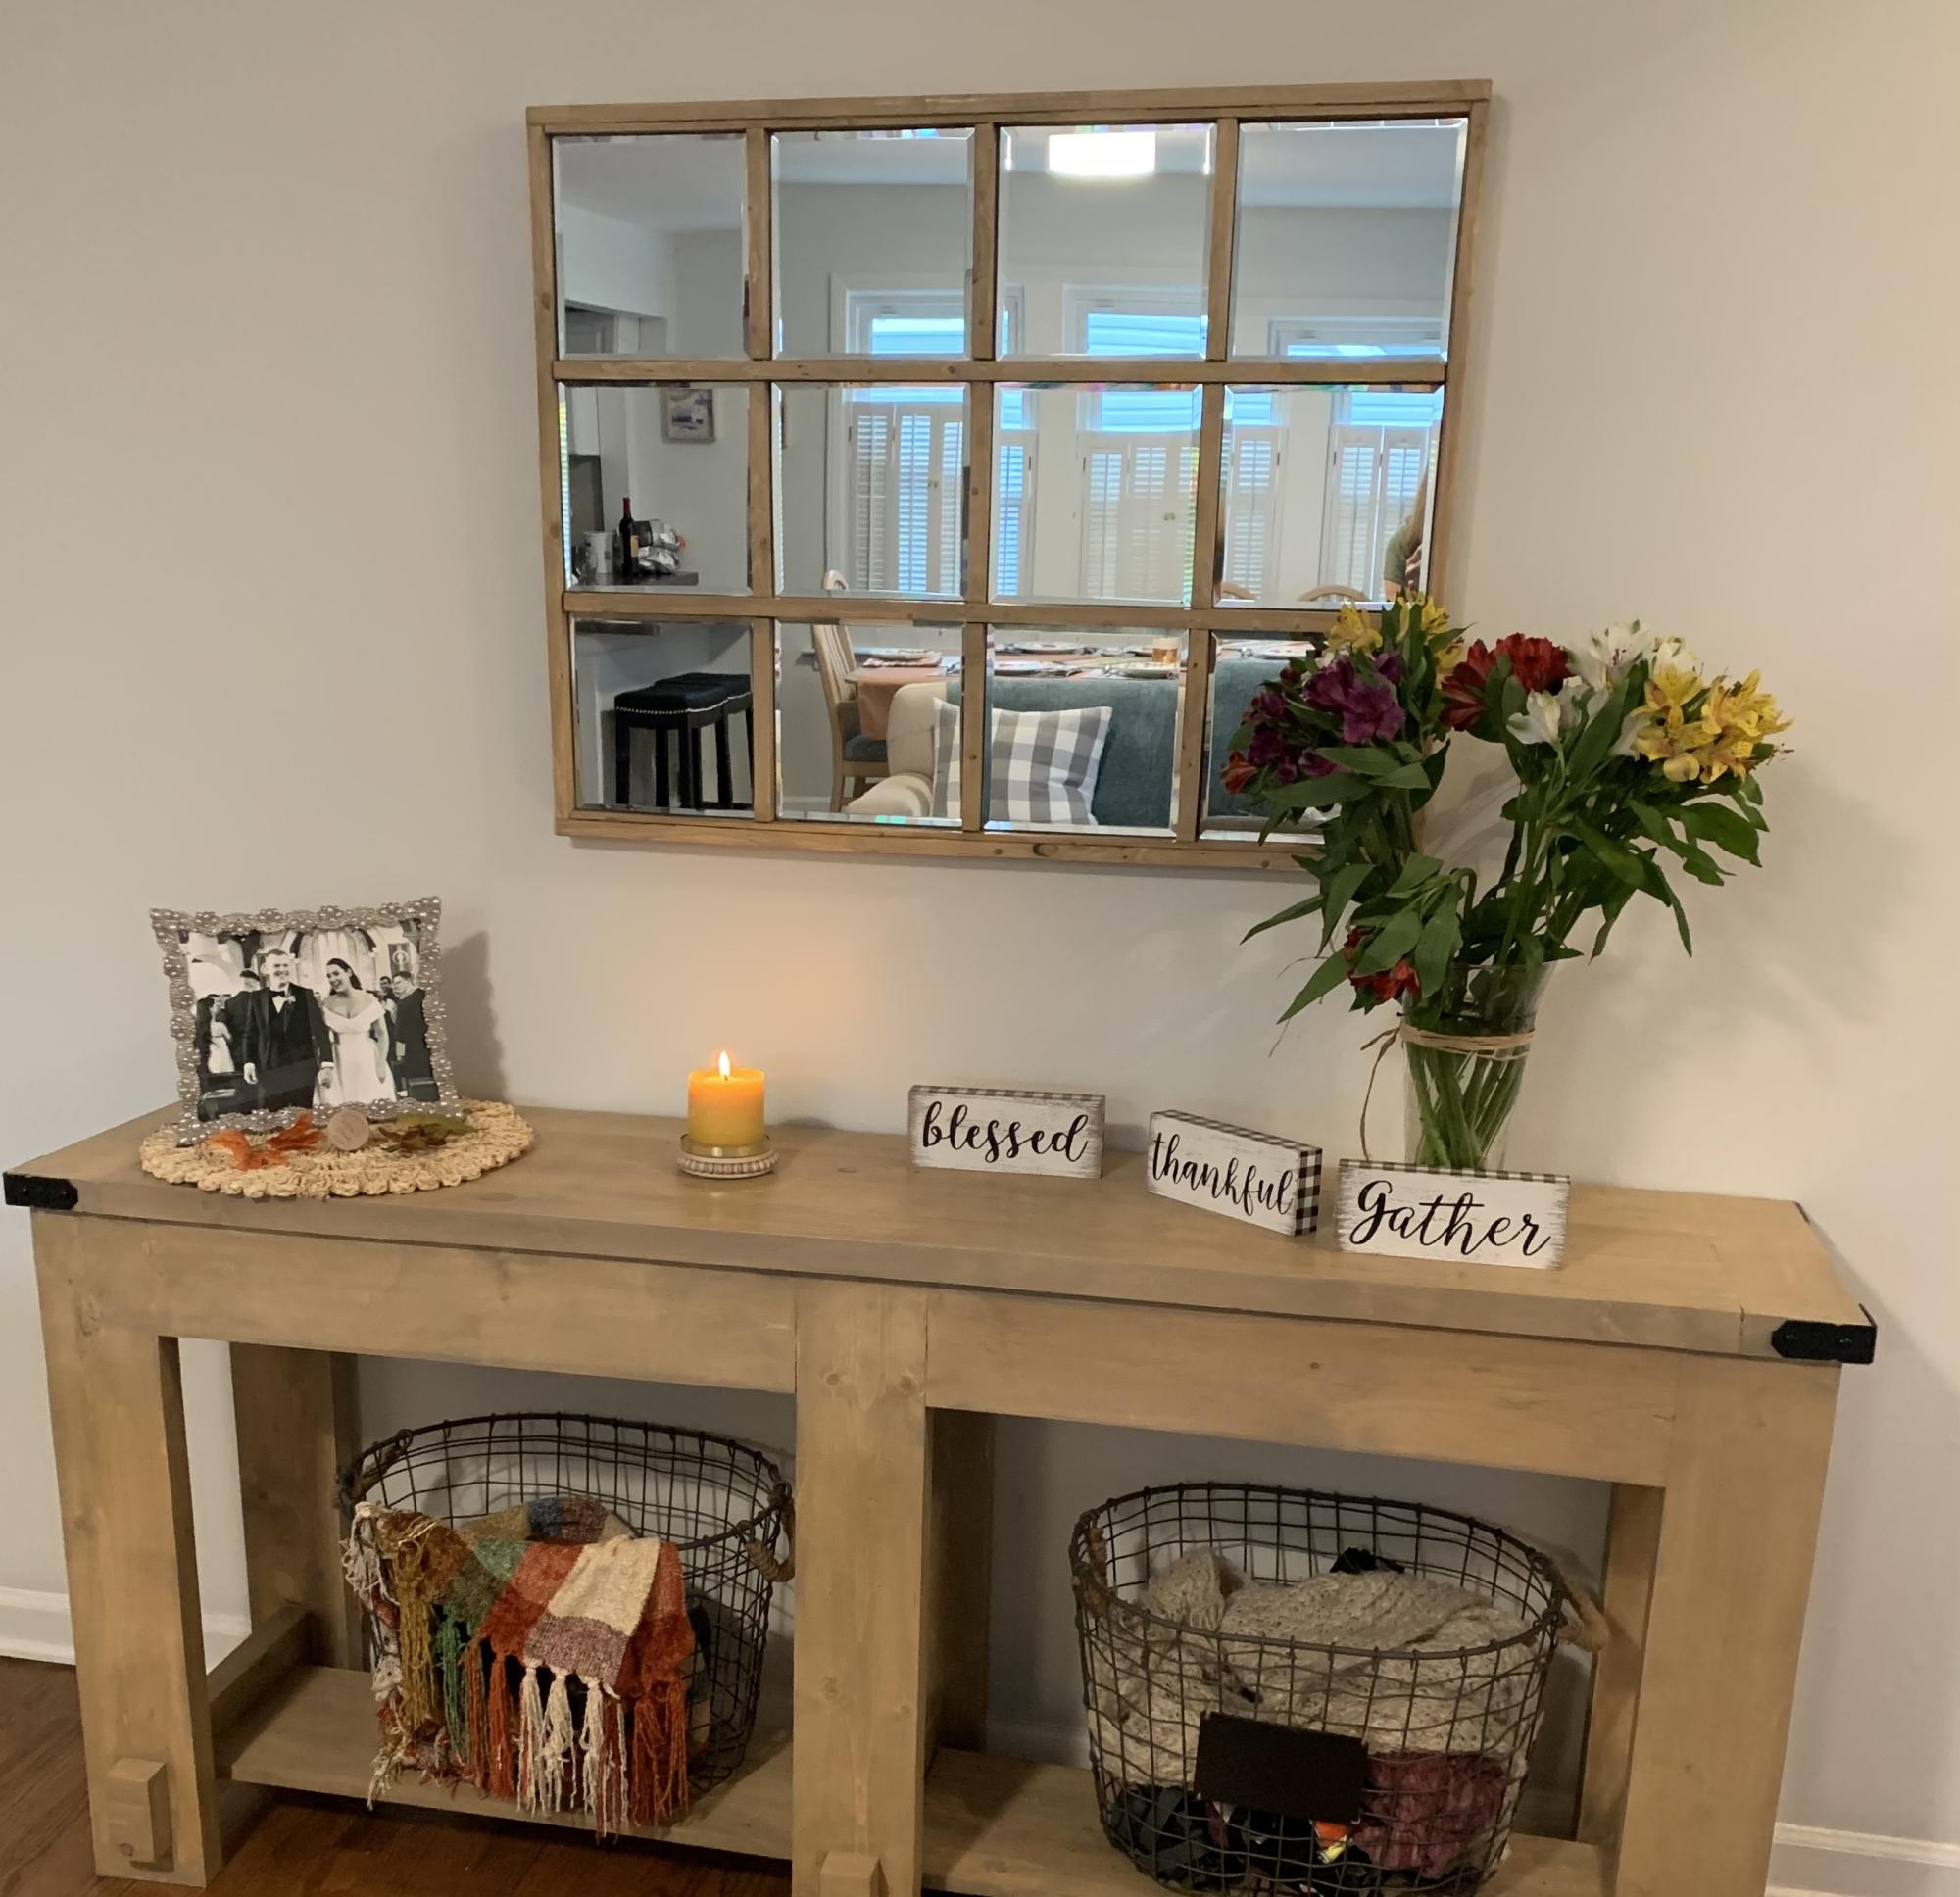
Niki's Modified Console Table
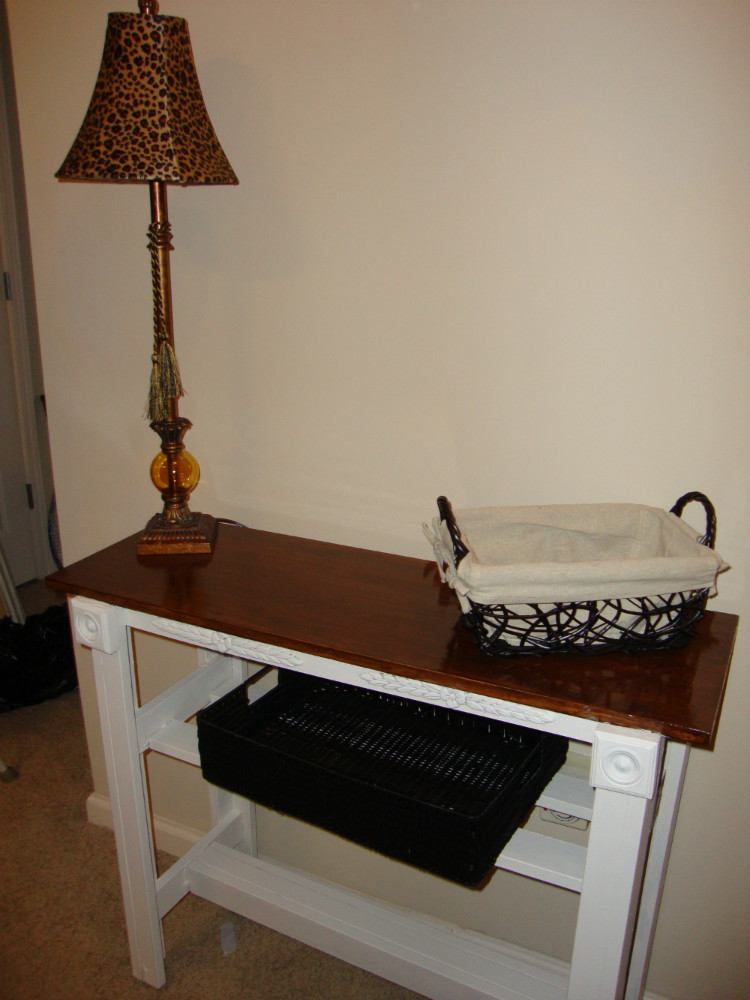
By using the simple console table project plan, I built my own console table. I changed some of the dimensions in order to make it fit in our apartment. I found the directions to be clear and easy to follow. To see more pictures, check out my blog, Sweet Southern Charm!
http://sweet-southern-charm.blogspot.com/2011/08/i-built-console-table…
Built from Plan(s)
Estimated Cost
$30
Estimated Time Investment
Weekend Project (10-20 Hours)
Finish Used
Antique Oak Stains and Off White Paint in Satin
Recommended Skill Level
Beginner
Table with storage crates

Large Table with 2 super large crates on wheels. It is about 4 feet wide and sits about 2 1/2 feet tall. I use the table for random projects, homework, crafts, ect. The crates I store extra blankets in one and in the other a lot of quilting items.
Estimated Time Investment
Day Project (6-9 Hours)
Finish Used
Table is painted a blue color and the crates stained in golden oak.
Recommended Skill Level
Beginner
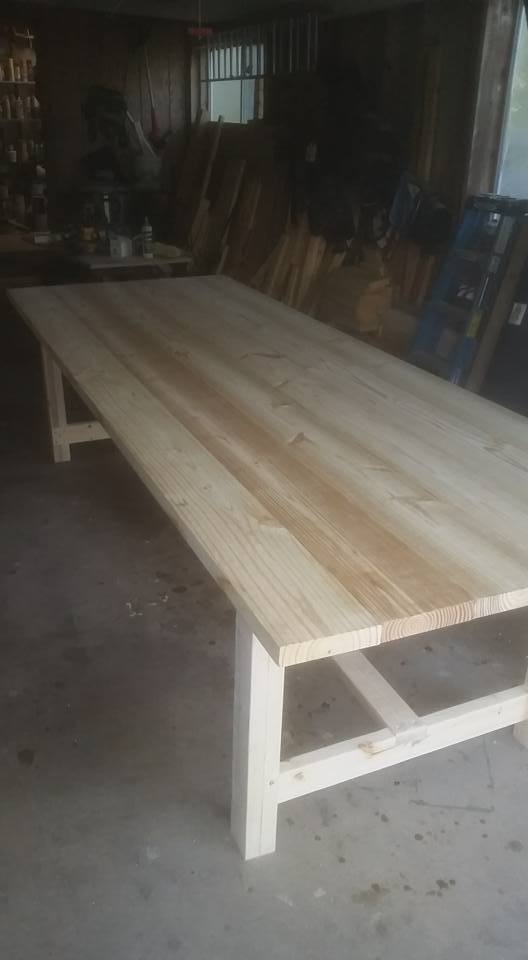
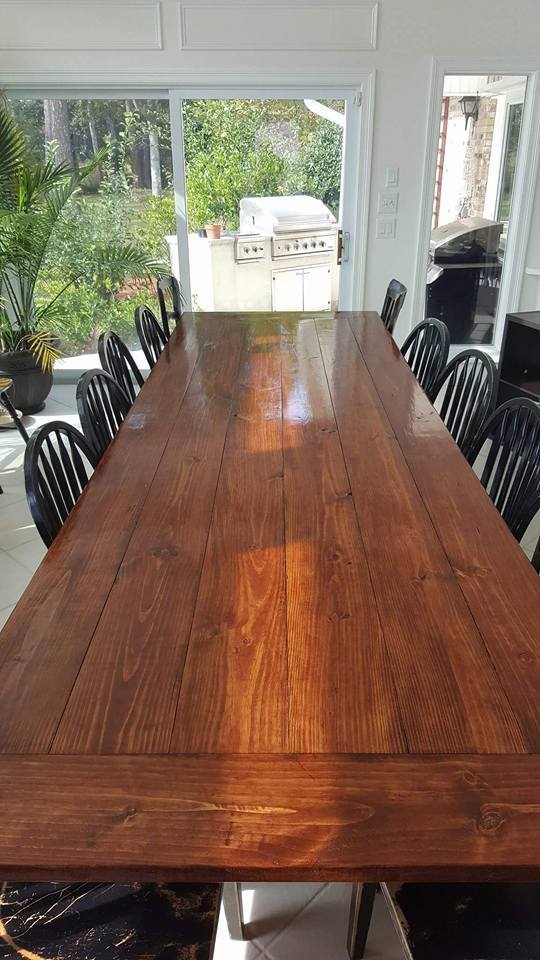
LARGE FARMHOUSE TABLE
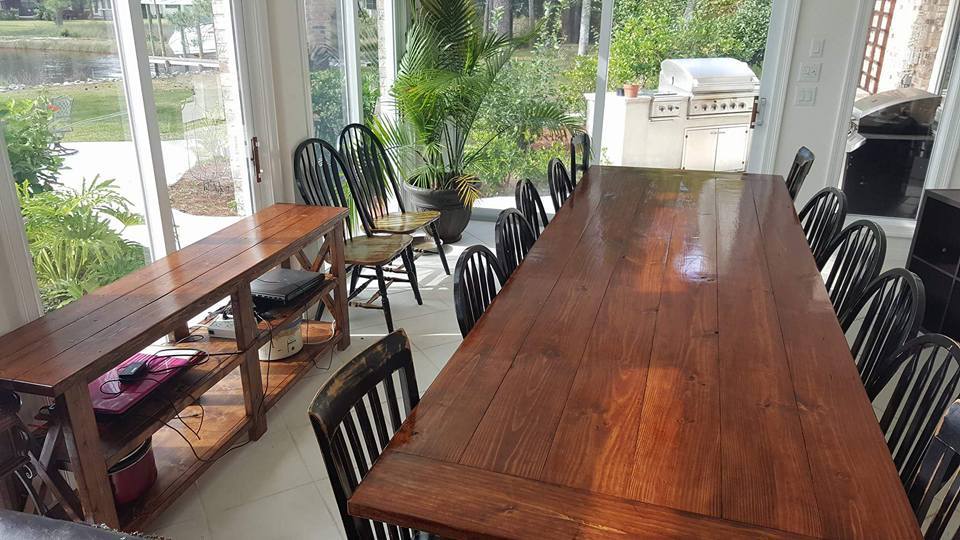
I used Ana's plans for this project, but had to deviate since I built it for a friend who needed a table for 14!! This thing is huge, 12 feet long, and about 44 inches wide. I made it out of pine, 2x8s for the top but stuck to the plans for the frame. It weighs about 200lbs or more, and had to move it with 4 guys...used an enclosed trailer to move it from my house to theirs. They love it so that's all that counts! Oh ya, in the picture, you will see Ana's rustic X console table too!
Estimated Cost
$150
Estimated Time Investment
Weekend Project (10-20 Hours)
Finish Used
Minwax English Chestnut stain, then a GLOSS polyurethane
Recommended Skill Level
Beginner
Functional Workspace
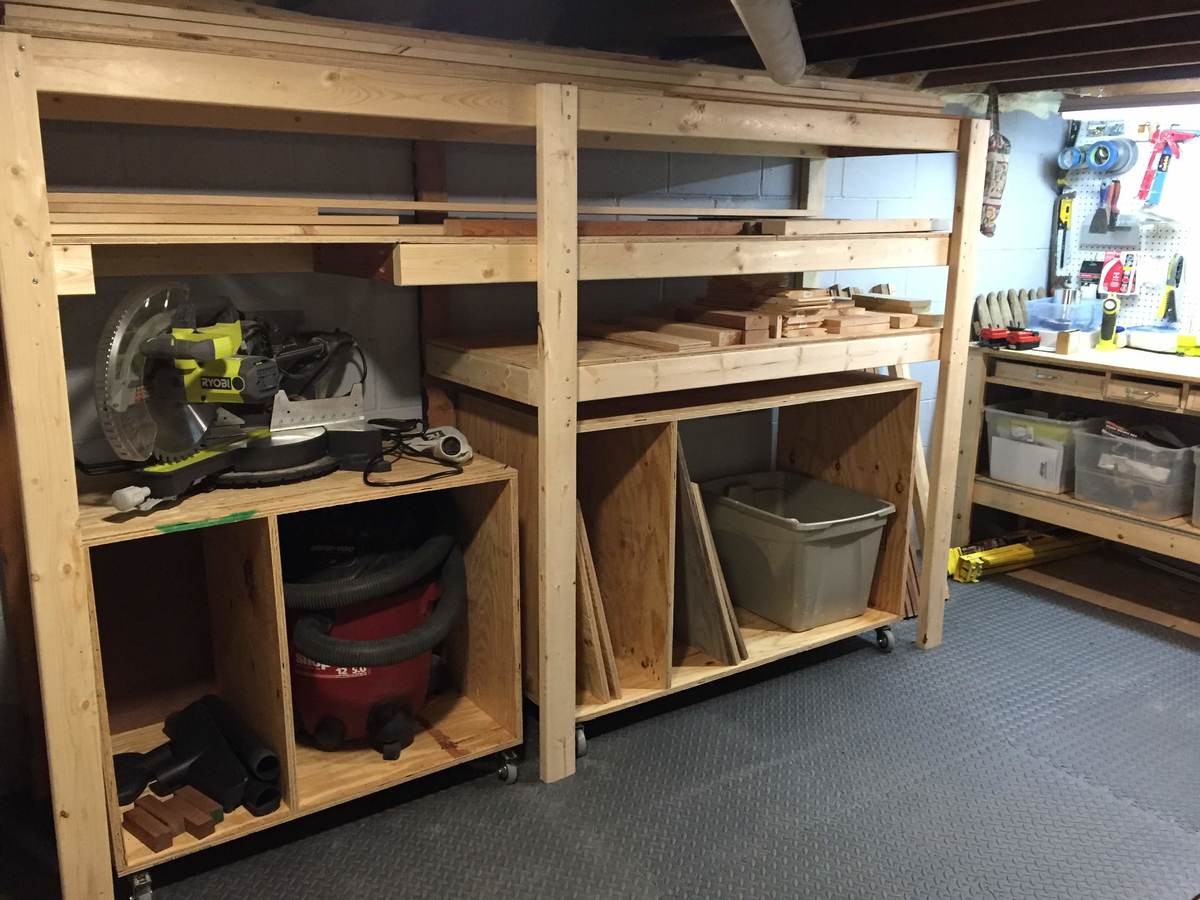
I don't have much space for a workshop in my home - just the corner of my basement. This plan was the answer! It adds so much storage and functionality. I plan to add some shelves to both units but love them already. Thank you so much!
Built from Plan(s)
Estimated Time Investment
Afternoon Project (3-6 Hours)
Recommended Skill Level
Beginner
X based pedestal table
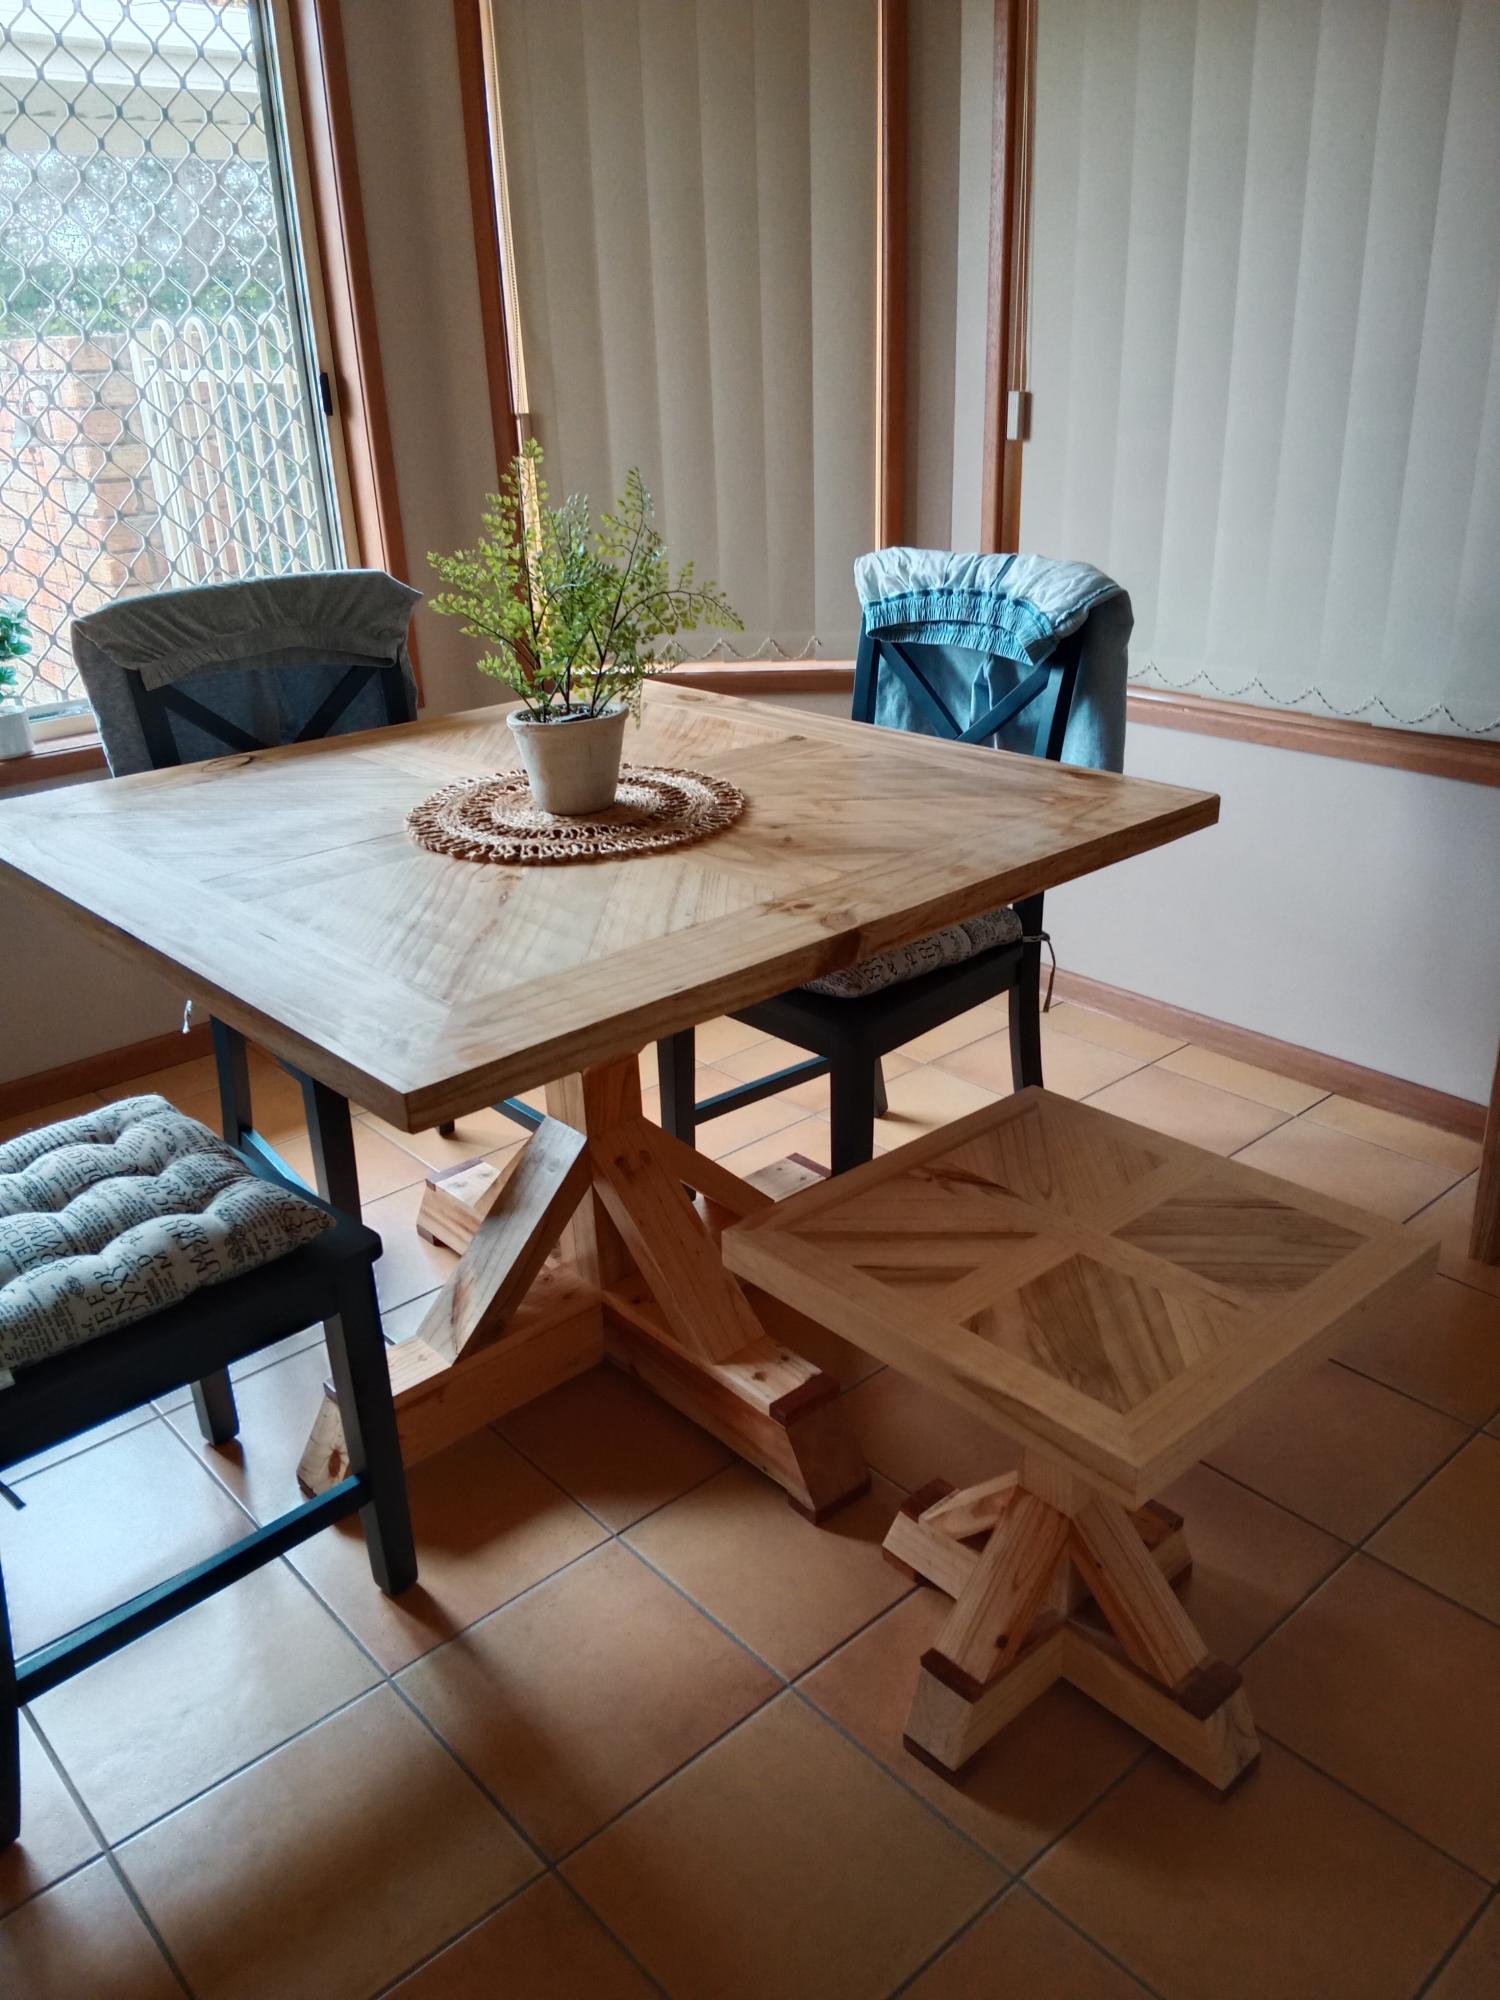
I was so impressed with the dining table i decided to make a lamp table as well
Comments
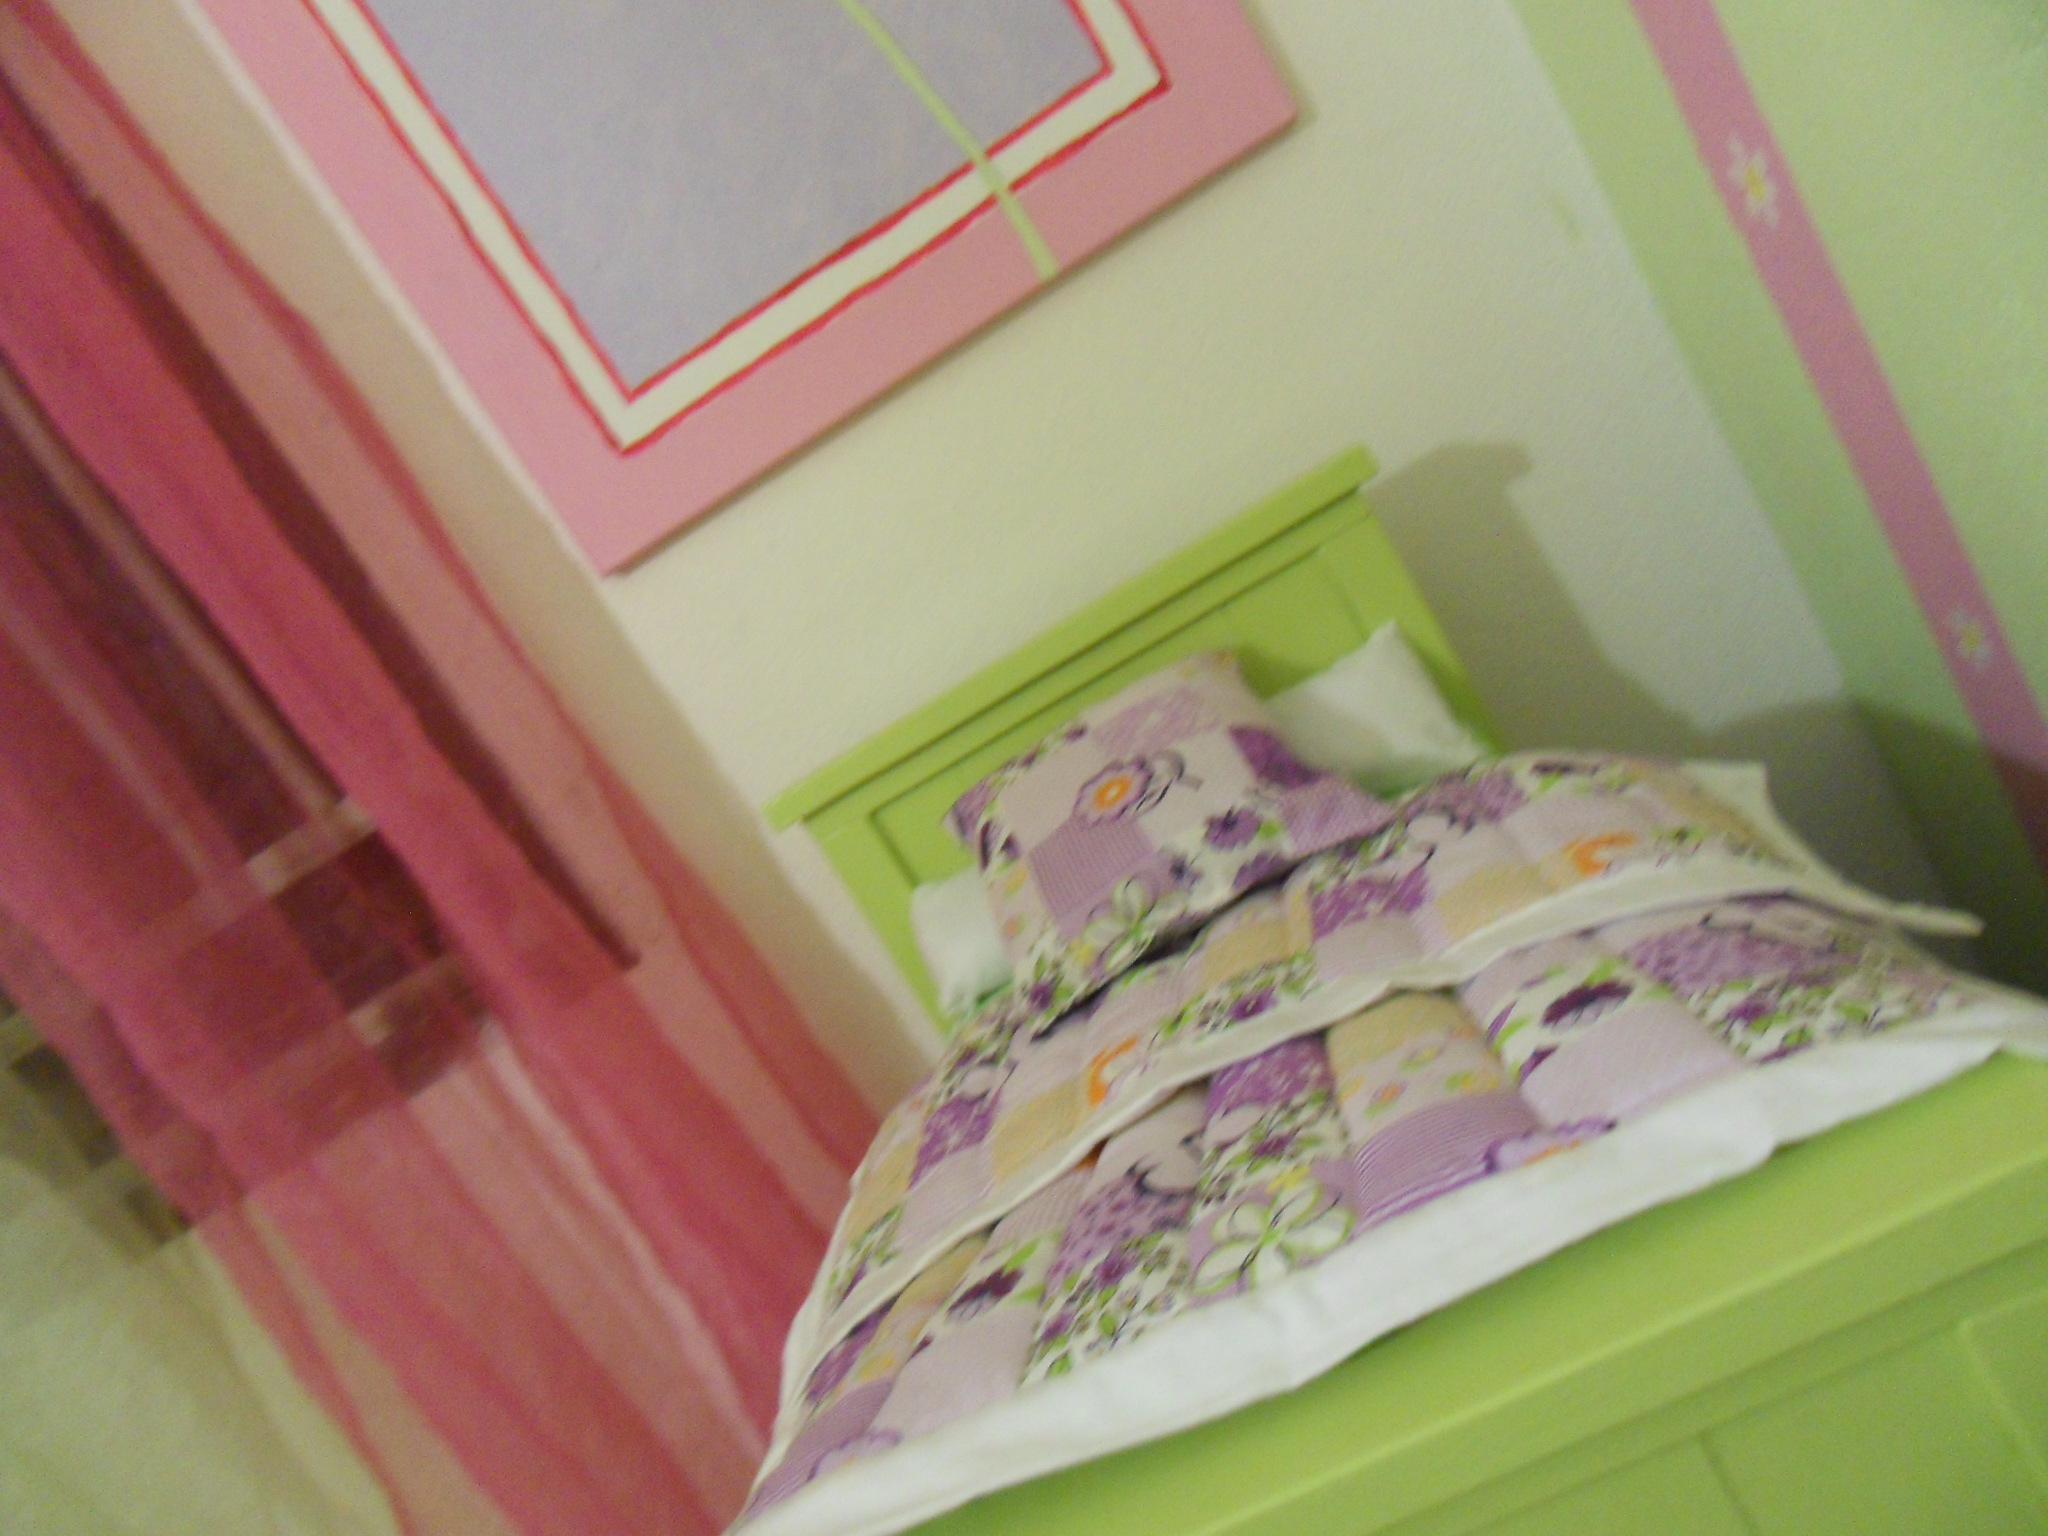
Farmhouse Doll Bed for Jennifer
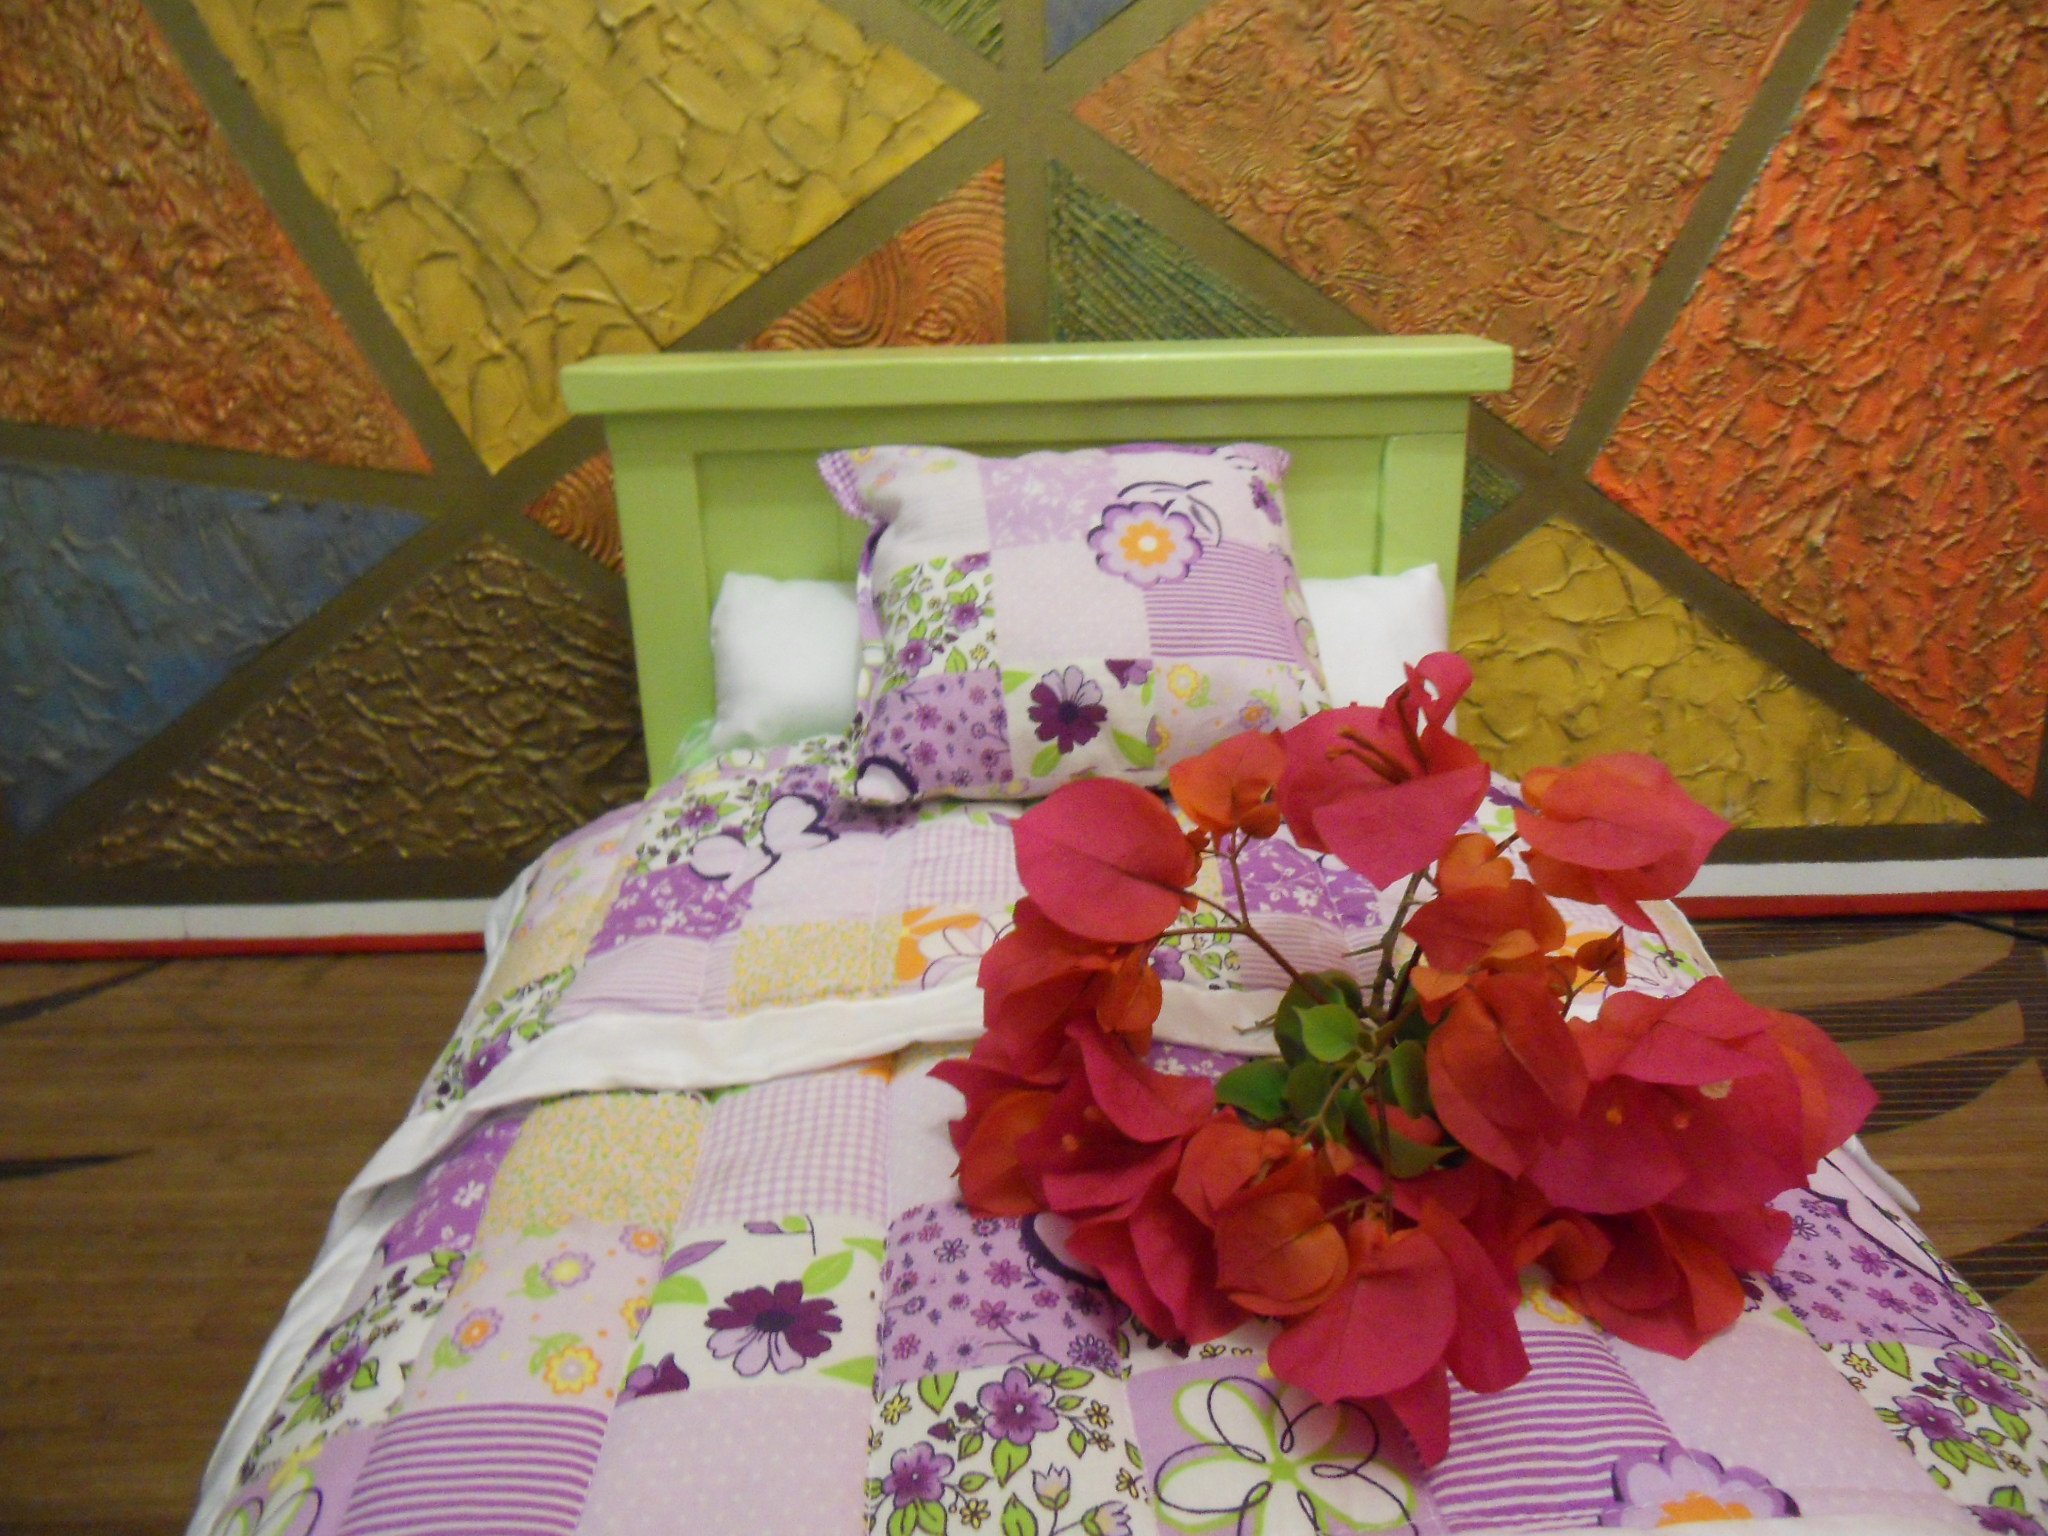
I built the farmhouse doll bed for my 3 year old daughter. She has 2 dolls and always wants to sleep with her.I placed the doll bed near her bed and then they can sleep together. She is very happy. I am satisfied with the result and I think I will build an other doll bed.
Thank you so much Ana!
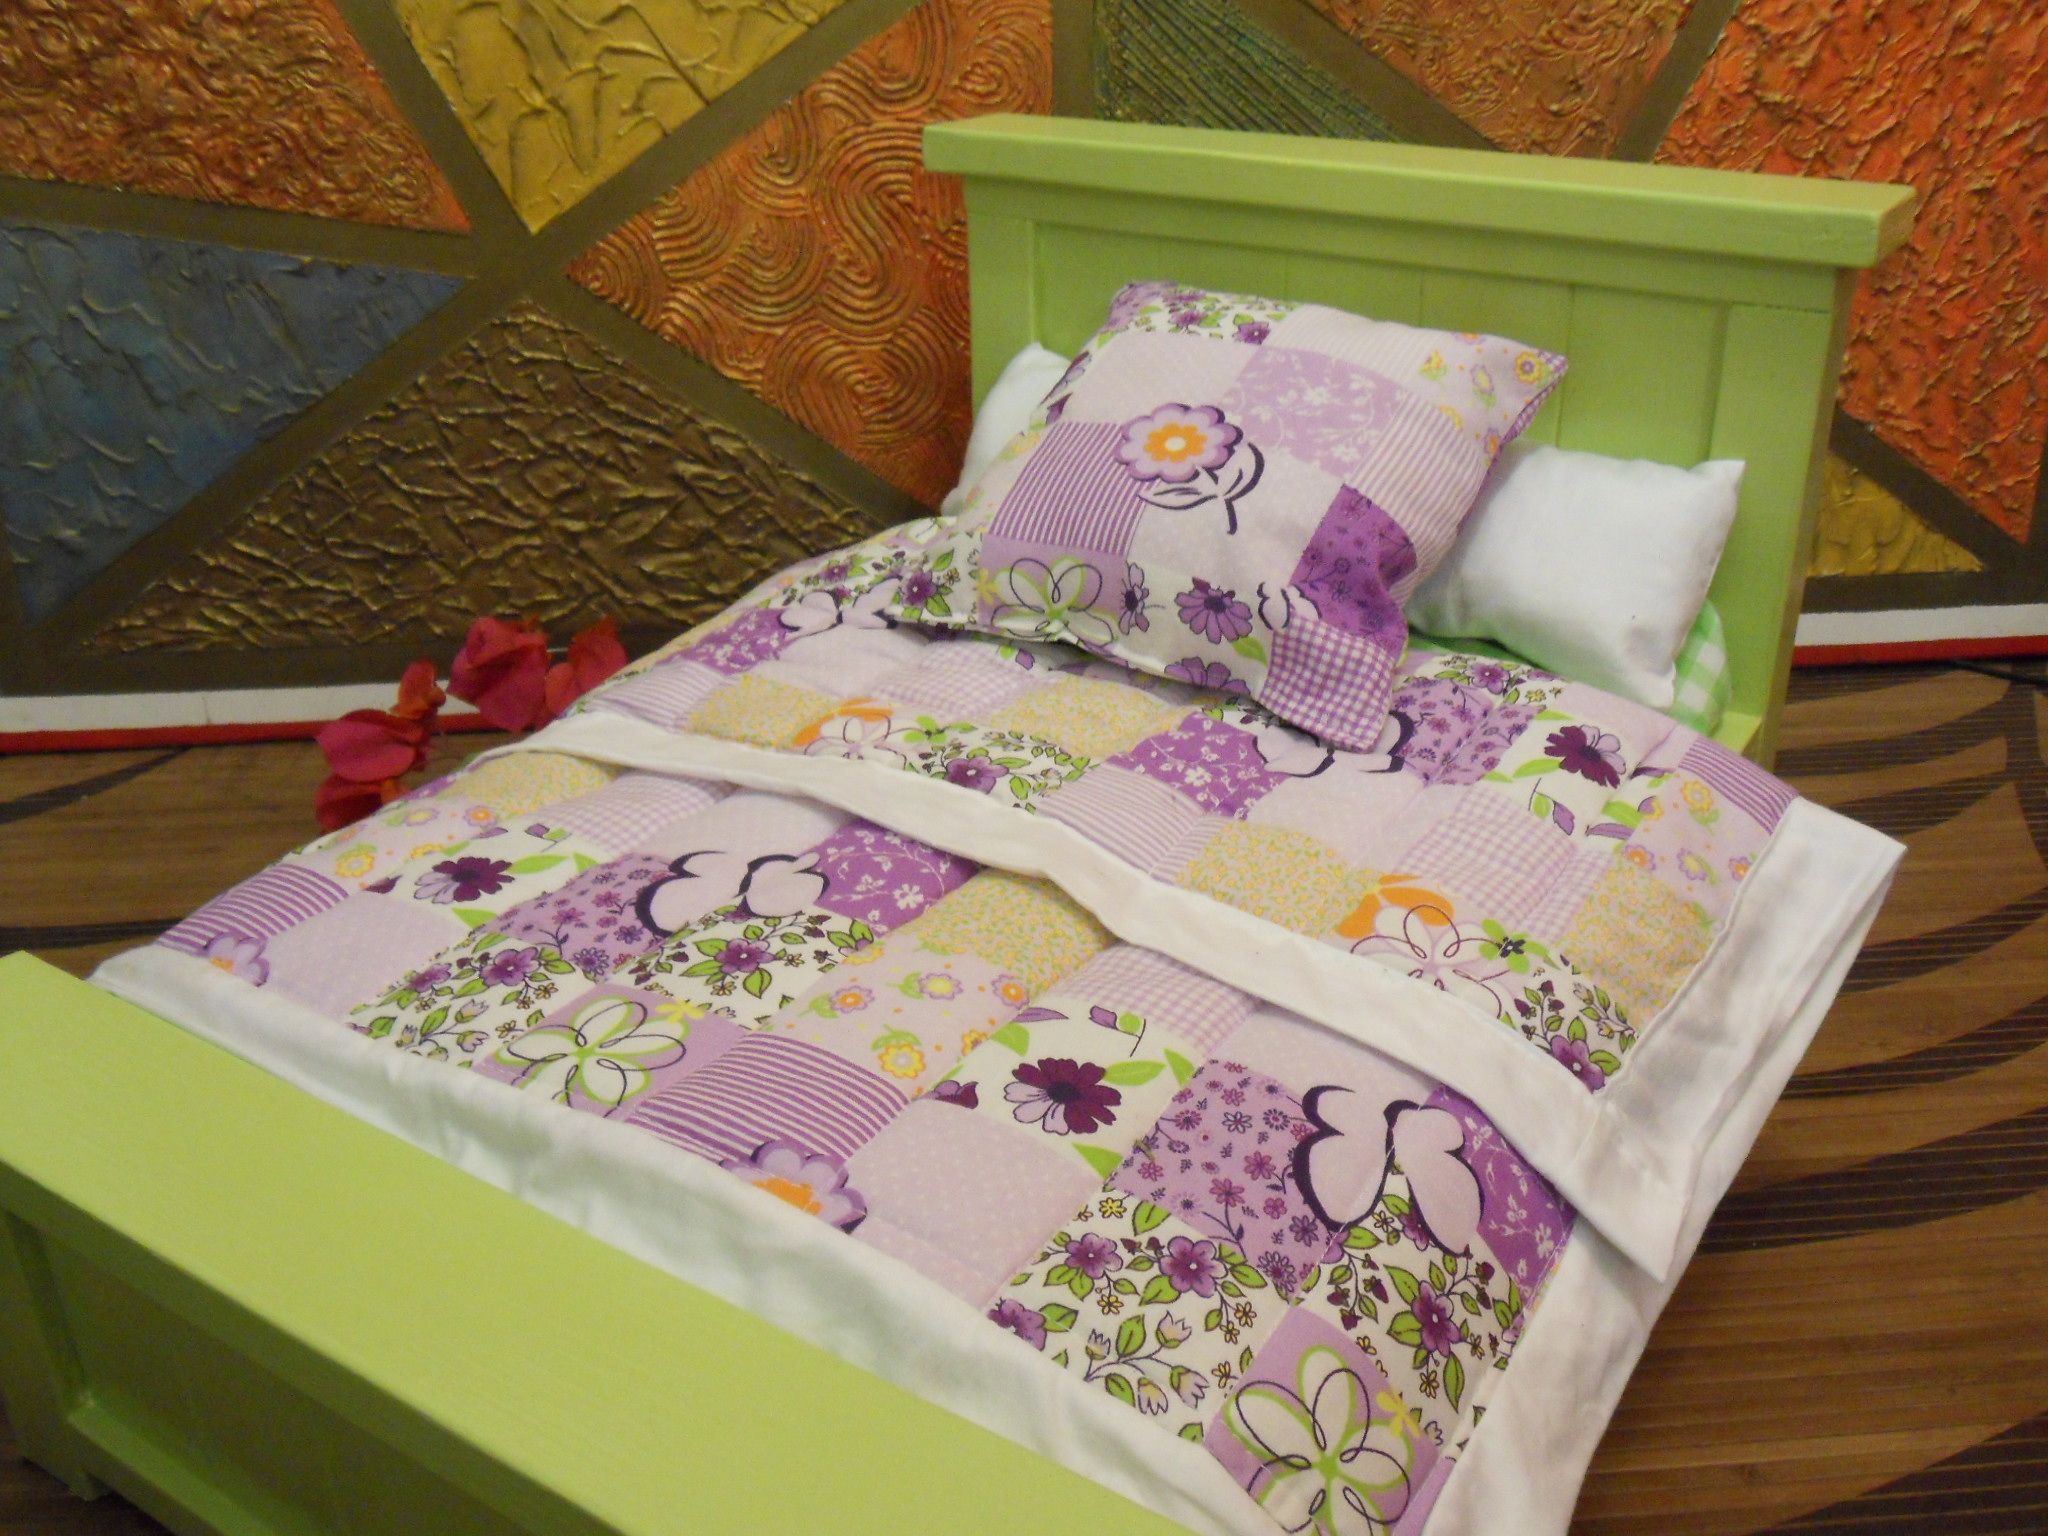

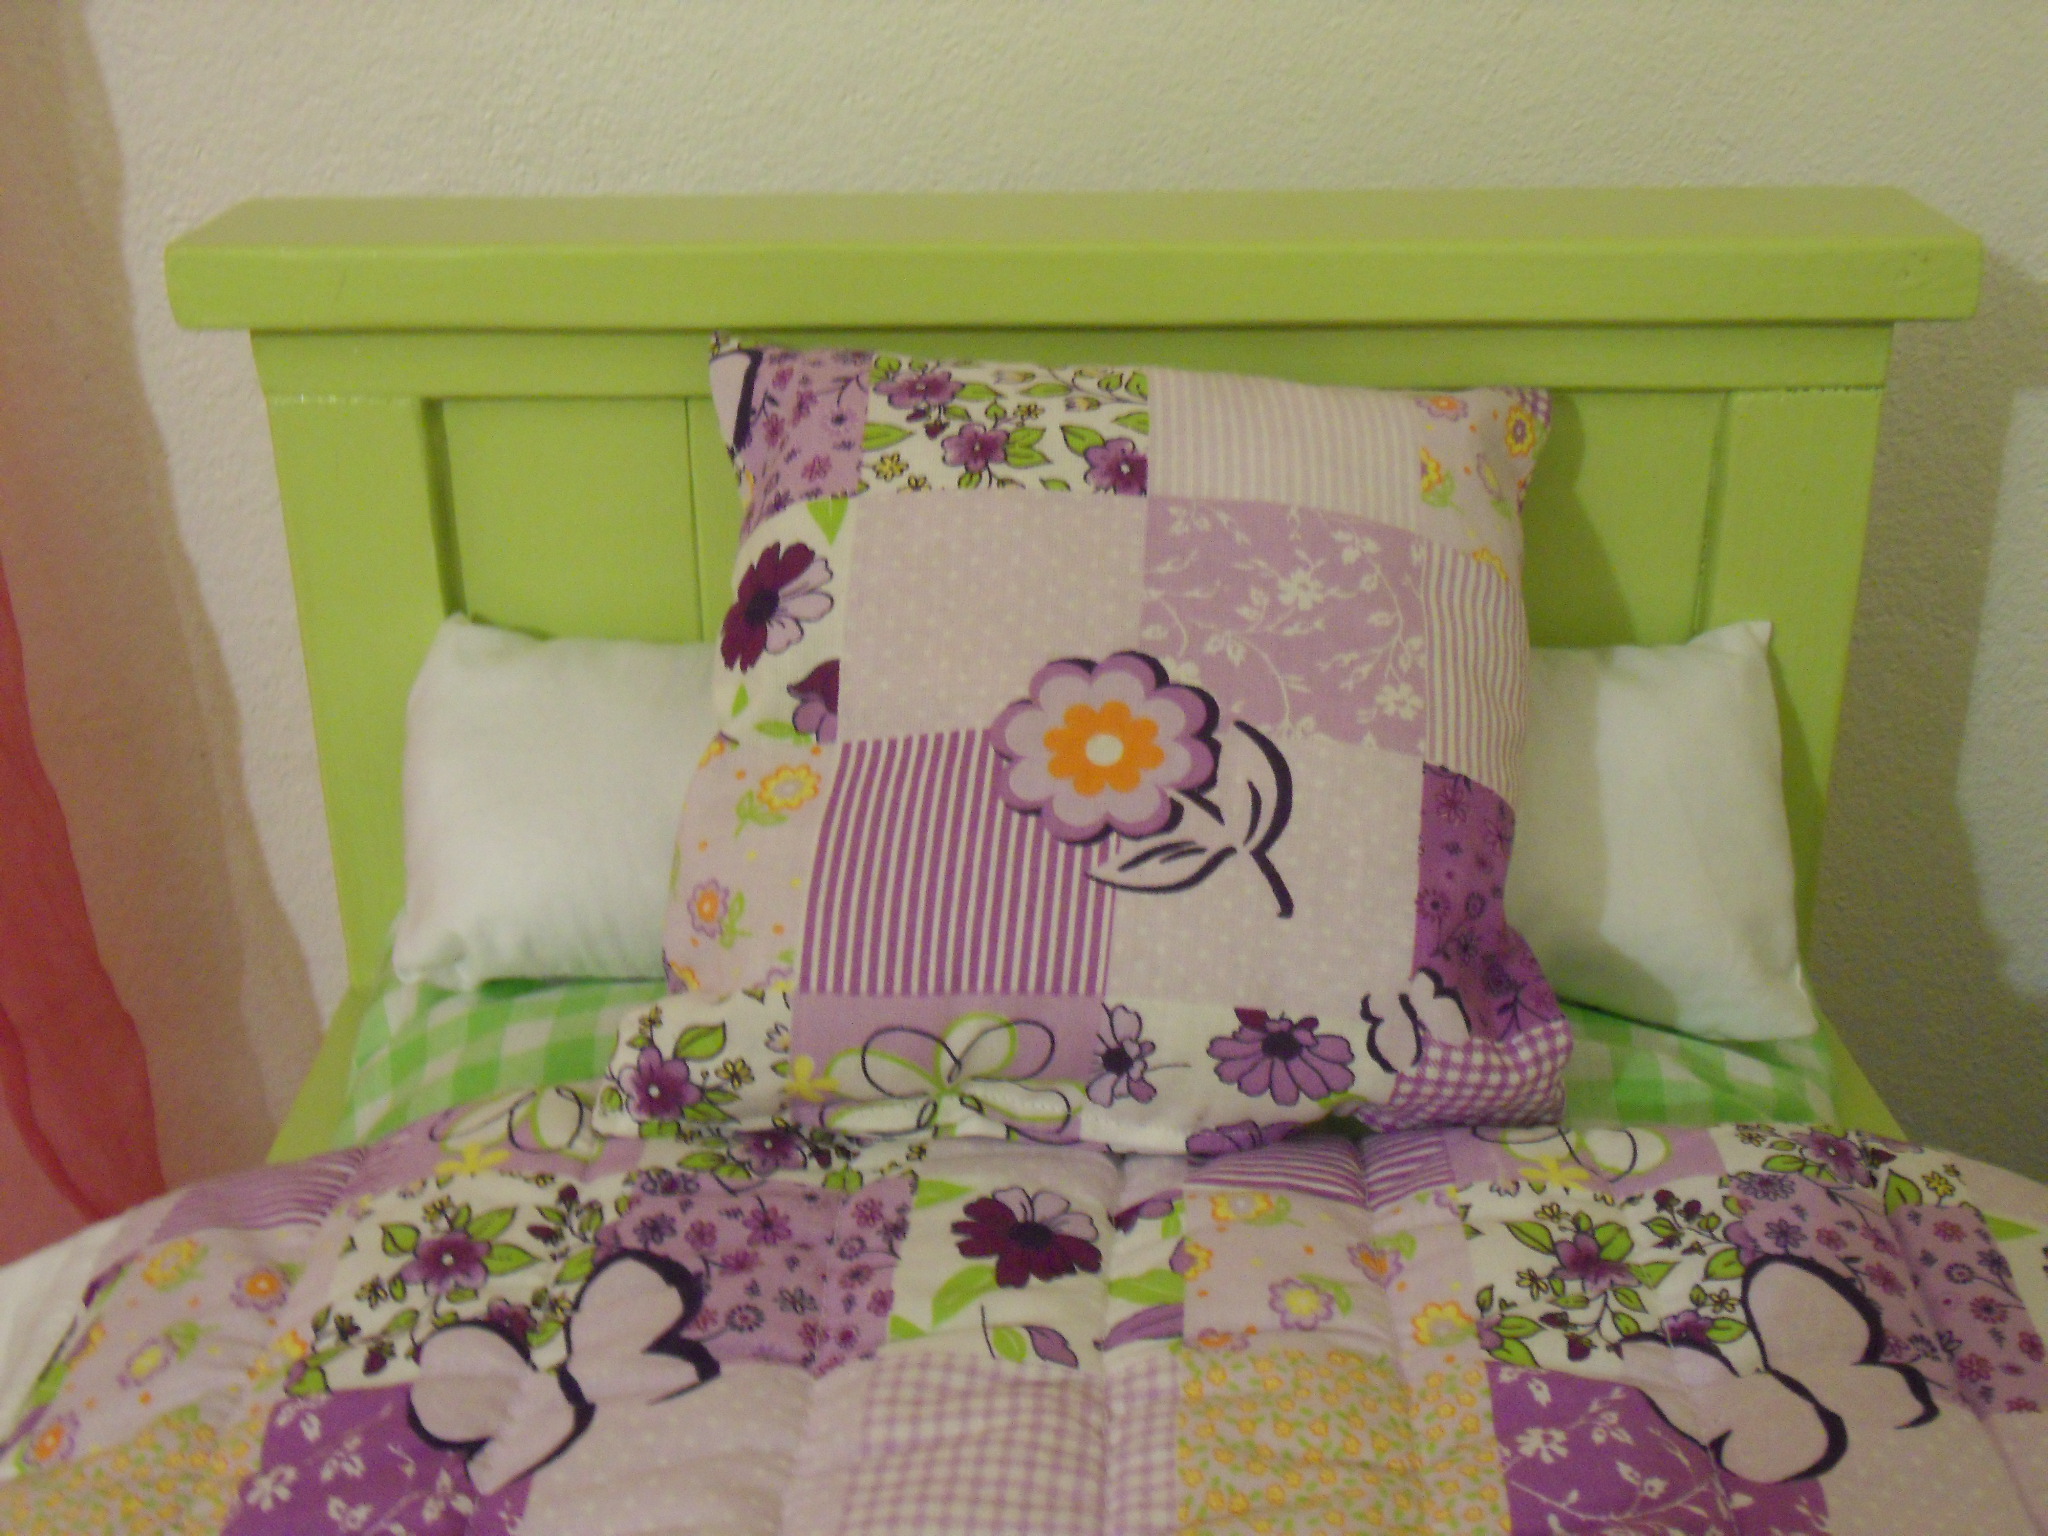
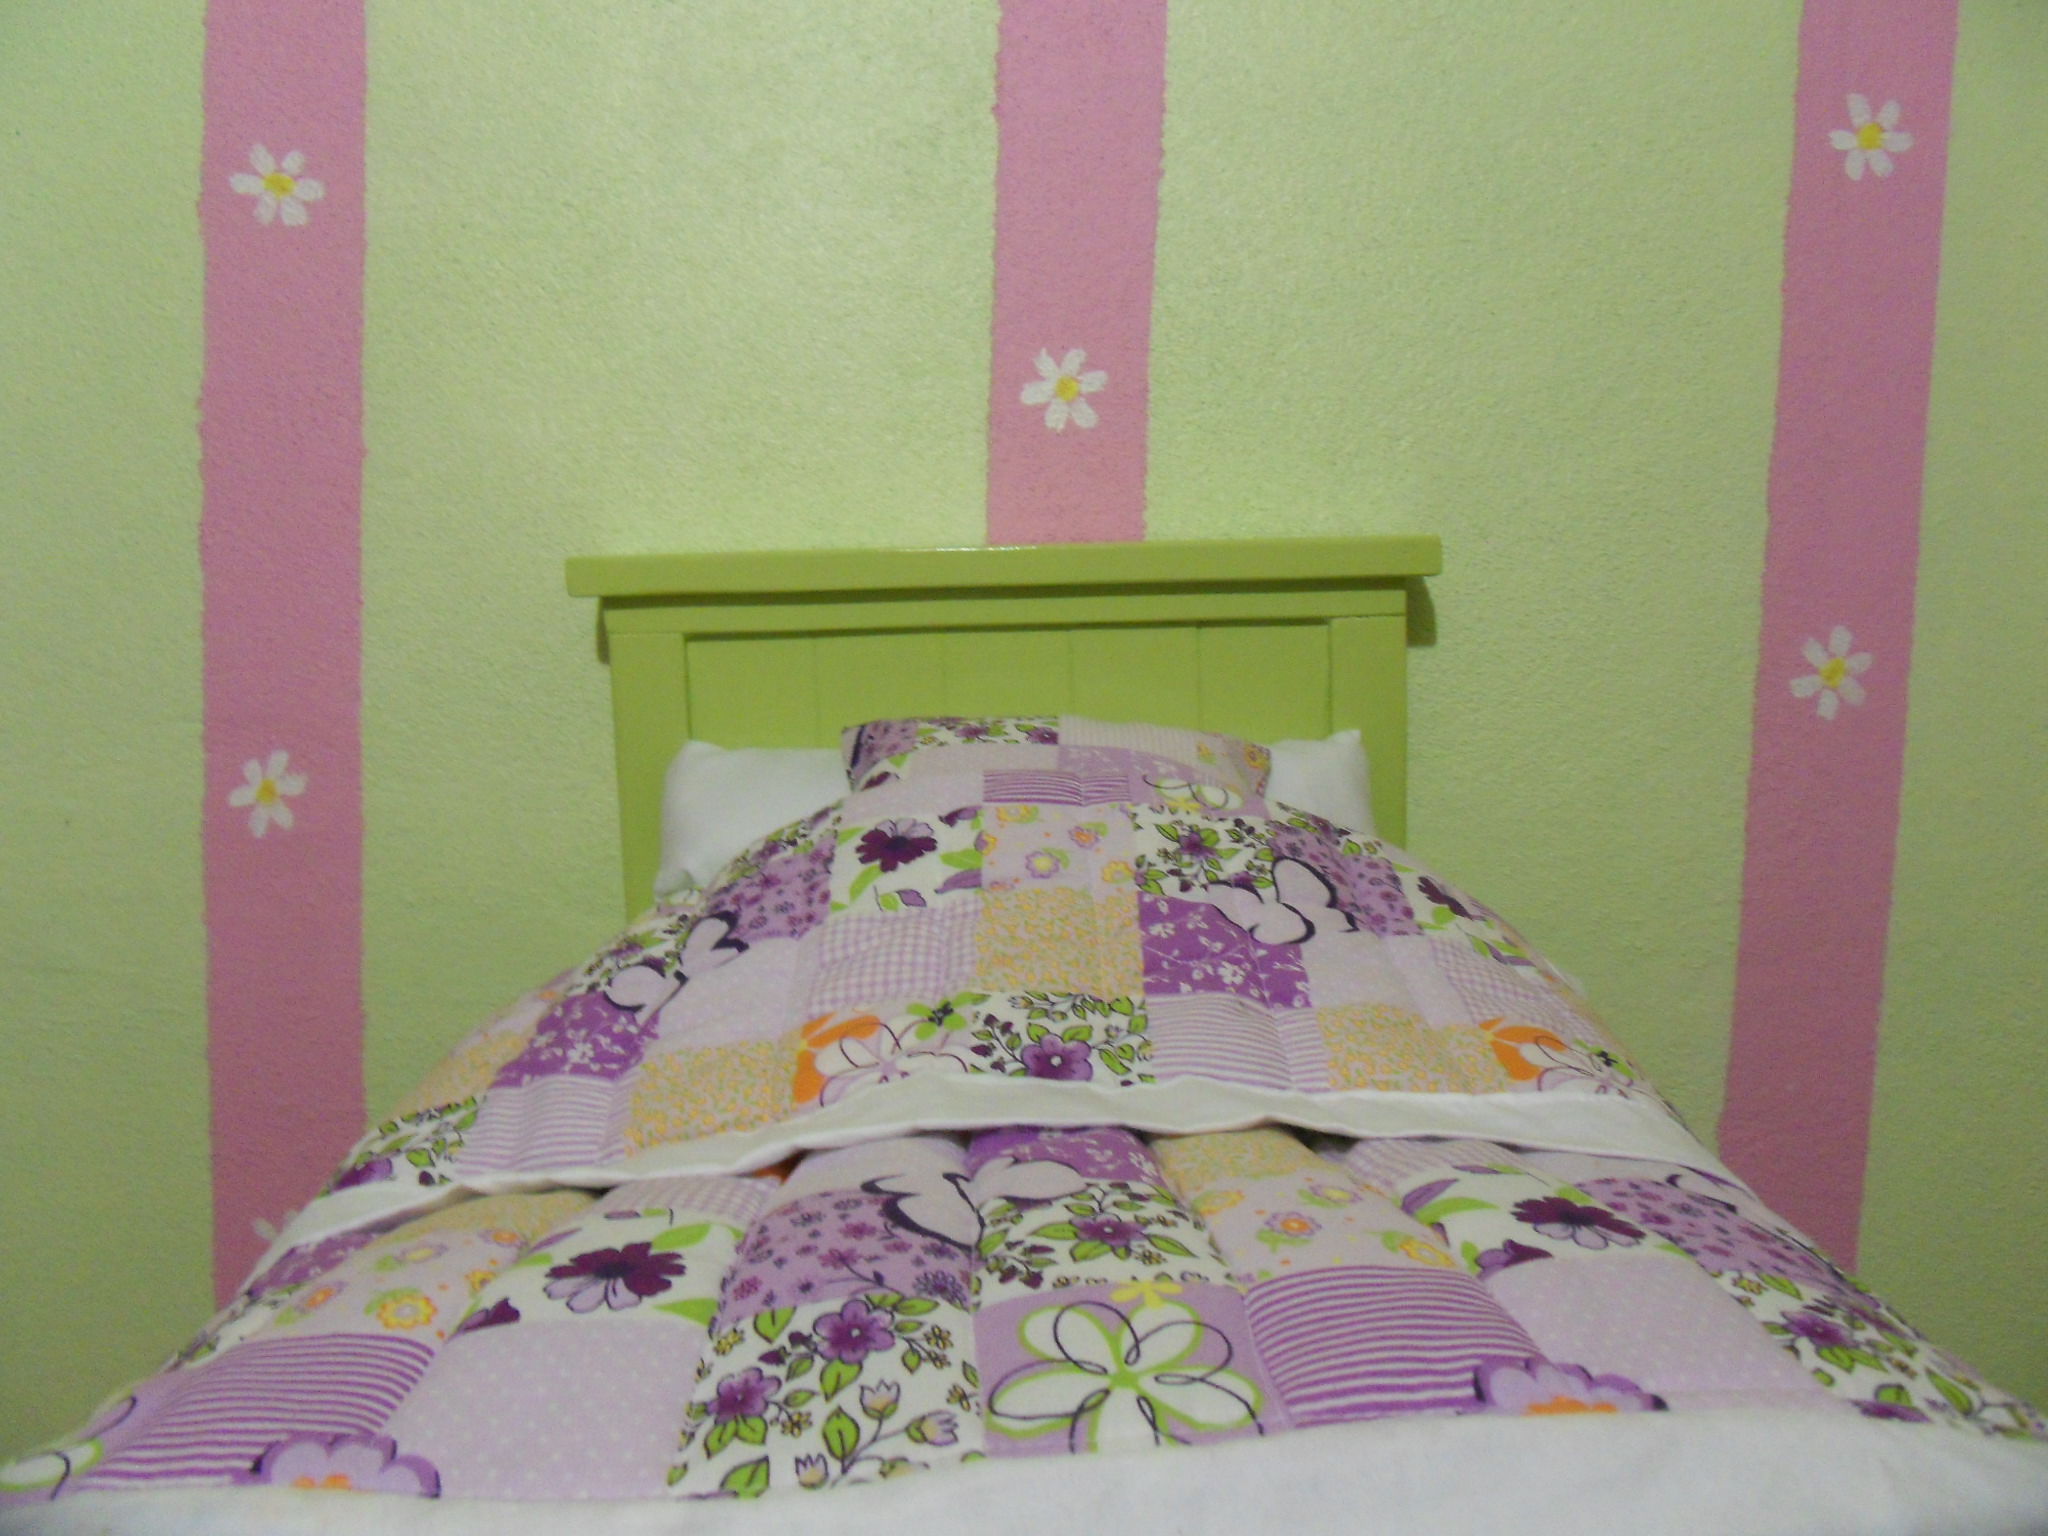
Built from Plan(s)
Estimated Cost
free, I used wood scrap and I already had the fabrics
Estimated Time Investment
An Hour or Two (0-2 Hours)
Finish Used
2 coats of Green acrylic paint and 1 coat of brilliant varnish
Recommended Skill Level
Starter Project
Comments
Toy bin box with cubby shelves
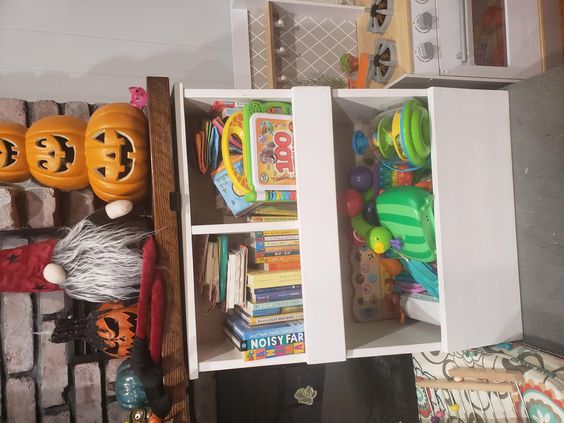
Adjusted the dimensions to fit between hearth and mantle. Perfect for my daughter's tous and book storage
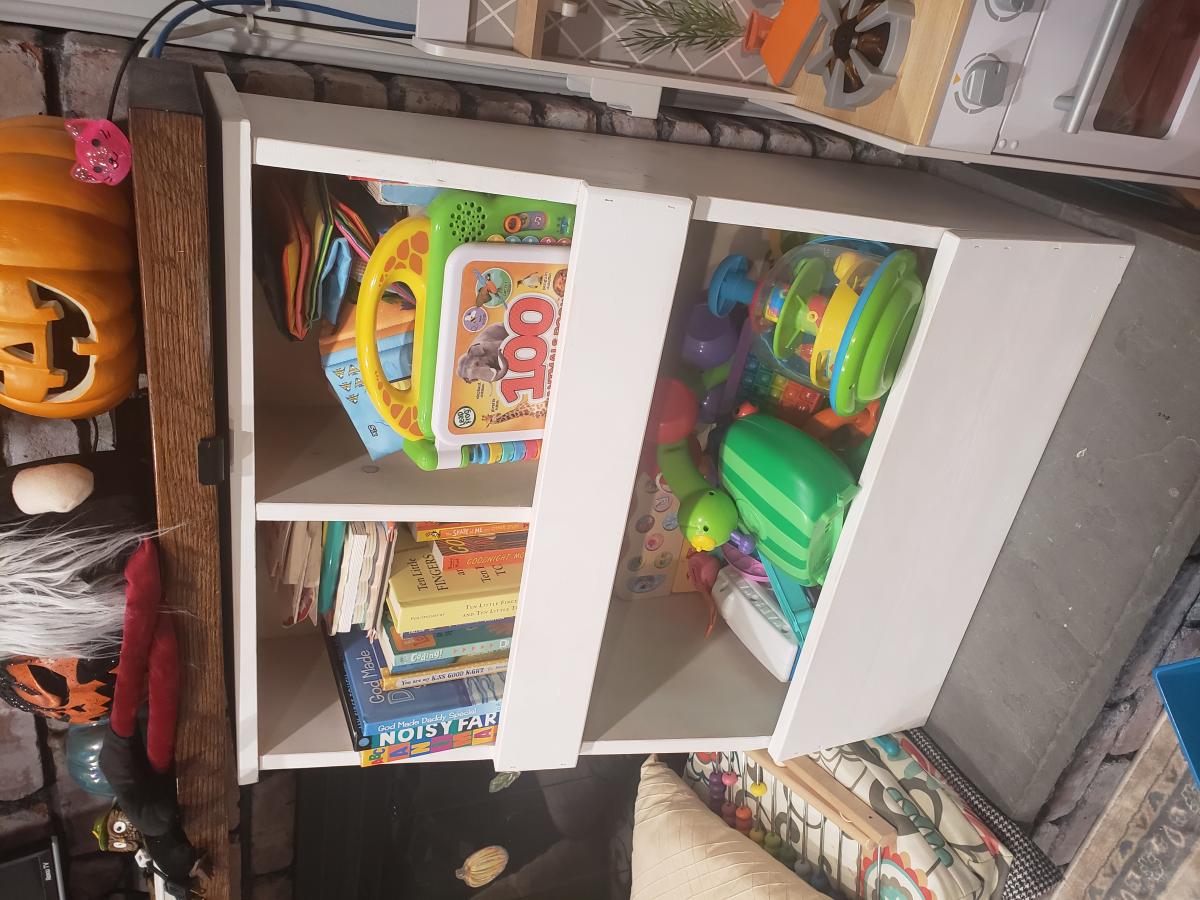
Built from Plan(s)
Lapdesk
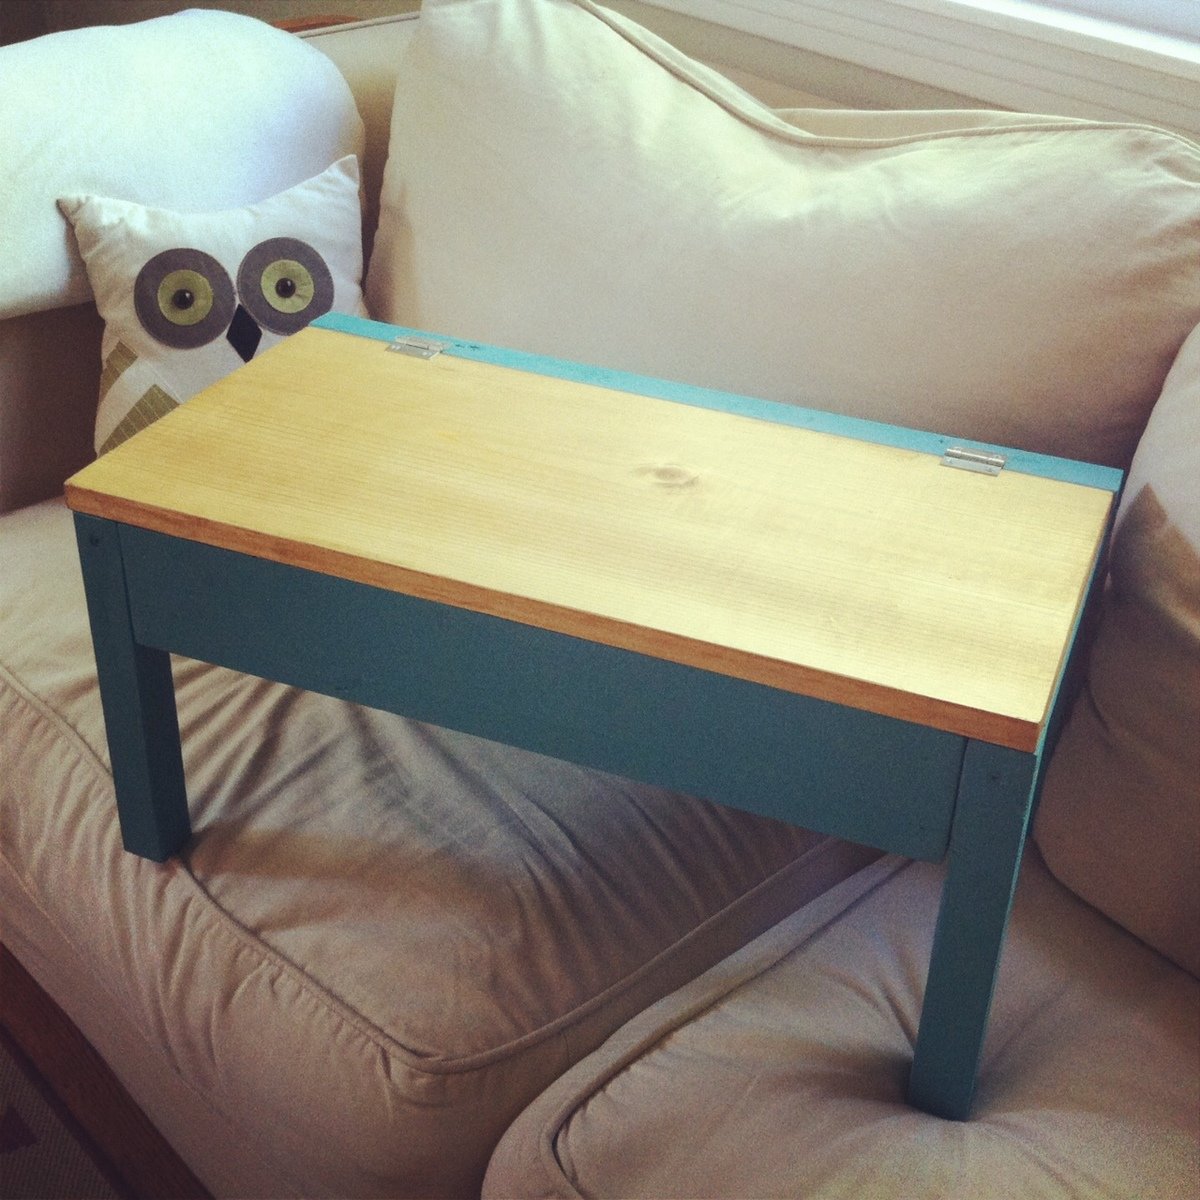
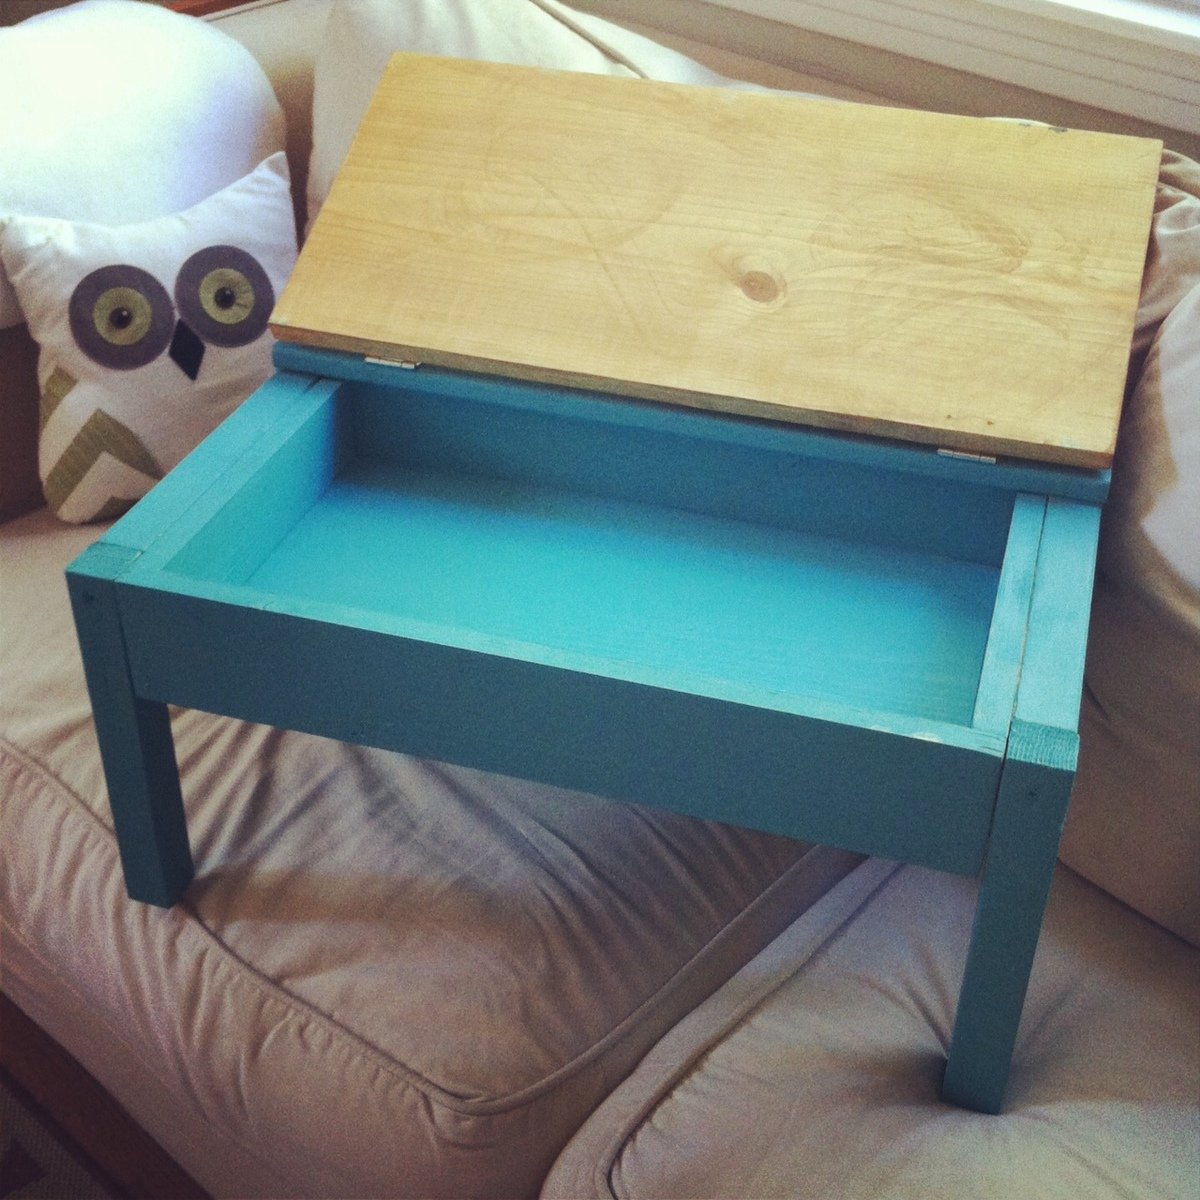
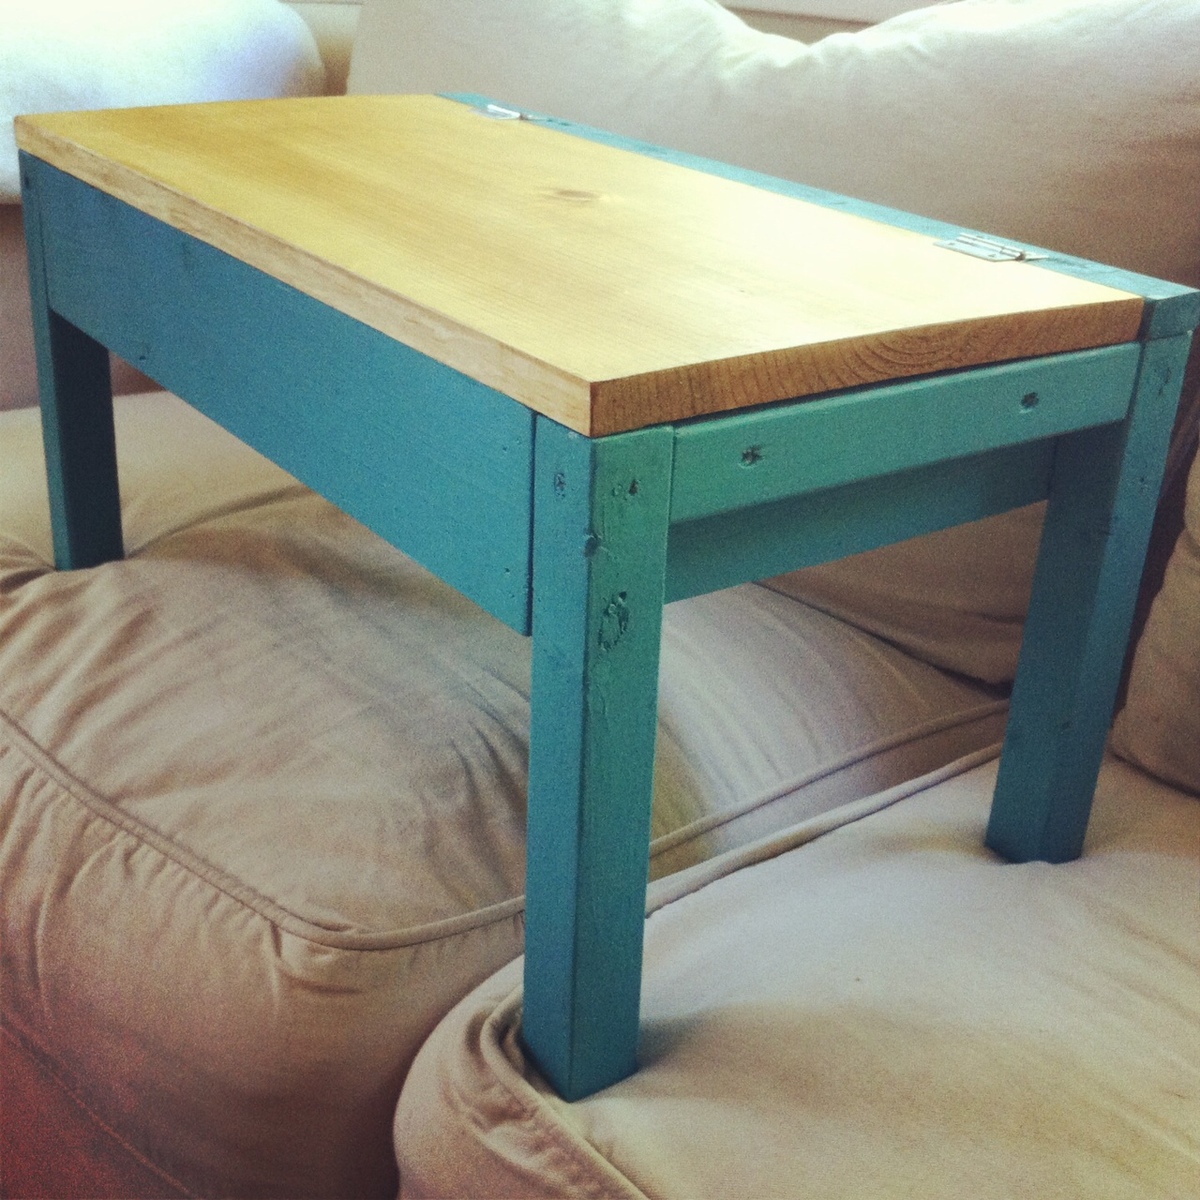
This was a pretty simple project and only took a few hours. I painted the bottom with some oops pain I found at Home Depot- I wanted the blue to be darker, but I still think it turned out ok and I will probably end up giving it to my nephew. I followed the instructions that one of the other builders had done on this project as far as making the legs shorter and leaving the compartments out to make it lighter. Happy with it overall!

Built from Plan(s)
Estimated Cost
less than $10
Estimated Time Investment
Afternoon Project (3-6 Hours)
Finish Used
painted the bottom with blue oops paint and used minwax golden oak (1 coat, left on 20 minutes then wiped off) and polycrylic for the top
Recommended Skill Level
Beginner
Barn door console

I made the sliding barn door console from your plans. I liked it so much I made a 3 opening version for another wall. I found patio door rollers to use instead of taking apart a pulley in the directions from the that's my letter plan. I used old crates my parents had kept and scraps for my doors so it has sentimental value.

Built from Plan(s)
Estimated Time Investment
Week Long Project (20 Hours or More)
Finish Used
Varathane golden pecan and espresso for the top. Vinegar and steel wool for the backing. Various colors for the doors. Min wax clear polycrilic finish.
Recommended Skill Level
Intermediate
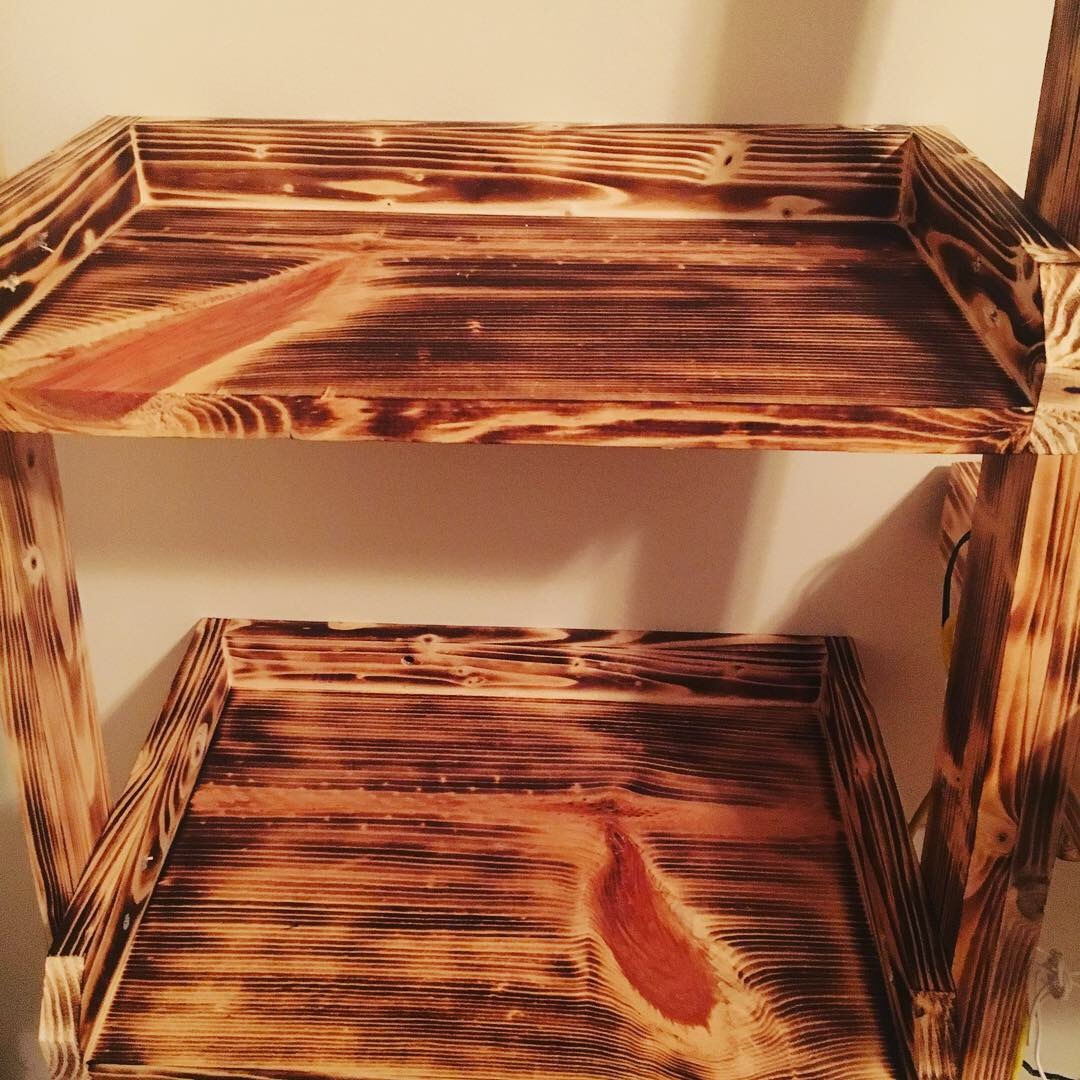
Leaning Desk and Bookshelves
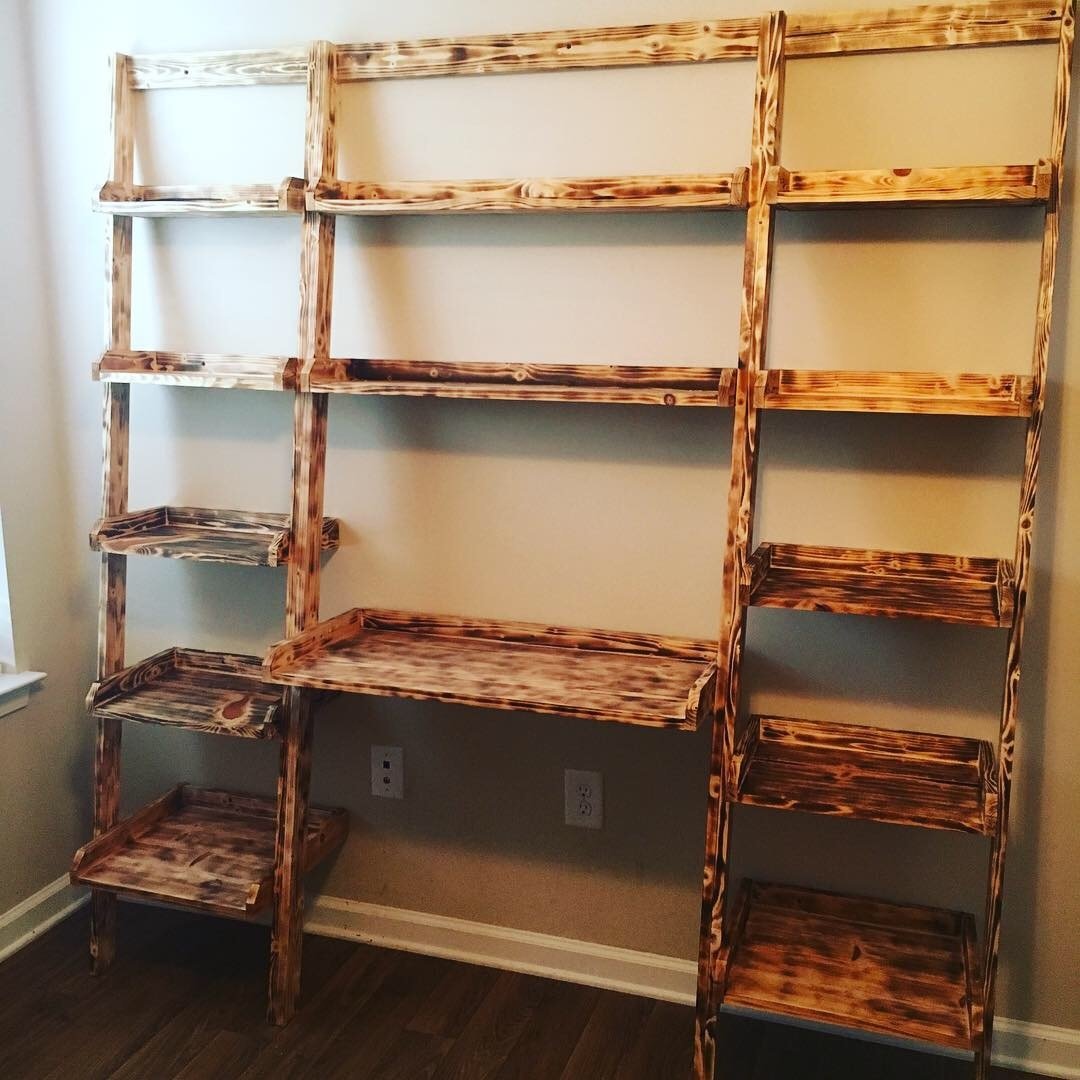
Used a handheld propane torch to “burn” the wood and it turned out amazing!
Built from Plan(s)
Estimated Cost
$100 I didn’t have any wood on hand so had to buy all of it. The rest of materials I already had.
Estimated Time Investment
Day Project (6-9 Hours)
Finish Used
Propane to burn the wood
Recommended Skill Level
Beginner
Grid Mirror
Thank you Ana for your amazing easy to follow plans and videos! I’ve had so many compliments in the mirror and goes great with the table from Shanty2Chic. I went with 8 x 8 mirror tiles. We love it!
Built from Plan(s)
Comments
Kid's Storage Step Stool (first project)
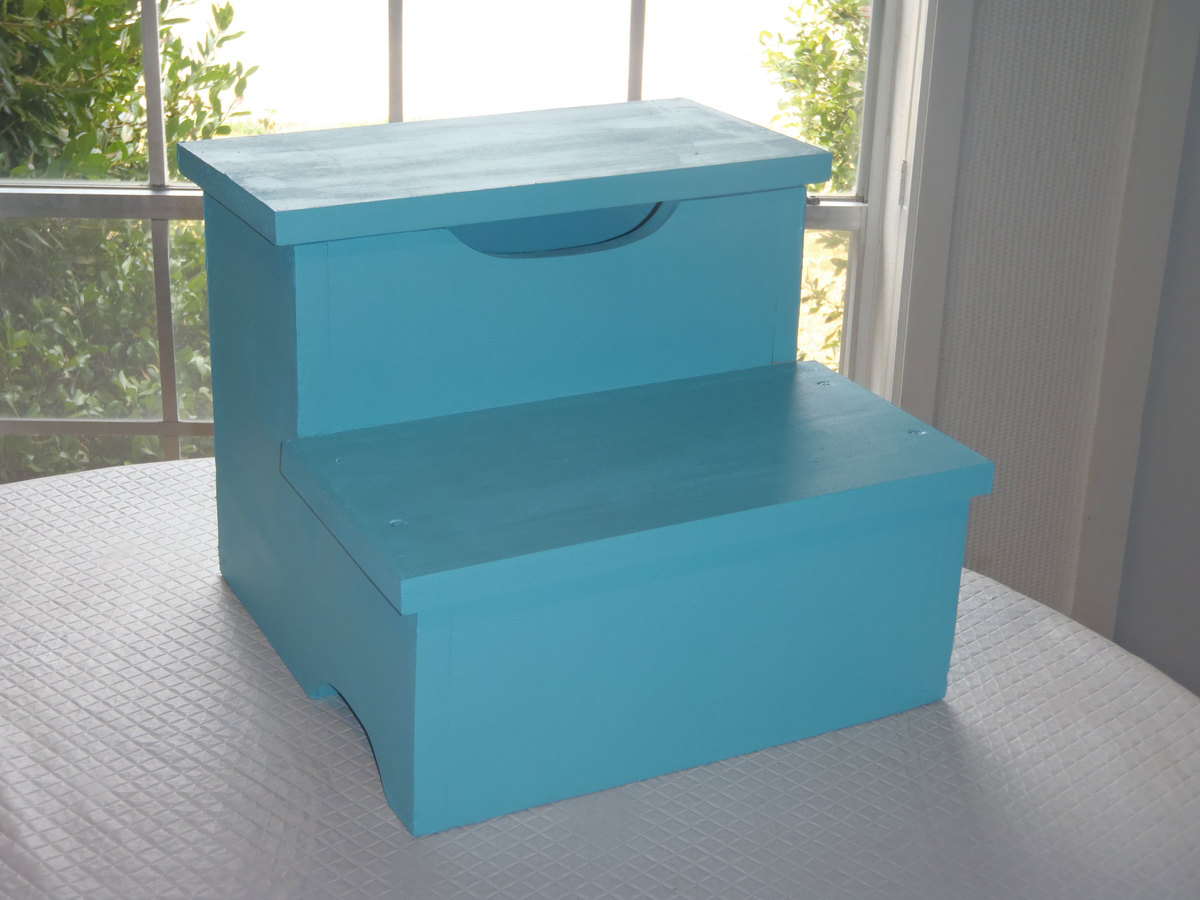
first project I've done in well over a decade, made it for my 3 year old son to have at the bathroom sink
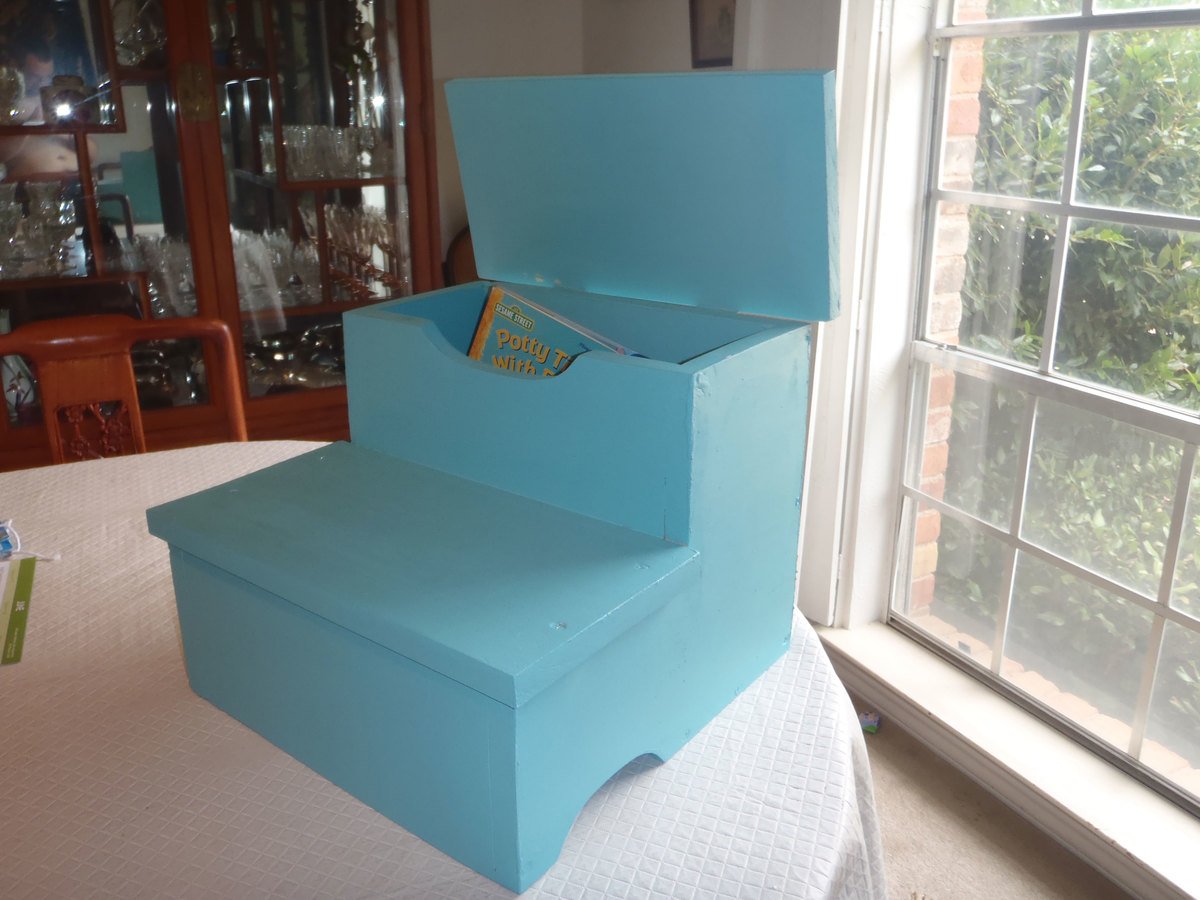
Built from Plan(s)
Finish Used
paint leftover from son's room
Recommended Skill Level
Starter Project
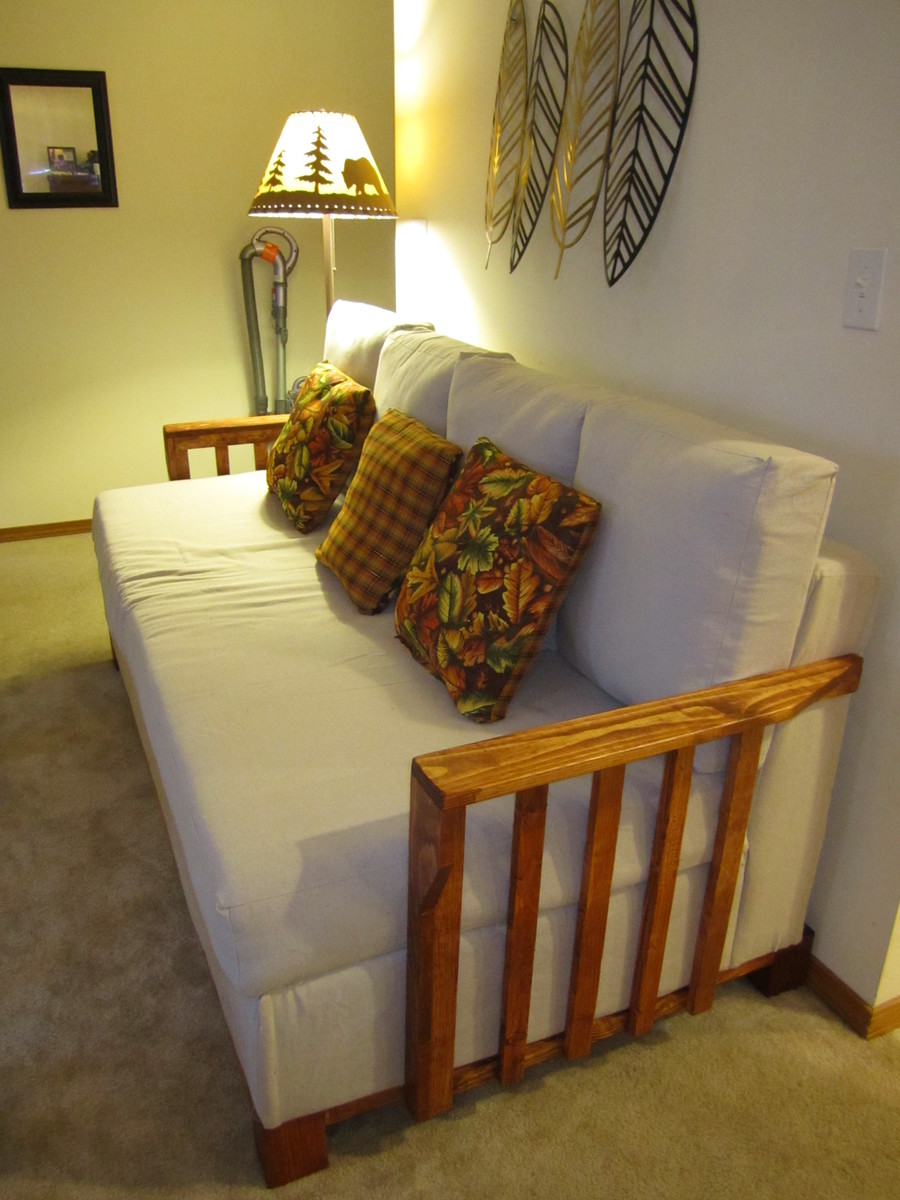
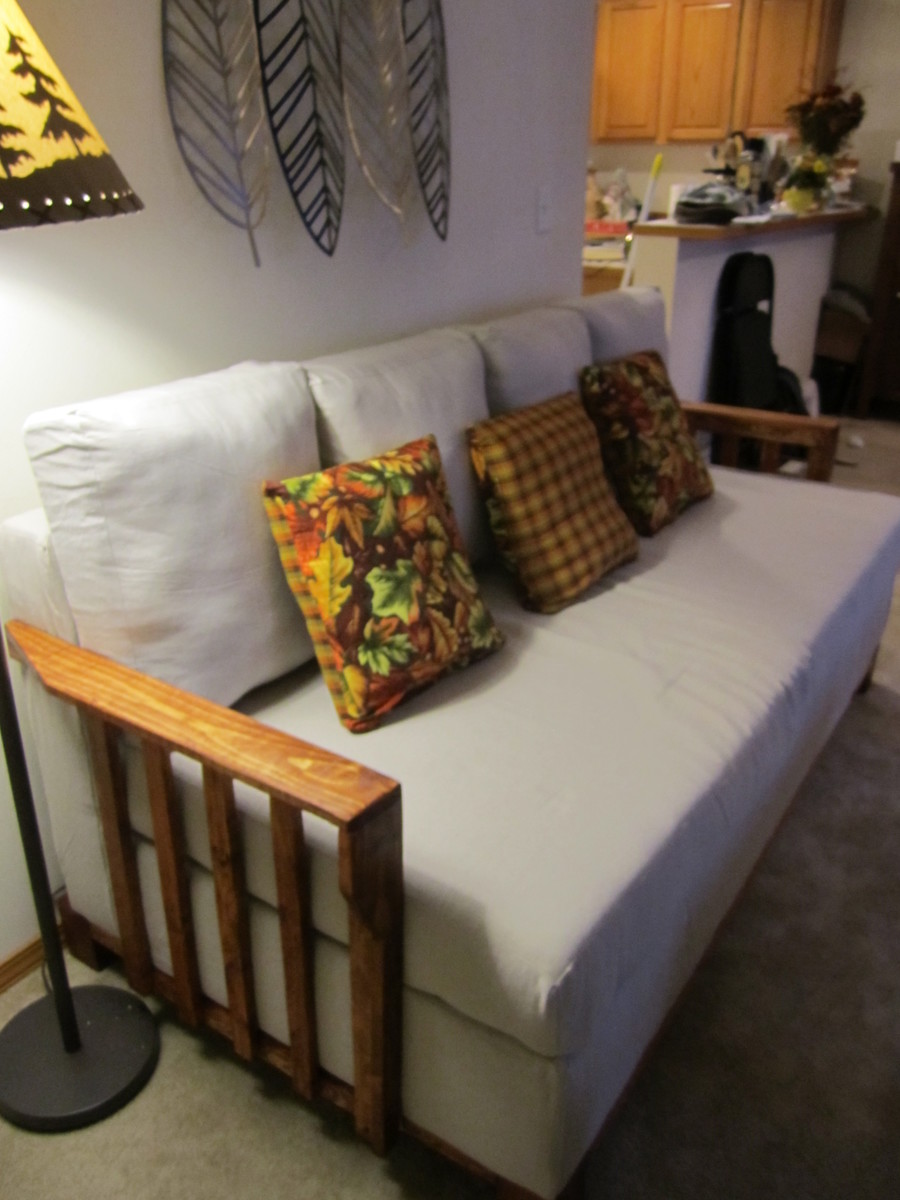
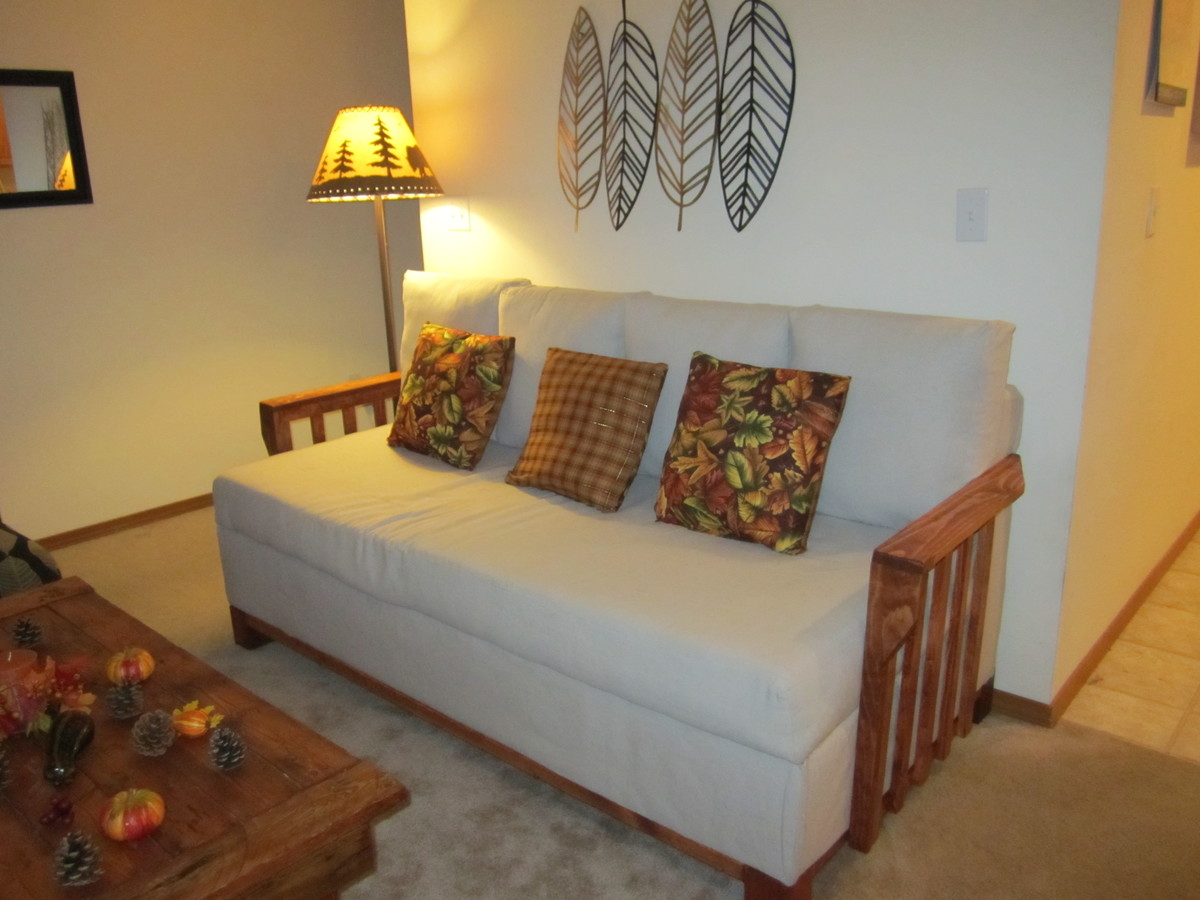
Storage Sofa with Armrests
When we bought our house a year ago, my husband was super excited to be able to get tools and start working with wood. At first, I didn't share his desire for DIY projects. It honestly wasn't until I found your website that I started to get excited. It was first a excitement of things that I could have my husband do/make as he had already made the coffee table that you see along with an entry table, 2 small bookcases, workbench, wall shelf, and storage shelves.
However, recently I started to get the crazy idea in my head that I could help and we could do projects together. When we decided that our couch was too big for our small living room space, we determined to buy a newer smaller couch. That was until I found the plans for this one. We decided that we would give it a try, and if it didn't turn out like I wanted it to, it could go in his man-cave.
Keep in mind, I am not a seamstress nor can I really sew in a straight line, but following Anna's plan made this project easy. My husband and I decided that he wanted armrests on the couch and came up with the armrests designs you see here.
I am already excited an working on our next project of a Farmhouse table that I have (not the hubby) done most of the work on.
Built from Plan(s)
Estimated Cost
$300
Estimated Time Investment
Week Long Project (20 Hours or More)
Finish Used
Early American, I believe. Fabric was the cloth paint drop cloth suggested in the plan which I love the neutral colors of and it makes things easier to decorate for the seasons.
Recommended Skill Level
Starter Project
Comments
Thu, 01/02/2014 - 10:05
I love your couch! My
I love your couch! My boyfriend and I just started this yesterday too. Were the armrests hard to construct for the couch?