Community Brag Posts

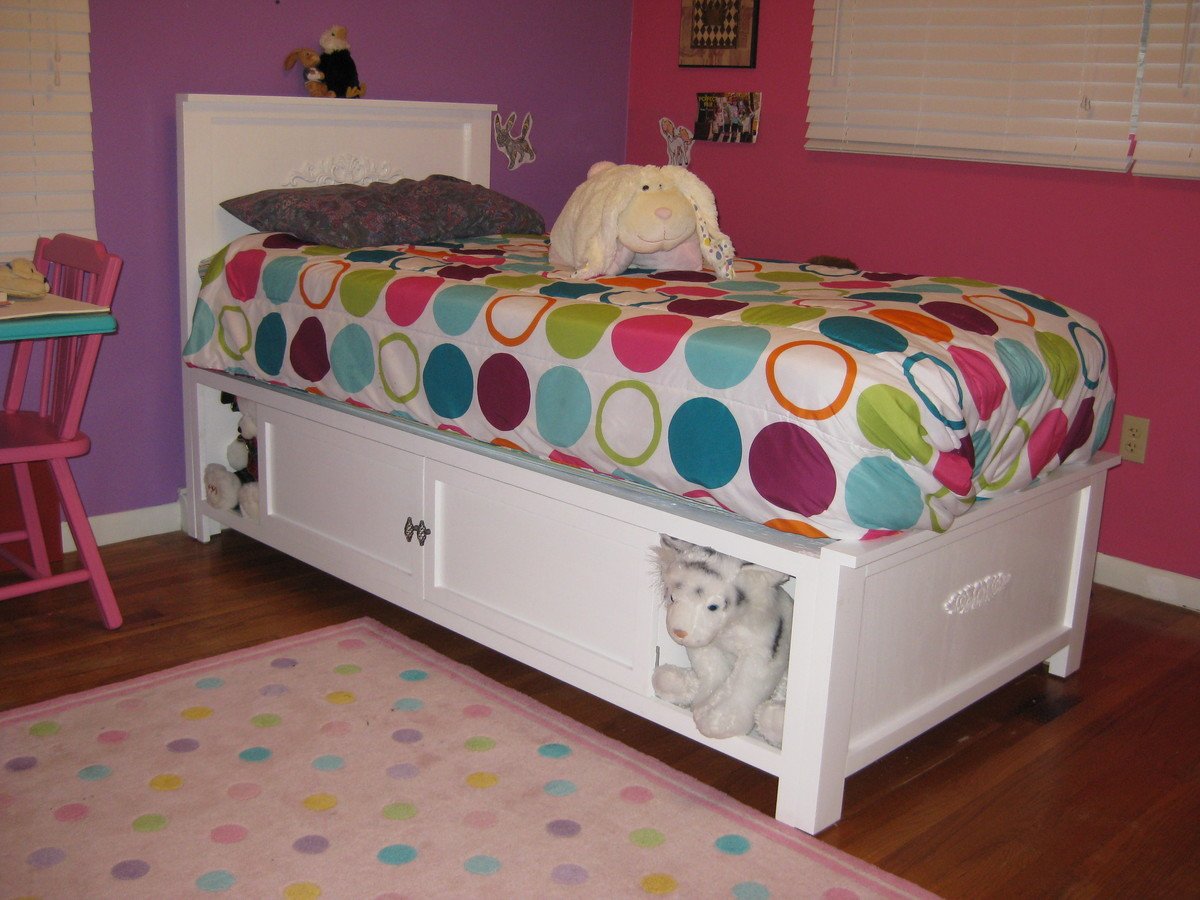
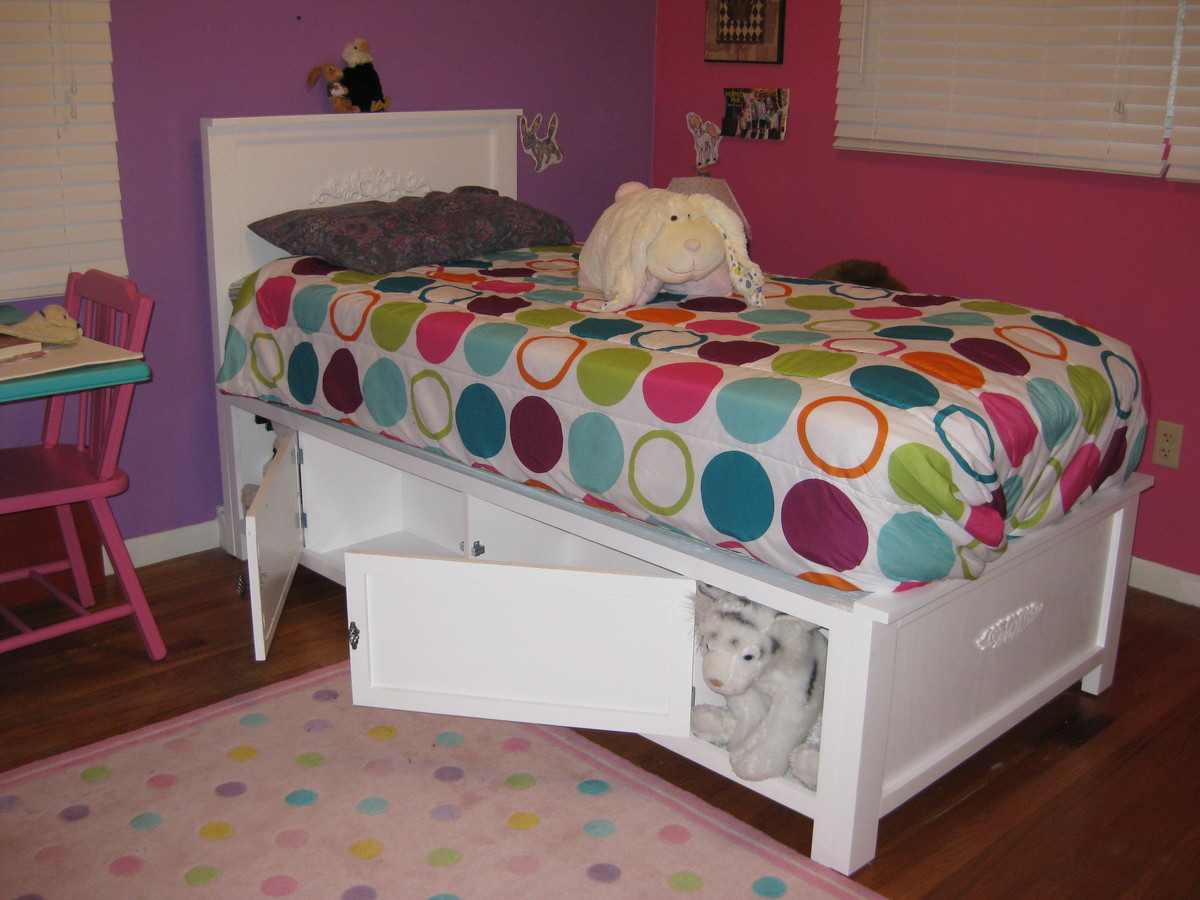
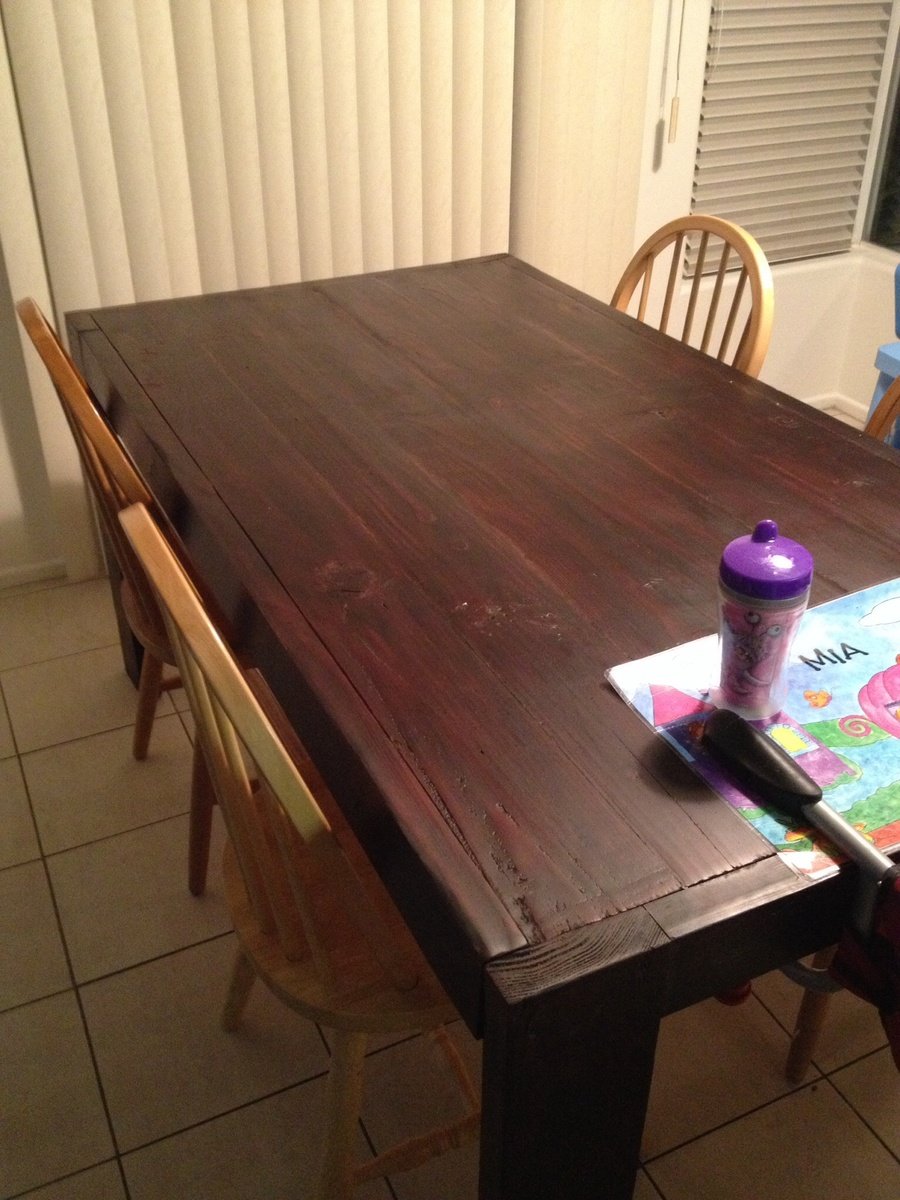
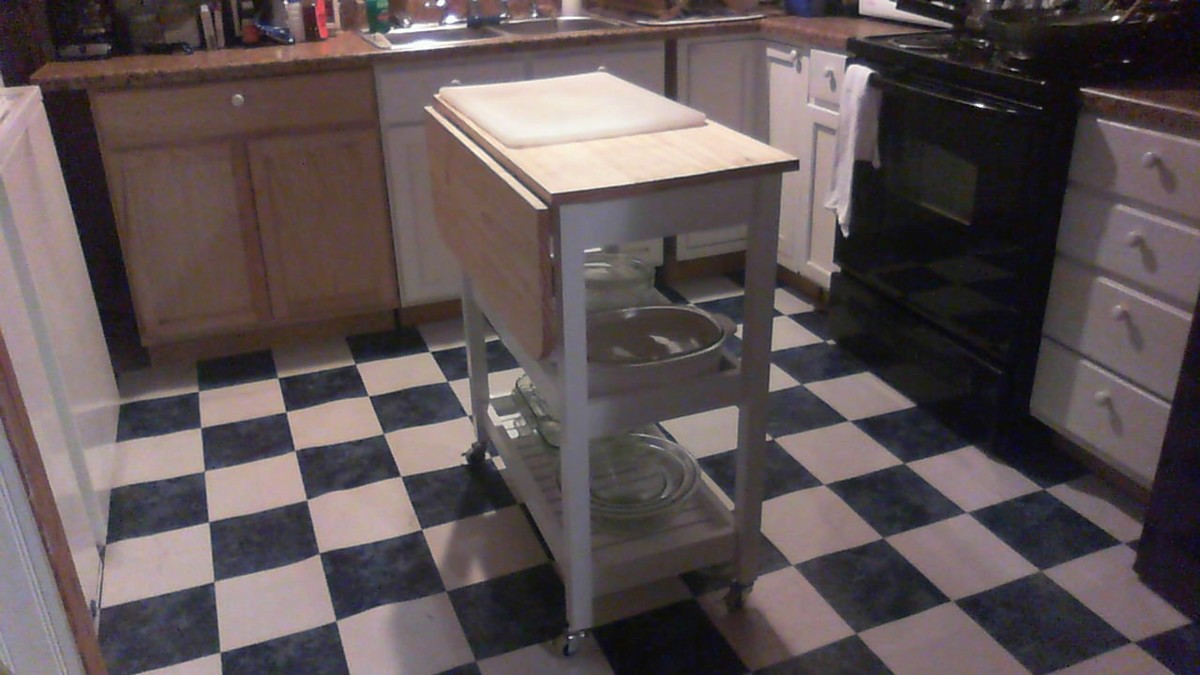
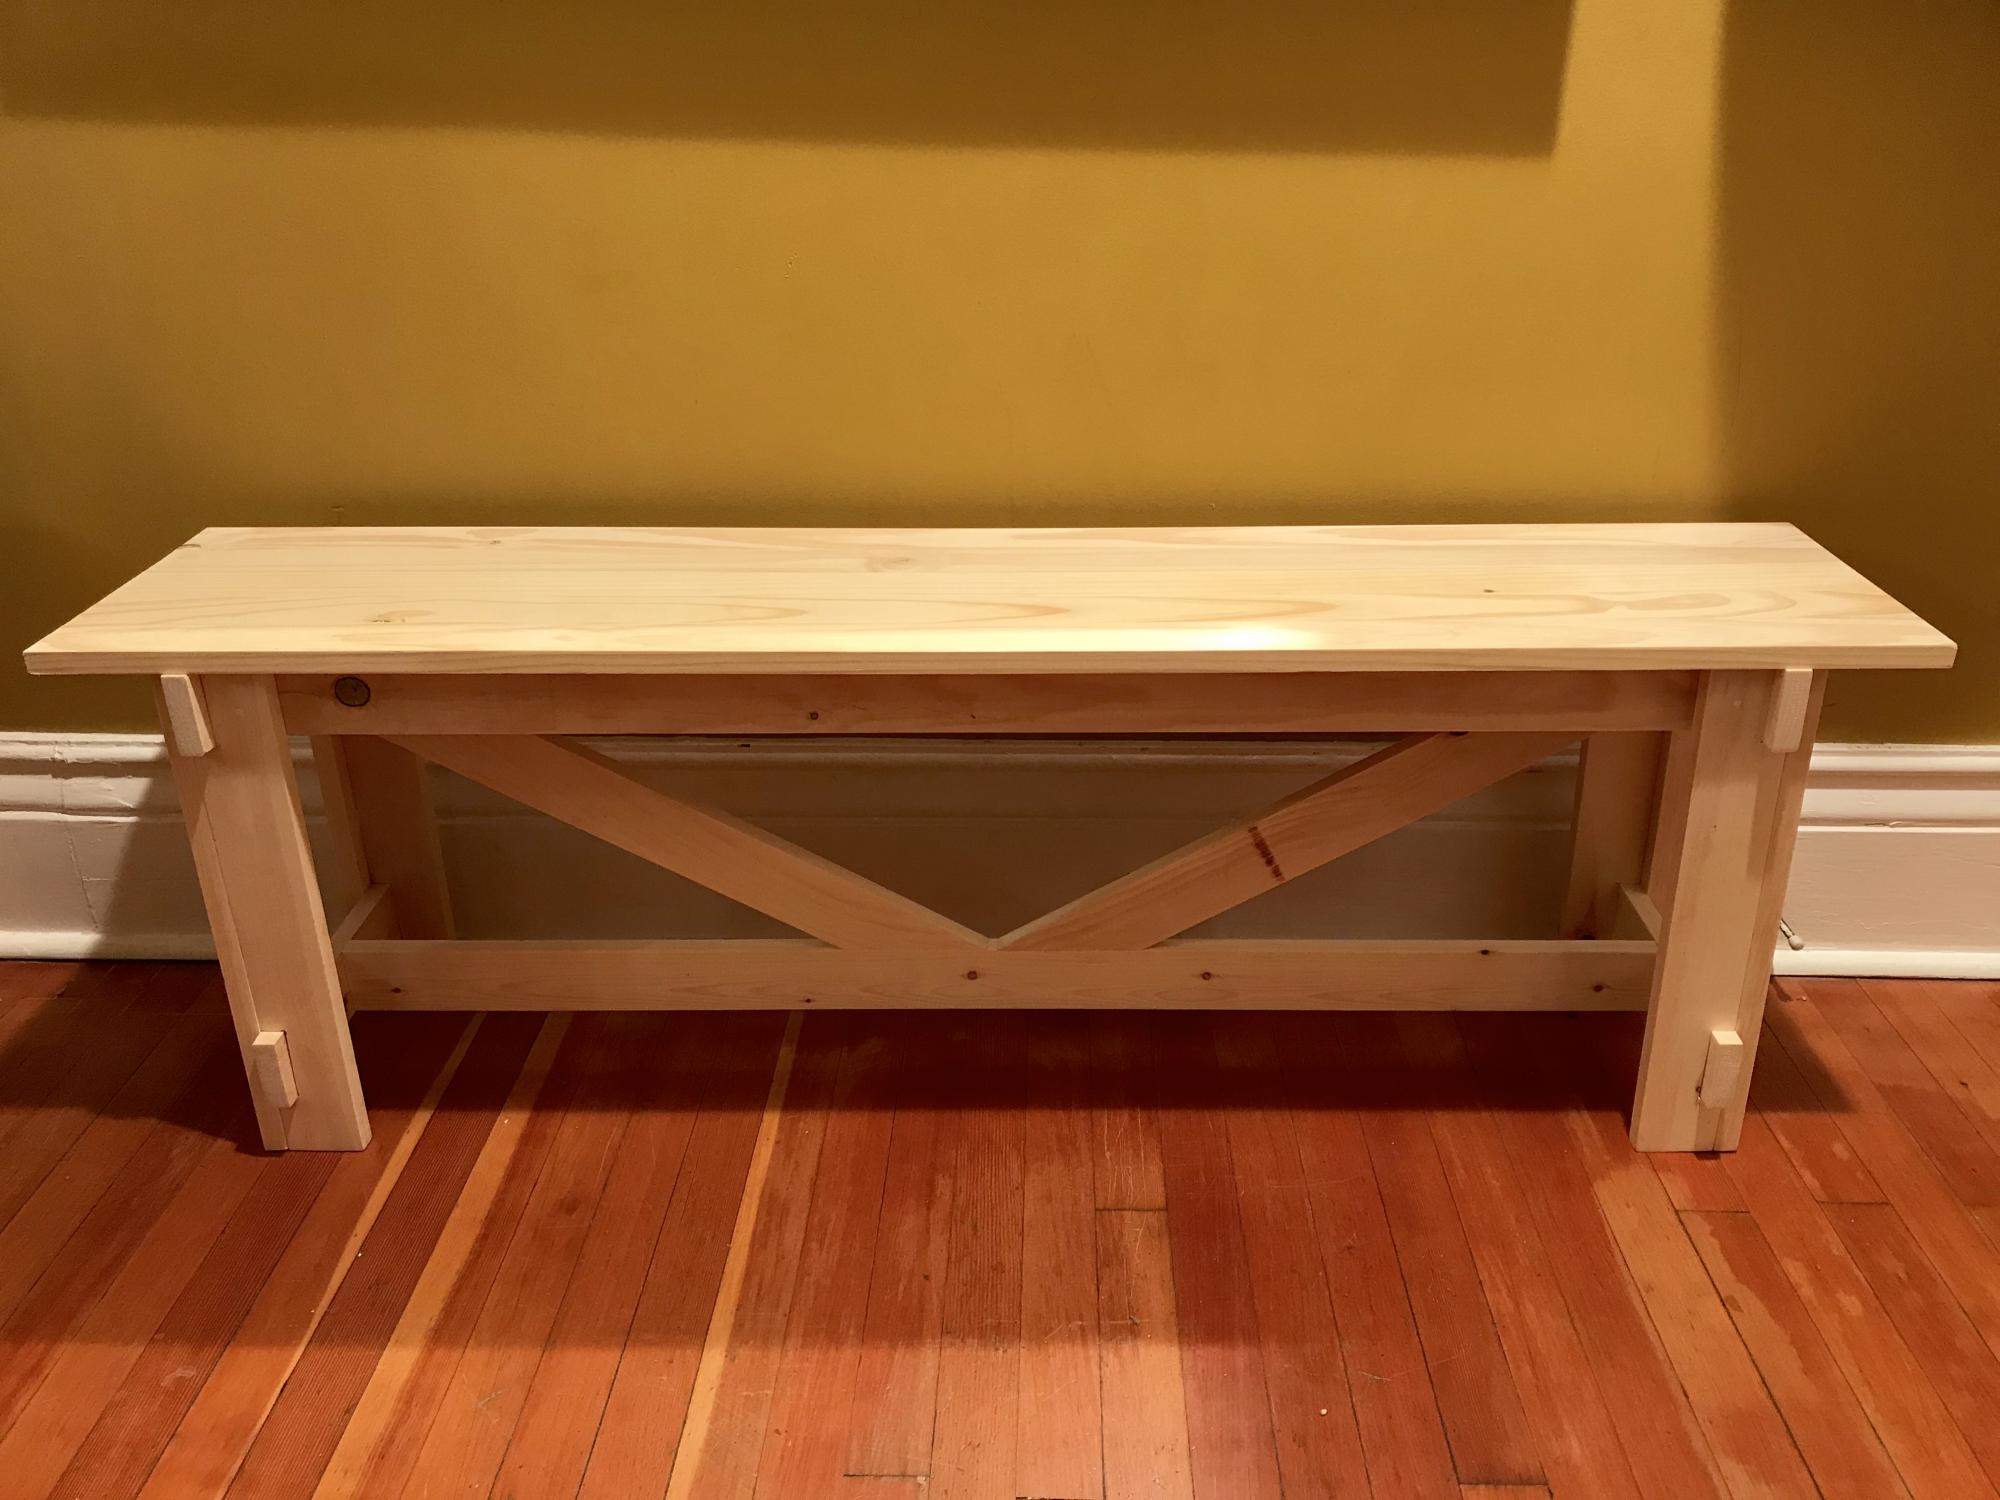
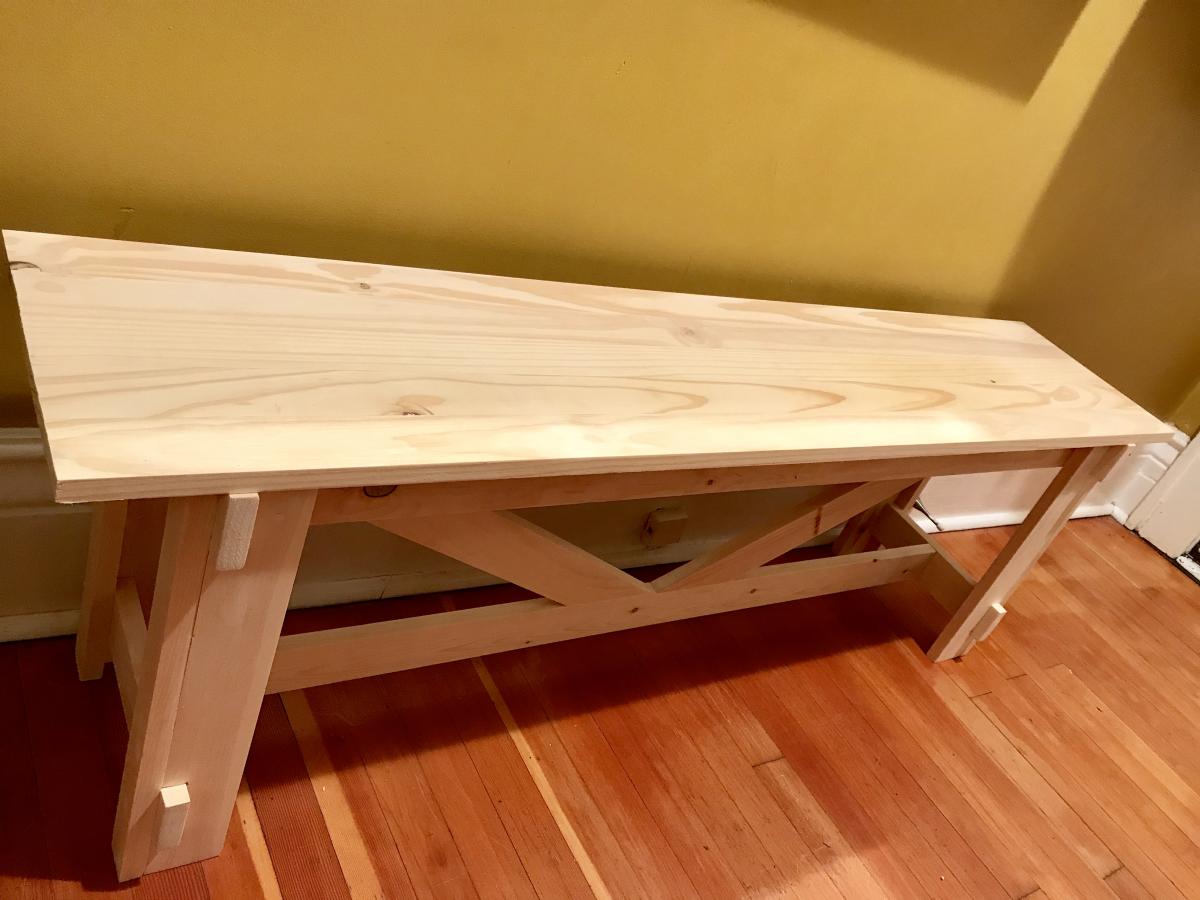
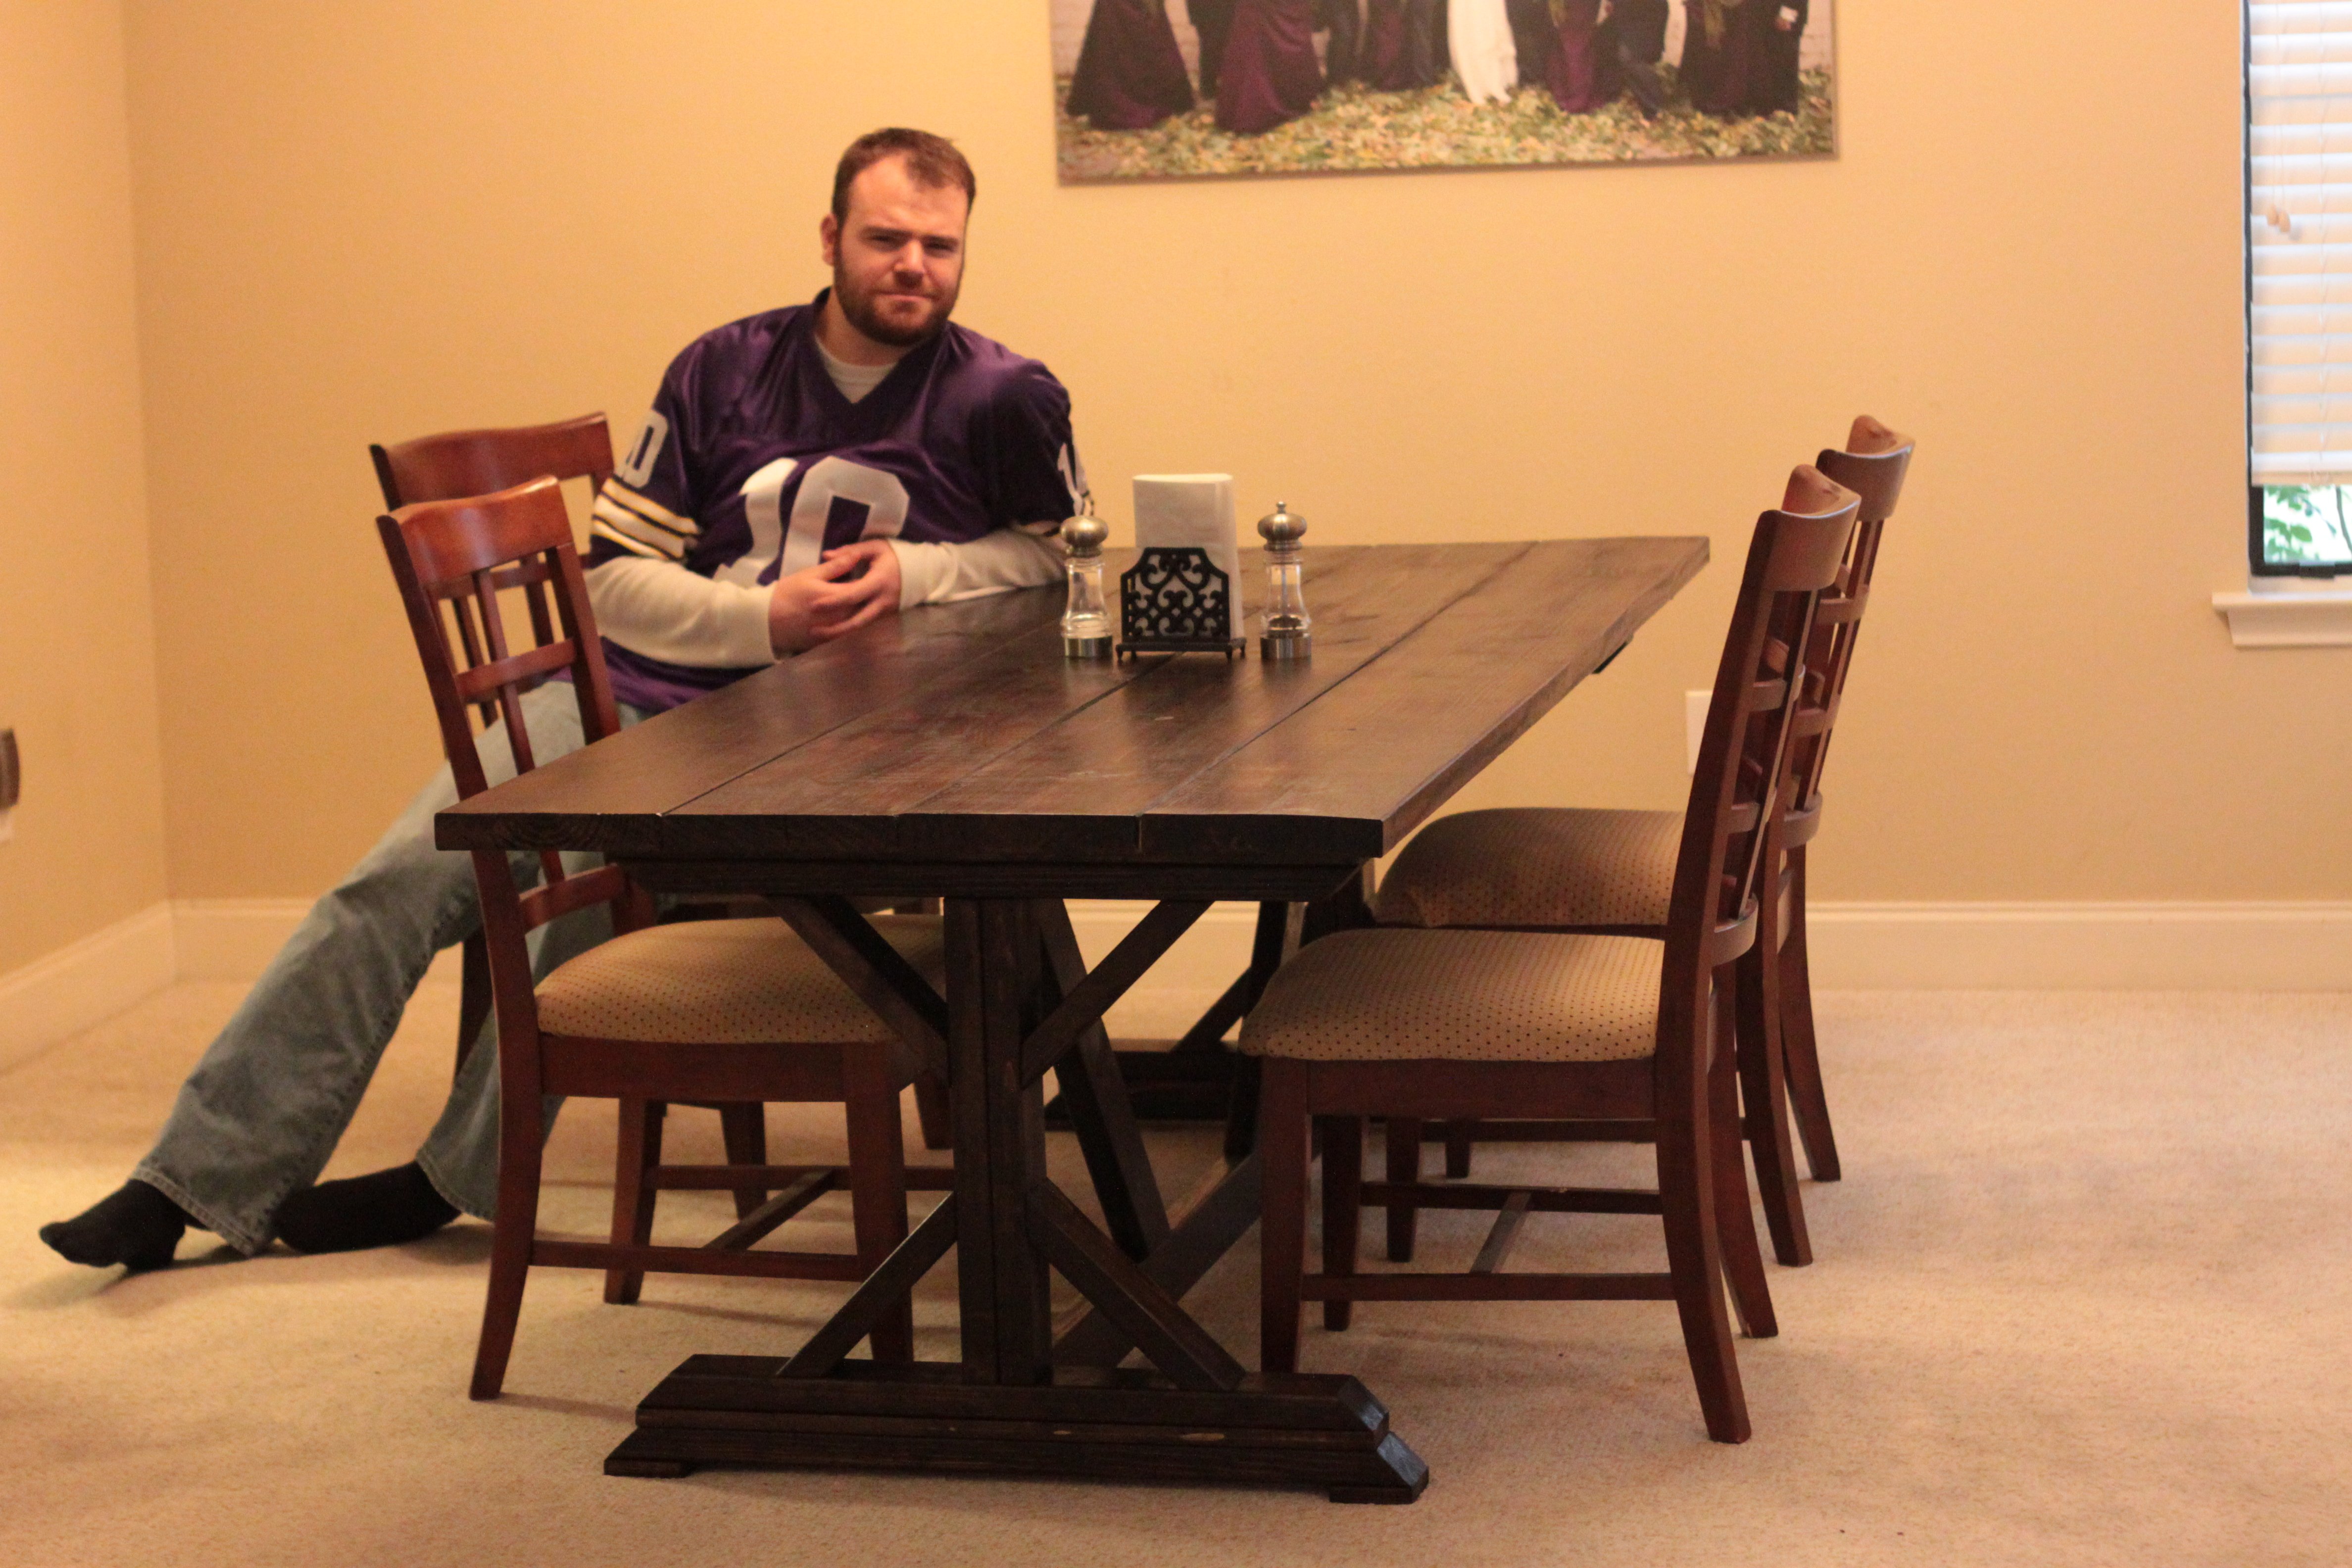
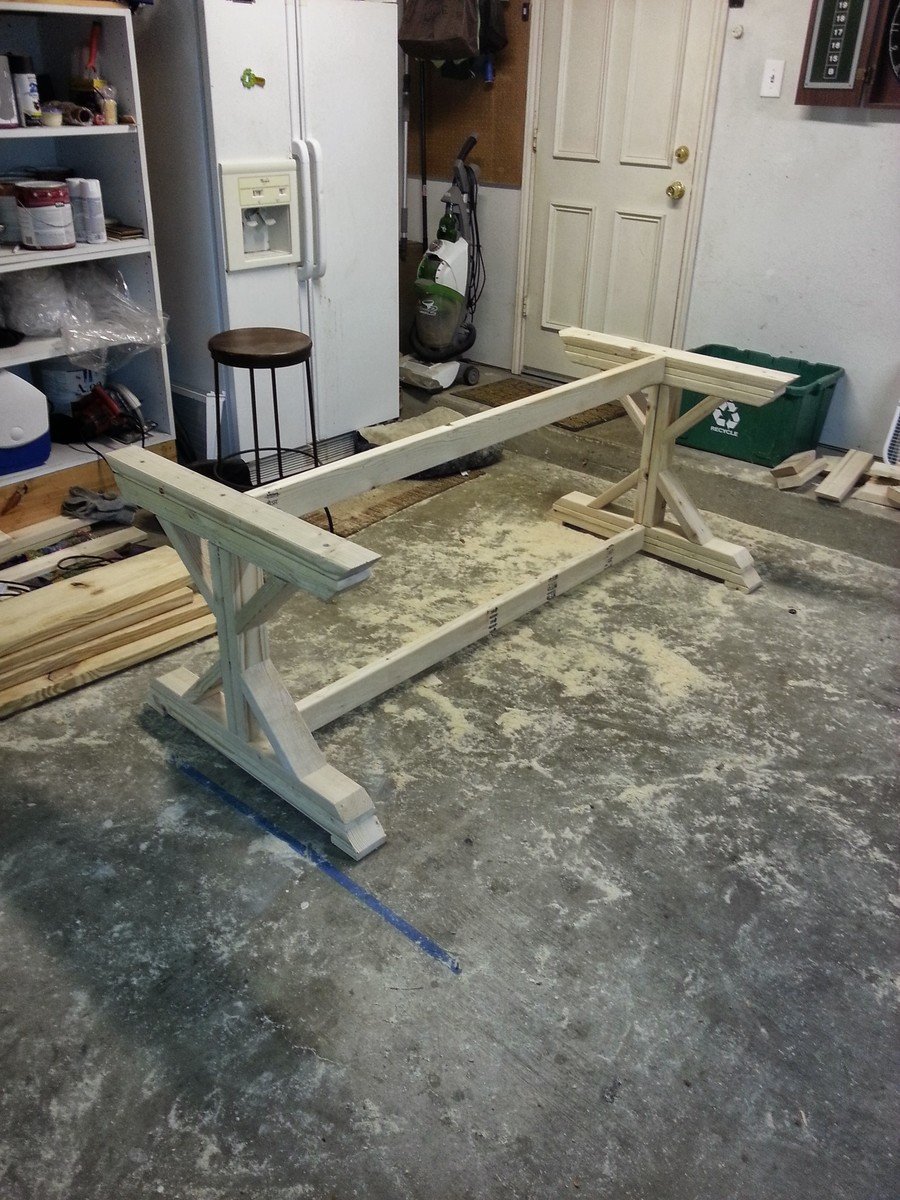
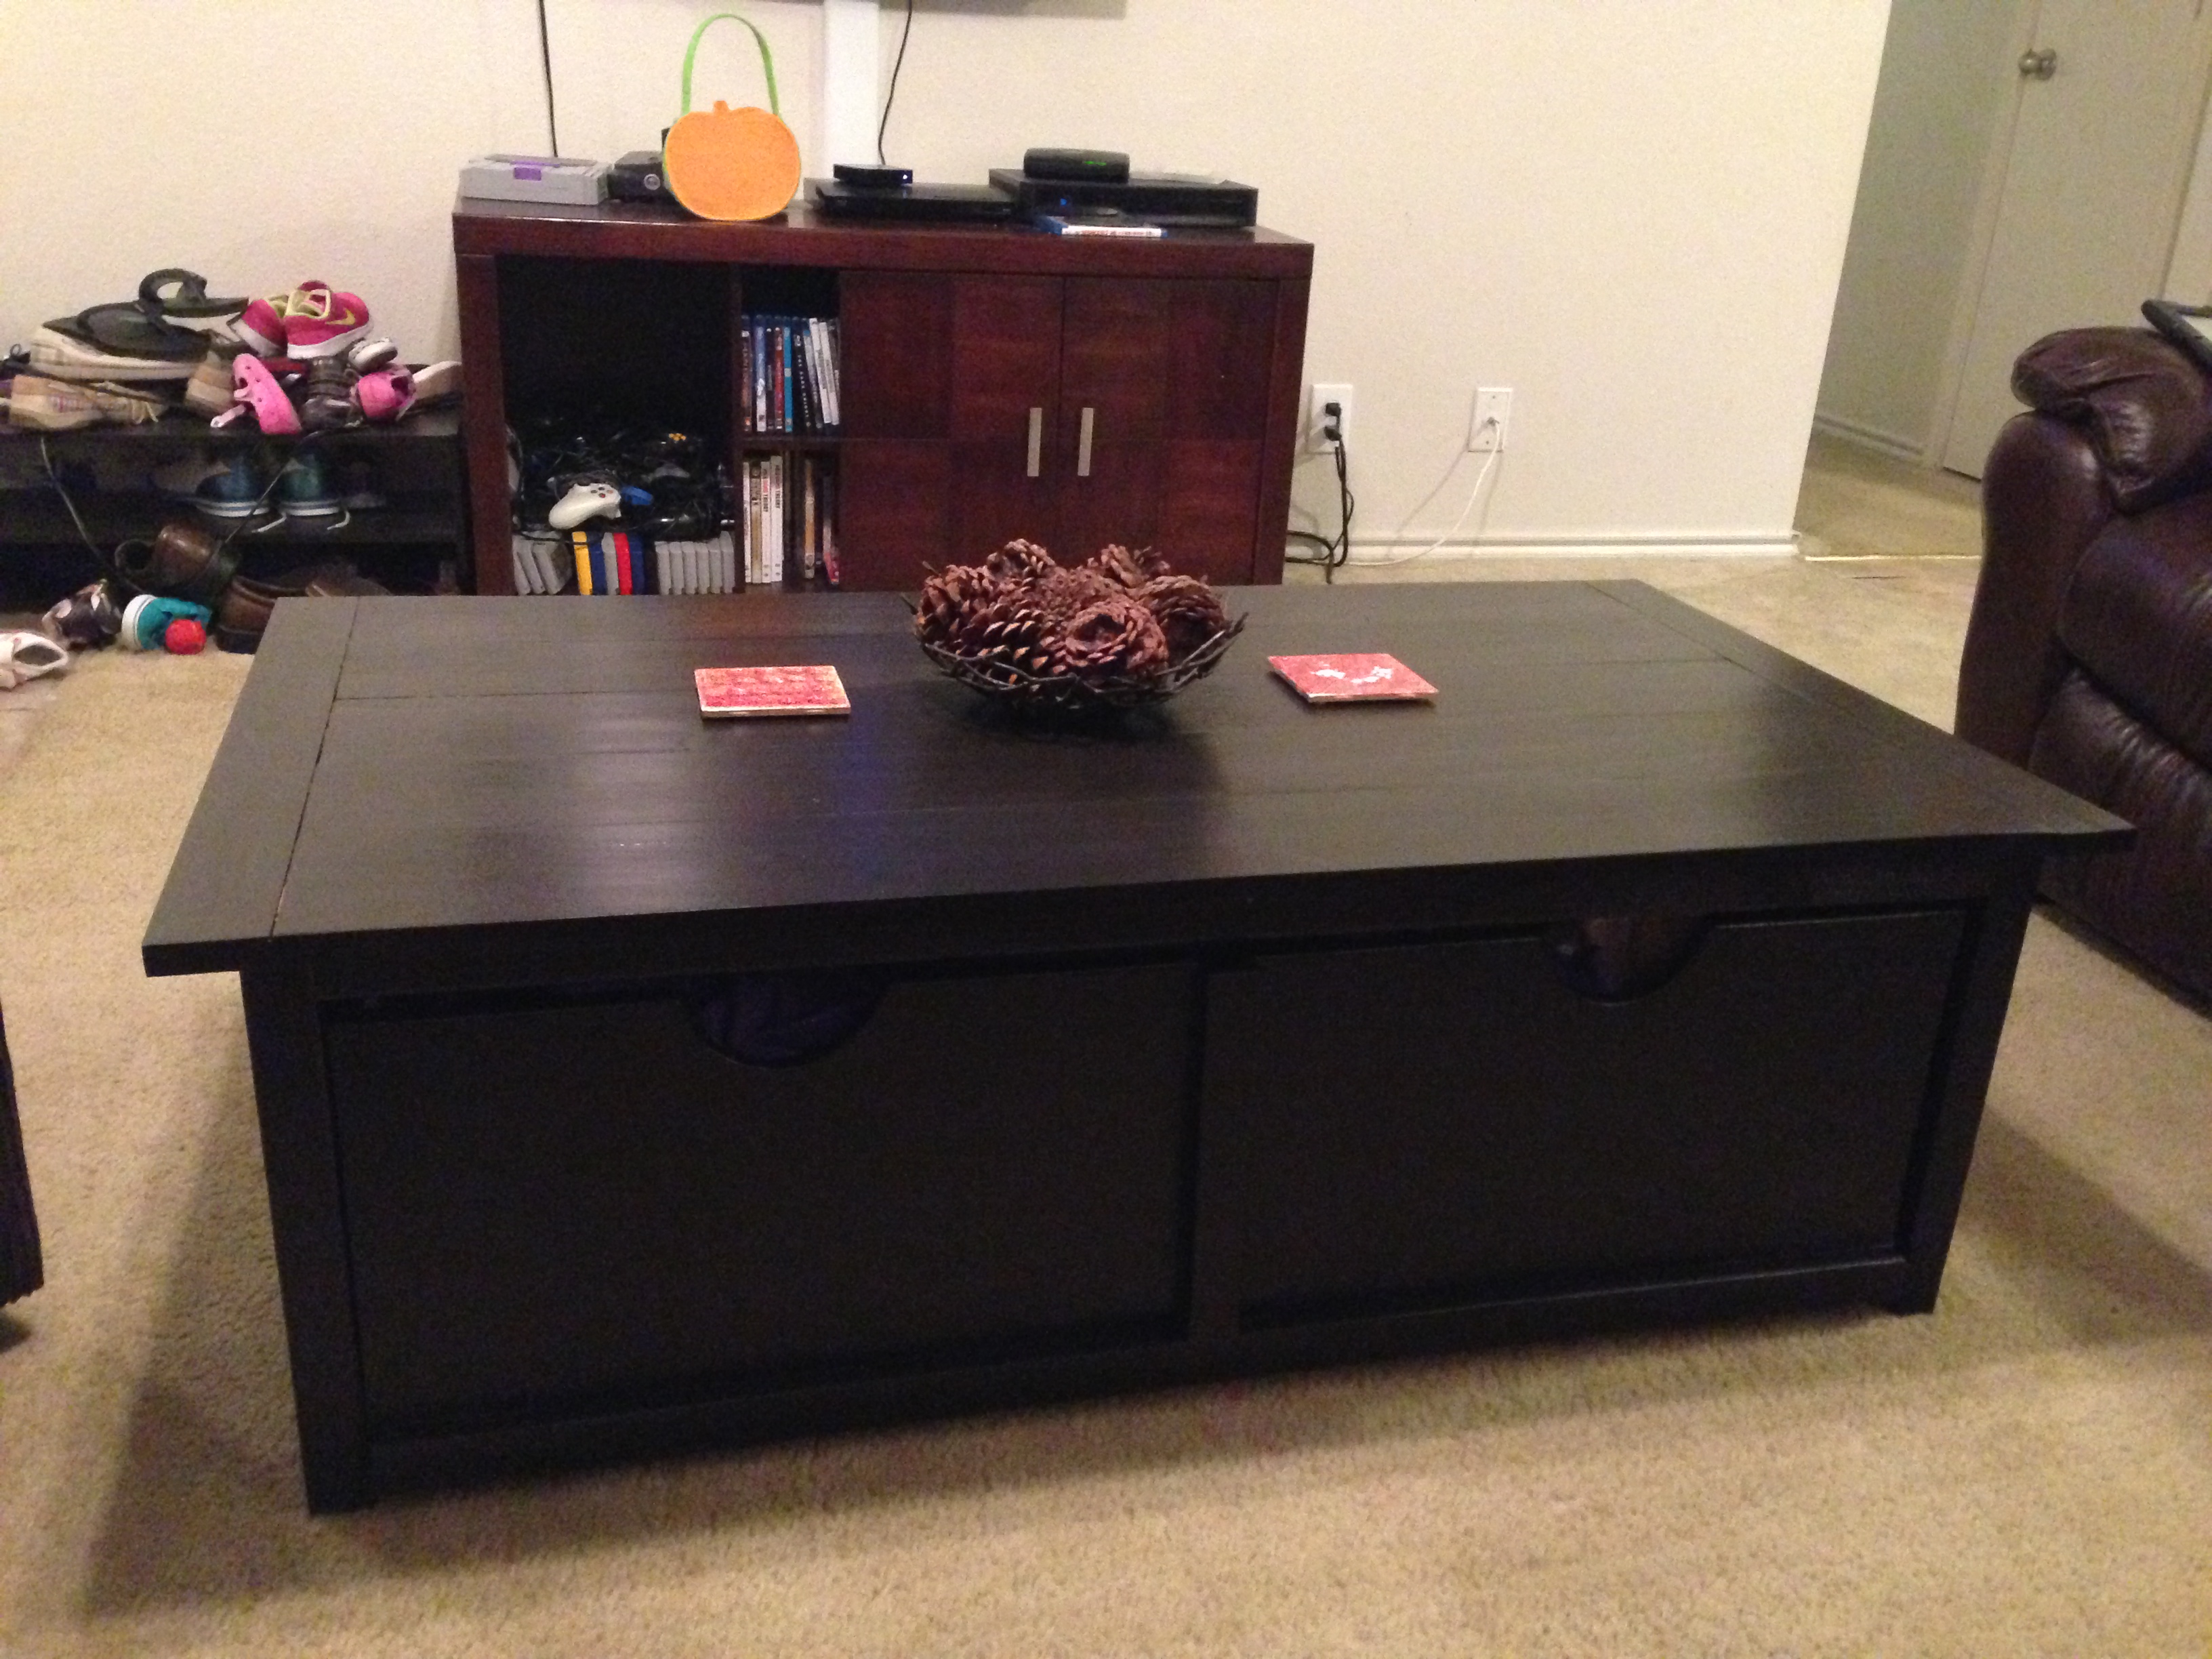
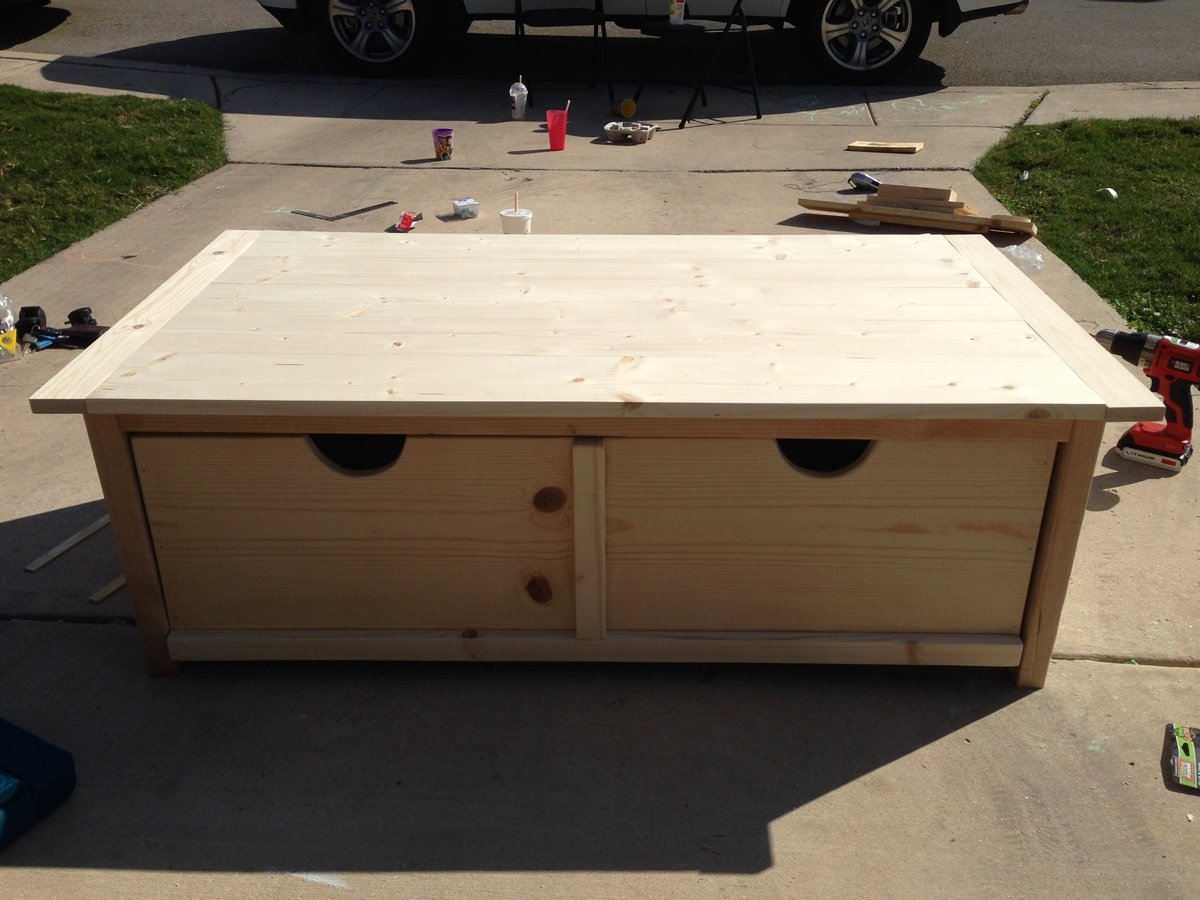
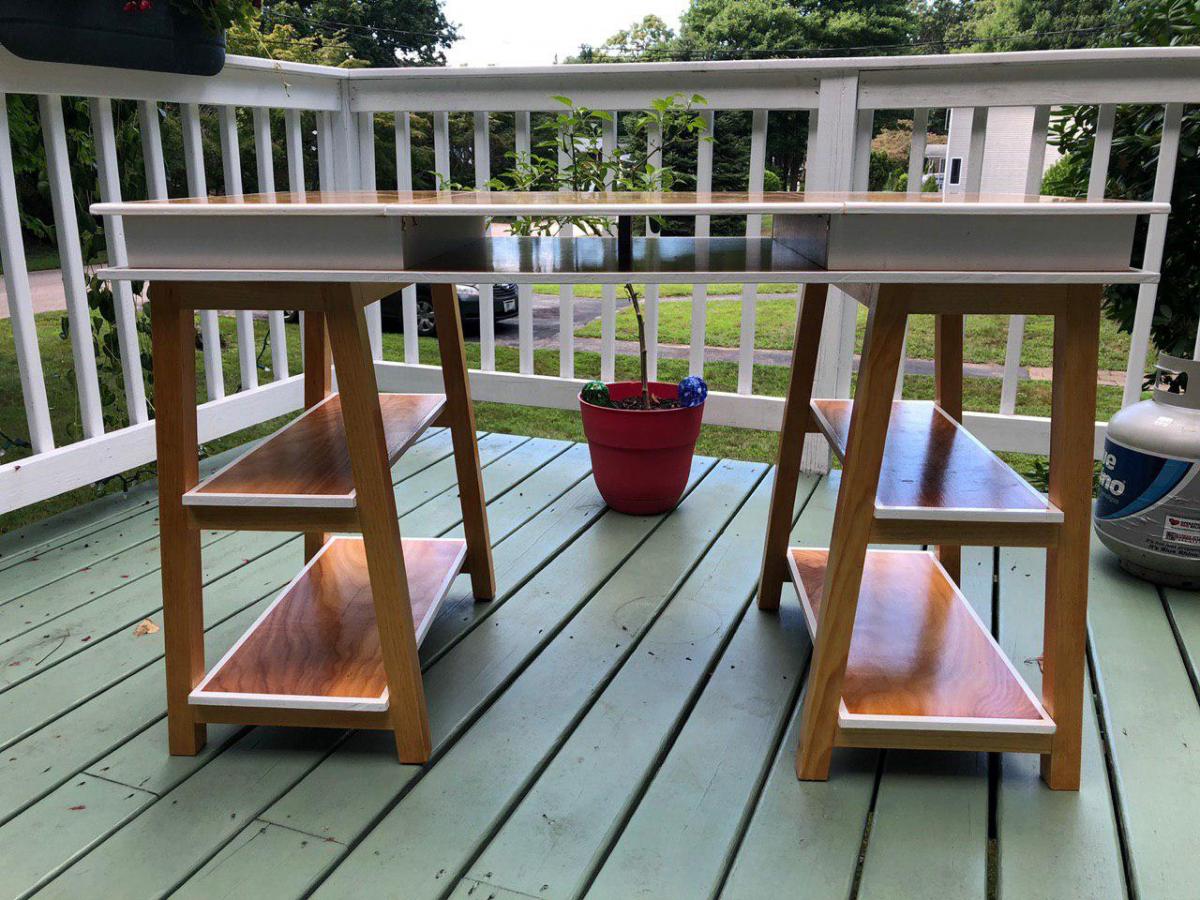
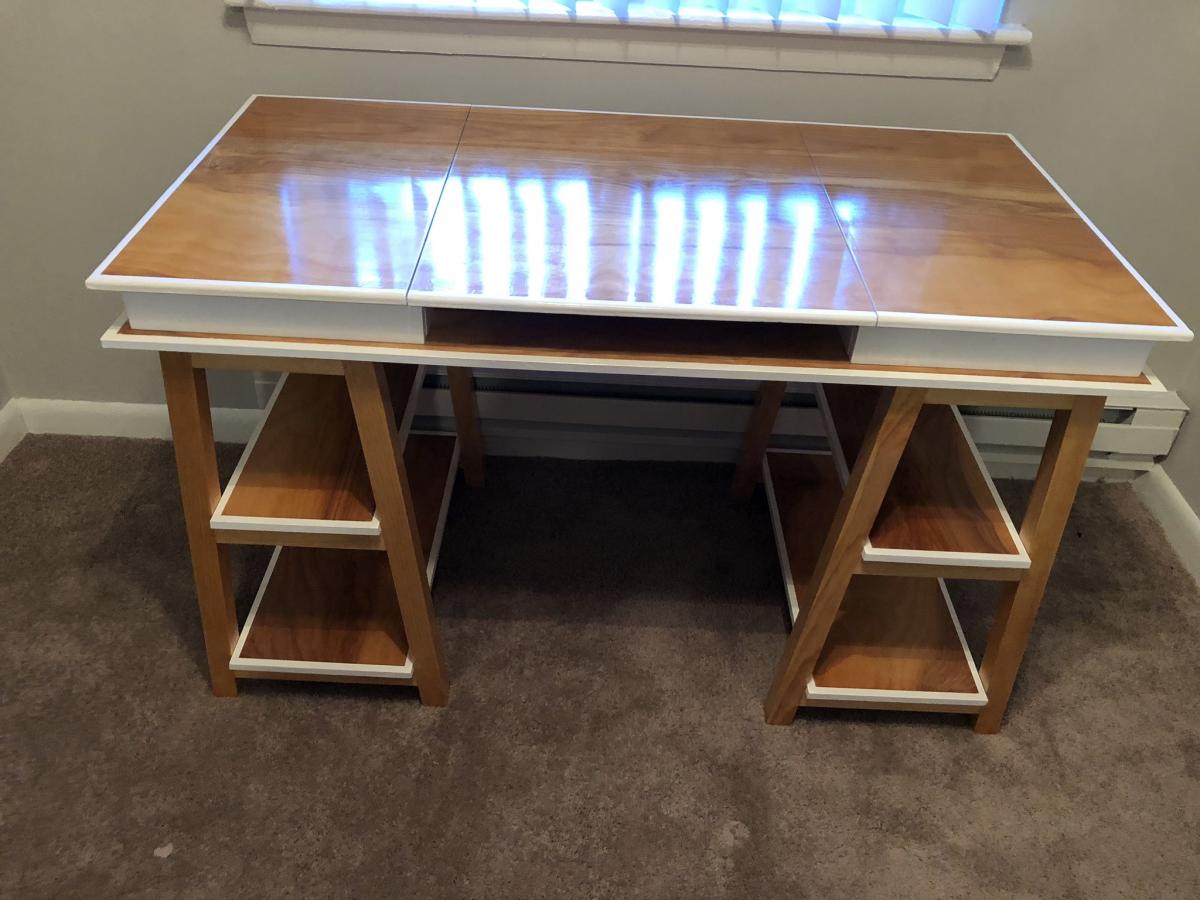
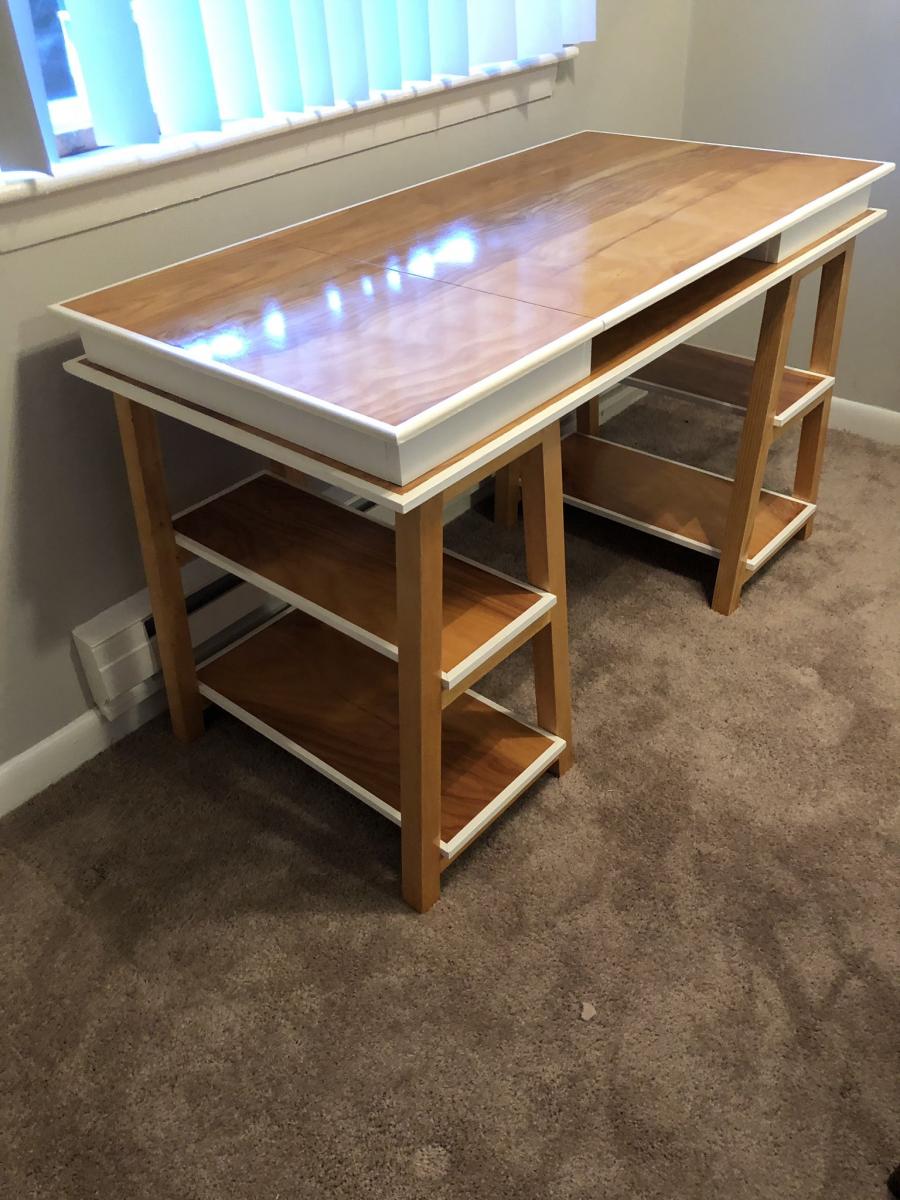
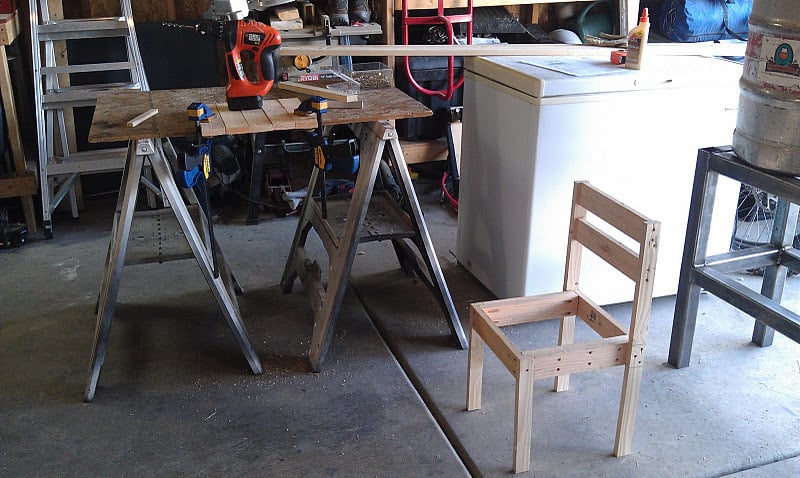
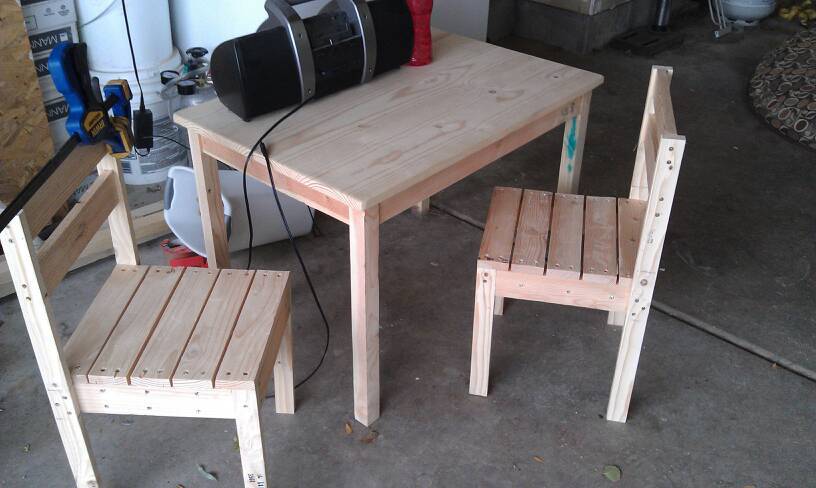
Sawhorse Storage Leg Desk

Submitted by Anonymous (not verified) on Sun, 08/25/2019 - 08:35

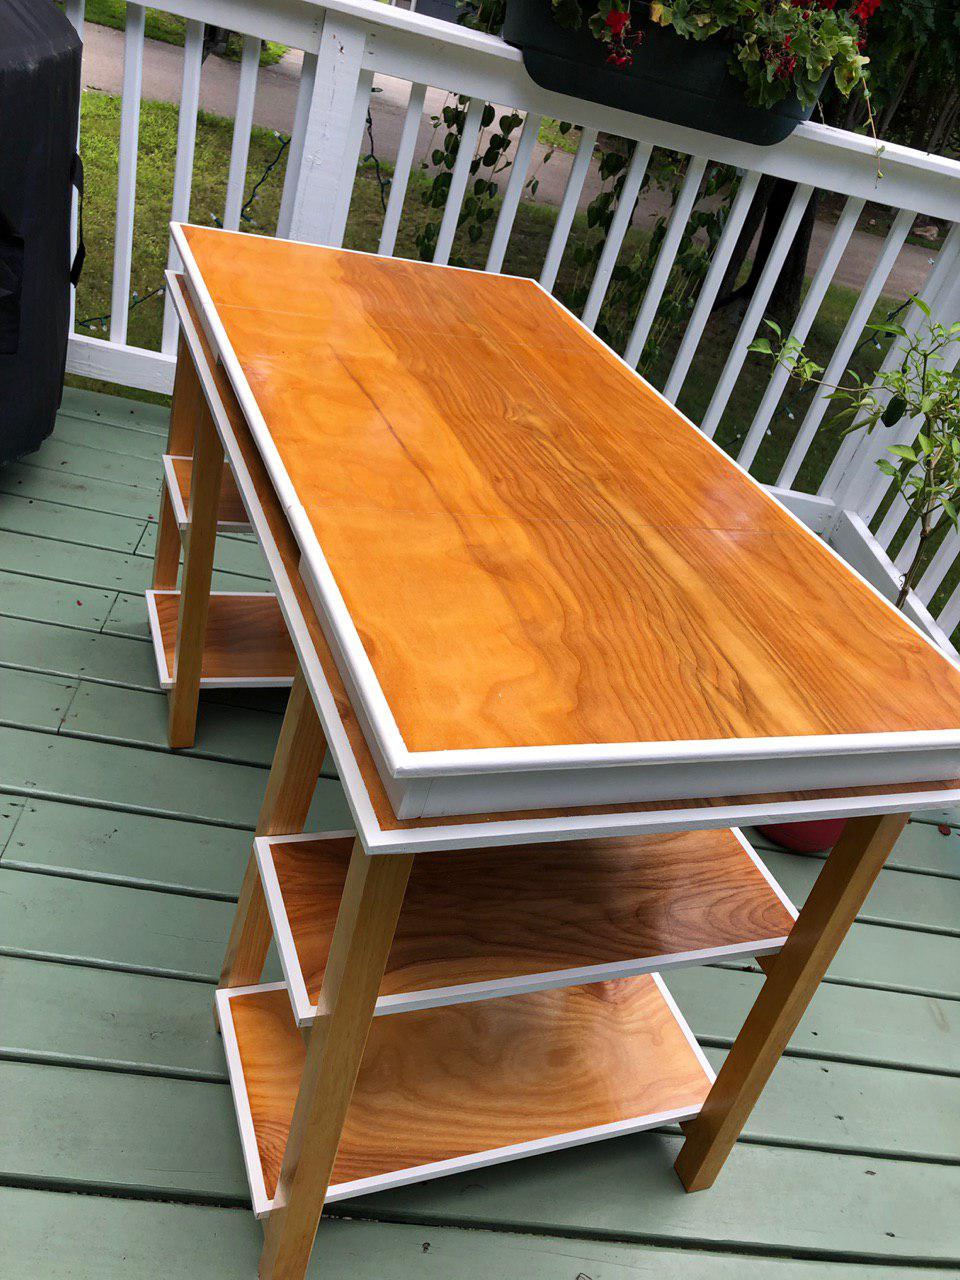
Based on the plans for the sawhorse storage leg desk.

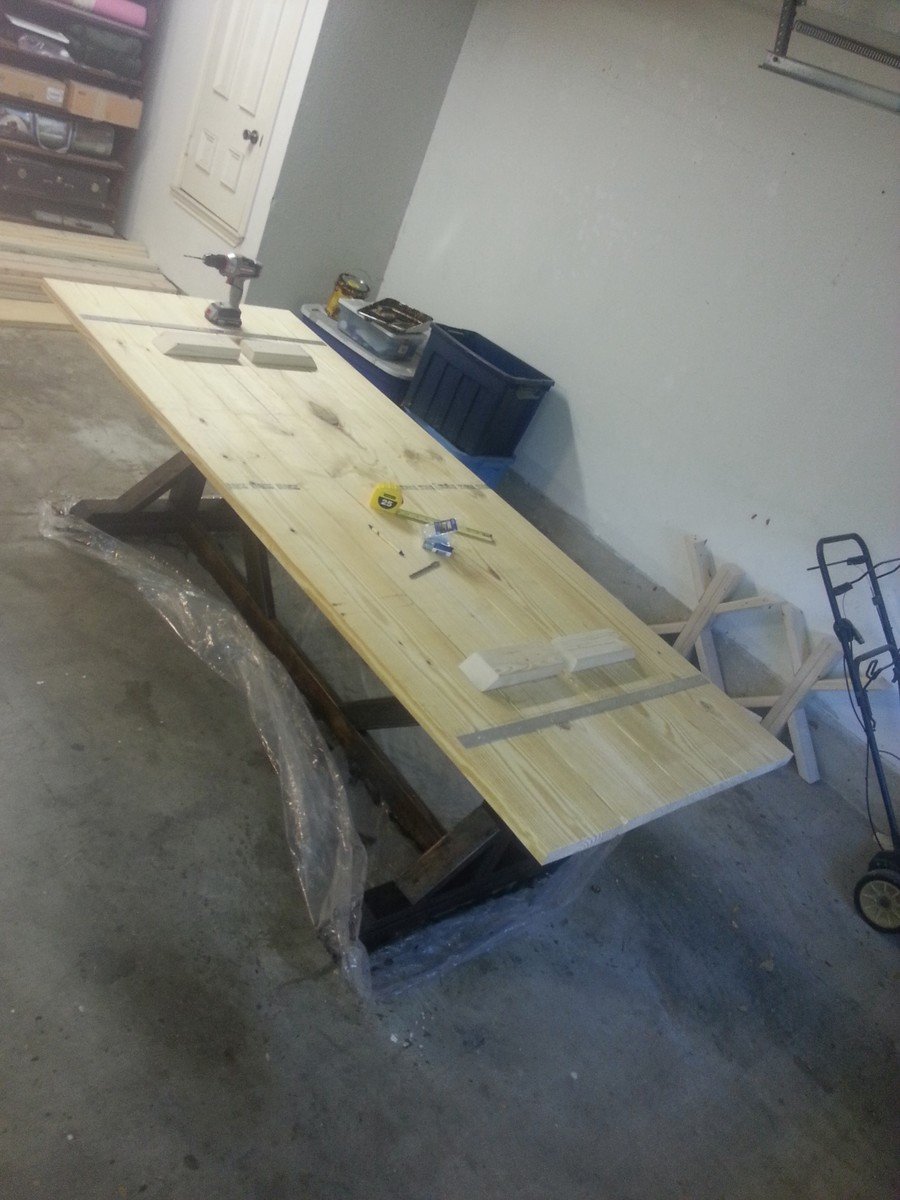
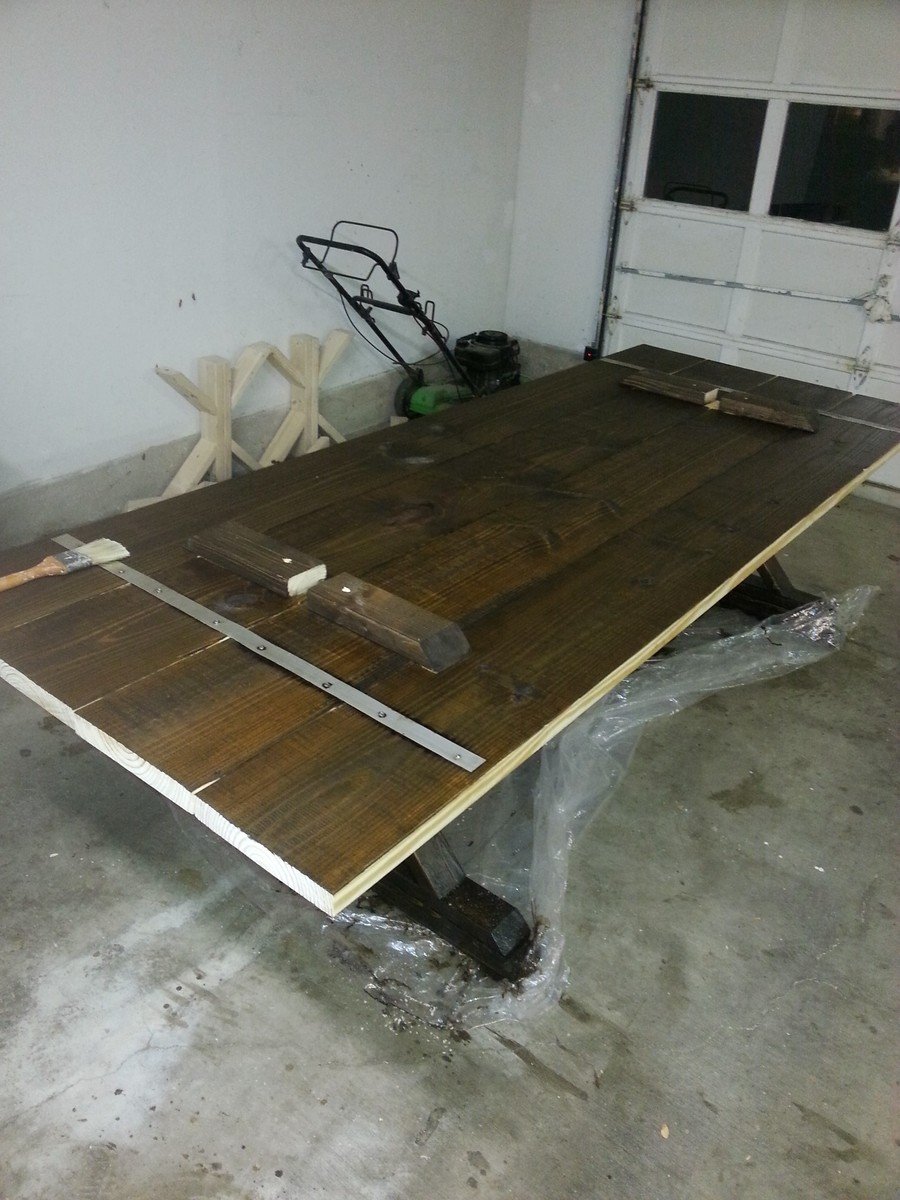
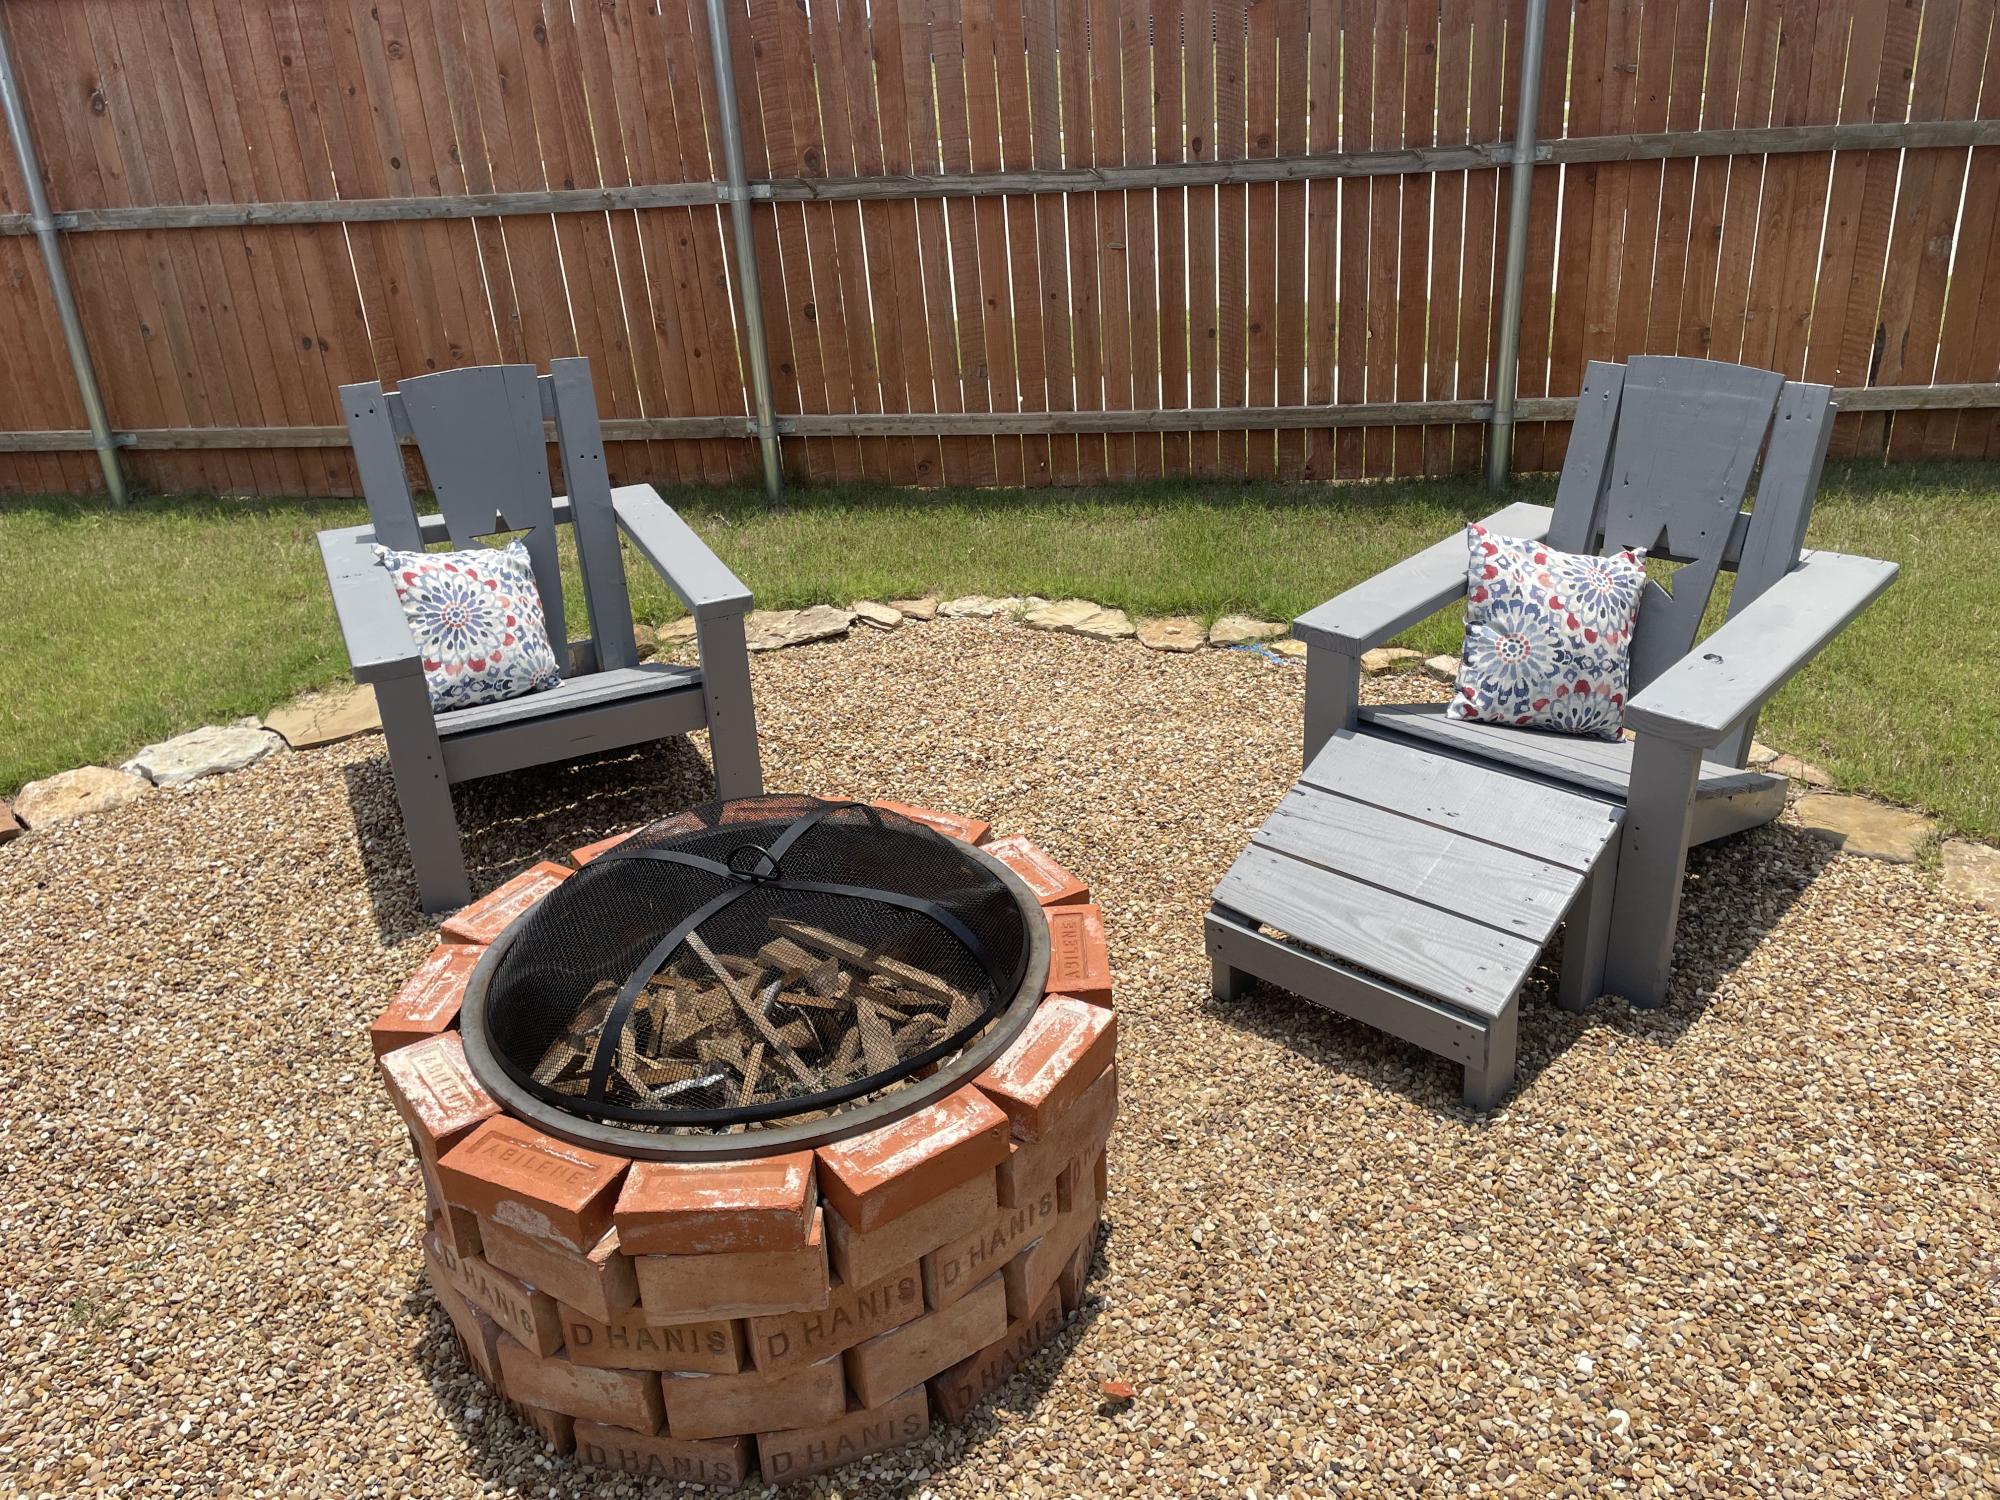
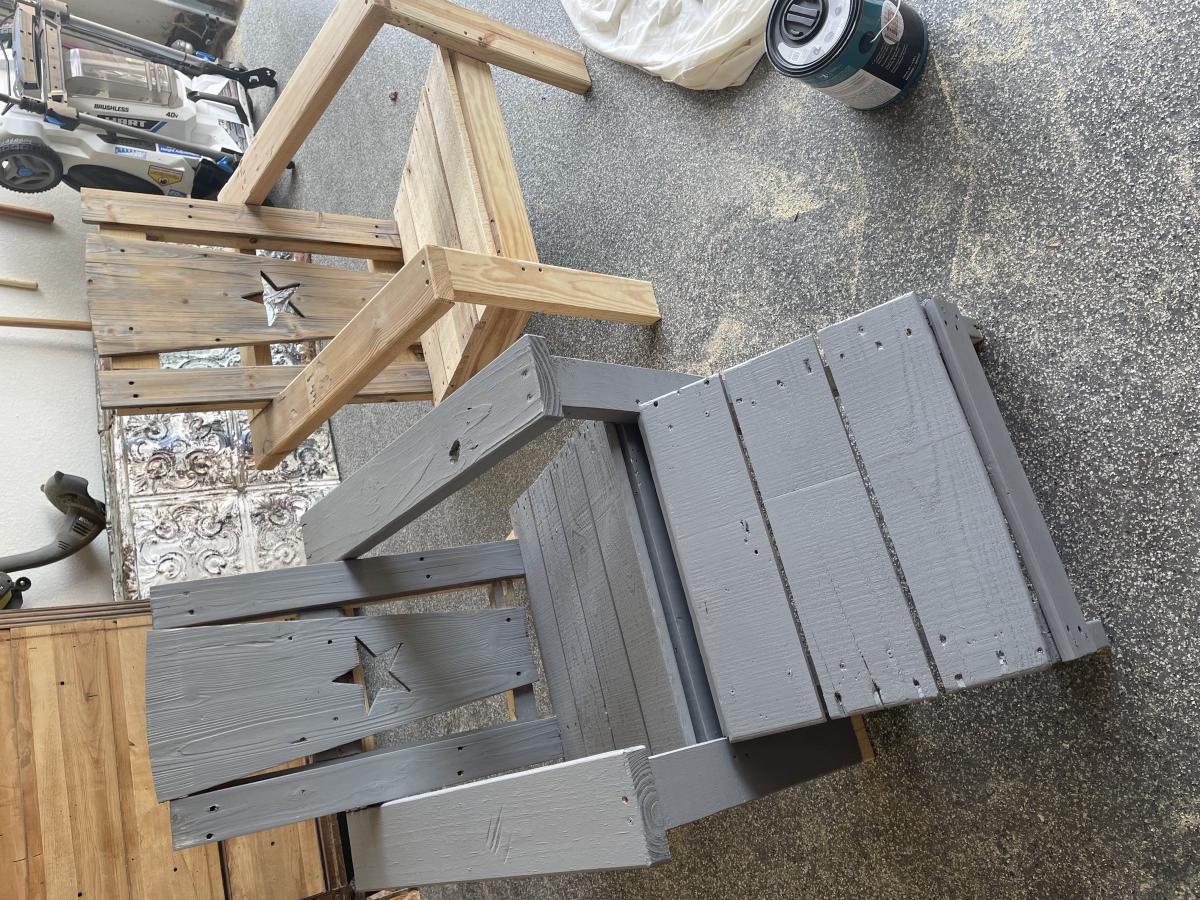
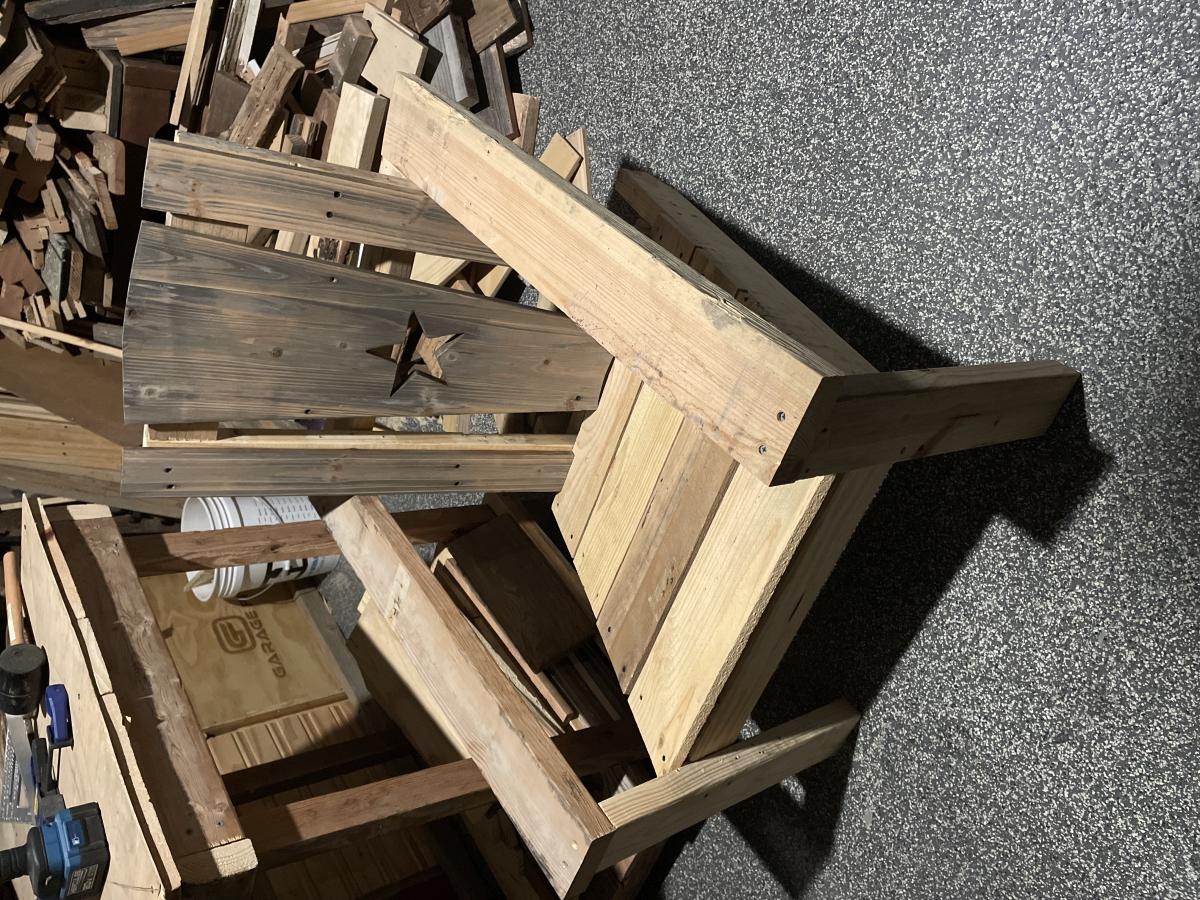
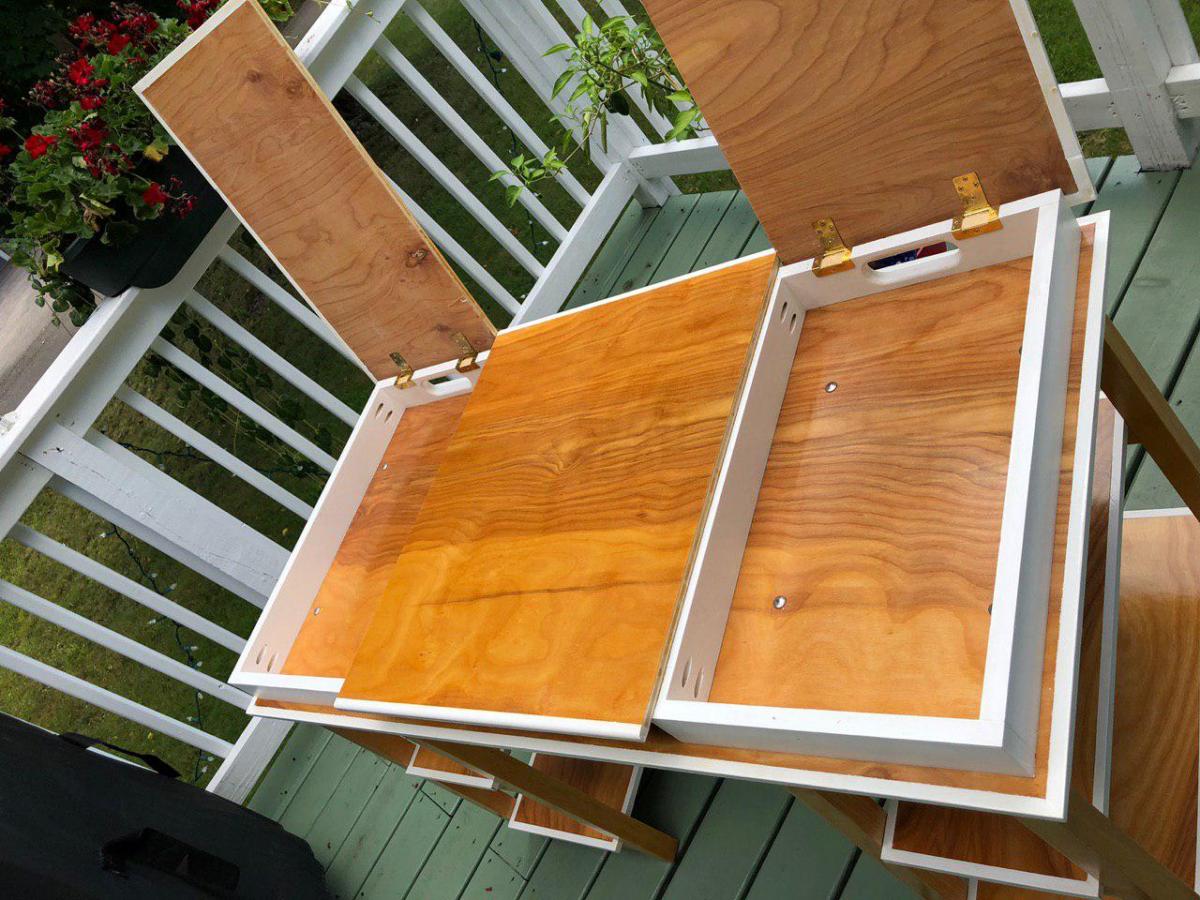
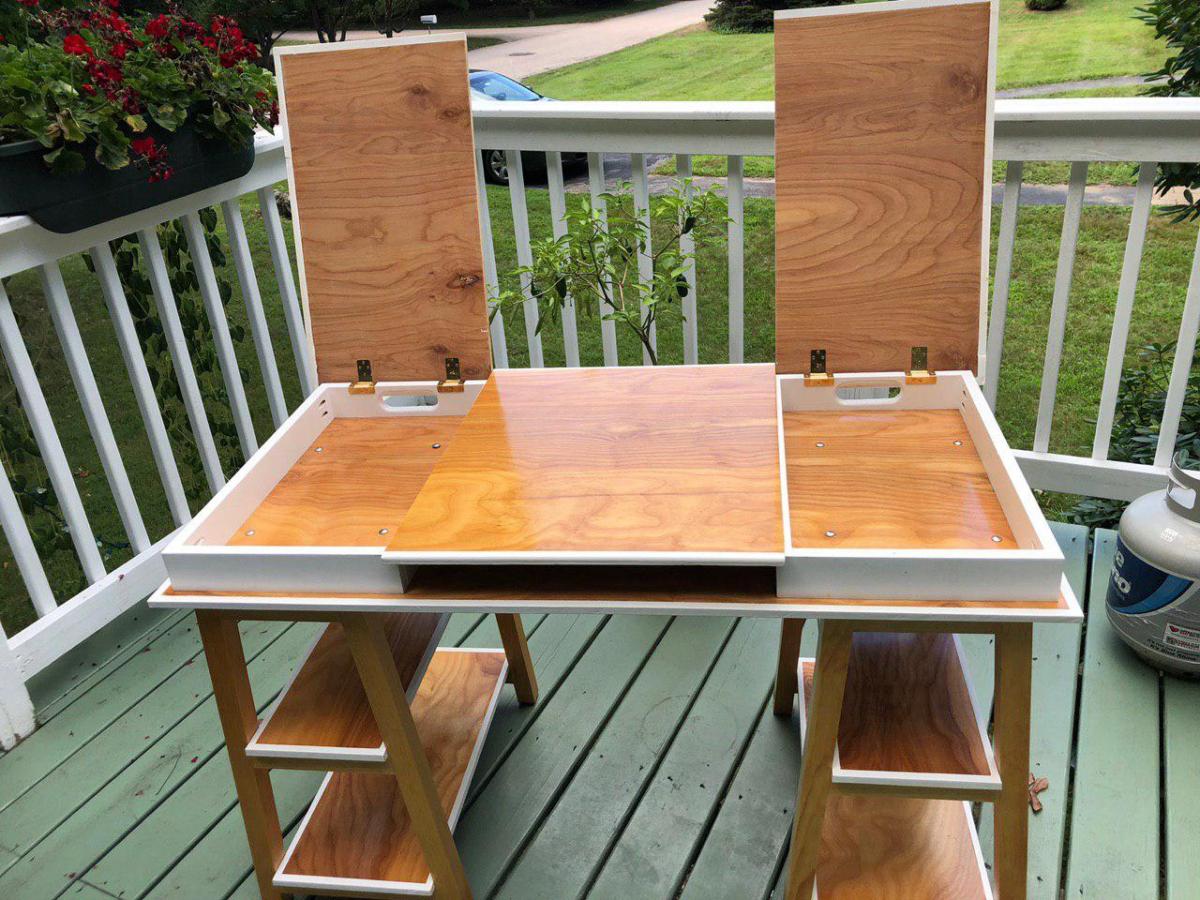
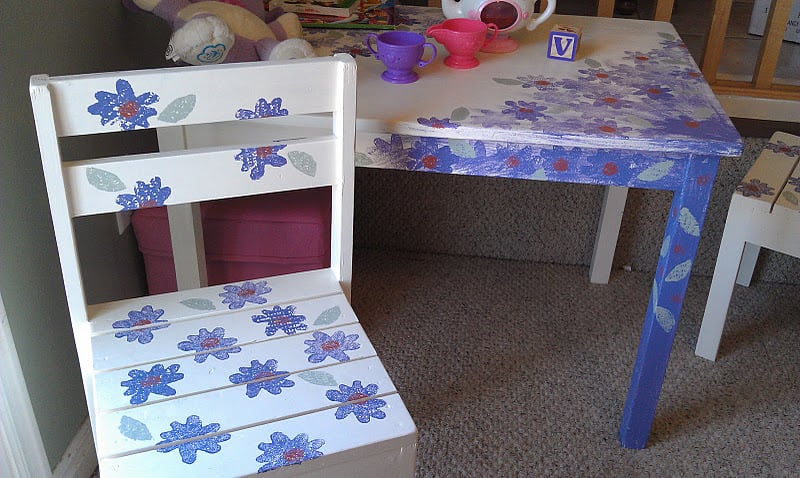
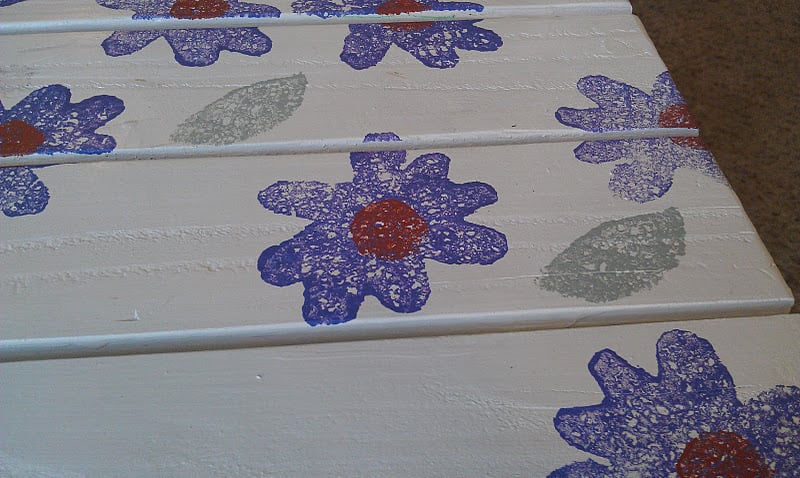
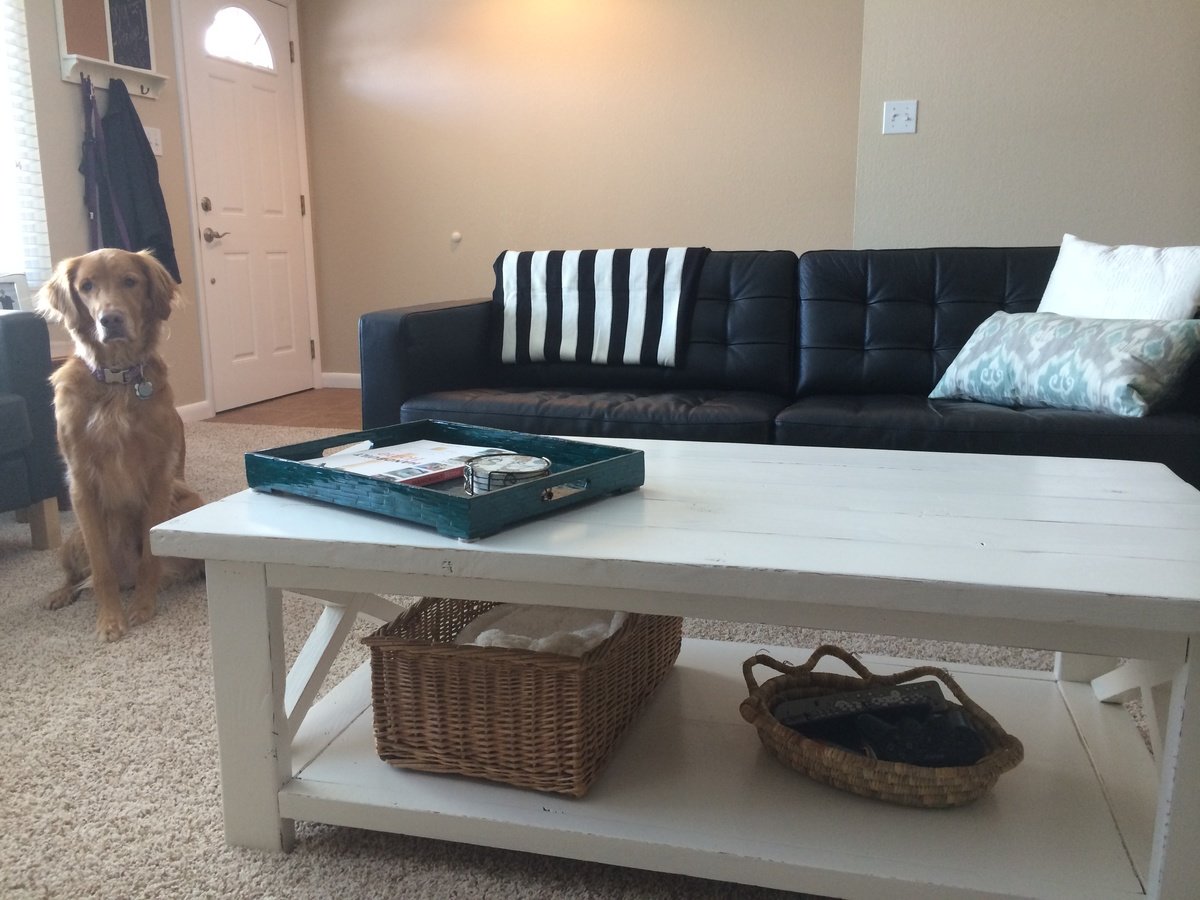
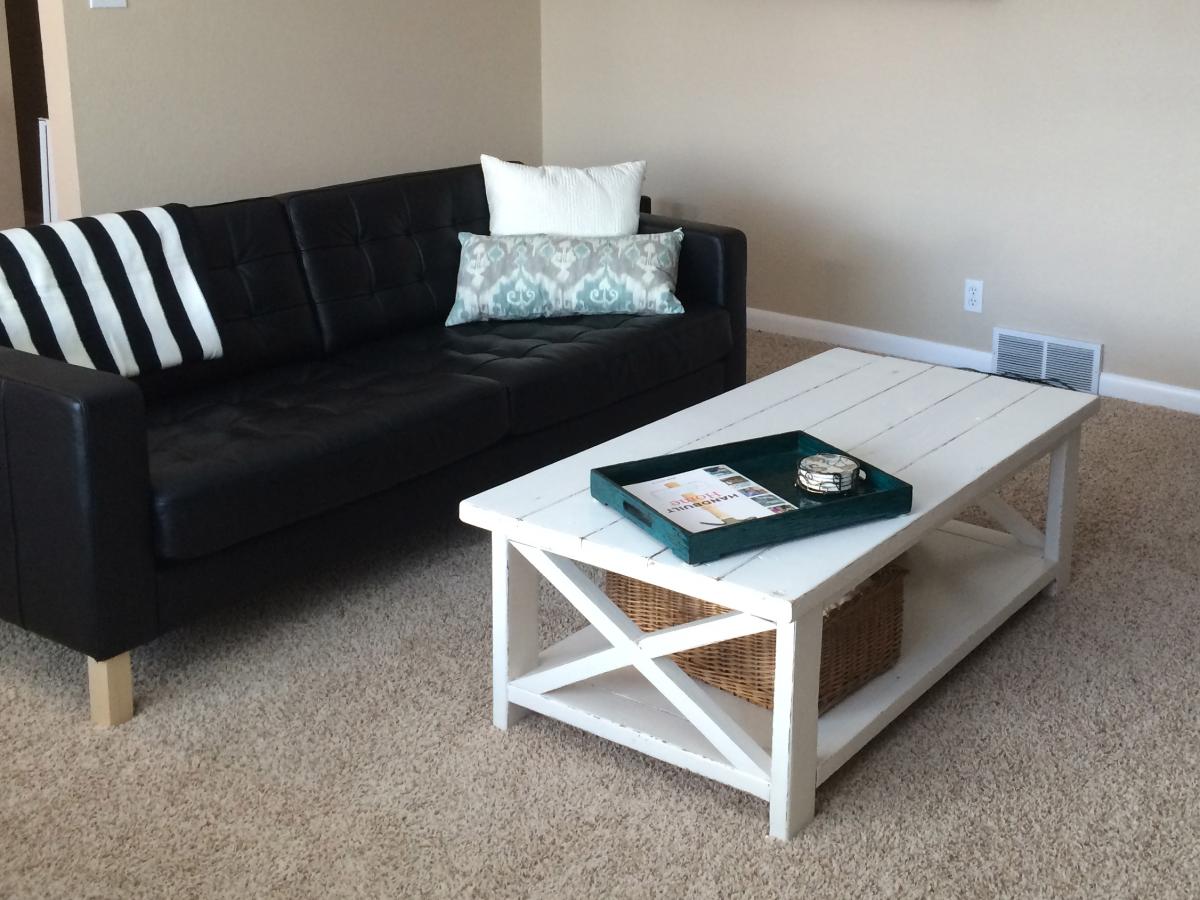
I added some trim around the edges with a roundover on the top for comfort when leaning against it. Plus a few coats of poly for protection.

Built from Plan(s)
Estimated Cost
$125
Estimated Time Investment
Week Long Project (20 Hours or More)
Finish Used
White paint
Varathan Ultimate Polyurethane - water based
Recommended Skill Level
Intermediate

Nightstands

Submitted by kwlogue on Sat, 05/06/2023 - 20:08

Fun and rewarding projects to finish. Took me way too long to finish, but 2 sever TBIs will do that to a person. Made a few modifications to the original King and nightstand plans but worked out fine. Thanks for these plans Ana!

Built from Plan(s)

Comments

Amelia's Table and Chairs

Submitted by UtahBeth on Thu, 01/05/2012 - 18:48

This is my first build! It took a lot longer than I hoped, since I could only work during nap-times. I probably used way more screw than necessary, and I didn't have the straightest pieces of wood. I'm especially happy with the paint job. I used some leftover interior house paint and cut up an old dish sponge to sponge on the flowers and accents. But I got it done by Christmas and now I can't wait to use my brand new Kreg Jig on a new twin sized bed for Amelia, or maybe some raised garden beds!! :)

Amelia LOVES her new table. She loves to hide underneath it. She loves to dance on top of it. She loves to pile all of her blocks on top of it. And she practically demands that Mommy and Daddy go over to "Sheet Down" and "Culor" with her. (I apologize for all the camera phone pictures.)

*Edit: I added two more pictures to show more detail on my first ever paint a'la Scotch Brite attempt. :)

Built from Plan(s)
Estimated Cost
$25 - $125 If you include the Kreg Jig.
Estimated Time Investment
Week Long Project (20 Hours or More)
Finish Used
Interior Latex Semi-Gloss Paints
Recommended Skill Level
Beginner

Comments

spiceylg

Fri, 01/06/2012 - 04:50

Great job! That paint job is amazing. Actually the photos are great, but wish you had a close up of the flowers.

Pam the Goatherd

Fri, 01/06/2012 - 07:18

Spiceylg, if you click on the top picture it should open in a separate window in an enlarged form so you can see more detail on the flowers.
UtahBeth, I love the flower paint job, too! Very cute.

spiceylg

Fri, 01/06/2012 - 08:31

Thanx Pam the Goatherd! I feel silly, I never even tried that before. So adorable UtahBeth! Love how the flowers are all over!

UtahBeth

Fri, 01/13/2012 - 10:56

Thank you! I'm still a little surprised at how well the painting came out. I added a couple more pictures for your perusal. Now I need to get started on Amelia Captain's Bed.! :)

Rustic X Coffee Table

Submitted by Mack1447 on Sat, 11/23/2013 - 09:52

This was my first build and I am so happy with how it turned out! The instructions were easy to follow and I learned a ton throughout the process. I had a little bit of trouble getting the angles right for the X's. I ended up just placing the boards against the wood at the angles they needed to go, scribing with a pencil and then angling the wood/blade to match the cut as someone described in the comments. It's not perfect, but pretty close. I originally planned on staining the table, but thought it looked a little to dark so I ended up painting it white. I can't wait to make the end tables now!

Built from Plan(s)
Estimated Cost
$50
Estimated Time Investment
Weekend Project (10-20 Hours)
Finish Used
I started out by staining the table with Minwax Special Walnut. It looked beautiful but just wasn't right for the room, so I painted two coats of Glidden Antique White paint on top of the stain. I then hand sanded the edges to give it a distressed look (and let some of the stain show through) and applied two coats of Minwax Polycryclic in satin.
Recommended Skill Level
Starter Project

Comments

My First Sideboard

Submitted by dalemahan on Mon, 02/08/2016 - 09:51

Modified the plans to shorten the sideboard. Inset the back into dadoes. Added four light windows. Lightened top by making 3/4" oak in 1-1/2" frame. Turned out not bad for a first furniture attempt.

Built from Plan(s)
Estimated Cost
$400
Finish Used
Satin polyurethane over red penetrating stain.
Recommended Skill Level
Starter Project

Small Cedar Shed with Living Roof

Submitted by Anonymous (not verified) on Mon, 09/09/2019 - 12:46

I built the shed during the summer of 2018, following Ana's plans but with the addition of a green roof. After almost a year the vegetation -- a variety of native plants from the upper Midwest -- has started to fill in pretty well. My carpentry skills are rudimentary so the project took a long time but was worth the effort.

Built from Plan(s)
Estimated Time Investment
Week Long Project (20 Hours or More)
Finish Used
Wolman™ F&P Cedar Finish and Preservative, if I remember correctly.
Recommended Skill Level
Intermediate

Comments

Team Chairs

I’ve always had a passion for creating simple, yet functional, wood projects…but definitely not a lot knowledge on how to do it. That’s why I so appreciate all of the plans that you share and you’re kindness of making them so freely available. Thank you!!


Here are the chairs I created from your “Essential Adirondack Chair” plans. I added a design when staining them to highlight my husband and I’s favorite teams (Go Yankees😉)! 


Thanks again so much,

Karen


Seasonal And Holiday

Emma's Storage Bed

Submitted by tugnut1 on Sun, 01/08/2012 - 07:02

I built this bed for my daughter as a X-mas gift. The build didn't take long at all to make. I followed the plan pretty close. I did a few things differently, but it turned out much the same. I used sanded plywood instead of the particle board for the headboards and foot boards. I was able to remove the feet that show up at the footboard of the bed by putting a long cleat on the back sides of the storage units that sat about 12 inches back from both ends of the head and foot of the bed. I finished the bed in gloss white latex paint. The finishing of the bed took the longest part, followed by sanding.

The Most difficult part of this bed for me was the hinges. I wish that I would have done them a little differently, but they work. Easy fun project.

Built from Plan(s)
Estimated Cost
$150.00
Estimated Time Investment
Week Long Project (20 Hours or More)
Finish Used
Gloss White latex paint
Recommended Skill Level
Intermediate

Comments

Lesley (not verified)

Wed, 05/09/2012 - 17:33

I dont understand how the headboard goes together. Did you use a Kreg Jig to assemble the headboard? If so, how does the Kreg Jig work?
Is it the same for the footboard?

Any advice you can share with me would be great!
Thanks! :)

rranders

Fri, 02/05/2016 - 21:22

 I would like to remove the little feet like you did on the Emma's Storage Bed. If possible could you provide more details on how you did this?  Thank you so much - I like your bed!

A small twist on the legs

This was a fun project that I made for my wife. I saw a Crate & Barrel table with legs that alternated directions. The plans were easily adapted to match. I stained the standard pine boards with Minwax Prestain, Minwax Red Mahogany stain (2 coats) and sealed with a matte polyeurathane. The matte finish cut down any shine and should prevent any fingerprints from showing up, though witha 2-year and 6-year old this is inevitable. I may still add some small 3-4" triangular braces on the ends of the table at the legs to add stability, but it seems quite stable as it is. The bench is next on the list, but this will have to wait until after Thanksgiving.

Built from Plan(s)
Estimated Cost
$80
Estimated Time Investment
Day Project (6-9 Hours)
Finish Used
Minwax Prestain, Minwax Red Mahogany, Polyeurathane matte
Recommended Skill Level
Beginner

Kitchen Island Victory

Submitted by Anonymous (not verified) on Fri, 02/12/2016 - 03:37

We needed a smaller kitchen island since my husband started using a wheelchair. The old one was just a little bit too big for him to maneuver in our small kitchen. I modified Ana's plans for the drop-leaf kitchen storage table making the base smaller (15" x 30") and taller (36") and only putting a leaf on one side. I also substituted slats (1" x 2"s) instead of plywood for the shelves. I love using pocket hole construction and ended up using almost 200 for this project! It turned out very solid and stable in spite of the increased height. We love it!!

Estimated Cost
$80
Estimated Time Investment
Weekend Project (10-20 Hours)
Finish Used
After assembly and before installing the top, I used an all surface bonding primer. After another light sanding I finished with one coat of latex enamel. No second coat needed. I then attached the top and finished it with butcher block wax/sealer.
Recommended Skill Level
Intermediate

Comments

Bench with cross bracing

Submitted by Anonymous (not verified) on Mon, 09/23/2019 - 17:48

My friend asked me to make two benches for her dining room table. She mentioned the plans from your website. I followed your plans/ instructions.
She loves them!.
Thank you & big hello from Canada.

Estimated Cost
$60
Estimated Time Investment
Weekend Project (10-20 Hours)
Finish Used
Paint
Recommended Skill Level
Beginner

Dining Room Table

Submitted by Anonymous (not verified) on Mon, 05/22/2023 - 07:47

I fell in love with the simplicity of this table. I had been wanting a new table for a good while and when I stumbled on Ana’s YouTube video of this table, I knew this one was easy enough for my husband and I to tackle! Thank you, Ana!!!!

Comments

Farmhouse Table

Submitted by glanzer on Fri, 11/29/2013 - 14:13

I had a few hiccups in the early stages building those X shaped bases. I relied a lot on eyeballing it and firmly holding things into place by hand. Very touch-and-go. I took them apart multiple times and rebuilt them.

I wasn't quite sure how to go about attaching the table top, and I finally decided that NOT attaching it was the way to go. I built some braces that firmly held the top onto the base without actually being attached permanently. This helped to move it into the house and will help in the future if we ever want to move it, as it's two very separate pieces.

After that it was pretty much smooth sailing. I had some issues with the staining, but that was largely due to the humidity in the area at the time. Once the temp cooled, the stain dried and all was fine.

From start to finish this project took me about two months, but I only worked on it once or twice per week for a few hours at a time. I'd say I spent 20-25 hours of actual time working on this.

I received 94 likes on Facebook for my project which I consider a win.

Built from Plan(s)
Estimated Time Investment
Week Long Project (20 Hours or More)
Finish Used
Minwax
Recommended Skill Level
Intermediate

Comments

SmileyFamily

Fri, 12/06/2013 - 13:54

Hi,

I was wondering now that you have used the table- do you think the top is secure enough to be unattached with kids around? Like does it move or tilt at all- what if you put heavy items on the side?

Thanks!

Hall Tree

Submitted by big mike on Sun, 02/14/2016 - 16:19

First project

Estimated Time Investment
Weekend Project (10-20 Hours)
Finish Used
Annie Sloan
Recommended Skill Level
Beginner

Aryanna and Aaralyn's first big girl bed

Submitted by Spolitte on Sun, 01/15/2012 - 22:49

We needed a bed for our girls but had very little time to build one. My husband found Anna's site and we were excited to give this project a try. In today's market it's easy to spend a lot and not get much with regards to quality or longevity. At least, if we build it, we know the quality of the material, the workmanship and the love that go into whatever it is we are making. Without the encouragement and easy to follow plans and instruction I doubt we'd have been able to accomplish so much. Our girls just love their new bed.. THANKS ANNA! Now... on to the next project. The folks at our local hardware stores are getting to know us by name! ;-)

Built from Plan(s)
Estimated Time Investment
Week Long Project (20 Hours or More)
Finish Used
Semi-Gloss, no voc paint. We did a lot of filling and sanding but the results were worth it. We also added a bit of shoe molding to soften the look of the head and foot boards.
Recommended Skill Level
Beginner

Comments

Garrett's Trundle Storage Coffee Table

I built this coffee table after my father-in-law accidentally broke my Rooms-to-Go coffee table by sitting on it. It ended up working out pretty well in the end because now I have a place to store all the excess blankets my kids use that were piled up "neatly" in the corner behind the end table. The plans were very helpful in getting all the measurements just right but don't go into any detail on how to actually go about assembling the table. My biggest regret would be how I connected the two tabletop ends. I used wood dowels and glue. It is holding up very well and looks nice but I didn't get as snug of a fit as I would have liked. I definitely recommend using a different joining technique. This was my first project using the plans on this website and I am looking forward to my next project.

Estimated Cost
$100
Estimated Time Investment
Weekend Project (10-20 Hours)
Finish Used
I used two coats of Minwax Kona stain and multiple coats of polyurethane to seal it and give it a smooth surface
Recommended Skill Level
Beginner

Extra Tall Bar Stool

Submitted by Anonymous (not verified) on Tue, 02/16/2016 - 15:30

Shortened by 4". Changed all 1" to 2" and used 2x4 instead of 2x2! Used 2x6 for the seat. Used pocket holes and screws. Love them!

Built from Plan(s)
Estimated Cost
I bought rough sawn wood from a mill at 100 ft for $100... total with finishes about $30 each.
Estimated Time Investment
Afternoon Project (3-6 Hours)
Finish Used
Minwax ebony stain (quickly removed with cloth) and polcrylic semi gloss (3 coats)
Recommended Skill Level
Beginner

Repurposed Rocking Chairs to Adirondacks!

Submitted by Anonymous (not verified) on Sat, 06/03/2023 - 06:31

I've done a couple of things from plans on this site but this turned out awesome. We had some old weathered rocking chairs that I dismantled and was able to use some of the wood for these Adirondack chairs.

Could have gone with a dark stain but the gray really worked well on this. Pretty simple build and very sturdy chairs. I loved this project and will certainly be making more of these.

Comments

"Big Kahuna" Sports Locker

I modified the original design to make this unit suitable for my son's room. It has basically the same dimensions as the original "Dress Up Tower." I also created a version that can be used as a bookshelf which will have 3-5 shelves (see bottom picture).

So far I have completed the SketchUp rendering and hardboard router template and am in the process of building the whole unit. I will post completed pics when finished.

If you'd like the SketchUp templates, just email I'll send them to you. Printing out the paper template at 1:1 will allow you to get the radius correct on the surfboard sides.

Mike

-----------------------------------------------------
Mike Sullivan
[email protected]

www.etsy.com/shop/BroadCoveArtisans
www.broadcoveinteriors.com
www.facebook.com/BroadCoveInteriors

Built from Plan(s)
Estimated Cost
80.00
Estimated Time Investment
Weekend Project (10-20 Hours)
Finish Used
So far, I decided upon Natural Oak stain and clear poly (sides), blue & white latex paint (stripes, inside & front)although I may change this depending upon how it looks completed.
Recommended Skill Level
Intermediate

Comments

American Girl Doll Couch

Submitted by mybartmart on Thu, 12/05/2013 - 00:51

My friend's daughter's both love American Girl Dolls. I have made them the bunk beds and the Farmhouse bed. But they really wanted a couch. I made them one using some of the elements from the Farmhouse Bed. I used a blue paint with a pickling whitewash stain on top.

I did have a hard time getting a good photo of the finished project.

Estimated Time Investment
An Hour or Two (0-2 Hours)
Finish Used
Blue wall paint, left over with Pickling white wash stain on top
Recommended Skill Level
Beginner