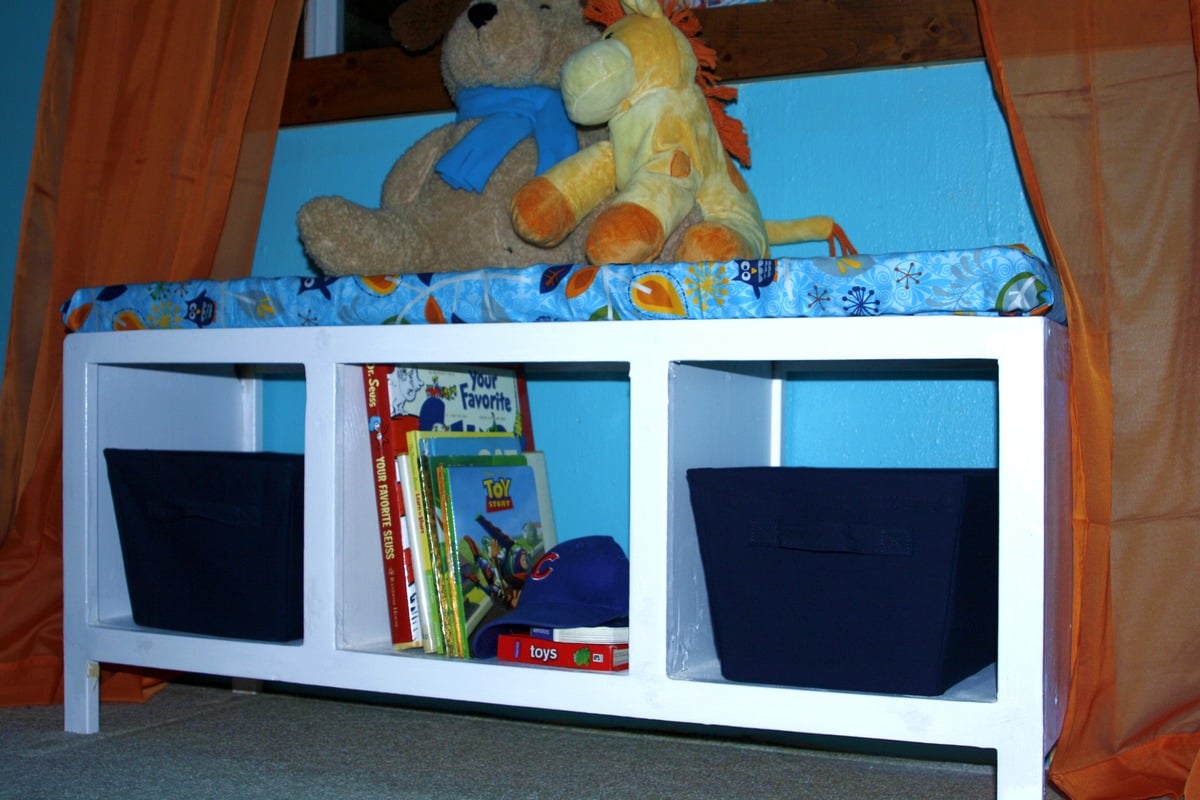
Doll Bunk Beds
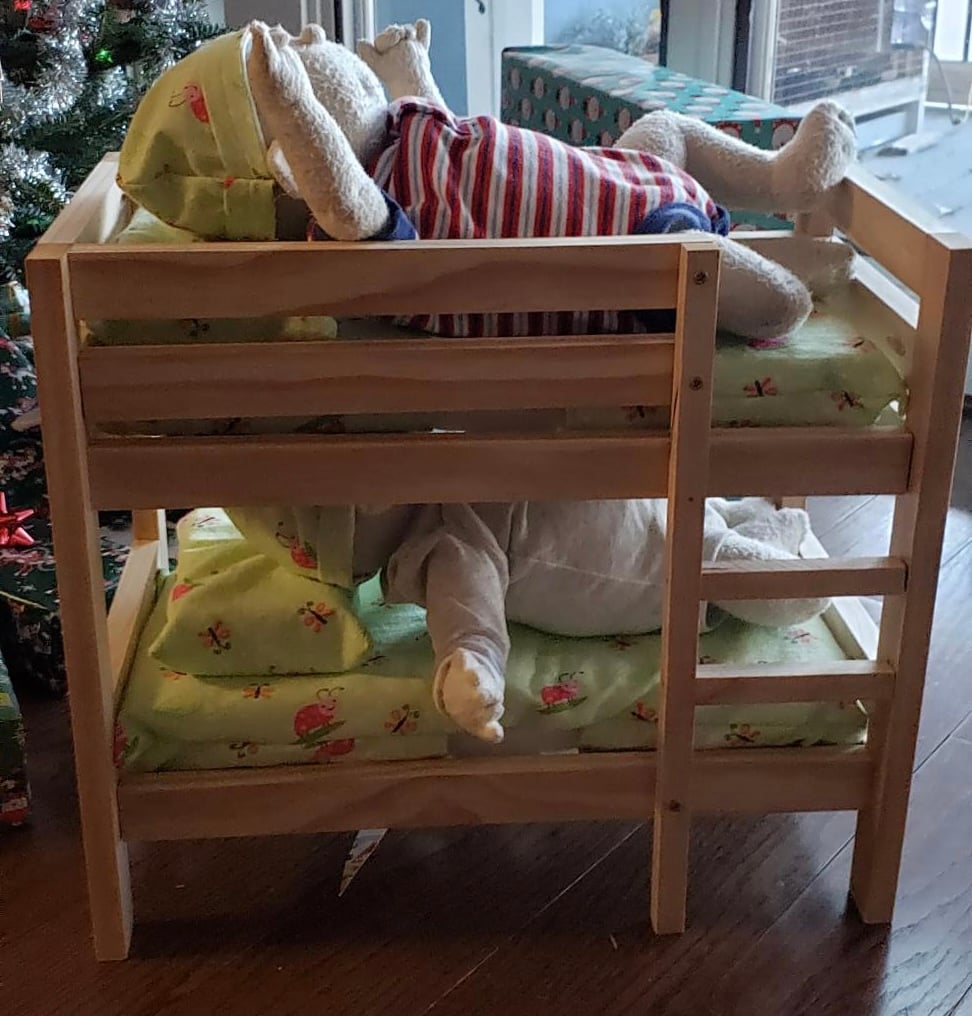
Built this with plans found on site. I left it unfinished to match the furniture in their room. My daughter helped by sewing the mattress and pillow covers. The girls loved it!
Built from Plan(s)
Built this with plans found on site. I left it unfinished to match the furniture in their room. My daughter helped by sewing the mattress and pillow covers. The girls loved it!
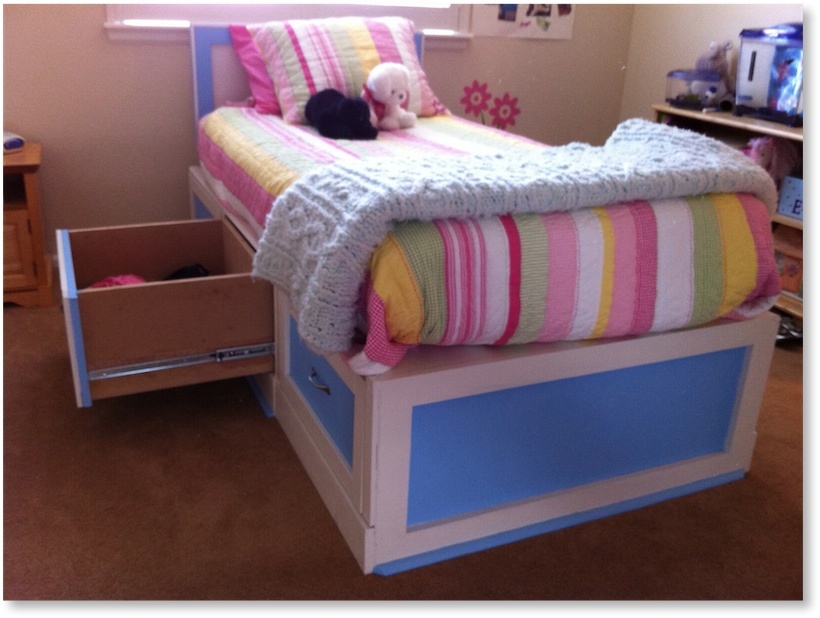
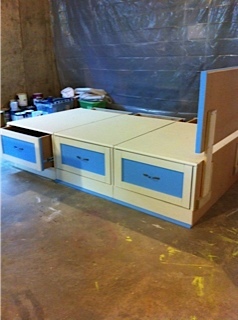
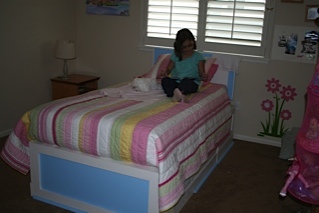
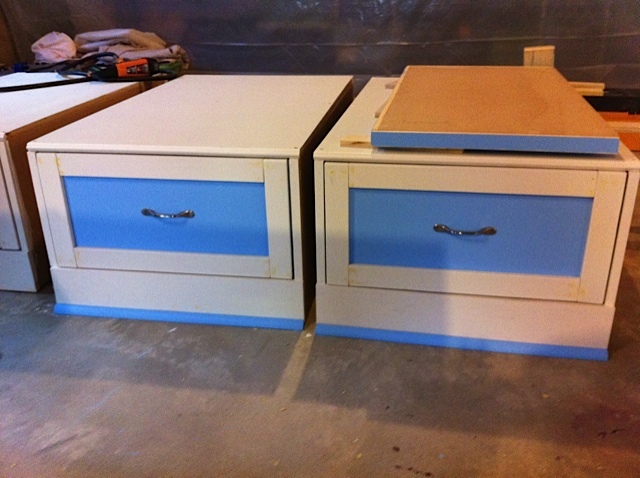
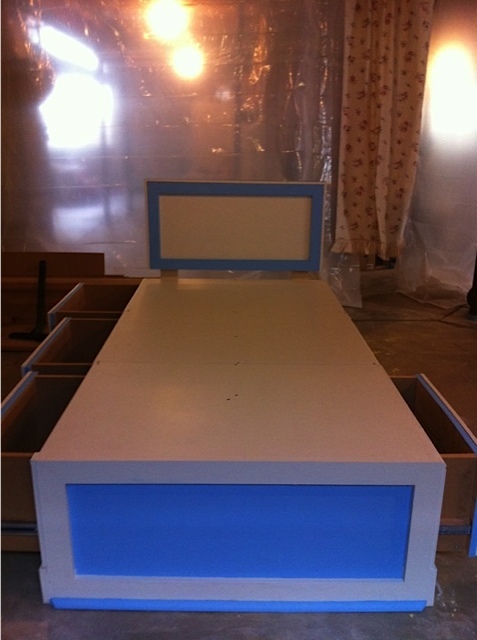
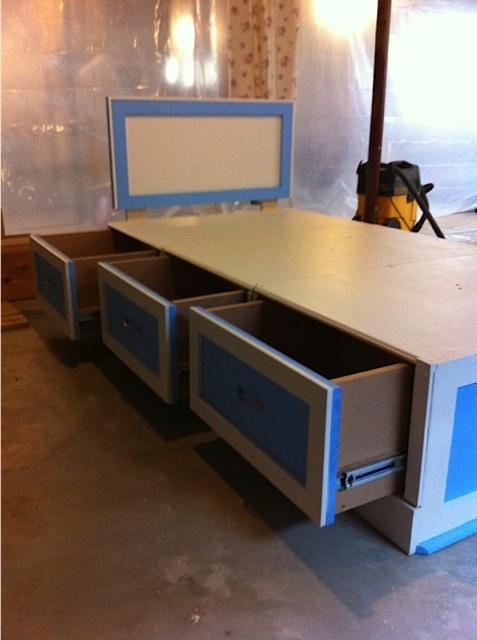
This bed is made from MDF with wood trim and drawer fronts. There are 3 "boxes" making up the bed. I've added a headboard and adjusted the drawers to provide for 100lb full extension drawer glides. The bed also has extra trim, like quarter round on the bottom allowing a polished look. I painted all the trim before installing so there were no cut-in lines.
We built this loft bed for my daughters fourth birthday and she loves it.
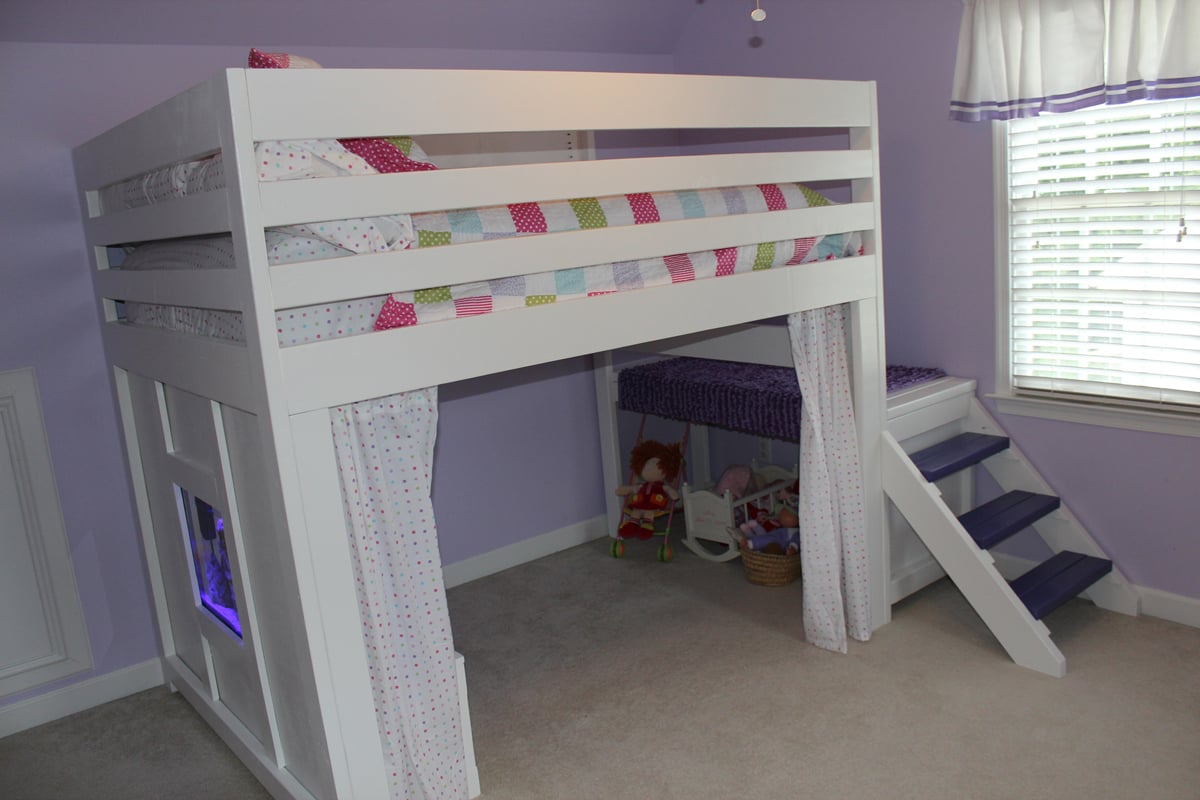
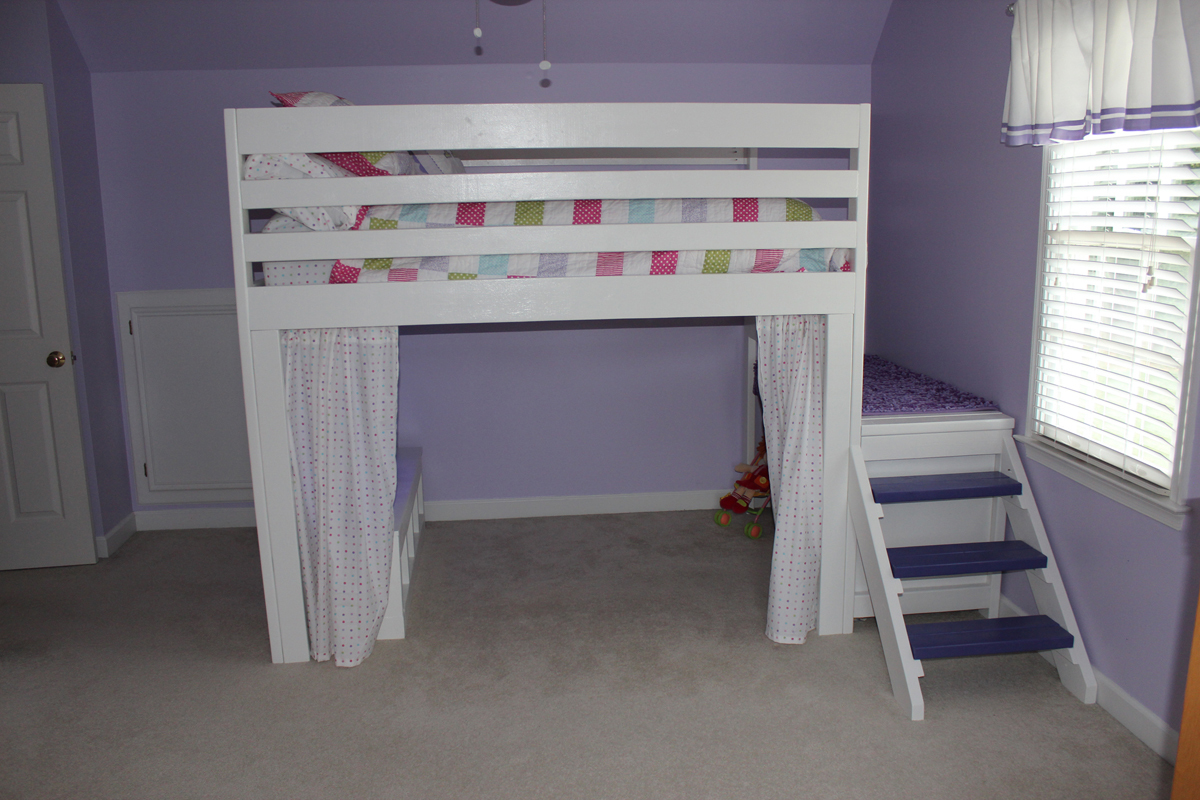
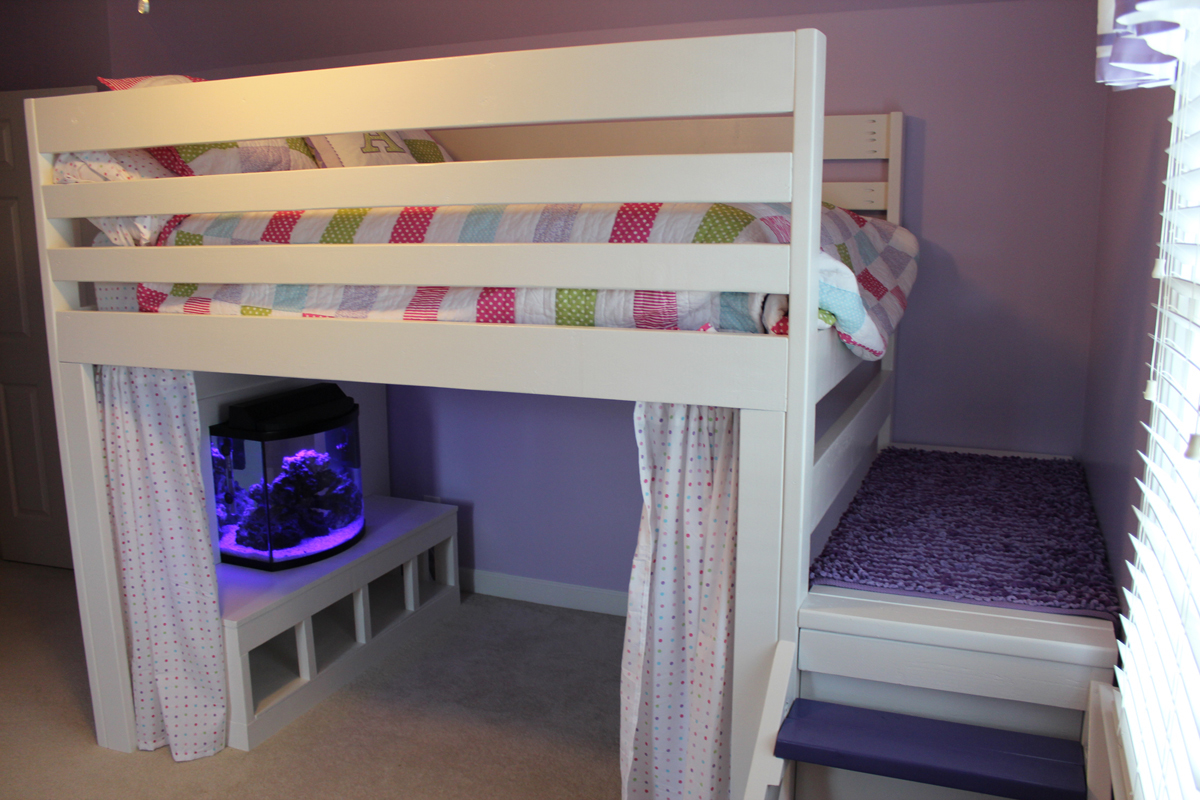
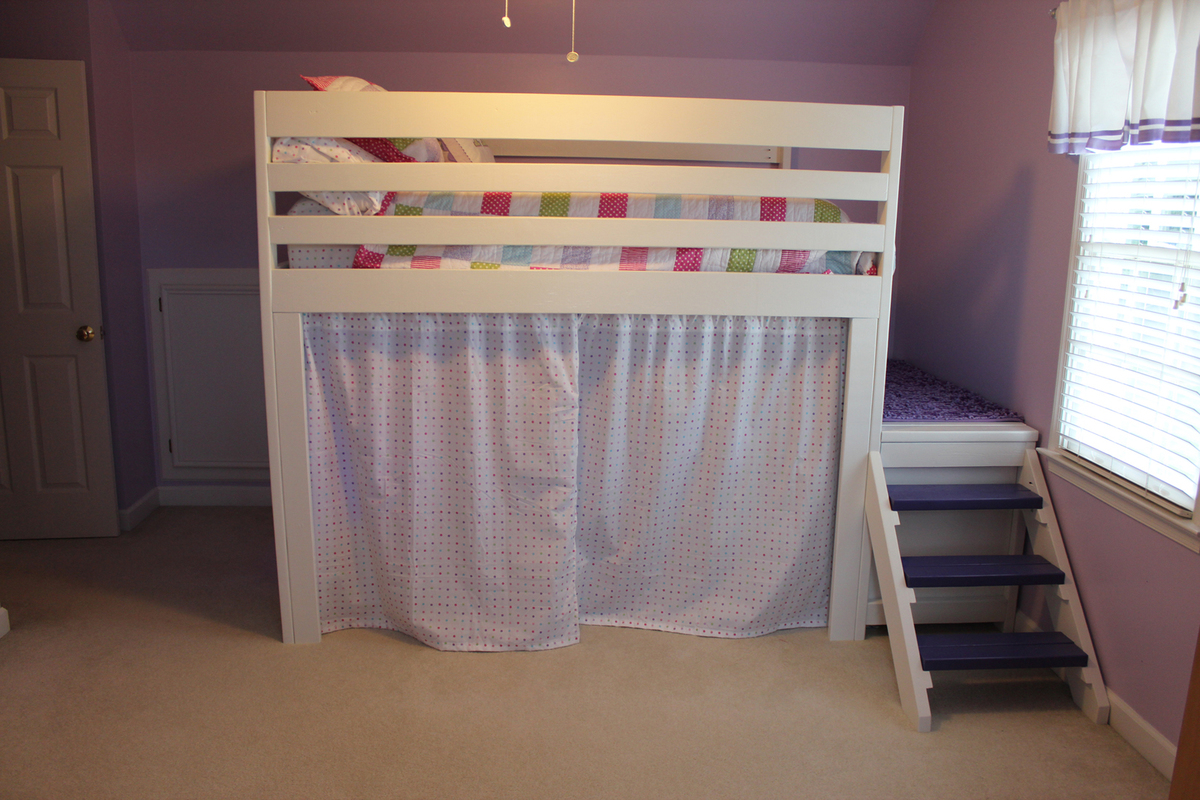
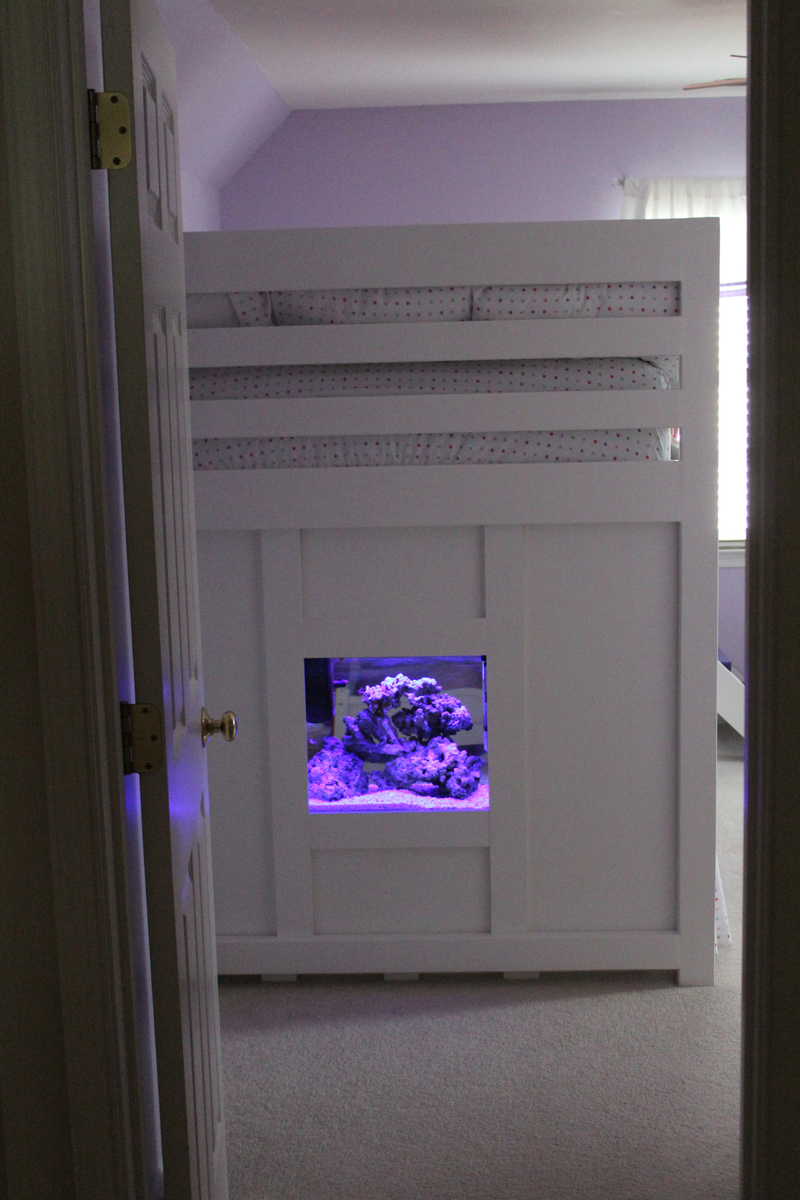
I customized the plans to a full-size bed instead of a twin, simply so I didn't have to buy new mattress down the road. We also integrated a 16 gal saltwater aquarium, since she loves Nemo so much. It is a simple design that we feel we can customize as she grows.
In reply to Curtains by HappyAnnika
Wed, 07/03/2013 - 06:33
I used 2 wooden dowels cut to 77" (length of bed) and attached 4 cup hooks (link below) to hold dowels.
http://www.lowes.com/pd_330634-37672-491035_0__?productId=3192589&Ntt=h…
Fri, 07/19/2013 - 11:47
I saw your post on the full size loft bed. I've only seen the plans for a
twin size. what are the plans or how do I modify to a full size? really want
to keep my sons mattress. and I love the flat panel on the side by the way
and the curtain
Thu, 08/08/2013 - 07:32
The original plans show a 44 1/2" width for a twin size mattress. I modified the width to 59 1/2" to fit the full size mattress. The original length of the bed was 75", I extended this to 77". Also, keep in mind the overall height of the loft bed. The mattress we purchased is 12 1/2" in height/thickness. So I also modified the overall bed height from 65 1/2" to 72" and 45" clearance underneath. Hope this helps.
Wed, 08/07/2013 - 16:59
i like how you have the extra 2x6 at the top. did you lower the height of the overall bed to do this? how high to you have it, and how much space did you leve between the "rows"?
In reply to height of bed by ldulitz
Thu, 08/08/2013 - 07:37
I actually added more height to the bed. The original plan bed height was 65 1/2", I modified that to 72". I added that piece because of the mattress height. We purchased a mattress that was 12 1/2" in height / thickness. The space between each row is 3".
Thu, 01/02/2014 - 14:03
I love all the modifications you made. Do you mind answering a few questions? What width of wood did you add to make the aquarium wall? Is it 1/4 inch plywood or thicker? I also noticed that you did not add another cross piece on the back, is that because the wall added stability and you didn't need it? Also I noticed you added 2x4's under the front side 2x6. Was that for stability as well? I want to make the full size version as well and appreciate your help:-) Thanks
In reply to Aquarium wall by bhoppy
Fri, 01/10/2014 - 06:41
I used 1/4 inch plywood for the aquarium wall. The cross piece in the back was not needed. This is where our daughter gets in and out of the bed. The 2x4's in the front are just for aesthetics. They are not needed for stability. I used them to hide the end of the curtains. Hope this helps and good luck.
Tue, 03/04/2014 - 08:12
I'm sorry I do not have the plans anymore. The original plans show a 44 1/2" width for a twin size mattress. I modified the width to 59 1/2" to fit the full size mattress. The original length of the bed was 75", I extended this to 77". Also, keep in mind the overall height of the loft bed. The mattress we purchased is 12 1/2" in height/thickness. So I also modified the overall bed height from 65 1/2" to 72". Hope this helps.
Fri, 04/01/2016 - 11:11
I cant even find the plans for the original twin bed. Am I missing something lol?
Fri, 04/01/2016 - 11:11
I cant even find the plans for the original twin bed. Am I missing something lol?
Fri, 04/01/2016 - 11:11
I cant even find the plans for the original twin bed. Am I missing something lol?
Fri, 04/01/2016 - 11:11
I cant even find the plans for the original twin bed. Am I missing something lol?
Fri, 04/01/2016 - 11:11
I cant even find the plans for the original twin bed. Am I missing something lol?
Fri, 04/01/2016 - 11:12
sorry I did not mean to post that so many times.
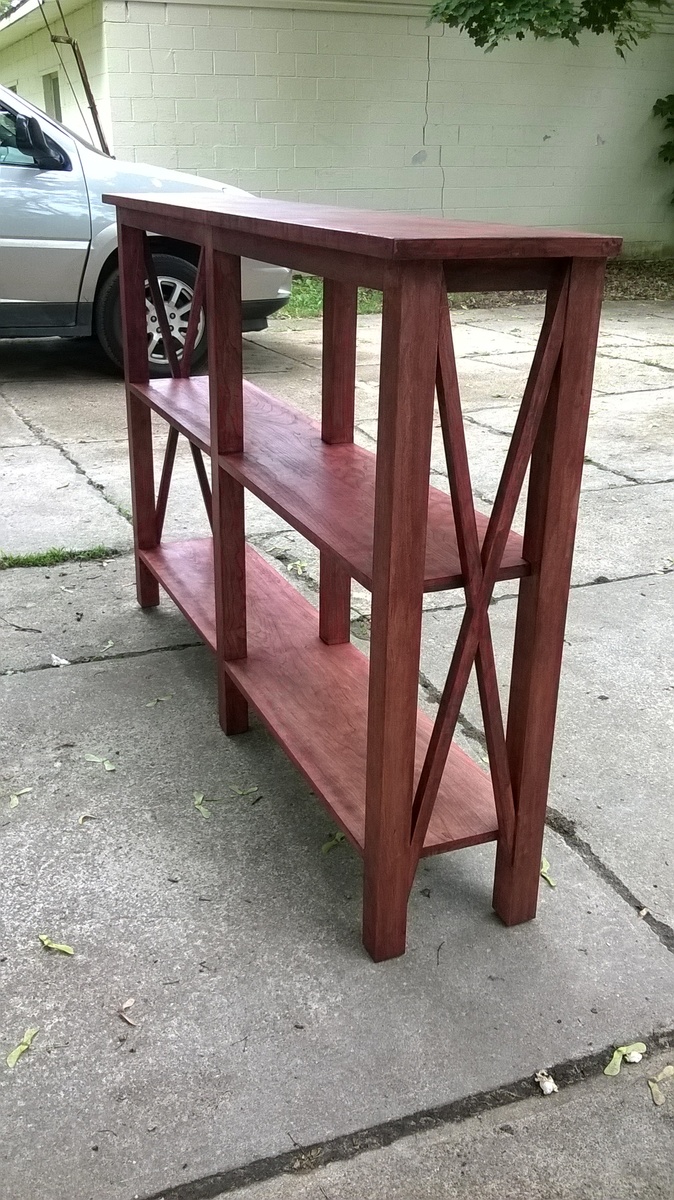
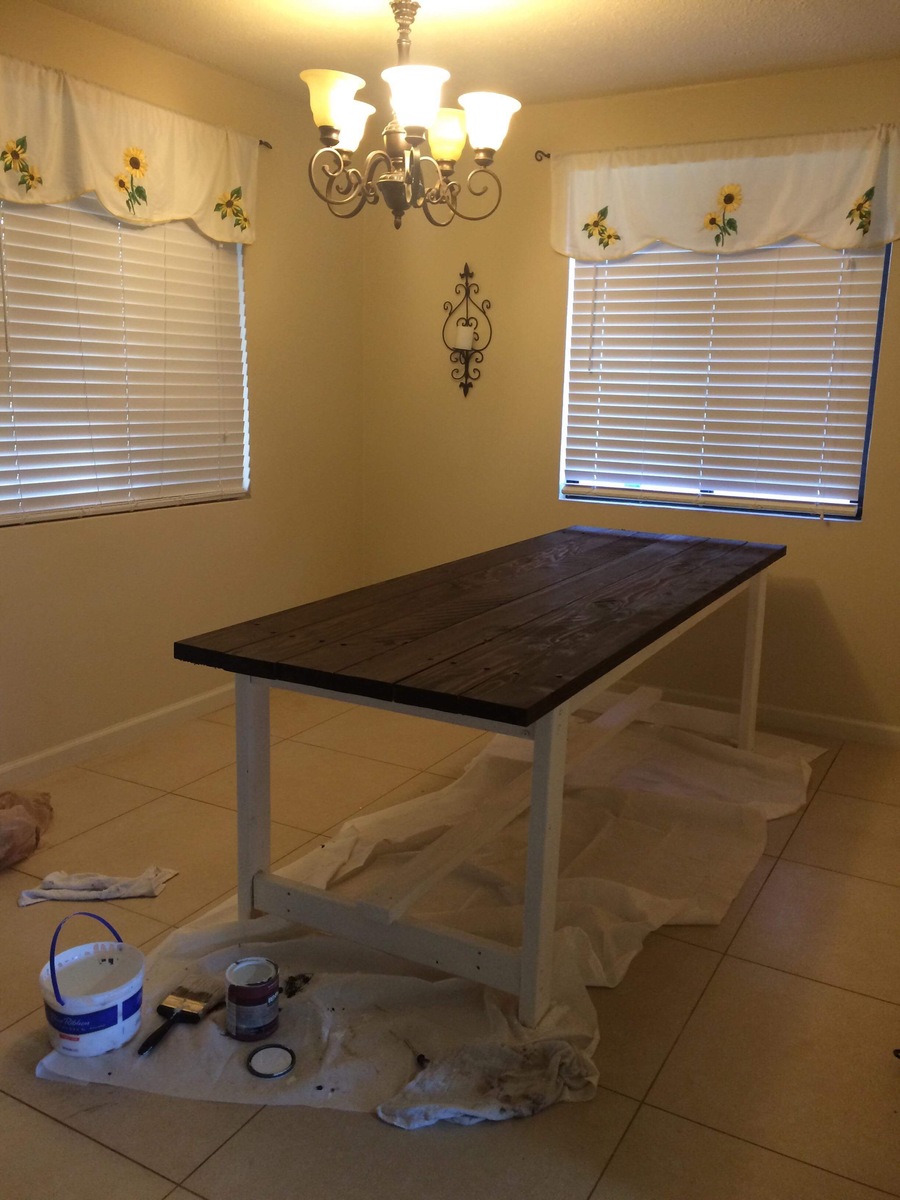
This was my first furniture project. I bought some rough cut cherry from a local mill which included a piece beautiful curly cherry for the top. My wife help finish this in General Finishes' Georgian Cherry Gel Stain. We used Kreg's pockethole joinery for assembly.

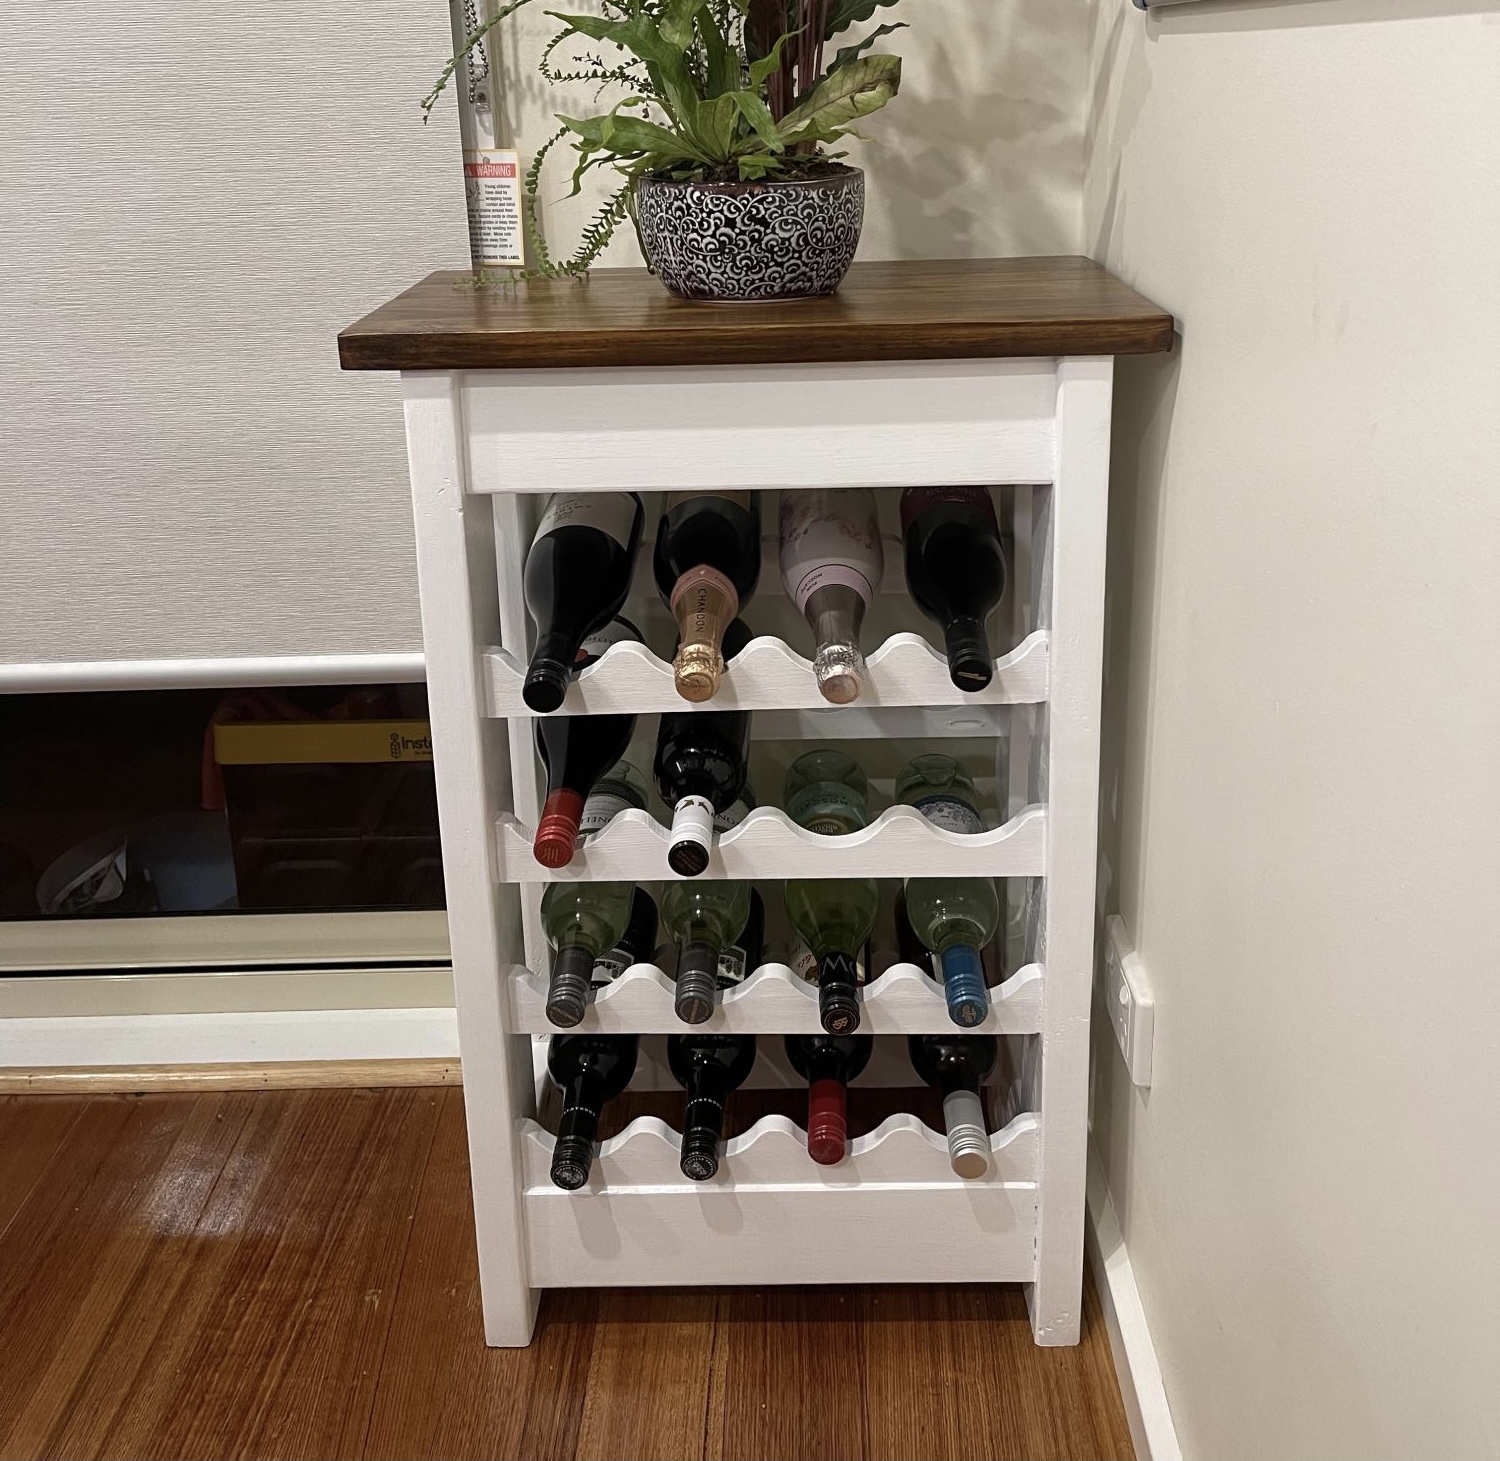
This wine rack project was built during 5th lockdown in Melbourne Victoria, Australia. Timber size is 35mm by 90mm. Table top is treated pine.
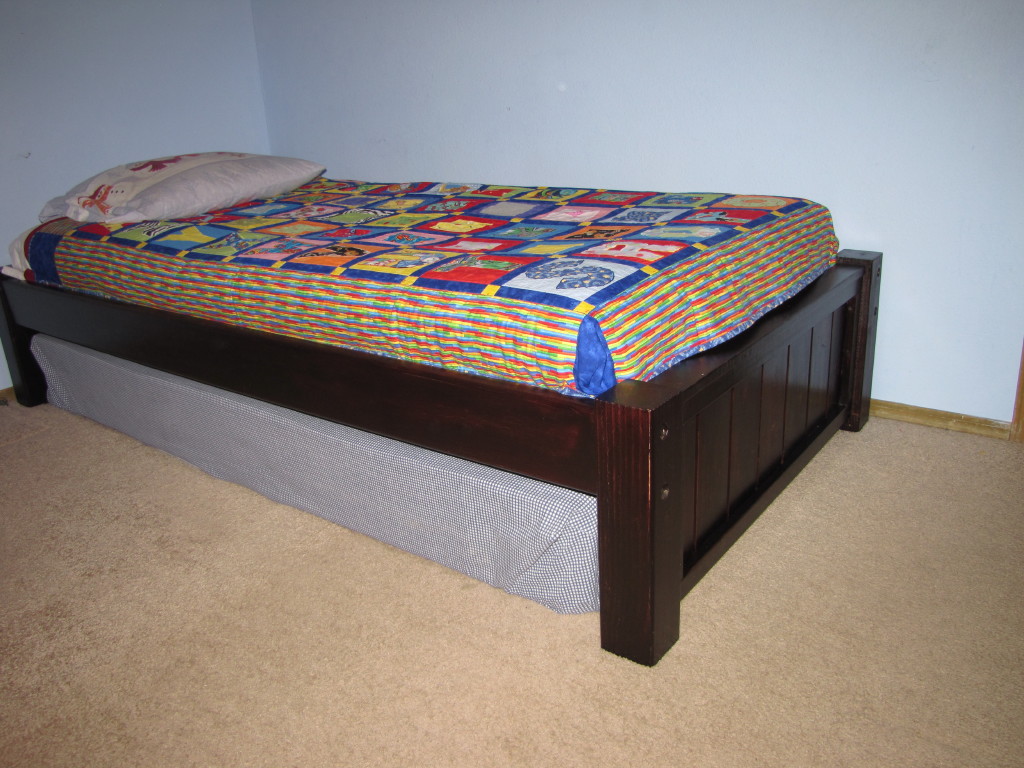
Revamped my son's bed and turned it into this. Very closely matches the dresser we bought him.
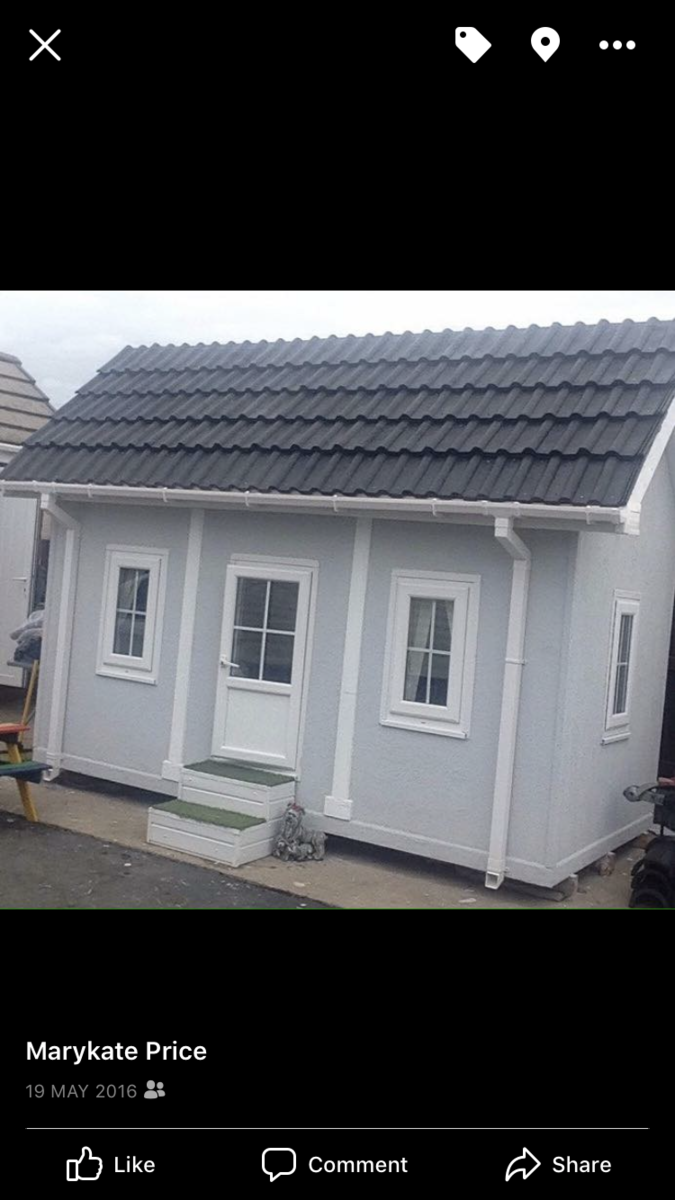
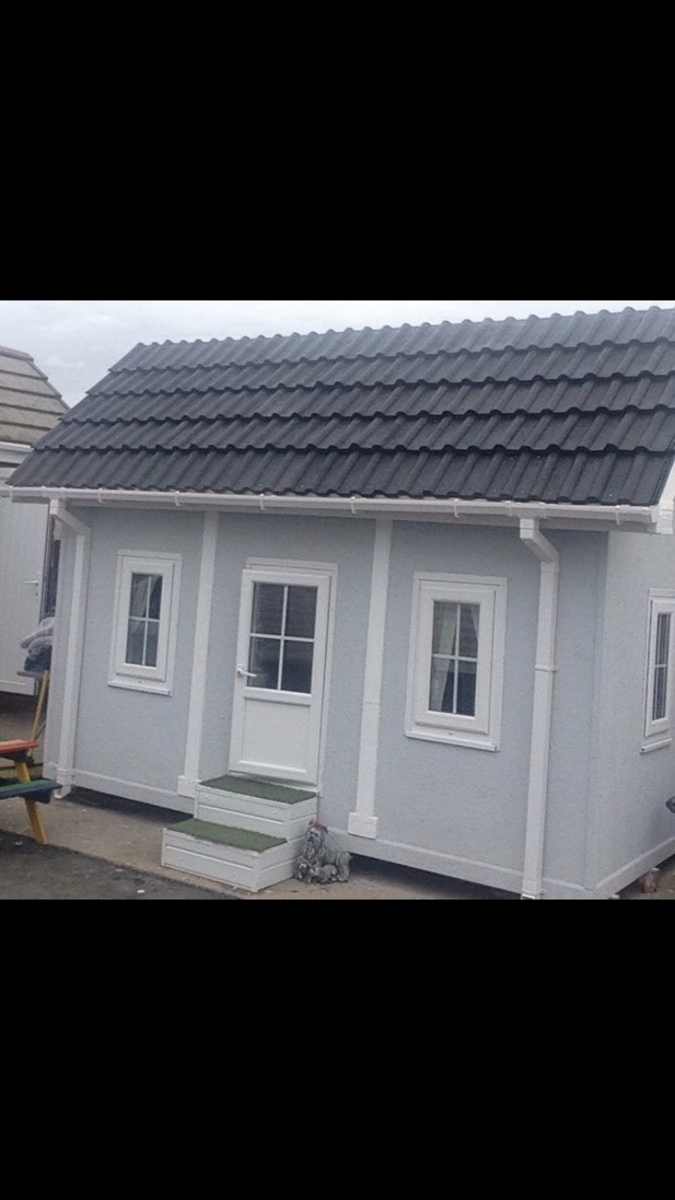
I made this my self for my doughter as a playhouse she loves it it is 6ft by 12 ft wide with a mini kitchen and mini fridge
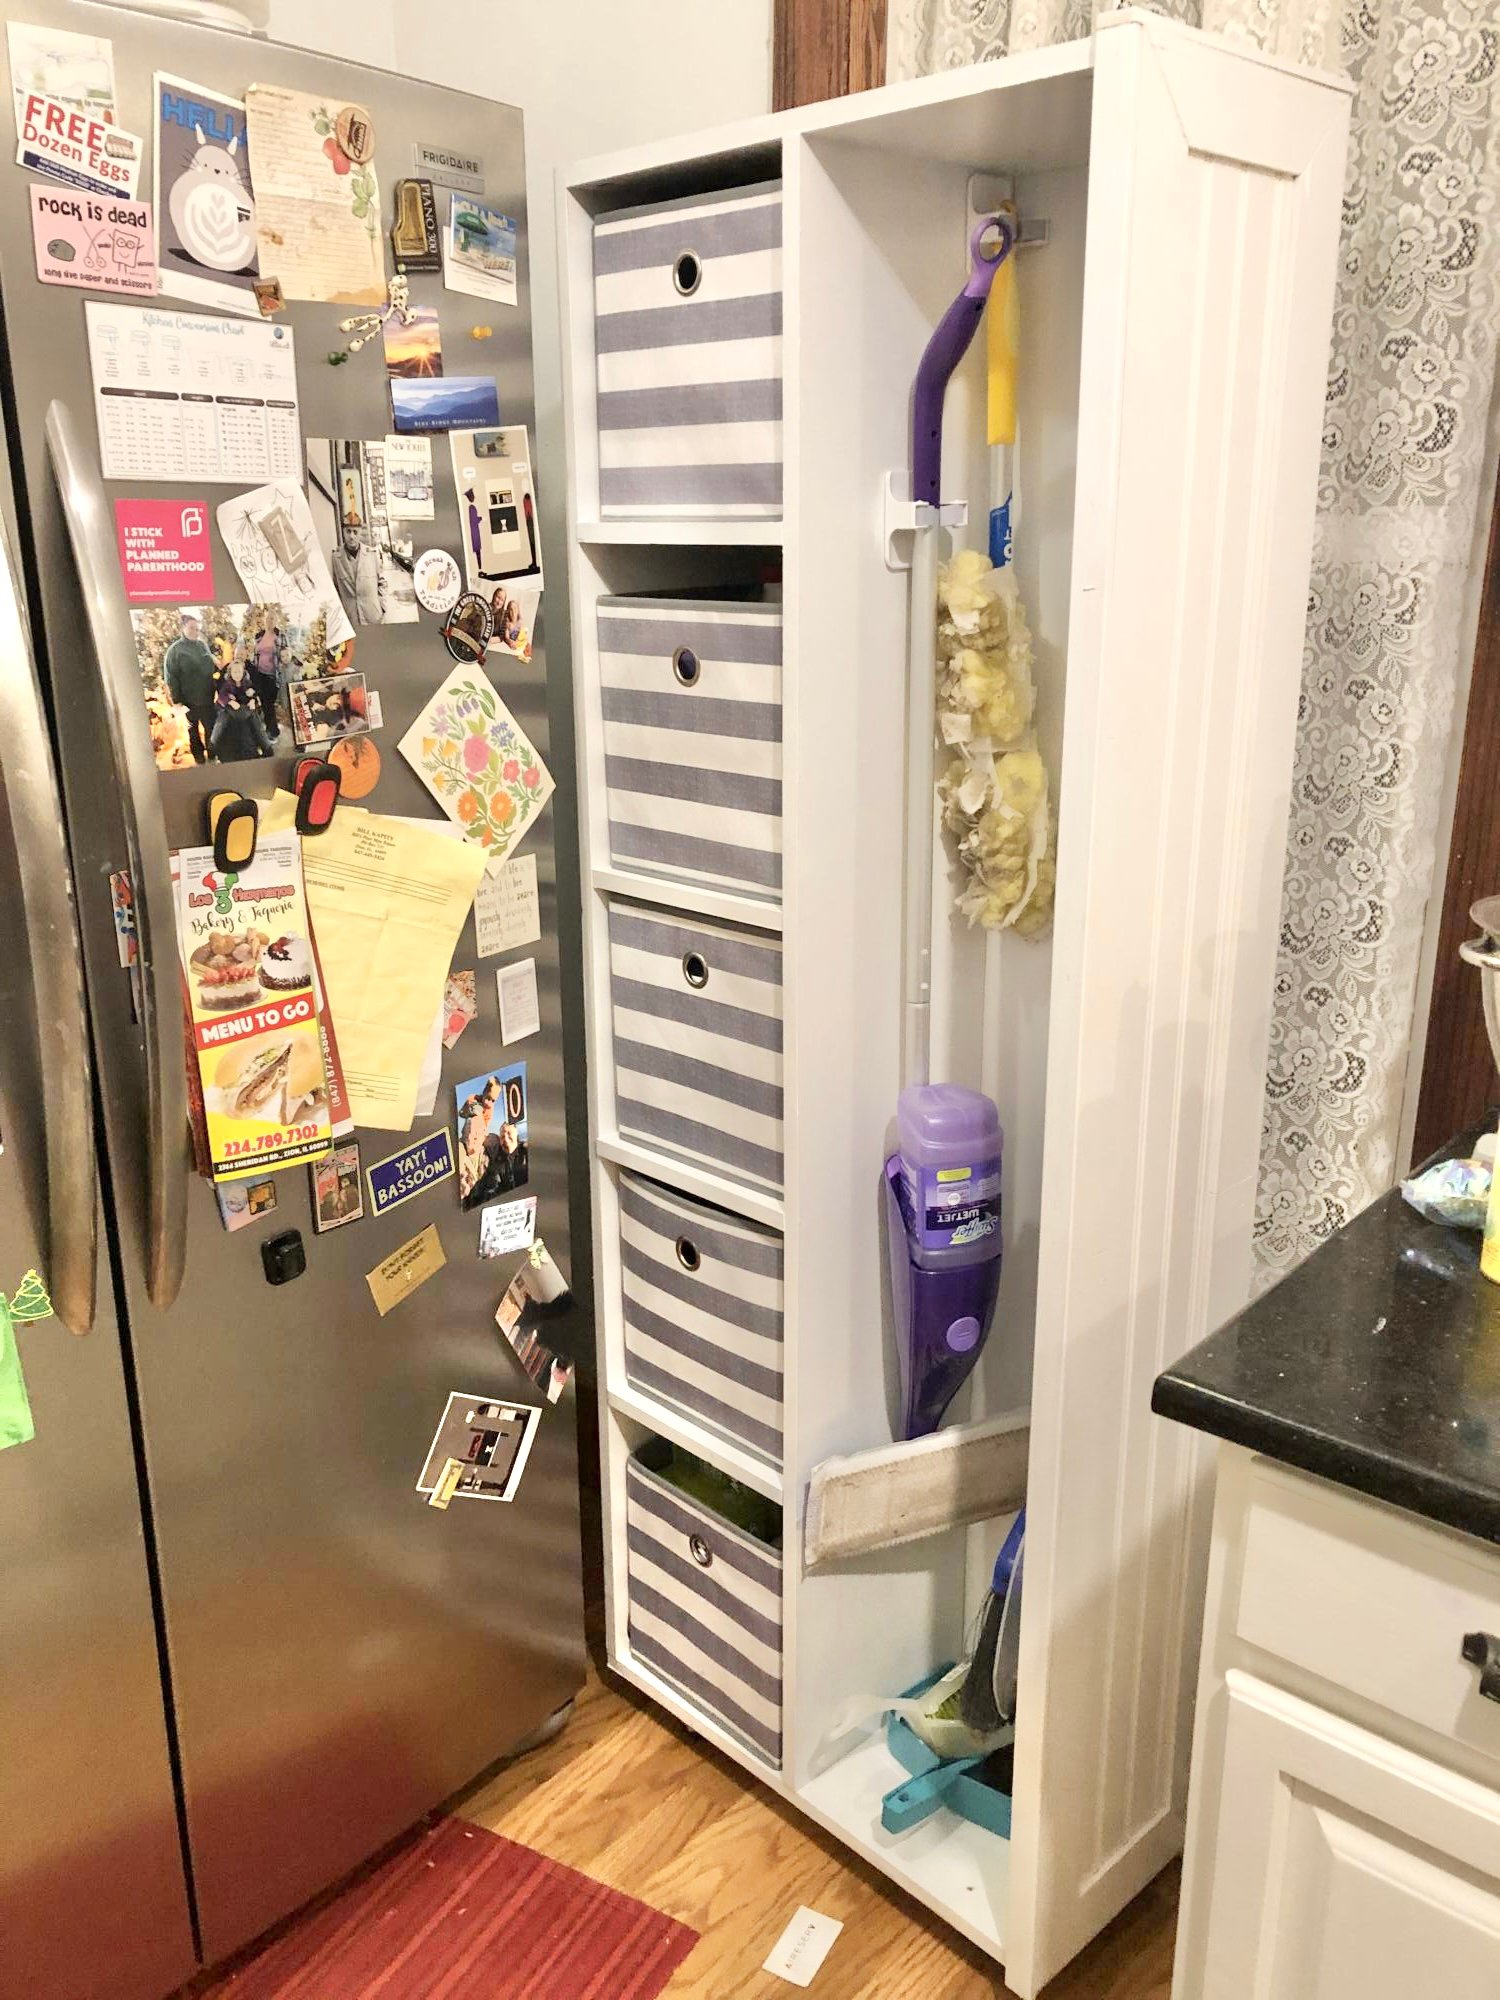
We needed to fill an empty space next to our refrigerator but it required custom cabinets, which were too expensive. So instead, I designed a rolling cabinet to fit the space. I used the Shelf Help website to create the design with the correct dimensions, as well as order the wood that was needed.
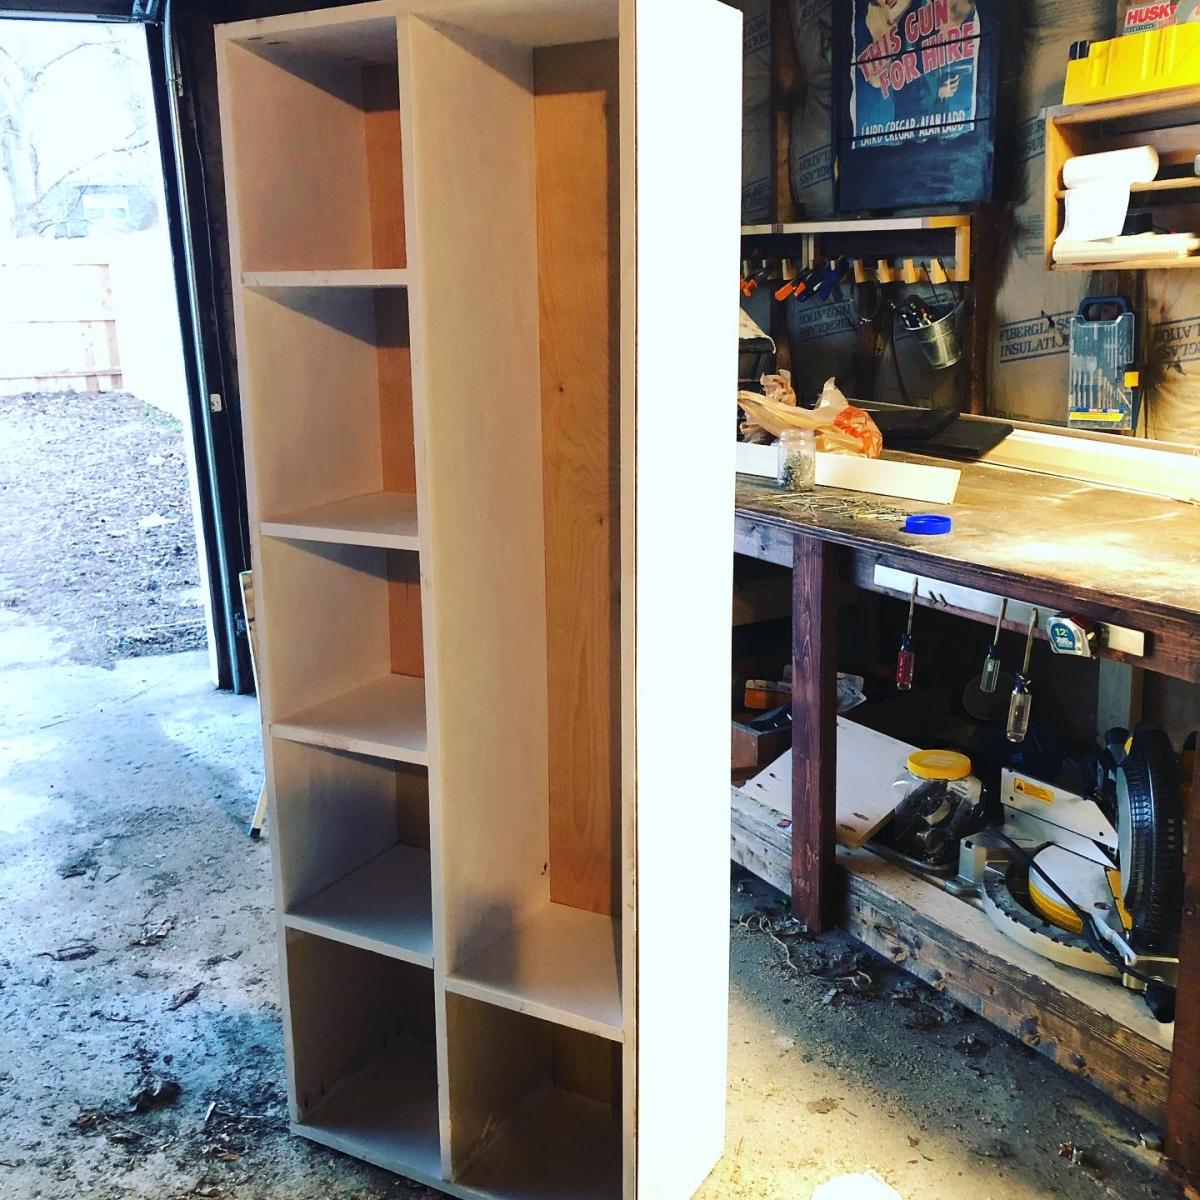
This was my very first carpentry project and through some trial and error, I was able to make this cool cabinet that houses all of our kitchen supplies, enabling us to tear out an original (junky) storage closet to make room for shelving (I’ll be designing and making those, too!). We added a vertical drawer pull (not pictured), and it works great!

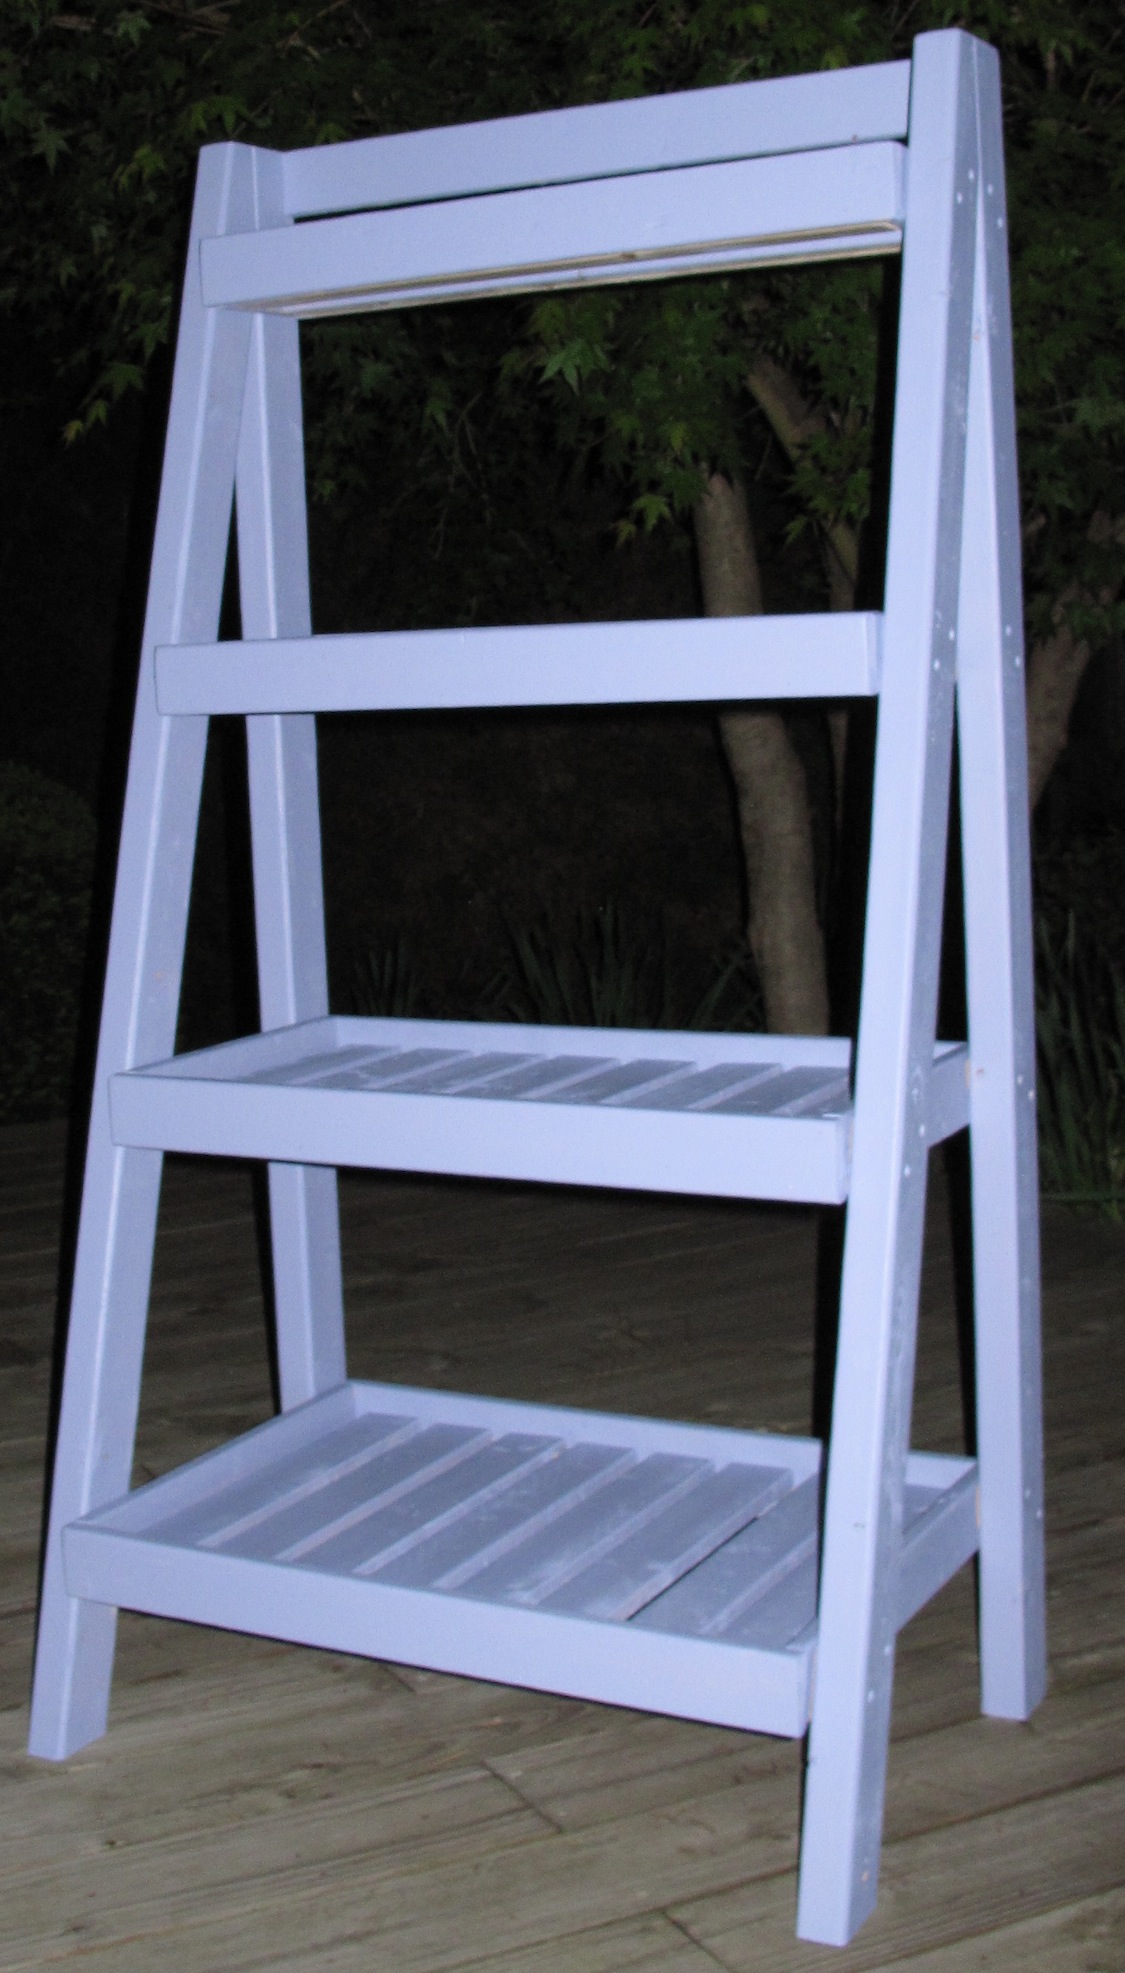
I built this for my sister-in-law who loves growing vegetables and herb - in her small apartment porch. She wanted something that she can put her plant pots (and she has so many of them!), so I modified the Painter's Ladder Shelf by:
1. Made the shelves with slats, with added support underneath
2. Beefed up the legs with 2X3s instead of 1X2s.
Dad helped with angled cuts and other things, and borrowing his workshop, this was a breeze to build.
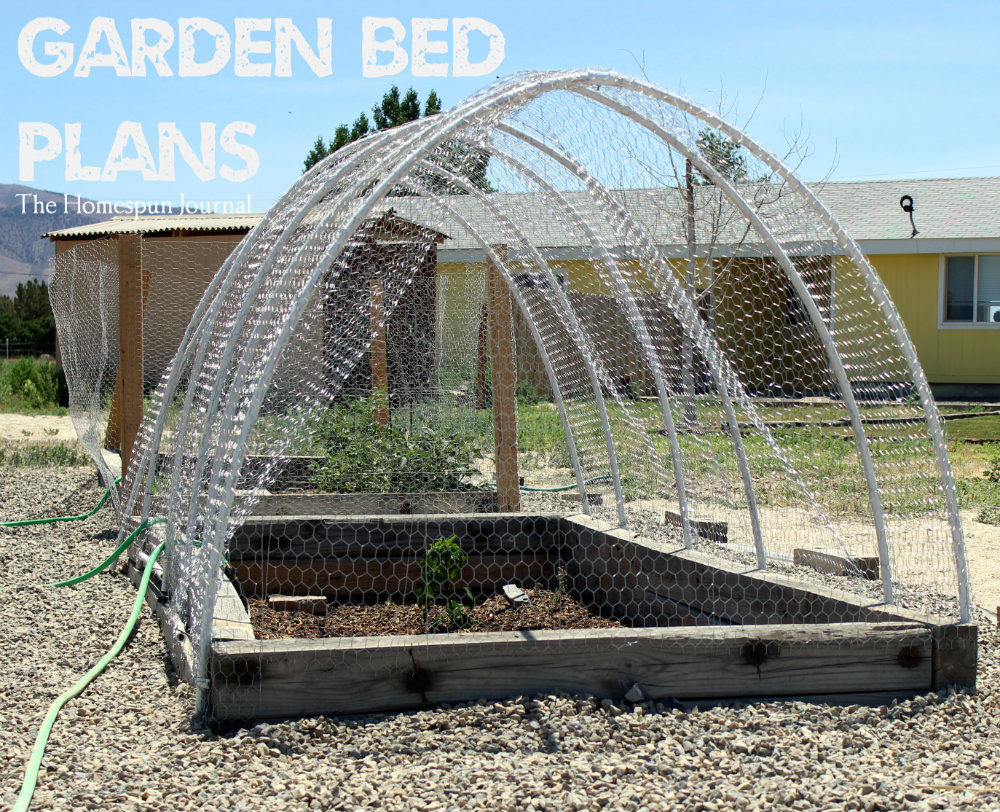
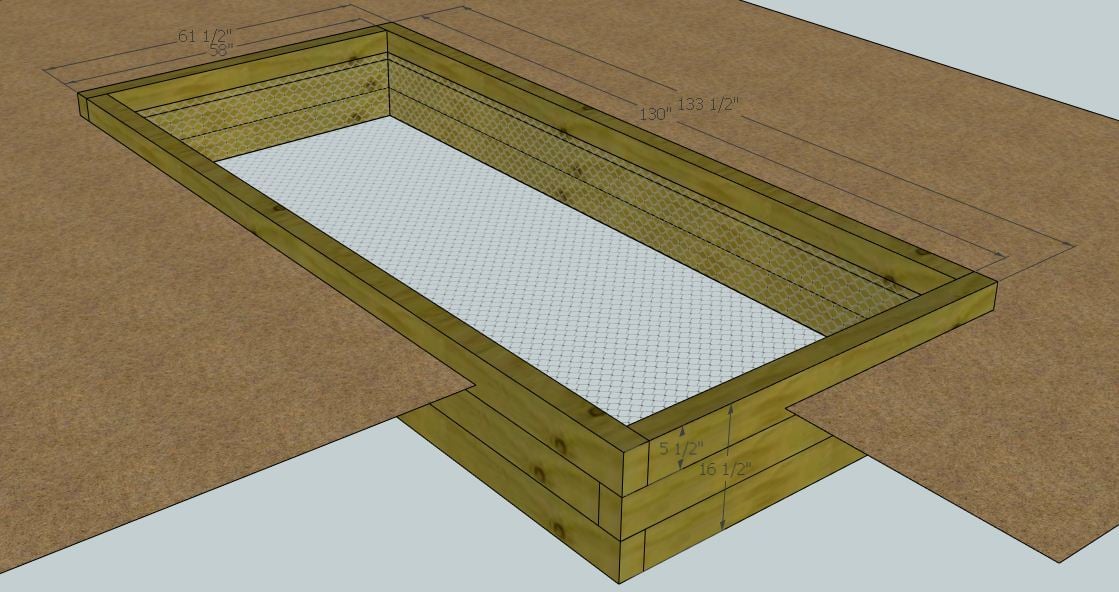
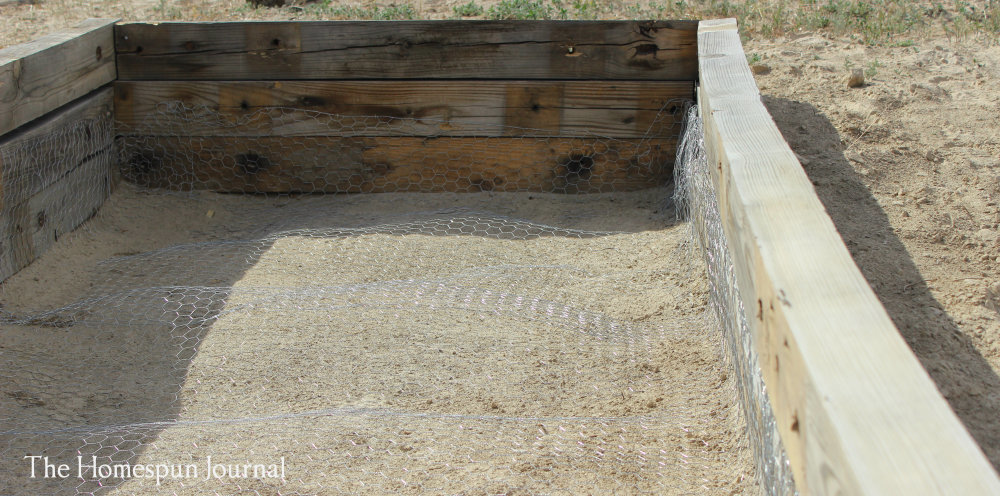
This is an easy garden bed plan. The only tool you need is a staple gun and you can easily complete this project within a weekend! Find part 1 of the design here.
I didn't follow the plan on this one. But it looks about the same. I used 2 x 4's for the legs.
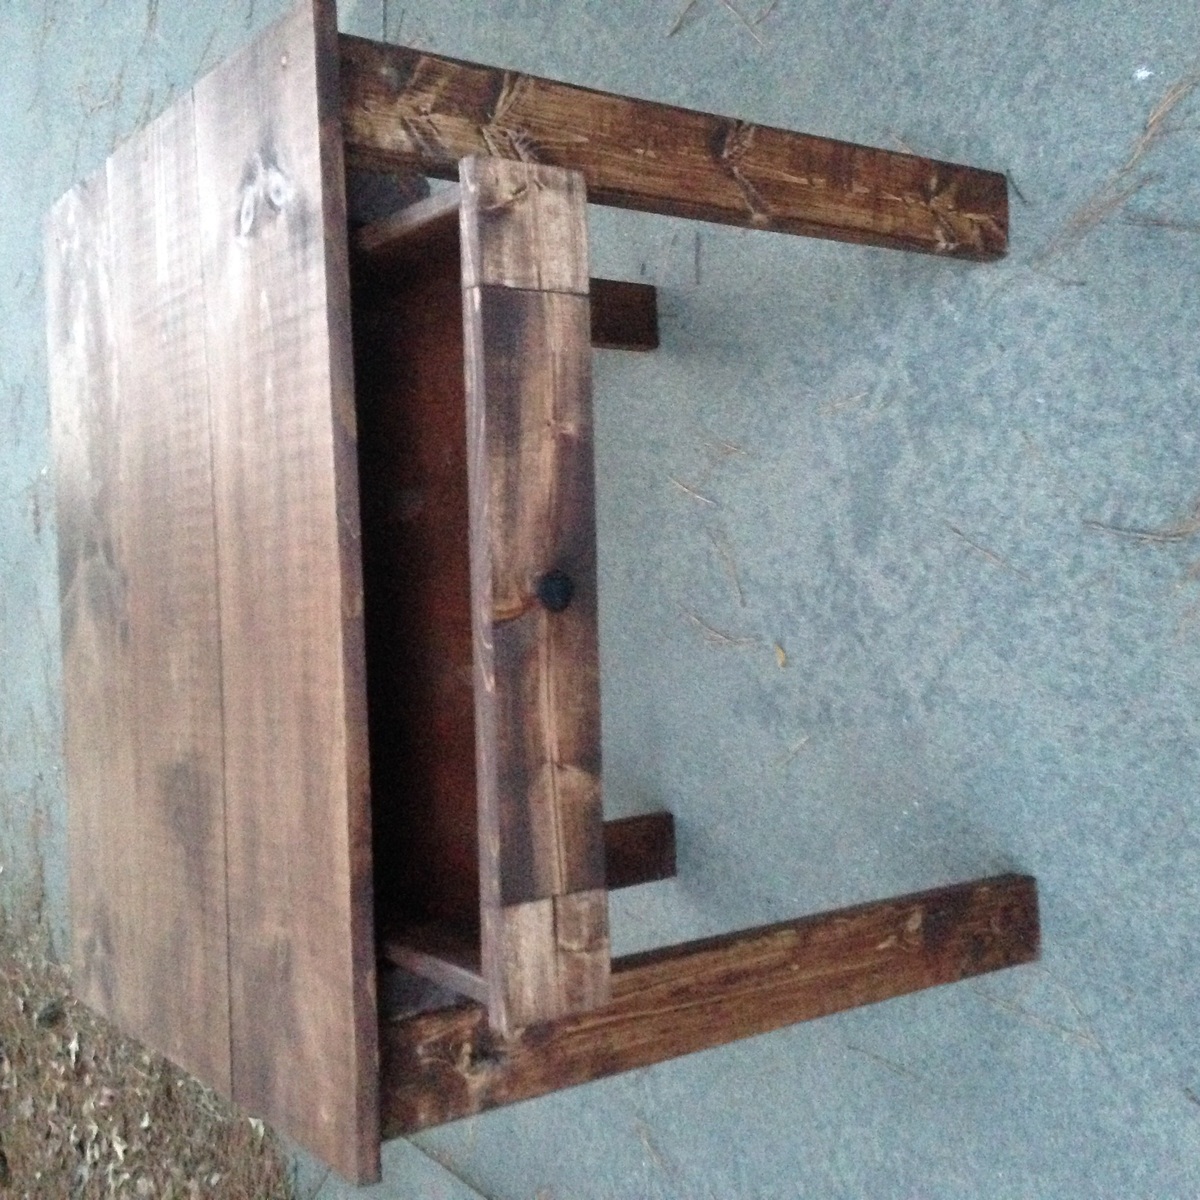
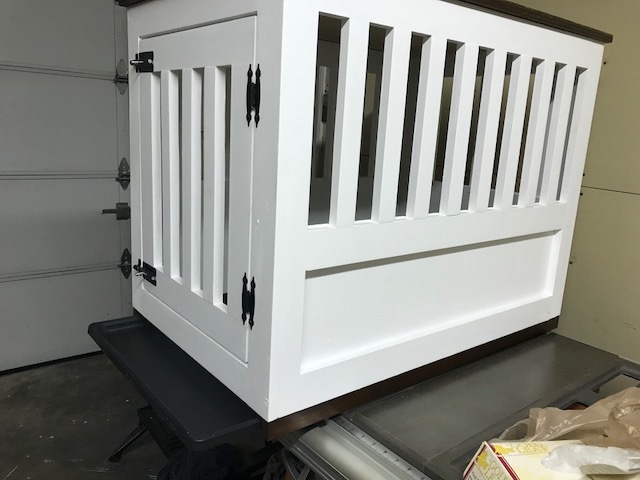
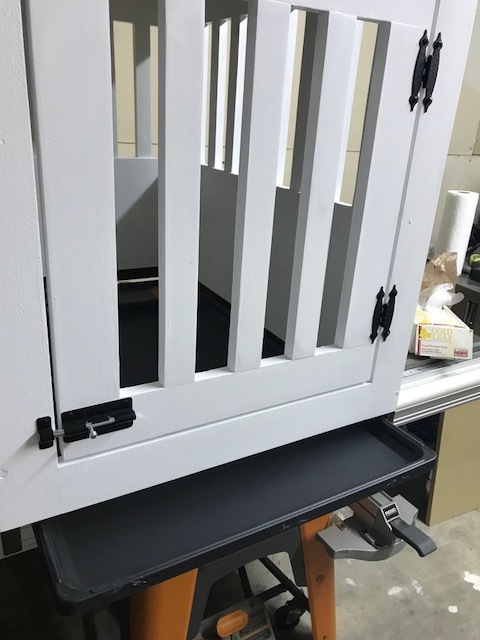
Made the kennel following the Large Wood Pet Kennel End Table plans as a gift for my mother in law, put a 1x2 rim at bottom cut to 1 1/4" to allow for a pan/liner to be slid in and out as needed. Mother in law was surprized and Extremely pleased.


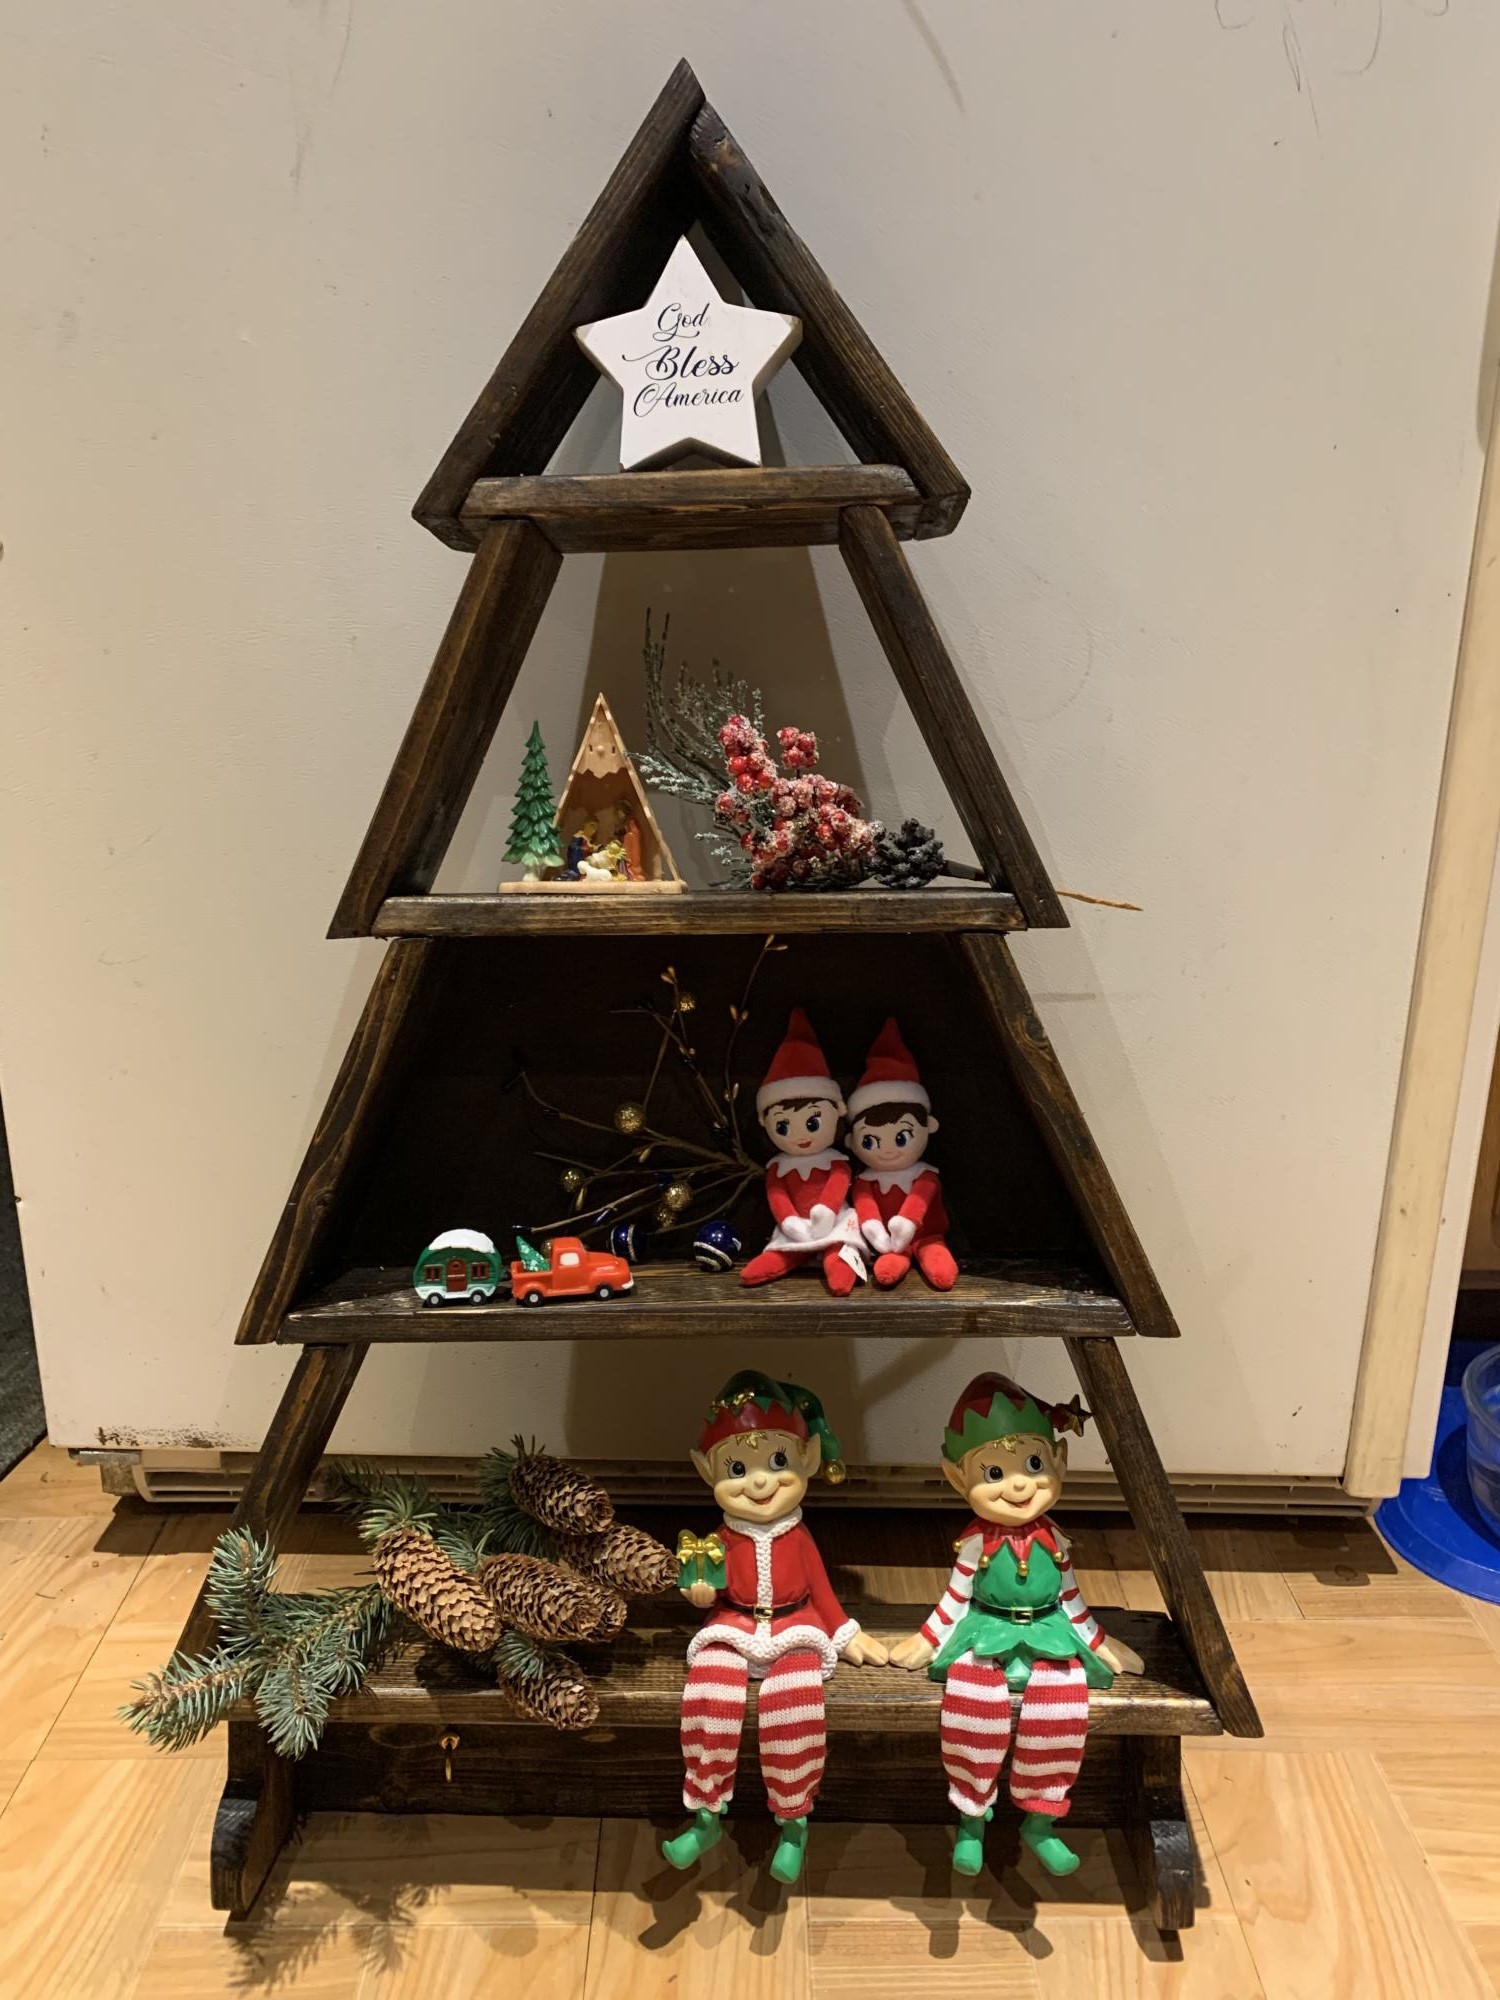
Made the Christmas tree build from your plans . Made it for a Christmas present.
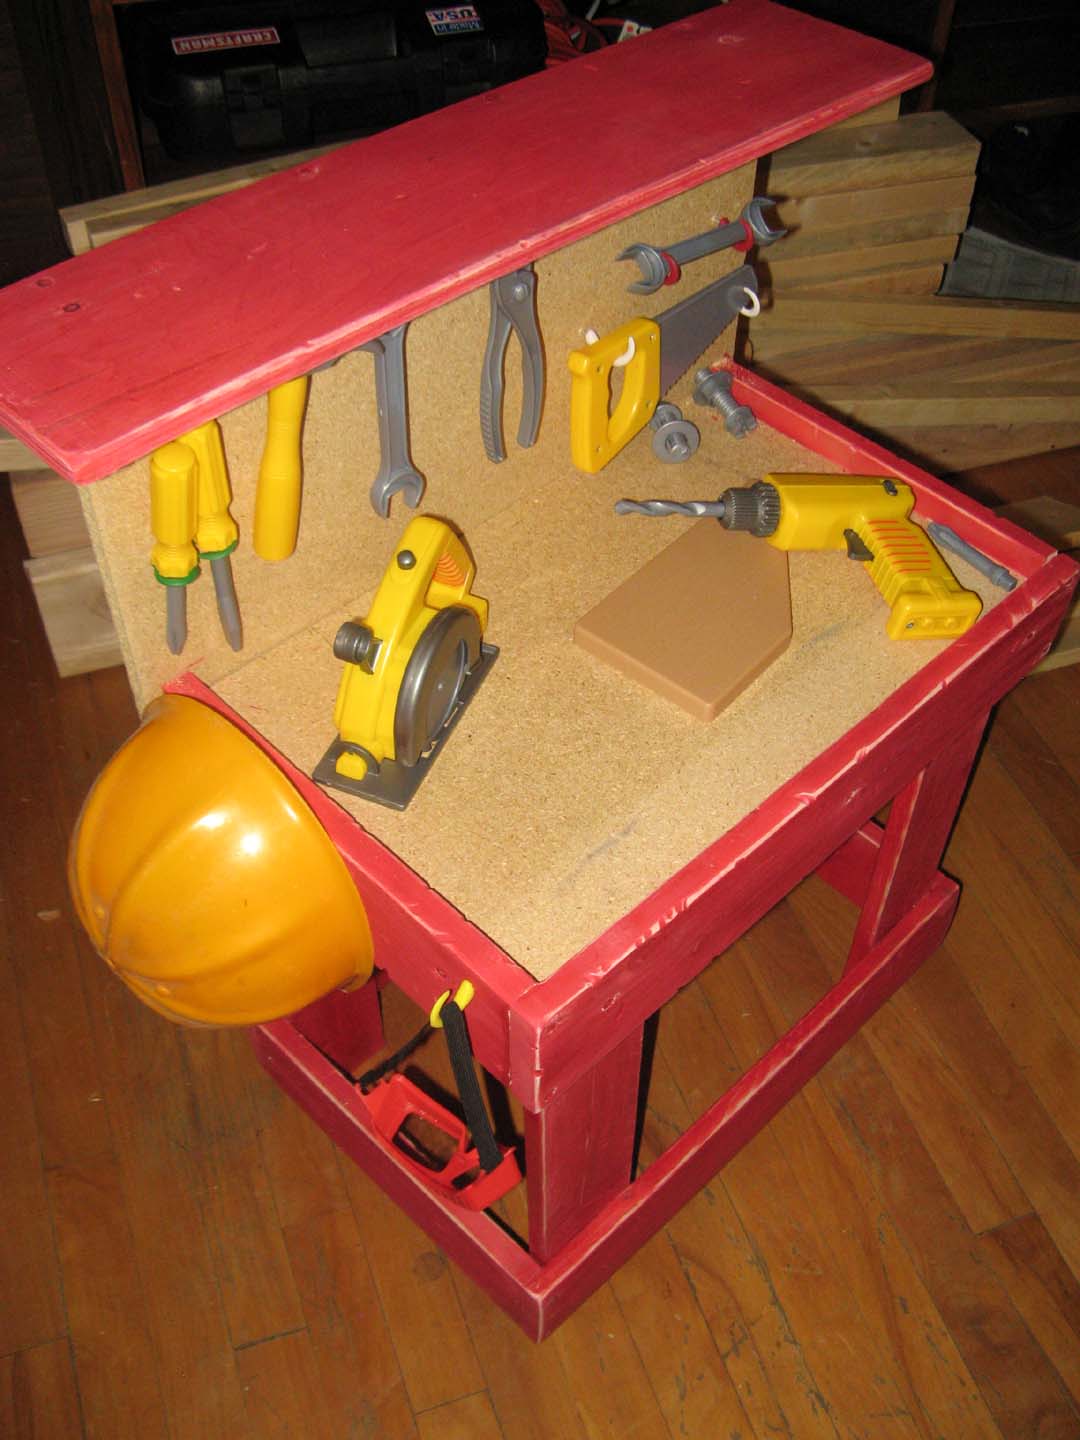
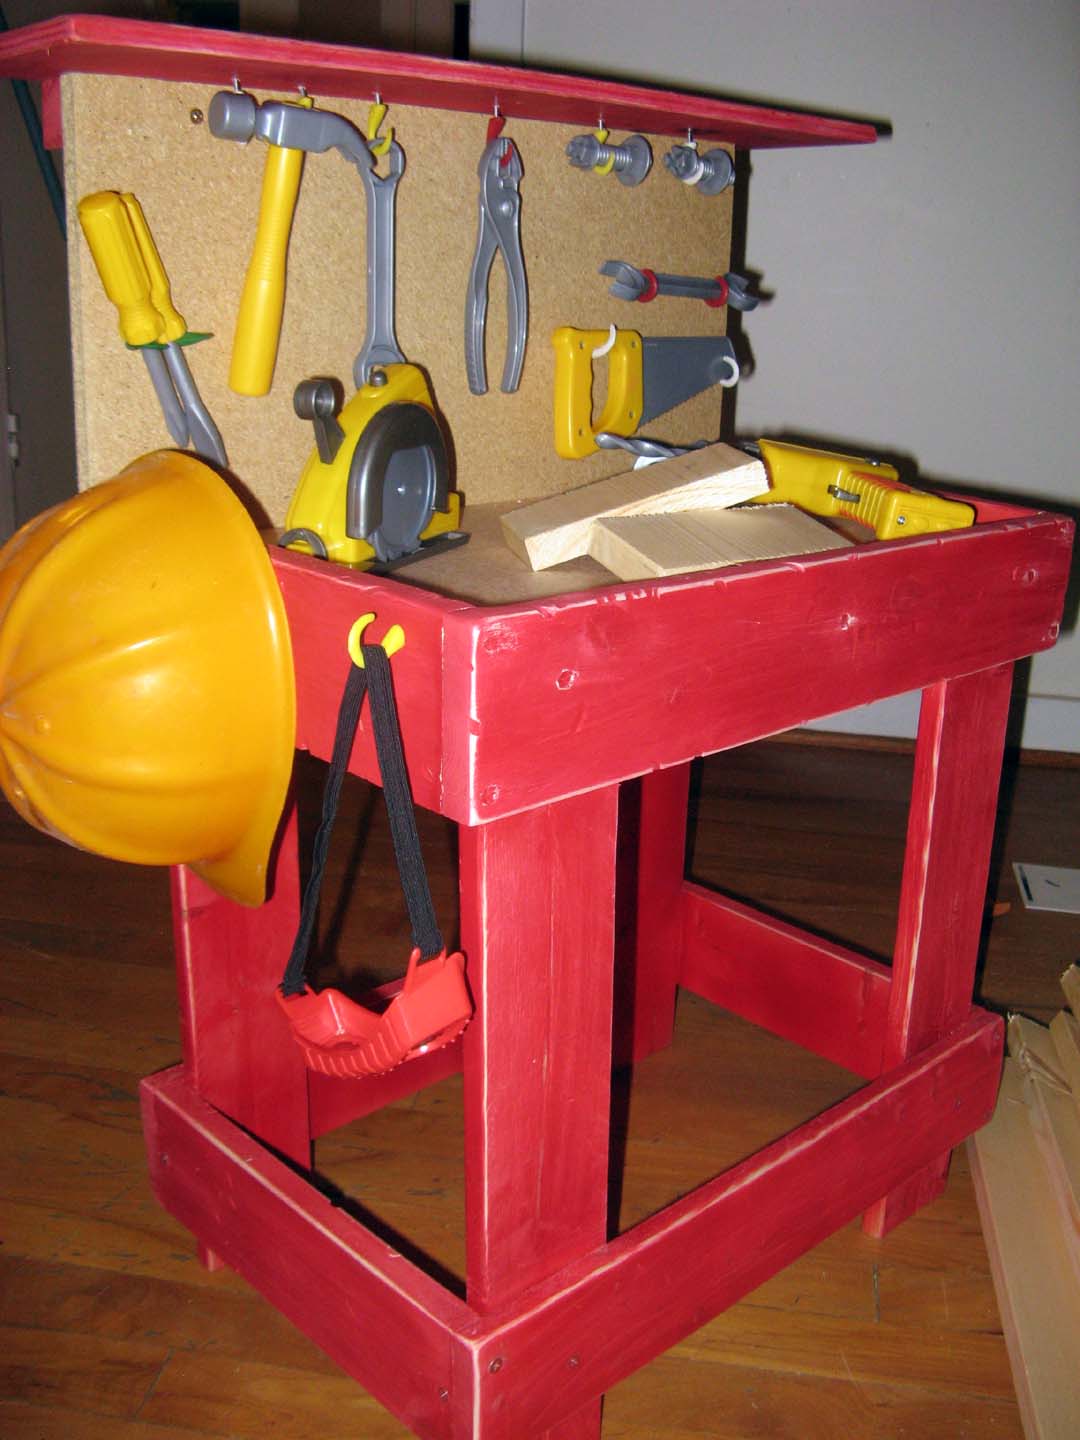
We built this workbench for our two-year old's birthday coming up this weekend. Really excited to see his expression when we show it to him! Built the whole thing out of scraps on hand- used 1x4's instead of 1x3s(that's what we had), and MDF for the bottom and backing. Used some scrap plywood and 2x2(support) for the top shelf. Added some hooks to the underside of the shelf & along the back to hang all the toy tools!
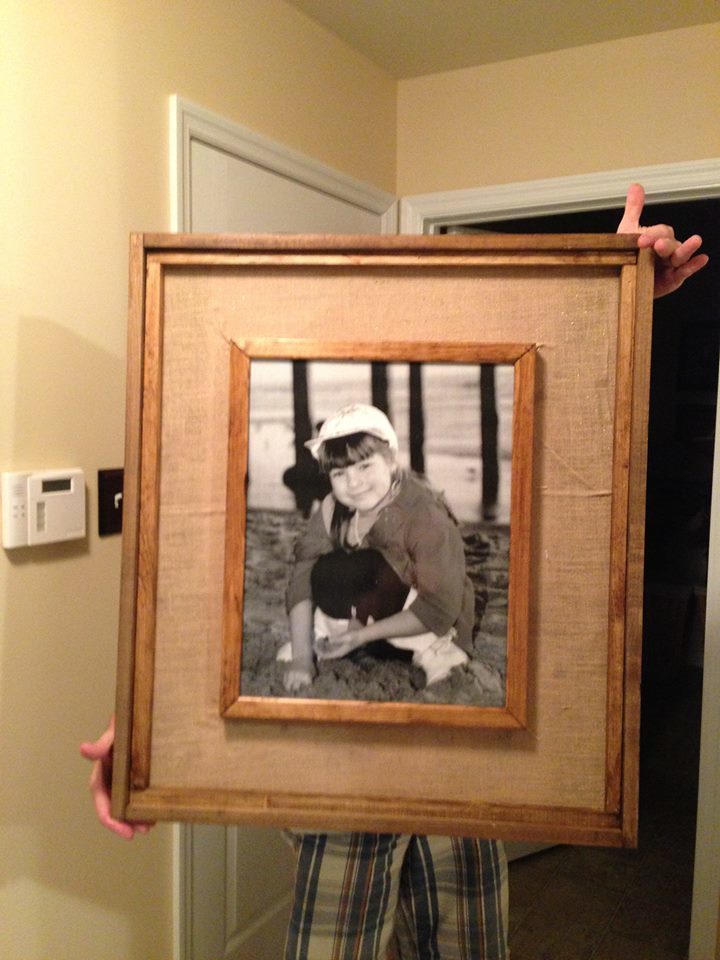
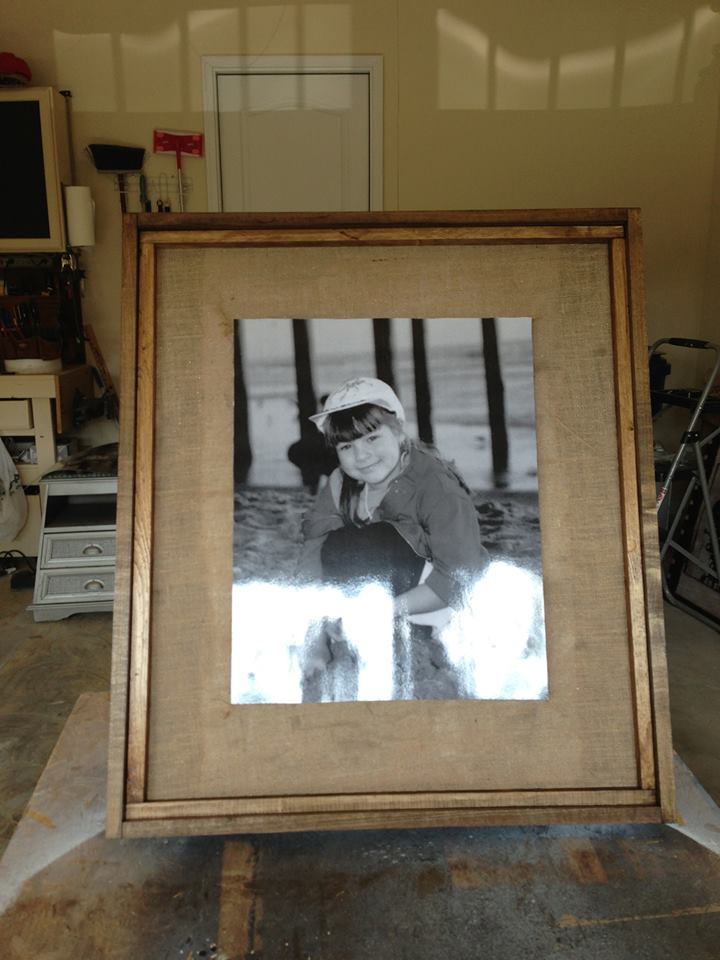
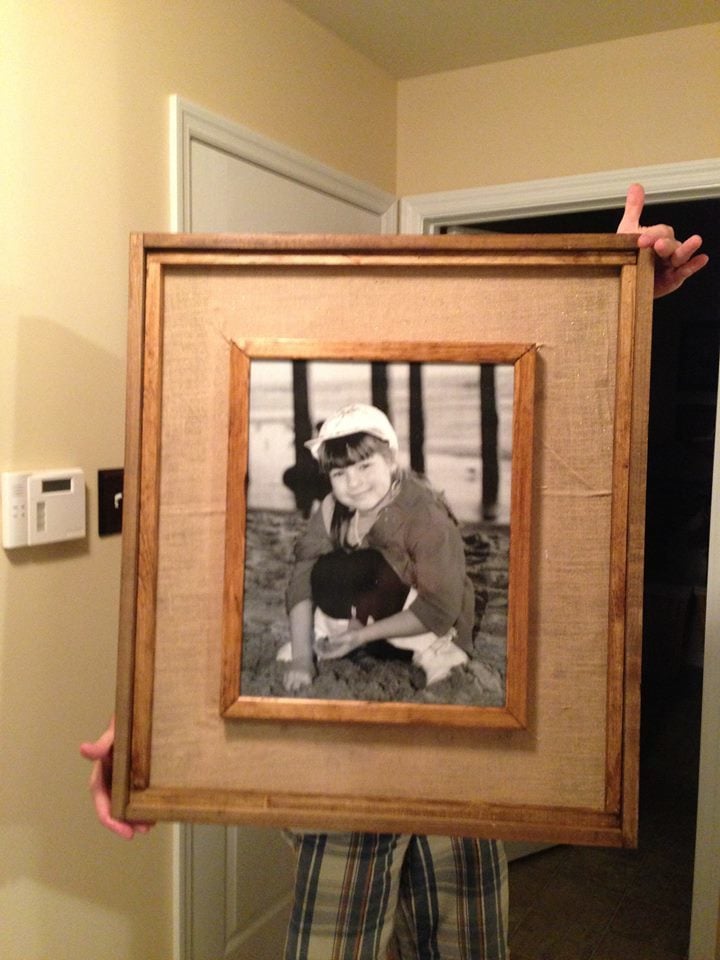
I had two large pictures I no longer liked. I took scrap pieces of 1x3 and 1x2's and created a frame, after covering the inside with burlap. I thin took and blew up photos into black and white, mod podged them to the center frame, and added stained L molding. the cost $15.00 each frame to update two old pictures that would have been given to goodwill or trashed.

Tue, 07/09/2013 - 11:04
I love this, especially that touch of burlap matting. Moreover, I love that you reinvented something you owned to make it amazing.
Not much to say, I followed the plans for the King (adjusted from Queen) and built this in 2 weekends. First weekend was construction (maybe 4-5hours) the second weekend was sanding and paint (2-3 more hours).
Pretty sure I built the wood frame incorrectly (supports are on the top instead of allowing the box to sit inside of the 2x6's). it sits a bit high, but it is very sturdy. The mattress shown is a 15" mattress sitting on a standard box-spring. I will probably just convert it to a platform with some plywood or slats and just ditch the box springs.
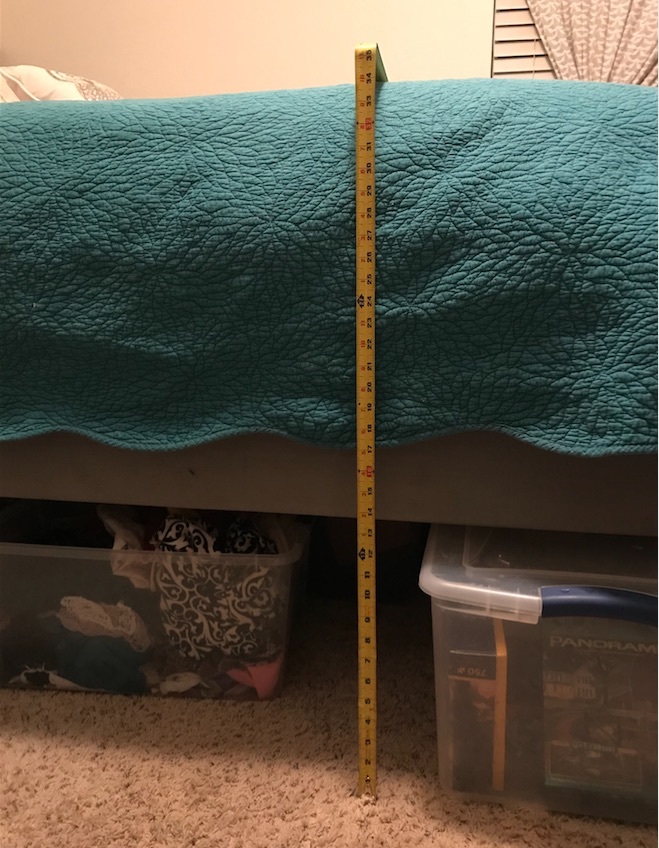
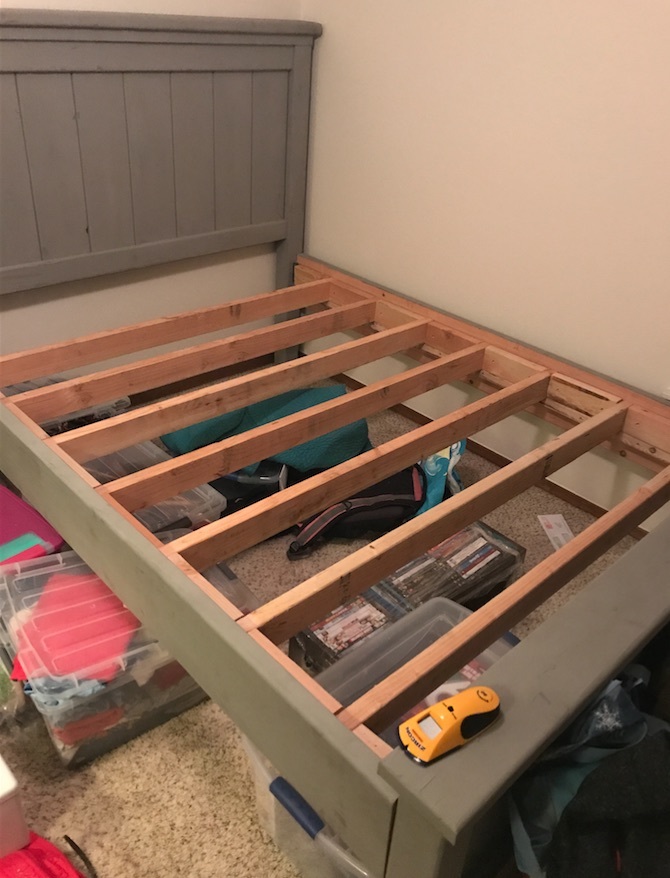
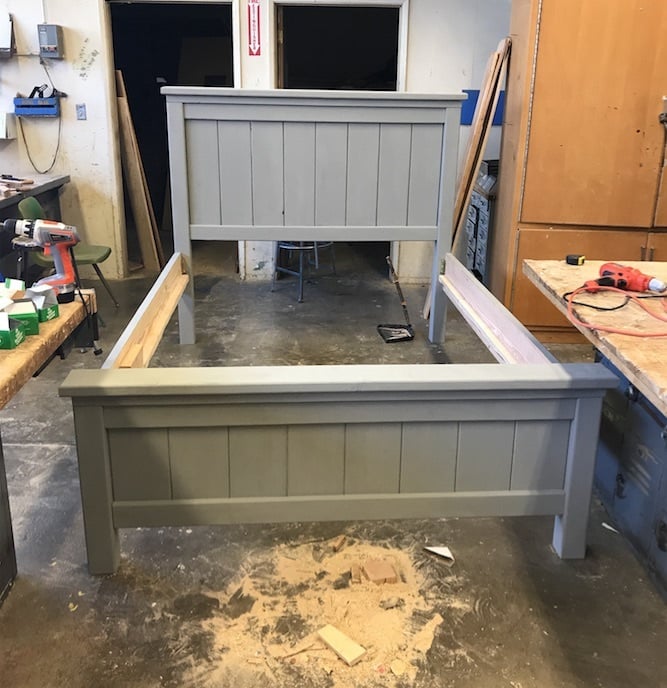
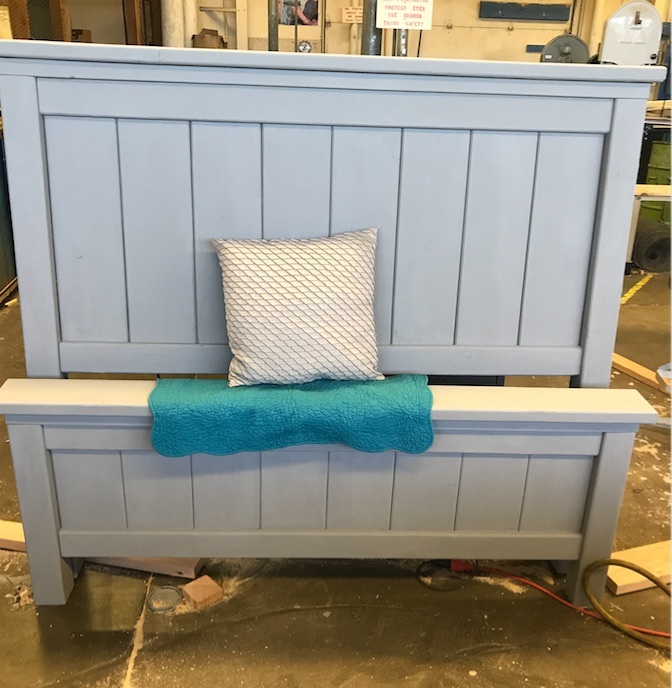
I came across the Farmhouse Bed Project and knew immediately I wanted to make this bed. I ran into a bit of a snag though when I realized I needed at least 12 inches of clearance for my storage totes. With some fixed math and a whole lot of “go with the flow” I changed the plans to fit my needs. I definitely went over kill on the mattress support system, but I know this bed will last me forever with the sturdiness of how it was built.
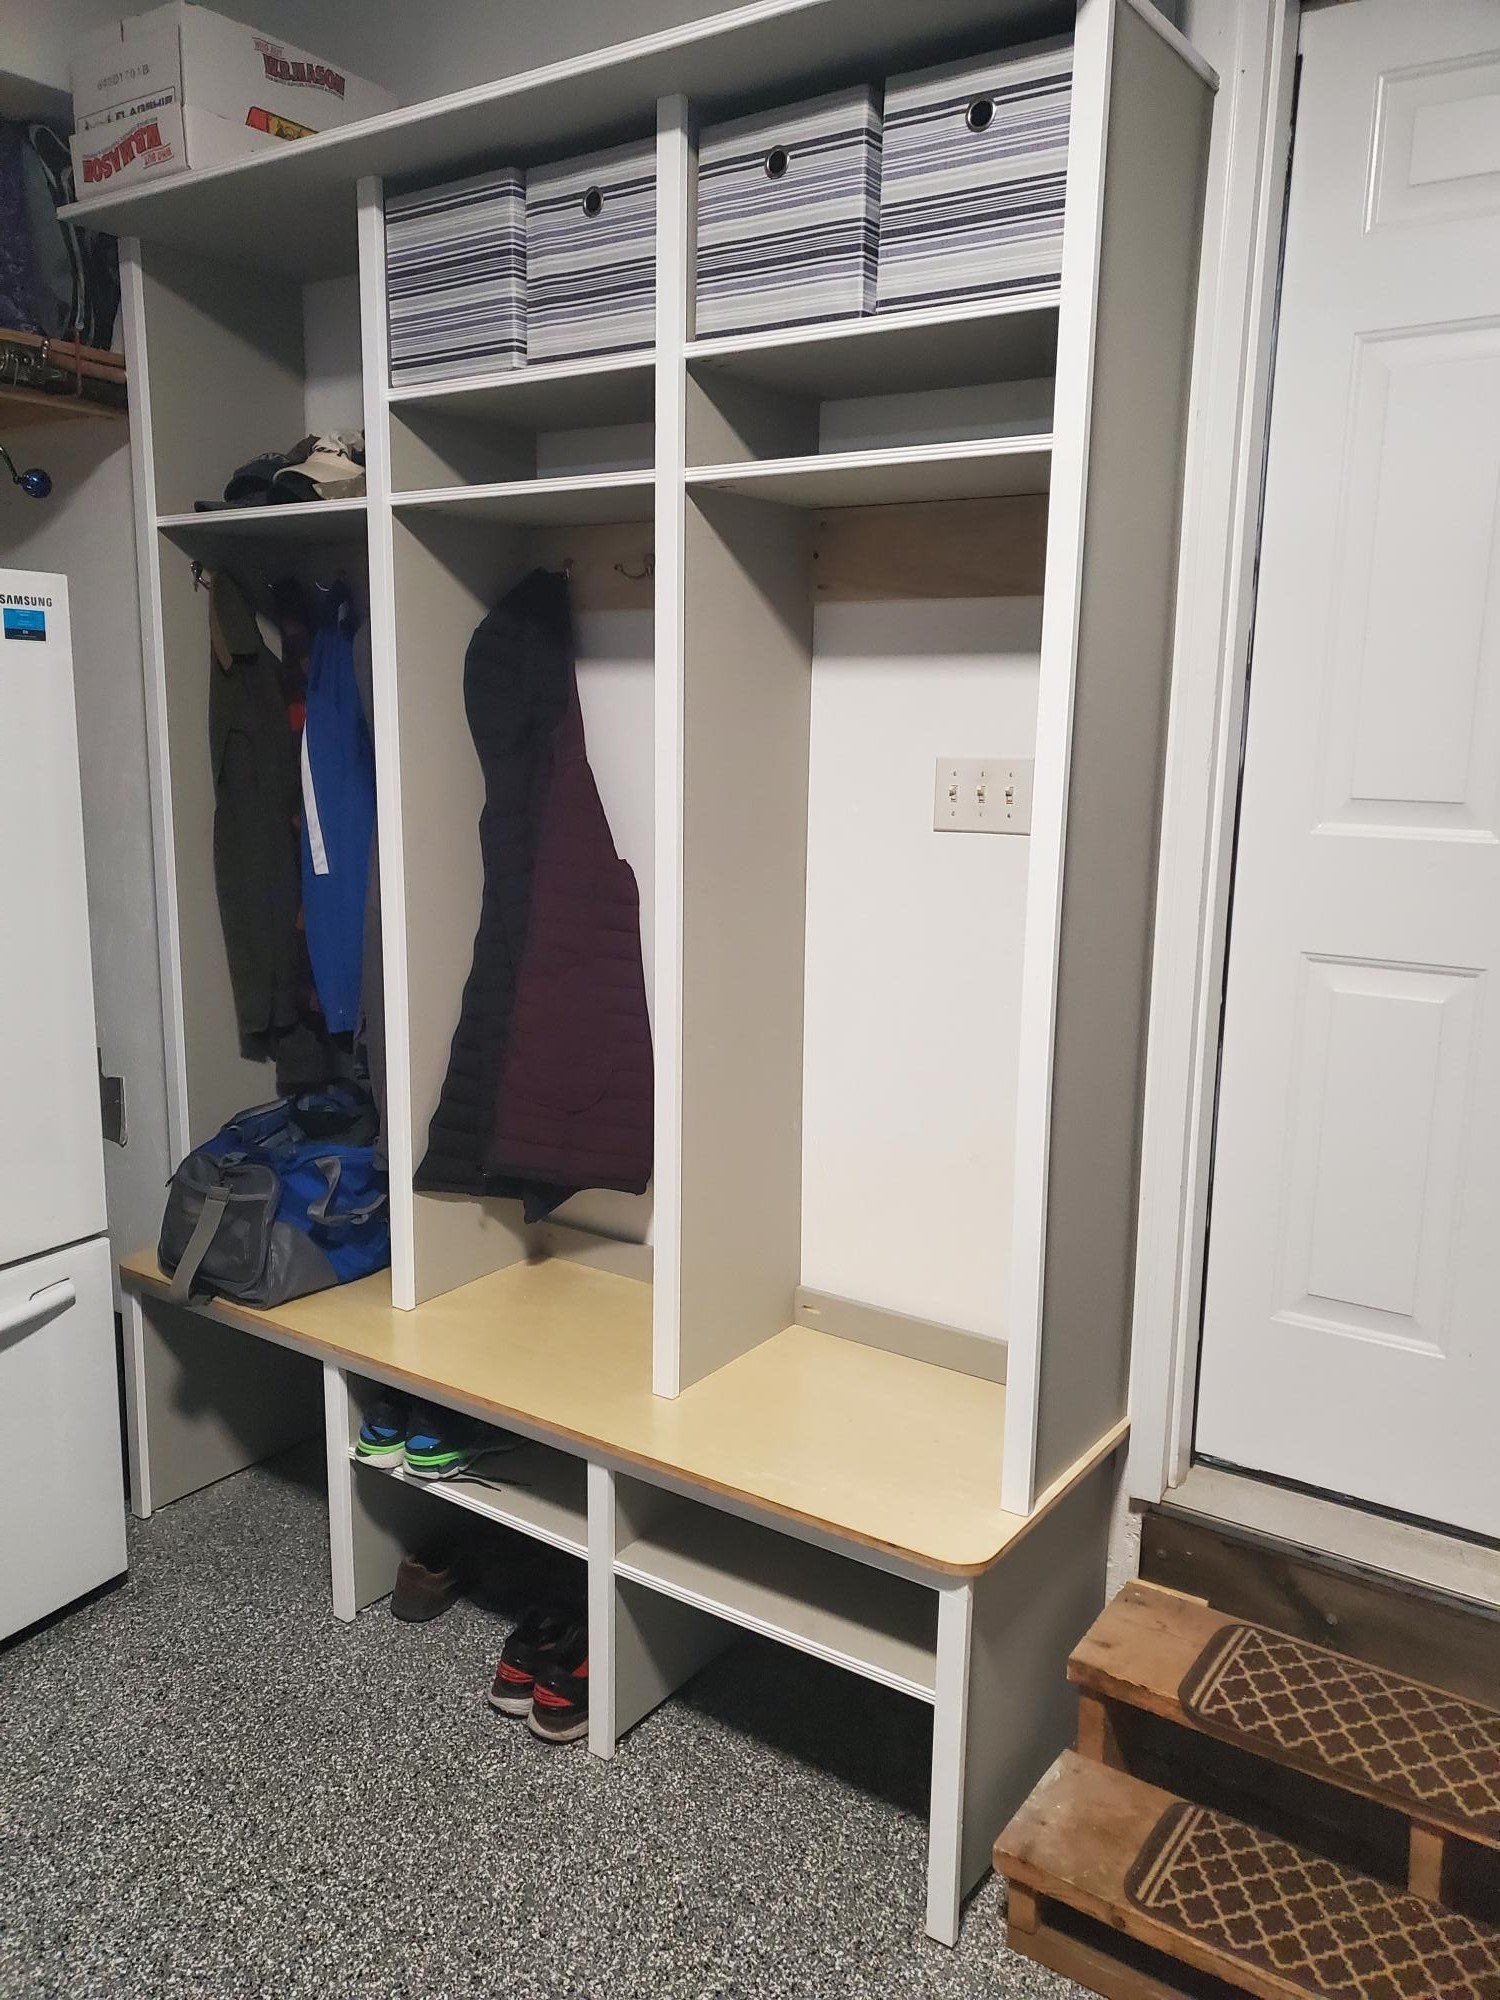
Thanks for the inspiration to add great storage to my garage.
Just downsized into a much smaller house after 20 years and I lost my mudroom area.
This mudroom/garage locker bench and hutch is a great looking unit!
Looking forward to seeing more on your site.
Thank you!
Mike
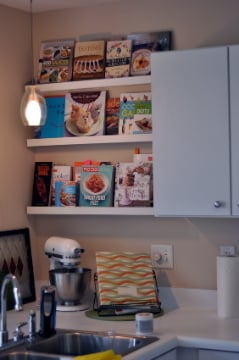
This was my first build and it was so much fun! I used a Kreg jig to construct the shelves using Ana's plan and then secured them to the wall with anchors. It took only a few hours from the trip to the hardware store for lumber to painted and finished ledges on the wall.


Comments
Ana White Admin
Sun, 12/26/2021 - 17:36
So fun!
Wonderful job, they will love and cherish these beds for a long time!