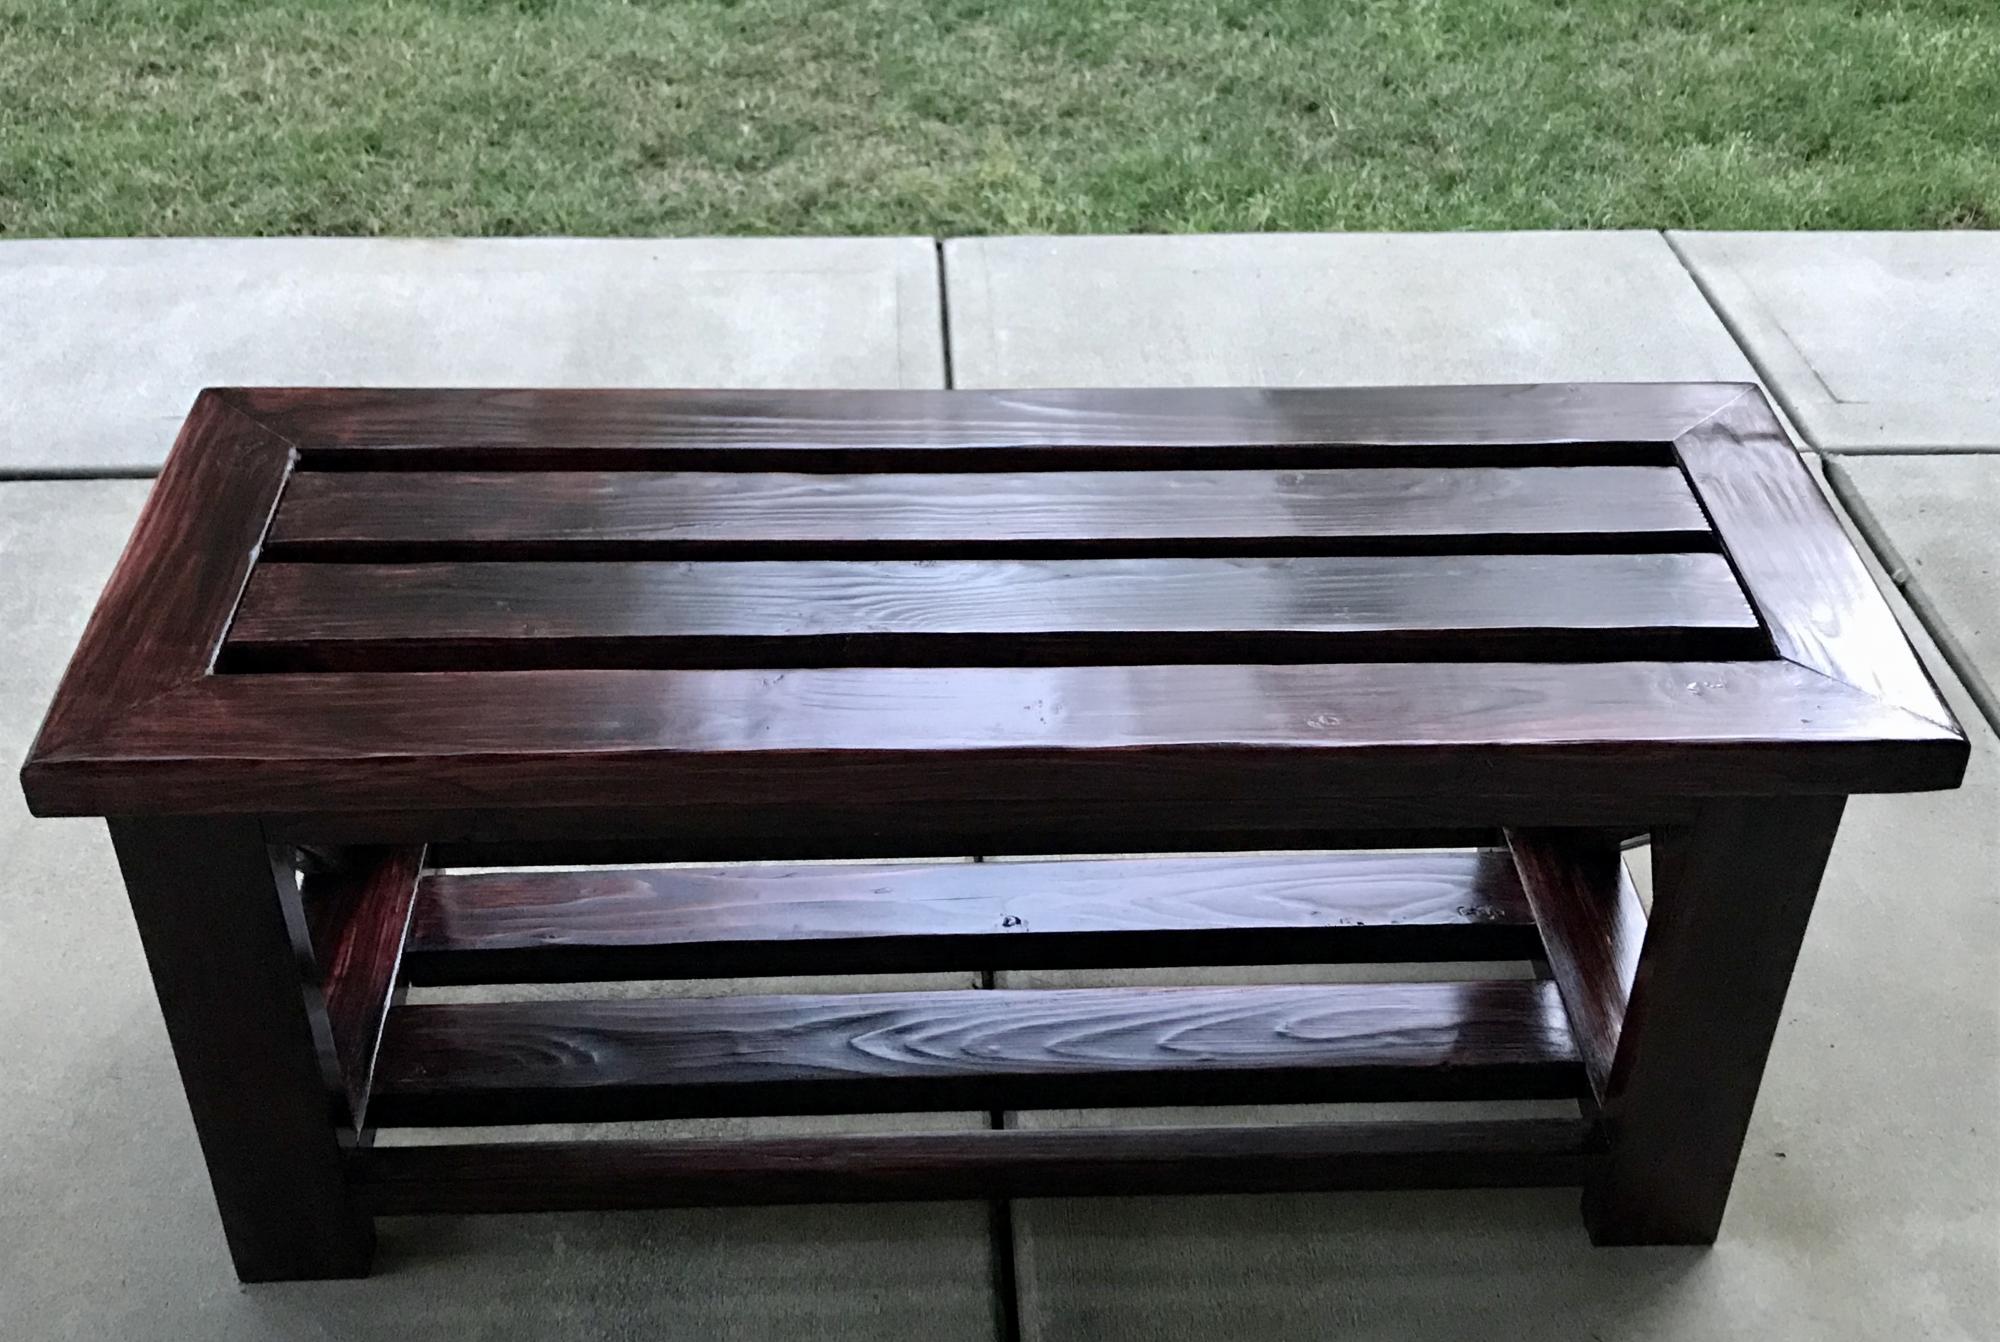
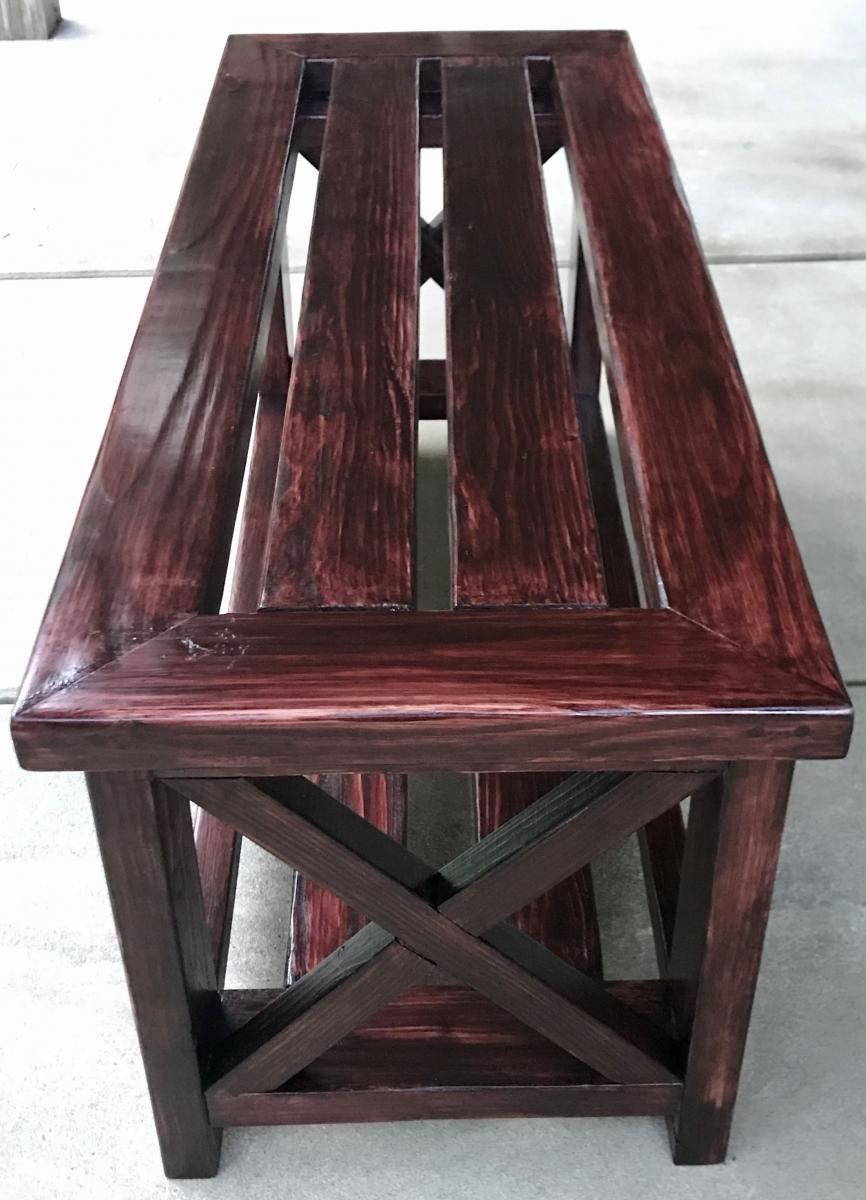
Refinished End Table
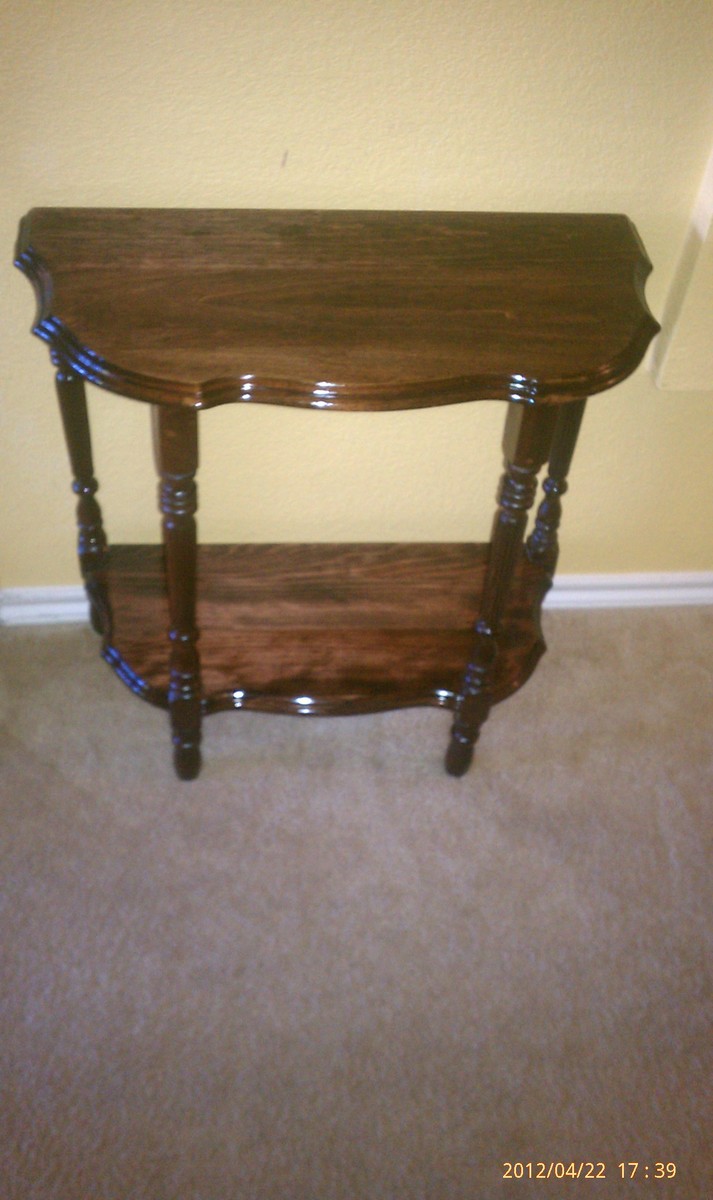
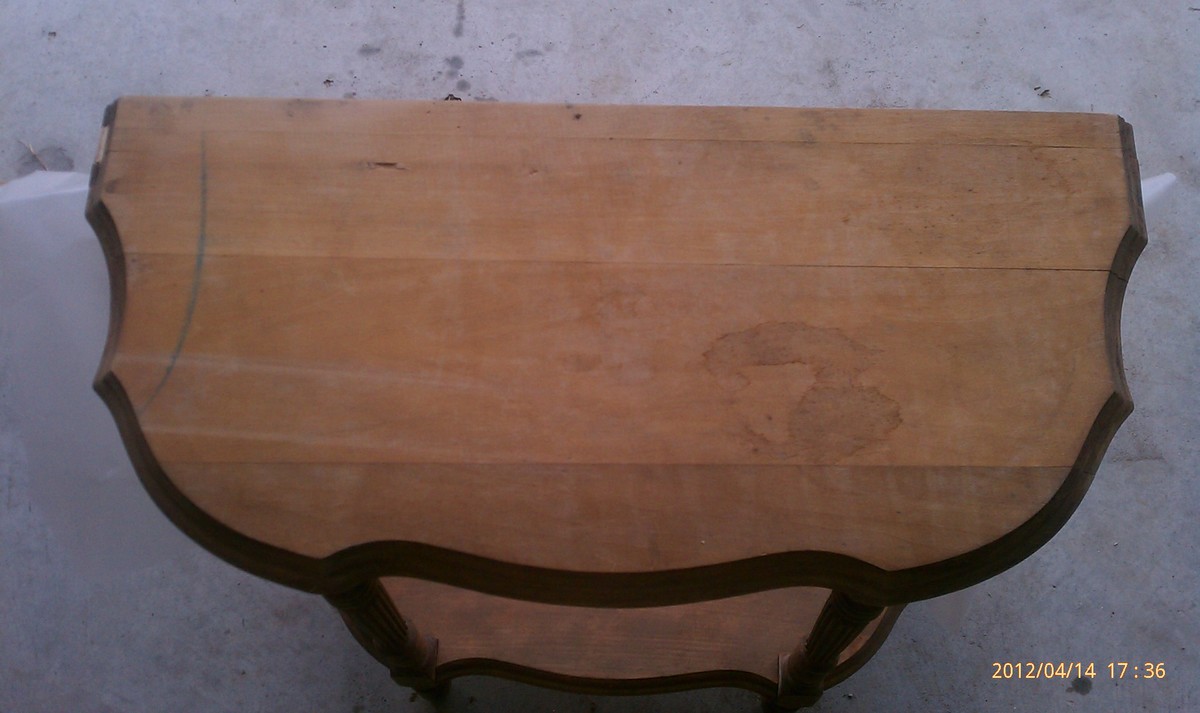
My mother found this old end table in her mother's basement in the mid 90's and brought it home with her to refinish. The table was very flimsy and Mom just didn't know how to fix it, so it sat in her garage since then. I saw it back in March when helping clean out the garage. I asked if I could restore it for her. I think it turned out really nice. Thanks to this site, I have been given the confidence to tackle projects like this. Just wanted to share the project and say thanks to everyone here for making this site a great resource.
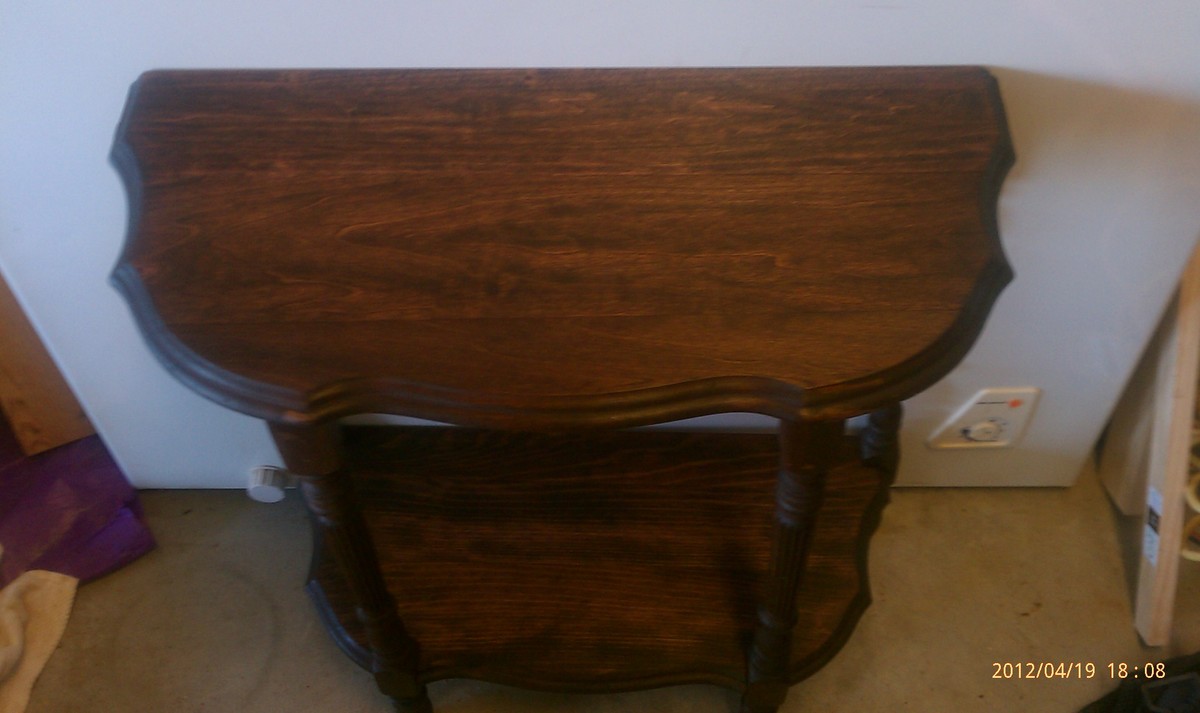
I fixed the table legs, sanded the table, used red mahogany stain, and about 15 coats of Poly to give the table a high gloss finish.
The additional photos are 1 of the original table and 1 of the table after staining and no Poly applied.
Mom was shocked with the finished project. Nothing more pleasing then see Mom smile!