Community Brag Posts

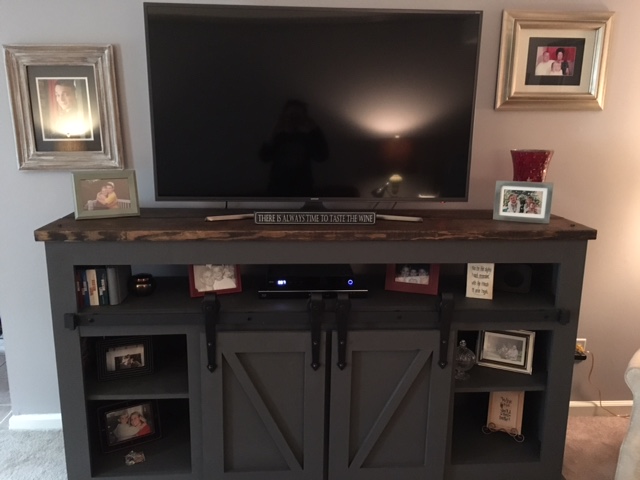
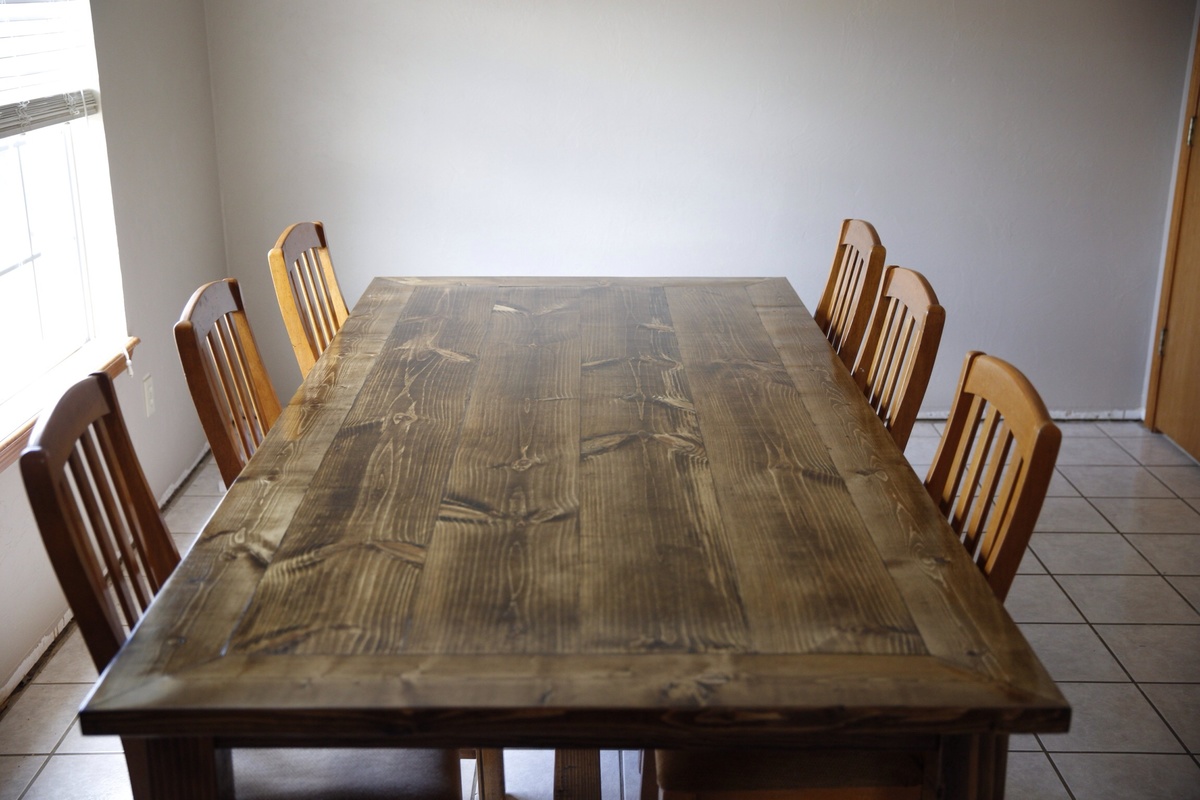
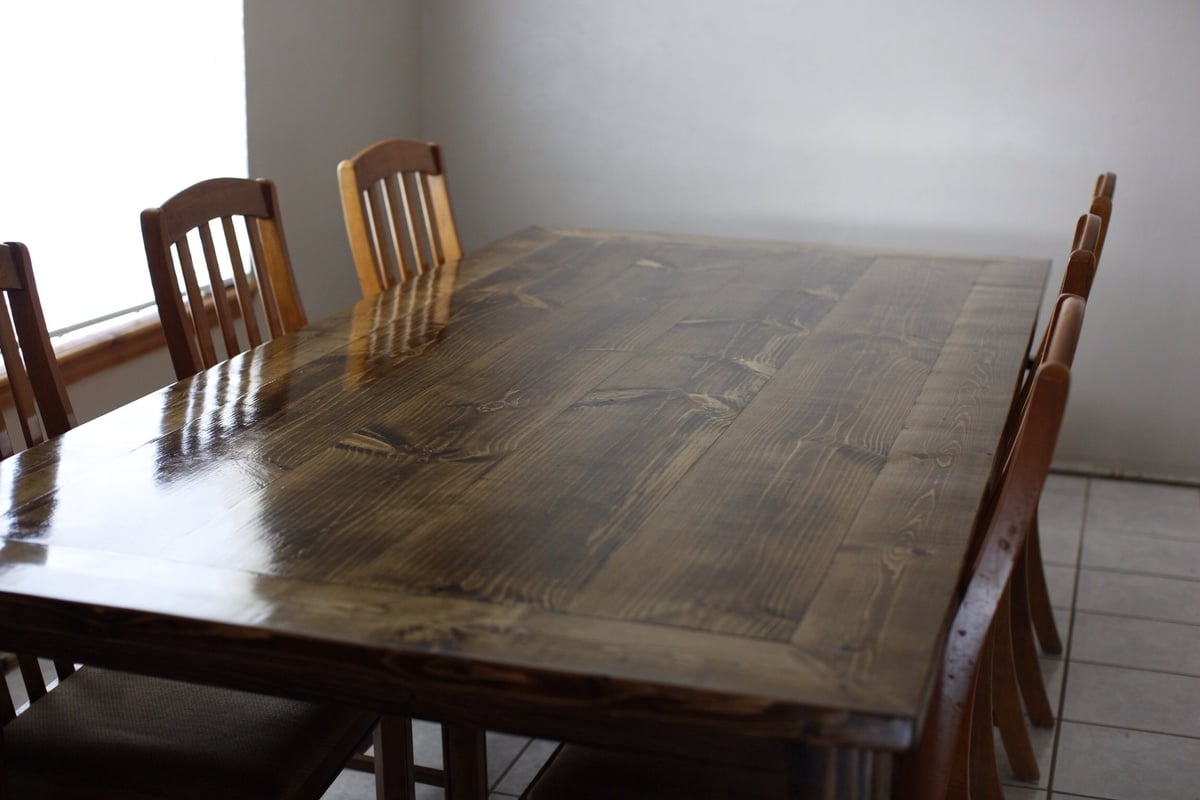
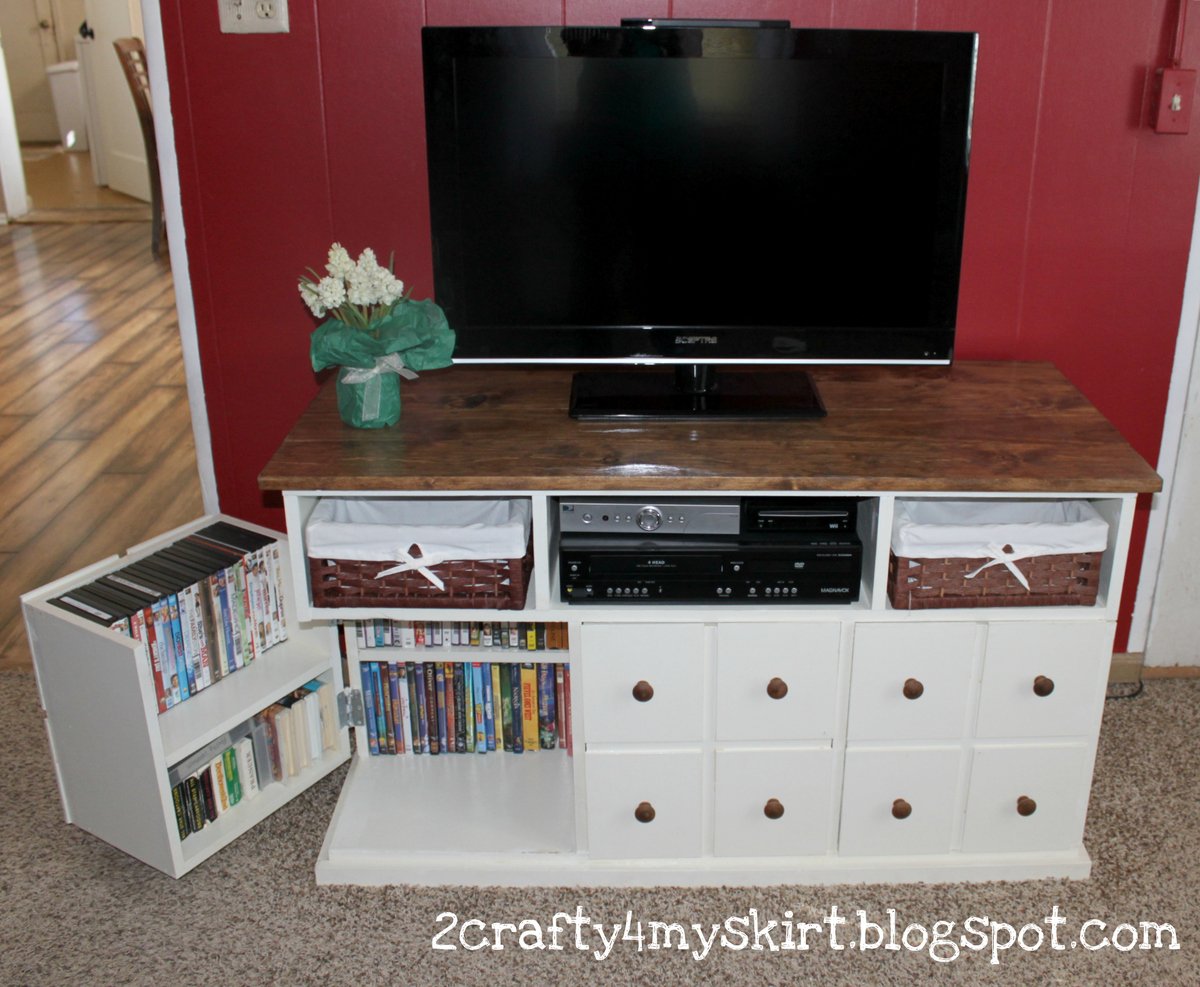
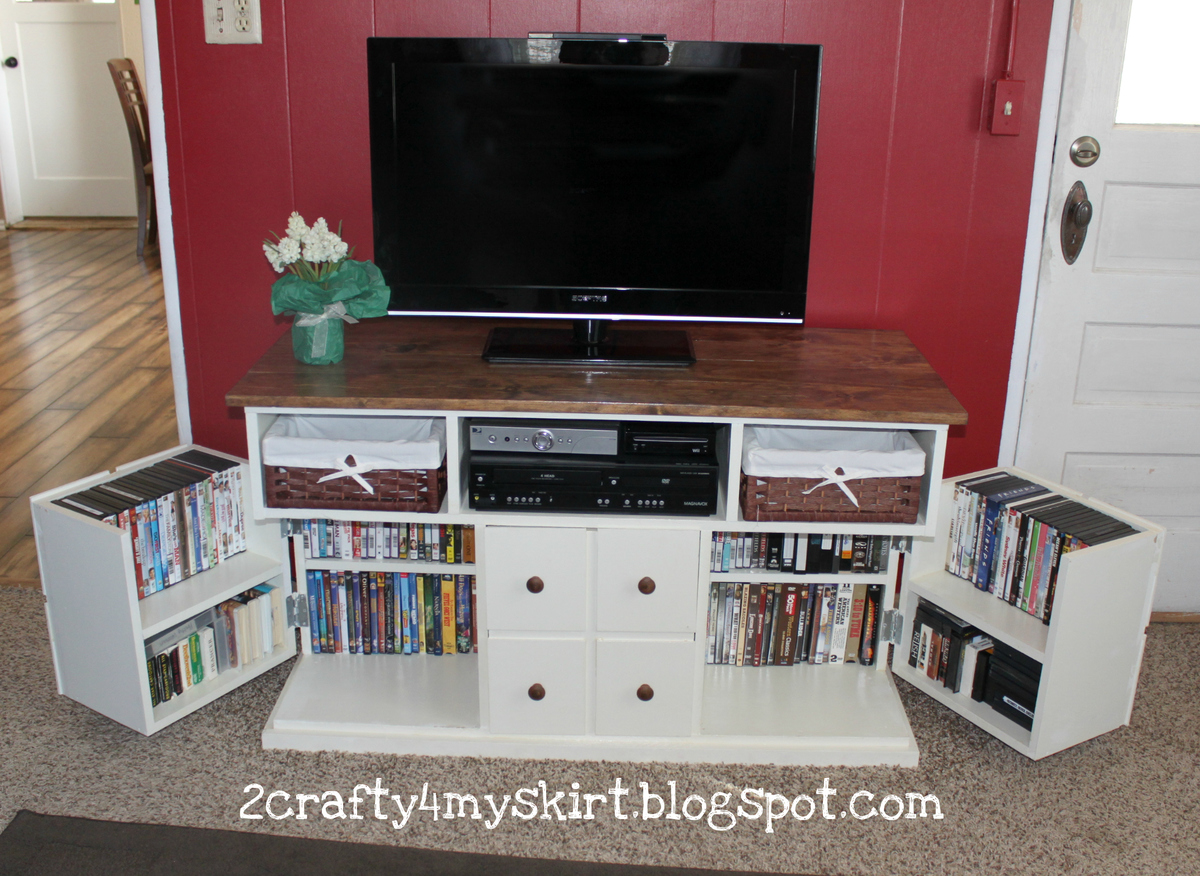
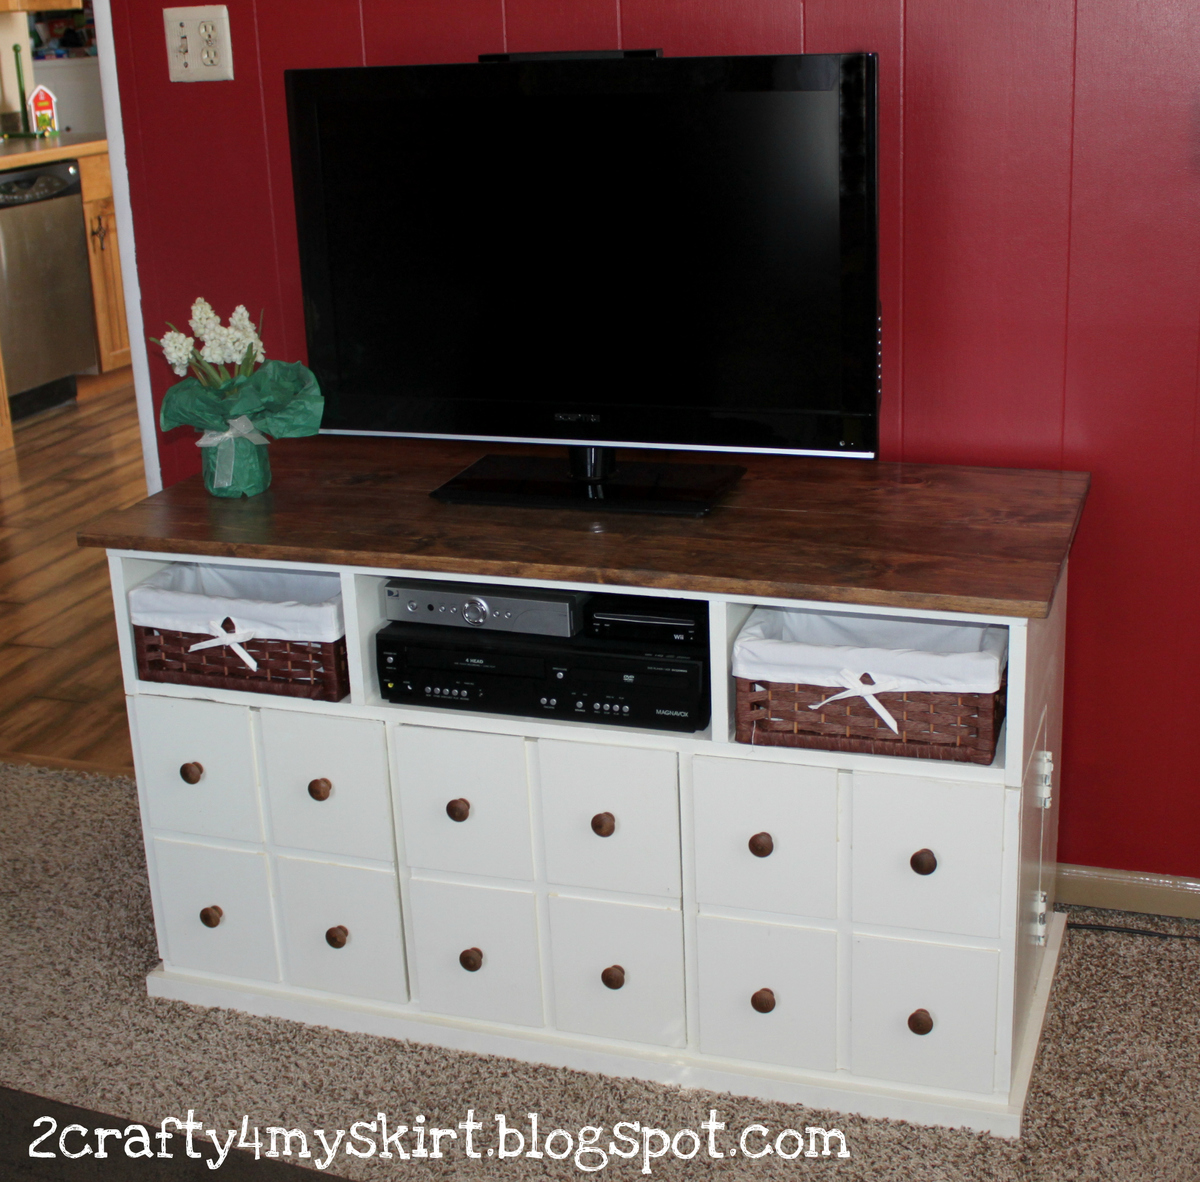
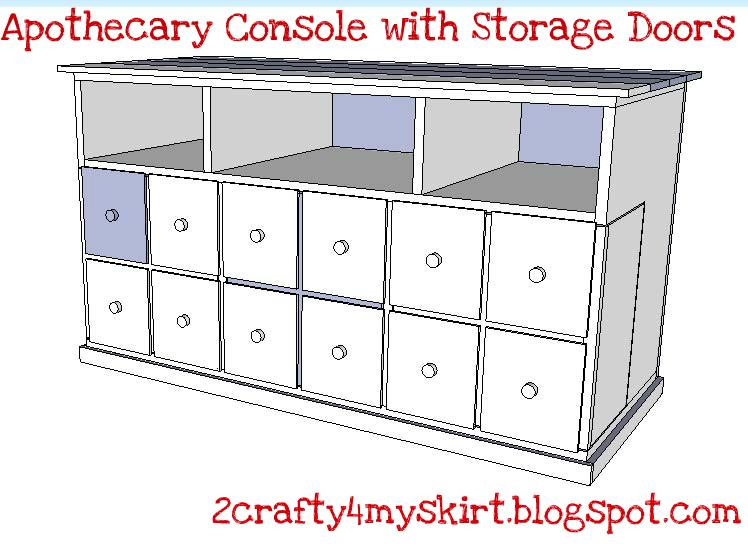
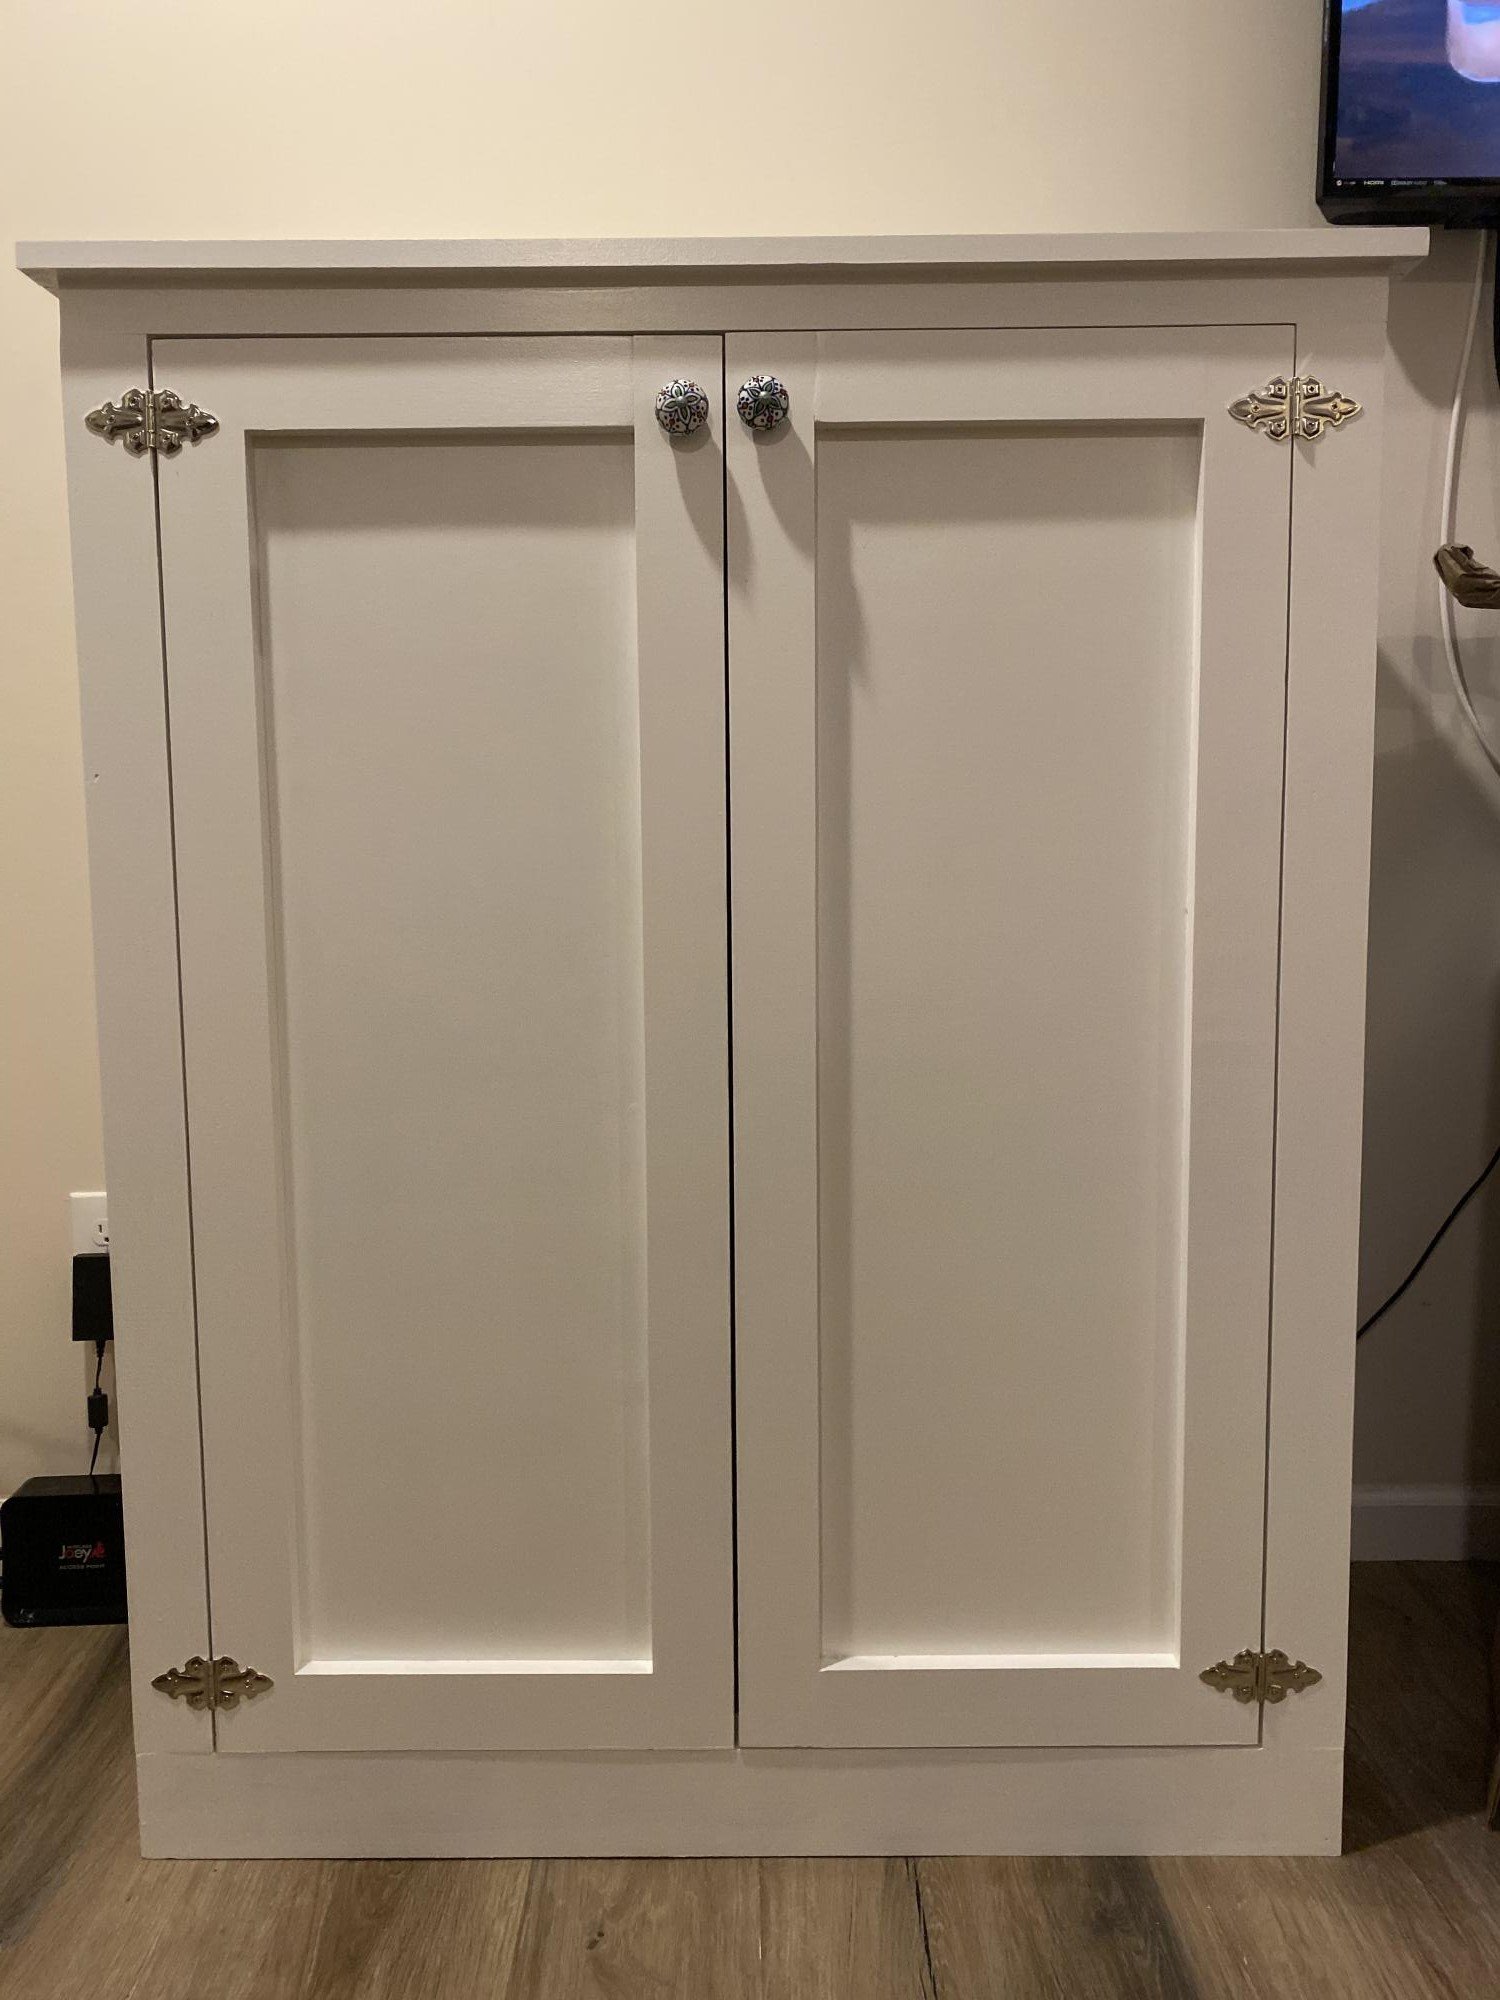
Barnhouse Door Cabinet

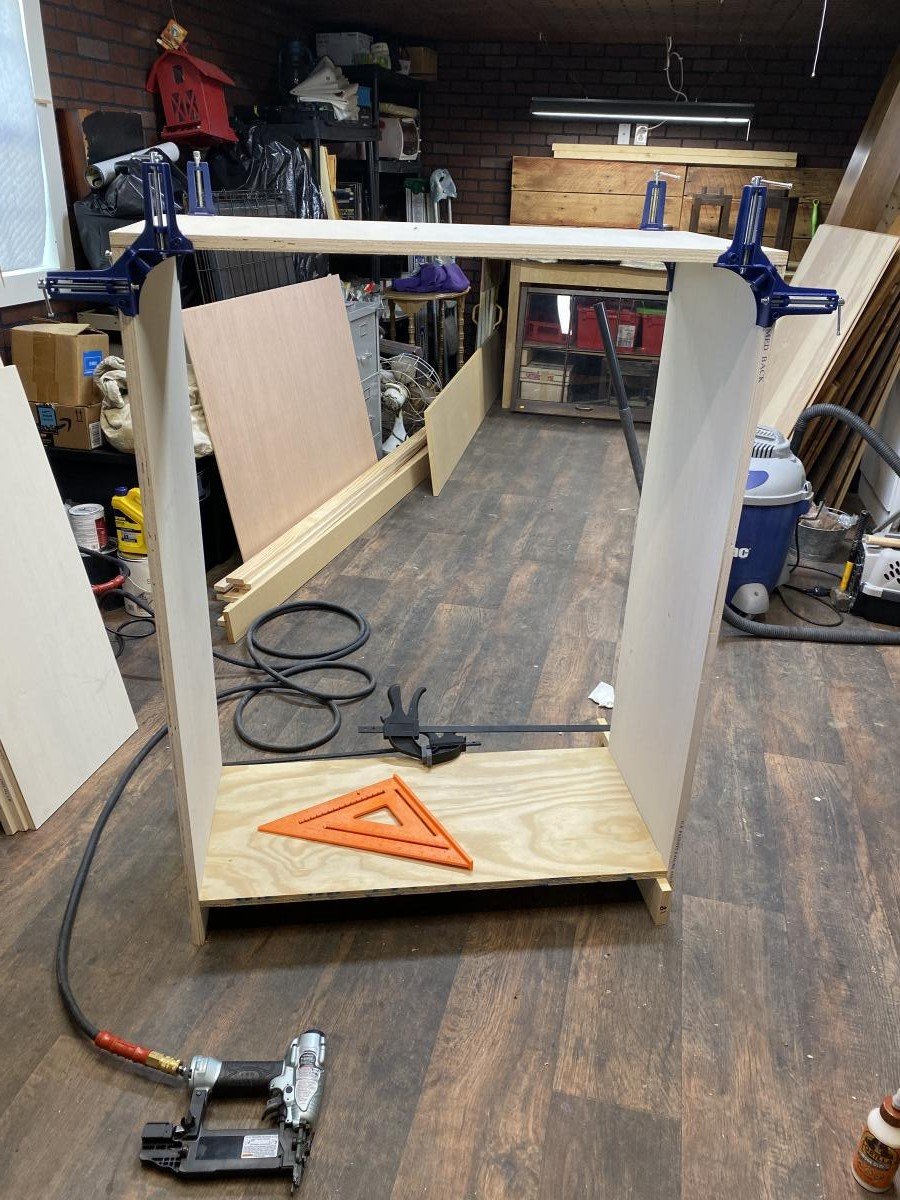
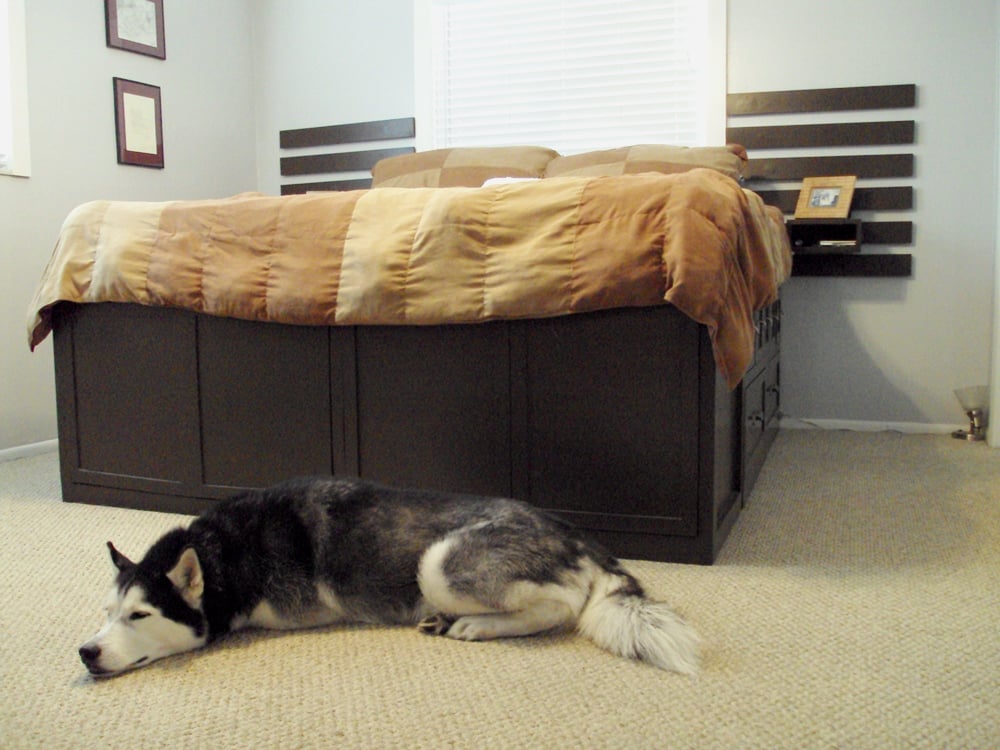
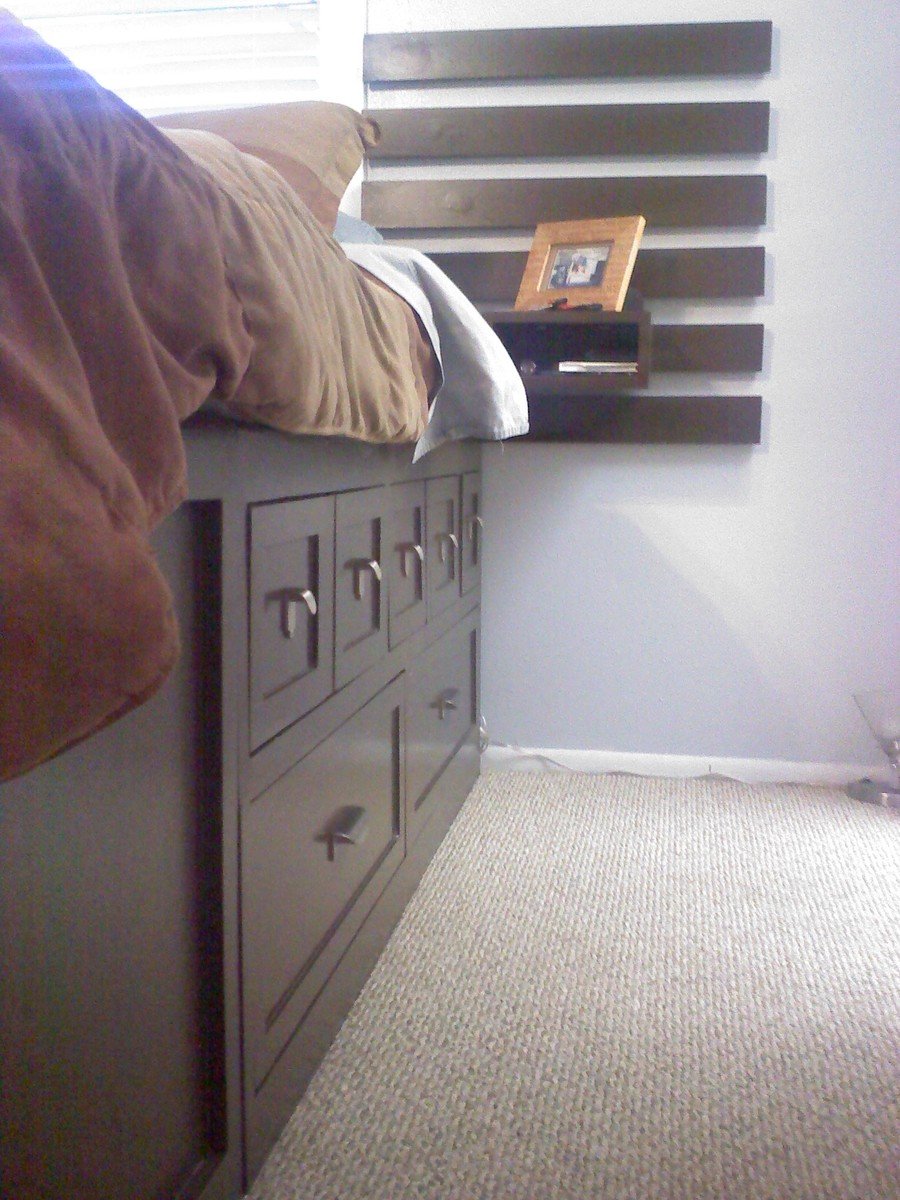
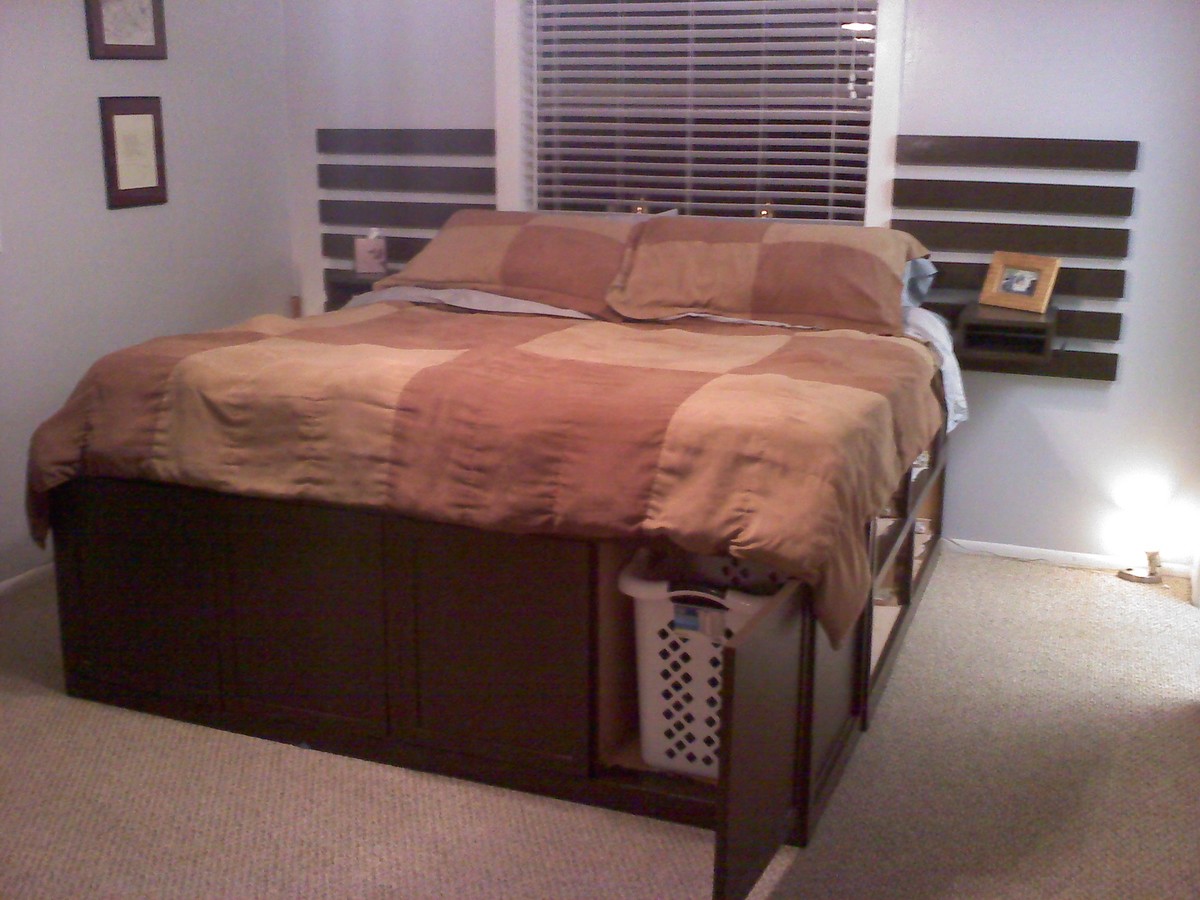
I began woodworking over the last year, having had no real previous experience, and fell in love. I work full time as a branch manager for the local Secretary of State, and have to fit my new hobby in where I can. Although I stumbled my way through the first few projects with my husband's help, I have grown both in knowledge, and confidence with each new creation. When I first started out I was nervous using cutting tools, relying solely on his assistance and focused on the nuts and bolts portion of the plans. However, I am now able to complete even more complicated plans with no assistance at all. Ana White plans are easy to follow and always end in a beautiful piece. The cabinet that I am submitting for this contest is by far my favorite of the pieces I have made so far. I think it turned out gorgeous, and I'm very proud of the work that I was able to do.

Built from Plan(s)
Estimated Cost
$450.00
Estimated Time Investment
Week Long Project (20 Hours or More)
Finish Used
I did a gray chalk paint with a chalk corresponding finish. The door was a satin polyurethane.
Recommended Skill Level
Intermediate

Pergola Sectional

Submitted by Anonymous (not verified) on Fri, 07/14/2023 - 12:40

My first ever attempt at woodworking, after I built the pergola I used the 2x4 outdoor sectional plans and modified slightly to fit the space I had. So easy to follow and delighted with the result. The hardest part of the whole project was making the cushions, that's how easy the woodworking plans were to follow!

@louspoutsstuff tiktok - Lou brown

Built from Plan(s)

Herb Garden Planter { $2 }

This was my first project, and Im pleased with the outcome. I made two different styles, and its hard to pick which one I like best. These are so versatile, thinking of making a silverware caddy and also one for the bathroom with handtowels, soap, etc. Candles would also be pretty.

Estimated Cost
$10 for both, the most expensive thing was handles for each
Estimated Time Investment
An Hour or Two (0-2 Hours)
Finish Used
Minwax walnut for the darker one, for the white one I painted dark gray, used vaseline for distressed look around edges, painted two coats over that in white..just a cheapy acrylic paint, and then sanded.
Recommended Skill Level
Starter Project

Comments

Dimensional Lumber Platform Bed

Submitted by Anonymous (not verified) on Sun, 03/20/2016 - 09:19

Modified to be able to be taken apart and easily reassembled into 4 frame pieces (each side plus the middle support beam) for transport at will, and made to fit a Queen bed instead of a double.

Built from Plan(s)
Estimated Time Investment
Weekend Project (10-20 Hours)
Finish Used
we added some cedar essential oil into linseed oil and gave it two coats with that!
Recommended Skill Level
Beginner

Twin Farmhouse Bed

Submitted by fanofana on Thu, 03/08/2012 - 18:50

My daughter learned to climb out of her crib so we rushed to the furniture stores to find her a bed. I was very disappointed in the quality we found. I had this project in the back of my mind but didn't know how quickly I could get it done. It was really quite easy and we got her in her new bed in no time! She loves it and I think it was better than anything we saw in a store and way less expensive!! I even made the quilt for her.

Built from Plan(s)
Estimated Time Investment
Weekend Project (10-20 Hours)
Finish Used
I used ProClassic Interior acrylic latex paint in gloss from Sherman Williams (as noted in another brag post). Using a mini roller saved a lot of time with the finish.
Recommended Skill Level
Starter Project

Comments

My new TV X Console!

Submitted by chlag on Thu, 01/02/2014 - 21:53

I Modified the plans to add enough shelves for my audio video equipment and leave place for the woofer. I also shorten it to fit in the space I had available. Notice the 2x4 legs became 2x3 to keep a decent aspect ratio.

Love the oxidizing finish!

Built from Plan(s)
Estimated Cost
80$
Estimated Time Investment
Weekend Project (10-20 Hours)
Finish Used
Tea - Vinegar/steel whole - Wax
Recommended Skill Level
Starter Project

Comments

Grandy Sliding Door Console Table

Submitted by Anonymous (not verified) on Tue, 03/22/2016 - 08:29

this is modified slightly from the original plan to accomodate some basic electronics for the TV

Built from Plan(s)
Estimated Cost
200
Estimated Time Investment
Week Long Project (20 Hours or More)
Recommended Skill Level
Intermediate

Comments

deannaw08

Mon, 03/28/2016 - 06:58

i like the modifications that you made.  I plan on making this in a couple weeks (too many projects going on right now), how many inches did you add to the top for the electronics/pictures?  what you have seems like it'd be a good height for what i'm trying to do.  Thank you!

jstewart

Mon, 02/26/2018 - 08:15

I would like to build this and i am trying to find the plans for this console. please

Libbytiny

Tue, 02/27/2018 - 11:36

HELLO ANYBODY?  Love love love this.  I want to list my house and buy, build and live in this instead!!!  I want to know where everybody is going to be putting their new tiny house what kind of property and environment also does anybody know if you can park a tiny home in an RV resort that have the big dog class a types any information about how to build this and to purchase the plans. thank you!!!!

RoninsDad

Fri, 03/16/2018 - 18:30

I was wondering if you had the plans to the changes you made to this. I would love to you build this one.

Big Kid Picnic Table

Submitted by HOWsMom on Tue, 03/13/2012 - 06:35

After I saw the bigger kid picnic table, I knew I HAD to make this ! I did change the measurements slightly, but I don't recall how now (I made this a year ago).

Built from Plan(s)
Estimated Cost
$40 CDN
Estimated Time Investment
Day Project (6-9 Hours)
Recommended Skill Level
Beginner

Farmhouse table

Farmhouse style table, 4 2x10 with 2X6 border. All Doweled and glued. Seems most plans are with square "breadboard" ends, i thought this style was a bit cleaner with no raw ends. 4X4 legs with 4X4 cross stretchers. Table ended up 4'X8' matching bench to follow.

You really need a dowel-jig, Kreg-jig, and bar clamps to do this project. You can also use a biscuit cutter instead of dowel jig, but I think it lines up better with dowels.

Close up shot shows swirl marks from 80 grit sandpaper used on an orbital sander... Even using 180 grit final sand it left them there, actually a nice distress look.

Estimated Cost
150.00
Estimated Time Investment
Week Long Project (20 Hours or More)
Finish Used
Min-wax dark walnut, min wax wood conditioner, 5 coats satin poly.
Recommended Skill Level
Intermediate

Wood shelving and hanging space for guest wardrobe

Submitted by Anonymous (not verified) on Wed, 11/13/2019 - 01:01

Ana's wood shelving plans are easily adaptable for whatever requirements you may have.
Apart from some of the cutting done on a table saw I was able to do this project on my own and assemble.
I'm a beginner and managed it OK. It's not perfect but my husband was over the moon to finally have hanging space and shelving in our new house.
Would look great painted or stained.

Built from Plan(s)
Estimated Time Investment
Afternoon Project (3-6 Hours)
Recommended Skill Level
Beginner

Apothecary Console With Storage Doors

This console features the style of the Apothecary Console and the functionality of the Console with DVD Storage Doors. I drew my own my plans by combining Ana's plans for the Apothecary Console and the Console with DVD Storage Doors. You can view my plans by visiting my blog at www.2crafty4myskirt.blogspot.com or by clicking the plan link below.

Estimated Time Investment
Week Long Project (20 Hours or More)
Finish Used
Paint - Antique White
Stain - Minwax Early American
Recommended Skill Level
Intermediate

Comments

stacynabby

Fri, 03/16/2012 - 19:27

Totally came out fantastic! I love the swing out DVD doors. Nicely played.

claydowling

Sat, 03/17/2012 - 19:50

That's a really awesome cabinet. I love the look of the apothecary, and wouldn't have thought to design the doors like that for the added storage.

Guest (not verified)

Sun, 03/18/2012 - 02:30

Really like this build. Just wanted to let you know there are a couple of mixed up letters in your blog address at the very beginning of the post...so it sends you to a different site.

Adore the cabinet! Thanks for sharing.

Olivia's Doll Crib

Submitted by ellie_pete on Tue, 01/07/2014 - 12:51

The moment I saw these plans I knew it would be the perfect Christmas gift for my daughter. We followed the plans fairly exactly, only using knobs instead of a notch in the drawer and adding some small furniture slides on the bottom. I had some left over fabric from the linens I sewed for my daughter's room and used these to create a mattress cover, pillow, and small quilt. She loves it. The drawer underneath is great for extra doll clothes, bottles, diapers, etc.

Built from Plan(s)
Estimated Cost
$50
Estimated Time Investment
Weekend Project (10-20 Hours)
Finish Used
Rustoleum satin paint and primer in white and pink. Victorian faux-crystal cabinet knobs for the drawer.
Recommended Skill Level
Beginner

Queen Storage Bed

Submitted by Anonymous (not verified) on Tue, 03/29/2016 - 07:18

This bed was my biggest project so far and it was very time consuming. I love it though, and it looks great in my son's room!

Estimated Cost
$500
Estimated Time Investment
Week Long Project (20 Hours or More)
Recommended Skill Level
Intermediate

Storage cabinets

We needed extra storage in the living room and I didn’t want to pay mega bucks for our cabinet guy to make something I thought I could do. 
Its four ft tall, 3 ft long and 16 inches deep. I added 1x3’s to the sides and 1x4’s to the bottom.
I bought the Kreg shelf pin jig and it was super easy to use. Plan to use it again on a bigger project. 
Next is a fireplace and TV surround. 

Thanks Ana for the easy to follow plans!
 

Estimated Cost
$250-300. for both cabinets
Estimated Time Investment
Week Long Project (20 Hours or More)
Finish Used
Valspar cabinet paint in cream delight, applied with a sponge roller, 3 coats and sanded in between each coat. Knobs from Hobby Lobby and hinges from Hardware Source.
Recommended Skill Level
Intermediate

King size Storage Bed - Highly Modified

Submitted by BJ D on Mon, 03/19/2012 - 12:59

In an effort to gain some space in our home, I decided to build up. The Bed is tall (not a problem for us) but not too tall. The added heigh allowed for an extra 2 LARGE drawers on each side and an additional storage space we refer to as the "cubby." This last space has a pop open latch insted of a drawer due to the side table above them. The cabinets at the foot of the bed have the same pop open latch system and house 4 large laundry bins.

The bed feels incredibly solid and I've already had several compliments from friends. One of the best came from a rather neat and organized contractor friend of ours who's home decor is wonderful. He asked where I bought it. My response: Lowes , in a pile of lumber :)

The time it took to build this was months, due to only working a night or two a week after my toddler went to bed. It could easily be week project.

Built from Plan(s)
Estimated Cost
less than 700
Finish Used
Chocolate Brown paint with Polyacryllic over.
Recommended Skill Level
Intermediate

Comments

BJ D

Wed, 03/21/2012 - 10:38

Thanks for the compliment!

I just realized that one of the drawers wasn't pushed all the way in for the pictures. Oh well.

spiceylg

Wed, 03/21/2012 - 11:36

This is stunning. What a beautiful build. Anyway you kept track of measurements and such so that you could post your modifications?

BJ D

Wed, 03/21/2012 - 14:35

I did...

But today is my first chance to start playing with sketchup. I'll see if I can put those together for you. In the meantime. Here's some numbers to look at. Remember, the bed is TALL, but my wife and I are both around 6 feet.
Each side cabinet is 60 inches wide by 20.5 deep by 22.5 tall (to the platform itself). The entire bed is 77.25 wide at the base, with trim.

Sewallmom

Mon, 09/07/2015 - 10:30

First of all......


Amazing work!!!  This is exactly what I am looking for to make for my daughters BDay.  She has a small bedroom.   I have never been afraid to take on a new project.  Saying that I will be having the lumber company cut all the pieces for me.   It will house all her clothes/shoes and hamper.


Please tell me that you have the dimensions for this platfrom bed.

HK (not verified)

Tue, 04/17/2012 - 14:20

LOVE IT!!!
Do you think its possible to create what you did on the end with the laundry hampers on all three sides, instead of having the drawers?? Do you have measurements or sketch-up of just that section. YOU ARE A GENIUS!!!!

BJ D

Wed, 04/18/2012 - 10:36

Thanks HK

Having the laundry hampers on all sides is quite doable. Email me if you want [email protected] and let me know what types of hampers you are thinking...how many... do you need doors... how tall...what materials you want to use and what size bed. I can help you with the design/modification.

kparrish21

Thu, 06/28/2012 - 14:05

I love the modifications you have made! I want my husband to make me this same bed that you have done. With our 3rd baby arriving in 2 months I really need the space that our clothes are currently occupying. Have you been able to make up plans for this bed? If not, do you have a list of measurements and supplies needed to make this?

BJ Epstein (not verified)

Mon, 07/16/2012 - 21:12

Hey BJ,

This is the other BJ (or as Greta would term it, "chick BJ")! I was looking at this site, and saw a picture of the bed you made, with the caption "BJ D made this." So I clicked on it, and it showed a picture of you, and I was like, "Hey, I know that guy! That's the guy that married my best friend! And that's their daughter! Wow, small world!"

Anyway, I was thoroughly amused, and also, I really like the modifications you made on the bed. I'm totally stealing some of your ideas when we make our new bed frame!

-BJ

BJ D

Tue, 07/17/2012 - 11:56

yes small world hun. I'd be happy to give tips/tricks I've come across through a few different projects, some from here and some I did solo.

If you don't have a Kreg Jig, get one :)

Nice to hear from you. :)

mvmauga

Fri, 04/18/2014 - 15:18

Hi, I emailed you, but just in case you don't still have that email or it doesn't go through to you. Did you ever make plans for your modifications? If so, I would love to see them. My email is [email protected]

Thank you!

My first ever woodworking experience!

My primitive mitre plastic template didn't allow me to get a 60 degree angle so I went with the very simply upright thingies instead! The vinegar, wire wool and tea oxidisation worked a treat and was far easier to apply than stain.

Estimated Time Investment
Afternoon Project (3-6 Hours)
Finish Used
Vinegar and wire wool applied 24hrs after dark tea application.
Recommended Skill Level
Starter Project

Breakfast Nook

Submitted by BERobinson on Thu, 03/31/2016 - 11:54

U-shaped breakfast nook custom built for client.

For the bones - I just laid the 2x4's out like studs all the way around.  Odd corner in back R, 106 degrees, made for some fun mitreing on molding and plywood.

For the decorative finish, used single-piece paneling, not the wainscoting sheet-panels, to give a fuller look.

Estimated Cost
$250
Estimated Time Investment
Weekend Project (10-20 Hours)
Finish Used
Minwax ebony stain on wood planking, and semi-gloss white on seat and molding.
Recommended Skill Level
Intermediate
Back