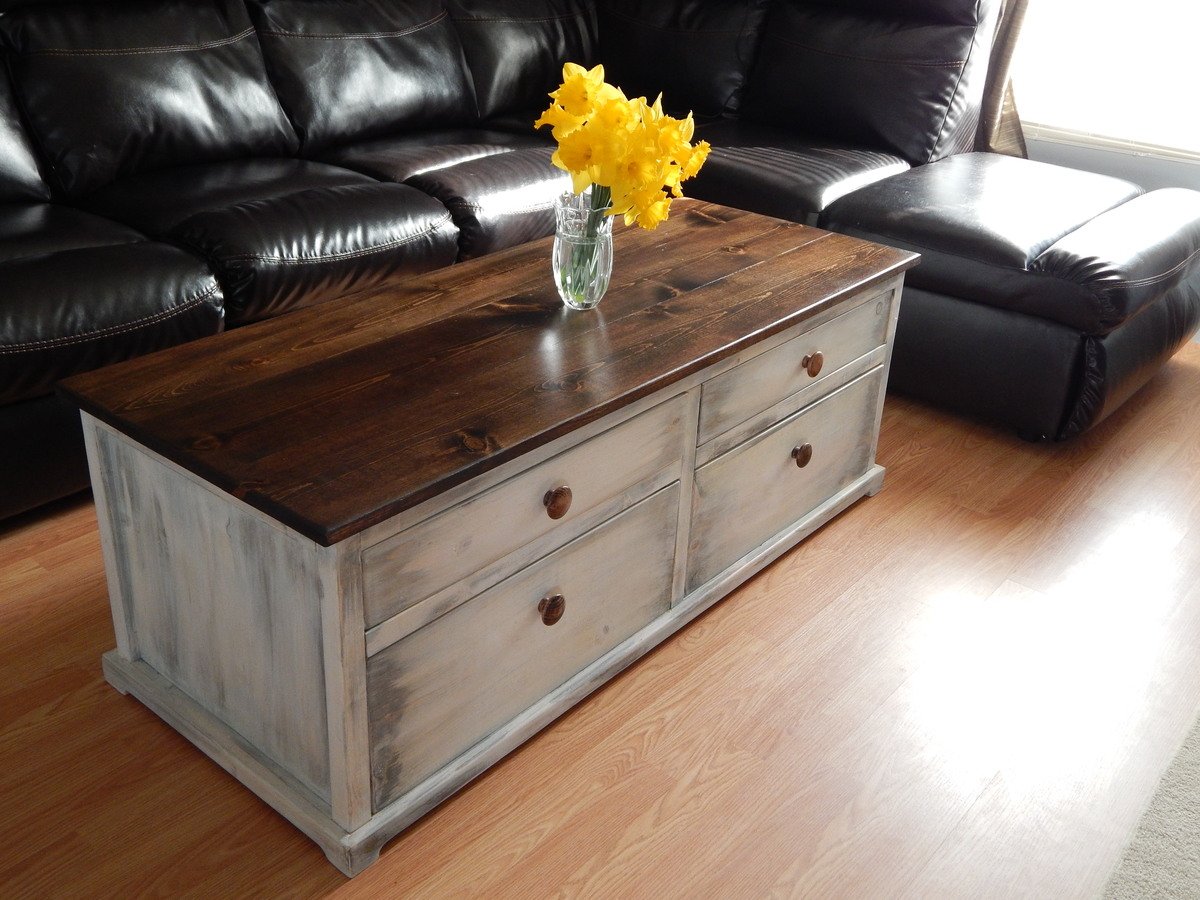
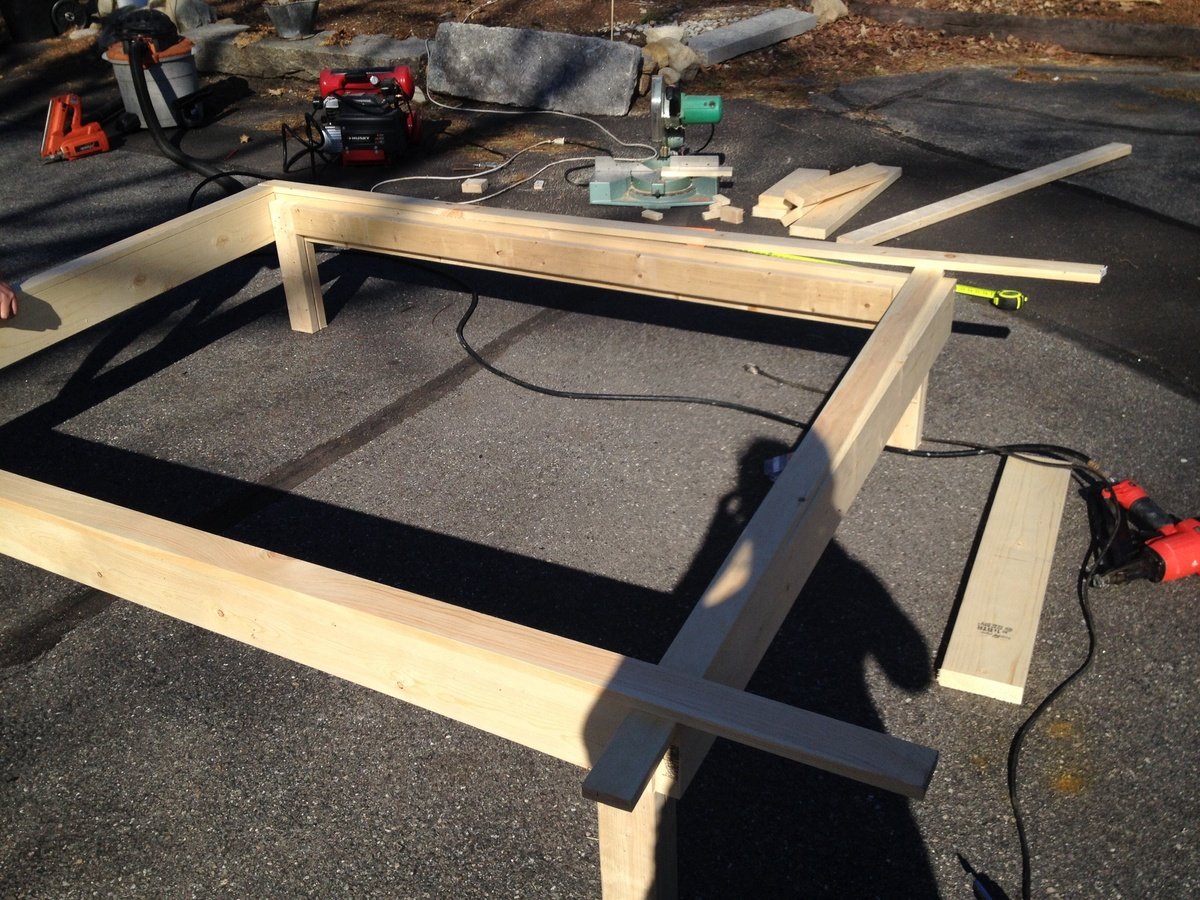
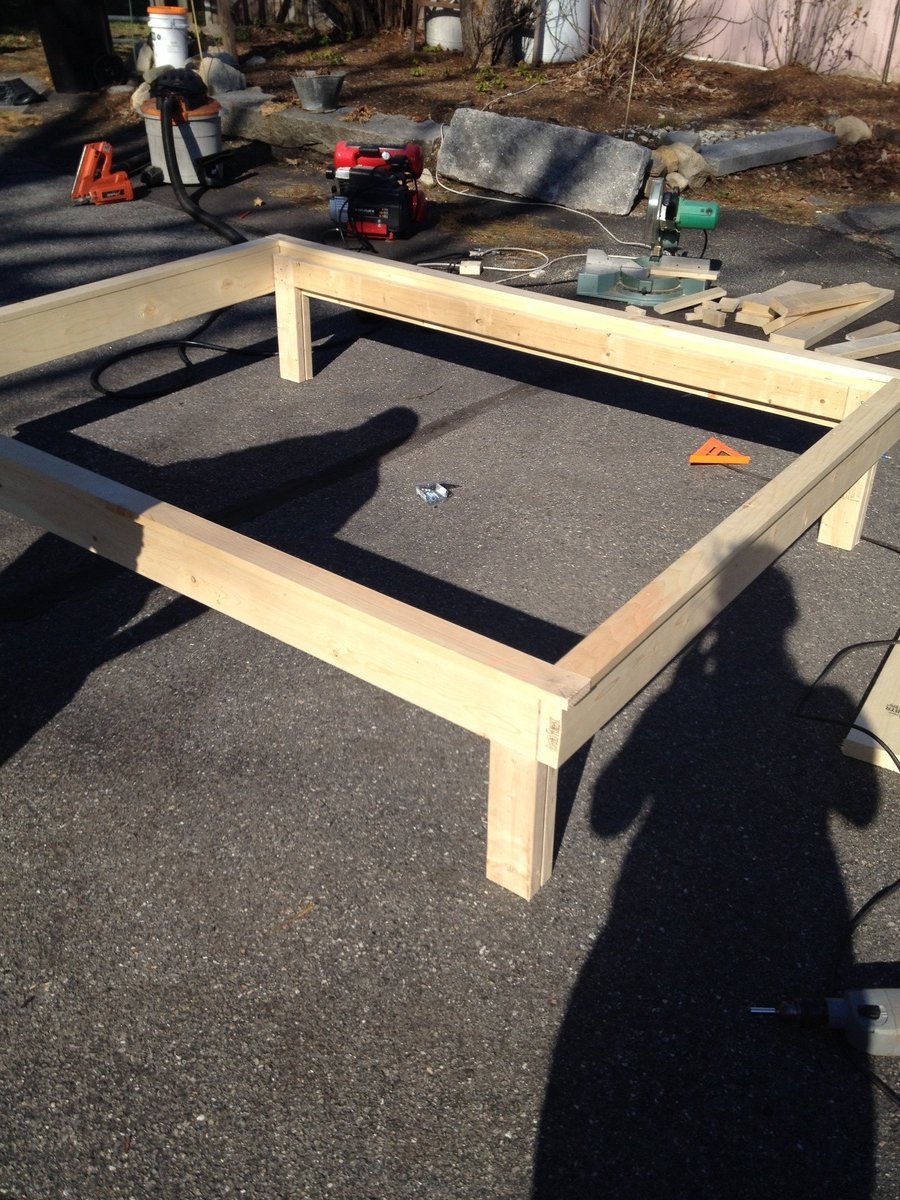
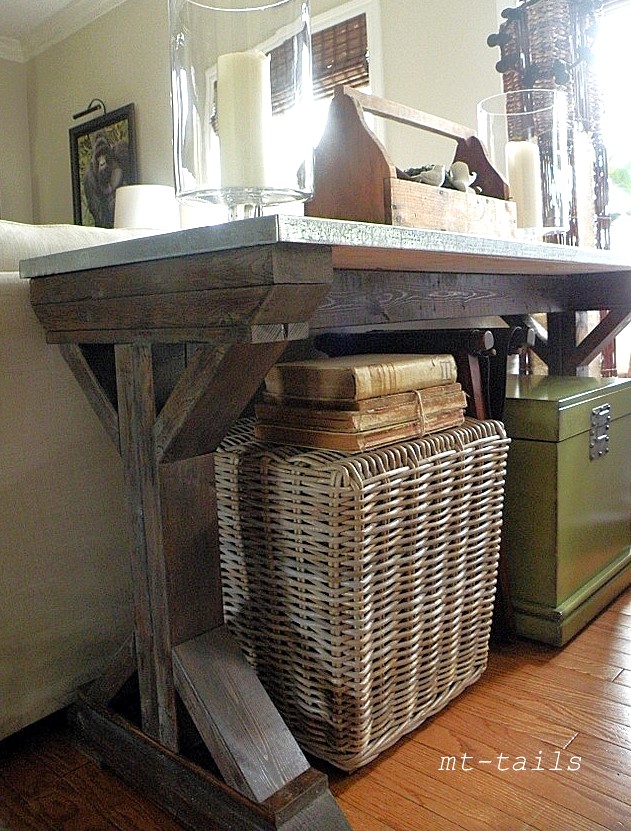
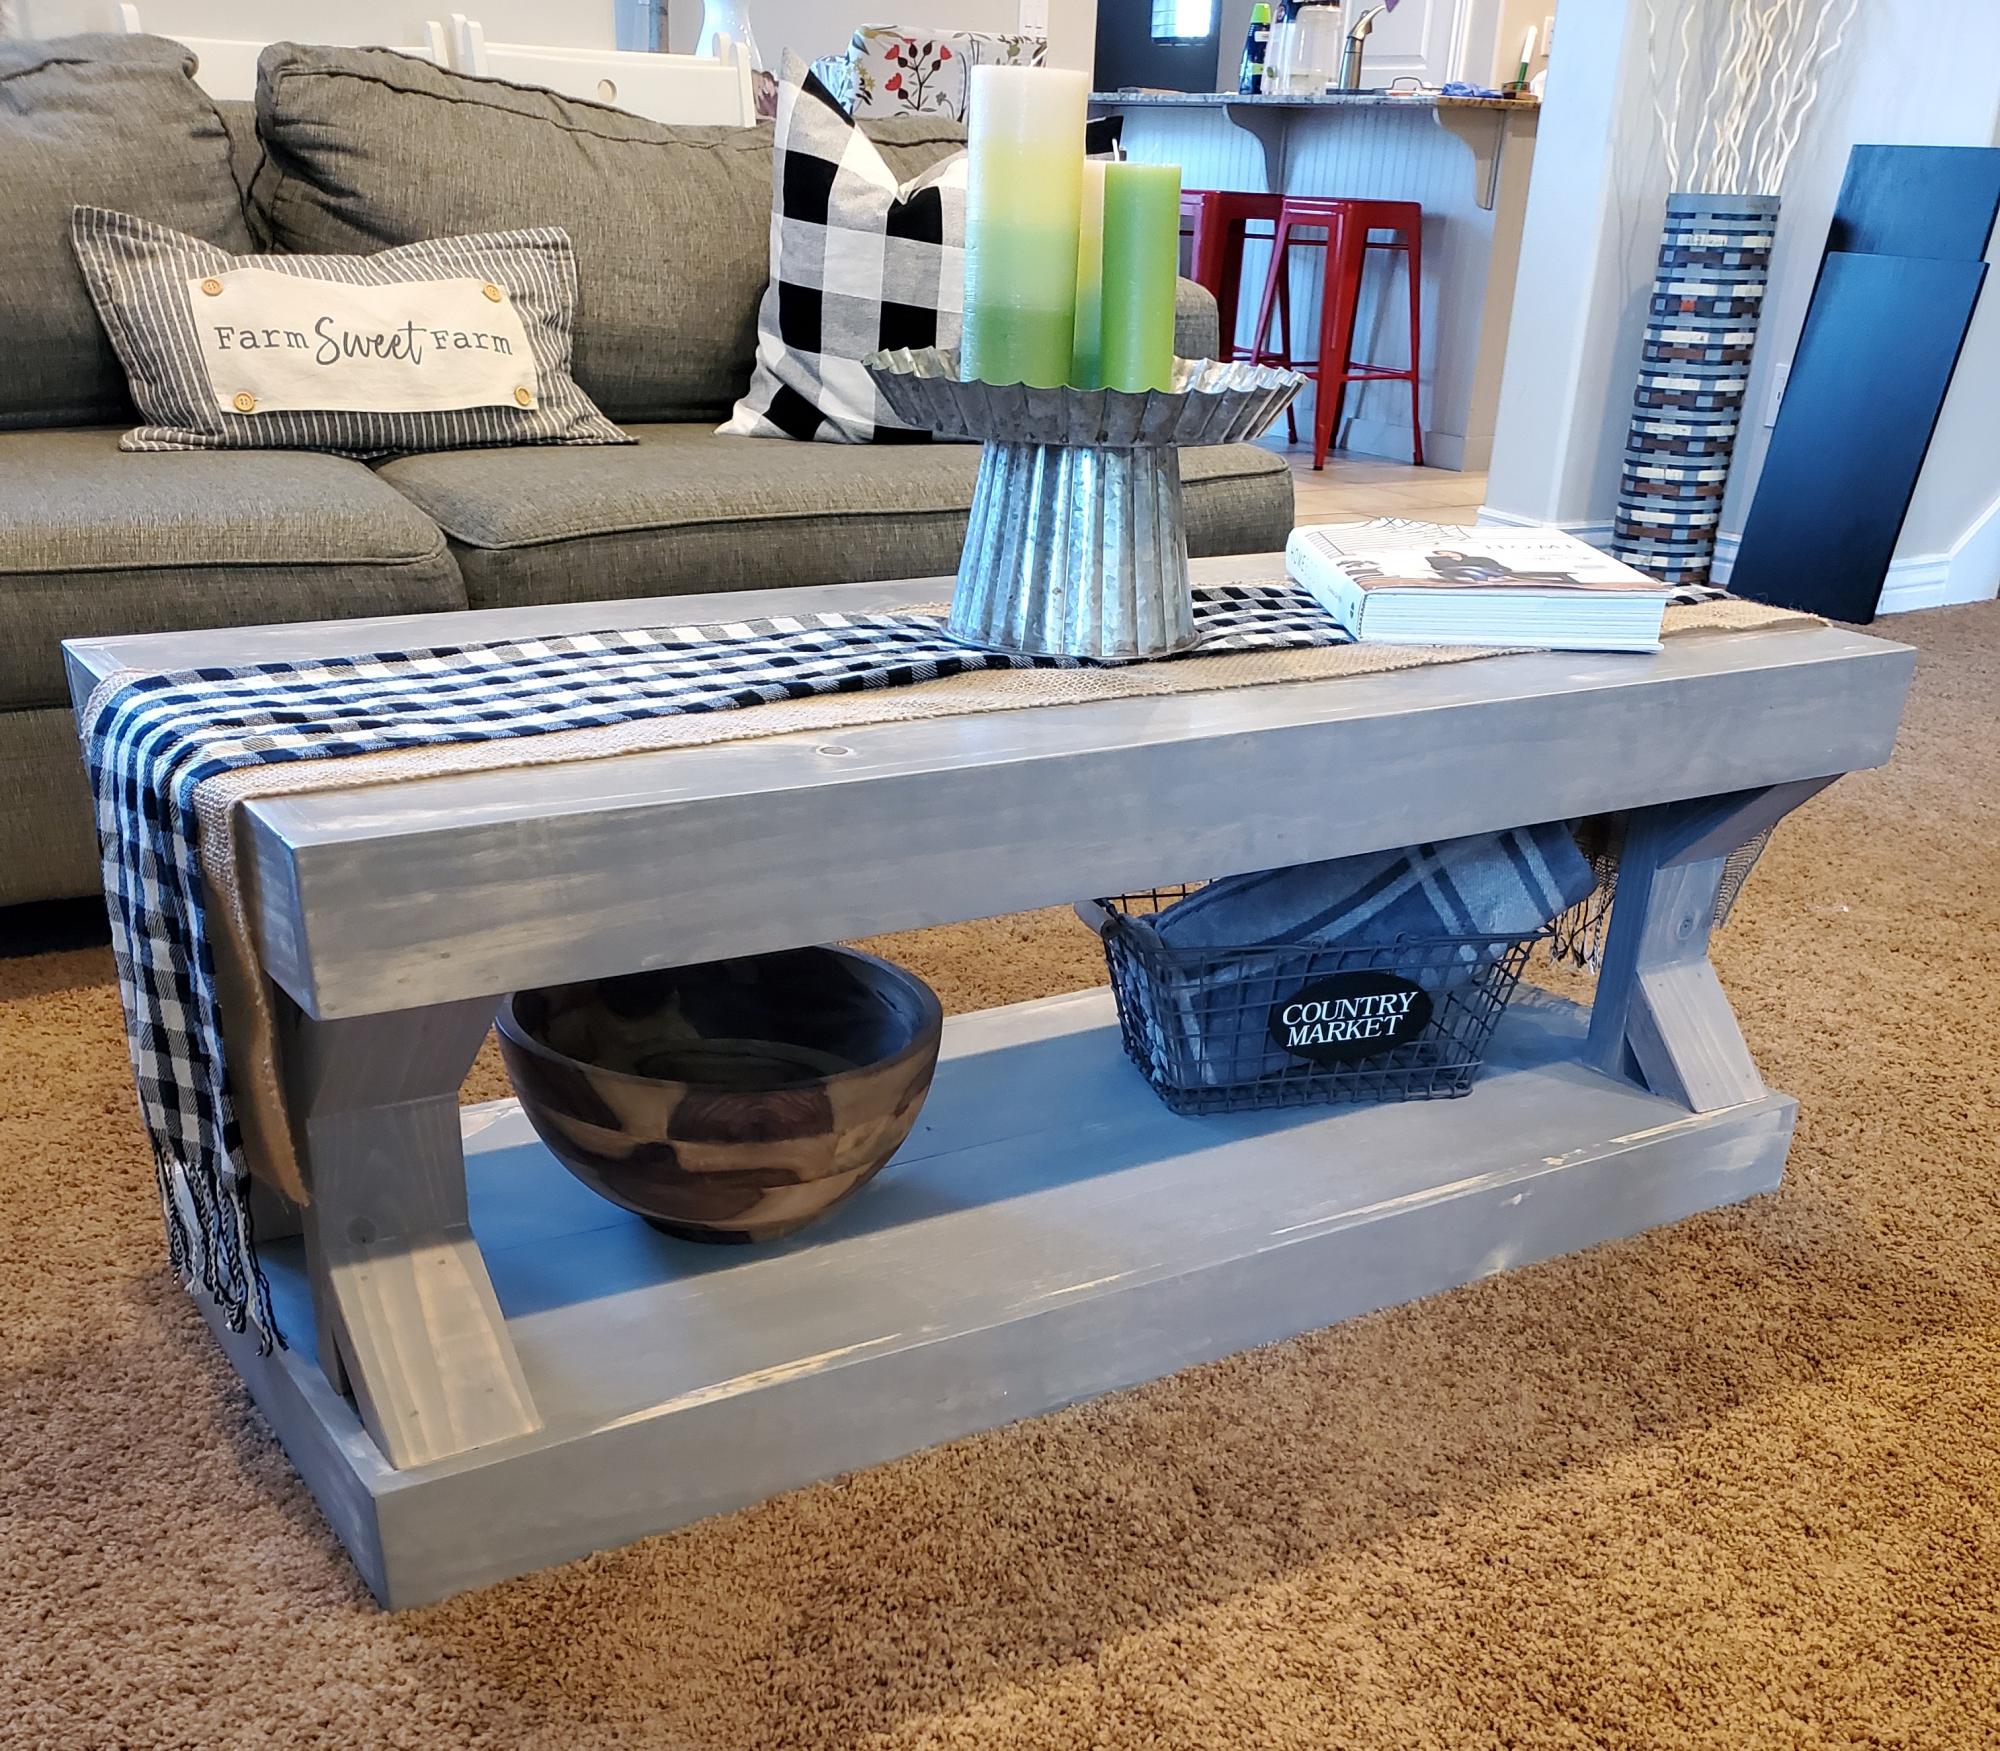
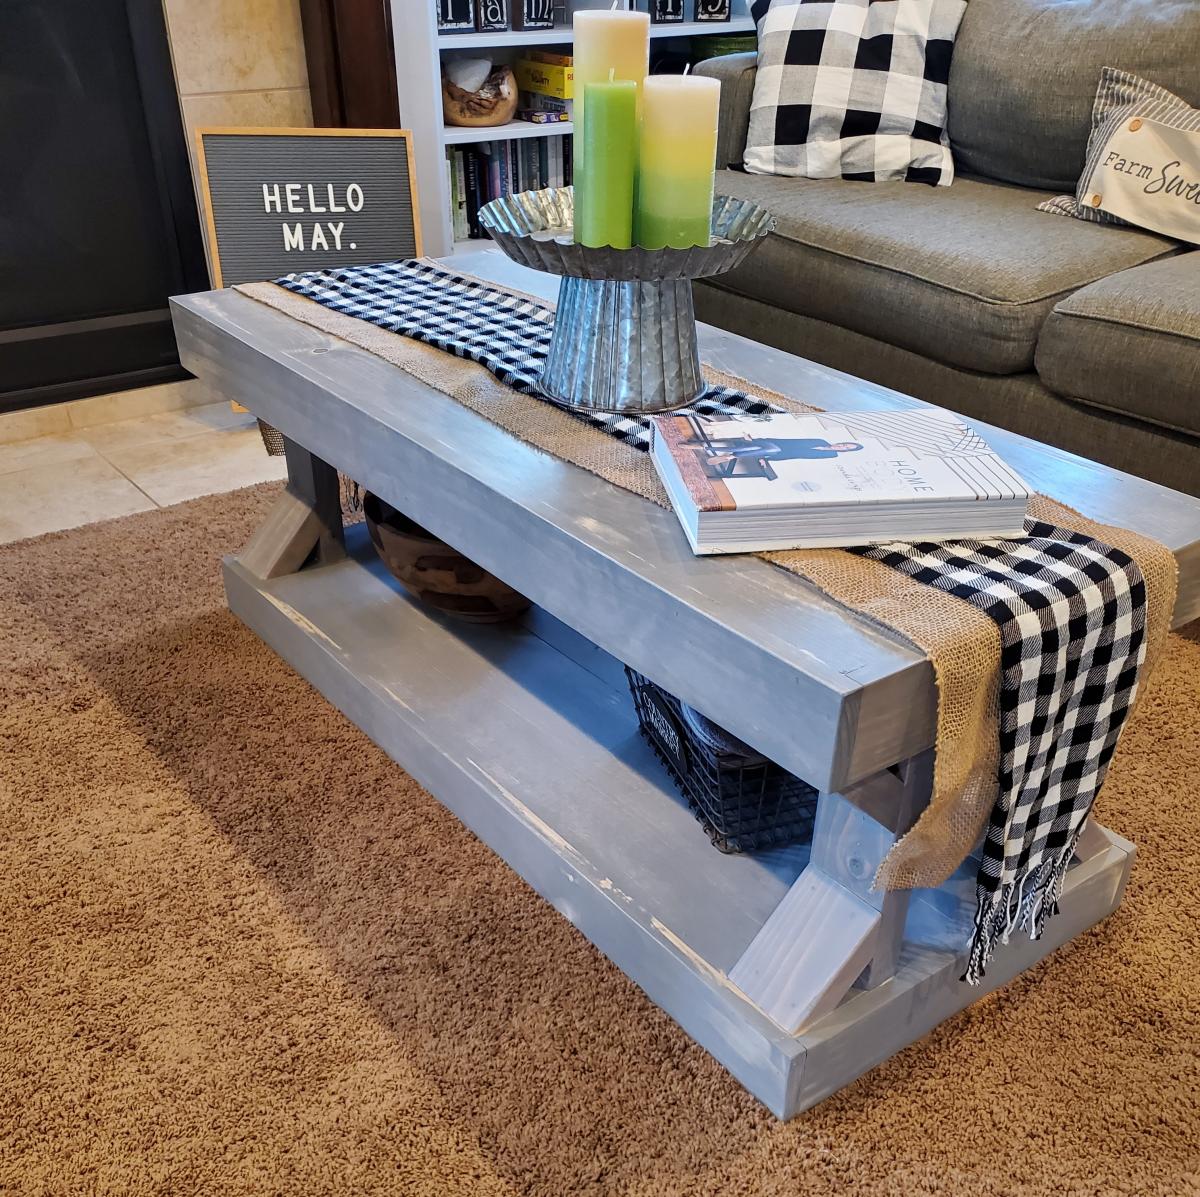
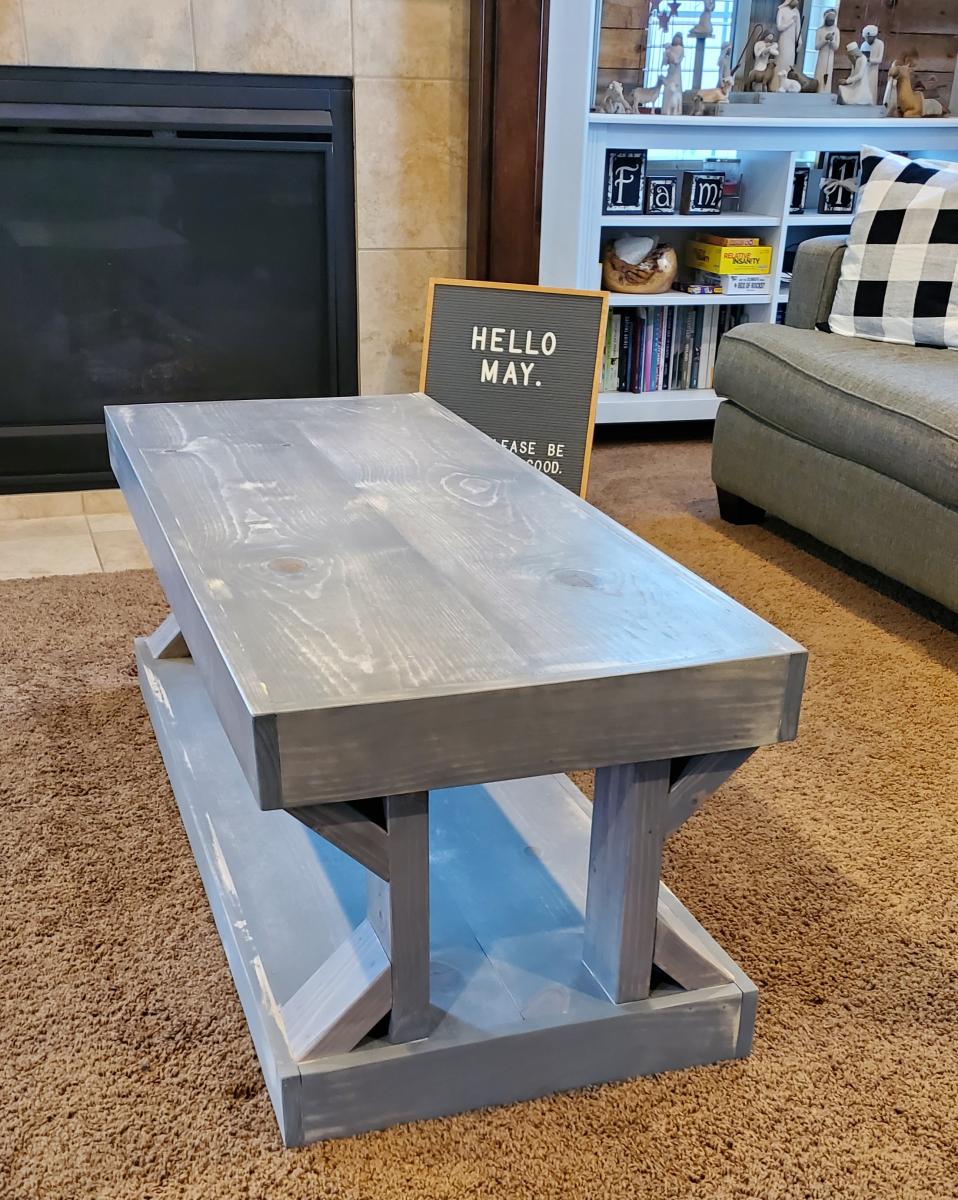
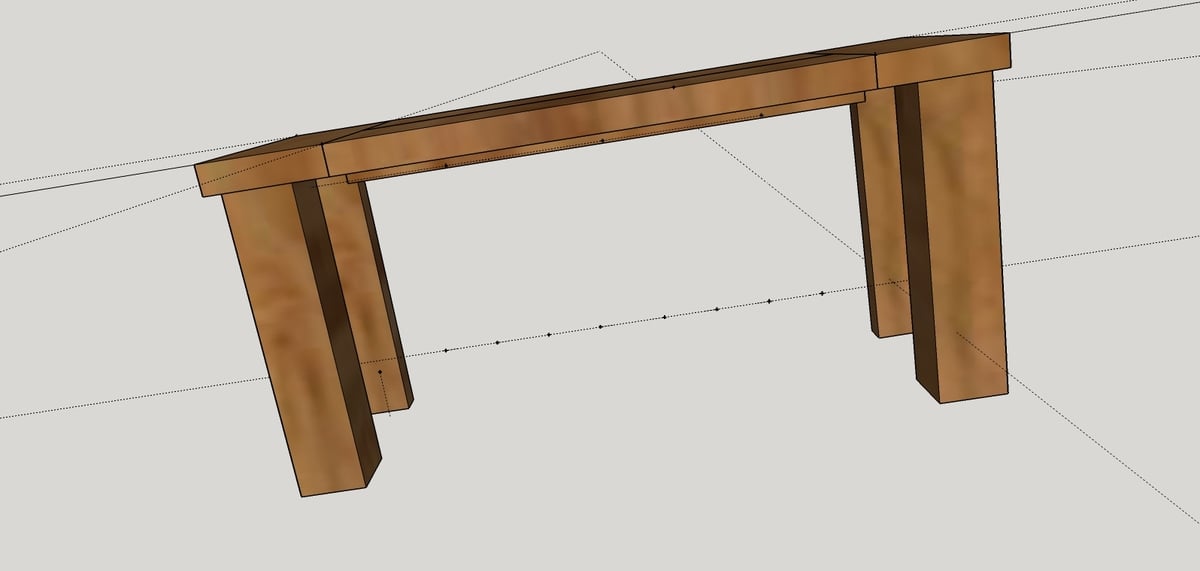
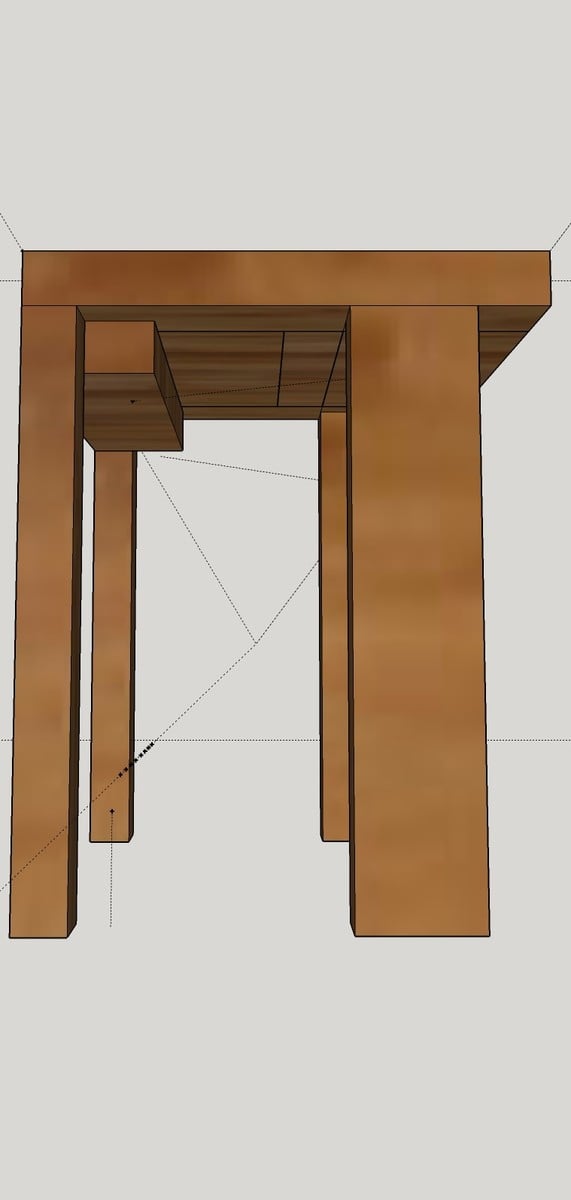
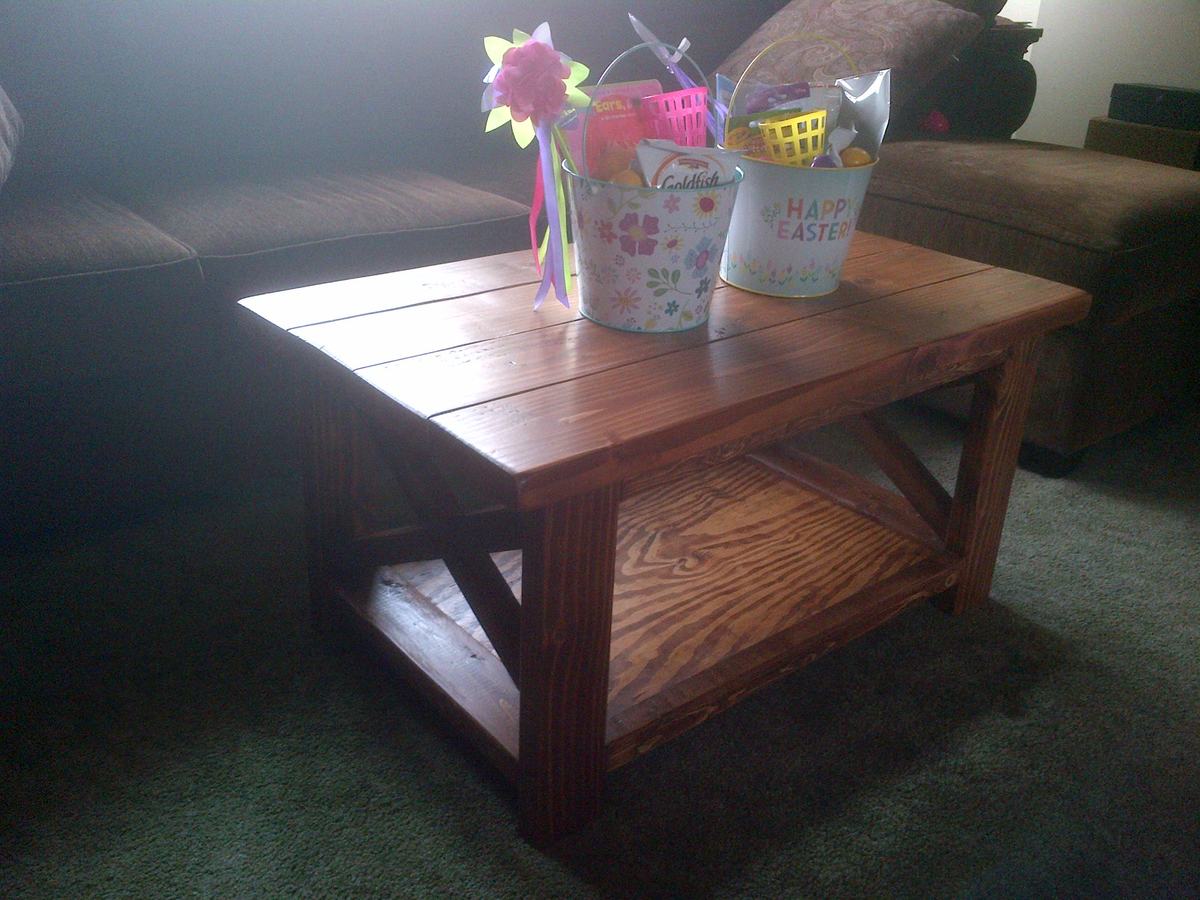
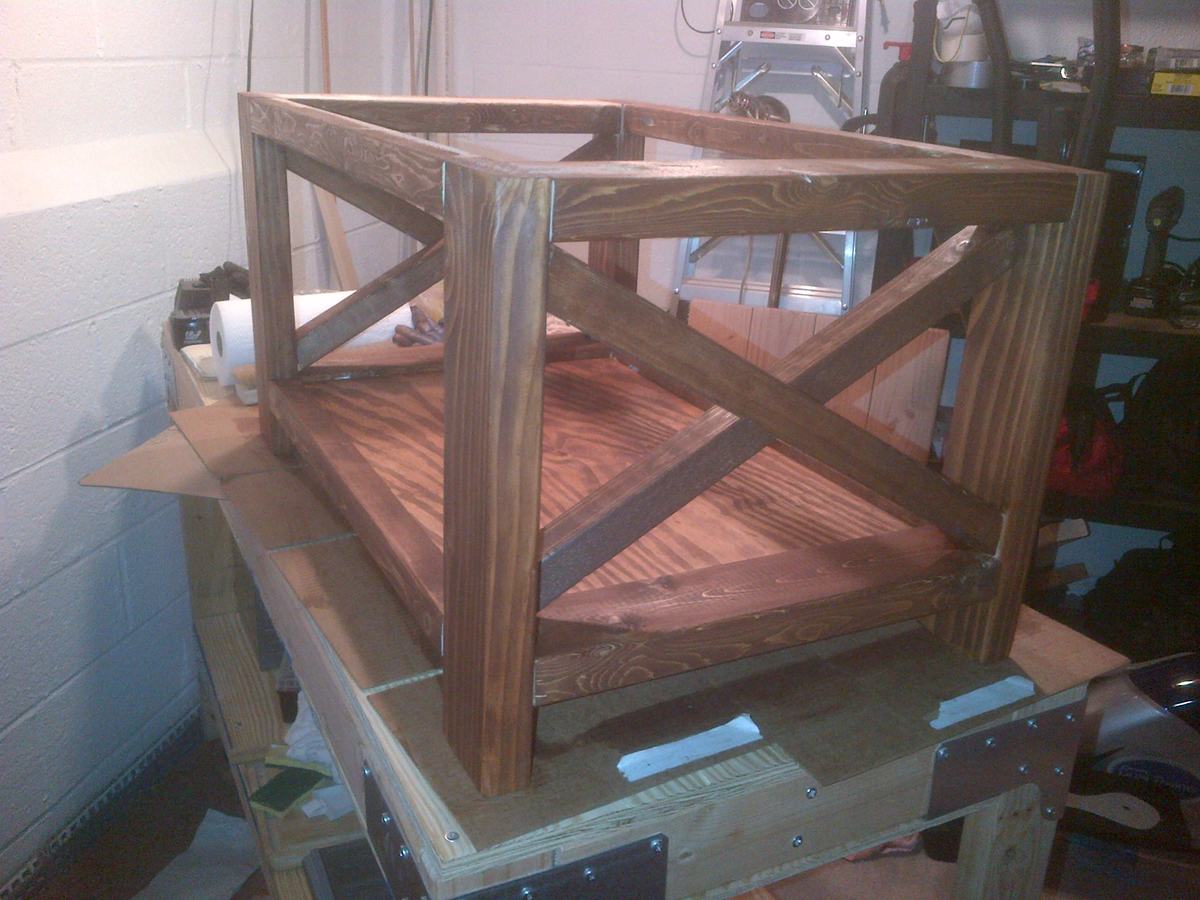
Pottery Barn Harper Style Coffee Table
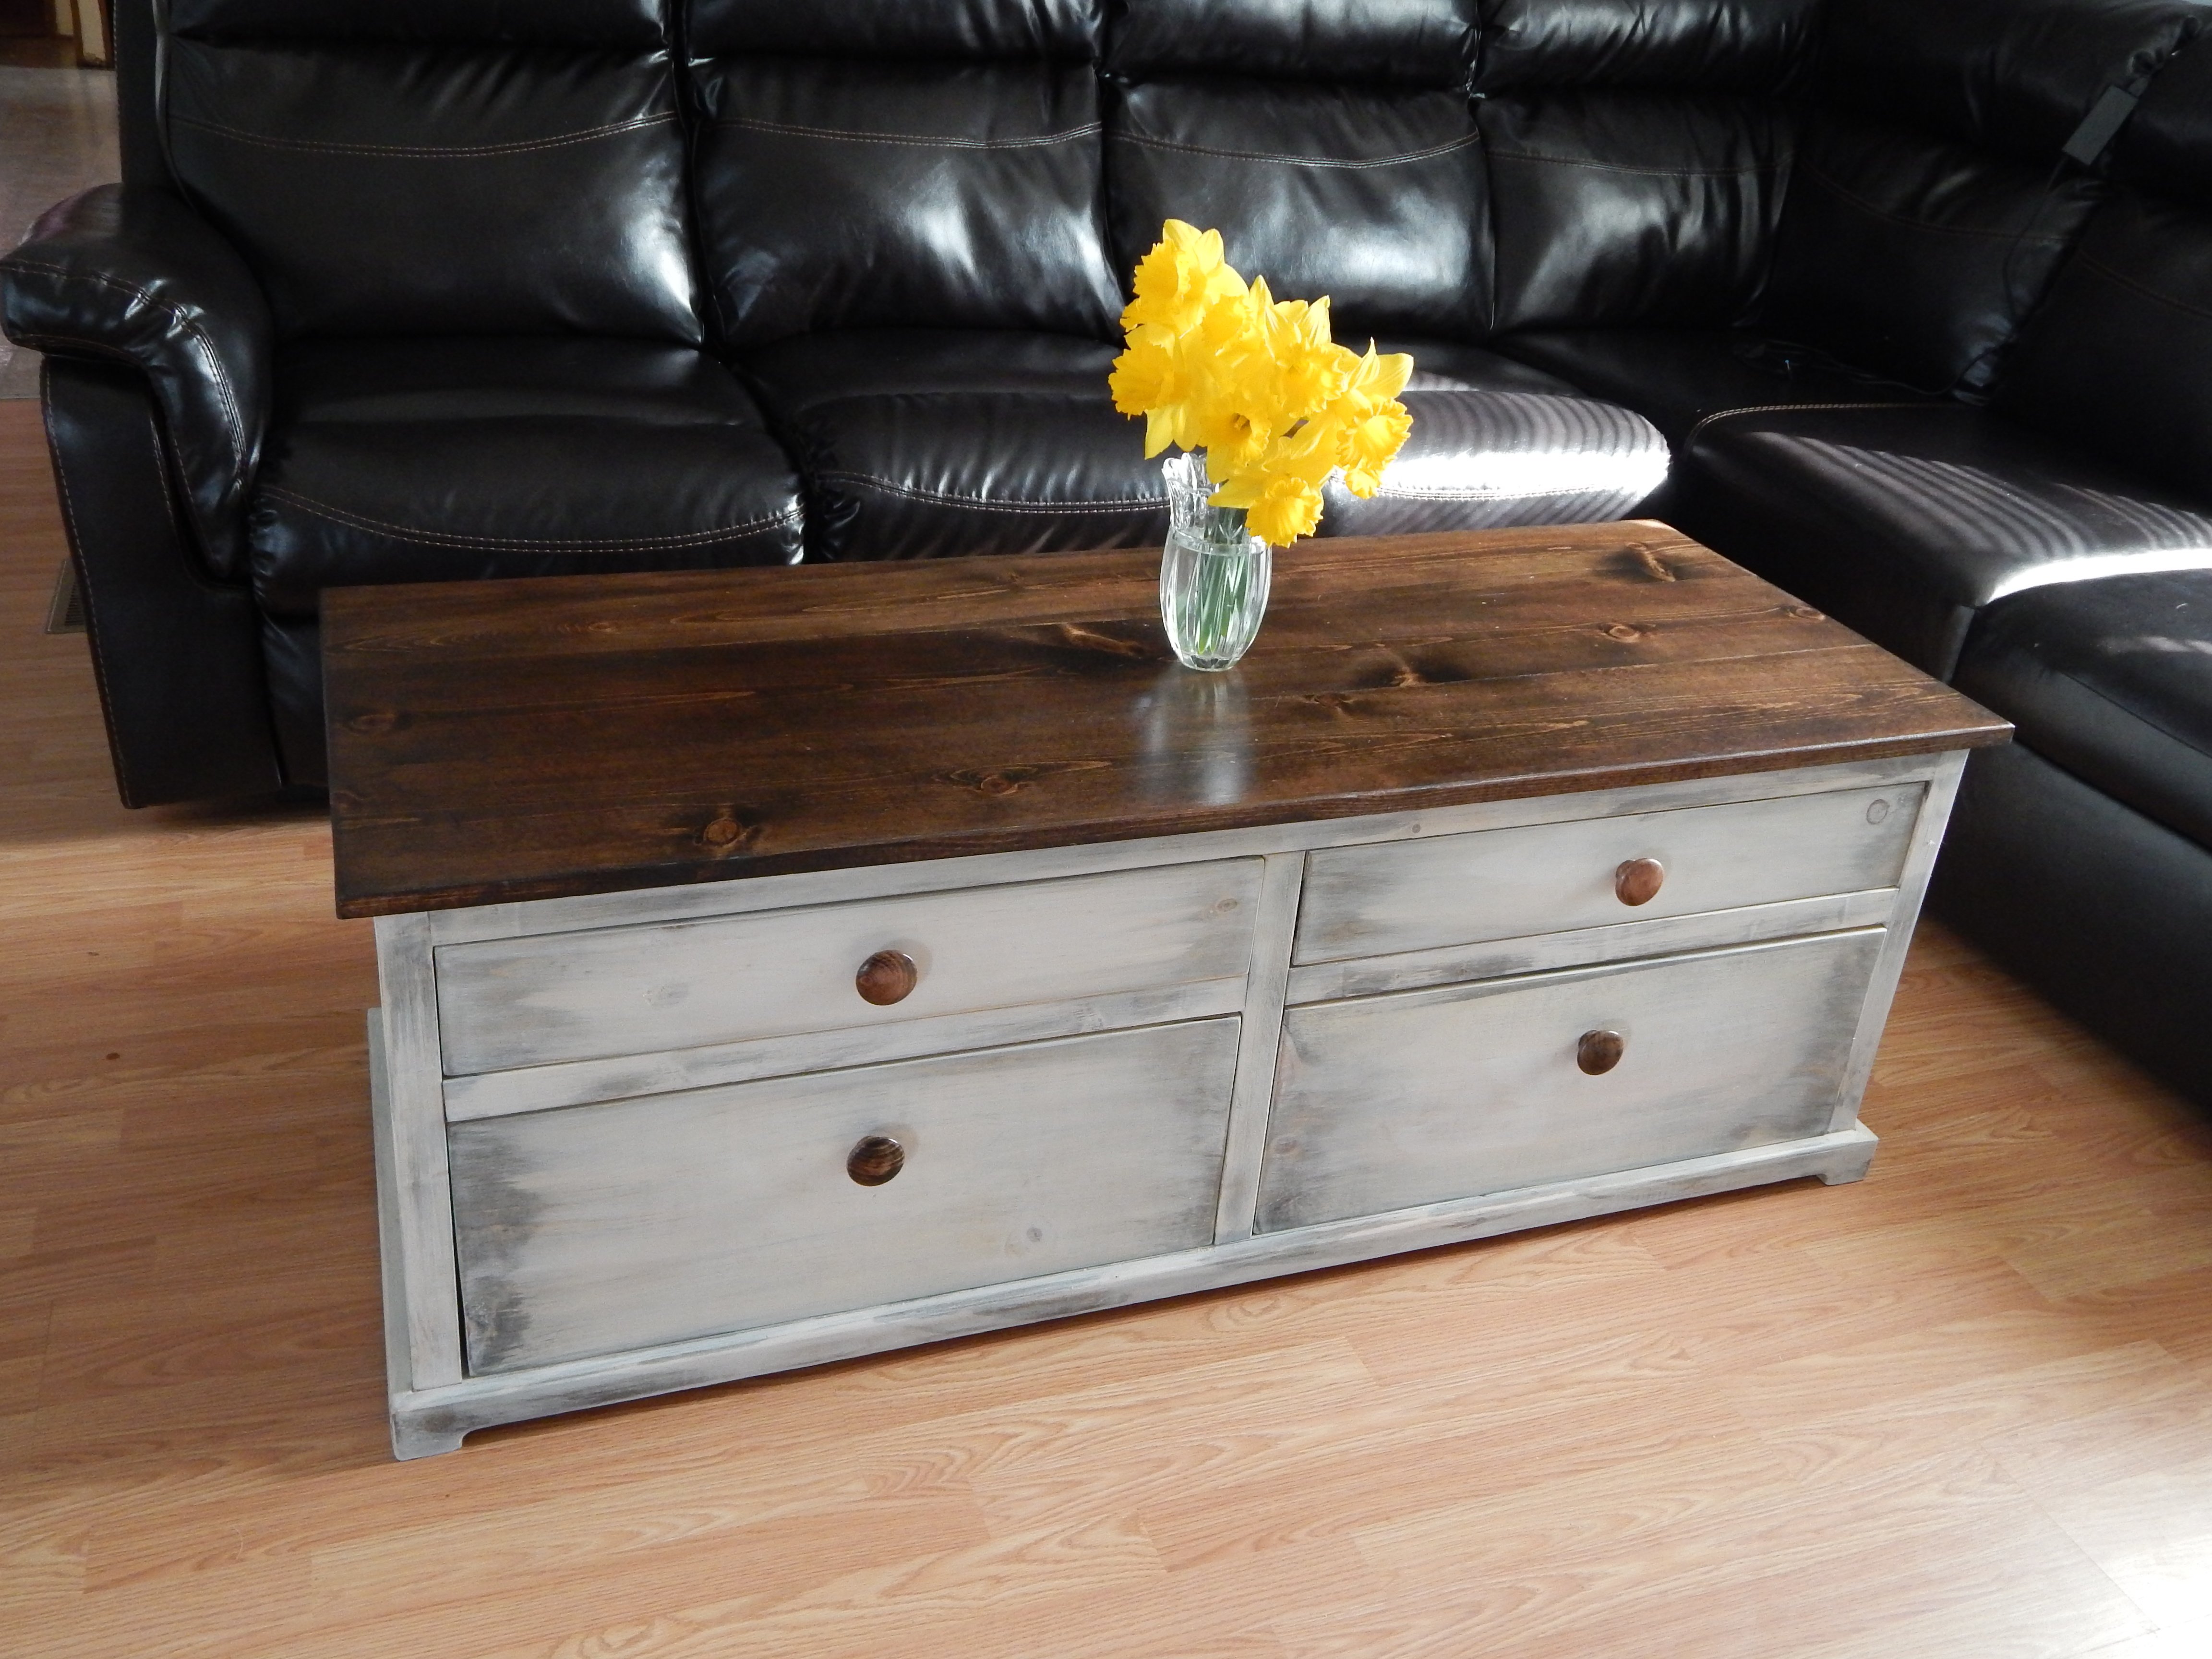
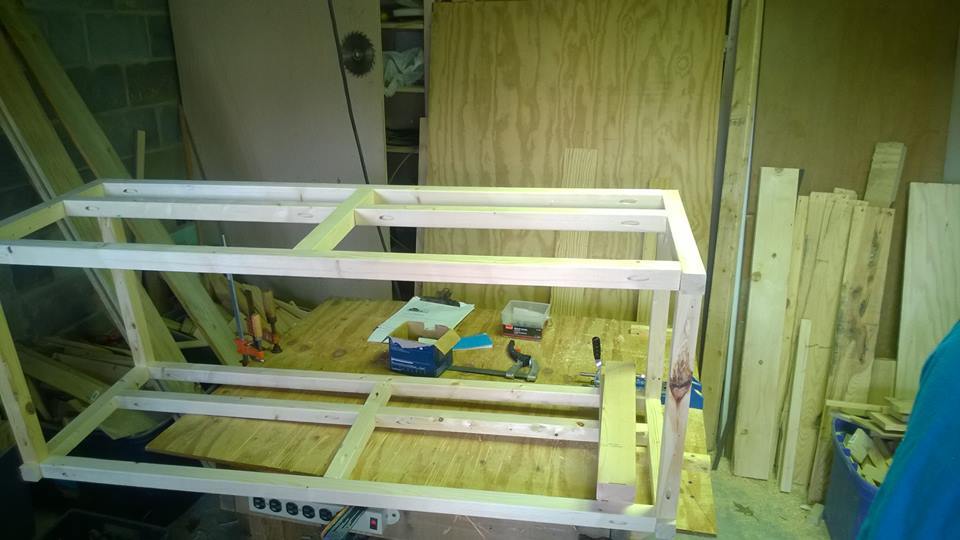
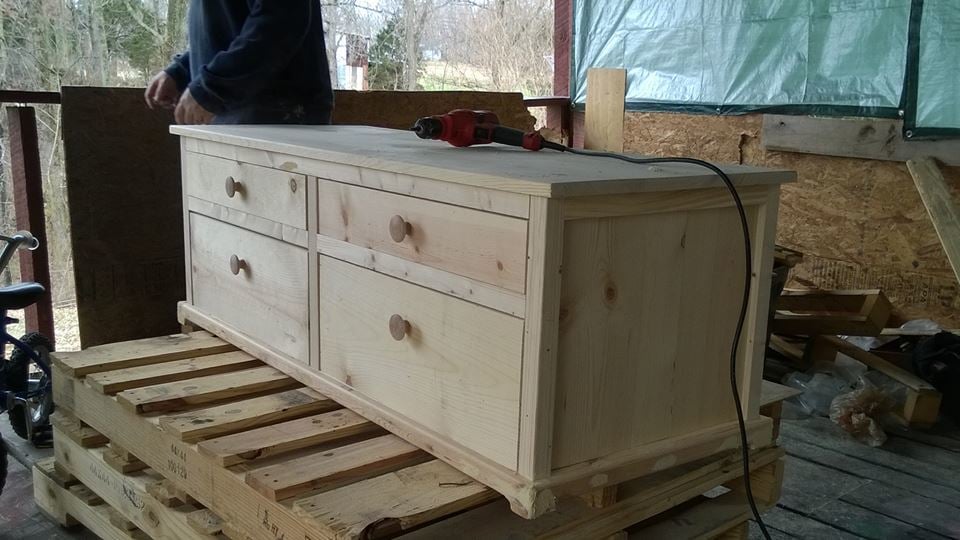
My wife saw the Harper Style coffee table by Pottery barn and loved it so as a gift to her i set out to recreate this table in a white wash look that is not available and after a week of creating plans and a weekend of work here it is with fully functional drawers that are accessible from both sides

Estimated Cost
$150-$200
Estimated Time Investment
Weekend Project (10-20 Hours)
Finish Used
combination of Minwax Honey and Ebony for the top and an underlying of random Ebony strokes and a few coats of Minwax Pickling White wash for the body of the table
Recommended Skill Level
Intermediate


Comments
Rustic Woodworks
Fri, 04/11/2014 - 17:14
Harper Table Plans
Plans can be made available upon request, just haven't had time to clean them up a bit