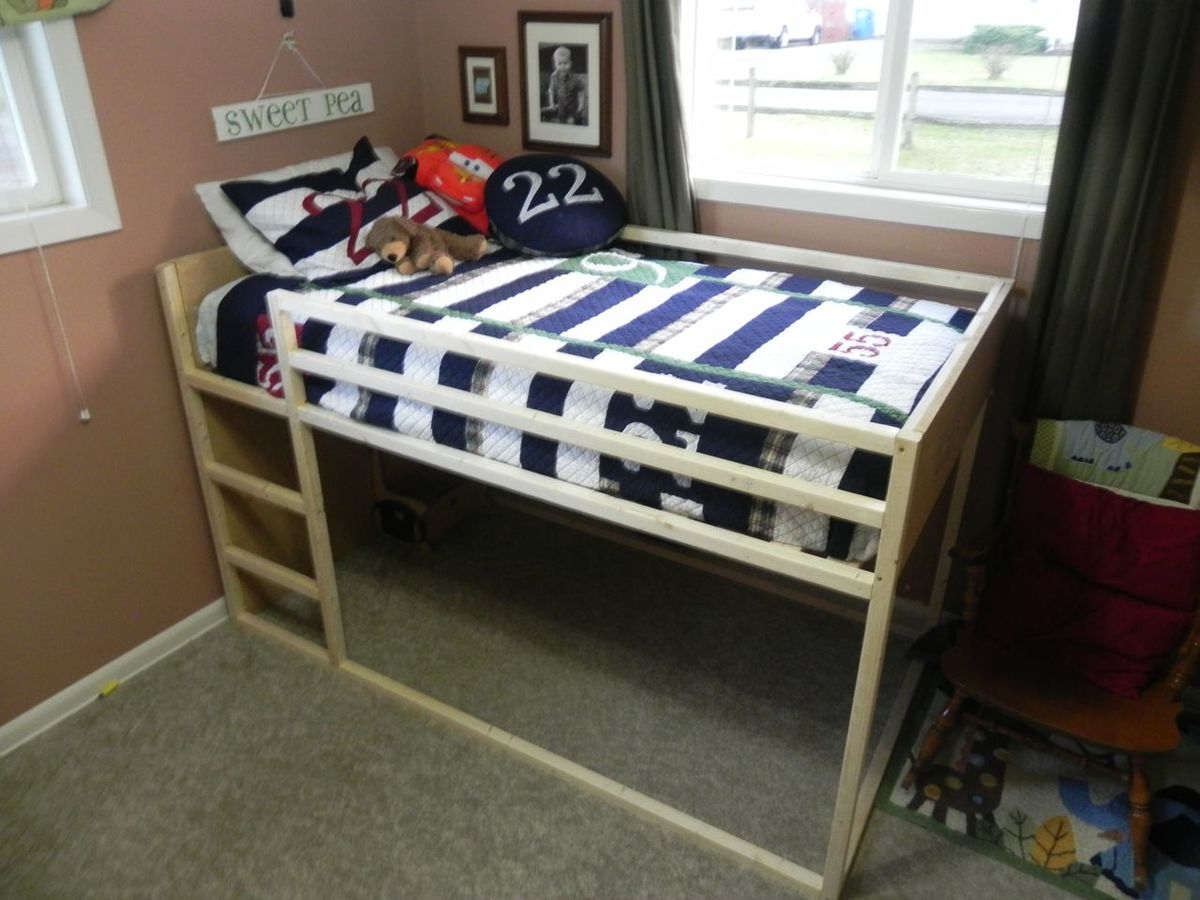
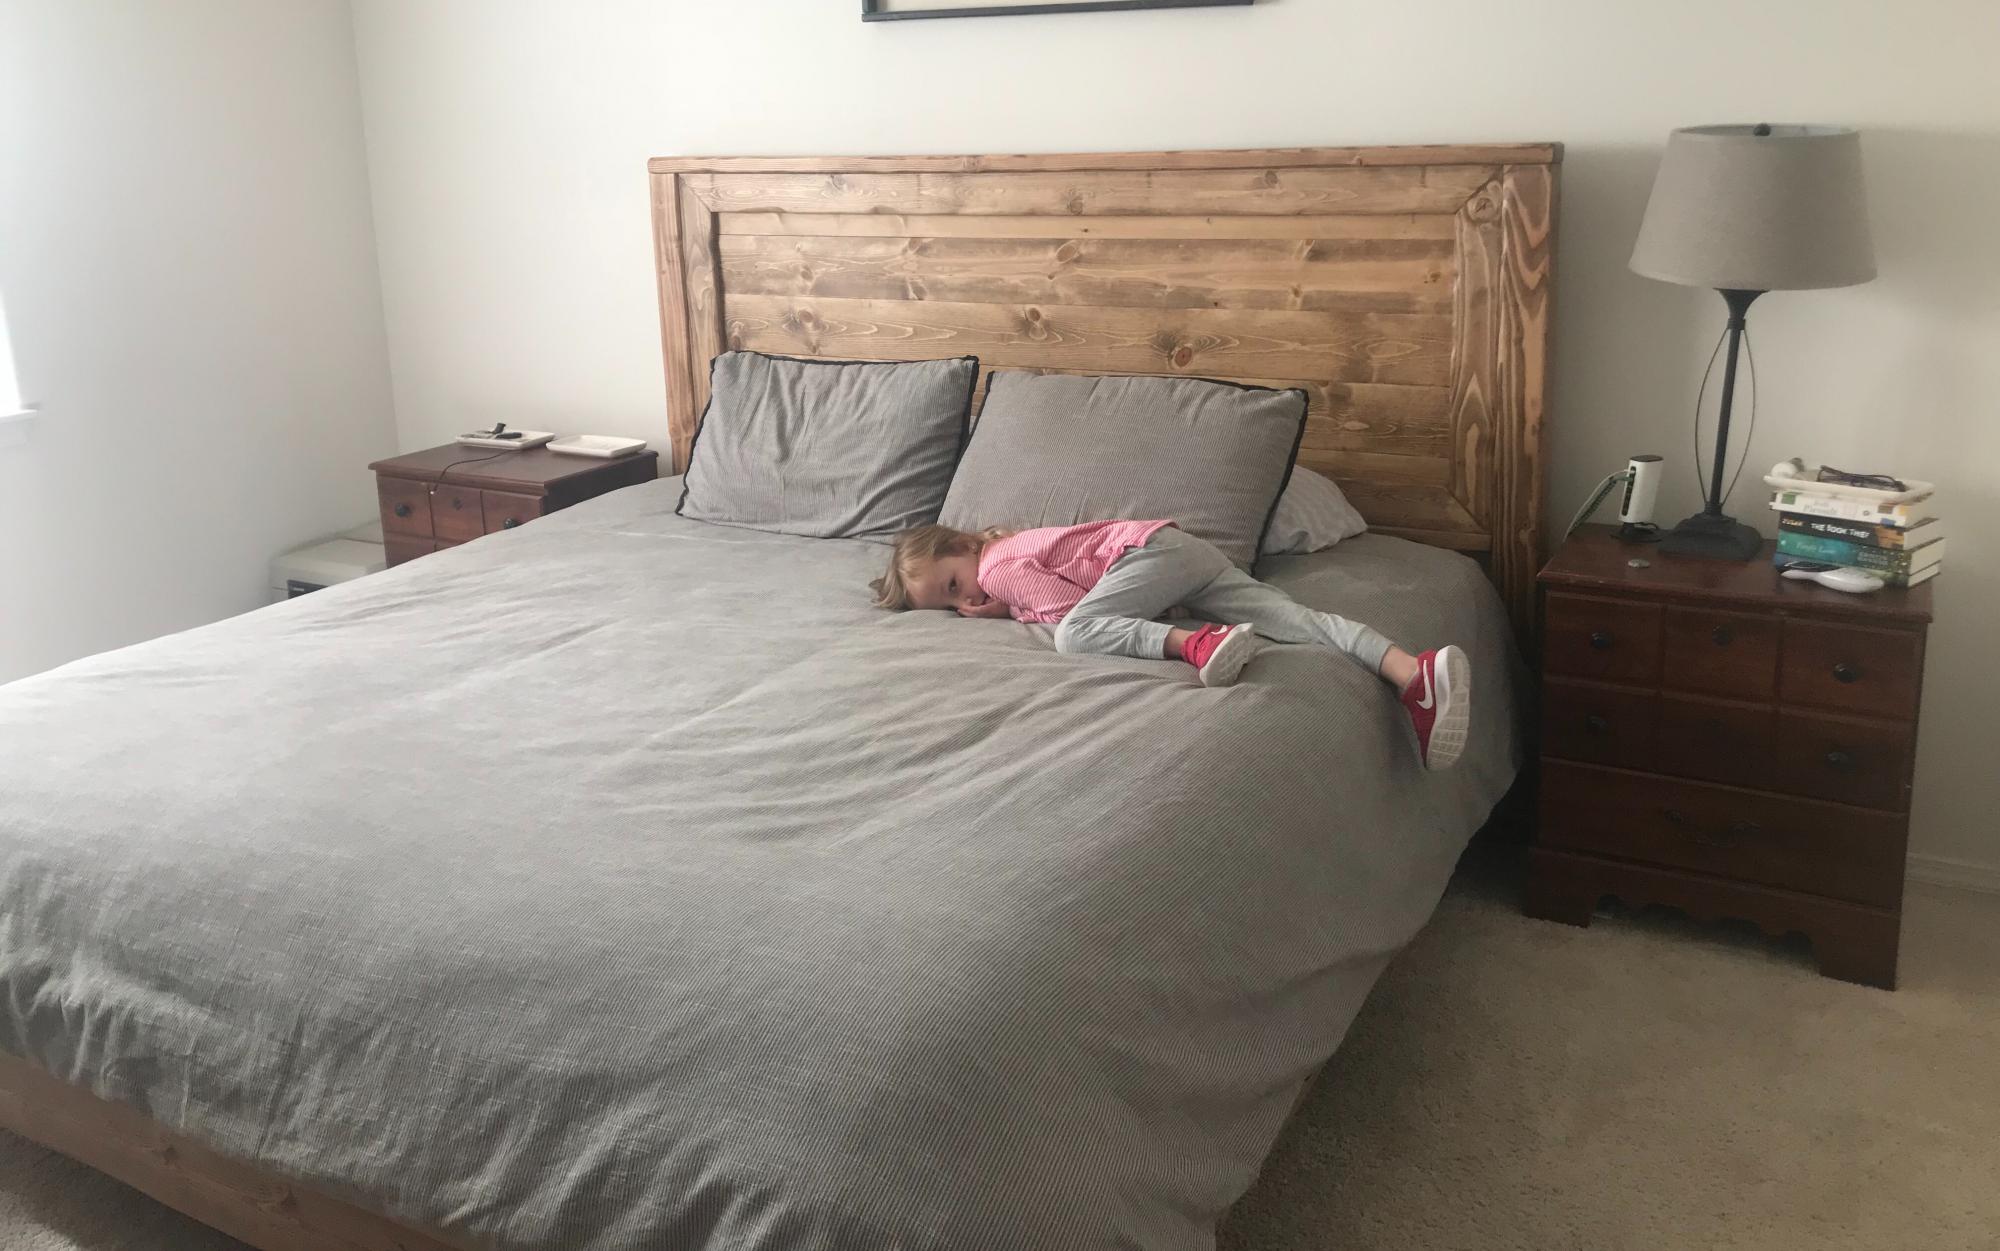
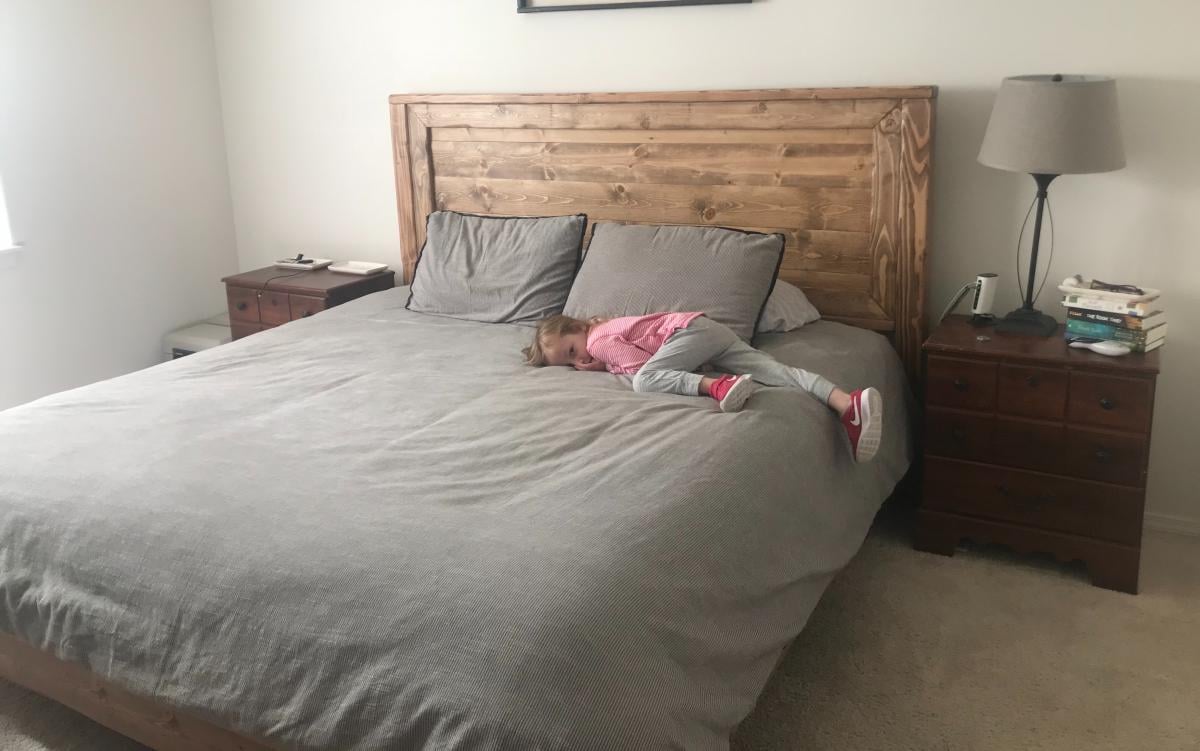
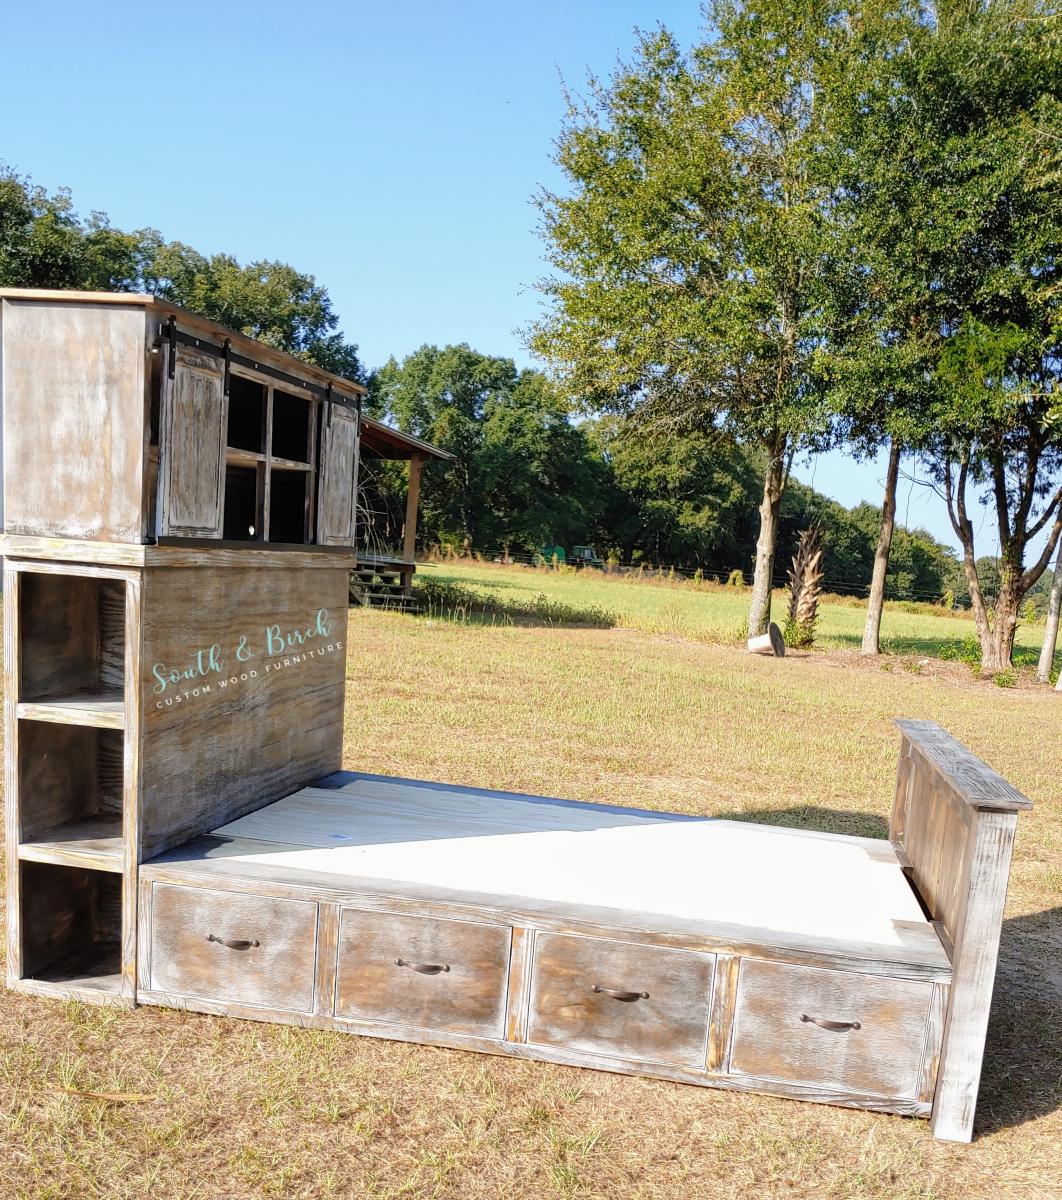
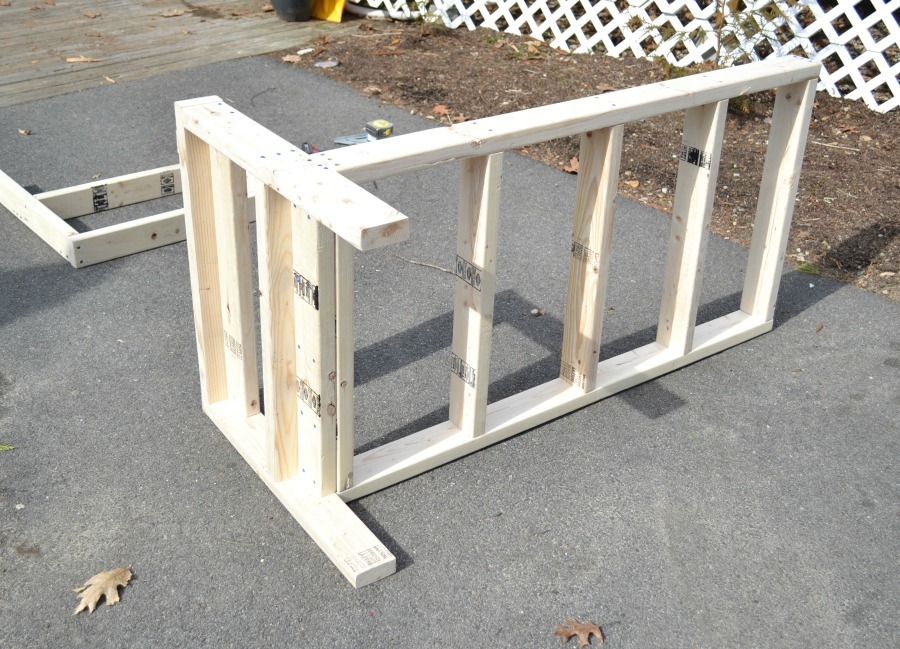
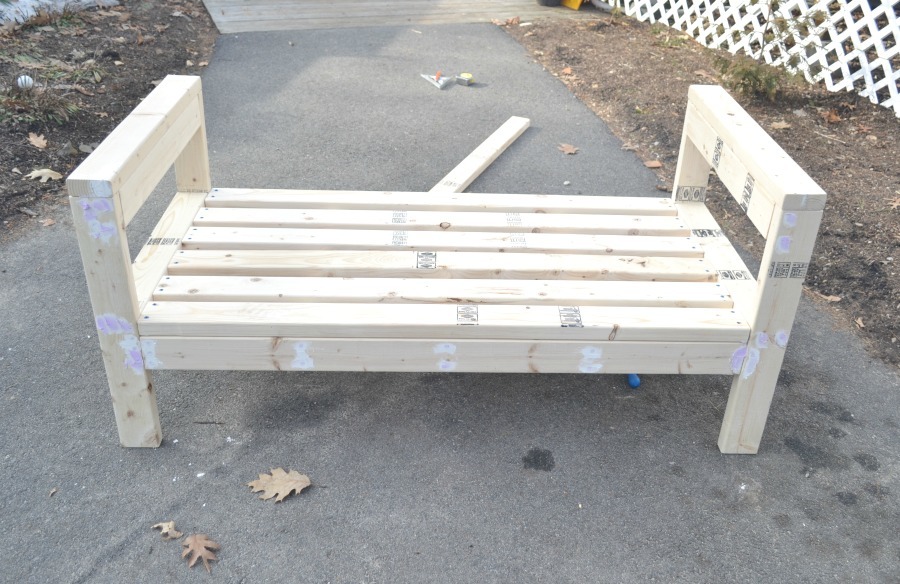
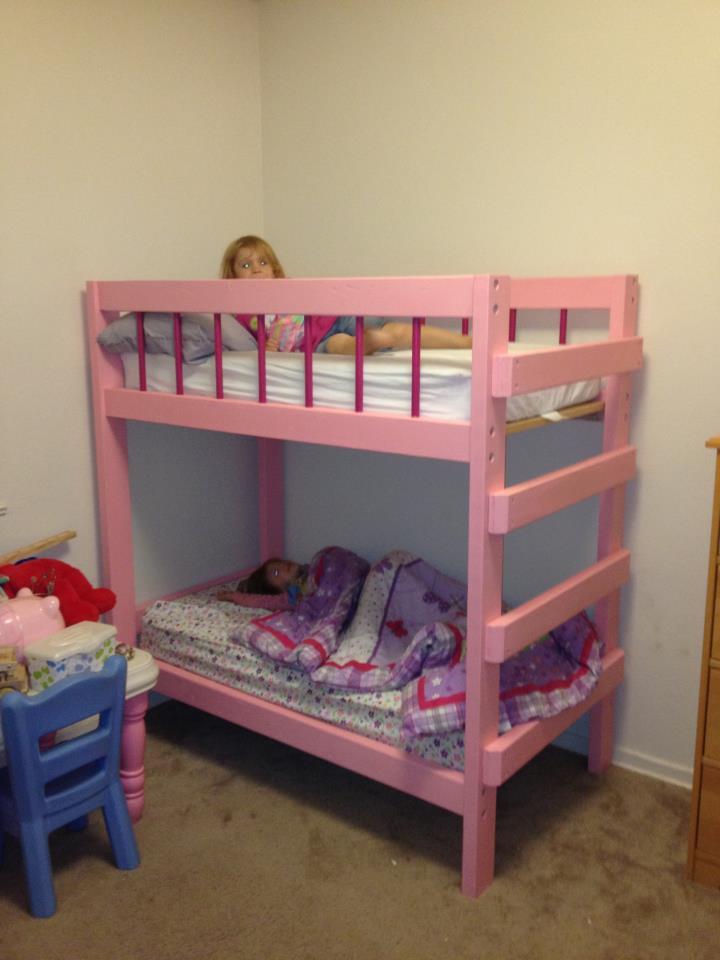
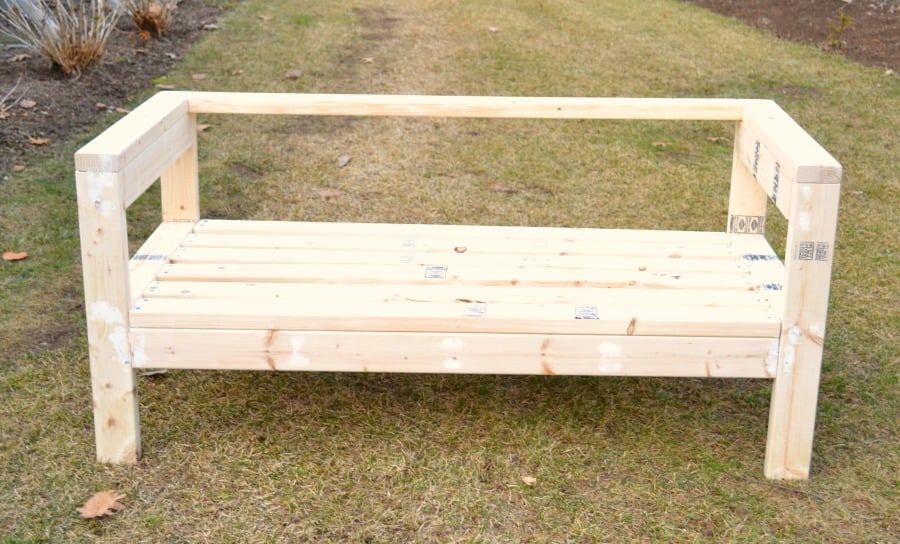
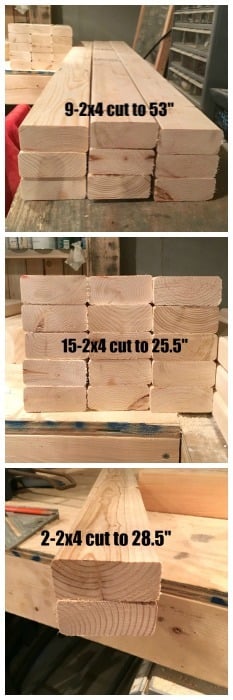
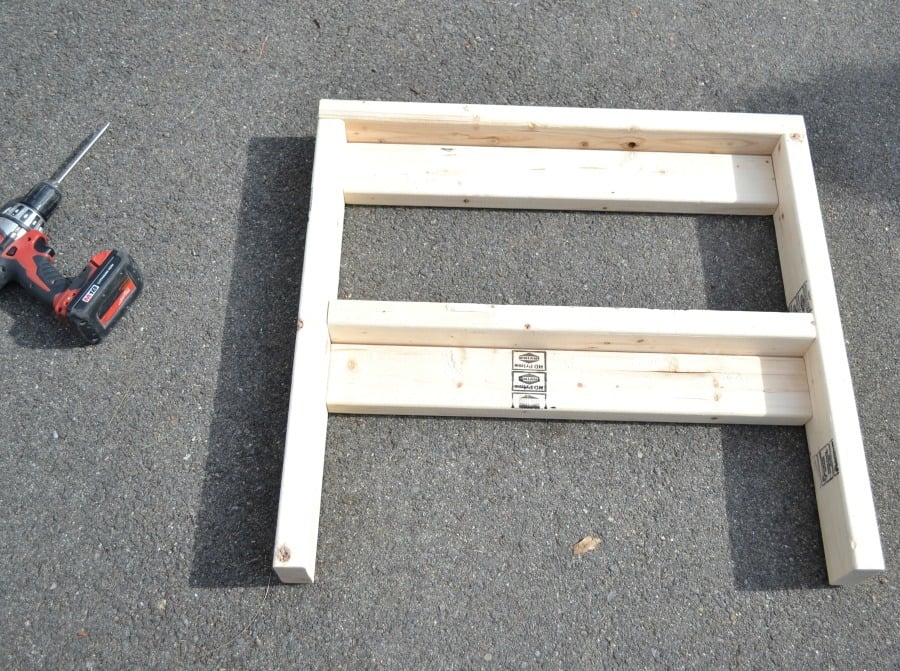
Community Brag Posts

PB Logan Classic Storage Wall Side Base and Hutch--modified

Submitted by kristen on Mon, 03/14/2011 - 18:24

This is my third Ana White project and I modified it quite a bit from the plan. I was inspired by the PB Logan Collection that Ana has a knock off plan of called the Classic Storage Wall and Hutch. You can read more about the whys and hows of this project on my blog pinktoesandpowertools.wordpress.com in the Cabinet and Hutch-laundry room category under woodworking (there are currently 17 posts about this project--yowza!). But the modifications that I made from Ana's plans were that I had to make it less wide, I added two drawers in the cabinet, and I put a back on this that mimics the PB picture (which happens to be the wall behind their open-backed units, not an actual back). The base also hides a cat litter box behind it, so the back is open and the doors do NOT open--they are a fake front. No need to peek in at a litter box and it eliminated the cost of hinges. I learned A LOT during this build! First experiences were: using a circular saw, making a straight cut jig for a circular saw to cut plywood, using a jigsaw, using a compressor and nail gun, cutting crown and base molding miter cuts, tearing out base molding to fit the cabinet, cutting out an electrical outlet in the cabinet and extending the outlet, learning how to remove pneumatic nails that find their way out to the front of your project, and probably more that I can't think of now! The back isn't quite done, but it won't be too much prettier than what the picture shows, and you can see how the litter box looks. I might turn it sideways and cut out a hole in the side--haven't decided on that yet... I am really pleased with how this turned out and I'm excited to start on my next Ana White plan (probably modified, knowing me!).

Estimated Cost
$250 for modified version
Estimated Time Investment
Week Long Project (20 Hours or More)
Finish Used
Primer and White paint are Olympic (Lowe's) No VOC paint. I topcoated it all with General Finishes High Performance Water-Based Poly and Minwax Water-Based Polycrylic in a satin finish (didn't have enough of either to do the whole project).
Recommended Skill Level
Intermediate

A bench for a future table

Submitted by Al Lulu on Fri, 05/31/2013 - 14:59

This is the third project I've done from this site and the first that came out absolutely perfect. The others were GREAT but this one....it just soared.
Took me all of 1 afternoon to build and 3 days to stain and finish. I used Early American by Minwax to match the existing dining room table.
My goal is to build the table that goes with it.
But, for now, this is the perfect addition to the house.
One thing.
The plans for this bench call for 1x4s for the breadboards and that doesn't make sense. I think it's a typo.
You will need extra 2x4s to make the project really soar. But, heck, who can't use an extra 2x4 lying around?

Estimated Cost
$40
Estimated Time Investment
Afternoon Project (3-6 Hours)
Finish Used
Minwax Early American
Varathane satin
Recommended Skill Level
Beginner

Comments

Rustic X Coffee Table

My wife was wanting a new coffee table so I decided to build one instead of goin and buying one. This being really the first somewhat hard wood working project that I had tried it turned out very good. My wife did her handy work on staining and making it look very old and rustic.

Built from Plan(s)
Estimated Cost
$50-$75
Estimated Time Investment
Weekend Project (10-20 Hours)
Recommended Skill Level
Intermediate

Porch is My Happy Place

Submitted by Malka on Wed, 09/13/2017 - 01:46

My father asked for a porch sign for his birthday, and as he enjoys sitting and watching the hummingbirds feed, thats the theme I went with. Sign is made with a redwood fence board that was sanded down and biscuit joined together, then given a decorative routered edge. Painted with Rustoleum paint, and given a few coats of spar urethane. Used jute cord on the back to hang the sign with.

Estimated Cost
$15
Estimated Time Investment
Afternoon Project (3-6 Hours)
Finish Used
Minwax Spray Spar-Urethane
Recommended Skill Level
Beginner

Upholstered Toddler (Not) Daybed

Submitted by Alyssa on Thu, 03/17/2011 - 16:32

My first "real" project! 


Of course I can't just follow directions though... I converted the upholstered toddler daybed into a non-daybed. In the process I messed up the measurements (not sure where) which made it tough to attach the headboard securely and also made it a couple of inches too long for the crib mattress. Oh well! It's solid now and we filled the gap with a rolled towel for the time being. I might make her a little box to fit in that spot and hold treasures.

Lesson learned is that building is fun, but I should let someone else worry about the math! ;)
Built from Plan(s)
Estimated Cost
Can't remember exactly, but it felt like a lot in the end. Fabric, batting, and extra bits for structural support (because I didn't follow directions) added up. The wood was cheap.
Estimated Time Investment
Weekend Project (10-20 Hours)
Finish Used
White paint on the legs, distressed a little for practice (even though you can't really tell unless you're up close), polyacrylic over top (not sure what the topcoat should be, but I had it on hand!).

Note about the "Estimated Time Investment" - I'm sure this would not have taken as long for someone that had done more woodworking than I have. I've made a kitchen set and a bike ramp previously (not Ana's plans) but that's about it... Also it's a TODDLER bed, which means I have toddlers and that always makes things take twice as long!
Recommended Skill Level
Beginner

Bedside Table

Submitted by RITWood on Fri, 09/15/2017 - 14:44

This is my interputation of the Reclaimed Wood Look Bedside Table.  I beveled the edges of the of the 1x material and a top drawer with a large cubby beneath.  I used a sprayed latex paint then a light sanding to give it the distressed look and the two coats of clear poly.  

Estimated Cost
$35
Estimated Time Investment
Day Project (6-9 Hours)
Finish Used
Sprayed on latex paint followed by two coats of water base poly. After the paint dried I lightly sanded using 150 grit exposing the raw wood underneath. I didn't want too much wear showing and I left some of the machining marks to give it more of the rustic feel.
Recommended Skill Level
Beginner

Doll house Bookshelf for Grand daughter

Submitted by mary tuper on Tue, 06/04/2013 - 18:13

This was my first project and there were many starts and re-starts and tearing apart and re-doing but finished product was great! I added the arched doors to original plans and had fun with the whole project!

Estimated Time Investment
Week Long Project (20 Hours or More)
Finish Used
Paint - for this I used leftover paint from grand daughter's bedroom and same colors.
Recommended Skill Level
Beginner

Comments

Modern Slat Bench

Submitted by vintran25 on Mon, 05/04/2015 - 21:28

This was my second project after creating a custom bookcase for underneath our kitchen island. When I saw this bench, I knew it would go well with my dining table. It was pretty easy to do. I sanded and stained each piece before putting it all together and I stained it to try to match my dining table.

Estimated Cost
$50
Estimated Time Investment
Weekend Project (10-20 Hours)
Finish Used
Varathane Stain + Poly - Kona for the top of the bench and mostly Dark Walnut for the sides.
Recommended Skill Level
Starter Project

Comments

Calmly

Thu, 05/07/2015 - 13:51

I love how you were able to match the bench to the table. By the way, what is the name of your table? I really like it! I wonder if Ana has time to draw up this plan, pretty please Ana.

Rustic End Table

Our first project using the plans provided on this web site.  We couldn't be happier with the outcome.  The plans were concise, accurate and easy to follow.

Estimated Cost
$50 for the lumber and approximately $25 worth of Gel Stain for 2 tables
Estimated Time Investment
Weekend Project (10-20 Hours)
Finish Used
Barclay Gel Stains
Recommended Skill Level
Beginner

Comments

Rustic X Small Rolling Kitchen Island

A beautiful housewarming gift for our son and his wife. We added doors with magnetic closures, slats to the back, and a safety feature to the drawer (toddler in the house). They loved this piece, and have many admirers of it. Time: 2 day build, 2 day finish.

Comments

Our Greenhouse:)

Submitted by lmckinney on Thu, 06/06/2013 - 19:43

Your plans made this project so much easier. We love it and have gotten a lot of compliments for it.

Estimated Cost
1000.00
Recommended Skill Level
Intermediate

Comments

Joni

Fri, 06/07/2013 - 12:42

This is amazing! All of your finishing touches make this really special. I love every detail.

Kirsten.dehart

Sun, 05/01/2016 - 17:43

Do the gable style roofs and greenhouse panels hold up in a climate for heavy snow loads??


Thanks!

toddler bed

Submitted by jwslink on Sun, 05/10/2015 - 10:49

Easy to build toddler bed

Estimated Cost
50
Estimated Time Investment
Afternoon Project (3-6 Hours)
Recommended Skill Level
Beginner

Outdoor 2x4 sofa

Submitted by BobC on Sun, 10/08/2017 - 11:08

We finally got our outdoor porch cleaned out and needed some additional seating.  Loved all the different designs based on Ana's 2x4 sofa.  Used Cedar boards instead of Pine.  

Estimated Cost
$80 wood; $30 stain; $200 cushions
Estimated Time Investment
Weekend Project (10-20 Hours)
Finish Used
Behr Premium semi0transparent Waterproofing Stain & Sealer; Chocolate
Recommended Skill Level
Intermediate

2x4 Leaning Hall Tree

Submitted by Anonymous (not verified) on Wed, 10/20/2021 - 14:13

I used this wonderful and easy plan to make a leaning hall tree for this awkward space in my dining room. Finally solved an 8 year old problem of what to put in this space! Thanks for the awesome plans!!

Built from Plan(s)

Comments

Blue Farmhouse Table

Submitted by ktrodger on Fri, 03/25/2011 - 20:16

I wanted a kitchen table that was bigger than the one we had from Ikea, but the Farmhouse Table was too long. So we modified the length, left off the stretcher, and painted it a bright blue! The major lesson learned in this project was to be sure to store boards carefully. We bought the lumber, cut the boards, and then didn't work on the project for a couple of months. Even though the wood was in our garage, some of the boards warped a bit, leaving us with bends and curves to deal with once we started to build. Luckily, things came together, but there are many more imperfections in this table than would have been there if we'd built it sooner. But we still love it! 

Estimated Cost
$60
Estimated Time Investment
Weekend Project (10-20 Hours)
Finish Used
Blue semi-gloss paint.
Recommended Skill Level
Beginner

Sofa/Console Table

Submitted by ndetermann on Sun, 06/09/2013 - 08:16

I used an all oak wood with a maple inlay on the table top to give it a different grain pattern and stand out a little more than just one type of wood. My wife wanted 3 shelves so she could display all our babies photos in our living room, toys on the bottom and odd storage in the middle. The way I figured to find the height of the second shelve was because we have a scentsy warmer and the basket we use to hold the scents I made to just fit under the table top. I also went with a fancier router-ed edge to the top which has three grooves instead of your normal round over or just square. I used a lot of kreg jigs to put this together and the two bottom shelves are free floating without a support beam. The way I did it made it really sturdy with clean lines on the peace. I sanded the whole project to 400 which made it feel like glass. If you would like to know more ask questions. I love to do this type of stuff.

Estimated Time Investment
Weekend Project (10-20 Hours)
Finish Used
Minwax Cherry stain with a Gloss polyurethane top coat
Recommended Skill Level
Intermediate

Comments

ndetermann

Fri, 10/18/2013 - 01:46

I just finished a second, smaller version of this one for one of my friends who just got married. I also inscribed their names and date they got married on the bottom. I made it look like a carving in tree. It was pretty cool.

Truss Shelves

Submitted by kvinjbj on Tue, 05/12/2015 - 08:37

This is project #3 for me. Went together pretty easy. I originally made it for my living room but my teenaged daughter likes it so much she is begging for it to be in her room. She helped me stain it so I guess I will give it to her. I love Ana, I love the plans, I love feeling so empowered!

Built from Plan(s)
Estimated Cost
wood for this was less than $50.00 - spent another $20.00 on conditioner, stain and sealer. Someone told me he has seen these for sale for $300.00 and I bet anything they are not as well made or sturdy as mine!
Estimated Time Investment
Weekend Project (10-20 Hours)
Finish Used
wood conditioner, walnut stain and polyurethane
Recommended Skill Level
Starter Project

RH dupe Concrete Dining table

Submitted by Don710 on Tue, 11/02/2021 - 21:42

60” round 1.5” concrete top.
No modifications to the base.
Used Behr water based stain (Early American)and wood conditioner.
Beyond pleased with the results:)

Comments