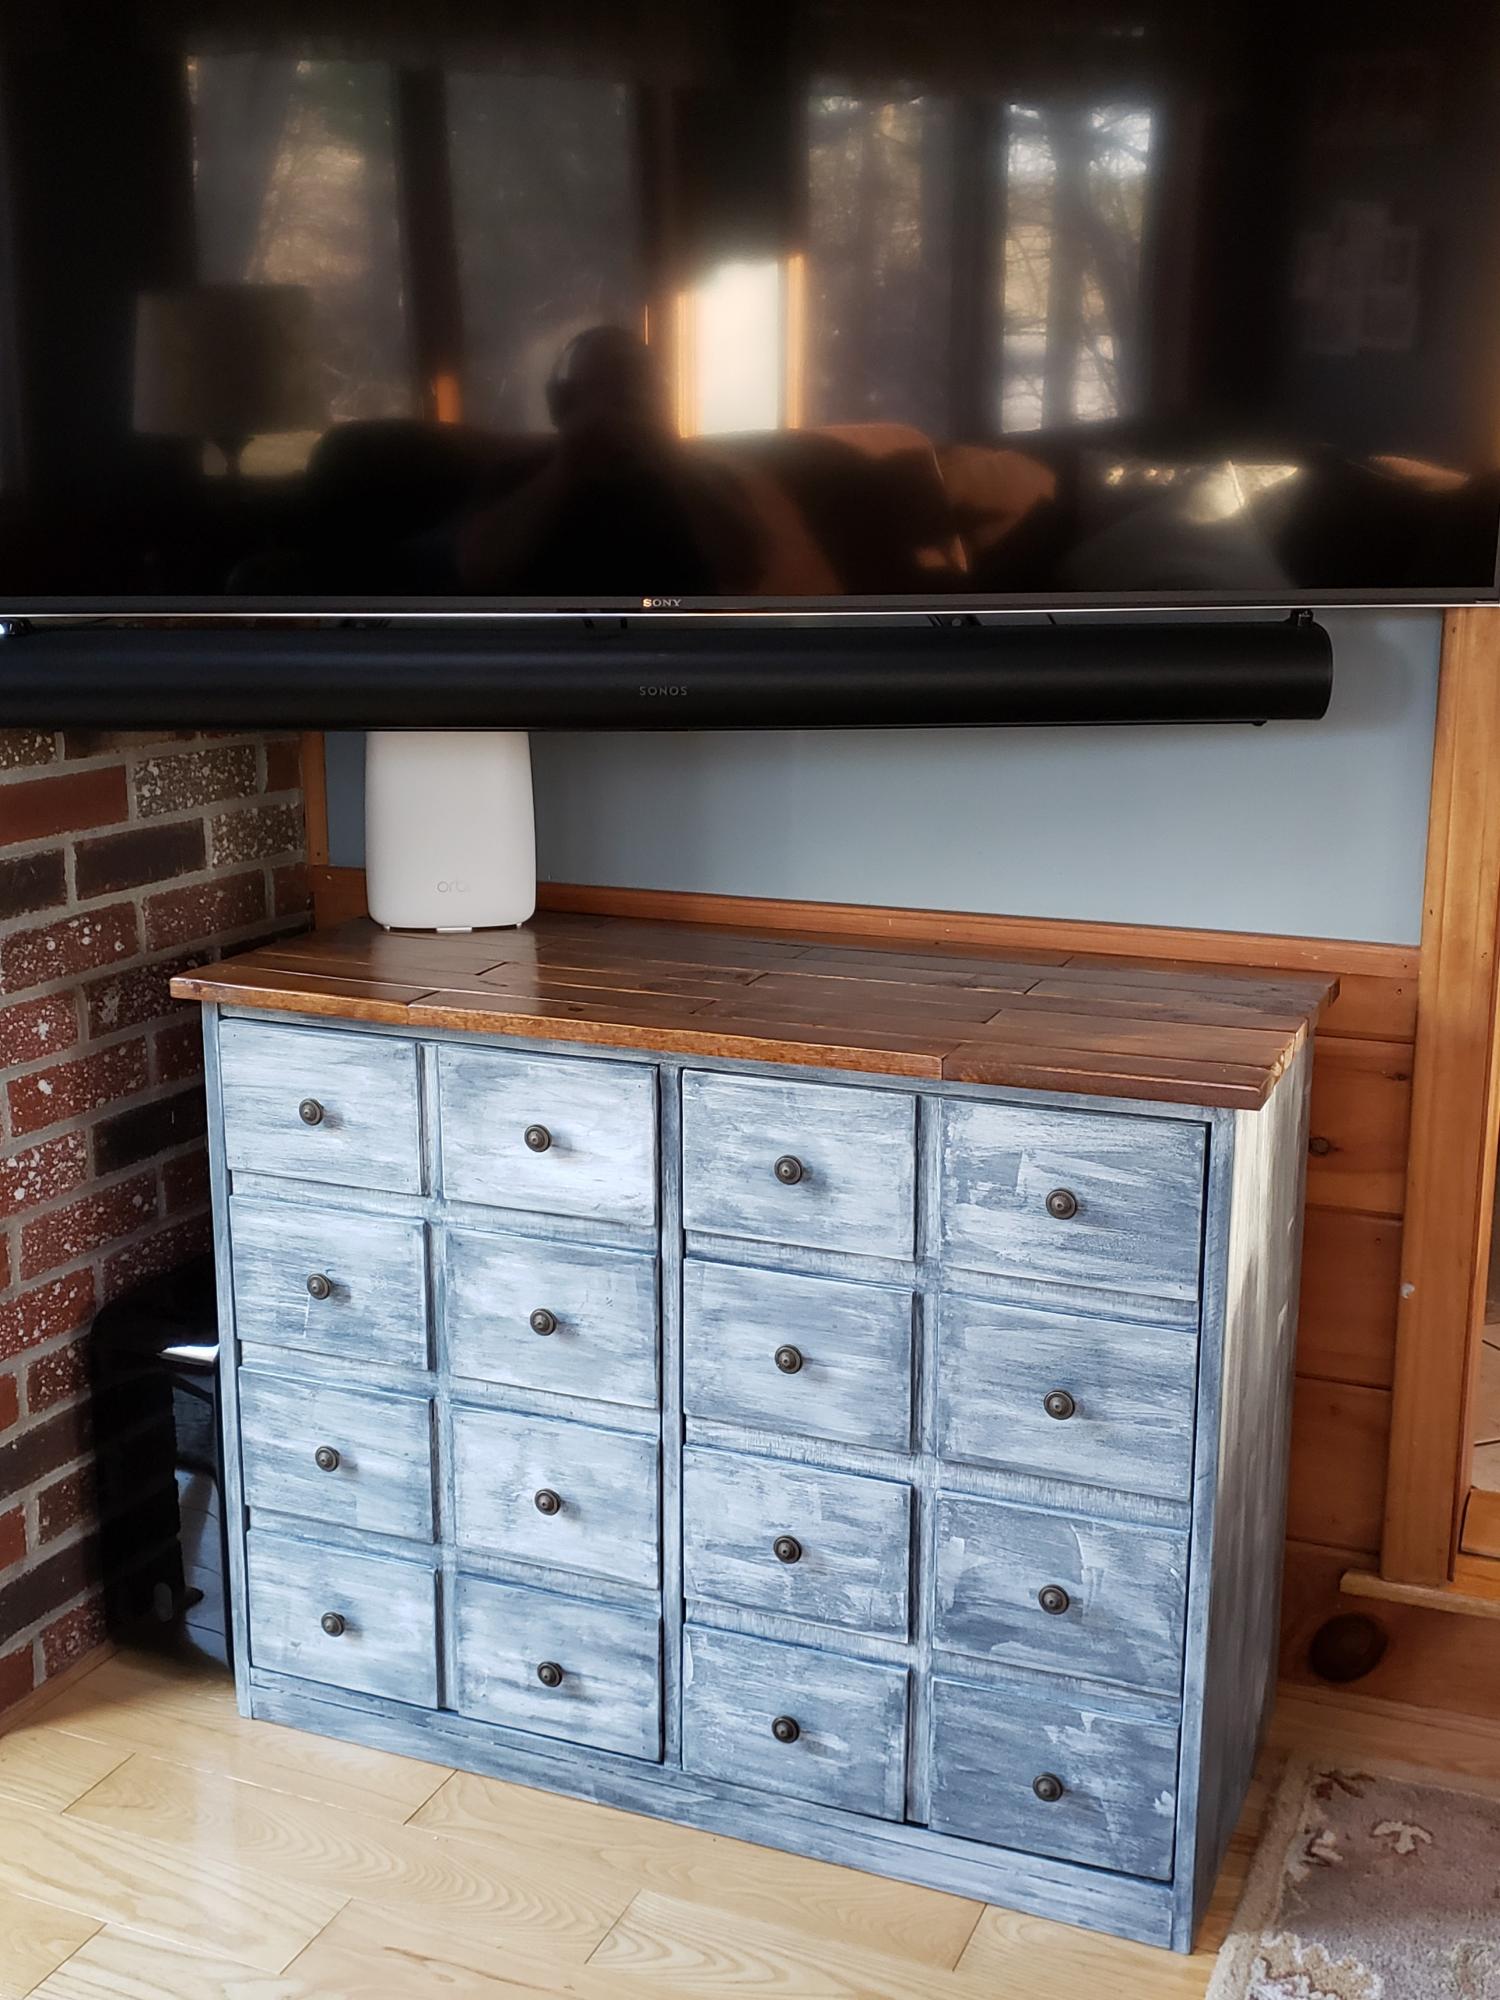
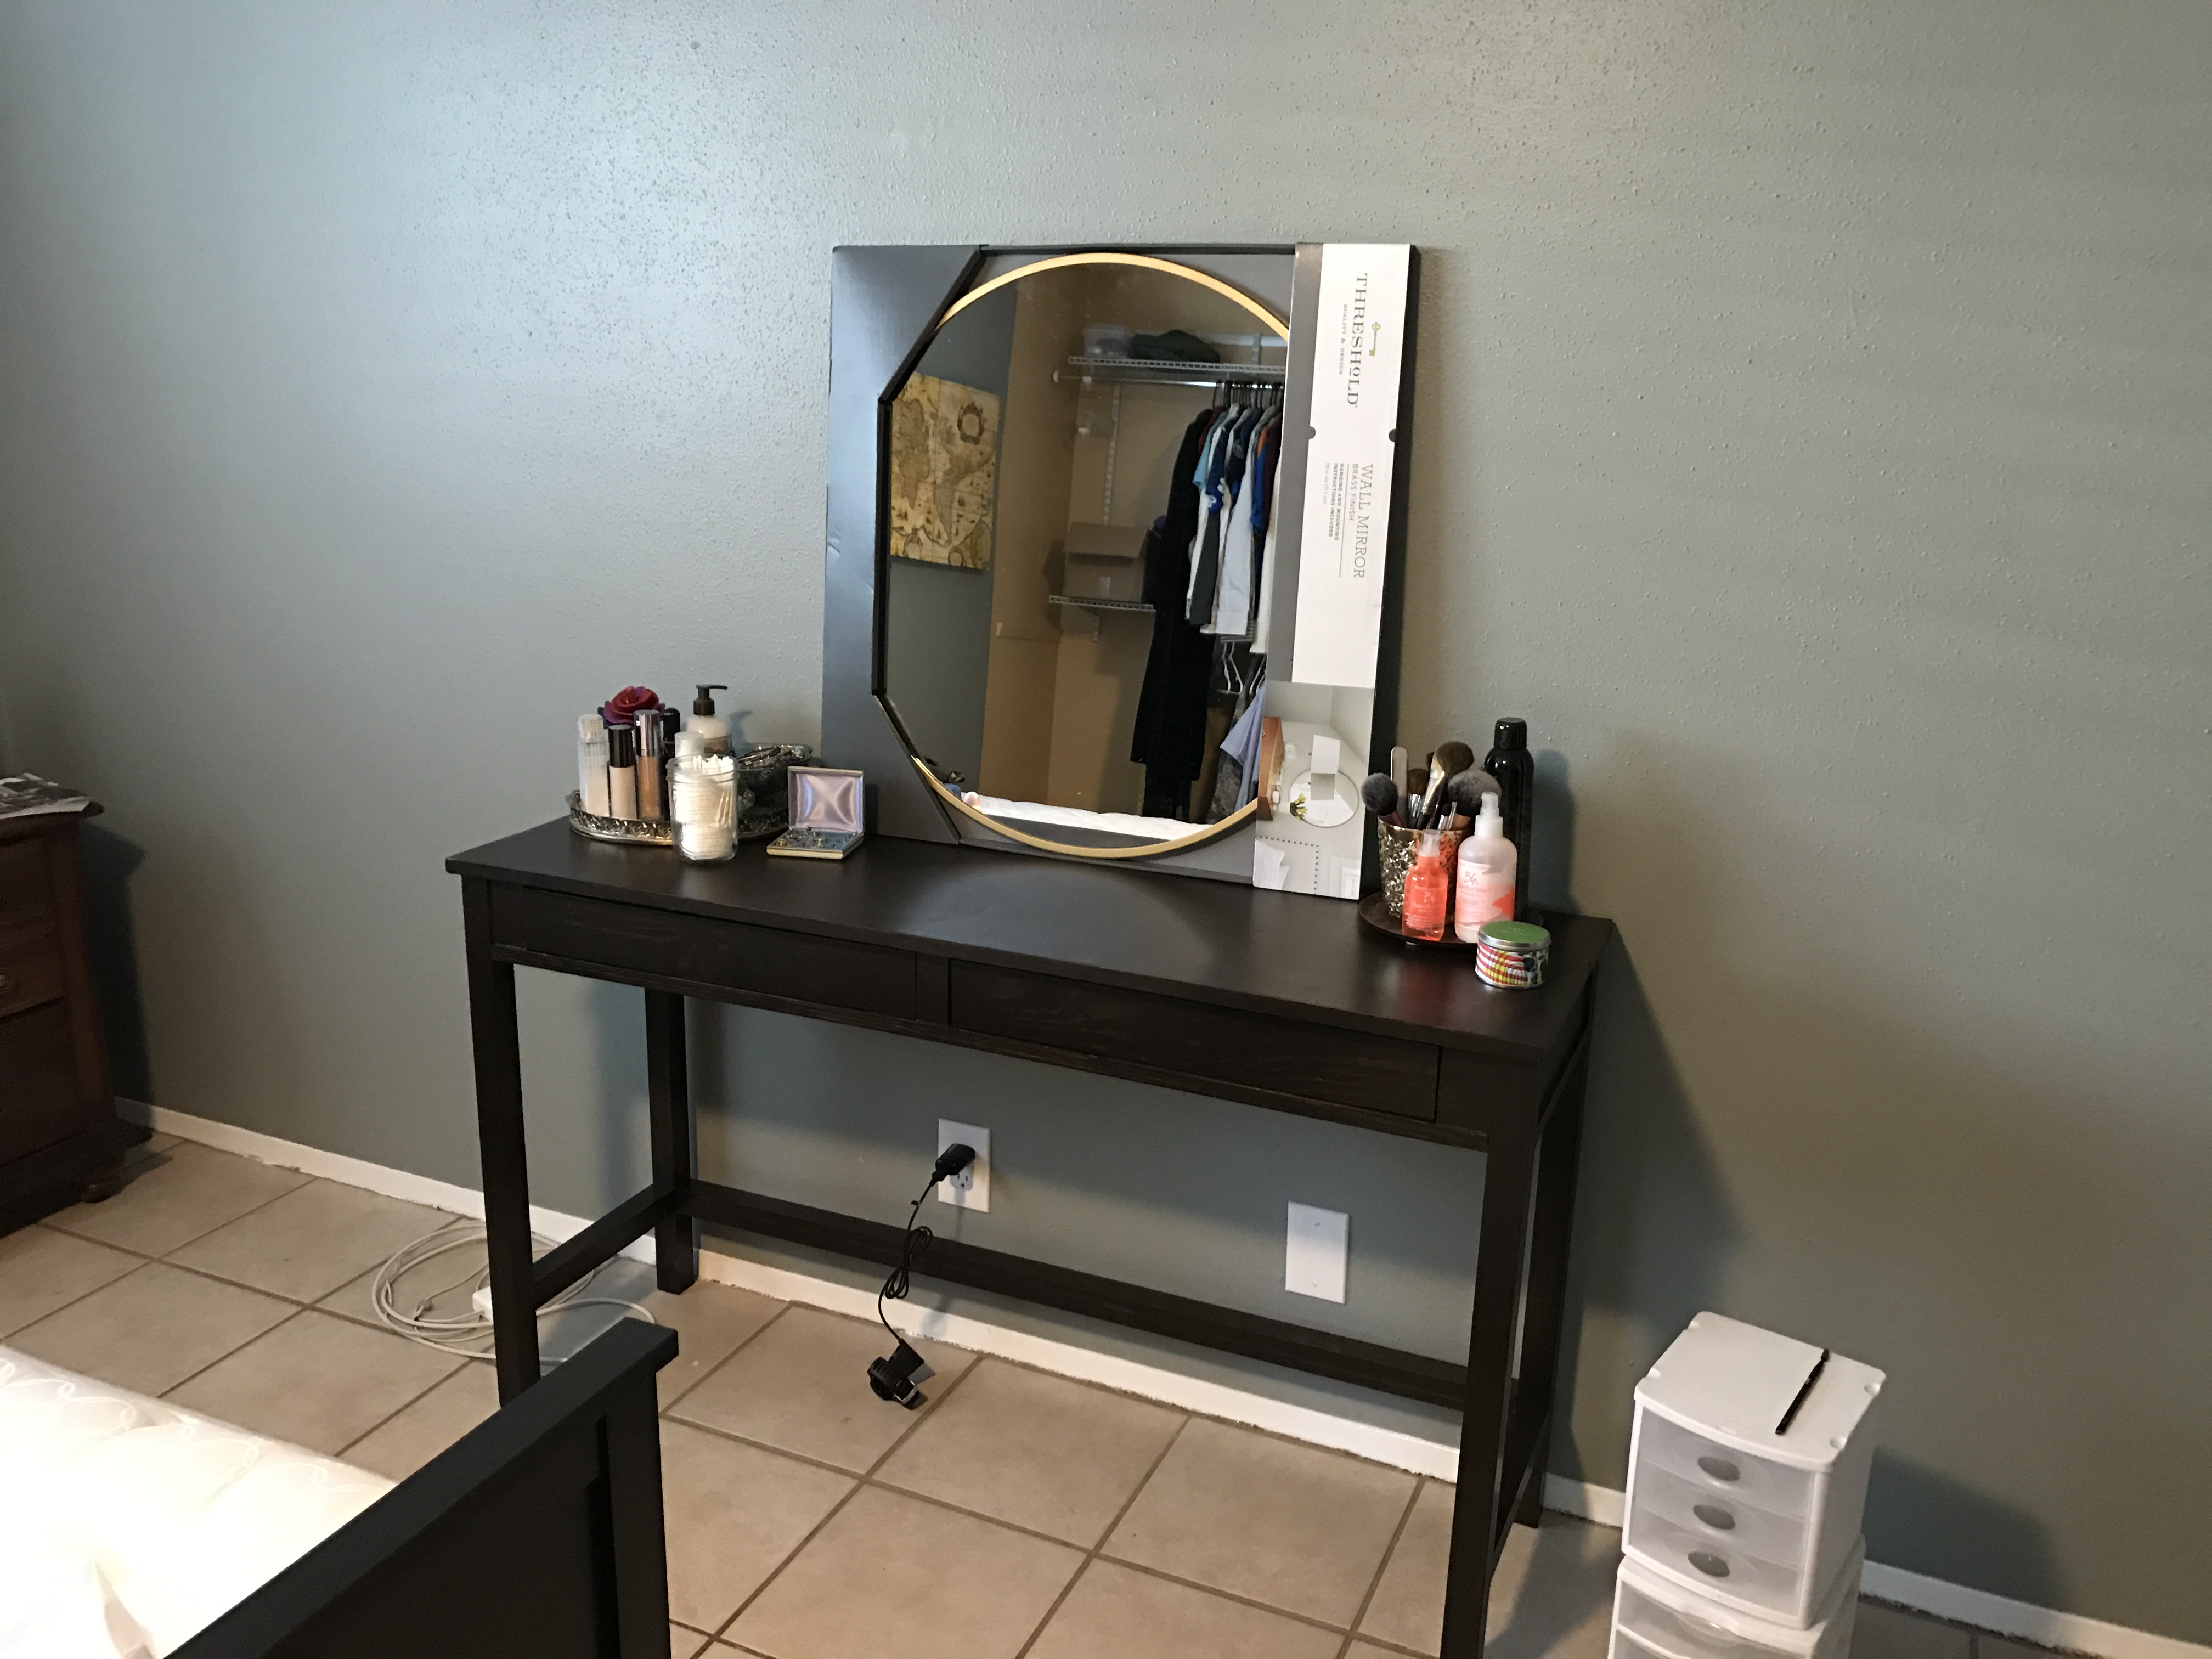
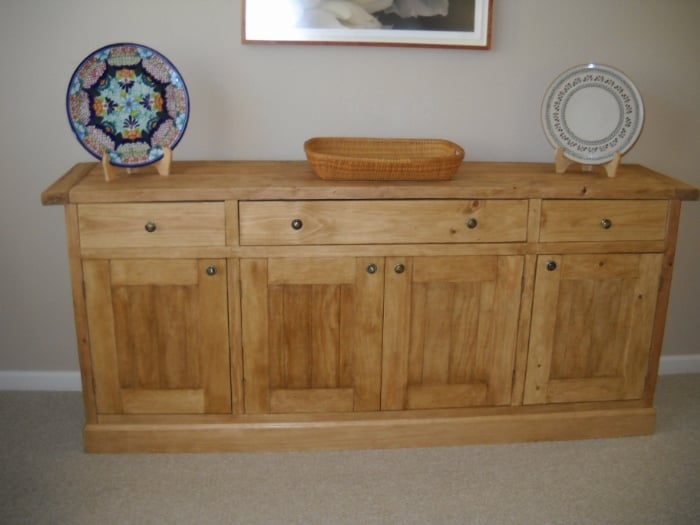
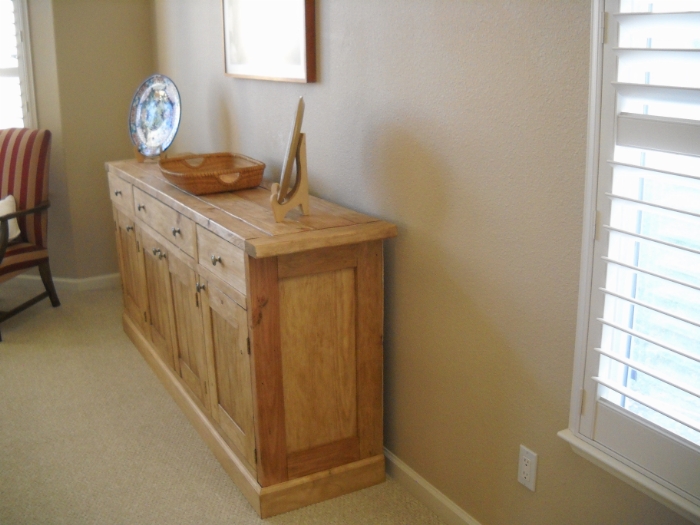
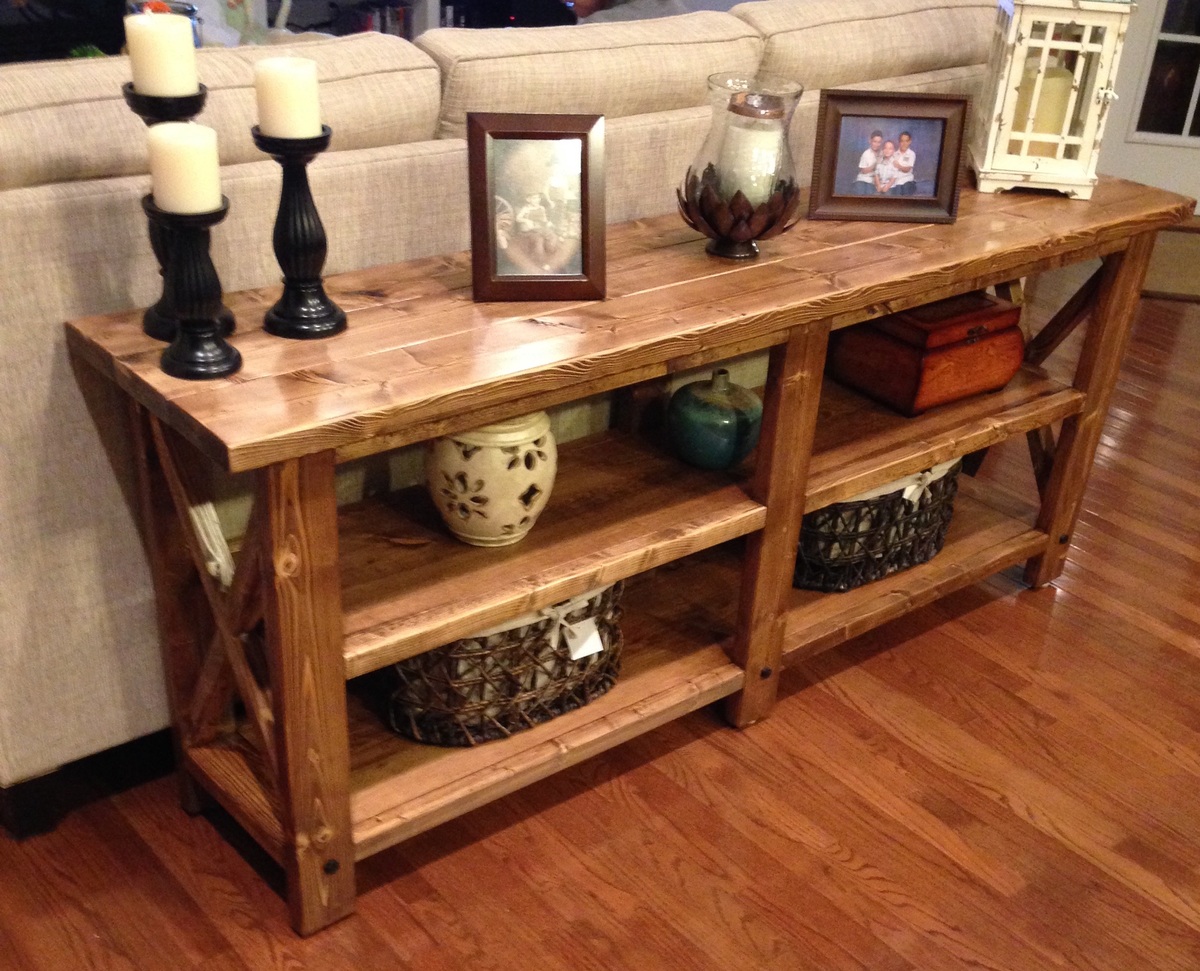
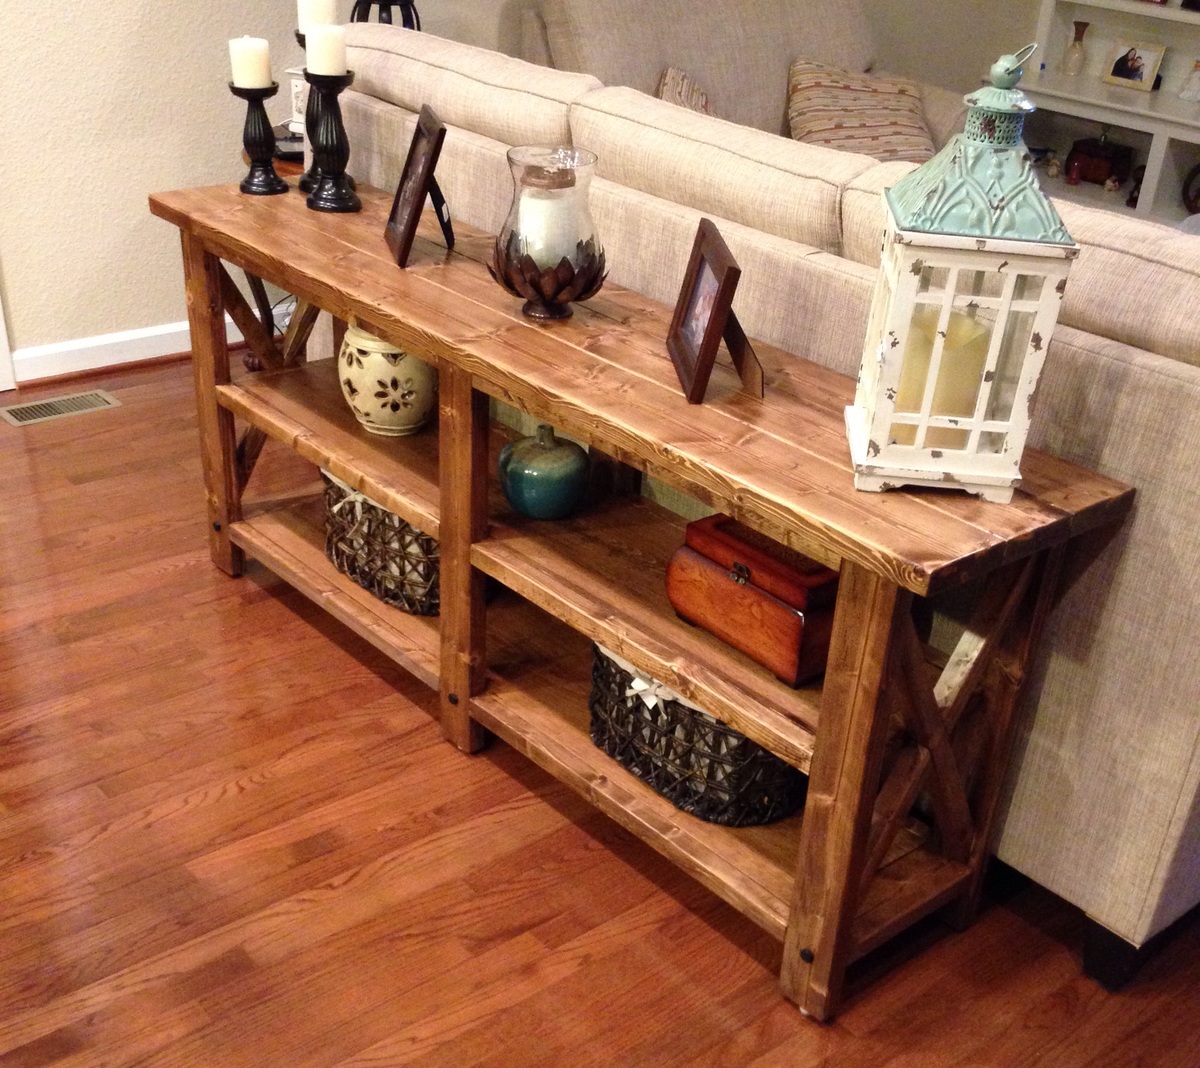
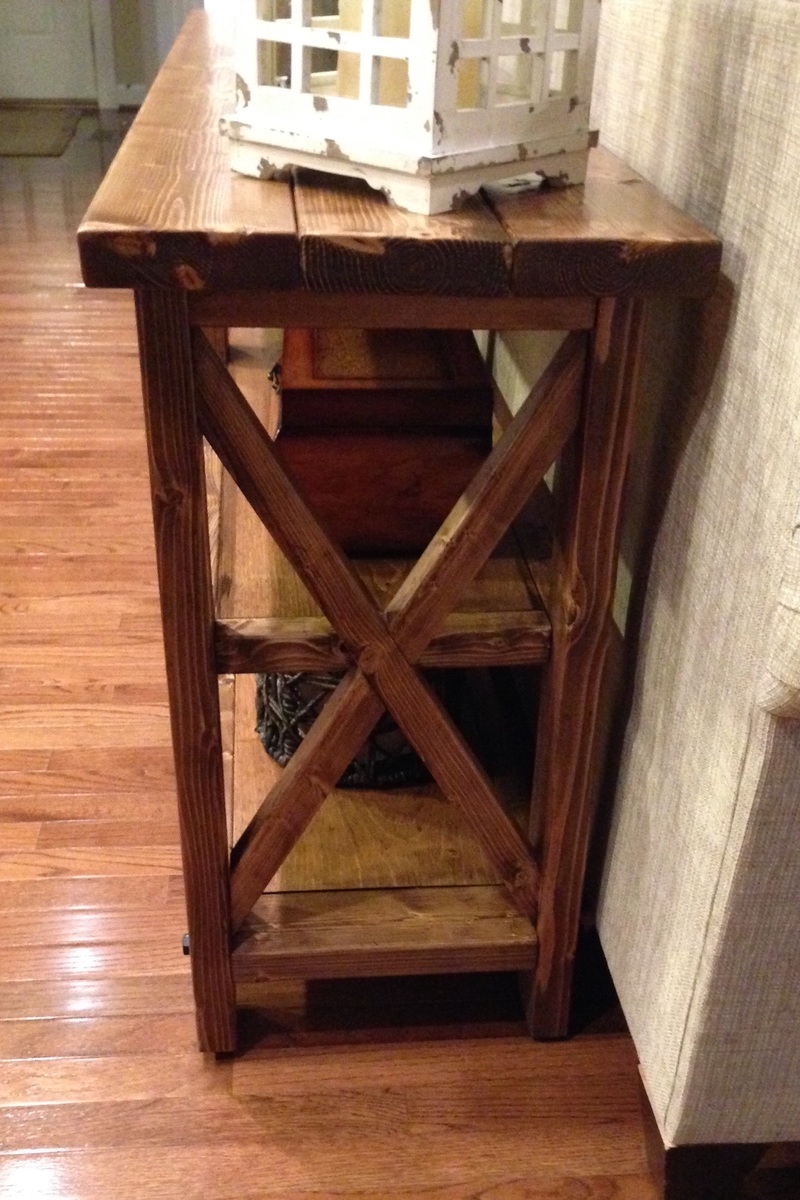
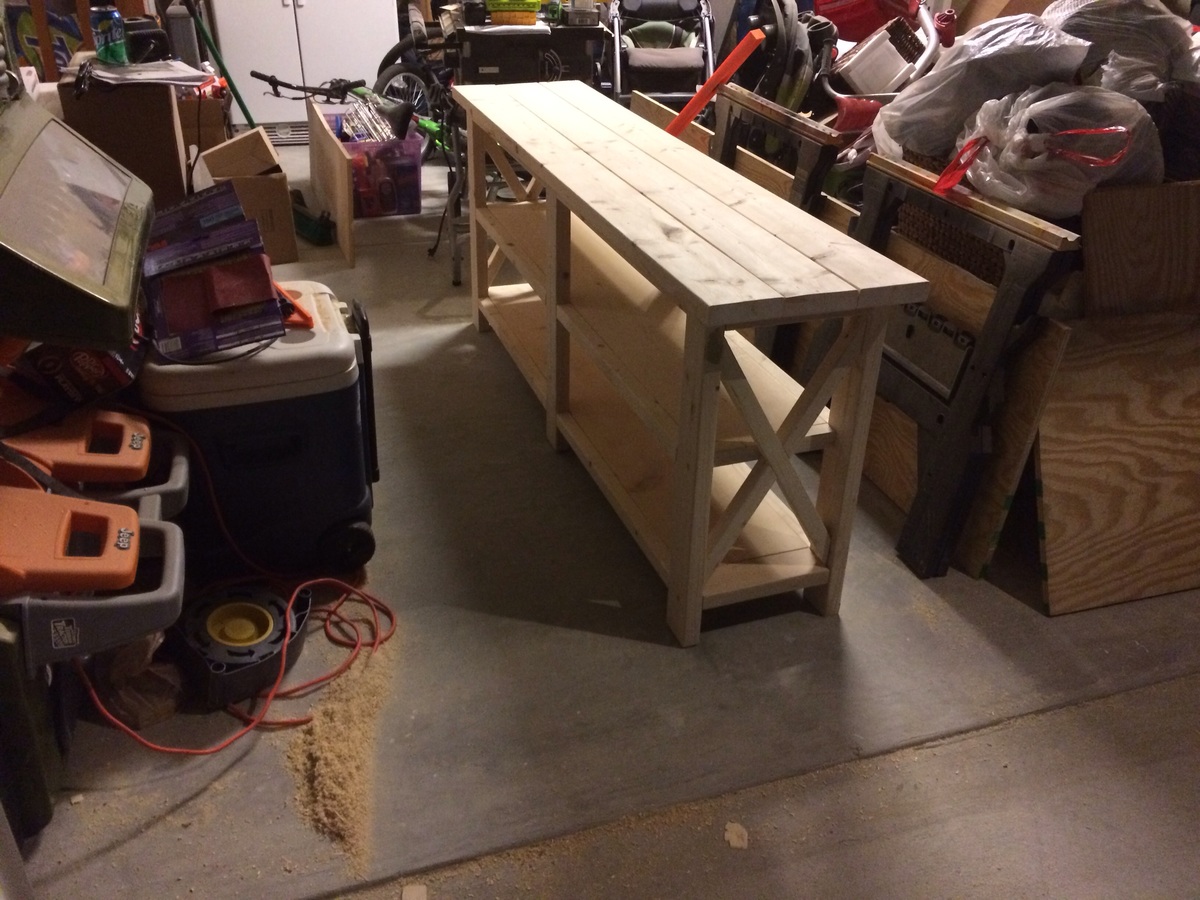
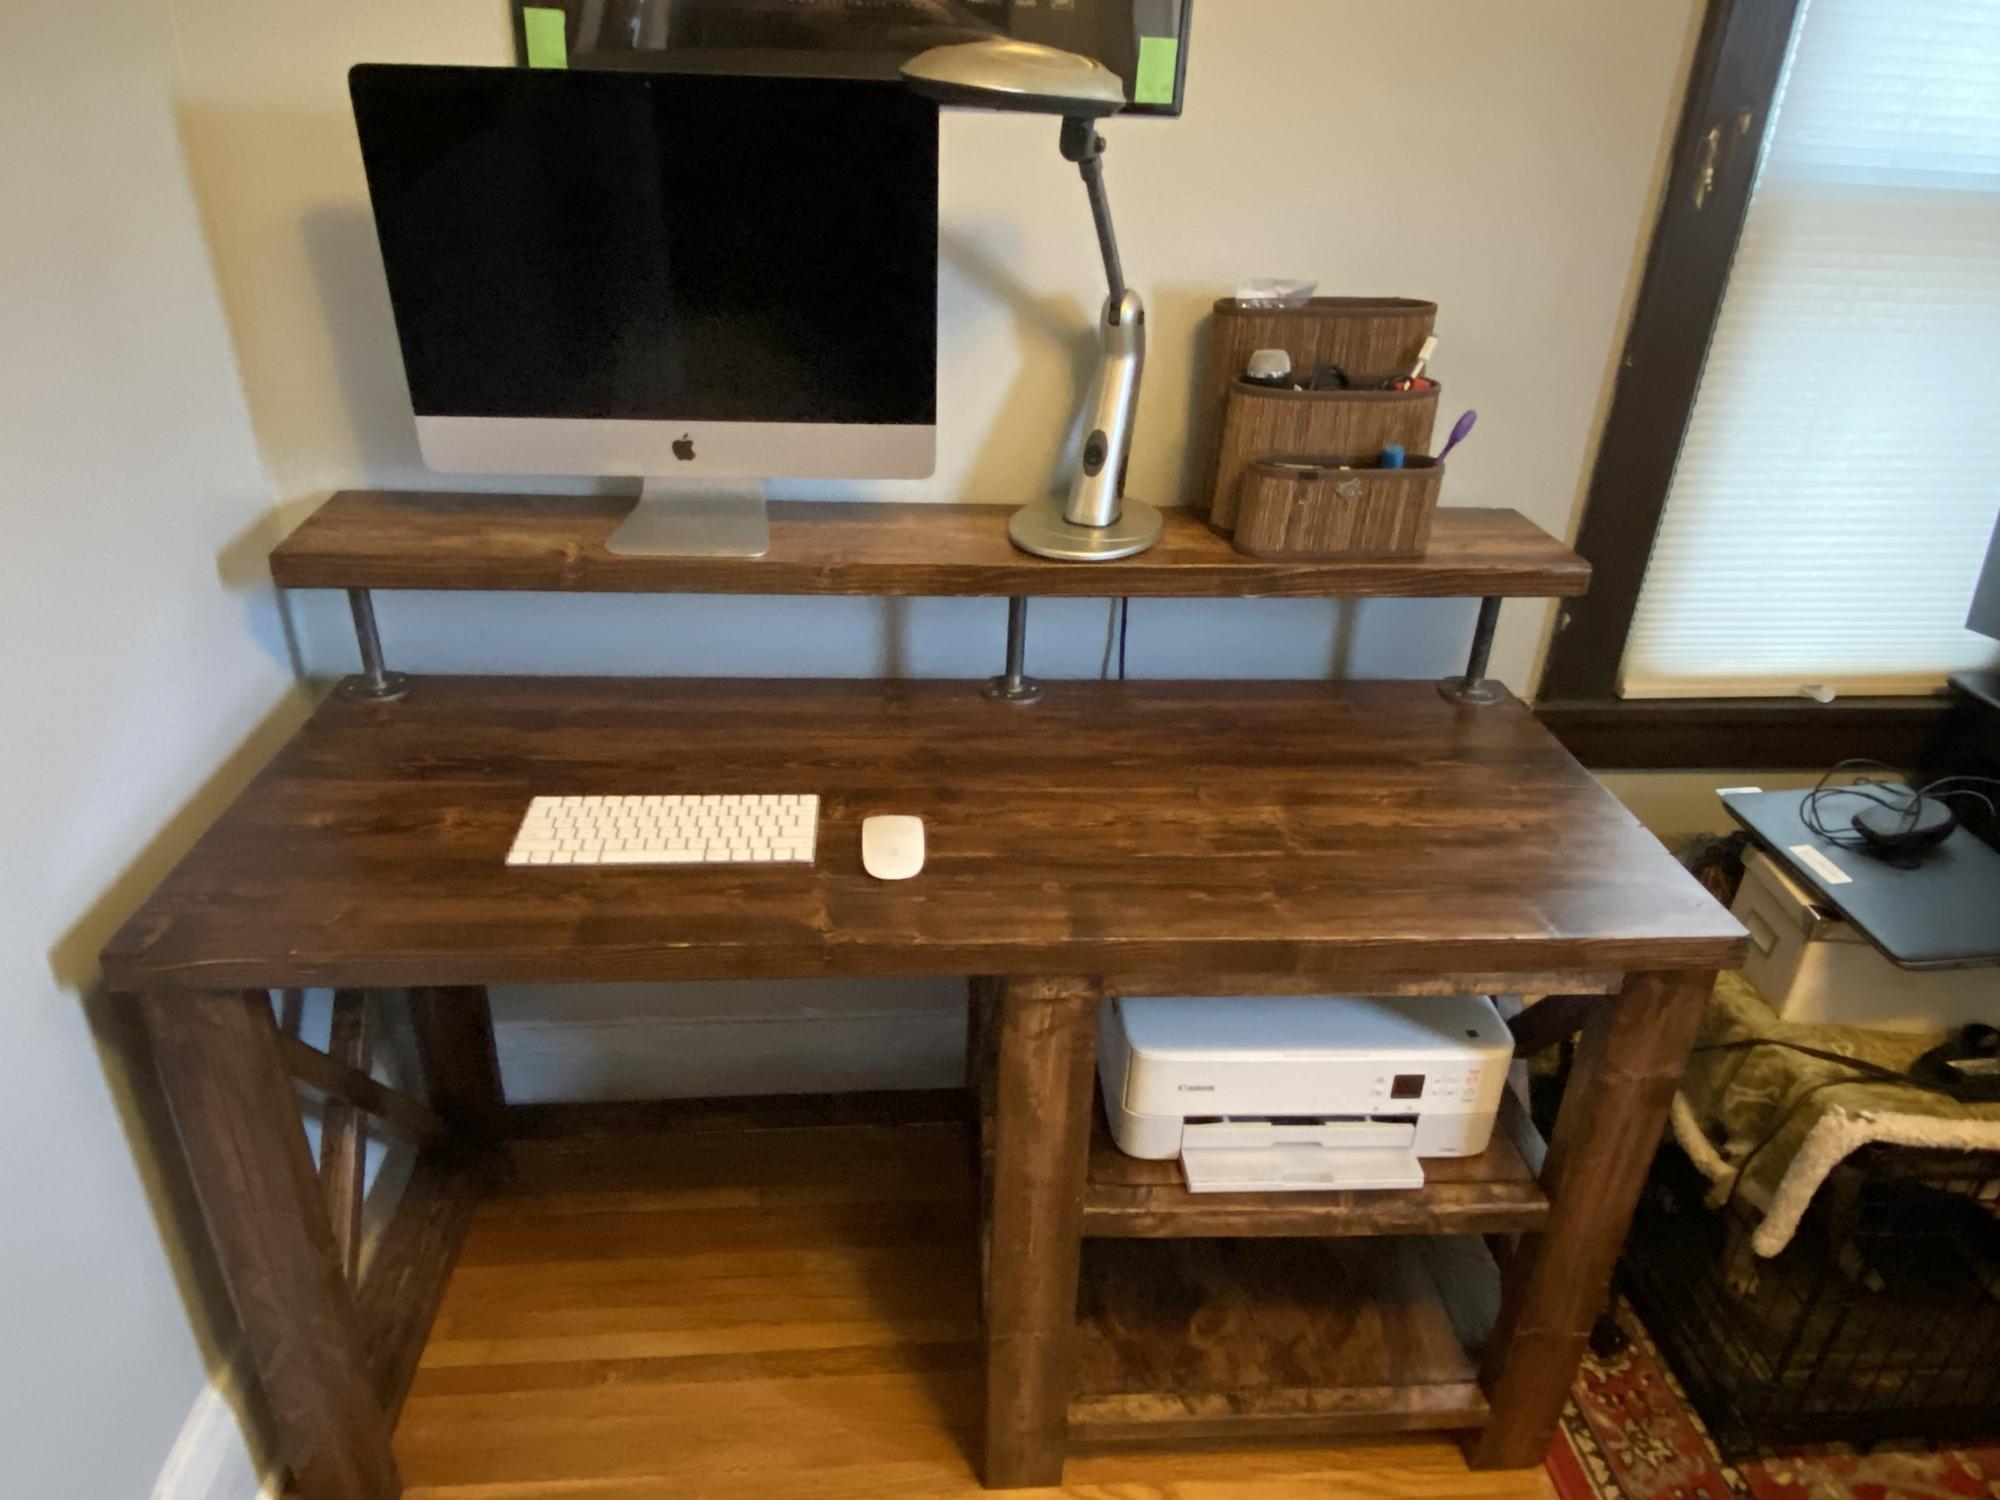
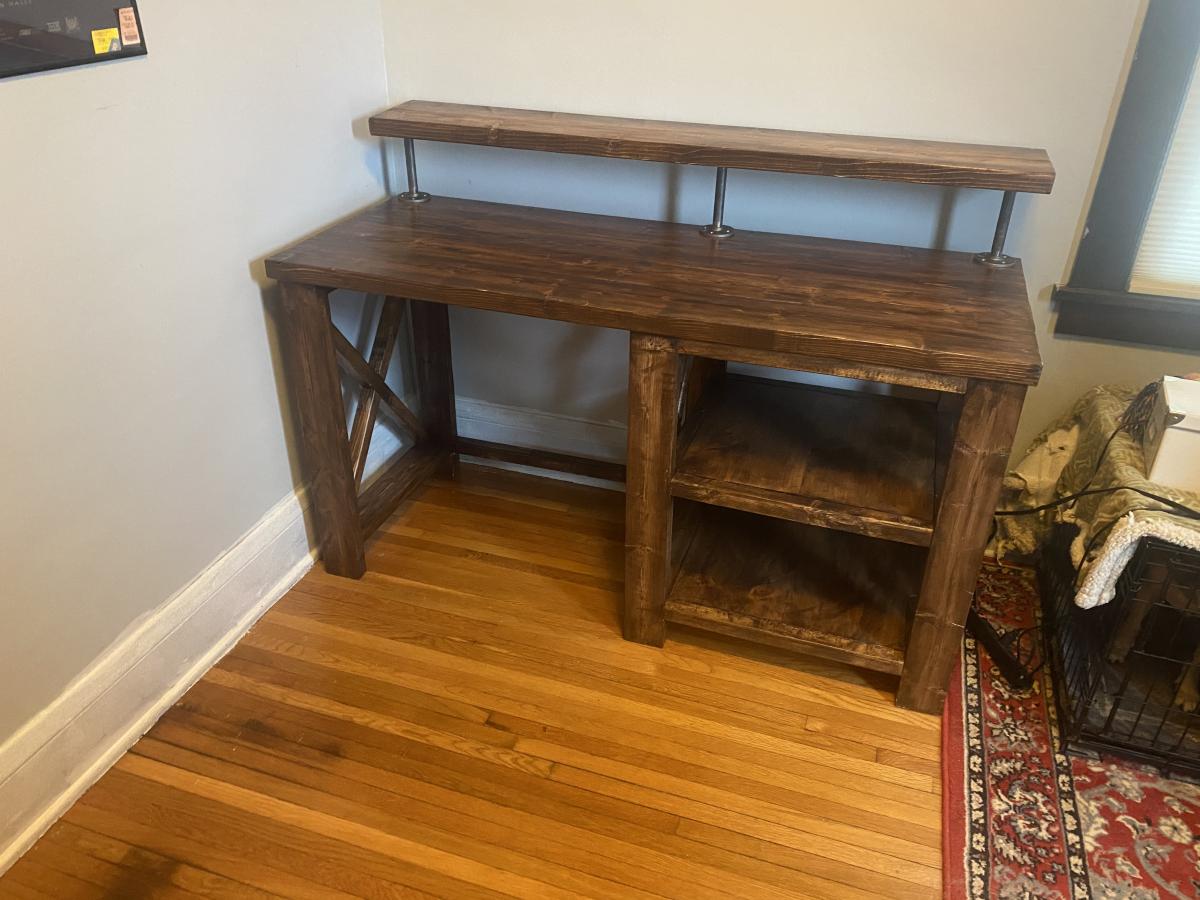
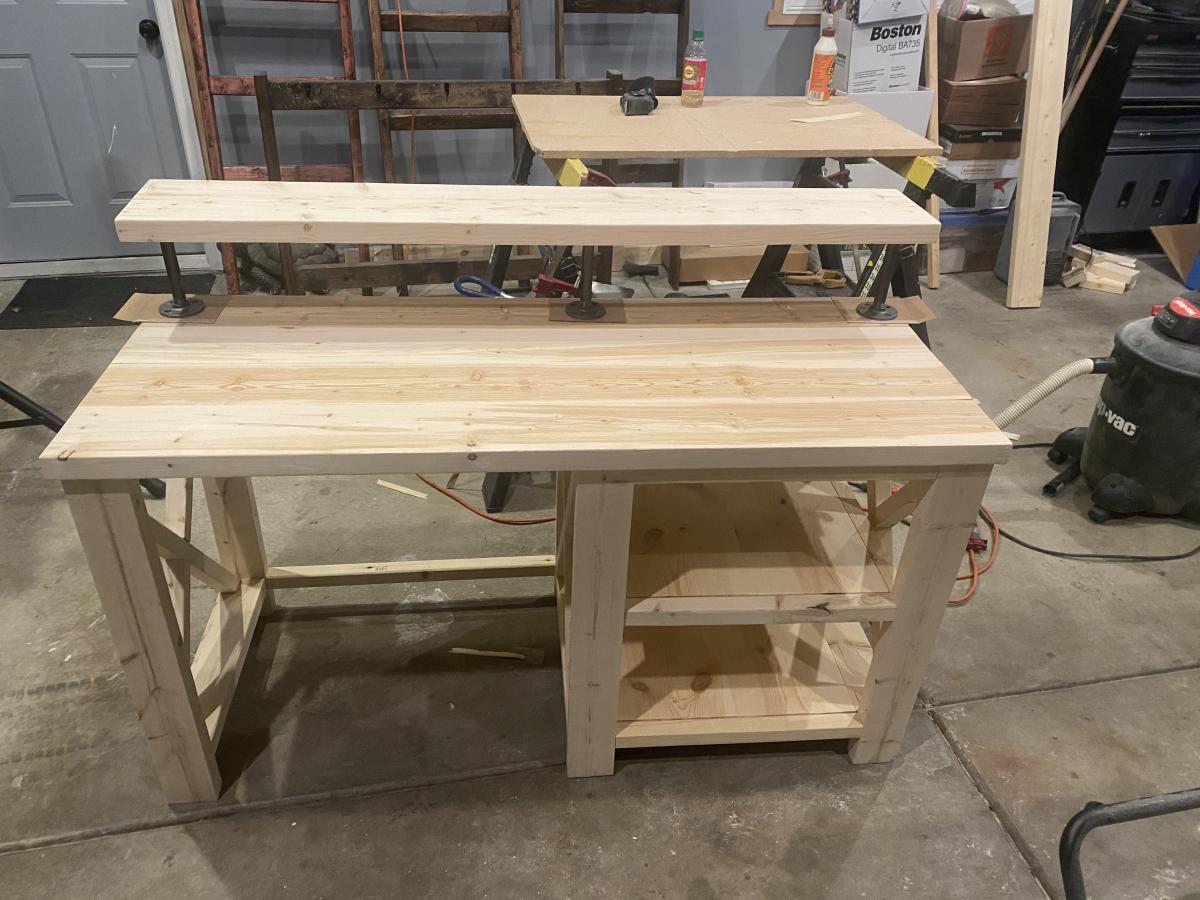
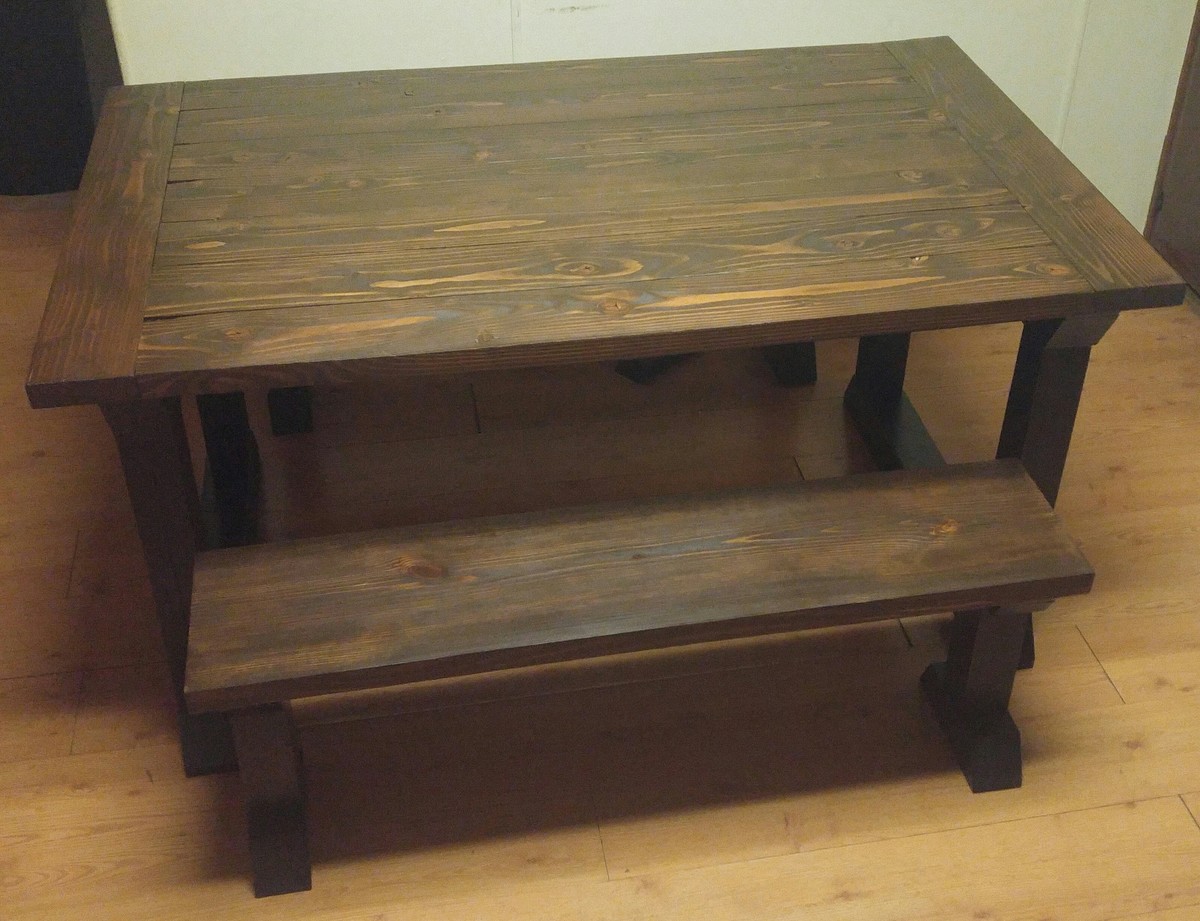
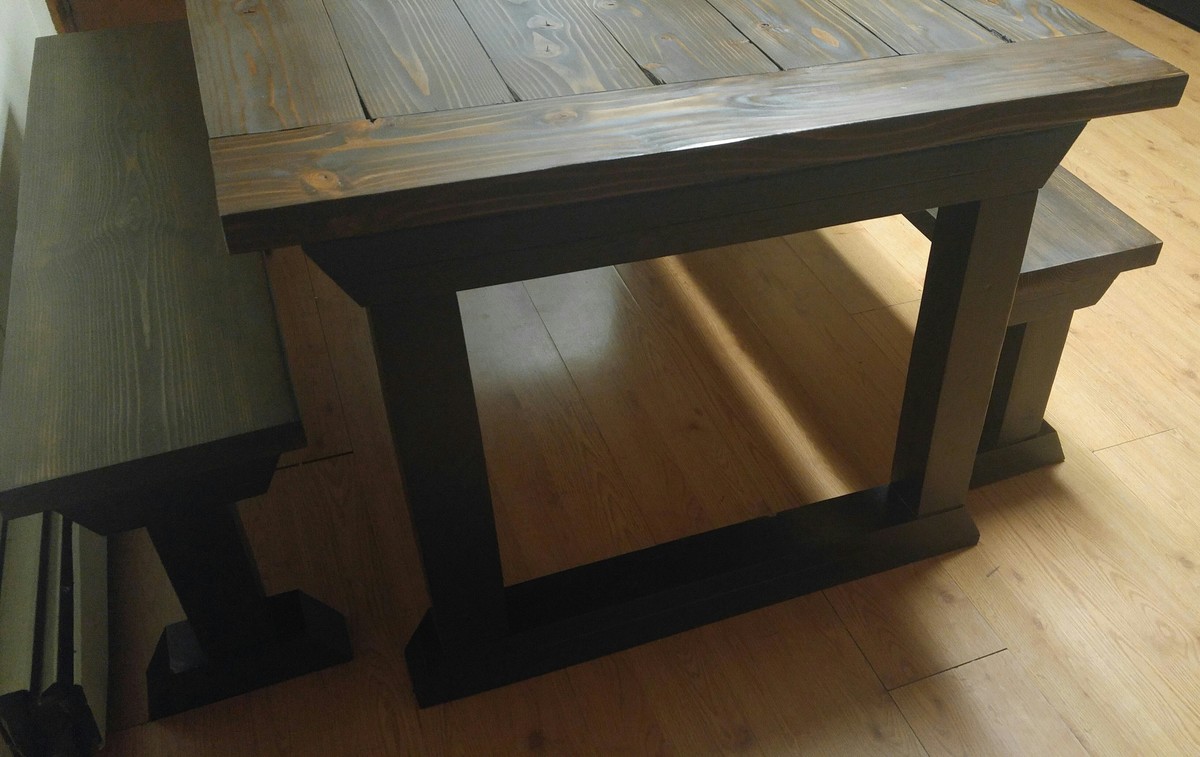
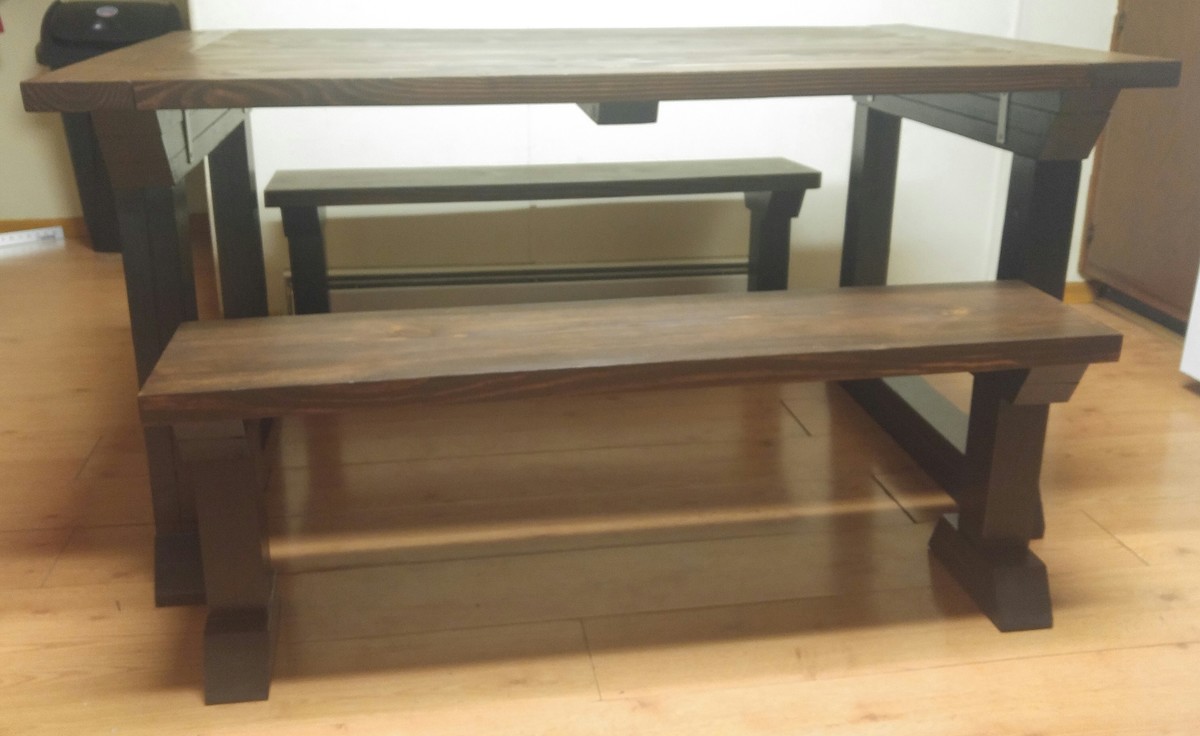
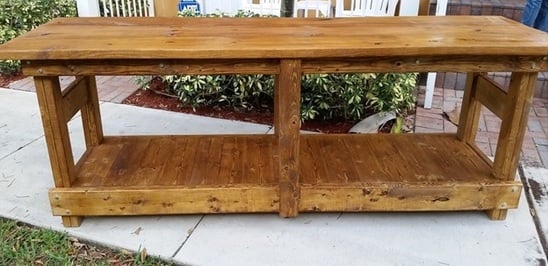
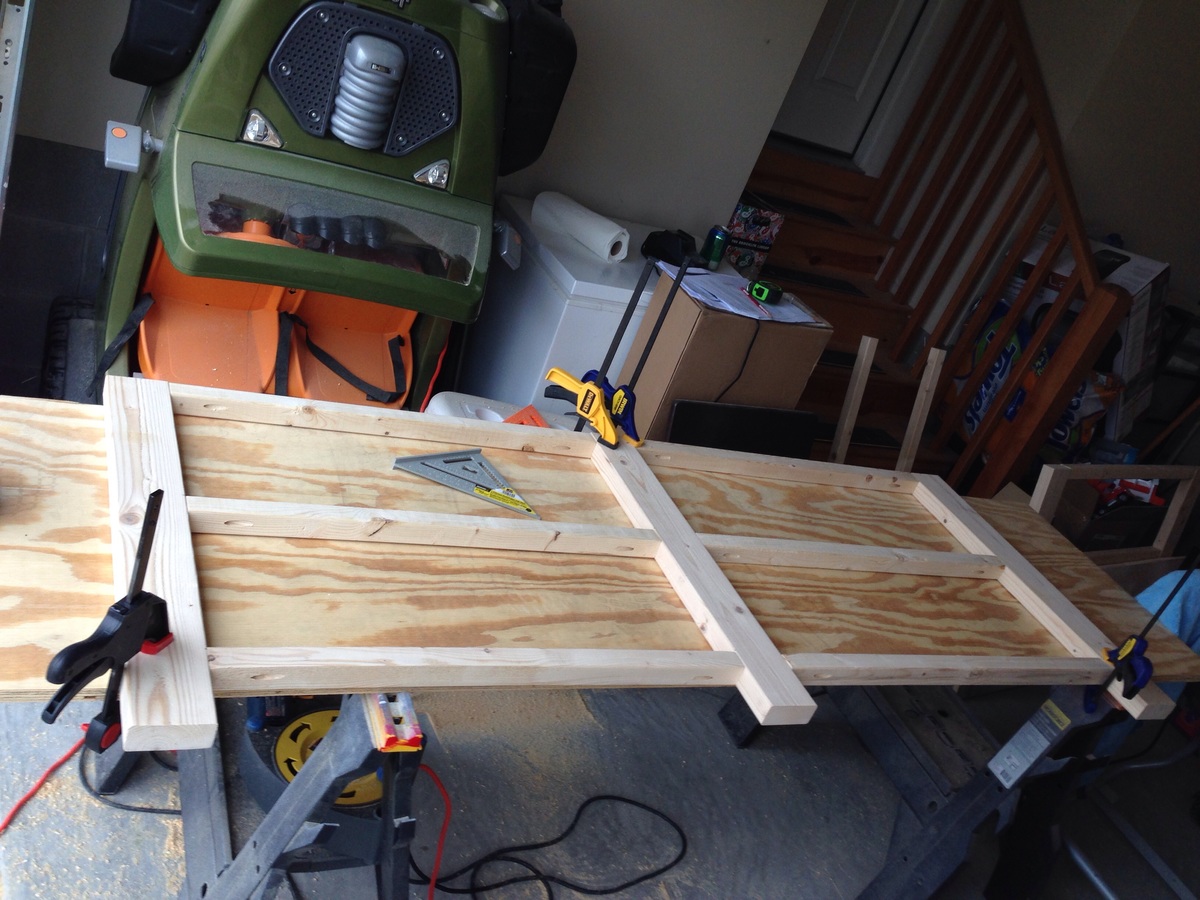
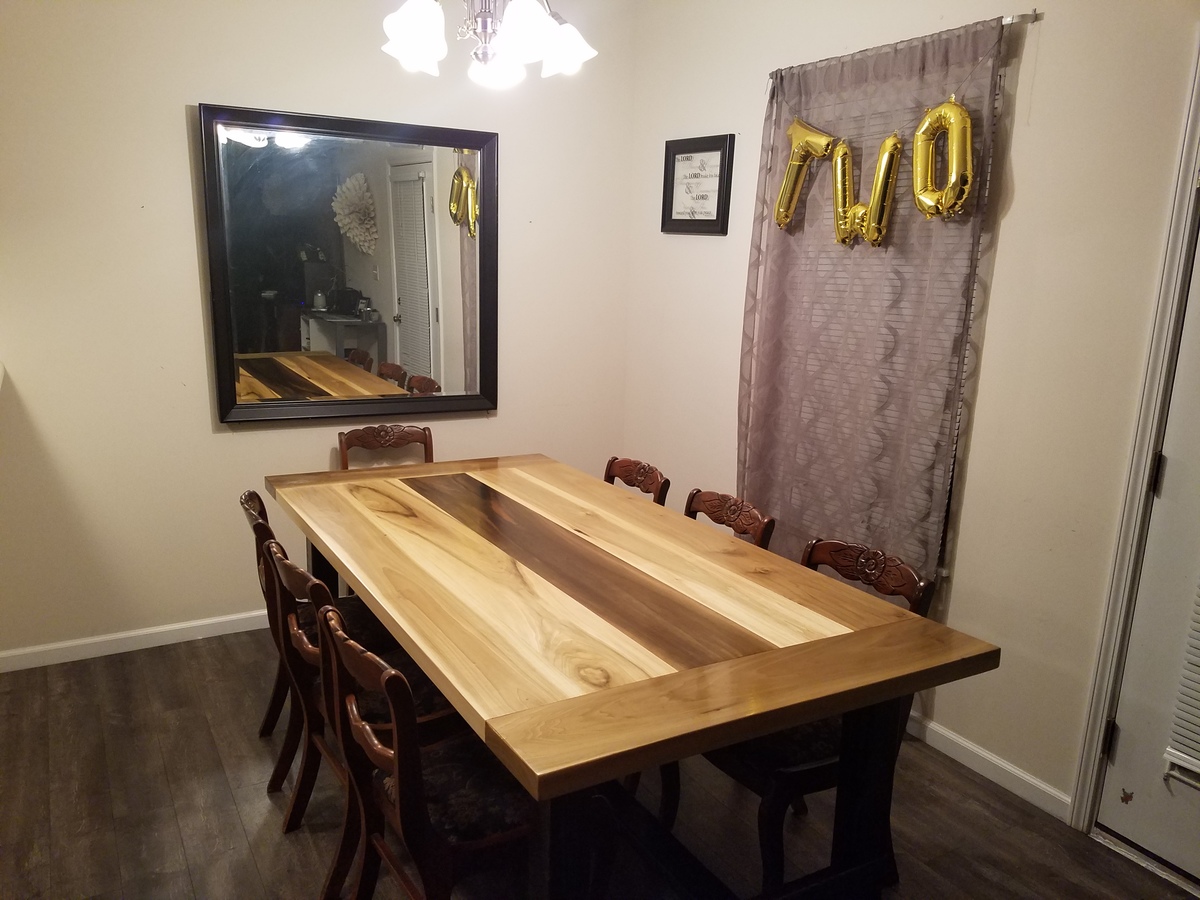
Community Brag Posts

Farmhouse Bed - Full

Submitted by pcarroll on Fri, 09/16/2016 - 19:14

Built using the Farmhouse Bed - Queen plan, making adjustments for the Full size matress.  The finish is a blue milkpaint over a white base and distressed with a sanding pad. 

Built from Plan(s)
Estimated Cost
$200
Estimated Time Investment
Week Long Project (20 Hours or More)
Finish Used
Blue milk paint over a white base. Distressed with sanding pad throughout.
Recommended Skill Level
Beginner

New work from home desk!

Submitted by Anonymous (not verified) on Tue, 06/30/2020 - 09:13

Thanks to the pandemic I needed to whip up a quick (and cheap!) home office. This desk was the perfect fit! I made the top out of an 8-foot rough pine board...Just cut it in half and attached it lengthwise with wood glue and pocket screws. Finished the top with a dark stain, and the bottom with some white trim paint we had laying around. The whole thing cost about $20, versus the $200 I would have had to spend. Very happy with how this turned out!

Estimated Cost
$20
Estimated Time Investment
Afternoon Project (3-6 Hours)
Recommended Skill Level
Beginner

My Channing Desk

Submitted by ecsorah on Mon, 08/27/2012 - 11:11

I followed the plan almost exactly, I just made it to fit the space that I had. It was super easy and I love the way it looks! And I used contact paper from target to decorate the drawer face and the shelf. I also made the shelf a pull-out shelf using the same type of drawer pulls as the drawer. i made that shelf the same width that I made the drawer and it fit perfectly!

The longest part of this project was drying time for stain and paint and such. I did not include that time in estimate for time to build.

Built from Plan(s)
Estimated Time Investment
Day Project (6-9 Hours)
Finish Used
Used a mistinted paint from a local paint store and minwax provencial stain.
Recommended Skill Level
Beginner

Comments

distressed wood console table

Submitted by joshmade on Sat, 06/21/2014 - 14:43

I saw this table on Anna's website from rogueengineer.com. The plans were simple to follow. I made it out of pine, 2×4s, and baltic birch ply.

Built from Plan(s)
Estimated Cost
$100-$150
Estimated Time Investment
Weekend Project (10-20 Hours)
Finish Used
Minwax Wood stain, wipe on poly
Recommended Skill Level
Intermediate

Comments

Craft and Fabric Cutting Table

Submitted by Anonymous (not verified) on Wed, 09/21/2016 - 10:17

This was inspired by the easy kitchen island and the easy garage workbench plans. I saw what another person had done so I modified it to my specifications to work as a craft and fabric cutting table. It is 37" high so I can stand and cut fabric comfortably without bending over. I chose 37" because I have long legs and needed a little taller than normal countertop height.

The top is 48"x38" so my cutting mat fits both directions and a yard of fabric fits completely on top. The frame is slightly smaller 44"x34" to allow a 2" overlay on each side. The bottom shelf is 44"x31" and the middle half shelf is 44"x17". I ended up doing a half shelf because I used the leftover scraps from the 4x8 plywood. It works great because I will be able to pull up a chair and put my knees underneath.

The 2x4 legs are set out 1" from the ends. I attached the shelves and table top using L brackets. Due to bad math I ended up with a 1" overhang on the shelves along the 44" side.

The paint I used is Behr brand Spun Cotton in satin finish. It is an offwhite / cream color.

The stain I used is Minwax dark walnut and finsihed it with 4 coats of Minwax polycrylic. 

I had an awesome guy at Home Depot do allt he cuts of wood for me.

Estimated Cost
Approx $250. The birch plywood was the greatest expense of wood. The other small things added up quickly.
Estimated Time Investment
Weekend Project (10-20 Hours)
Finish Used
Paint: Spun Cotton in satin. Behr (home depot) brand. Stain: Minwax Dark Walnut. Clear coat: Minwax polycrylic.
I used a 2 inch brush to apply polycrylic and a rag to apply stain. Just used a small roller for the paint. Take your time to sand all wood properly. I did 80, 110, then 220 grit to all pieces on the sides that will be seen and touched. Also make sure you sand between topcoats.
Recommended Skill Level
Beginner

Comments

Ana White

Wed, 09/21/2016 - 15:00

I can hardly belive this is DIY!  That birch plywood was worth it, it is lovely!  Thanks so much for bragging, really enjoyed seeing your project!  Ana

Queengirl35

Wed, 09/21/2016 - 20:57

Thank you for the kind words! (I am the original poster just made my account after the fact.) And thanks for this wonderful website! There are a few more projects I feel I can take on now that I have completed this one. 

Children's Table and Chairs

Submitted by Mommasus on Thu, 07/02/2020 - 14:05

I made these for my granddaughter. I was using fours colors instead of three so used 1x6's instead of 1x8's on for the table top and just added one more back slat to each chair.

Estimated Time Investment
Weekend Project (10-20 Hours)
Finish Used
Used exterior satin enamel paint and exterior screws so it can used inside and out. Painted all the chair slats and underside of the table top prior to assembly of the table and chairs. Required some sanding after filling screw holes but it was easy to touch up. Painted the chair and table base after assembly but before slats and top were attached. Attached table top and then sanded from 60 to 120 sandpaper so it would smooth for drawing and coloring and then painted the top of the table top.
Recommended Skill Level
Beginner

Farmhouse Table

Submitted by EMiracleKY on Mon, 06/23/2014 - 20:34

This was my first ever project. The table that has a white base is another table I built after the stained one.

The project took several weeks because I only was able to work on it on Saturday mornings. I'm happy with how it turned out and learned a lot from it! I have a new love for woodworking and enjoy the whole process, from design, to completion.

Thanks for checkling it out!

Estimated Cost
125-150
Estimated Time Investment
Week Long Project (20 Hours or More)
Finish Used
Cabot stain- Lowes doesn't carry Cabot anymore though :/
Recommended Skill Level
Beginner

Make it bigger

Submitted by Stootz97 on Fri, 09/23/2016 - 23:45

Thanks for the awesome plans. Read a lot of feedback from people saying it was too small. Just make it bigger! Used same plans but 6 1/2 long and 4 inches wider. Added extra support to the table top and used all 2x4s. Lovin it

Estimated Time Investment
Afternoon Project (3-6 Hours)
Recommended Skill Level
Starter Project

Comments

twin farmhouse beds

Our girls had made do with hand me down room furniture and decor( youngest 2, out of 5 girls). It was time to give them a space they love. I have never built anything other than slight upcycle projects. Slightly modifying this or that , never just starting with lumber and a plan. They picked the farmhouse beds and my husband was gone for 3 weeks backpacking, so off to buy lumber. Not as easy NO ONE HAS UNTREATED 4x4 posts!!!!! i called 3 counties, almost cried, to order was 3 weeks, or just cant get them. Finally found a cedar and cypress mill 1 hr away. Hopped in the car and off i went to load up.I had 2 beds to do so the second one went faster. What i learned?
1. even after predrilling you will do best hand screwing screws. Cypress was really hard in places and a stripped screw equals stress.( just like there is no crying in baseball, there is also no crying in carpentry)
2. the 2x4 that is under the 2x6 on headboard and footboard should be cut AFTER you assemble the 1x6 and 1x4 base. Much easier than making cuts with a circular saw on 1x6
3. your hands will feel like they were run over after day 1 of sanding, it will pass and get better.
4. perfect is not possible. It probably not even preferable. You want perfect? That is a machine
The room still needs some special touches, lamps, nicknacks, etc. cannot paint , rental. so sad. oh well

Built from Plan(s)
Estimated Cost
$300( for both)
Estimated Time Investment
Week Long Project (20 Hours or More)
Finish Used
Paint and then hand rubbed wax
Recommended Skill Level
Beginner

Comments

sgilly

Fri, 08/31/2012 - 09:55

Your girls must be so happy to have these cute beds. And, proud of their mama who made them!

In reply to by sgilly

sambenedetto7@…

Fri, 08/31/2012 - 10:09

Really hard to find common ground for a 15 yr old and 12 1/2 yr old. Tried to go for sophisticated beach side cottage. Dark wood bookcase and side tables , jute rug, cotton quilt coverlets....also i did add six inches to the height for added storage. Lots of girls equal lots of shoes

Bike work bench

Submitted by hjason on Thu, 06/26/2014 - 08:31

My daughter and I made this for a Father's Day gift, along with a bike rack, to get my husband's bike "shop" in better order.

Built from Plan(s)
Estimated Time Investment
Day Project (6-9 Hours)
Finish Used
None!
Recommended Skill Level
Beginner

Comments

Farmhouse King Bed with Drawers

Submitted by jpad067 on Mon, 07/06/2020 - 15:55

Inspired by the Queen Size Farmhouse Bed with Drawers, my father-in-law and I converted those plans into a King size. This was quite the project and took us a substantial amount of time to complete. We used a modified French Cleat to make the entire bed modular, so it can be easily (still very heavy) moved. The entire storage capacity is roughly 30 cubic feet, so we will have ample room to store our linens and other items not regularly used. This entire project was modeled from an antique door that my wife found in an antique store. Enjoy!

Estimated Cost
$1300
Estimated Time Investment
Week Long Project (20 Hours or More)
Finish Used
Sherwin-Williams Emerald Urethane Trim Enamel (Snowbound)
Recommended Skill Level
Advanced

small shed

so i put this storage shed on the outside wall of my garage and then i put my dust collector inside it and cut a hole for the pipe to into the garage. It's nice and out of the way now. I adjusted the size a bit to make it fit more of my outside tools like the trimmer and blower. Its not in the picture but I also extended the roof about 30 inches over the side to park the lawn mower under it. If I were to do it again I'd make it even bigger.

Built from Plan(s)
Estimated Time Investment
Weekend Project (10-20 Hours)
Recommended Skill Level
Beginner

"Nook of woe" is now "nook of wow!"

Submitted by OliveJuice on Sun, 06/29/2014 - 11:36

We had a 28 inch nook in the mud room/bathroom that was the collect all for our shoes, hats, boots, scarves, and pup accessories. Had seen shoe cabinets at ikea but with the space being small it needed a "custom" build. Ana had the perfect solution!! We took basic plan and reduced length to 28 inches and top width to 12 inches. I wanted a larger top surface to place baskets. We took the 2 drawer and added a 3rd for increased storage space. Drawers were also made deeper to fit with the wider top piece. Also added a 4 thick chunky legs (4x4) to help support and stabilize dresser. Those were set in a bit to accommodate the molding along baseboard. Added faux drawer fronts using 1/4 inch ply wood. We put the magnets on but made drawers hard to open so we kept magnet but removed the plate. An old leather belt was recycled for the back strips to prevent drawers from flopping down.

Built from Plan(s)
Estimated Cost
$60 (we had drawer pulls from other project that we recycled)
Estimated Time Investment
Day Project (6-9 Hours)
Finish Used
Morocco Red with a turquoise under coat. (Used 1 small sample sized jars each from Home Depot) lightly sanded red off edges to let the turquoise show through. Same with the wooded knobs.
Recommended Skill Level
Intermediate

Garage Shelving by using 4 by 2s

Submitted by Anonymous (not verified) on Sun, 10/02/2016 - 19:02

Simply inspired by Ana's Garage Shelving project using 2 By 4s. Thank you Ana. Below are my project details.

1. Shelving Height =  8 Ft, Width = 12 Ft, Depth = 13 inches (Each shelve having 3 pieces of 2 by 4s). All 8 Ft and 12 Ft lumber available in this standard size.  Only cutting required (done at Home Depot) was for the 13 inch pieces to build the shelving legs (which in Ana's original plan is 17 inches, and has 4 pieces of 2 by 4s).  Able to carry all lumber (multiple trips) in minivan after folding seats.


2. Garage Floor was a bit uneven - so I used Shims (plastic) as suggested by HomeDepot associate.


3. To secure the shelves from the top of the wall, I used corner L brackets, 3 inch by 3 inch.  I used 1-1/2 inch screws to mount the bracket on the 2 by 4s, and then to mount the other side of the bracket to wall studs, I used the 2-1/2 inch screws (which I used throughout the project as Ana suggested). I mounted two brackets sideways, and one on the top (because the stud was around the corner).   Used a thin nail to find the stud as studfinder results were not reliable


4. After making shelving legs, we made them stand next to the wall, and then mounted the shelves (3 pcs each on each shelve) and then put screws.  My wife, her uncle, aunt, and cousin helped to mount finally, and it was great fun.

Estimated Cost
Approx $150
Recommended Skill Level
Starter Project

Nail Polish and Accessories Cabinet

Submitted by vickitee on Wed, 07/02/2014 - 07:39

I made this cabinet for my 9 year old daughter. My daughter enjoyed filling the shelves with her things and the door with her ear rings. The shelves are made from 1x3's. I added 4 small hinges and 1 magnetic closure. The stain used is purple (daughter's choice). This was a fun build that took 2 days start to finish.

Estimated Time Investment
Day Project (6-9 Hours)
Finish Used
purple stain
Try to stain the cabinet before installing the chicken wire!
Recommended Skill Level
Beginner

Modified Laundry Basket Dresser

Submitted by dkarinen on Wed, 10/05/2016 - 17:54

We modified this just for more stability around little ones. I also torched the Oak top so the grain would be more prominent and routered the edge. 

Built from Plan(s)
Estimated Time Investment
Weekend Project (10-20 Hours)
Finish Used
Behr ultra pure white paint and gunstock stain.
Recommended Skill Level
Intermediate

Farmhouse Headboard

My daughter is thrilled with her Farmhouse headboard. She’s a horse-loving teenager & this fits her bedroom style perfectly. All of the wood I used was pulled from piles at our family farm. This plan has plenty of room for little errors & customization of the finished look. I scarred up the wood with a hammer, big screws & went to town with a Dremel sanding tool to round the edges & make it look very rustic. So much fun to build & see my girl so excited. Thank you for sharing this plan!

Built from Plan(s)
Estimated Cost
$15 screws & wood stain (had free wood)
Estimated Time Investment
Afternoon Project (3-6 Hours)
Finish Used
Minwax Special Walnut
Recommended Skill Level
Beginner

Toddler Farmhouse Bed

Submitted by benabb on Wed, 09/05/2012 - 20:34

I followed the instructions to a T.
This is a very simple build and makes a great bed. My daughter loves it and I love the look.
I didn't screw down the 1x2 supports because I was having trouble with the wood splitting. It's worked out fine this way, I just need to rearrange a little bit when I change the bedding on her mattress.
If you have a kid who likes to climb or jump on their bed a lot, be sure to use a lot of screws to connect the bed frame to the foot board.

Built from Plan(s)
Estimated Time Investment
Day Project (6-9 Hours)
Finish Used
1 coat pre-stain.
2 coats Minwax Golden Pecan.
1 coat poly.
Recommended Skill Level
Beginner

Woven back bench

Really fun project. I plan on making a side table and 2 chairs with this plan as well.

Built from Plan(s)
Estimated Cost
$75
Estimated Time Investment
Weekend Project (10-20 Hours)
Finish Used
Cherry gel stain and oil pecan back. Followed with high impact clearcoat.
Recommended Skill Level
Beginner

Comments

pde00311

Tue, 07/08/2014 - 10:26

Awesome job. I love the finish. I actually just finished a pair of these (which I have yet to post on the website) that are sitting on my front porch. I was also thinking of making matching side tables, but I cannot decide what would look good with the benches. Are you using Ana's plans to make your side-table, and if so, which plan? Looking forward to seeing what you create.

Hailey Platform Bed

Submitted by juls02 on Thu, 07/09/2020 - 10:15

I'm just beginning to experiment with furniture building, but I am pleased with how the bed came out. The plans were easy to follow. I didn't have a finish nailer at the time, so I had to use 2 inch finished nails which I hammered in. Although you can see the nail heads along the side of the head board, I don't think it distracts the eye.

Estimated Cost
$120
Estimated Time Investment
Weekend Project (10-20 Hours)
Finish Used
Alternating with Verathane's "Flagstone" and "Briarsmoke" wood stains
Recommended Skill Level
Beginner
Back