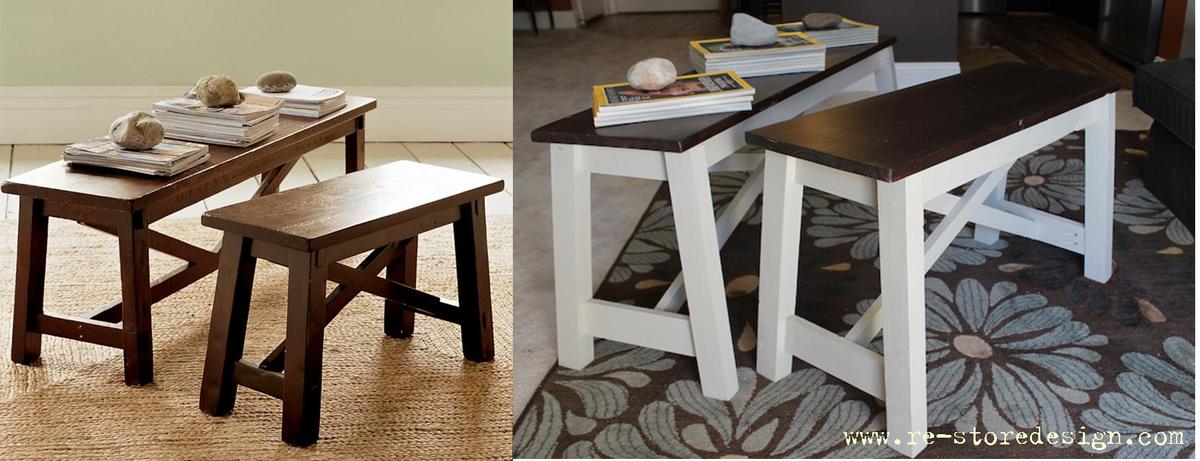
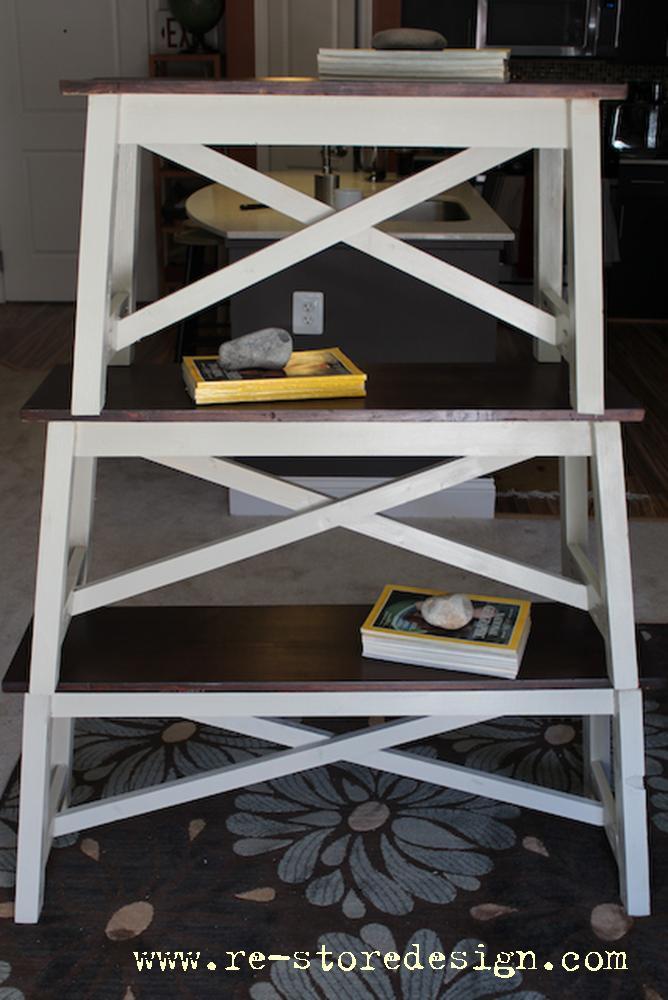
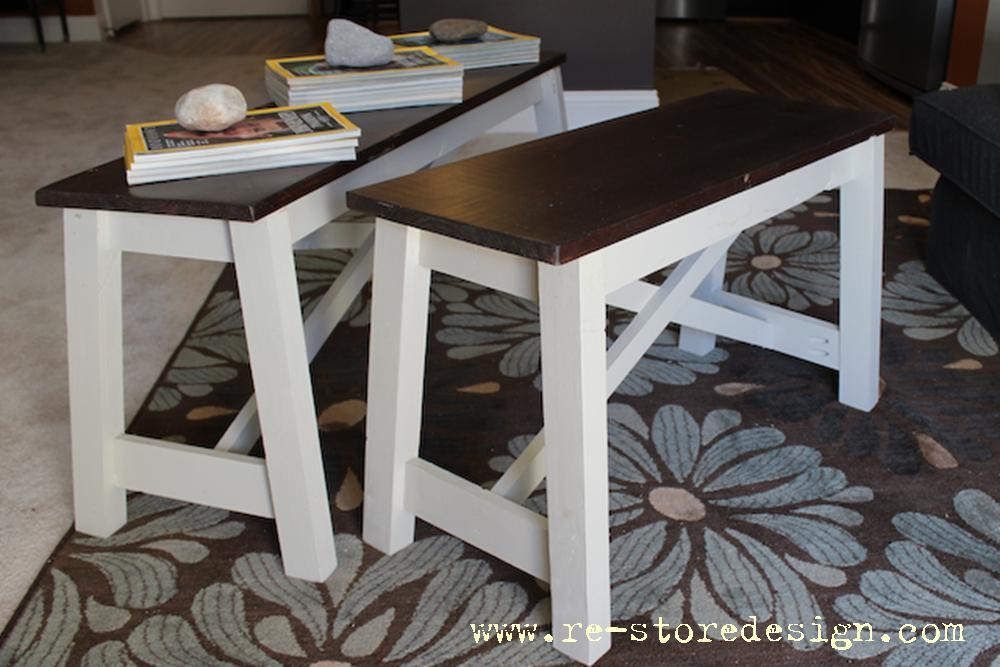
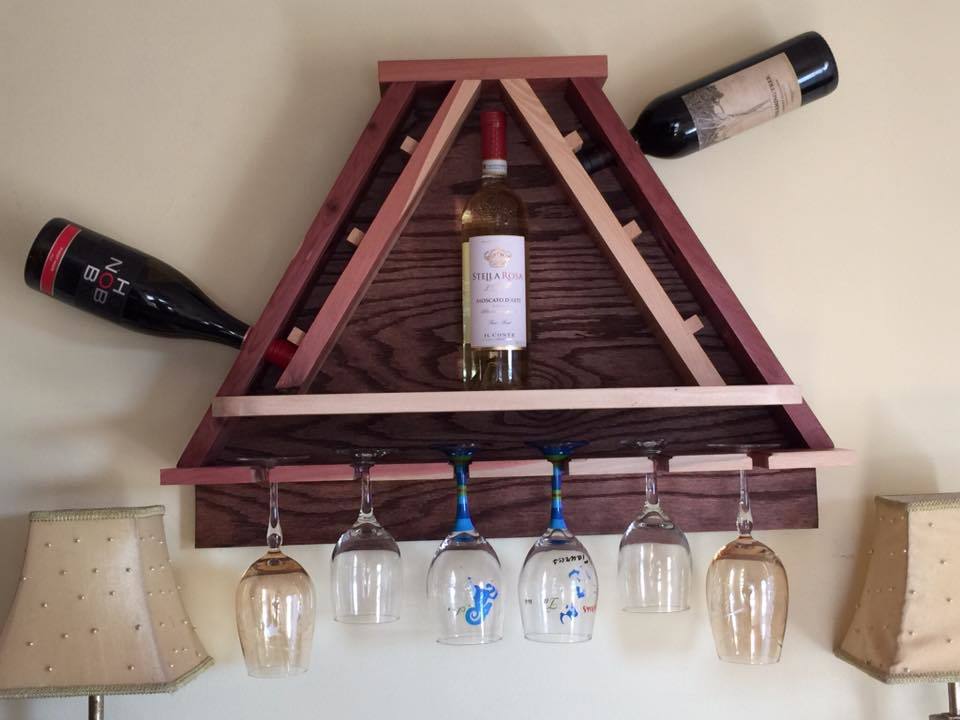
Community Brag Posts

Free laundry dresser :-)

This is the second one of these I have made. I love the 1st one and I wanted to make one for my sisters birthday. Being on a pretty tight budget, the extra $40-$50 I needed for the materials was pretty illusive. While closing up our shop one day I noticed that our buildings dumpster was overflowing w/ perfectly good cabinet doors. I jumped rt in there and grabbed a few of them. I had them for a few days before I realized what I could use them for. I had to change the measurements a little but it worked out well. I used my kreg jig jr. To fasten them all together 1st (the plan says to attach the cleats 1st but because I was changing the measurements , I did it last). Instead of putting a back on it, I used scrap 1x 2 furring strips across the back of the cleats and it feels just as sturdy as the 1st one I built. To dress it up a bit, I painted the molding on the cabinet doors and the cleats a blueish grey and aged it for some character. Finishing w/ Johnson's paste wax.

Built from Plan(s)
Estimated Cost
$2 for kreg screws and paint
Estimated Time Investment
Afternoon Project (3-6 Hours)
Finish Used
Oops paint from Home Depot and Johnson's paste wax
Recommended Skill Level
Starter Project

Comments

spiceylg

Wed, 08/14/2013 - 04:48

Love that you repurposed something you found! Great recycling and free materials for you. A win-win! I'm sure your sister will love it!

Rustic X CoffeecTable

Submitted by kelty on Wed, 09/09/2015 - 08:51

My first build from your site. The plans are great!  I changed it and used half lap joints for the Xs to keep them as solid pieces. Only cheap lumber is available at the big box stores, so LOTS of sanding. 

Built from Plan(s)
Estimated Time Investment
Weekend Project (10-20 Hours)
Finish Used
Weathered gray by rustoleom
Recommended Skill Level
Beginner

Castle Loft Bed for Two

Submitted by Elliotte on Tue, 07/31/2018 - 10:30

This project started with our older girl wanting sleep in the same room as her younger sister once she was out of a crib. Since it meant no more sneaking into Mom & Dad's bed I was happy to comply. The only problem was all the plans I found were for one bed not two. Both girls love storytime in bed, so I had to make it strong enough for the whole family to be up in bed. To not turn her room into a construction zone, it was made in sections that could fit up the stairs & through the bedroom door. 


All together we have a twin bed, a crib-size bed, three removable railings (to let me put them in bed when they fall asleep elsewhere), a slide anyone can use, a secret tunnel to crawl through underneath (and strong enough for adults to use as a step-ladder), a spiral stair for the kids to climb, and enough room for adults to sit up underneath. There is a flag pole next to the slide, but neither my wife nor I have gotten around to making them a flag yet. 

Estimated Time Investment
Week Long Project (20 Hours or More)
Recommended Skill Level
Advanced

We Love our Sectional and Tables

Submitted by Mrs.F on Sun, 05/15/2022 - 09:33

We love our sectional built from the modern sectional plan. We also made the tables from an Ana White plan but we adjusted the size. My husband and I love projects.

Comments

Rustic Farmhouse Table

Using Ana White's Rustic Table plans, I recreated her design by modifying the measurements to fit my dining space. I did not use wood glue, as the plans call for, and simply left the wood screws visible which I felt added a rustic touch. The top is stained with Minwax Special Walnut #224, and the bottom is painted Simply White by Benjamin Moore. The table measures 72"x42" and is 30" high. It can comfortably seat six chairs.

Built from Plan(s)
Estimated Time Investment
Afternoon Project (3-6 Hours)
Finish Used
Minwax Special Walnut #224
Polycrylic
Benjamin Moore Simply White
Recommended Skill Level
Beginner

Comments

snomii

Sat, 09/07/2013 - 12:22

I love your choice of colour! It's the perfect backdrop to a nice dinner full of colour! I'm getting inspired to try this now!

King Headboard

Submitted by kaileelev on Sun, 09/13/2015 - 19:26

Super easy and quick project! If you buy the select pine from home depot- it is a piece of cake to build. No sanding!

Estimated Cost
$50
Estimated Time Investment
Afternoon Project (3-6 Hours)
Finish Used
Minwax provincial stain. Polyurethane coating.
Recommended Skill Level
Starter Project

Farmhouse coffee table

Submitted by Anonymous (not verified) on Sun, 05/29/2022 - 17:19

All pocket hole joinery
Base is painted shade of white
Top is dark walnut

Comments

School Table

Submitted by jazberg on Fri, 07/15/2011 - 12:46

My husband and I took the Narrow Farmhouse Table and modified it for a school table for our children. We used two old doors we had left over from remodeling our 1925 craftsman home. One door is the top, and the rest is lumber culled from the other door. A fun, free, one-day project.

Built from Plan(s)
Estimated Cost
Free (glass top - $75)
Estimated Time Investment
Afternoon Project (3-6 Hours)
Finish Used
Paint. We sanded the paint already on the door and stained the bare wood to add contrast.
Recommended Skill Level
Intermediate

Comments

Queen Storage Bed

Submitted by weav3887 on Mon, 09/21/2015 - 07:19

This was a pretty easy build!  I changed the plans a little bit by adding ventalation holes and the way the cubbies conntect.  I wanted to be able to easily take apart the bed if I need to so I built a track system that the middle support sits on and locks in place. 

Built from Plan(s)
Estimated Time Investment
Weekend Project (10-20 Hours)
Finish Used
Red Oak
Recommended Skill Level
Beginner

Little helper tower

Submitted by Luvin_wood on Sat, 09/15/2018 - 12:55

I made this for a friend who has two little ones that are less than two years old. Although I enjoy the ease and convenience of the Kreg jig, I wanted to try something more difficult for this. So for the sides I used mortise and tenon joinery for the ladder rungs and top arches. The only screw I used we to place the hinges and attach the feet. I also didn’t like the gap in the platform that would have been caused by my 1x8 actually only being 7.5 in wide, so I made my own platform by joining the edges of two pieces of wood (one was 11 inches and the other was 6 inches wide). After clamping and lettting the glue dry, I trimmed up the platform to size. Due to the modifications the project took well over 20 hours, but was a fun challenge. 

Built from Plan(s)
Estimated Cost
100 dollars
Estimated Time Investment
Week Long Project (20 Hours or More)
Finish Used
Minwax Poly shades espresso gloss
Recommended Skill Level
Advanced

My version of "Outhouse Plan for Cabin"

Submitted by johnseigle on Mon, 06/06/2022 - 15:00

Hi Ana and Family,

I mostly followed your plans for my remote Alaska property outhouse build, with slight modifications. Our property is 7 miles from any road (and 2.5 hr drive from Anchorage) and I typically go there in the winter via snowmobile (December-April). I built this on my back deck in Anchorage and then took it apart and transported it in sections (back wall, 2x sidewalls, floor parts, door, roof parts, seat parts). It took me 5 trips to get it all up to my property from the truck at the trailhead via snowmobile!

The hardest part was digging the hole under 5 ft of snow! I cut several dead spruce trees in the area I planned to situate the outhouse and started a big fire (really big). We kept that going until we had melted out about a 15ft wide area down to bare soil. The next morning, while the ground was still warm from the previous evening's fire, we dug the hole (only about 3.5x3.5ft). Then I cribbed in the hole with old cedar fence slats to help prevent the inevitable ground cave-in that we often see with soil melt and rains in Alaska. Then, I pieced the outhouse together, with the frame sitting on small pavers.

I used a combo of T&G pine and cedar for the walls. I used metal for the roof. As I built this in January and February over several weekends (in Alaska), it was very cold and I would take the pieces inside and paint/stain them. As such, this basically took me all winter from start to finish. It doesn't take that long if you build it on site in warm weather. Once transported to the cabin site, it took parts of 3 weekends to get it in place and useable, including site prep. I've still got a little touch-up work to do (e.g., window for light in winter and bird block to keep the spring and summer nesters out). I put some anti-slip tape on the frame so that I don't slip on the frame base.

There is some waste wood if you follow the plans directly (especially 2x6), but I am using that to build a small firewood cover at home. This was not an inexpensive outhouse even without pandemic prices (I could have chosen a less expensive siding), but I wanted a nice outhouse and I'm very pleased with the outcome, so it was money well spent. Great plans! Thanks.

Built from Plan(s)

Comments

Chalkboard top art table

I already made the stack-able chairs for my daughter, but she was using an end table for an art table and her chairs would not fit under it. I took the old legs and frame off of the table and built the clara table frame. I kept the original table top. I then spray painted the legs black and for the top I used chalkboard spray paint which I found at Michaels. She now has a fun table that can be used for art projects and she can draw right on it. The before photo below shows the original table. I took the spindle legs, painted them different colors, and I will be using them for a bench to go with a new dining table I am building.

Built from Plan(s)
Estimated Cost
$10
Estimated Time Investment
An Hour or Two (0-2 Hours)
Finish Used
Black chalkboard spray paint
Recommended Skill Level
Starter Project

Fancy X Desk

Submitted by gsligh on Tue, 08/20/2013 - 09:46

I modified the plan by using a hardwood plywood 4X8 sheet cut down to a 72" by 28" size. I put hardwood trim around the edges for a smooth appearance. I stained the top with a Minwax poly shield oak finish and painted the base using a glossy enamel paint "Inkwell" from Sherwin Williams. The seamless top makes for a better writing surface.

Built from Plan(s)
Estimated Cost
$120
Estimated Time Investment
Week Long Project (20 Hours or More)
Finish Used
Miniwax oak polyshield and enamel paint "Inkwell" from Sherwin Williams. Using enamel paints makes the project take longer because of drying times in between coats.
Recommended Skill Level
Beginner

Tryde Coffee Table

This was my first build and I haven't stopped since!! Thank you Ana White for your inspiration, building plans and encouragement!!!  

Built from Plan(s)
Estimated Time Investment
Weekend Project (10-20 Hours)
Finish Used
Vinegar Mix
Recommended Skill Level
Beginner

Grandy Sliding Door Console

Submitted by Codding58 on Mon, 10/08/2018 - 15:52

This was a super fun build for me!    I have been wanting to do it for a long time, but was a little intimidated with the hardware.   I bypassed the expensive kits you see online and built my own from aluminum flat bar, carriage bolts, and sliding door pulleys.  I am very pleased with the overall project and wish I would have done it sooner!   Shortened down to 6', and I opted to make 3 "openings, with the middle being the same as the outers, doubled, to insure the doors matched up.

Built from Plan(s)
Estimated Cost
Probably around $250
Estimated Time Investment
Weekend Project (10-20 Hours)
Finish Used
Varathane Weathered Gray wood stain (base)
Varathane Ebony (top and outter planks of doors)
Minwax jacobean (middle door plank)

Multiple coats of polyurethane
Recommended Skill Level
Intermediate

Comments

Coop Update

Submitted by vendo on Mon, 06/20/2022 - 15:37

I had to move our original coop to another property, so decided to do a little upgrade. We used Ana's Chicken Run plan for both of the large sections and just added a roof. We attached the run to a small red coop that we purchased. Ana's plans are great for modifying for any size, as you can see the main tall portion is from her run plan just built taller and we added a door to the front.

Built from Plan(s)
Seasonal And Holiday

Potting Bench

This was our first build project! We spent the most amount of time picking the color than we did on the actual assembly. We extended the back 2 legs 36 inches to accommodate the window frame and shelf.

Built from Plan(s)
Estimated Cost
$40
Estimated Time Investment
Afternoon Project (3-6 Hours)
Finish Used
Benjamin Moore Grey Wisp
Recommended Skill Level
Starter Project

Comments

Spring

Mon, 07/25/2011 - 09:02

This is beautiful! I have a garage full of these windows and I have been trying to figure out things to do with them before my husband decides to throw them out.

bhoppy

Mon, 07/25/2011 - 12:05

Love the window too! DId you paint hte wood right away or wait a while?

Emma AND Sarah

Wed, 07/27/2011 - 19:21

We painted it right away. We were so excited to finish our first project. We didn't paint the window though. Thanks for the comments

Tree House Stool

This project was so fun! I made it to blend in with a tree house I built (adapted from Ana White plans). The top of the stool was the best part. Full details on my blog.

Built from Plan(s)
Estimated Cost
$3
Estimated Time Investment
Afternoon Project (3-6 Hours)
Finish Used
"dried leaves" Clark & Kensington paint
Recommended Skill Level
Beginner

Comments

JoanneS

Thu, 08/22/2013 - 13:34

This is super cute and so creative! I looked at the tree house on your blog, just made me say Wow!!!!

Loft Bed

Submitted by Medickep on Sat, 10/03/2015 - 13:34

I built this loft bed for my neighbor's daughter.  It has a lot of space for storage and the book shelves with desk really add a lot of stabilty.  I added some supports to the back rail as it moved to much for me and made the ladder out of 2x material as it kept costs down and seemed stronger.  Neighbor wanted the ladded straight up and down so I connected it to the lower bookshel too!  Would not recommend cutting pieces in advance on this one!  I also used plywood for the shelves and trimmed them out as it was cheaper!

Estimated Cost
300 +/-
Estimated Time Investment
Weekend Project (10-20 Hours)
Finish Used
Up to the neighbor this time!!
Recommended Skill Level
Intermediate

Comments

LanMan20

Mon, 10/05/2015 - 14:39

Good job!  I am toying around with building something similar from scratch.  A few questions if you don't mind: 

1. Given the sturdiness, I am guessing it is fairly heavy.  Could two people move it?  

2. By chance, is it modular for easy breakdown and transport (upstairs)?  

3. Are there any plans available (materials listing, cuts, etc.)?  

Thanks for posting and keep up the great work.  I am sure your neighbor will be pleased!

Medickep

Tue, 10/13/2015 - 15:03

Hopefully you have not been waiting long! I do not get notified for some reason to remarks any longer!

Yes, it's very sturdy, especially with the addition of the book shelves and desk.  Itt is designed to come apart with a few screws, so going up stairs is not an issue.  I got it from the following plans. 


http://ana-white.com/2010/05/furniture-plans-loft-bed.html

http://ana-white.com/2010/06/plans/what-goes-under-loft-bed-how-about-big-bookcase

http://ana-white.com/2010/06/loft-bed-small-bookcase-and-desk


I do not recommend cutting everything in advance.  Build as you go if you want everything to fit perfectly!!

Love this bench!

Submitted by Anonymous (not verified) on Tue, 10/16/2018 - 10:38

This was my first real project from start to finish. We bought rough lumber from The Home Depot.  Between having a toddler, tweenager and a life it took about a month of sporadic work but it was a great bonding project for my husband and I.  Guess the overachiever in me should have seen that one coming, I wanted have the full experience of jointing our own wood.  I learned a lot and had a lot of fun working with the table saw, miter saw, jointer, and kreg jig, all of which my husband already owned.  I did not use any glue on this project simply because I wanted to avoid the mess.  The best part about this project was the easy measurements..I'm not too good with the confusion.  It made it so much easier when cutting, specifically the 45degree angles. 

Estimated Time Investment
Week Long Project (20 Hours or More)
Finish Used
None at this time
Recommended Skill Level
Intermediate