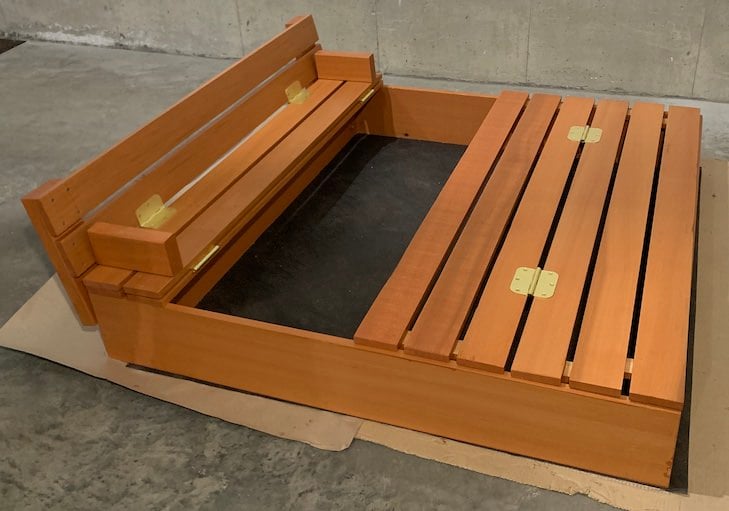
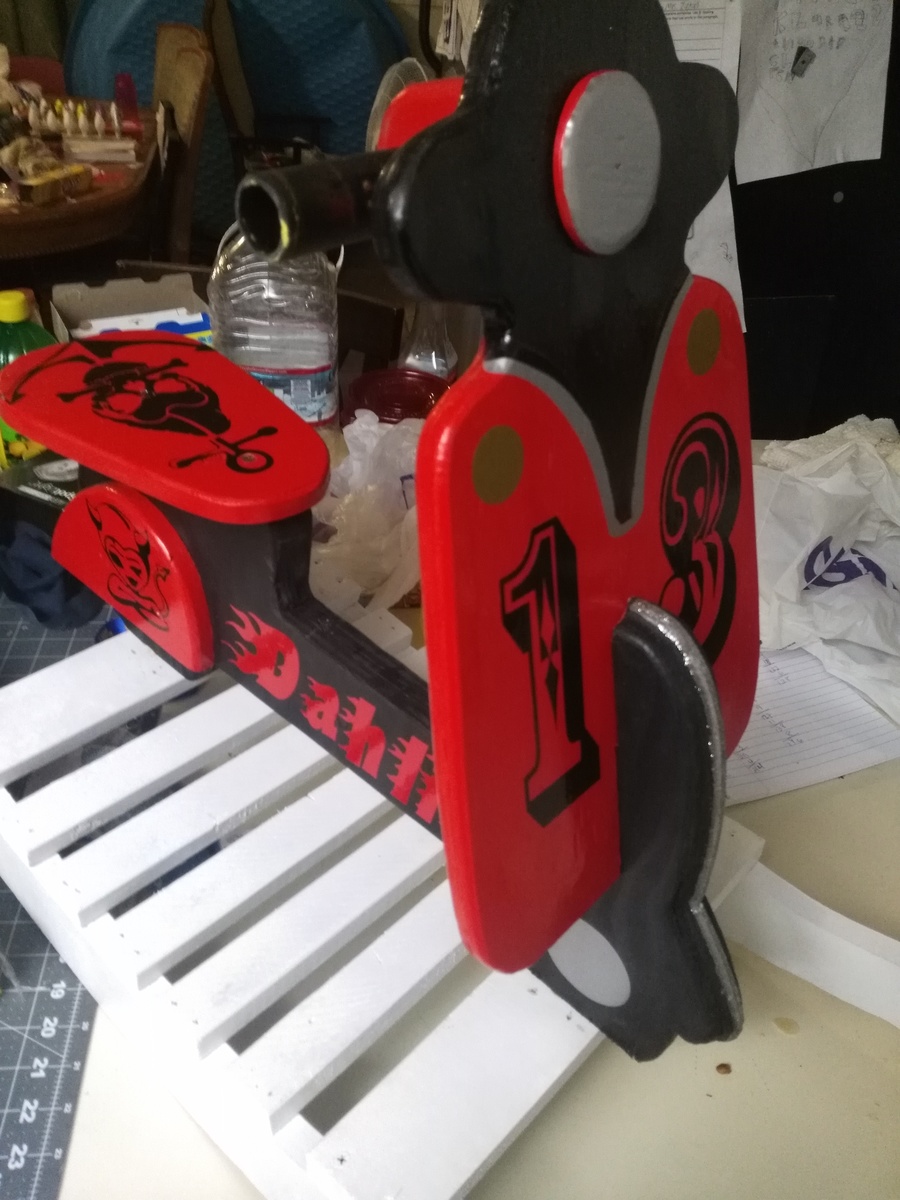
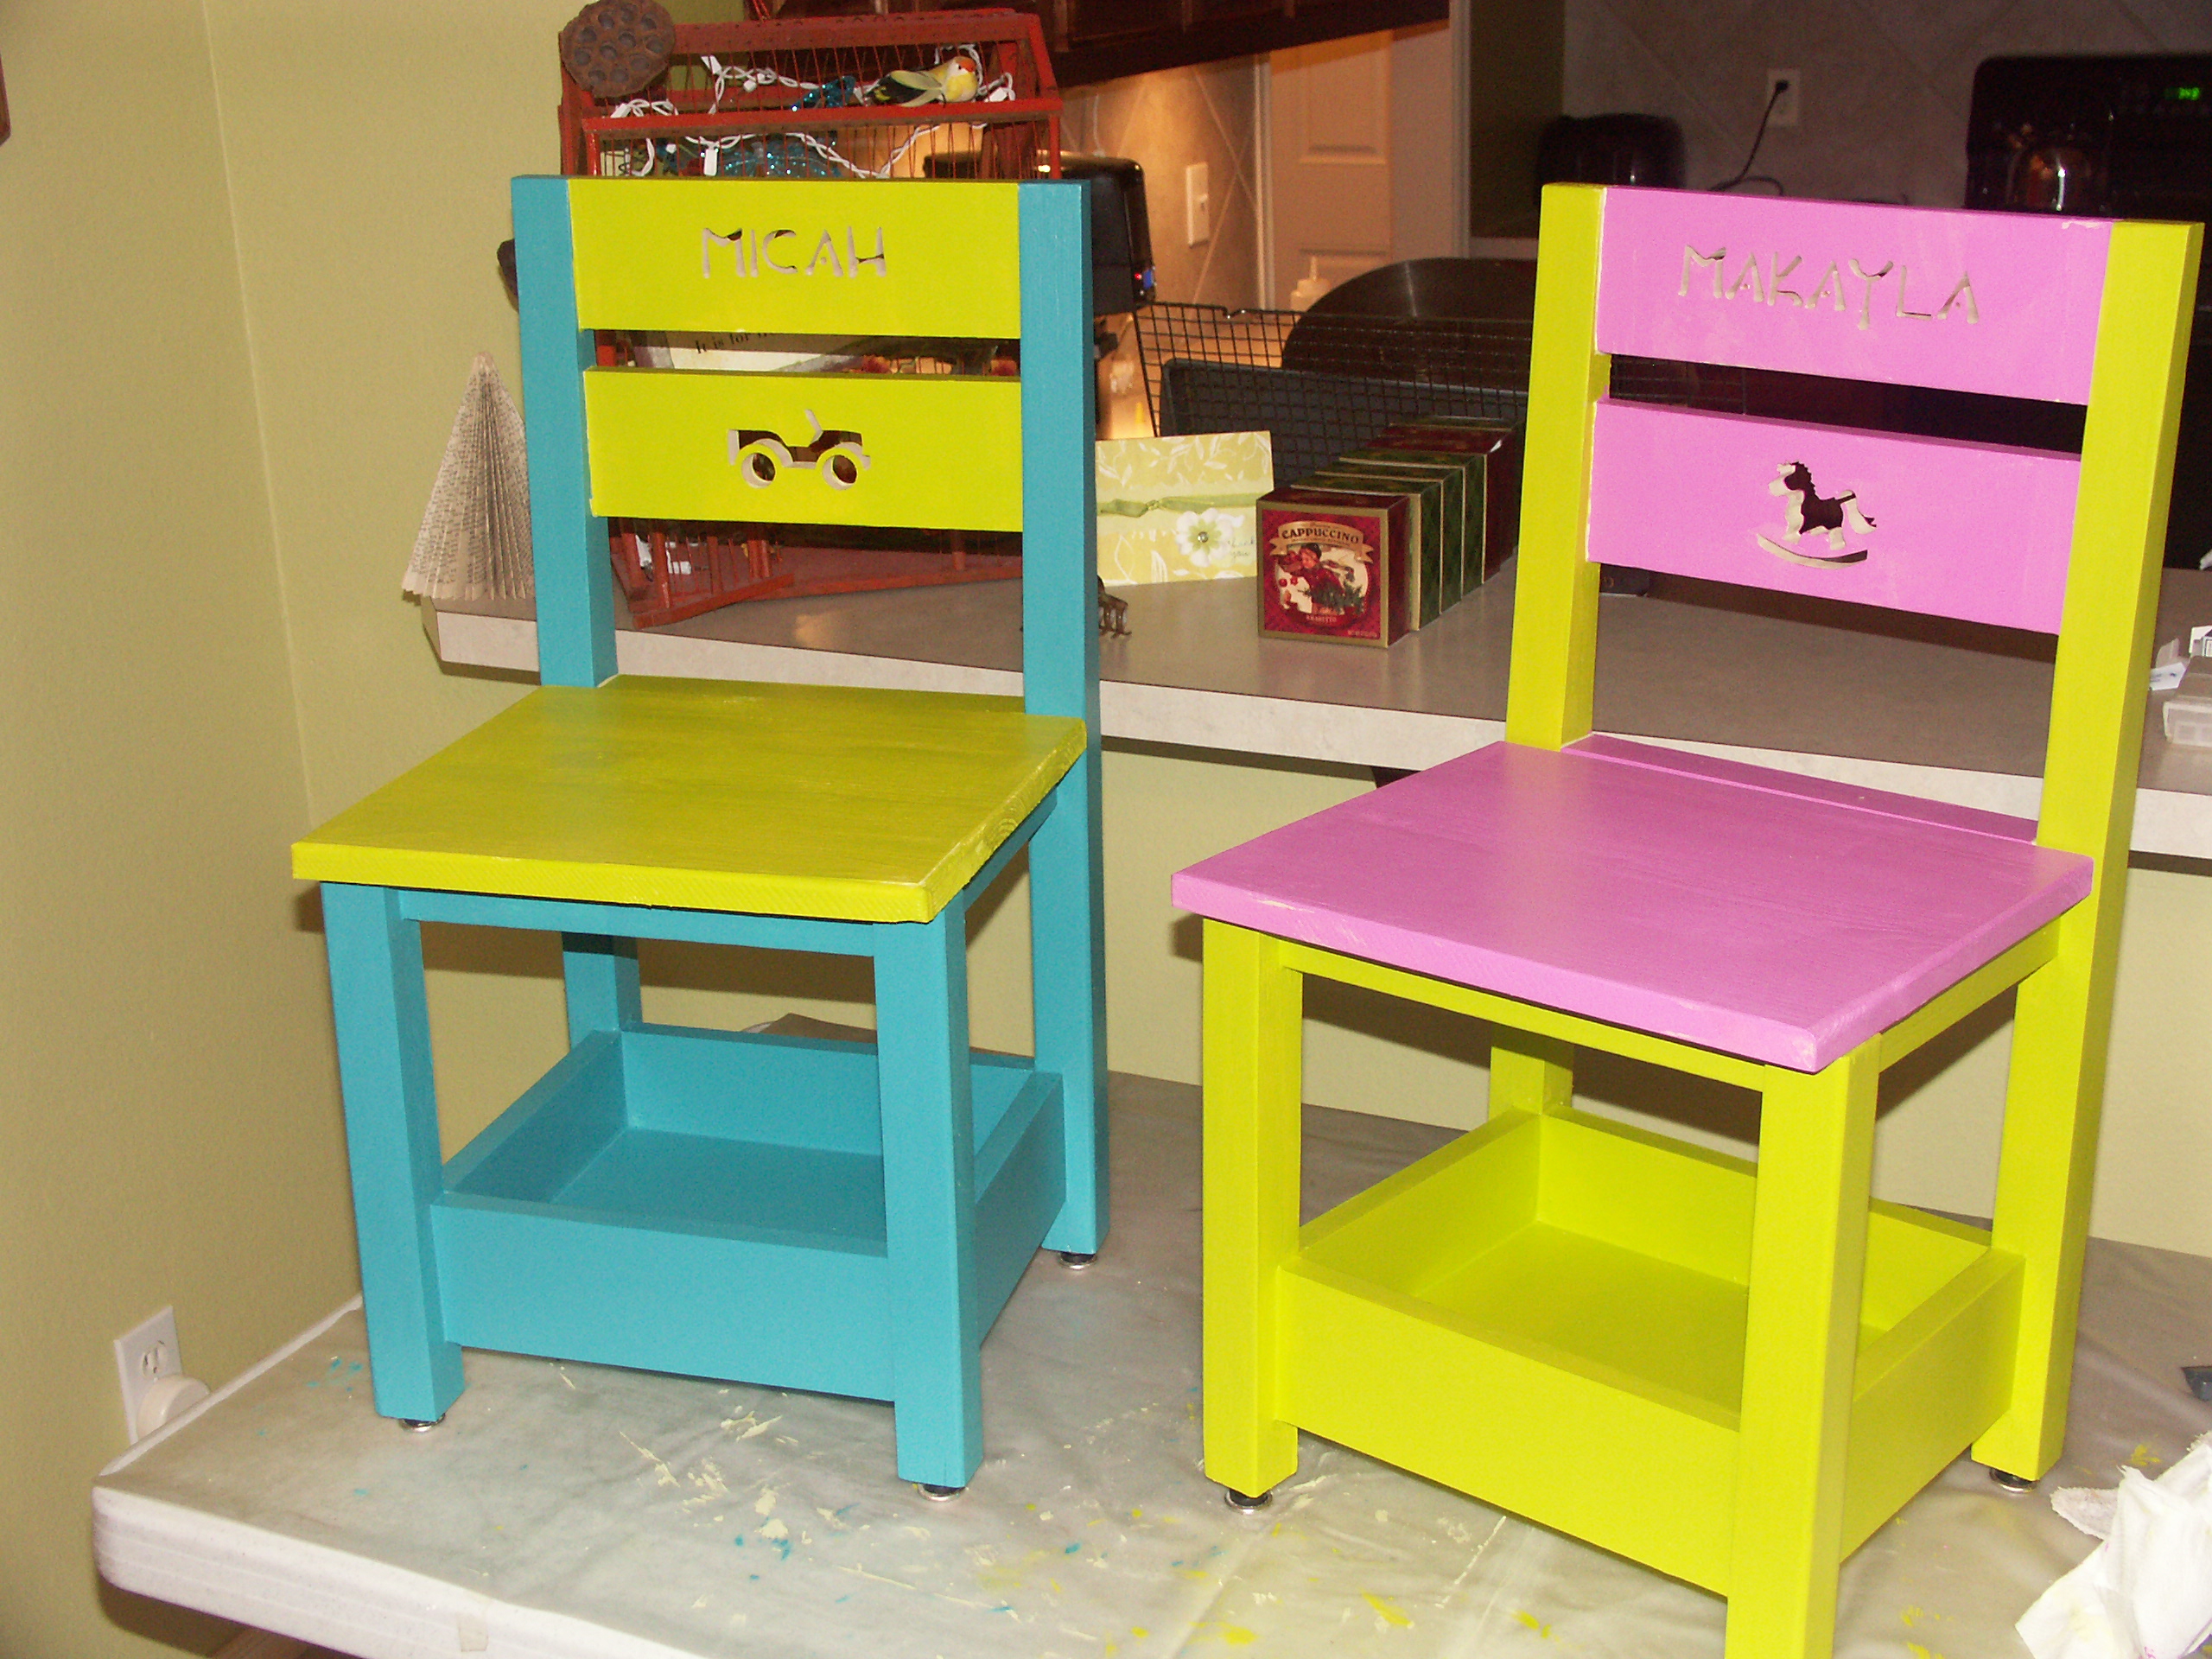
Community Brag Posts

Queen Headboard

Submitted by TKP3321 on Sun, 03/03/2013 - 17:48

Was my first DIY project and was surprised as to how easy it was. The directions in the plan were spot on and look forward to future projects.

Estimated Time Investment
Afternoon Project (3-6 Hours)
Finish Used
Minwax Stain - Riverstone
Recommended Skill Level
Beginner

Husky Farmhouse Table

My Dad came to visit for Christmas and he knew for months that all  I wanted to do was have him build this table!! We used pine and found really cheap legs on amazon that were being discontinued. They were $15 each!! We plan on having a large family so we made this to fit 8 people. There is enough room to add chairs to seat 12 for parties and events though.I got all of the chairs off Craiglsist for free and just painted and recovered the seats. I am totally in love with this table! Thank you Ana White for the plans and my Dad for his hard work! 

Built from Plan(s)
Estimated Cost
$250
Estimated Time Investment
Day Project (6-9 Hours)
Finish Used
We used one coat of Minwax stain in Dark Walnut. we then added three coats of clear spar urethane in a satin finish. I didn't want the table to be too glossy looking. After that dried we applied a coat of wax and viola!! The chairs and legs we painted with primer in a slightly off white color. Then we dabbed a paintbrush in the tiniest amount of stain and went around the legs and chairs really lightly to give them a worn look. I love how it turned out!!
Recommended Skill Level
Intermediate

King Farmhouse bed

Submitted by Anonymous (not verified) on Sun, 04/09/2017 - 18:15

Thanks to Ana for her inspiration and such great plans.  My wife wanted a taller headboard and footboard so we added to the overall height of both.  Everything else is pretty much per Ana's specs.  Our big box stores here wouldn't know a straight board if it slapped them in the face.  After putting my headboard and footboard together the gaps looked terrible.  So I decided to veneer both with 5 mm underlayment ripped 7.5 inches wide and angled to 45 degrees on each side.  Once that was glued and nailed into place both pieces looked much better.  We decided to do without a box spring so the deck/frame is built from 2 2x10's, 5 2x4's, 6 2x4 "feet", and two sheets of 1/2 inch plywood. This thing weighs a ton!

Estimated Cost
$450 for wood, hardware, primer, and paint.
Estimated Time Investment
Week Long Project (20 Hours or More)
Finish Used
Behr antique white (although the wife swears she is going to distress it later).
Recommended Skill Level
Beginner

Comments

Vertical Star Planter for Succulents

Submitted by thediyplan on Mon, 03/08/2021 - 14:59

Are you looking to make a small planter for your succulents? There are many different shapes and sizes out there that you could choose from. Some planters are easy to make and some are more complex. The planter in this tutorial looks a bit intimidating to make, but it’s actually quite simple. Follow my step-by-step plans on how to build a DIY Vertical Star Planter for Succulents.

Since this project does not require any large wood pieces, I’ve built it using scrap wood that I had in my scrap pile. The overall size of this star planter is about 18” wide. You could easily adjust these plans to make the star any size you want.

See my website for additional pictures and how I've built it, TheDIYPlan.com

Estimated Cost
$15
Estimated Time Investment
Afternoon Project (3-6 Hours)
Recommended Skill Level
Intermediate

Comments

Barn Playouse

Submitted by lddupuis on Wed, 03/06/2013 - 08:15

We turned the Playhouse loft bed into a "Barn" for my son who wanted his room to be all about horses.

Built from Plan(s)
Estimated Cost
$300.00
Estimated Time Investment
Weekend Project (10-20 Hours)
Recommended Skill Level
Beginner

"Grow" Stool

I built this step stool for my son's new "big boy" bed. I built the bed and ended up being a little high for him. So I decided he'd probably like to have a little stool to use to help him get up in the bed. He loves it.

I made it with scrap wood that I had from making his bed. I love the simple design and it is very easy to build. I did use a set of metal stamps and stamp "GROW" onto the stool. We used milk paint and then sealed it with Hemp Oil.

Thanks for all of the plans, love to create stuff!

Estimated Cost
3 bucks
Estimated Time Investment
An Hour or Two (0-2 Hours)
Finish Used
Miss Mustard Seed's Milk Paint (curio color), sealed with Hemp Oil
Recommended Skill Level
Beginner

Concrete top rustic x end tables

Submitted by Anonymous (not verified) on Thu, 04/13/2017 - 21:03

I took the rustic x base and decided to put a concrete top on it. 

Estimated Cost
$50-$100
Estimated Time Investment
Weekend Project (10-20 Hours)
Finish Used
Oxidized wood with brown furniture polish.
Recommended Skill Level
Intermediate

Step Stool

Submitted by stonejamie on Sun, 03/14/2021 - 17:28

I built this step stool pretty quickly using the plans from Ana-White.com. I sanded the final project and stained it in weathered gray. I applied a couple of coats of polyurethane diluted with mineral spirits all over and a couple of extra coats on the top. Finished with a couple of dresser handles.

Estimated Cost
$20
Estimated Time Investment
Afternoon Project (3-6 Hours)
Finish Used
Verathane weathered gray. Polyurethane diluted to 50:50 with Mineral oil.
Recommended Skill Level
Beginner

Comments

Painted and Stained Katie Open Shelf Nightstand

Followed Katie Nightstand plans, but stained the top and both shelves. Open areas were built to accommodate some wire baskets we found at the Container Store.

Estimated Cost
90.00
Estimated Time Investment
Day Project (6-9 Hours)
Finish Used
Valspar Off White (can't remember exact color) in semi-gloss and Minwax Wood Finish in Red Mahogany/Gun Stock (2/1 mix) with 2 coats high gloss Polycryic over top.
Recommended Skill Level
Intermediate

Rustic X End Table

Submitted by Anonymous (not verified) on Sun, 04/16/2017 - 08:49

Not too bad for a beginner. We couldn't find the bolds, but we did add the L brackets.


Here's our experience: http://wearegrownupsnow.blogspot.com/2017/04/diy-rustic-x-end-table.html

Built from Plan(s)
Estimated Cost
$60
Estimated Time Investment
Weekend Project (10-20 Hours)
Finish Used
Pre-Stain Wood Conditioner (Minwax) and Dark Walnut Stain+Poly (Varathane).
Recommended Skill Level
Beginner

Comments

Lunar2

Fri, 04/21/2017 - 12:02

The L brackets look great on your fab rustic end table.  As for the bolts, I've seen that some people use upholstery tacks instead.  Superficial, but they can look good - there are different finishes to complement your brackets

Modern farmhouse bed and nightstands

Submitted by Markb25 on Thu, 03/18/2021 - 00:59

Having recently moved house our current bed was too big to fit so, I took a break from building Wendy houses to build this. The size of the room meant the nightstands couldn't be built as per the plan. Not wanting to alter the size of wood used, I opted to do away with the draw instead installing a solid base with a flip down front.

Built from Plan(s)
Estimated Cost
250
Estimated Time Investment
Day Project (6-9 Hours)
Finish Used
Homemade, a solution of white vinegar and steel wool to force oxidation of the wood, followed by rustolium clear wax.
Recommended Skill Level
Beginner

Comments

Boys Room Makeover

Submitted by agarrigan on Mon, 03/11/2013 - 14:08

My husband and I made this for our boys last spring, while we were still in our old house. It's a modification of Ana' loft bed, with stairs that I drafted myself, a smaller version of Ana's flat bookshelf at the top, and a modification of Ana's dresser bookshelf from the cabin collection underneath. It has tons of storage and a tunnel/hiding spot that goes under the back step all the way through the dresser bookshelf. My boys loved this, and it made a huge difference in their room. Oh Ana, where would I be without you? Thanks for the great plans and inspiration.

Oh, and if you want to see more pictures including before and after shots of the boys room, check out my blog.

http://theelusivebobbin.blogspot.com/2012/03/finding-space-aka-boys-roo…

Estimated Time Investment
Week Long Project (20 Hours or More)
Finish Used
Flat latex paint.
Recommended Skill Level
Intermediate

Comments

robsaem

Tue, 11/25/2014 - 07:52

I absolutely LOVE this bed design.  Do you have a complete set of plans for this bed?  I tried to follow the separate plans for each part, but it is a little confusing.  I am a newbie, so wanted to make sure I do this right.   Thanks so much!  Robin

Laundry Sorter

Submitted by AndyH on Sun, 01/18/2015 - 14:23

Laundry sorter with 3 tilt out bins and 3 drawers.  Made to fit a recess in laundry so it looks like a built in cabinet.

Estimated Cost
$320
Estimated Time Investment
Week Long Project (20 Hours or More)
Finish Used
Minwax Ebony and Minwax Satin Poly.
Recommended Skill Level
Beginner

Comments

Sofa table

Submitted by Anonymous (not verified) on Tue, 04/18/2017 - 19:32

This was so much easier then I thought it was going to be. 

Estimated Time Investment
Weekend Project (10-20 Hours)
Recommended Skill Level
Intermediate

Garden planters

Submitted by Anonymous (not verified) on Tue, 03/23/2021 - 08:36

Great project to try and as you can see they turned out quite well

Built from Plan(s)
Estimated Time Investment
Afternoon Project (3-6 Hours)
Finish Used
Once assembled just use a course P80 sandpaper, then finish with finish with fine P120 sandpaper
Recommended Skill Level
Beginner

Comments

Wood Headboard

Submitted by hwwelch27 on Wed, 03/13/2013 - 19:58

I spent a Saturday gathering supplies and building this headboard. It was a great plan. I did not have any reclaimed wood available so I went out and bought some new wood then I stained it. We absolutely love the way the stain turned out!

Estimated Cost
$100
Estimated Time Investment
Day Project (6-9 Hours)
Finish Used
Minwax Dark Walnut Stain
Polyurethane coat on top
Recommended Skill Level
Beginner

Vegetable Bin

Submitted by brittanyj on Wed, 01/21/2015 - 08:46

Made this vegetable cupboard for a family member this Christmas.  It turned out really cute.  The knobs were half off from Hobby Lobby, and I used ORB hinges.  I bought L-shaped magnet clasps so that there was a better way to mount the magnets to fit with the doors.  The stain is a mixture of driftwood and walnut stain because the driftwood has almost no color to it.  It ended up giving a kind of country rustic finish to it, which is something different for me.  Pretty easy project and if you measure carefully and dry fit, the doors aren't too bad to fit in the openings (rare for inset). 

Built from Plan(s)
Estimated Cost
$40
Estimated Time Investment
Day Project (6-9 Hours)
Finish Used
driftwood, walnut stain, poly
Recommended Skill Level
Intermediate

Comments

Marine Ply Stools and Benches

Submitted by Anonymous (not verified) on Fri, 04/21/2017 - 15:39

I have been working on using my cad skills to make somthing using a CNC router so this is what I came up with. I designed it a a flat pack with minimal assembly. Very comfortable.

Estimated Cost
$20
Estimated Time Investment
Day Project (6-9 Hours)
Finish Used
Stain and Varnish
Recommended Skill Level
Advanced

The Little Clubhouse That Could

Submitted by momof2as on Sat, 03/16/2013 - 15:38

So in late December 2011, I asked my son if he was ready for his big boy bed. I had found a bed in a PBK catalogue that I loved. There was no way I could afford or justify the $1400 price tag plus tax and shipping so I had ventured onto ana-white.com and found a suitable option instead. His response to my question was, "No." Queue the Price Is Right losing sound. So, I waited.

Sure enough, six months later, he tells me. "Mommy, I want you to build me my big boy bed now." I lit up with excitement. So I logged onto this wonderful website and began to search through the loft beds for the original plan. When the list of loft beds popped up, my heart almost stopped. It was June 2012 and there IT was. Posted in May 2012, the PBK clubhouse bed of my dreams! I was beyond excited. I knew that Ana wouldn't let me down!

I printed out the list and told the hubby to get the truck we were headed to my favorite blue store. Now, I have never built ANYTHING in my life, but I had drooled over enough plans on this site to know that Ana wouldn't lead me astray. So, a few hundred dollars later in lumber, we pull into the drive way with all I needed to get started. My wonderful husband unloaded everything and began organizing the garage. When I saw he was done, I said, "Thanks babe, now can you watch A while I get started on all the cuts." I saw his heart break. He thought he would be making the bed. He had no idea, that my intentions were to do this on my own. (I have OCD and my husband does NOT and we have a crooked fence to prove it)

So in one night I made all the cuts and assembled the ends of the bed! Happy Dances!

The next day, I assembled the front and back of the clubhouse and it was standing tall in my garage that night. I was fortunate to have a great baby sitter Saturday and Sunday.

While this project could have been finished in two to three weekends, I (well, my son) chose July for this build which is not so smart so the sanding and painting had to wait until the cooler evening and night hours. Eventually, I had to set it up in my living room to paint it (I spray painted the primer on outside and sanded that before bringing it in). Once I did that, two coats of blue and white, a two full coats of the finish and the bed was DONE!

My three year-old was so proud of his new digs and he told everyone he showed, "My mommy built that for me, all by herself!" Talk about one of the sweetest things I've ever heard, praise from a three year-old.

P.S. We removed the cardboard from under the feet after the curing period for the finish. It was dry, but to be safe (my OCD) I put the cardboard there for a week. I didn't want the feet to get stuck to the carpet under the weight of the bed.

Built from Plan(s)
Estimated Cost
$500
Estimated Time Investment
Week Long Project (20 Hours or More)
Finish Used
China Blue Latex Paint (eggshell)
White Latex Paint (eggshell)
Satin Finish
Recommended Skill Level
Beginner

Comments

JoanneS

Sat, 03/16/2013 - 17:14

What an awesome build! Better than PB bed! You did a fab job - Looks like it was built by a pro!

cjpyles

Mon, 06/10/2013 - 09:52

Just wanted to let you know that your post almost brought me to tears. I was so inspired that you took this on yourself, as your 1st build, that I think I'll do the same! My husband could build this in a day, because he's the most talented person I've ever met... but its important to me to teach our little girls that mommy's can build things, and fix things too. My motivation will be that moment when my 3 year old (because it might take me another 6 months to finish- hahaha) tells everyone that HER MOMMY built it for her all by herself.
You rock!
And I'm in love with this site- thanks Ana!!!

2 Cubbies

Did so many "firsts" with this project. My daughter/grandsons moved in just before Christmas. They needed space for their toys in their bedroom. Soooo, without tools, or paintbrushes, or..... anything, I opened my mouth and out came the words - I can make them some cubbies!

These took me 10 days to build, because I had to keep running to the store to get tools, paint, screws, circular saw.....

Then I decided to make a cut out at the bottom, tried to use a hand tool, chucked it, went to the store and purchased a jig saw. Completely happy with how little time it took!

I figured out the bottom shelf was missing from the cut list/shopping list. I made a ton of mistakes, figured out how to fix them, and am pleased with my first project.

Built from Plan(s)
Estimated Time Investment
Week Long Project (20 Hours or More)
Finish Used
Acrylic Paint
Recommended Skill Level
Intermediate

Comments

Chevron Headboard!

Submitted by Chrisboire on Sun, 04/23/2017 - 15:15

A friend asked me to make a headboard for him as he couldn't find anything online or in store that he really liked. 

I was up for the challenge and always love working with wood to make new and exciting things so, challenge accepted. 

This was my first attempt at a headboard and I think it turned out pretty nice. 

Knotty pine face with a cedar frame. 

Looking forward to my next project! 

Estimated Cost
CA 225
Estimated Time Investment
Weekend Project (10-20 Hours)
Finish Used
Minwax Dark Walnut stain
Recommended Skill Level
Beginner

Comments