Potting Table
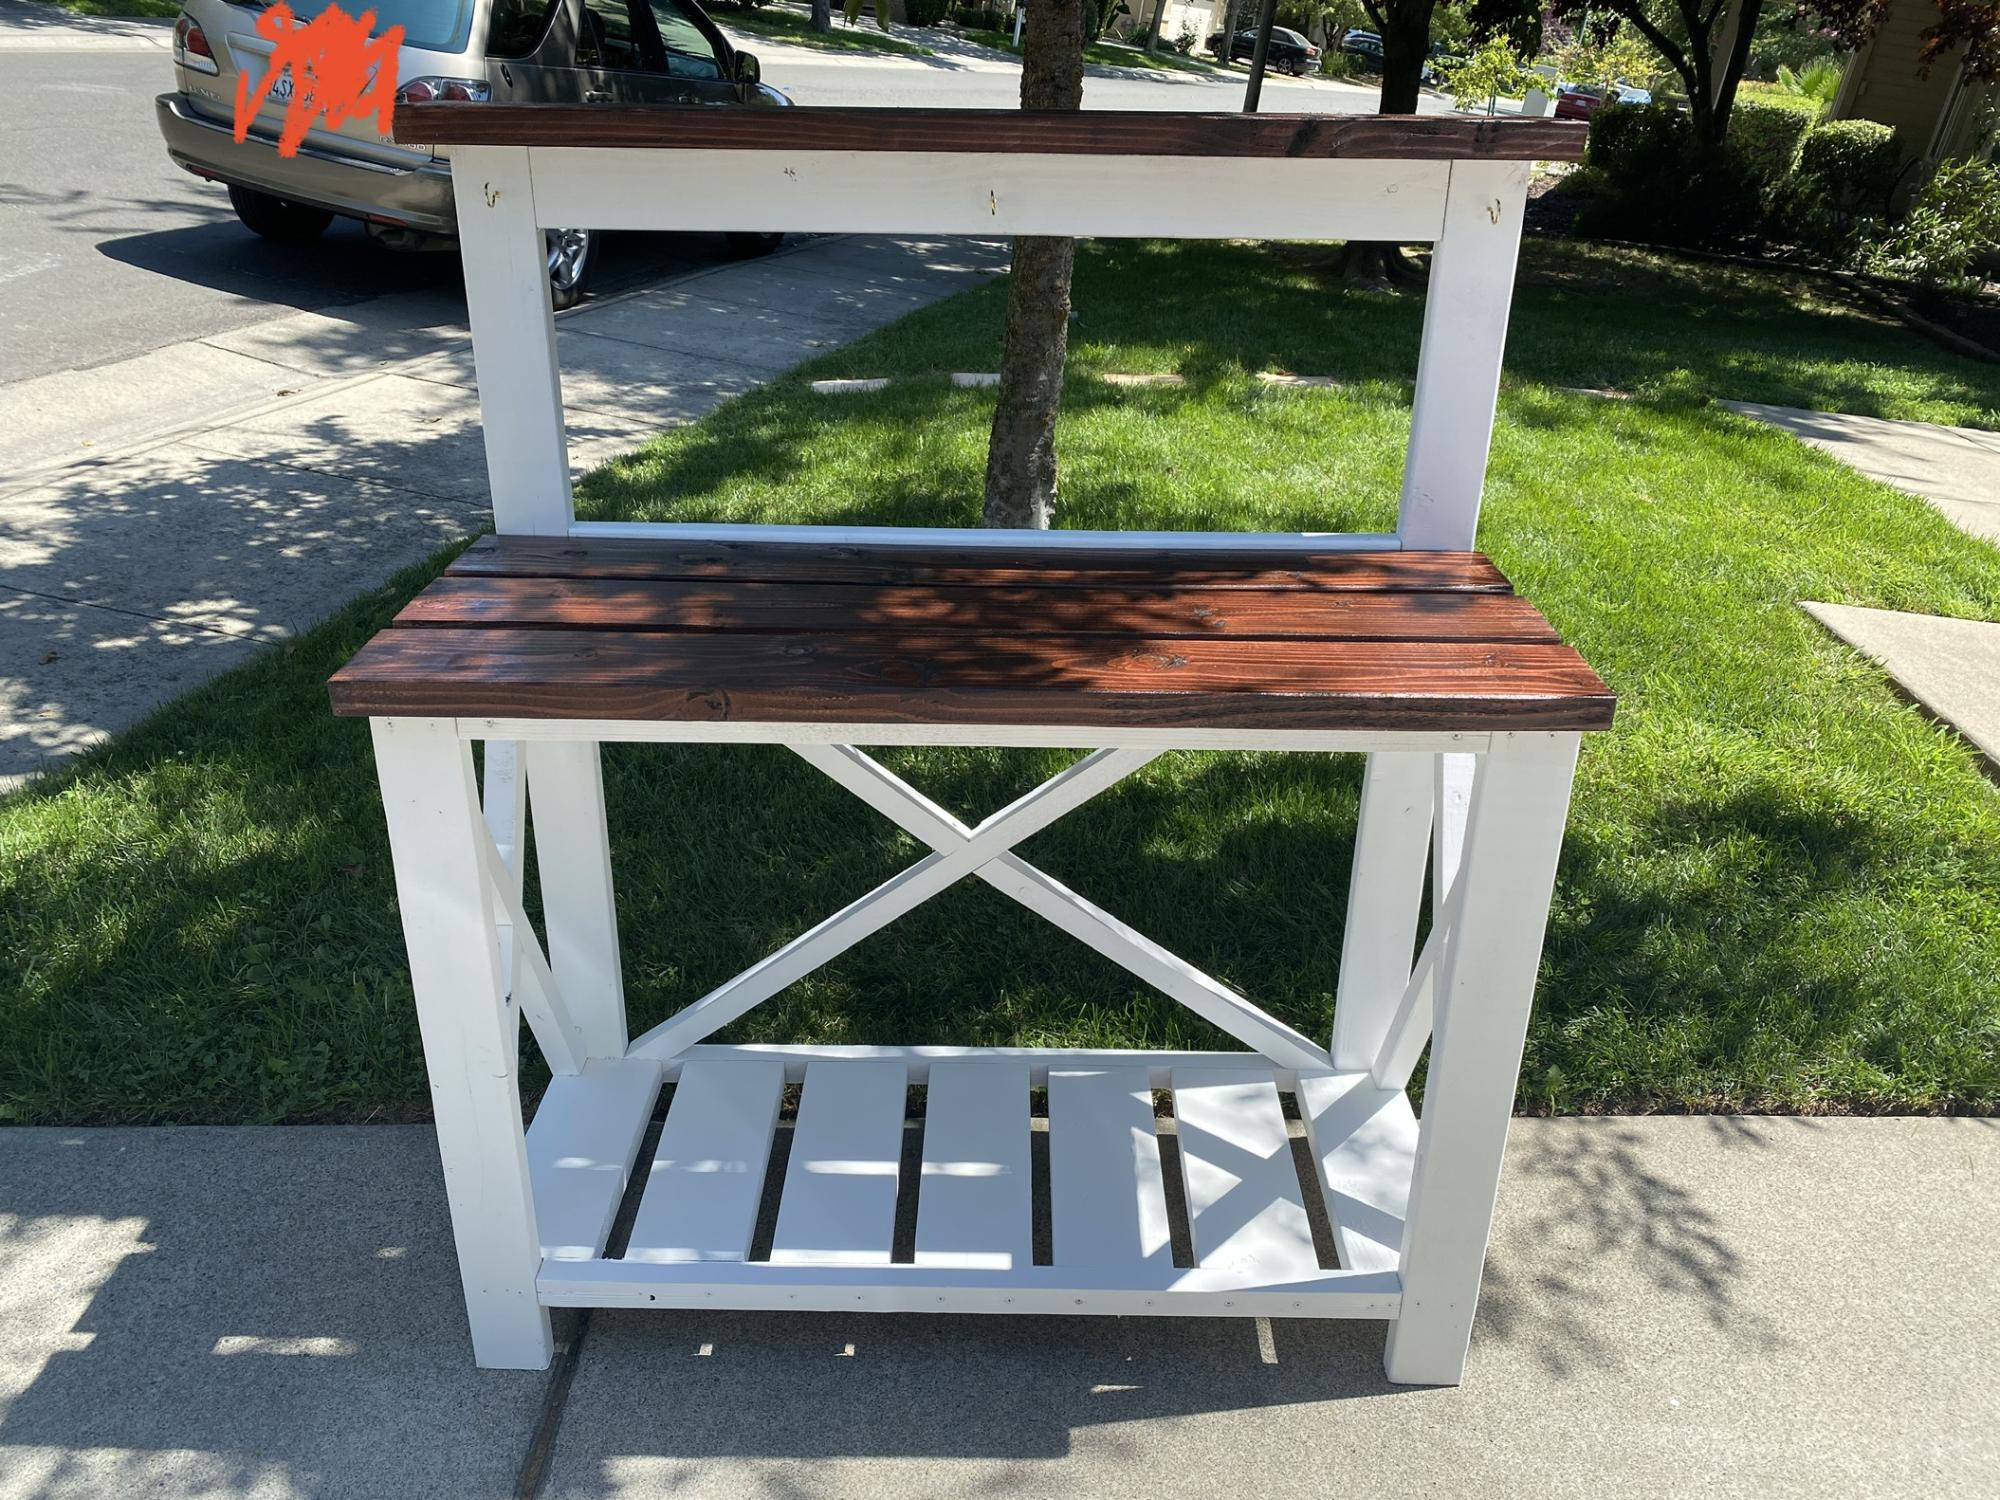
I really liked your design so I decided to make one for my mom for Mother’s Day and she loves it. Just painted it white before adding the 2x6’s and stained them a walnut Thank you ..!!!!
Built from Plan(s)
I really liked your design so I decided to make one for my mom for Mother’s Day and she loves it. Just painted it white before adding the 2x6’s and stained them a walnut Thank you ..!!!!
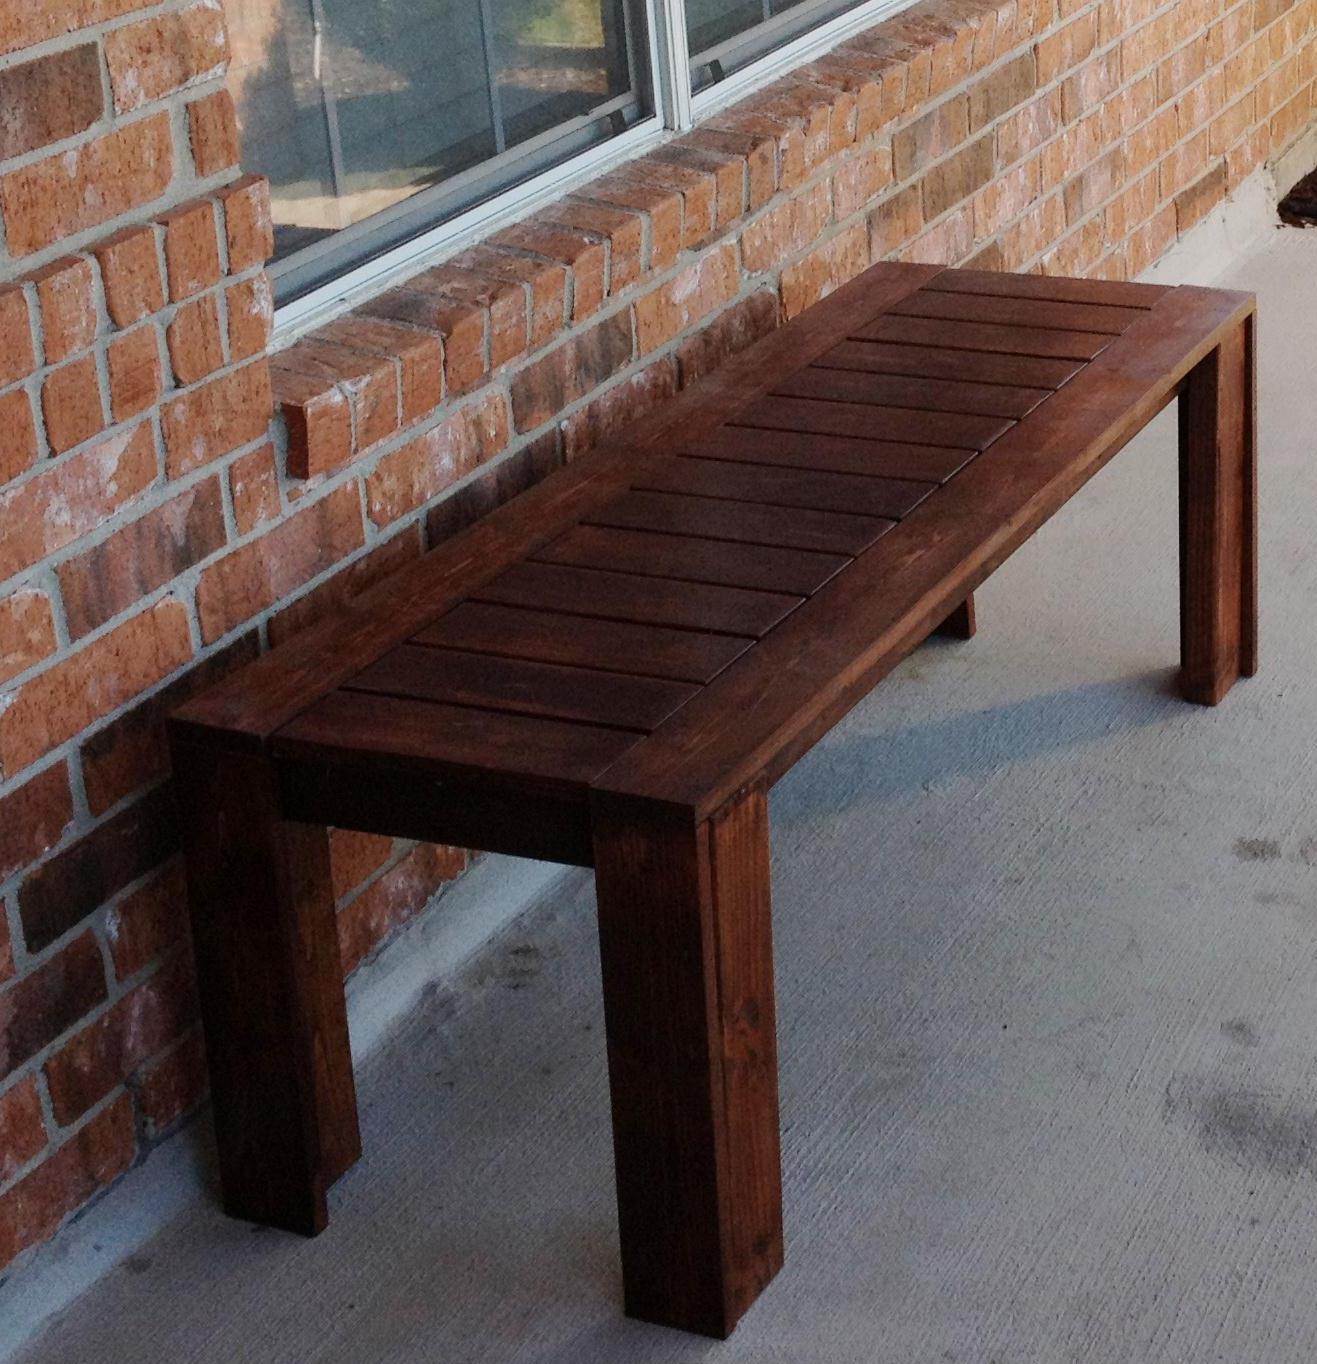
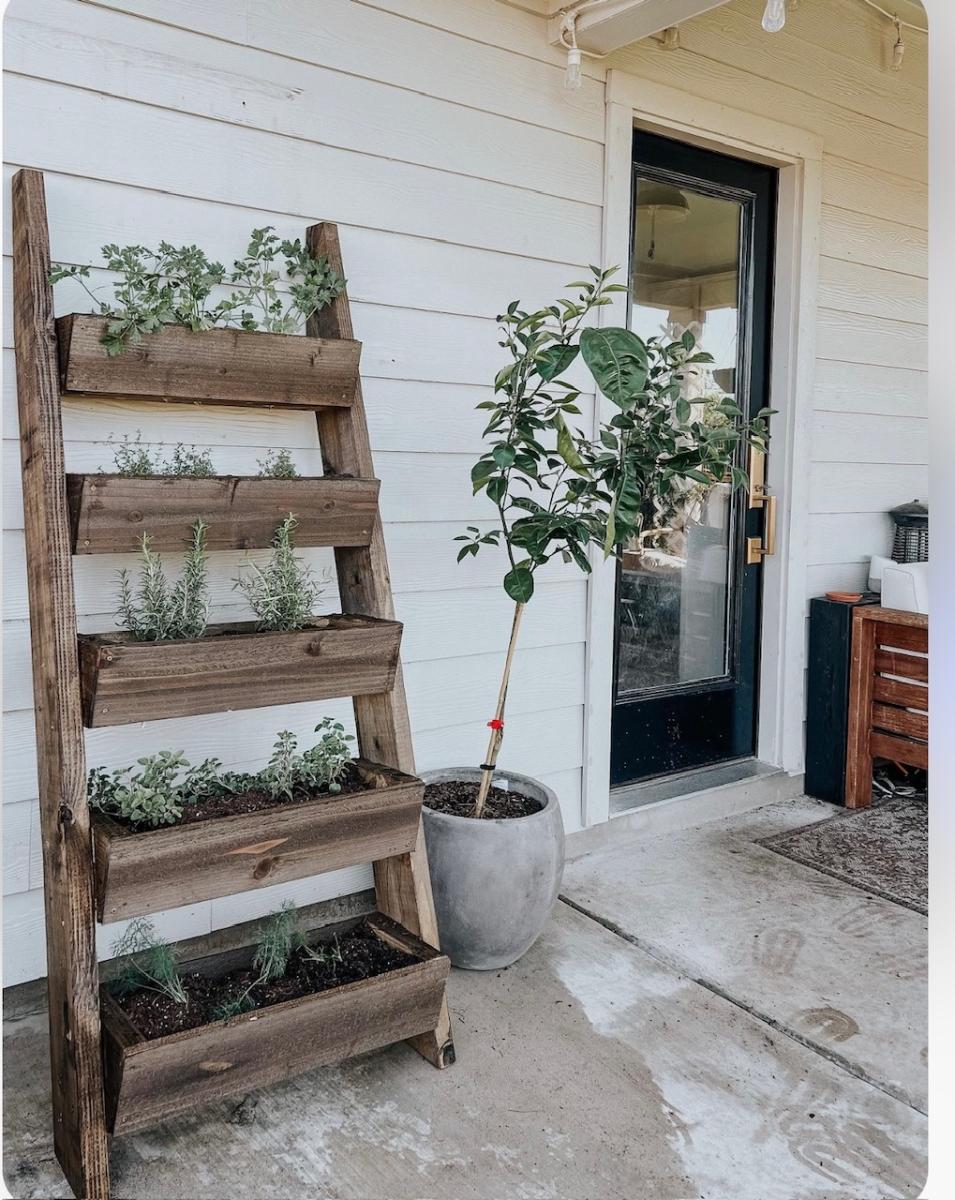
About a year ago, I stumbled across your site, I was a lurker for awhile, finally joined, and can finally post the projects I have done so far. This was my second build from your site. It works perfectly on the front porch.
Fri, 01/13/2012 - 15:44
Thank you very much, I can't wait to start my next project, new night stands to match the bed. Yep, I'm hooked :)
Tue, 02/21/2012 - 14:09
you should really show the plans for the projects.
Thu, 02/23/2012 - 15:36
I'm not sure why the link is not working for you above where is shows: "From Plan." It is working for me.
Thu, 04/26/2012 - 14:55
Looks like you added additional leg supports?
Looks great!
Thu, 05/31/2012 - 14:59
I really like this plan - re the wood choices and finish: How is the wood, especially the white wood, holding up against the elements? Great job on this btw.
Thanks
Paul
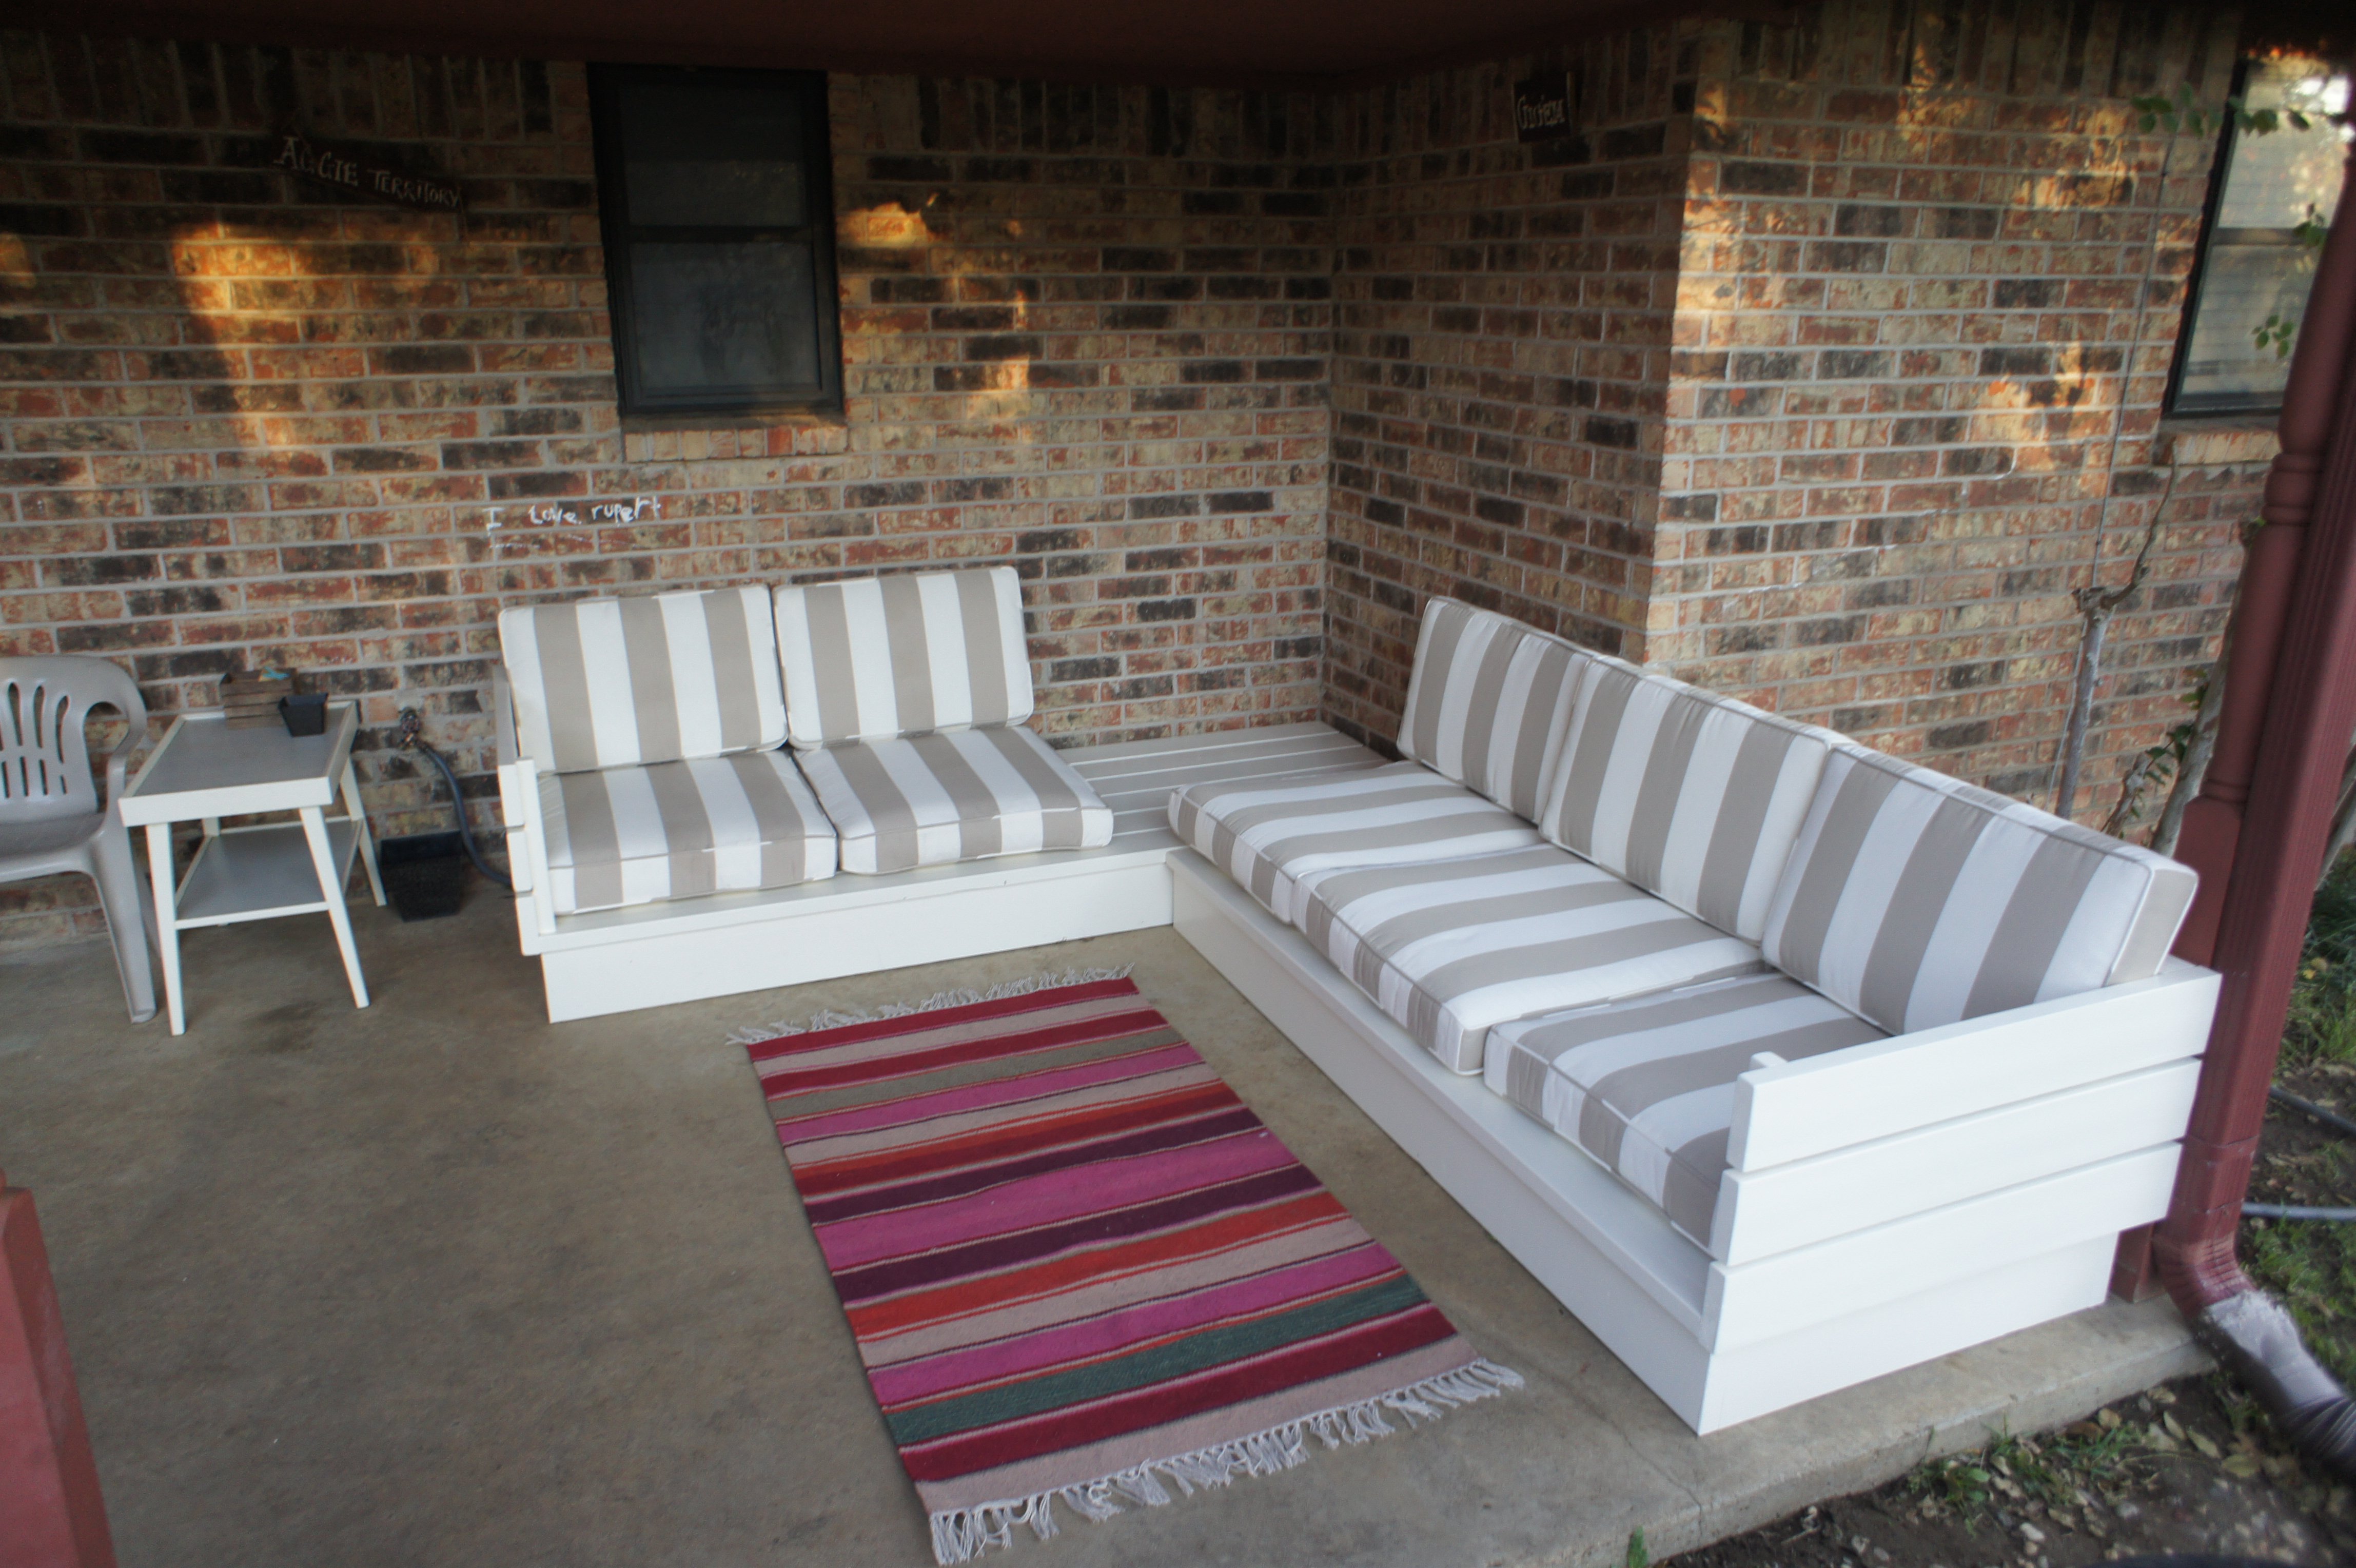
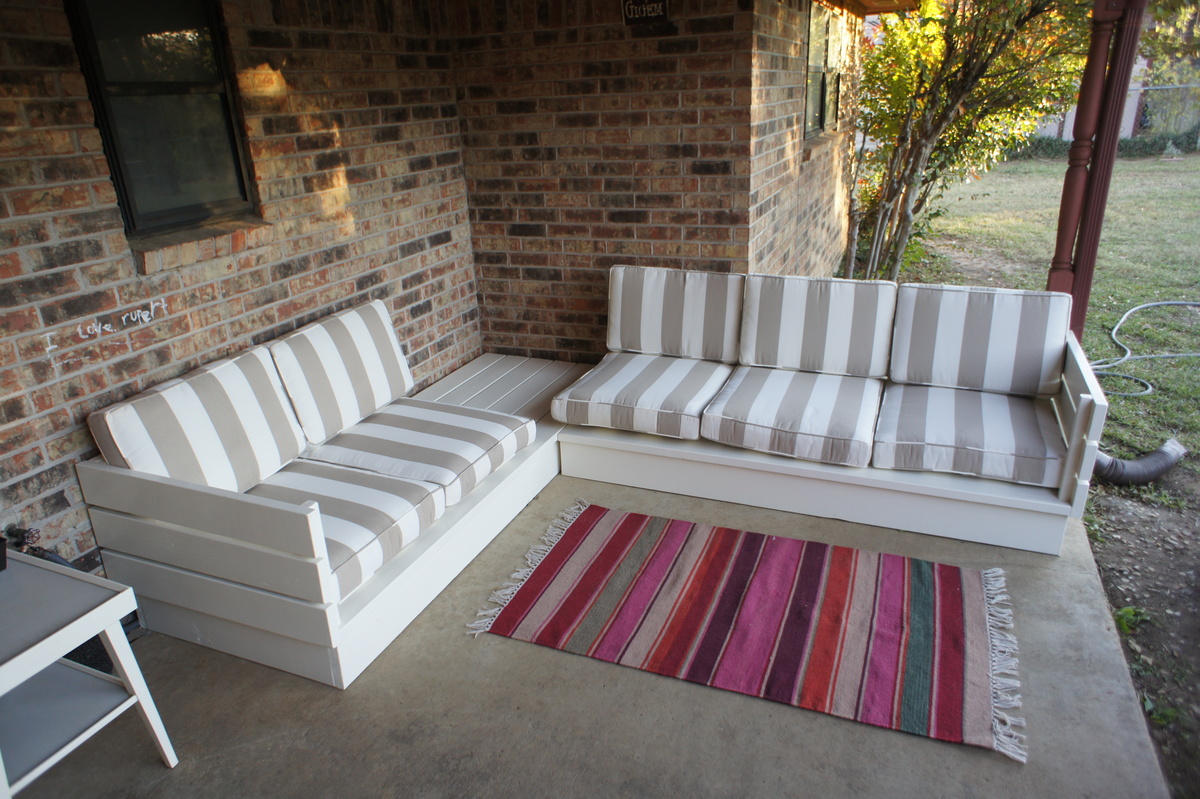
This was my second Ana White project (first was a sandbox). I made a few changes to Ana's plan so that it would better fit my porch. First, I basically flip flopped the plans so that the end table was on part 1. I also altered the length to better fit the cushions I found. Ana's plans were 24" between the 2x2. Mine ended up being 26.5". I also used 2x8's for the base instead of the 2x4 for added height.
The price of outdoor cushions was a big surprise!! We looked into buying outdoor high density foam and making our own cushions, but that seamed to be just as expensive as buying cushions. We also really had a hard time finding large cushions that actually fit this plan. Most cushions are REALLY small for this couch. we found some Pottery Barn cushions online that were on clearance.
It was a fun project and we love the couch!
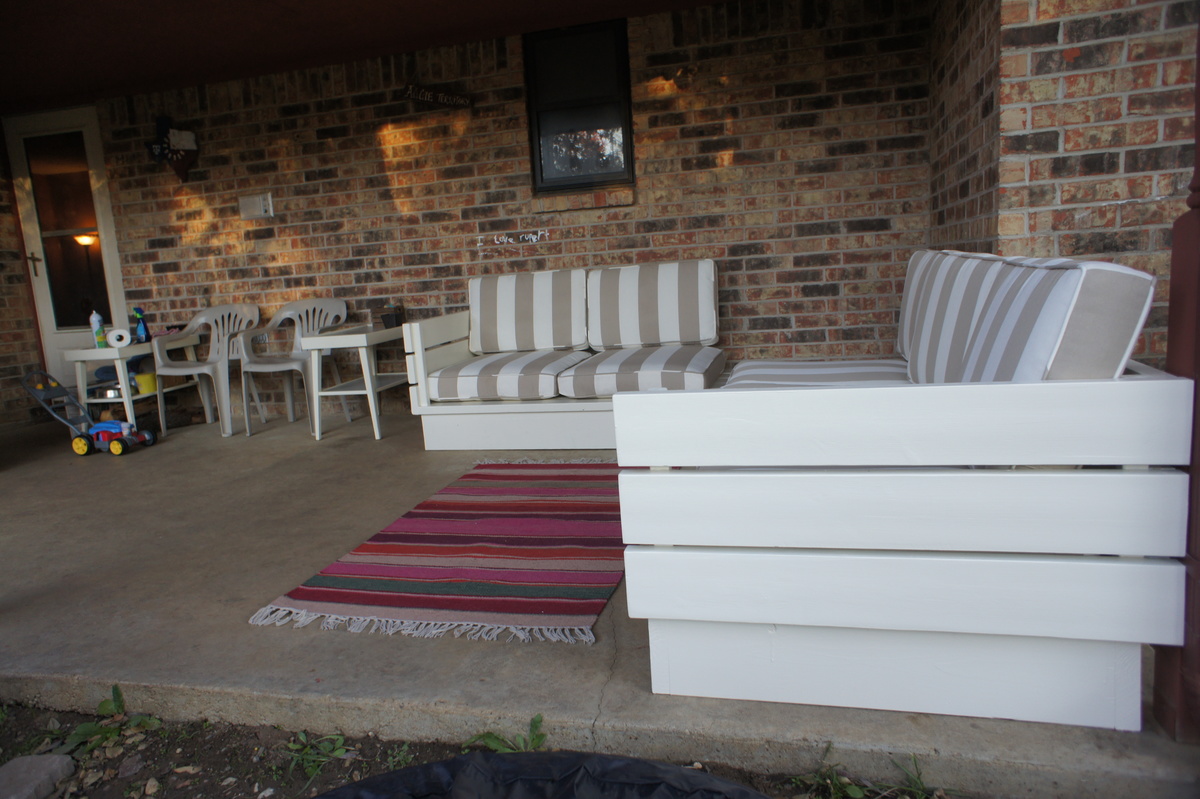
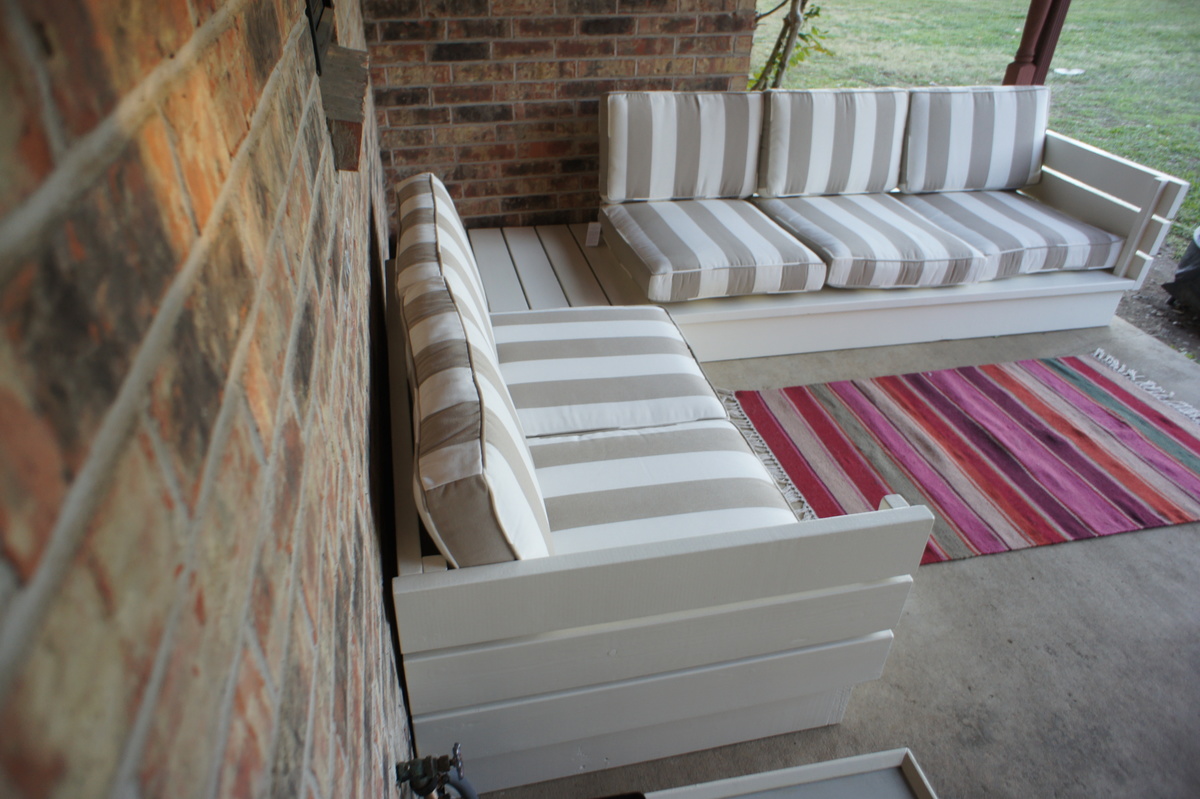

Top 22.5" x 24.5" Base 21"x21" Total height 24"
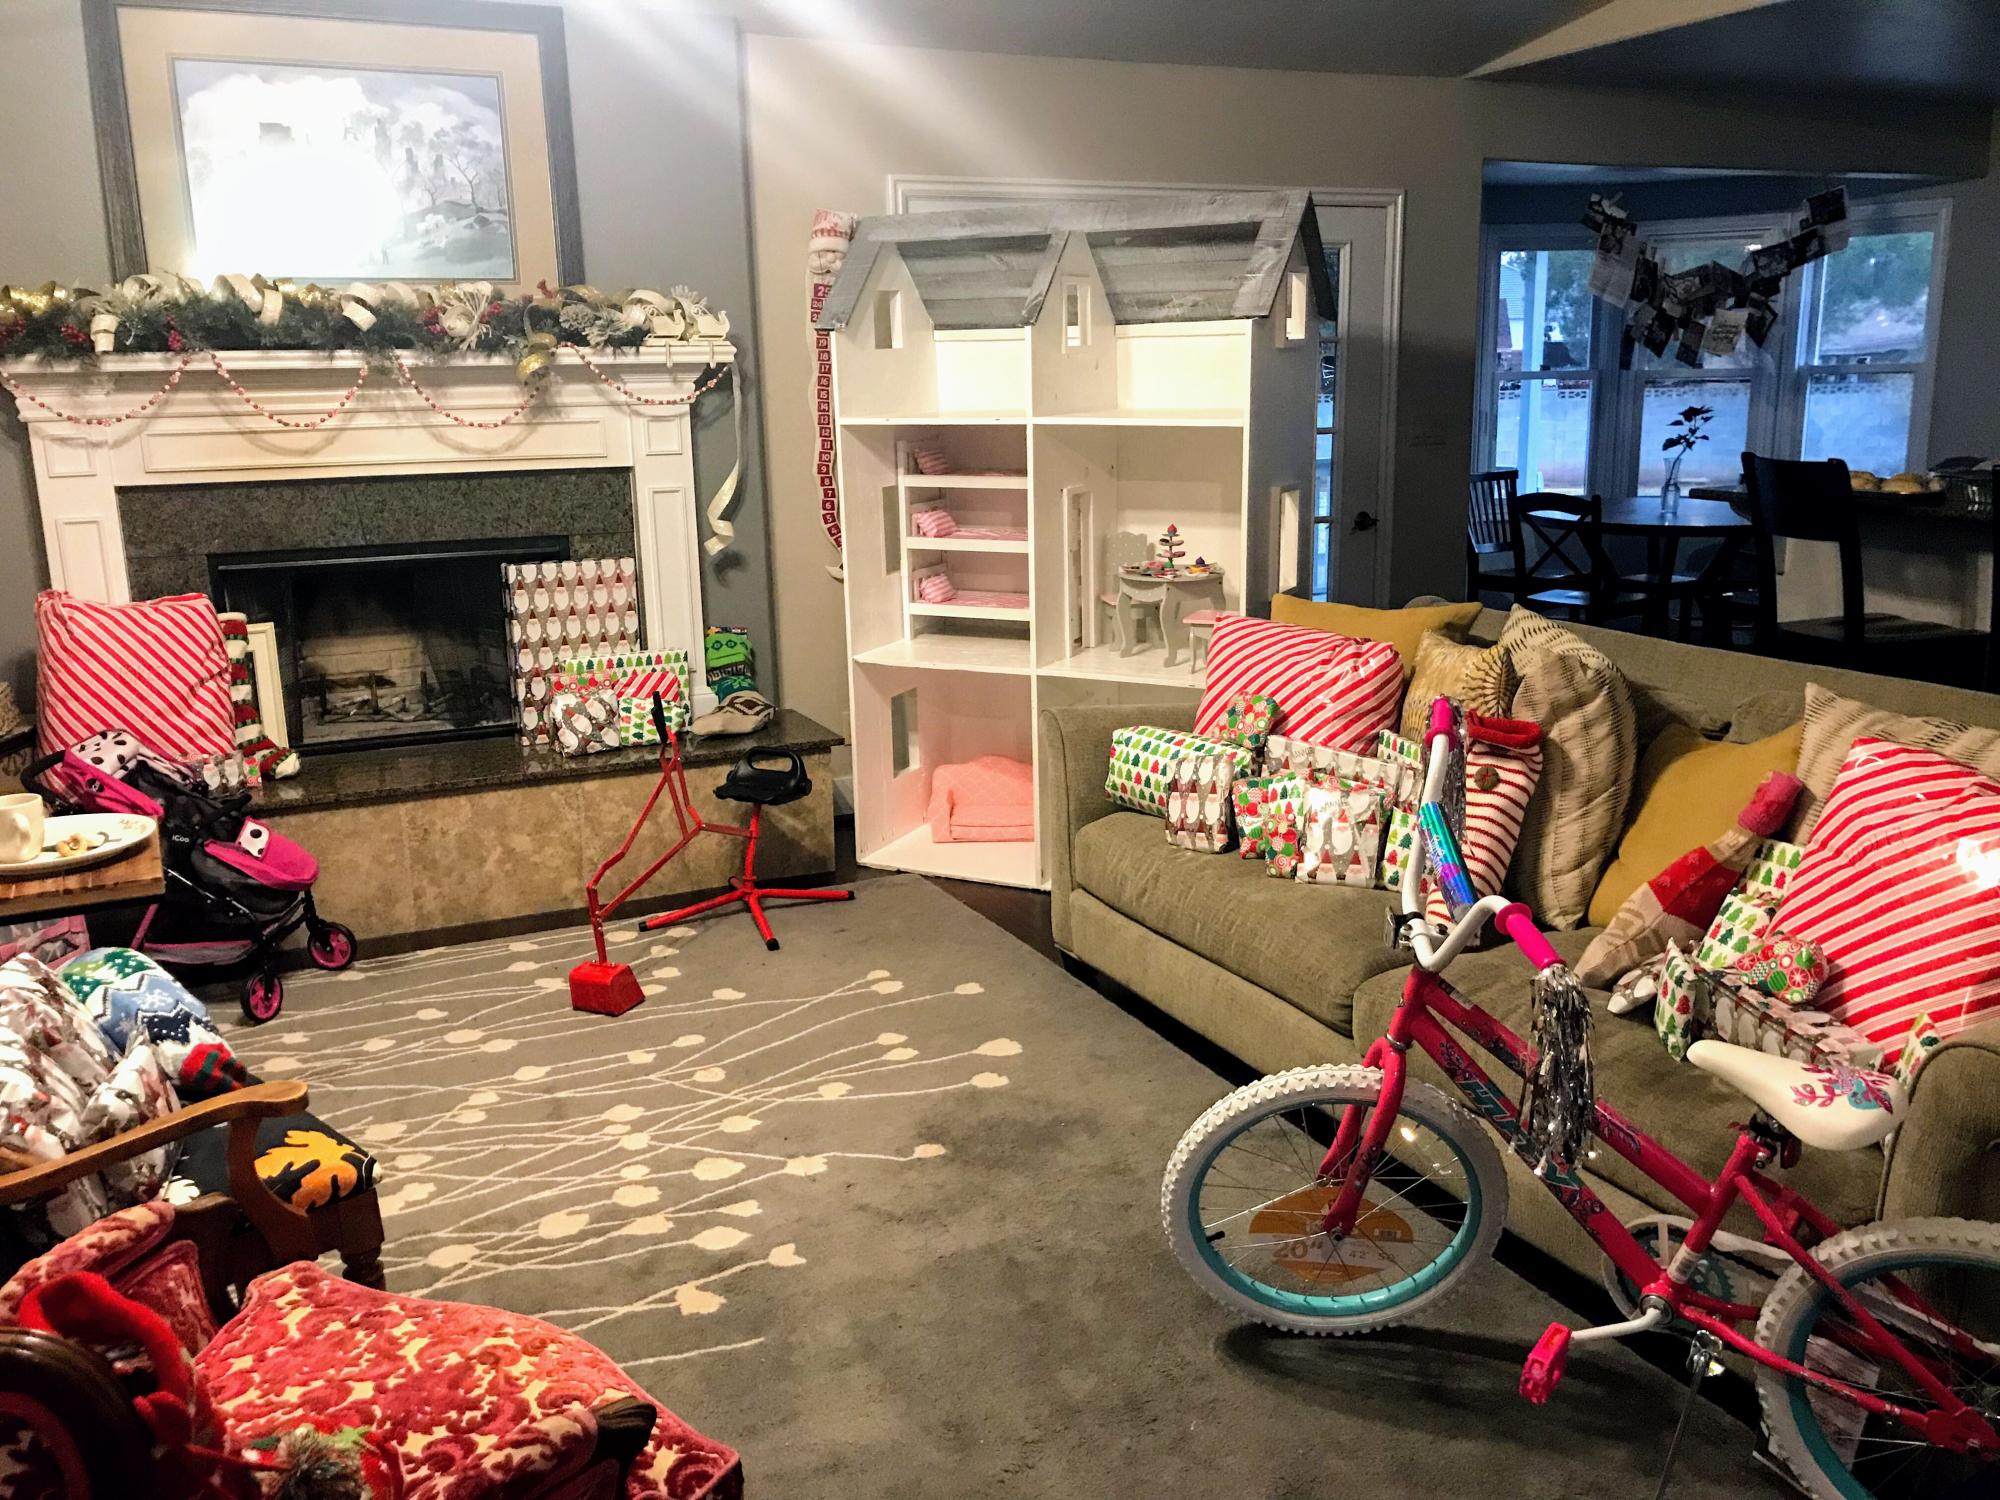
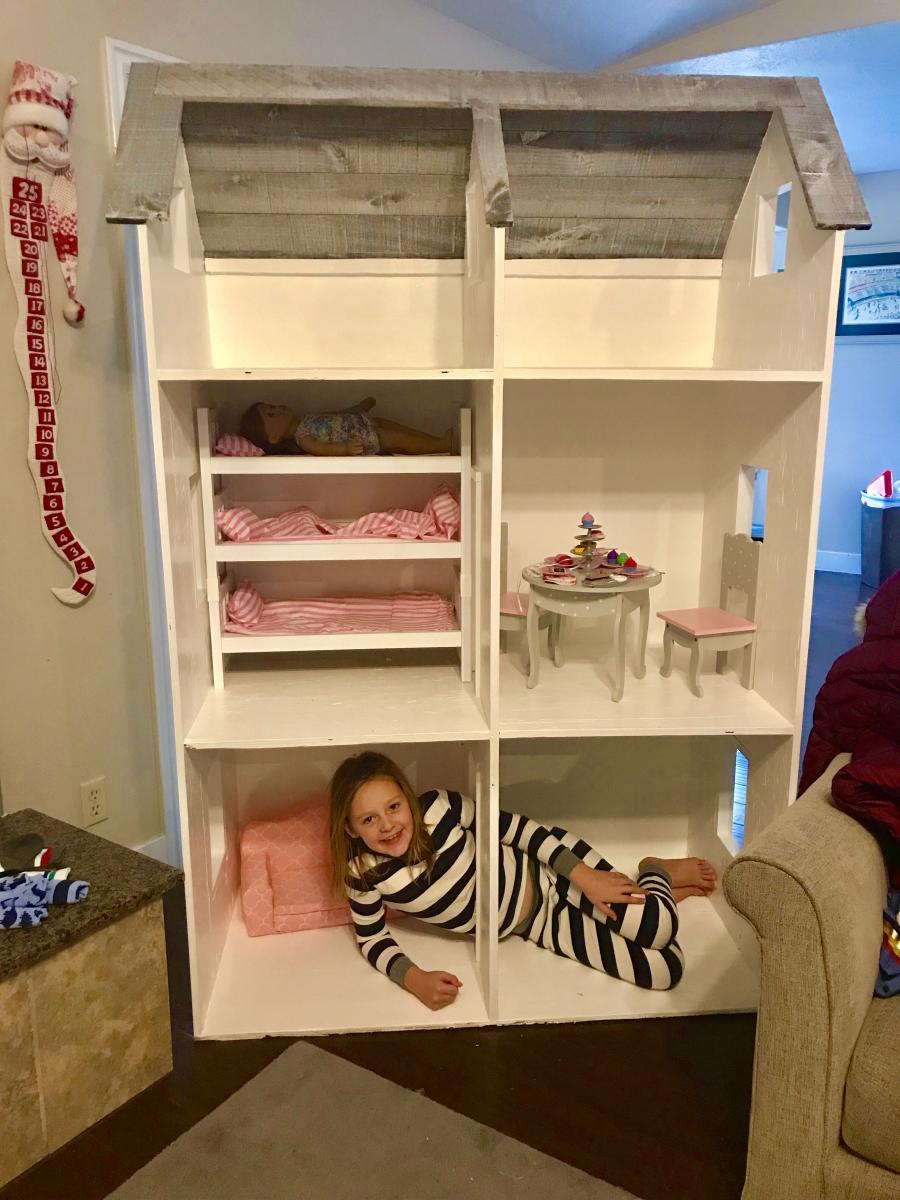
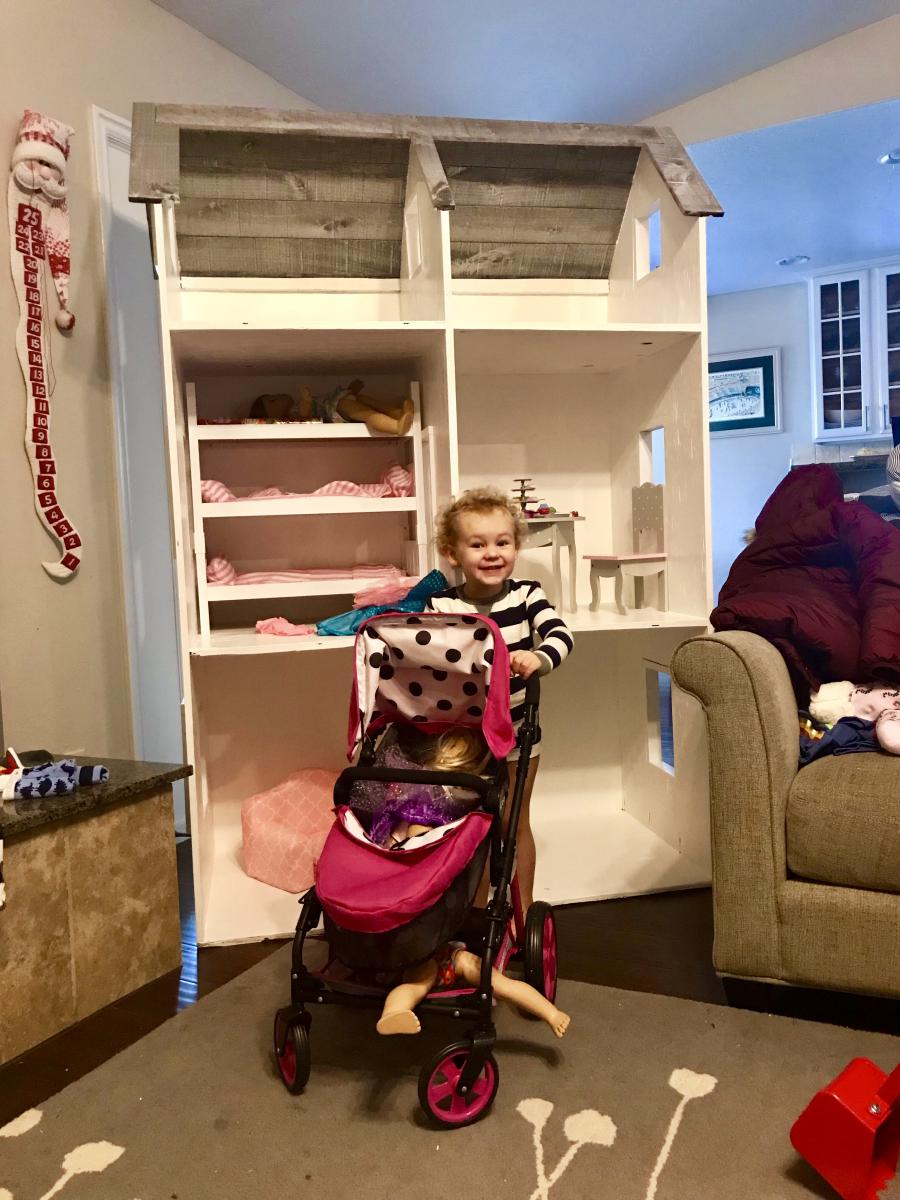
Ana, you saved us! Thanks to you, Santa’s Elf “Ralph,” whipped this up literally the day before Christmas. We have three little girls and wanted to make Christmas magical again after having survived some significant personal tragedy. Christmas has been rather difficult after loss and grief but your doll house was the perfect remedy. Not only do our girls still play with it daily over 9 months later (this has never actually happened with any other toy), but we are thrilled to use it to store all of their dolly clothes and accessories. No mess in our house and it’s super cute! People ask us all the time where we bought it. We tell them it came from Ralph the elf and his bestie Ana White.❤️

Wed, 10/02/2019 - 09:55
This is a gorgeous dollhouse! I especially love the stained roof. And the smiles!

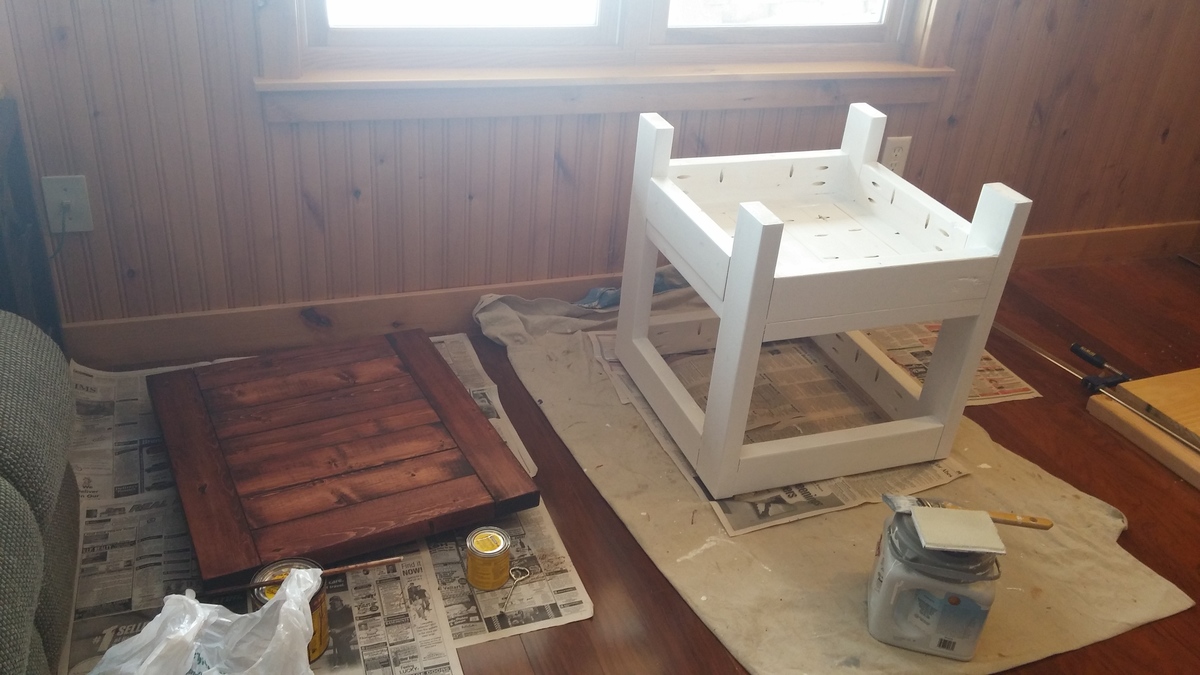
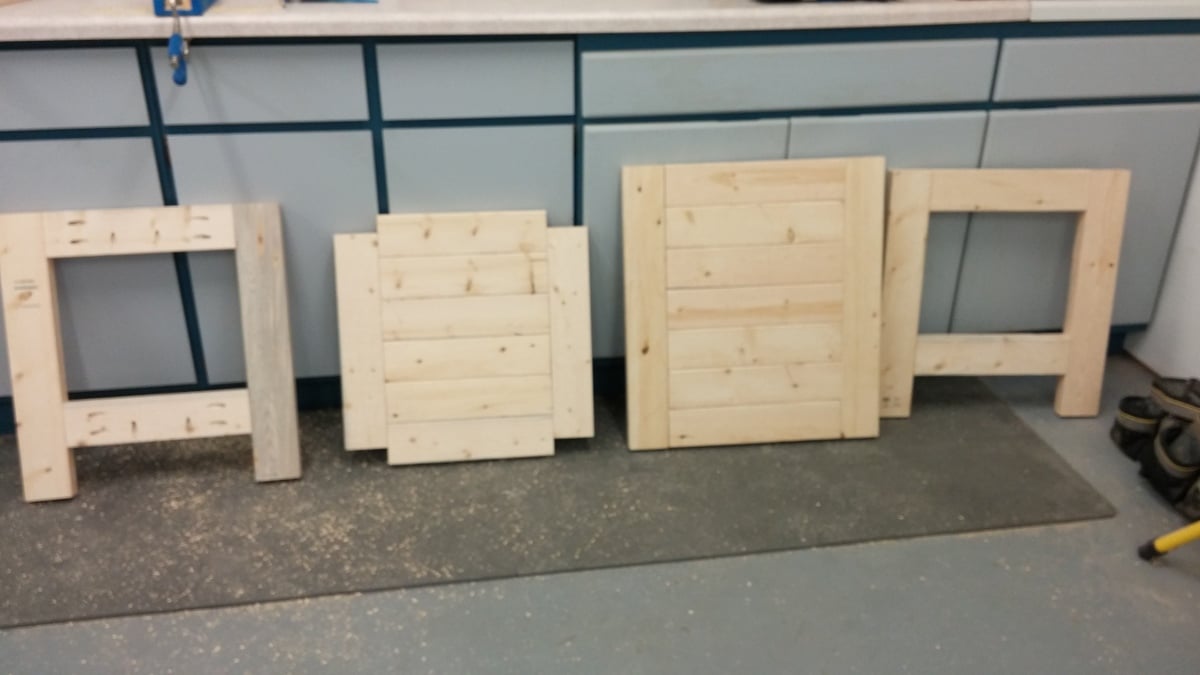
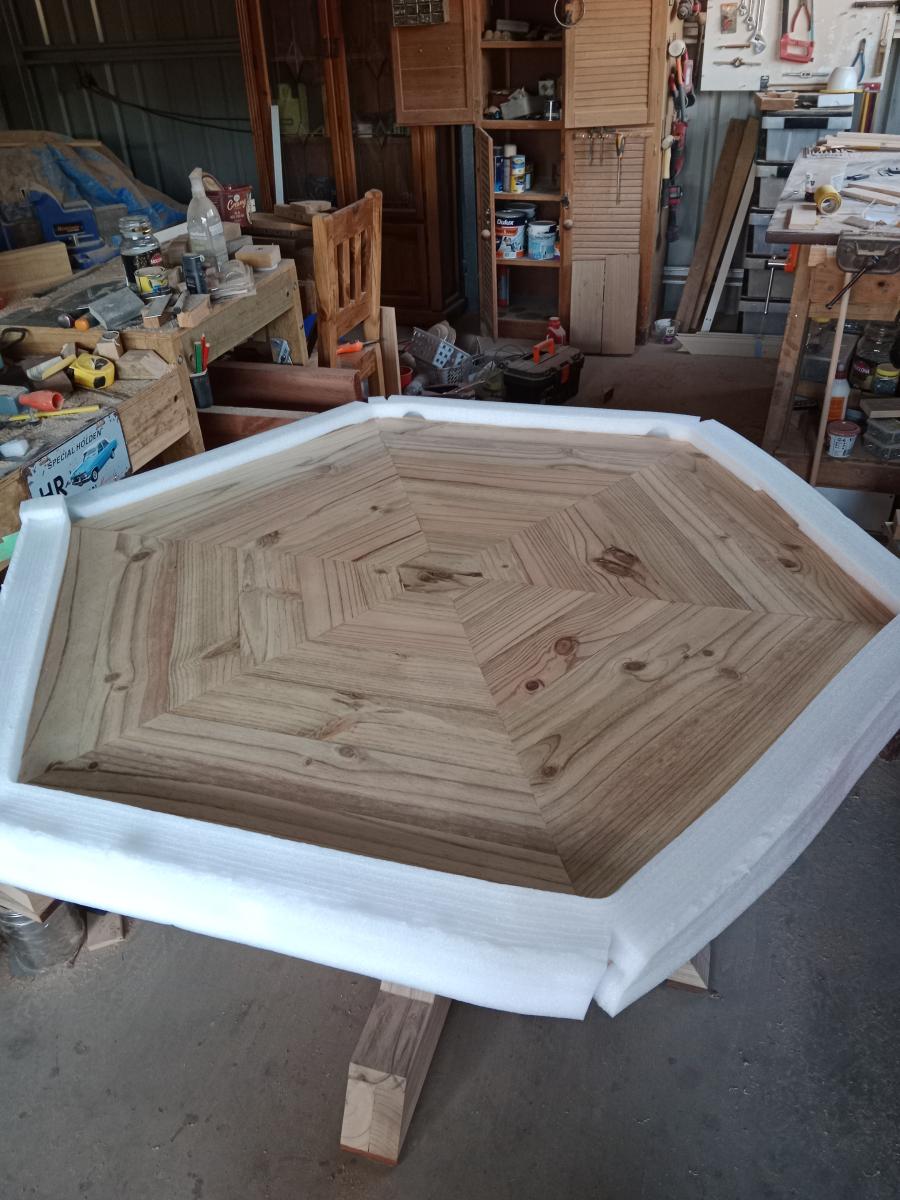
After completing all the pieces for myself based on 4x4 pedestal dining table with planked wood top, I thought I would build a table for my daughter.
The pedestal base is the same as the plan.
Now all i have to do is get it transported 400km down the road
The table was made from 200mm x 50mm pine sleepers
The top was finished with 2 coats of British paints 1 coat finish
Tue, 05/30/2023 - 12:52
Wow, this is gorgeous, thank you so much for sharing! Your daughter will be thrilled.:)

I made the barn wood frame for less than $30 (the plexiglass alone was $23!). It's better than the $80 they were going to charge me at the frame shop for the same style! I used an opaque black stain to both hide my not so accurate miter cuts and give it a modern feel. I'm very satisfied with the results!
Sat, 02/18/2012 - 09:24
I need a large frame for a family photo. I cant spend the money right now. This has been very helpful. Great job
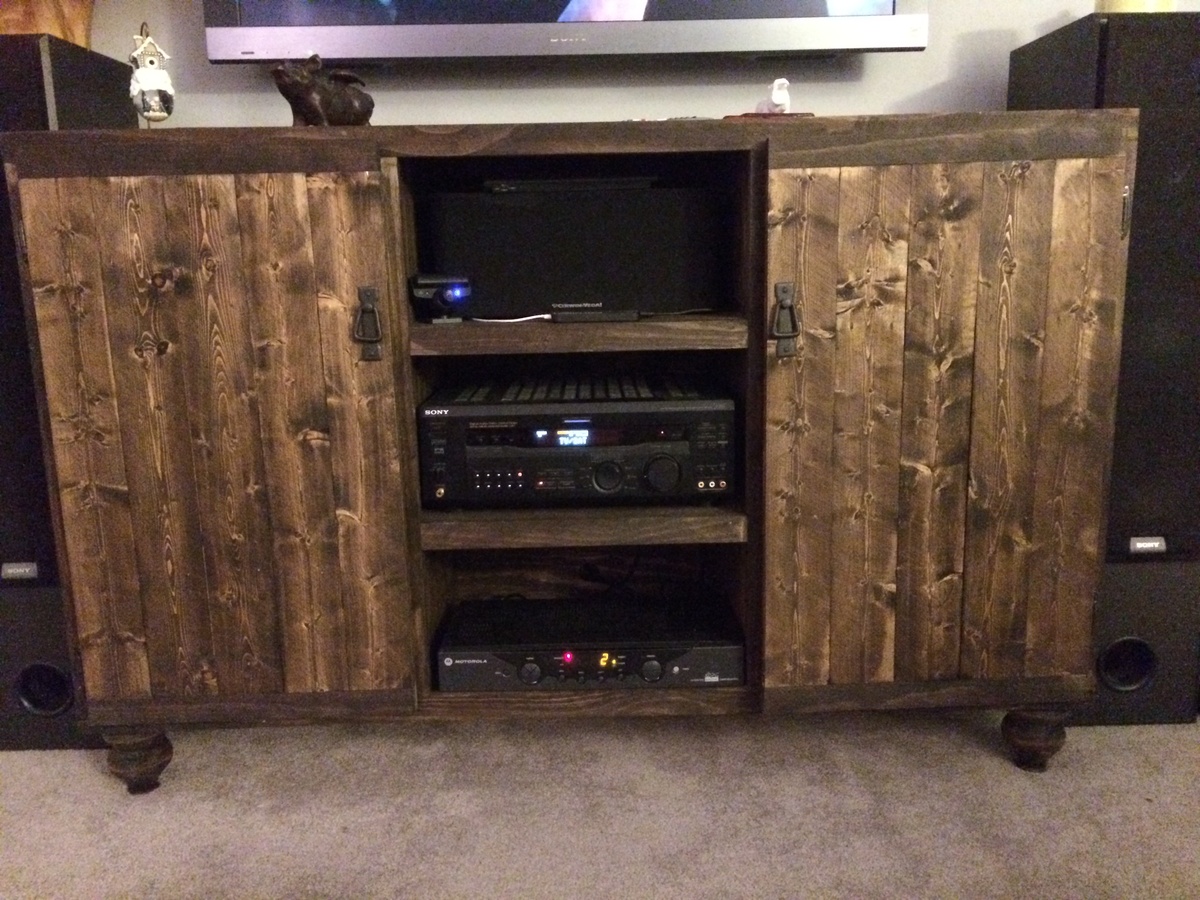
We made this based on the Emerson Buffet plans, but modified to fit our current TV accessories. We also added legs, instead of the framed base.
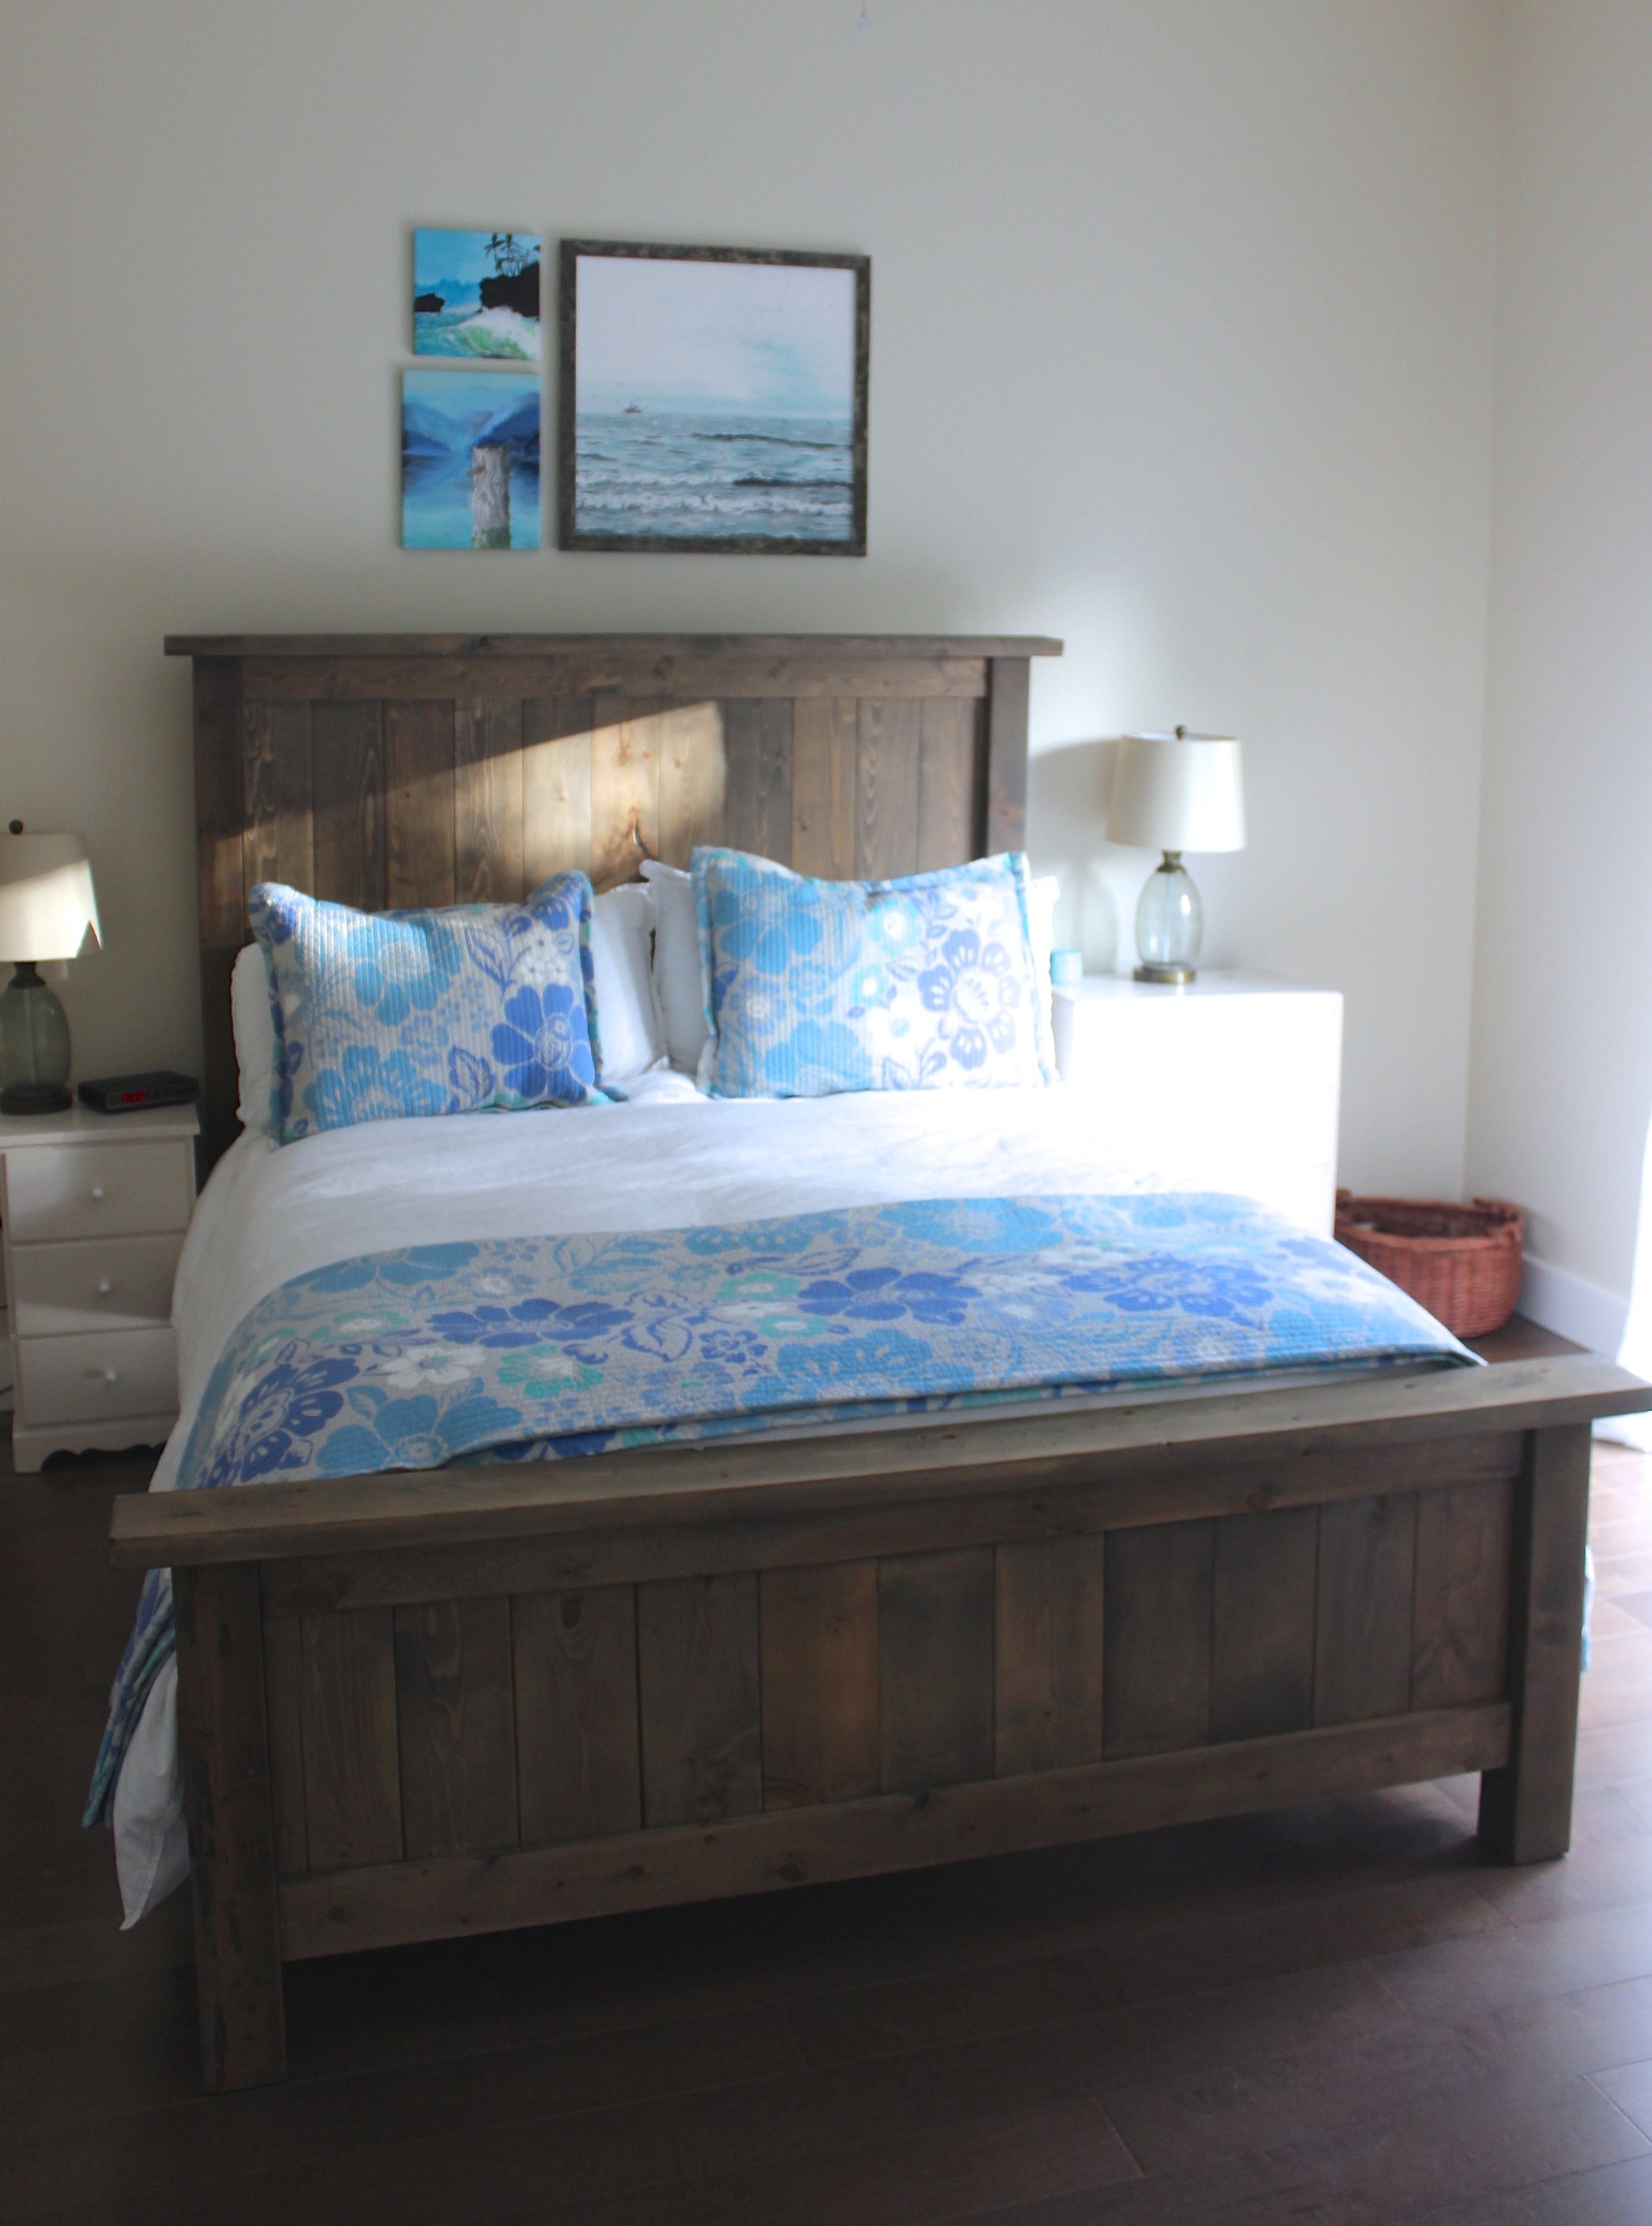
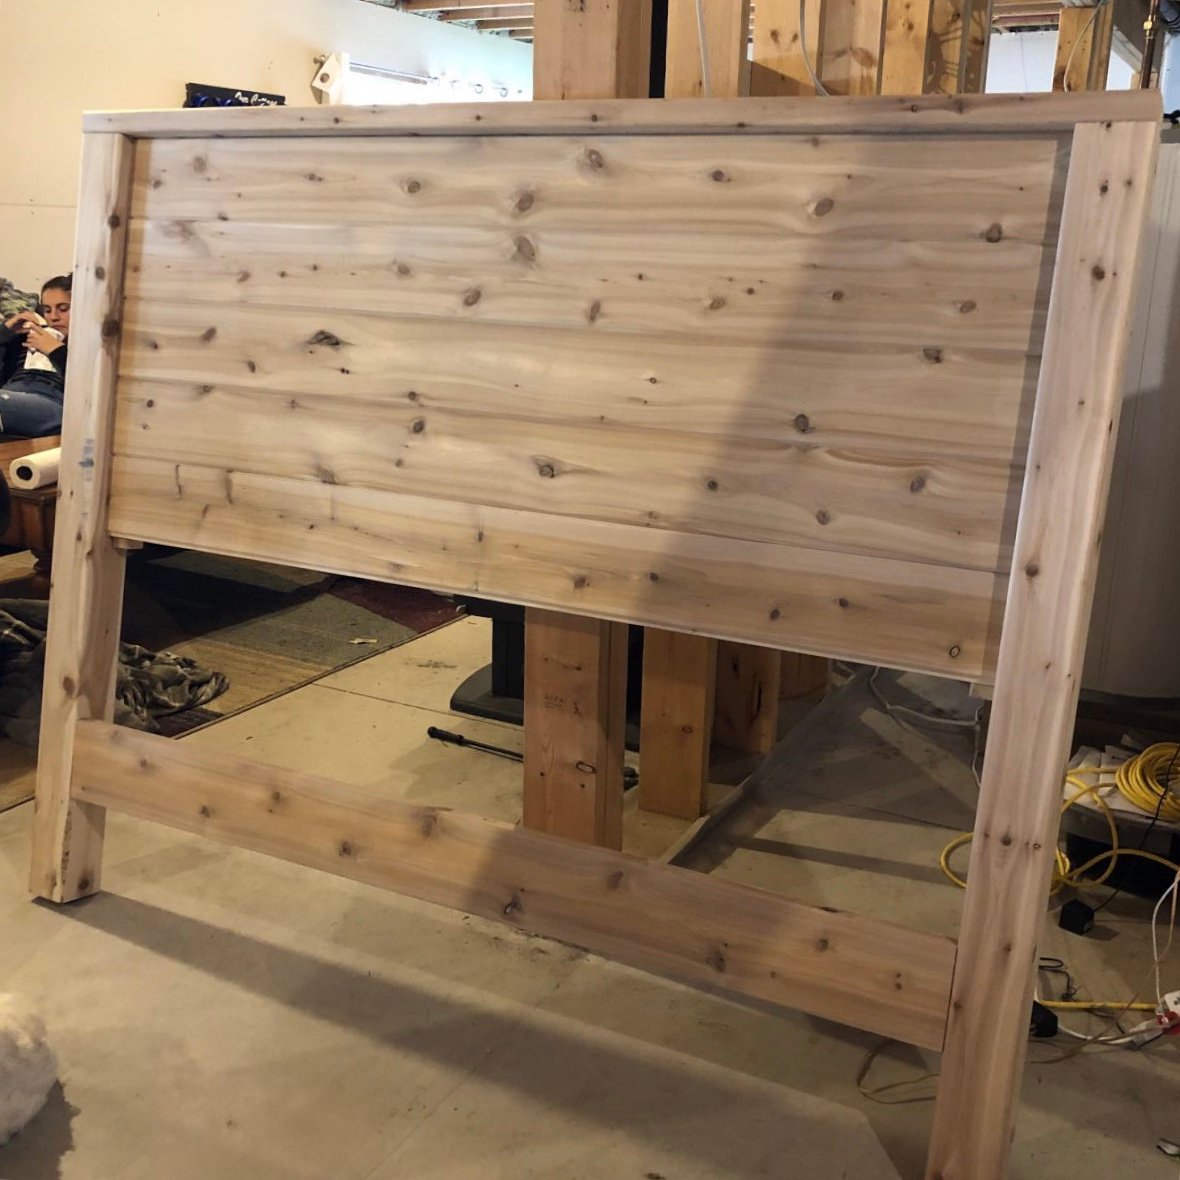
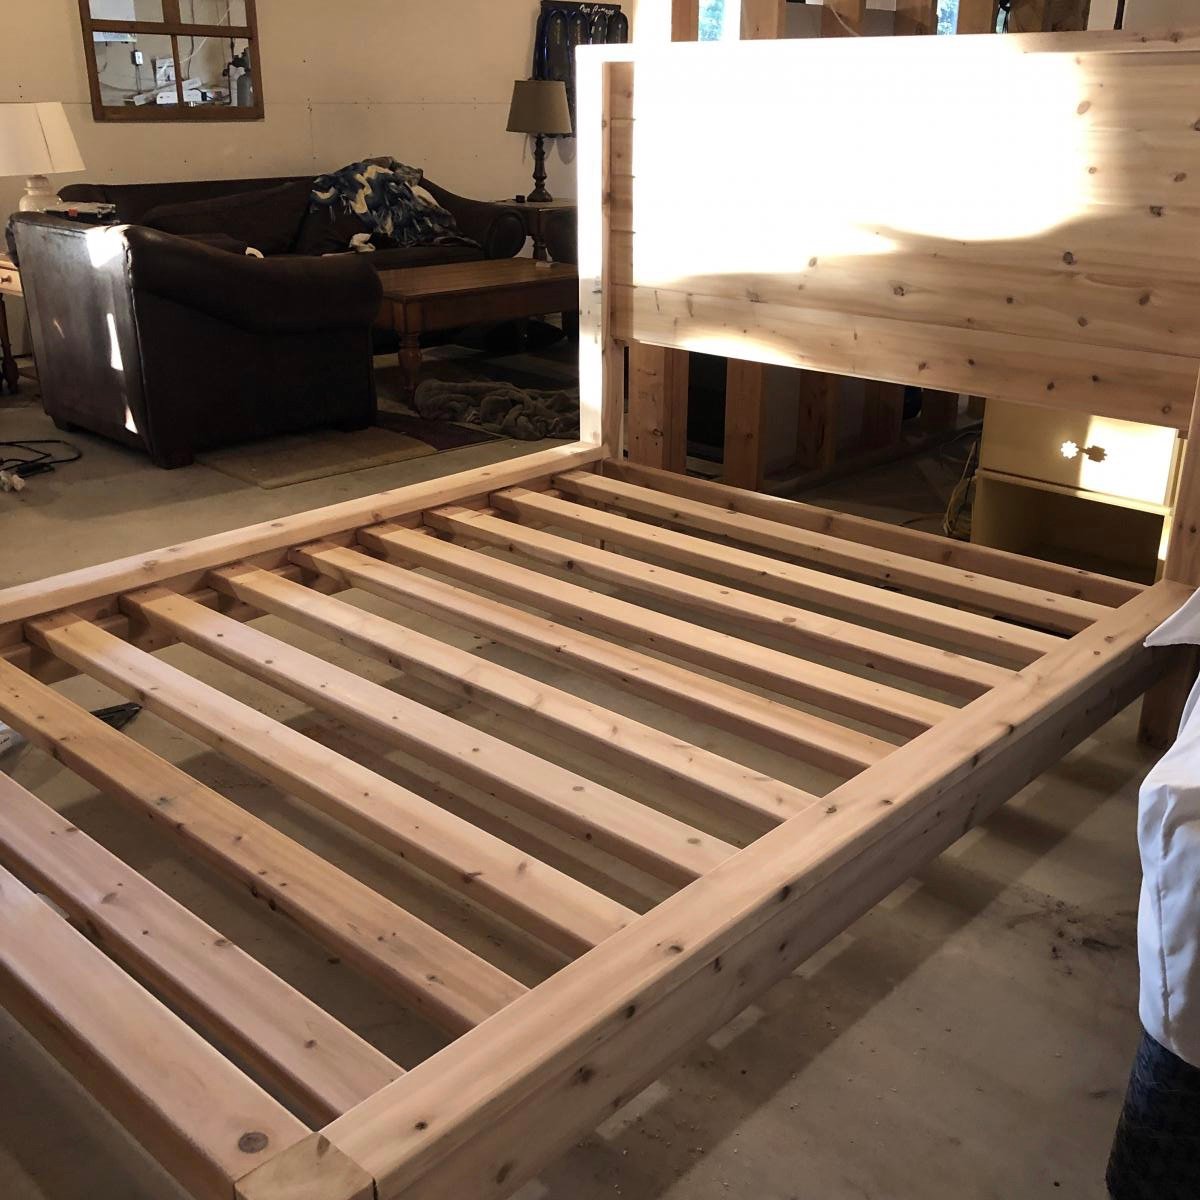
We've built over 100 of these farmhouse beds - we've tweaked the design ever so slightly.
Our first Farmhouse Bed took roughly a day to complete. We sanded the entire bed, applied stain & then applied two coats of matte varnish. At least apply one. Stain can leak for weeks, and smell bad for longer.
We use 2x3's for our slats and find them extra strong!

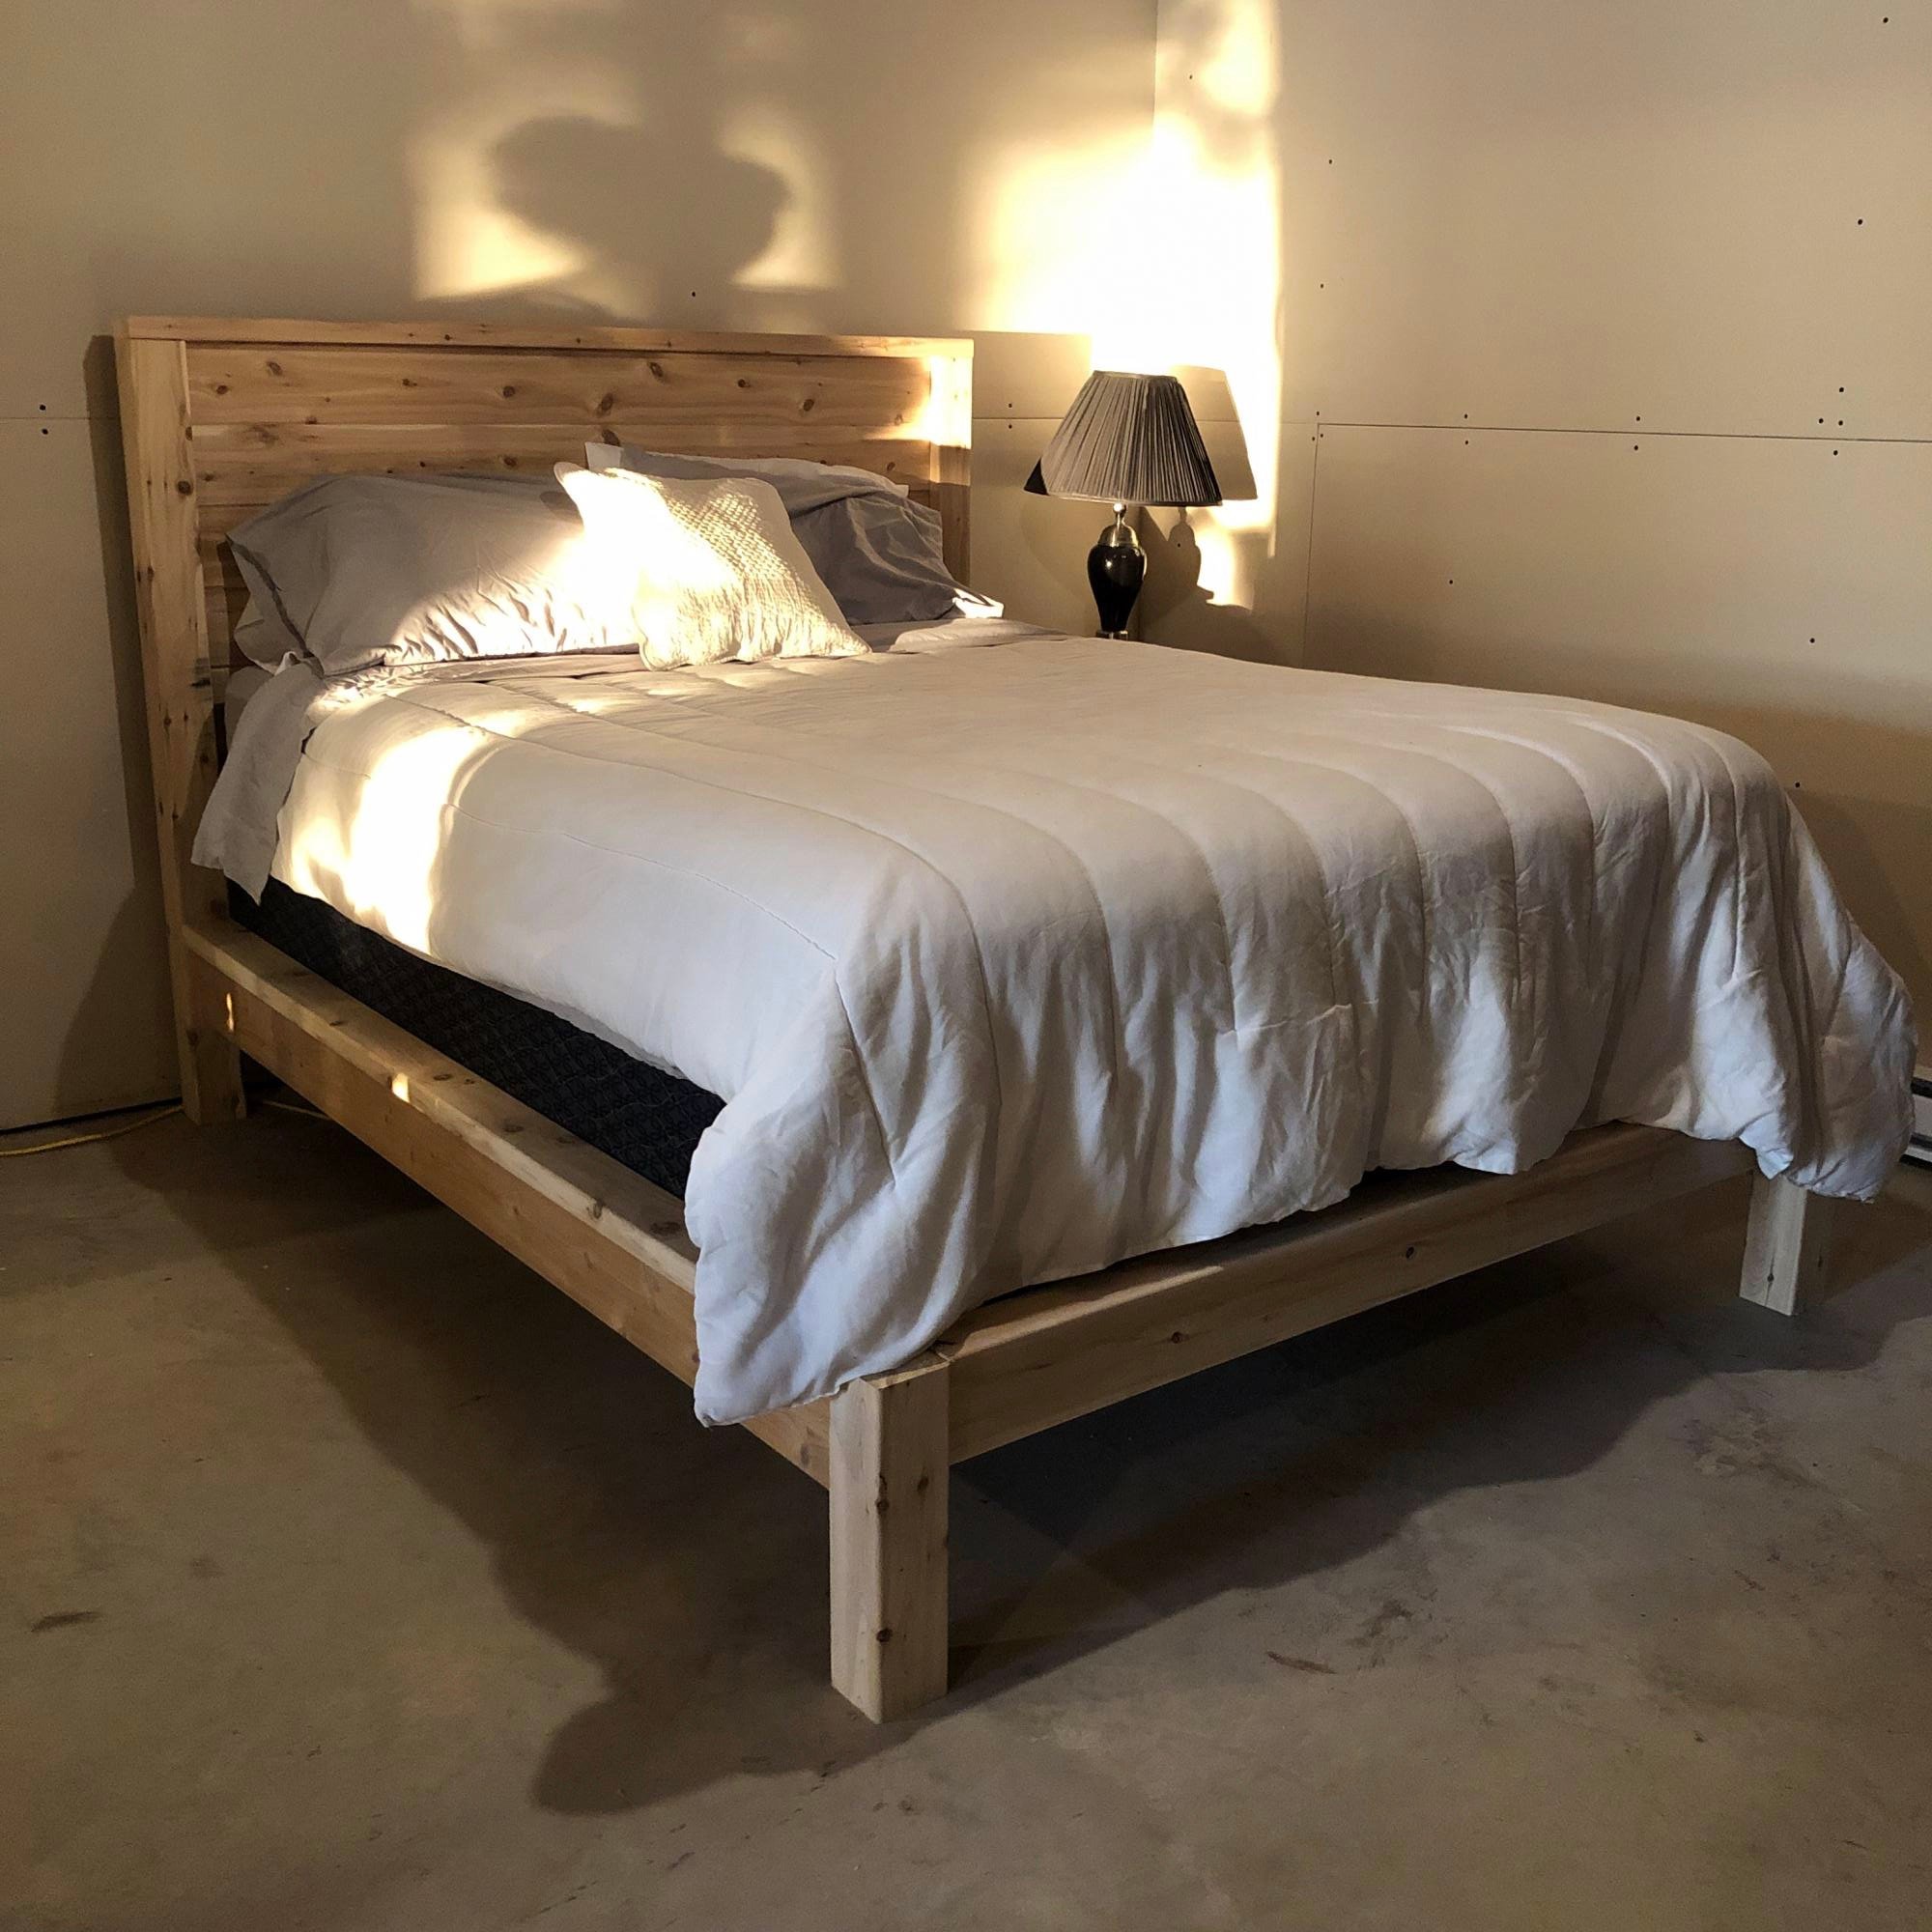
Love this bed so much, we plan to build another 3. Used local white cedar milled just down the road from our cottage.
http://www.ana-white.com/woodworking-projects/modern-farmhouse-bed-frame
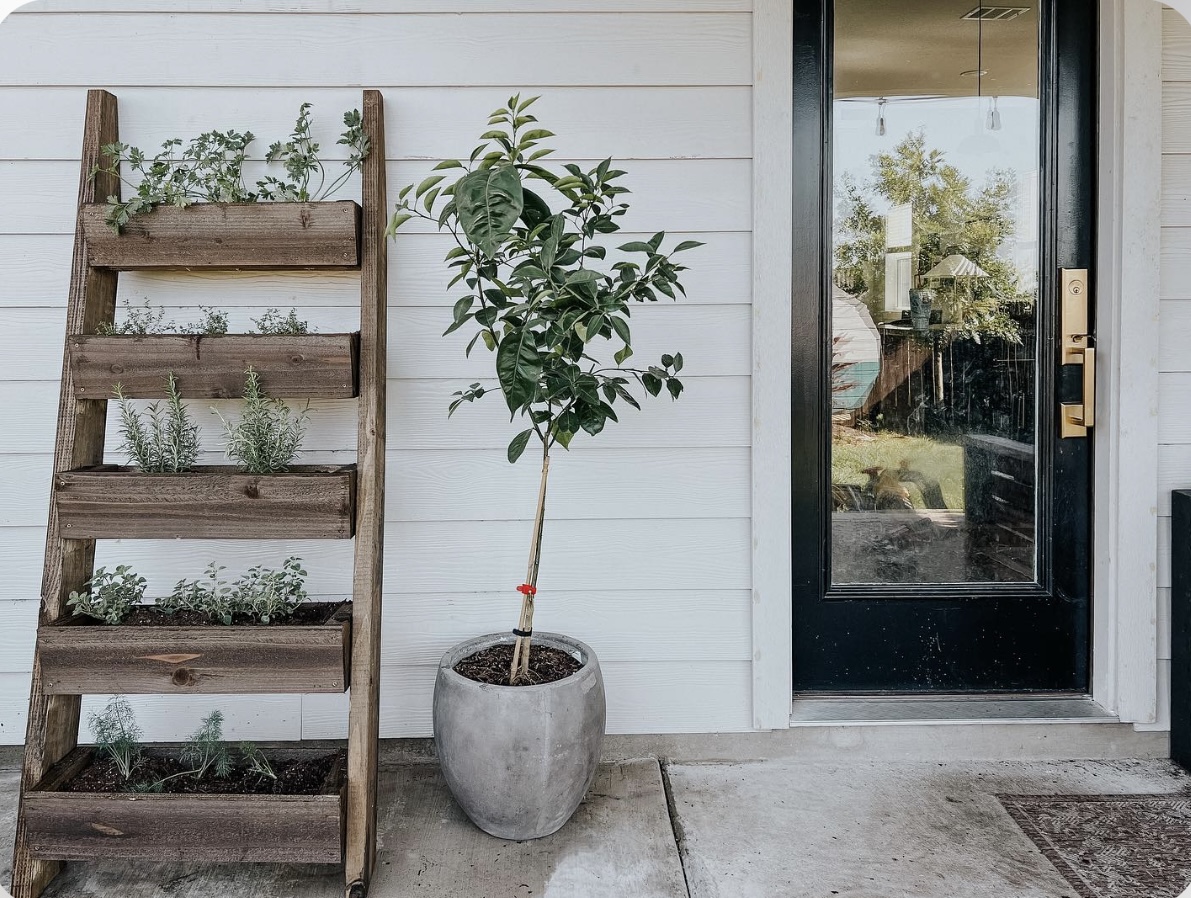
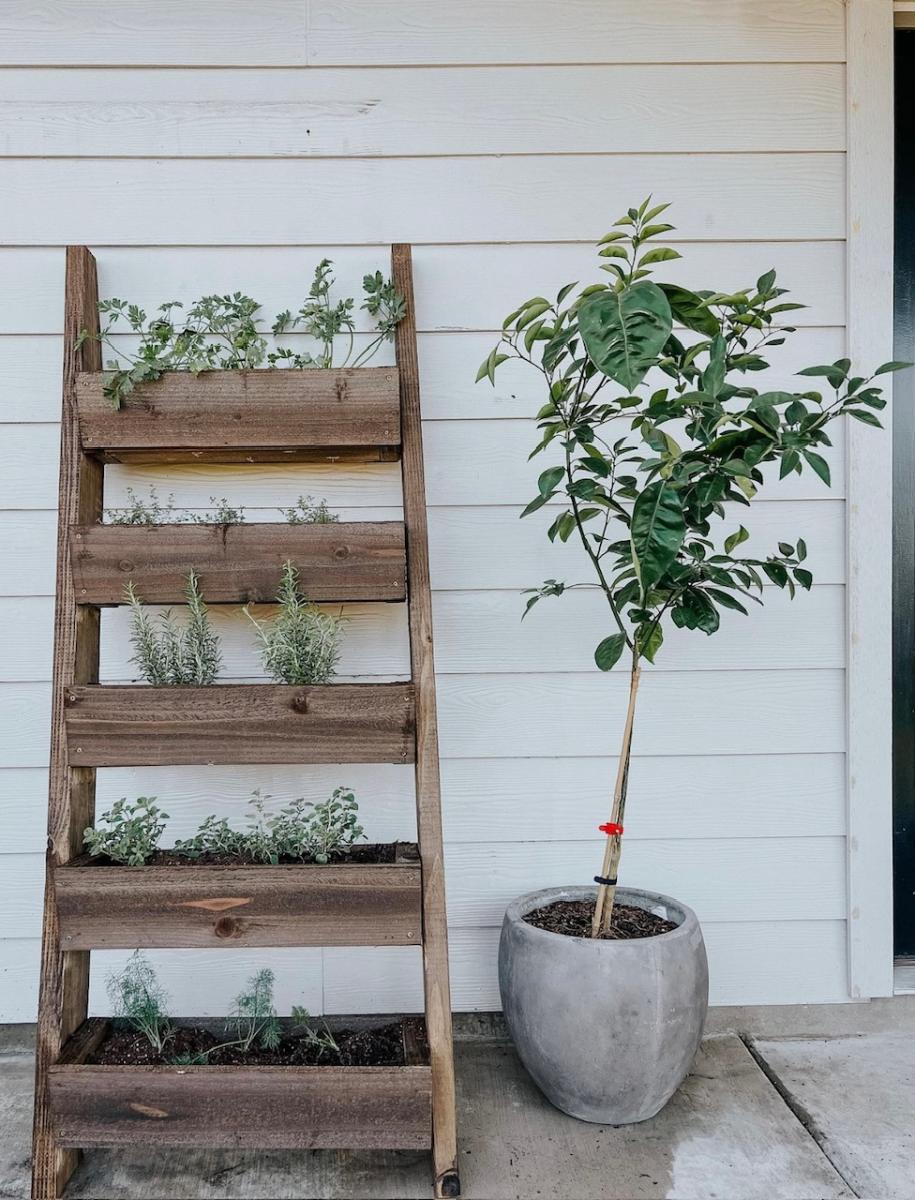
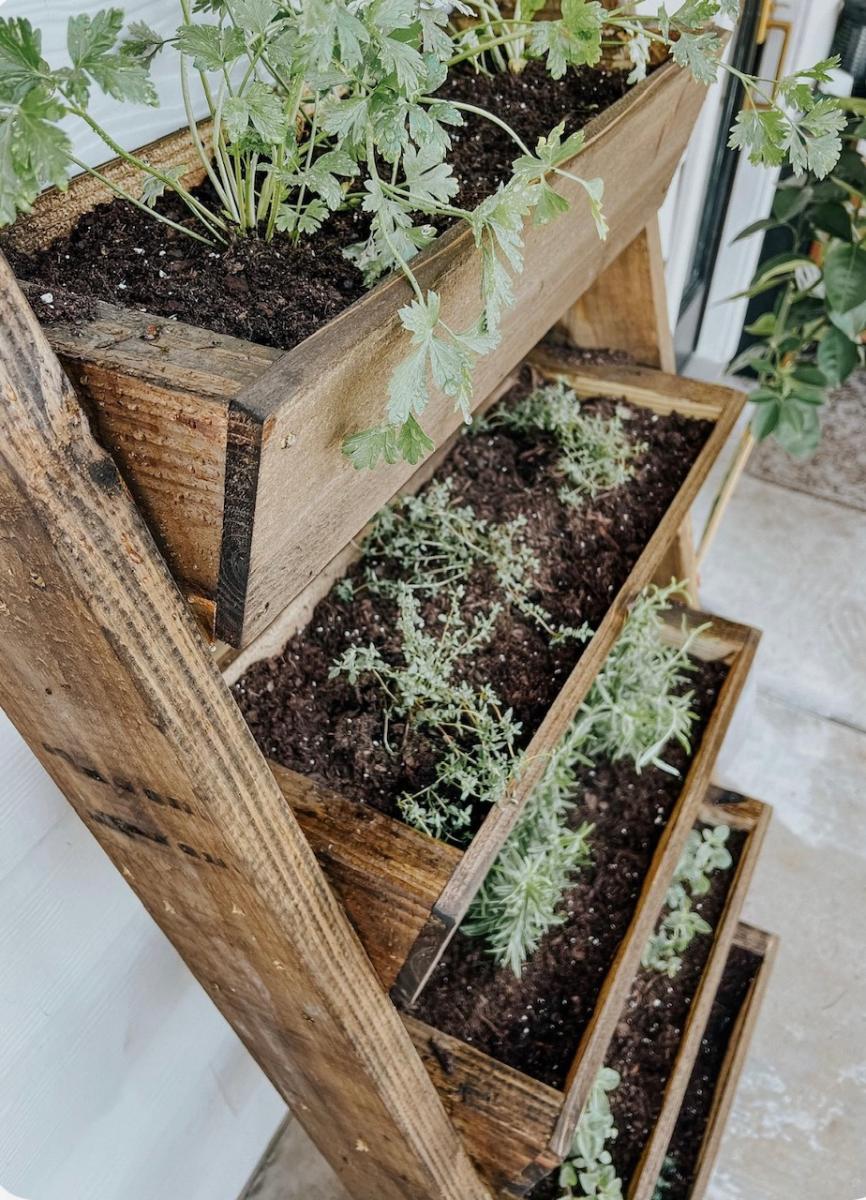
"For this project, I decided to lean on the expertise and creativity of someone else, and I followed a tutorial from Ana White It was incredibly easy to follow, really well written, and a super simple build. It took me just a few hours to build the leaning planter, and cost about $45 in wood." - Amanda
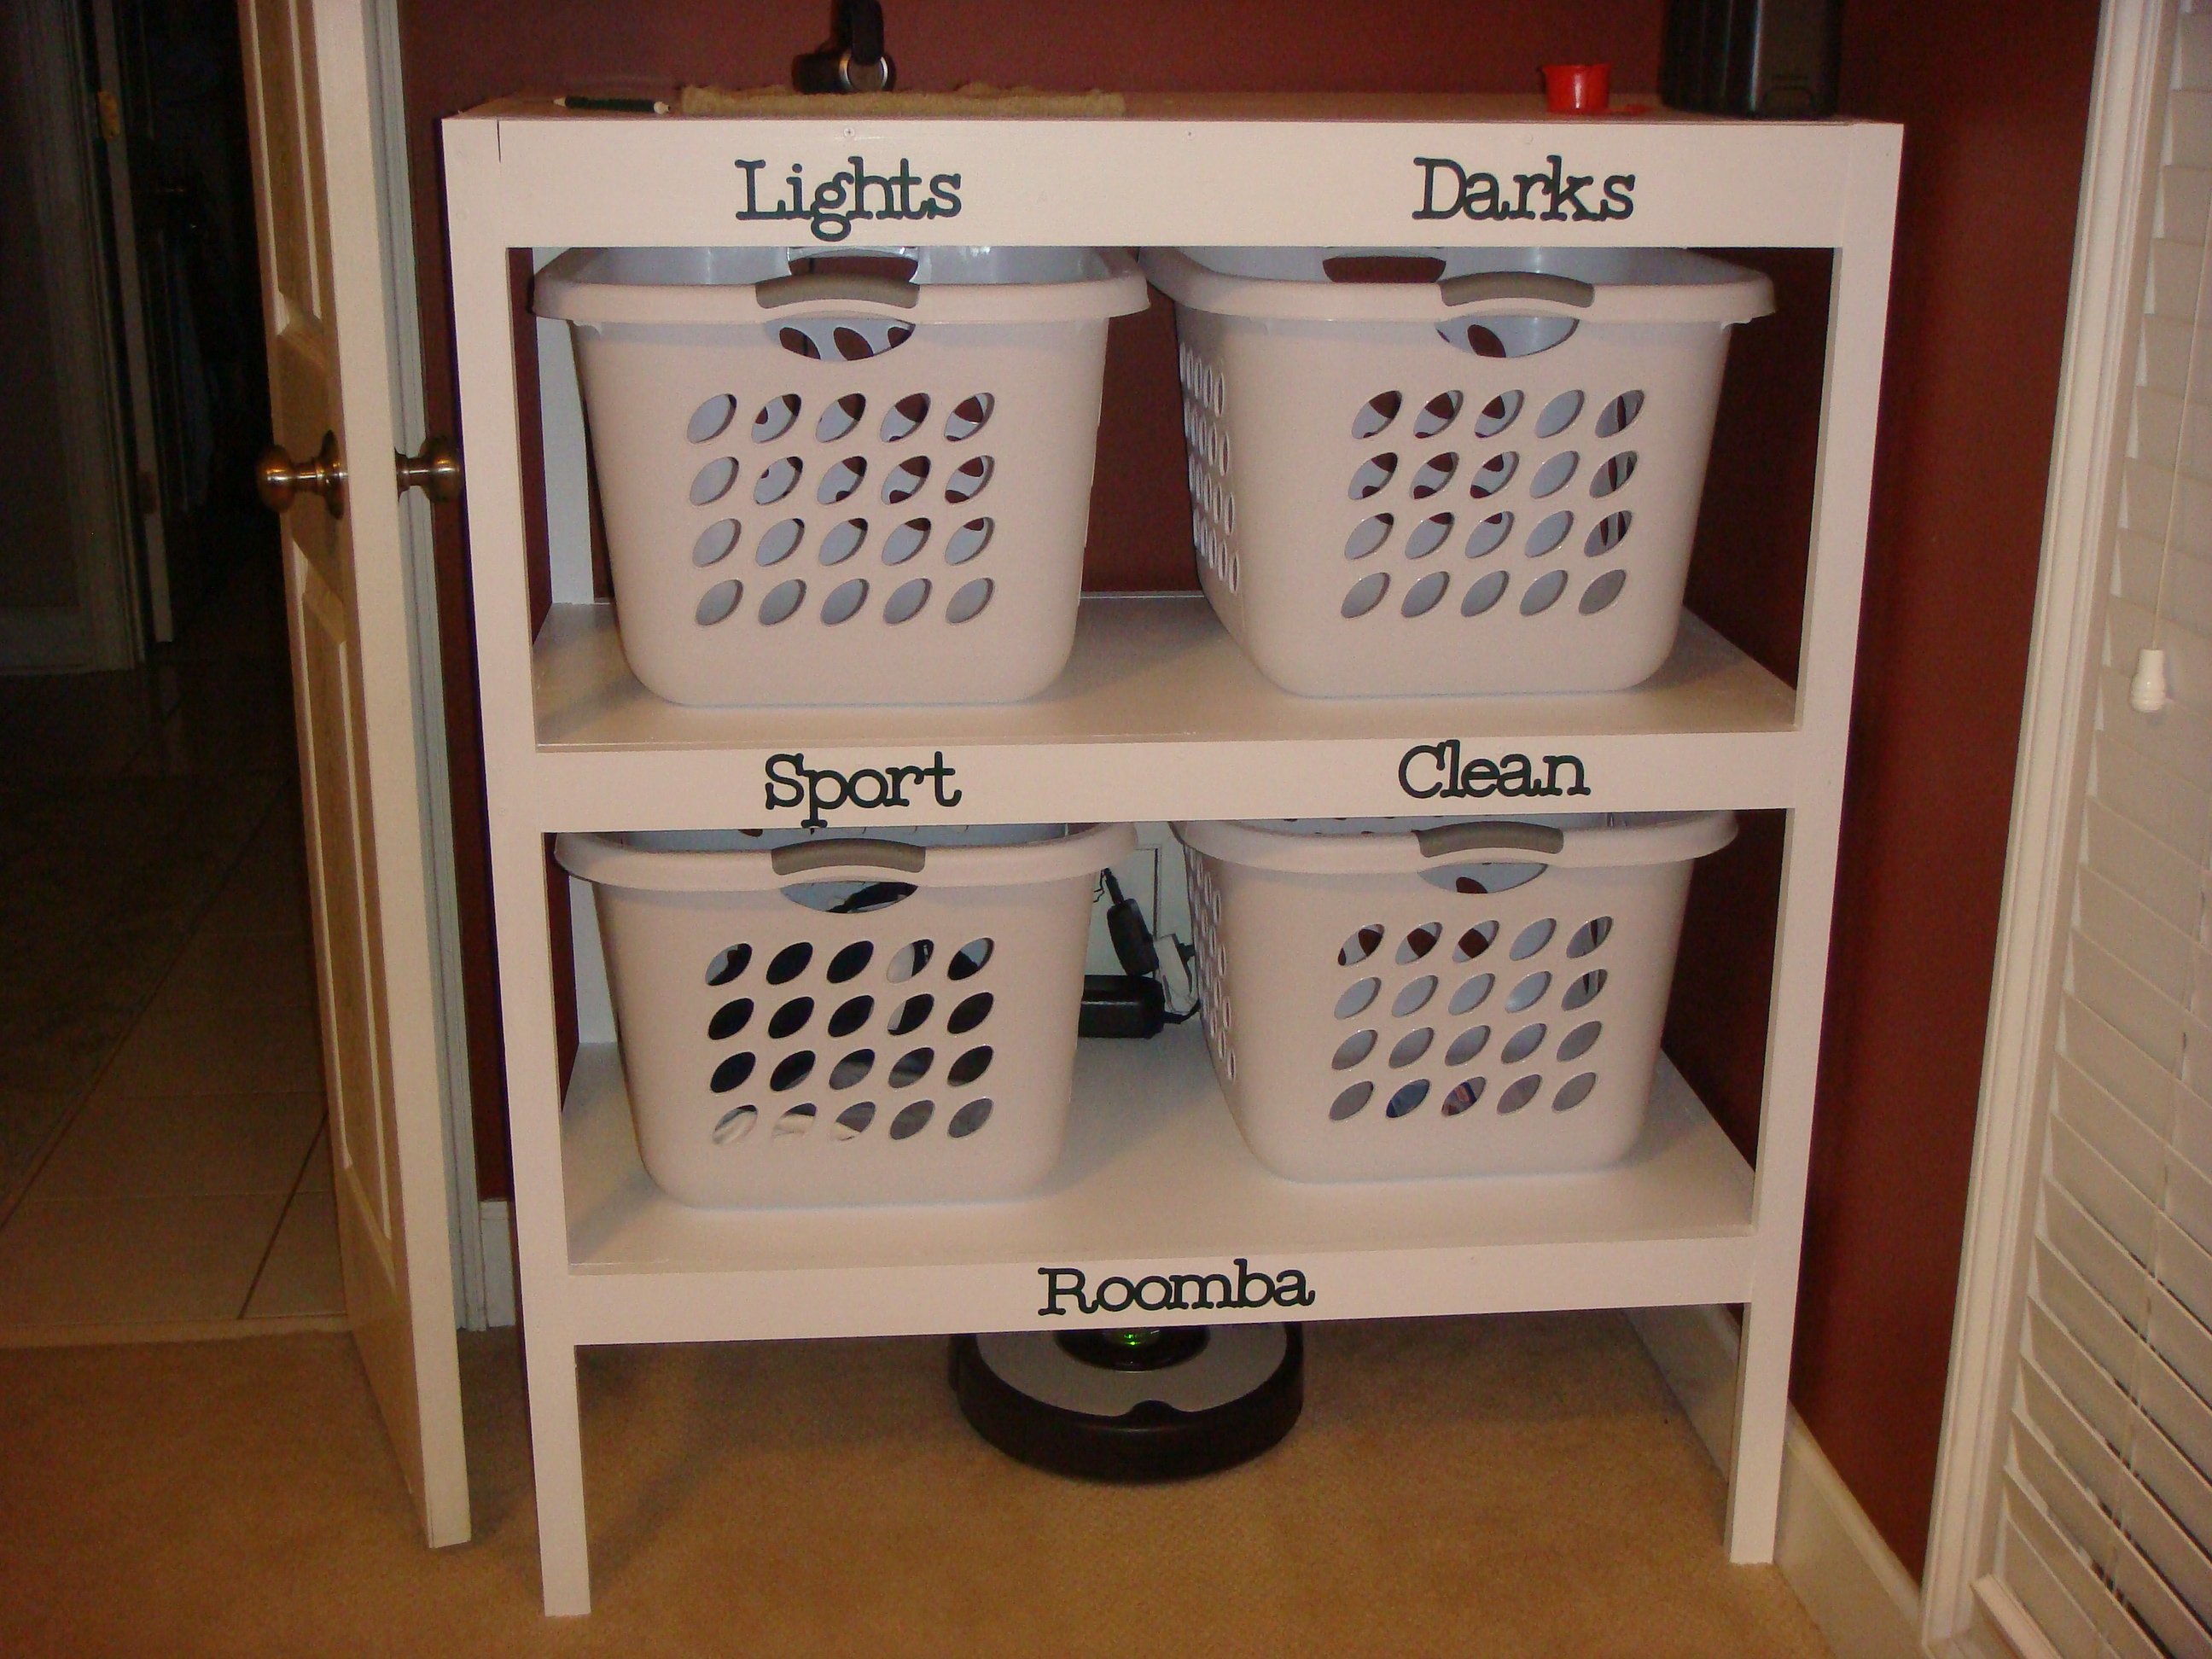
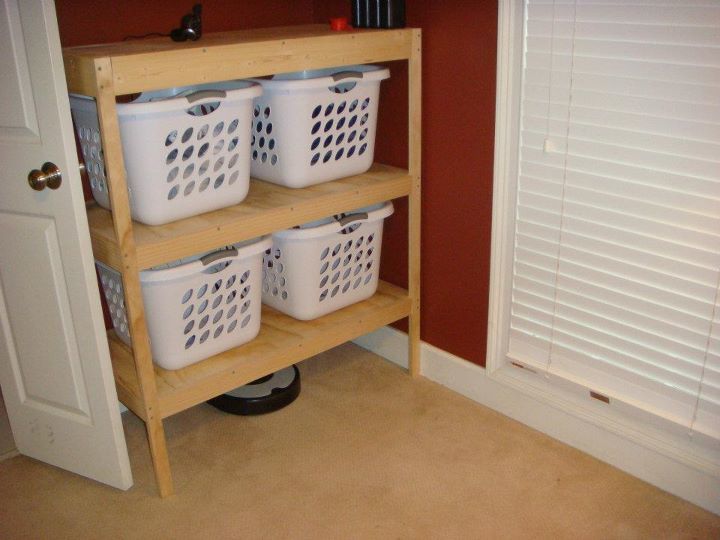
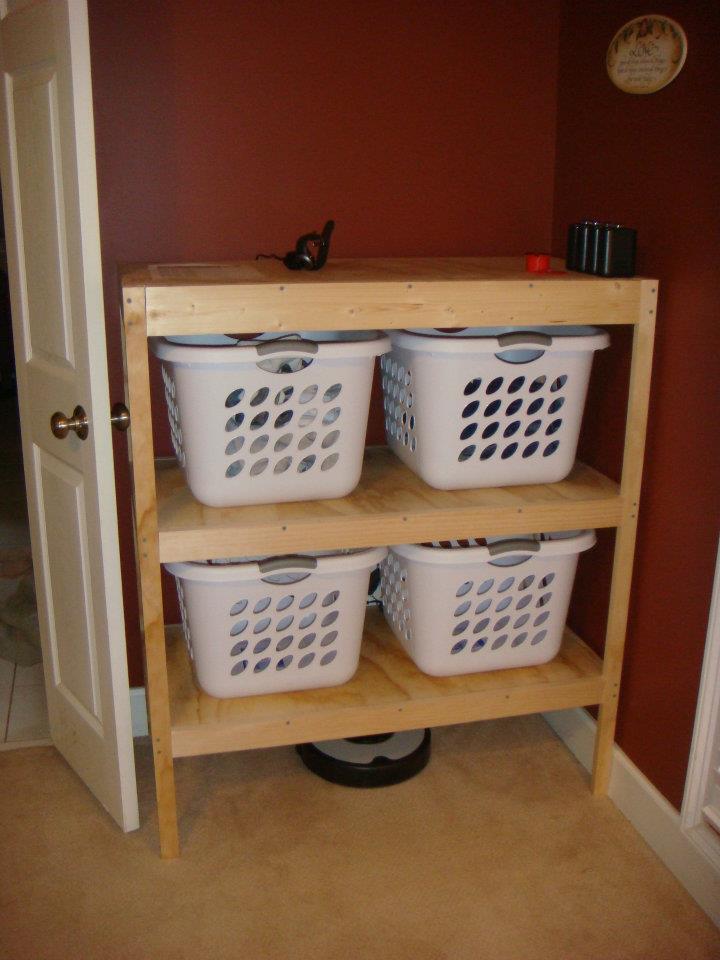
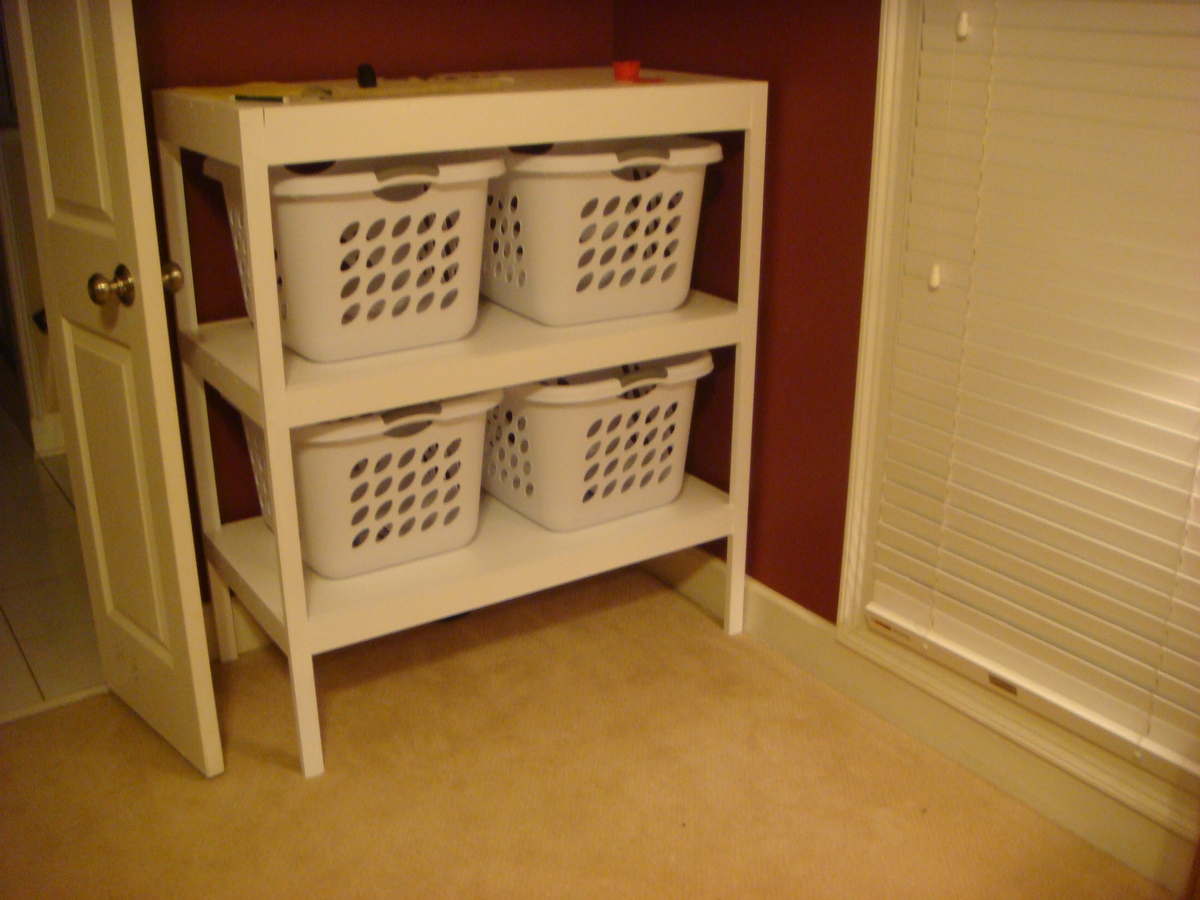
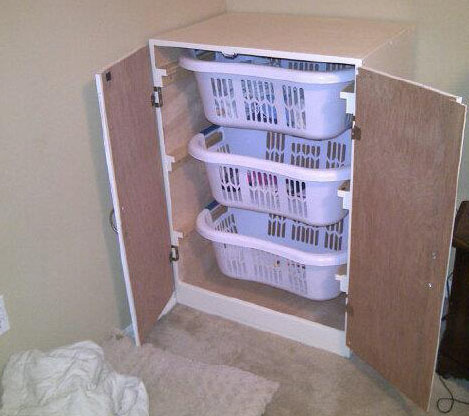
My original plan was for a laundry cart or stand for laundry baskets. I ended up building one that is pretty big for 4 baskets, a shelf on top, and elevated 10" on the bottom for our Roomba vacuum to be stored.

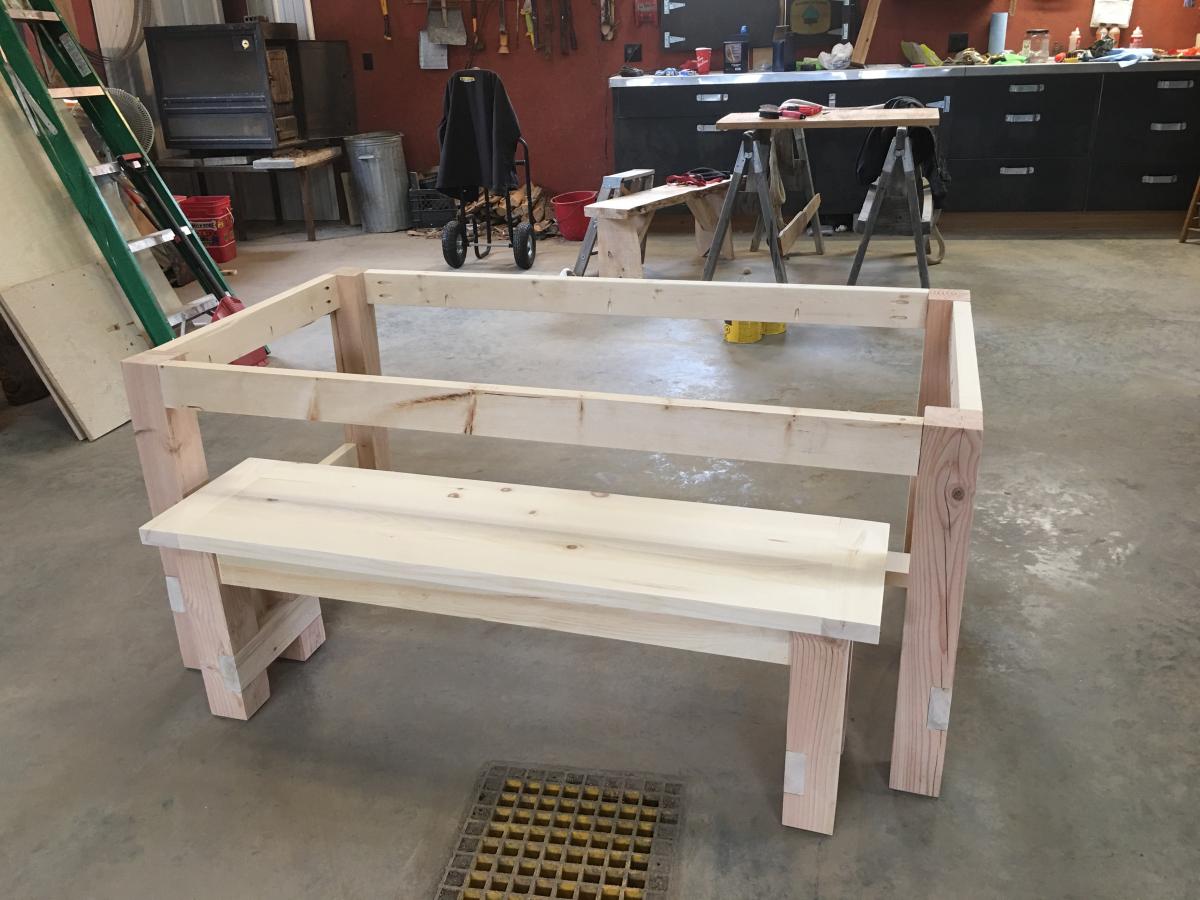
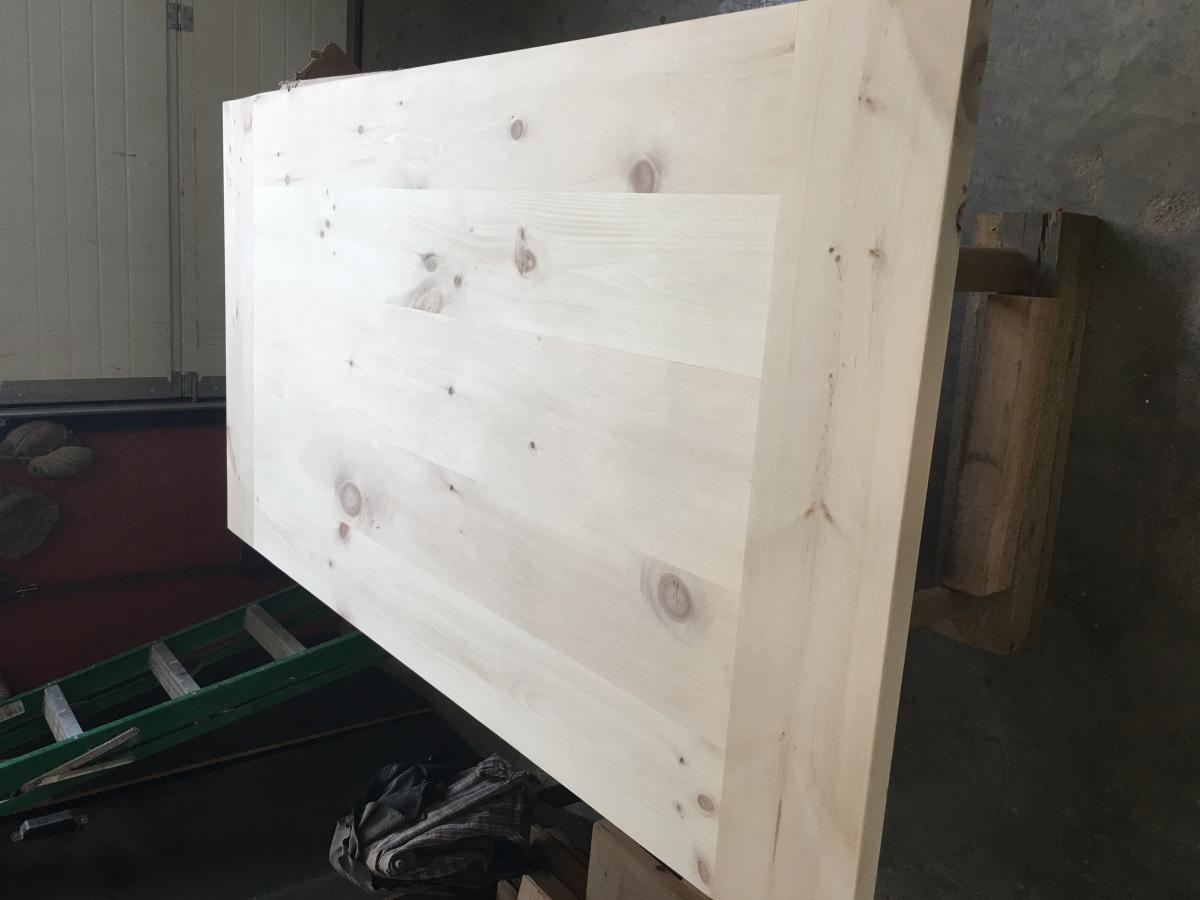
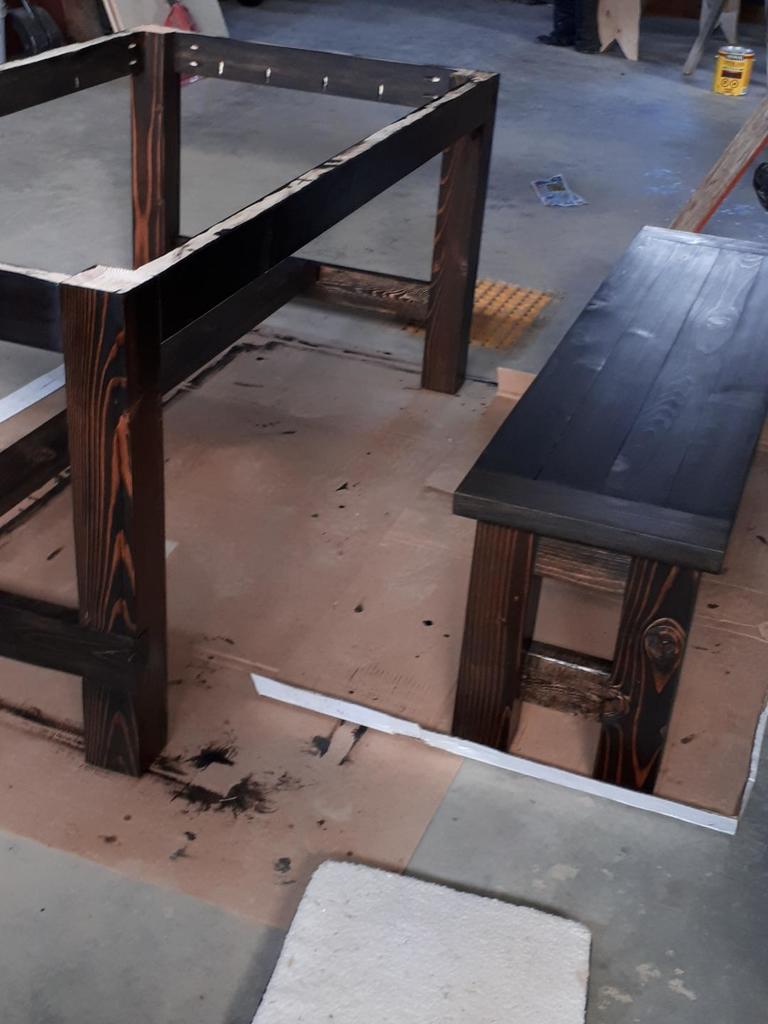
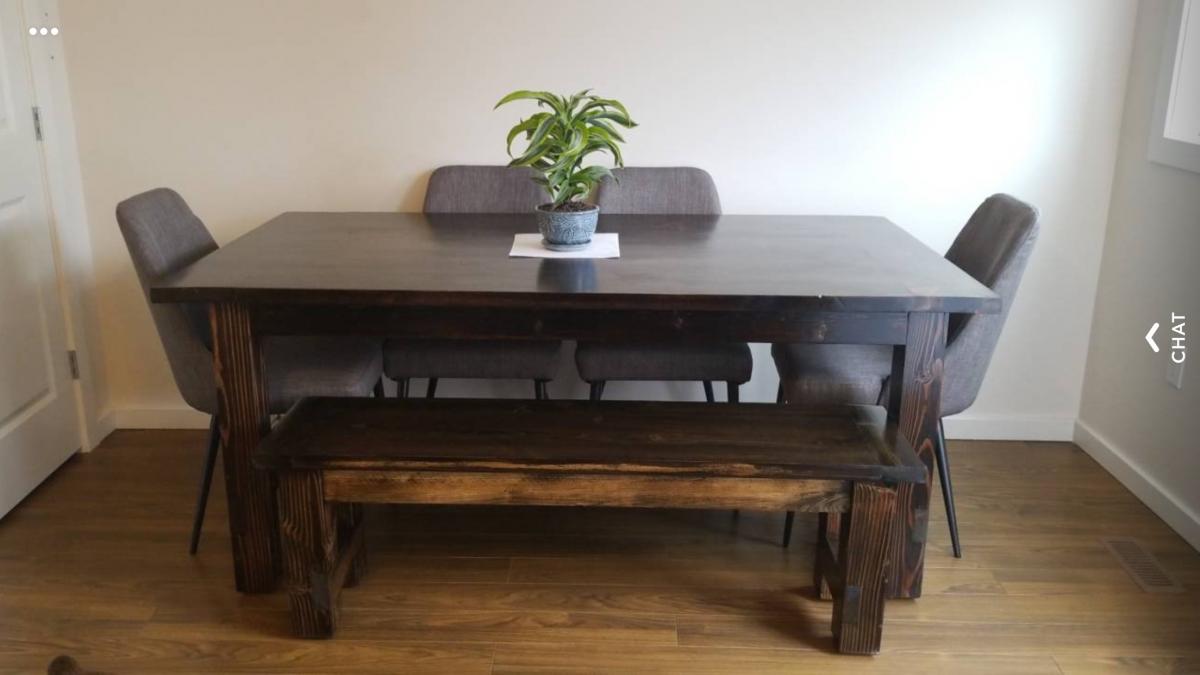
I saw the plans for this and had to have it! My husband had it assembled pretty easily (we've built several dining tables/benches, but this was our first piece that went out of that box, lol) and the whole project took maybe a day or two including staining. We left of the end pieces just because we were trying to get it done quickly for Thanksgiving; we intended to add them on later, but I kind of like it open. Everyone who has seen it loves it!

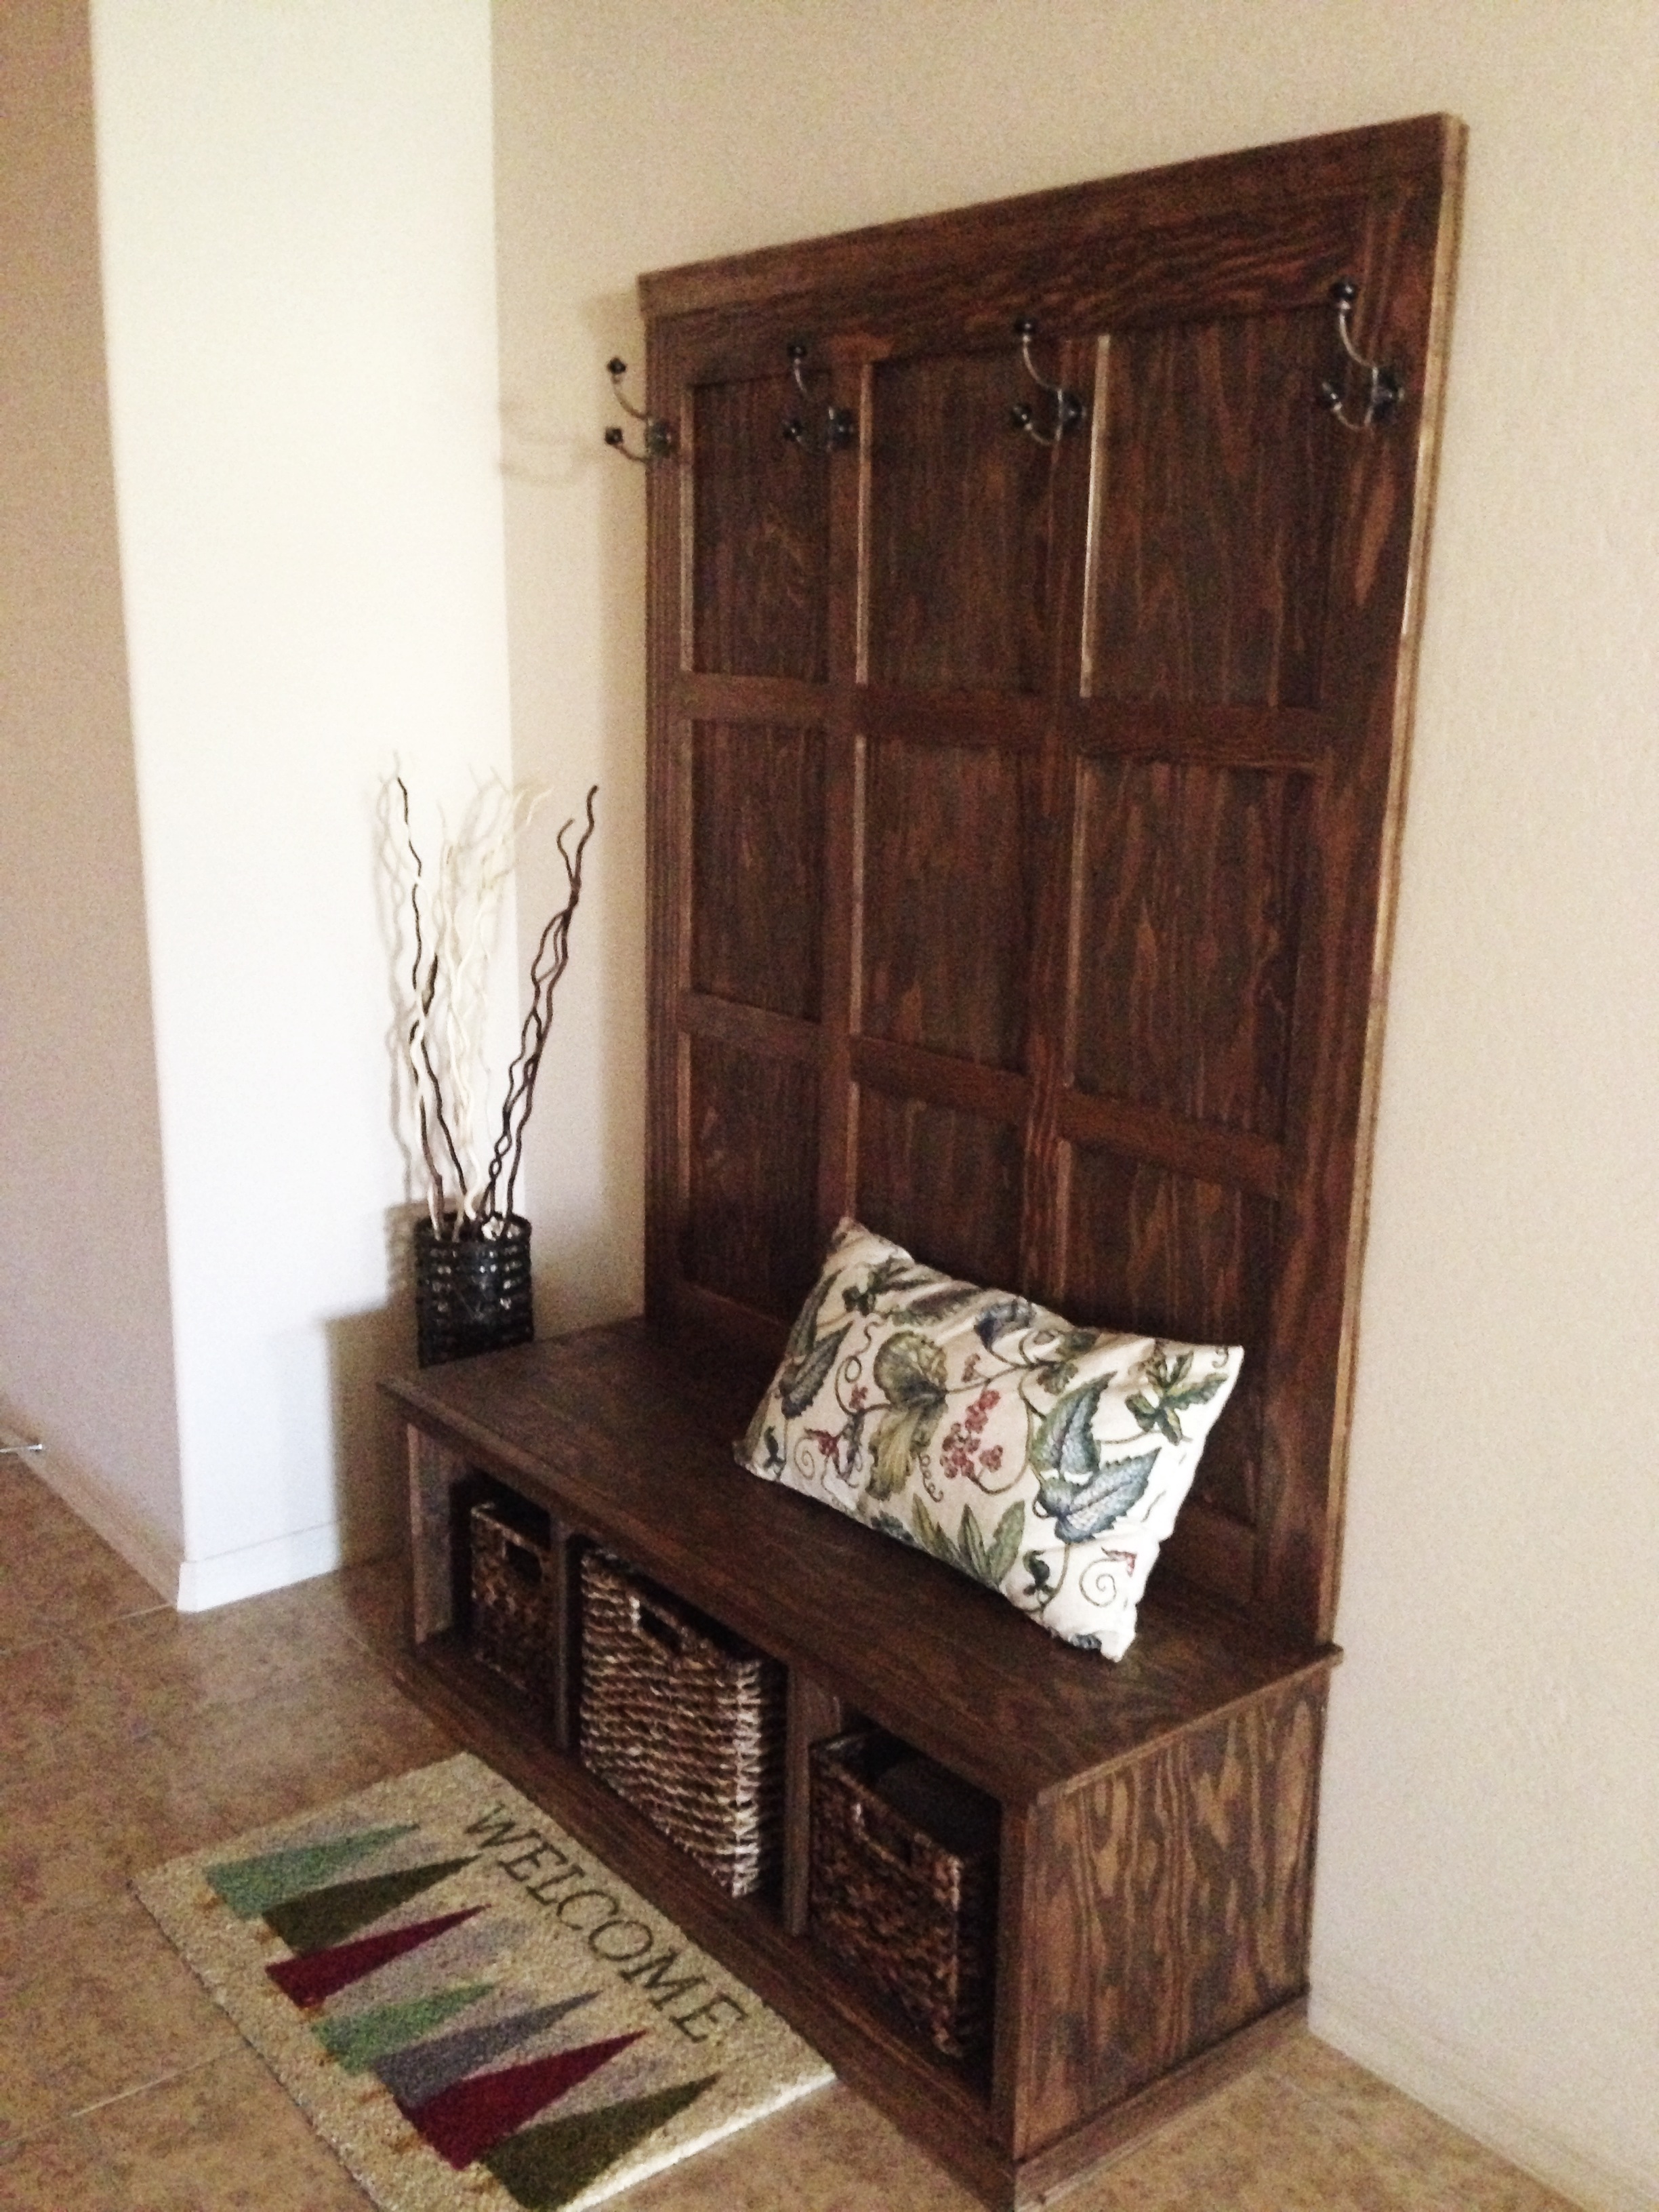
Sat, 12/07/2013 - 21:46
Your hall tree looks really good! (Early American is my favorite stain color!)
Val @ artsybuildinglady.blogspot.ca
Really fun project. My dividers were a little off, but for kiddo storage- it's not too shabby. Bins were on sale at target. Because I trimmed the whole case out in 1x2s- 11x11 was the size I needed. The labels were extra, but totally worth the cost in my opinion. Loved this project and love the organization it brings!

My daughter needing a dining room table. After discovering Ana White’s web site and building plans, I figured I could do this ! I have a background in quilting so I was thinking , cut the material , piece it together....simple !!!! It was definitely the plans and YouTube videos that made this achievable. I had never run a miter saw or table saw in my life ! I still can’t properly read a measuring tape !!! I had the basics down and away I went !!!
It turned out beautifully and best part of all is I could gift my daughter a table and bench made with love from mom !!
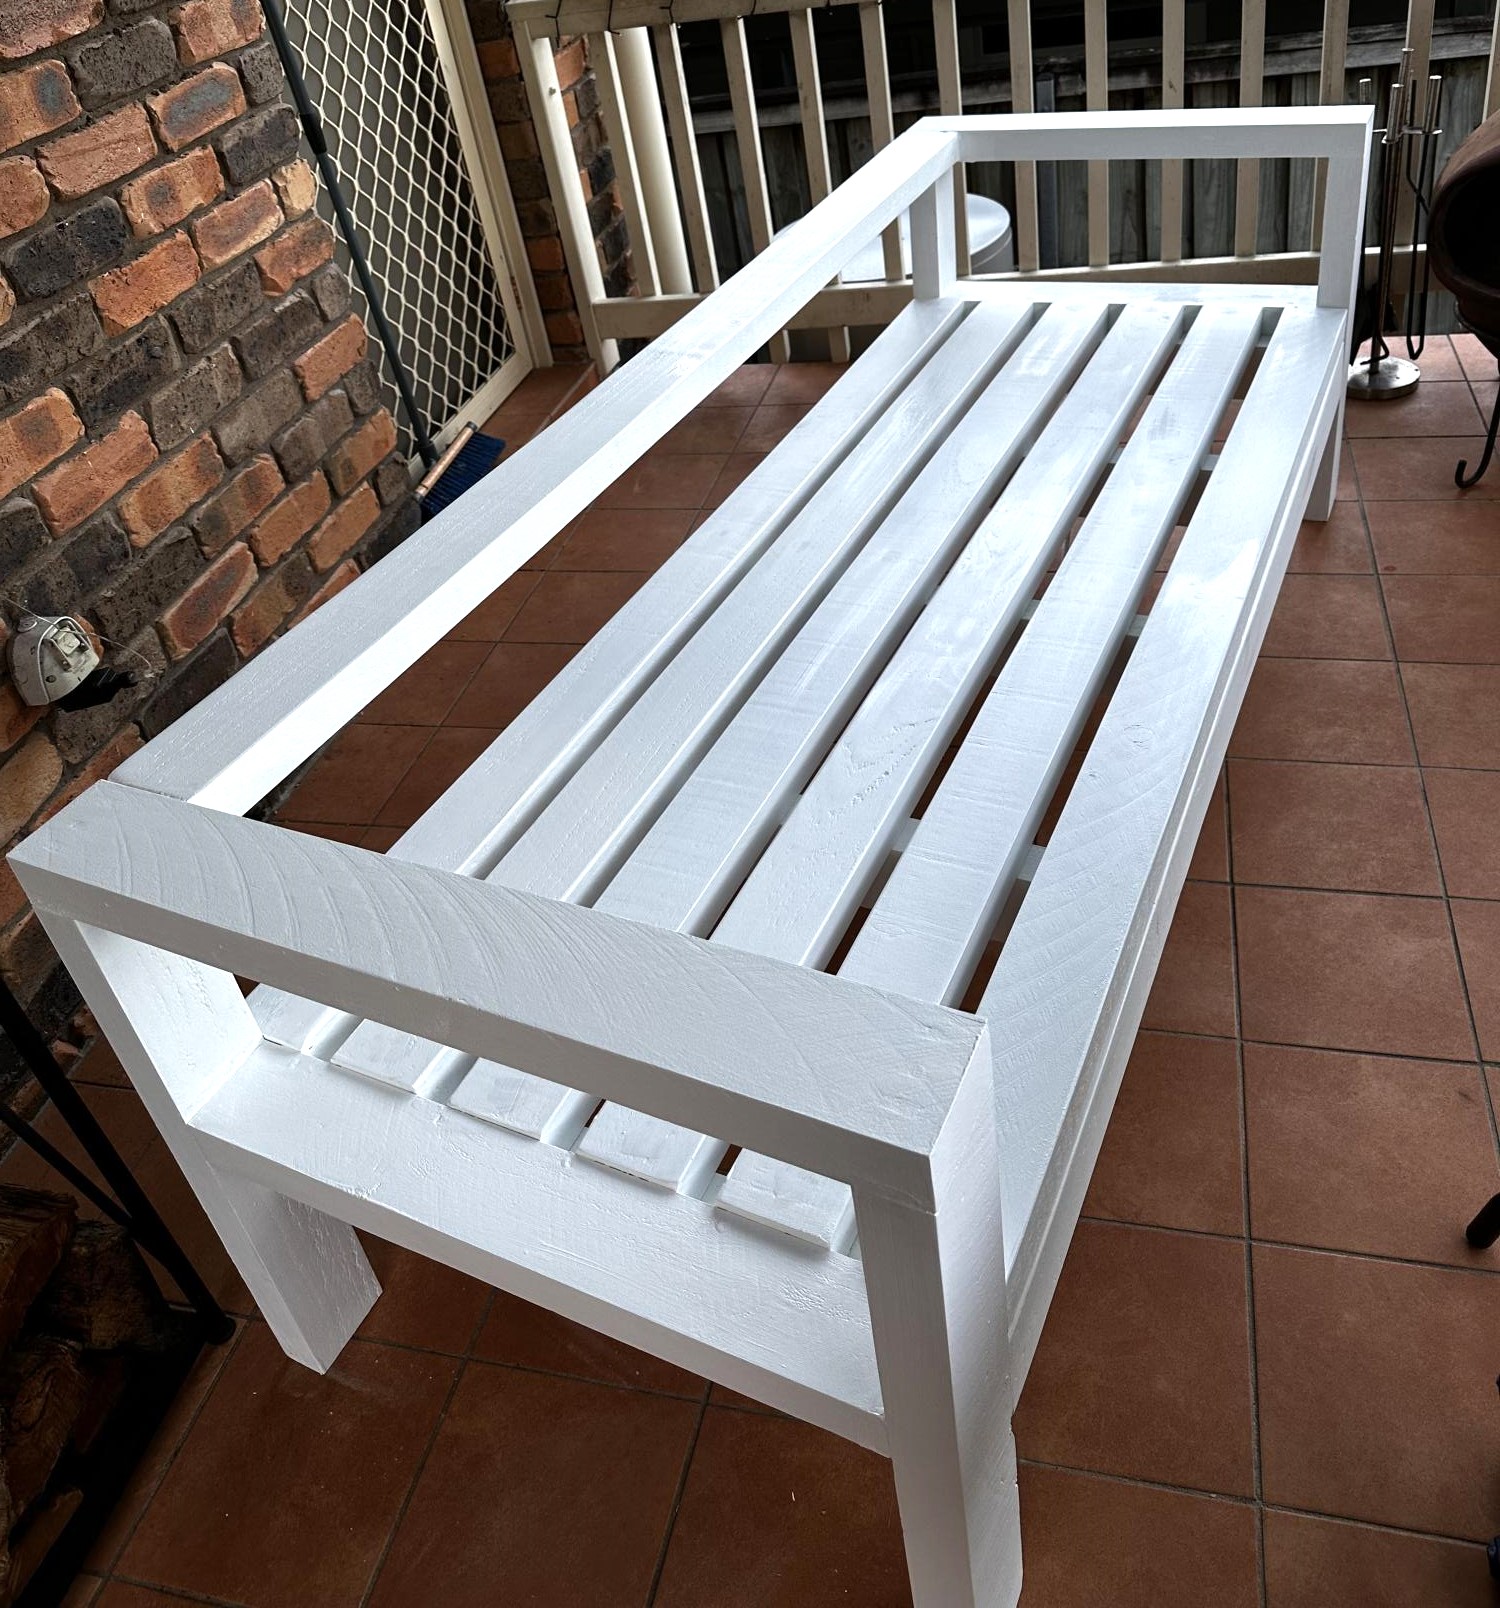
Choose the equivalent of 4 x2 here in Australia but as you can see the Depths were different. Painted in Dulux outdoor paint in Vivid White
Sat, 06/10/2023 - 06:28
It looks great, yes there is some figuring when dealing in metric...

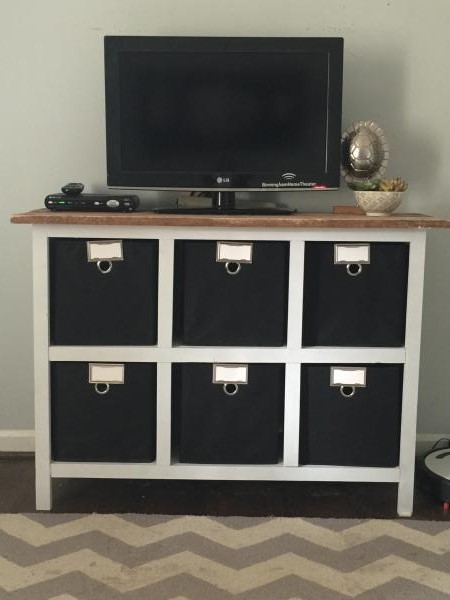
This is our version of a dresser cabinet. Thought we would share. We used mostly birch plywood and began by staining it but ended up painting it after the stain didn't work out.
Tue, 04/17/2012 - 07:34
Great job! I am in the process of building mine. Trying to figure out how to do my doors. I did a double set (6 baskets). Figuring hinges out is baffling! Lol

I used the basic plan but made a few changes. First I wanted a track layout that was screwed down. Easy to start playing for a two year old. And a reversible top that could be used for activities. The top therefor is one piece of ply. With a hole drilled in one end for inserting a finger to start the lift/flip. I used a little thinner ply than recommended to give a little lip around the trim to not allow the crayons and trains to roll on the floor. This also allows me to put two inserts on the plain side. I have a half chalkboard/ half whiteboard inserts. This gives it more flexibility. I also added a theater front to the mix that I store in the cavity of the box with the other top inserts. Finisher with white paint and minwax spray lacquer.


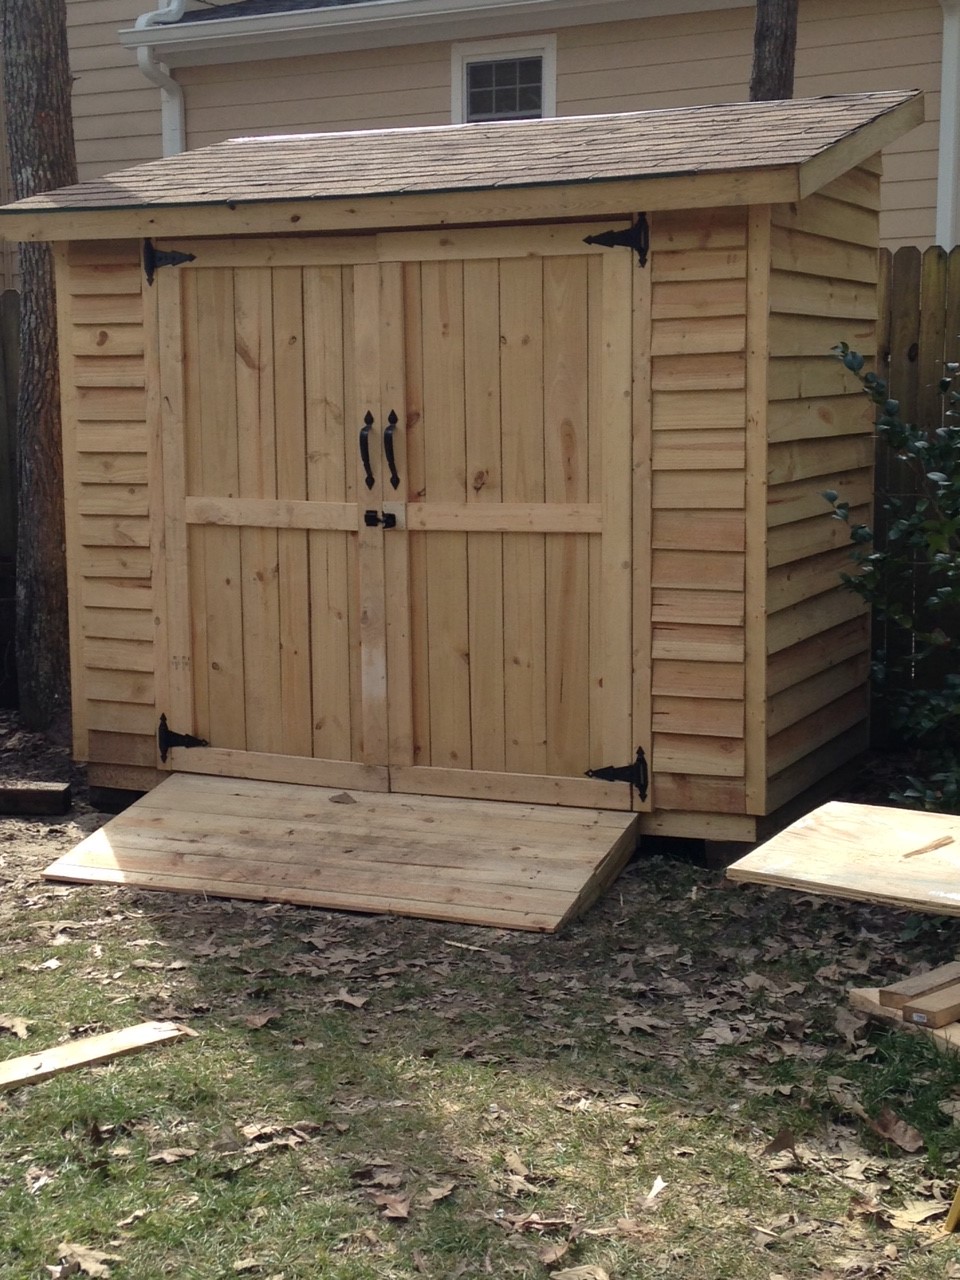
This is a modified version of your plans. I made it 4x8 and adjusted the roof and front according. For the back wall, I used T1-11 siding and the pickets everywhere else. I added a floor and ramp too.
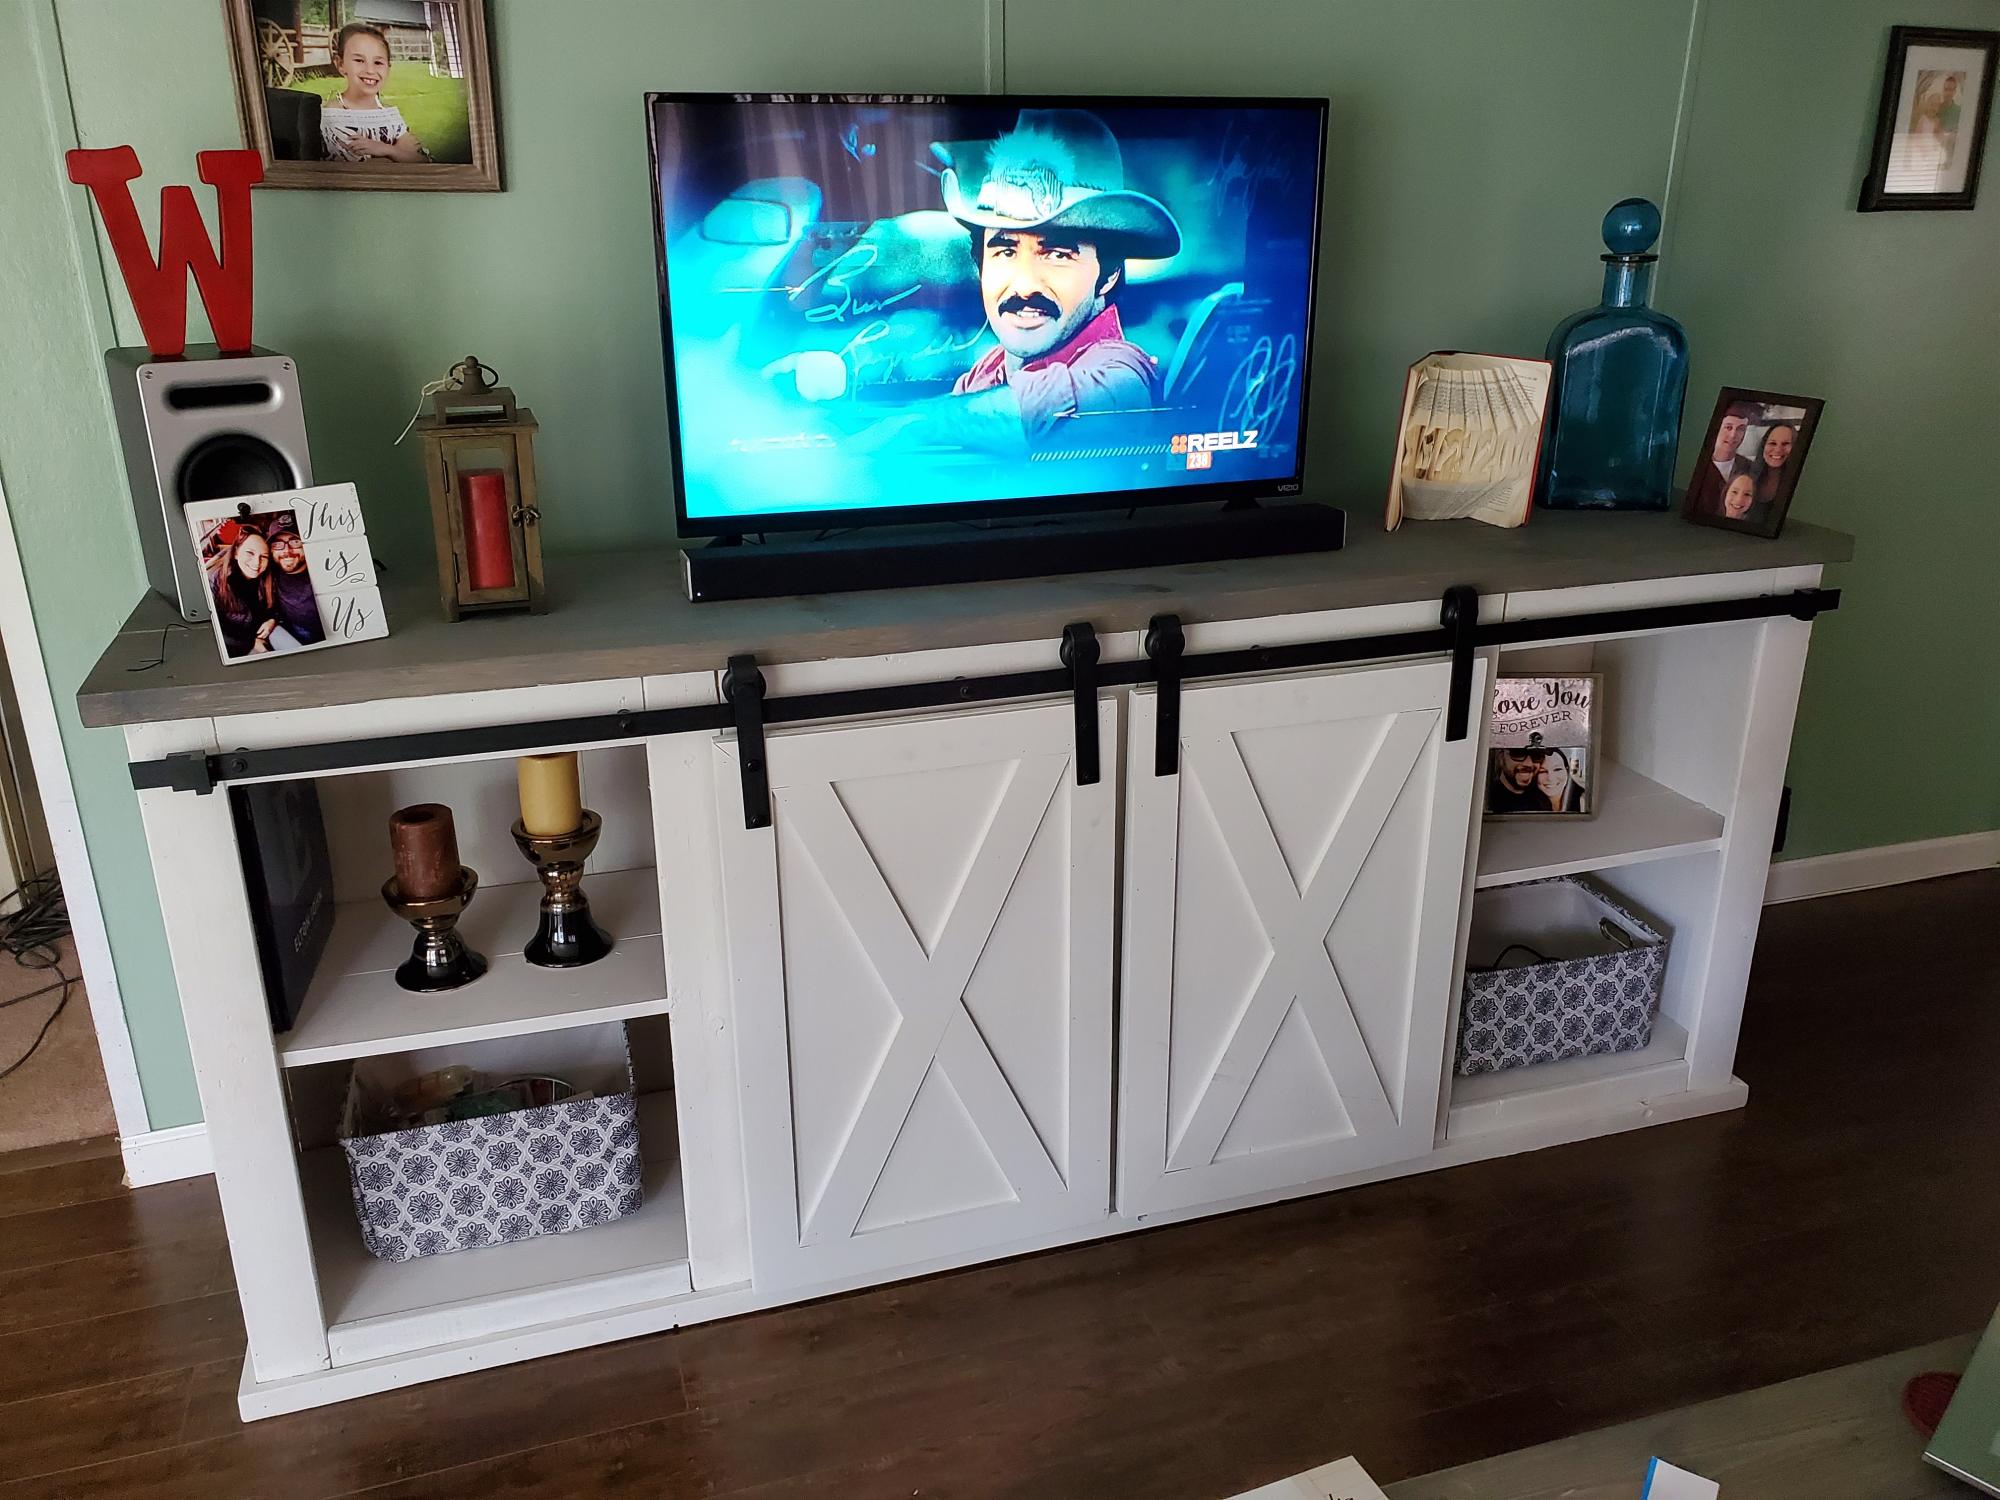
After moving, my wife informed me that I would be building her a new TV console. This is the end result. Now we need a bigger TV!
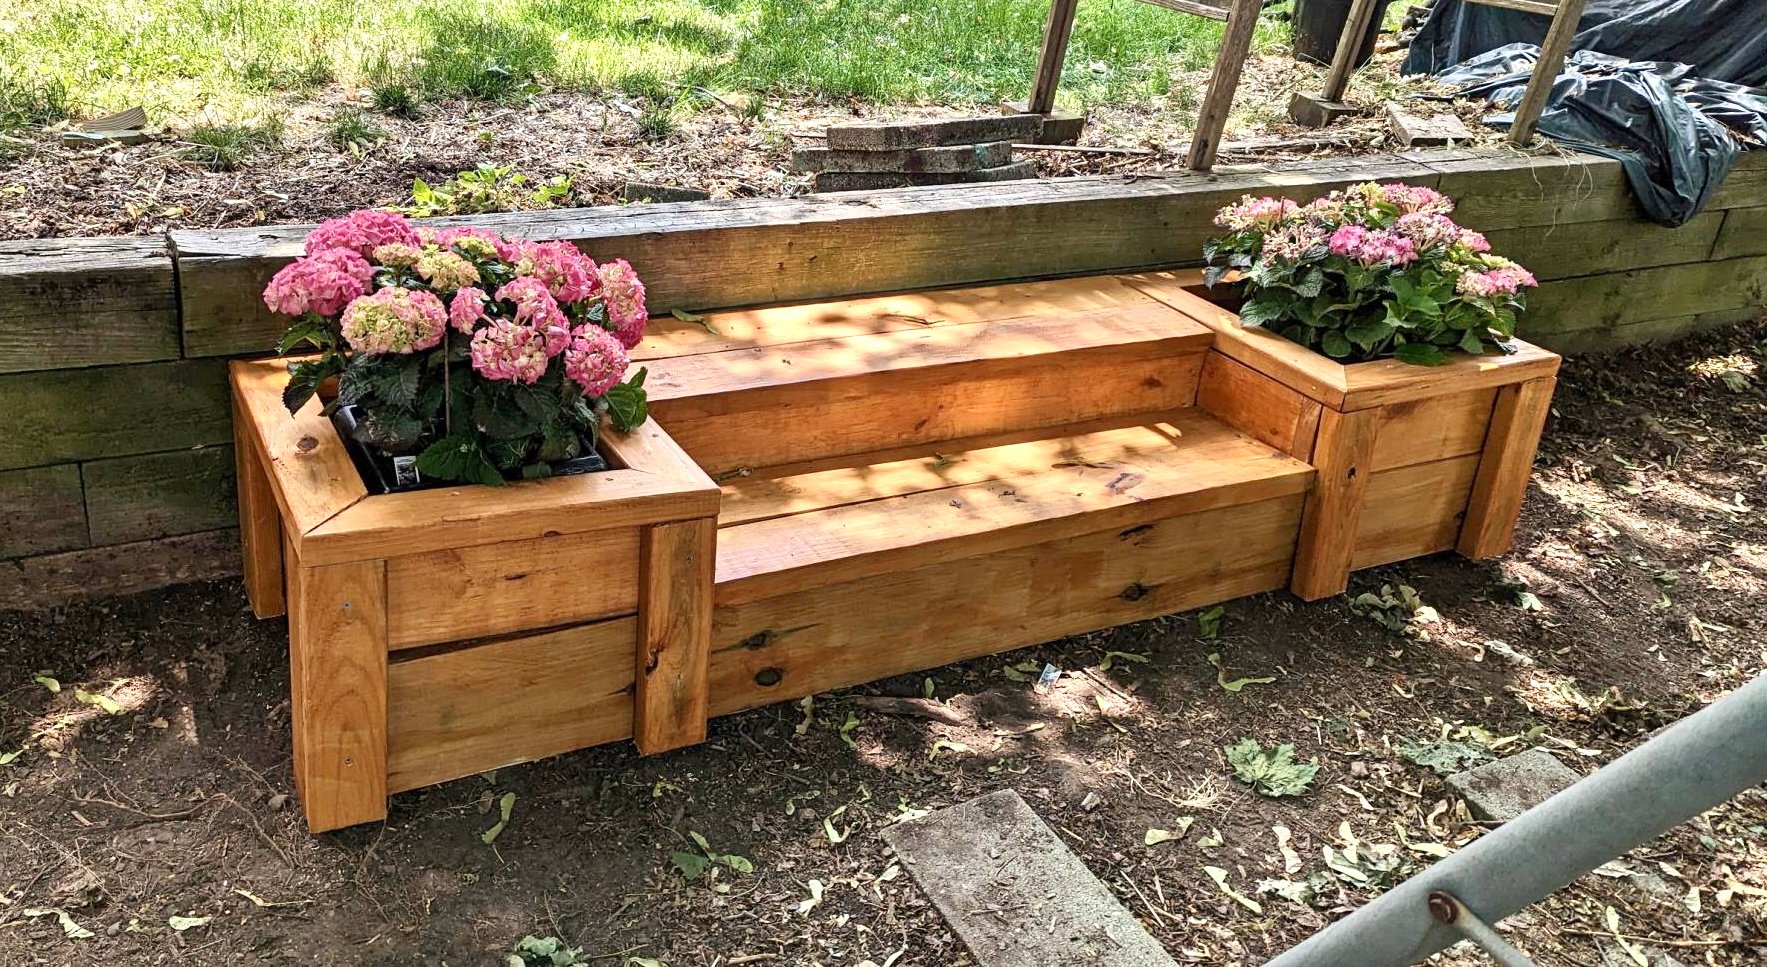
When my husband left he left behind an entire tier of our yard that he'd used to throw sticks, branches, clippings, dead plants, you name it for years. I cleared the mess last spring and am excited to make it beautiful this season!

Comments
Ana White Admin
Tue, 05/23/2023 - 21:00
Beautiful potting bench!
I bet your mother loves it! Thank you for sharing, love the finish and x detail.