Pub style farmhouse table
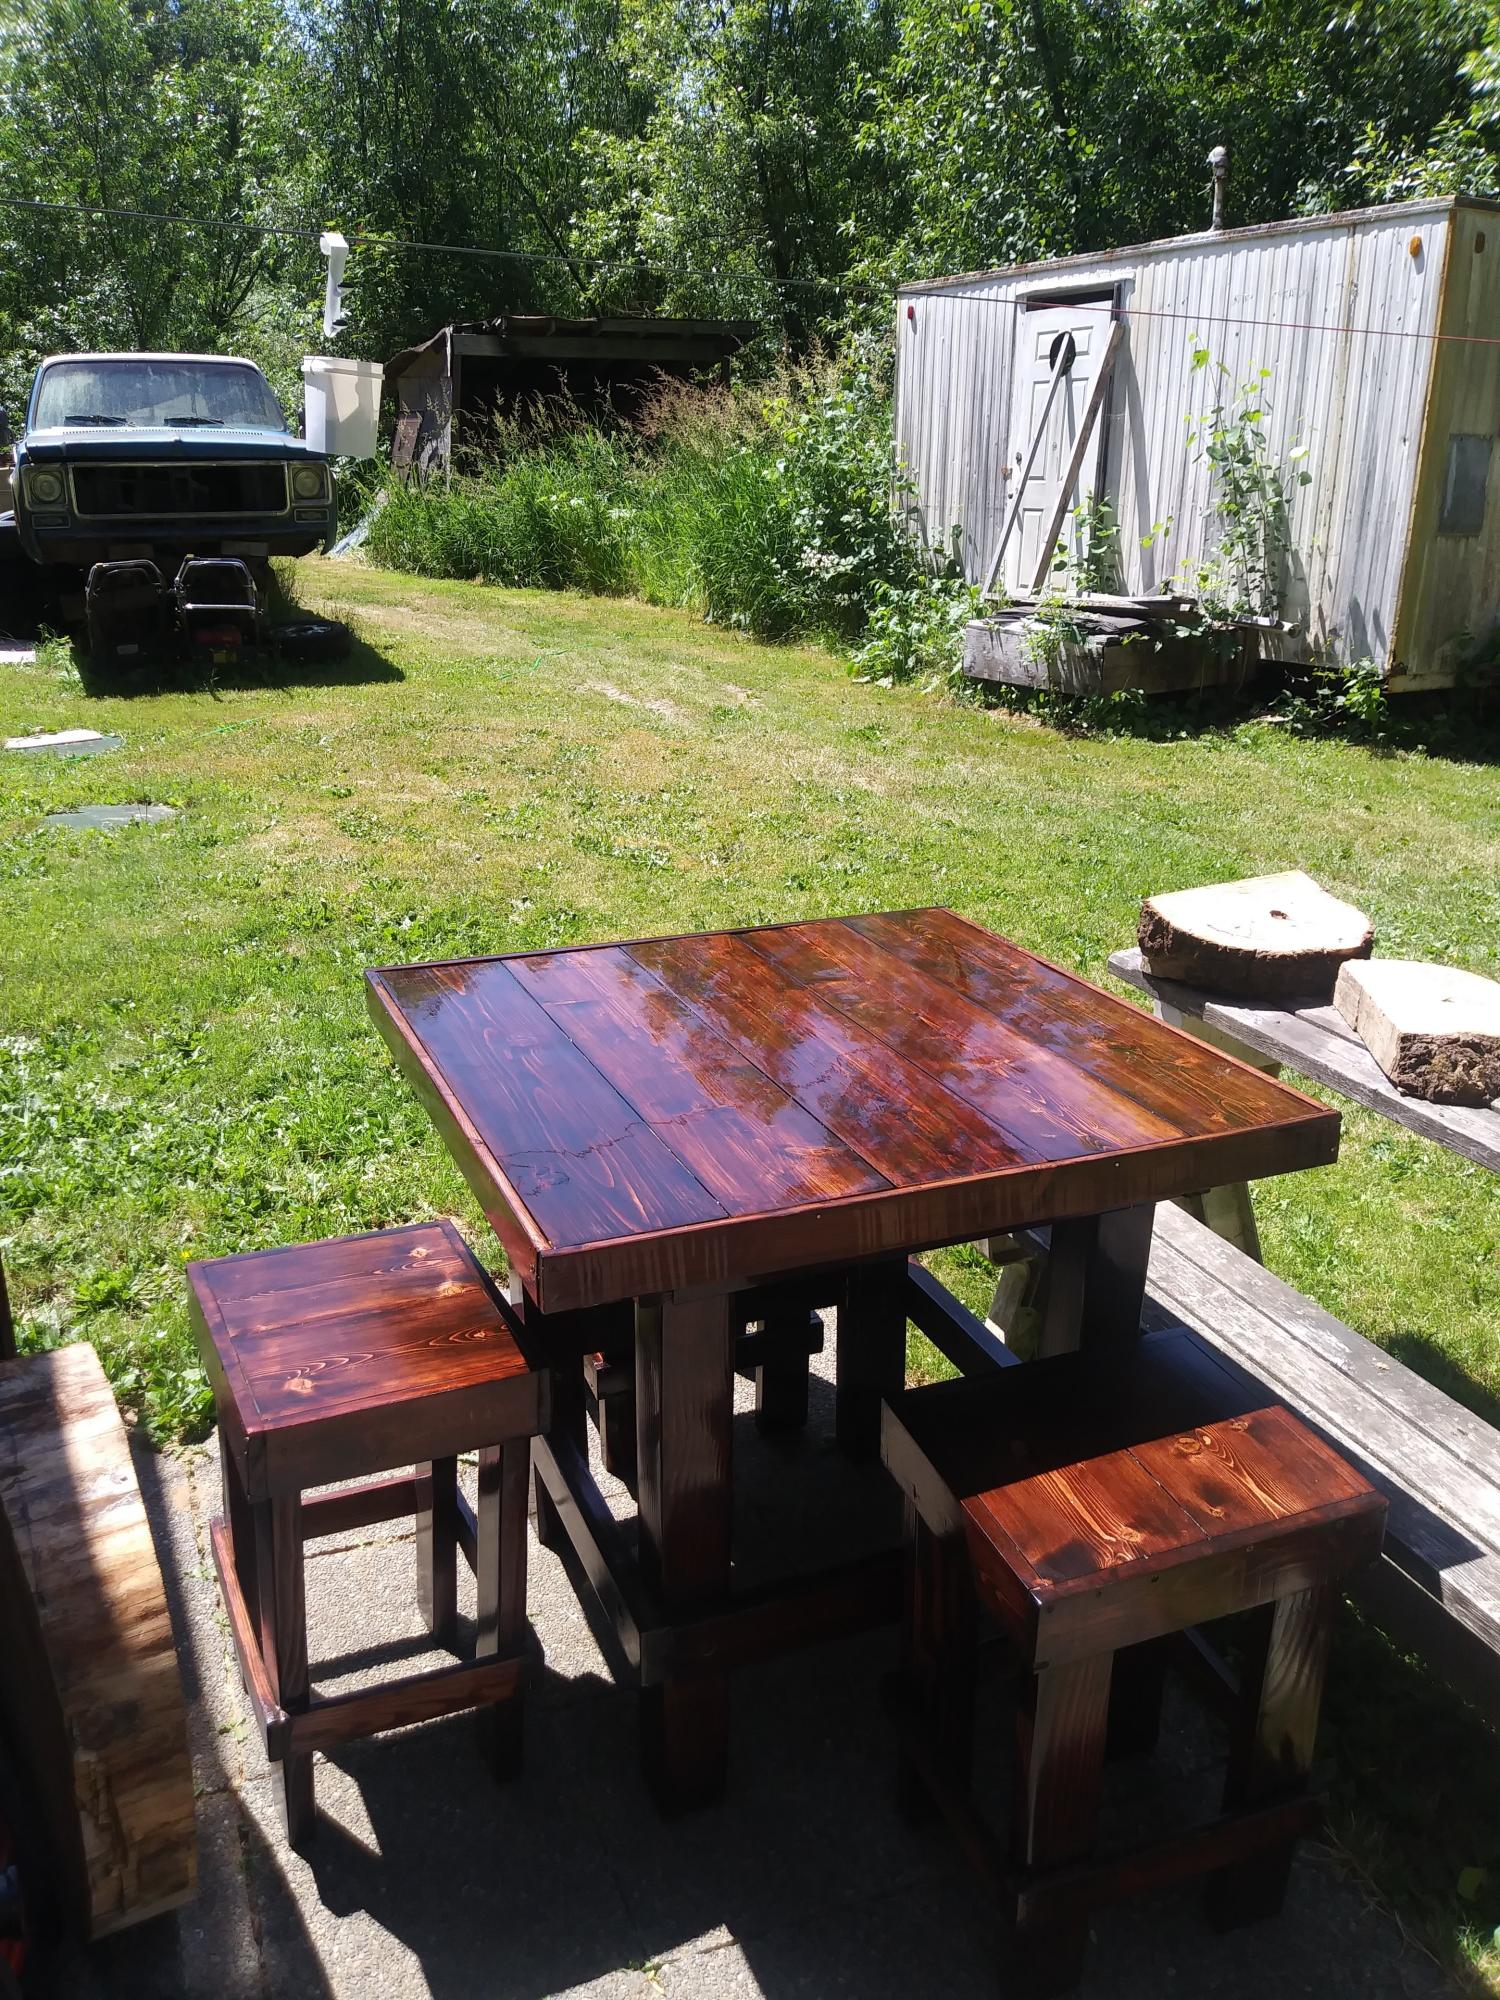
Made this for my daughters family spent hours upon hours on that finish!
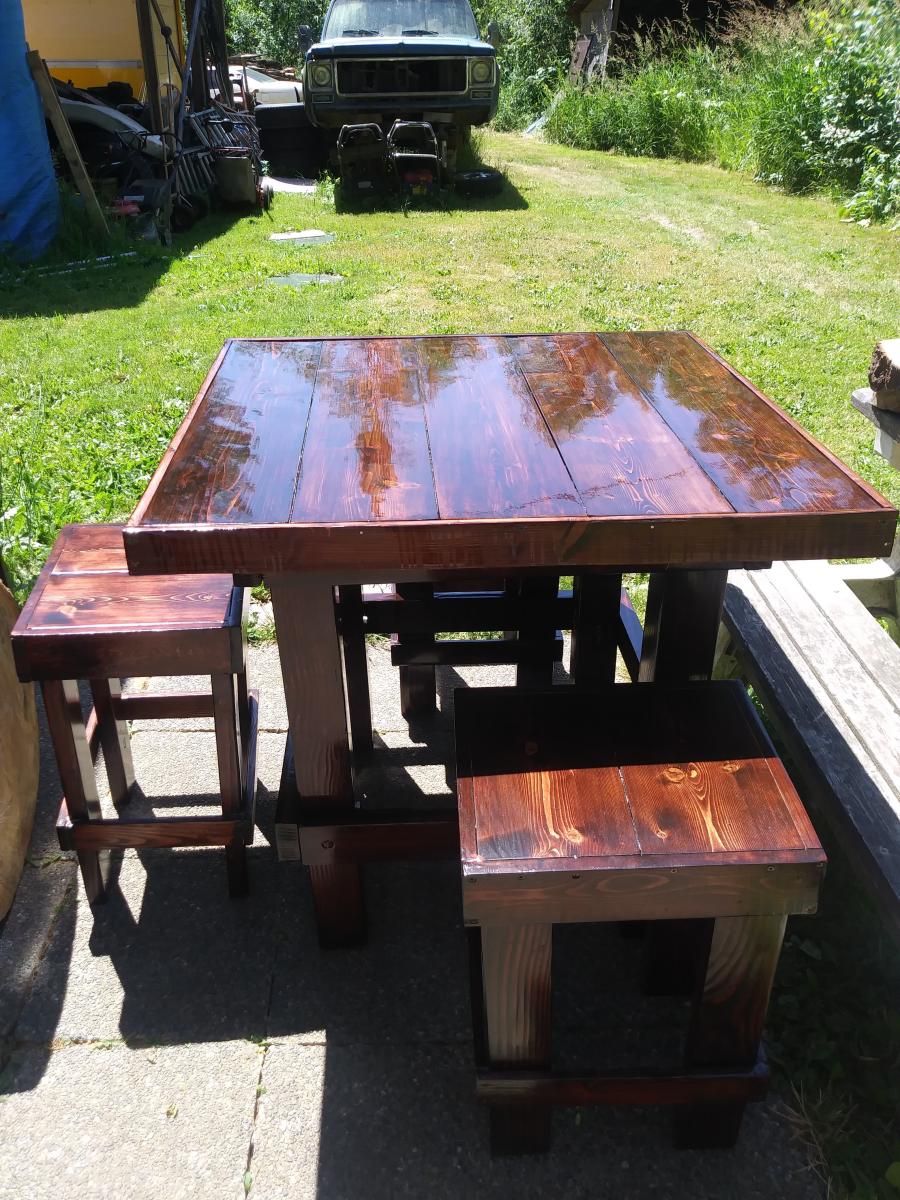
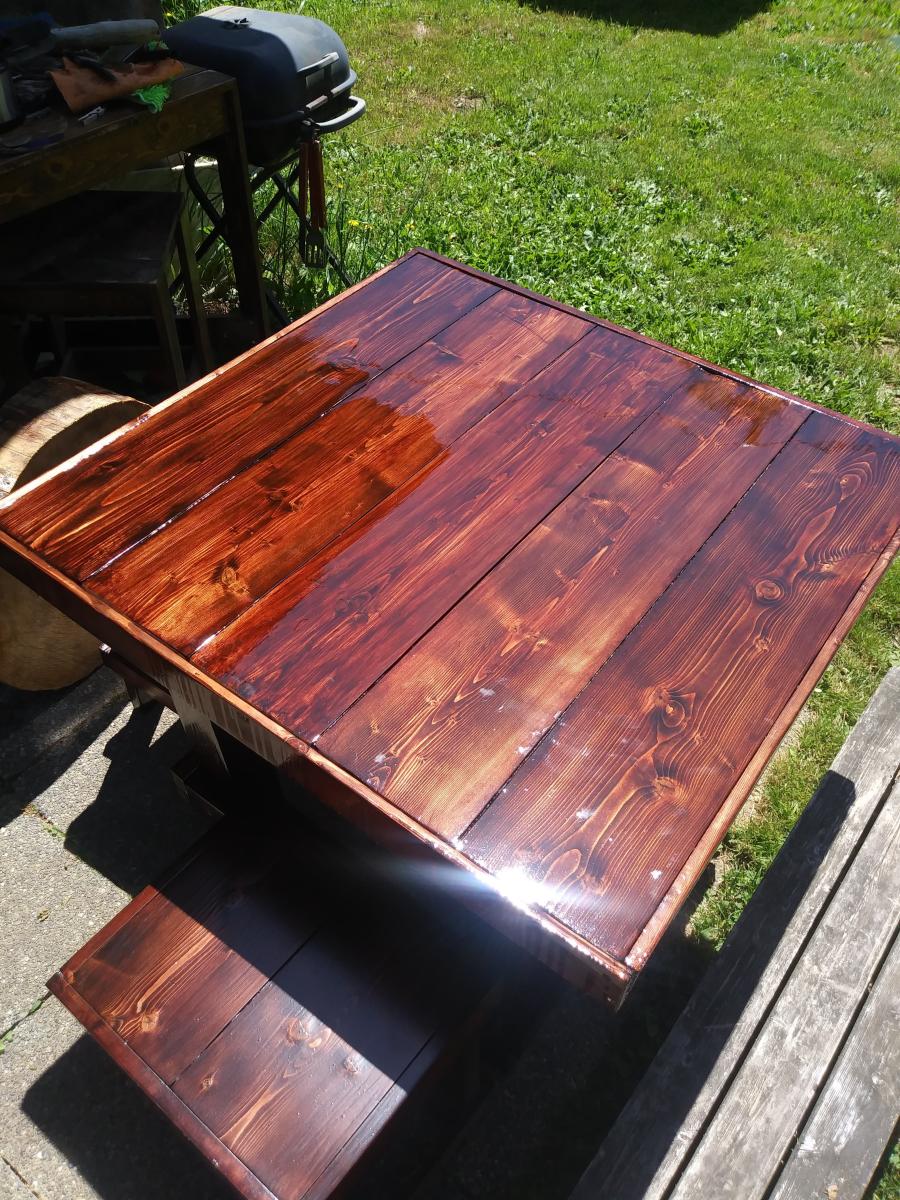
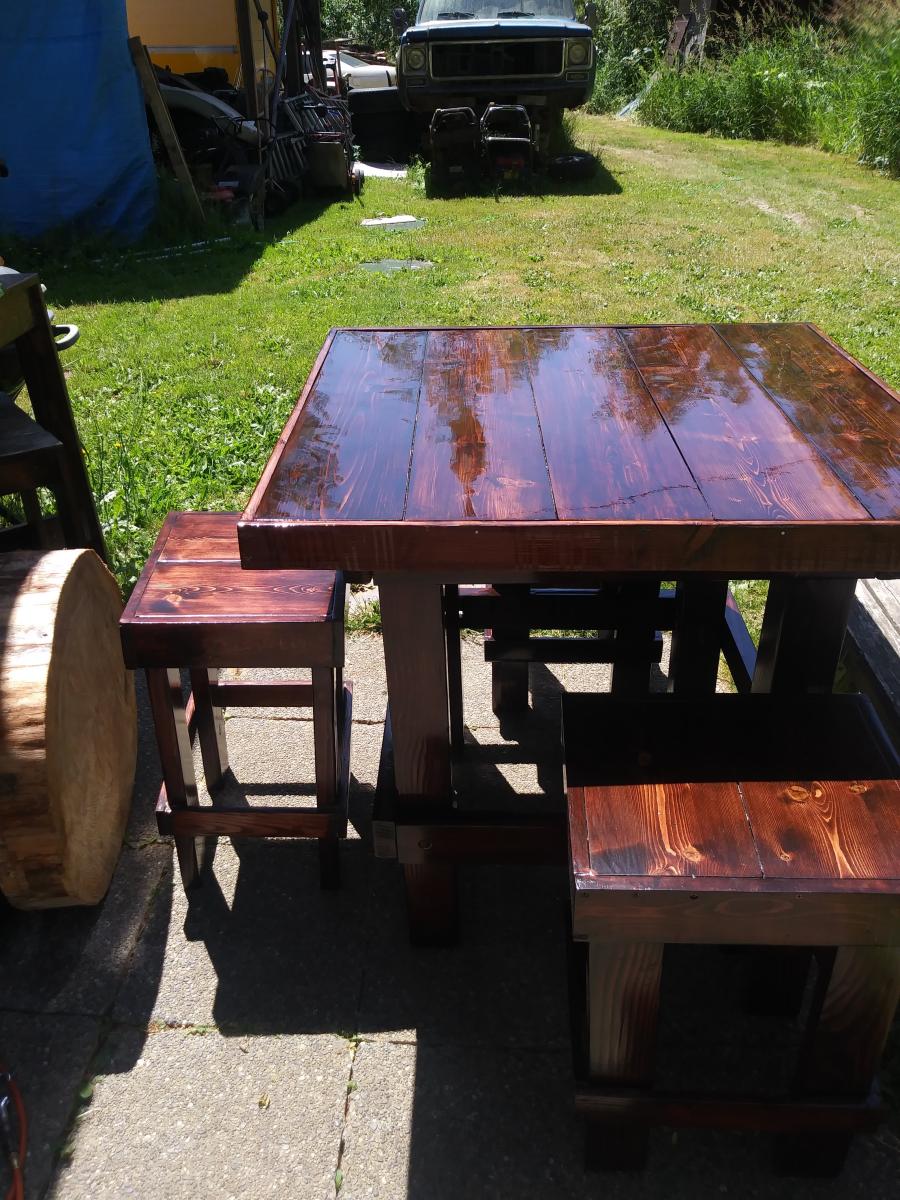
Built from Plan(s)
Made this for my daughters family spent hours upon hours on that finish!
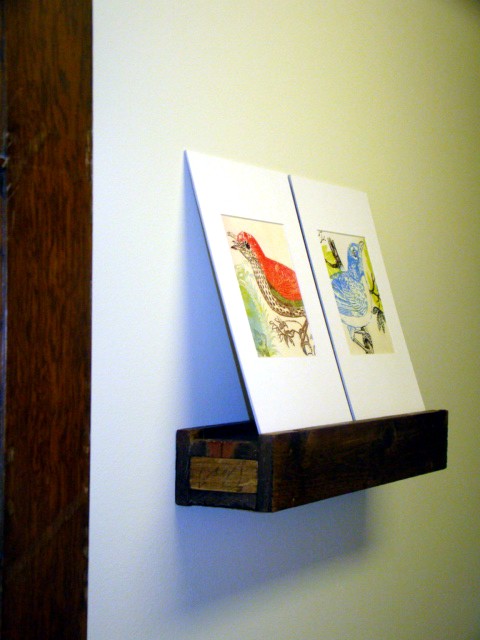
These shelves were easy to make and are sturdy also. I haven't gotten frames for my pictures yet - I was so excited to hang up my shelf.
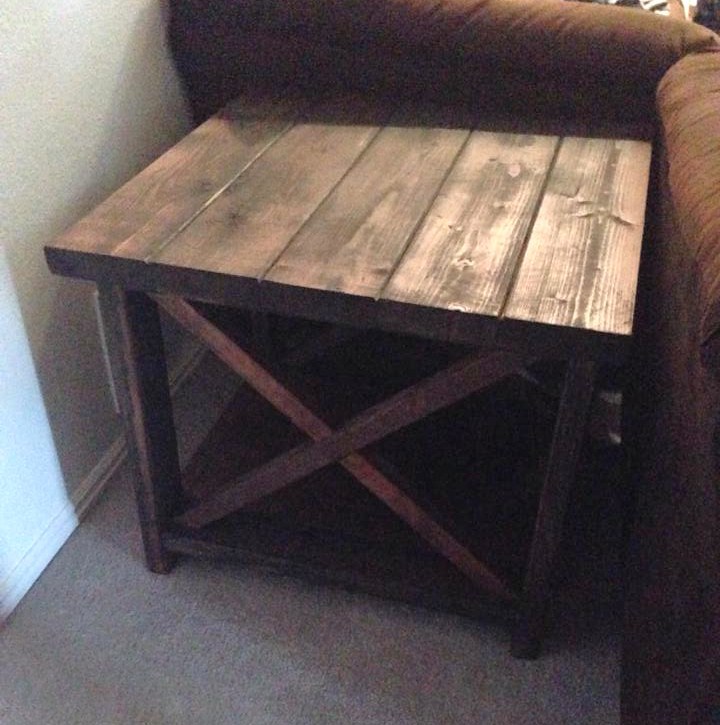
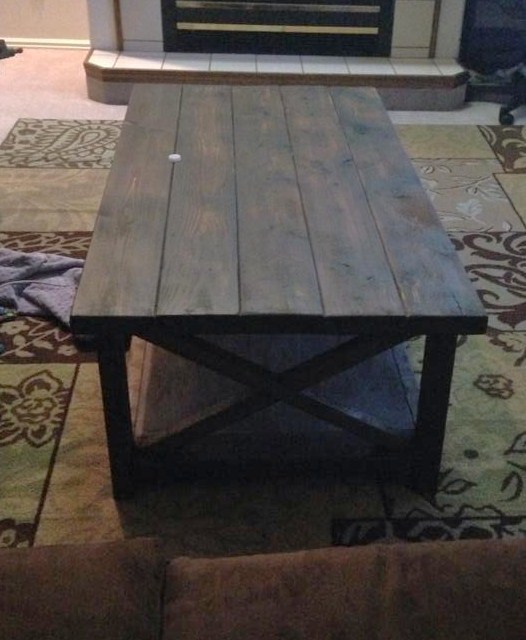
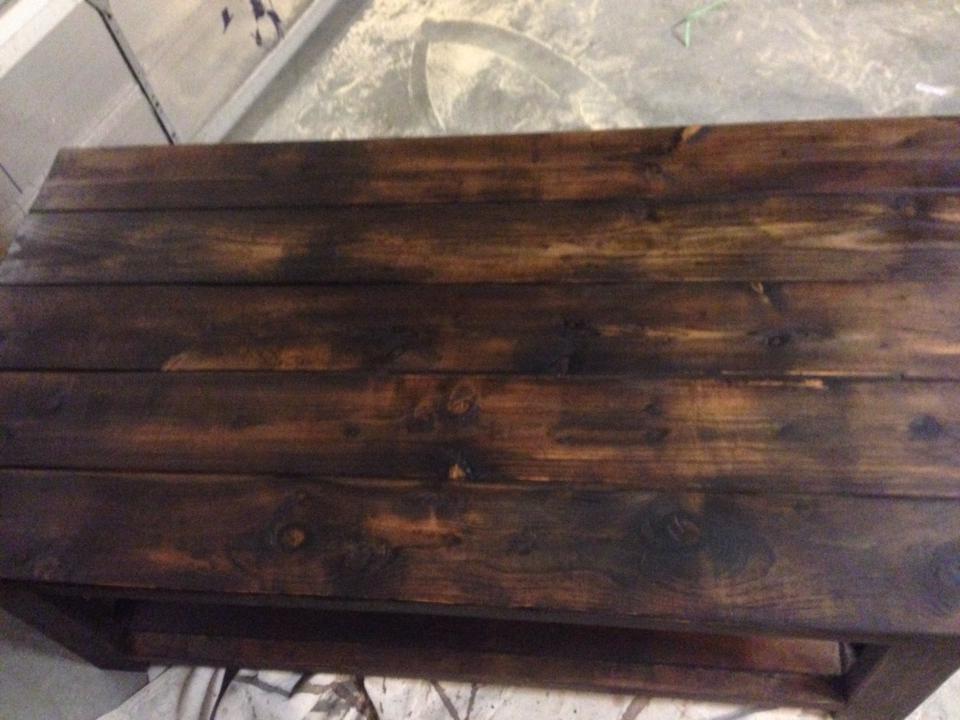
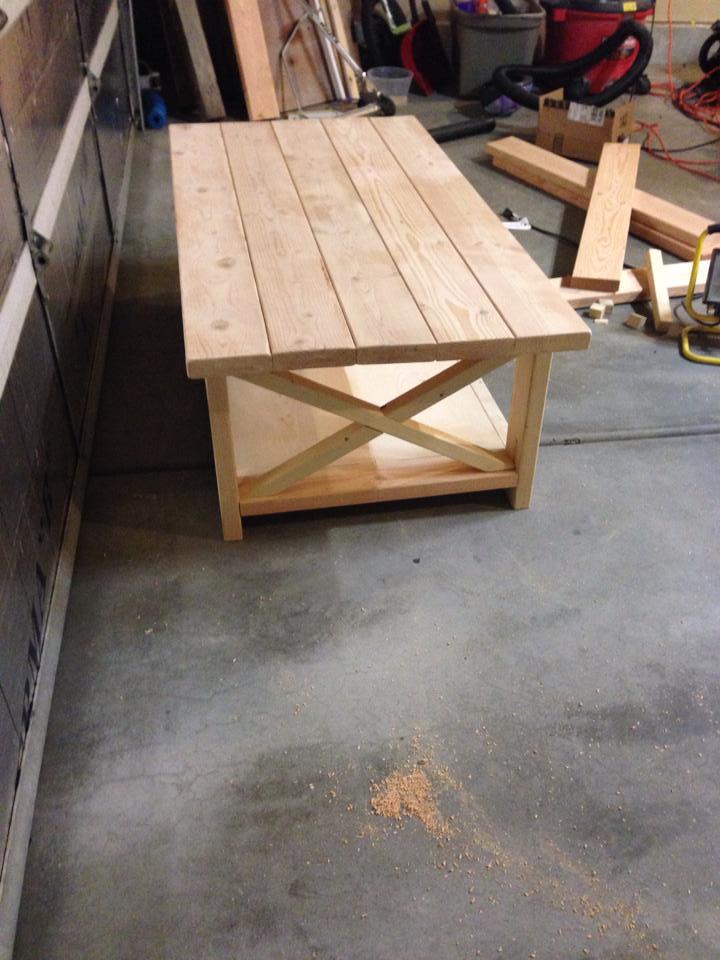
WOW this was our first build. We had some money to get started so went and bought new miter saw and sander, kreg jig, basically everything we needed to build it. Tools aside we spend only about $100 on the lumber to build the coffee table and 2 side tables.
Eric cut notches in the X instead of using 2 separate pieces for the other side, so they fit together like a puzzle piece. it was a learning experience of trial and error, but he got better and better each time.
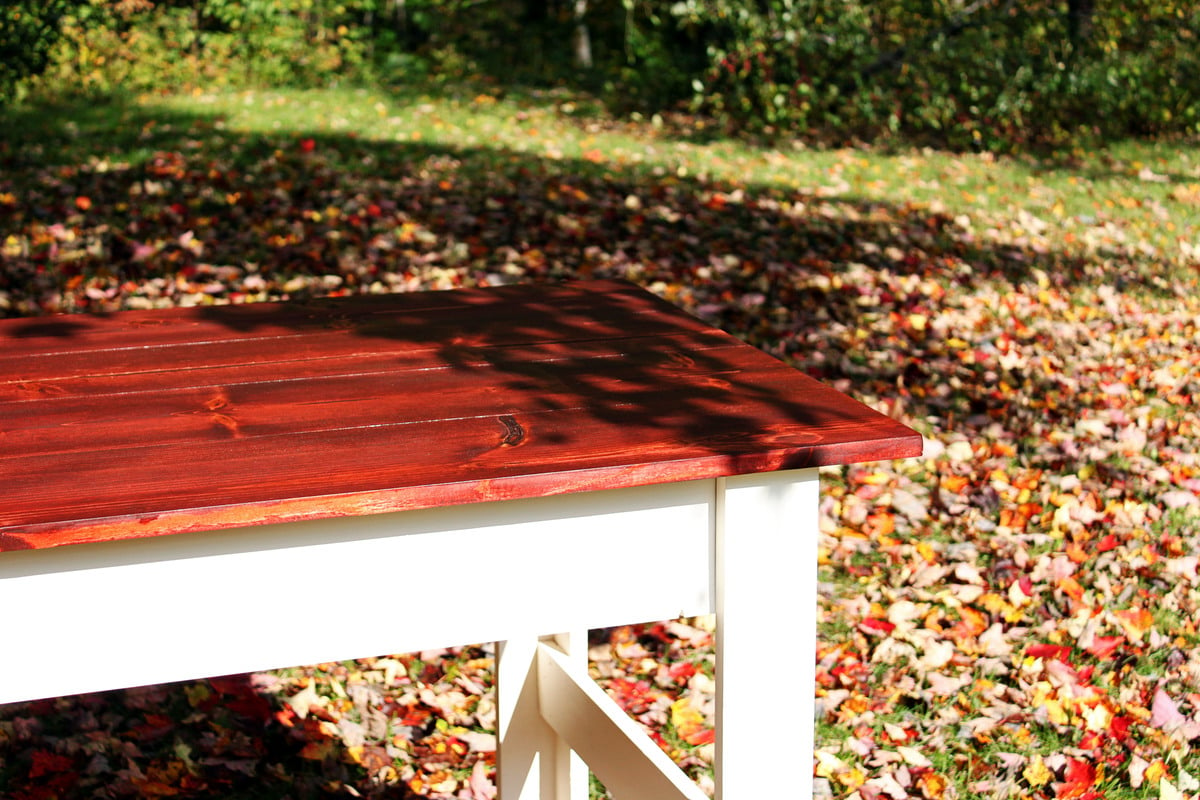
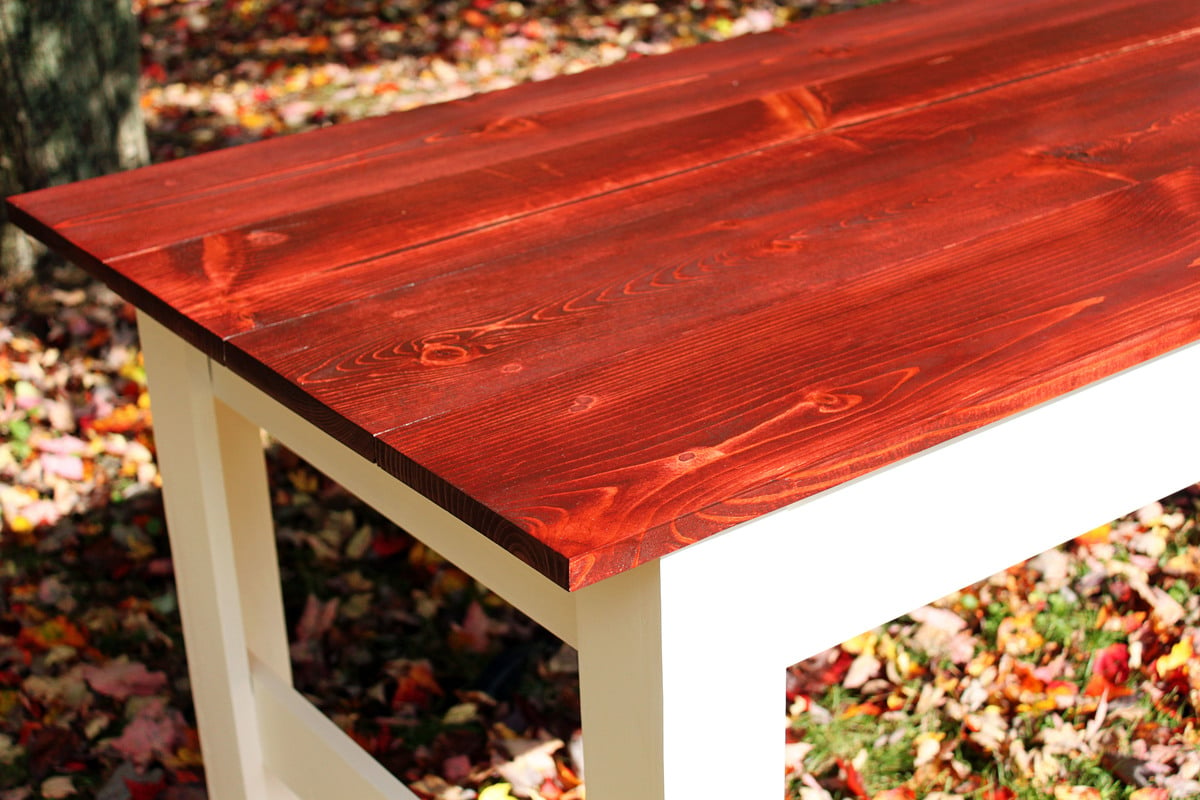
For the finish i used the tutorial of dissolving steel wool in vinegar and then added a coat of strong coffee which made an ugly green-gray color. I happened to have picked up a can of "autumn" wood stain that when applied made the color pop and look amazing. (thank goodness because i was so frustrated and wanted to give up) when we do this again (cuz i just sold the set we made) i will be better at sanding everything nice and smooth, and do staining/painting of the Xs and the top separately before putting everything together.
I dont recommend the steel wool and vinegar stain, it smelled terrible and was hard to apply because it was watery and ran a lot plus you cant see the color develop for a long time so its hard to see what was wet and what wasn't. yuk. The Minwax "gray" stain they just released would most likely work a lot better. those small can of stains for $6 are big enough for all 3 pieces we built so really i don't think i saved money buying the steel wool and vinegar.
Anyway this was way fun! Cant wait to build again :)
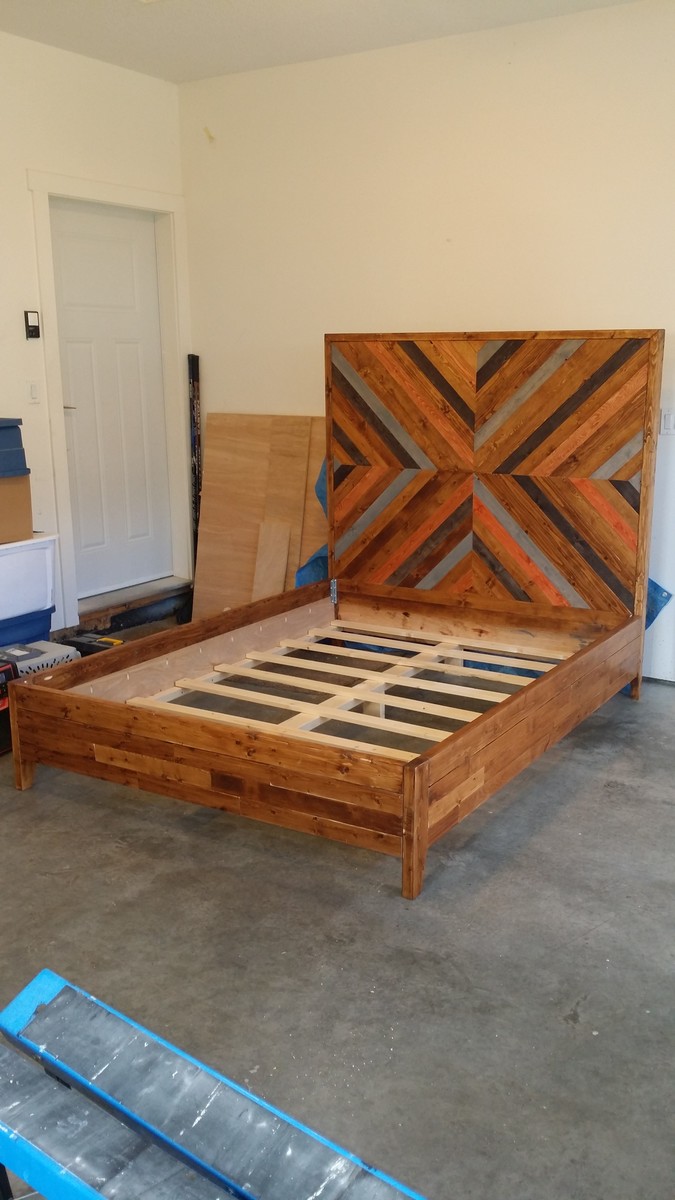
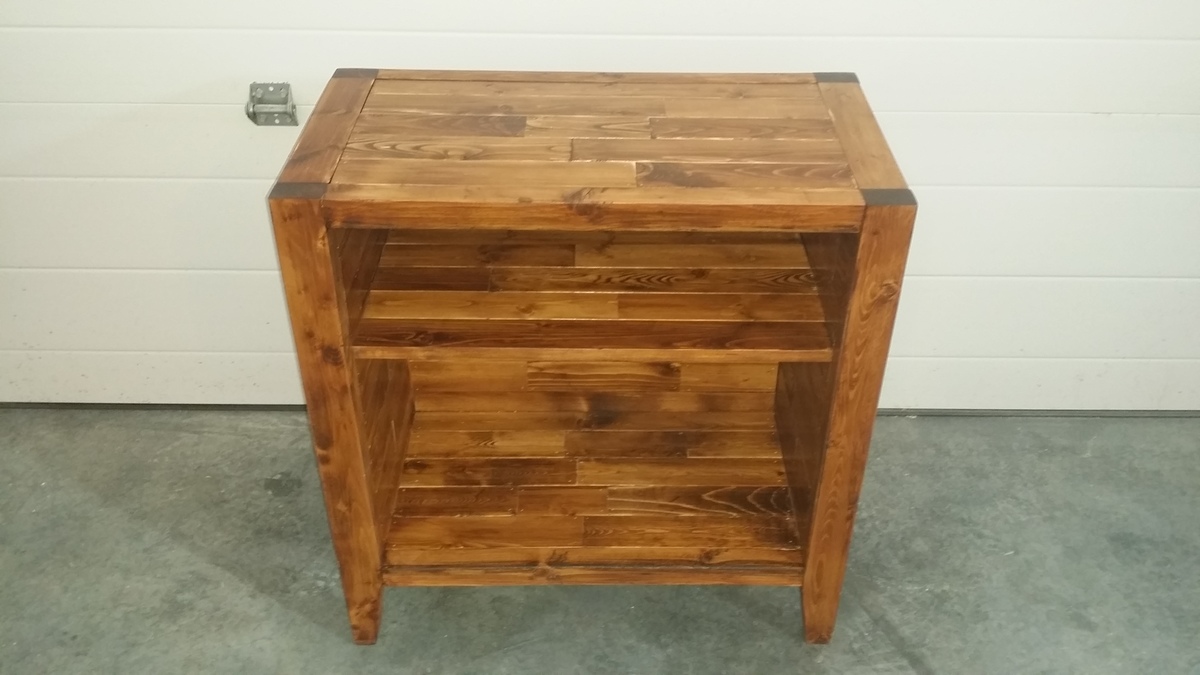
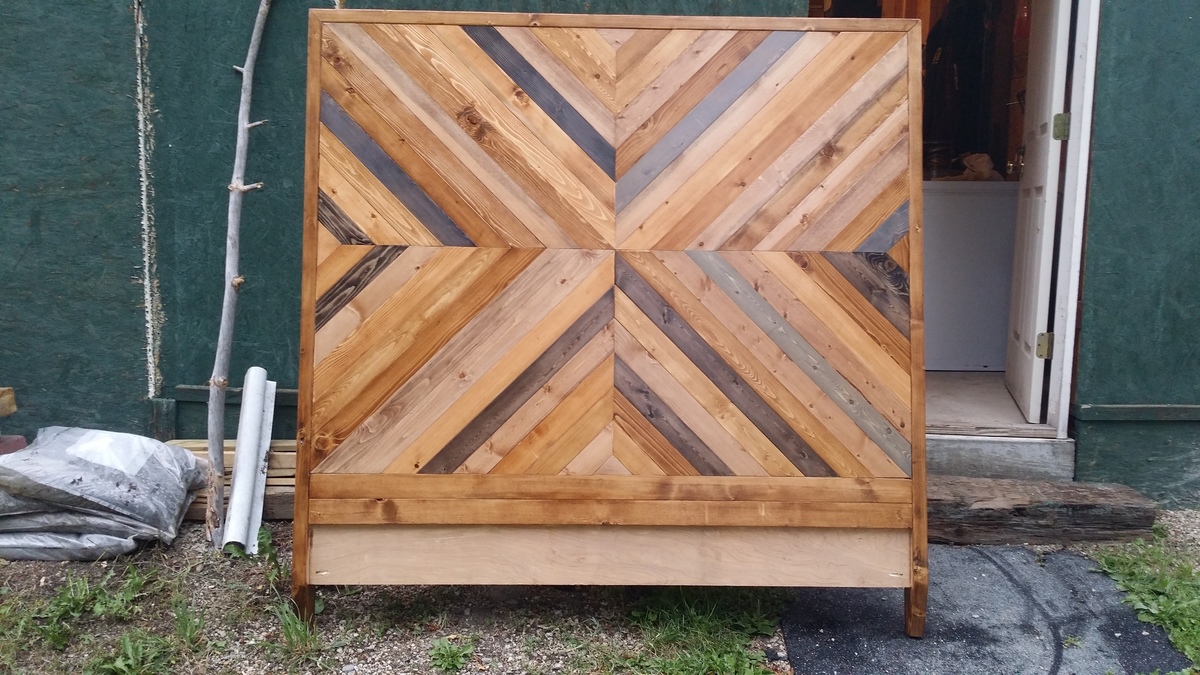
I pretty much just followed the plans. It turned out a bit more colourful that I expected but I've already sold it so I guess its okay. I'm going to make another one with a bit more toned down colours. I also created a matching night stand. I didn't follow any plan. Just used the ideas from the bed build.
Mostly built from cedar plywood.
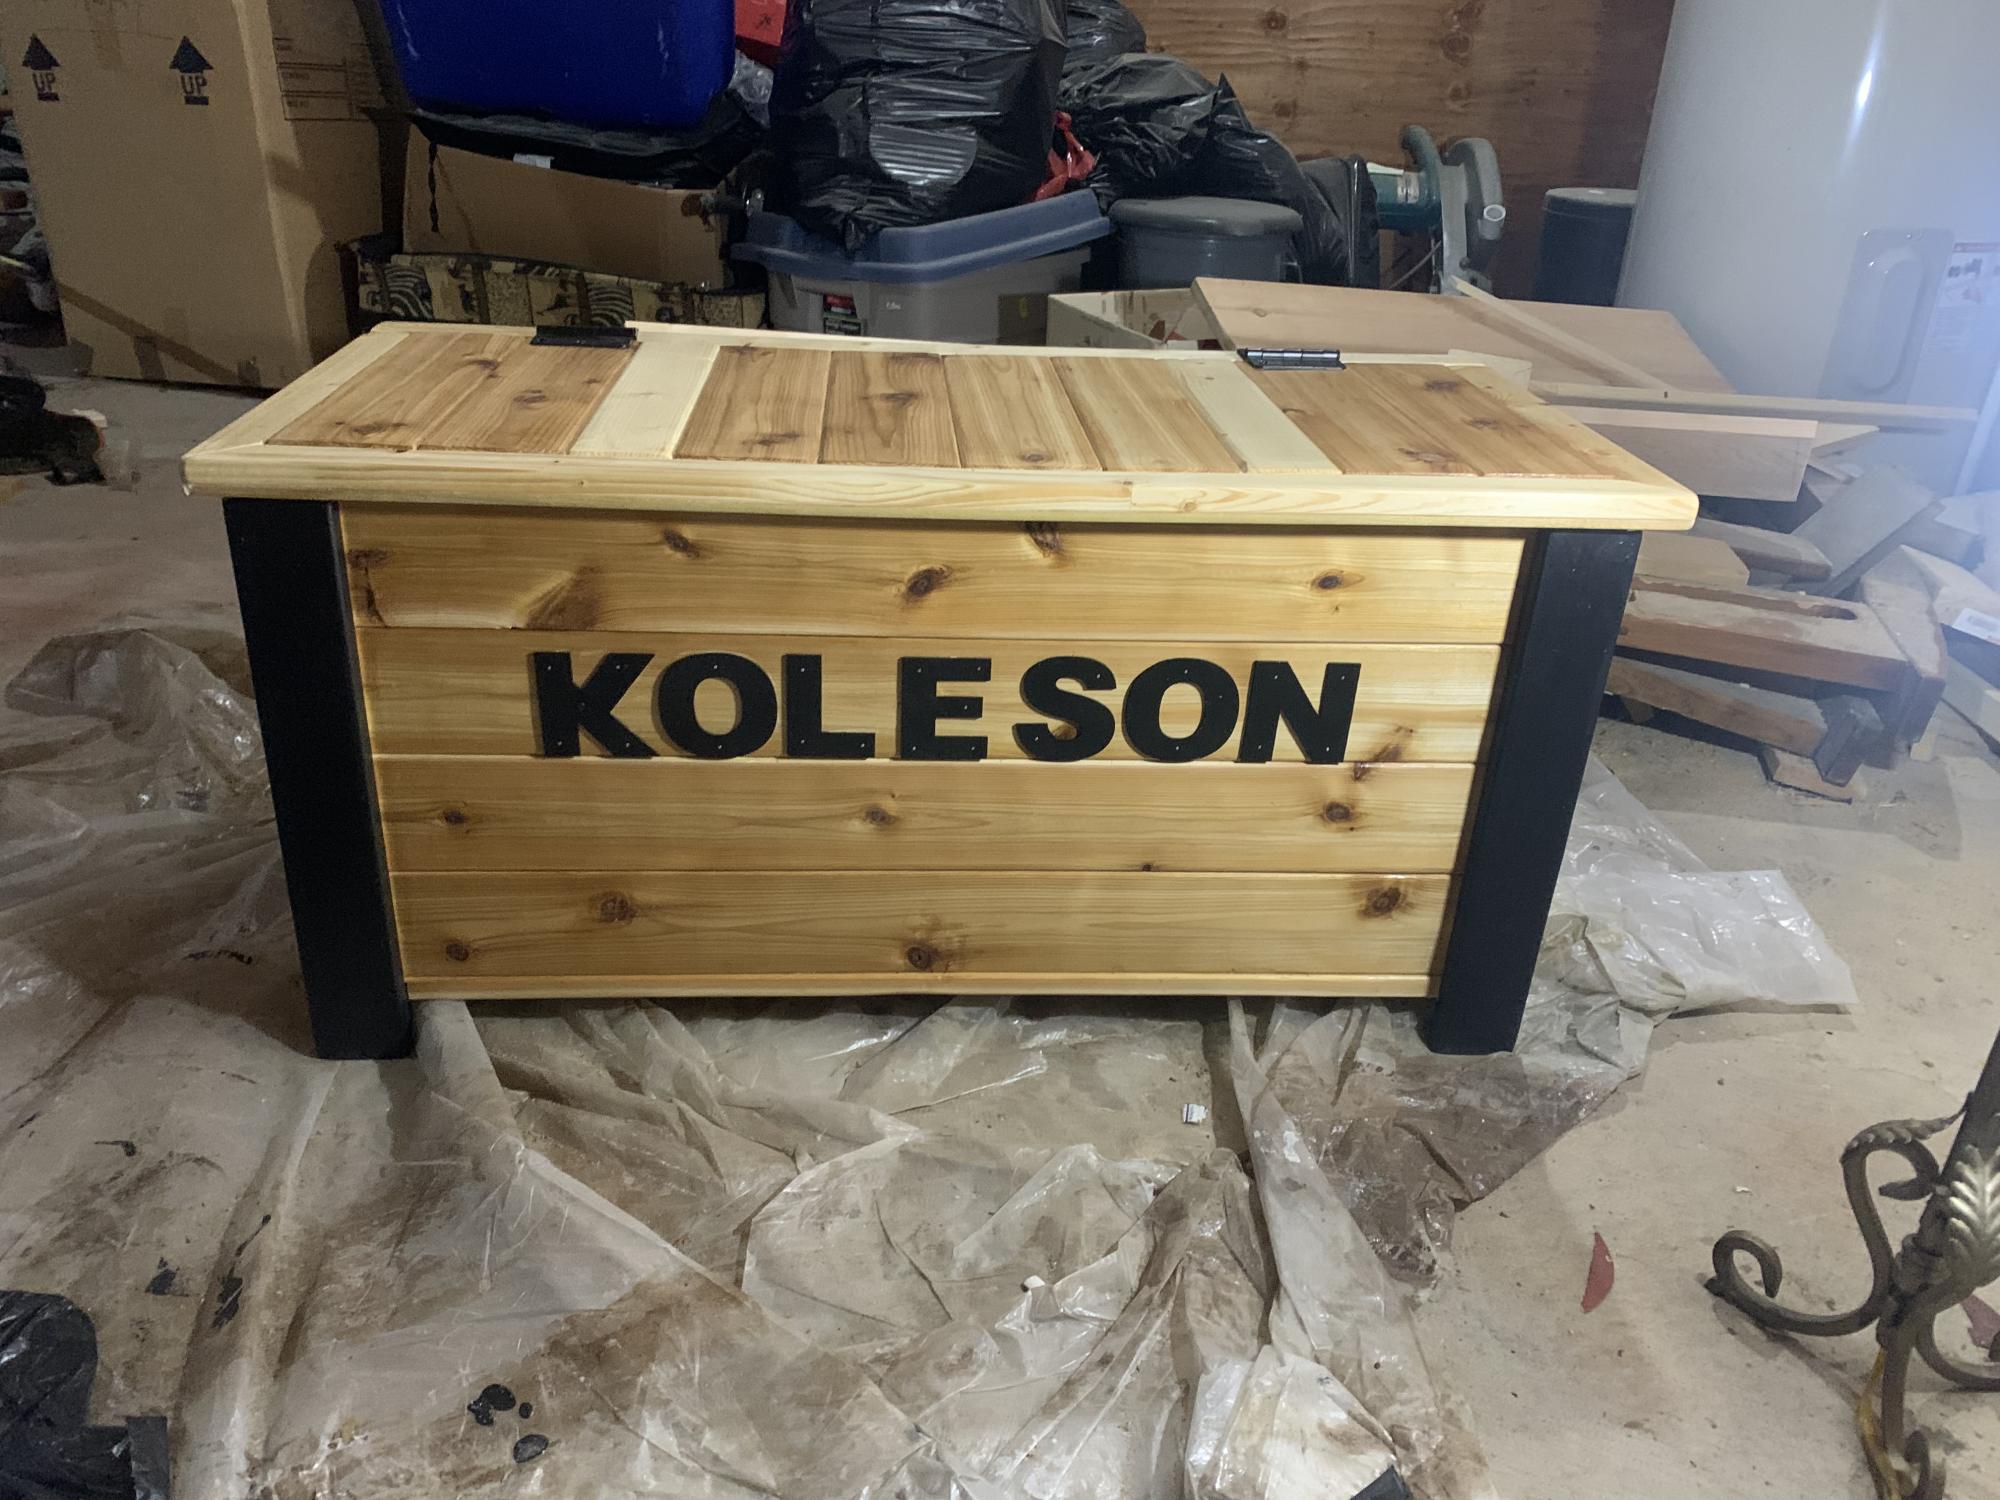
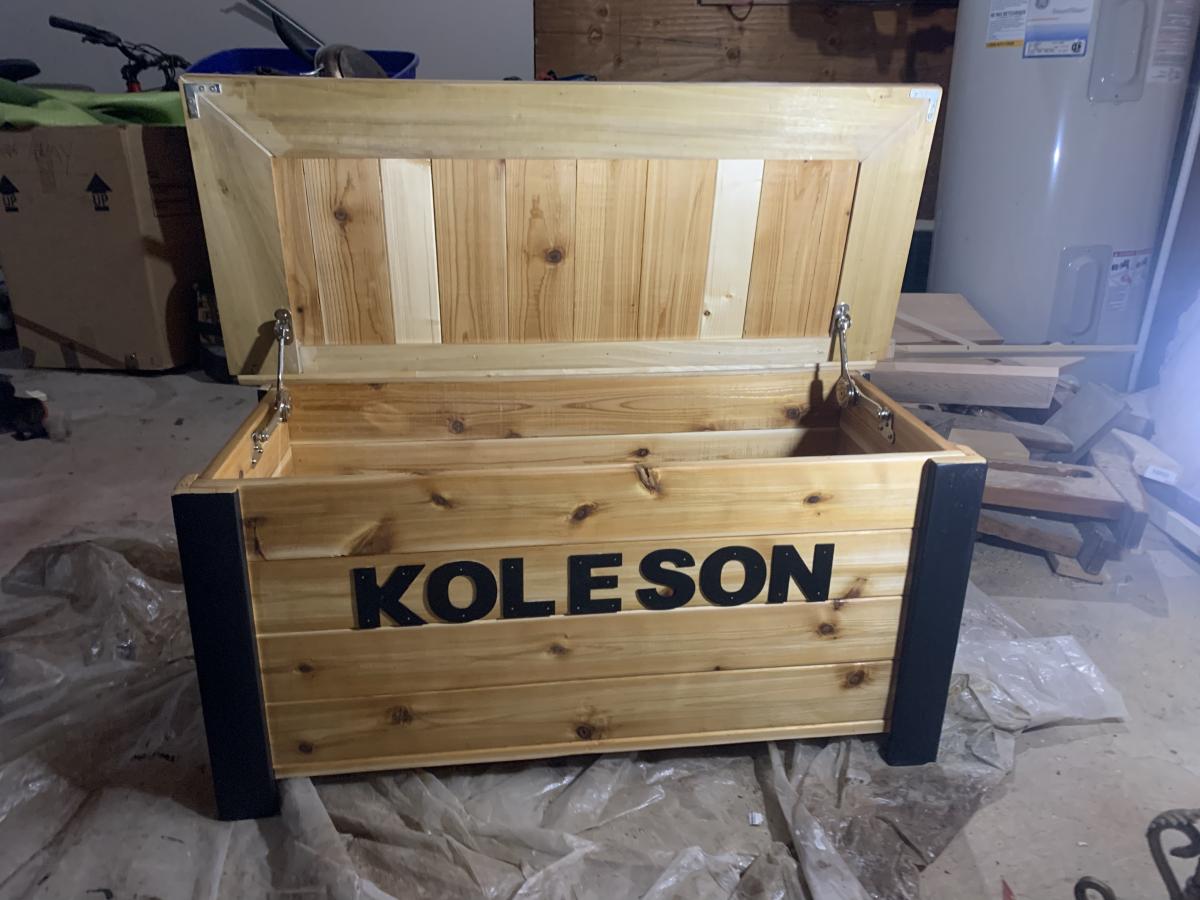
Had to reinvent the lid. Used panels instead of the recommended panel boards
Sun, 01/22/2023 - 08:22
Beautiful box and love the customization! Thanks for sharing.
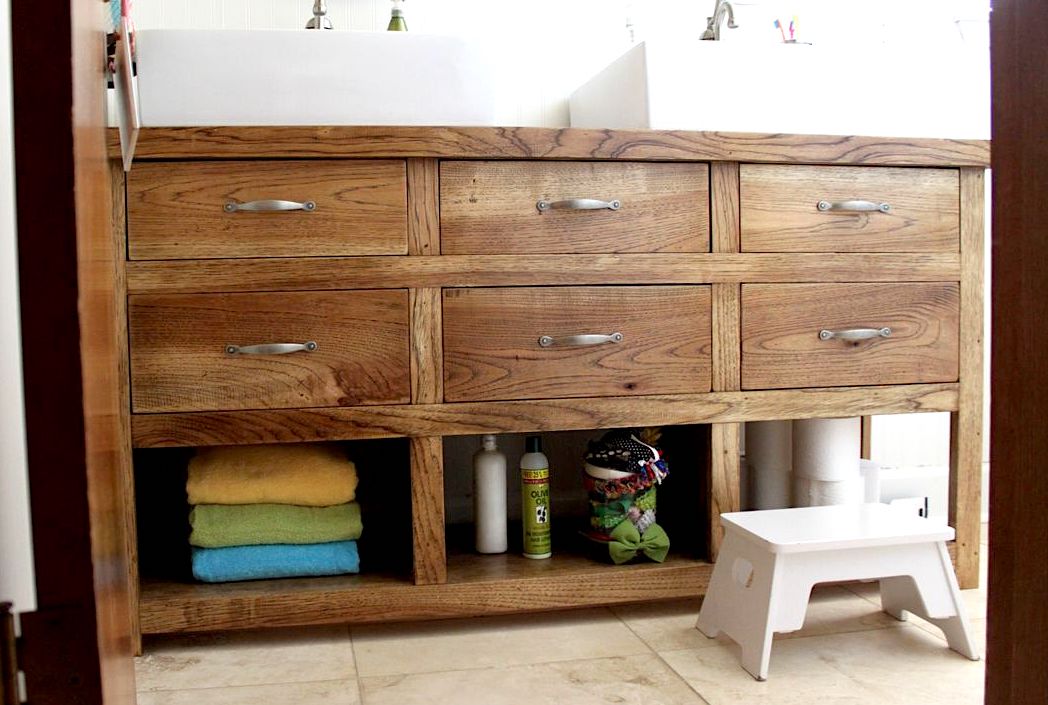
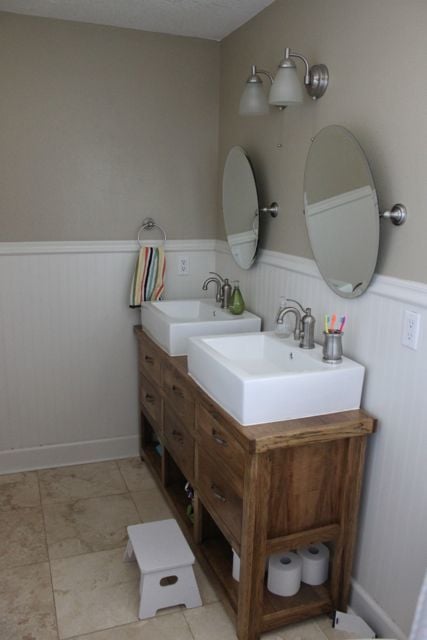
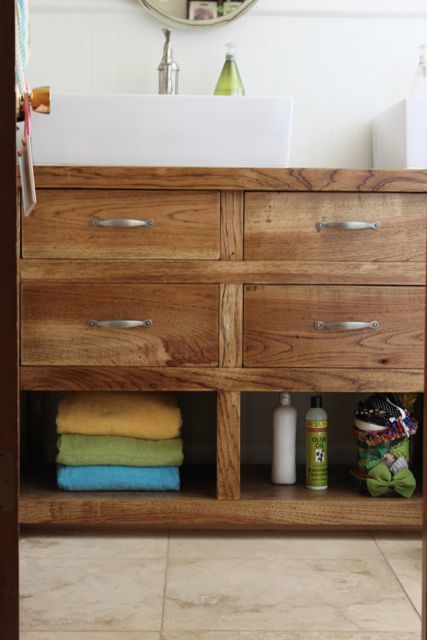
We looked high and low for a sturdy dresser we could convert to a vanity for our kid's bathroom. We could find nothing for under $500 so we decided to make it. We used solid hickory for the top and bottom and hickory vaneer for the rest. Only the middle drawers are useable, the side ones have a faux front to leave room for the sink plumbing behind. My husband also reinforced the bottom compartments by making them three separate compartments instead of one solid one. We ordered the sinks from overstock.com and the faucets are from Lowes.
Fri, 10/07/2011 - 16:14
Love it!!! I have been looking for a design I love and this is it :) Thank you for sharing!
Fri, 10/07/2011 - 16:39
My kids have been bugging for years for double sinks. I LOVE this. I was thinking along the same line but never got past the thinking part. This is GORGEOUS!
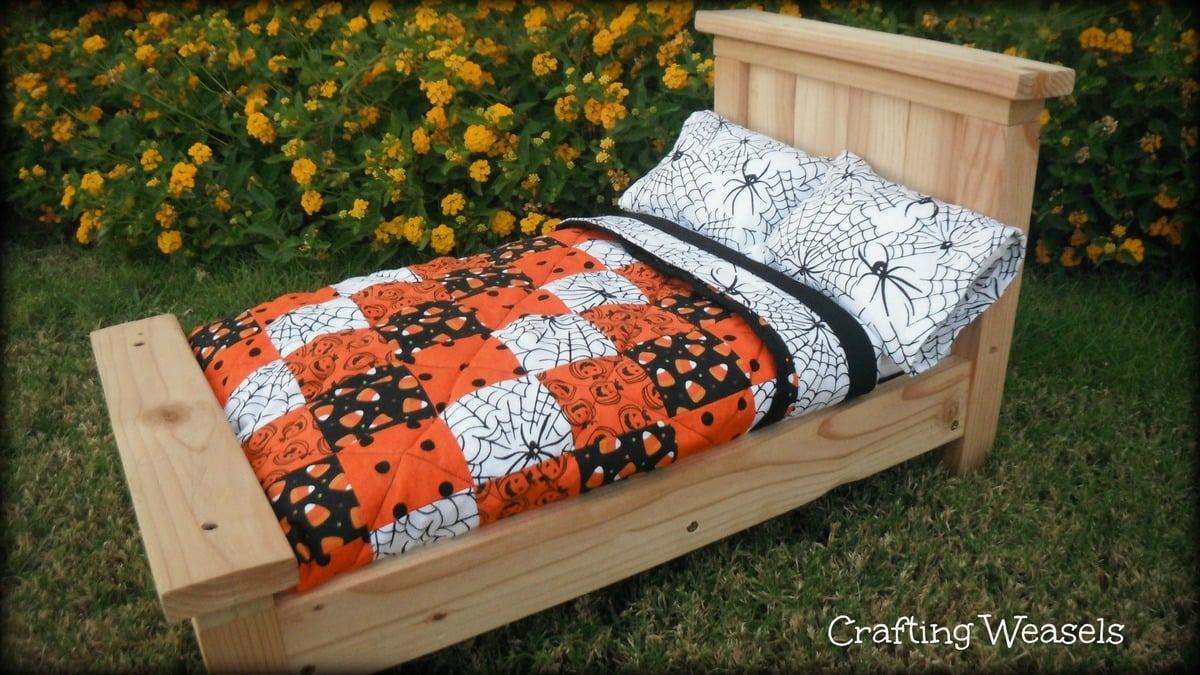
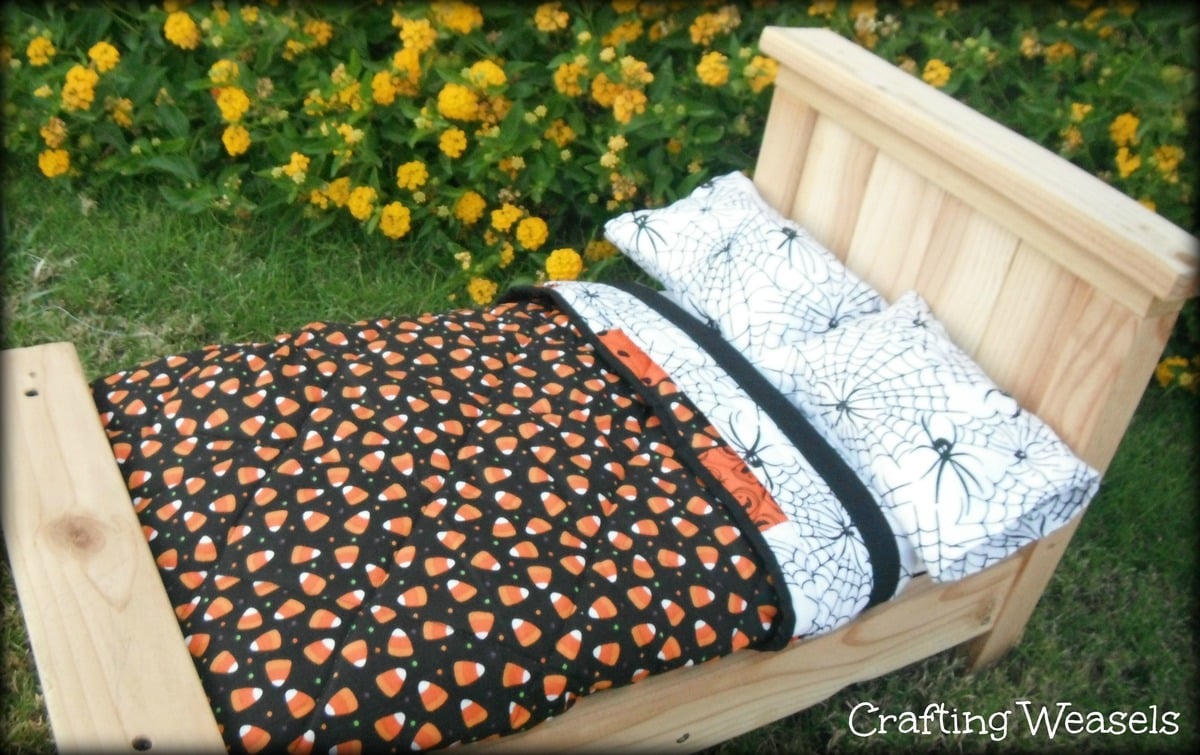
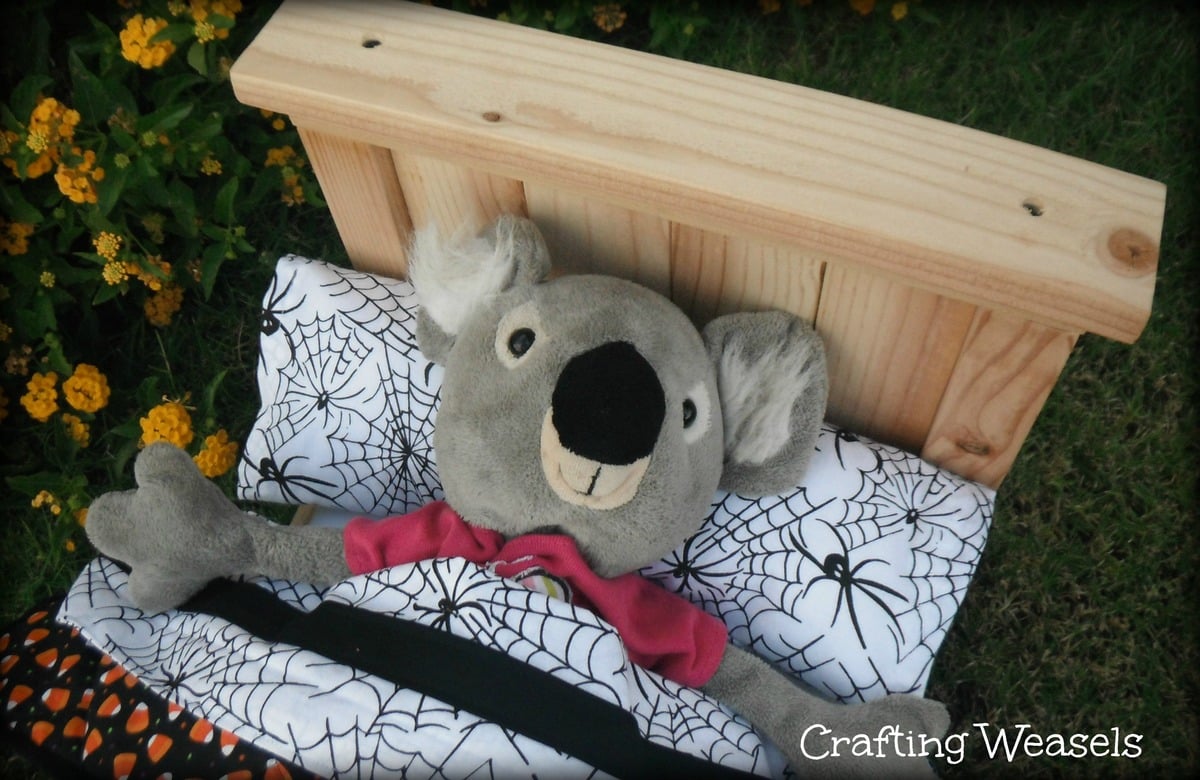
I made this bed for my daughter's Koalas (they are about the same size as the American Girl dolls).
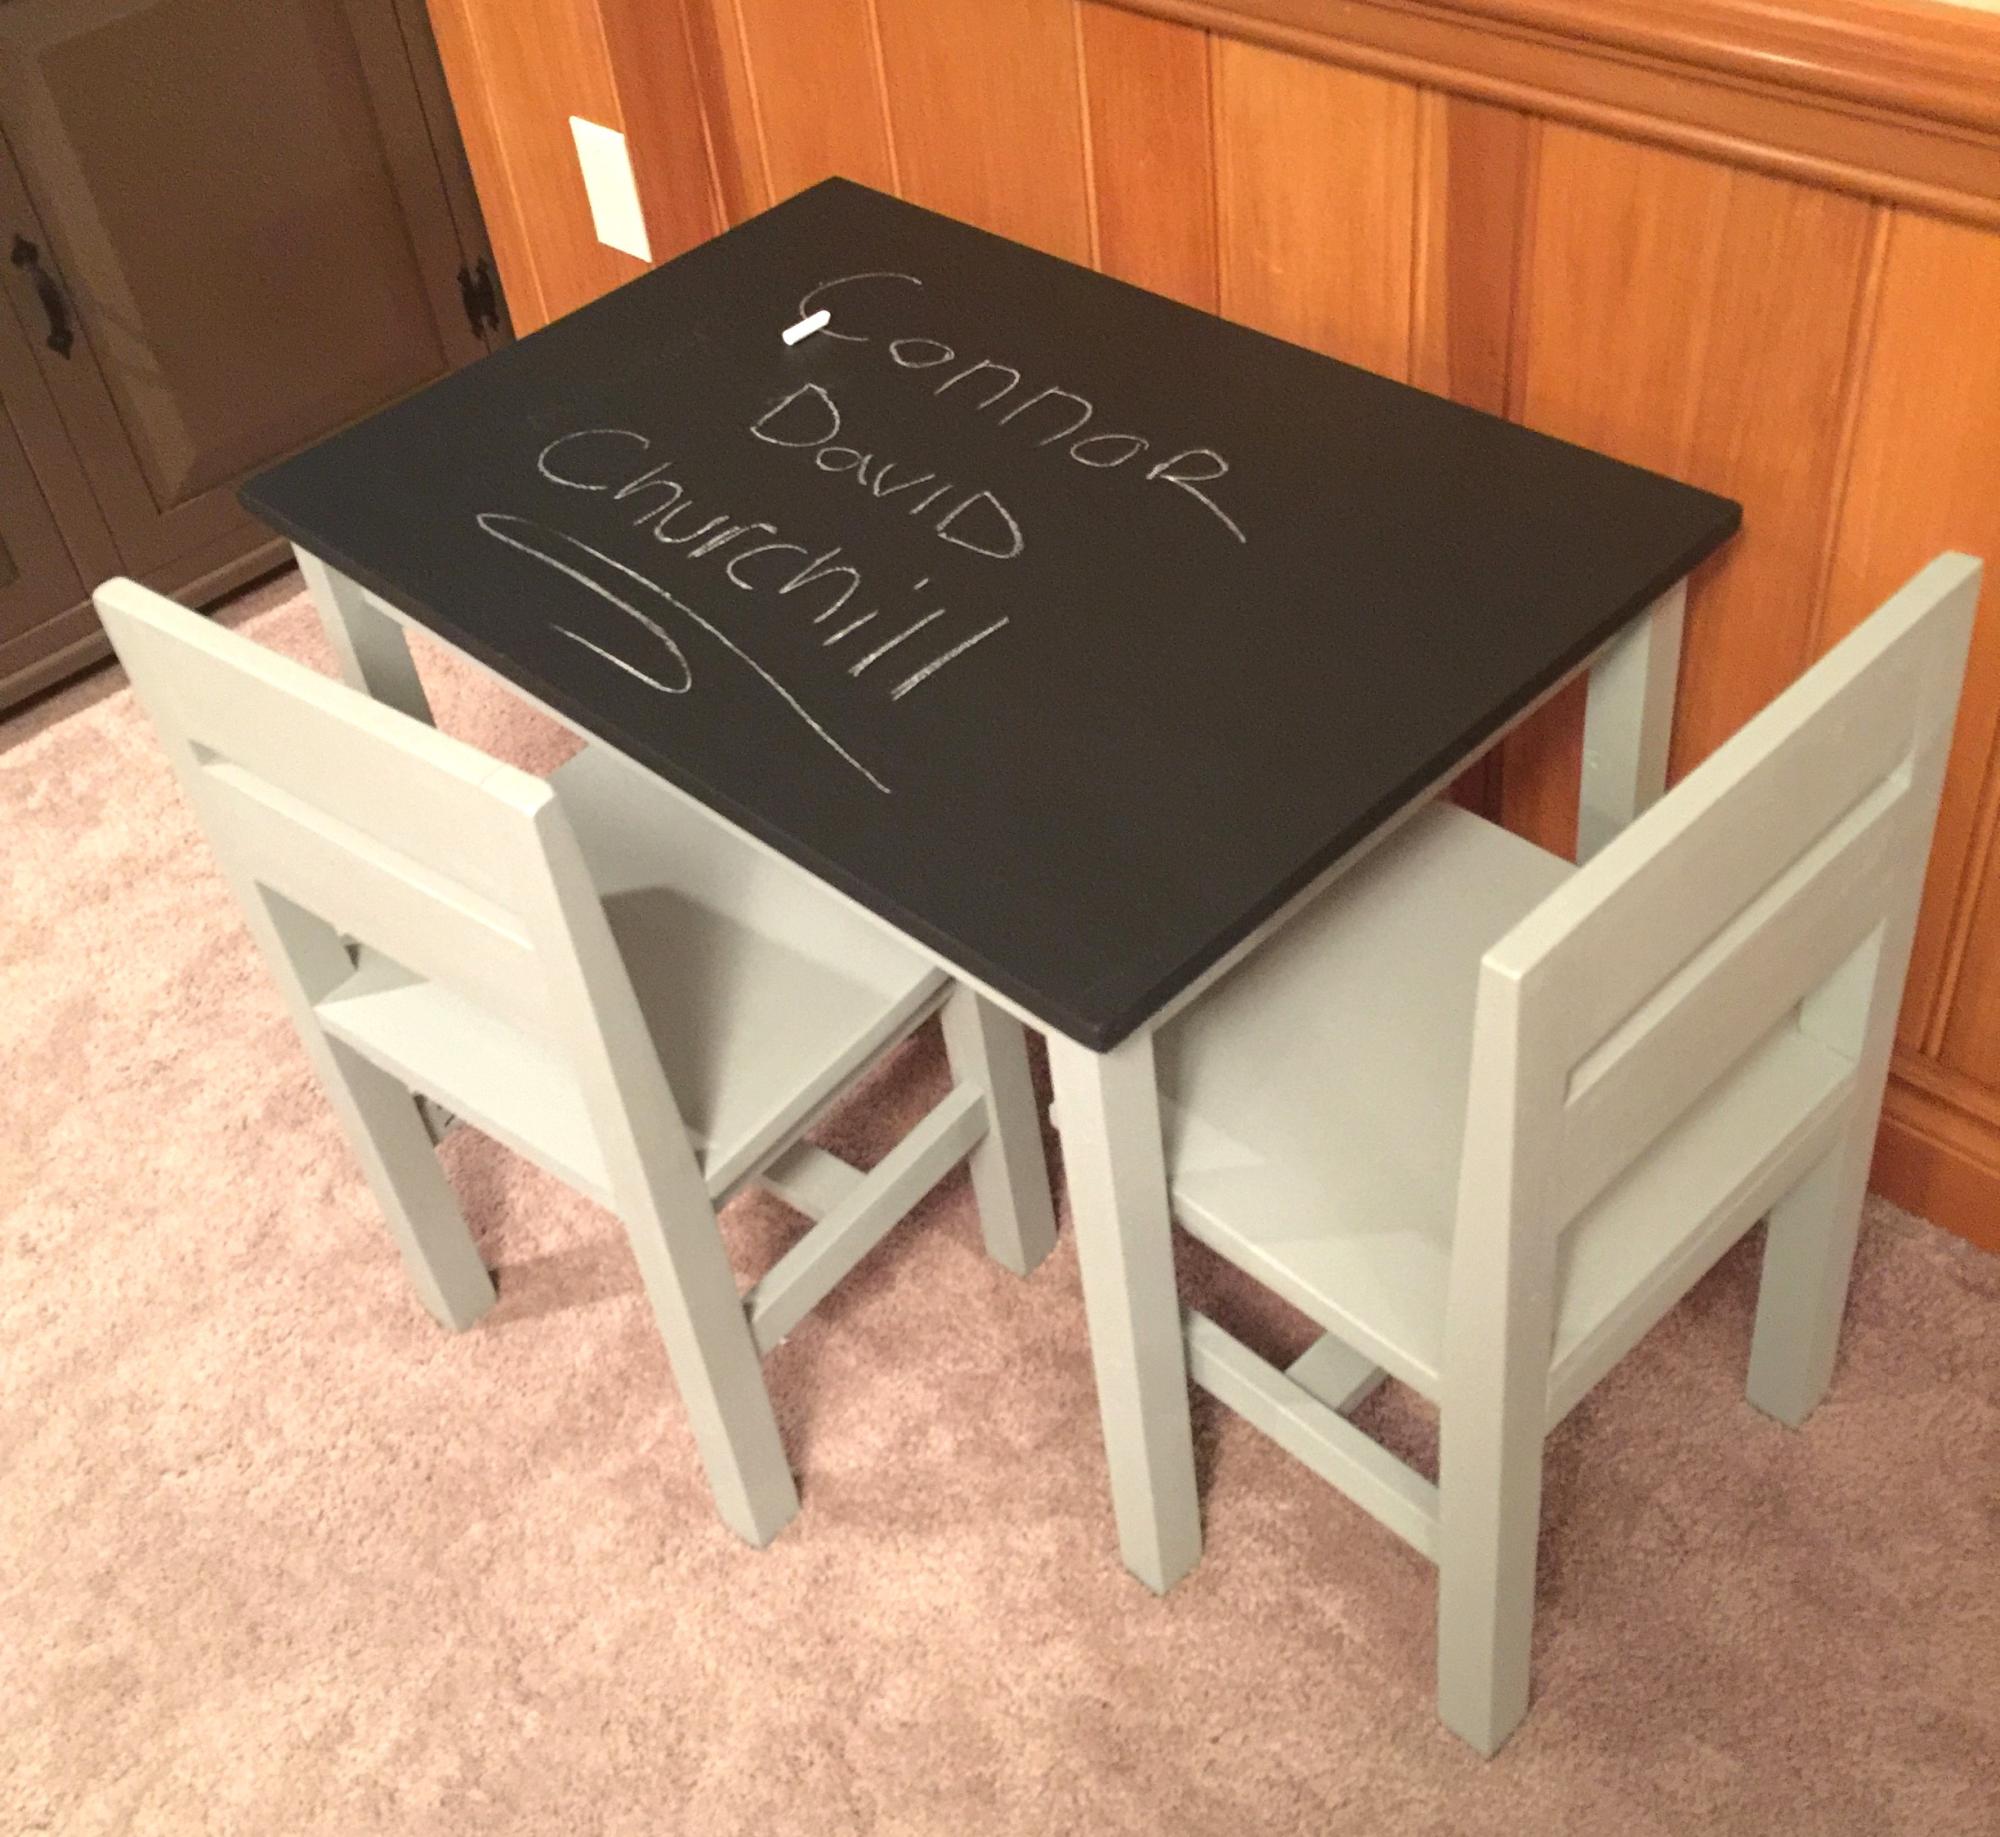
Clara table with chalkboard top.


This was an easy fun project for me! Alot of first finish wise, really like how it turned out, and so does the Mrs.

This table started out with several pieces of rough pecan slabs. I planed the lumber and created the table. It is finished with teak oil.
Mon, 01/30/2023 - 09:18
WOW, this is gorgeous, love the wood grains and finish! Thank you for sharing.
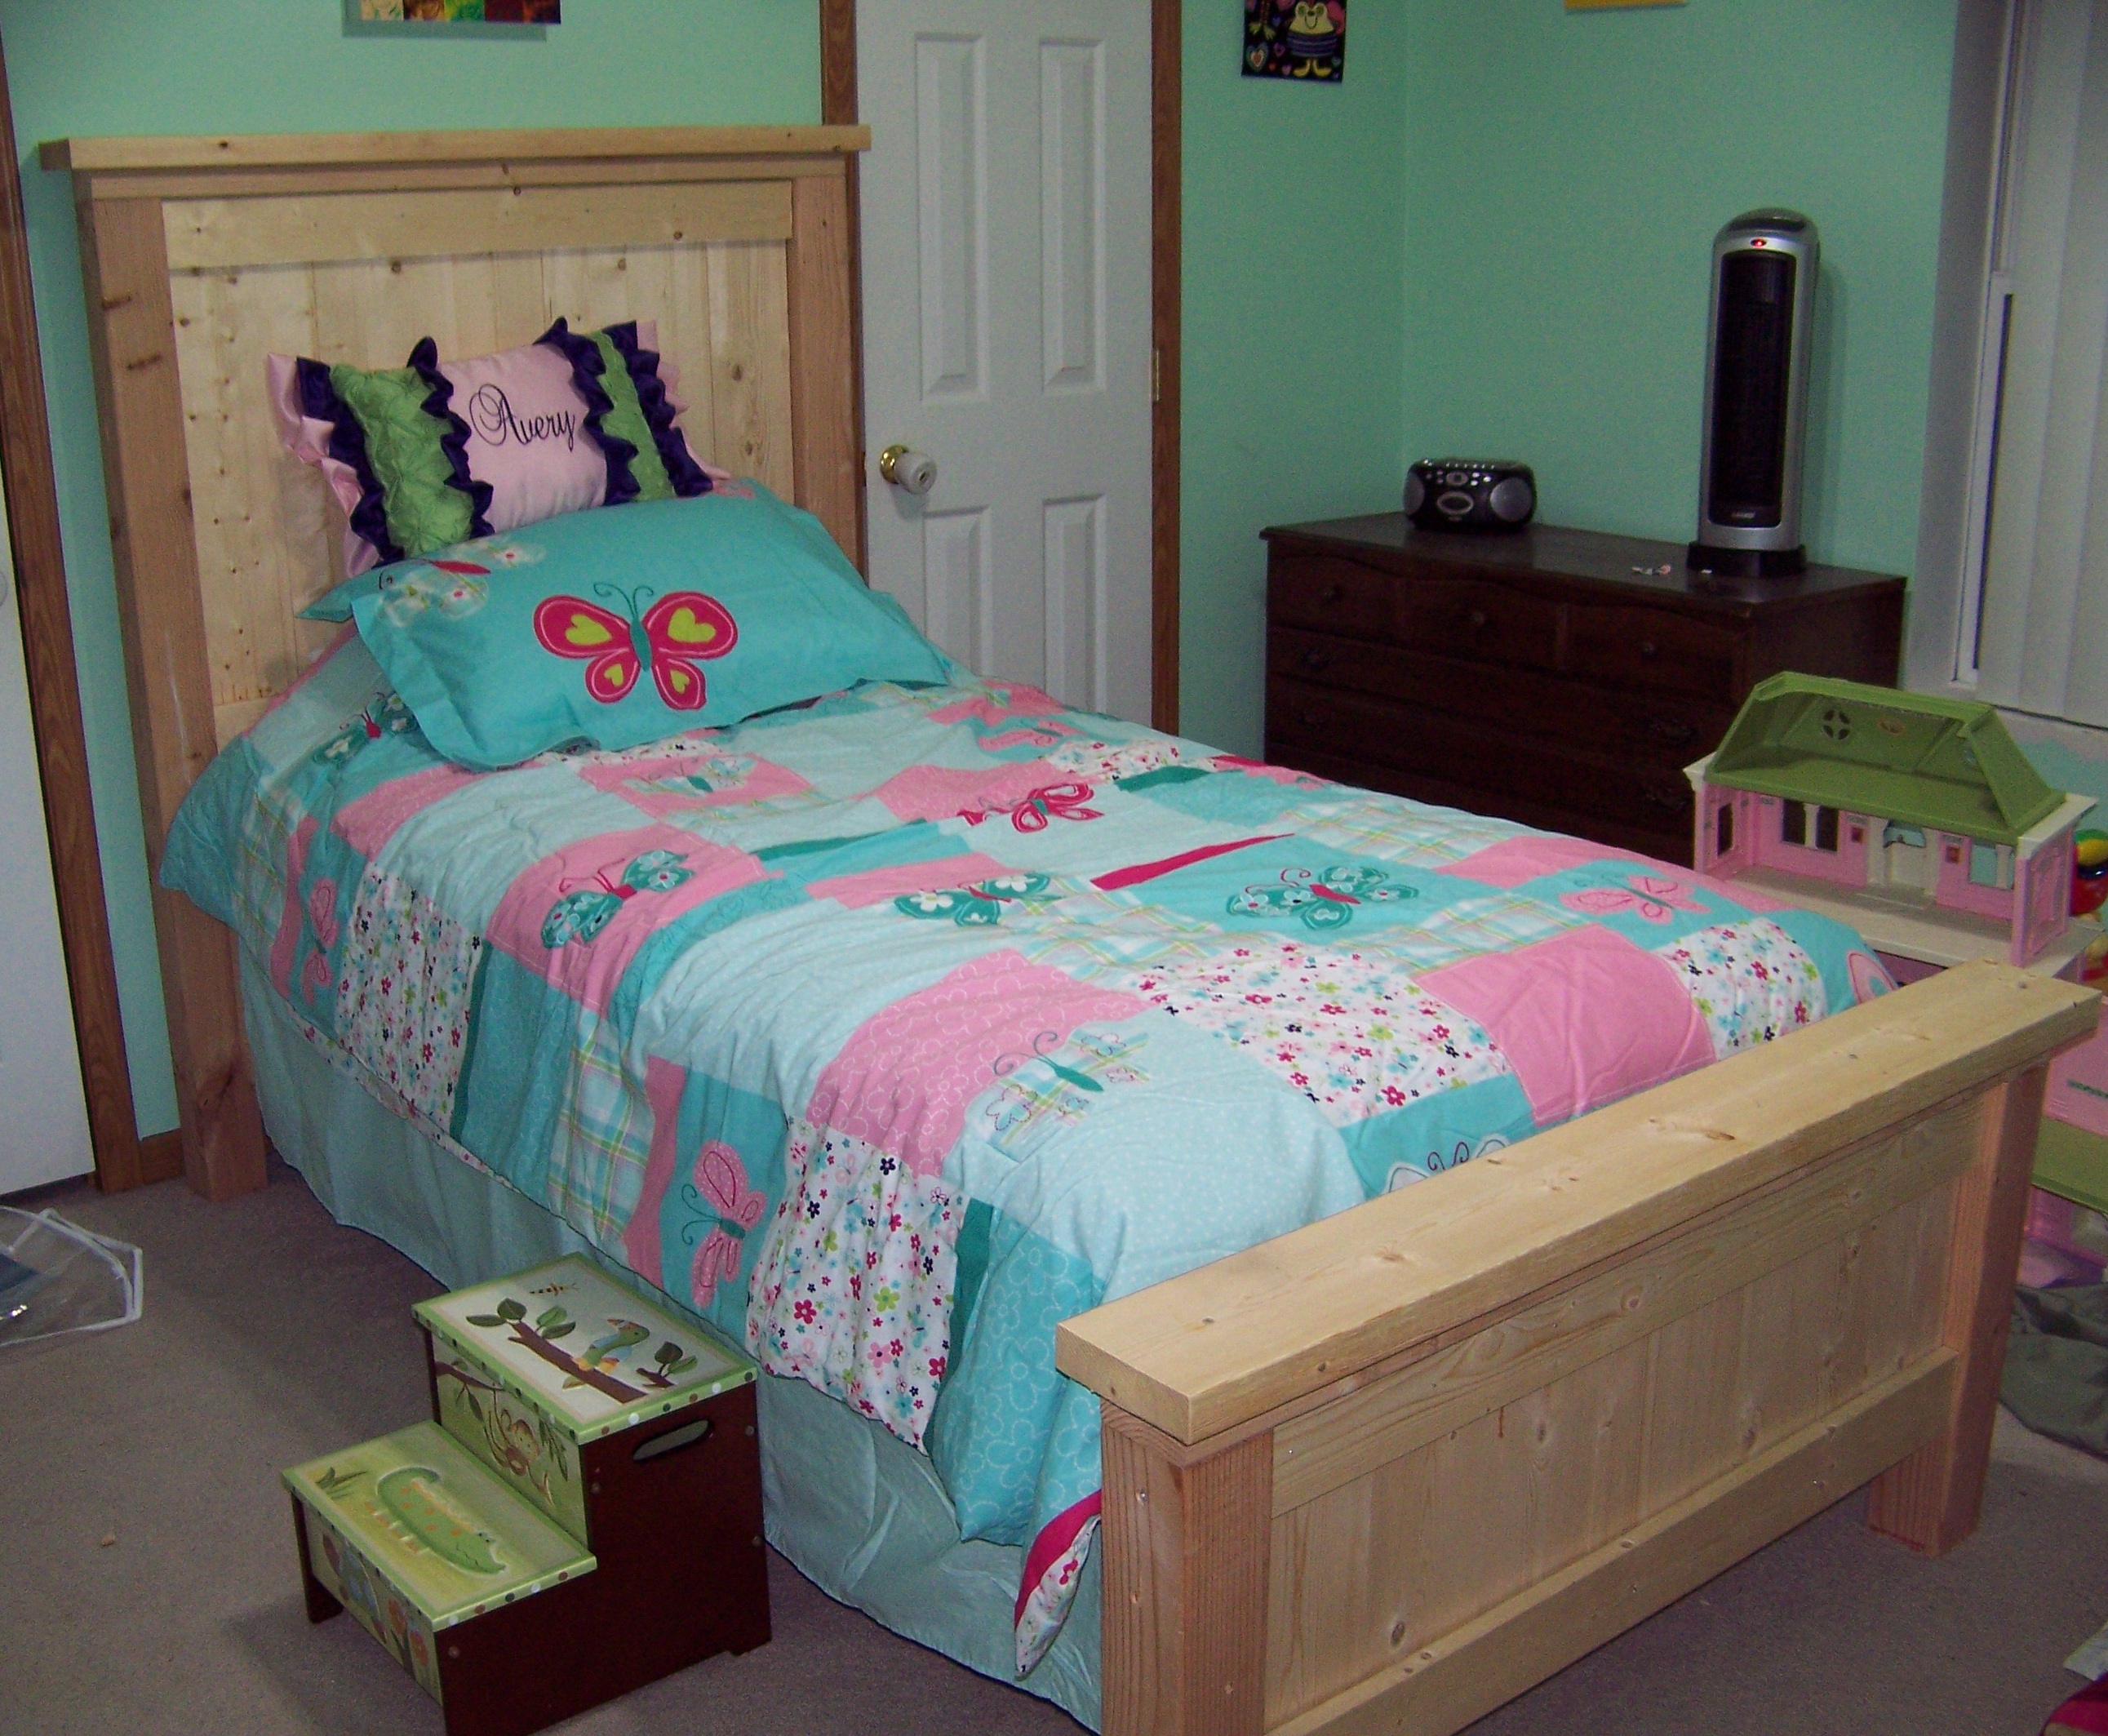
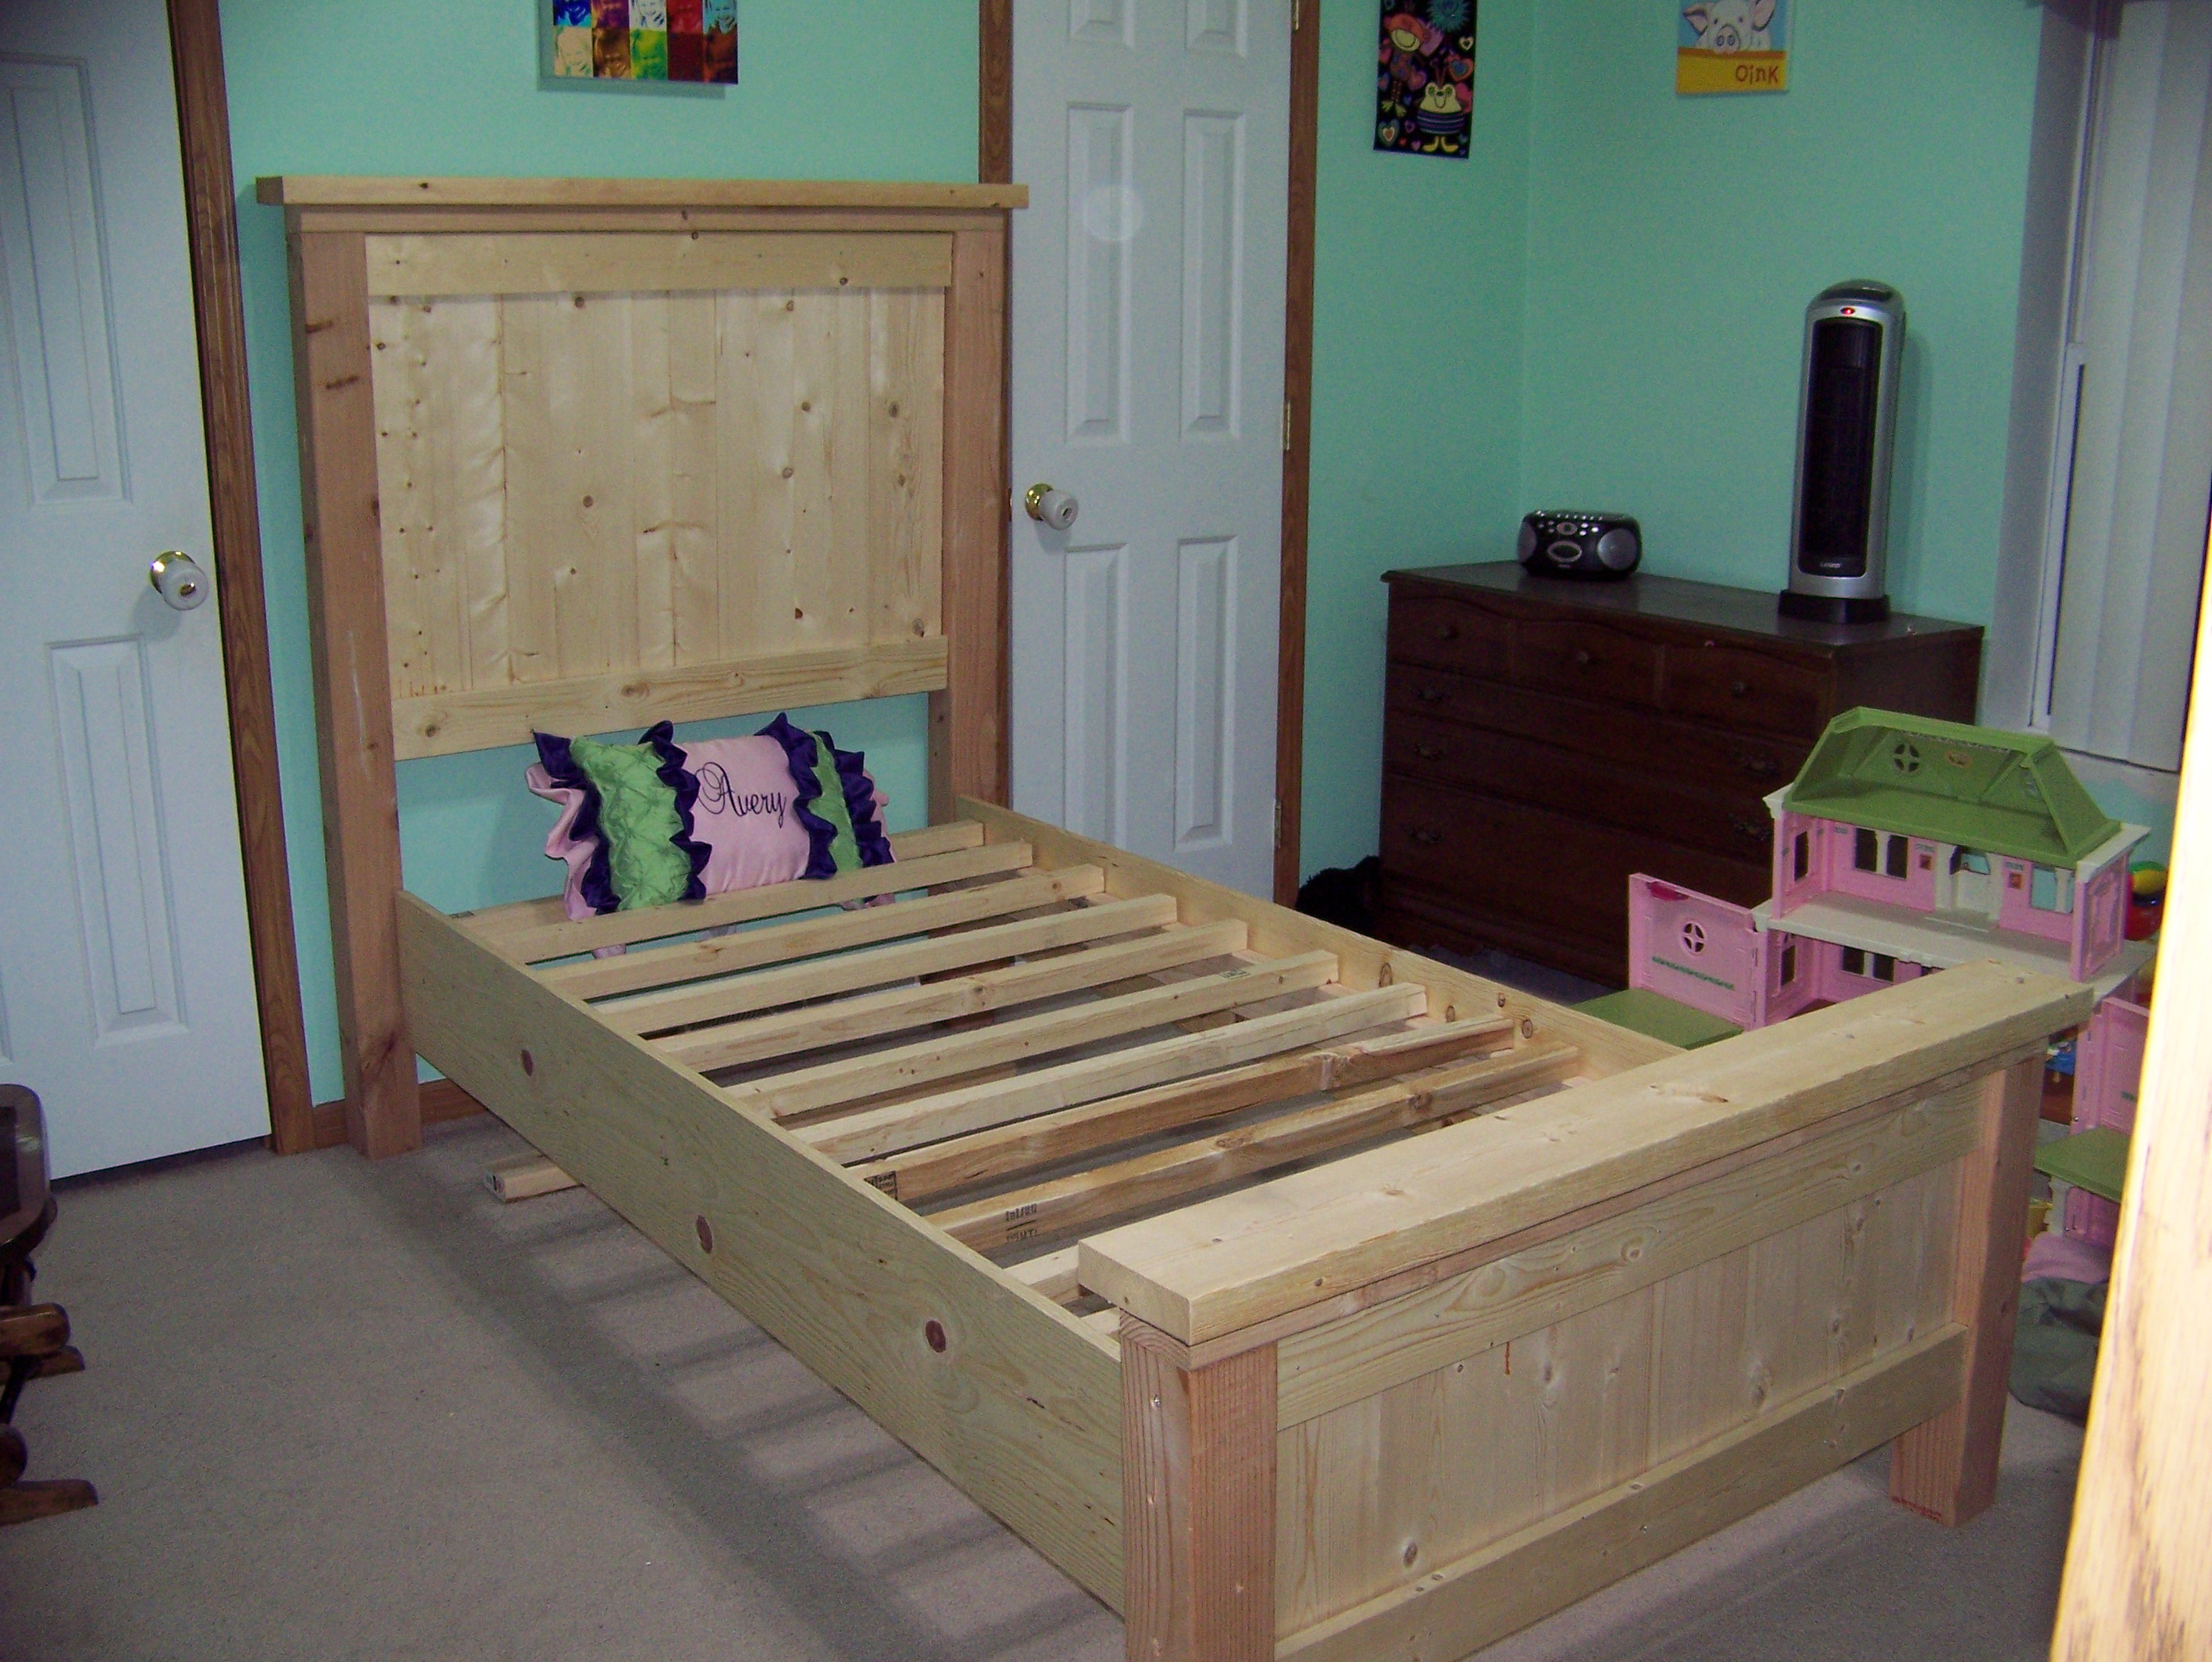
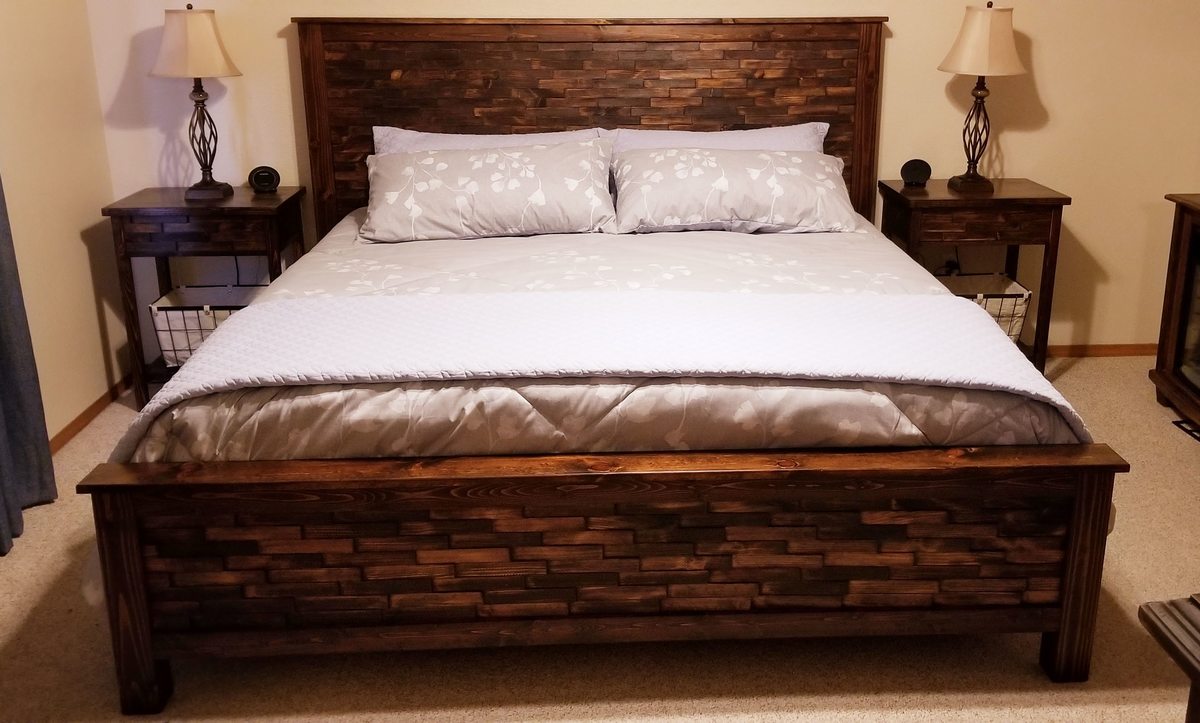
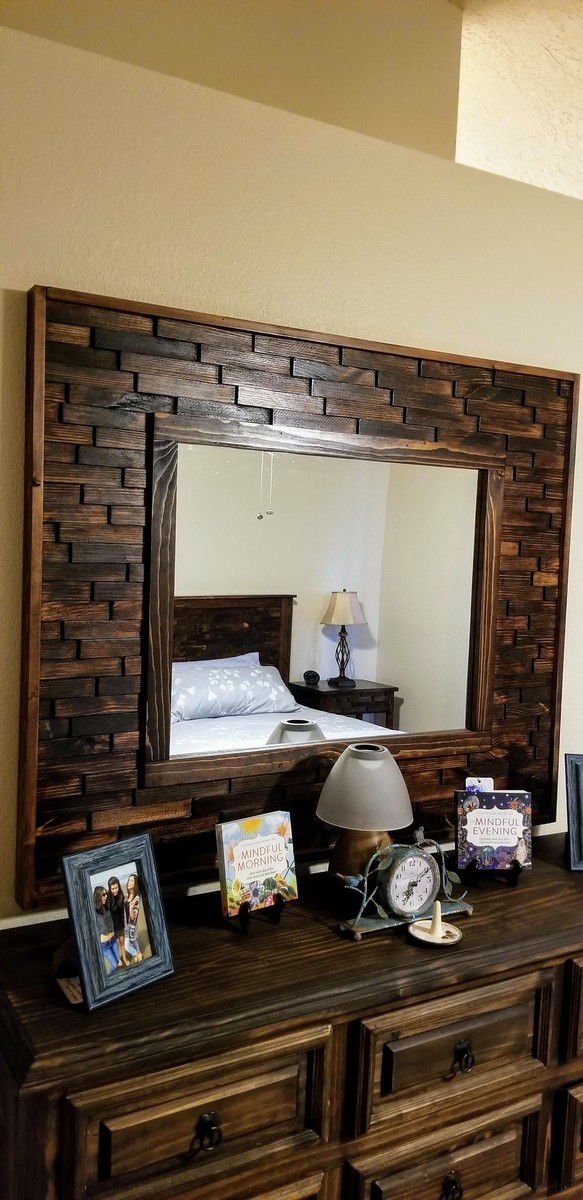
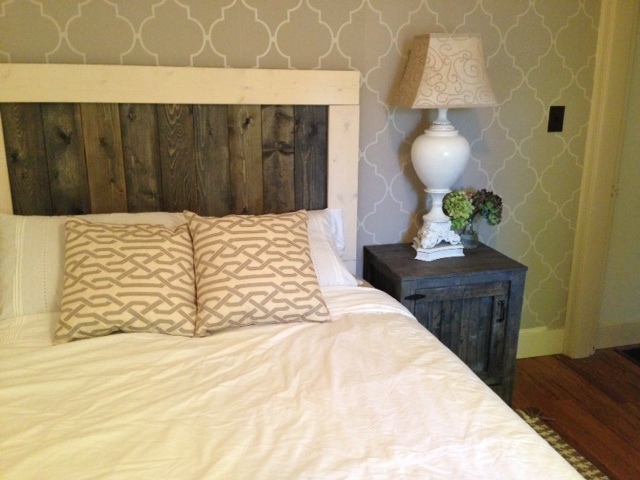
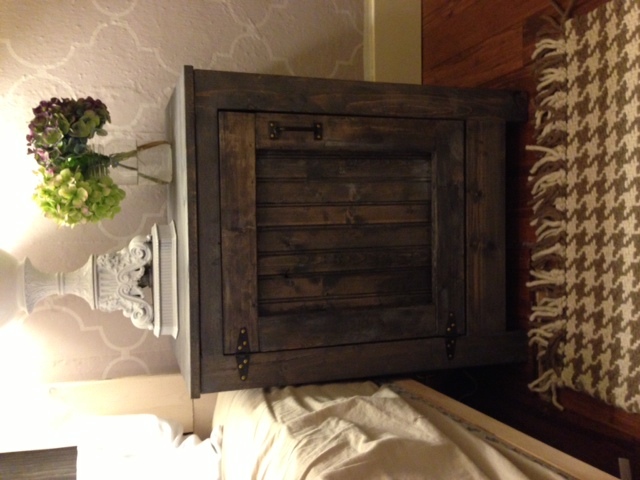
This was made with the Farmhouse Bed Plan.
Woodworking runs in my family, but this is my first item built from scratch.
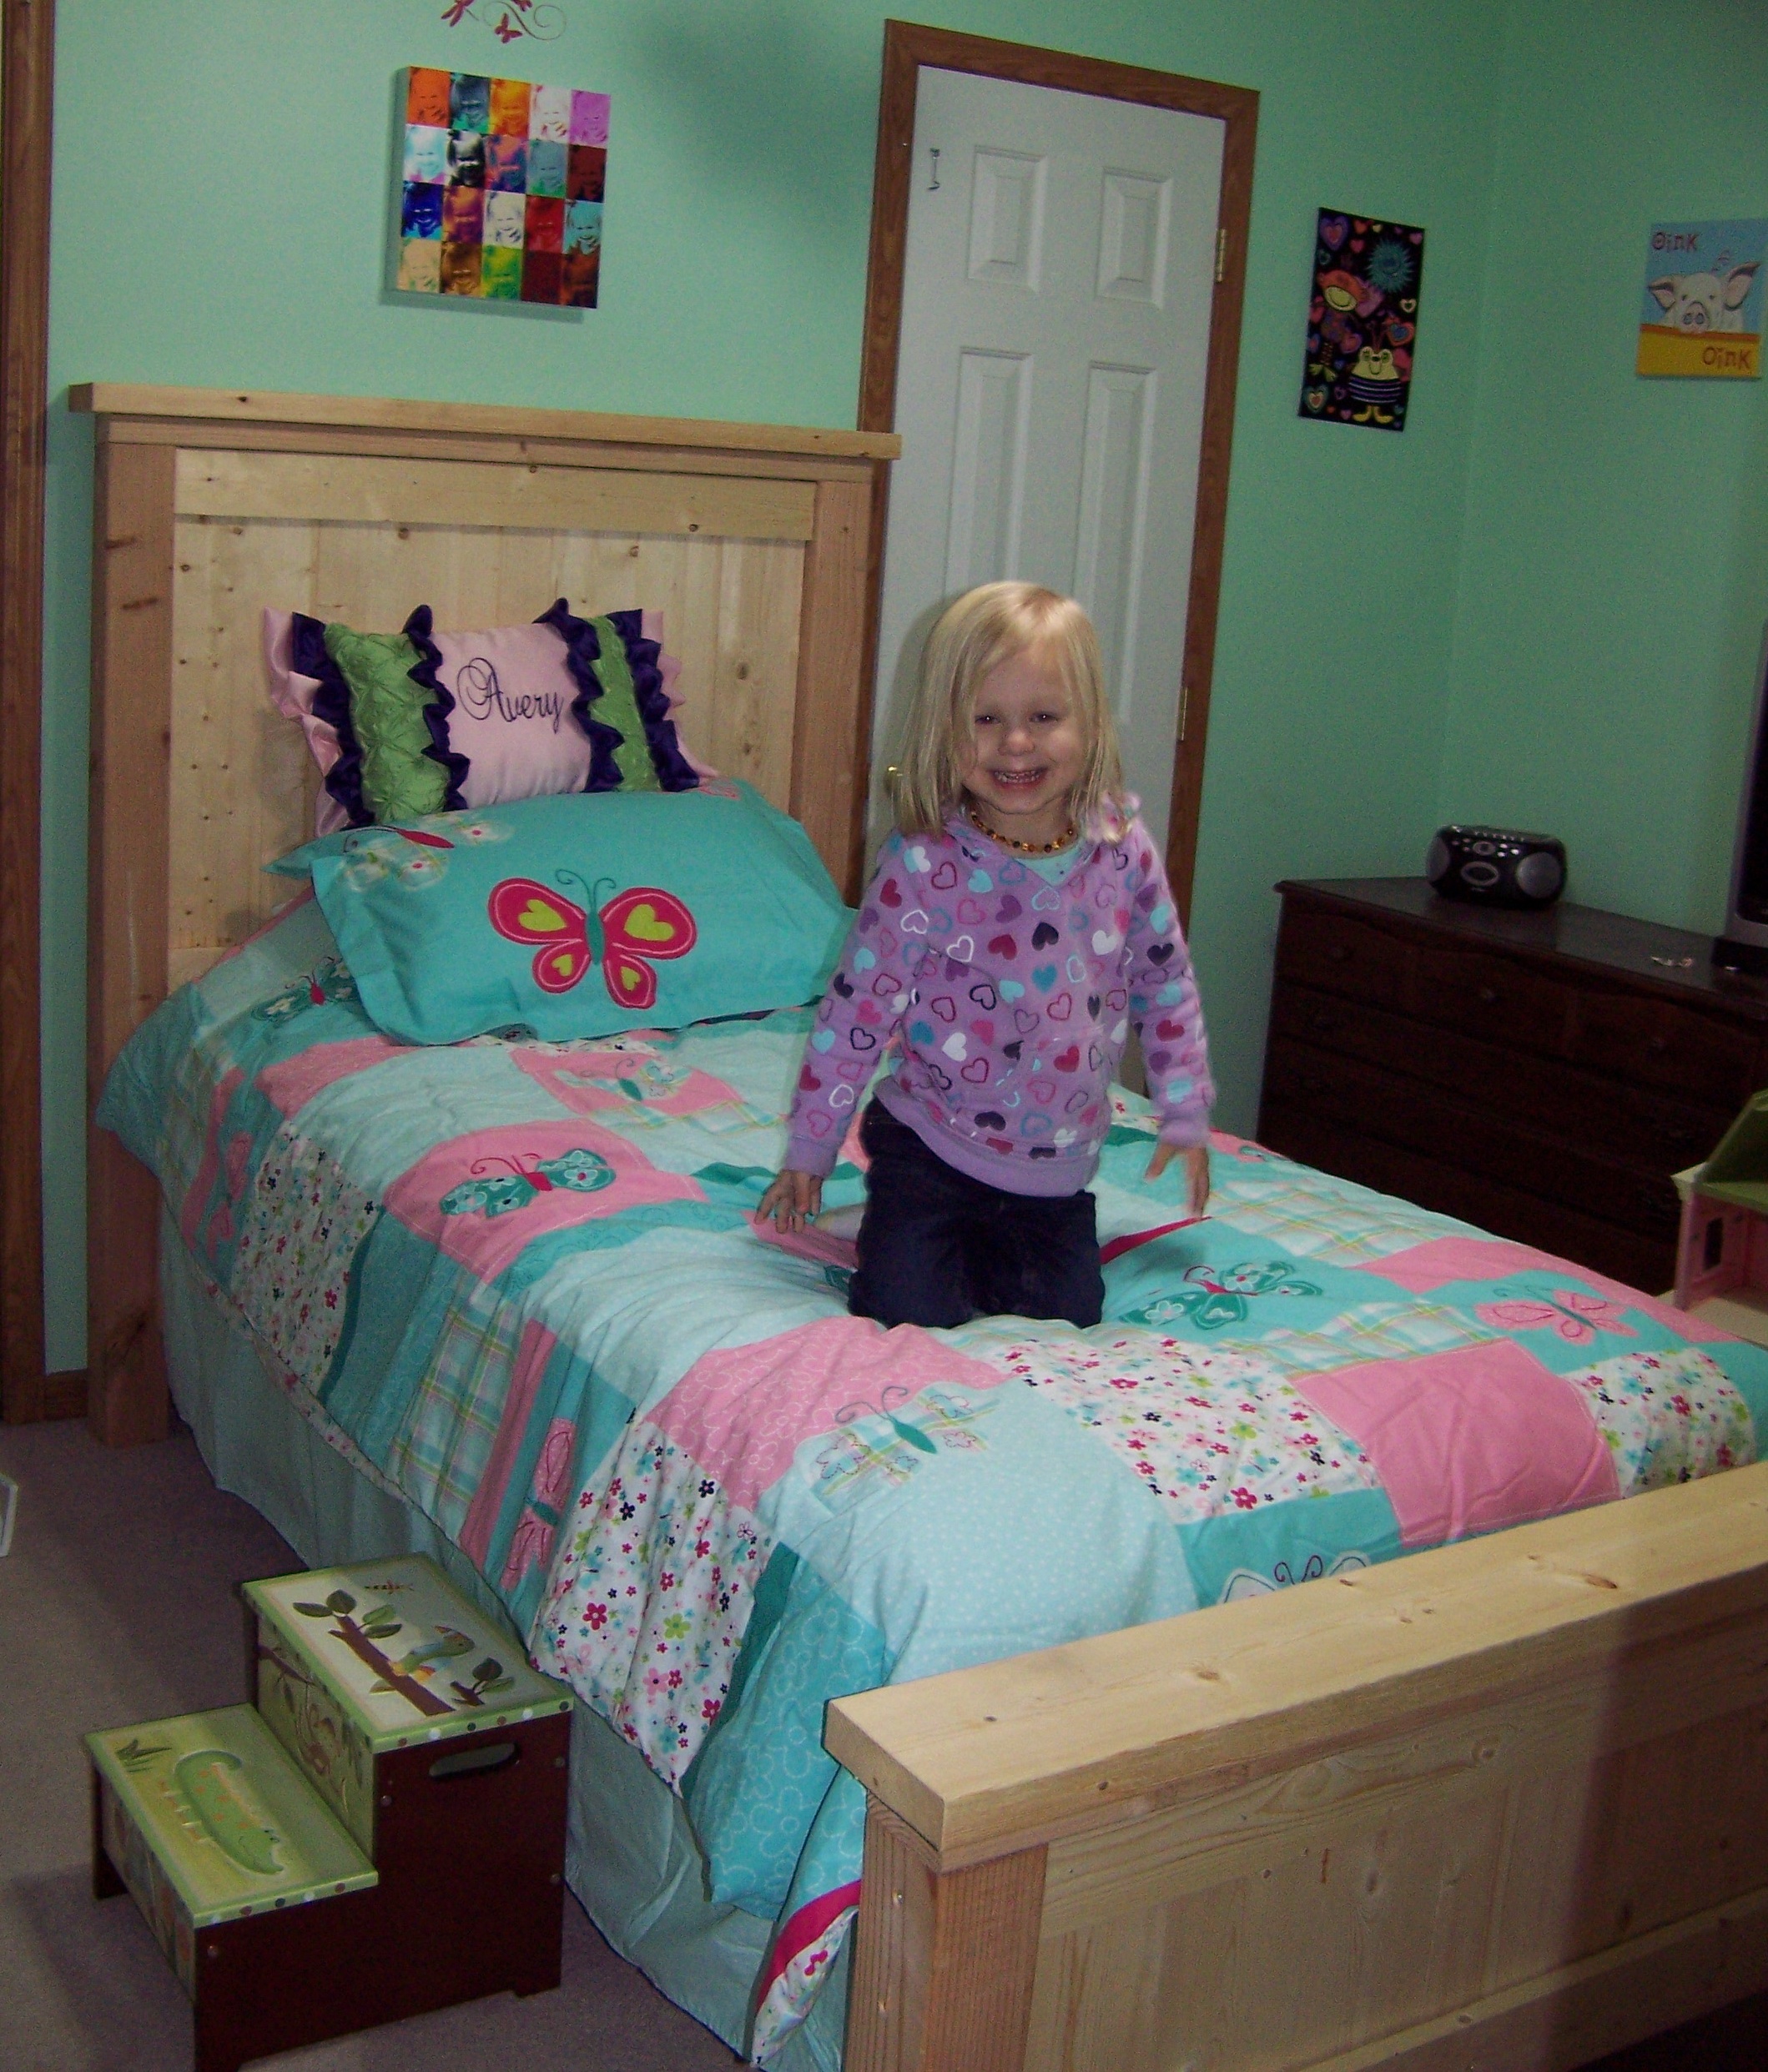
We decided to leave it bare for a while. It looks beautiful as is.

Mon, 01/07/2013 - 07:24
I will be building this with modifications to the headboard. I'm going to put baseball bats in-between the 4x4's as the header.
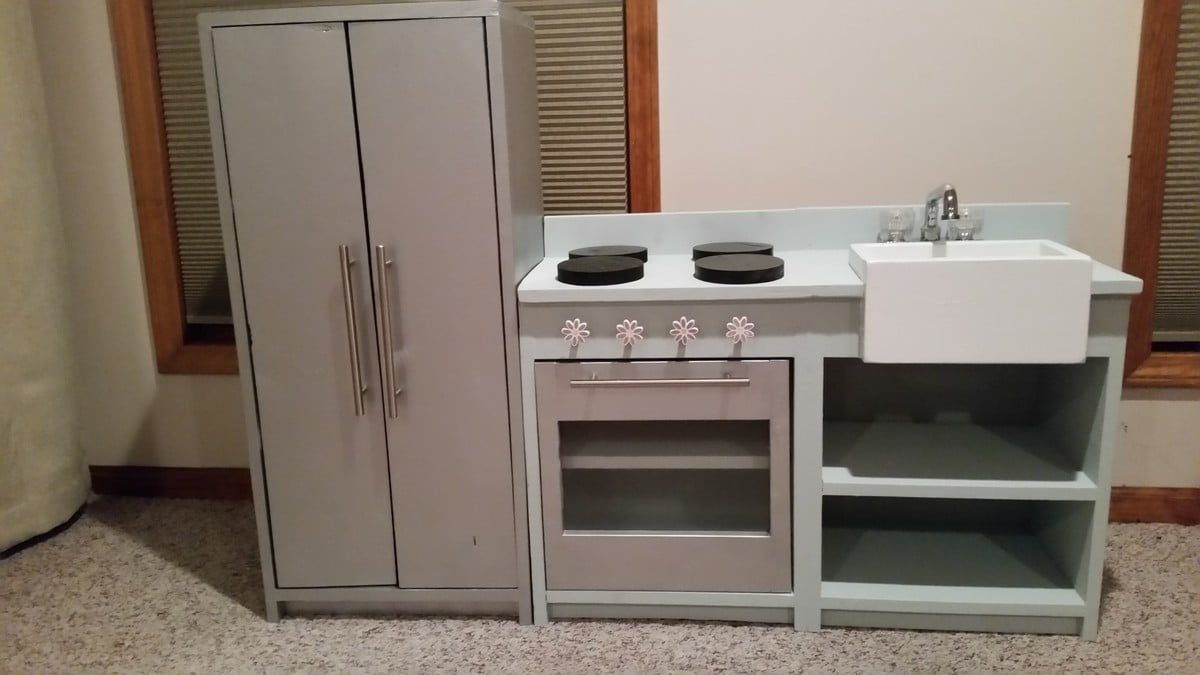
This project went pretty smooth. I built the sink box out of 1x6 and 1x8. Total cost (if I got the right stuff the first time) would have been about $120. Most of that is in the faucet (a $25 laundry faucet from Home Depot), pulls (about $4.50 each), knobs ($3 each), and hinges. I also purchased the wooden discs for the stove at Michael's for about $1 each. I used common pine and sanded it smooth before painting, which saved a lot of money over the more polished pine products. I used stainless steel spray paint for the fridge and stove door, and leftover paint for the rest of the sink and stove. I glued all joints and used my finish nailer rather than a Kreg Jig. I had a hard time finding hinges that will work, so keep that in mind. I ended up buying some of the European hinges that were surface mounted on the inside, and they work well. One suggestion - if you're planning on mounting these next to each other remember not to allow any overhang on the countertop. The plans call for a slight overhang, and I had to do some messy cuts after I had the cabinets assembled to correct that. I ended up attaching the cabinets together for added stability. Overall this was a surprisingly simple project. I'm considering building another cabinet like the sink/stove without any doors just for some countertop space and additional storage.
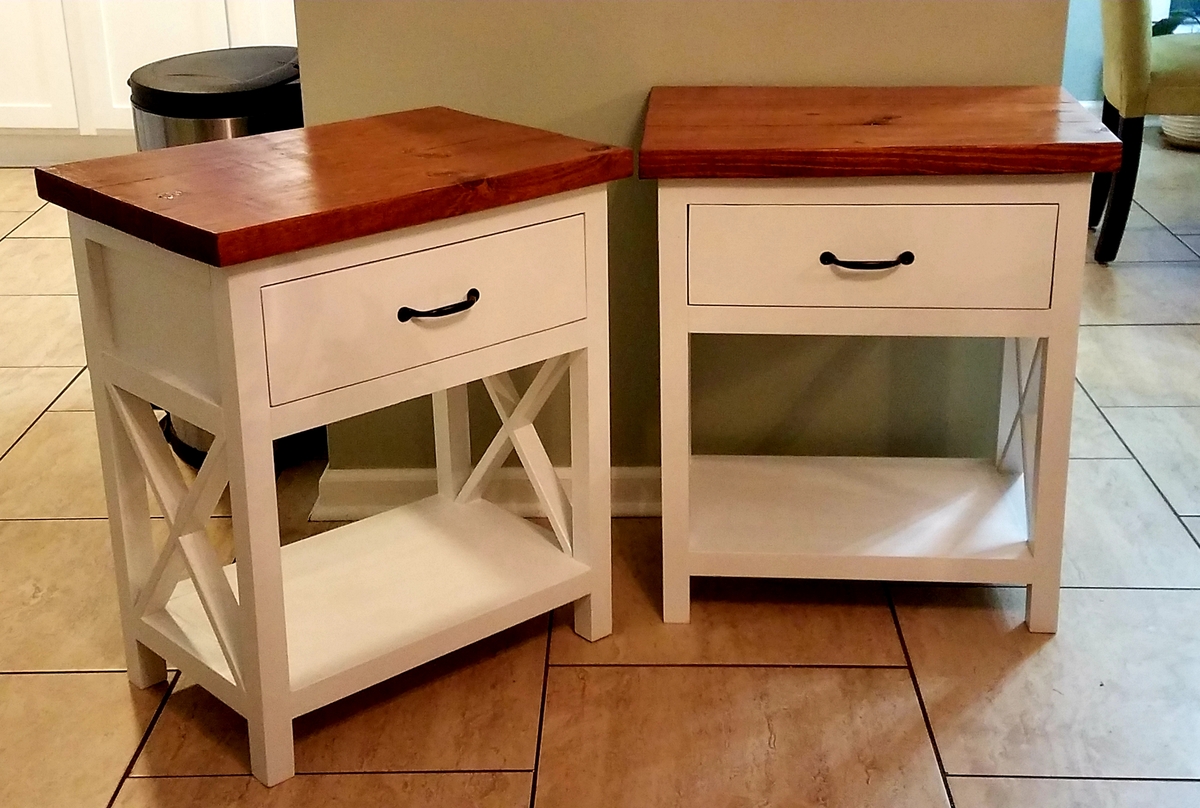
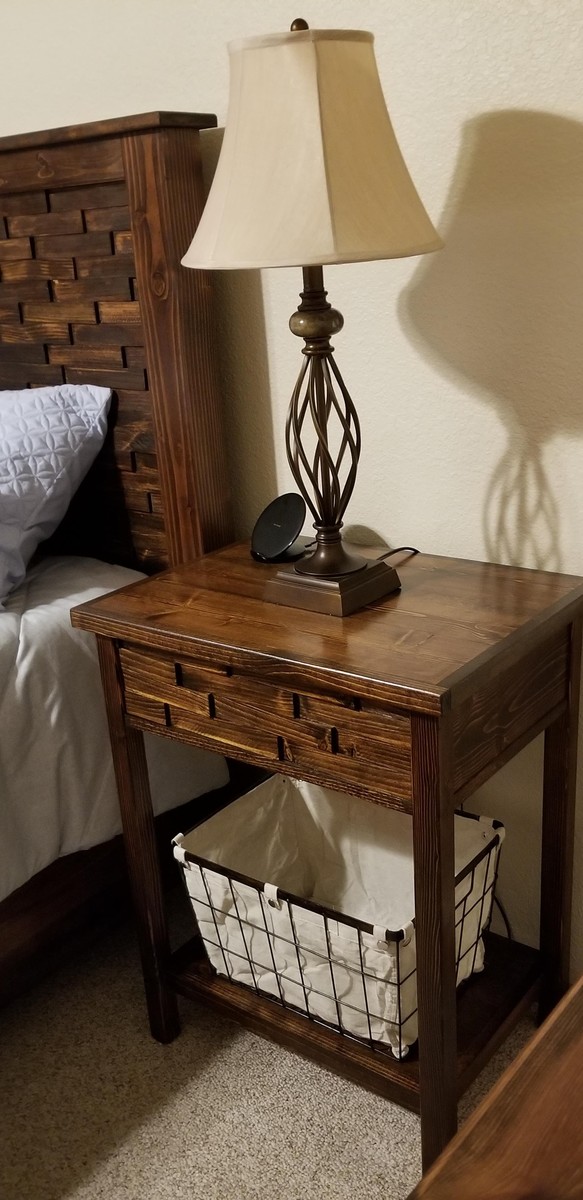
This is the second time i made these tables. The first time was for my son and his fiance to match the farmhouse bed that i made for them but i did not do the inset drawers. Tried but couldn't get them to sit right. My niece liked them and didn't have any tables to go along with the bed her new huband's grandfather had built. I love the inset drawer look so i tried again. The first one i had no problem with but the second one had to make the drawer box over a couple of times. I did differ the pattern a bit and used 2" top instead of 1 inch simply because i had some leftovers. I also used drawer slides instead of wood slides.
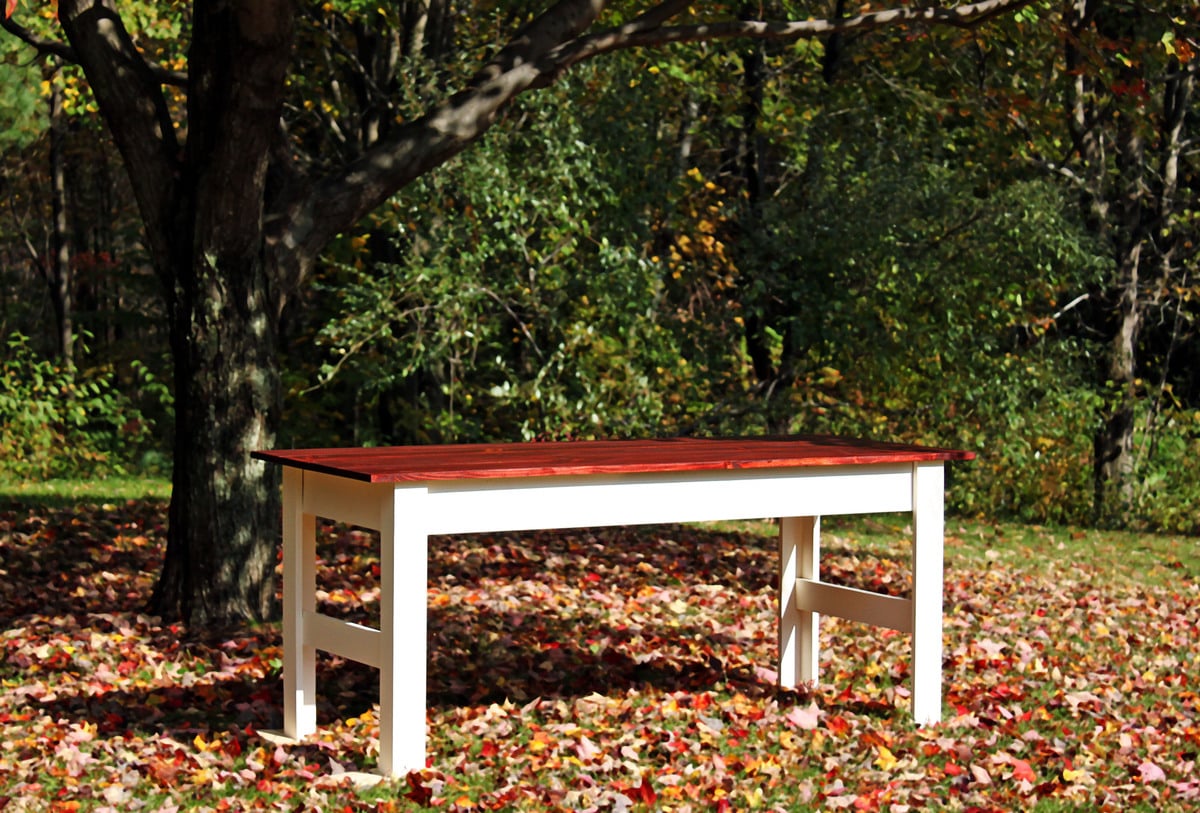
modifications to plans: legs not tapered; shortened table by two feet.
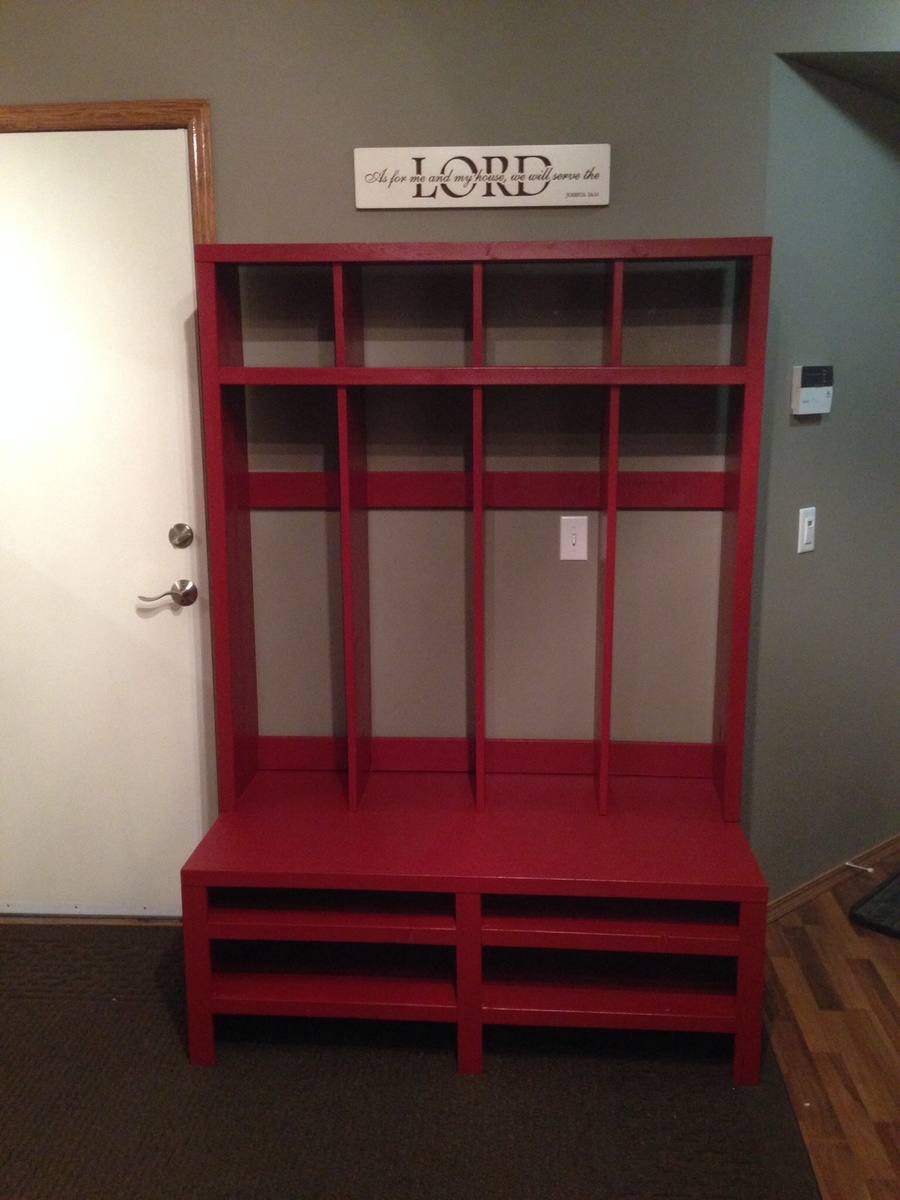
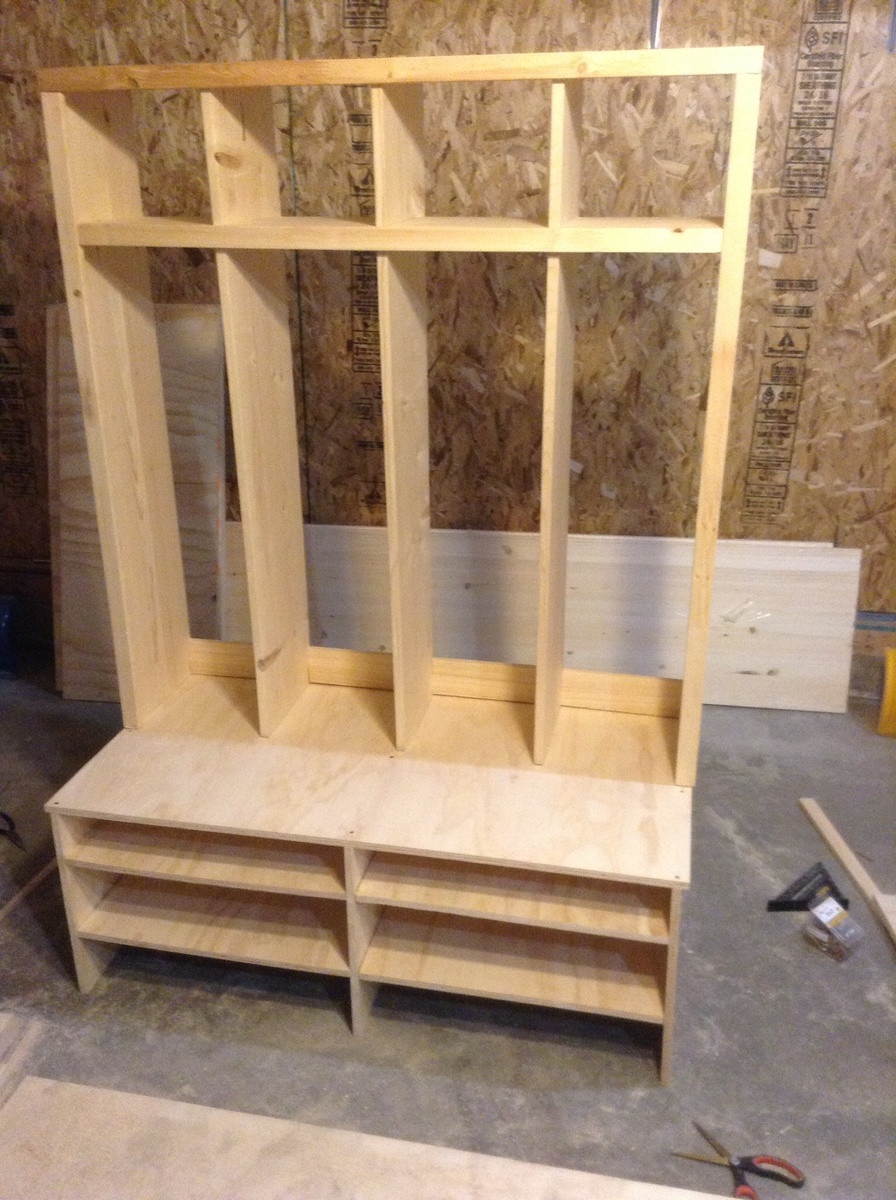
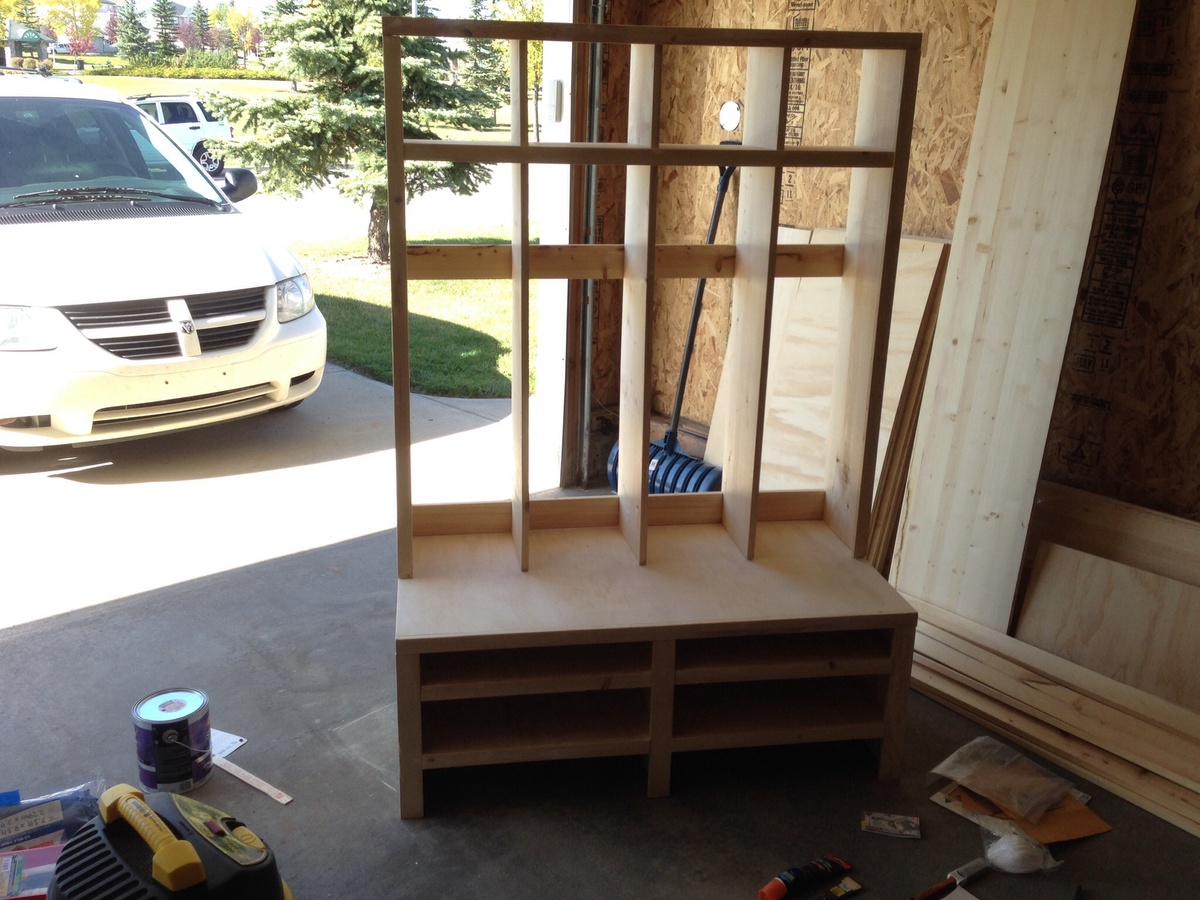
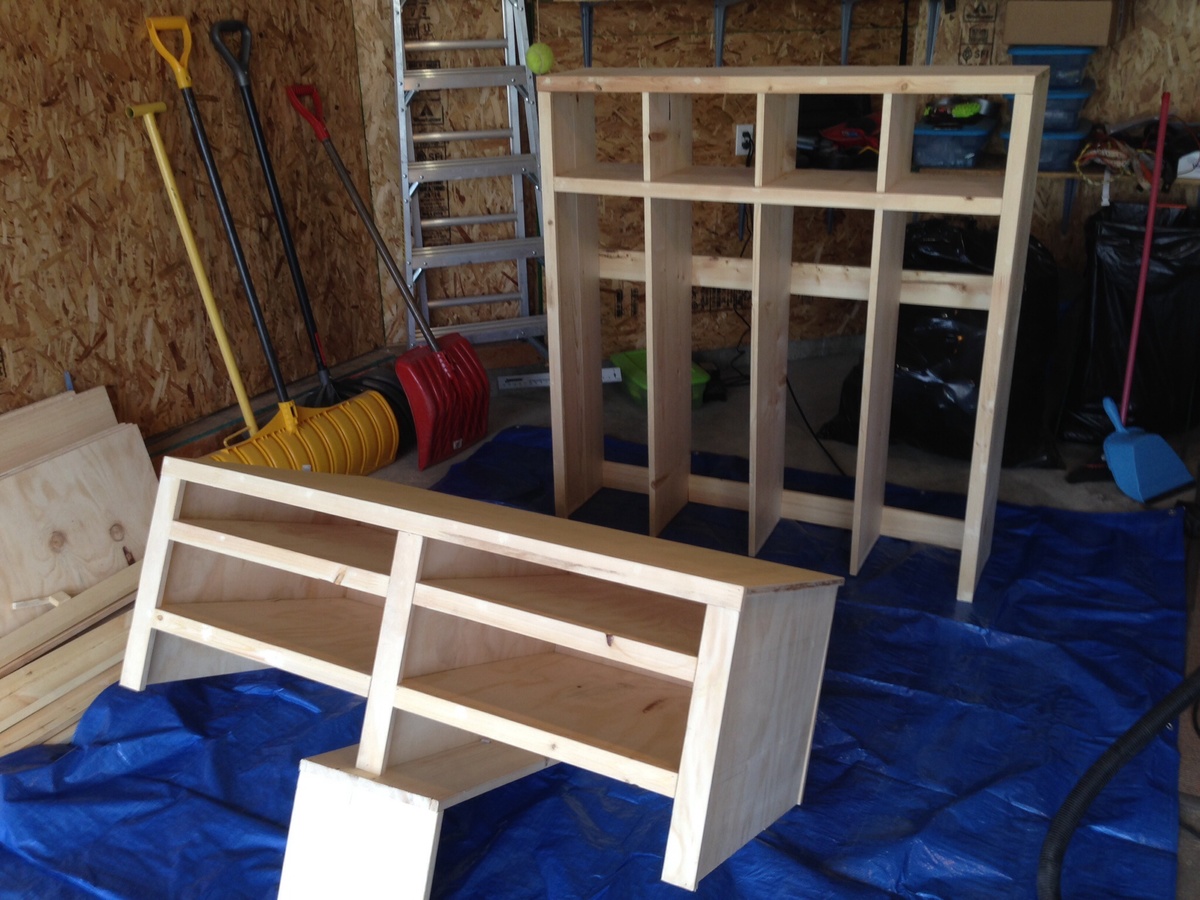
I modified the Braden Shoe Shelf plans to fit our entry space. I also wanted 4 cubbies, one for each family member. This was a Huge learning experience for me but I loved every minute.
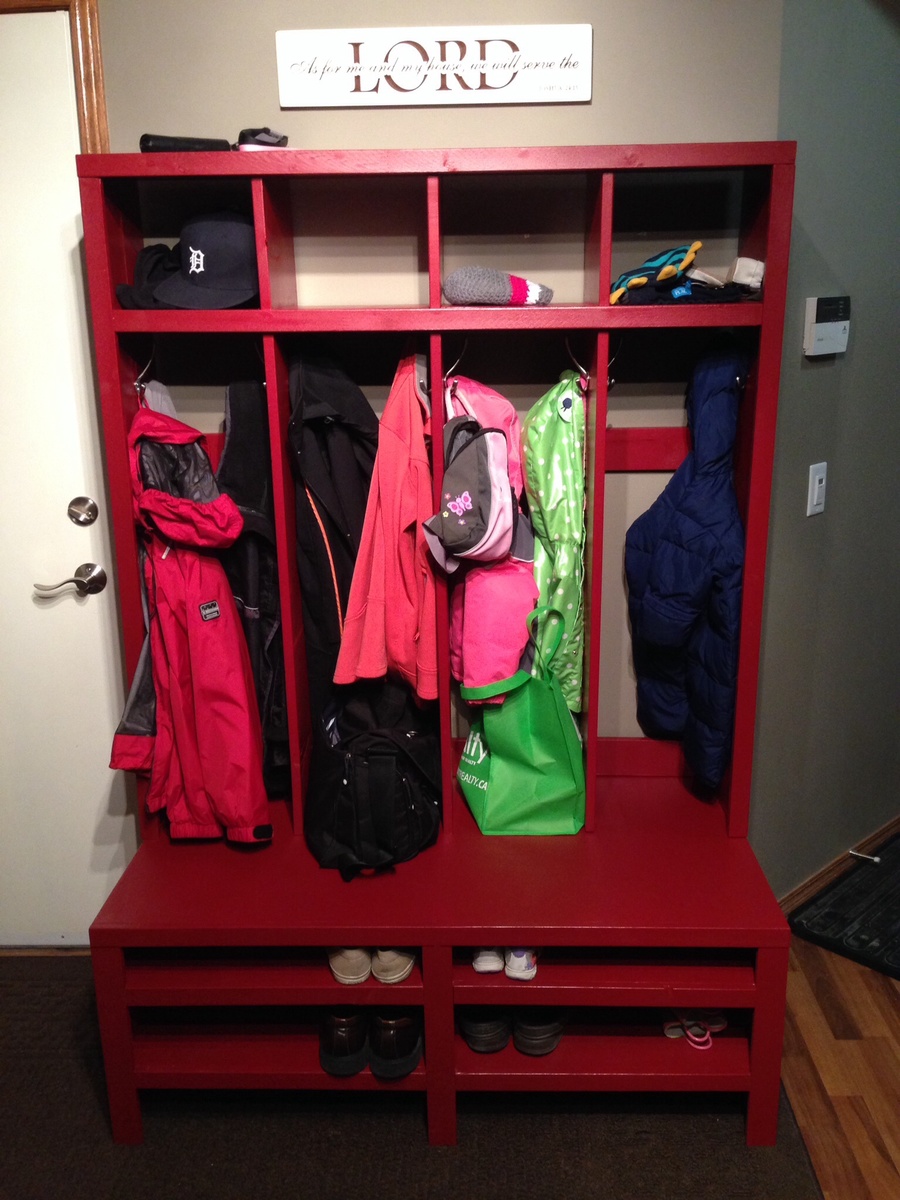
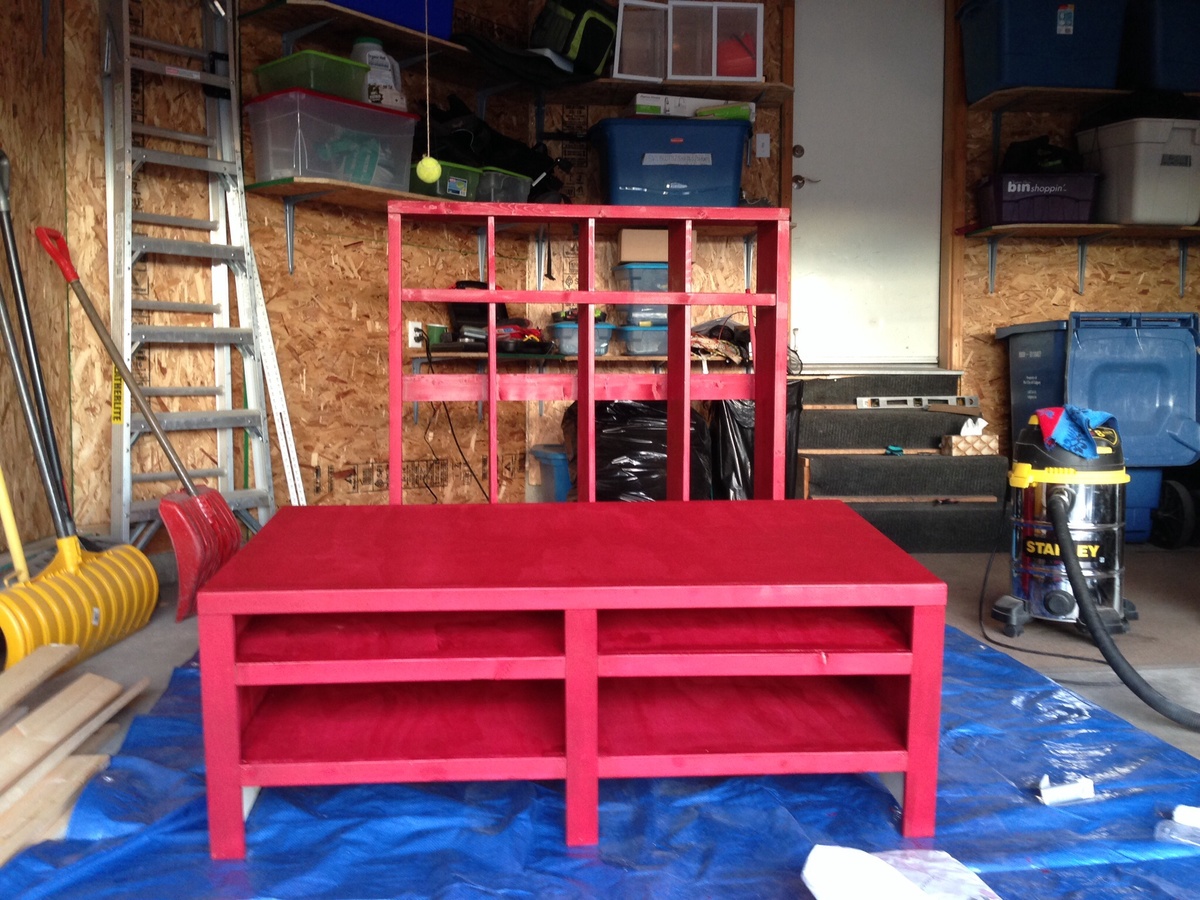
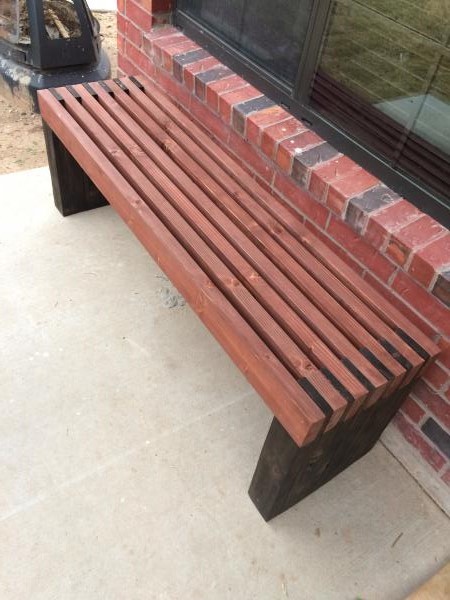
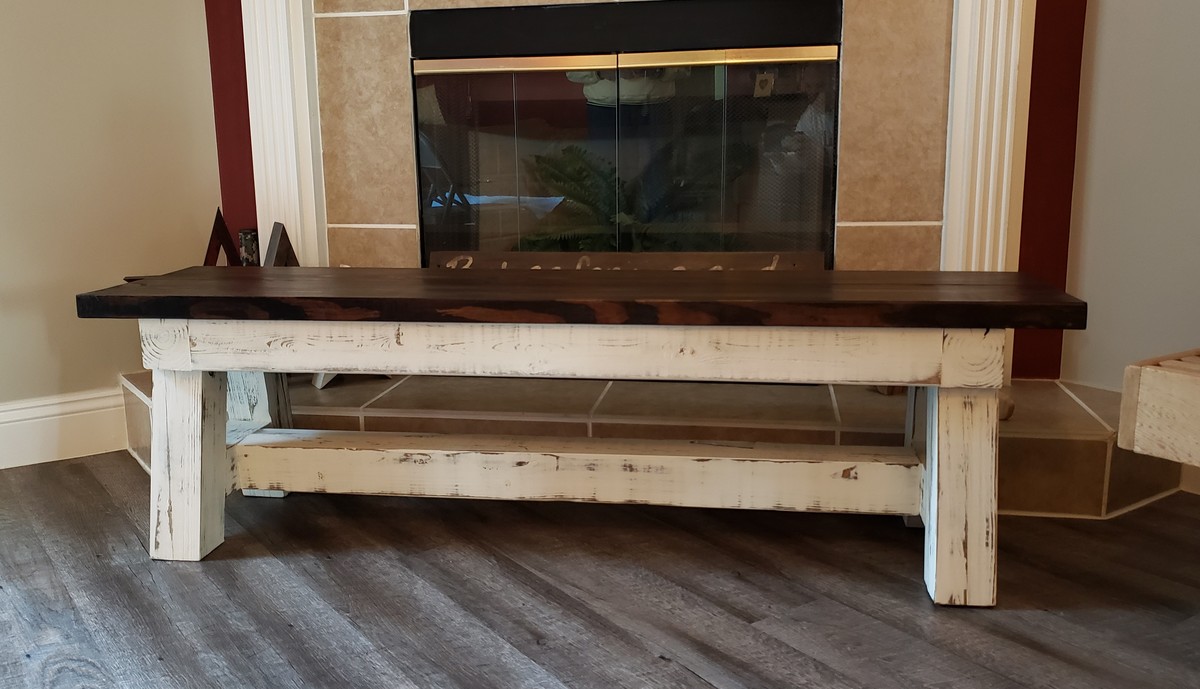
I followed Ana's instructions except for my bench was 56" in length and stained the top red bottom brown.
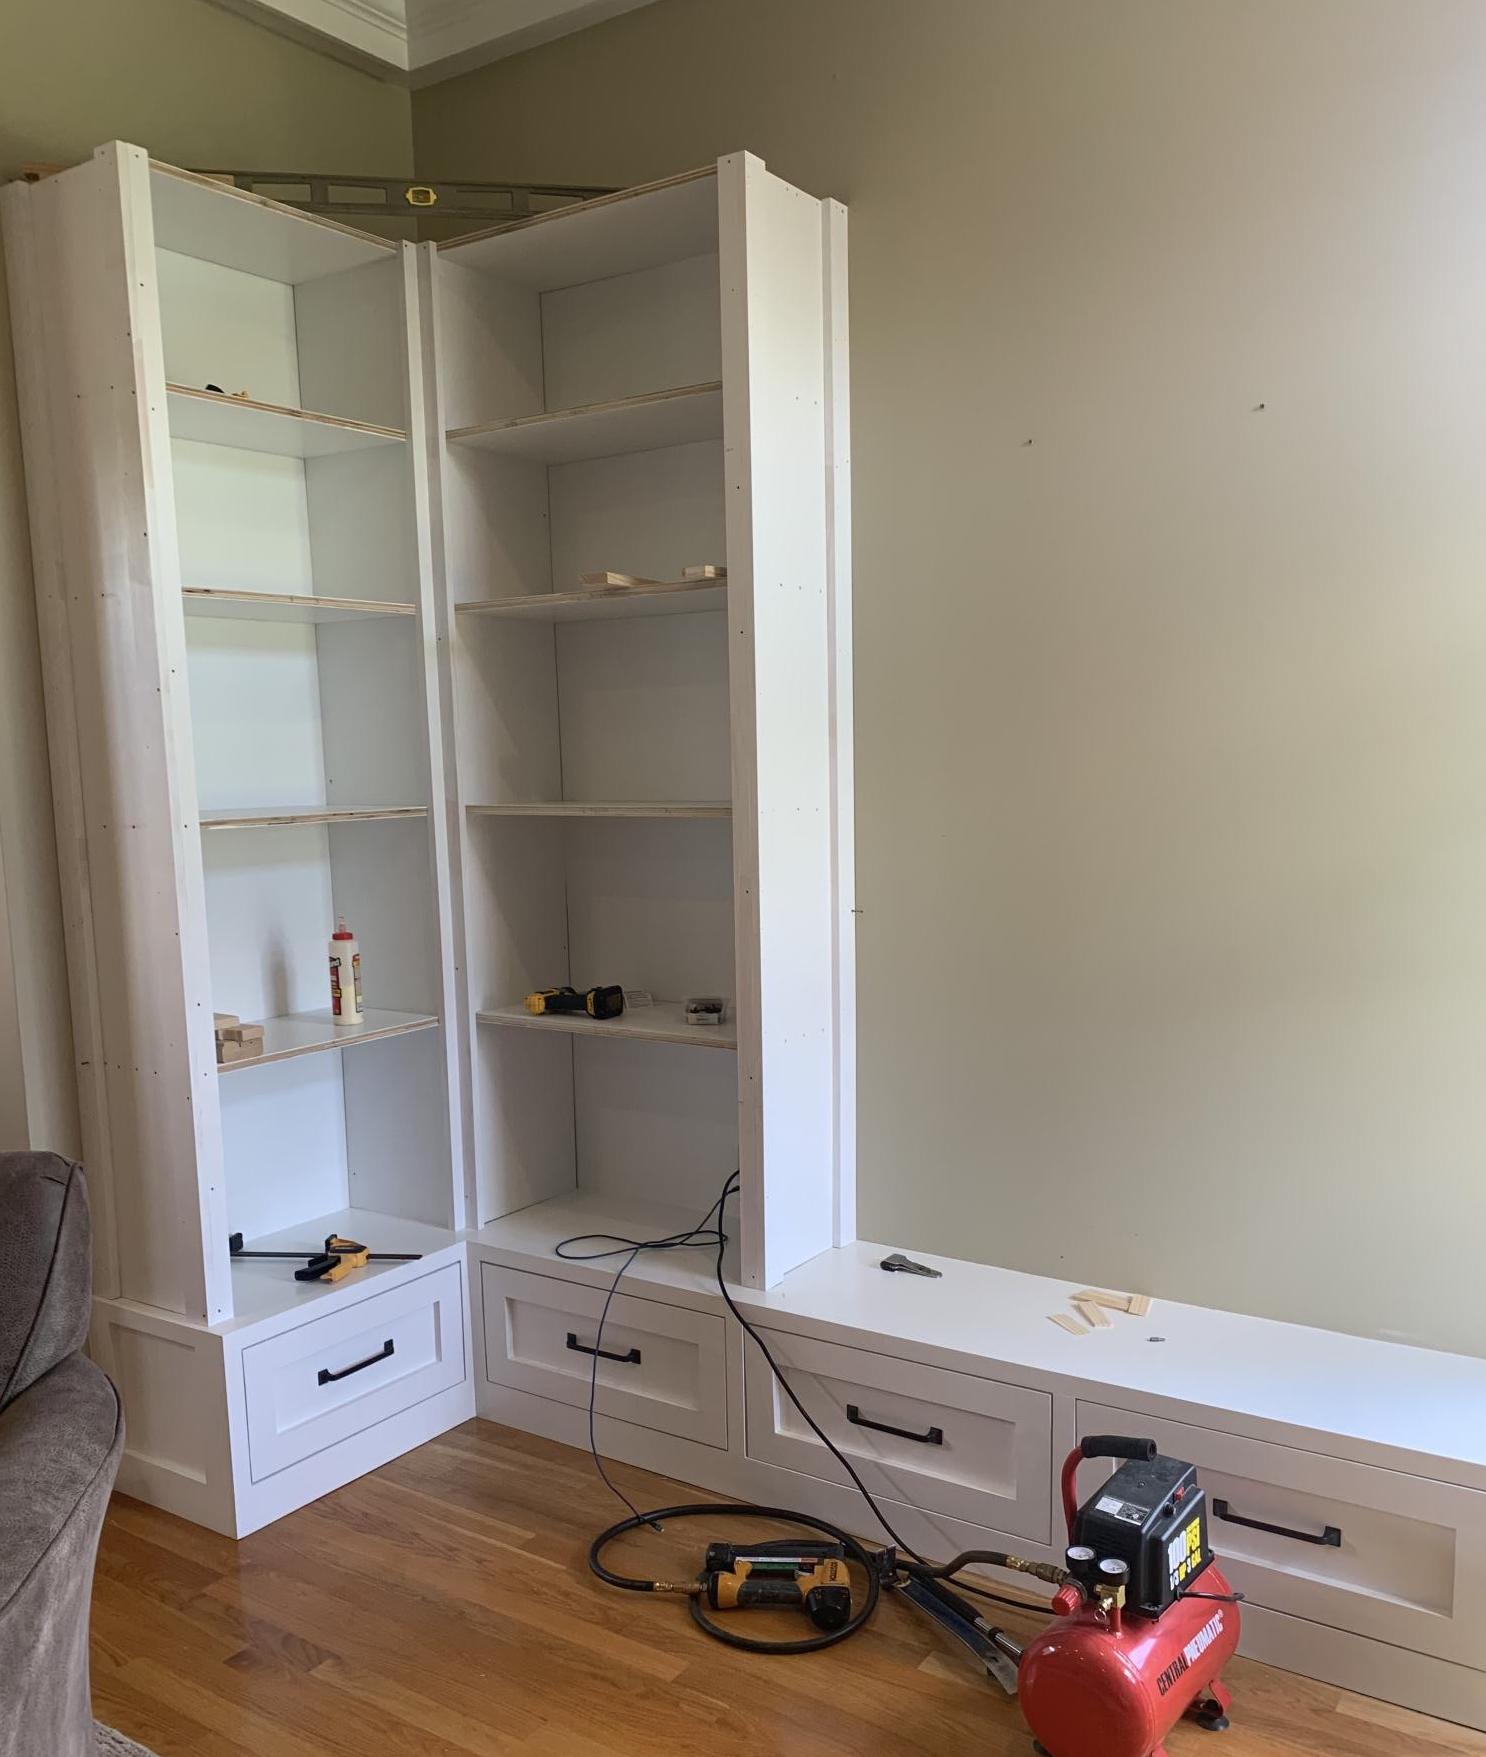
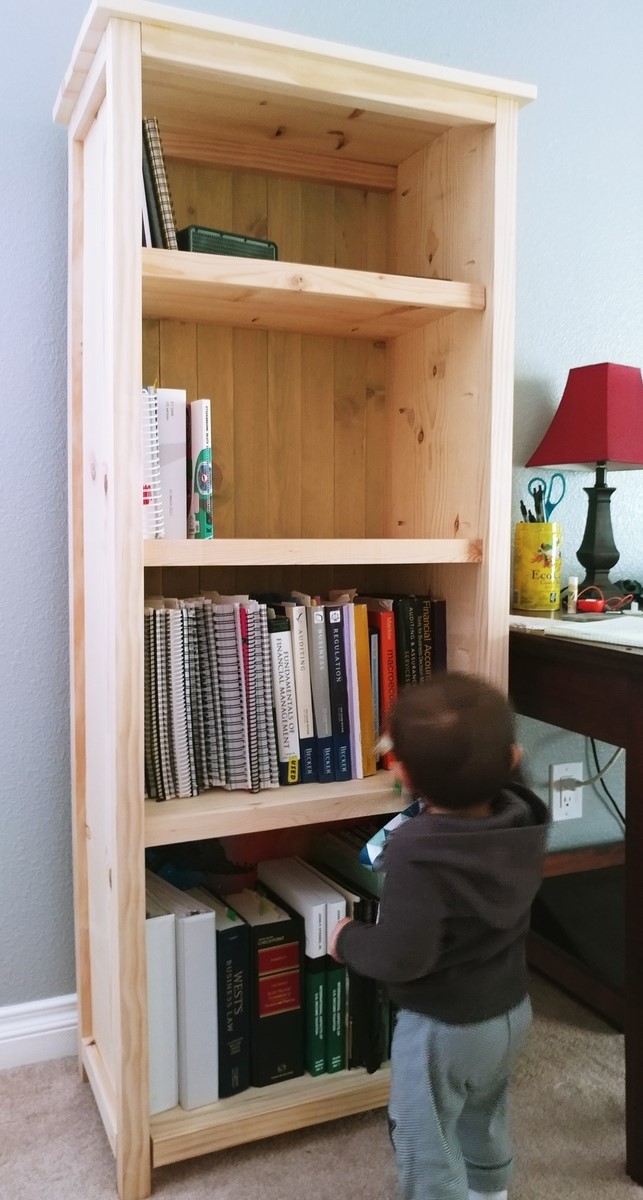
Thanks for the inspiration! First time building something this massive. I have 10 foot ceilings. Bookcases are about t 9 foot tall.
Comments
Ana White Admin
Sat, 01/14/2023 - 12:51
Looks amazing!
WOW! Beautiful finish for sure, thank you for sharing!