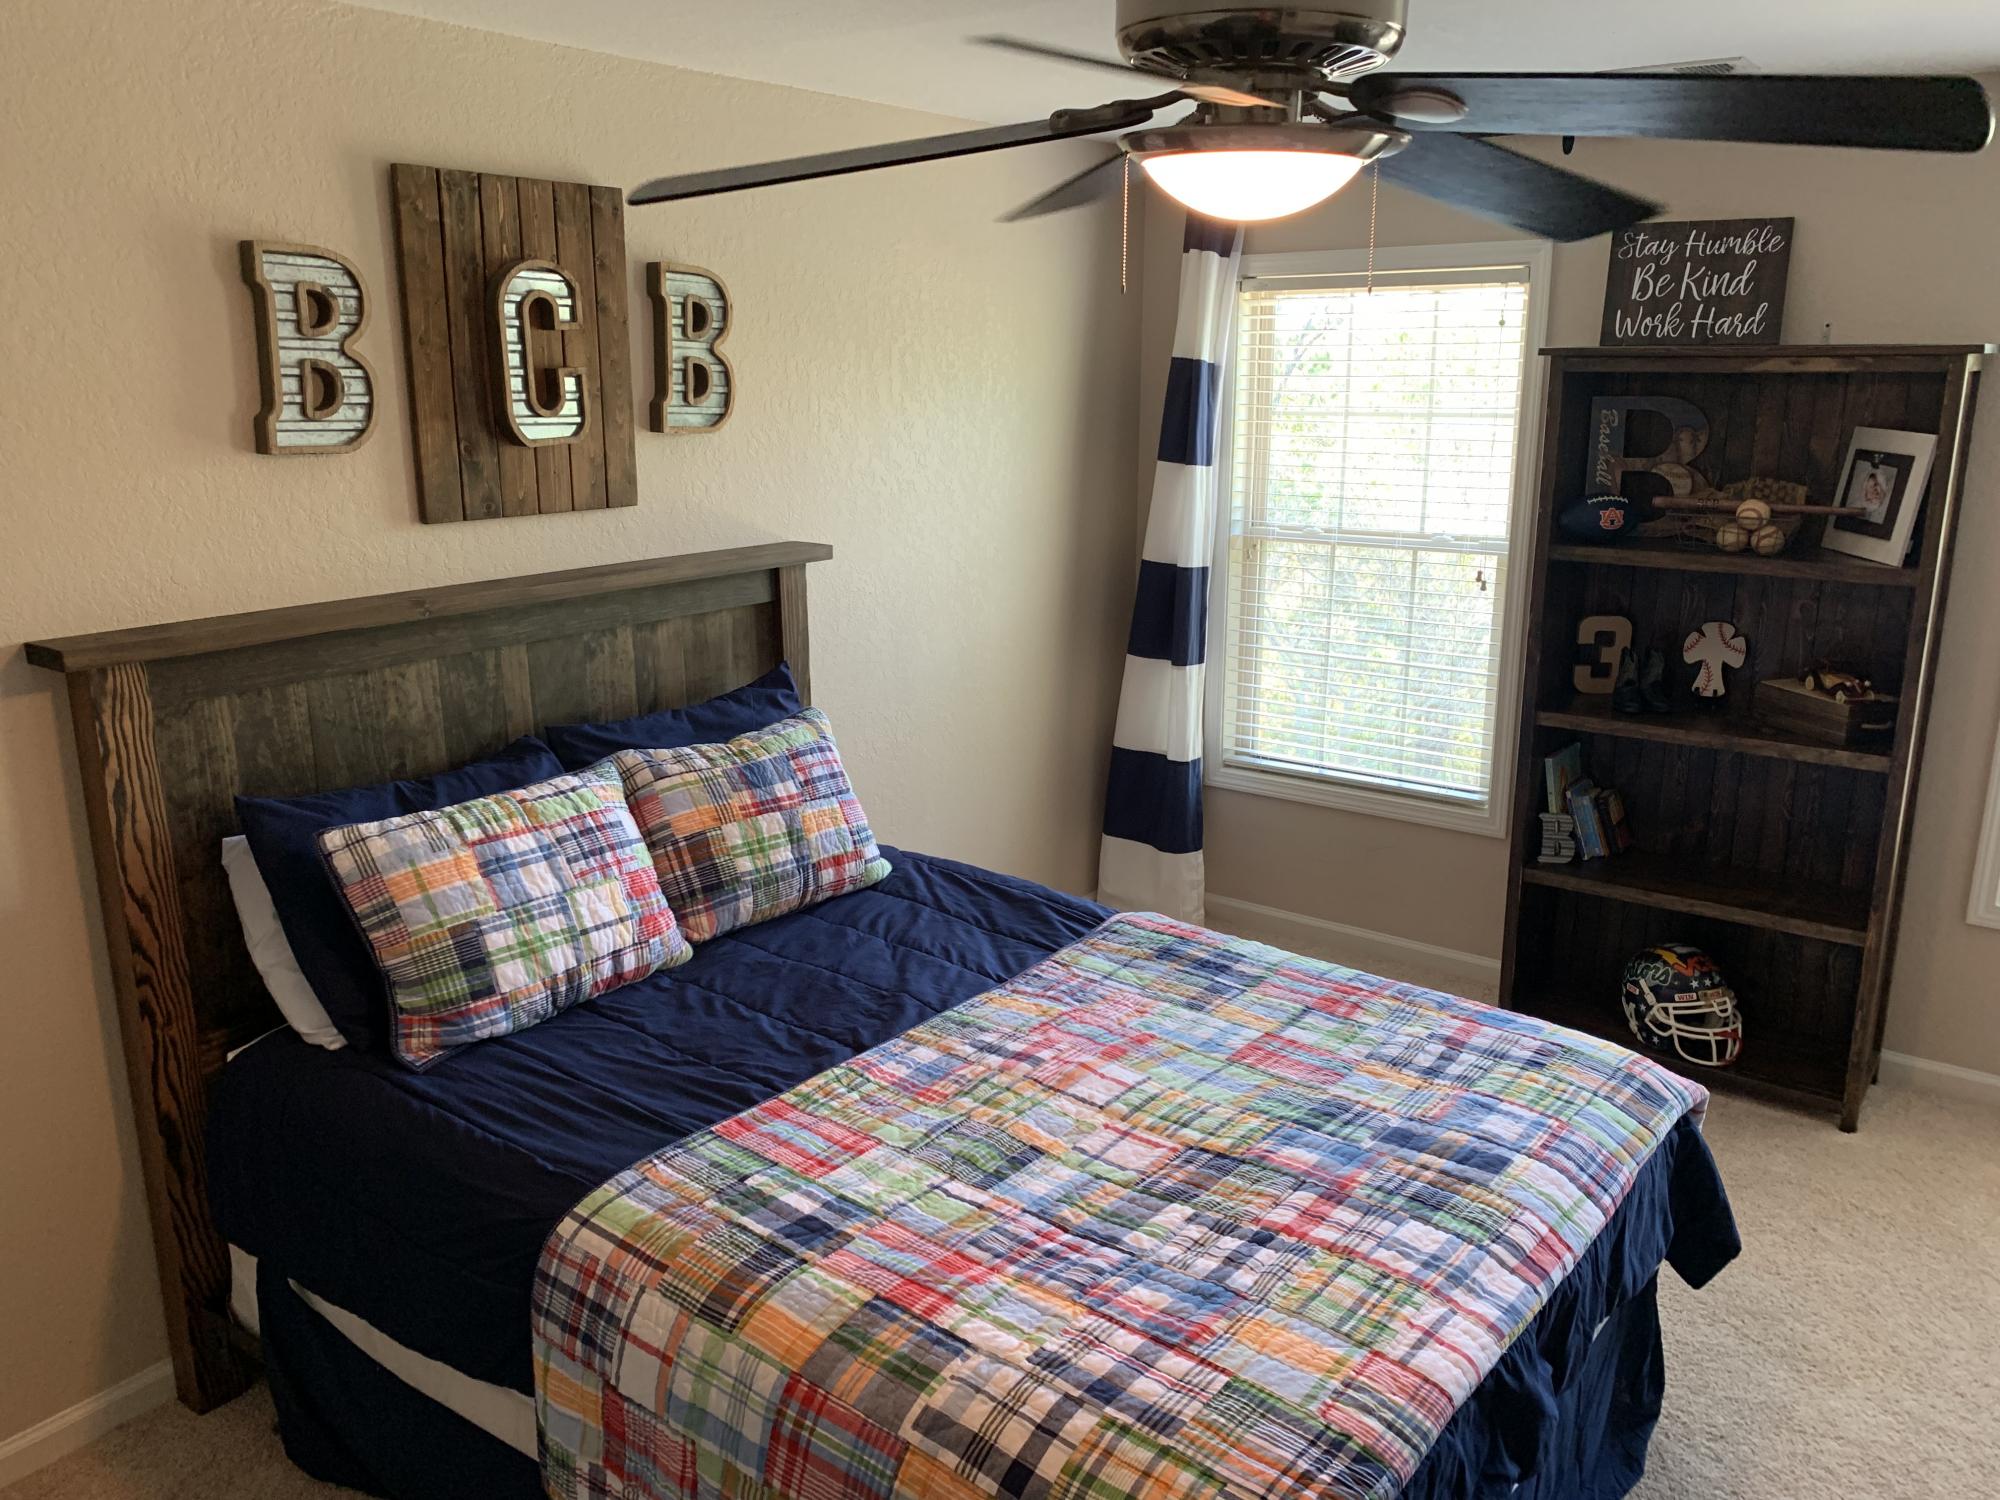
Community Brag Posts
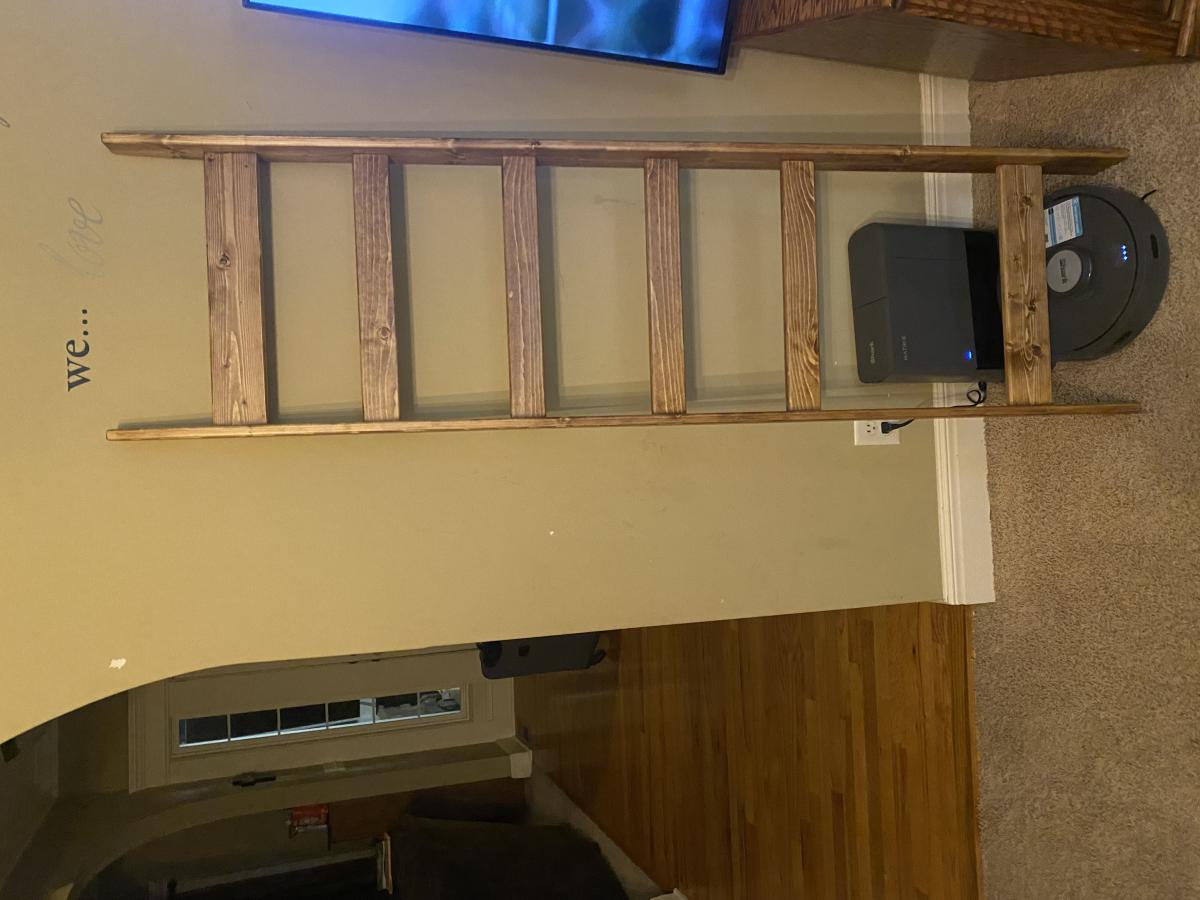
Ladder blanket rack
Made this ladder blanket rack and stained it. Only my second project that I have stained. I’m not around the learning curve yet. Works very well and hides our robo vac well. I did have a mishap - lesson learned don’t put kreg screws in for a test fit and then remove them. All of the holes stripped out while doing final assembly after finishing and I had to plug the holes to be able to finish it.
Built from Plan(s)
Comments
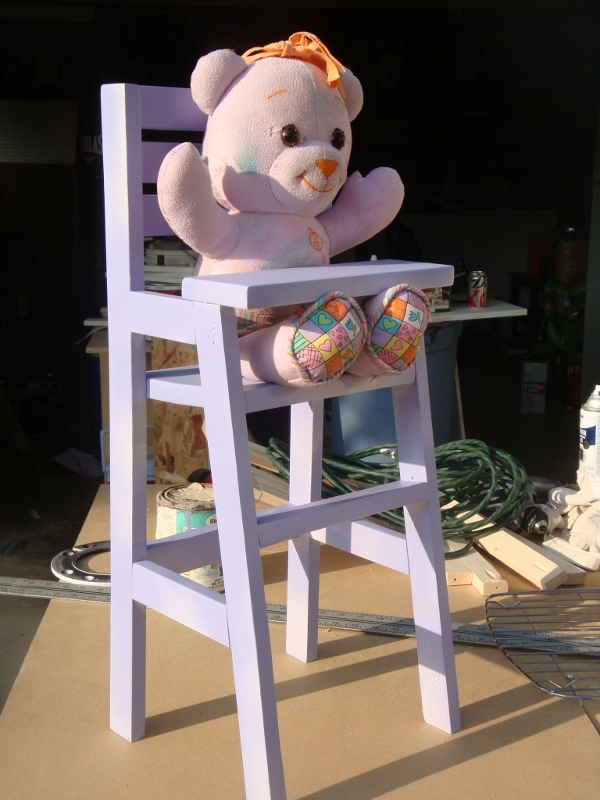
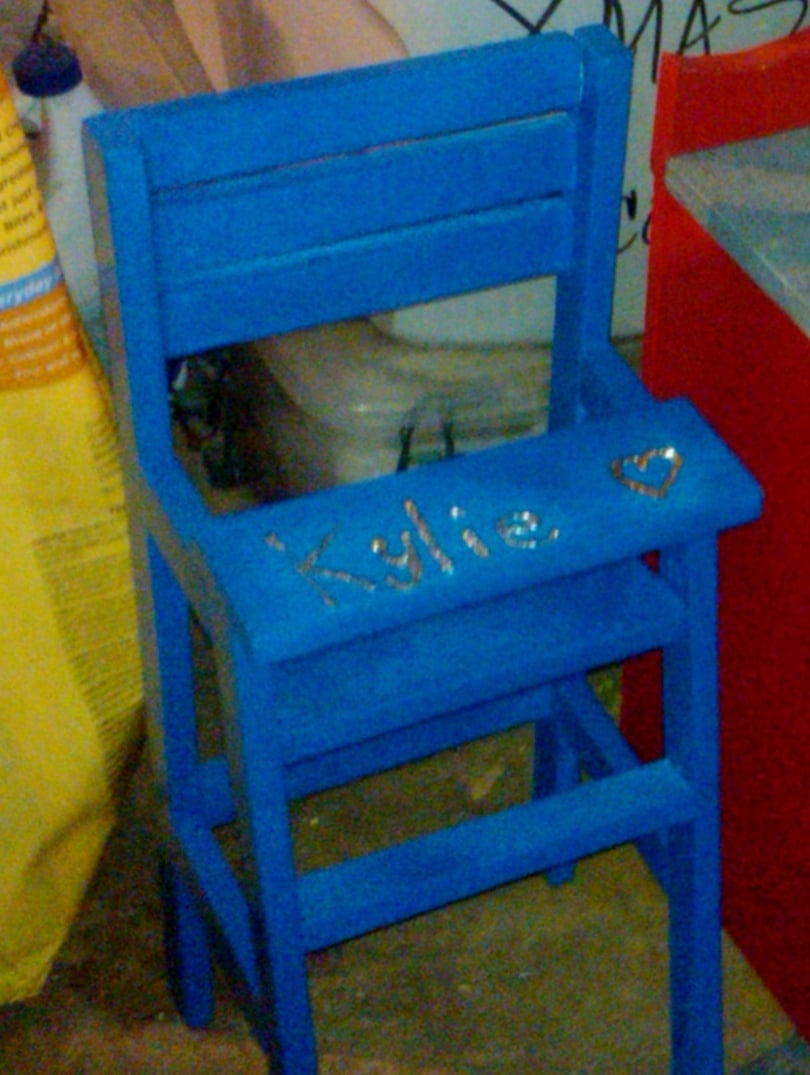
Doll High Chair
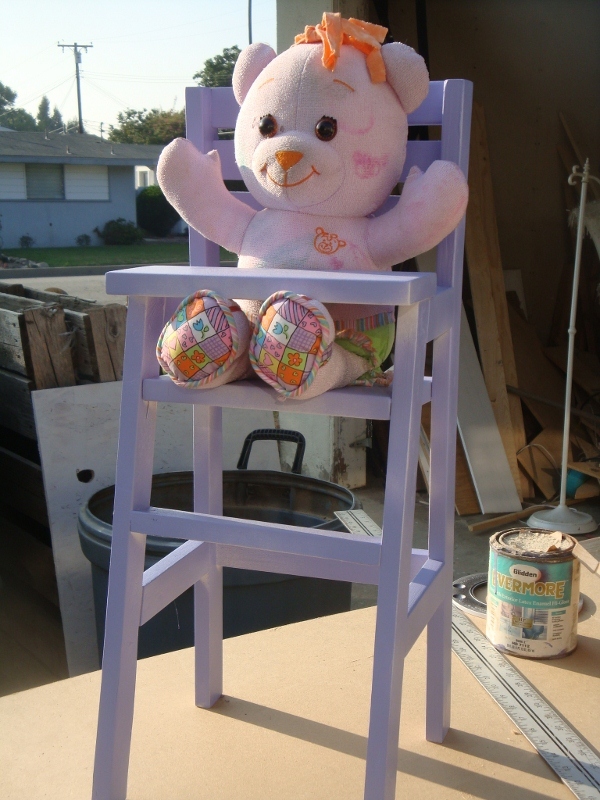
I love this design, Ana has created the perfect toy, esp to give as Birthday presents! The size is perfect, very sturdy, I put mine together with Kreg Jig. I've made 7 so far, the first time I made it, I didn't have a 1x8, and ended up Jigging 2 1x4's together. Worked so well, I do it every time now. I like to make these, fully sanding the piece before I put it together, and letting my niece or whoever is recieving it, paint it themselves. It's a great way to spend an afternoon with your aunt
Blog is under construction, I will be posting additional high chairs as I make them
Built from Plan(s)
Estimated Cost
15 if I bought the wood, use scraps and leftover screws
Estimated Time Investment
Afternoon Project (3-6 Hours)
Finish Used
Kilz primer, and semigloss paint. This is a project I let the kids paint, and I always tell them, "It always dries different." When they go down for their nap or bed, I come behind and touch it up.
My nieces have used glitter pens to write their names on them, and I've spray Poly'd which holds up well
My nieces have used glitter pens to write their names on them, and I've spray Poly'd which holds up well
Recommended Skill Level
Intermediate
Comments
Thu, 11/15/2012 - 02:12
Doll High Chair | Do It Yourself Home Projects from Ana White
Why viewers still use to read news papers when in this technological globe everything is
presented on net?
Our rustic outdoor bench
My younger brother, John, and I built this bench during the weekends during the first few months of "back-to-school" as a way to spend time with each other. This is a variation on the simple outdoor bench by Ana. Our mainframe was built of regular 2x4s and the slats with pine, while the legs and the exterior wood was of cedar that was leftover from when our parents built our log home 20 years ago. Since we used the cedar, we also had to wash the logs with special logwash, and wait for them to dry, so our project took a little longer than most. Due to the staining, which was the stain used on our house we ended up putting a light clear coat over top of the stain since we didn't want it to be rubbing off on our clothing during use (since it's not typically used as furniture stain). Our Dad did have to help us a bit with the log legs that needed to be cut with a chainsaw and he sandblasted (he's a stone engraver by trade) the wood to make it look a little more weathered and "rustic." Overall it was fairly simple and my brother and I are both very pleased with the outcome, and this project has driven me to start making my own simple bedroom furniture when I move out for graduate school!

Estimated Time Investment
Day Project (6-9 Hours)
Finish Used
A log house stain and wash. Would not recommend, since it requires some up keep and had to be reapplied several times, including a clear coat.
Recommended Skill Level
Beginner
Comments
Wed, 12/18/2013 - 09:16
It is beautiful.
I love the rustic look, but that it is also very useful. Lovely.
My "almost" outdoor sofa
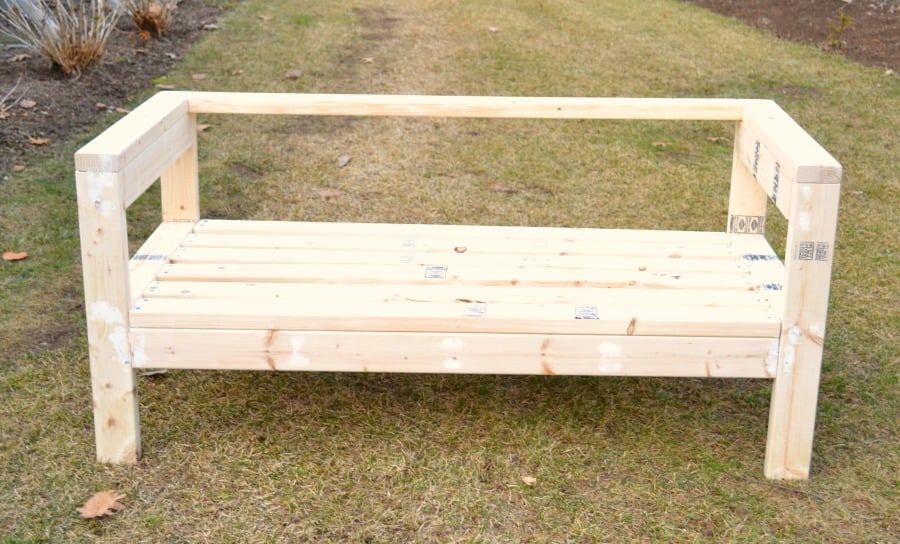
I have been looking for something to add extra seating to my deck while also filling an awkward corner that I have never been able to find prefab furniture to fit. This build reminded me a lot of the large X bench that Ana made for her cabin (that I also built for my front porch.) It is super simple and so sturdy. I can't wait to sew cushions for it and build the second half.
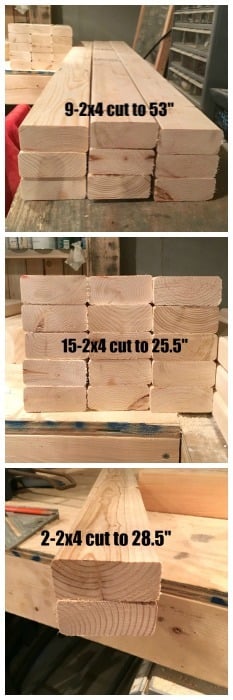
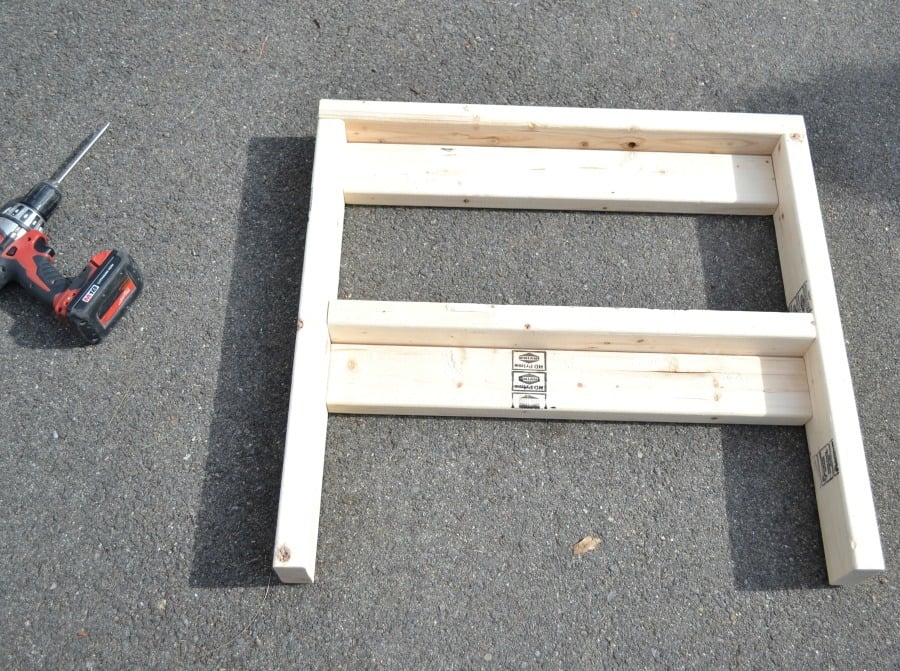
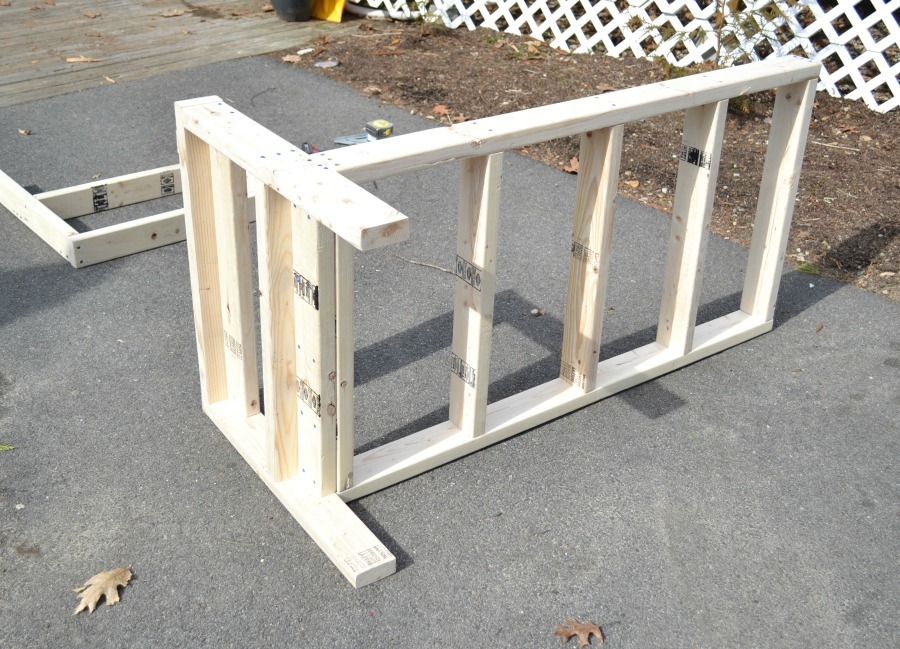
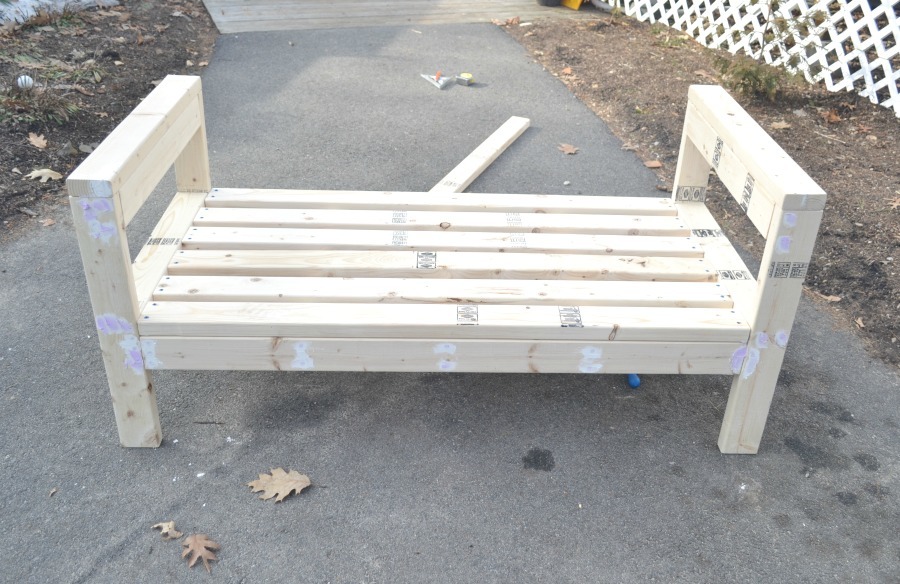
Estimated Cost
$30-$40
Estimated Time Investment
Afternoon Project (3-6 Hours)
Recommended Skill Level
Starter Project
Chunky leg table
I made this table from the husky farmhouse table plan, I have loved this table since I first saw the plan. I used 4” legs instead of 5” and 1x6’s for the top. It turned out beautifully. I did purchase the Osborne legs as recommended.
Estimated Cost
$300
Estimated Time Investment
Day Project (6-9 Hours)
Finish Used
Top: stained with “Early american satin stain.
Legs and base: sarin black spray paint.
Legs and base: sarin black spray paint.
Recommended Skill Level
Intermediate
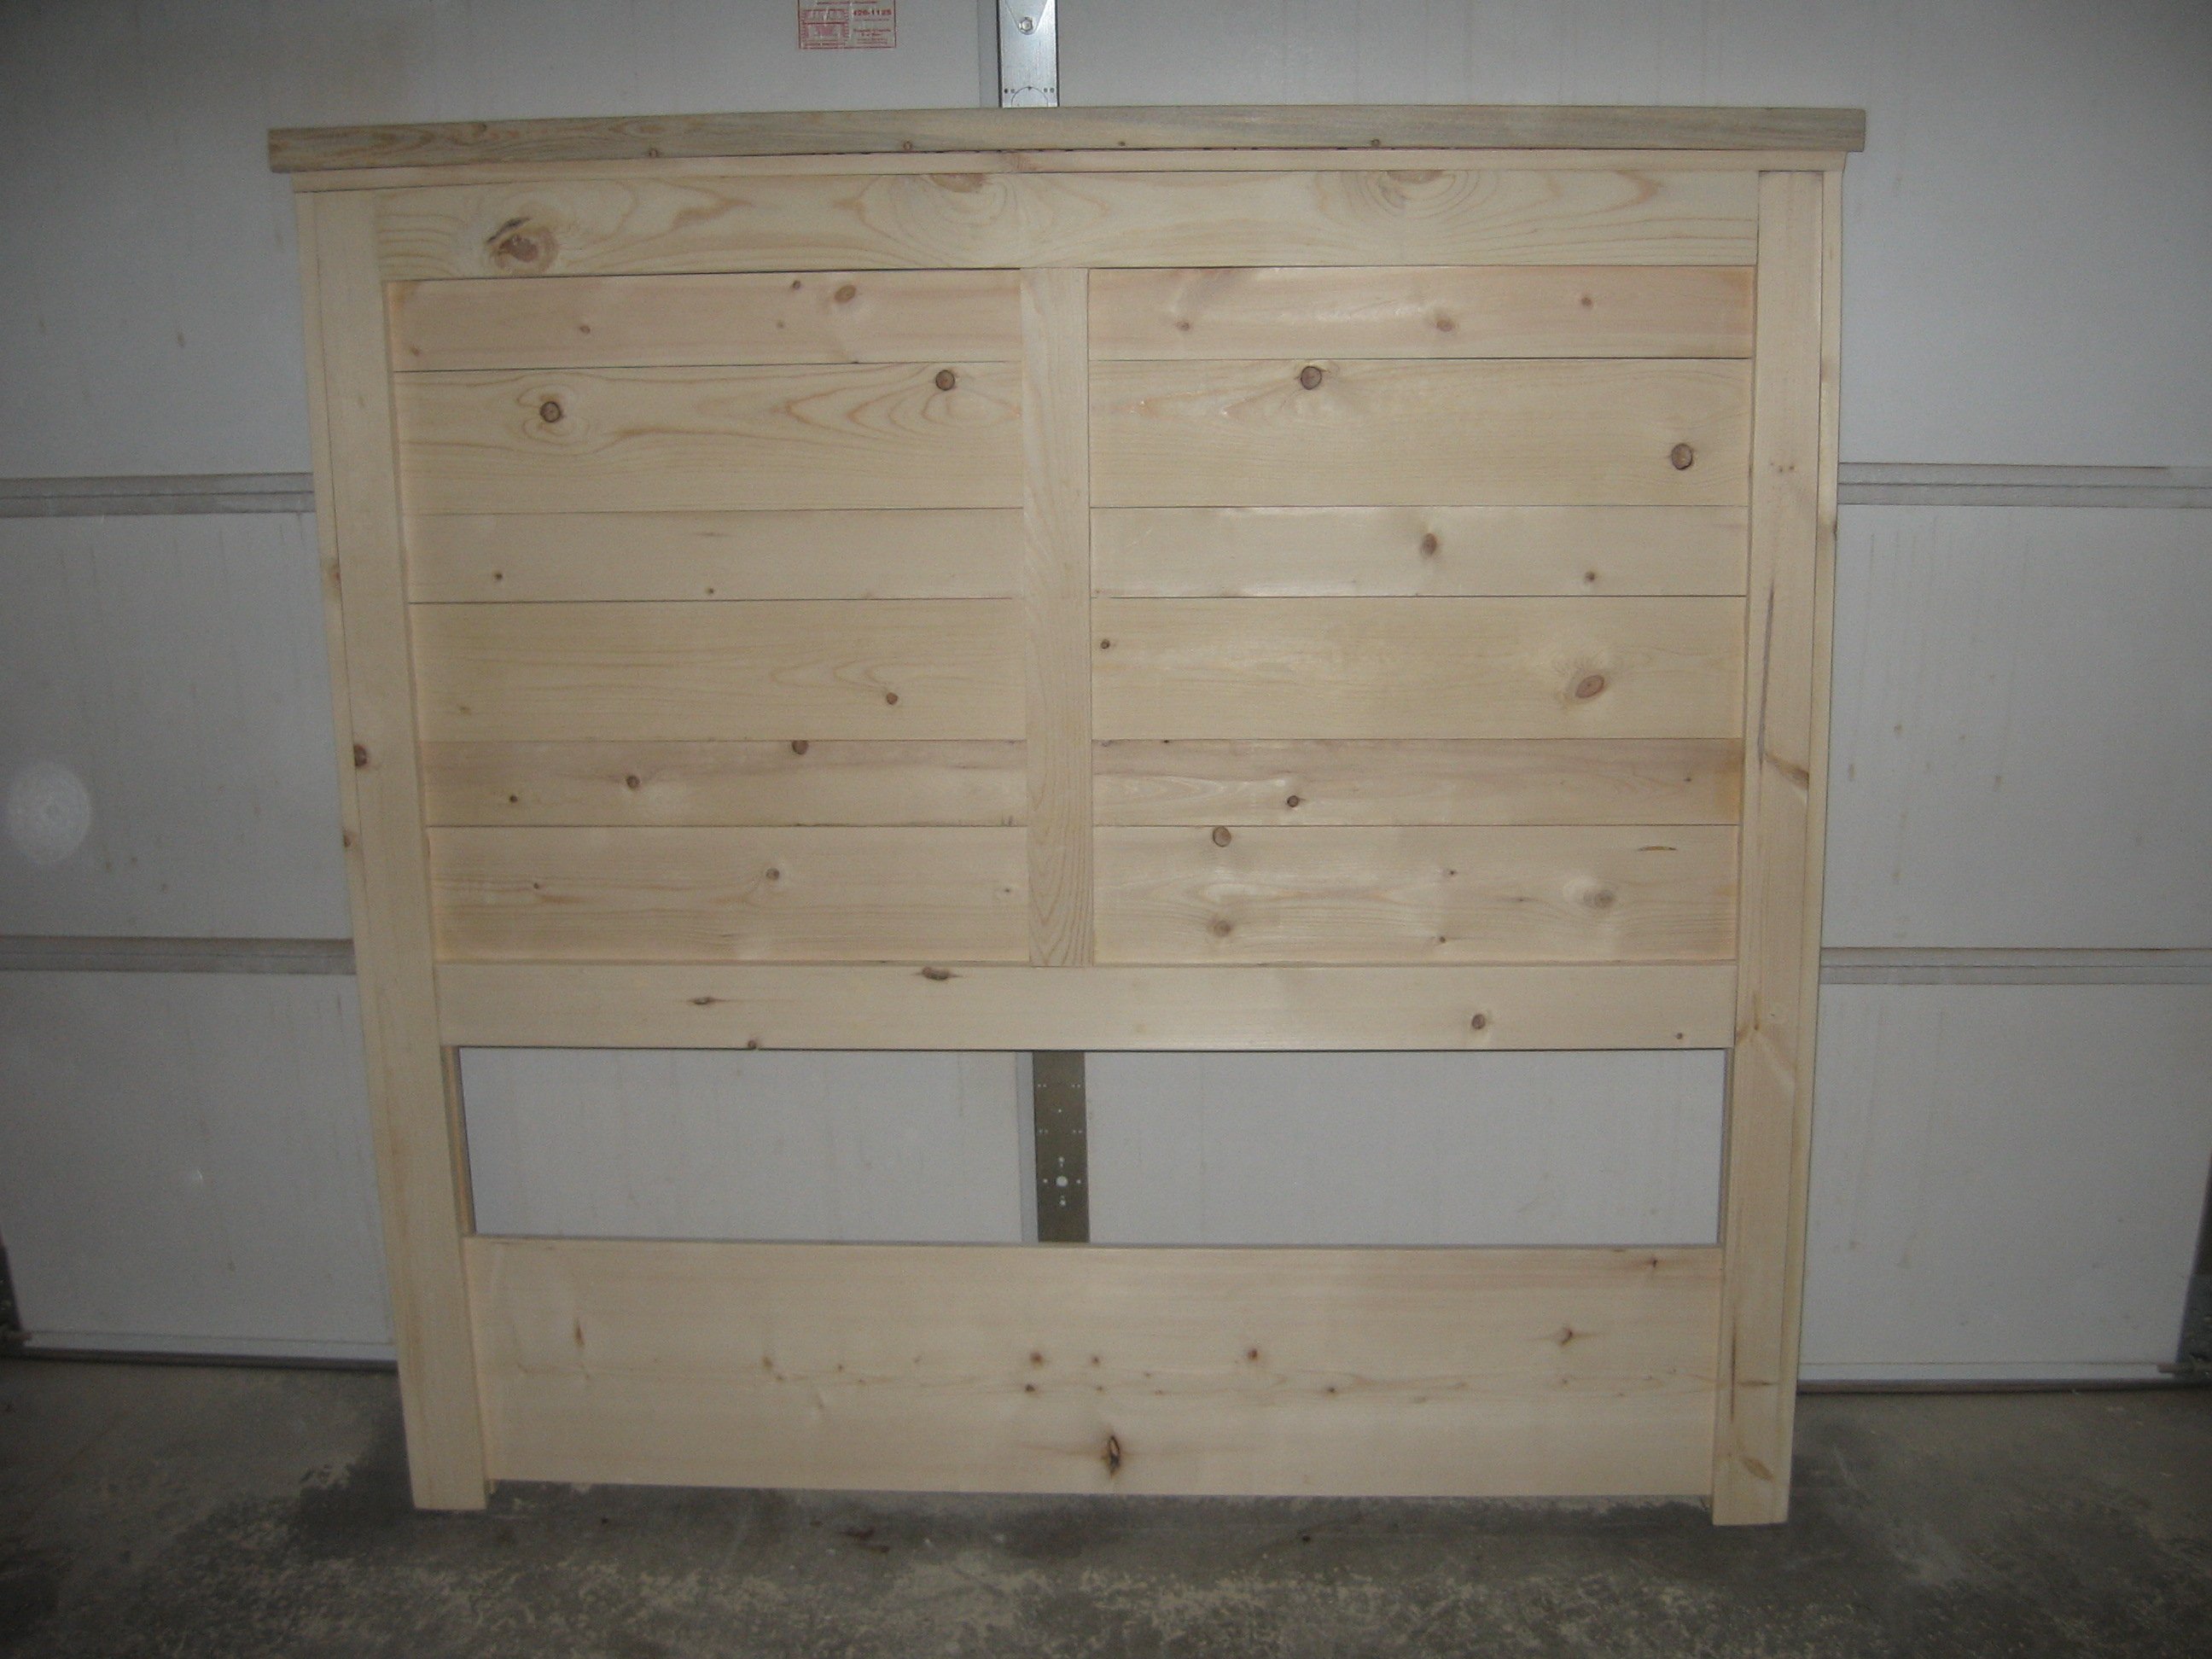
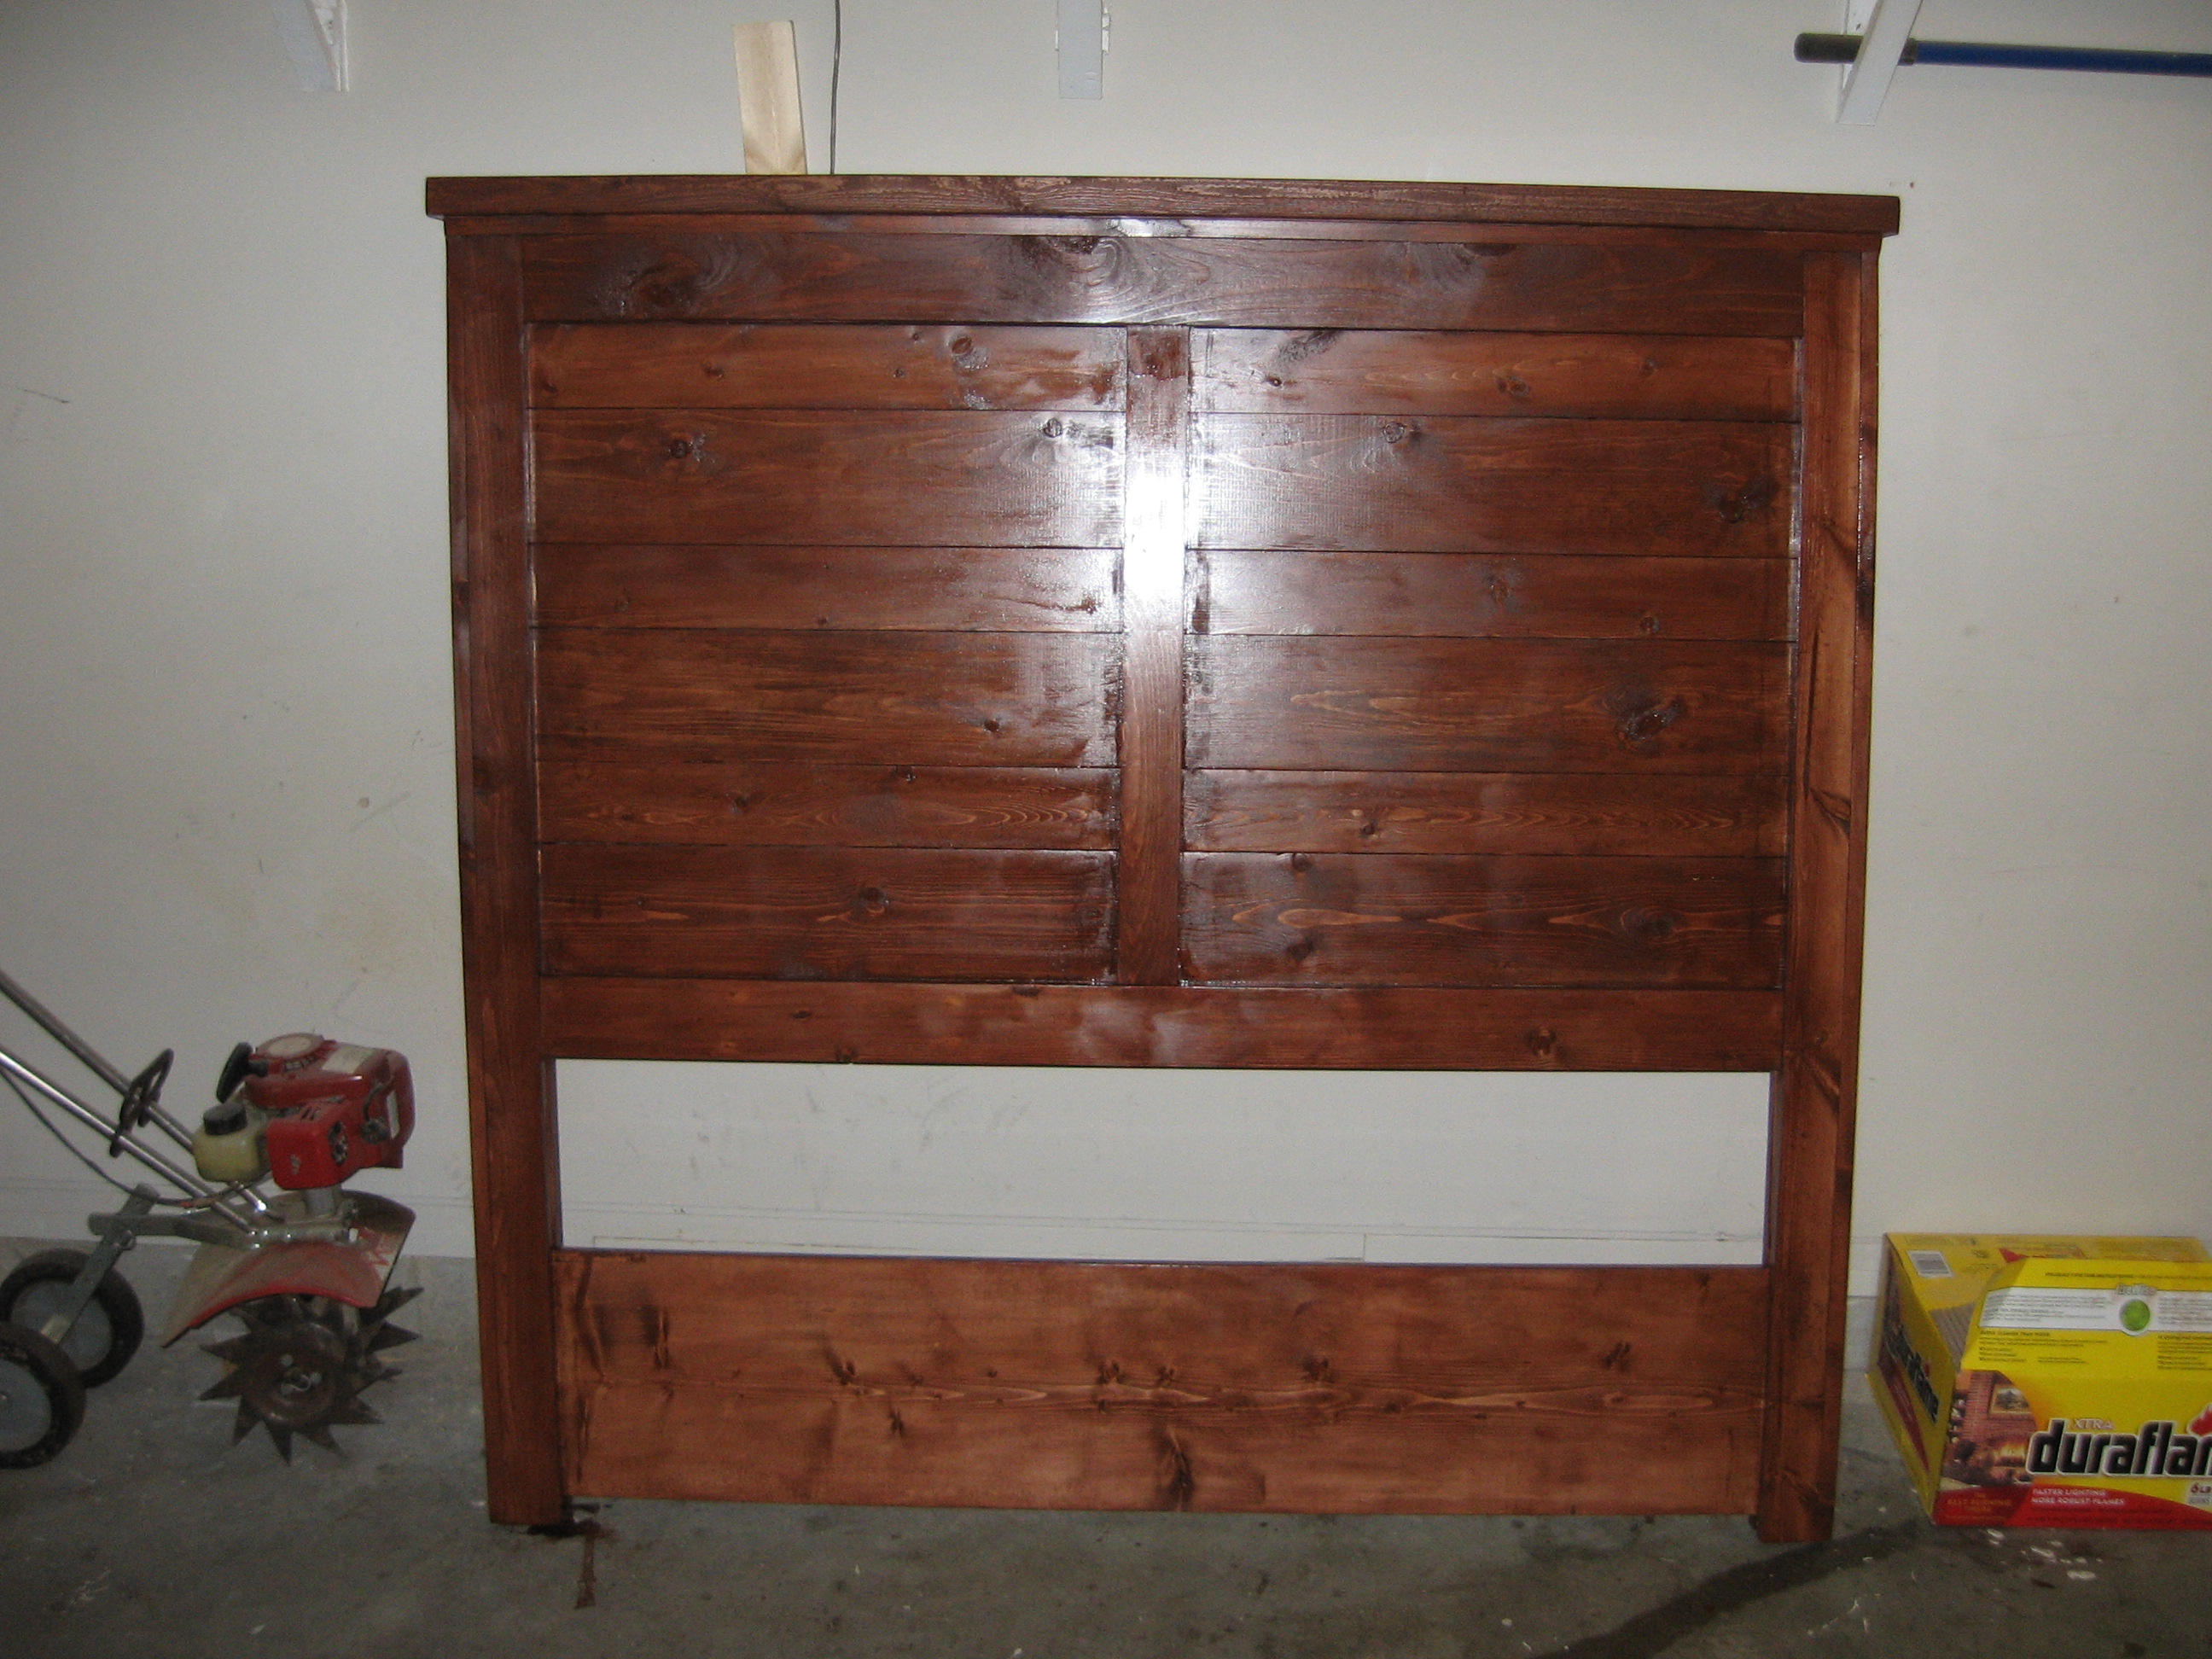
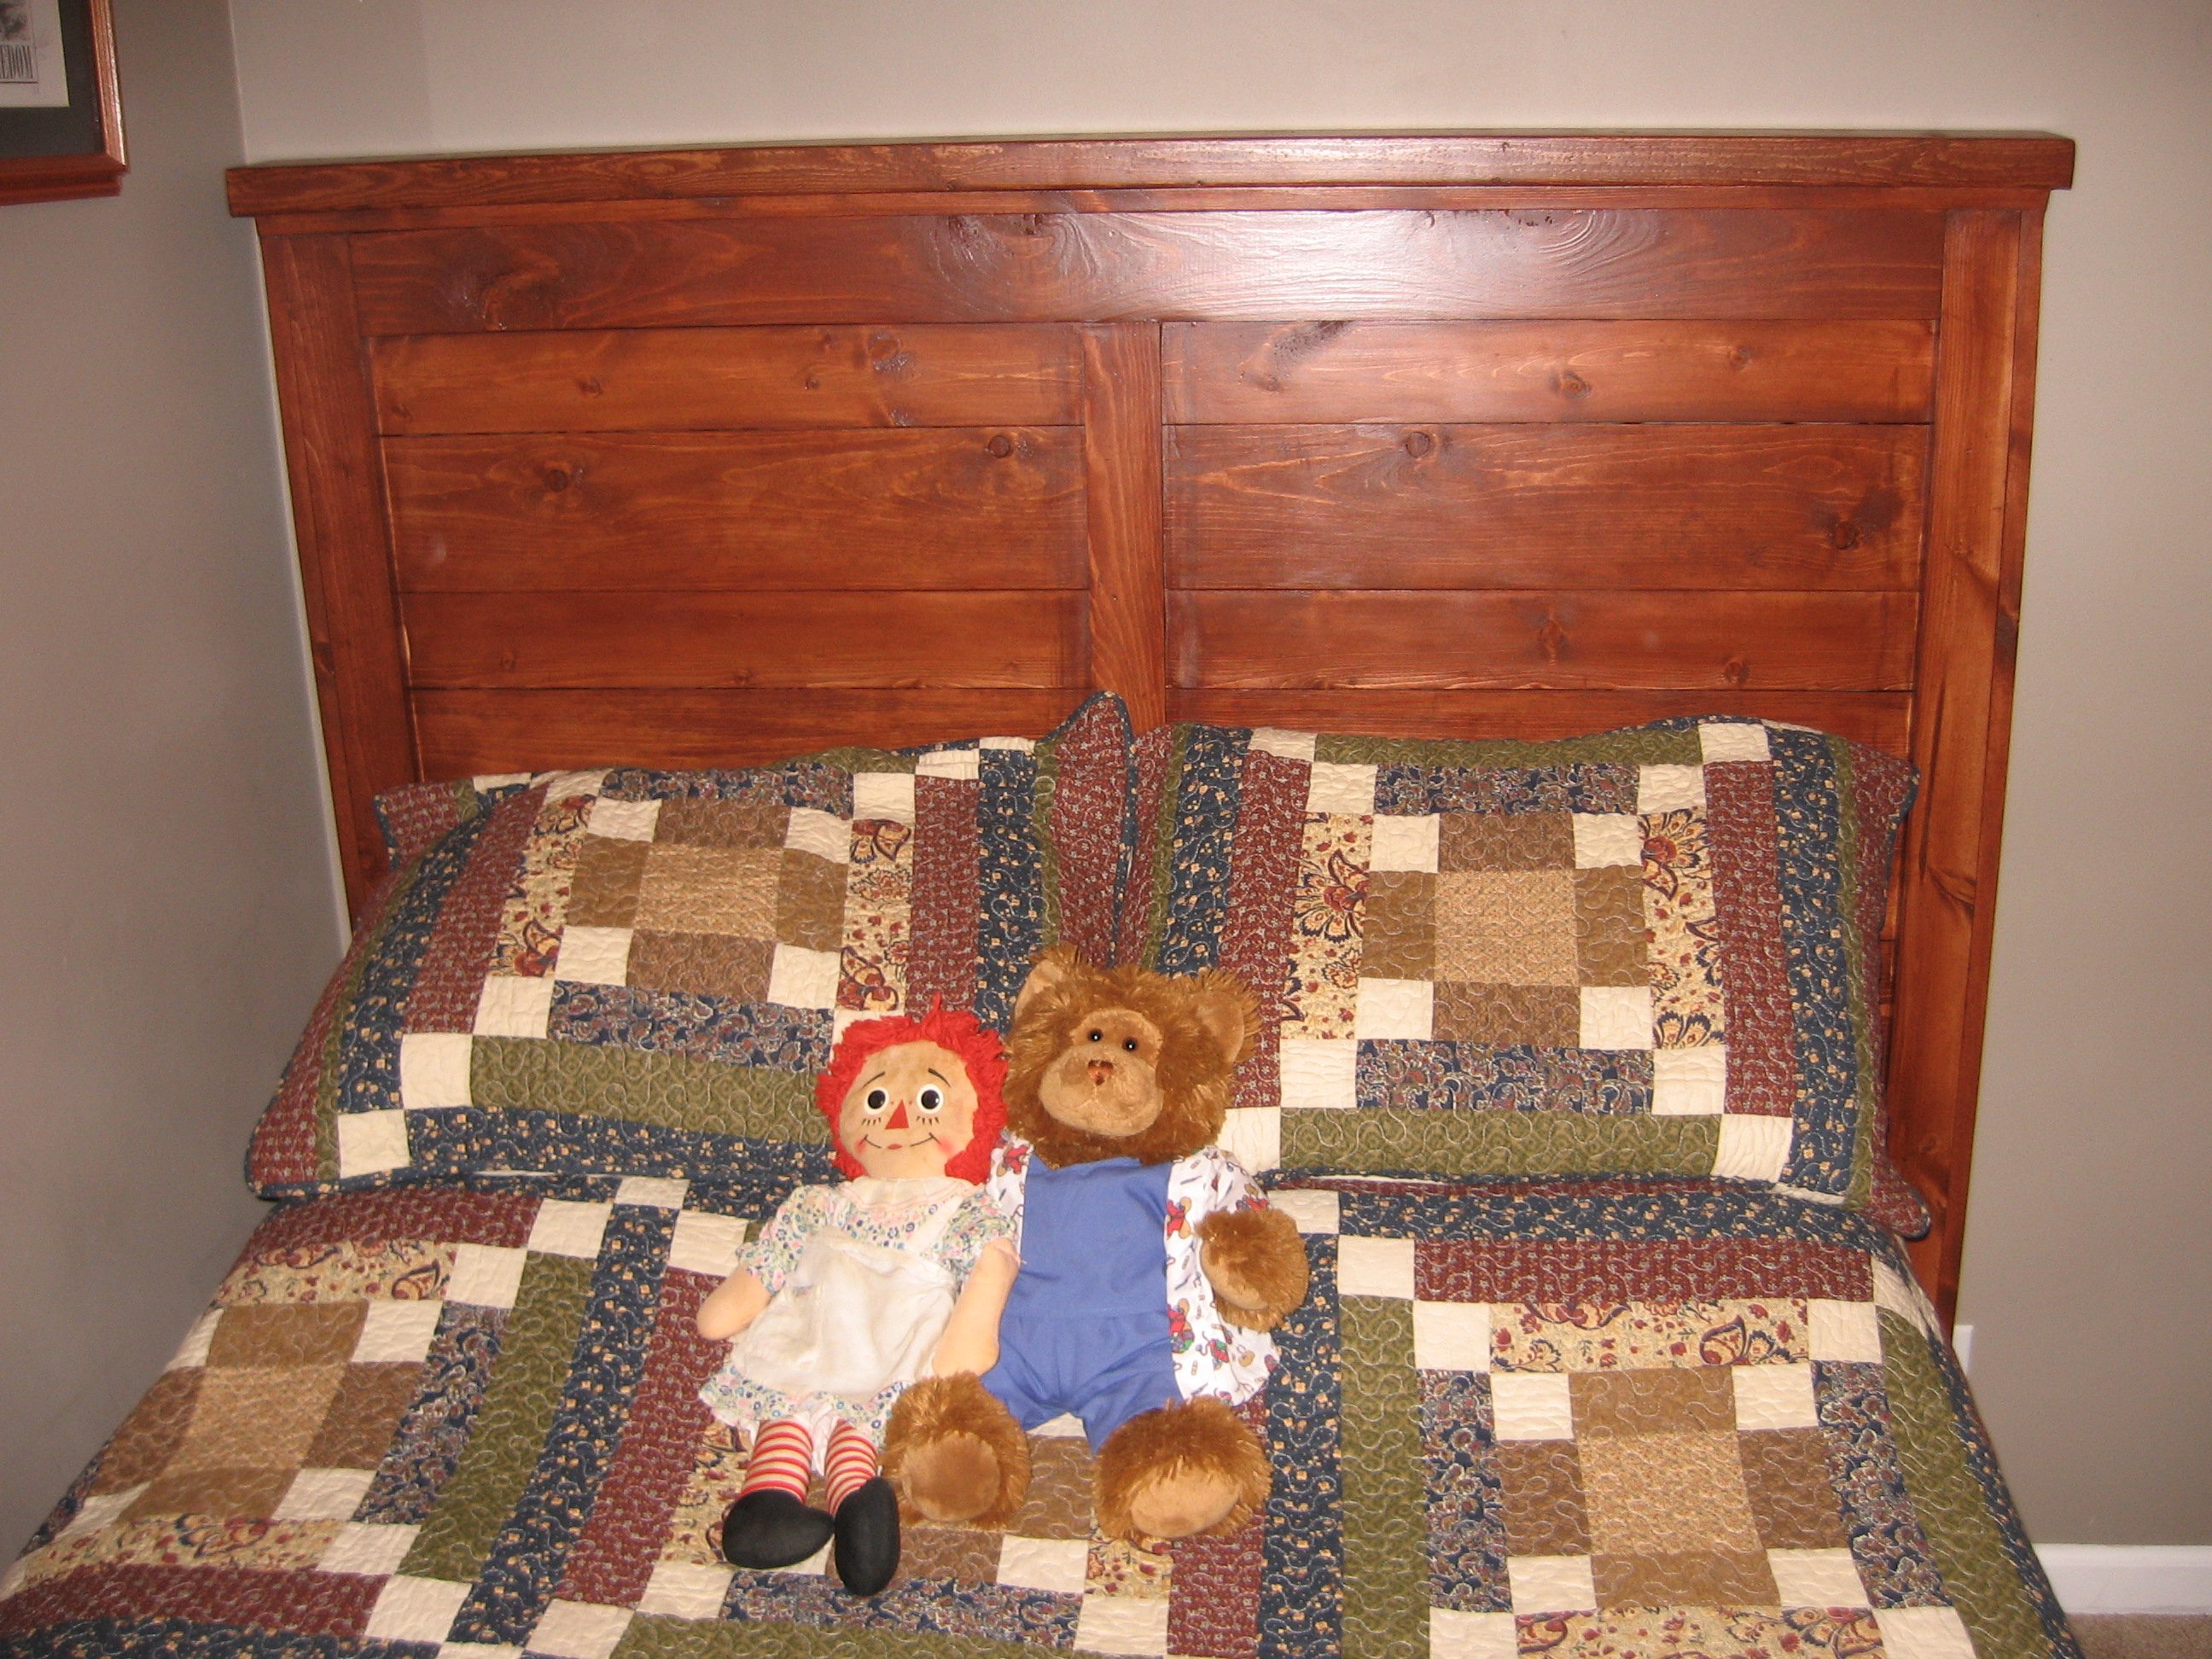
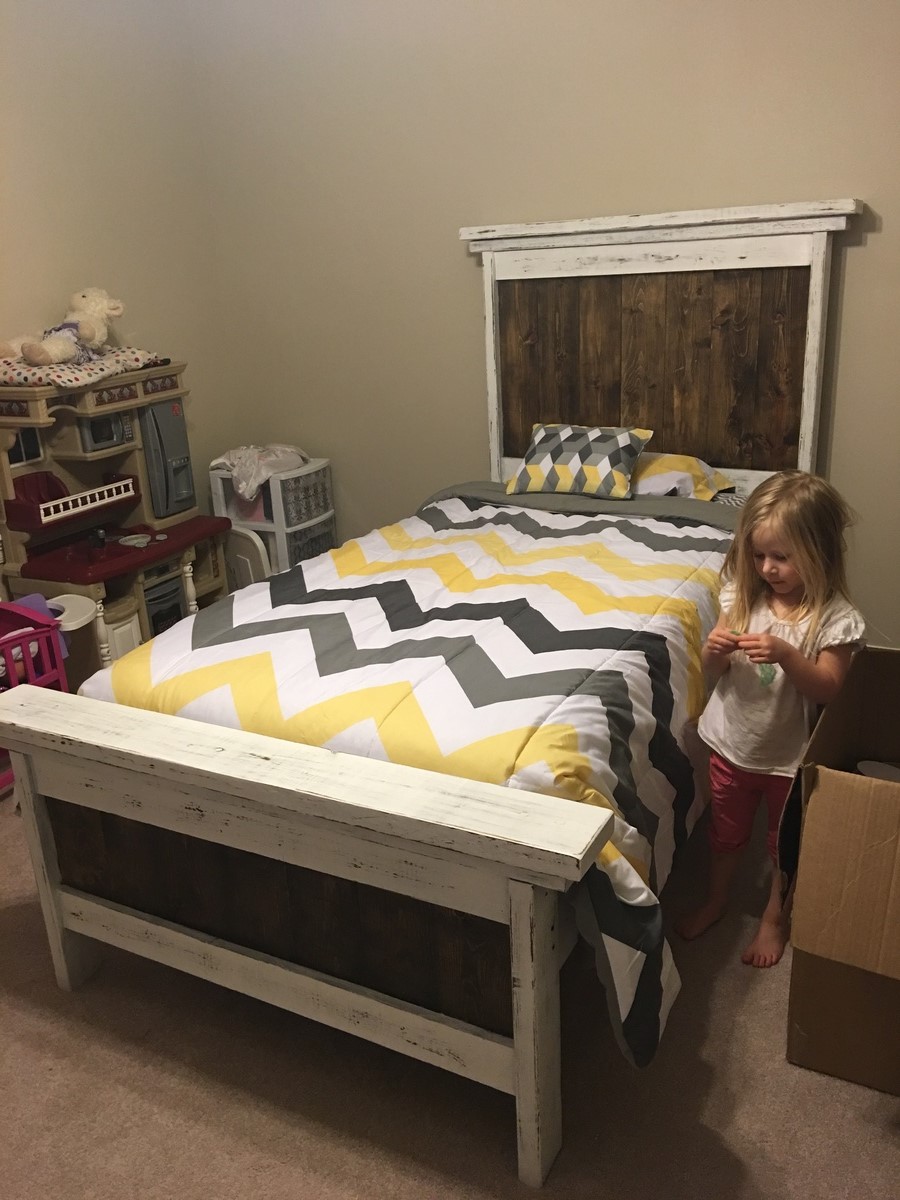
Headboard
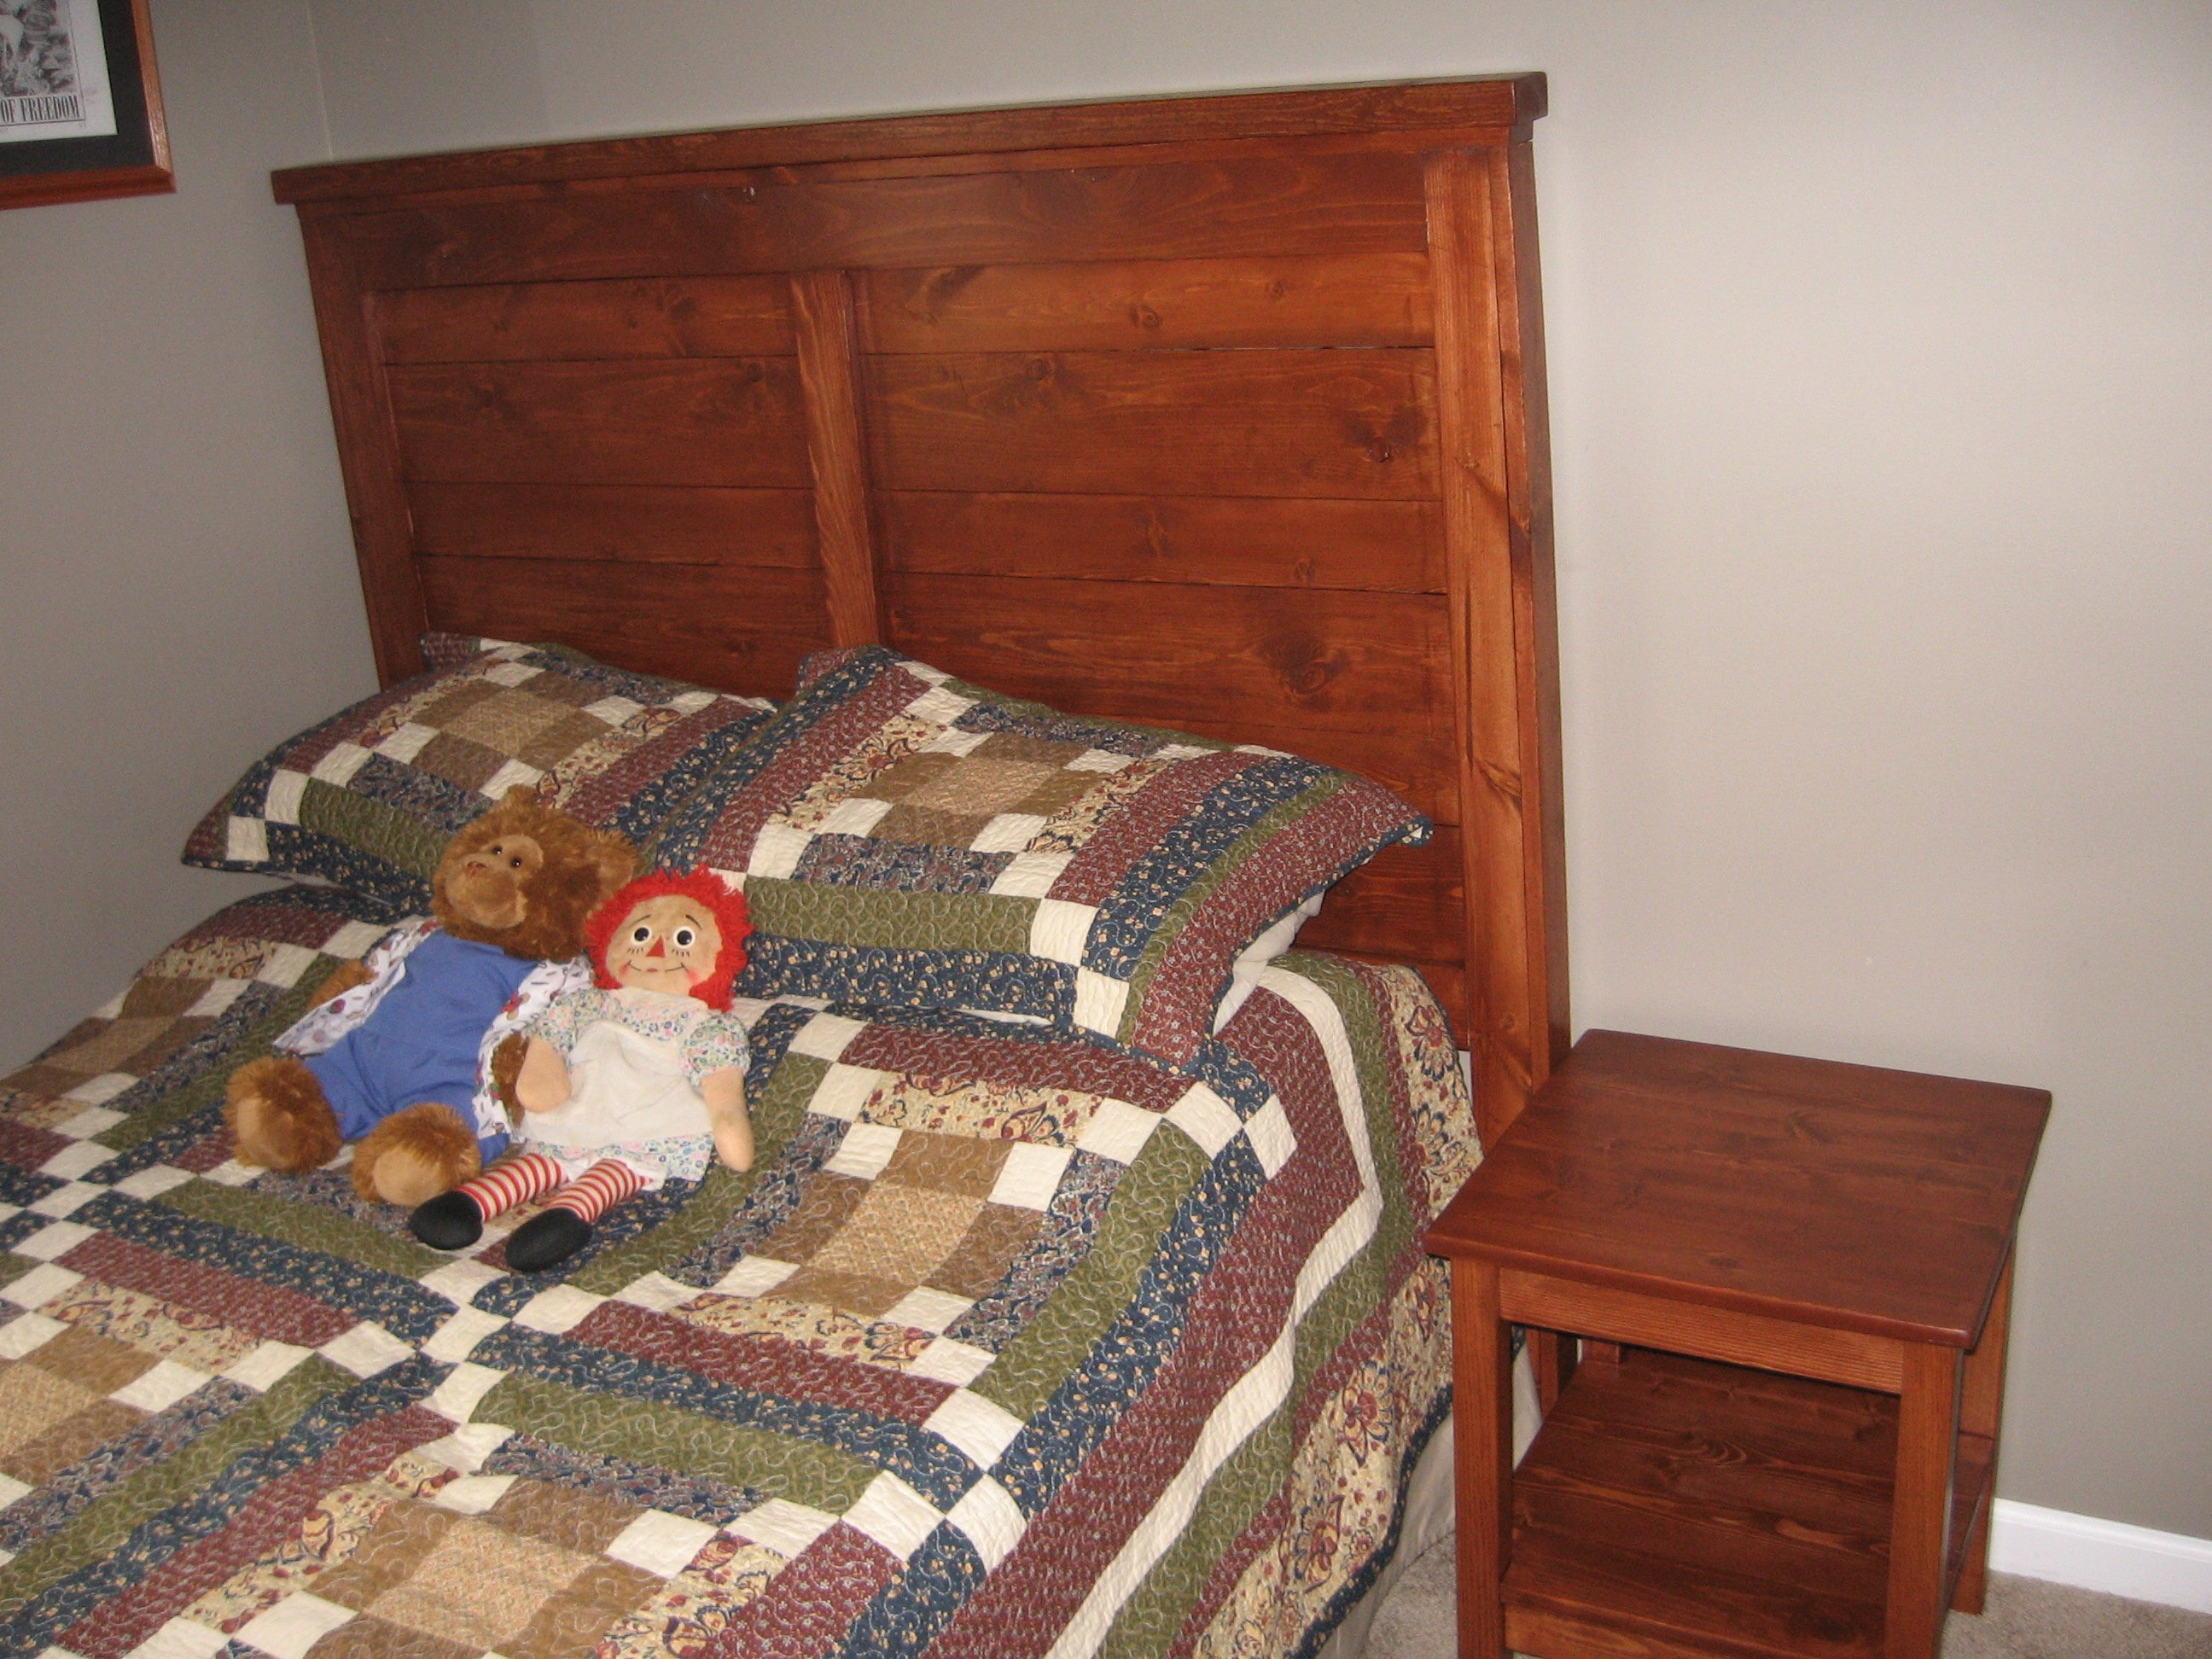
I used the Farm House Headboard plan to make this headboard. I had to mix the stain to match a dresser I already had. I used a mix of Minwax pecan, red oak, and jacobean stains for the base coat and then Minwax red chestnut for 2 additional coats. I then used 2 coats of fast drying poly to top coat with. The wood is pine stud grade. I did modify it a bit by adding an additional vertical cross member in the center and I had to add a 1" x 12" at the bottom because the style of the bed frame. I built it in an afternoon but it took several days to stain and top coat.
Estimated Cost
$100
Estimated Time Investment
Week Long Project (20 Hours or More)
Finish Used
One coat of a custom mix of Minwax pecan, red oak, and jacobean stains. Two coats of Minwax red chestnut stain. Two coats of Minwax polyurethane. I sanded between the coats of polyurethane using 320 grain sandpaper. All finishes were done with brushes. I wiped down the stain applications with cotton cloths after waiting 15 minutes.
Recommended Skill Level
Starter Project
Lego toy box
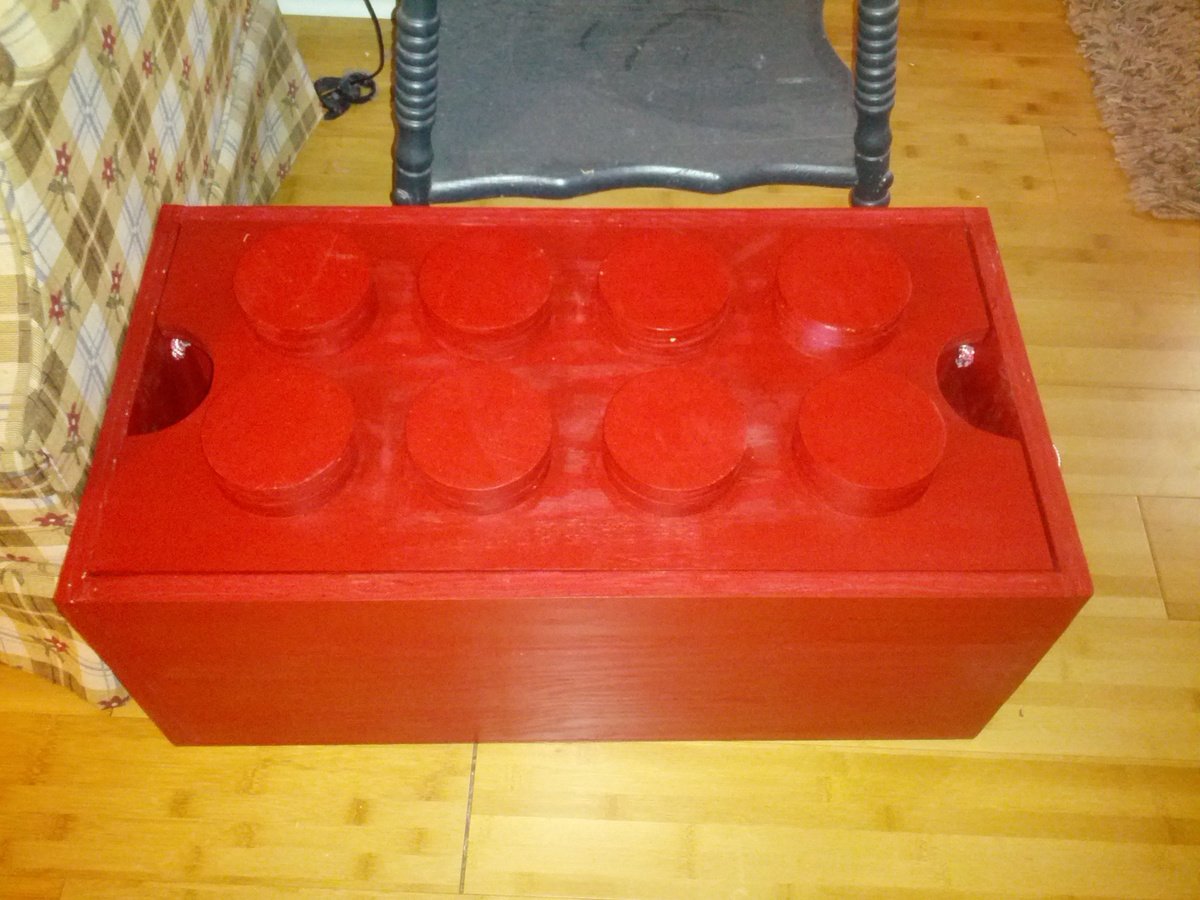
I built one for my kids and one for a nephew. I ordered the 10" x 10" Lego plates from Amazon. The sides and top are made from 3/4" plywood and the bottom is 1/4" plywood. The overall dimensions are 26 1/4" x 13 5/8" x 11 7/8" (not counting the top circles). I used a 4" hole saw to cut the circles then glued/nailed two together and used wood filler to fill the hole created in the center of the circles by the hole saw.
Other than changing the dimensions, I followed the original plans closely. The images in the original plans have 2 plates that are 15" x 15".
When cutting the circles, I clamped/screwed a scrap piece of wood under the plywood to produce much cleaner cuts.
I did paint the inside bottom white to make it easier to see the bottom and small pieces. I also drilled a pair of holes on each side to add rope handles.

Built from Plan(s)
Estimated Time Investment
Afternoon Project (3-6 Hours)
Finish Used
Valspar paint sample from Lowes
Recommended Skill Level
Beginner
My Potting Table
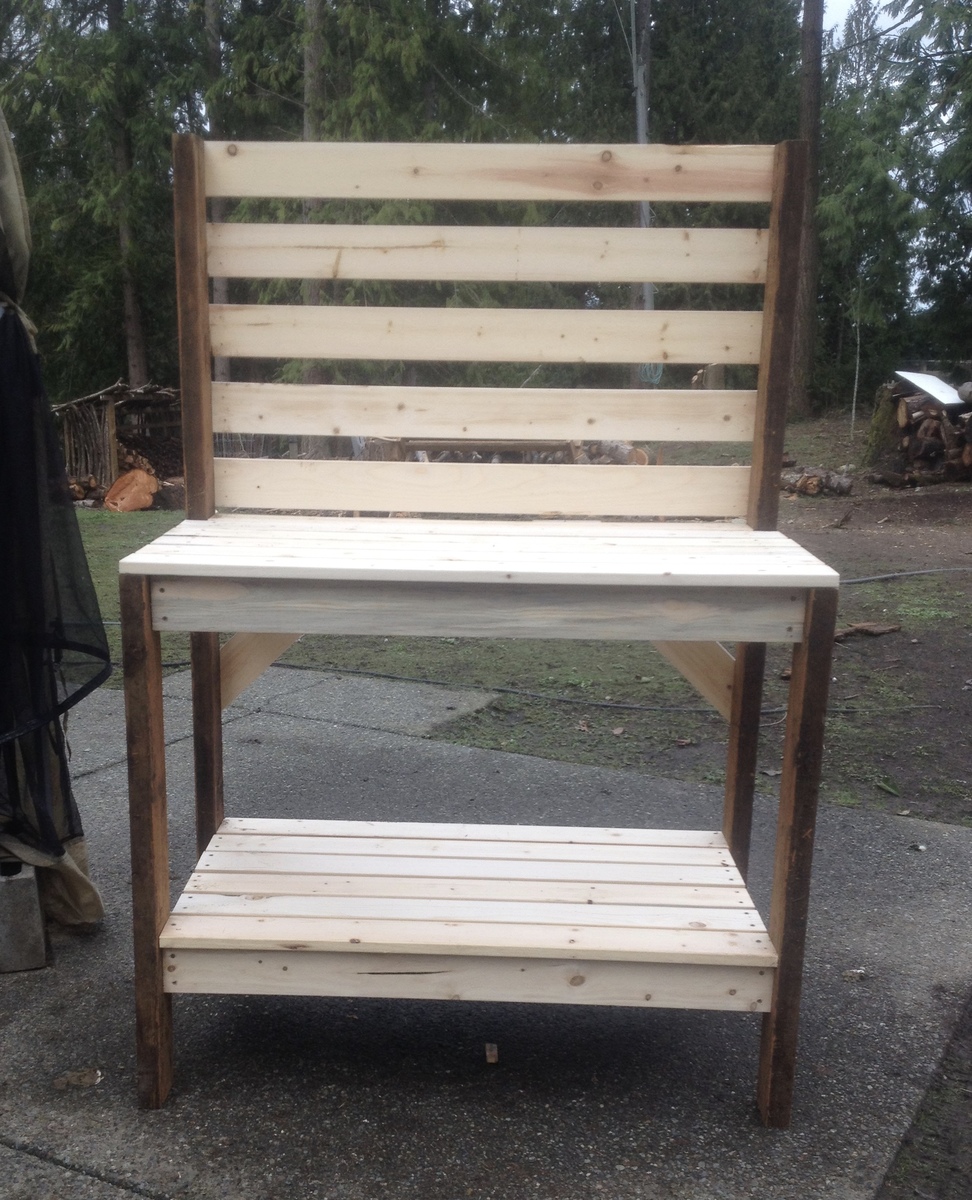
Loved making this. Took less than 2 hours, not including painting, which I haven't done yet. Plans were easy to follow but I couldn't find a cut list which would have made the trip to the lumber yard a little easier. I used some scrap wood and some new so very reasonable to make.
Built from Plan(s)
Estimated Cost
$40
Estimated Time Investment
An Hour or Two (0-2 Hours)
Finish Used
Haven't decided yet
Recommended Skill Level
Beginner
Clara Table
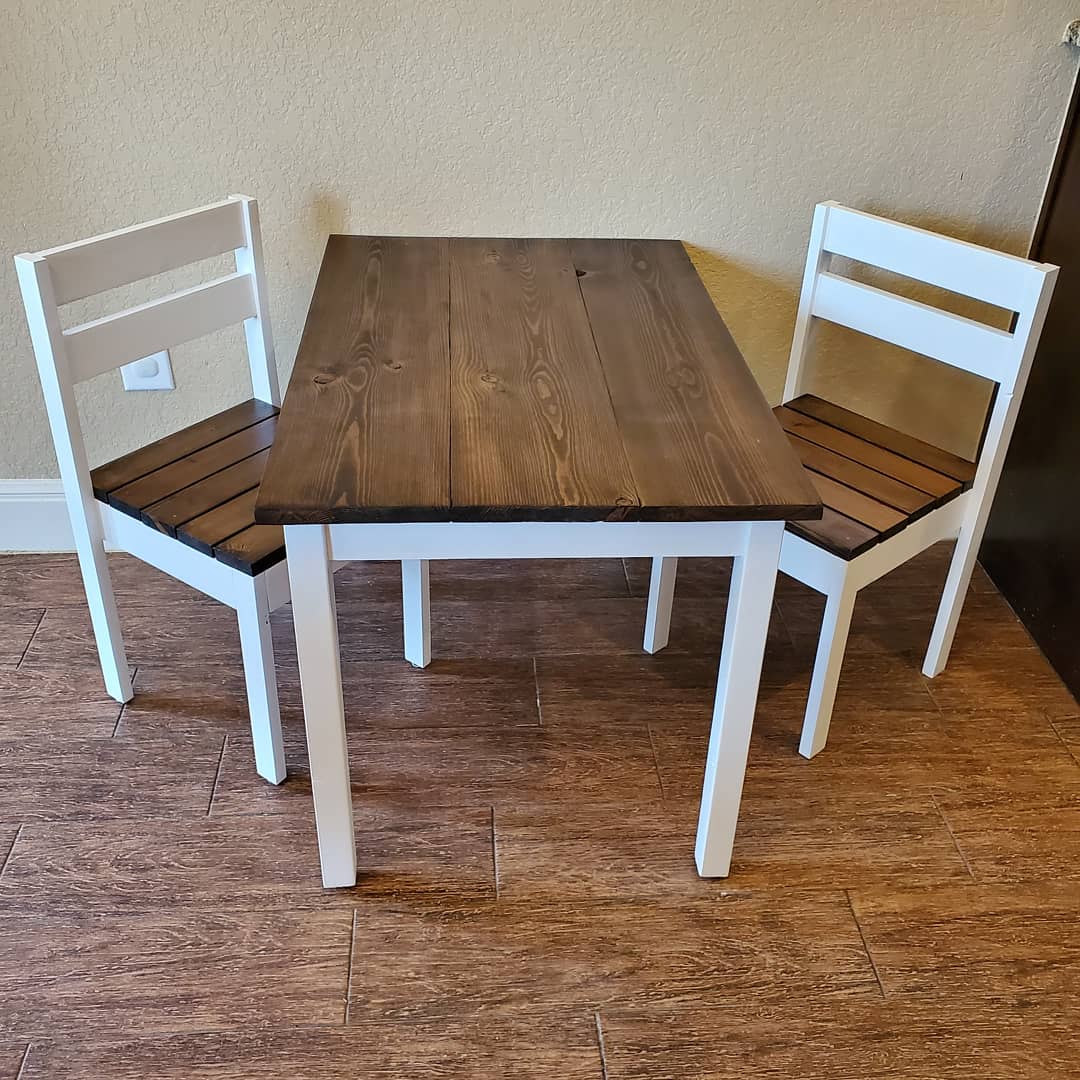
I stained the top with Dark Walnut stain and used perfect white paint.
Built from Plan(s)
Estimated Cost
50
Estimated Time Investment
Day Project (6-9 Hours)
Finish Used
Dark Walnut Stain. Ultra White Paint
Recommended Skill Level
Starter Project
Comments

Fri, 10/11/2019 - 09:38
What a beautiful set! Thank…
What a beautiful set!
Thank you for uploading so many brags - love it!
Outdoor Sofa and Table Set
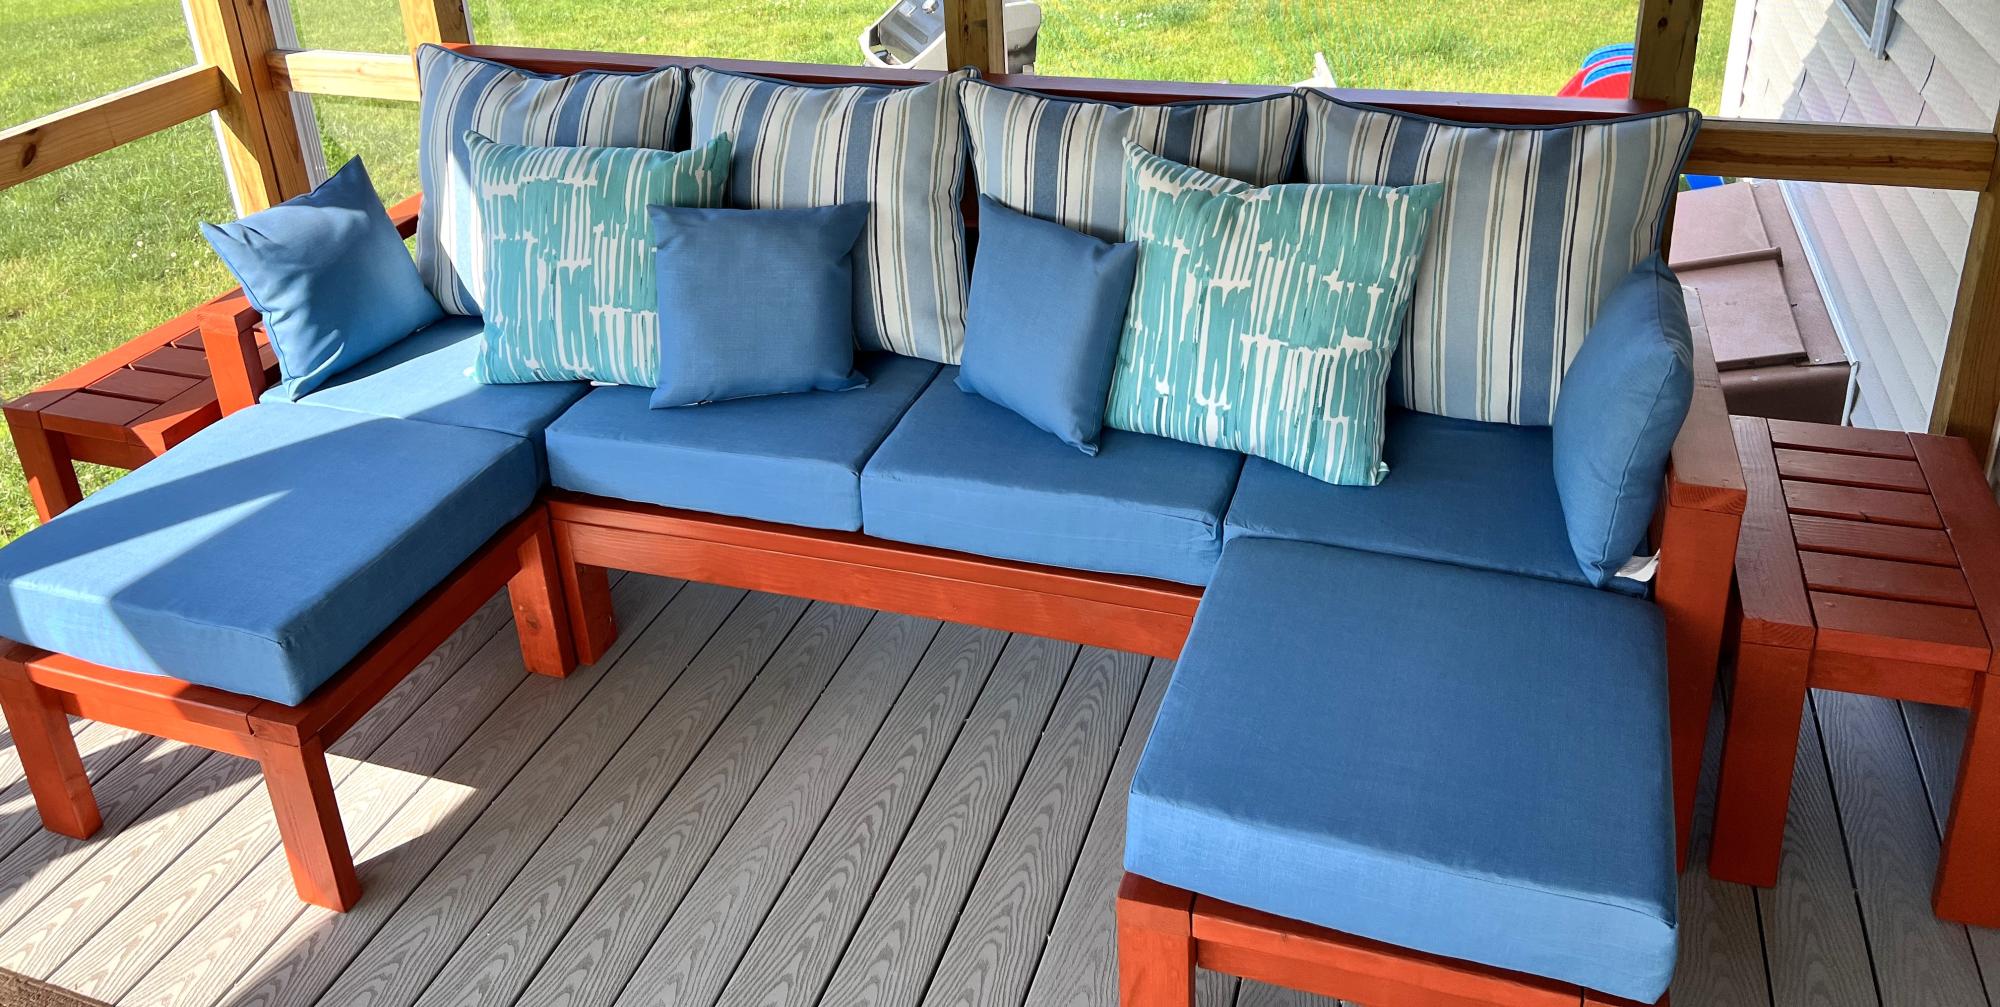
Sofa with 2 ottomans and 2 side tables.
Vinny M
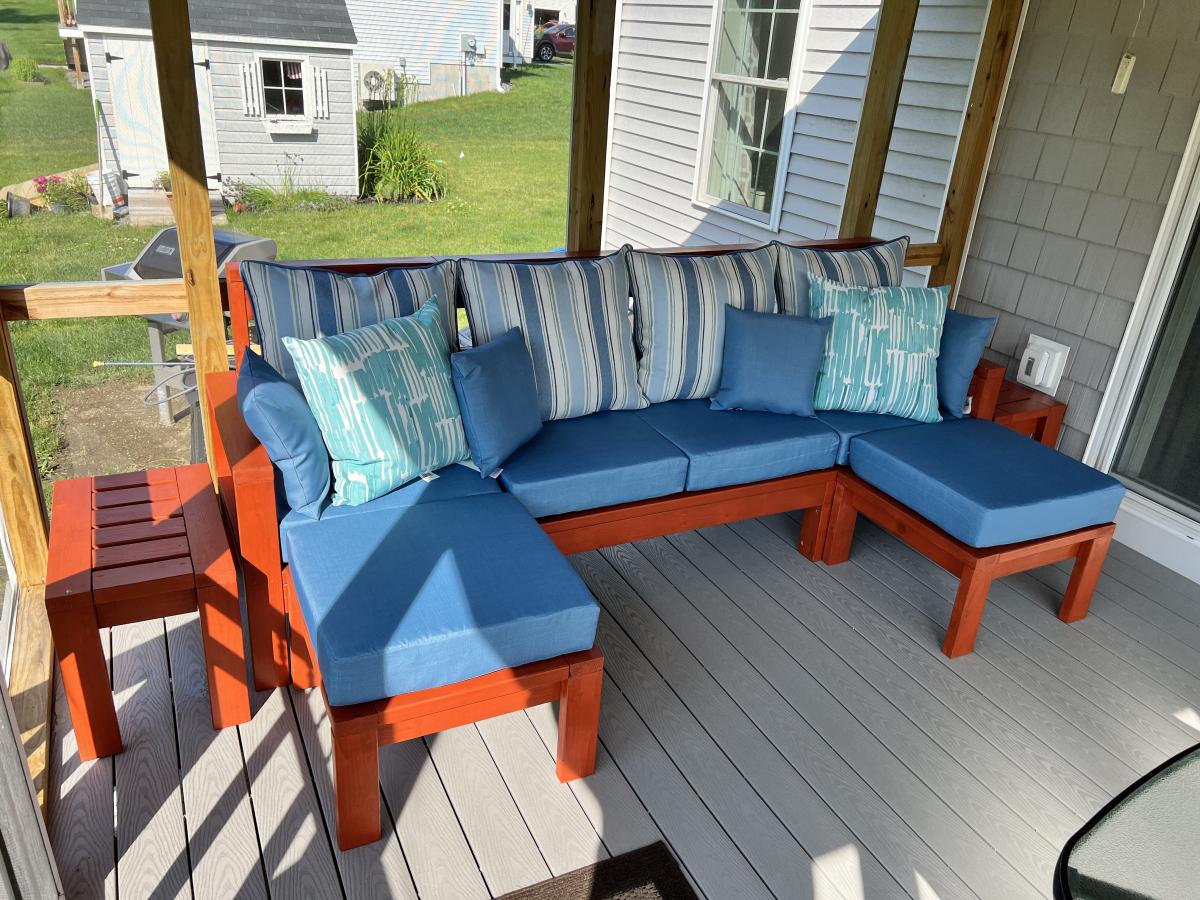
Built from Plan(s)
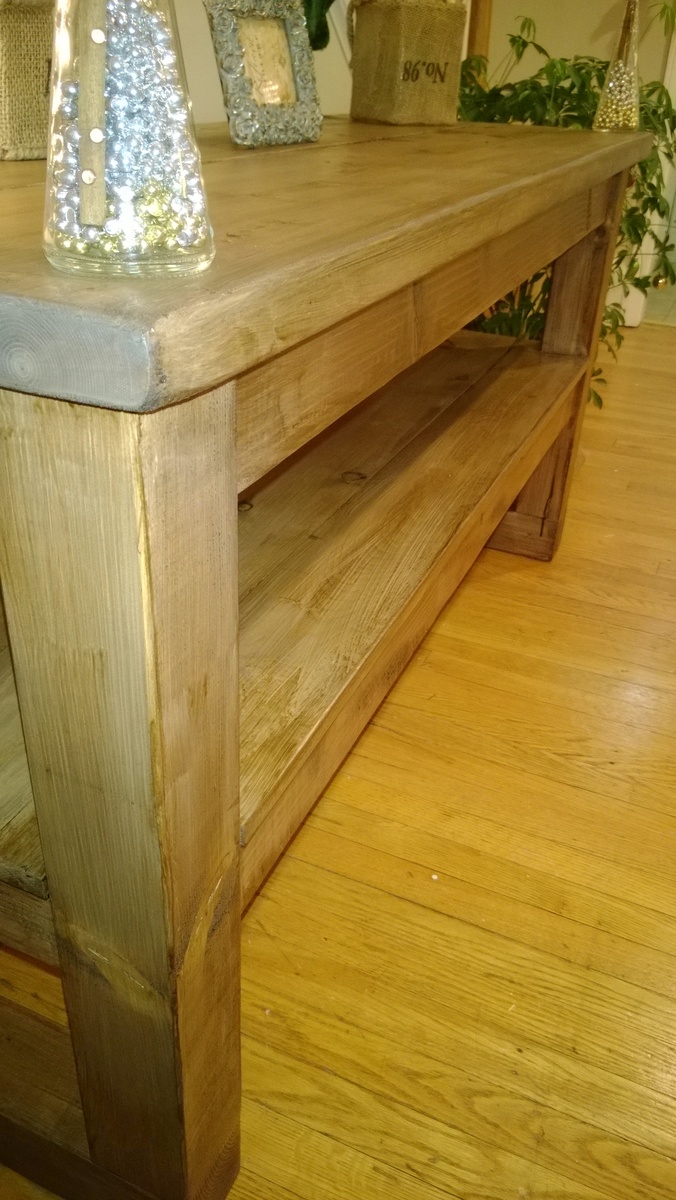
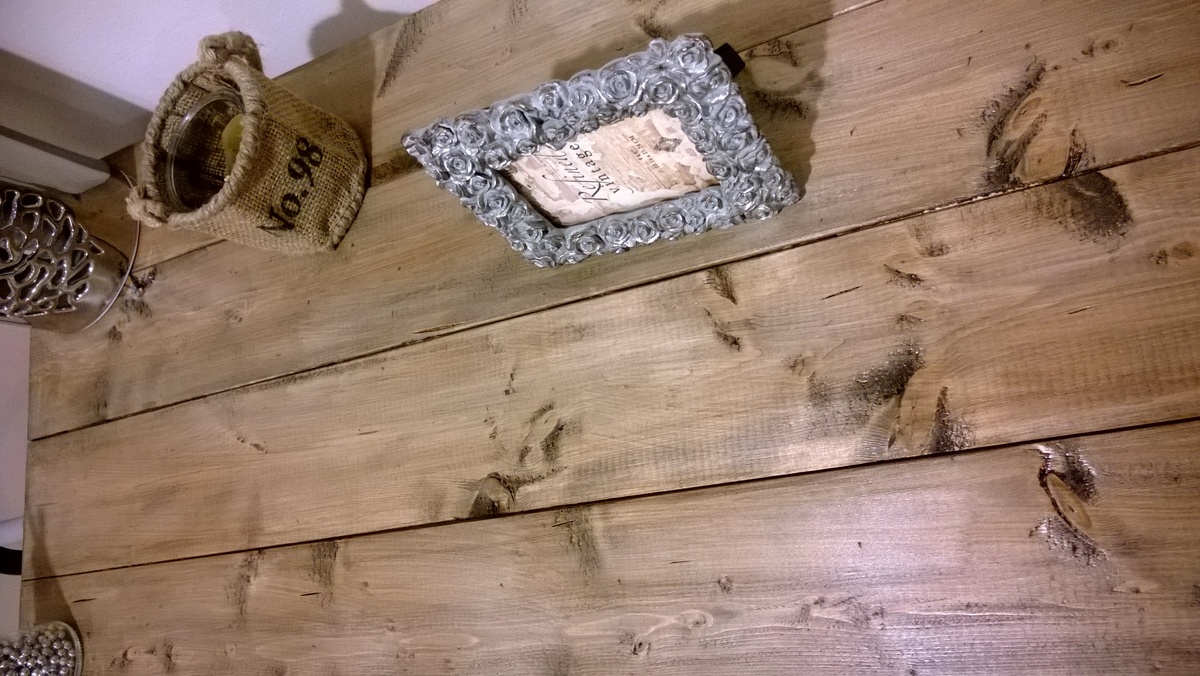
Our awesome new table.
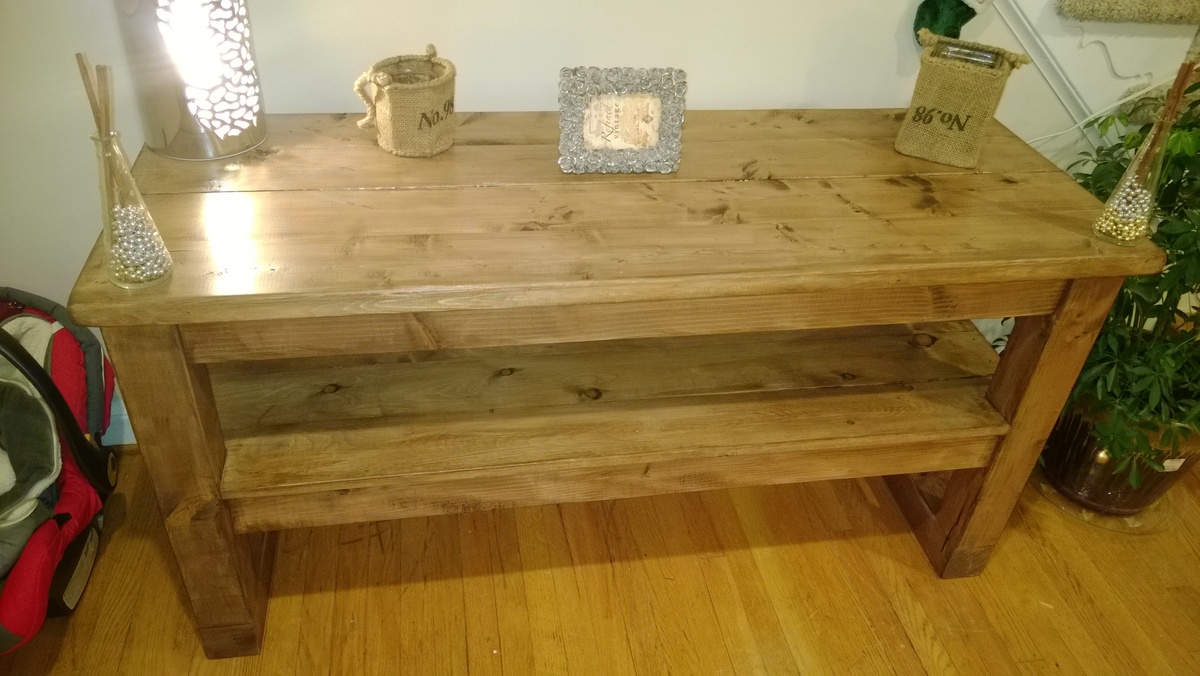
This was a fun and easy project to do. We really like how it turned out and how it compliments the room. For the bottom shelf I used four 1x6 boards instead of a single 21" wide plywood board. For that worn look, I took a drywall rasp and chewed up the corners and edges. Staining was a two part job. The first coat was called weathered gray. After it dried I lightly sanded it with 180 grit and applied a second coat of dark walnut. The gray subtly shows through the walnut. If I had it to do it over, I may have applied a coat of ebony stain to the corners and edges to make the color less even. I did very little sanding on this piece because I wanted a rough texture, but I did enough to make it sliver-free. The project cost about $80.
Estimated Time Investment
Weekend Project (10-20 Hours)
Finish Used
Varethane Weathered Gray water based with polyurethane.
Varethane Dark Walnut water based with polyurethane.
Varethane Dark Walnut water based with polyurethane.
Recommended Skill Level
Beginner
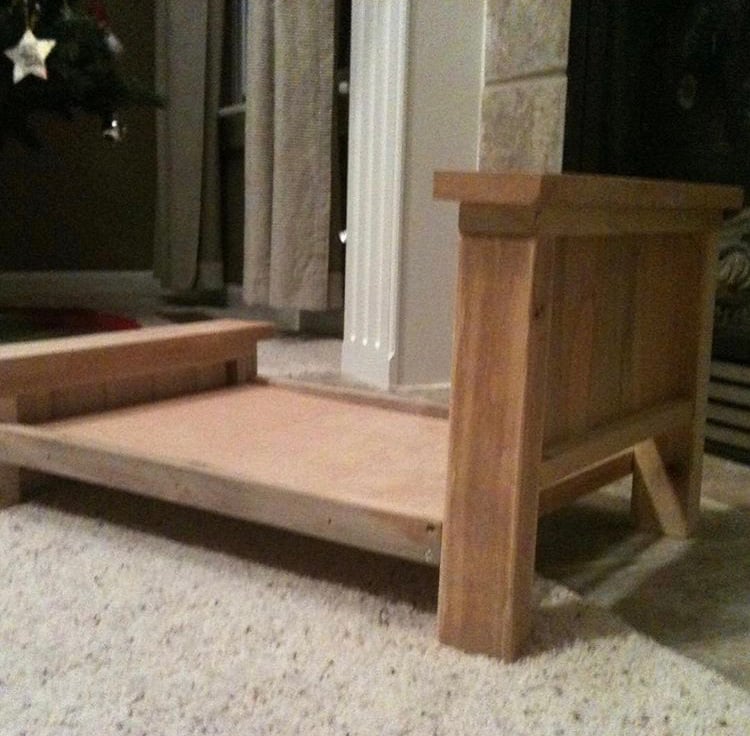
American Girl Doll Bed
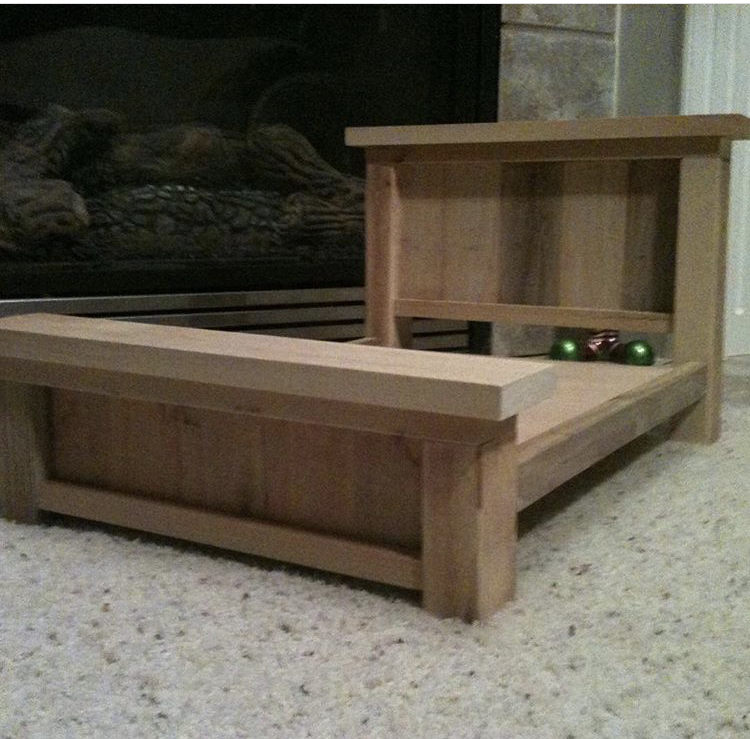
My daughter wanted a bed for her dolls. American Girl Doll Bed beds are outrageous, soI decided to make one out of some scrap wood we had laying around. I modified it a bit and added a trundle bed below.
Built from Plan(s)
Estimated Cost
0
Estimated Time Investment
Afternoon Project (3-6 Hours)
Finish Used
Stained
Recommended Skill Level
Intermediate
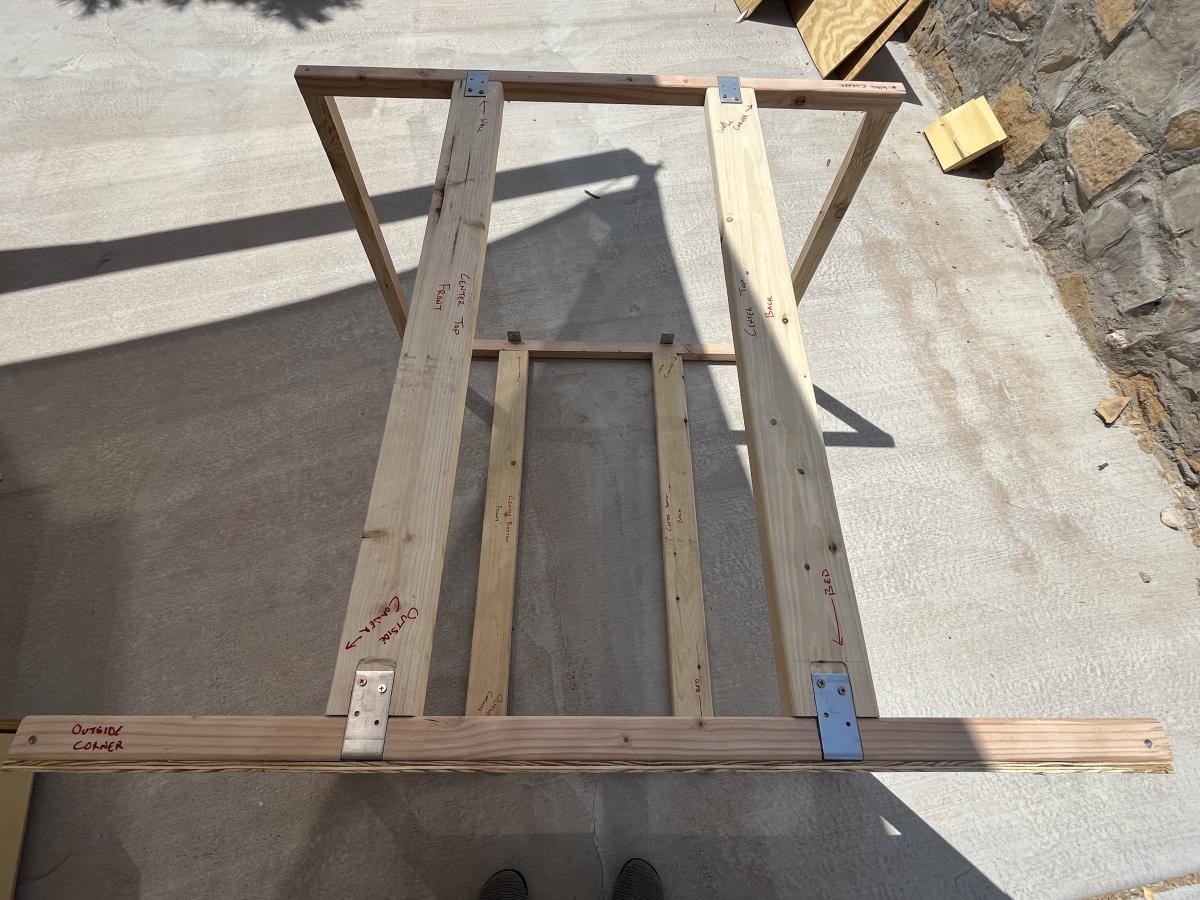
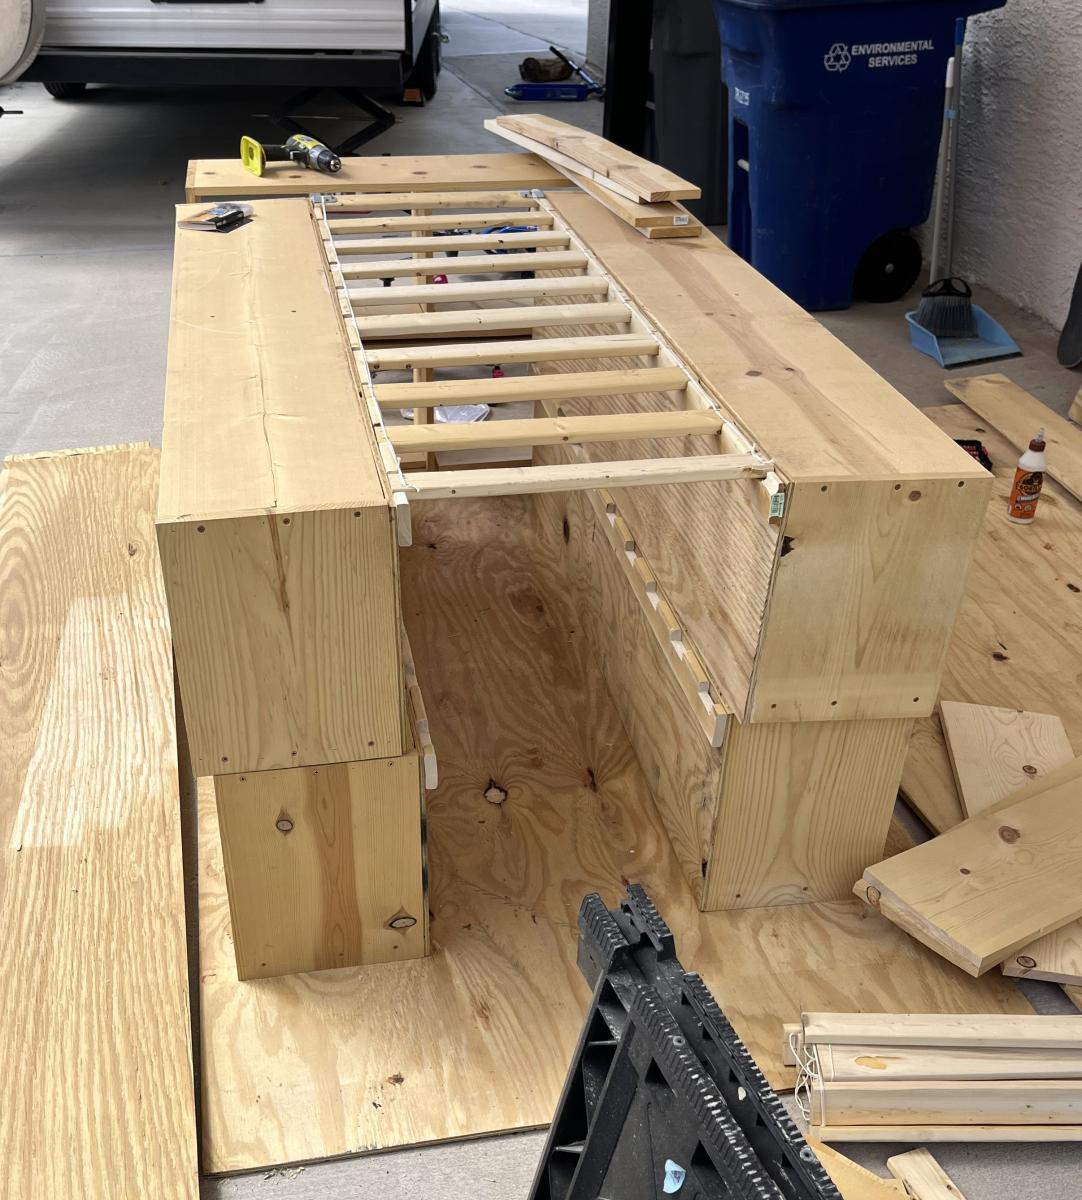
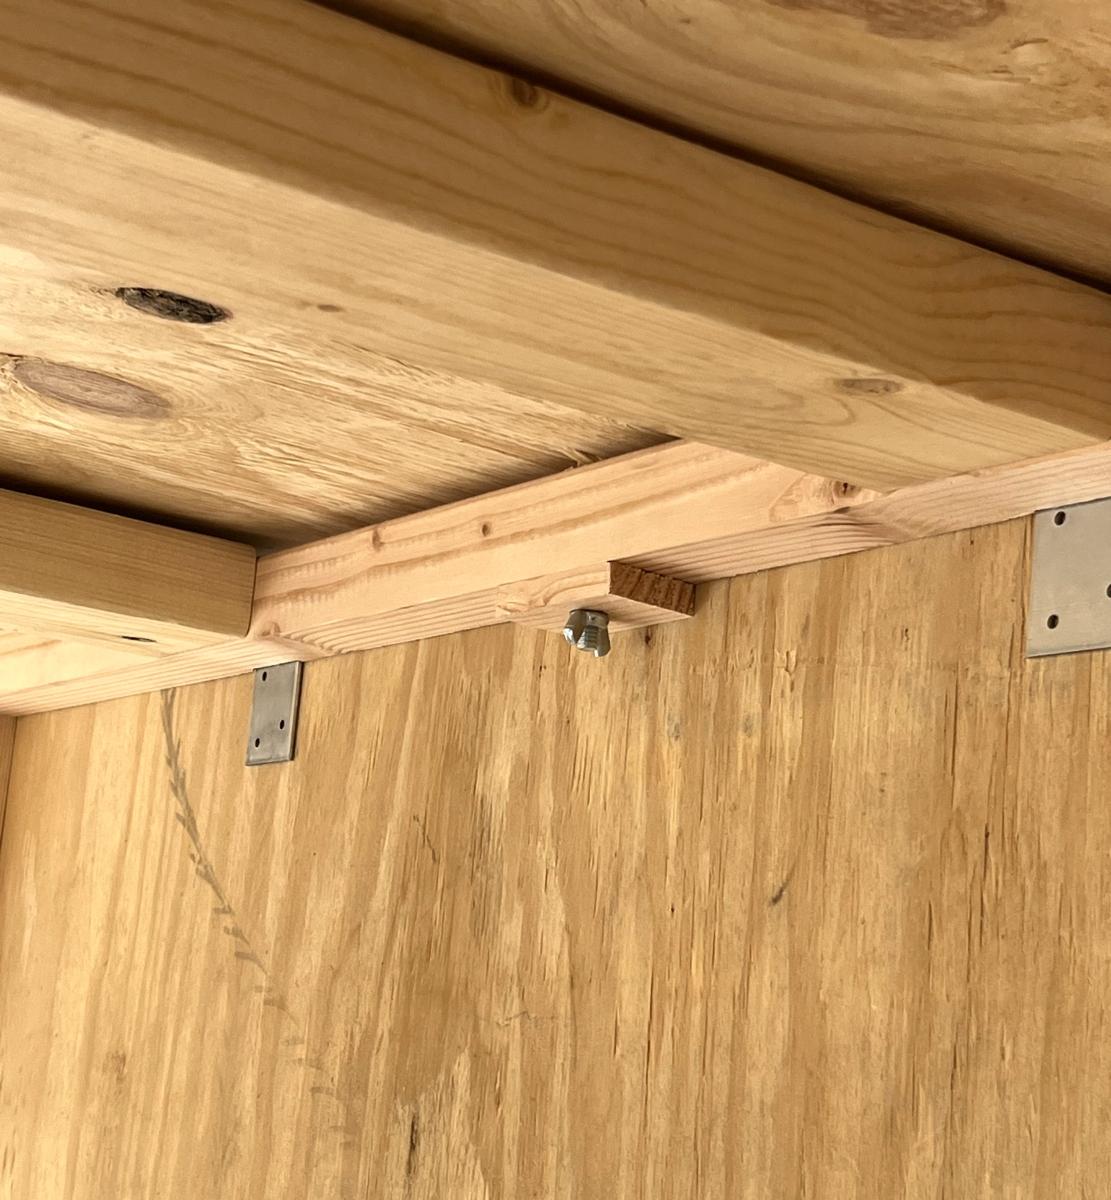
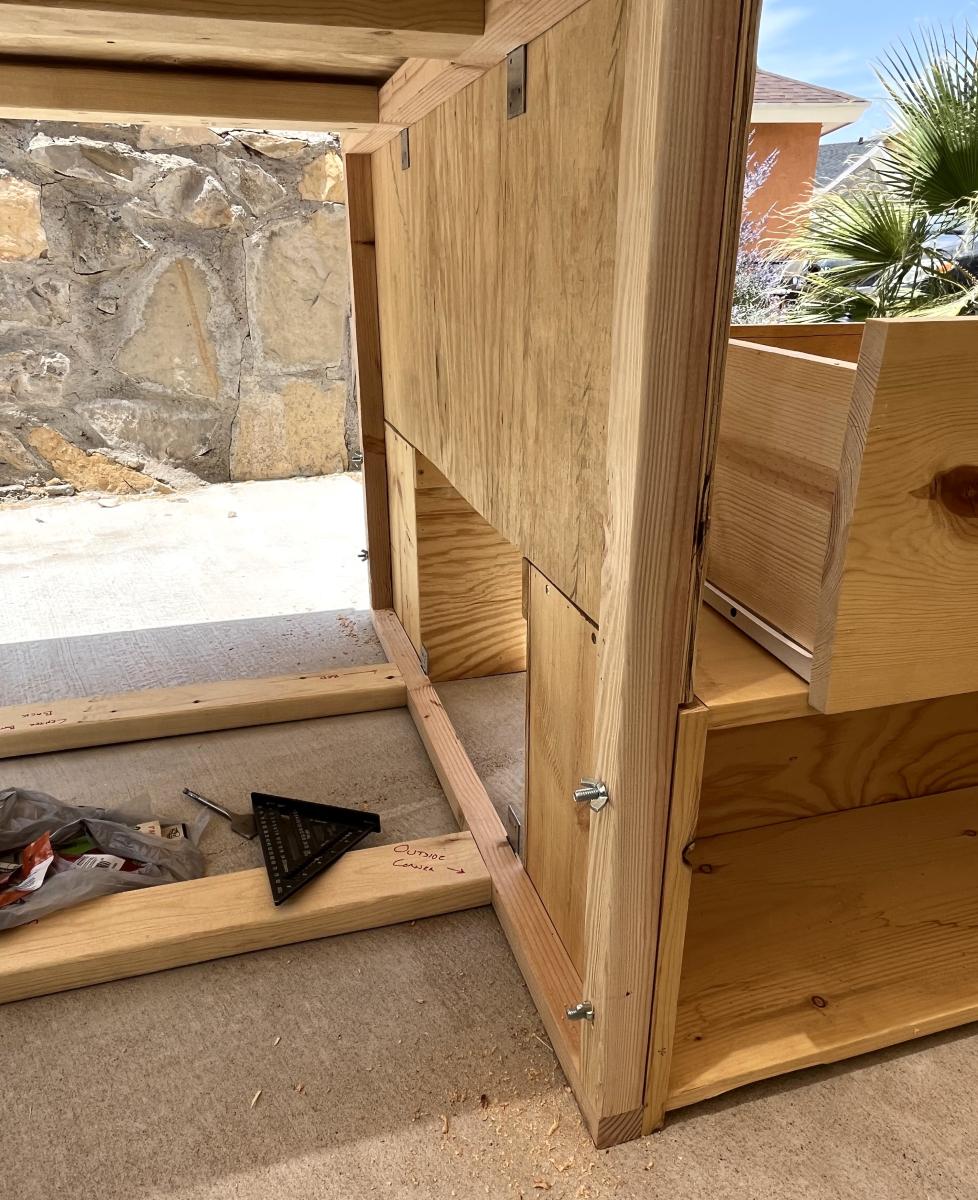
Twin Corner Beds with Storage Tower
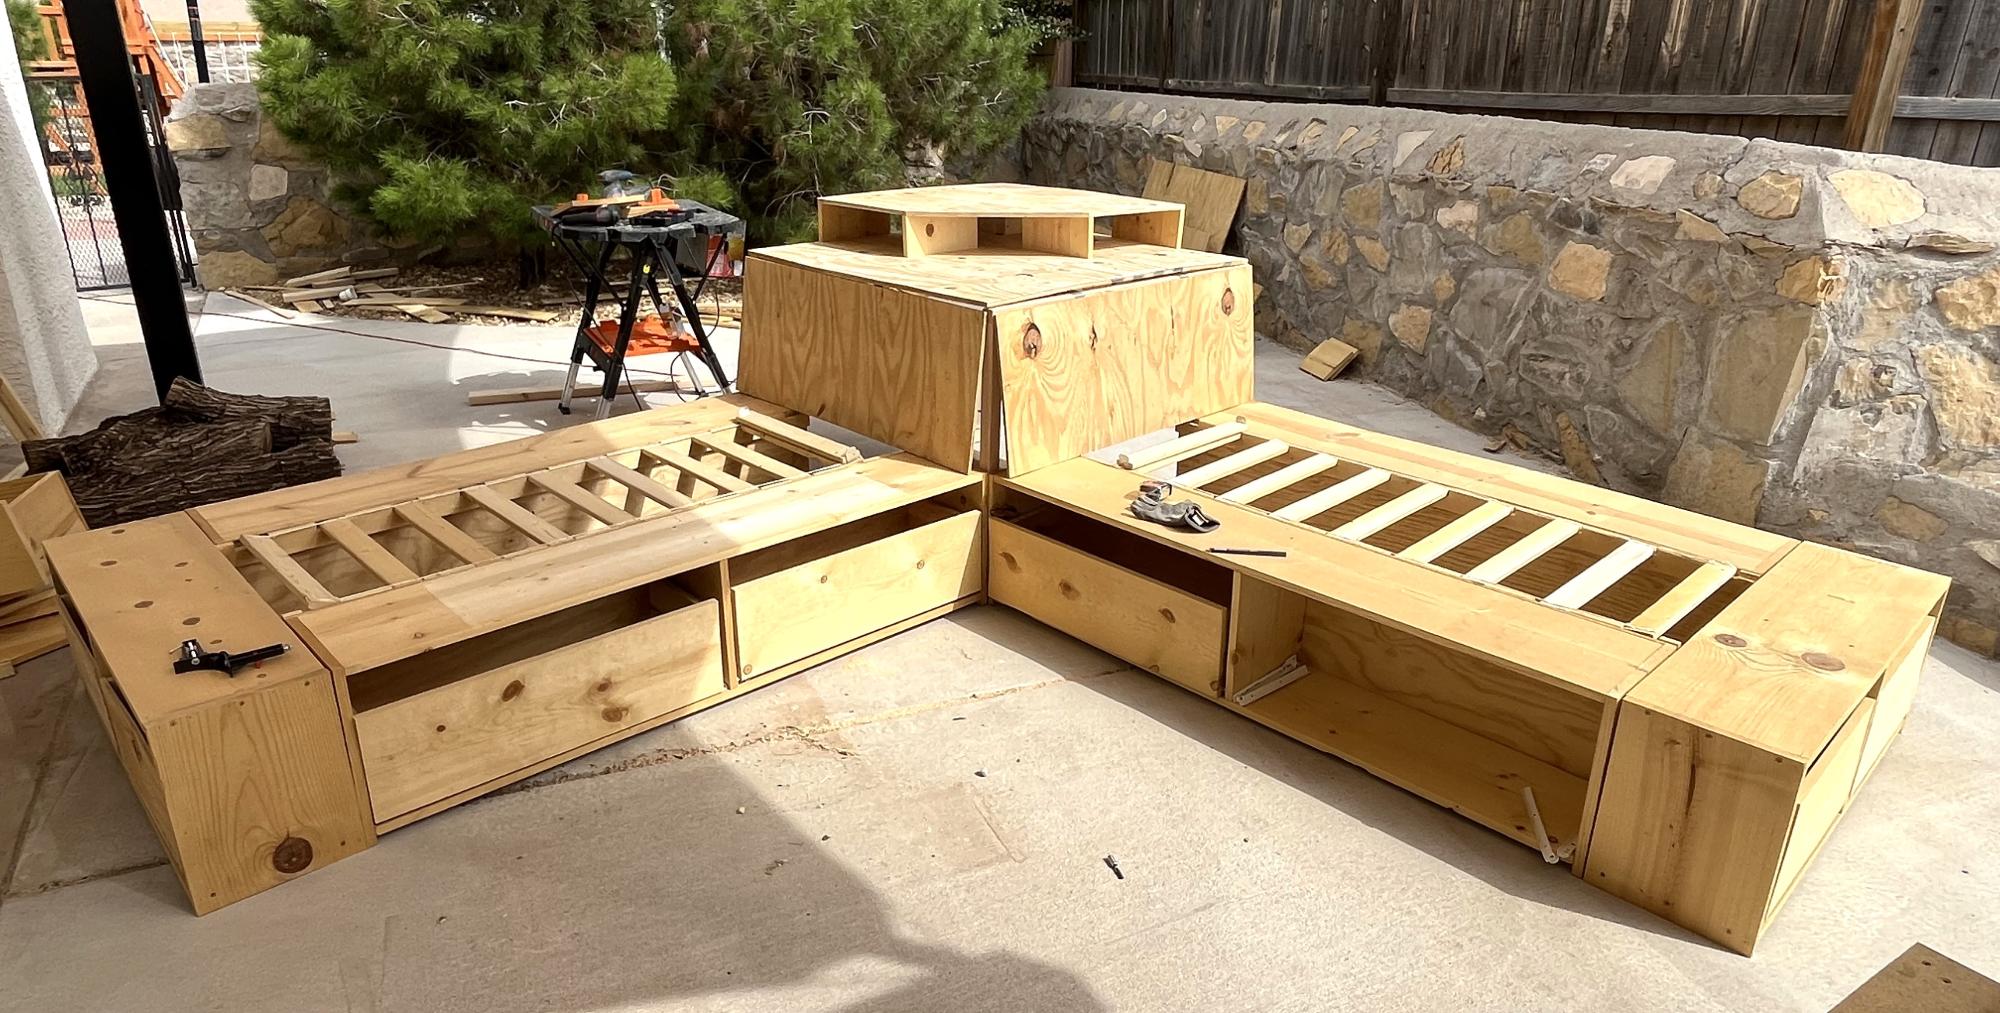
Built this plan, added bolt hangars and flat face mounts, and corner braces to make it easily assemble or disassemble for moving
Built from Plan(s)
BenchWright Coffee Table
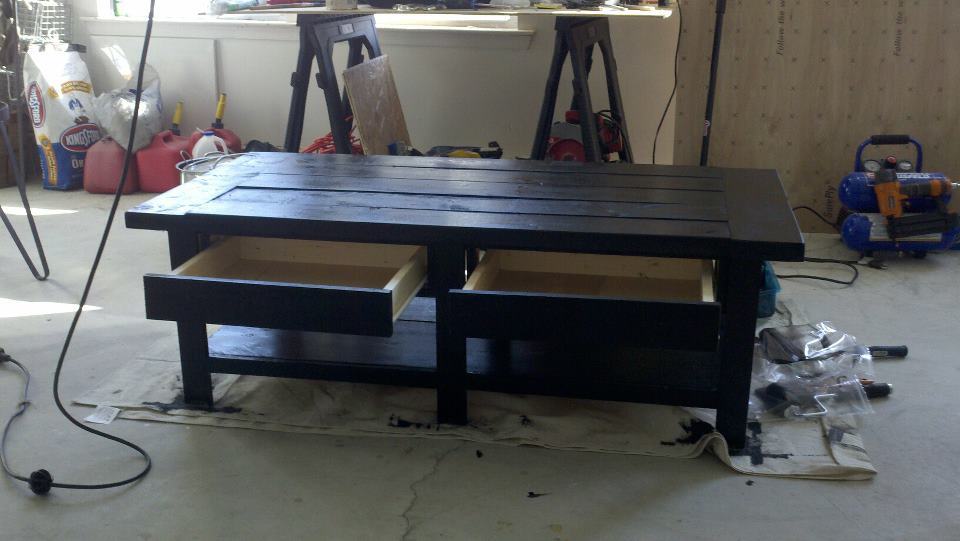
Pottery Barn Inspired Ana-White Collection
Built from Plan(s)
Estimated Cost
$115
Estimated Time Investment
Day Project (6-9 Hours)
Finish Used
Water Based Stain ONXY
Recommended Skill Level
Intermediate
Computer Armoire aka my new office
From these plans: http://ana-white.com/2013/05/plans/toy-or-tv-armoire
For my quilting business, I needed an office for the paperwork, etc. that comes with running a business. With no spare room for an office, I built this armoire to hold my computer, business papers, and the bags that contain my quilting samples, forms, etc.
On the inside, I used pegboard for the backing so the electrical equipment would have ventilation. I also thought I might be able to hang stuff from the pegboard as well. If I had to do it again, I would set up the keyboard slide and side drawers a little differently. I used scrap wood for that part. I should have just gotten another piece of 3/4 inch plywood and fixed it right, with pocket holes. I'd intended to put drawer pulls on the drawers, but the doors hit the drawers when they close. So, I will need to cut some holes in the drawers to use as pulls.
Estimated Time Investment
Week Long Project (20 Hours or More)
Finish Used
Black Rustoleum Painter's Touch Flat Black, distressed and finished with Briwax clear and Mahogany
Recommended Skill Level
Intermediate
Geo Thermal Anna White Greenhouse w/ Aquaponics system coming!
My Annawhite design with geothermal improvements. It will also have a 1000 gallon Aquaponics system inside!
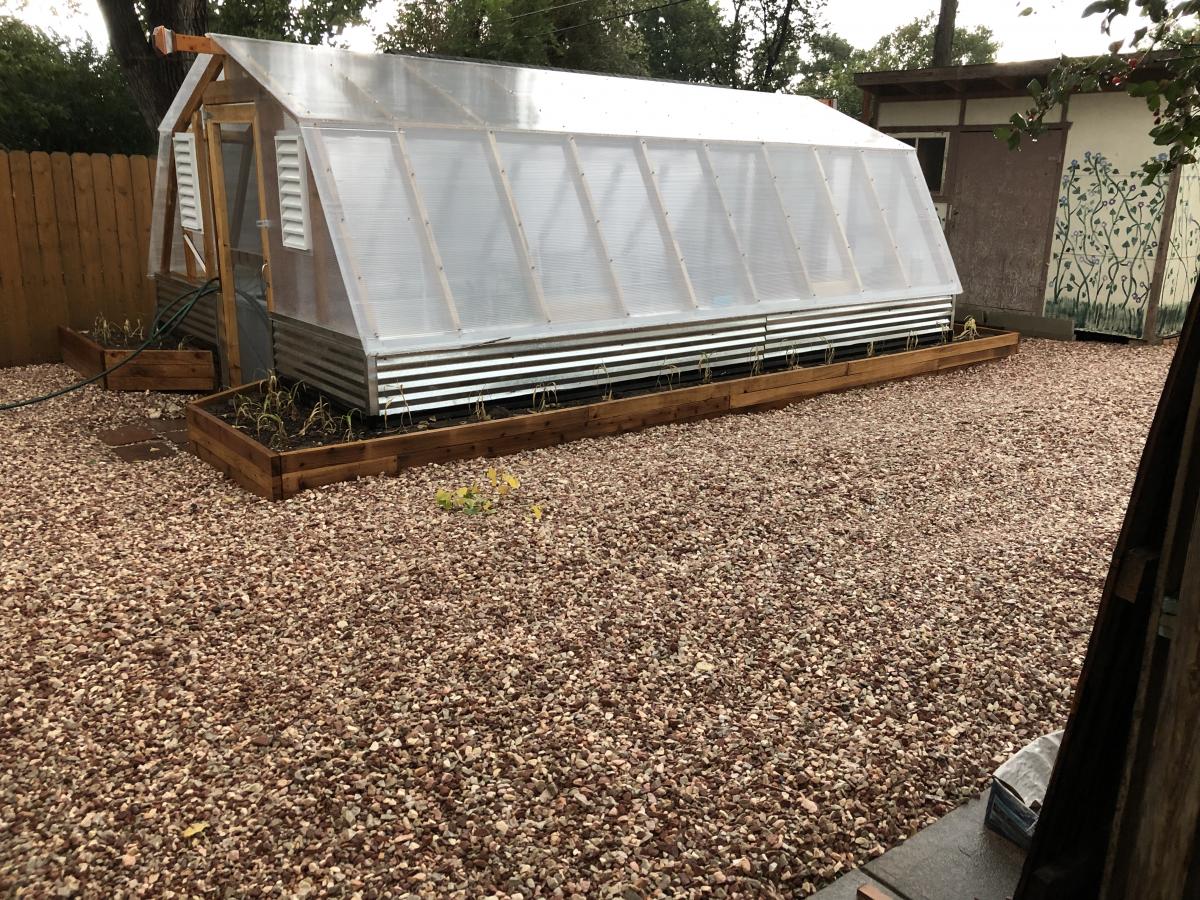
Built from Plan(s)
Estimated Cost
$7000.00!
Estimated Time Investment
Week Long Project (20 Hours or More)
Finish Used
This thing has taking me all summer to build! :-) Cry
Recommended Skill Level
Intermediate
Cottage End Table

Basically the same idea, I added doors with antique hardware.
Don H.
Built from Plan(s)
Pallet Bookshelves
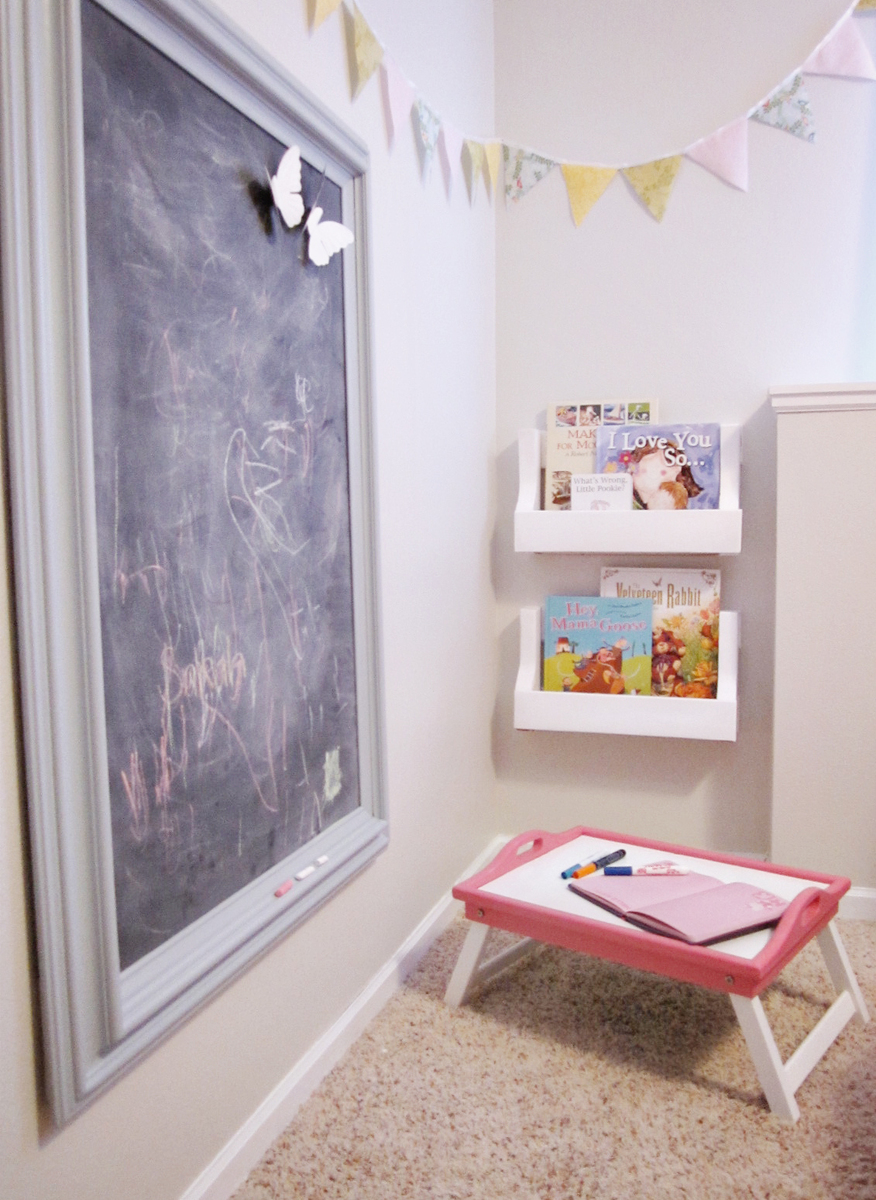
My daughter's room has a strange little cut-out section in one of its corners. We debated for a while over how to make it look like it's supposed to be there. After discussing all of our options, I remembered that we had a wood pallet in our garage. I also remembered seeing a great plan on Ana White's website for a book shelf made from a pallet, so I decided to give it a try. Fortunately cutting the pallet down in half made it the perfect size for this corner. Sarah loves books and drawing, so it makes a perfect little reading/art area. I love how it turned out, especially since it was FREE!
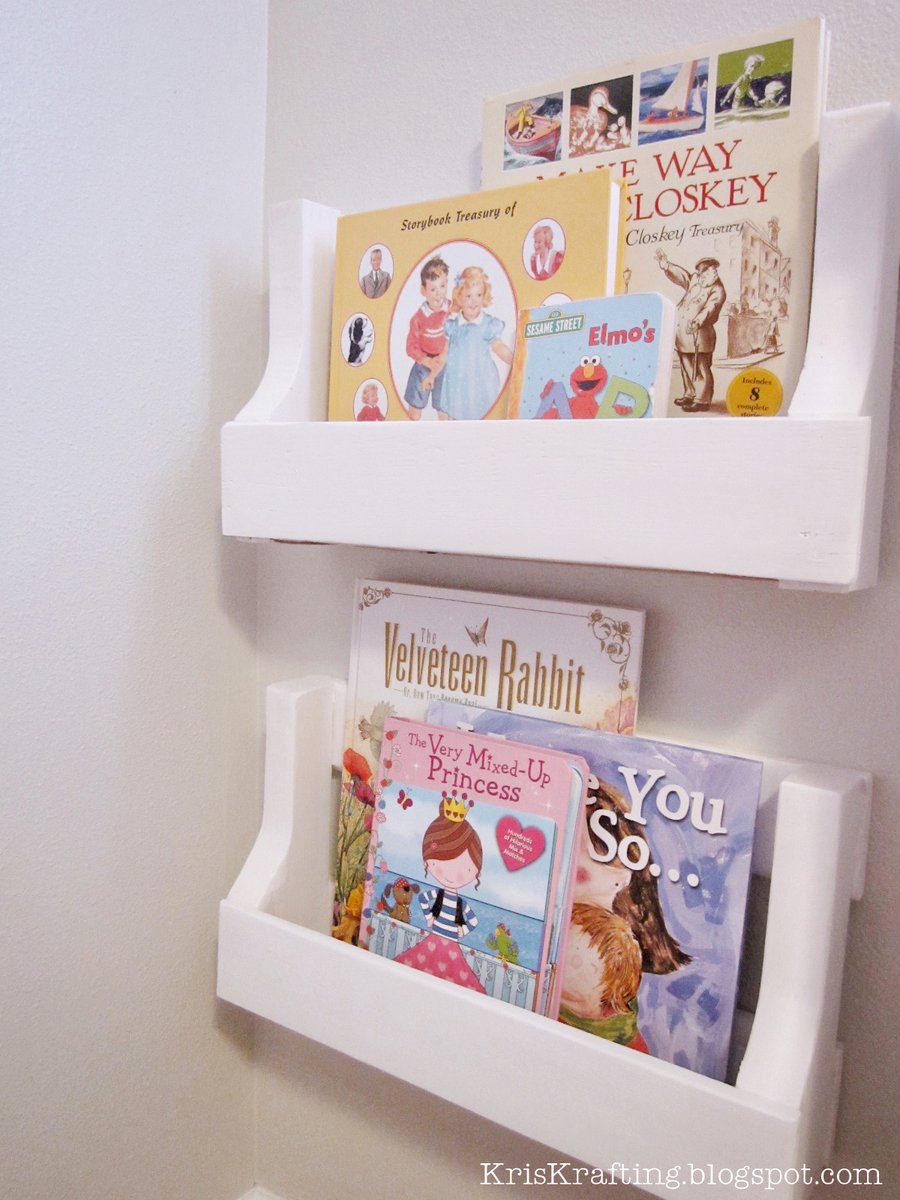

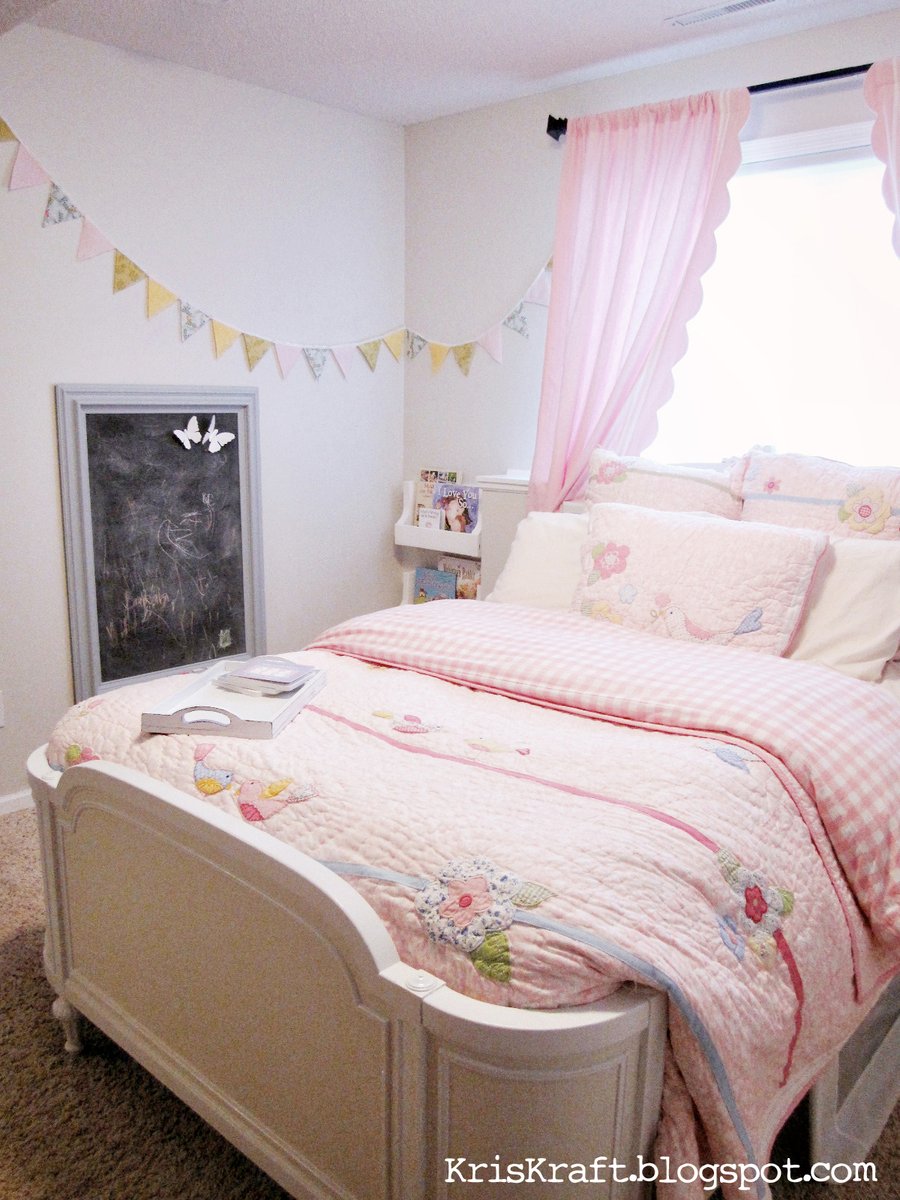
Built from Plan(s)
Estimated Cost
FREE
Estimated Time Investment
An Hour or Two (0-2 Hours)
Finish Used
White Paint
Recommended Skill Level
Starter Project