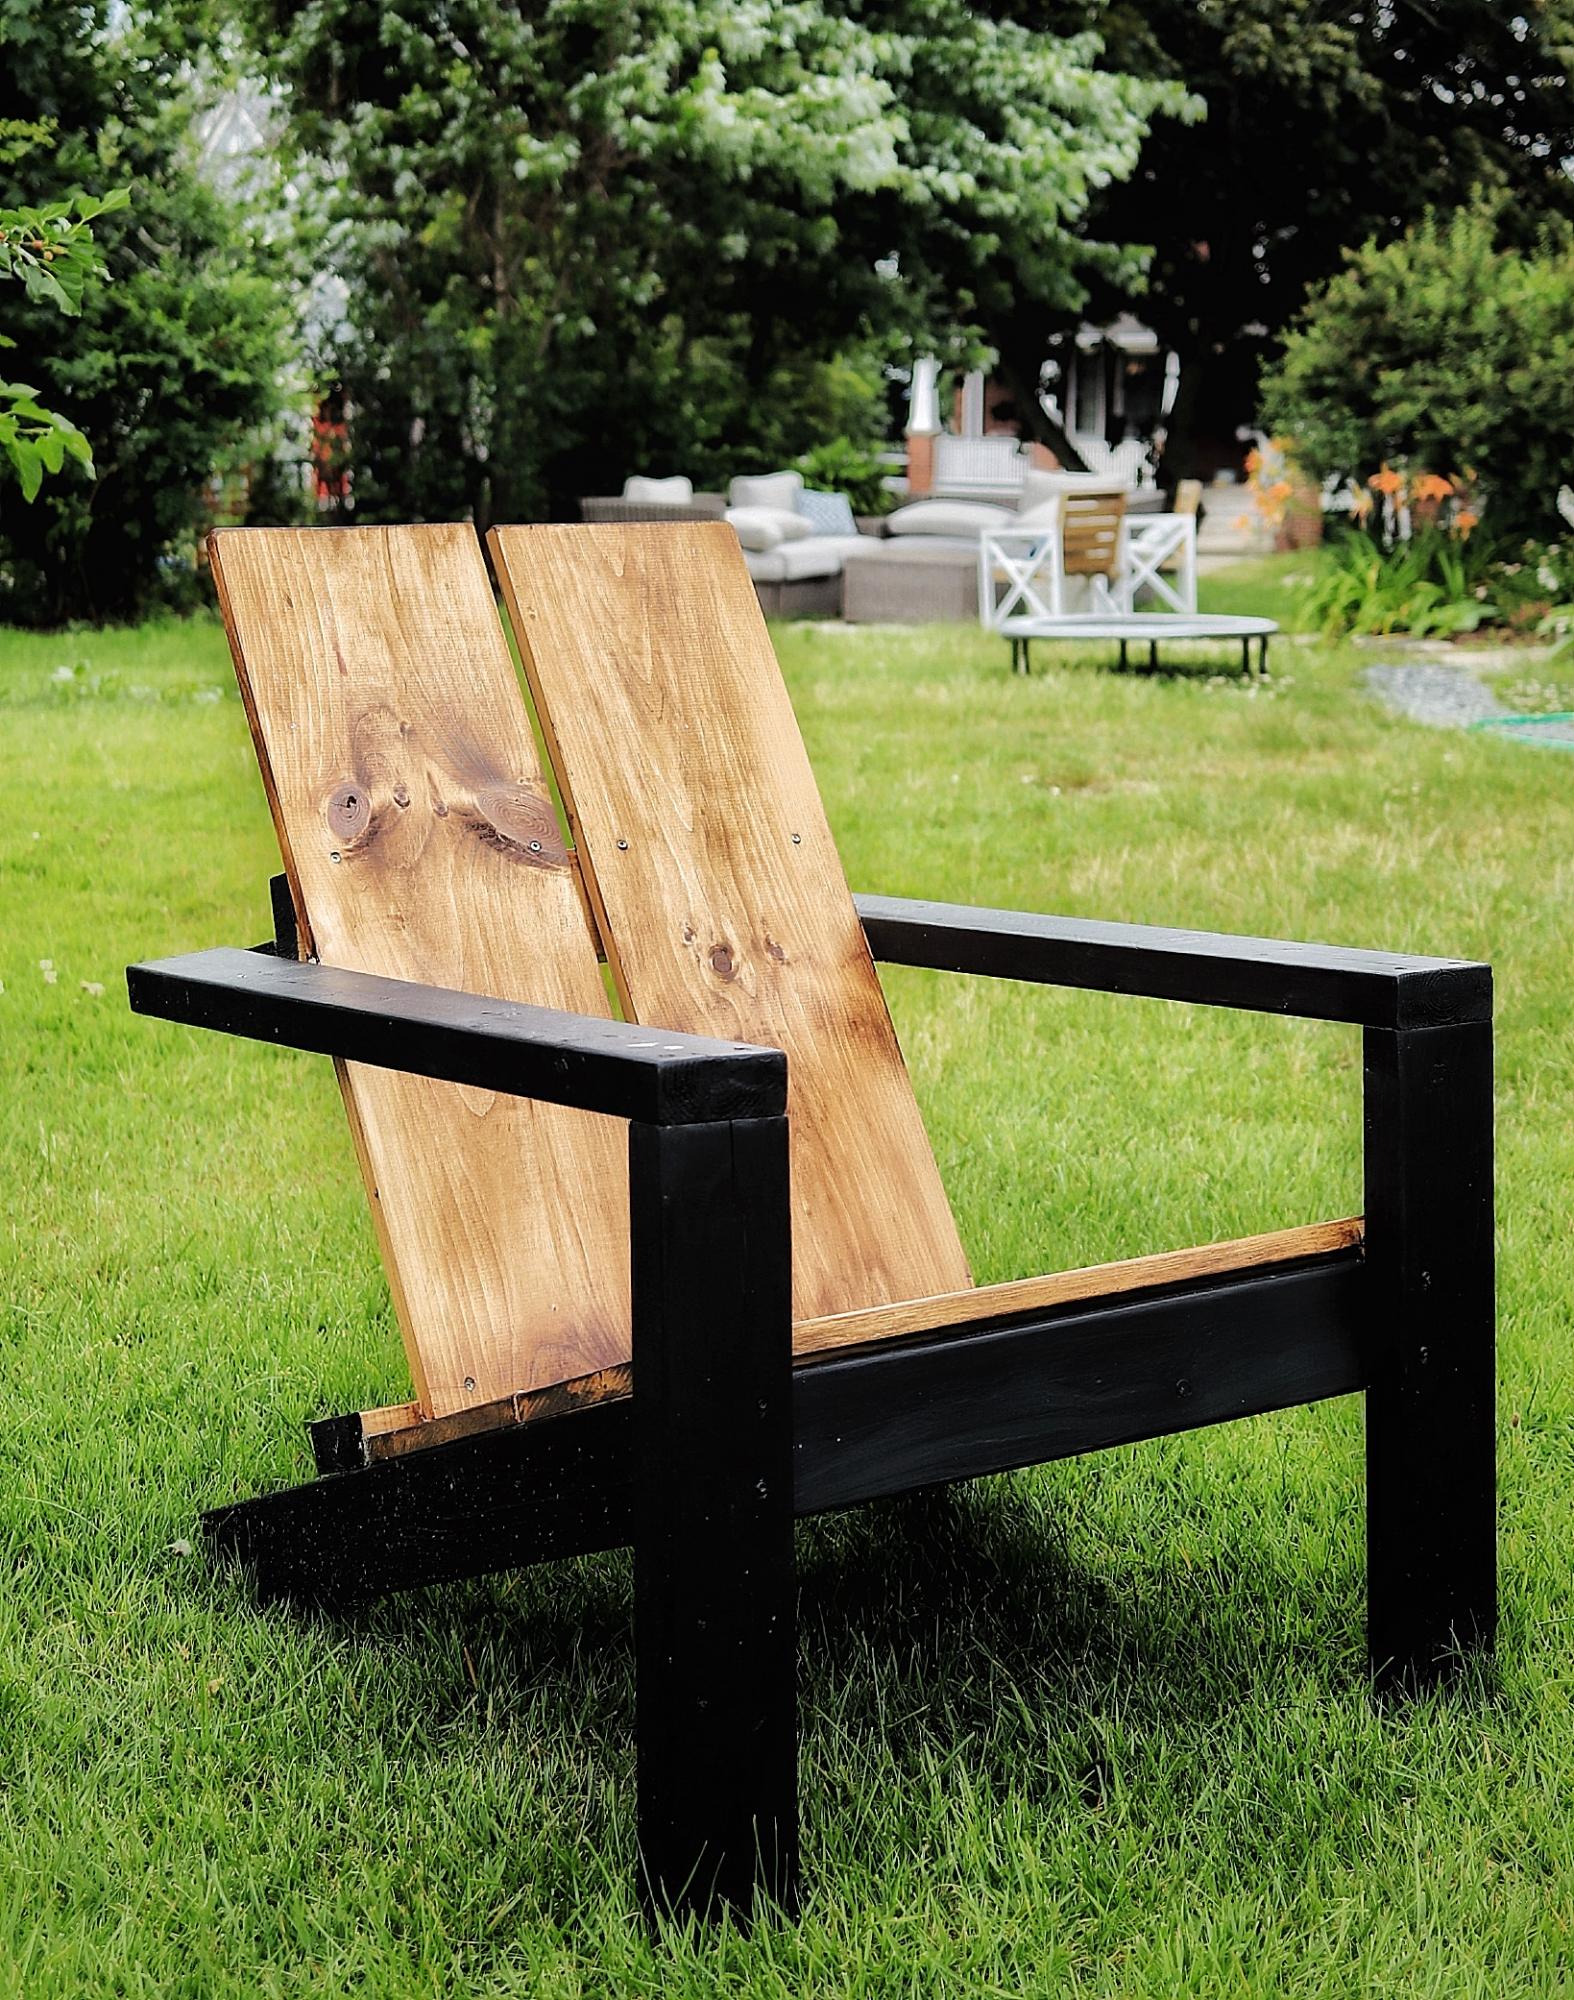
Best Chairs Ever!

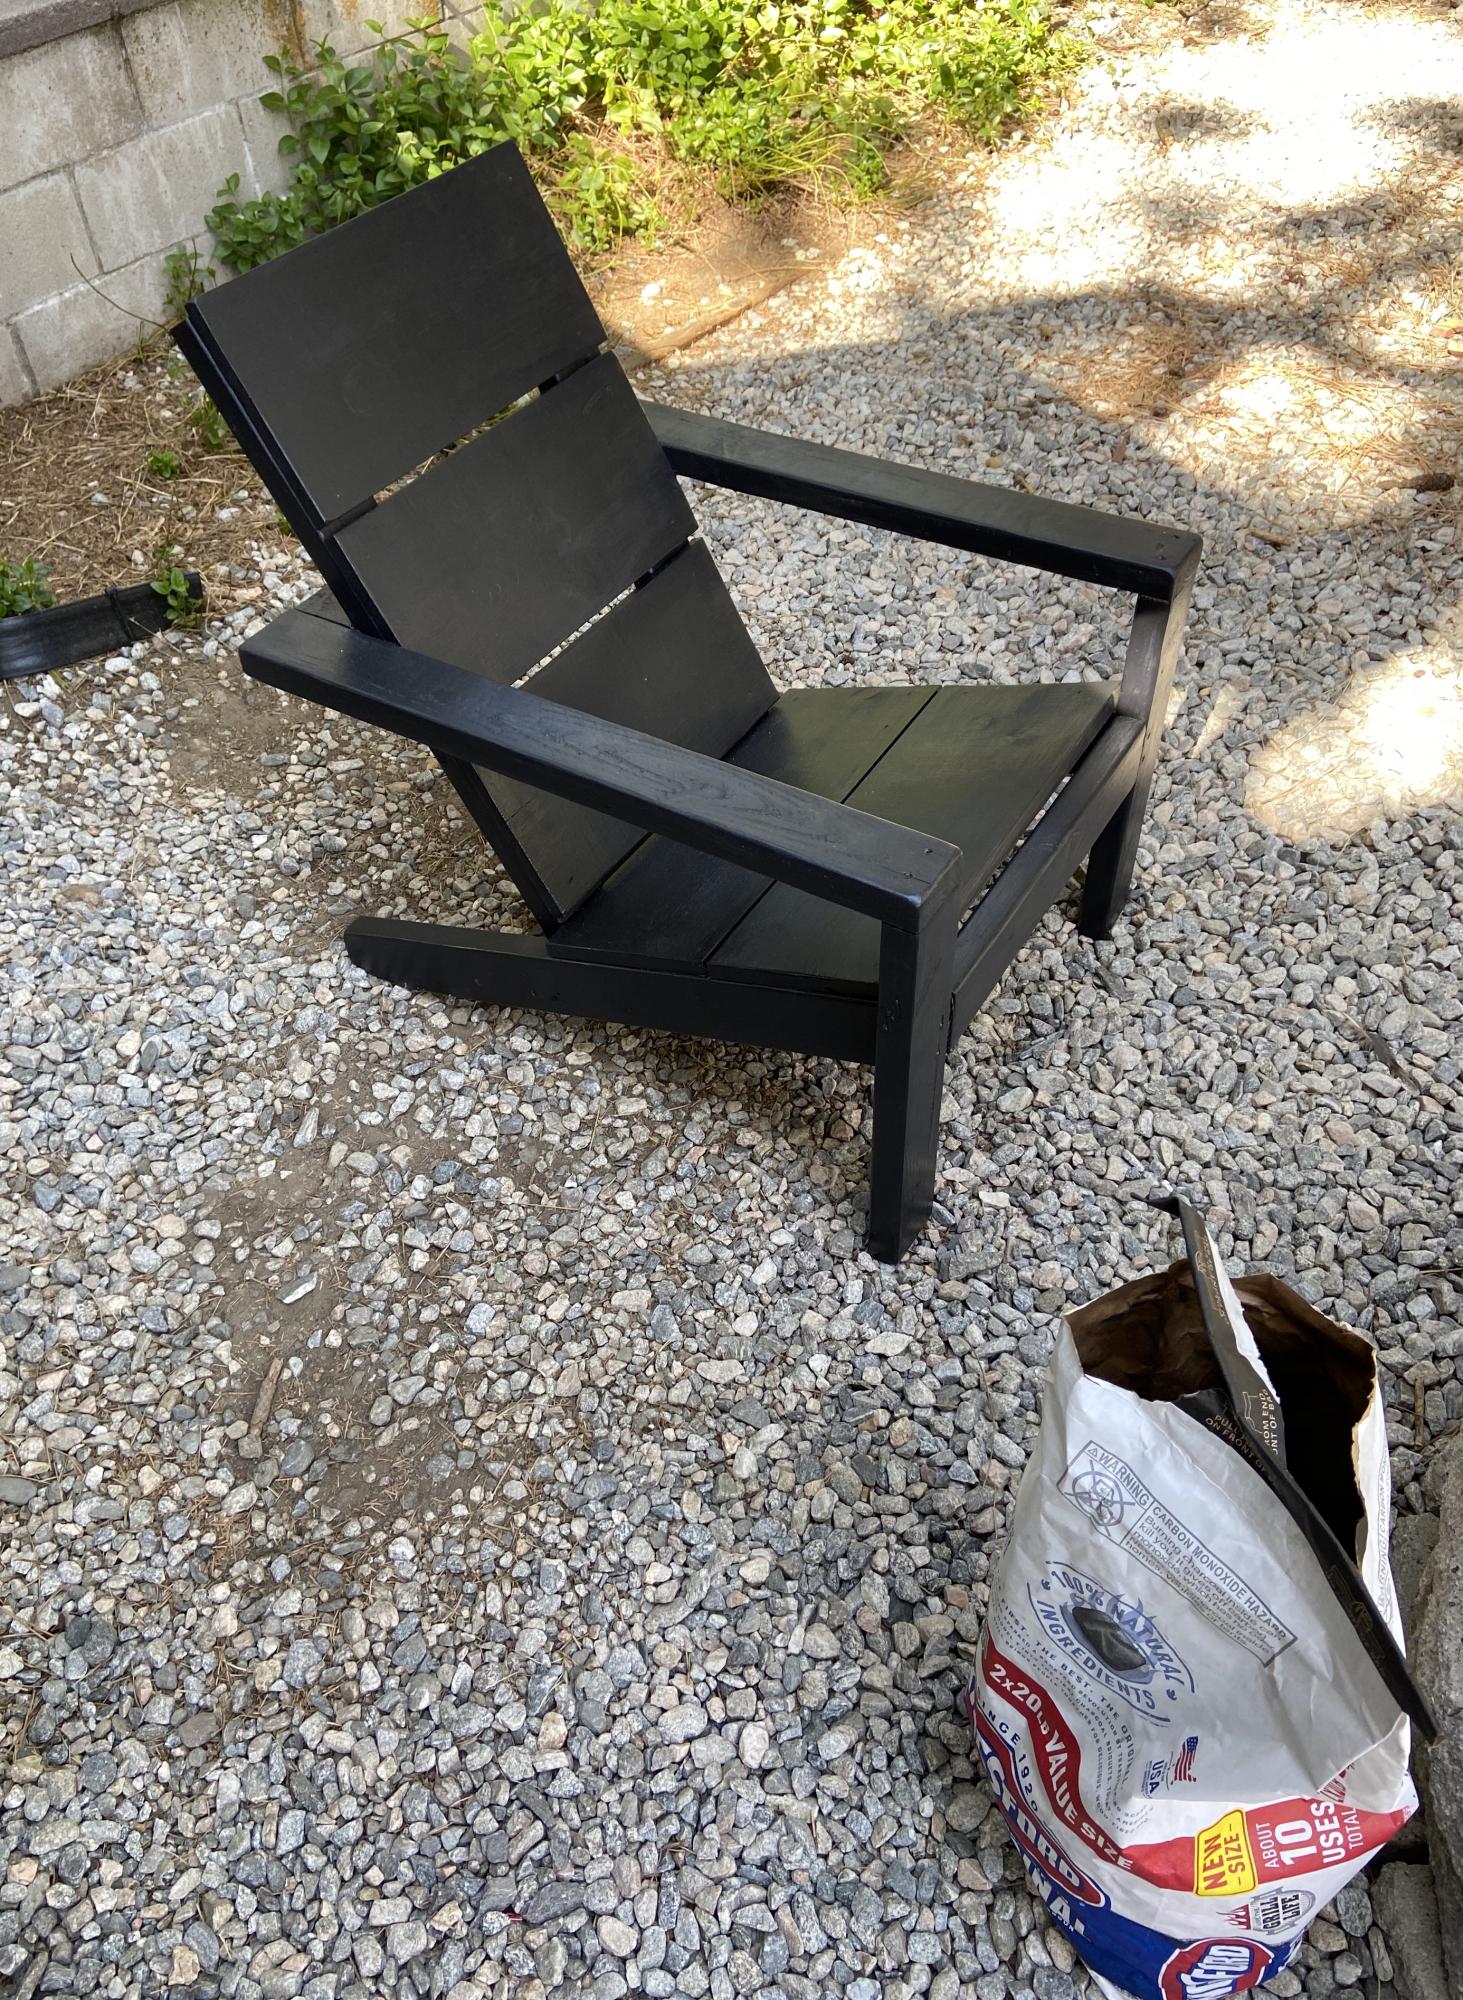
I made these modern Adirondack chairs for our business in Anchorage. GREAT and easy to build design by Ana - we upgraded the arms to tapered 2x6 and they're awesome!


Built from Plan(s)
I made these modern Adirondack chairs for our business in Anchorage. GREAT and easy to build design by Ana - we upgraded the arms to tapered 2x6 and they're awesome!
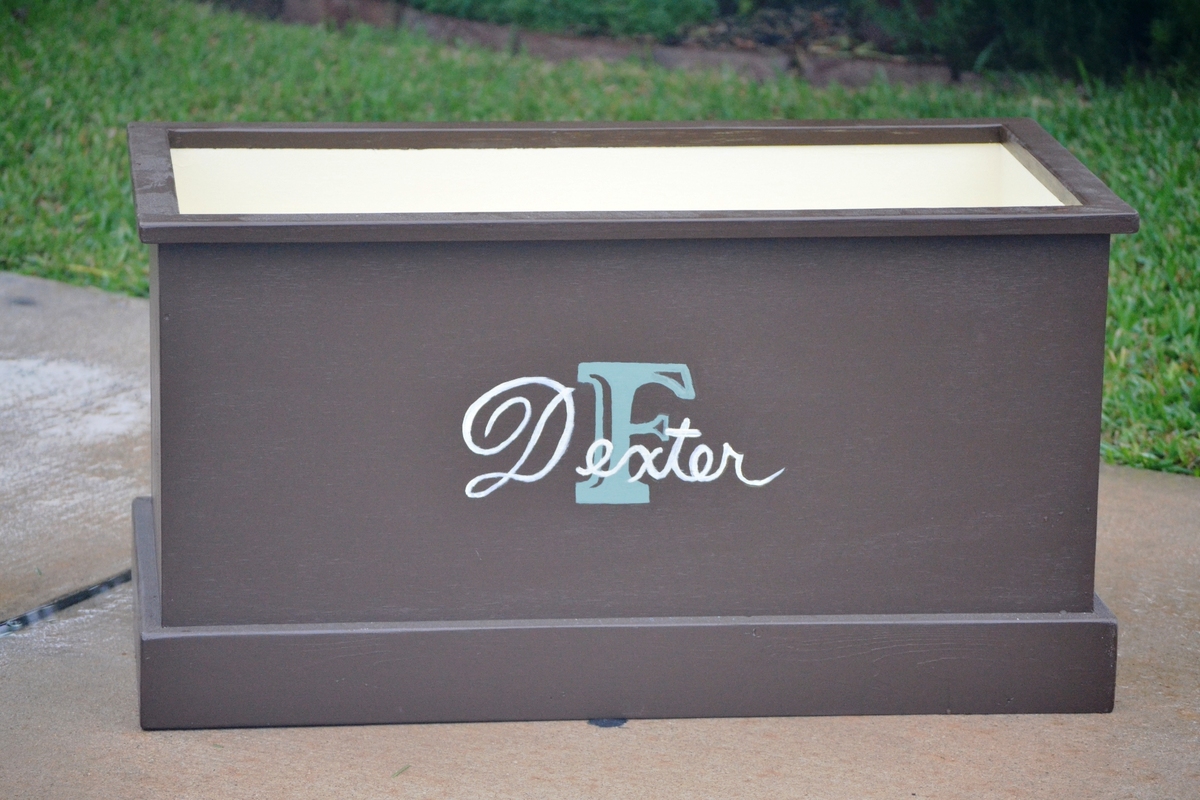
I am in process of making these for my new twin nephews. By reducing the width of the toy box by 1/2", I was able to fit two of the open top toy boxes on one sheet of cabinet grade plywood ($30).
For Two Toy Boxes cut plywood to the following dimensions (see photo for layout):
2 - 32 x 15 1/2 pieces (bottoms)
4 - 33 1/2 x 15 1/2 (front and back)
4 - 15 1/2 x 15 1/2 (sides)
My local Home Depot does not charge for cutting the plywood and the person that was assisting me made absolutely perfect cuts and helped direct me to the cabinet grade plywood (which was located away from the plywood aisle), thus saving me an extra $15.
Boxes took approximately 2-3 hours each to build, another hour to sand and fill screw holes, and several hours to paint.
Photo is of Dexter's toy box. Dante's looks very similar. My 2 year old niece enjoyed taking a nap inside of the boxes as well.
Make sure to purchase non-toxic paint.... I believe one of my nephews may be part beaver!


I recently had a workshop built and I have been trying to now work on the furniture for it. My first project was this workbench inspired by the plans "garage workshop workbench". I added drawers on each side and will probably end up adding a shelf in the open area as well after letting my kids finish decorating the top. It's already a nice addition and I may build a smaller version for my garage. I added casters and have the option to roll the table around or have it stationary.
Tonie

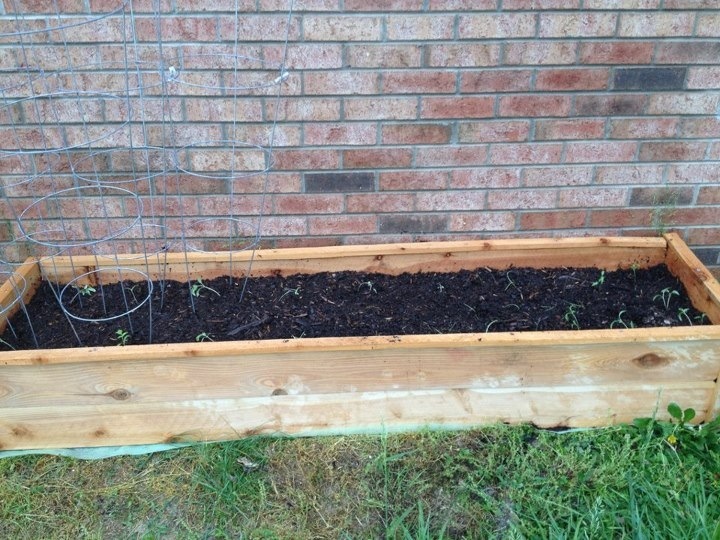
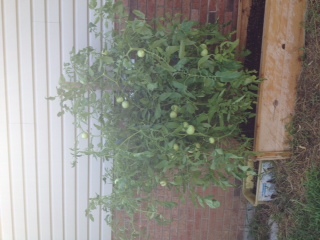
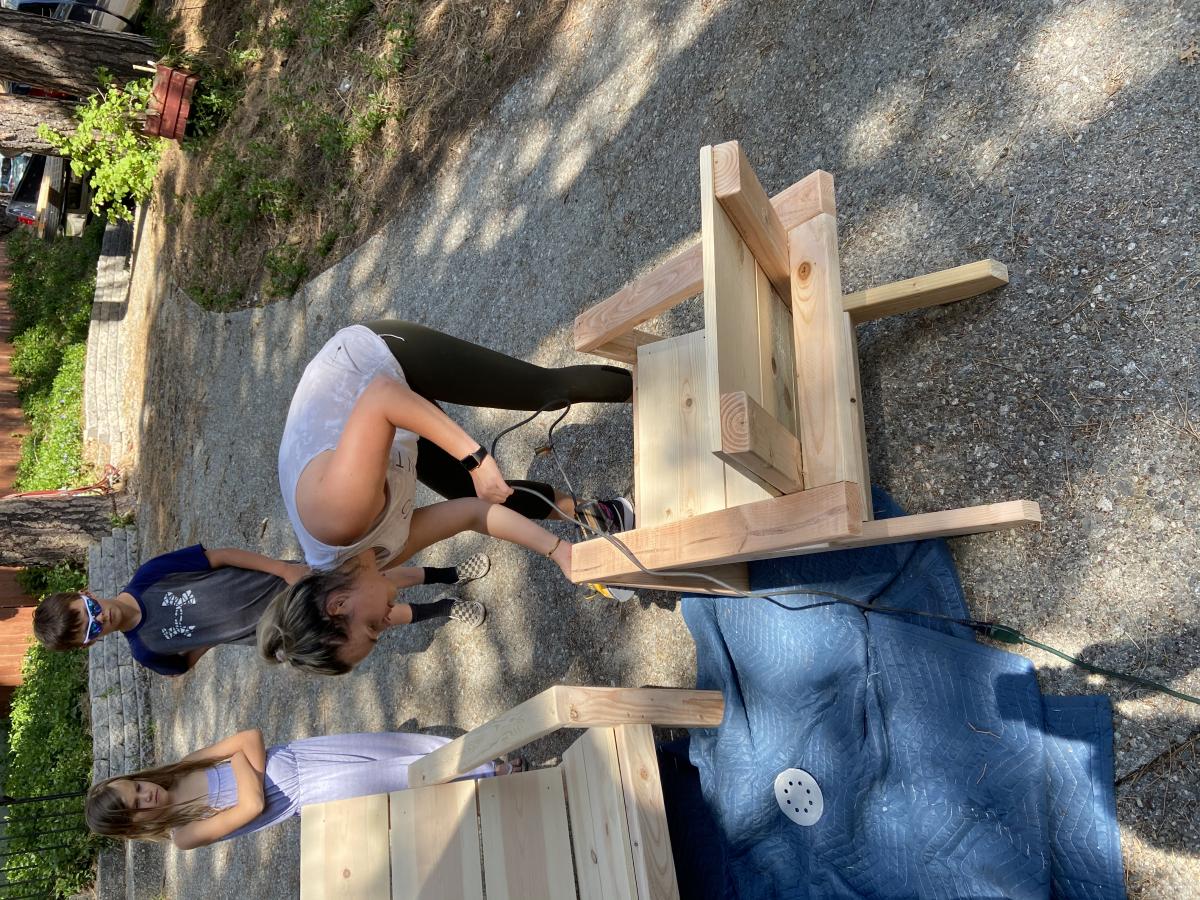
I built this a couple months ago and I'm finally getting around to posting a brag post. This is the second woodworking project I've ever done and my first year gardening! I almost spent over a hundred dollars on one of these raised garden beds and then I saw Ana White's plans and I am so grateful! Hopefully my tomatoes will be ripe soon, but one thing is for sure... this raised garden bed paid for itself with the amount of veggies I'm getting from it! I have big gardening plans for next year! Sorry my second pic is sideways... can't figure it out!
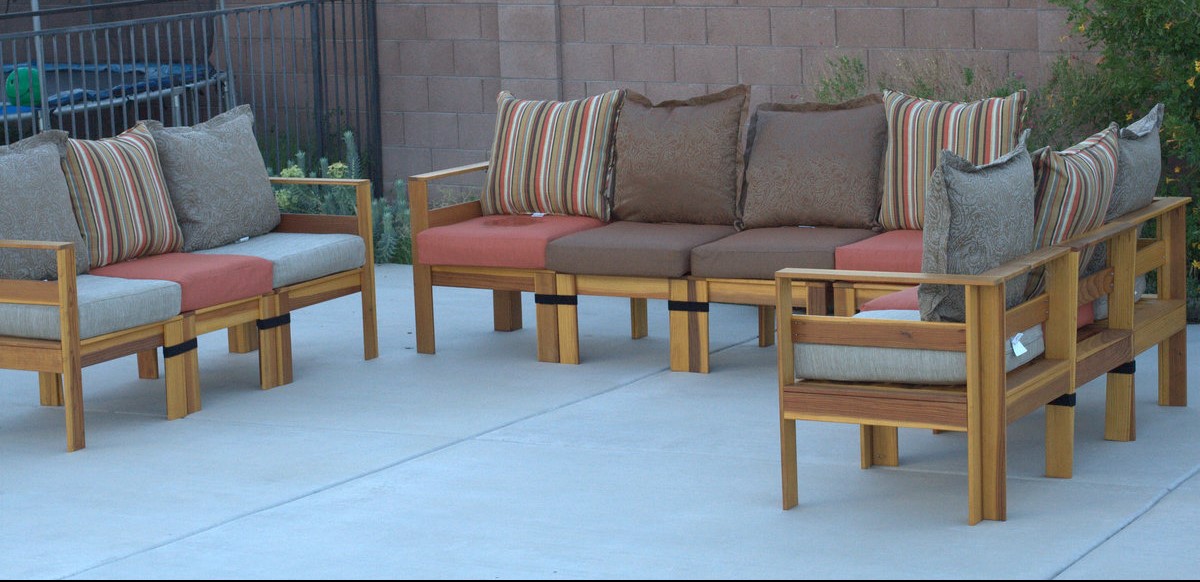
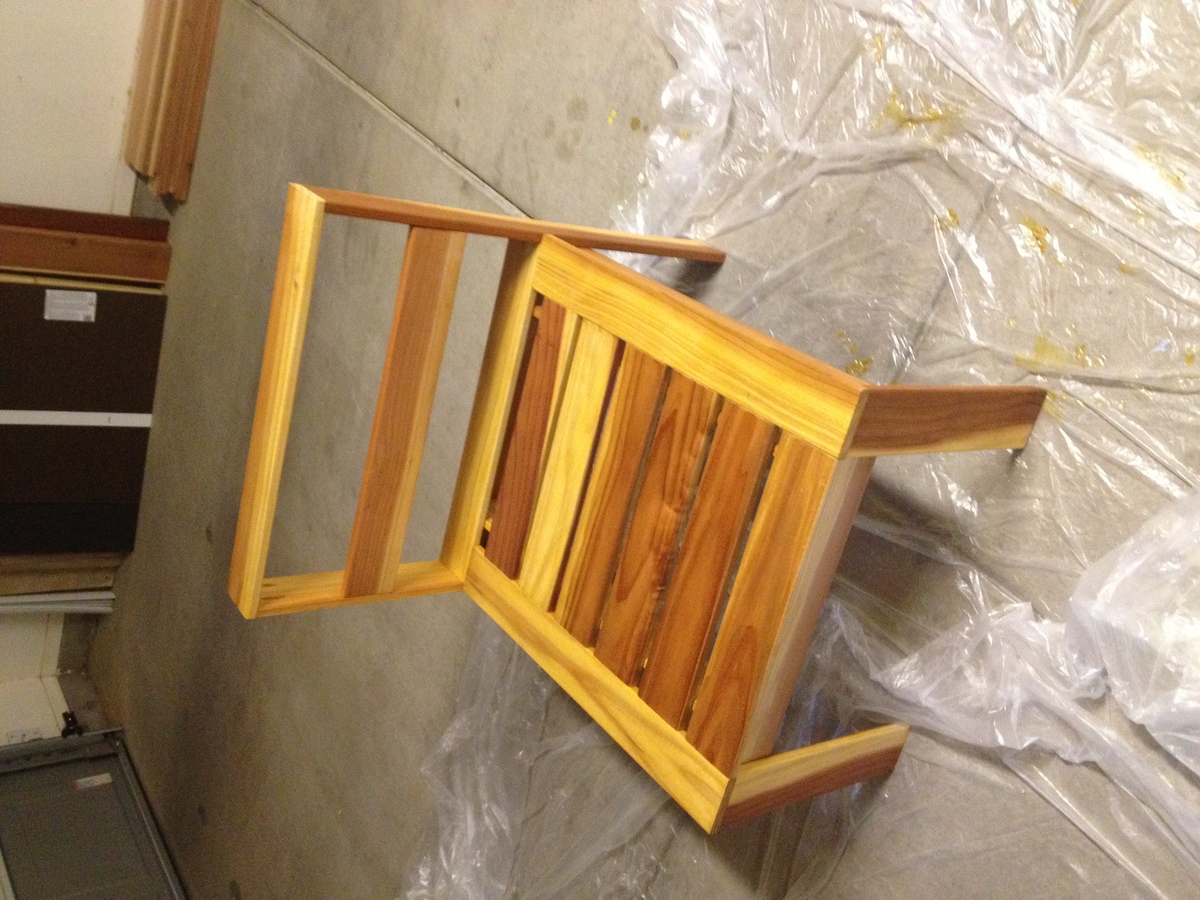
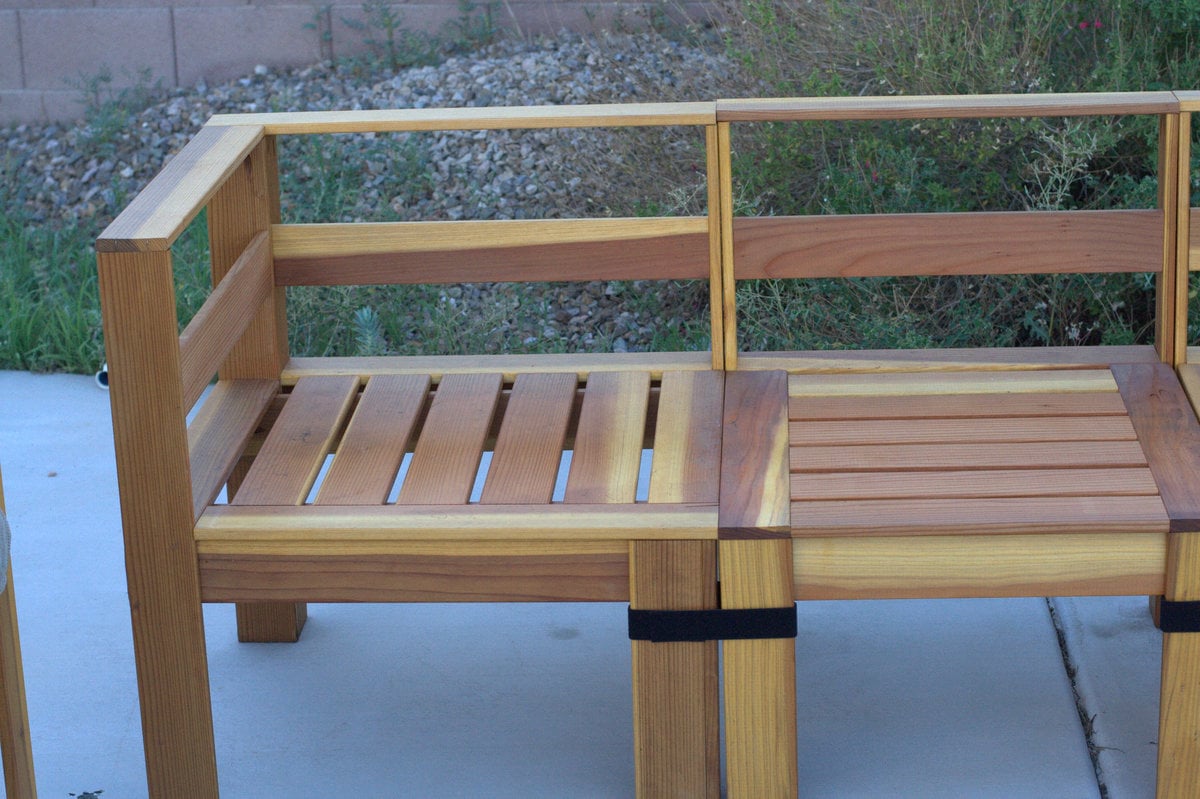
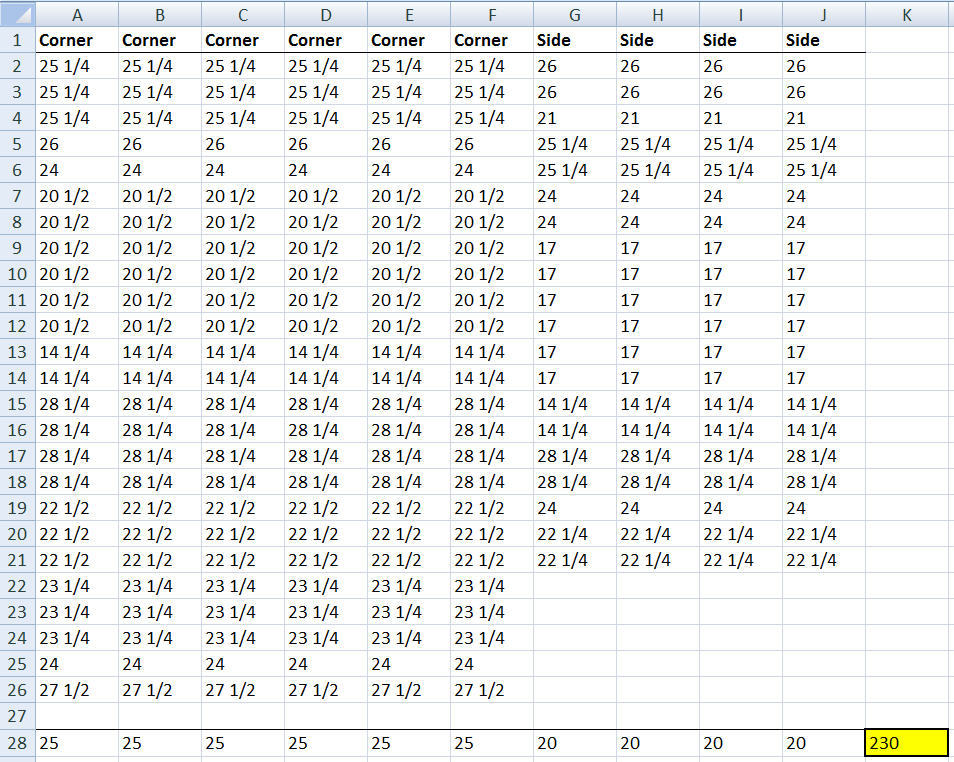
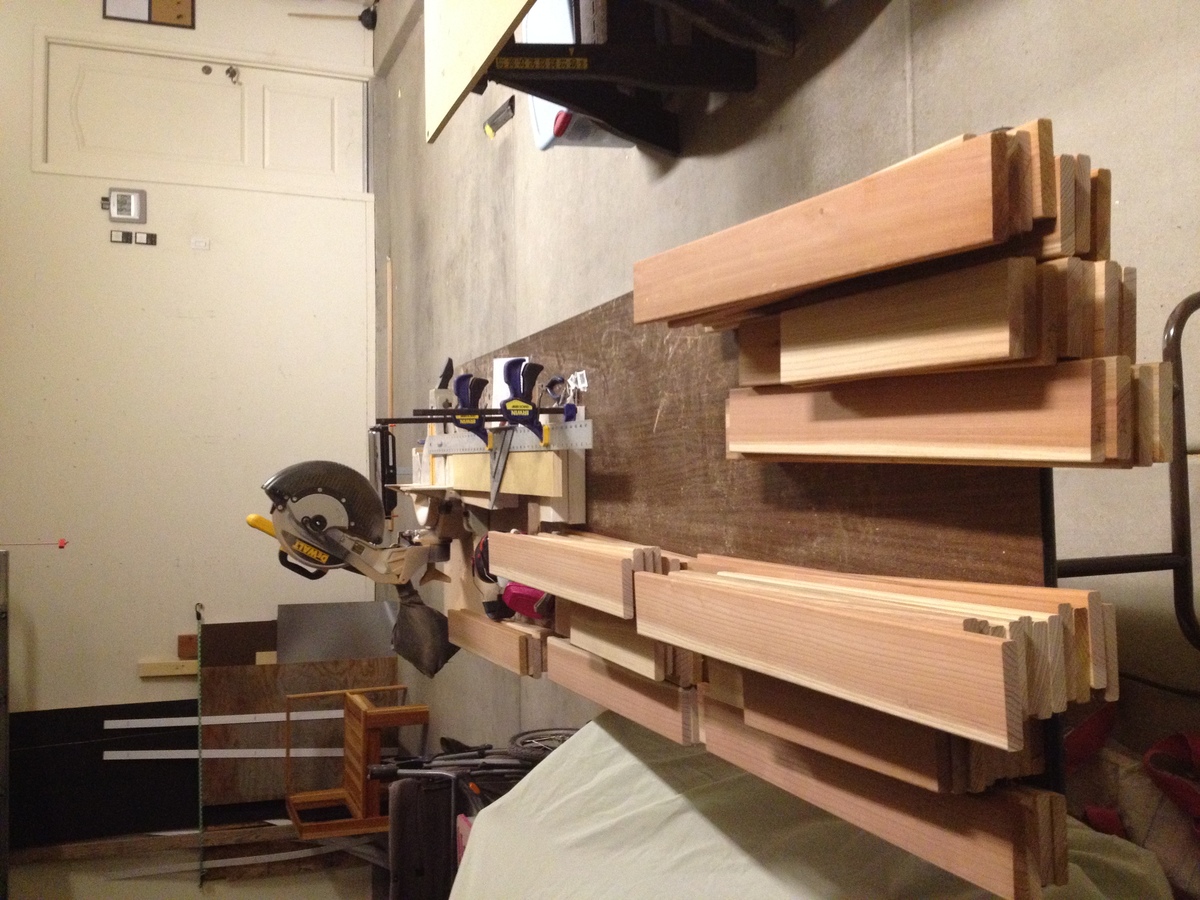
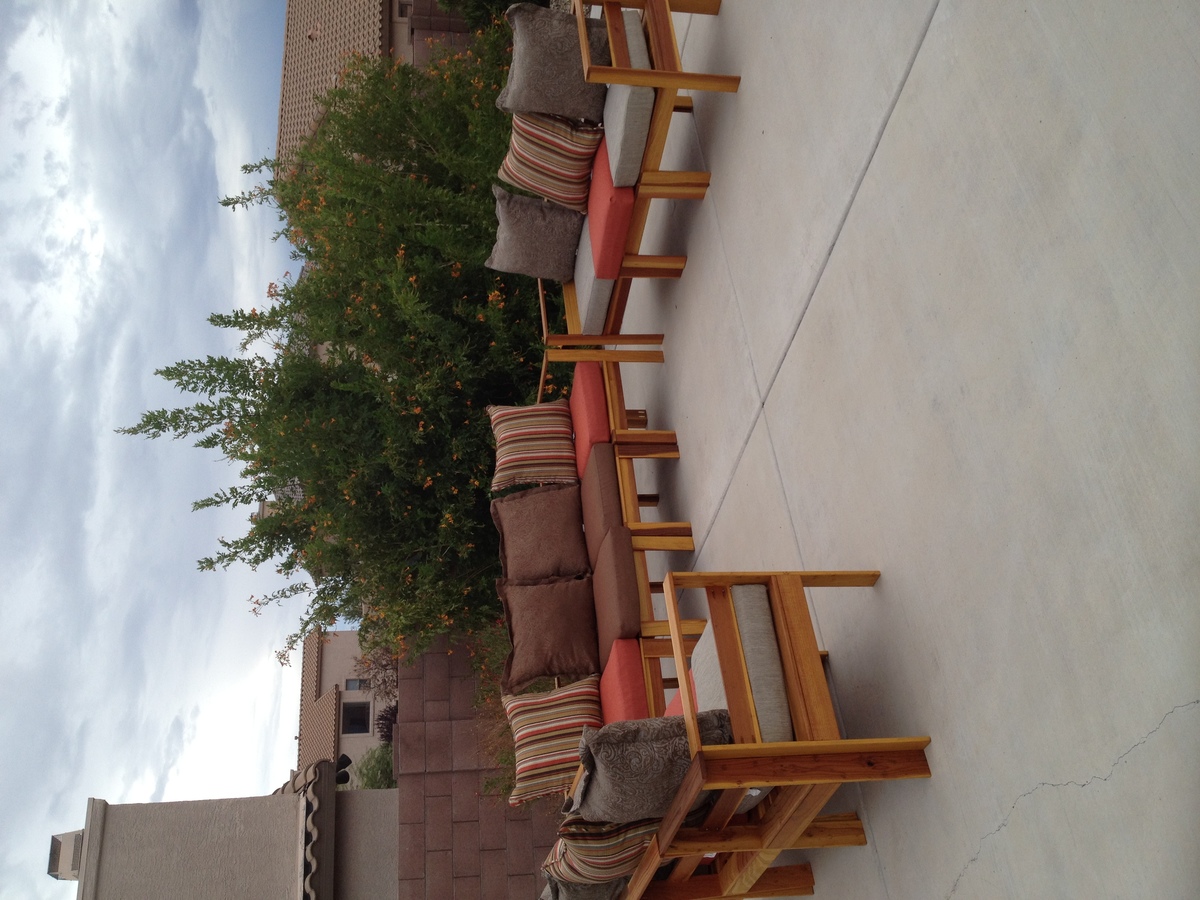
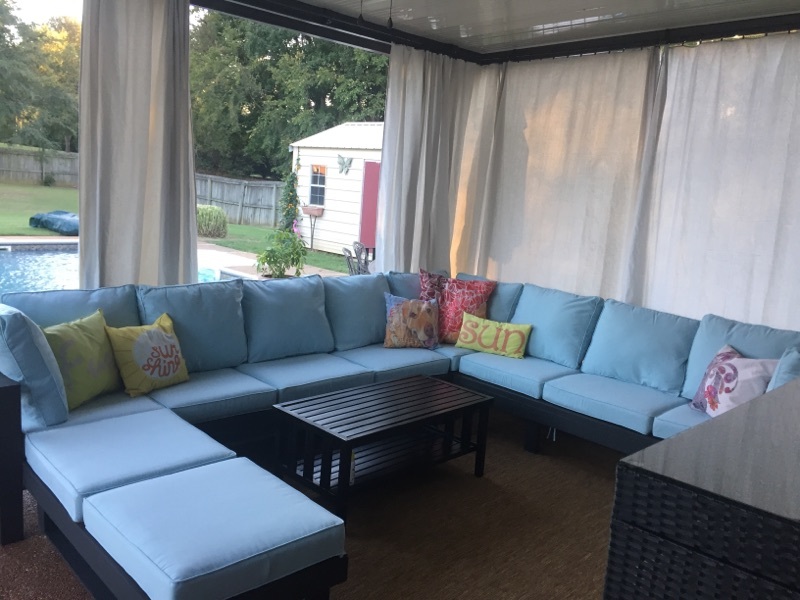
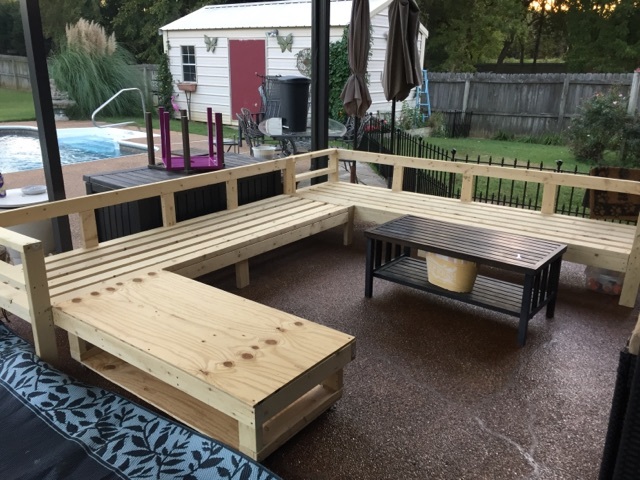
Pocket Screws are my new favorite things! Total of 10 chairs made, 6 corners and 4 sides. Over 230 cuts, and 1000 pocket screws. It took me a while to finish, but I am very pleased with the result. I would not attempt this project without the Kregg Jig or similar product however. It saved me a bunch of time. The plans were detailed and easy to follow. I added a back brace to the design, and decided to make three separate units instead of a u-shaped sofa. This adds more armrests to the unit. I intend to add end tables in the corners and a table in the middle still. Instead of screwing the chairs together I used One-Wrap Velcro so the units can be reconfigured. I purchased the cushions instead of making them. Lowes had some on sale for $50. It added about $500 to the total cost, but it was worth not having to sew.
Sun, 08/19/2012 - 09:03
Just got inspired (Thanks to Ana) and built a deck this summer.
Wanted to do something in the Simple Modern Collection...
Been trying to figure out what chairs and loveseats to put out there. You've given me the inspiration to do it this way!
I think I'll just start it easy -- one sectional at a time.... easier on the budget, too. And I sew, so the cushions will be done at home during the winter -- mix 'n' match.
Am raising the seat height a little (bad knees) and would love to know if there is any way to slant the back? I'm sure I'll figure something out.
Can't wait to show this to my family!!!
Beautiful.... just beautiful...
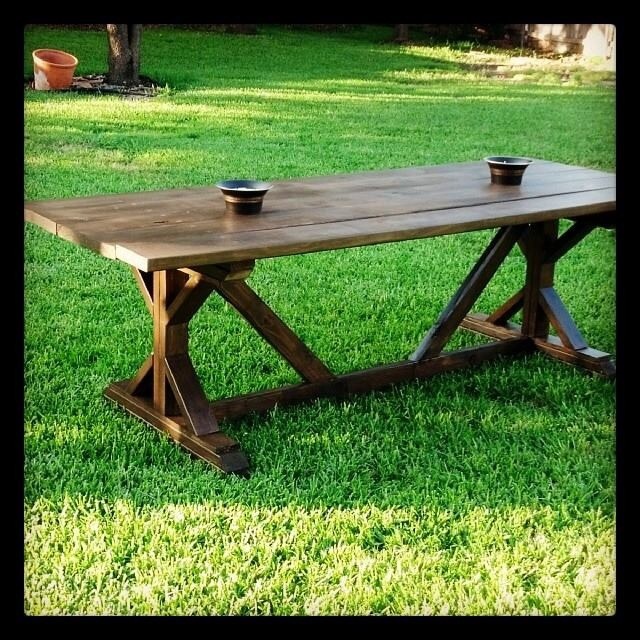
Needed a patio table for this space and decided on this plan. After the build portion, the stain finish really made it complete. Now time for some summer get togethers.
My daughter and my first project .. thank you for the easy plans and YouTube tutorials! Onward and upward ...

My husband used the plans from this website to make a single Murphy bed. He didn't make any changes, save for building the frame out of solid poplar and using birch plywood for the flat surface the mattress sits on when it's unfolded. We trimmed it to mimic the the lines of a built-in in the same room, and stained it Jacobean to make it look dark. It's a solid piece of furniture and is saving us tons of space.
I was so excited to find the plans for these awesome chairs, I’ve built 7 this season already—the modification happened as an accident, but I loved the result !

Thu, 03/04/2021 - 10:59
This is absolutely gorgeous! I love the modification!
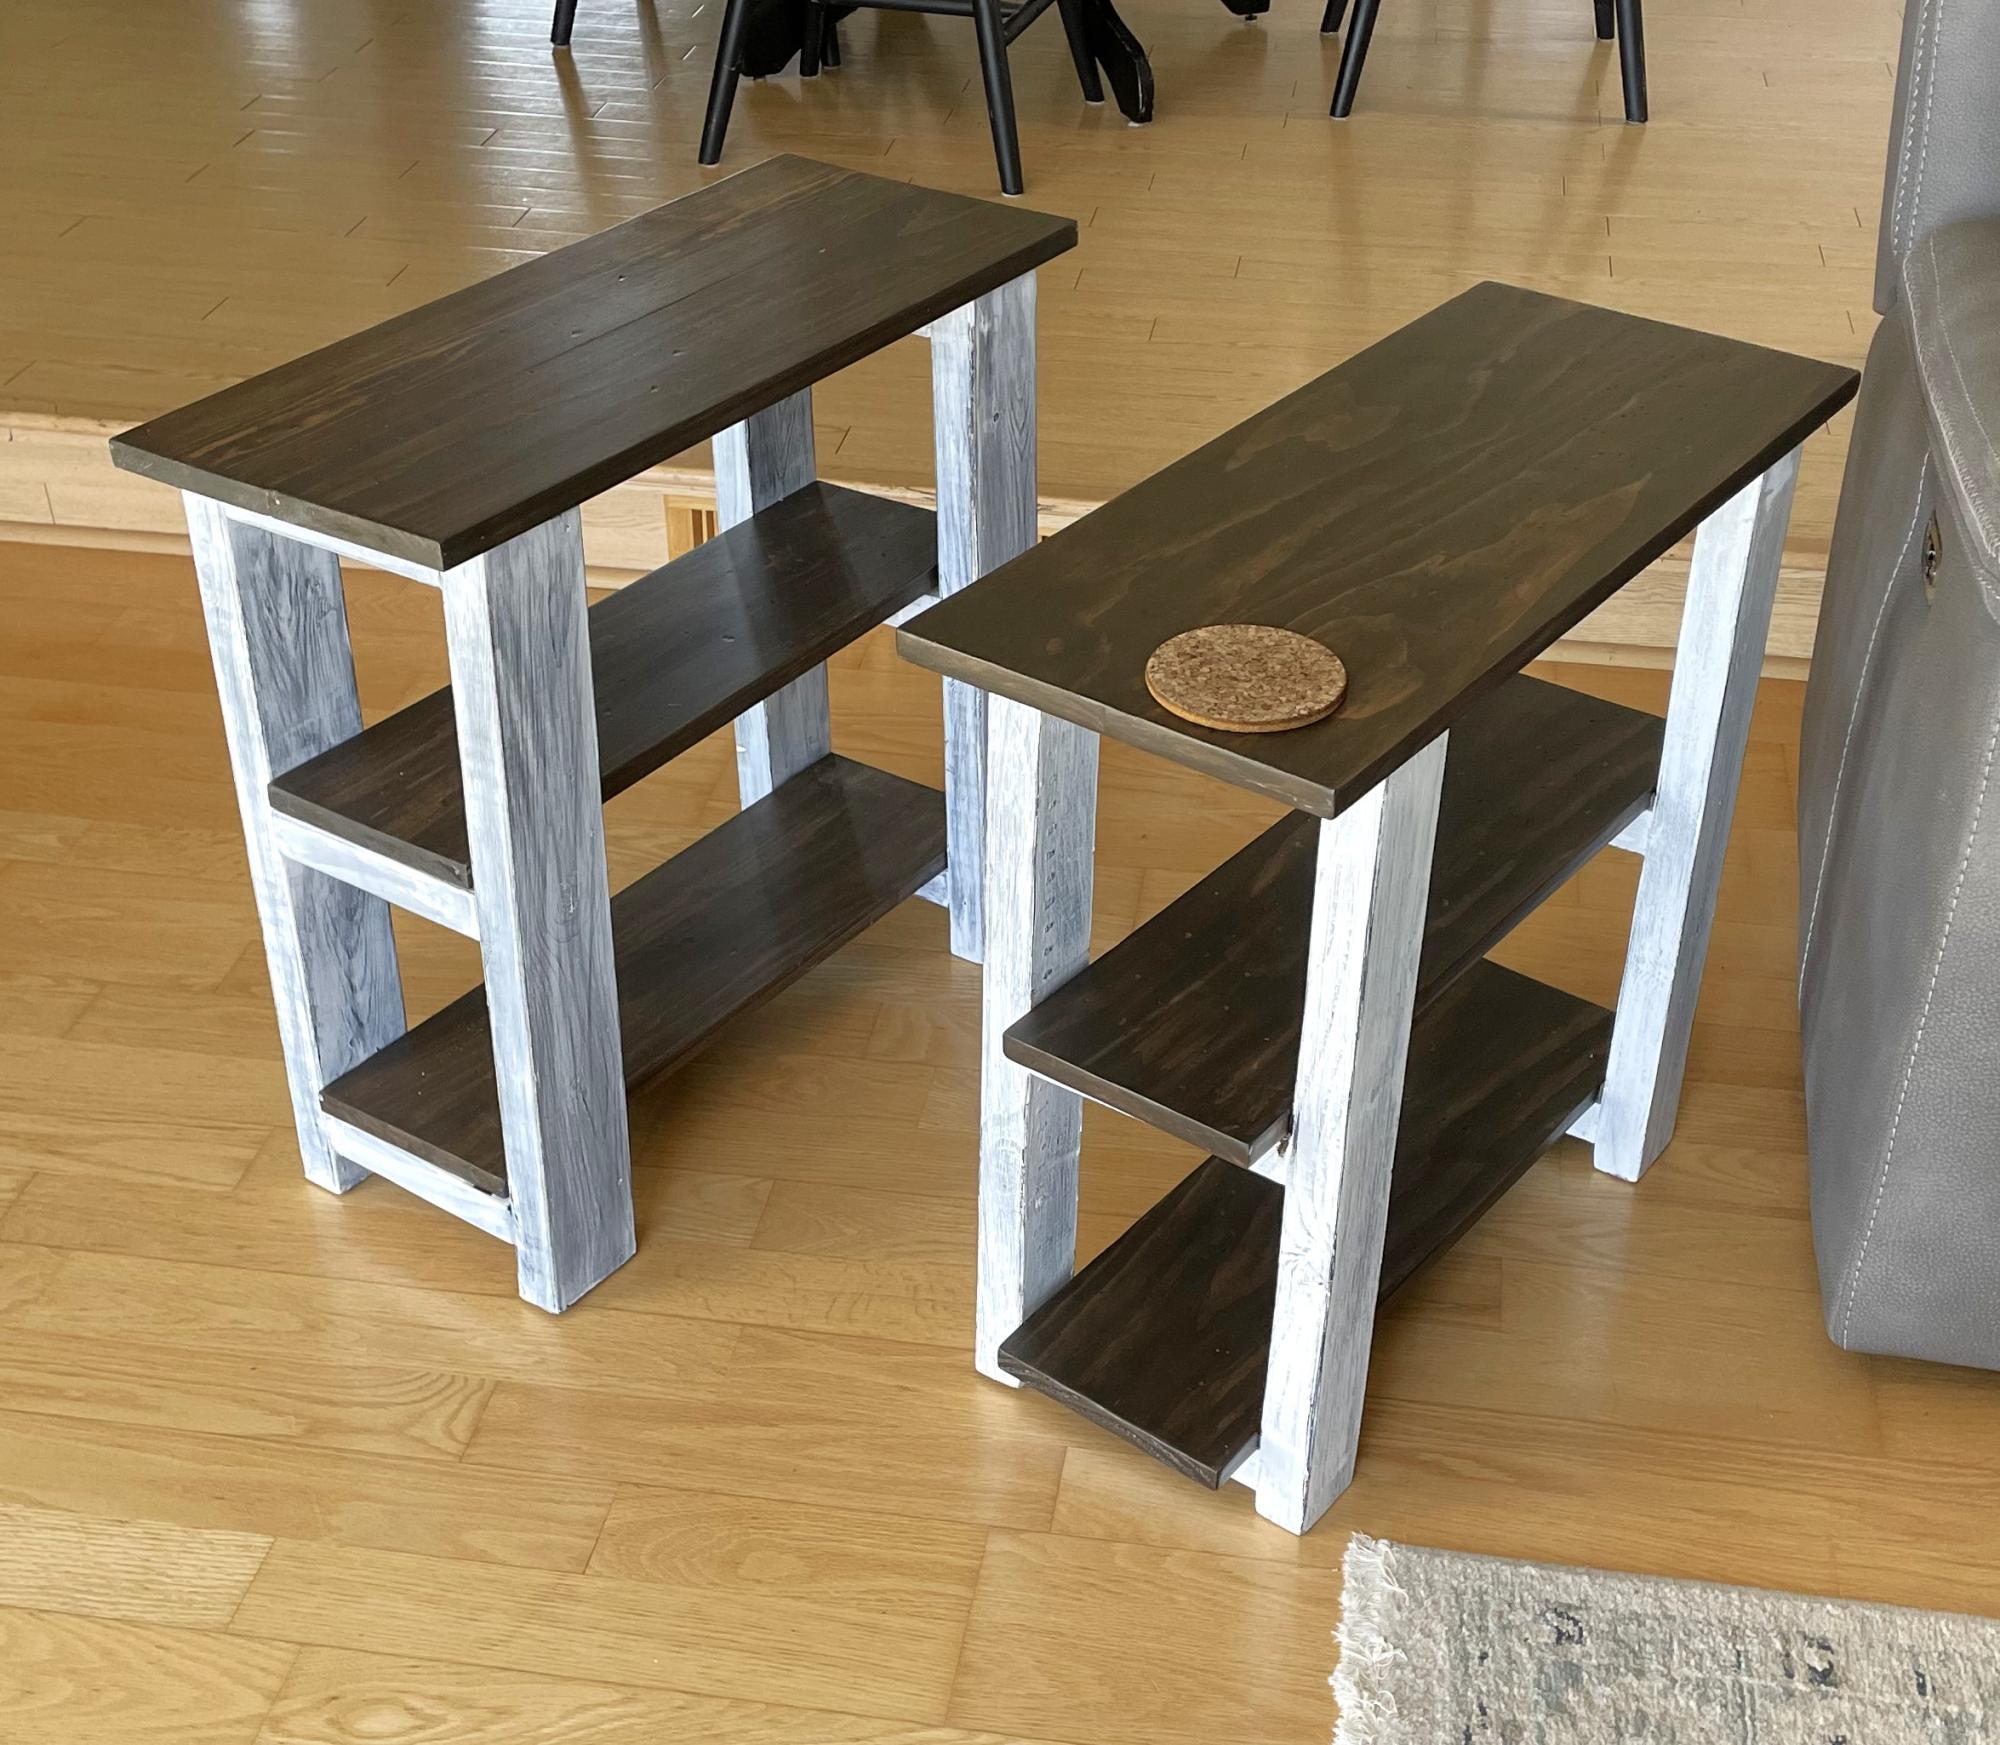
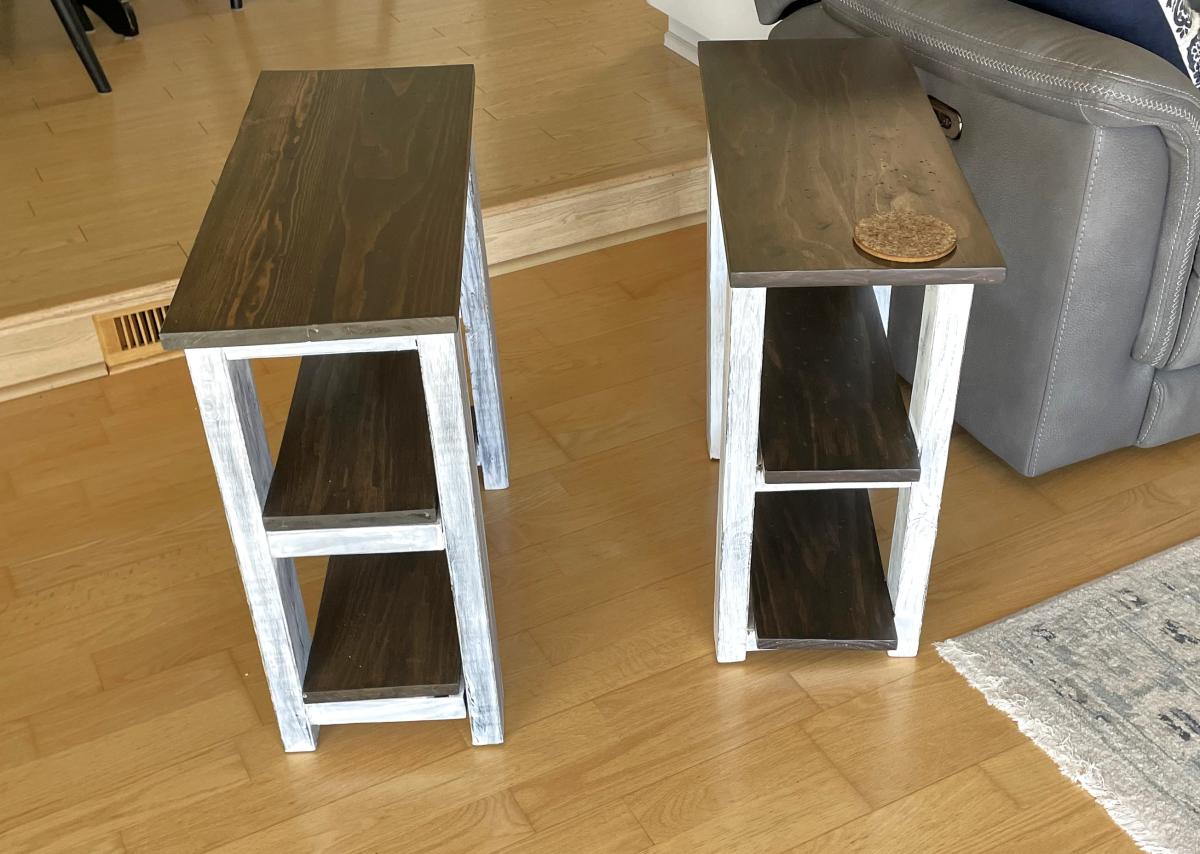
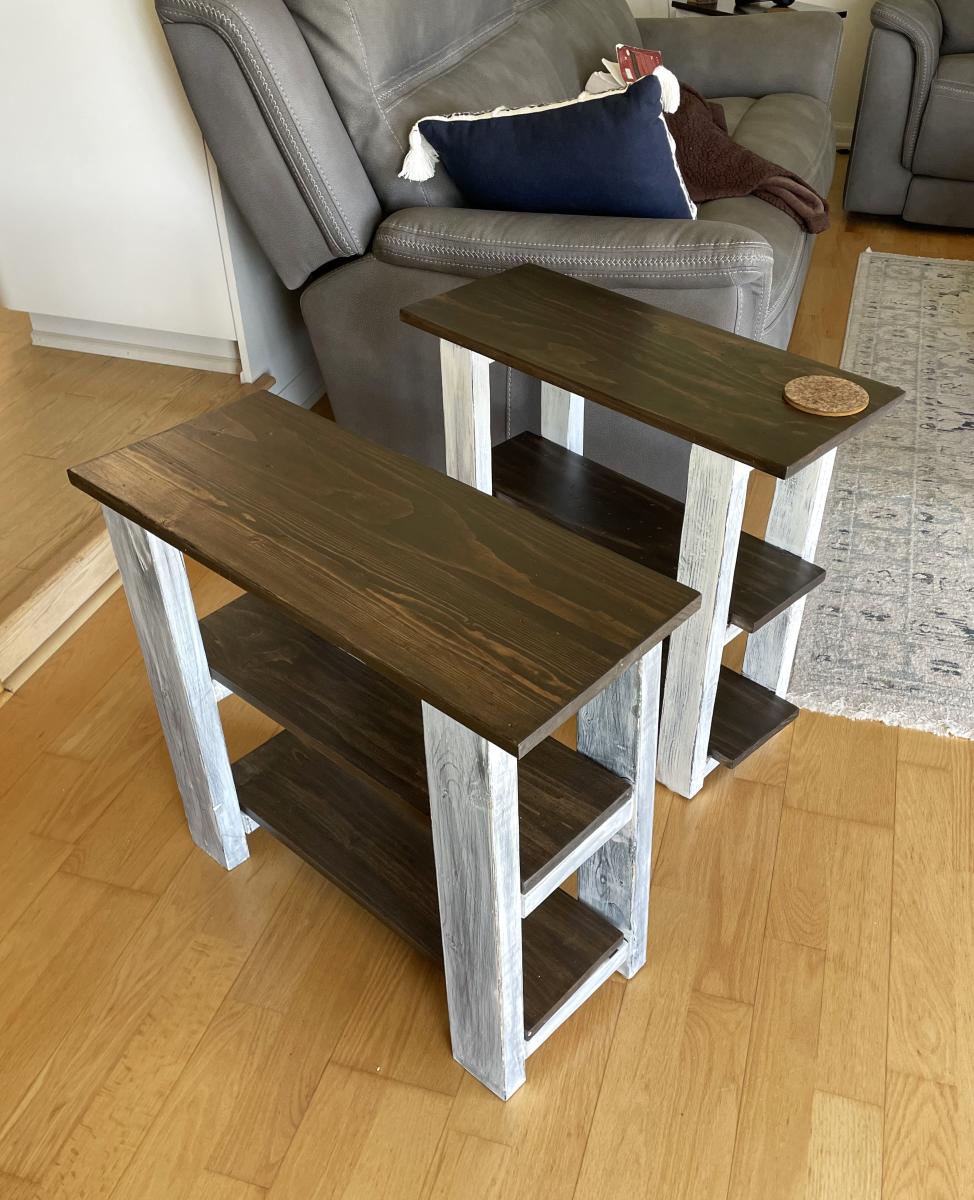
This a good build! I learned a lot especially about measuring where the middle shelf should go so it is even. I am so happy to have made all the tables in our family room!
Kim Rachow
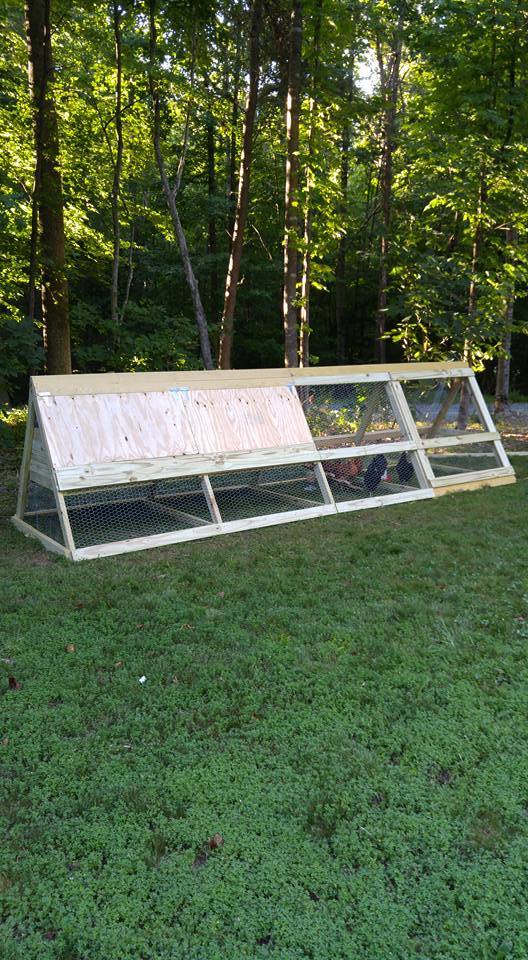
We wanted our chickens to have plenty of room for when we ere not home and could not let them free range in the yard. One of the six was a rooster-- and long story-- but we don't have him any more-- so 5 chickens now enjoy this coop/run. It cost about $300 in supplies. It is 16 feet long.
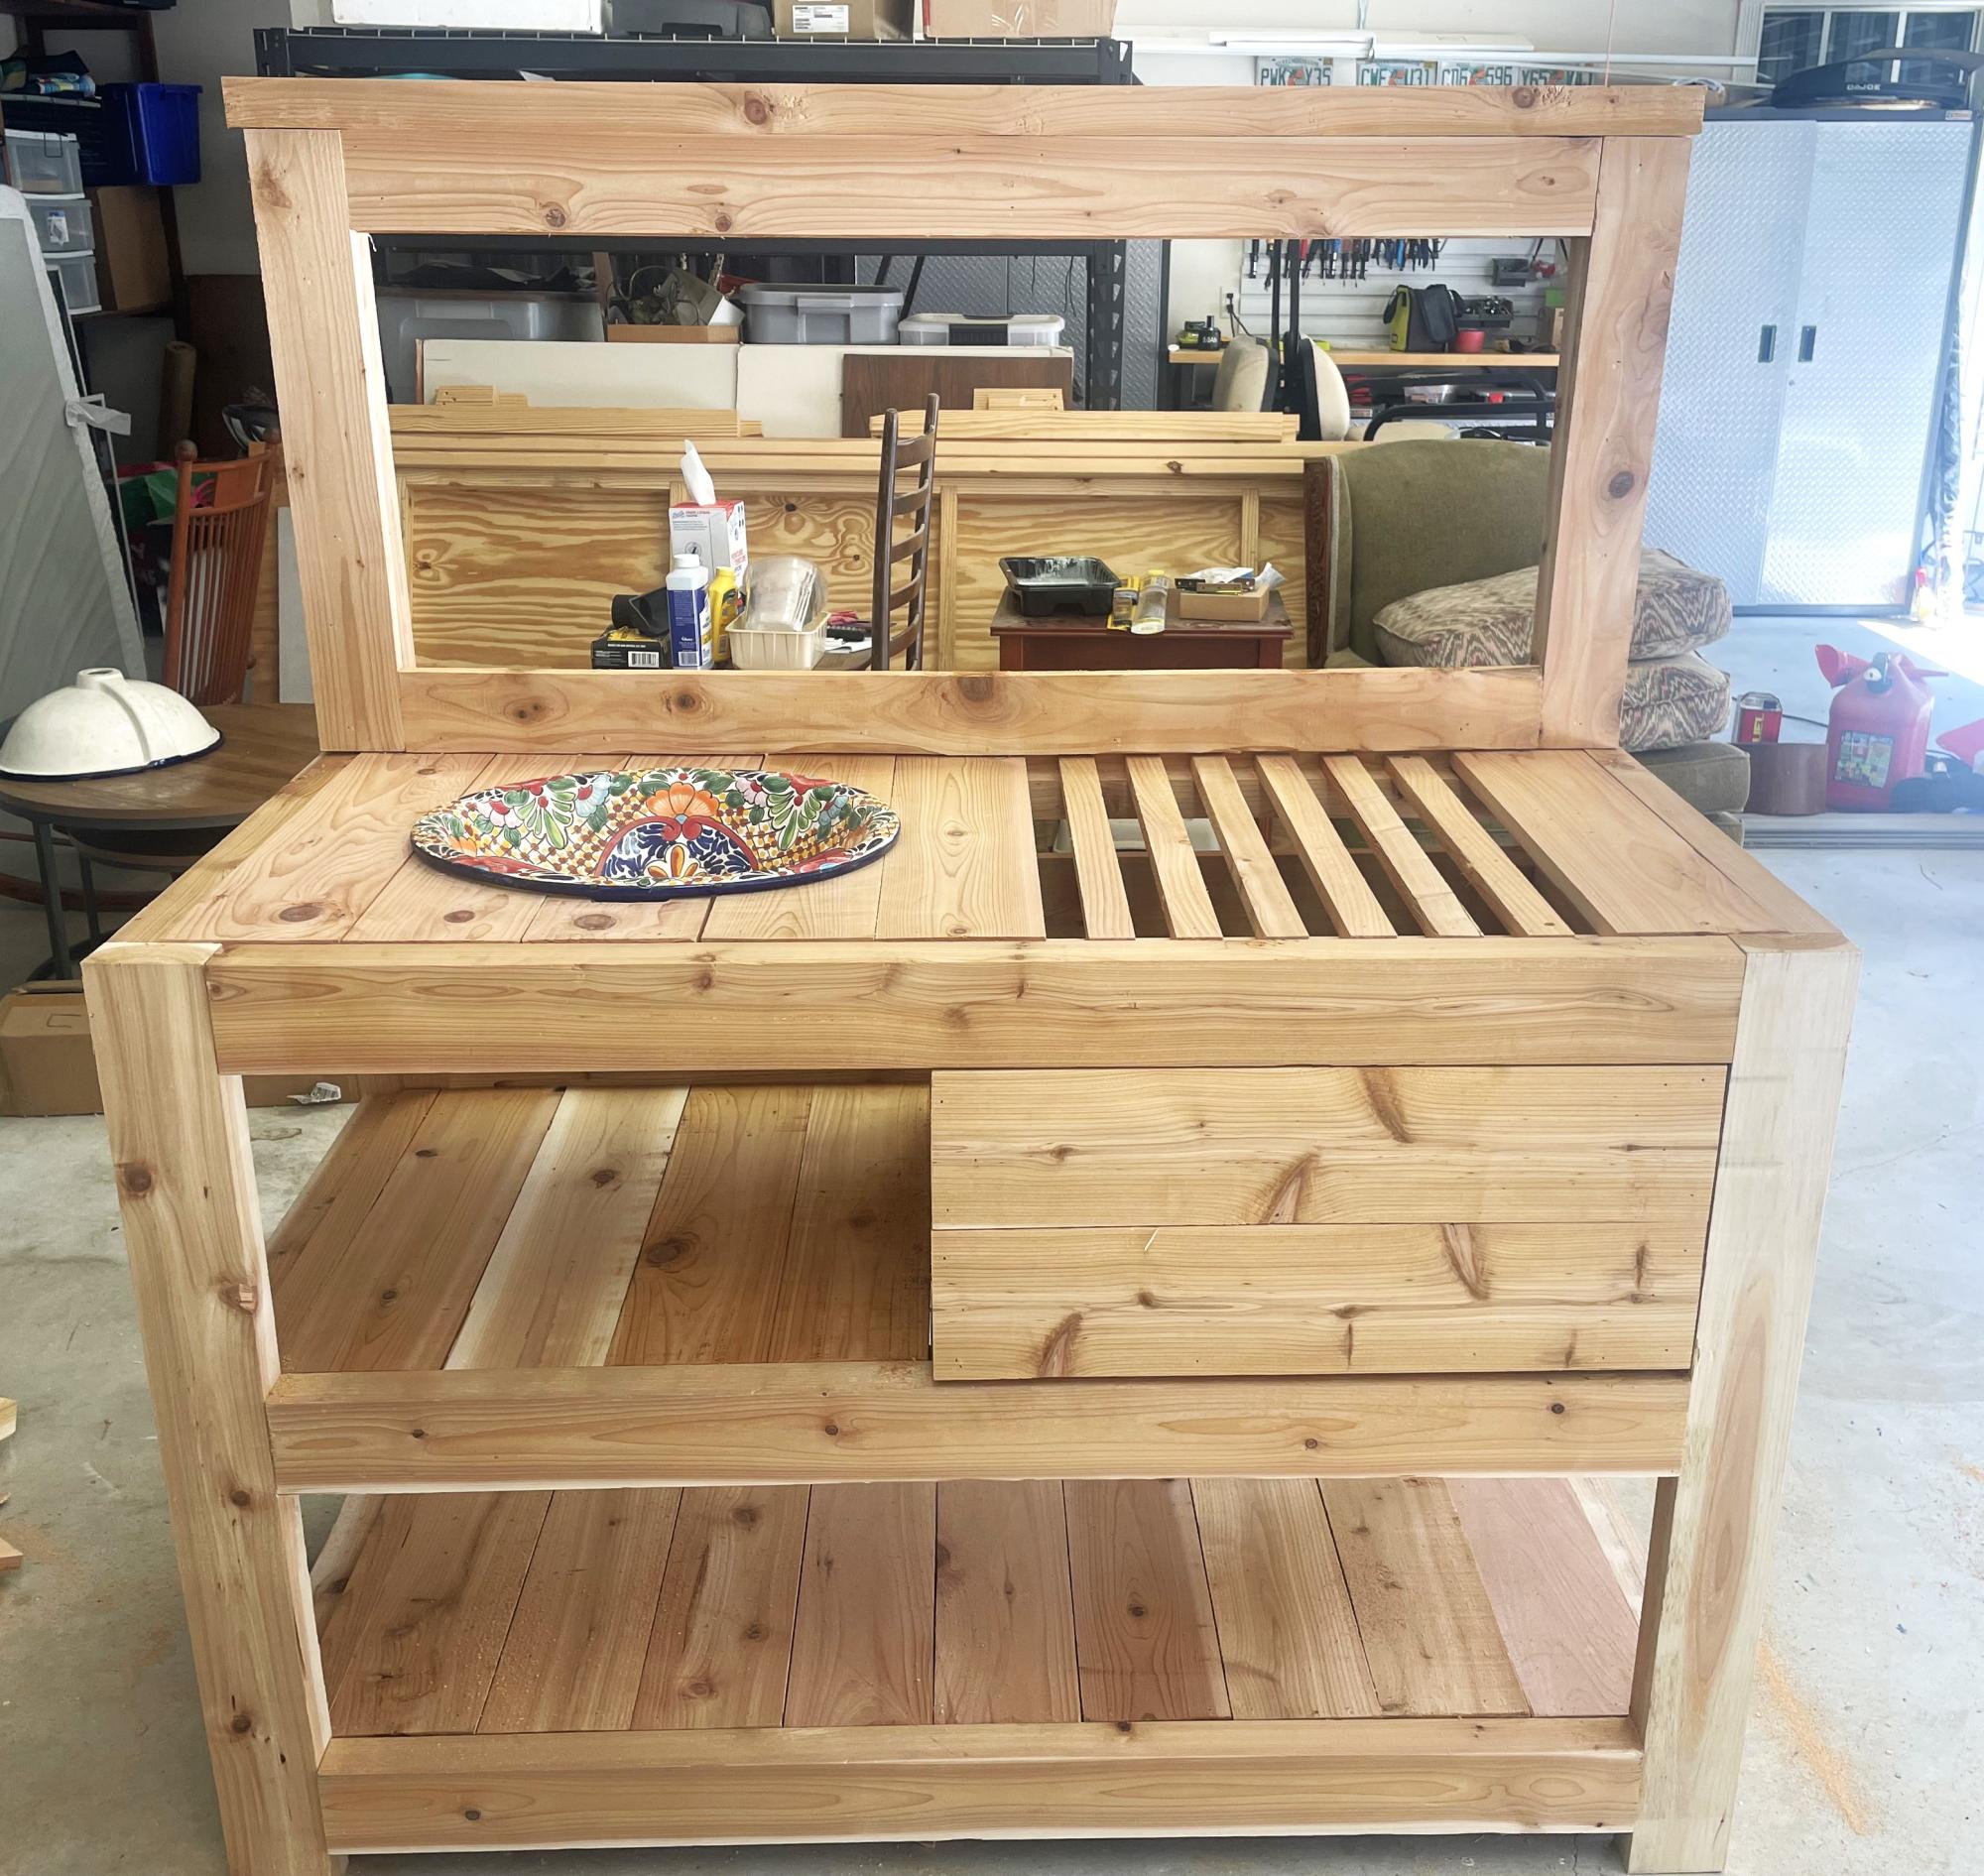
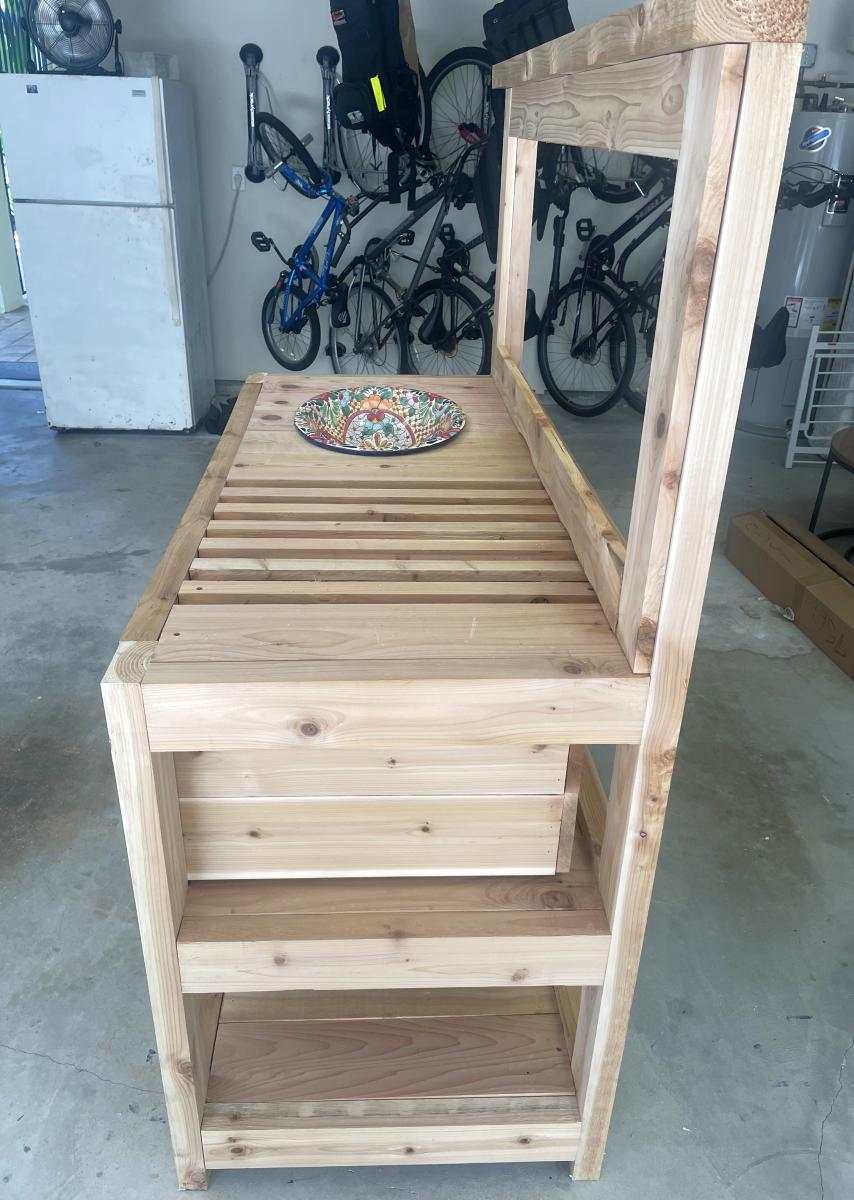
Made this from a great Ana White plan Modified it to fit a small sink that will drain to a water bucket underneath it.
Joe
Thank you Ana! the directions were right up my alley! We have never built anything and now we cant wait to build our next piece! we used your insturctions and made minor modications to accomodate our cushions. We got brave and designed our own ottoman and put it on casters :-) We also added a few back support and legs.
We used one coat of deck over paint
Cushions were on sale at ballard http://www.ballarddesigns.com/ballard-basic-seat-and-back-cushion-set-w…
Quality of cushions is amazing! they were the most expensive part. We spent $600.00 on cushions.
Wood, putty, paint and screws about 350.
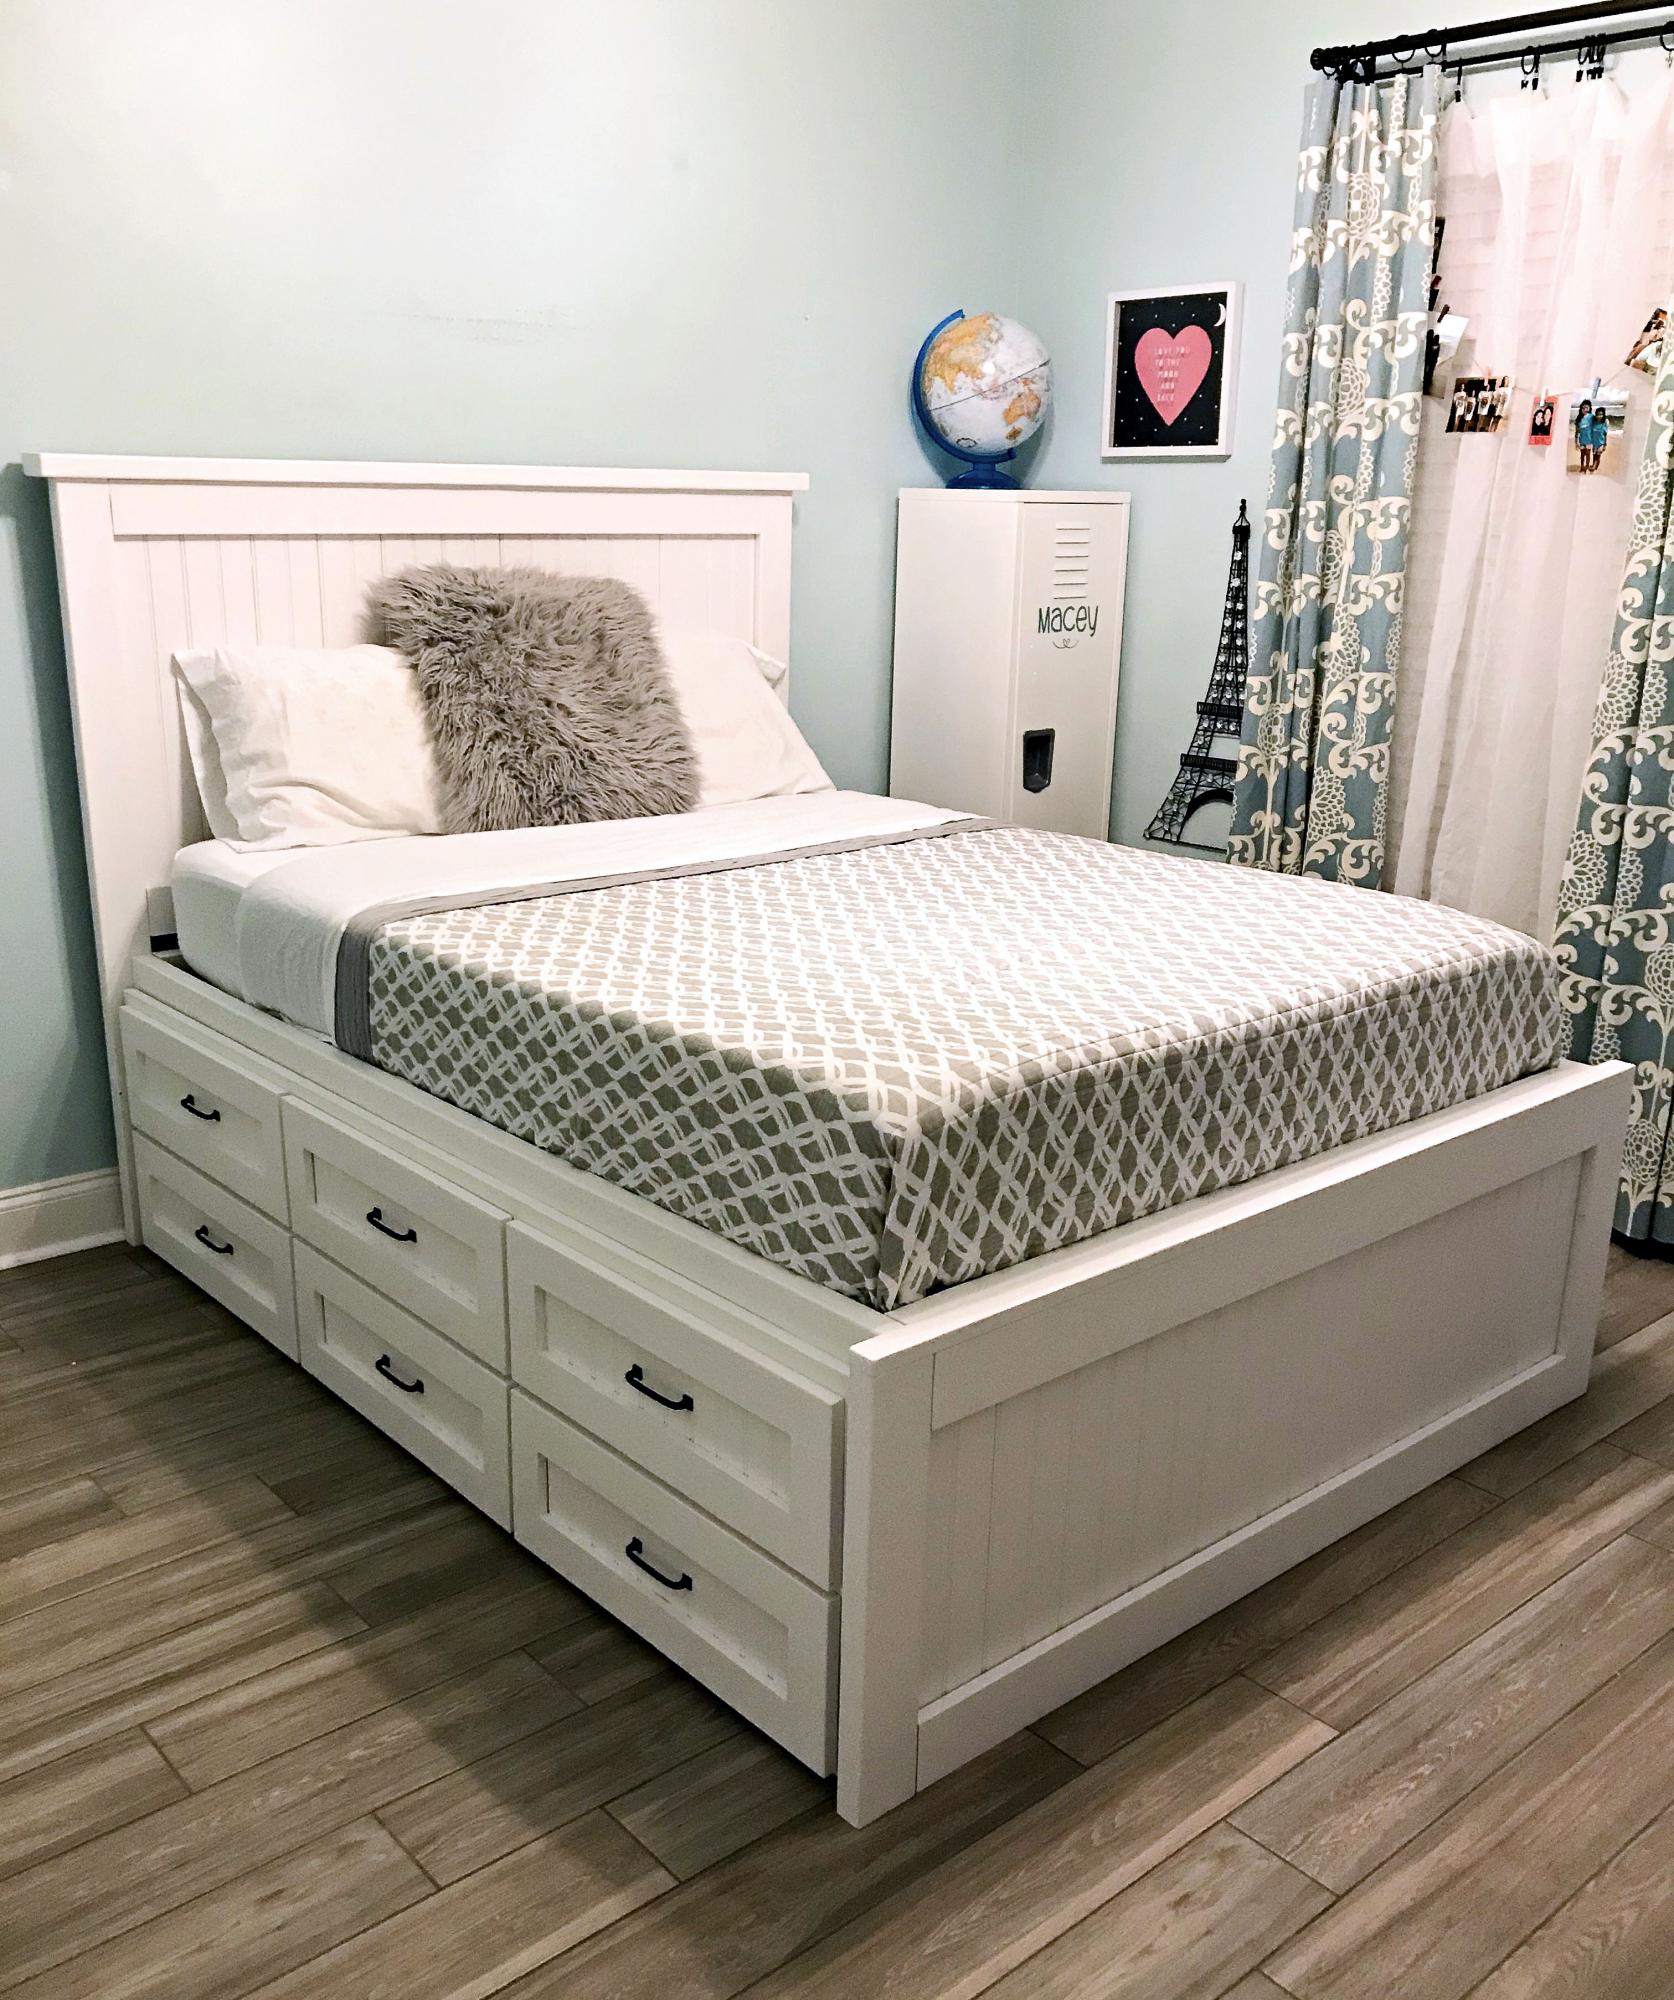
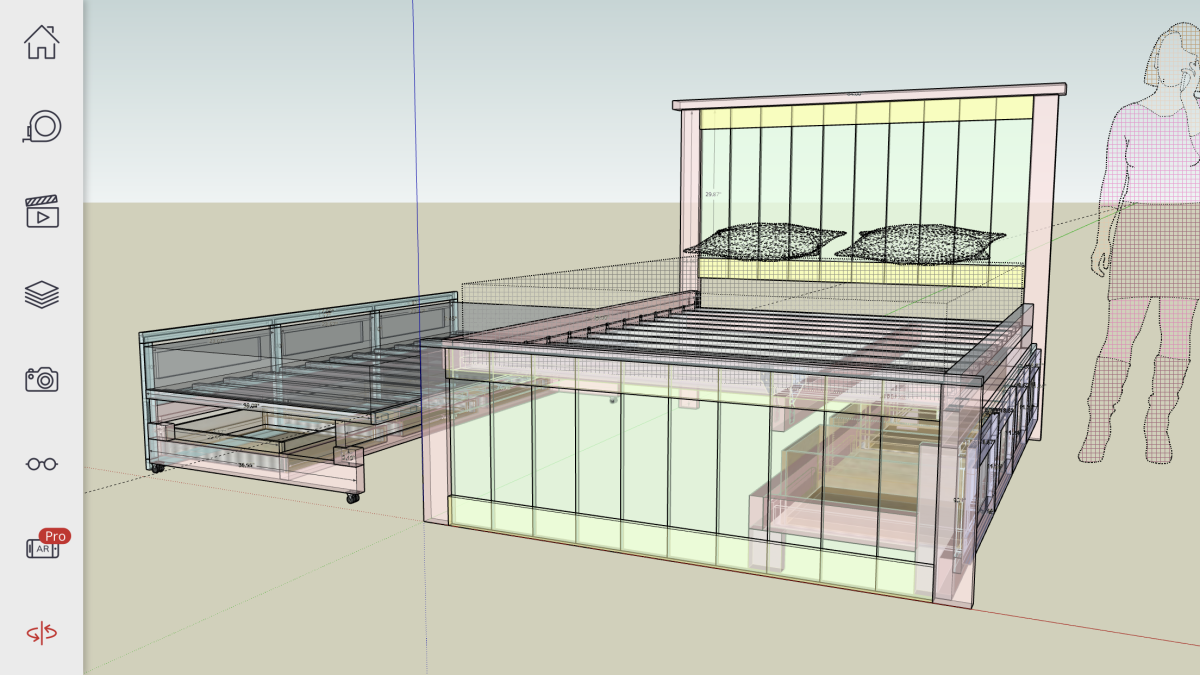
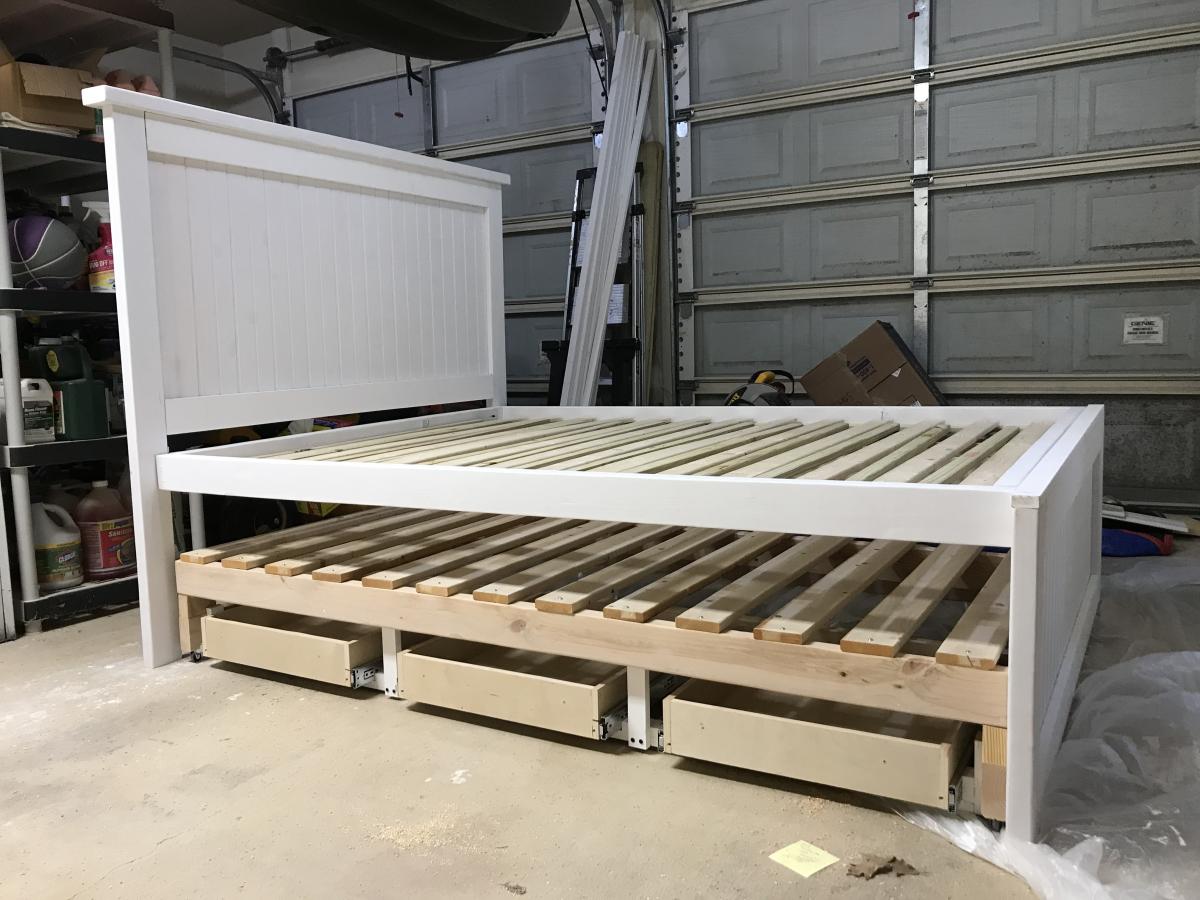
Full size storage bed with trundle. Three drawers and a trundle on one side and four drawers on the other. I started with the farmhouse design (headboard and footboard) and modified it to make it not so heavy and I designed the rest using SketchUp. See more photos in blog link.
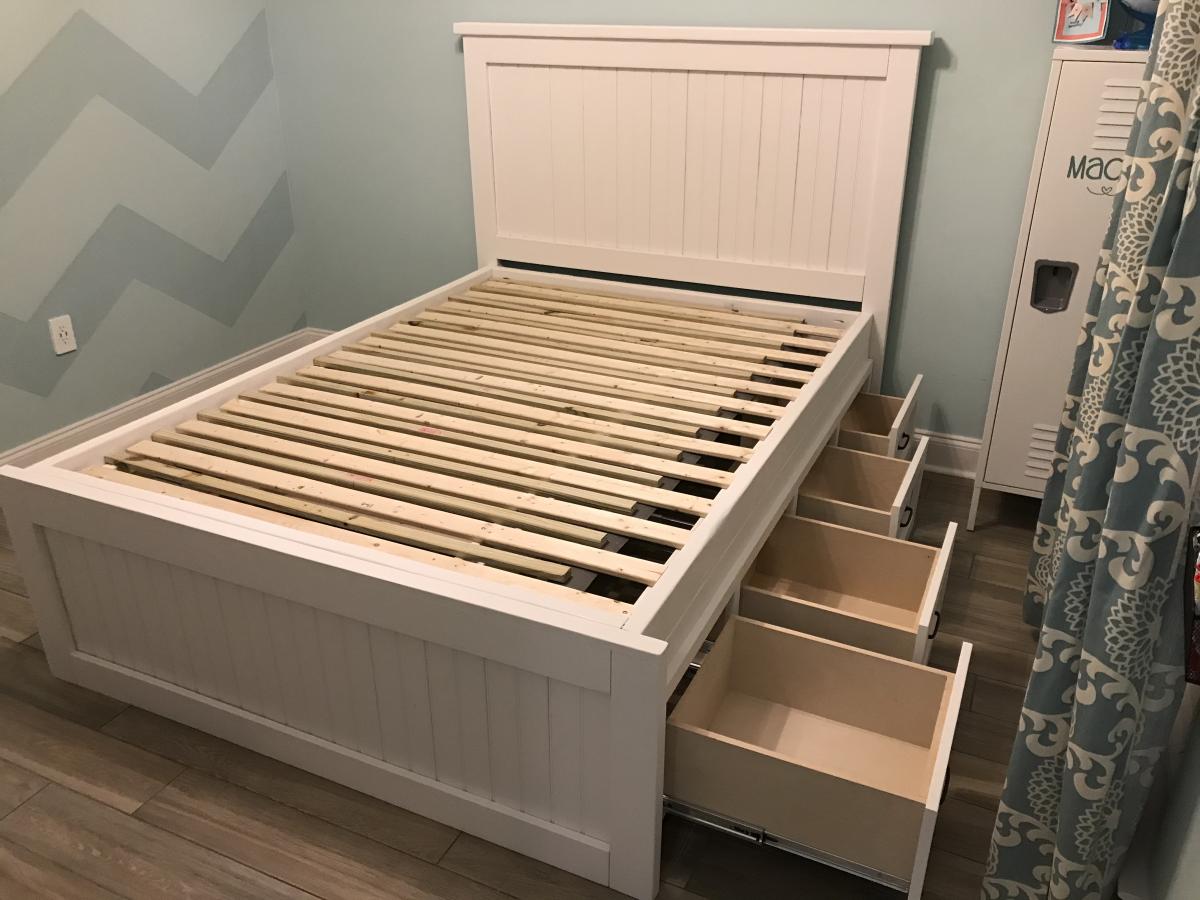
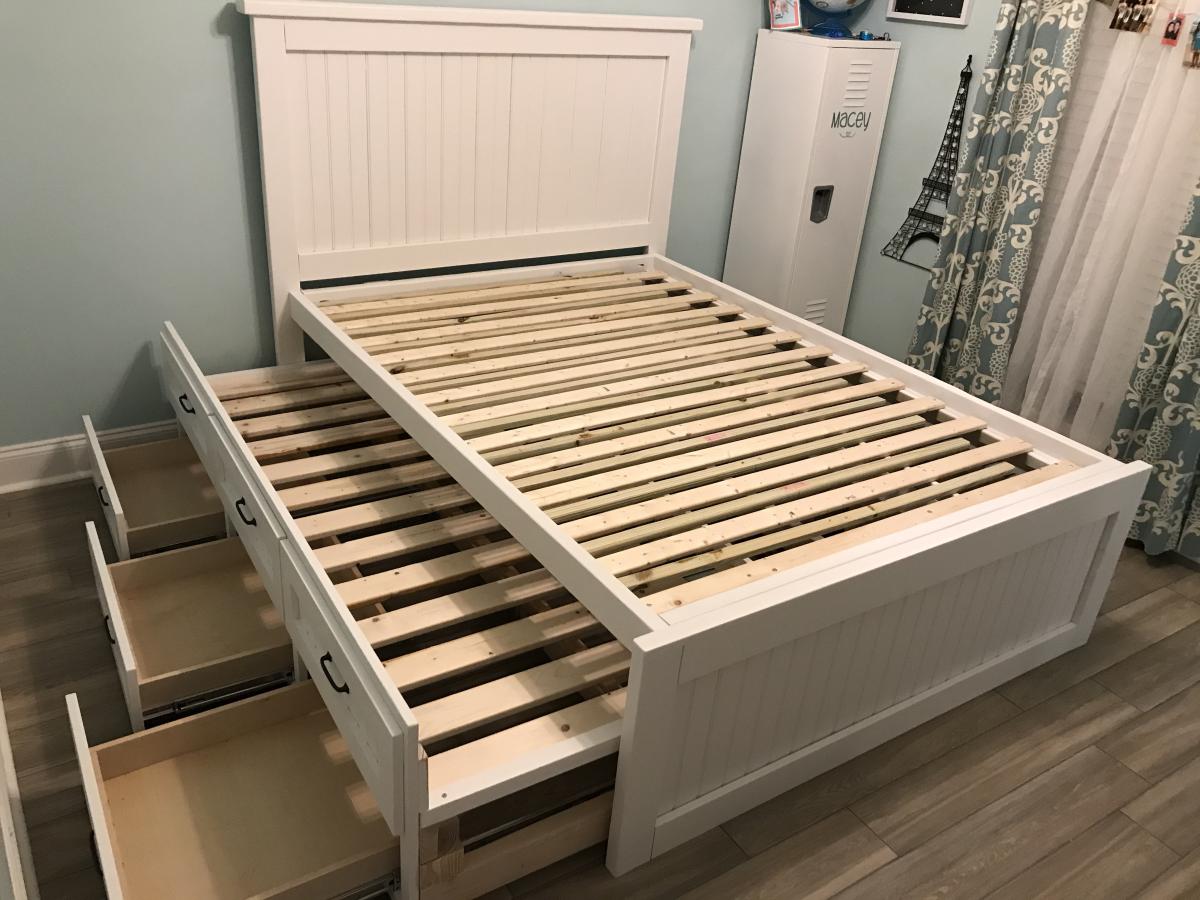
It was very easy to follow the directions and the costs were minimal. Our granddaughter is in heaven with this bed.
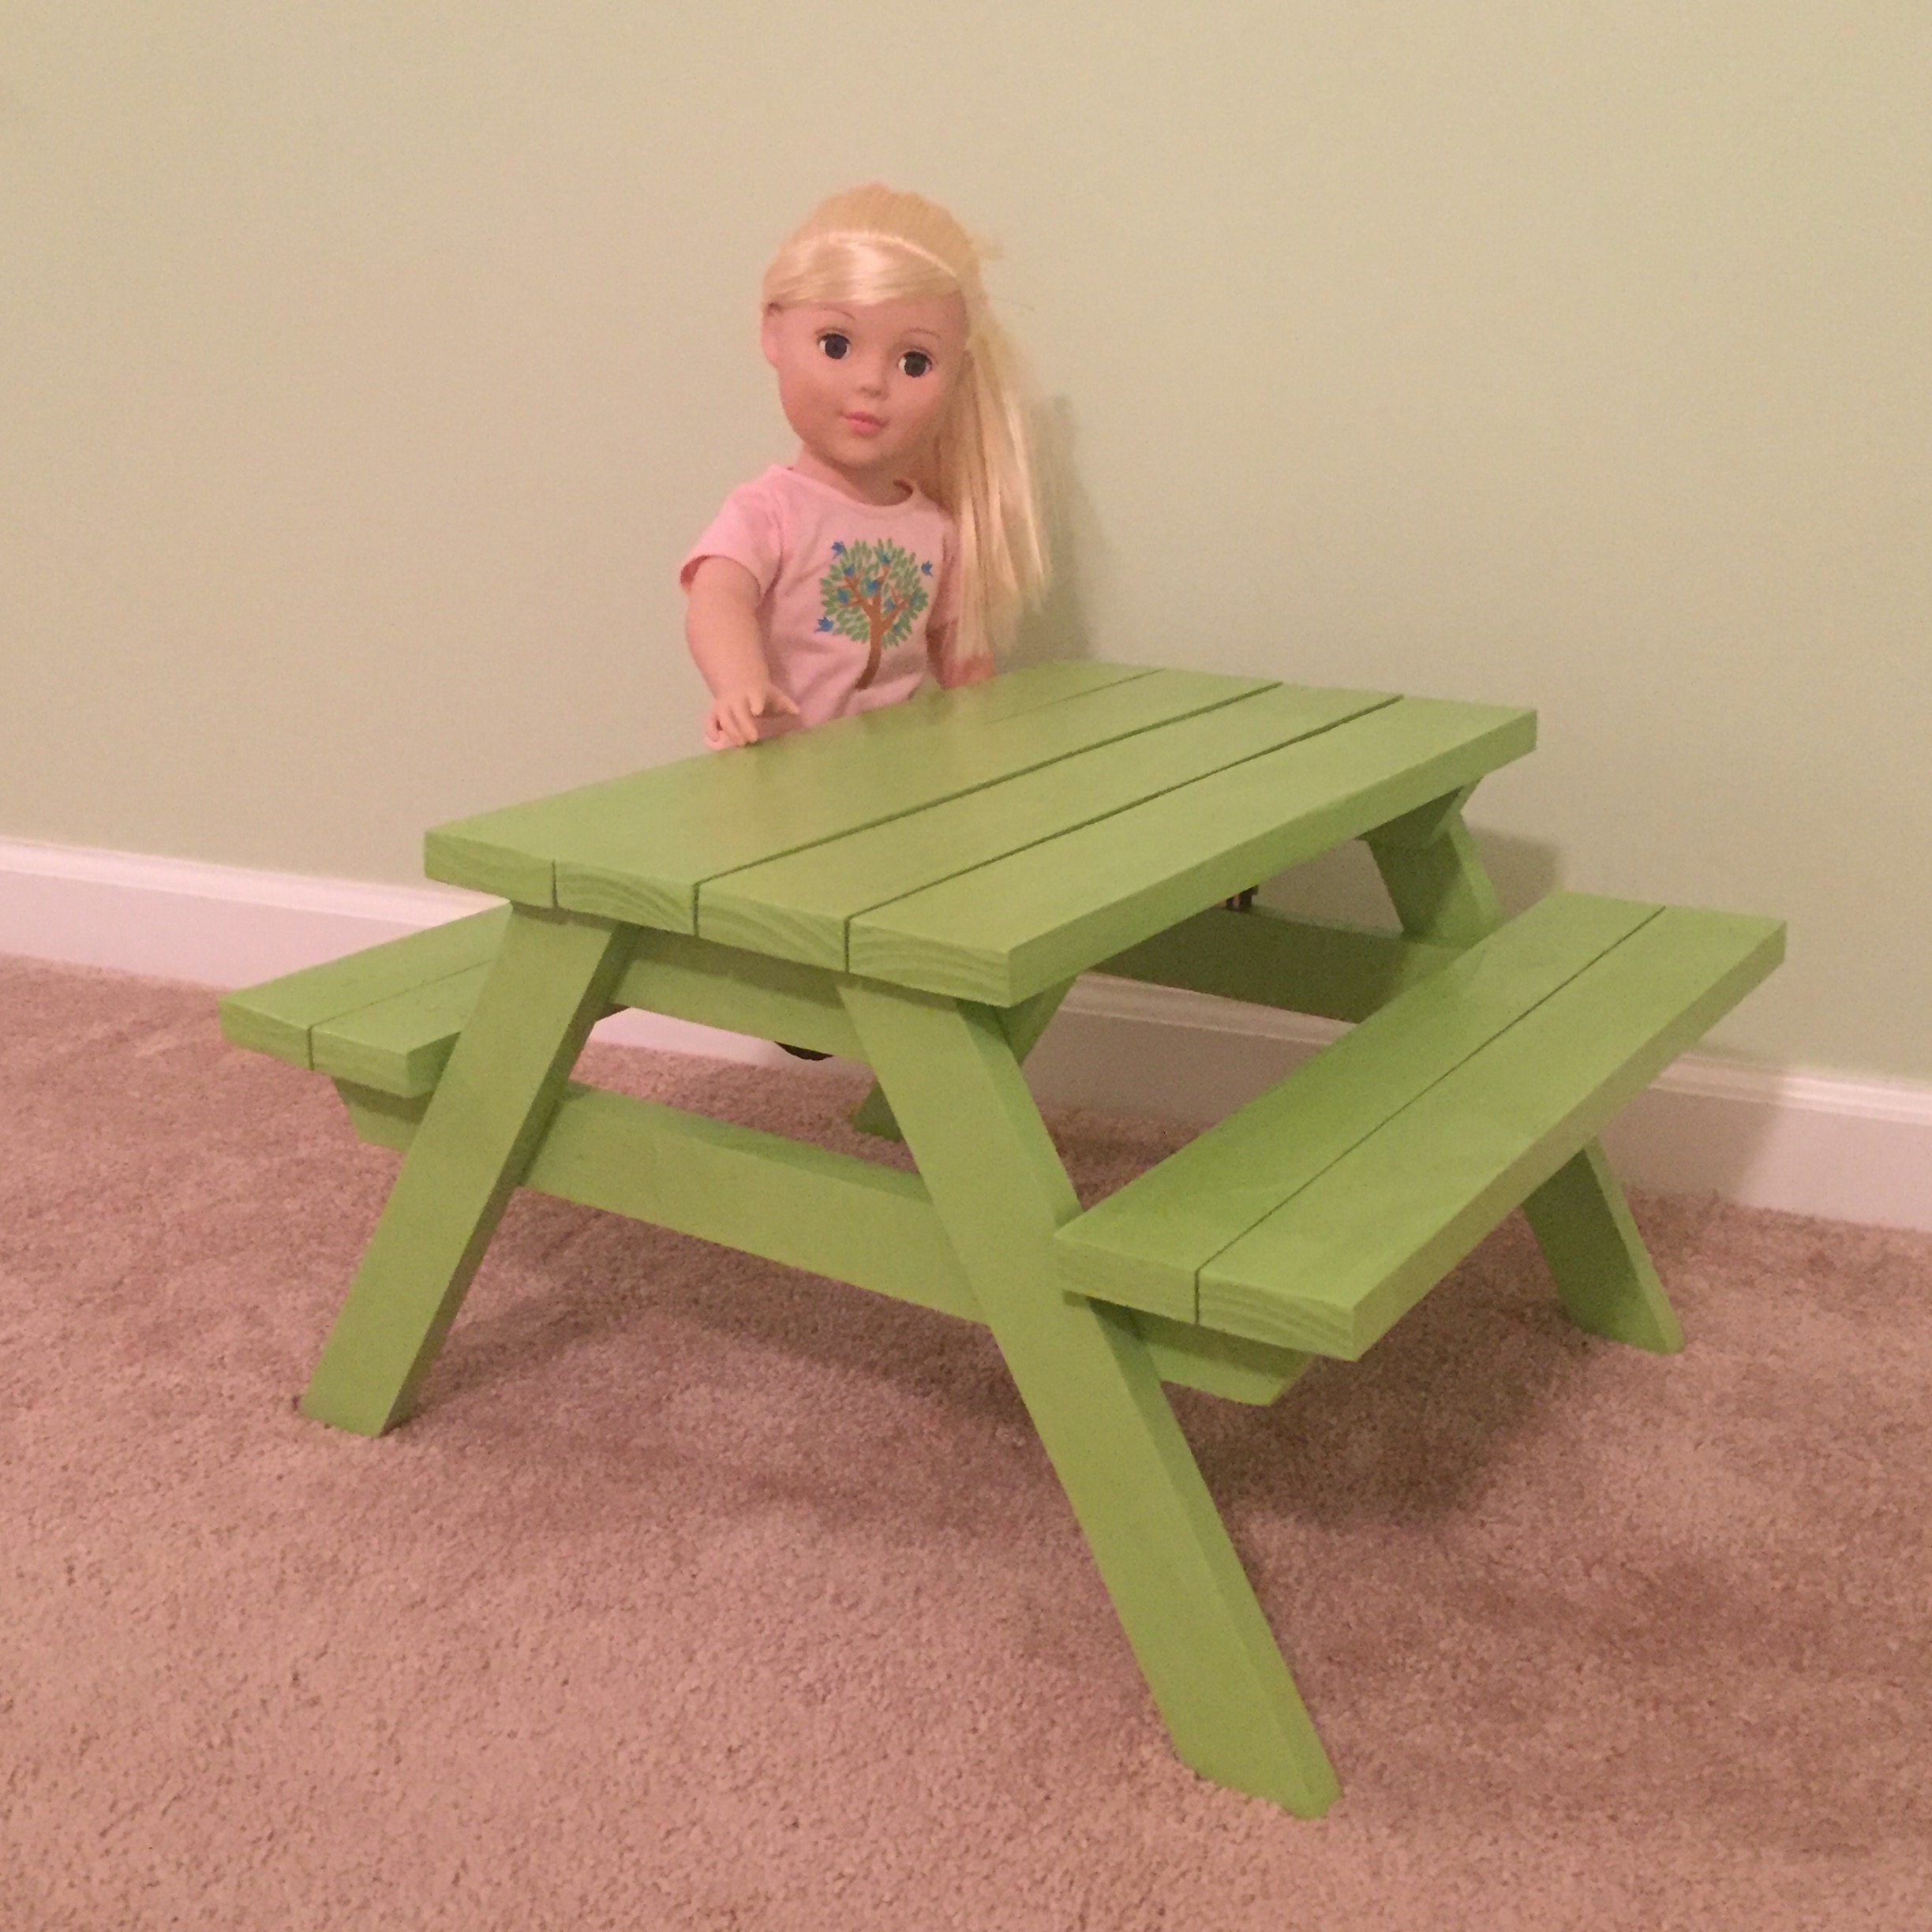
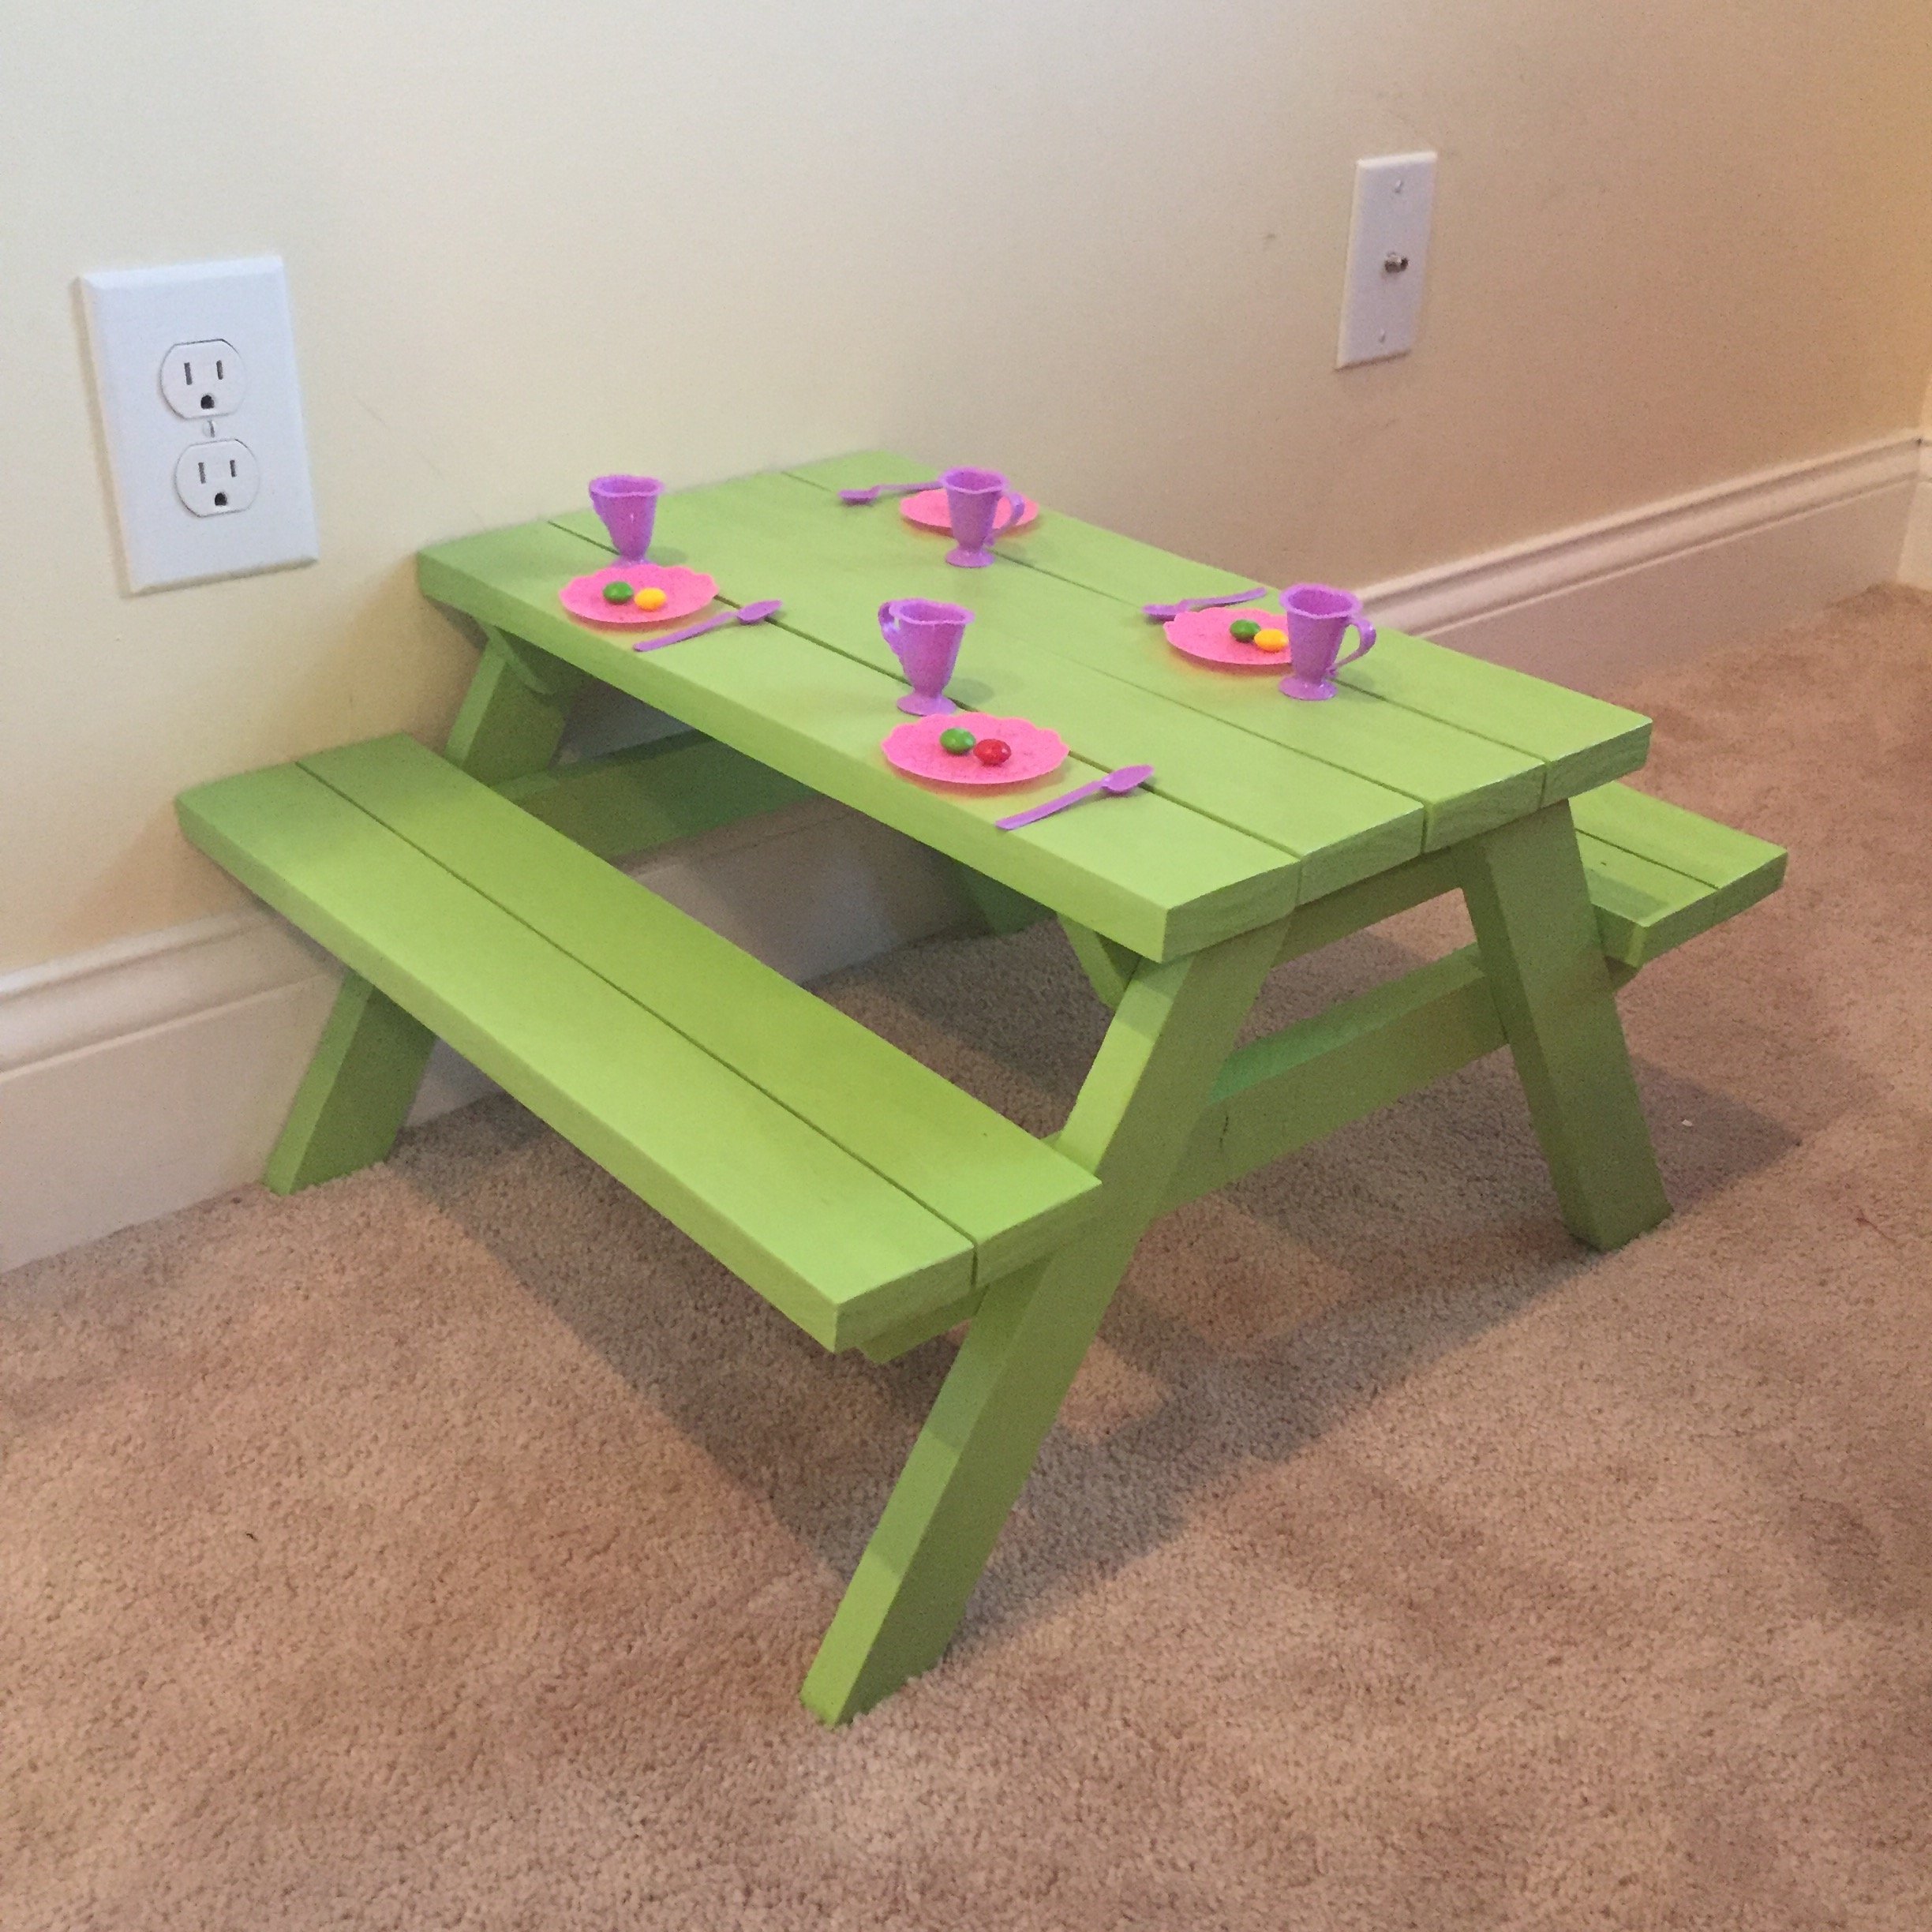
This is my scaled down version of the preschool picnic table, made for an 18 inch doll. I used scrapwood that someone was throwing away and supplies left over from other projects, so it didn't cost anything but time. My girls have really enjoyed it. Here are the measurements:
Cut List:
4 – 1×3 @ 17-3/4″ (Tabletop pieces)
1- 1×4 @ 9-3/4″, then cut in half using a table saw to equal 2 pieces (Supports directly beneath tabletop pieces) The longest measurement is 9 ¾”, with the ends cut at a 30 degree angle back to 7 3/4″.
2-1×4 @ 12-7/8”, then cut in half using a table saw to equal 4 pieces (Legs) (angle each end to 30 degrees as shown in preschool table plans)
1 – 1×4 @ 19″, then cut in half using a table saw to equal 2 pieces (Supports directly beneath seat boards) (angle ends to 30 degrees as shown in preschool table plans)
4 – 1×3 @ 17 3/4″ (Seat boards) I ran these 1 x 3’s through my table saw to make them 2” wide.
*When attaching the legs, secure them to the supports below the tabletop pieces so that the bottom of the legs will measure 19 5/8” from lateral edge to lateral edge when resting on the ground. In the preschool picnic table plans, this measurement is shown as 33”.
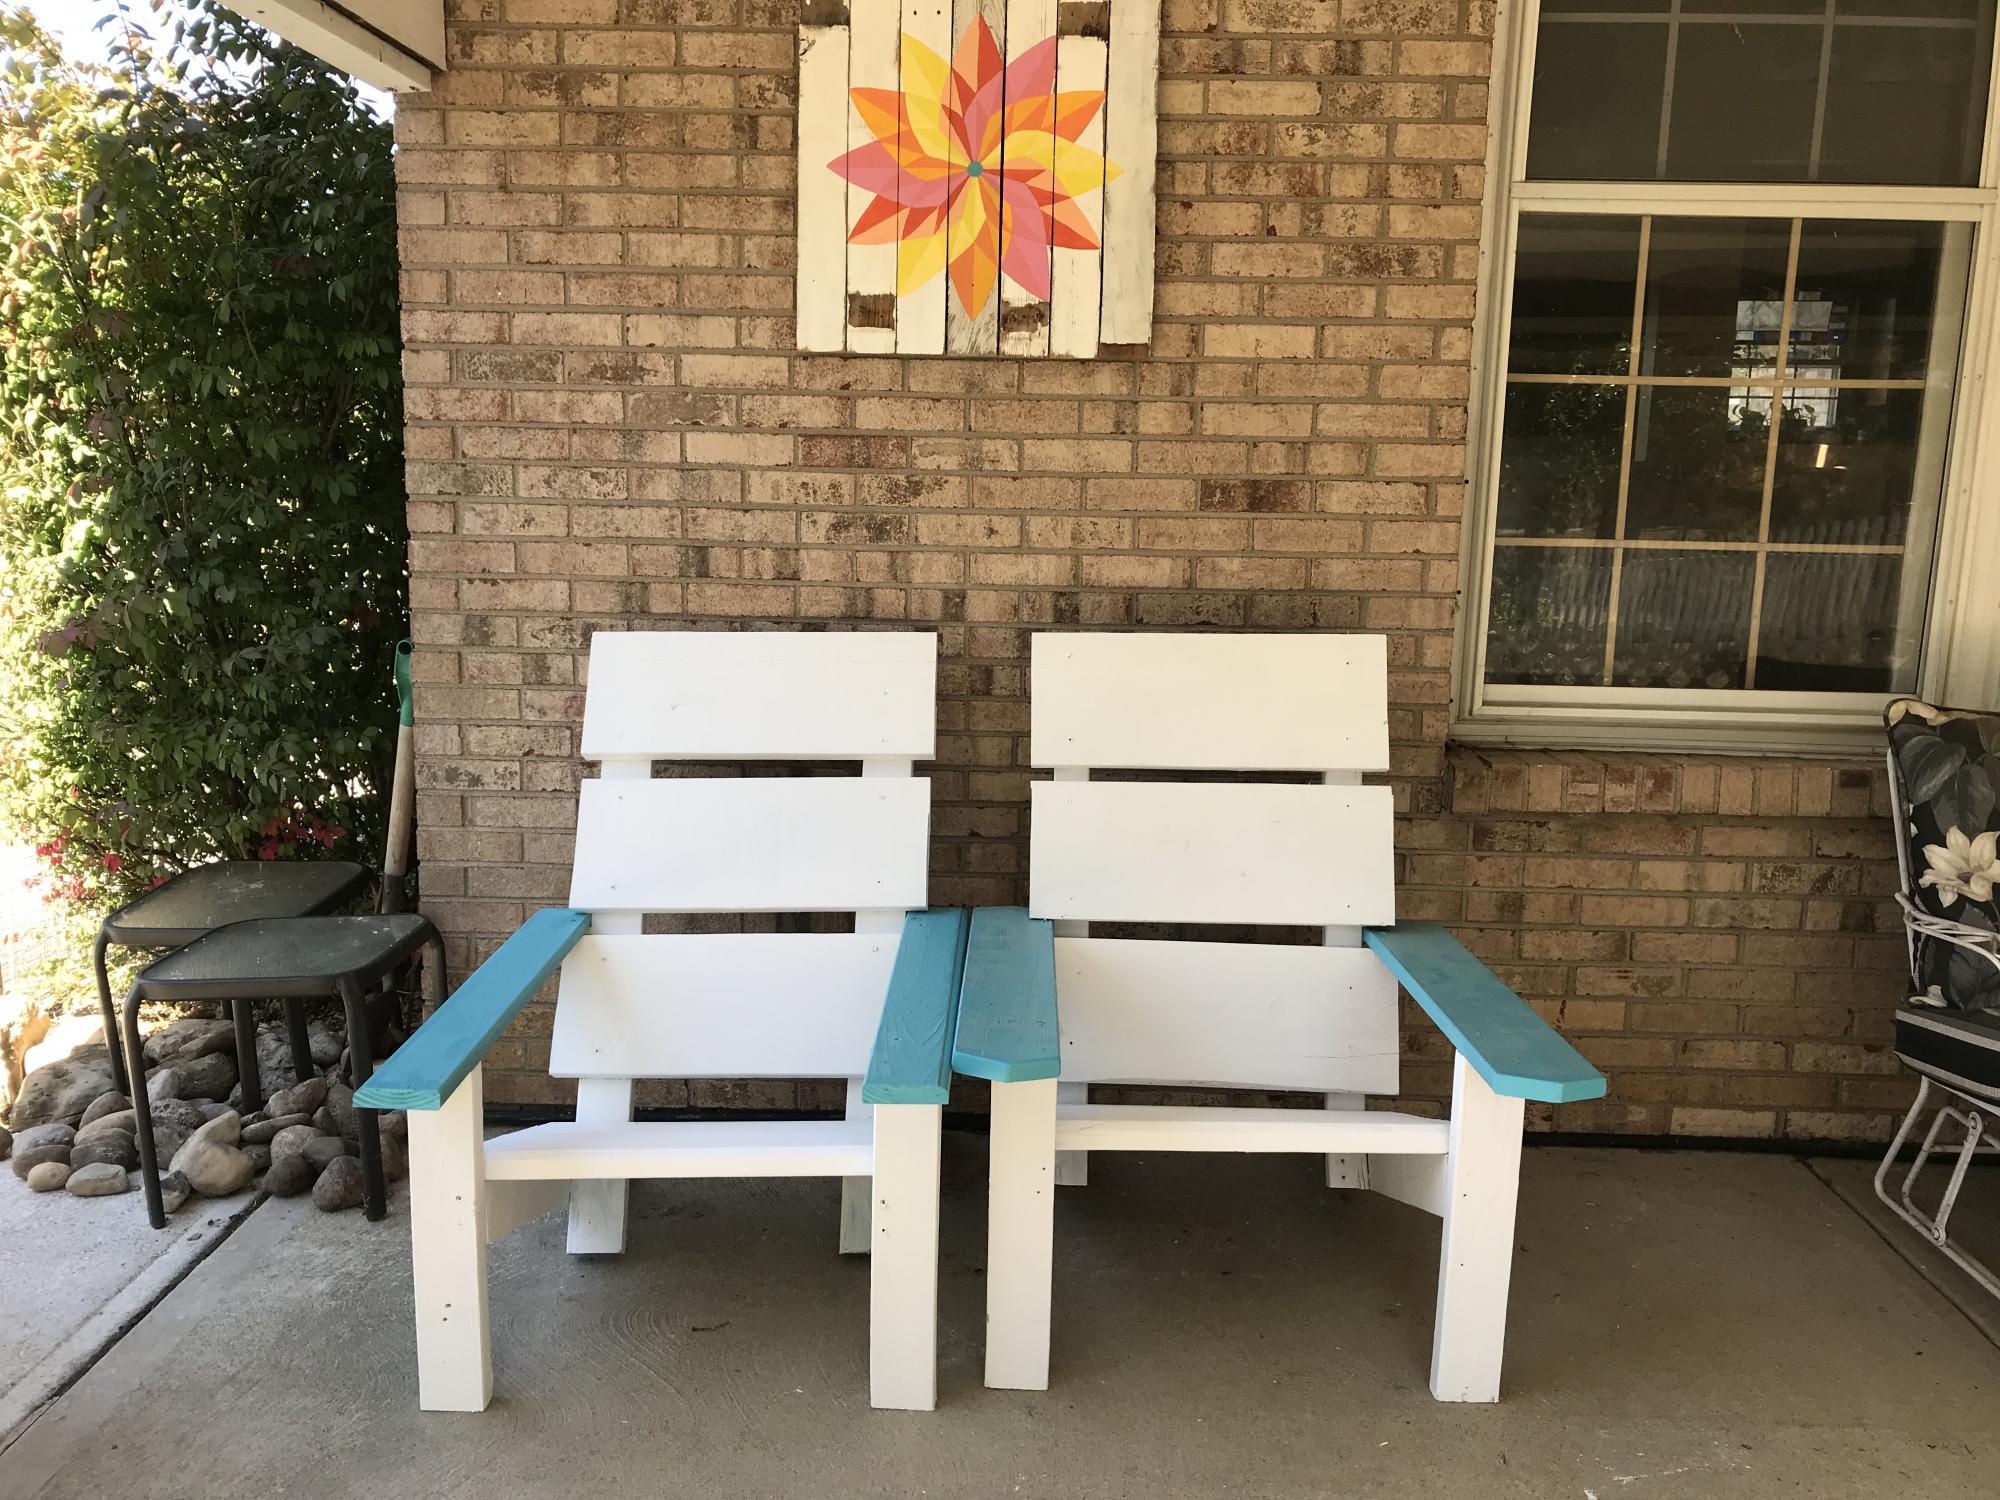
A few months ago I noticed two 2 X 10 X 10s in the damaged wood pile at Home Depot so I snagged them. I am a veteran so I get 10% off on top of the 70% off. The rest of the wood and even the screws and paint were from other projects. Thanks for the awesome, free plans. They are comfy for me at 5'8". Whoop whoop!!
Sat, 10/10/2020 - 11:12
Thank you for your service, I am happy to hear you are enjoying them!
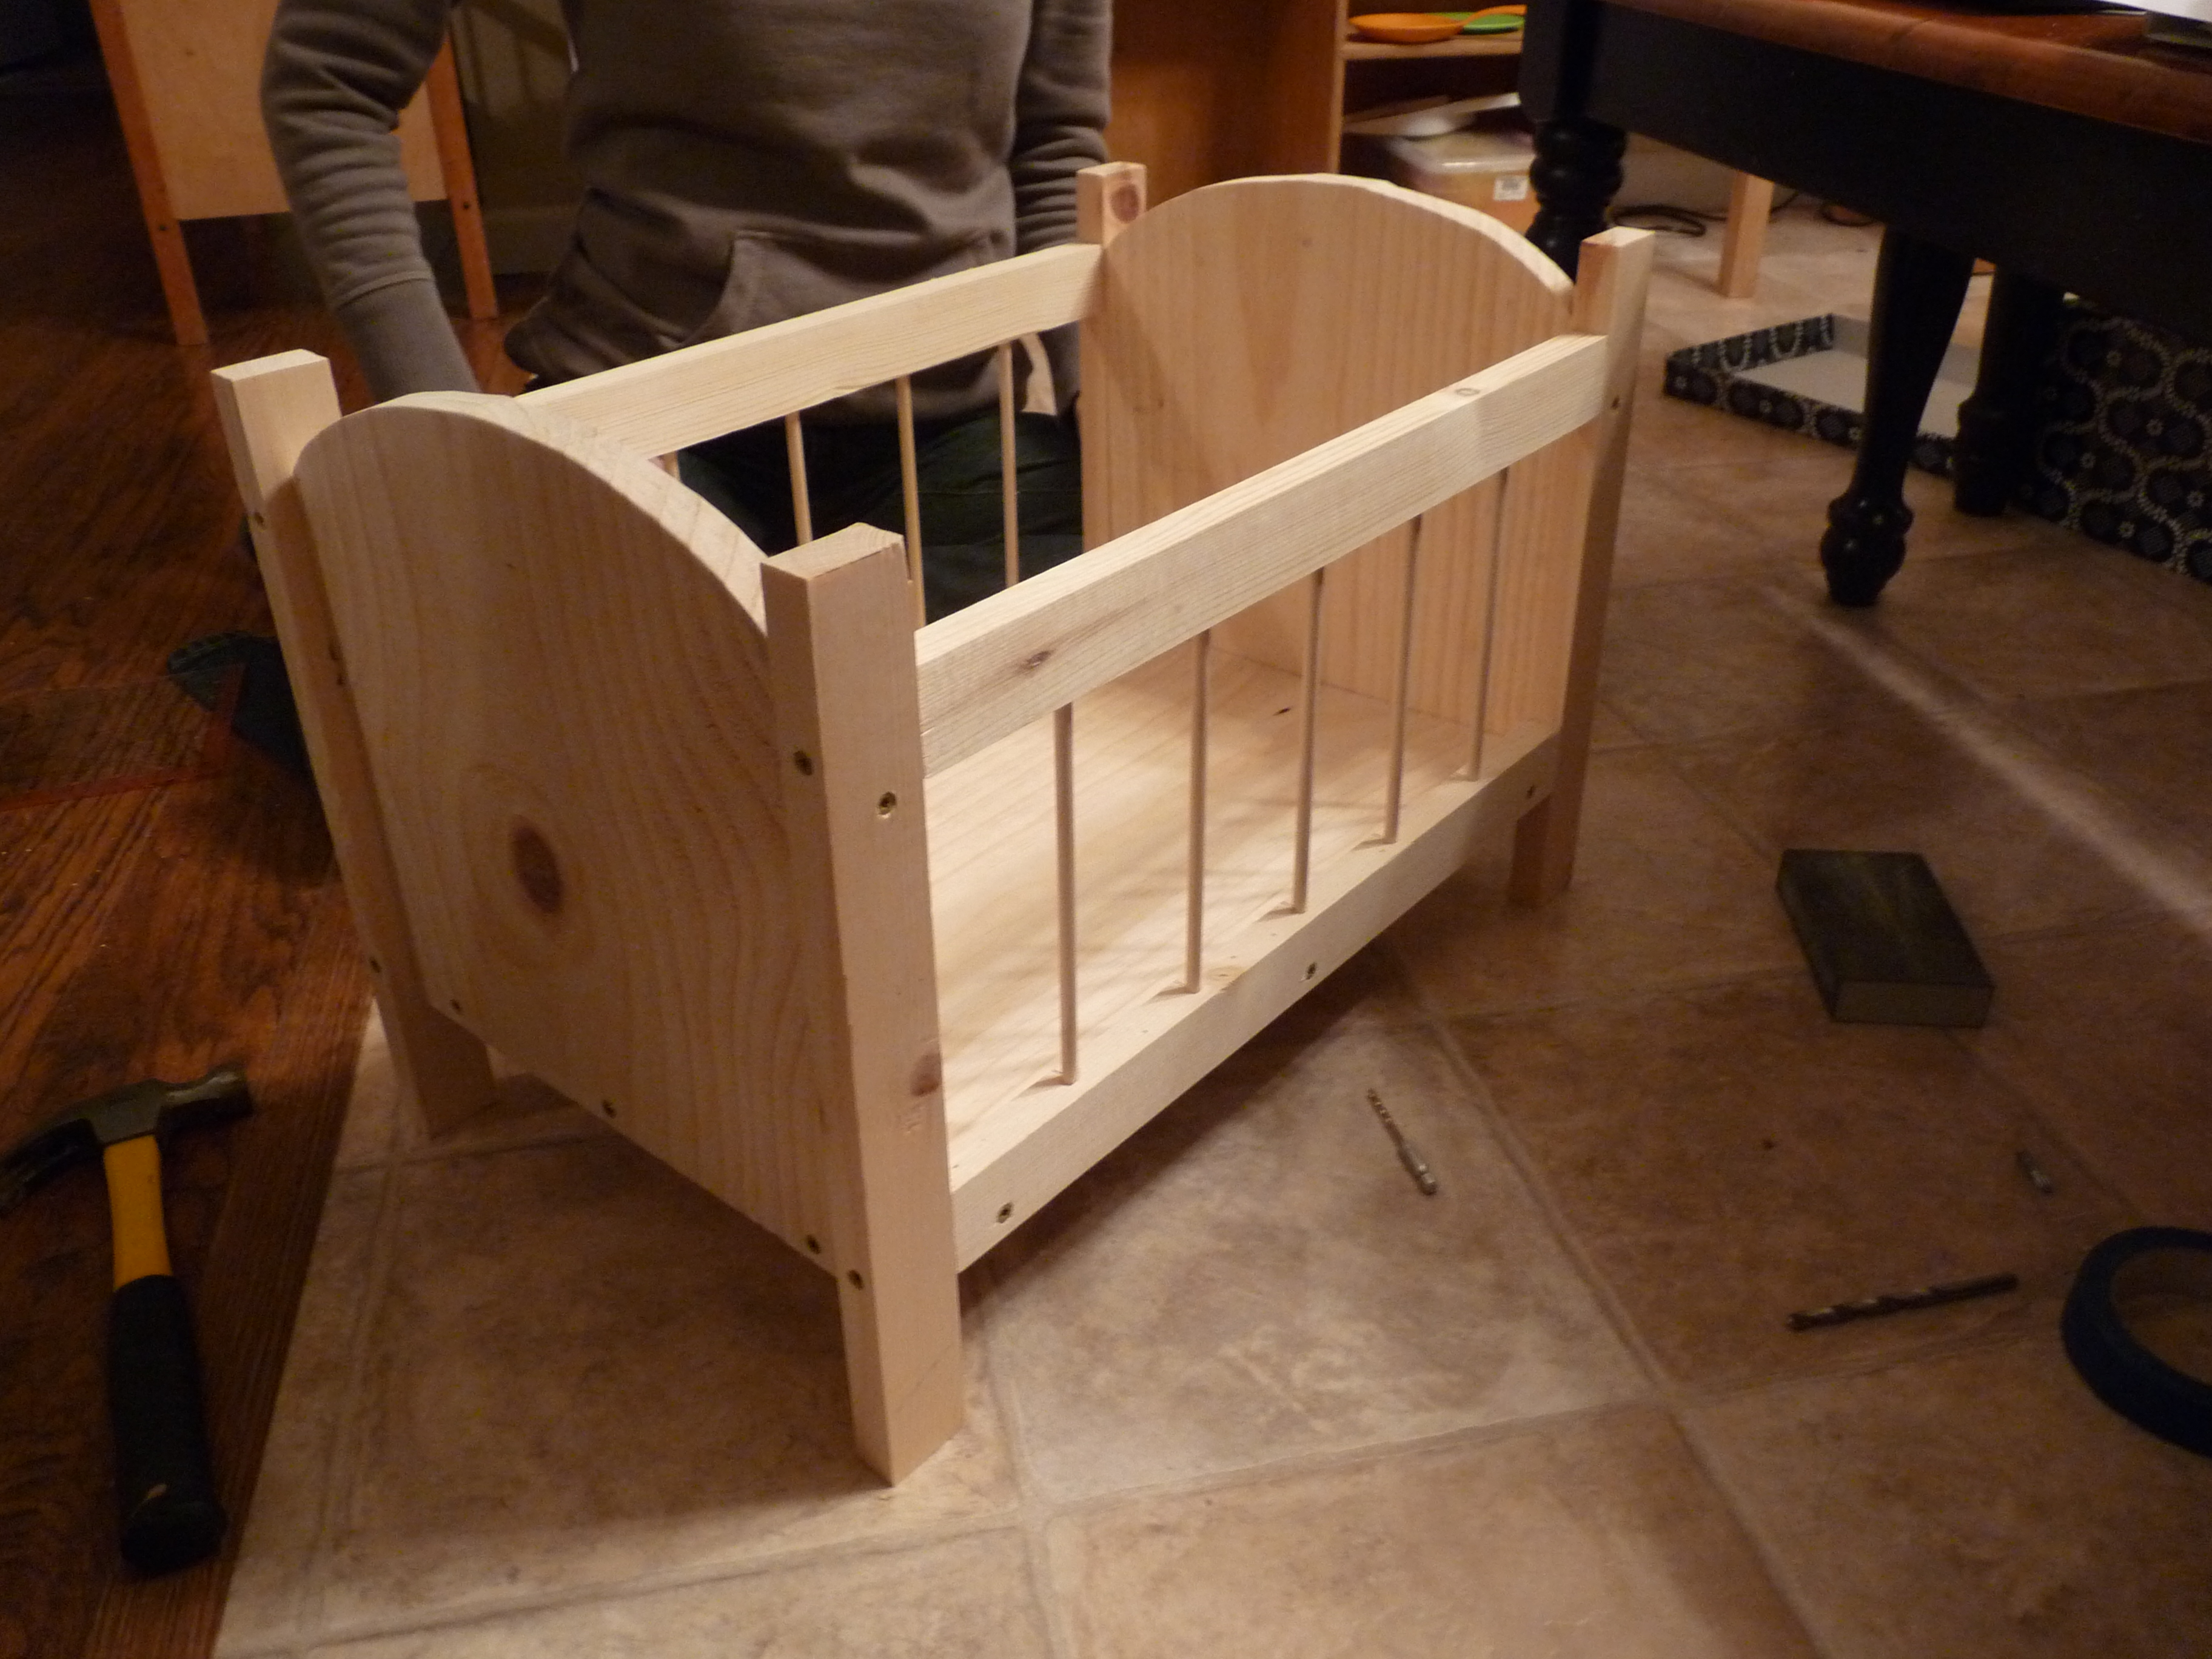
My husband did the cutting and we worked together. Everything was great. We used screws to attach the sides instead of finishing nails because we didn't have the right length.
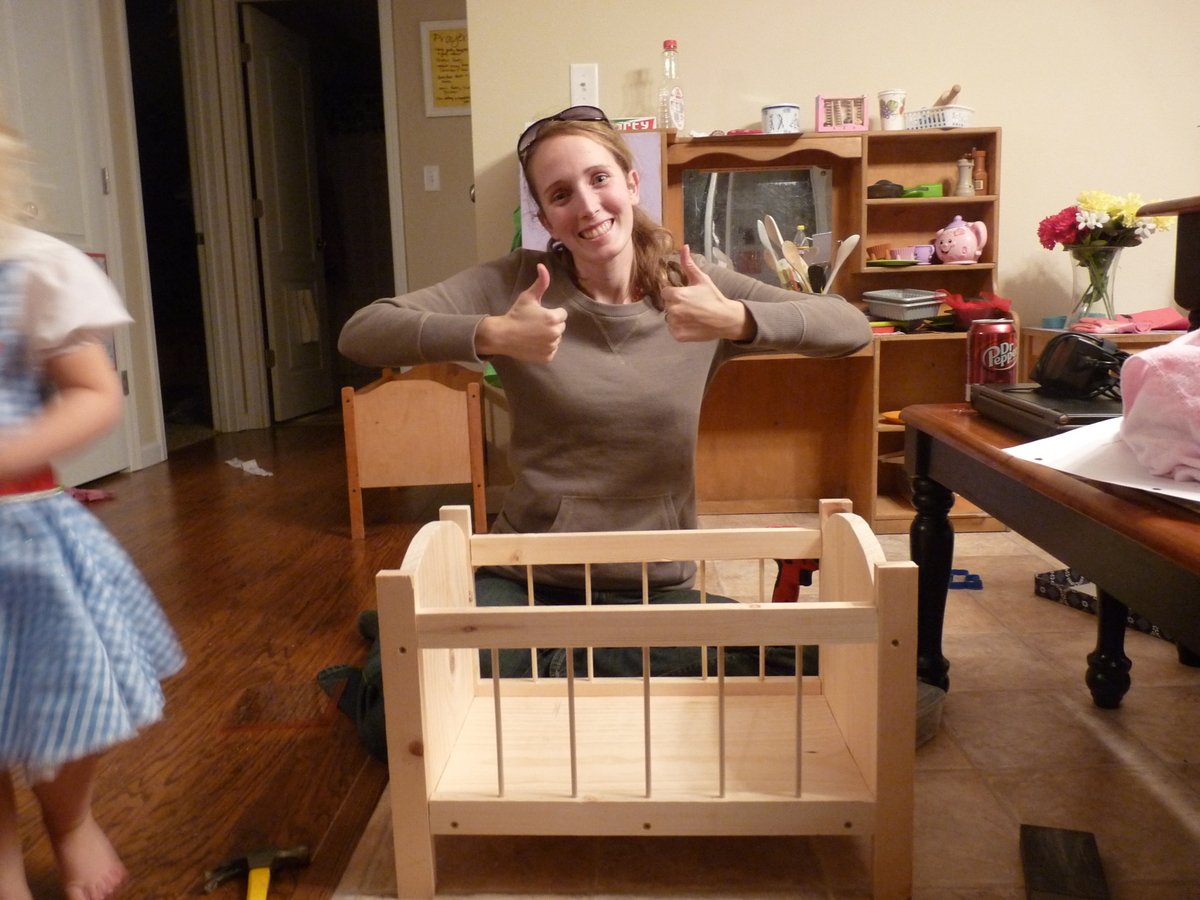
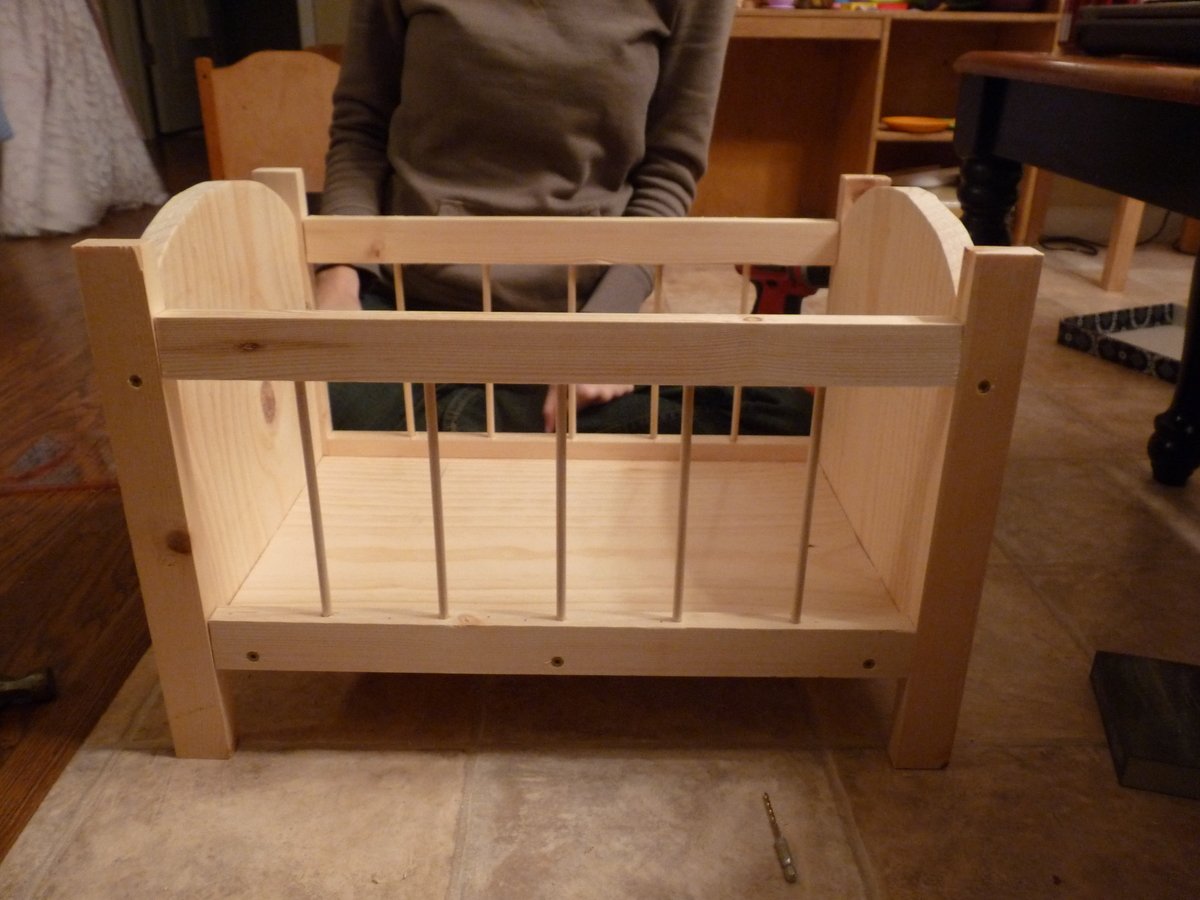
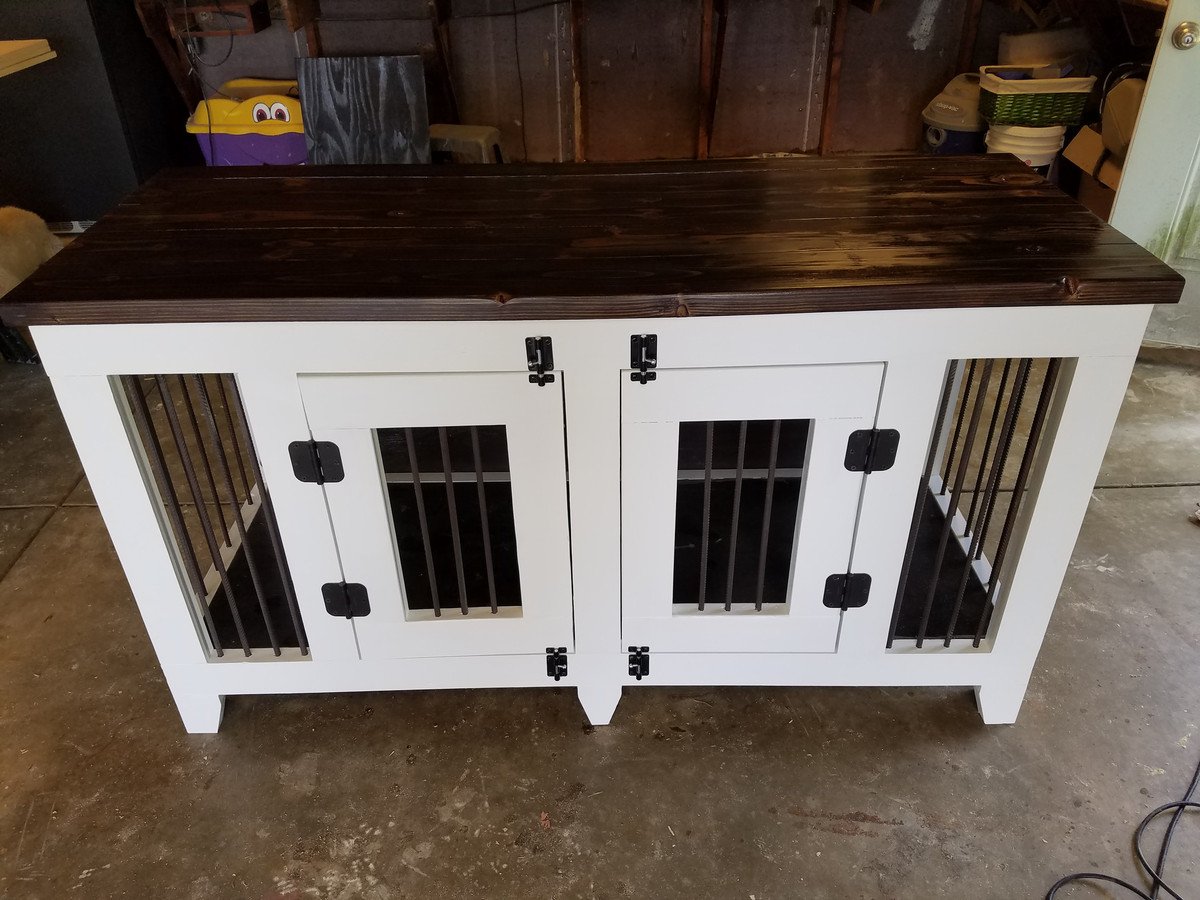
I had so much fun building this!! It ended up being 80"L x 29"W x 40"H
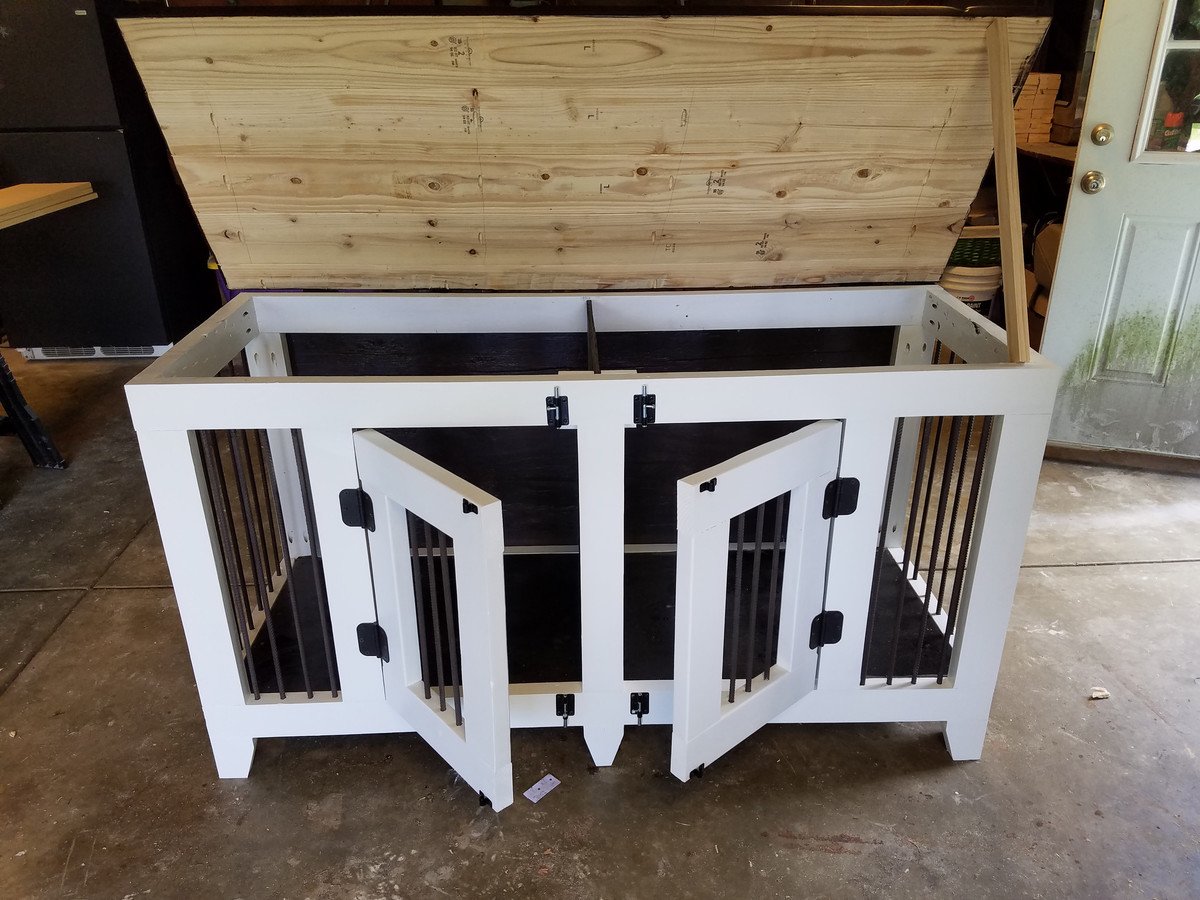
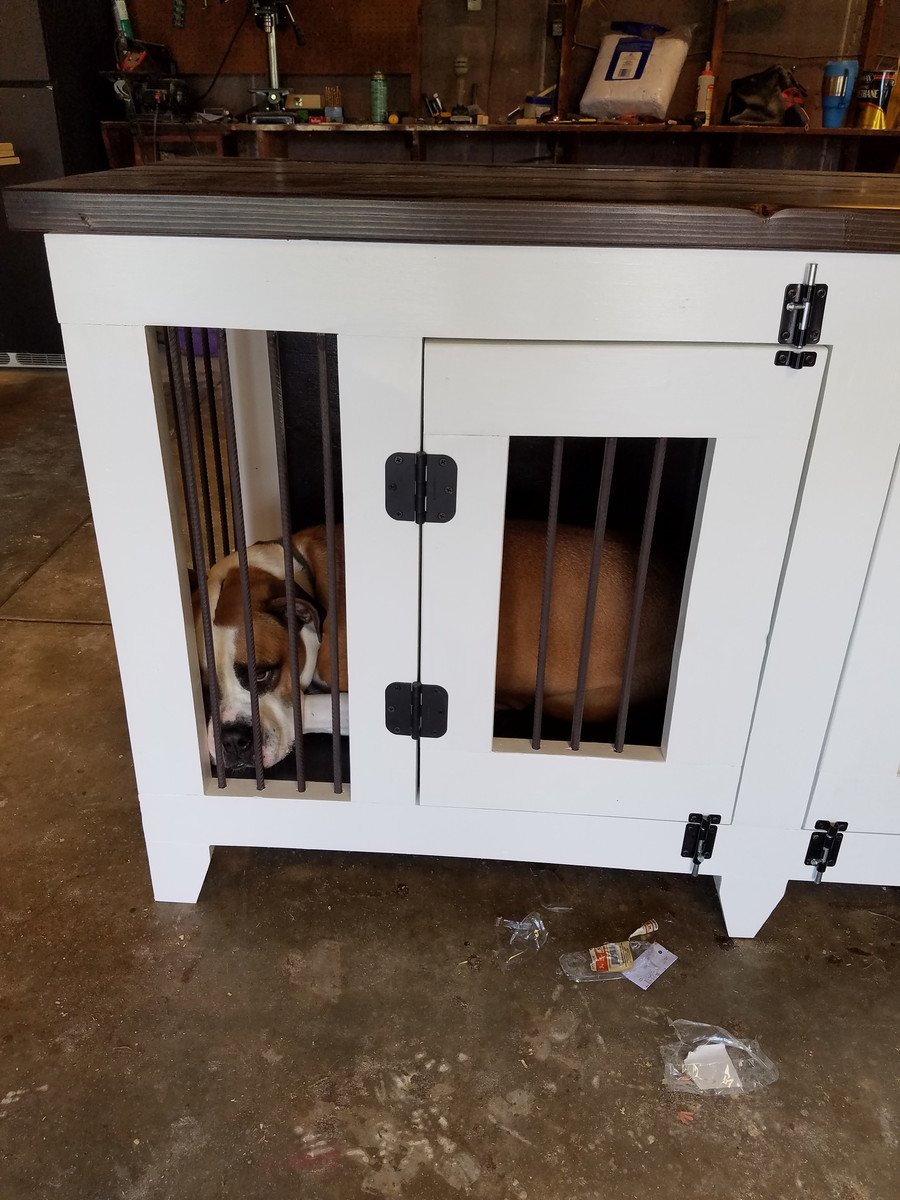
I added a removeable center seperator to make it available for 2 dogs and a hinged top for easy cleaning. If you would like to know more, mssage me here! https://www.facebook.com/almshousecreations

Sat, 11/21/2020 - 13:10
I was about to ask the same thing. If there is any, I can not find them. Please post

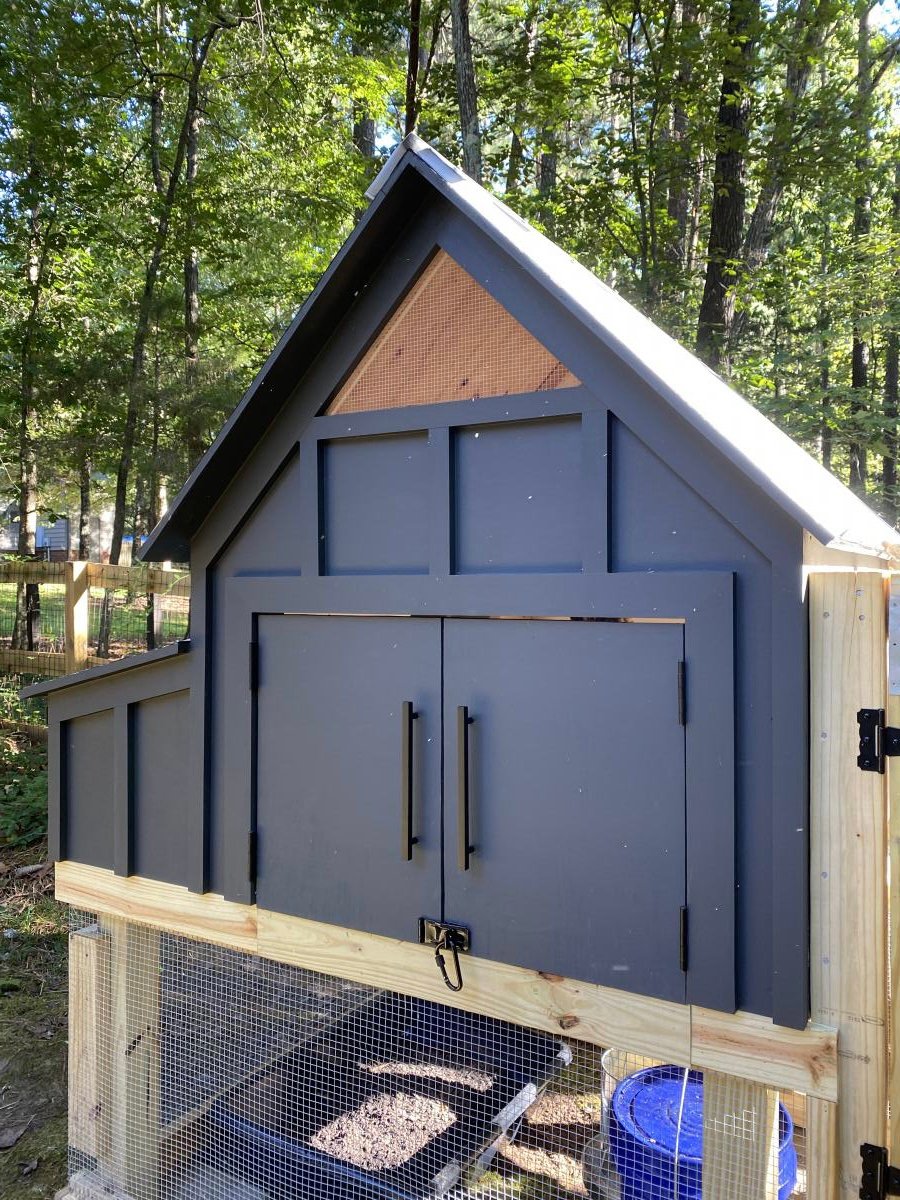
We took some creative liberties on the Williams Sonoma inspired coop posted here. Because we don’t get a whole ton of sun in our backyard, we eliminated the herb garden planter and instead built a longer run. We also made the coop a bit wider to accommodate for the inevitable chicken math. And, you’ll notice the vent both shaped differently and is a bit higher. This was to increase air flow, avoid the dreaded draft, and to lend a more Scandinavian vibe. We also decided to place the chicken exit on the outside wall to allow for more living space under the coop itself. The project took about a month to complete, dedicated to only working weekends. And, it was very much over budget! Who knew wood is so expensive?! But overall, the outcome was even better than I expected. The chickens love it and I don’t mind looking at it!
P.S. this was a pretty advanced project. The fractions alone had me yelling “uncle!” Thankfully my husband is pretty handy, and my father-in-law (career in the construction industry) had a few pointers, so they took the lead in executing. I chose the paint colors and suggested the deviations from the original blue print. ;-)

Wed, 11/18/2020 - 12:55
Thank you! Yes, I suppose everyone is wanting wood for home improvement projects now that we're not leaving the house! Also, I didn't mean to post a picture of my son and his friends. Am I able to delete?
Thu, 01/14/2021 - 07:43
does this roof have the same angle as the 'Small Chicken Coop with Plans'? It seems to be 'less steep'. Wanting to start this project next weekend and trying to get my mind wrapped around everything!. Thanks.
Wed, 03/16/2022 - 09:53
Do you have a run side photo? I am thinking about adding more run onto mine.....
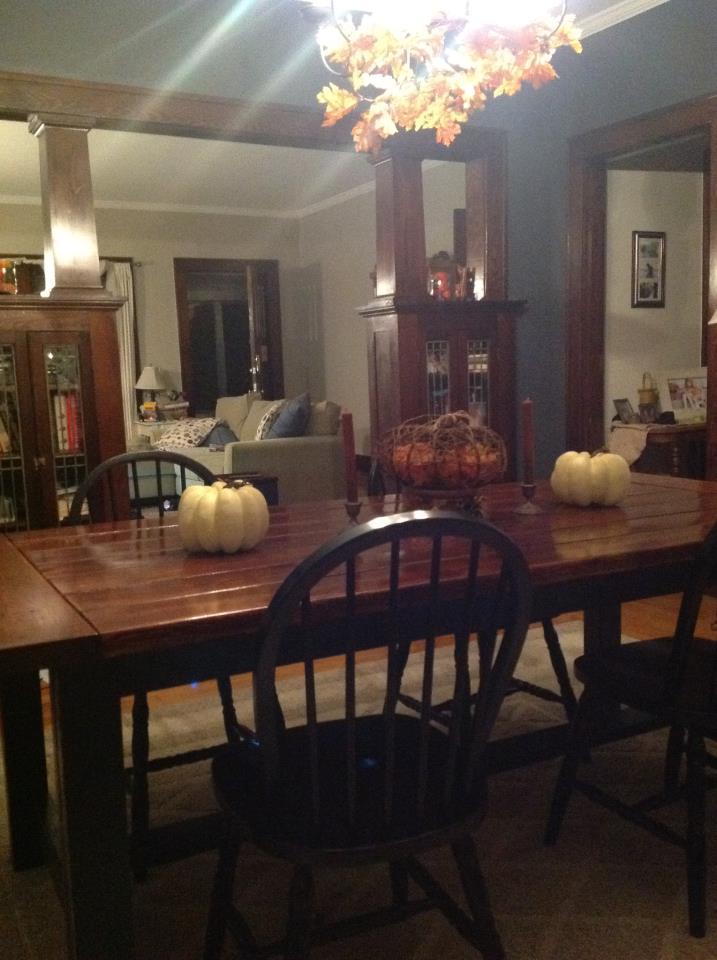
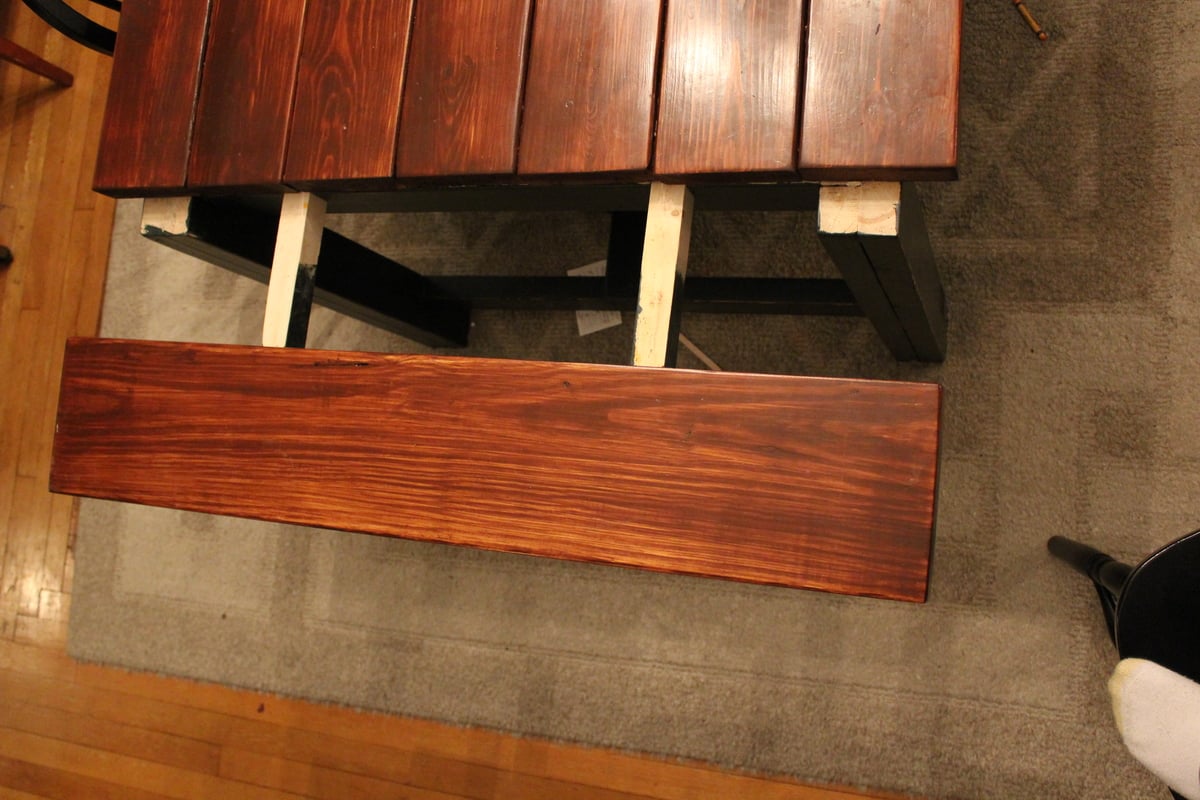
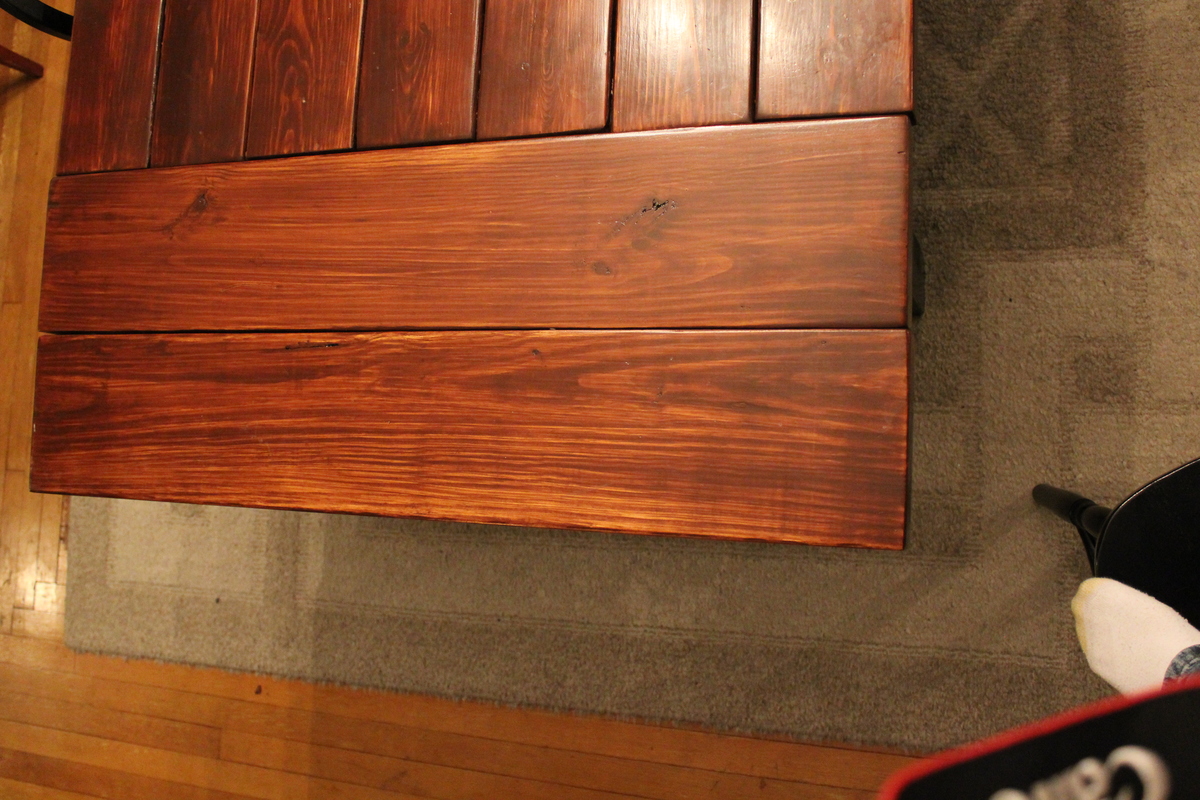
After searching retail stores for farmhouse tables and not liking the pricetags, my wife talked me into tackling this plan. (I'm glad she did) This is my finished product.
I made the breadboards extendable so we could add extra boards if we needed additional seats for guests.
Thu, 01/24/2013 - 12:03
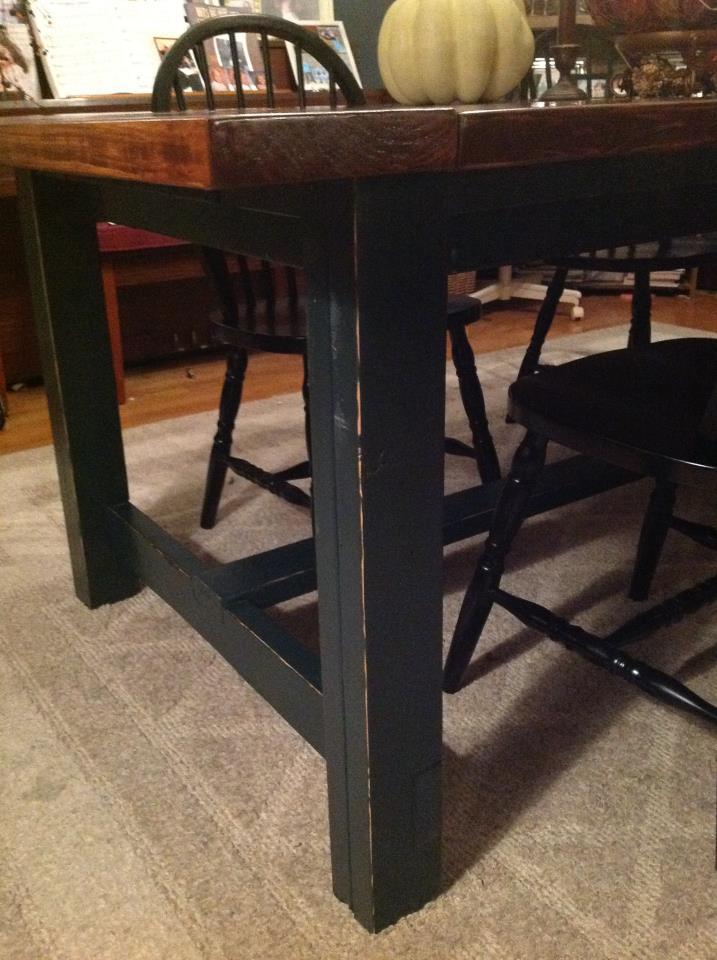
I basically notched out the end apron so that 2x2's could slide through, then attached the 2x2's to the breadboard. I originally attached them so they were just under the edge of the breadboard, but have since changed it so that it goes about halfway. I hope you understand what I am trying to say, if not I can add some more pictures.
Sat, 05/18/2013 - 06:55
Every time we visit websites, we saw almost the same as the other article and topic but I am shocked when I first read the title from this page. I never think that the blogger has the knowledge of making something new online. I only saw this kind of blog in this page. I concur that the blogger has the intellect of Albert Einstein. منتديات