Solid Wood Outdoor Table
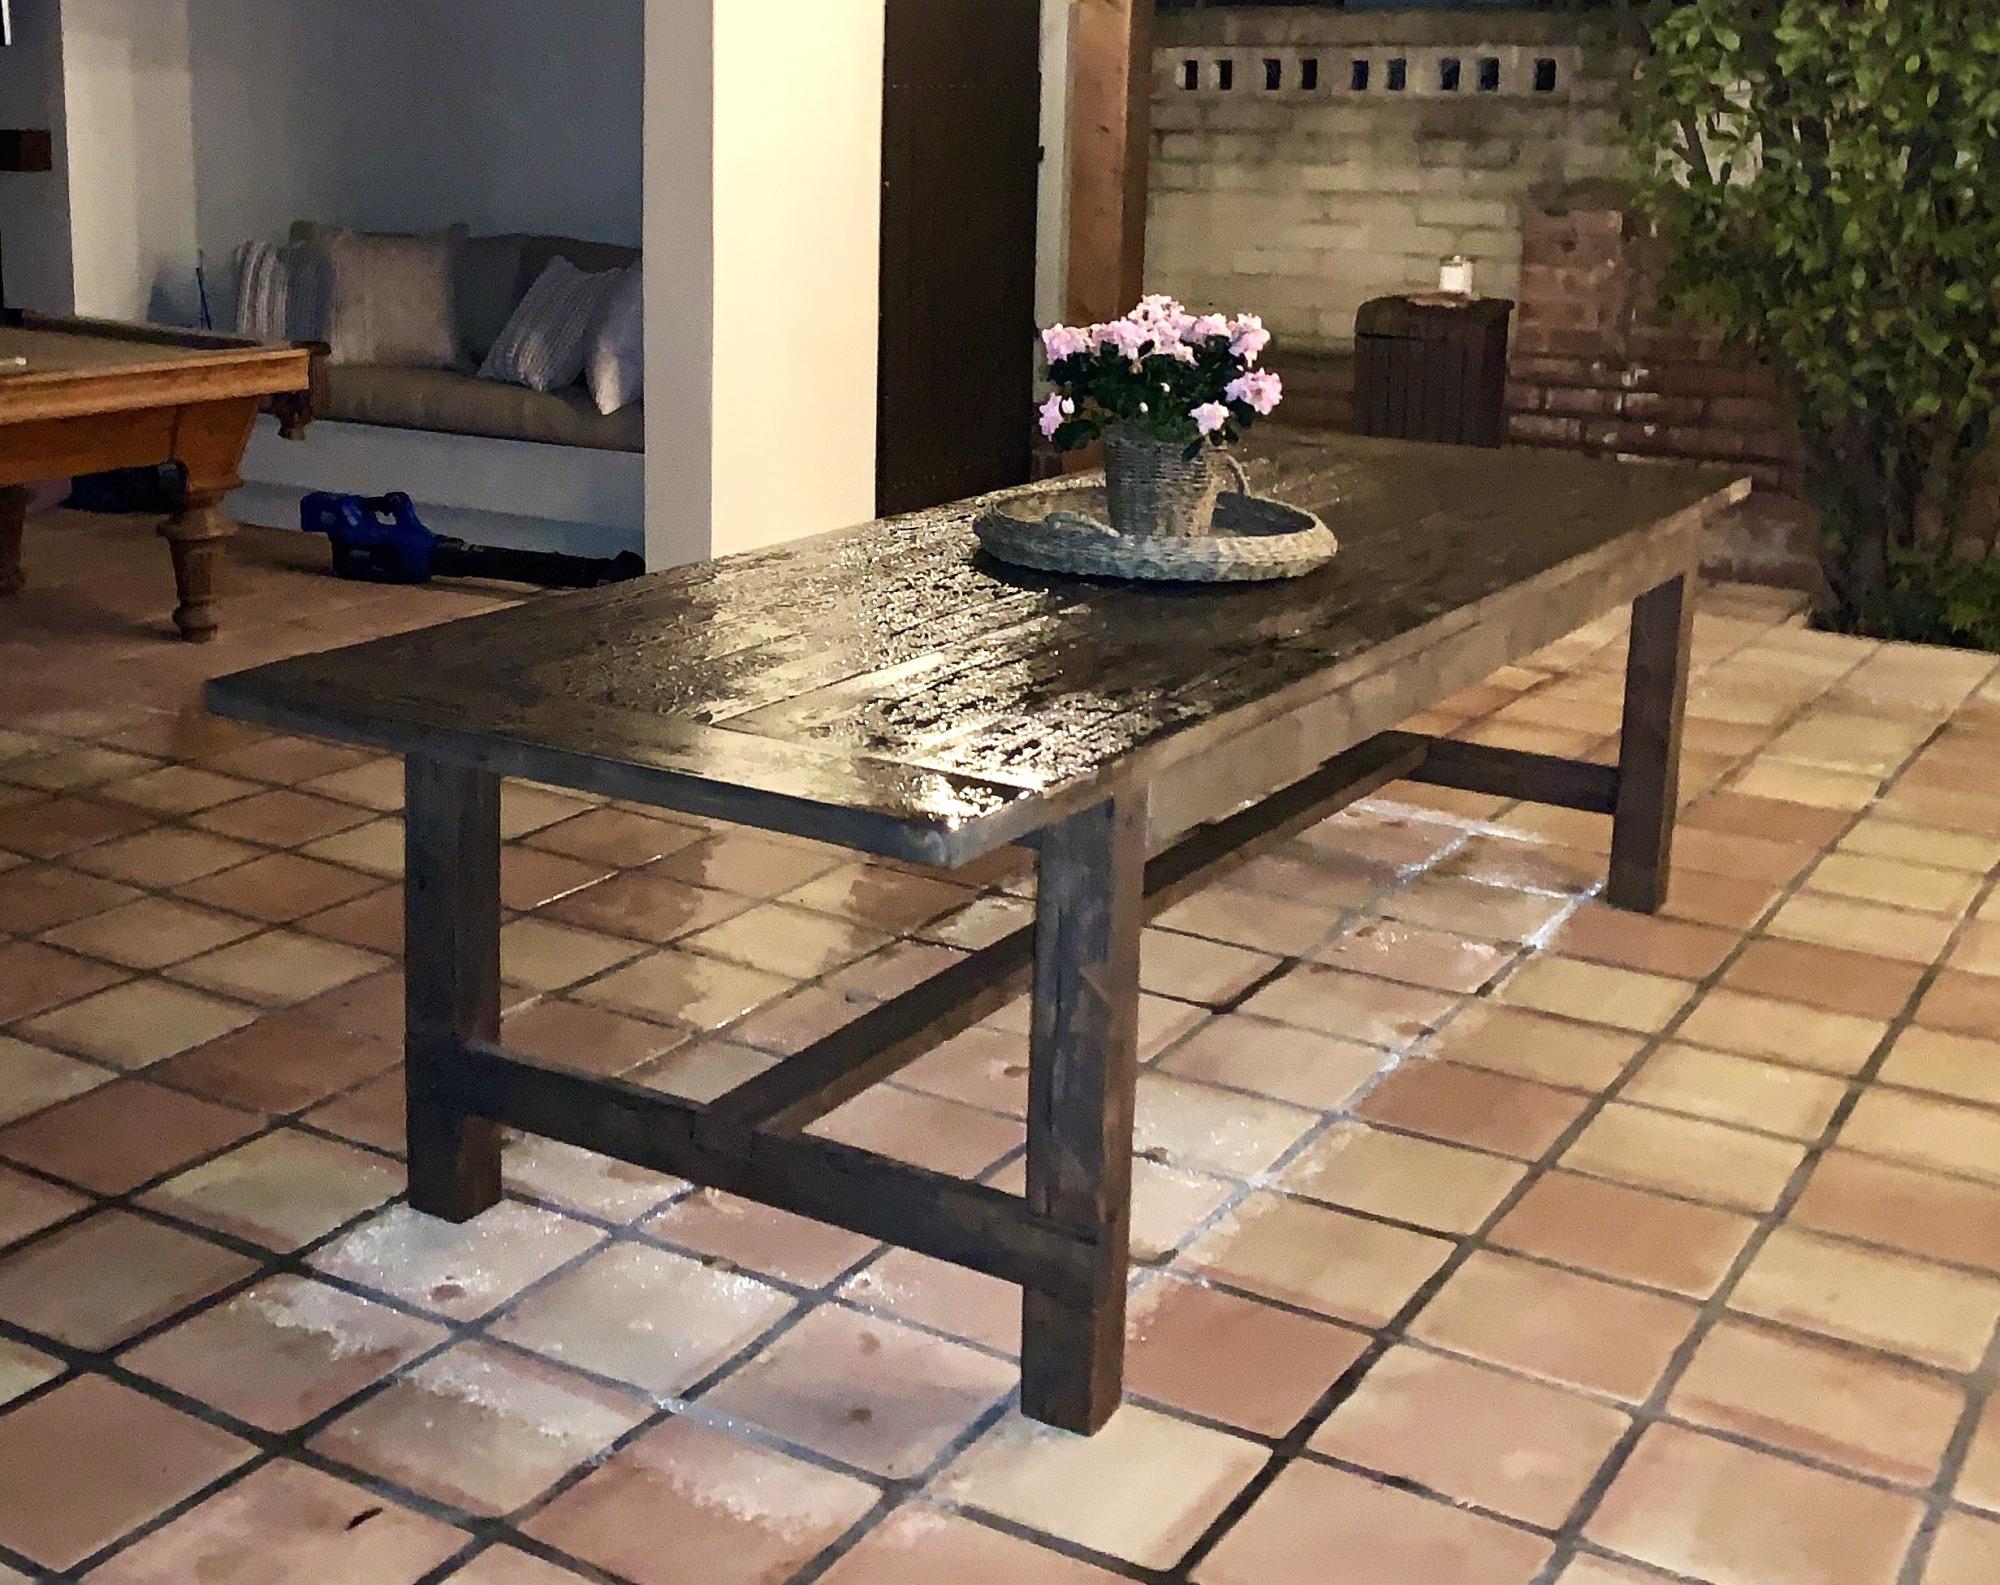
Farmhouse outdoor table.
Donna and Shelley
Built from Plan(s)
Farmhouse outdoor table.
Donna and Shelley
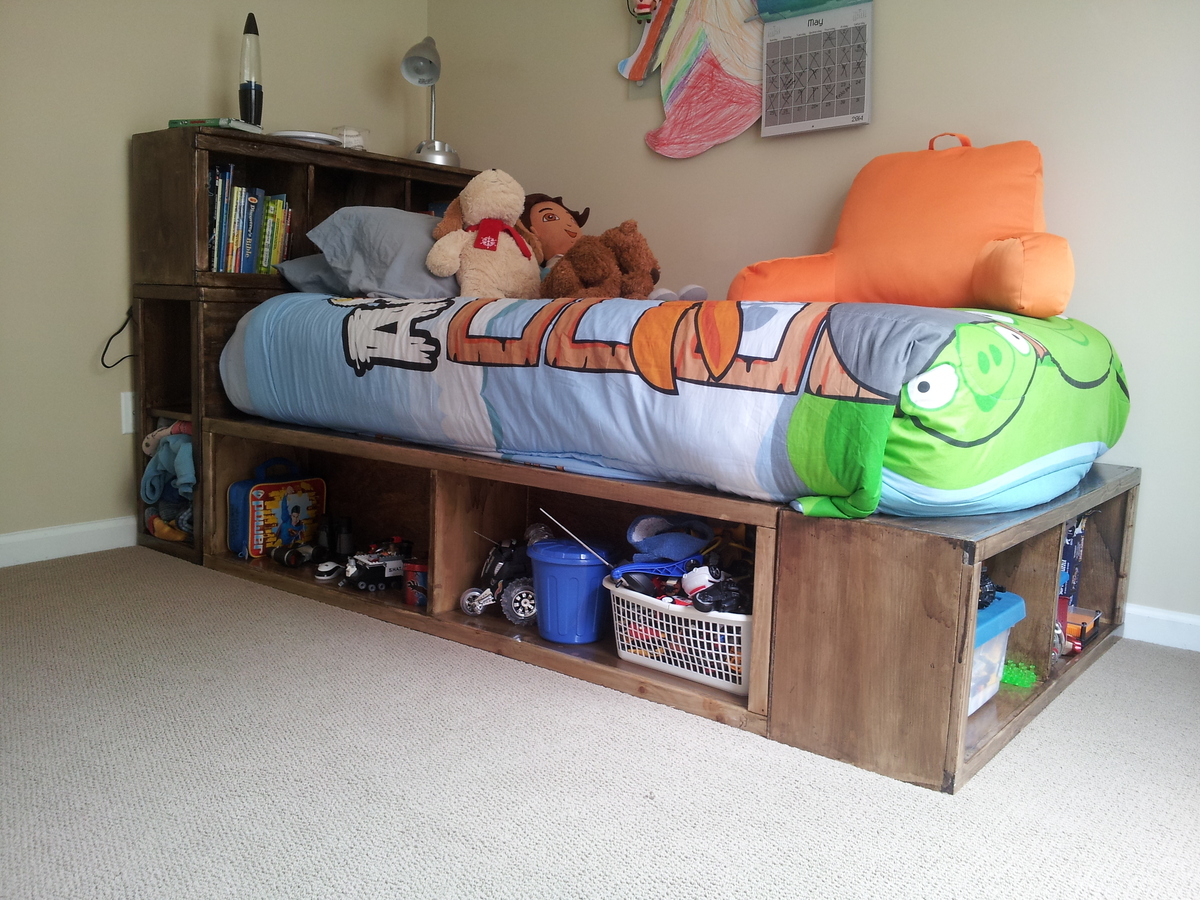
Son's bed (age 9) first build and he loves it! I'm pretty psyched too!
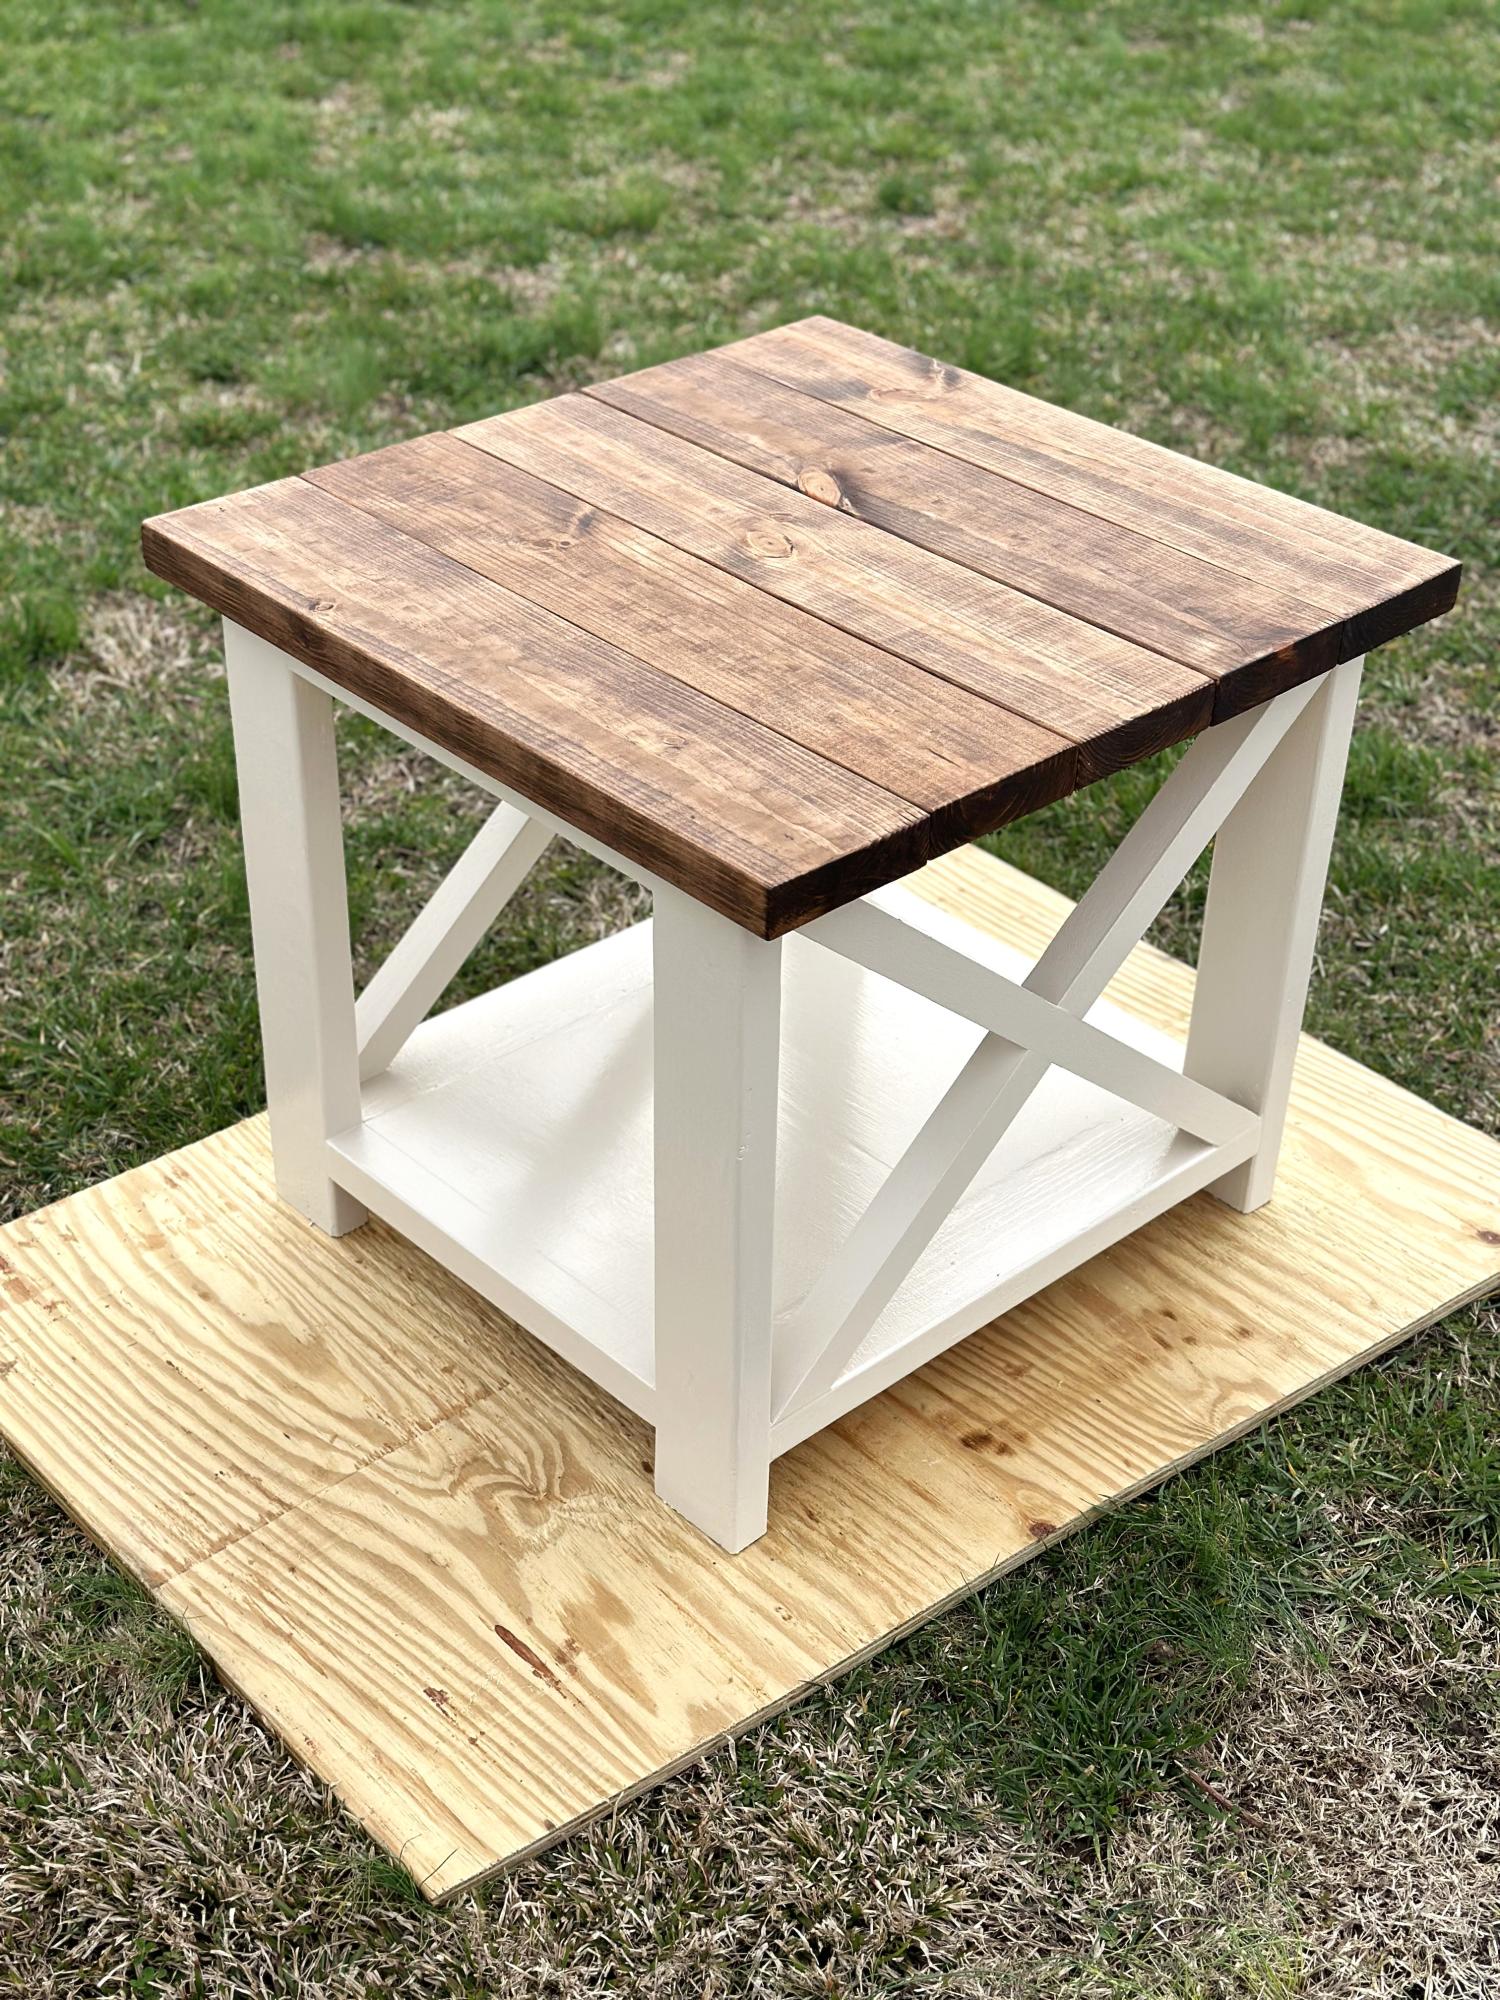
Wife wanted a new end table for our living room. After searching for a month and not finding one I ran across this plan and decided to just build it. Definitely saved a ton of money and she got to custom her own colors. Went with a Honey stain top and beige bottom. She is very excited about it. Built it in just 2 days with only a drill, palm sander and 10” miter saw.

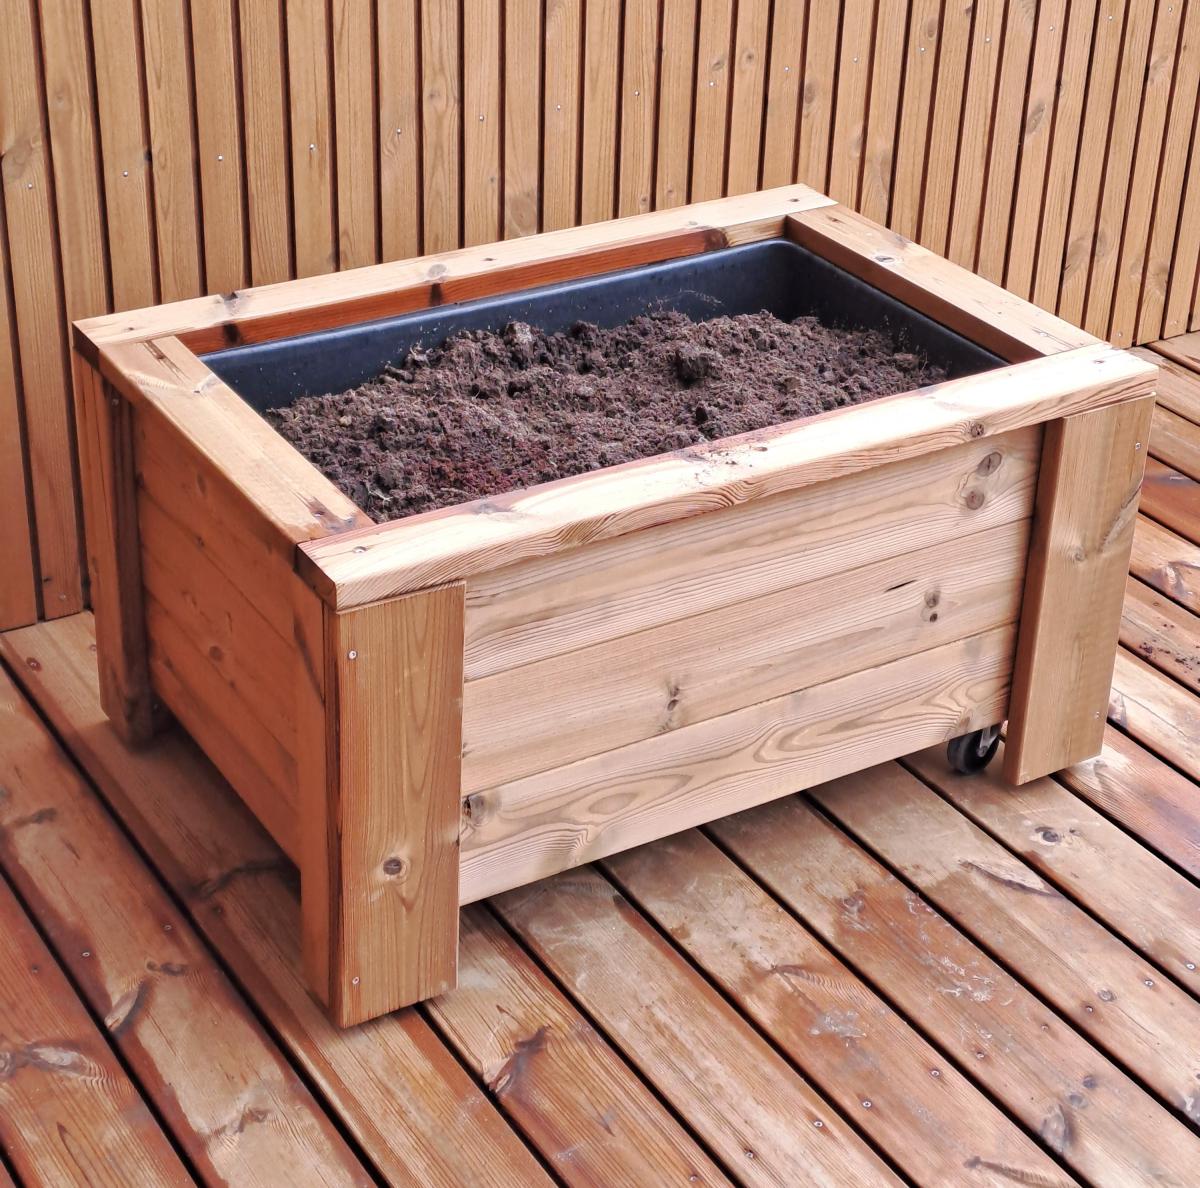
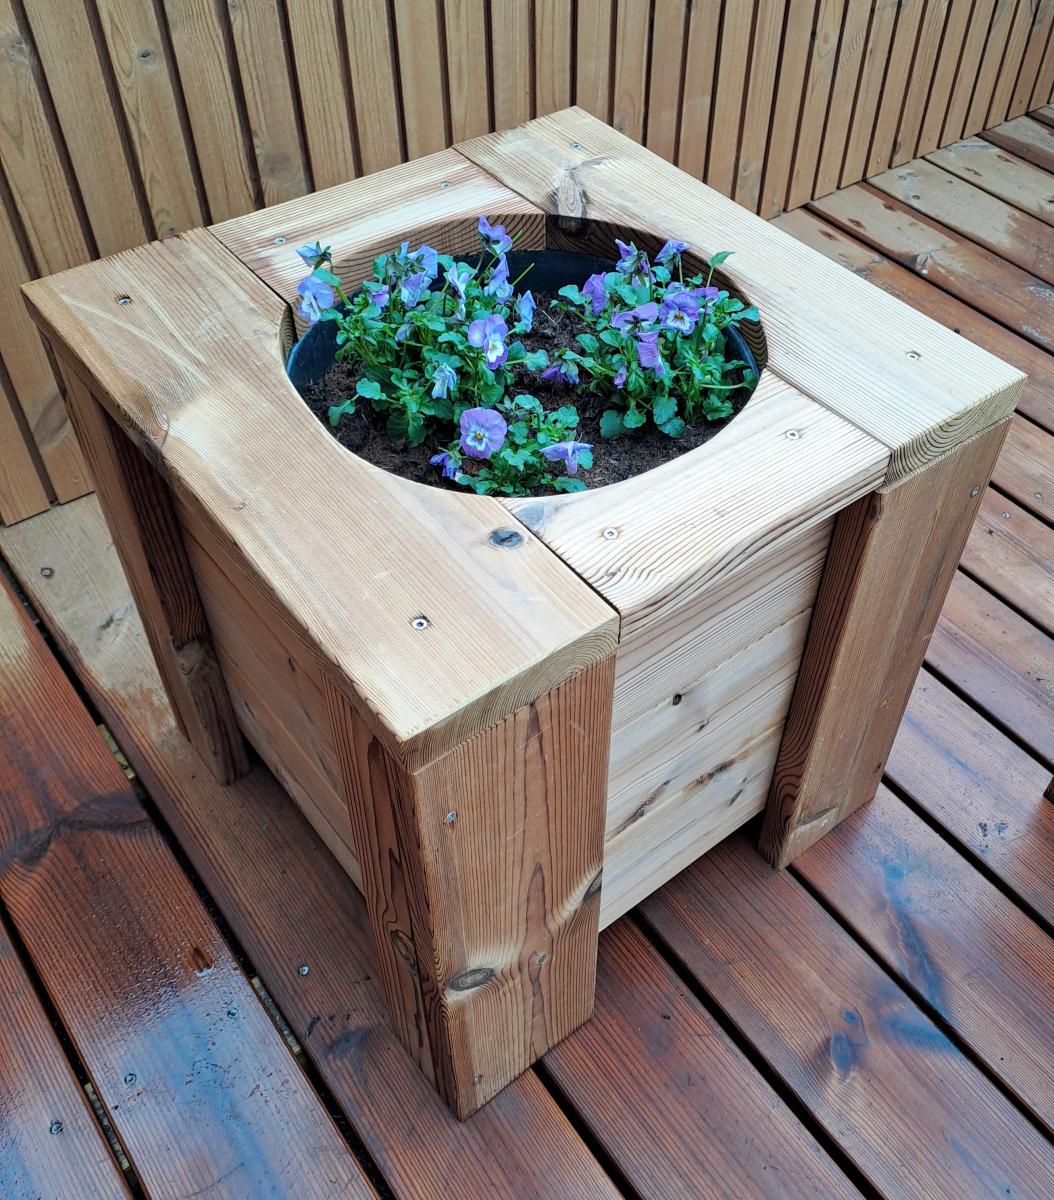
I build these planter boxes, from wooden remains from terrace building, inspired from Ana White planter boxes.
Søg
Shortened the legs to 17" and used 1x2s on the shelf because that's what we had on hand. Sealed with Thompson's aerosol clear waterseal.
first time ever building anything... my wife loves it and wants me to do more!
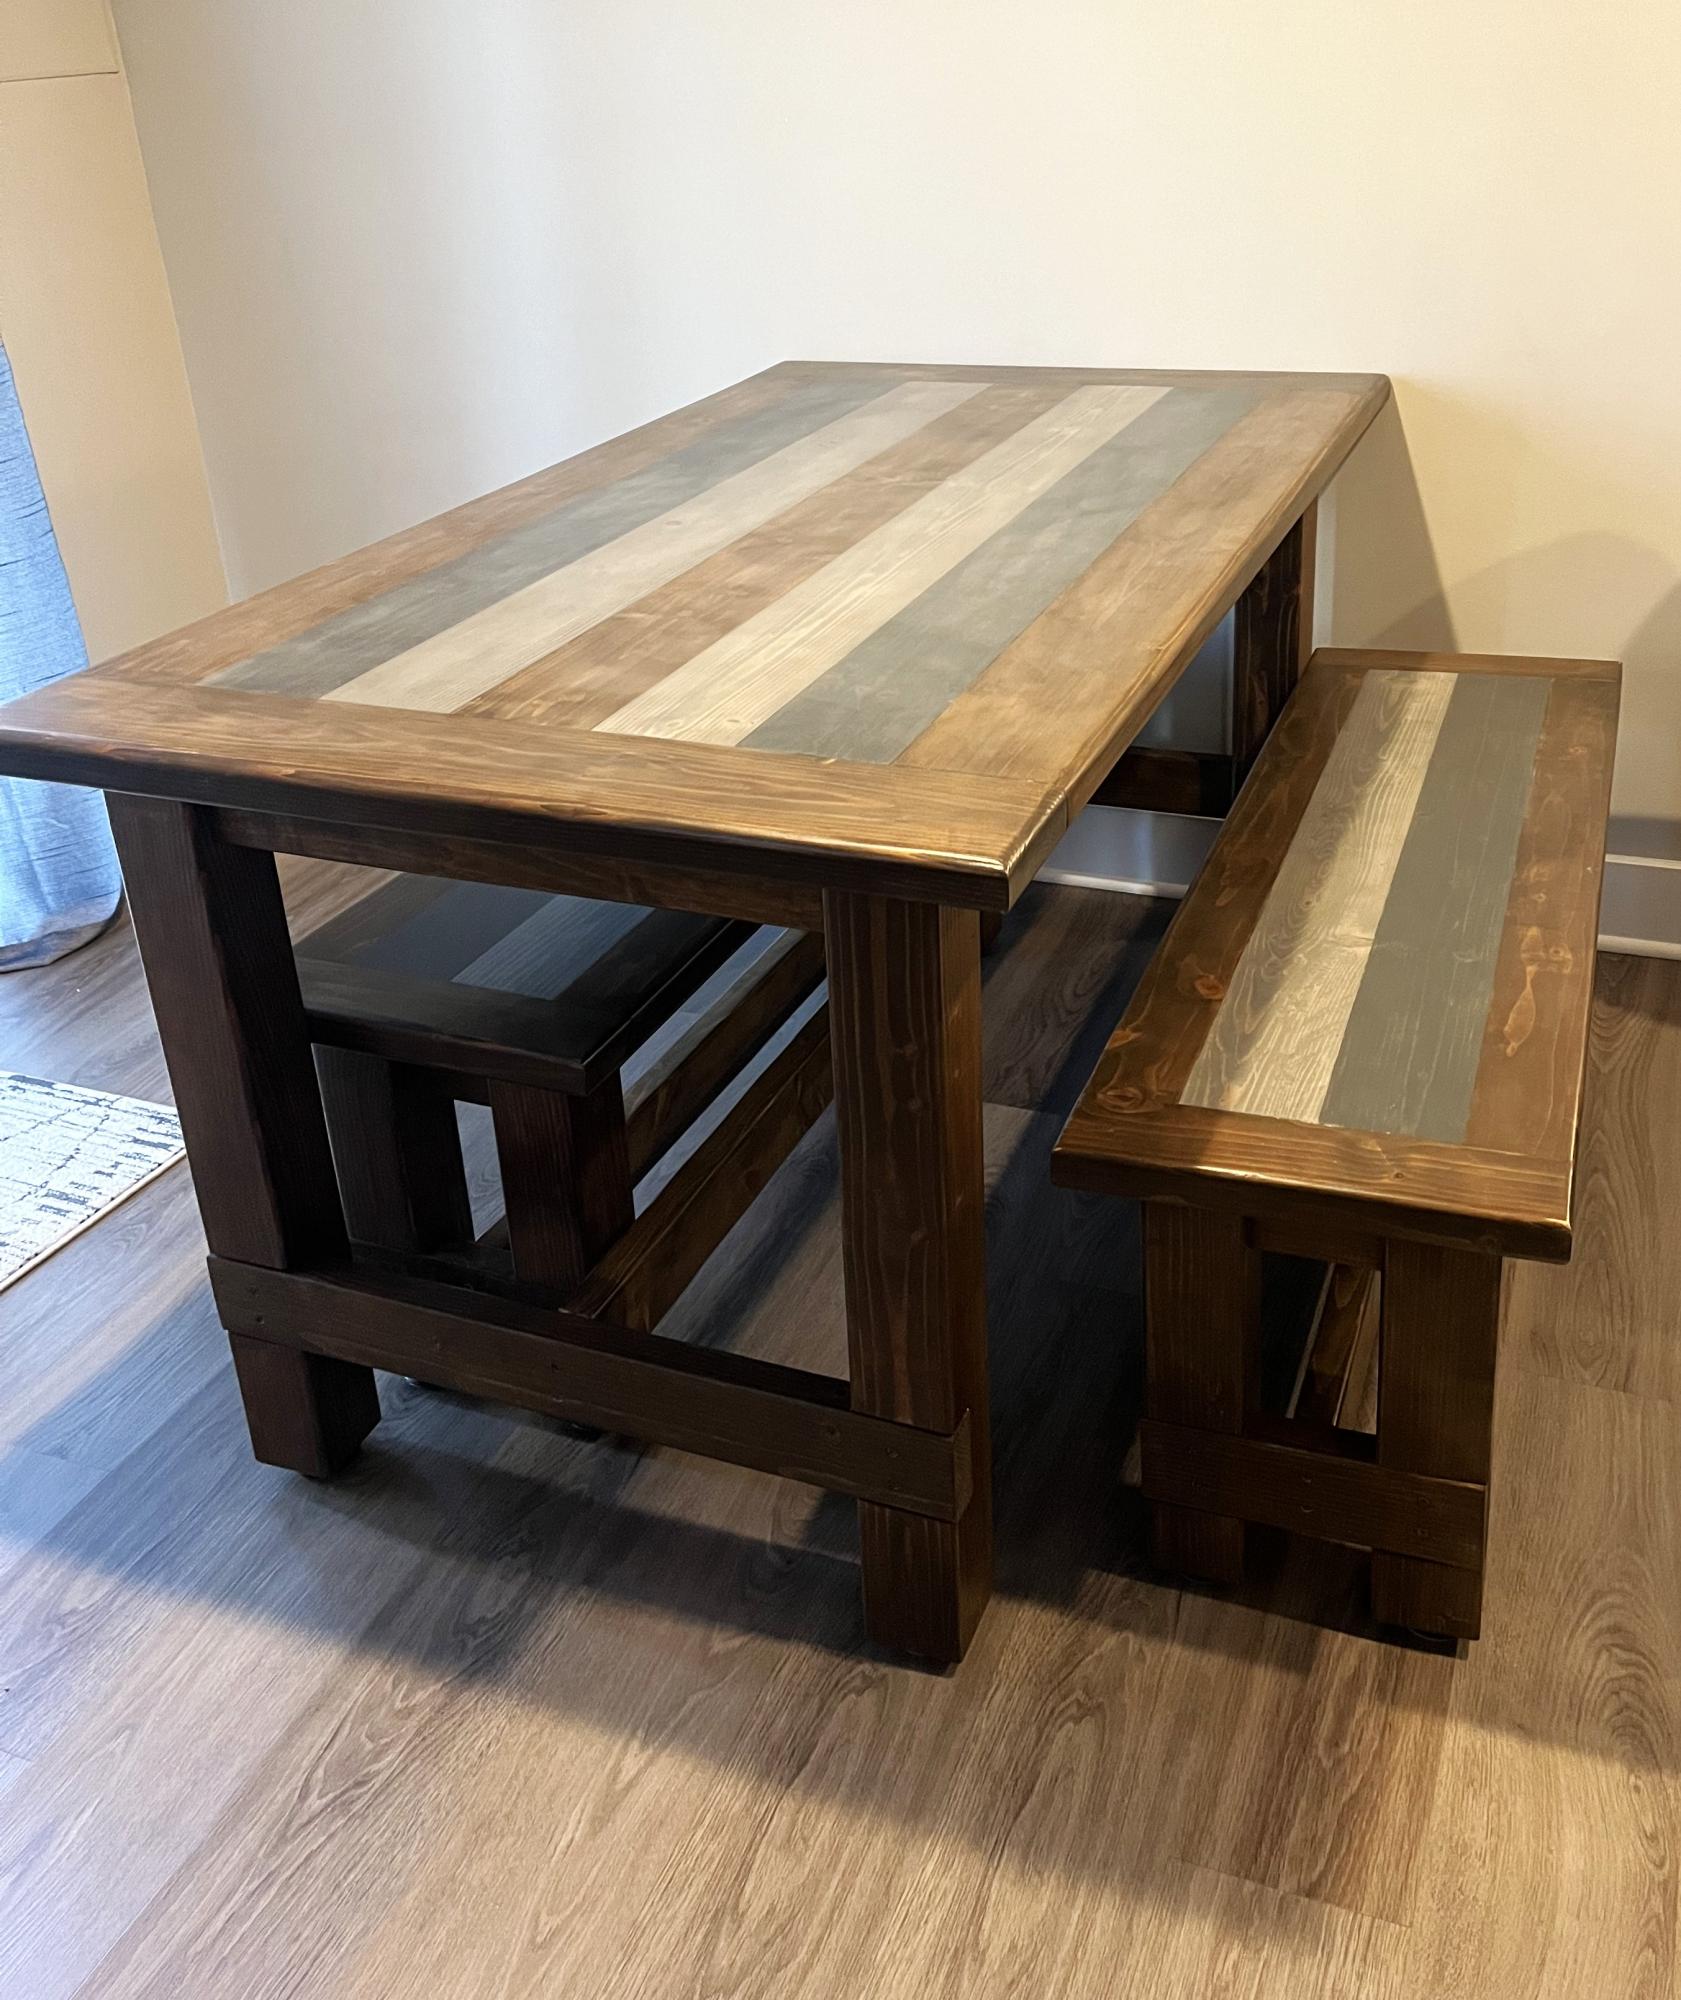
Made this farm table and benches from your plans. Son wanted the multi colored and wanted it epoxy coated. I put a couple top coats of satin poly over to tone down the gloss. He loves it.
Renee White @momanay
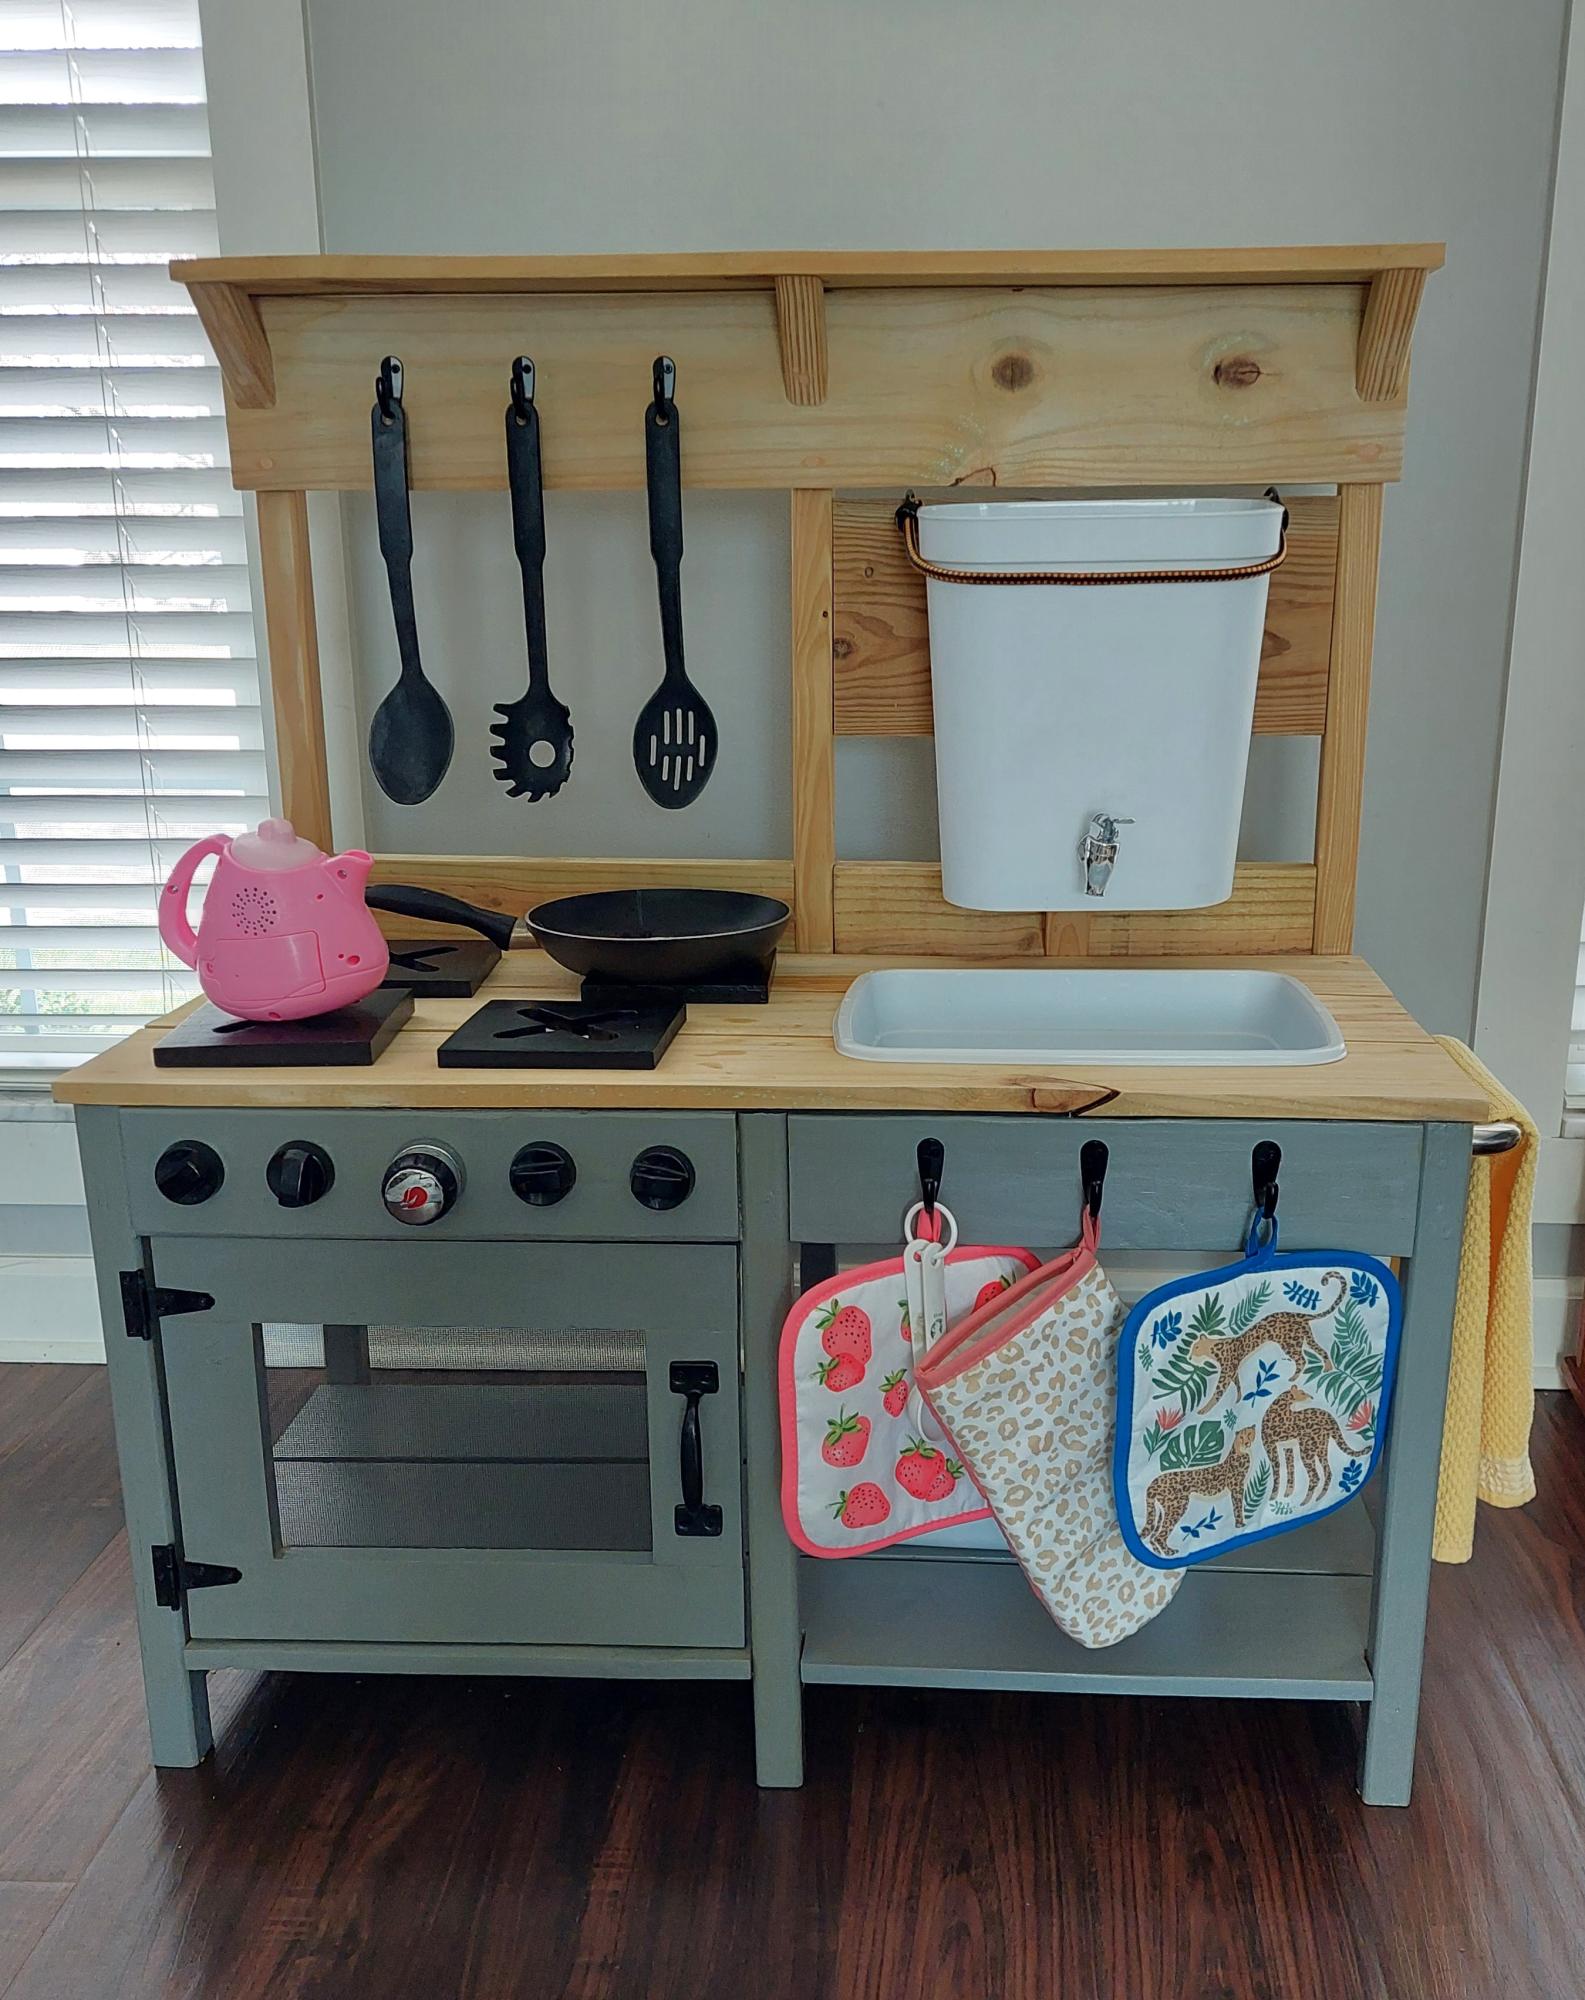
I built this using Ana's plans for her outdoor play kitchen. I live in North Carolina and took it to my grandchildren in Ohio. They love it! I used an inexpensive beverage dispenser installed into a trashcan and connected a small aquarium pump to recirculate the water from the sink to the water tank. I'm super pleased with how it turned out!
Nancye Butterworth
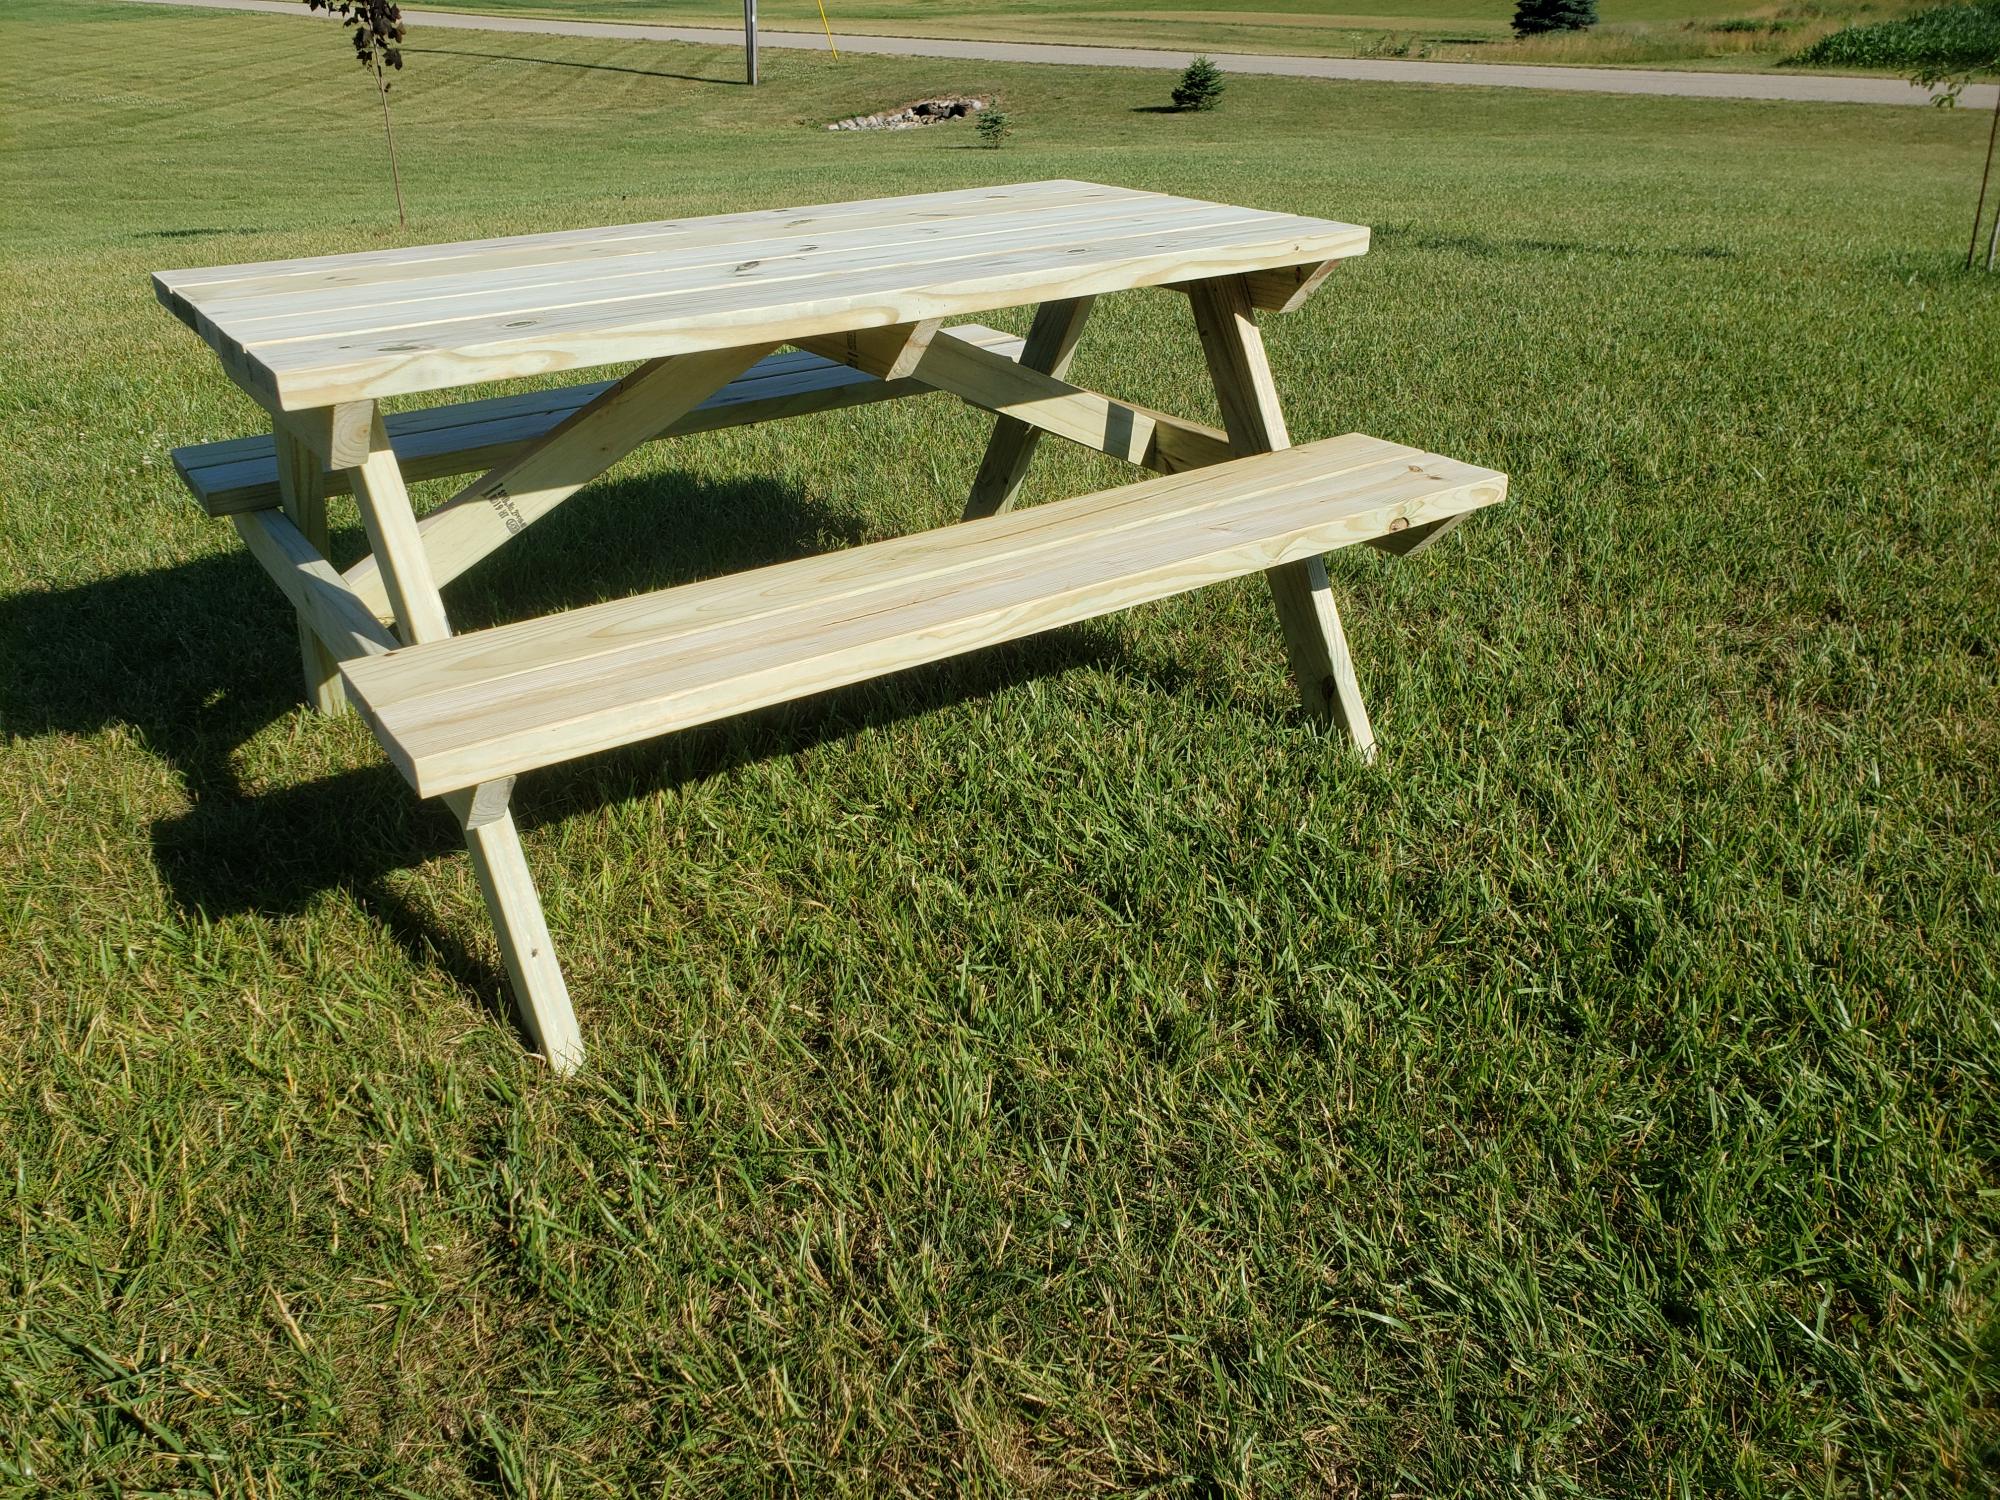
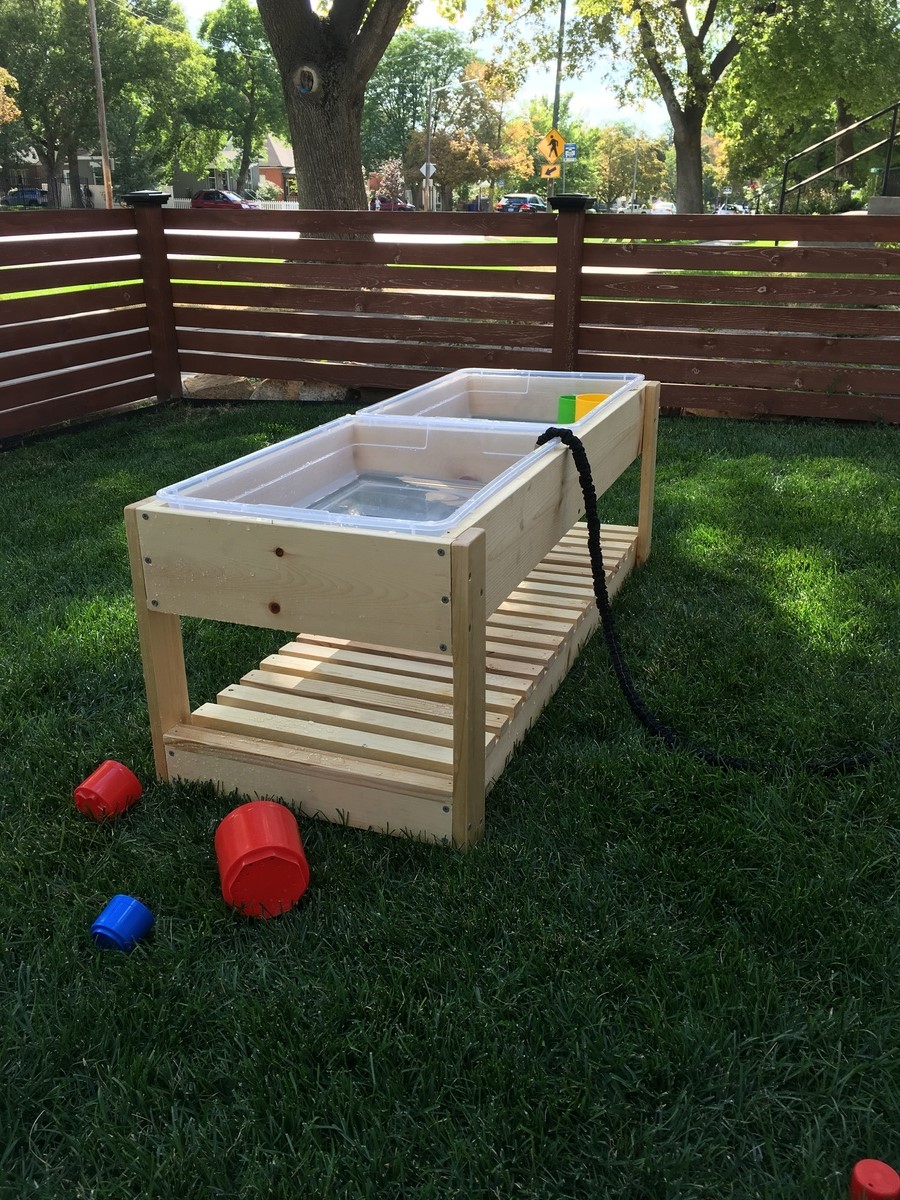
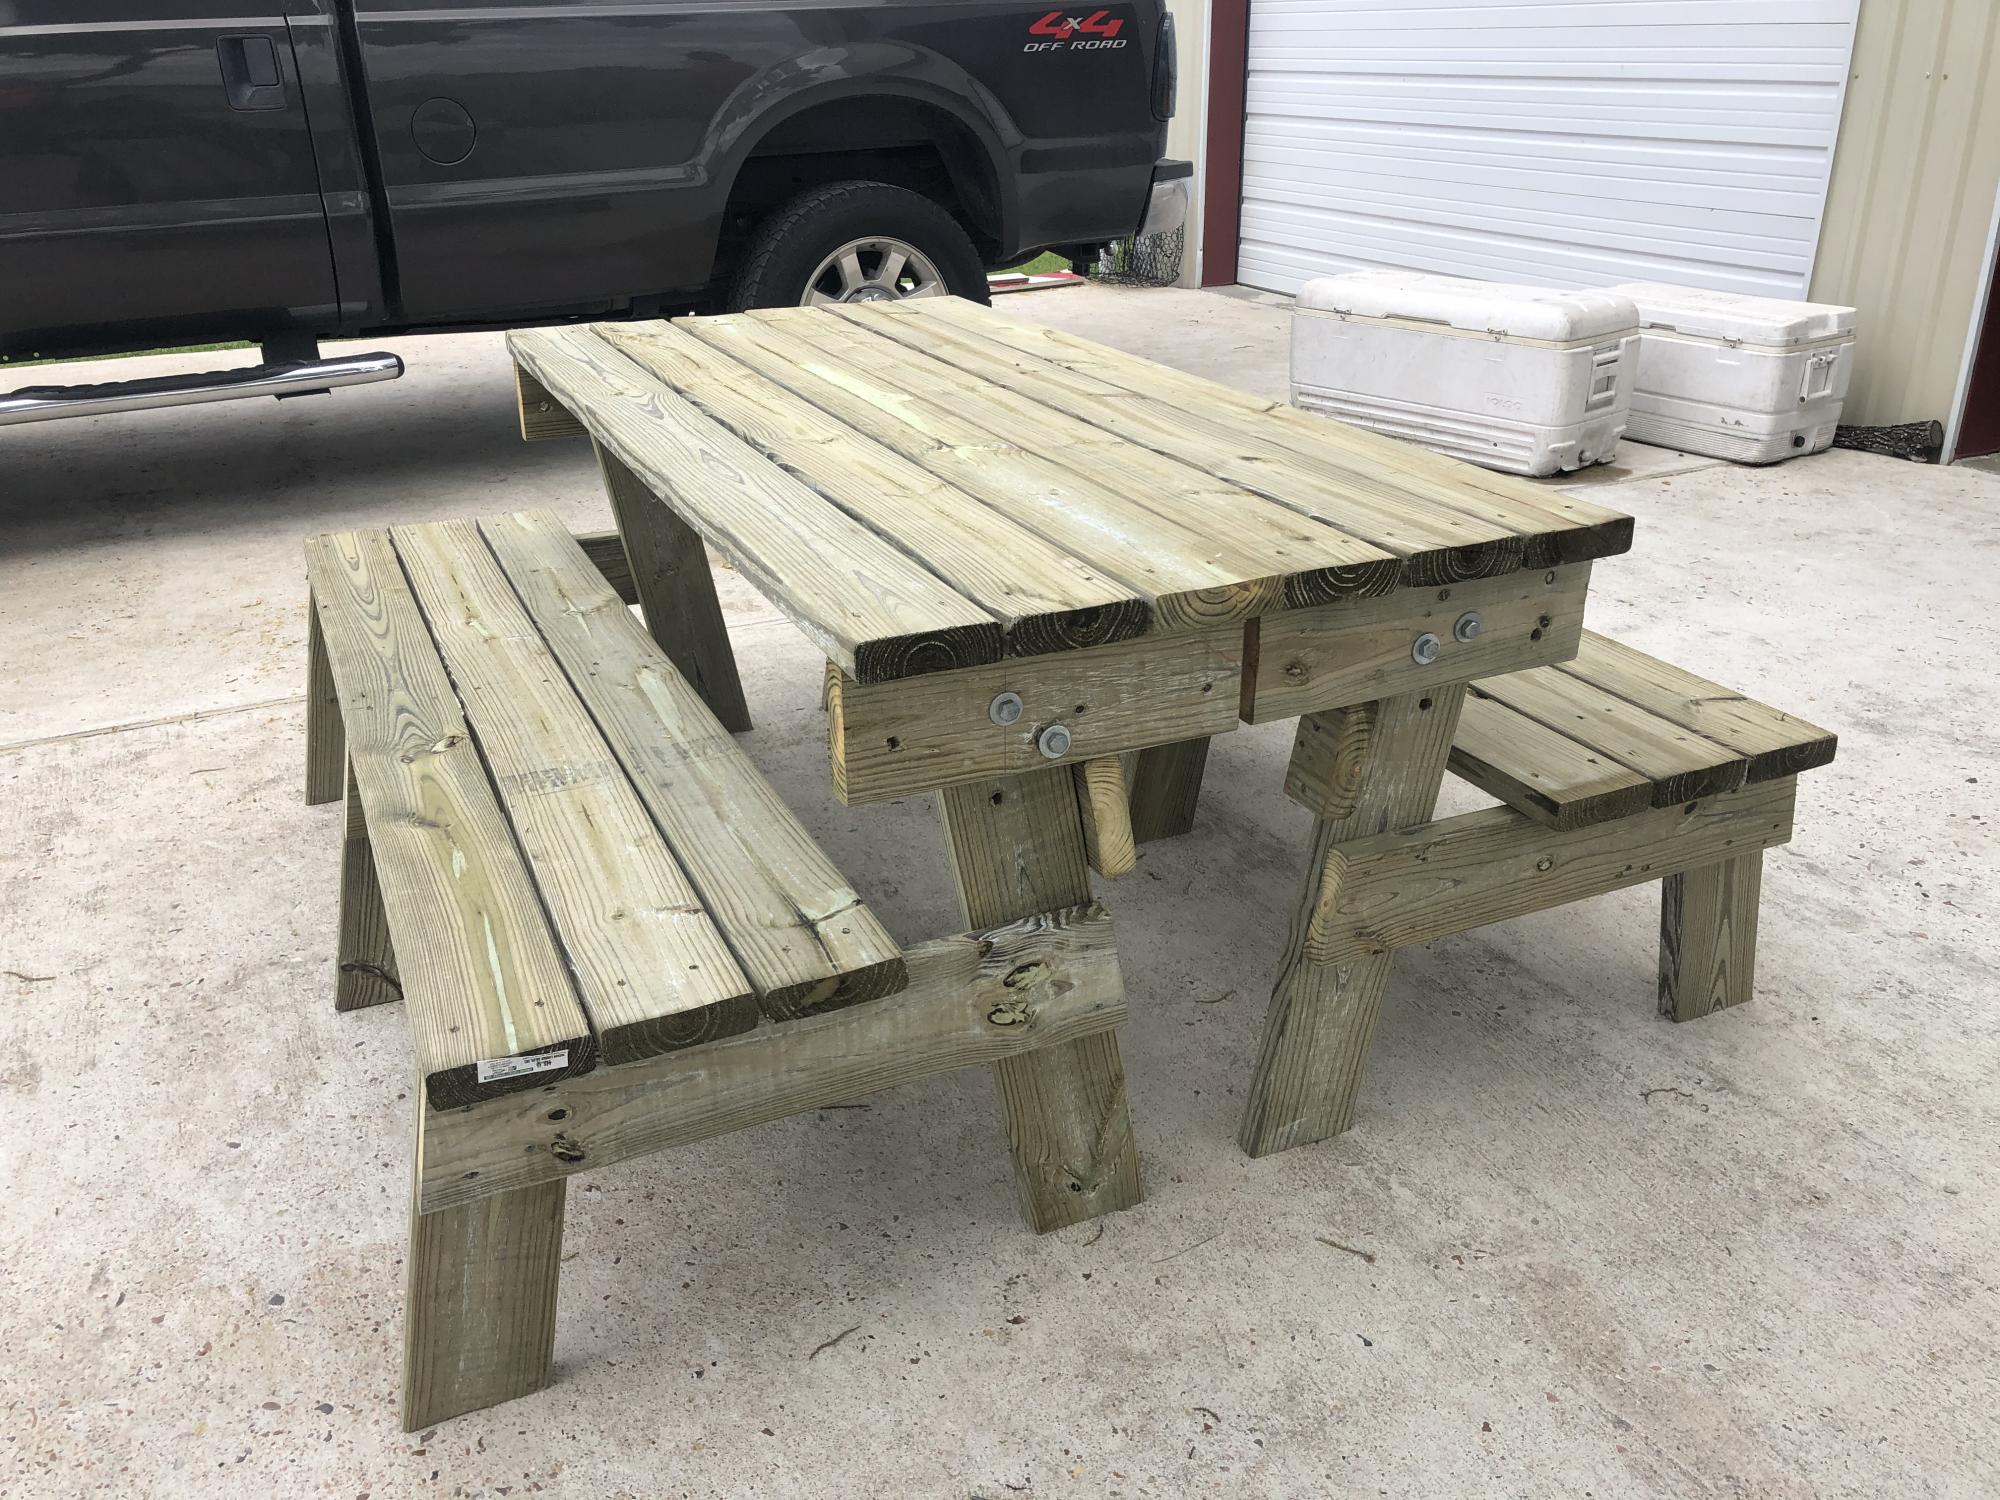
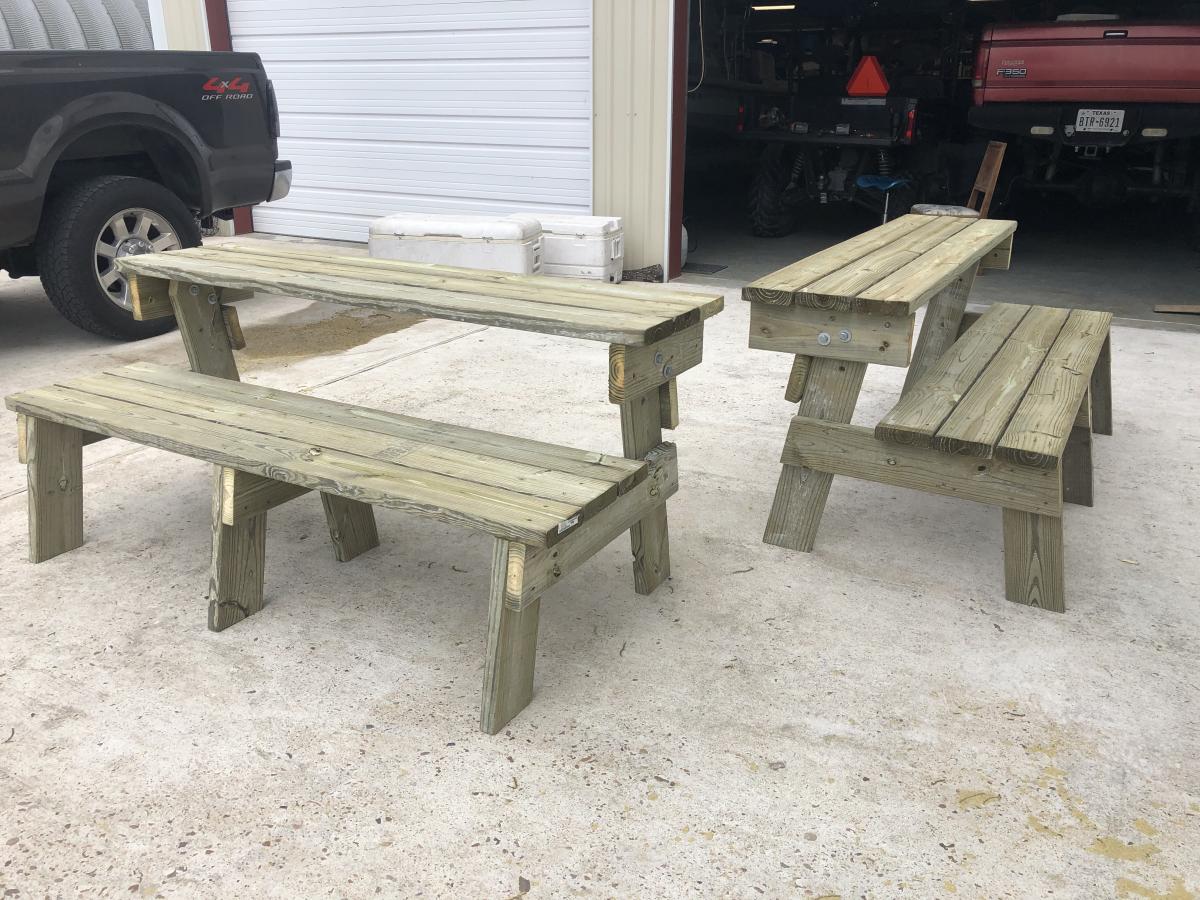
We built from the plan with green treated lumber. We also joined the top and the seat with pocket holes and outdoor blue Kreg screws so there are no screw holes exposed on the tops. Easy build. Great compact picnic table.
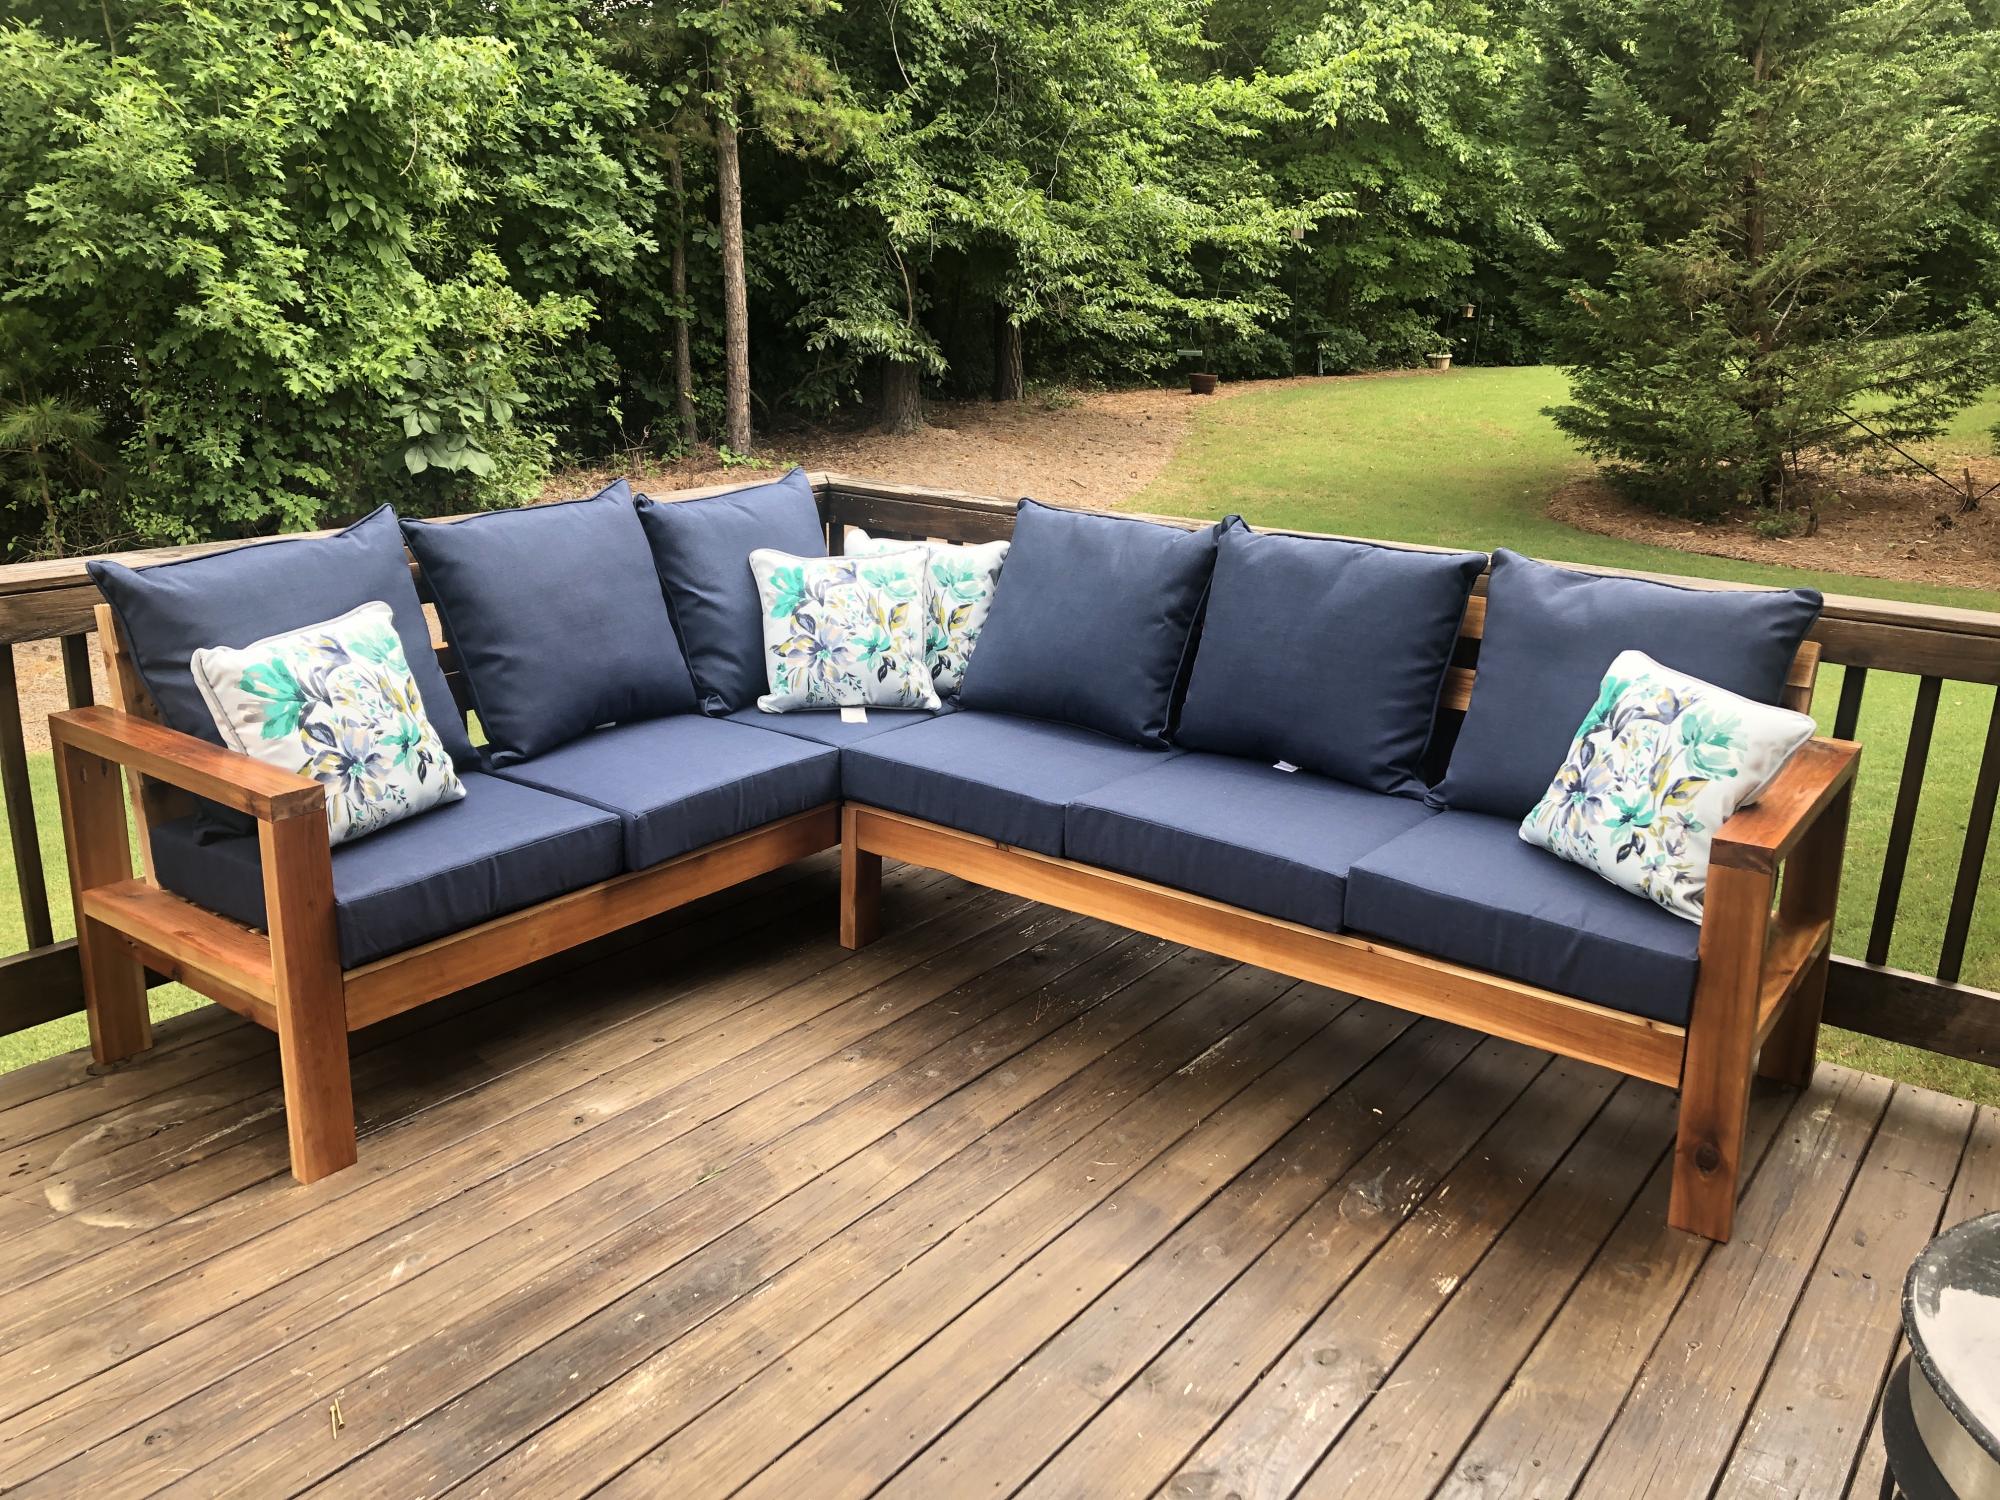
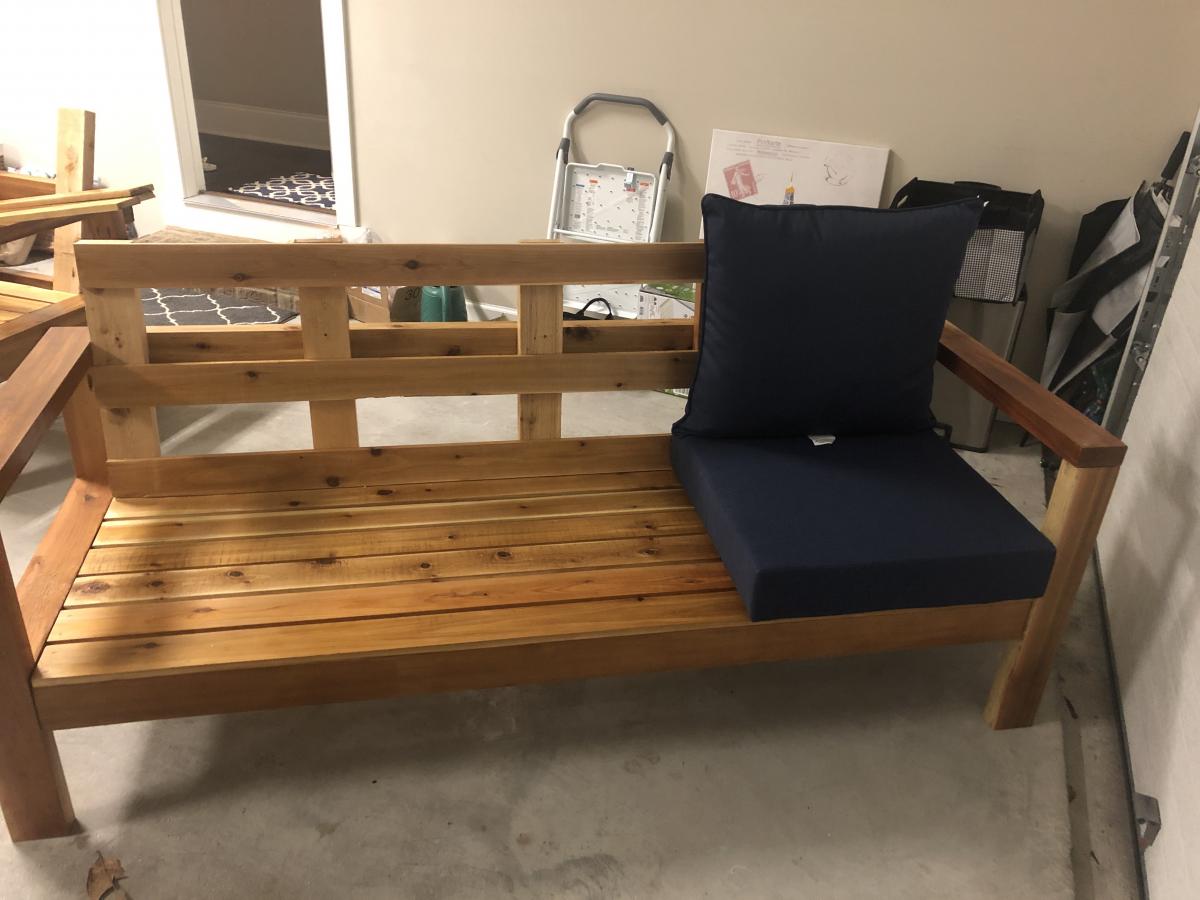
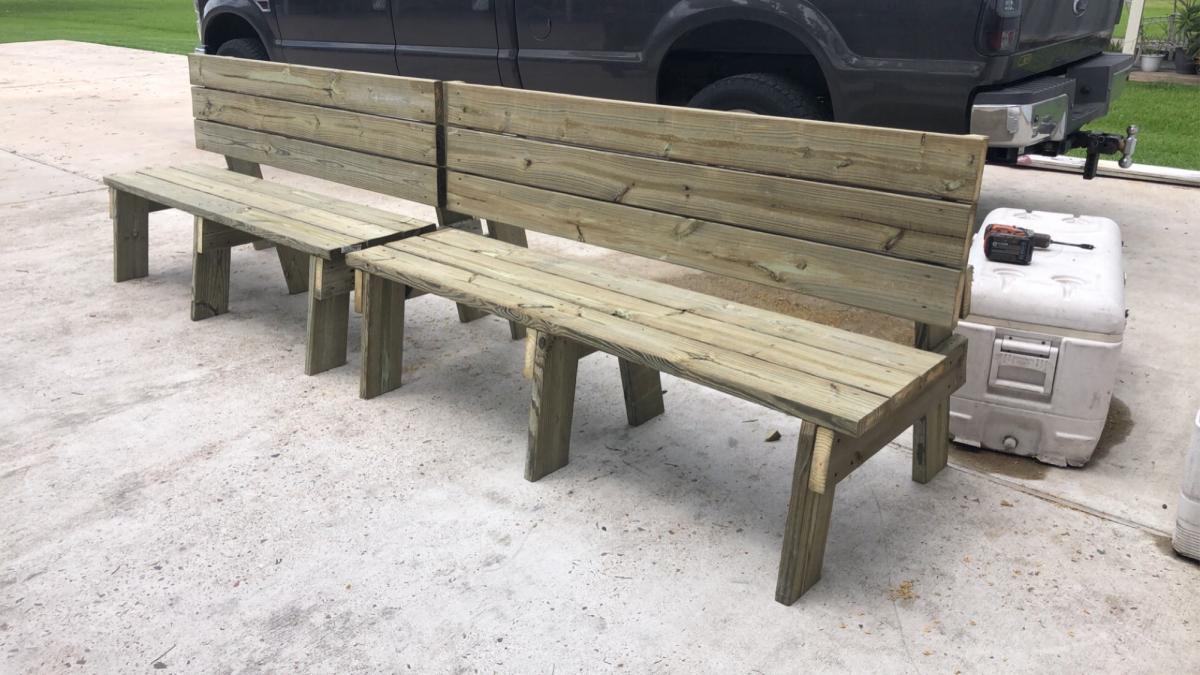
My sister needed new outdoor furniture for her deck and liked the look of the sectional. I used cedar with a clear varnish to creat this piece for her that was perfectly sized for her deck. The challenge to this one was getting it to her house about 3 hours from mine. Fully assembled it would have been tight getting it in my truck. I ended up cutting all of the boards and drilling all of the pocket holes in my shop and then assembling at her house. I have added backs to some of the pieces I have made fro others that want the extr support. I add a 1x4 laying flat across the back of the seat. The slats going up and down then have a slight angle to them which adds comfort and support. I attached the pieces to the 1x4 and the upper back rest piece in the plans.
My husband and I modified the plans just a bit for this Picnic Bench Table we found on your site. We love it!
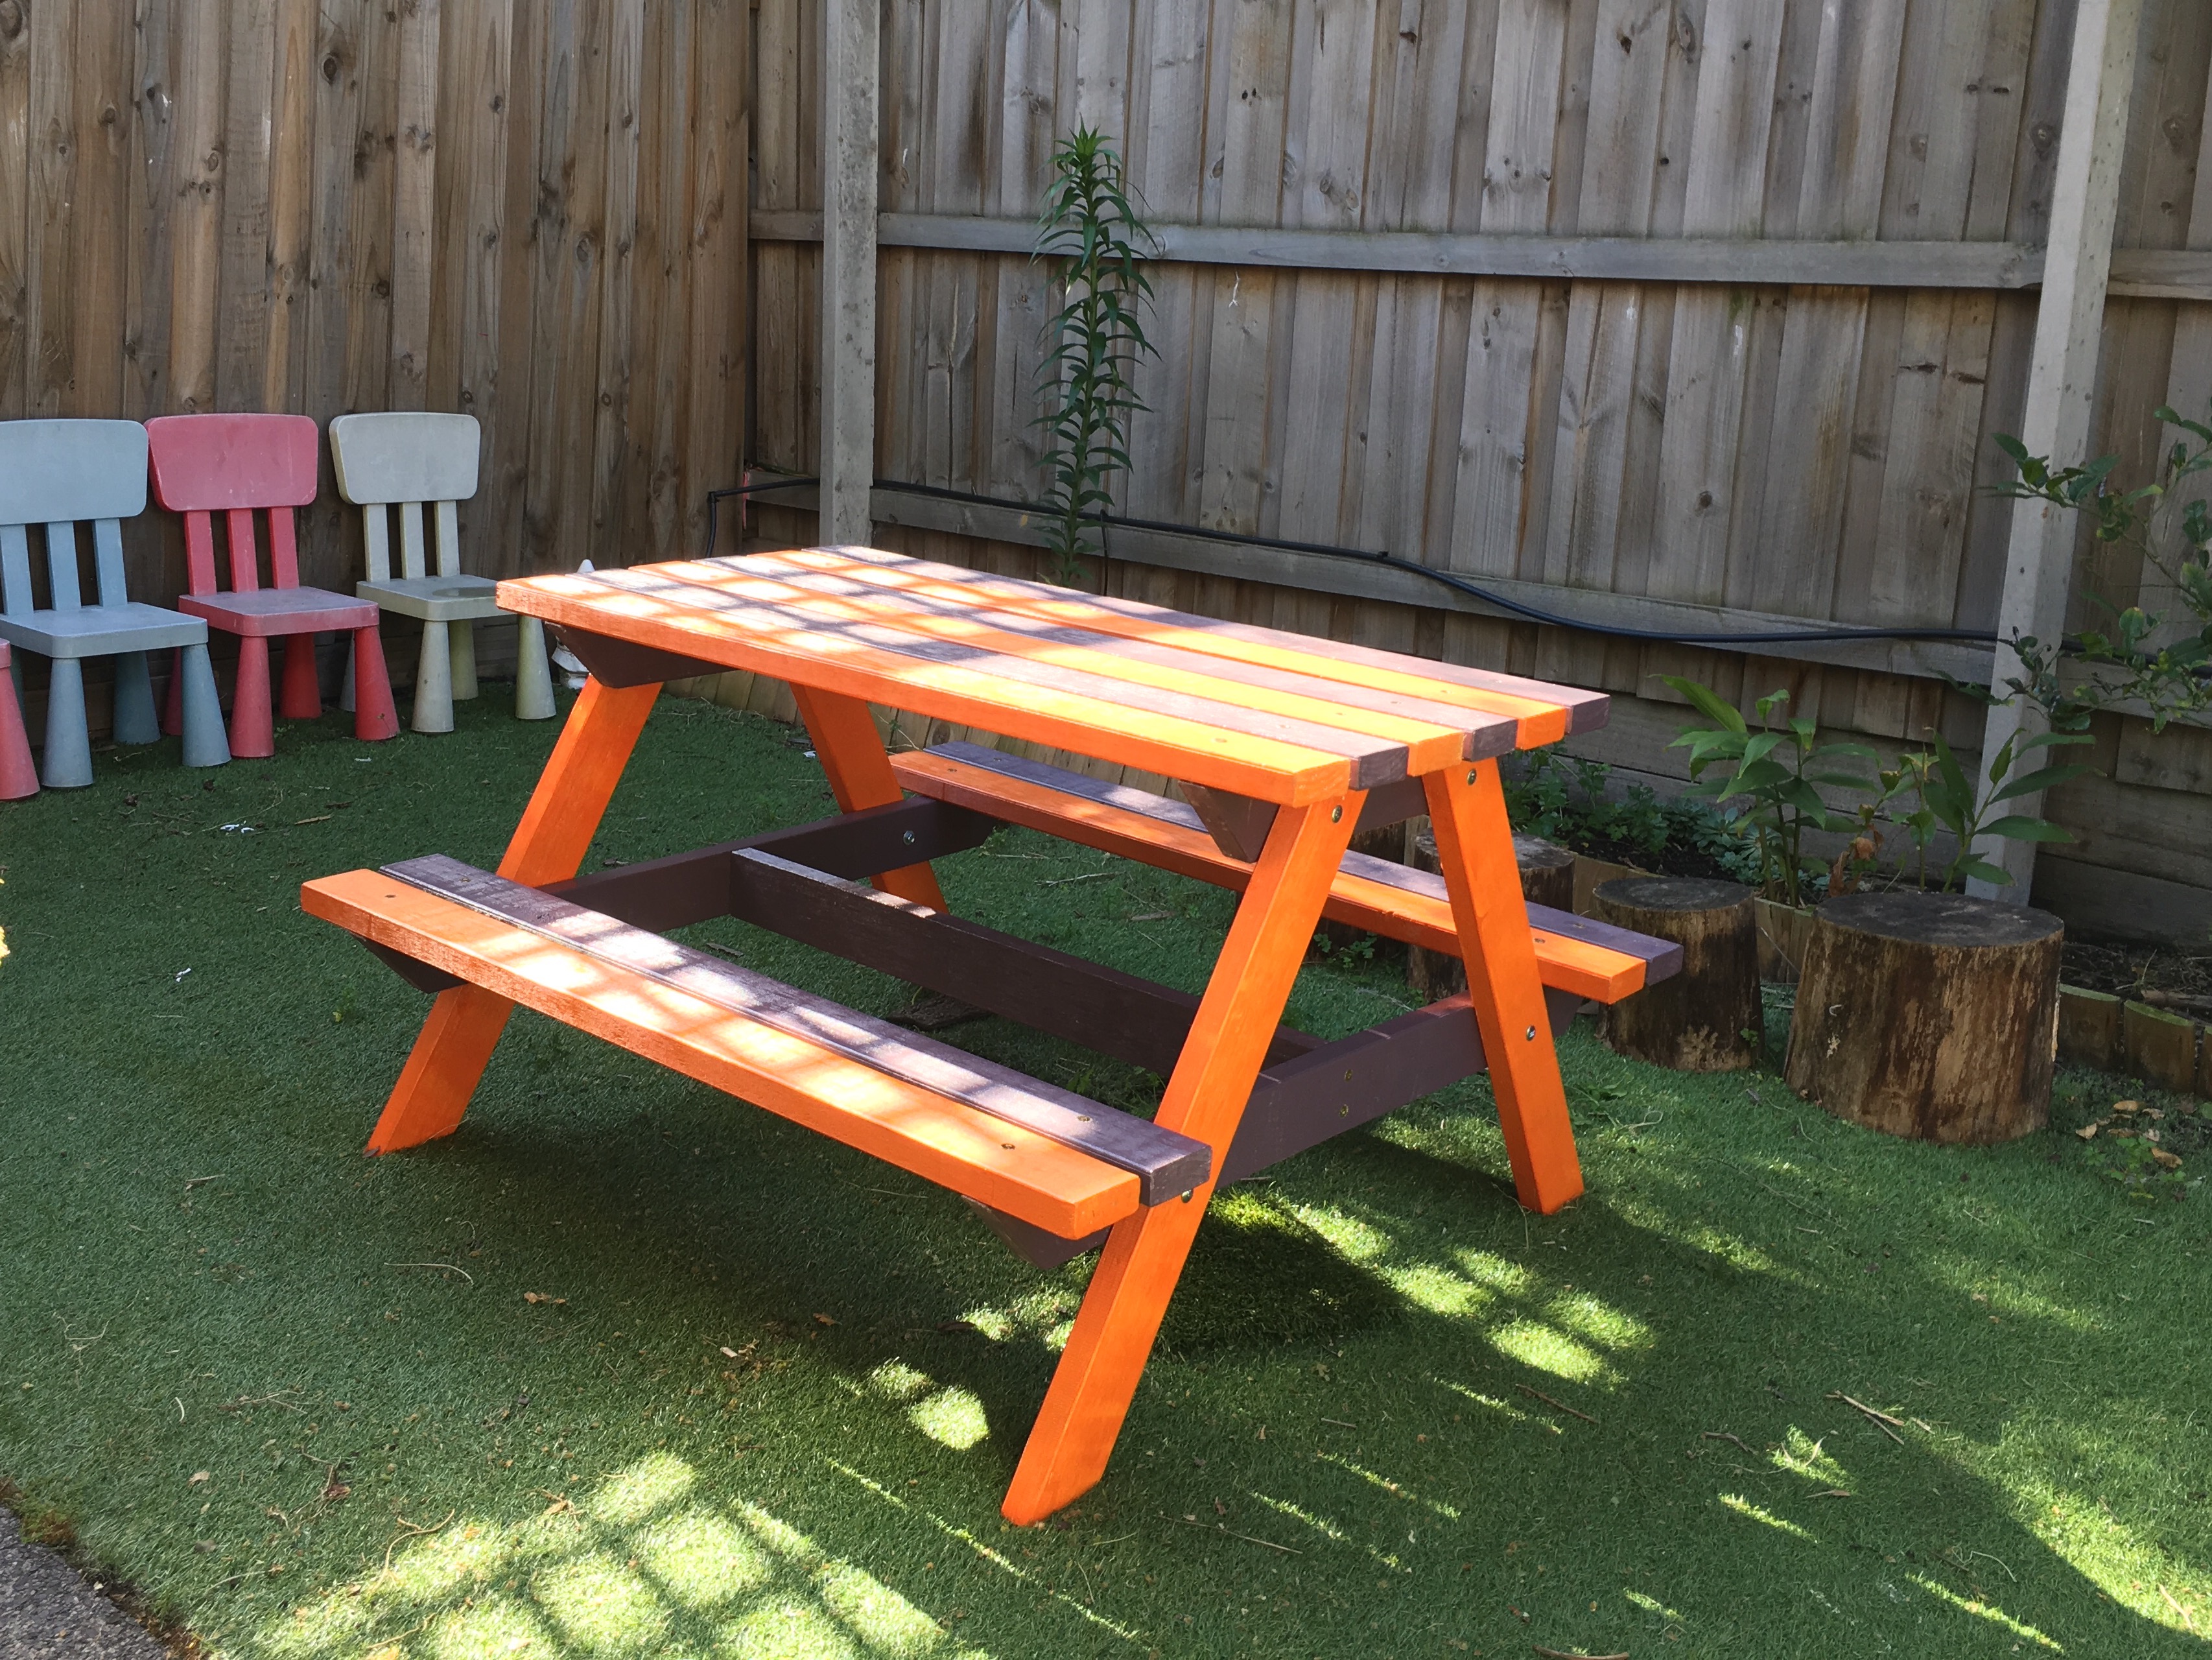
I had to convert Ana's plan into metric measurements using 90x35mm timber available in my local hardware shop. Painting was done pre-assembly and was the most time consuming part. It is not perfectly angled but am happy with the final result.

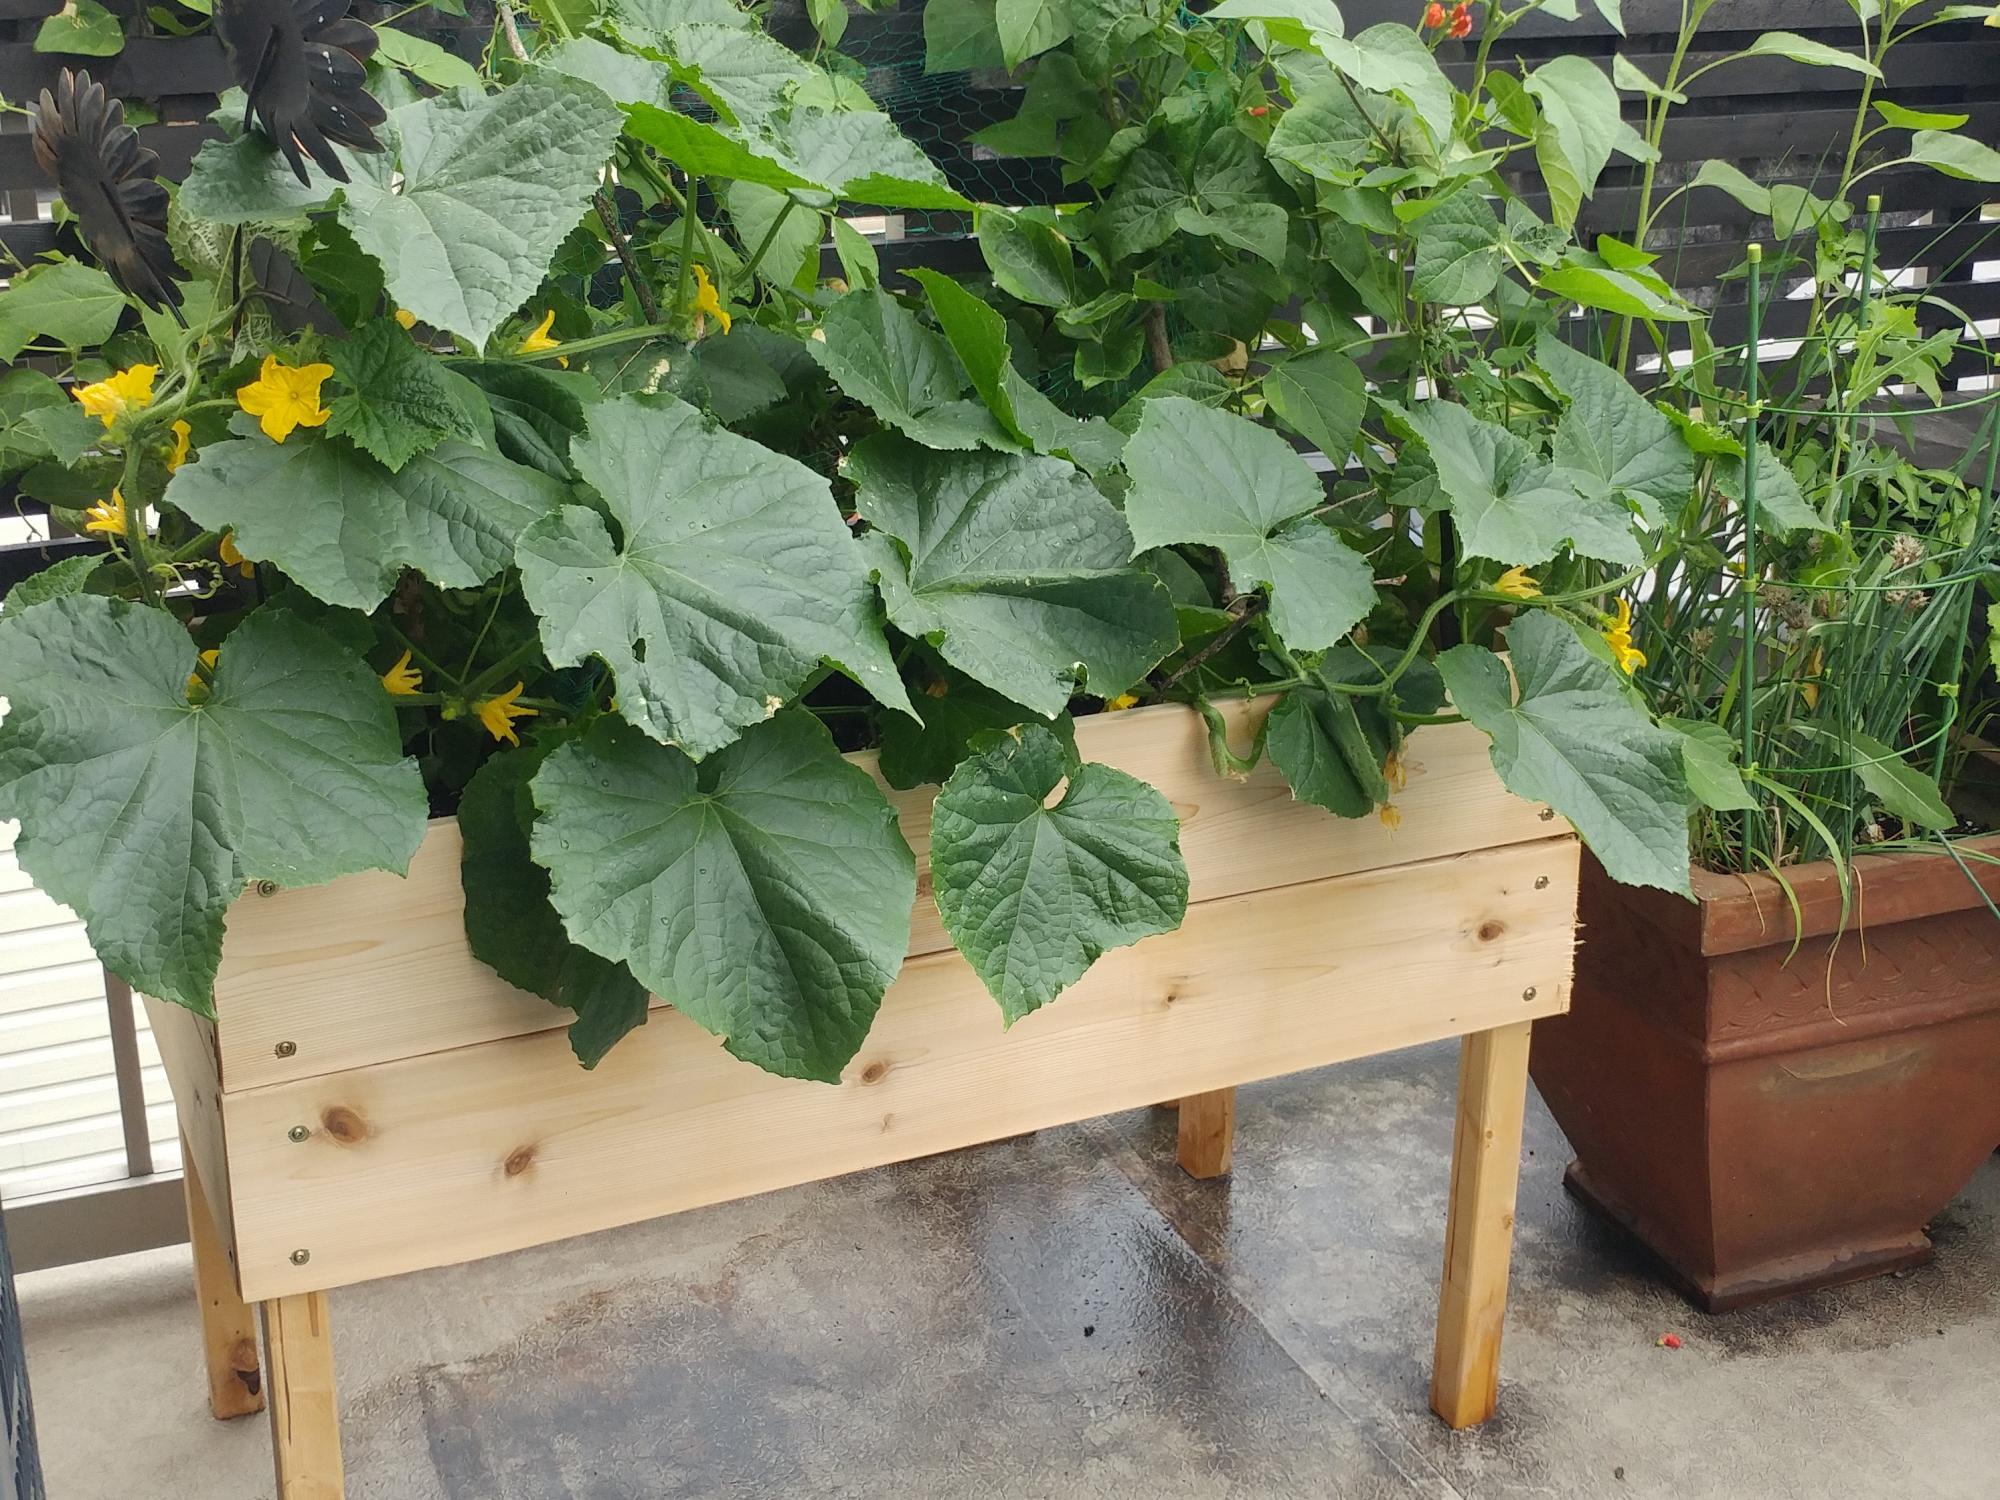
My first ever build! I made two of these planters for my deck. They were easy and the cucumbers and runner beans I grew from seed loved the deep soil in them! They make my little space feel like an oasis.

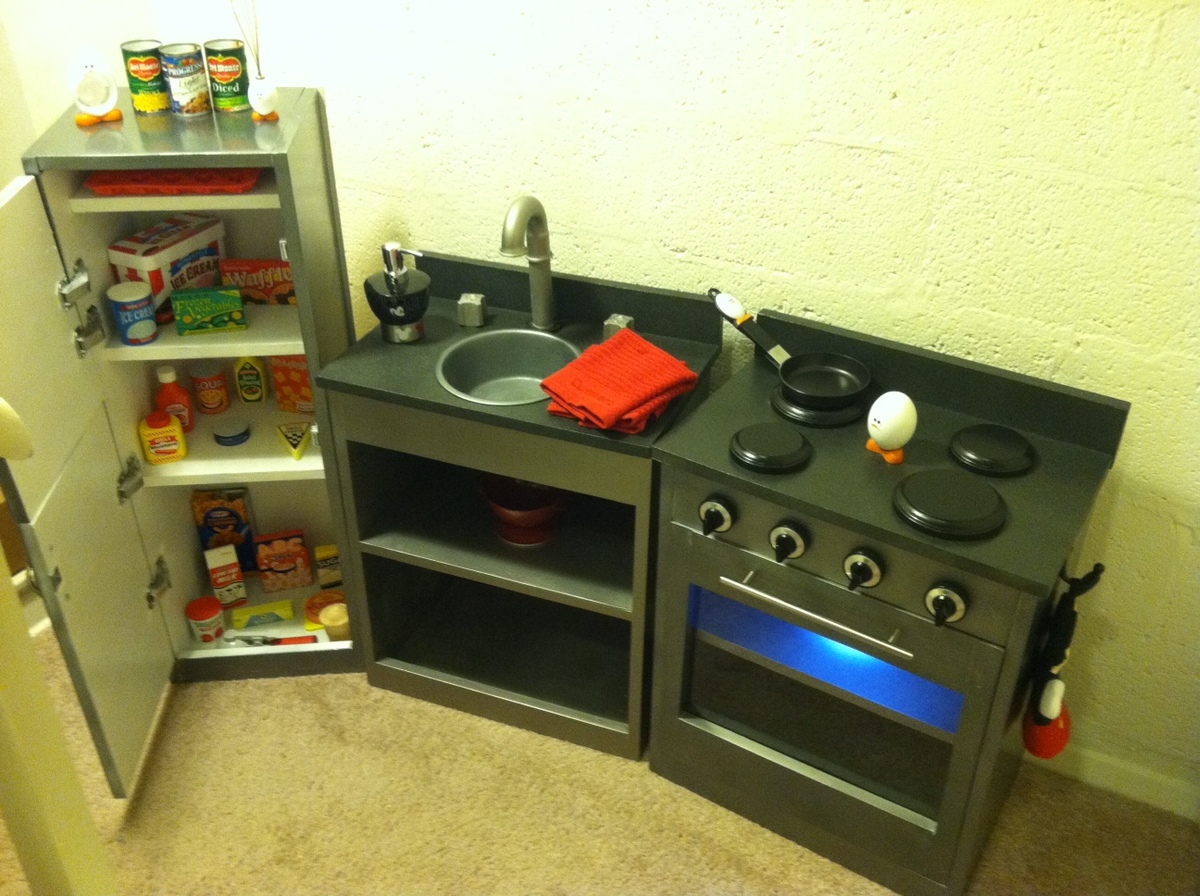
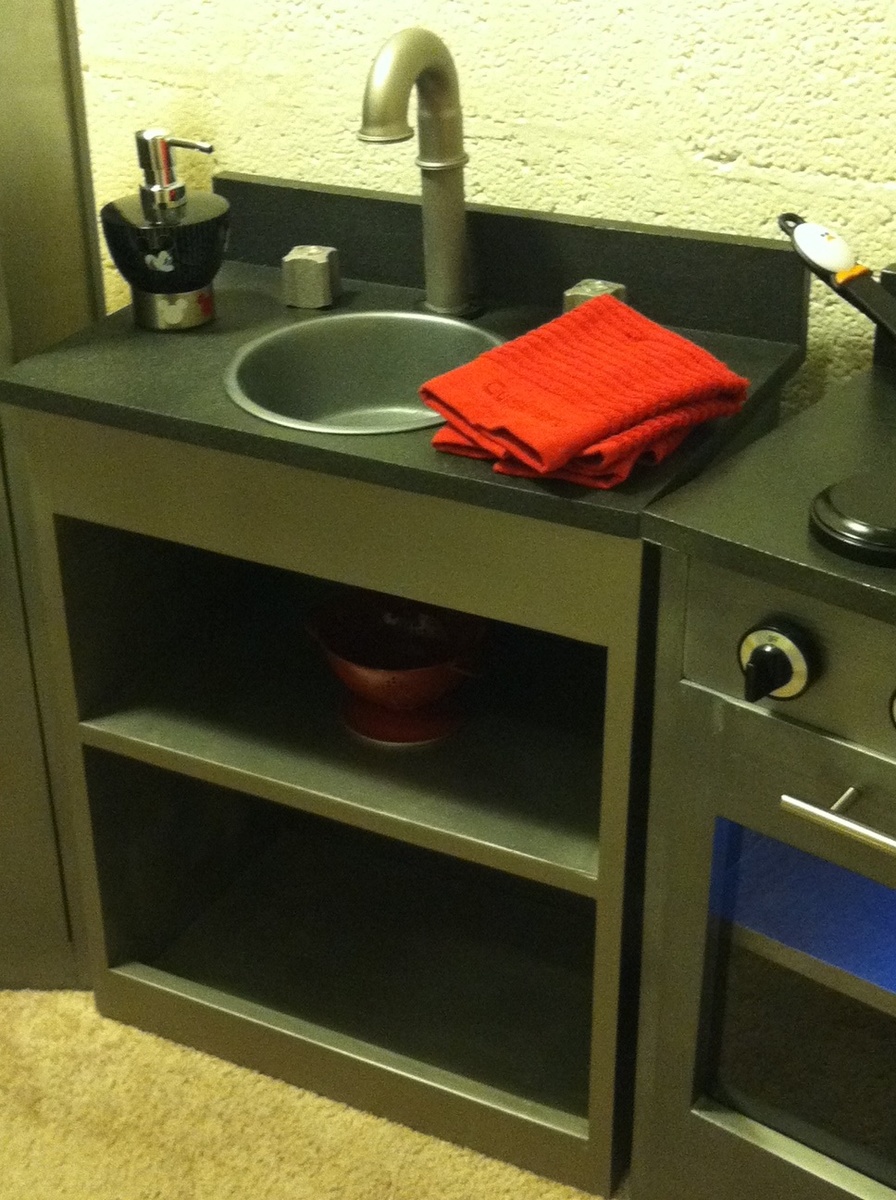
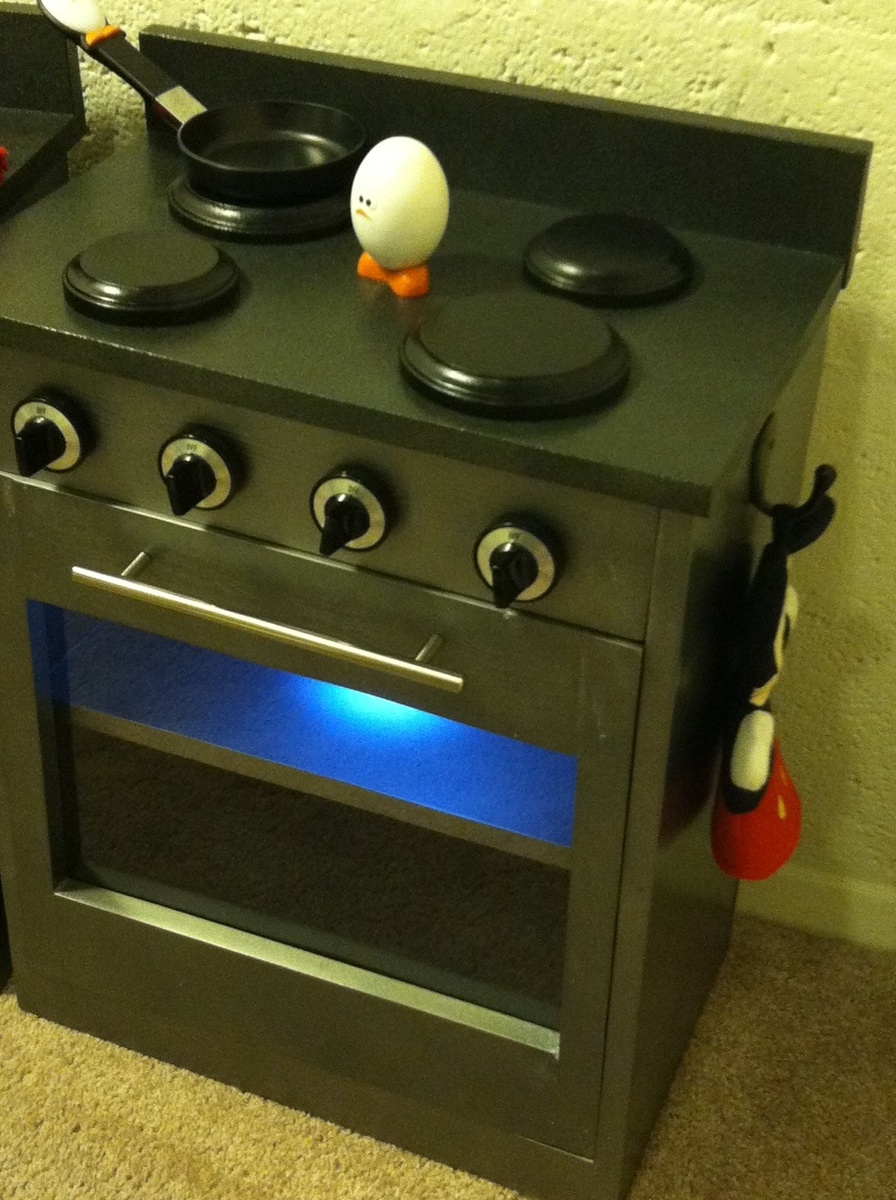
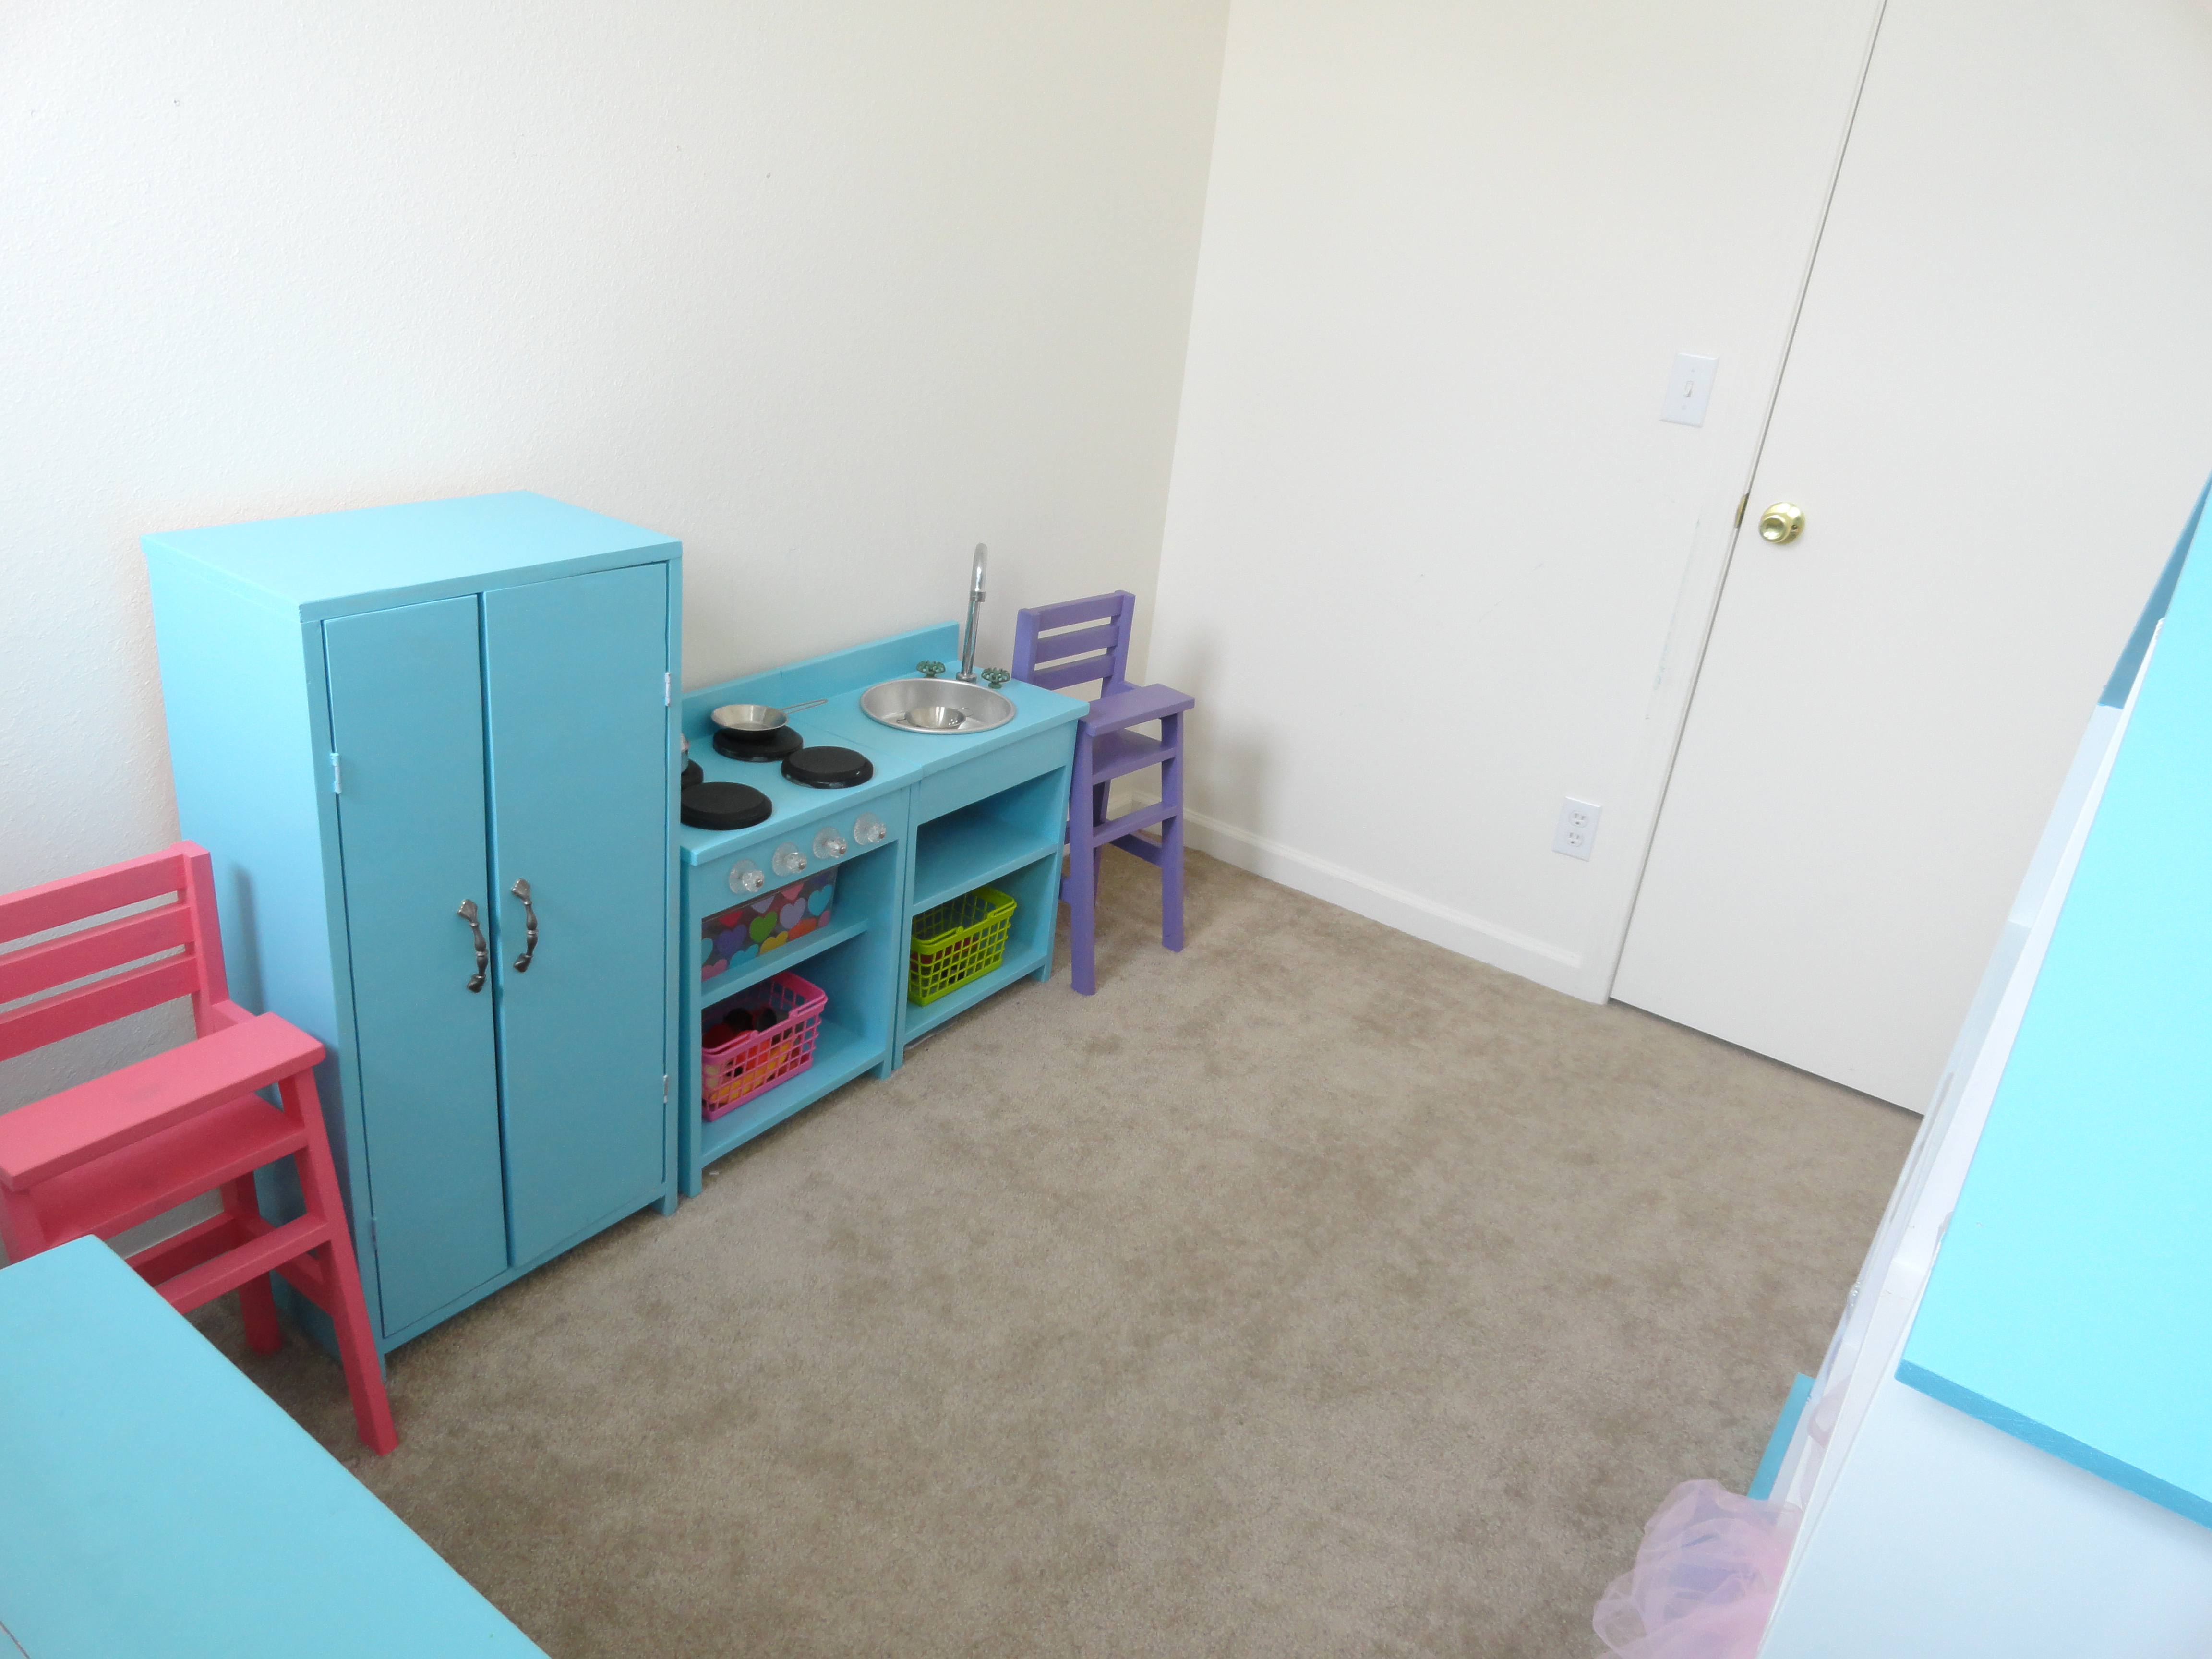
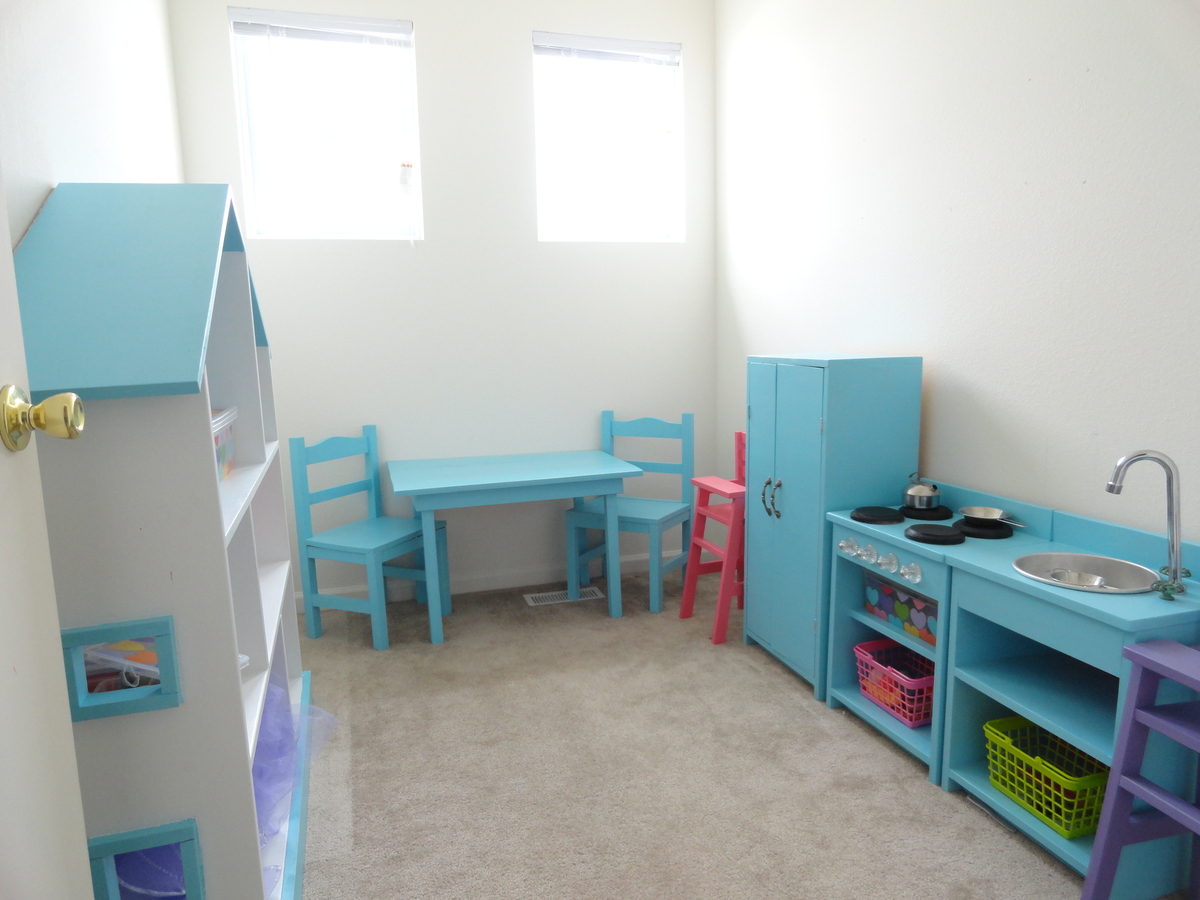
This was my first build! I made this kitchen for my 2 1/2 year old son, and he LOVES it! I used the Kreg Jig which made it super easy to build. It was the finishing that took the most time. That and I had to squeeze the work in during naptimes and bedtimes.
I followed the plans for the Simple Play Kitchen and also the Old School Fridge. I added 3 inches to the height and width of the sink and stove pieces after reading another post. The fridge I kept the same dimensions as in the plan.
For the accessories:
Fridge handles: under 3$ each at Lowe's, Stove handle about 4-5$
Sink faucet: random plumbing part from the plumbing aisle at Home Depot, glued together and then spray painted
Sink hot and cold knobs: clearance replacement knobs from Home Depot
SInk: pet food dish spray painted
Stove burners: wooden discs from Michael's, spray painted black
Stove Knobs: replacement knobs also found at Home Depot
Stove Light: $5 at Home Depot, it's battery-powered push light, and happened to have a magnet on the back of it, so I screwed a magnet plate in the oven and now it stays in place, the velcro didn't work
Towels and other accessories found on clearance at Marshalls
The building part went quickly like I said, but the finish took forever! But it was worth it to see the look on my son's face when he finally saw it. He loves it!

Fri, 05/06/2016 - 11:50
I couldn't help but get a little excided when I found this play kitchen you have built. I am currently building a tiny house in my daughter’s bedroom and I am working on her kitchen. I have been having nothing but nightmares trying to get a realistic stainless steel appliance look. I have tried stainless steel contact paper and the exact same glittery stainless steel spray paint you tried before. I also ended up with a horrible outcome and had to sand everything back down and start over. I can wait to go to home depot and get the colors you used for your final coats and give them a try. You may have just saved my workshop from a father that might have went incredible hulk on it from one more failed attempt at creating stainless steel looking play furniture... Thank you!!!
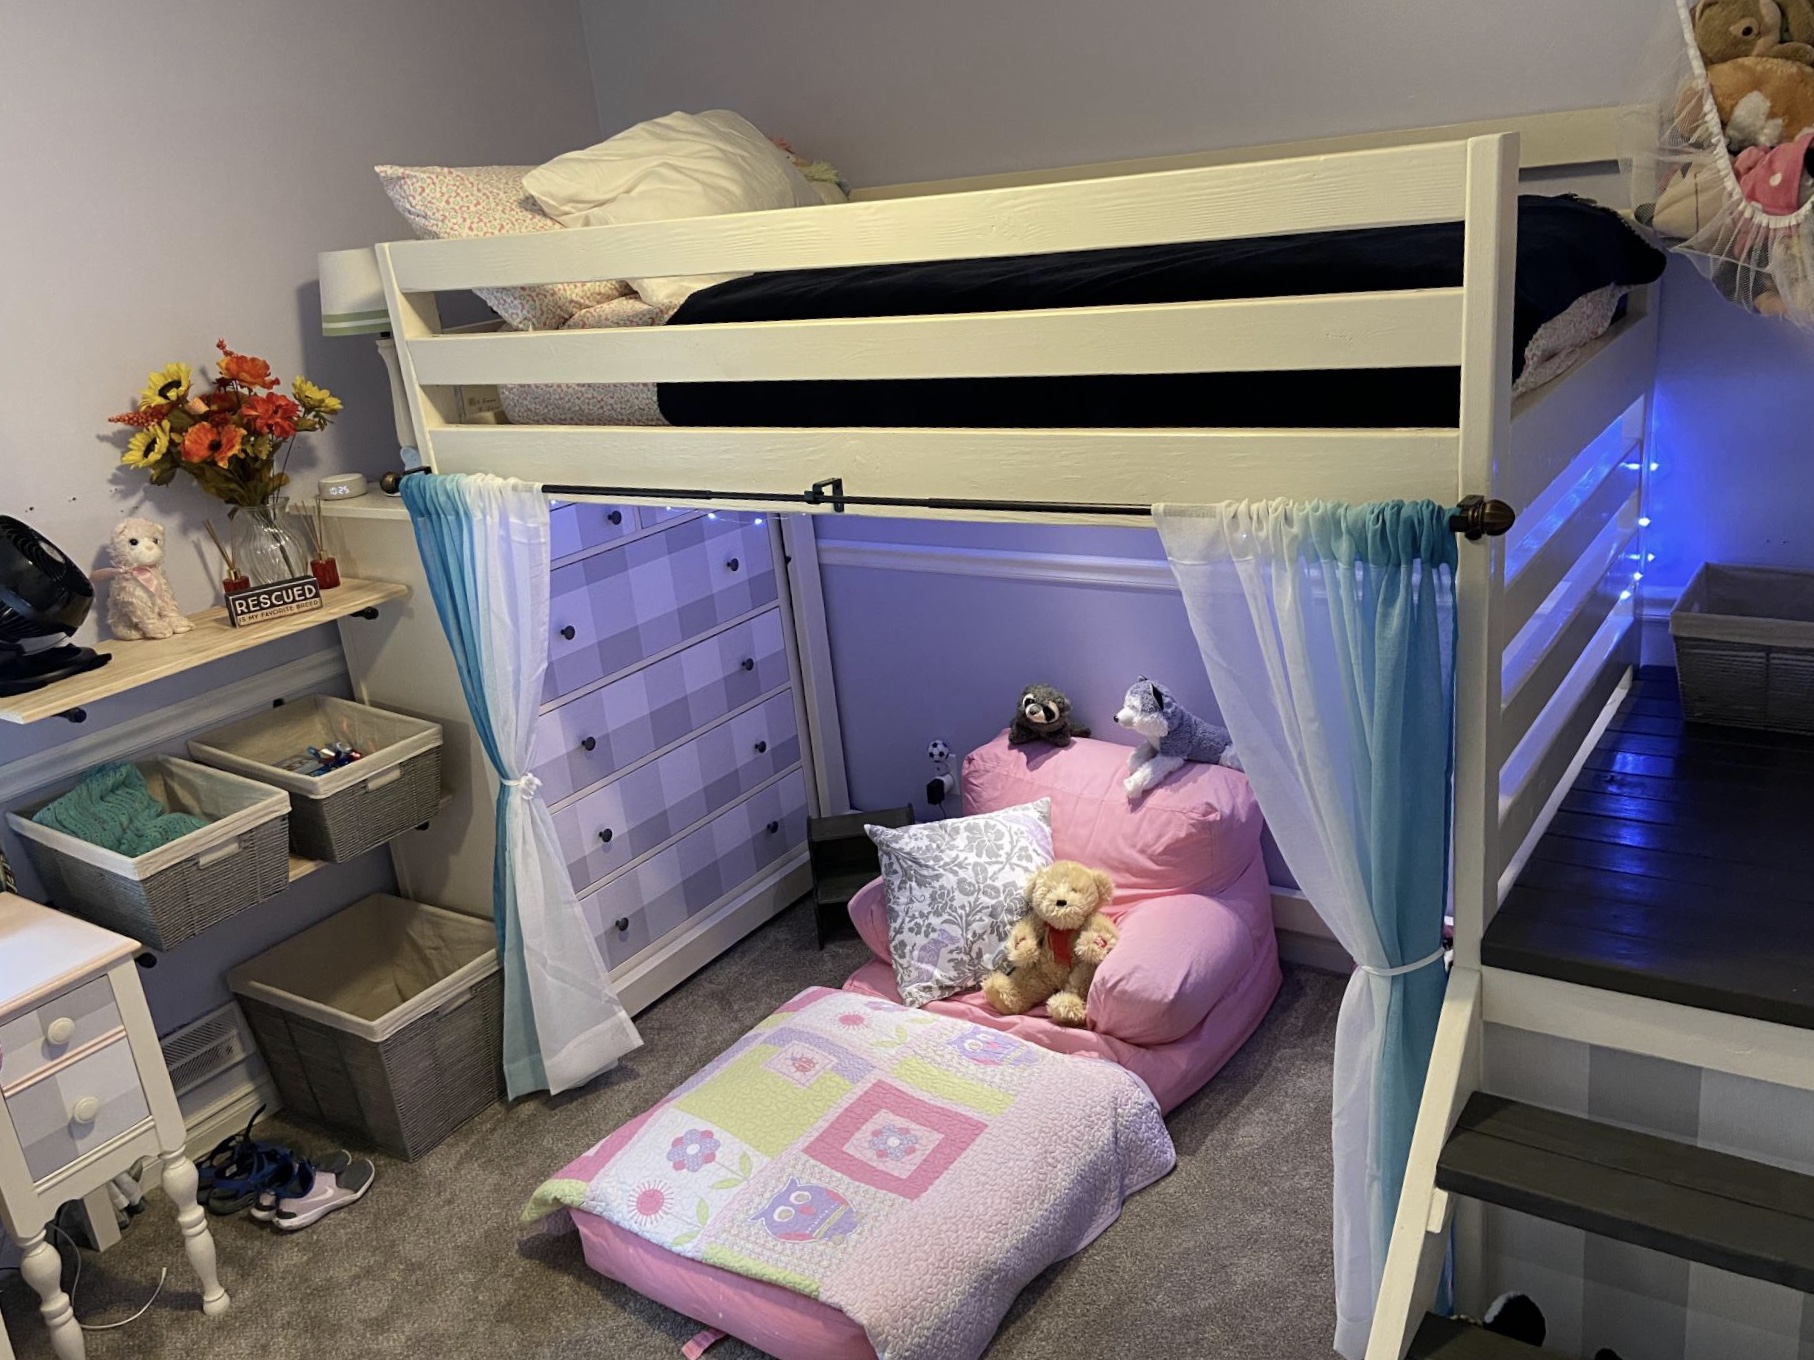
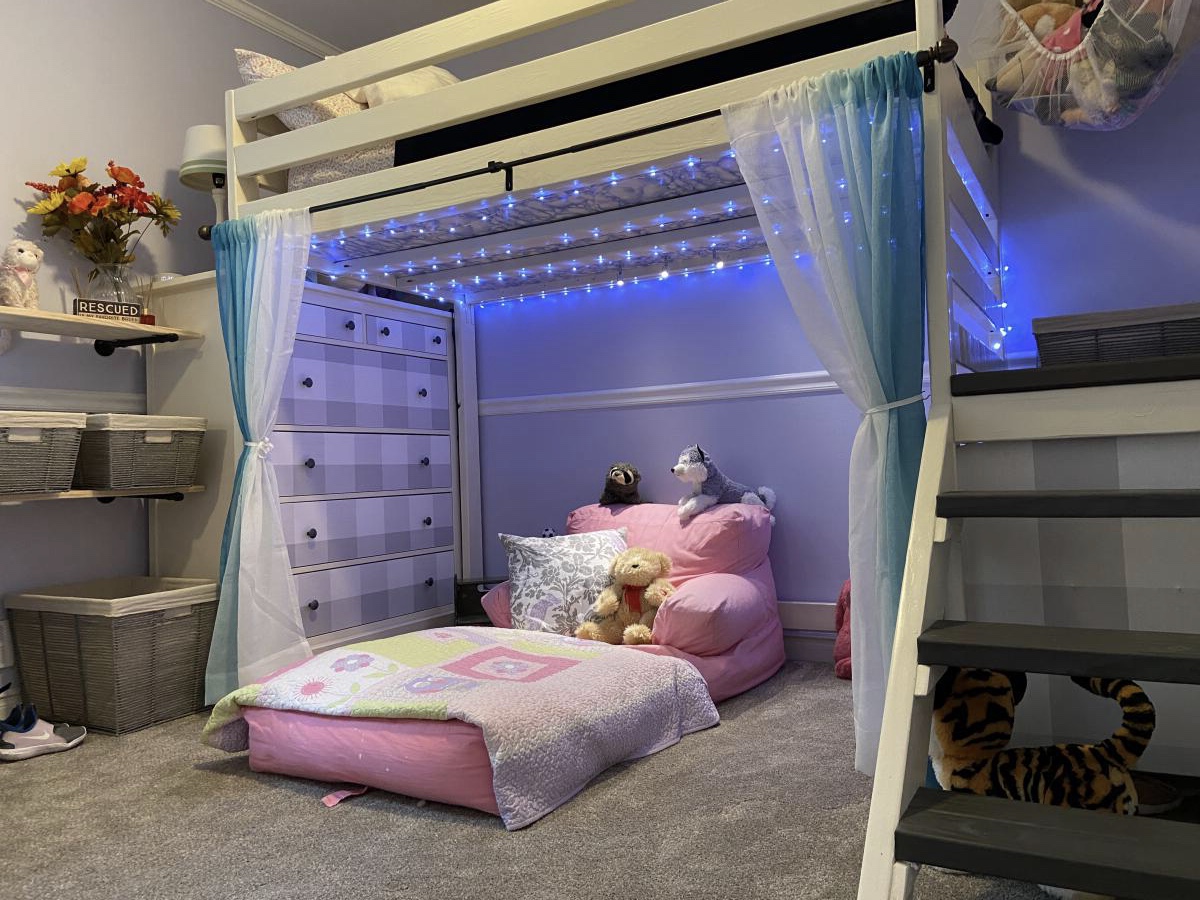
This was a labor of love for my 7 year-old daughter. I LOVE the plans, and modified them a bit to make it work in her small room. Modifications include:
-- Made it six inches higher than the plan calls for. My daughter can stand up underneath (probably for another year), and there's still plenty of height for her to sit up on the bed, even with 8-foot ceilings.
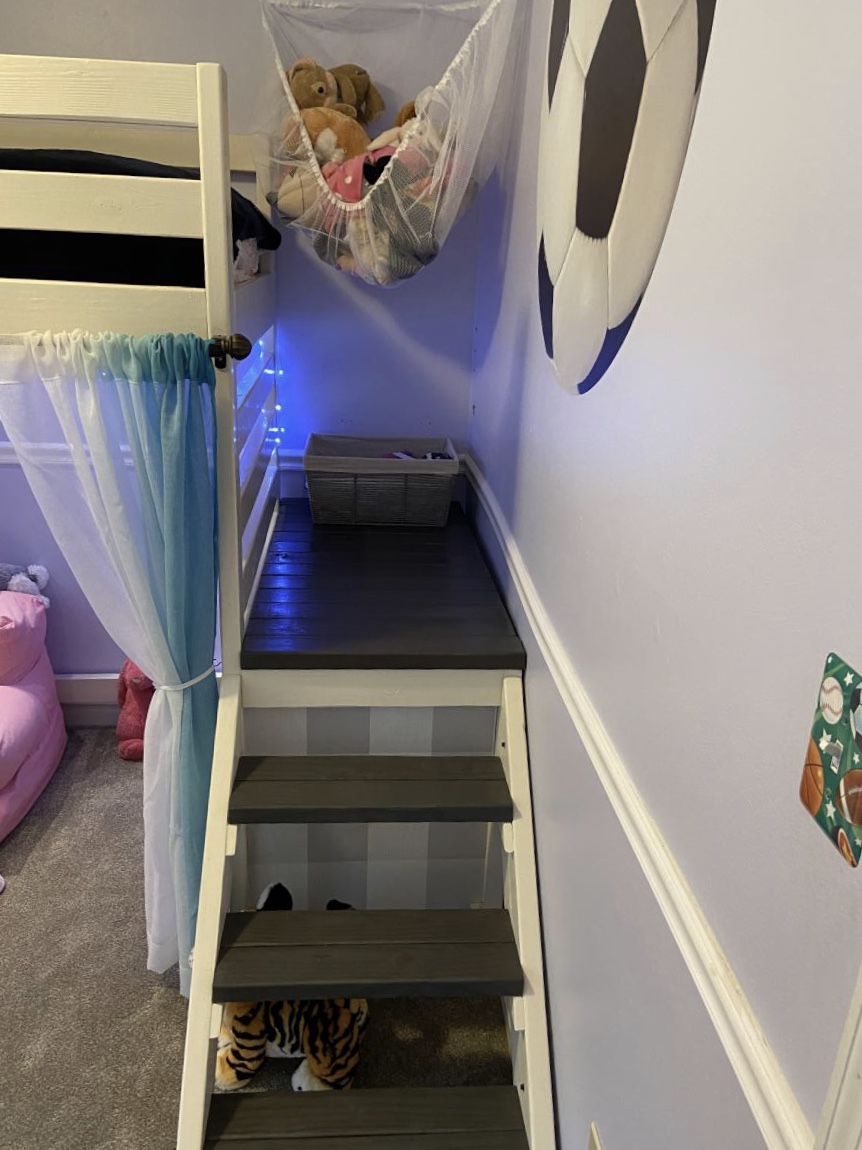
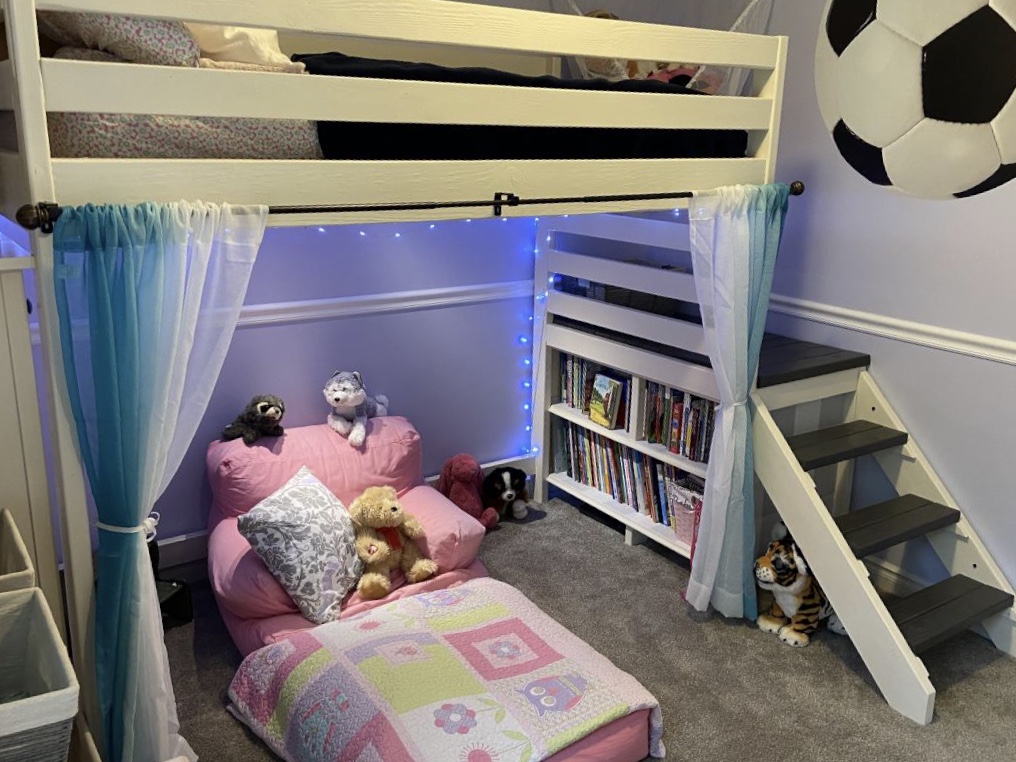
-- I added a book case under the stair landing. Again, her room is small, and the goal was to take advantage of every available nook with the room redo. I love how they came out. I used adhesive wallpaper as a shelf liner and on the outside portion under the steps, and reinforced the shelves with a piece of wood that I screwed into the top of the frame (using my beloved Kreg jig).
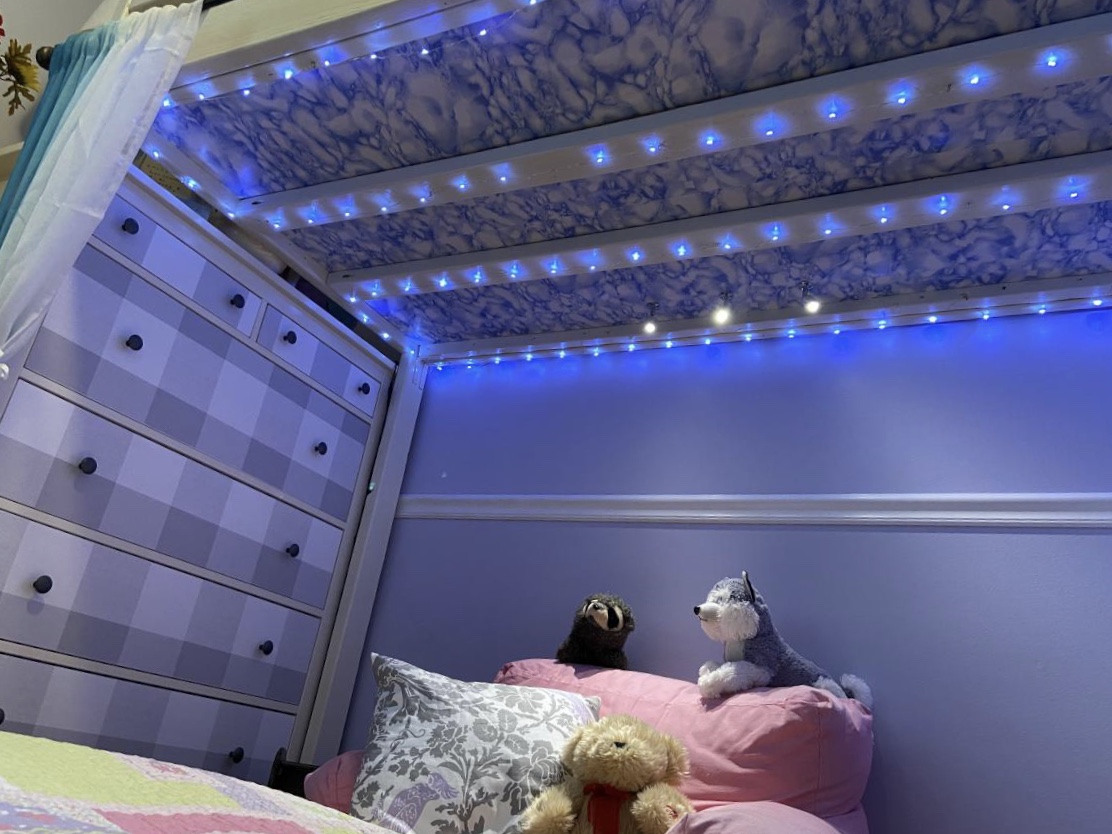
-- I got really lucky with the dresser on the left side of the bed. It fit *perfectly*. It's a Hemnes dresser from Ikea, in case anyone wants to do the same. My six-inch height addition allowed the six drawer version of that dresser to fit; otherwise the three drawer would have worked. I added the same adhesive wallpaper to the drawer faces to dress it up a bit more... really pleased with how that turned out, too. So much so that I did the same thing to her desk.
-- To give me peace of mind, I added MANY L-brackets on the underside of the bed, and also used two additional 2x4's from head to foot. Every joint was made using my Kreg (did I mention that I love that thing?).
-- Cloud'esque adhesive wallpaper was added under the bed. I like the look, but that particular wallpaper was tough to apply smoothly. If anyone is considering doing the same, I suggest only using thick paper... it won't crease and will save you many four letter words.
-- I strung "fairy lights" under the bed, possibly excessively. :-) My daughter loves them, and enjoys telling Alexa to turn them on/off (by use of a smart plug... they're really cheap these days).
-- I also installed what we call "reading lights" (as they're known to Alexa... separate smart plug) underneath, as that space is now the go-to reading area at bedtime.
-- I painted it white and made the stair landing a grayish brown stain.
I can't say enough about how much I love this site. The plans -- including the ones for this loft bed -- are all easy to follow from both instruction and materials perspectives alike. And the finished products are all great. I also made a desk from plans on this site, and am going to get working on some outdoor furniture soon. This plan in particular COMPLETELY TRANSFORMED my daughter’s small room into a space where the whole family loves to hang out before tuck-in.
The day my daughter inevitably outgrows her loft bed (hopefully several years from now) will be a sad day indeed.

I saw a cabinet like this on Pottery Barn's website (for $600) and I knew I wanted to build it for my 12 year old niece and could do it cheaper. I have only built one other thing so I am a beginner. I do not recommend this as a first project because if it wasn't for my husband figuring out the "lazy susan" part and fixing a couple other "oops" then it would not have turned out as great as it did.
I started with the plans for the 5 Cube Tower Bookshelf and then went from there. I ended up with only 4 shelves because of a miscalculation on my part. I cut off the legs and added crown molding to the top. Used plywood for the 3 layered base and quarter round for the decorative look. The base is heavy, which I wanted because of the 2 pegs on opposite sides for hanging things (she's 12 and purses, scarfs, clothes...there is no telling what will be hung there). I added molding to both side of each opening so that as it spun things would not slide off. I have no explanation for the lazy susan because my husband figured all of that out.
The Cork board and mirrors were easy. I bought the cork in a pack of 4 squares at Walmart and the mirrors in a pack of 6 squares from Lowes. We placed and glued them on before adding the molding around the edge. Fyi: I tried to use the $5 full mirror from Walmart but it was to wide. I bought some cute buttons and cut off the loop part to glue flat metal tacks to the back. She now has decorative thumb tacks. I painted it white and then top coated it with polyurethane.
We absolutely love this and so does she. It is in her room and I think looks amazing. Can't wait to share my next projects that are almost complete.


Wed, 01/02/2013 - 01:19
So great! I just found this at PB Teens last night and thought NO WAY! For $600!!! I had exactly the same idea as you did.... Build a 5 cube tower and make it spin. Ana rocks! Thanks for sharing!
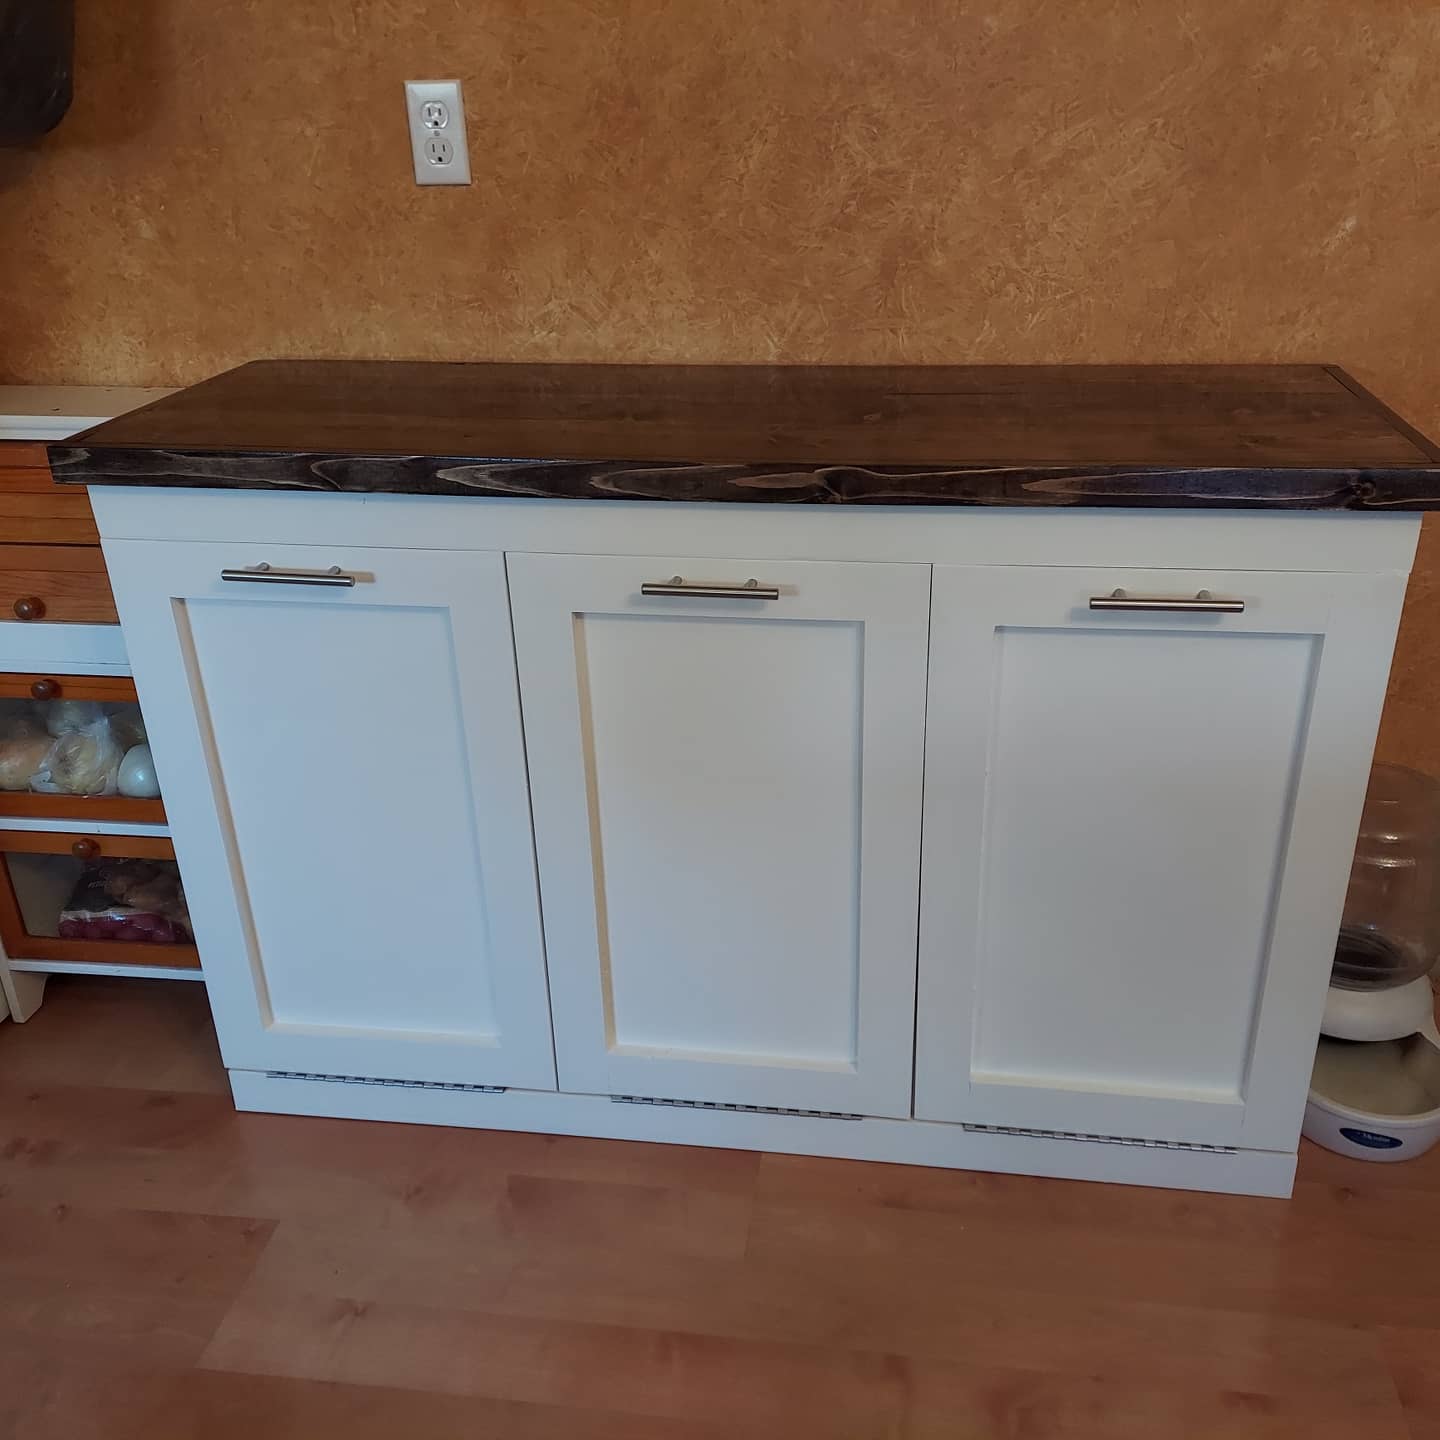
Loved building this recycling center. Basically made three cabinets from the plans and then attached them together. Now the dog can't get in the trash and the recycling and empty cans don't gather in the counter and it looks great! I used piano hinges for the doors which makes them feel much more stable.
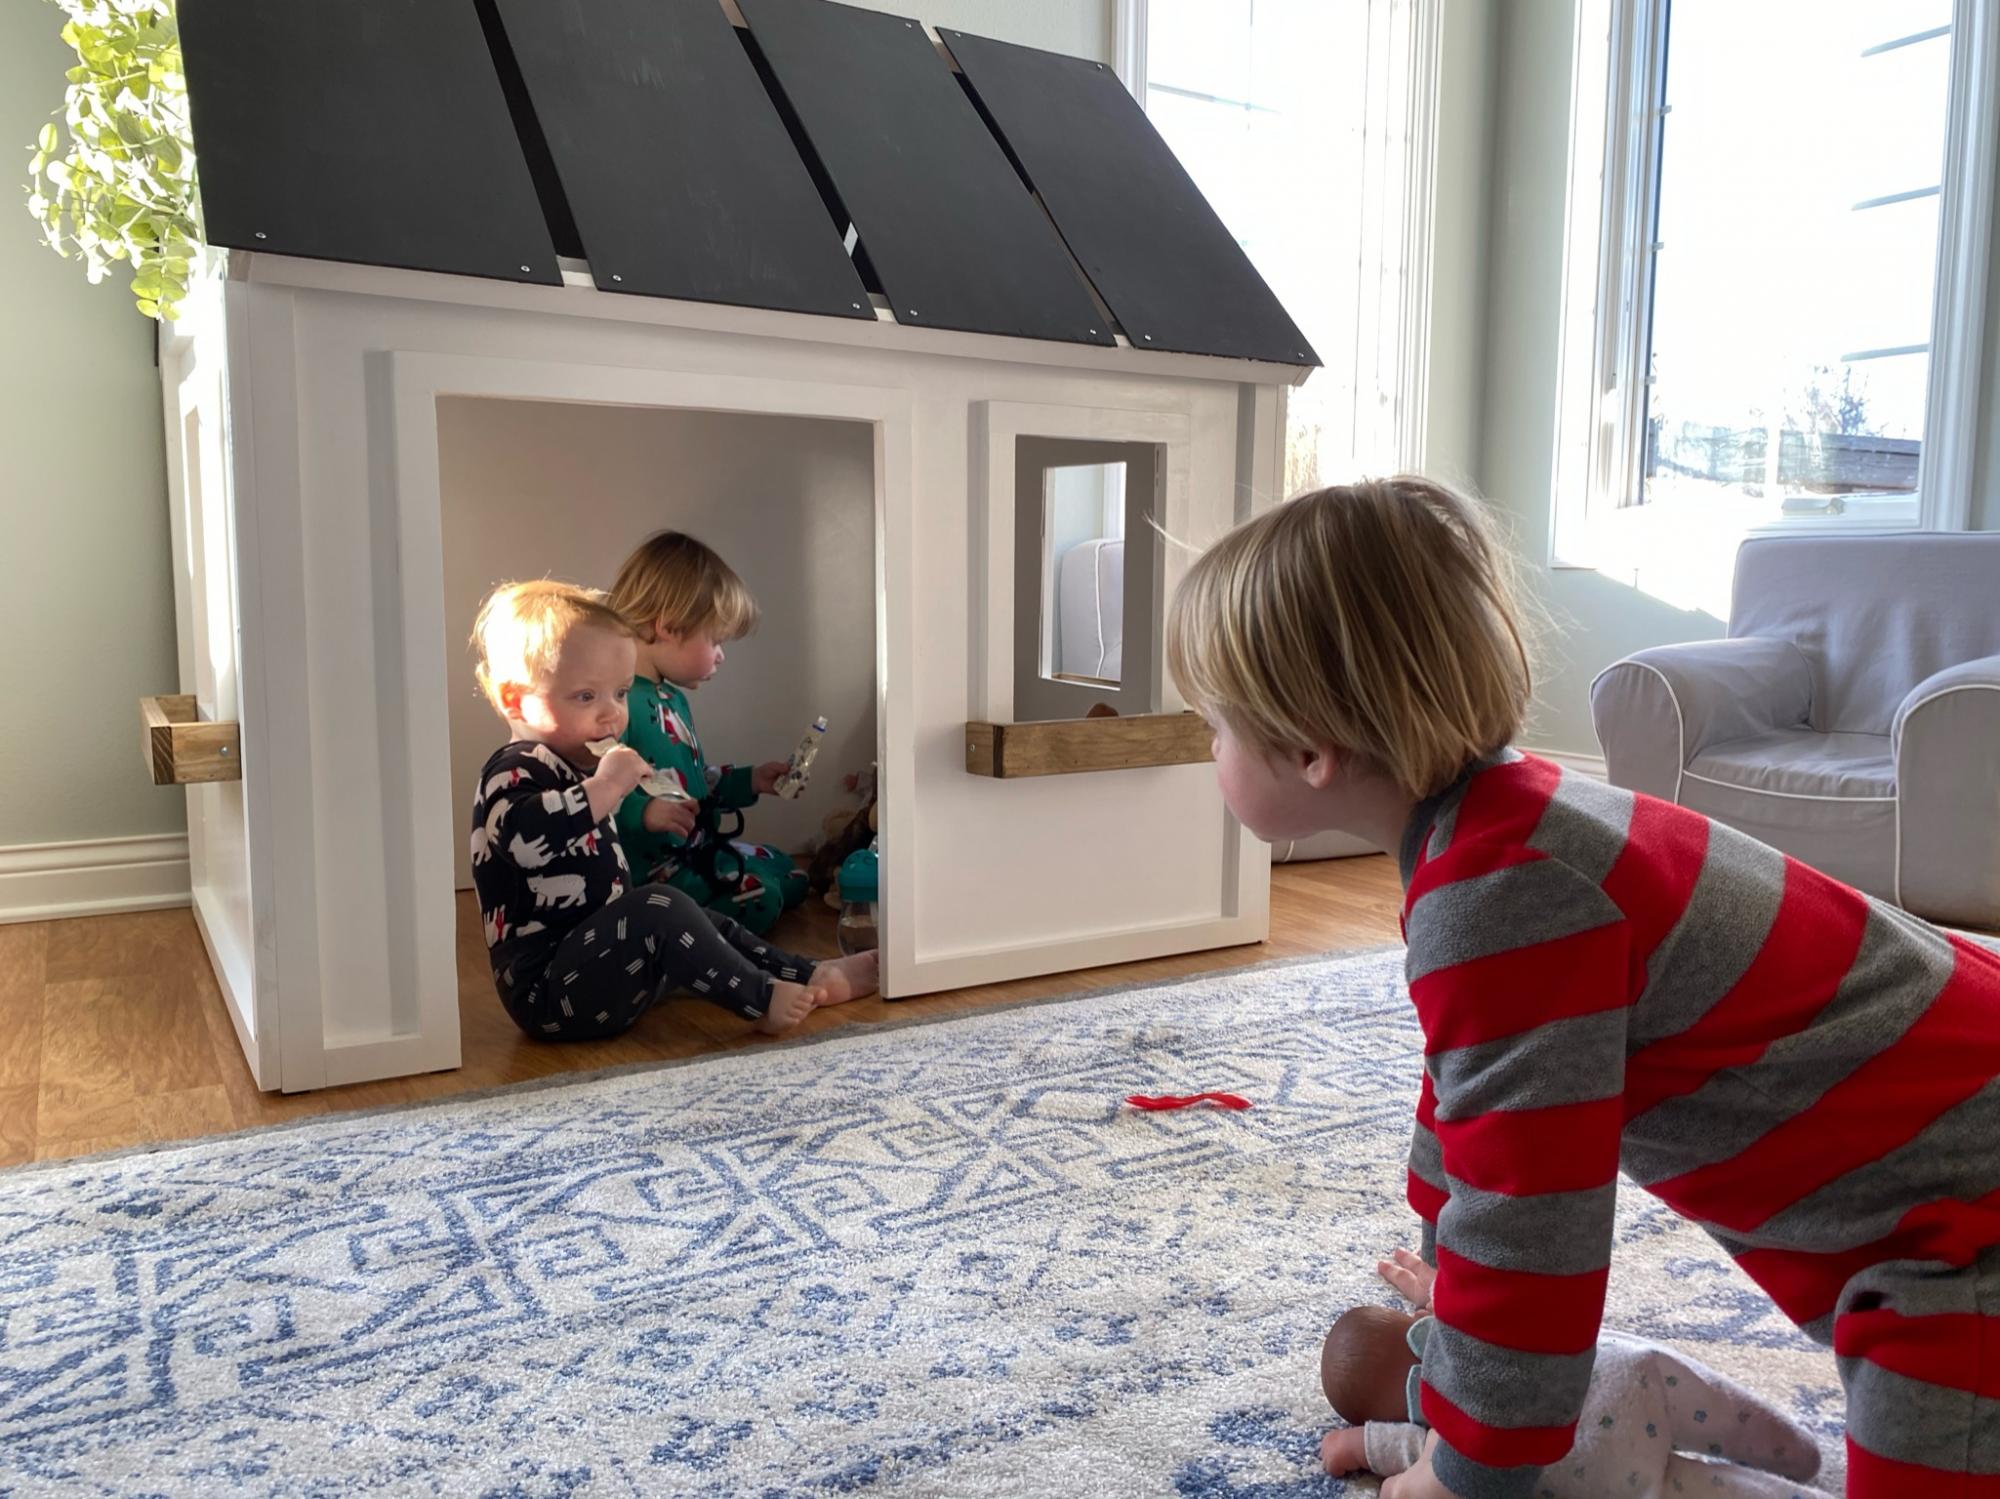
Ana White's plans were amazing and the outcome was perfect! What a fun project for Christmas! Thanks a Zillion, Ana!!
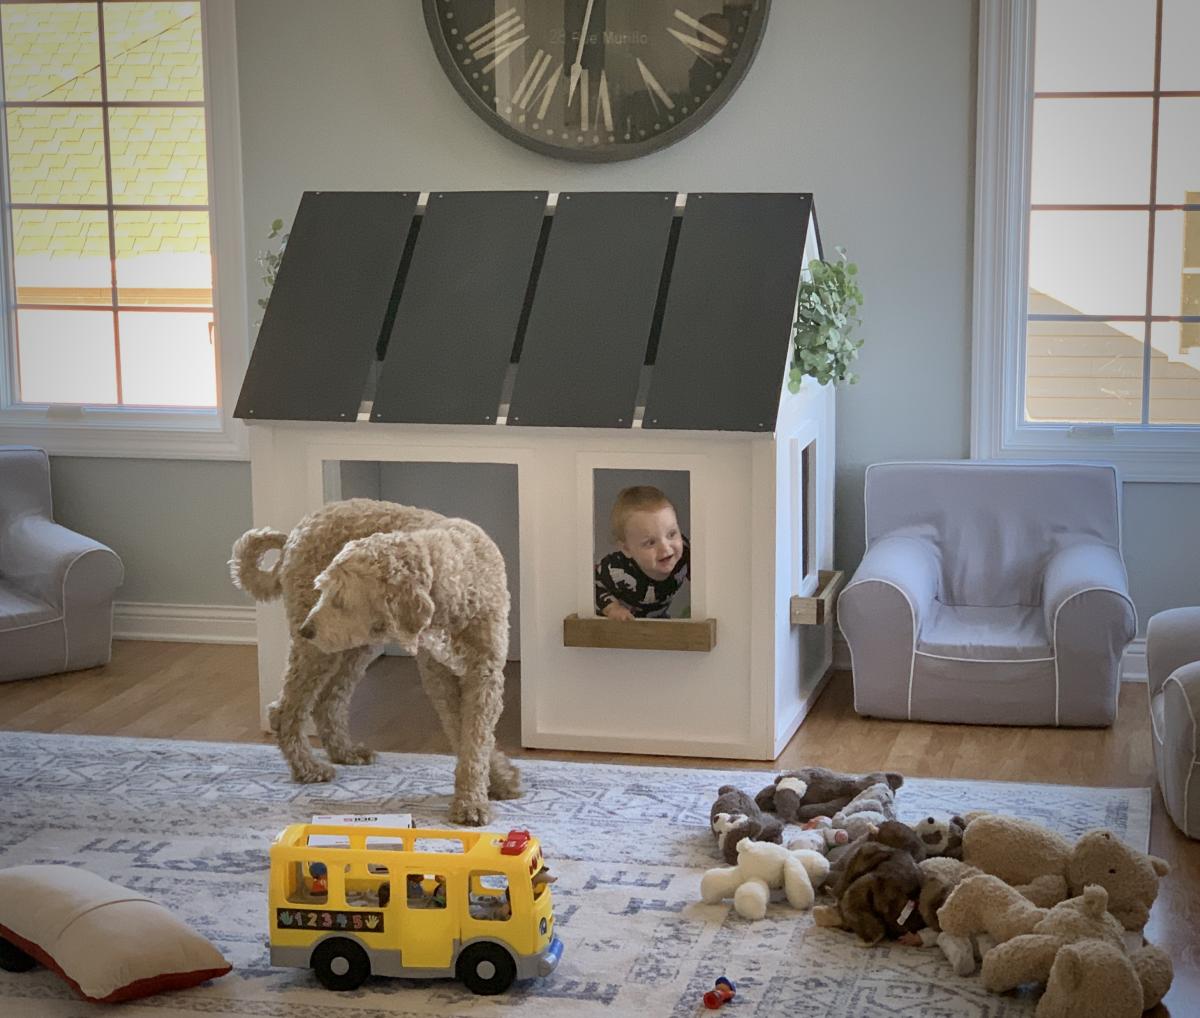
Fri, 12/25/2020 - 12:41
This just makes me smile so big, great job and Merry Christmas!

In reply to Heartwarming! by Ana White Admin
Tue, 12/29/2020 - 11:17
You ARE the Master!! Looking forward to more fun projects!

I built this for an odd-sized print. I used 1x3 on the interior frame, and 1x2 on the border frame. I really like the rustic look of it, and it came together really quickly.
I built the kitchen as a Christmas present. I still need to put the oven door on but still love how it all came out. I just started a blog and as I was posting my latest blog post I realized how obsessed I am with all of your plans!! Thanks so much :) I'm not sure how long it took to build because I only get to work in the garage an hour or two a few nights a week.
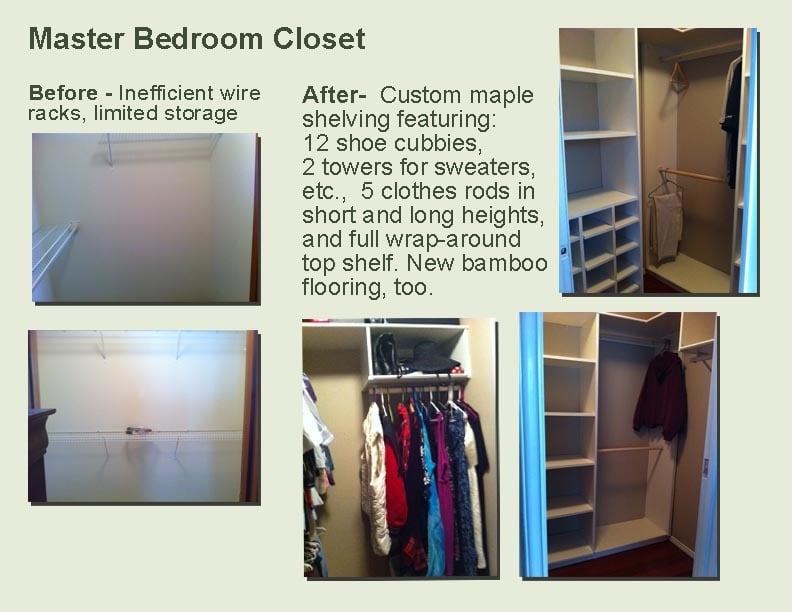
I've been drooling over those custom closet organizers for years, but they were either too expensive, not well made or some combination of not right for us. So seeing Ana's master closet plan really sent my imagination soaring. My challenge. My master closet is a small walk-in 5'x7' so I did have to do some adjusting. I love having a place for shoes and sweaters. One of my favorite parts is the continuous top shelf that connects all the parts together forming a big 'U'. I used my Kreg jig to connect each of those pieces. Anyway, thanks Ana White for the inspiration.