Community Brag Posts


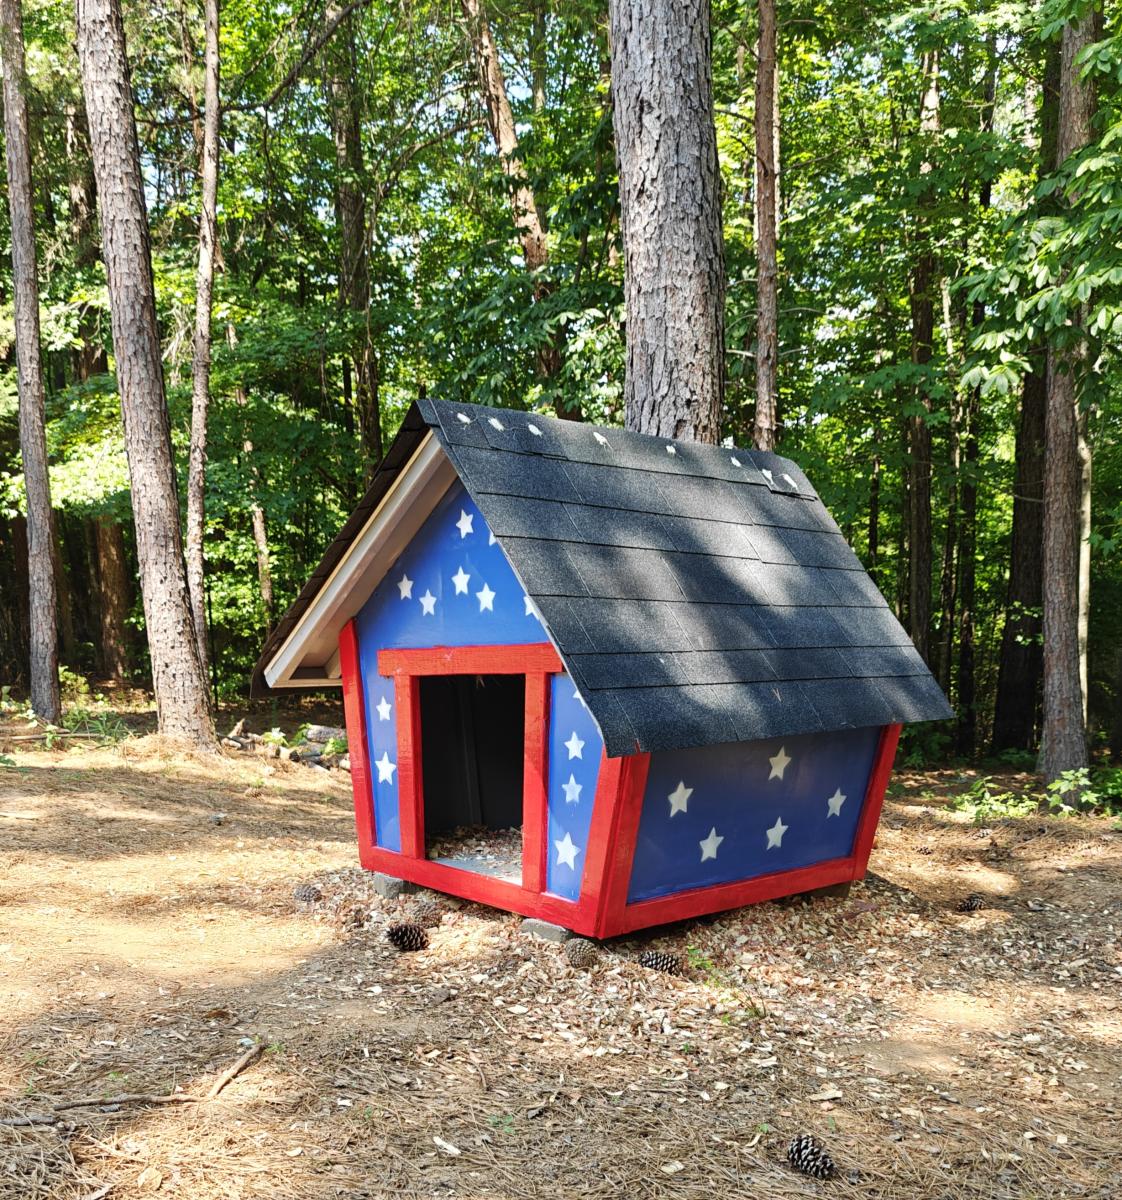
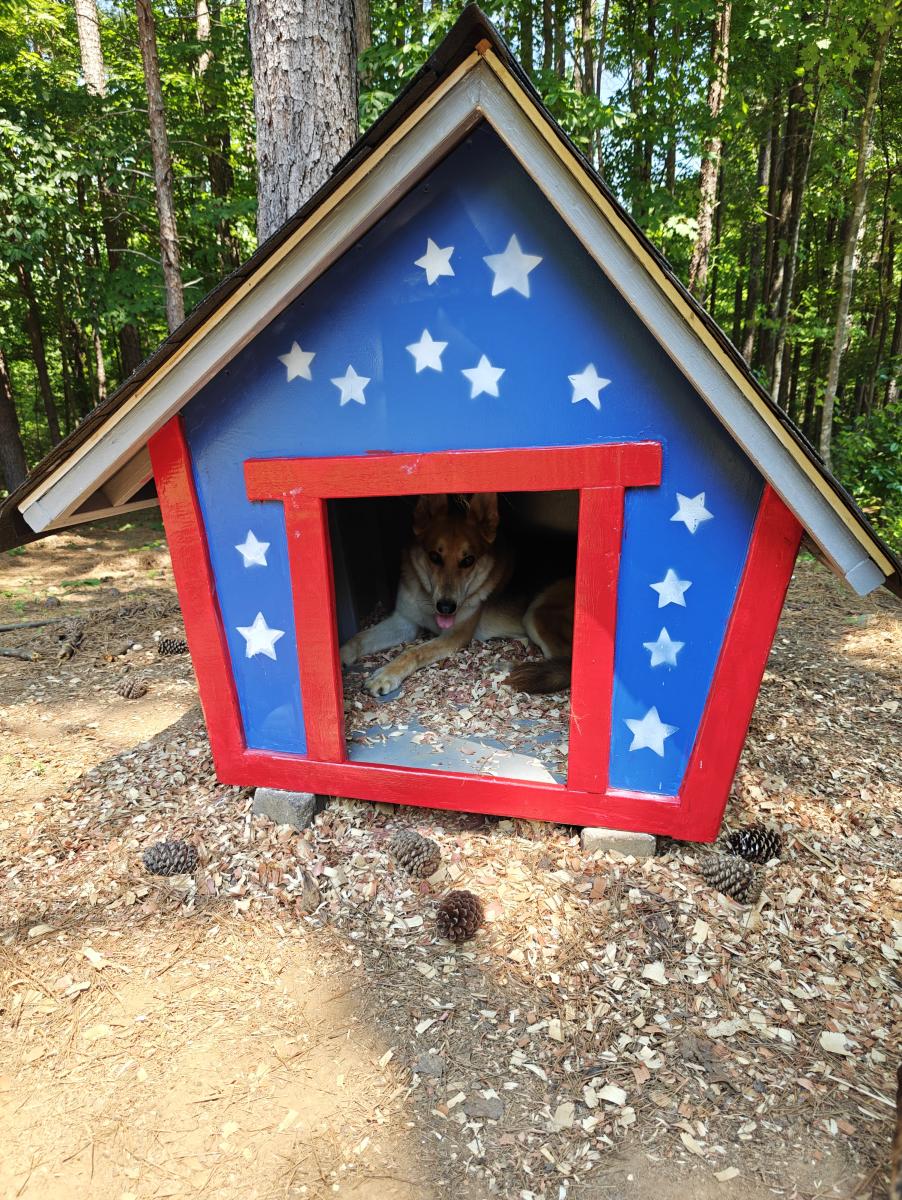
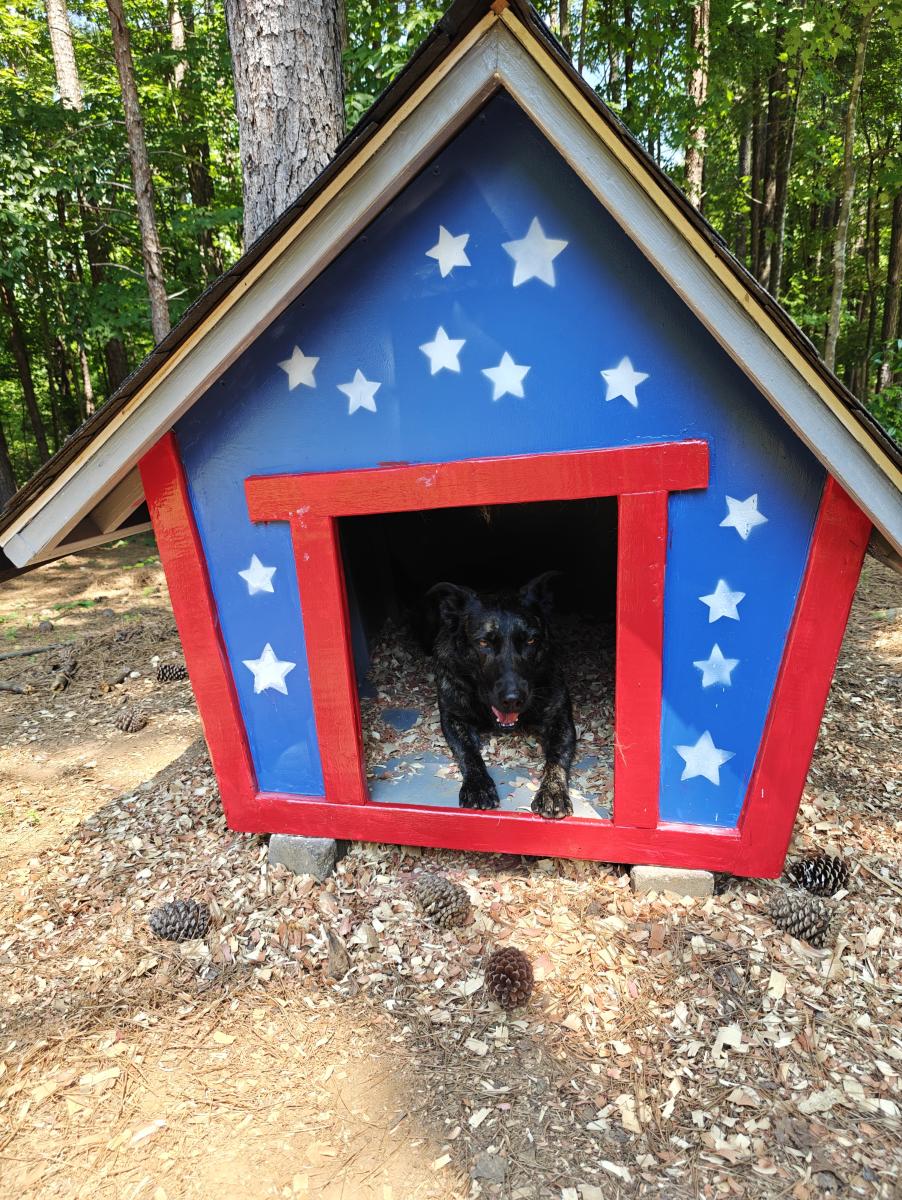
DIY Doghouse
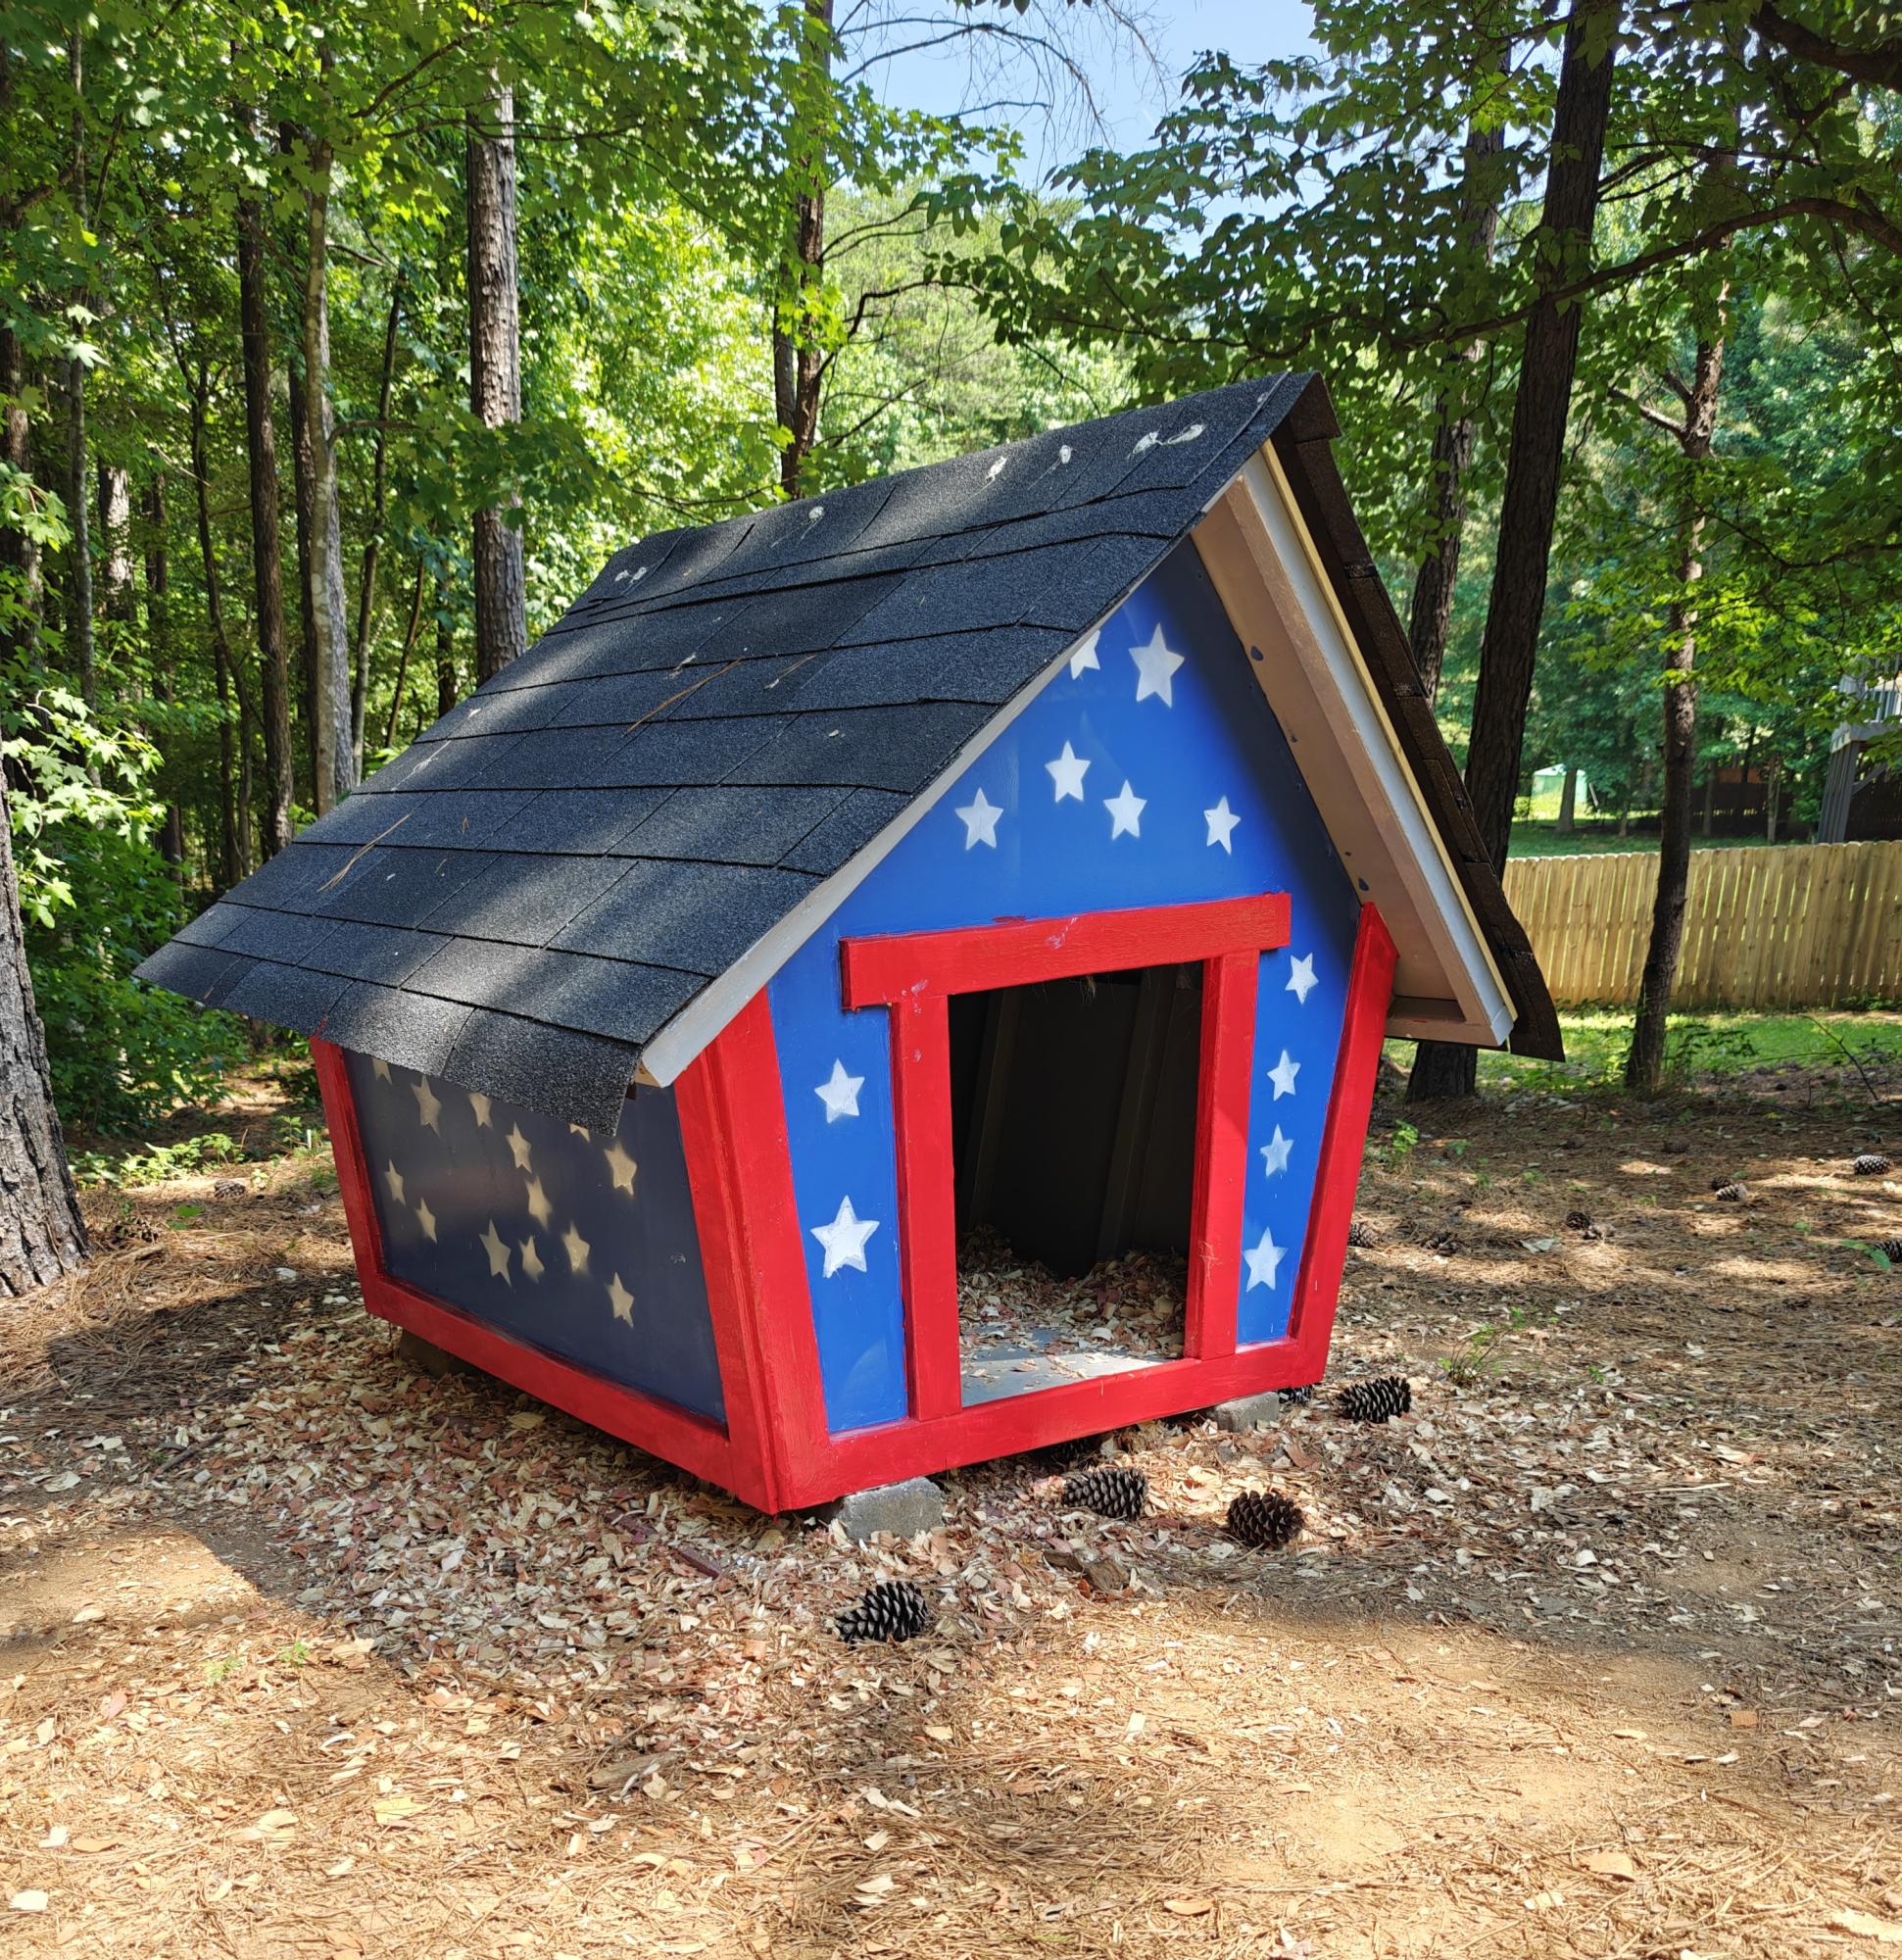
I'm going to build a second one but it looks like both dogs are enjoying this one I was even able to get them to get in it together when it wasn't too hot :-)
This is my first project from your website and it was really interesting I ended up modifying the plans a little. For the modifications the back panel was pre-drilled and attached with bolts and t-nuts to allow me to easily remove when the weather starts to get cold and put in insulation... Order clean it. It's a very good size dog house and I really enjoyed this project! Thank you so much for your contributions to those that have never actually worked on anything like this before.
Cathleen
Built from Plan(s)
Comments
For Annika -
I have too many scraps … and a granddaughter with a 2nd birthday coming up soon … so spent a couple hours cutting the pieces … took extra time since i was trying to make scraps work … but it still came together well. I had trouble making pocket screws work on this project … but the design makes it easy to bury and cover regular screws.
Built from Plan(s)
Estimated Cost
free - used scraps
Estimated Time Investment
Afternoon Project (3-6 Hours)
Finish Used
martha stewart satin latex - custom mix - with wax finish
Recommended Skill Level
Intermediate
Extended Farmhouse Bedside Table/End Table
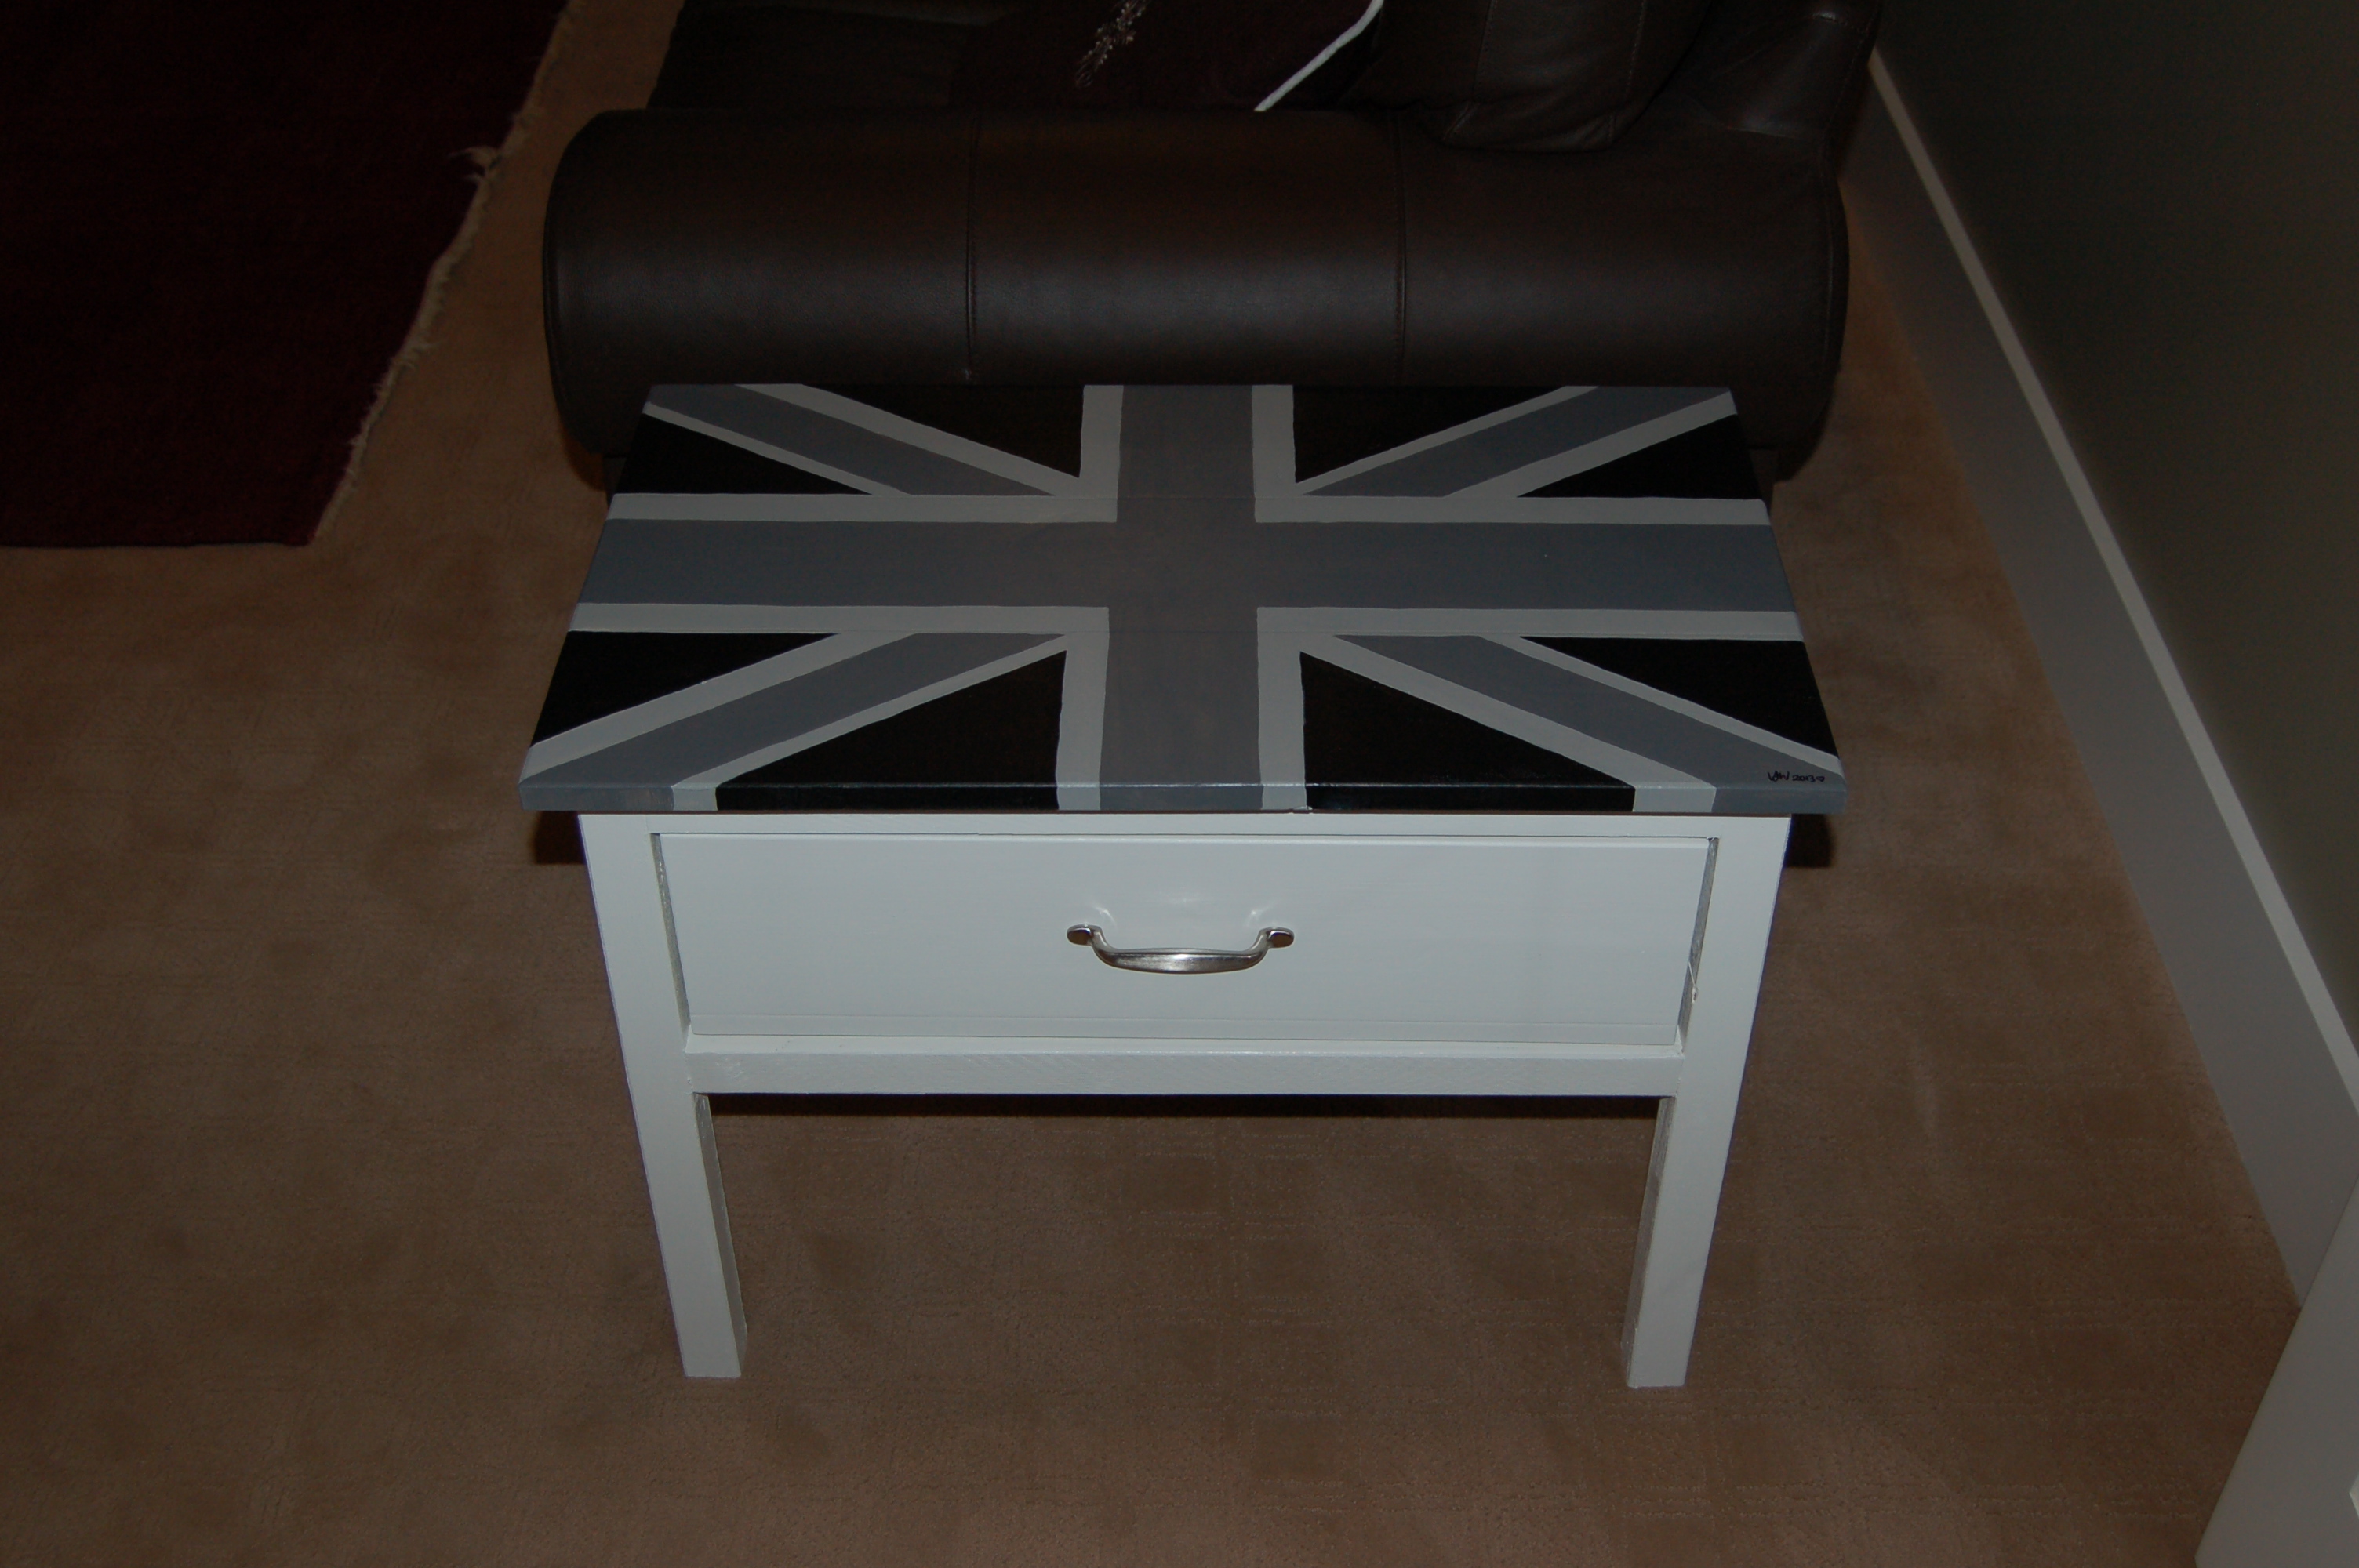
I used the Farmhouse Bedside Table plans as a starting point for this Christmas gift project for my husband. I removed 5" off the legs, omitted the shelf and doubled the width so that it would hold 30 DVDs in the drawer. I wanted something unique for his man cave and coming from England this seemed a great way of introducing our heritage without being overpowering in the room. Great project plan and easy to follow and only took a day to make including the painting time.
Built from Plan(s)
Estimated Cost
$20
Estimated Time Investment
Day Project (6-9 Hours)
Finish Used
Benjamin Moore Cloud White for the main unit with Martha Stewart's all purpose craft paints for the Union Jack.
Recommended Skill Level
Beginner
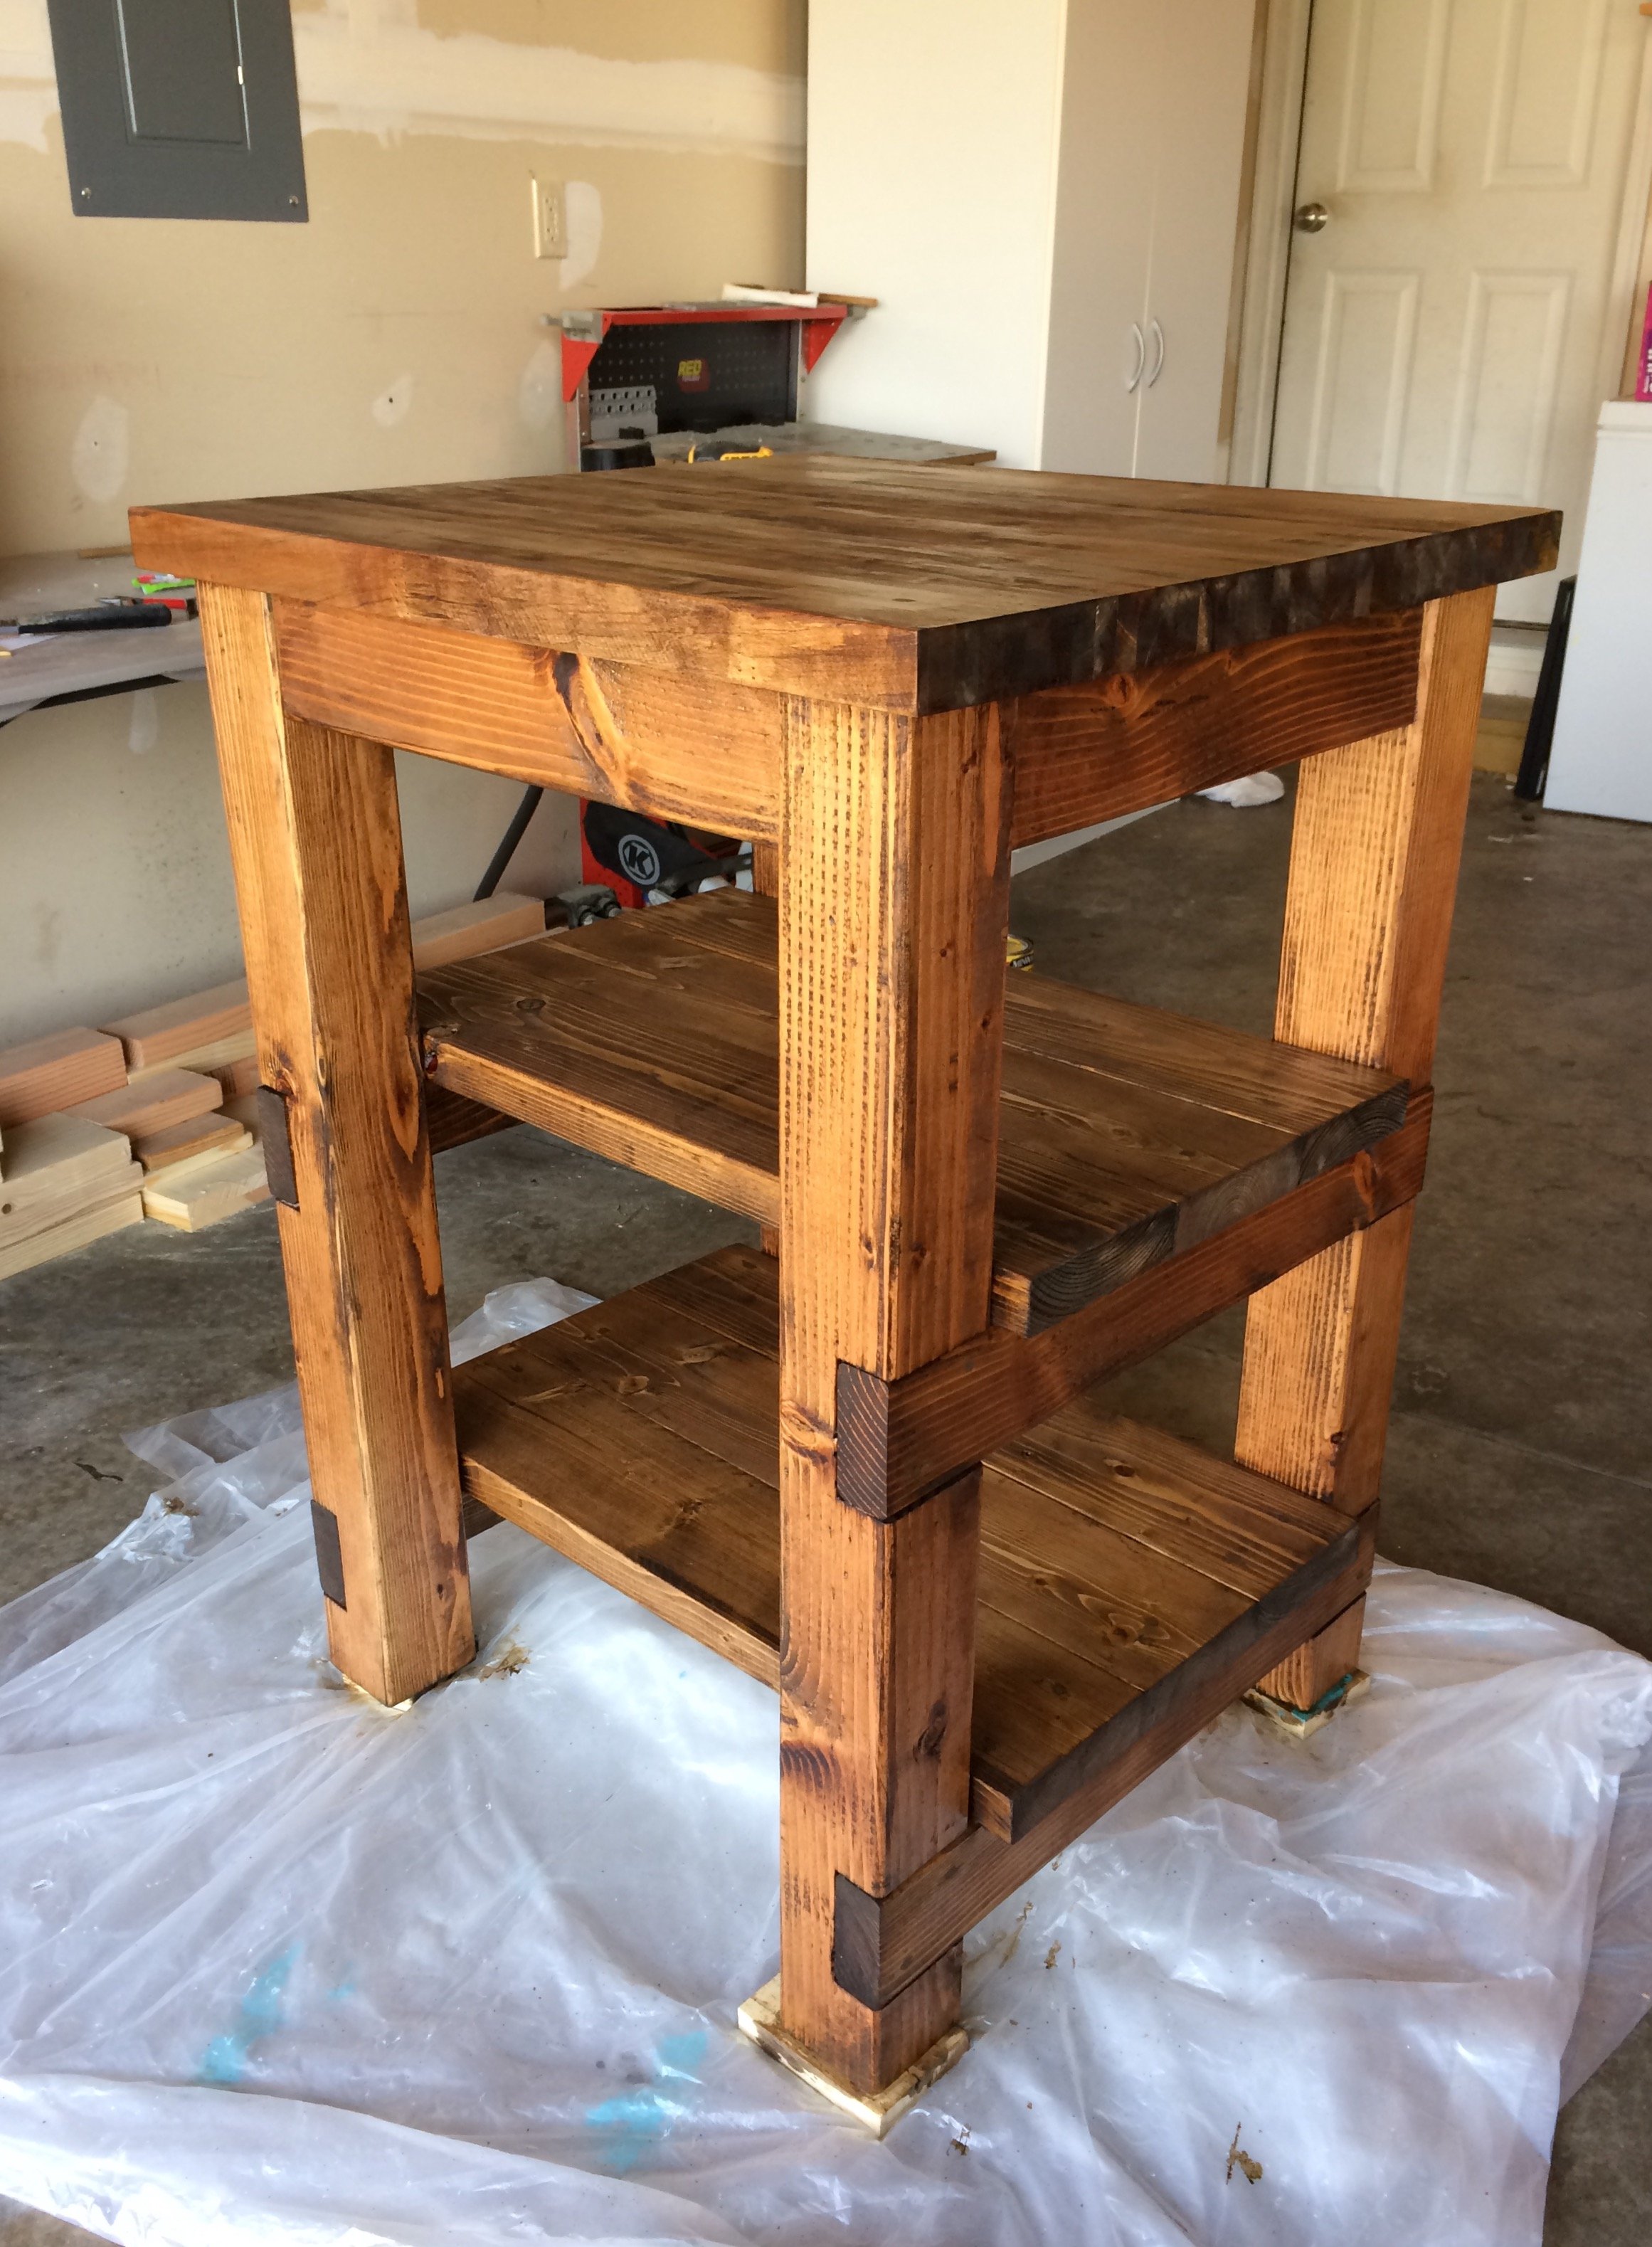
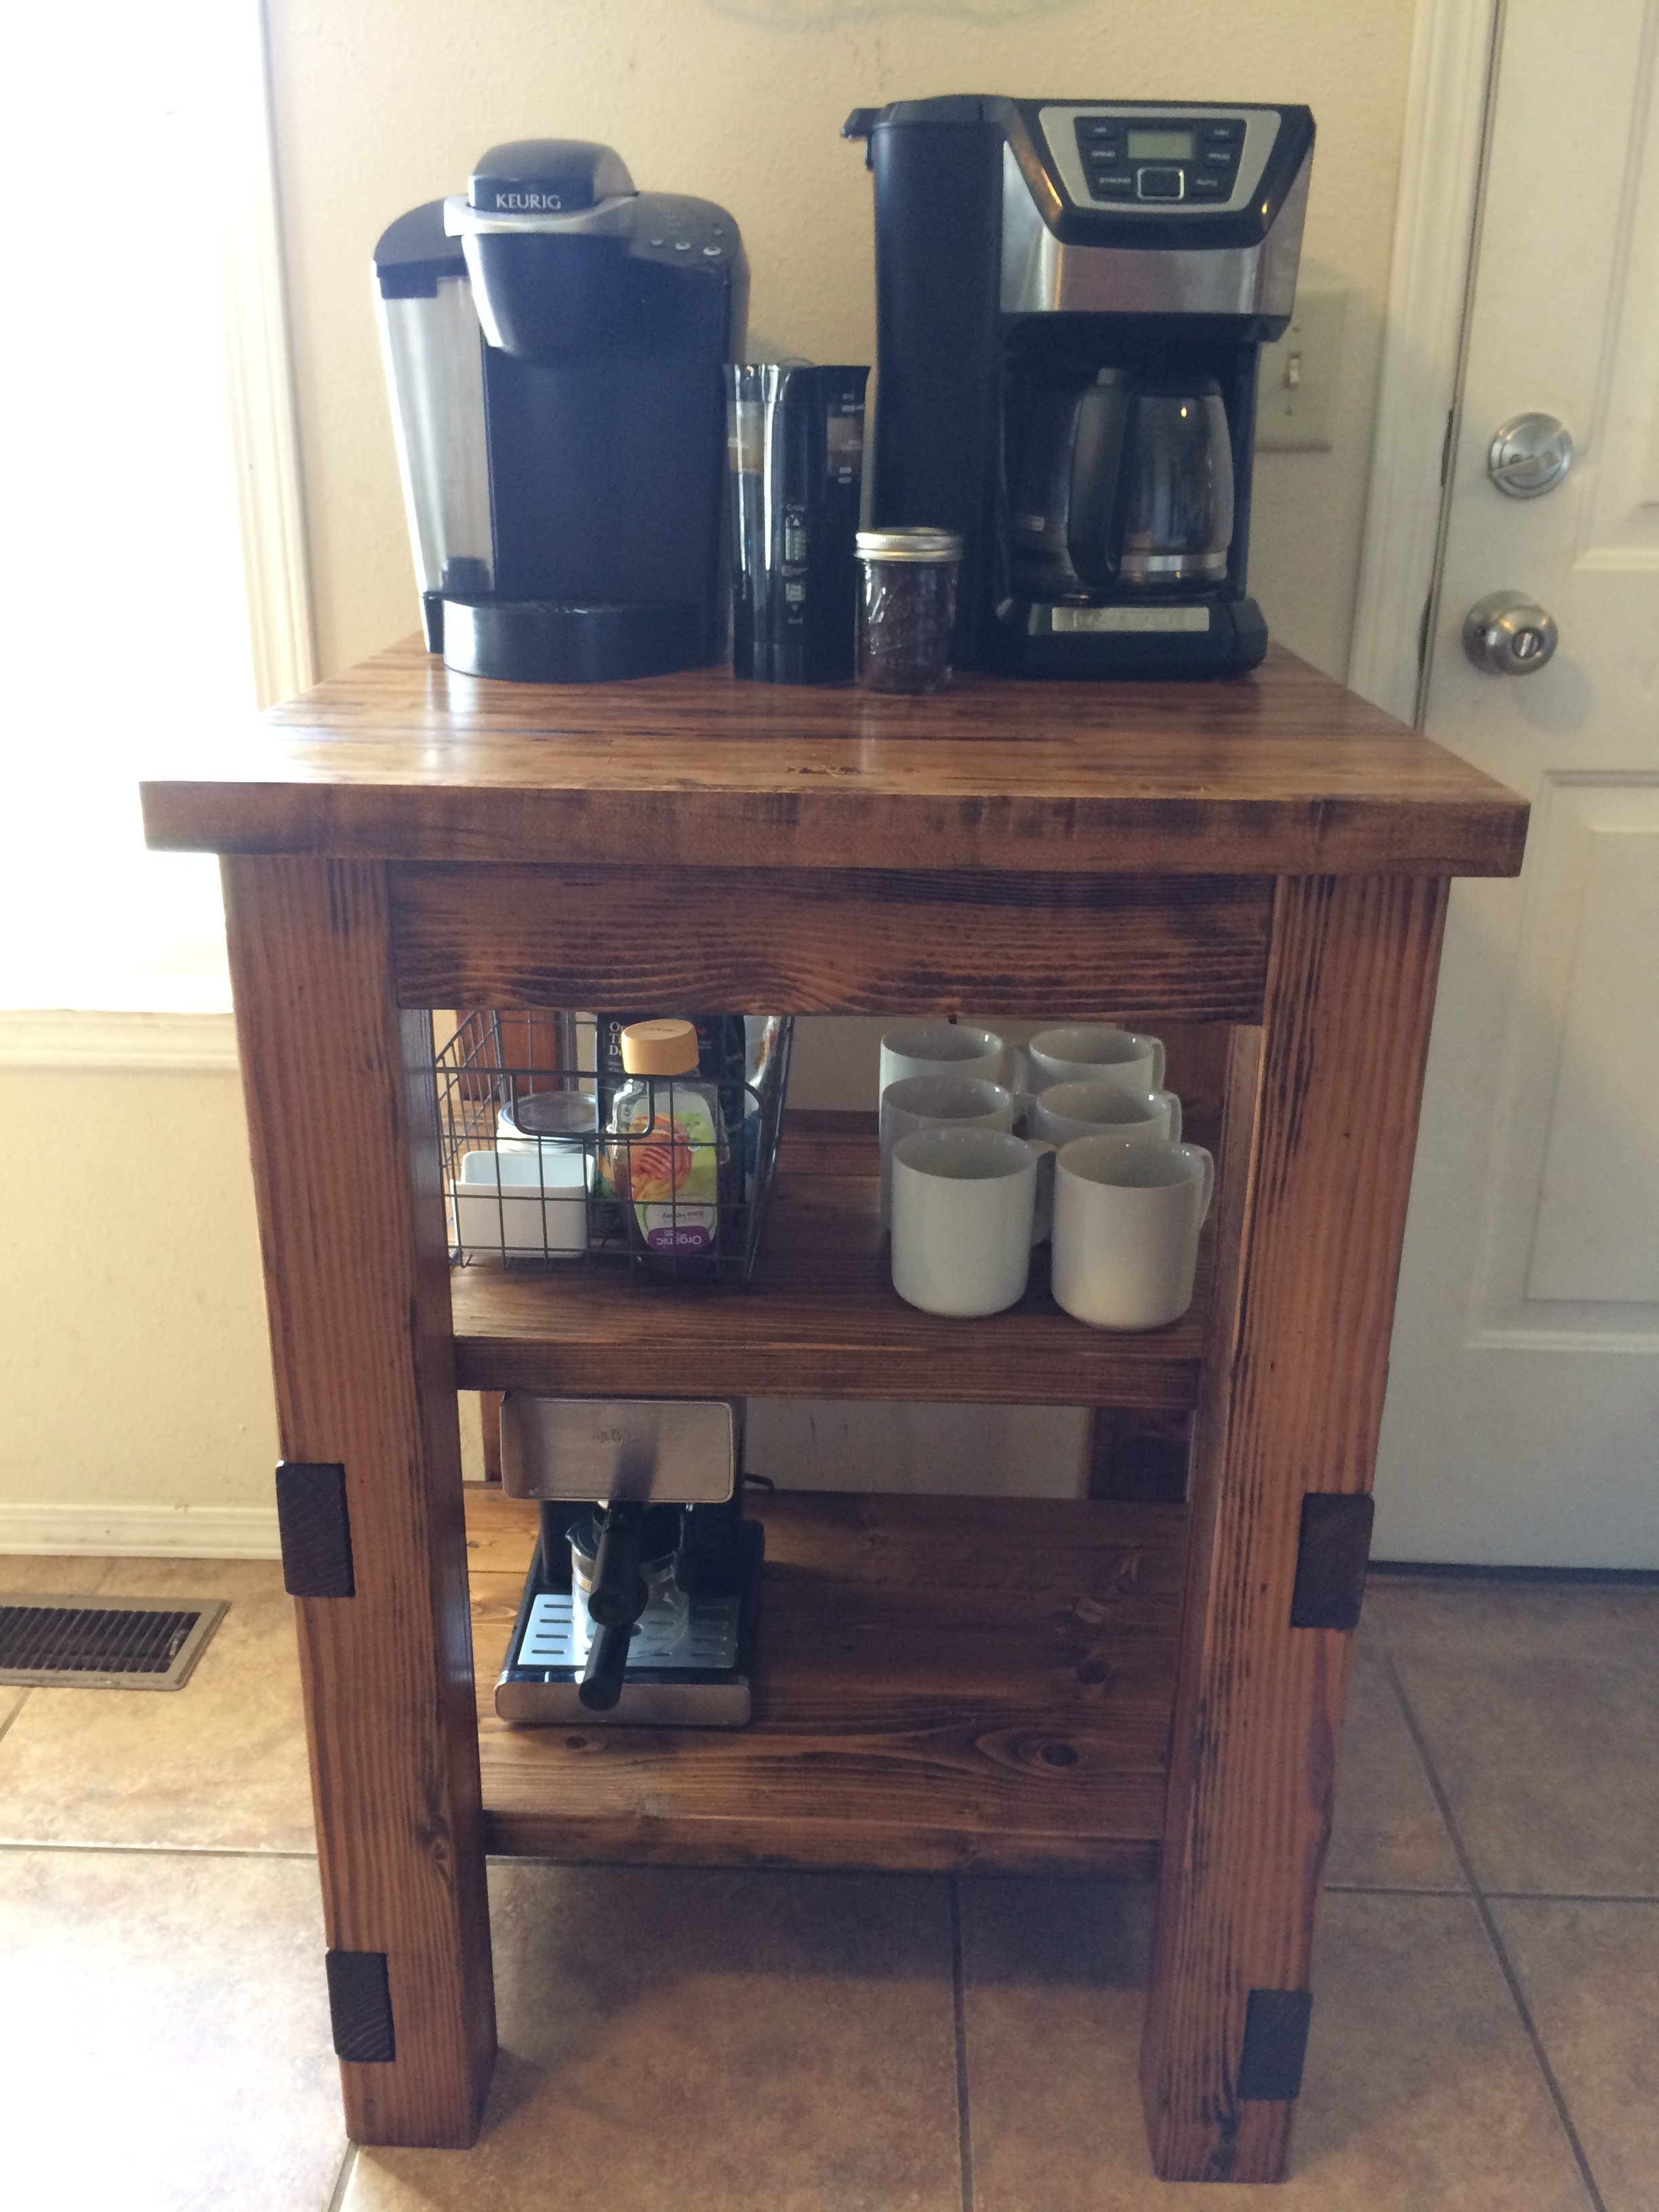
Coffee Bar
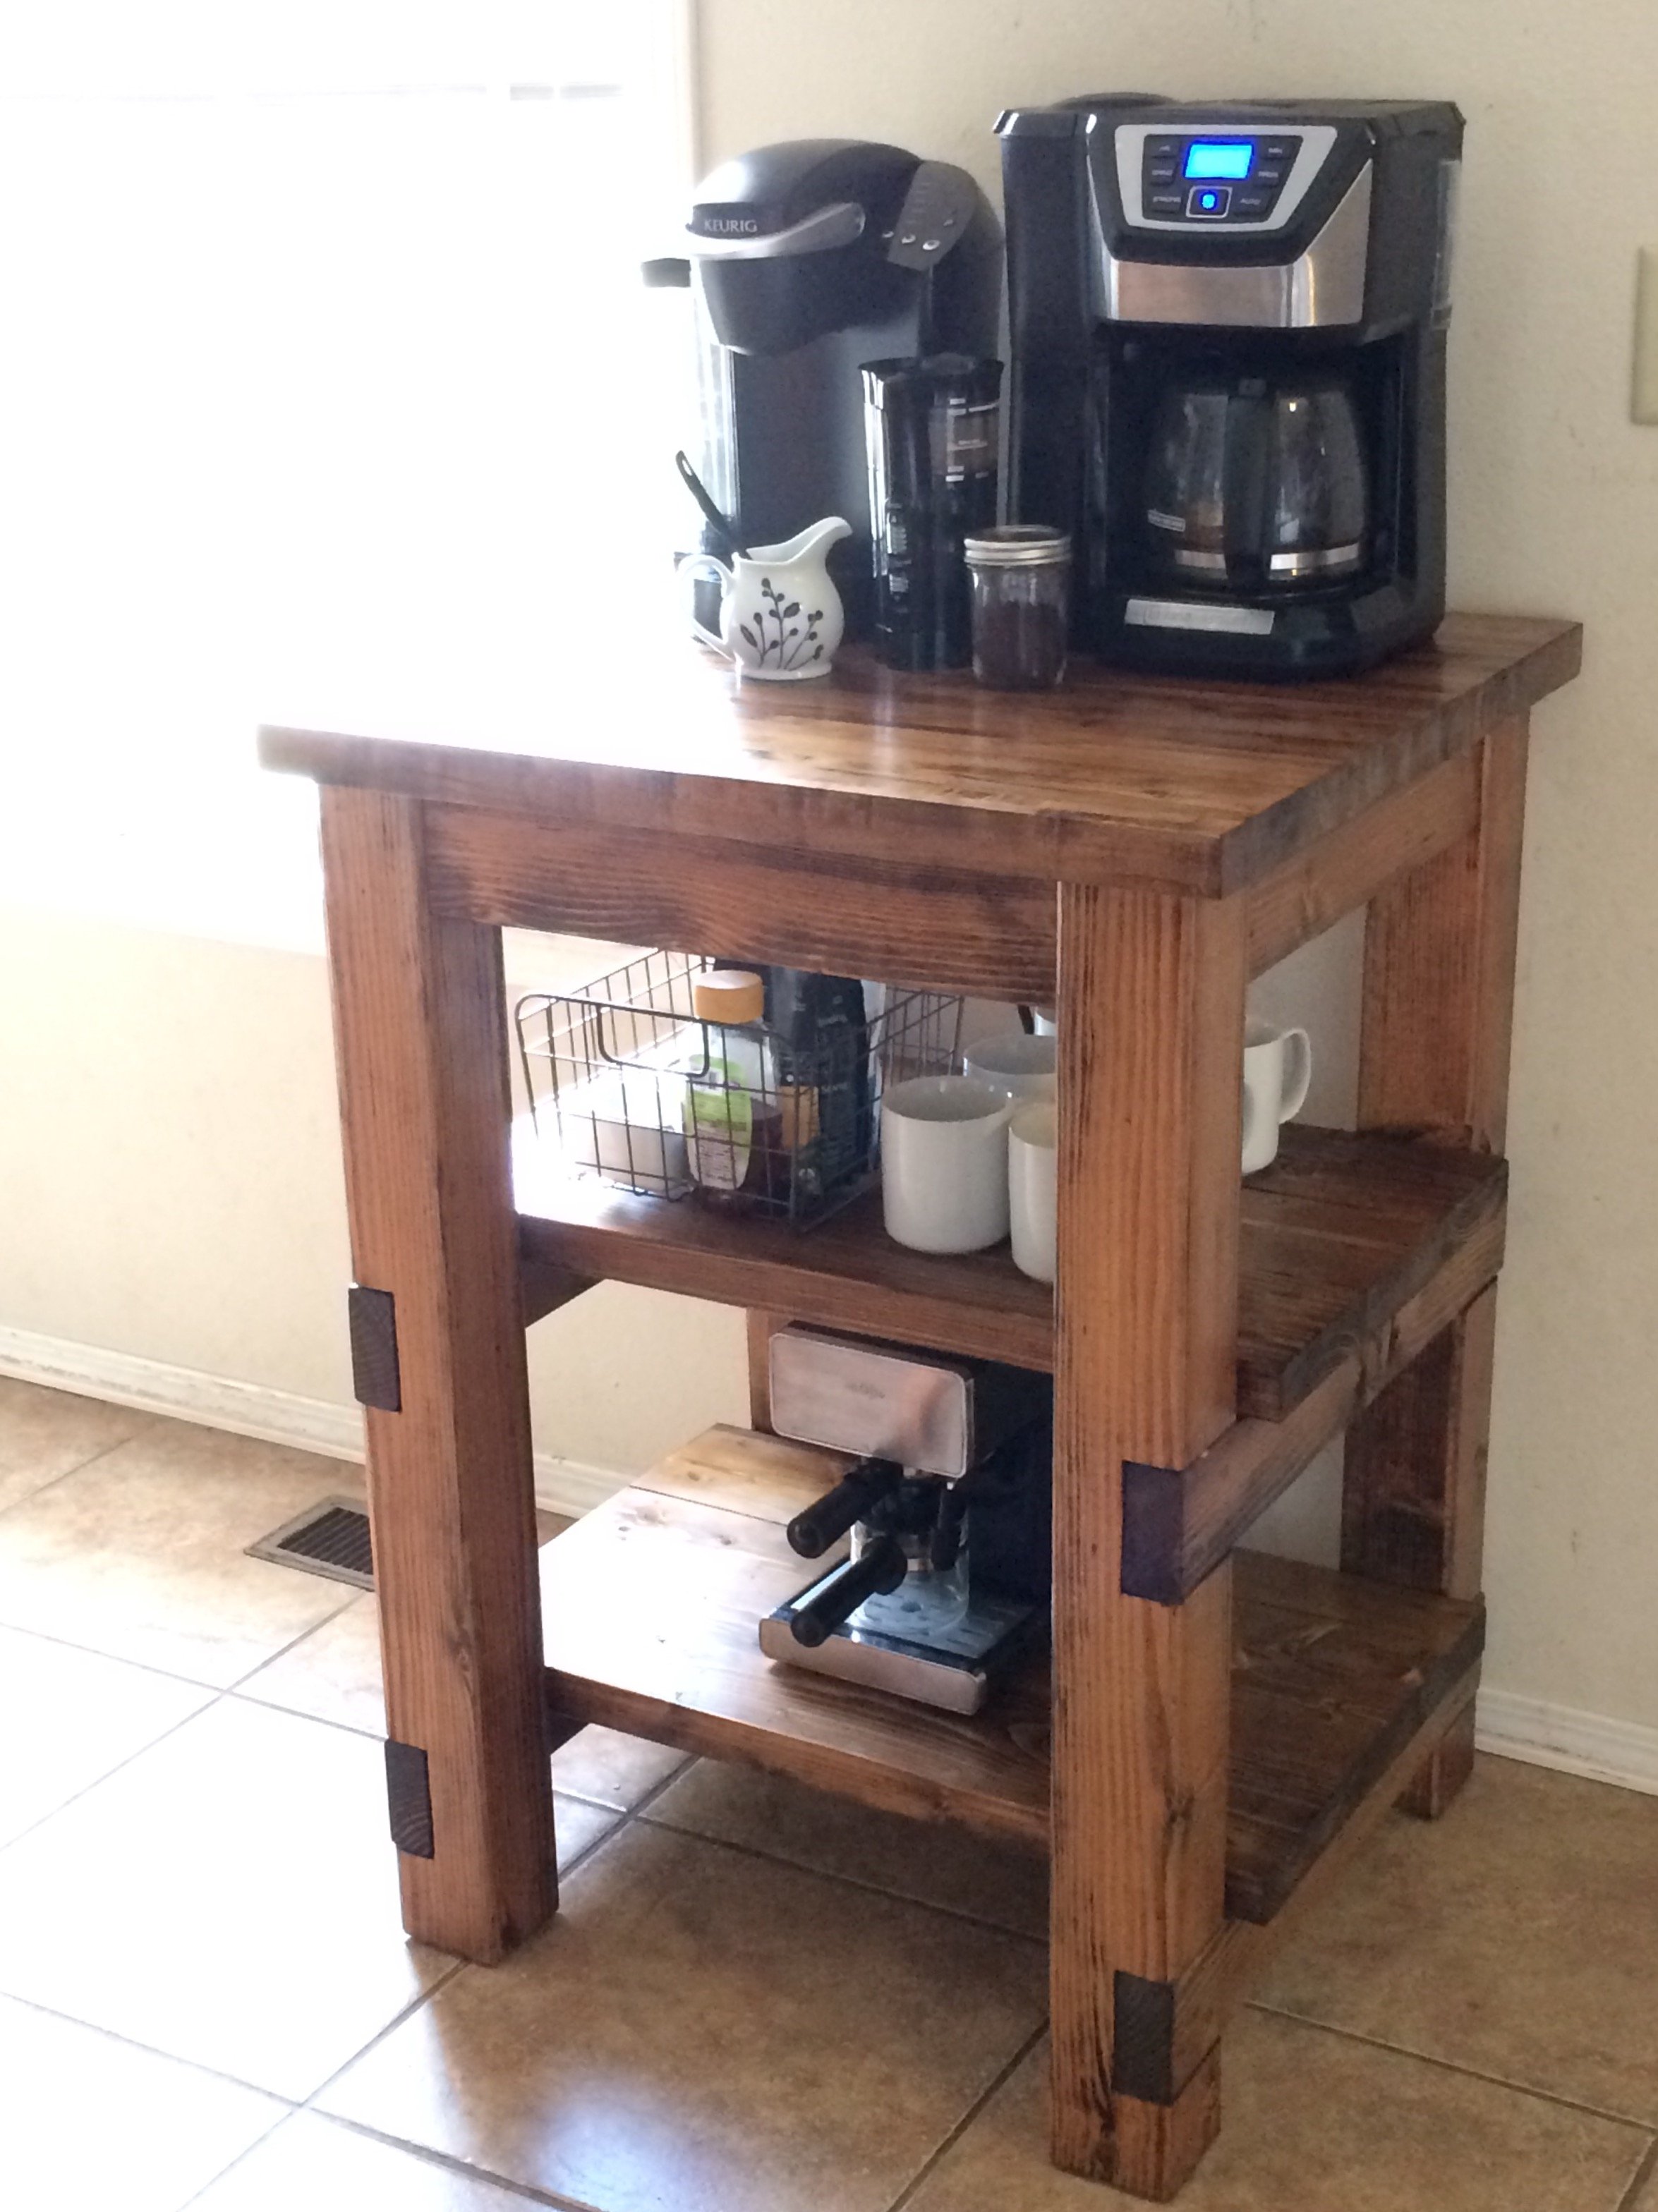
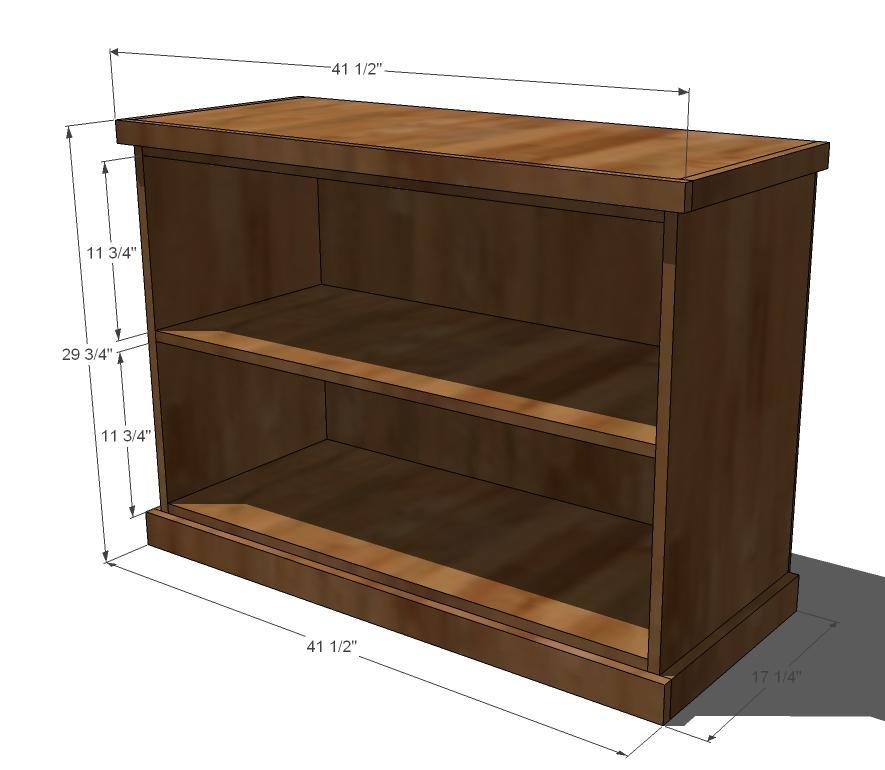
I modified this plan to fit a 27"x 25" chunk of butcher block that my mother-in-law gave me. The finished height is 36 & 1/2". I didn't have any special tools to make the notches for the shelves. I simply lowered the blade-stop on my 7&1/4" miter saw and fastened the screw with hair ties (or in other words, I jimmy-rigged it ;)). I practiced on scrap wood until I reached the depth I needed. There is a 9&1/4" clearance between both shelves, and the shelves have a 1" overhang off the sides. I mainly used pocket holes to connect the pieces. The shelves (3-2x6s each) were fastened together with wood glue and pocket holes, then I slid them into place and screwed them into the side aprons/supports from the top, then filled with wood filler. For the top, I added support from underneathe (2x2s that I had on-hand), then used 2&1/2" screws from underneathe through the 2x2s into the butcher block. At first I used zinc wood screws, but learned quickly that they strip extremely easily, so I switched to sheet rock screws. Fun project!!
Built from Plan(s)
Estimated Cost
$35 in lumber, not counting the butcher block top which I got for free from my mother-in-law.
Estimated Time Investment
Weekend Project (10-20 Hours)
Finish Used
For the butcher block, I decided to stain it since it would not be coming into contact with food. I sanded the butcher block with 220 grit sandpaper with my orbital sander. For the rest of my project I first used 80 grit, then 220 grit. Then I applied pre-stain wood conditioners overall, then Minwax provencial stain (I left it on for about 3 minutes then wiped it off). Then I used two coats of polyeurethene, sanding with 400 grit between the coats.
Recommended Skill Level
Intermediate
Mud Kitchen

We live in the south so we opted for treated wood. We weren’t able to locate all the connectors to combine sink sprayer and water hose so we ended up just getting another garden hose and sprayer. Works just as well. We used Smokey Mirror exterior stain to add some color. Didn’t have all the tools handy so we opted for a farm style sink that sits on top of the wood. Kids loving it so far, they have been playing non stop. Thanks for the great plan.
Built from Plan(s)
Estimated Cost
60
Estimated Time Investment
Day Project (6-9 Hours)
Recommended Skill Level
Beginner
Comfortable Outdoor Wood Chairs
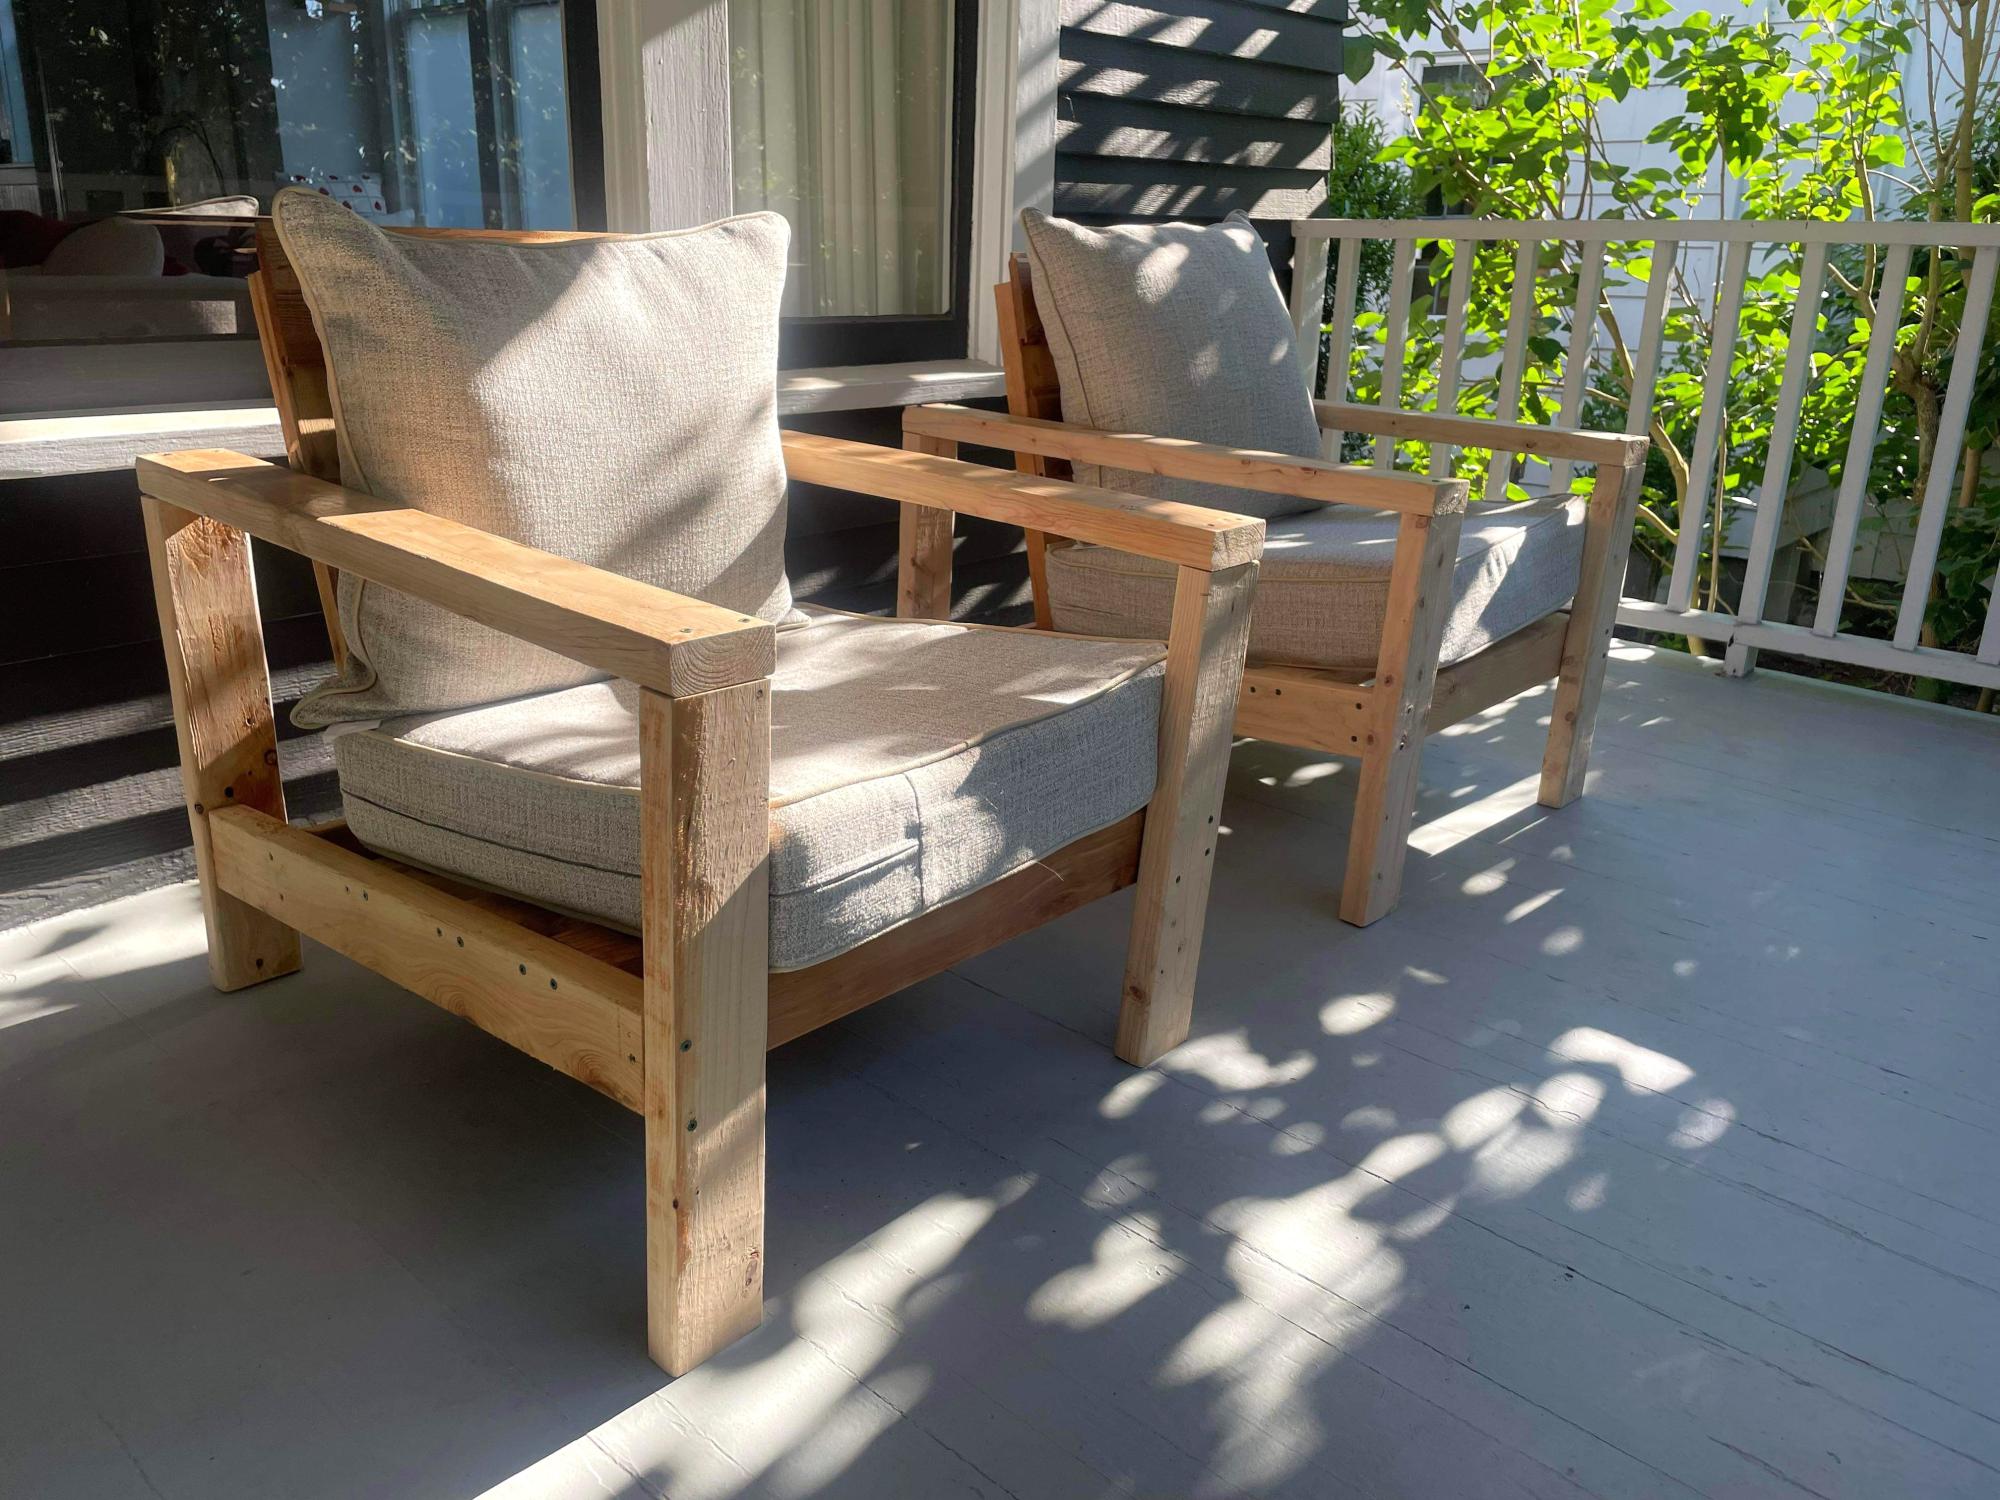
Loved it. I’ve made 6 chairs.
Crystal Shanaman
Built from Plan(s)
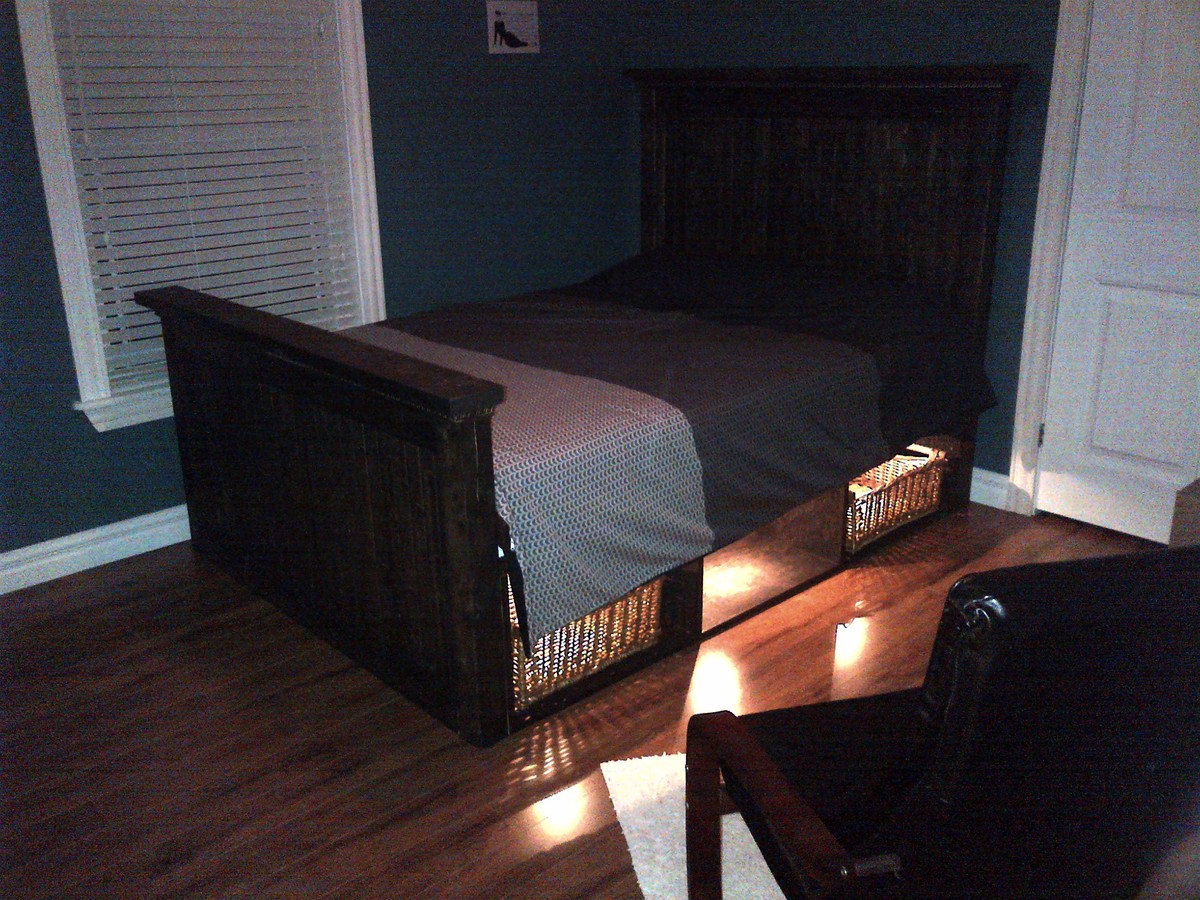
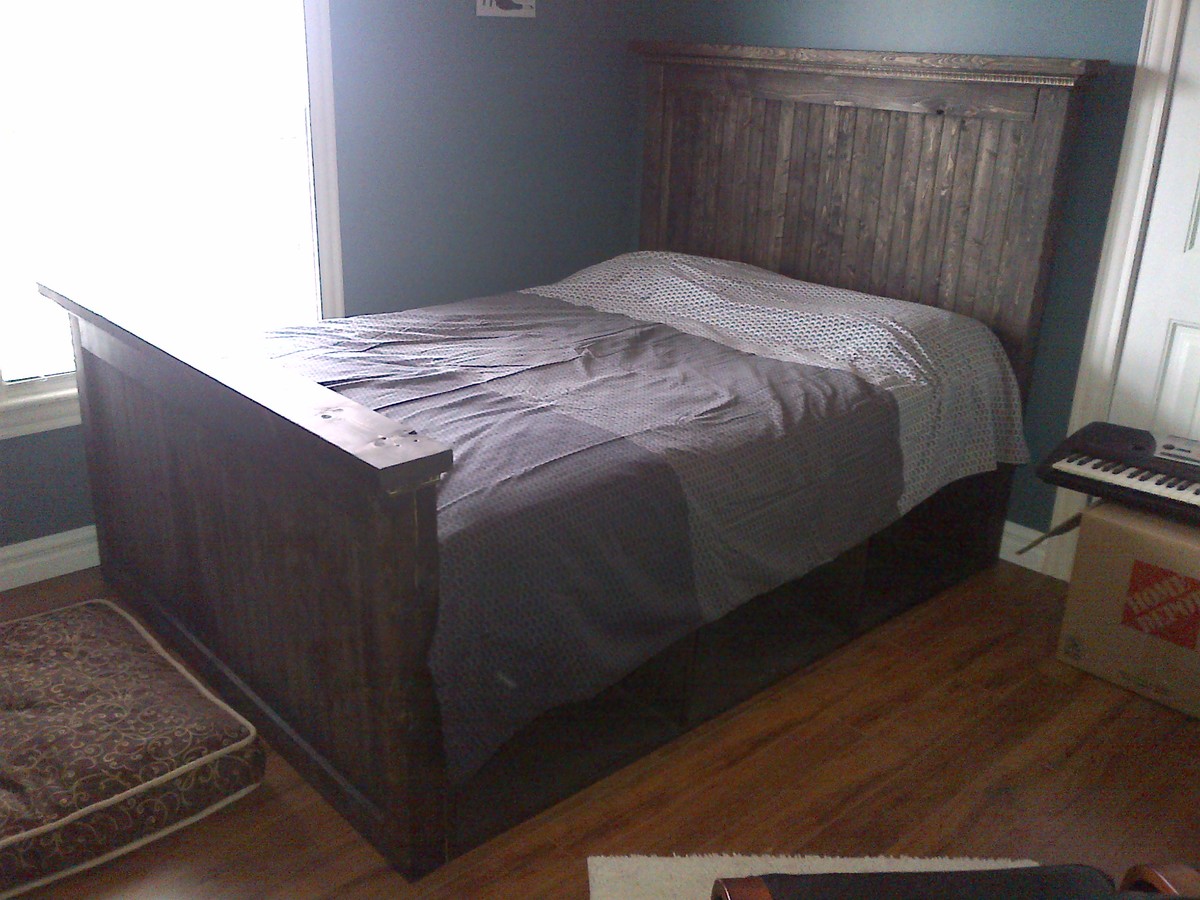
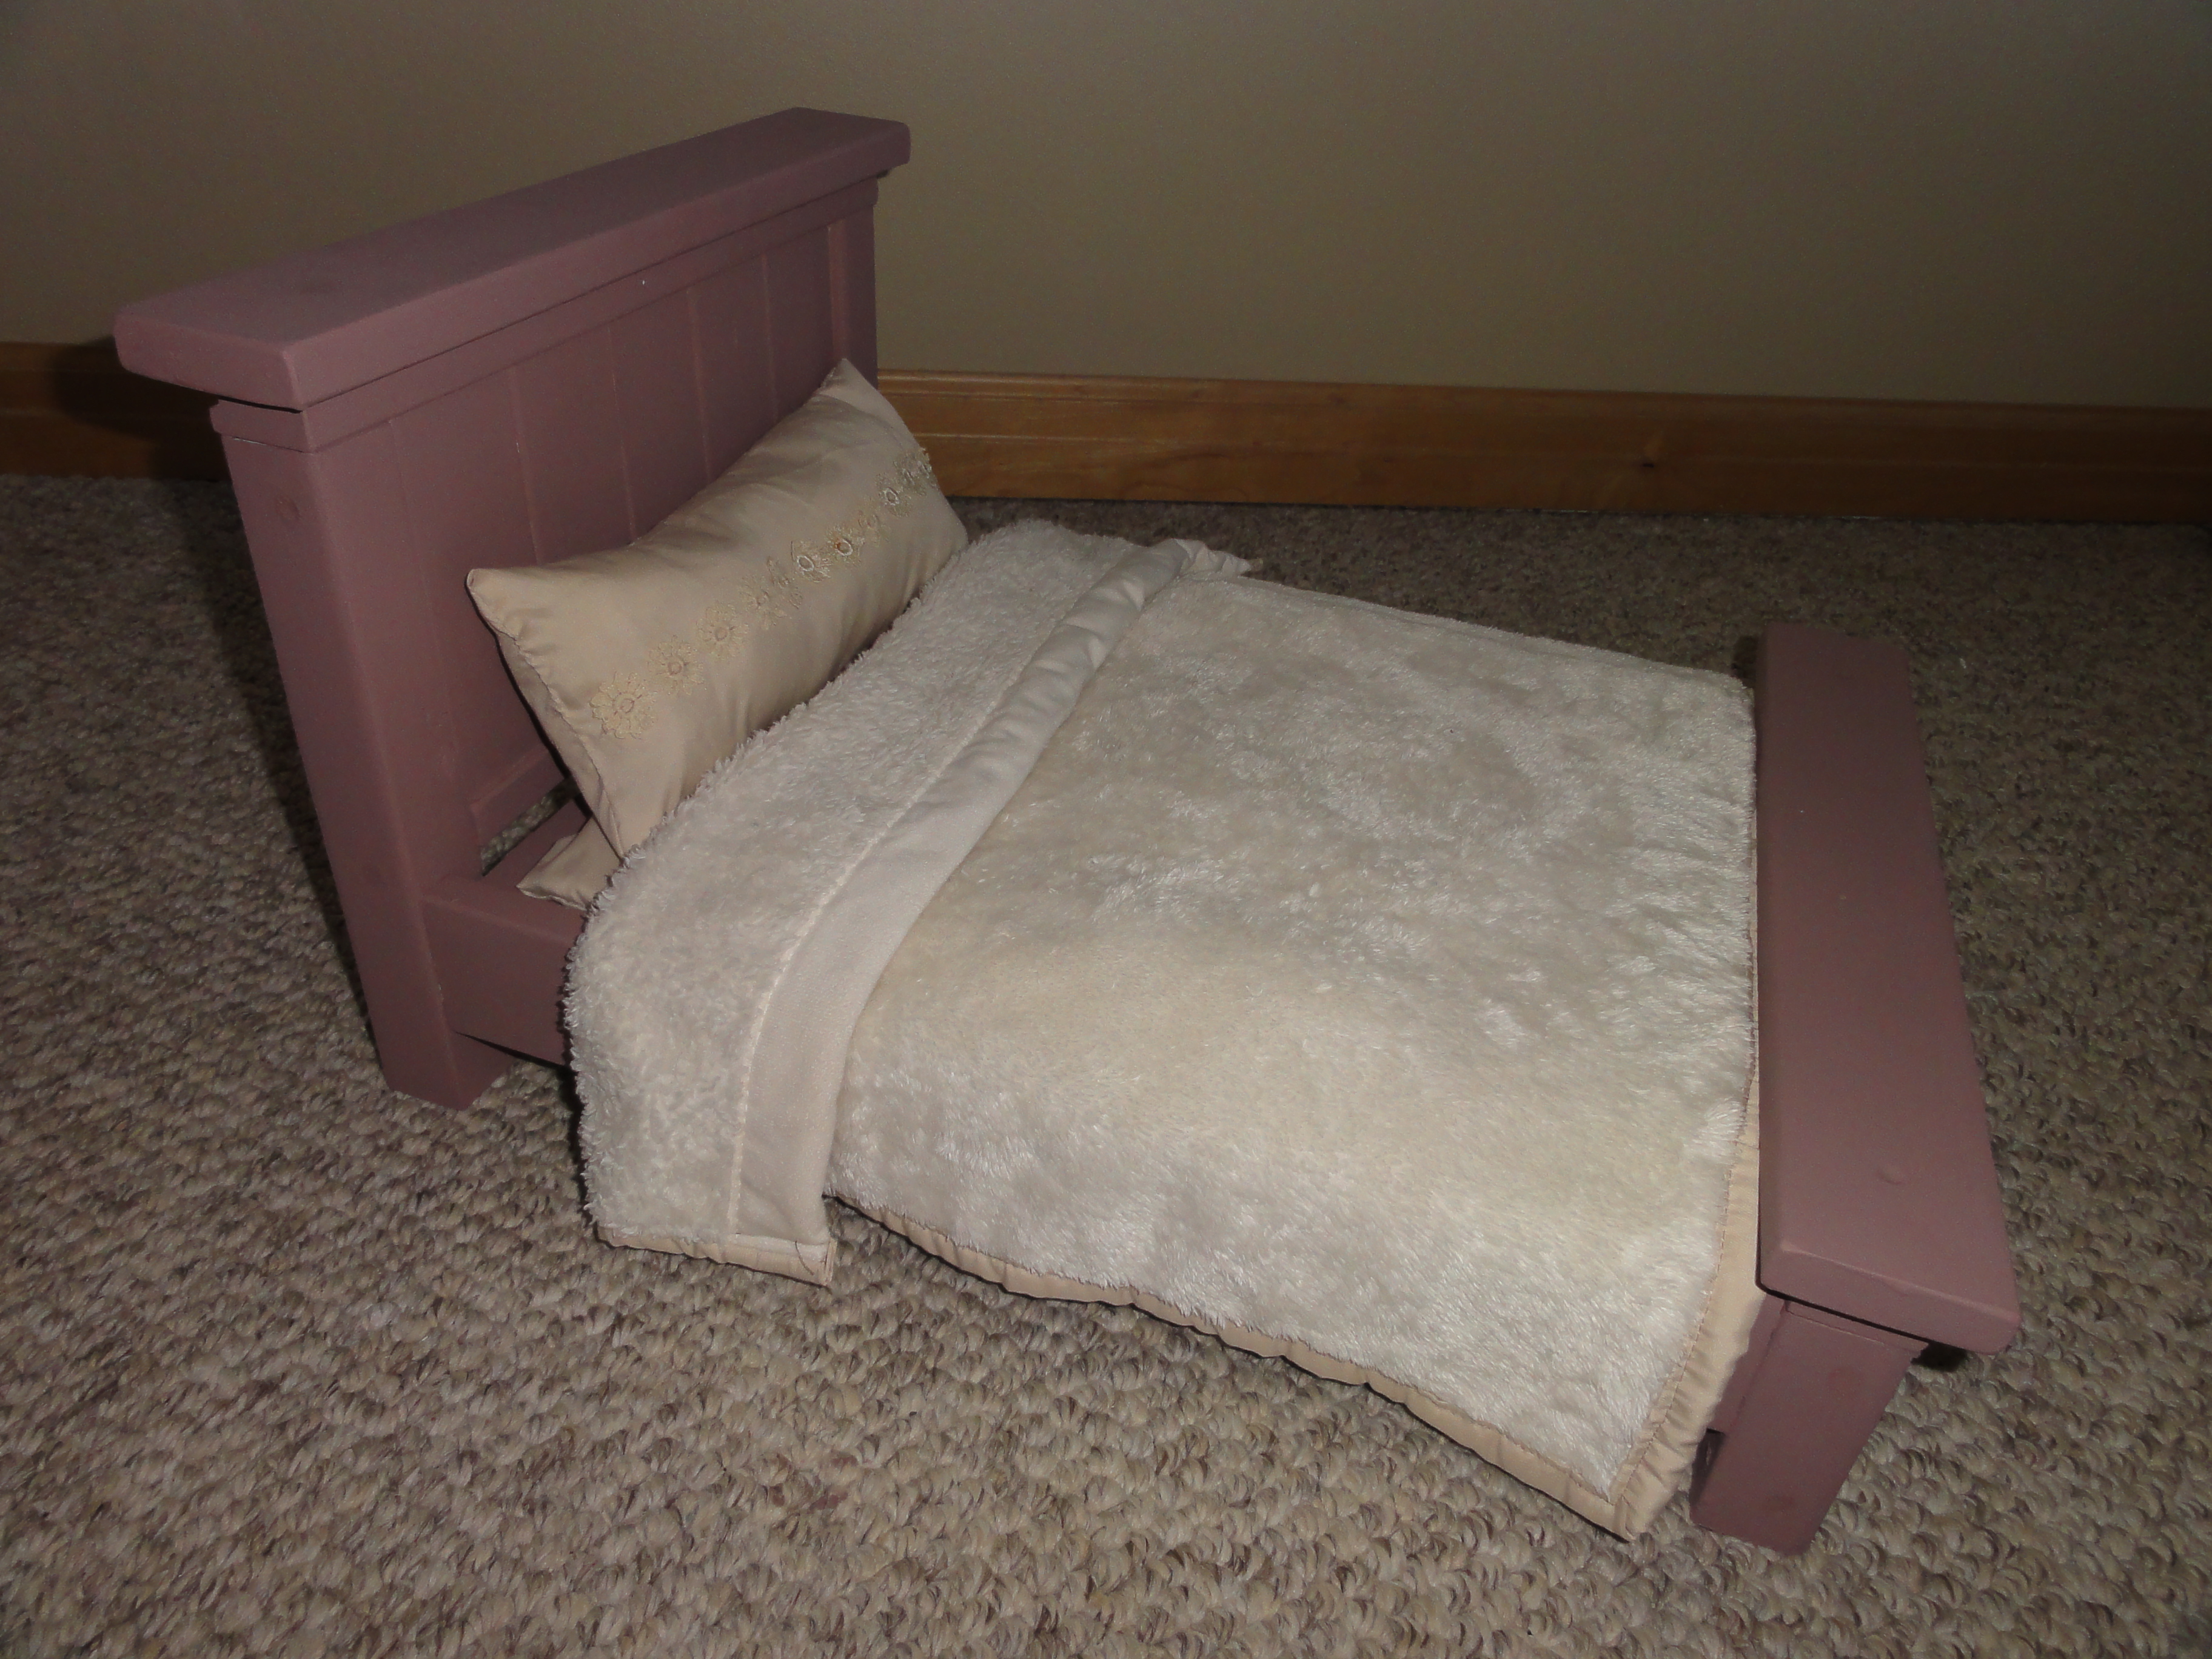
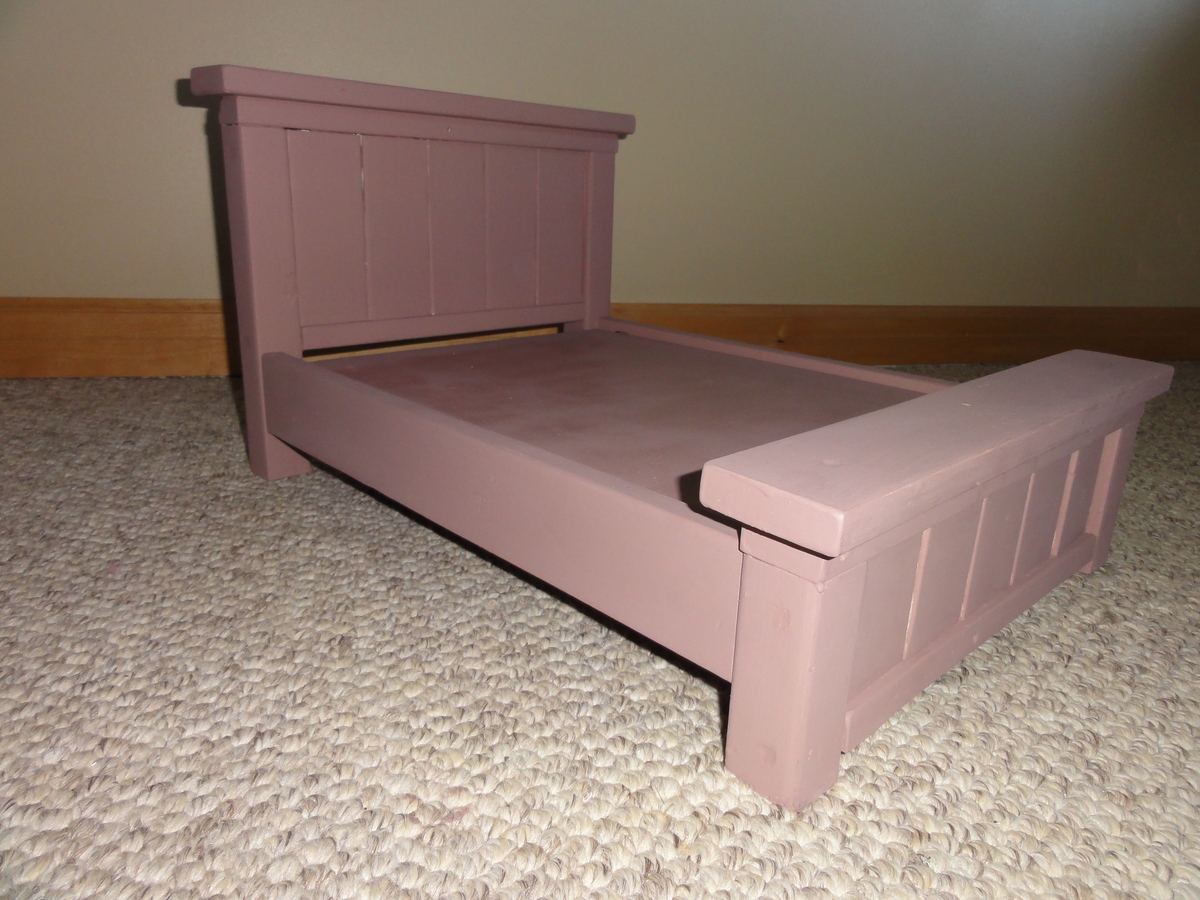
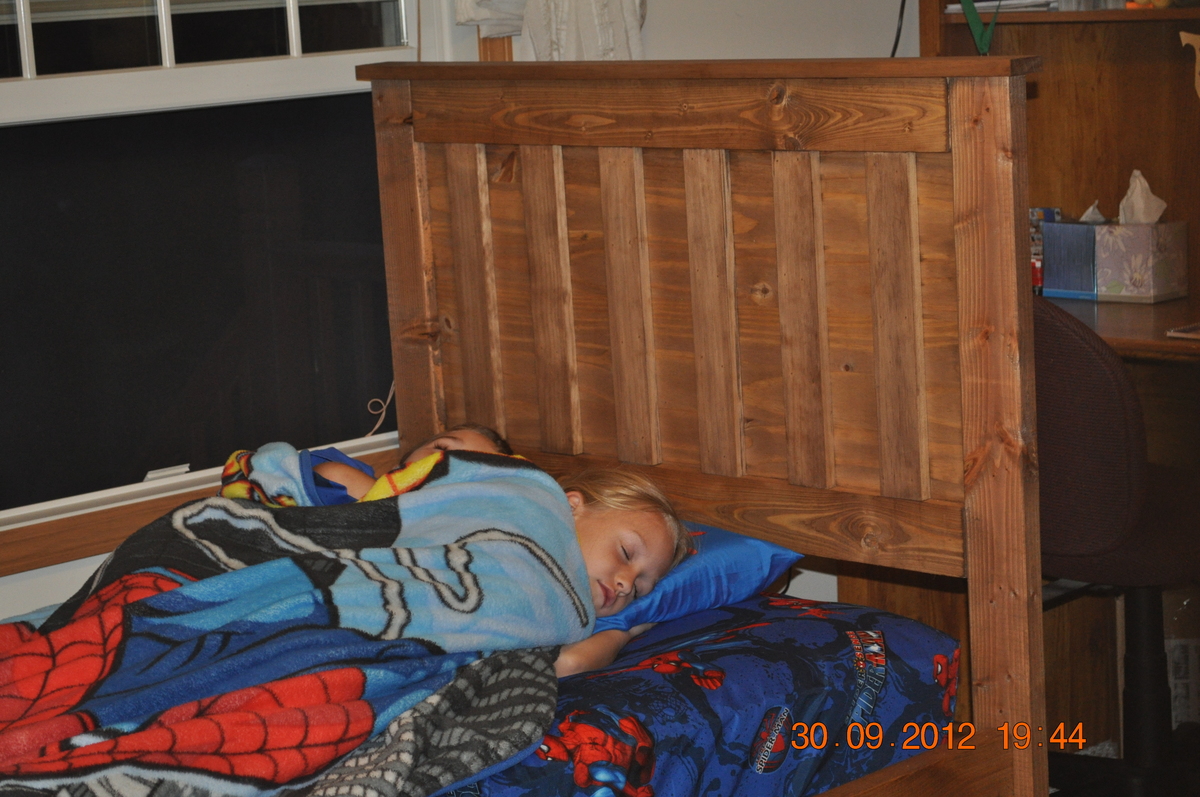
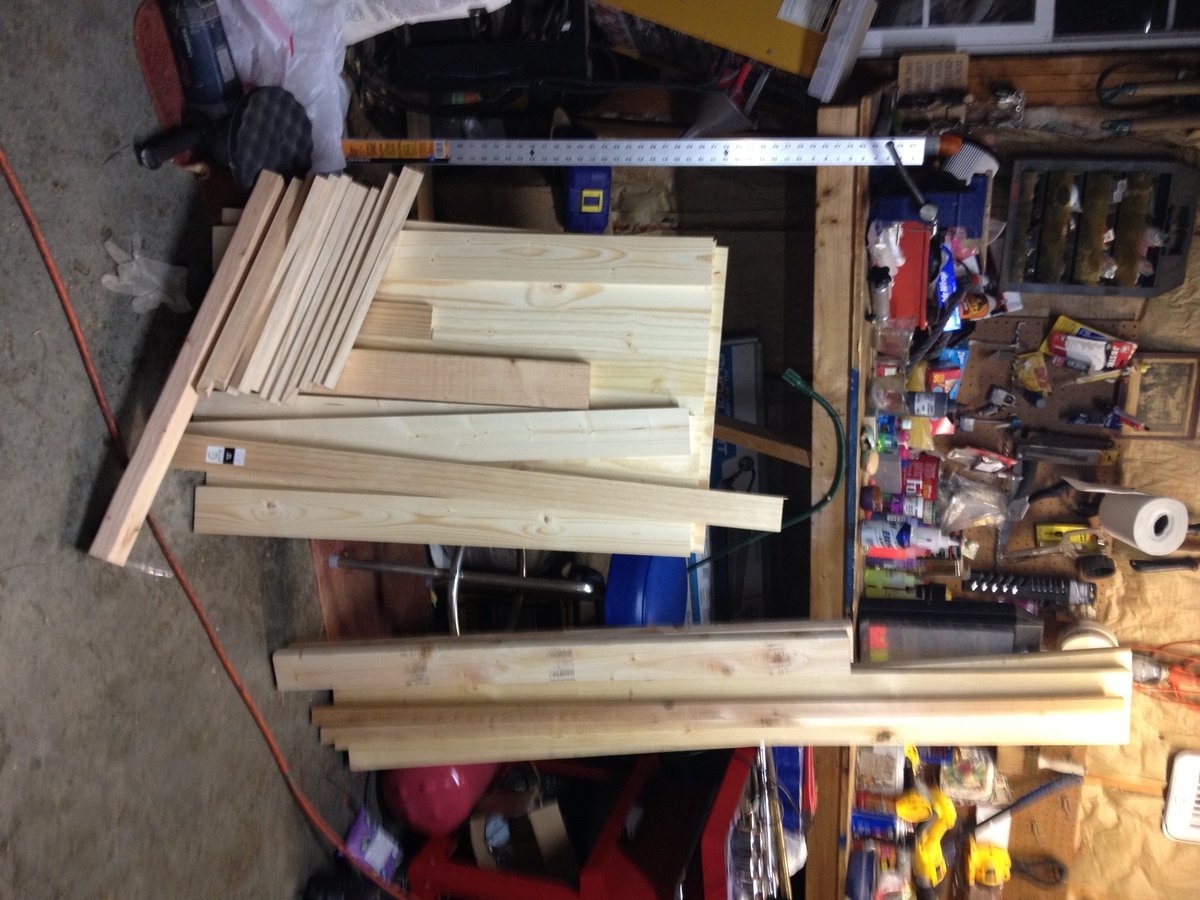
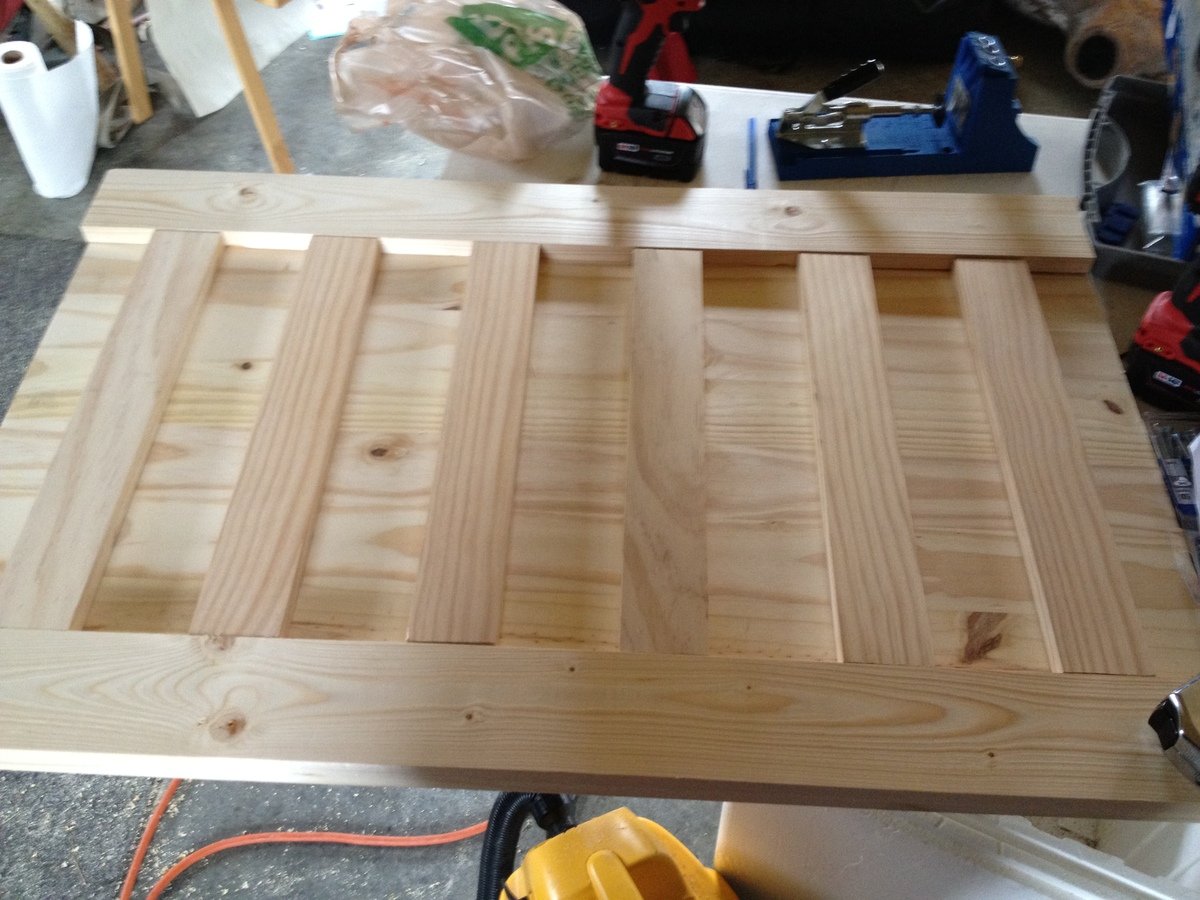
Kentwood Bed
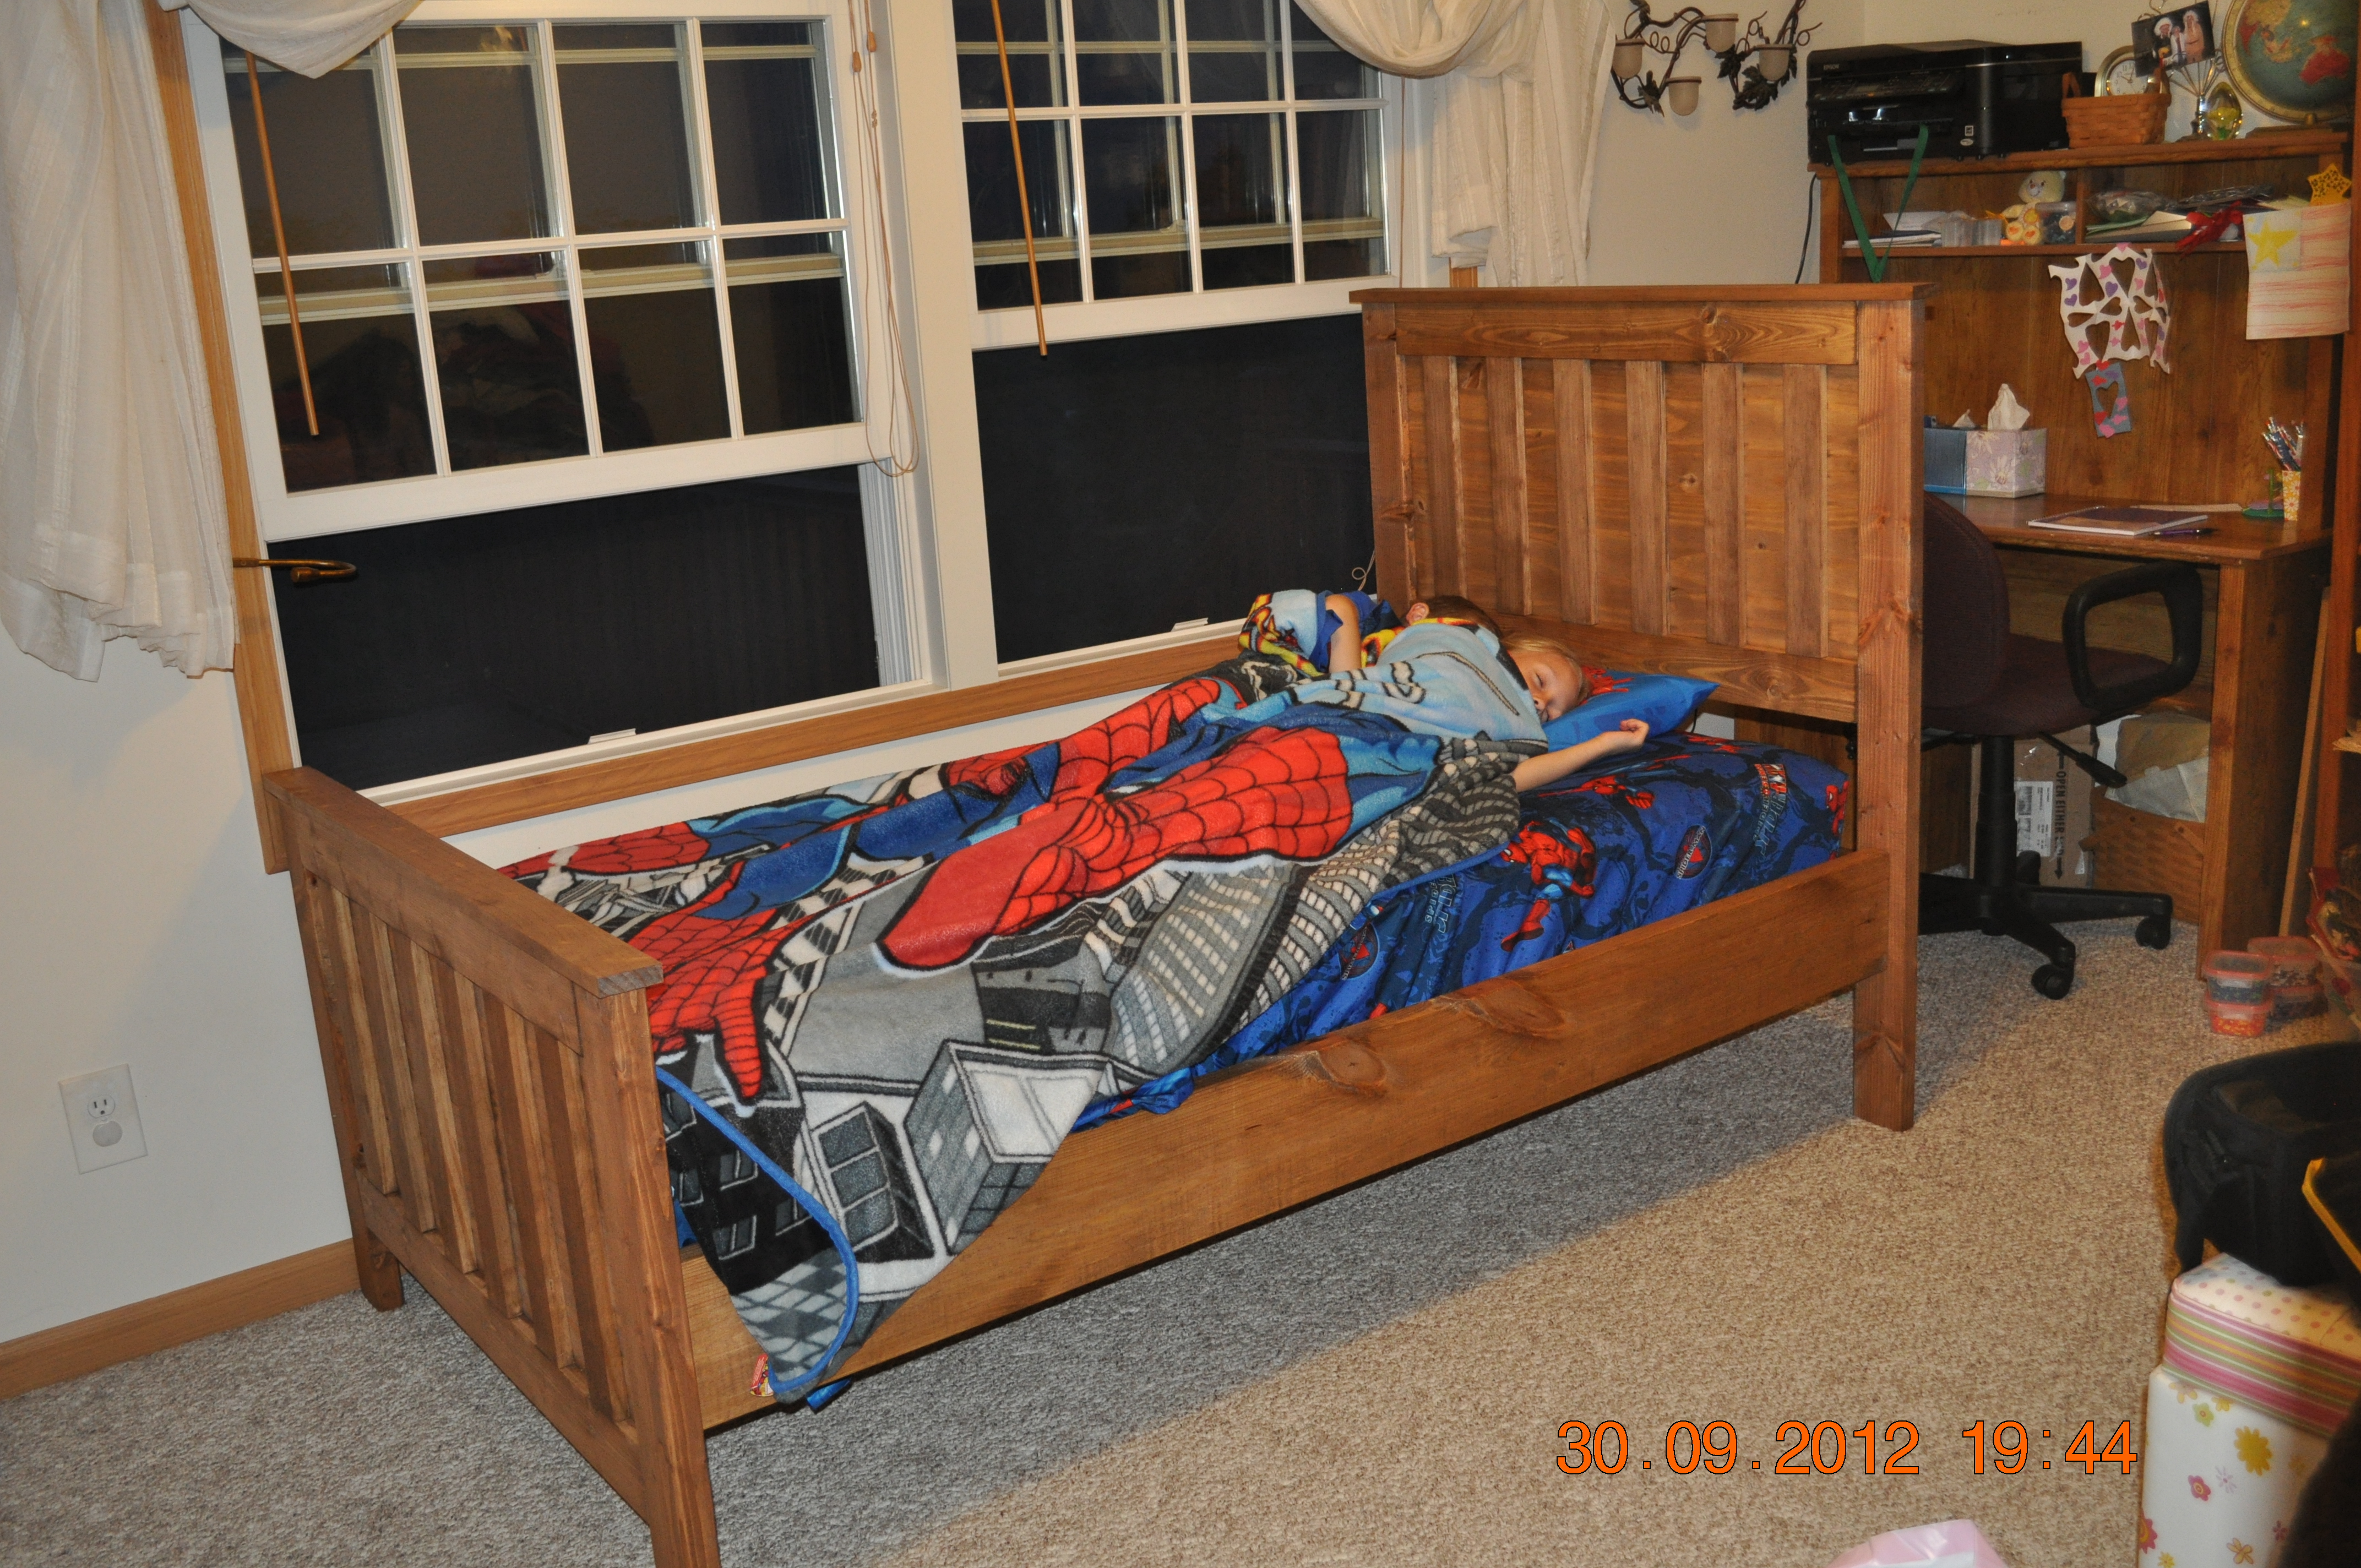
After searching for the perfect bed (quality bed) that didn't cost a fortune and after discovering Ana's site a while back I got the nerve to try to build my sons bed! My husband help me cut the large pieces and figure out how to use a Kreg Jig.It was really easy and fun!!! Thanks for the plans and the inspiration!
Built from Plan(s)
Estimated Cost
$100.00
Estimated Time Investment
Weekend Project (10-20 Hours)
Finish Used
sanded, preconditioned the wood and stained with Minwax Early American stain
Recommended Skill Level
Beginner
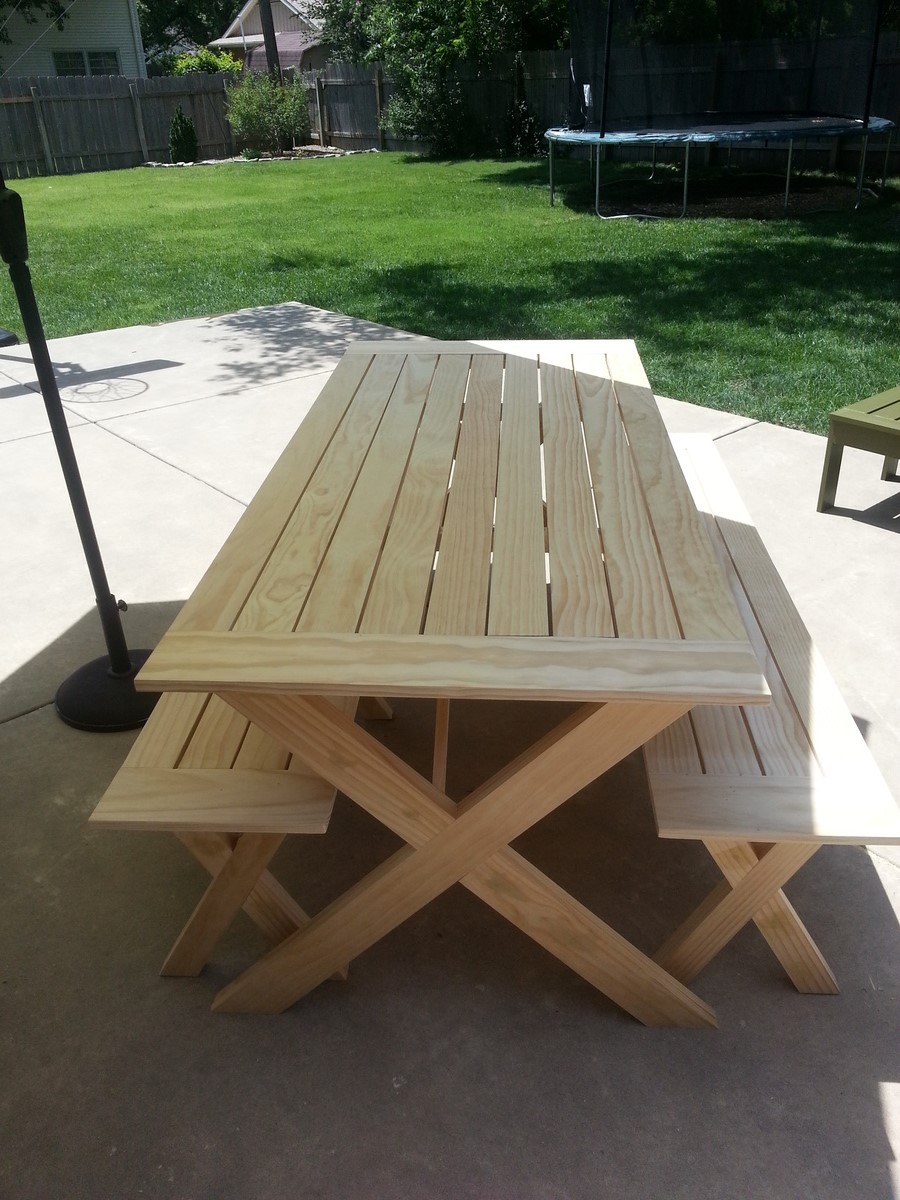
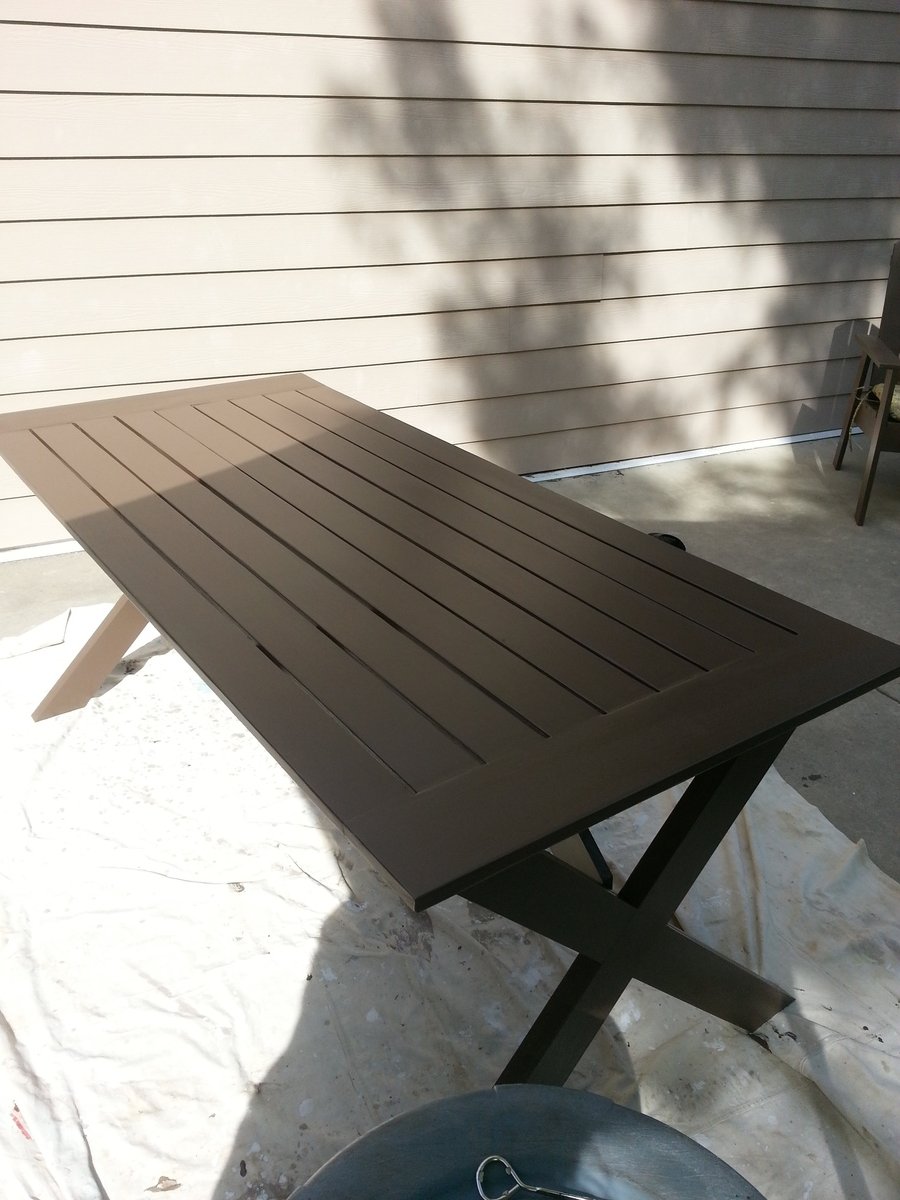
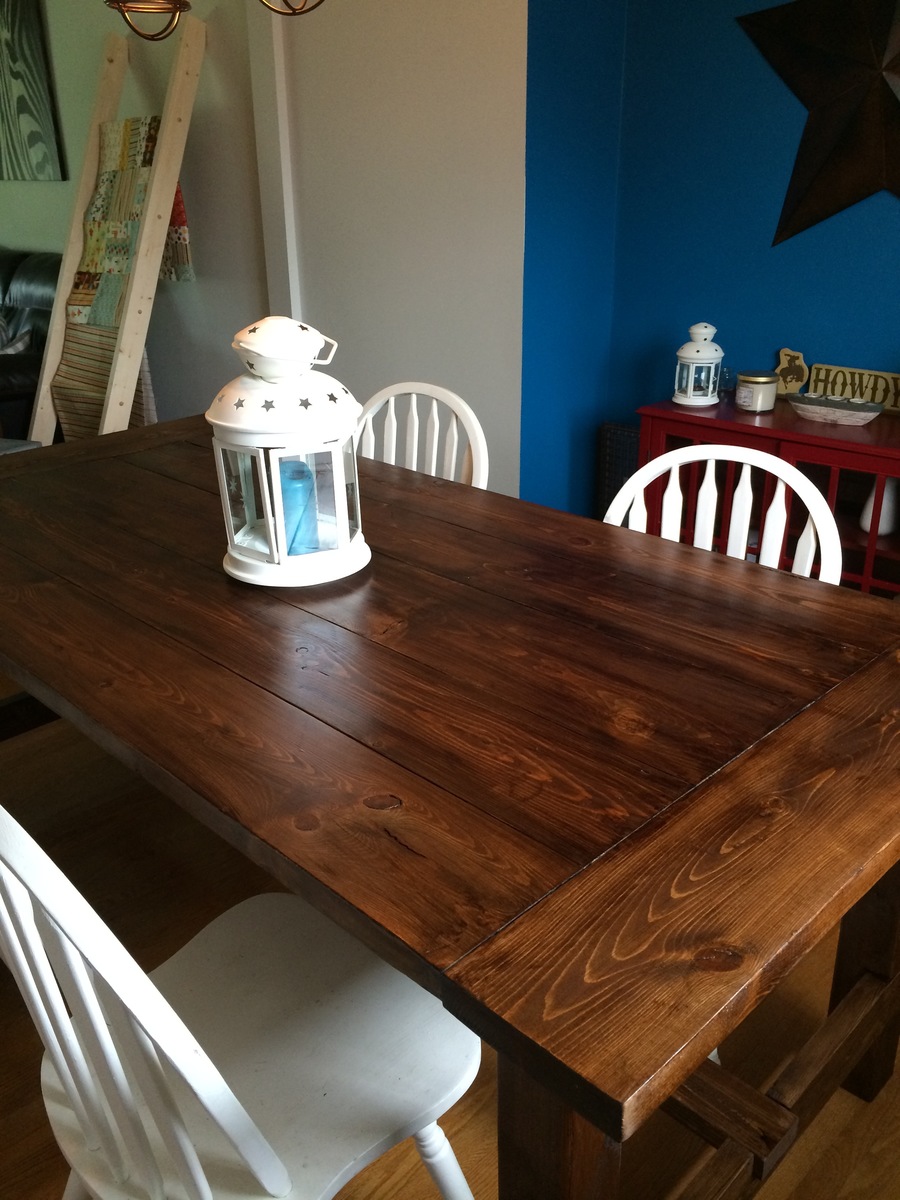
Our first DIY a beautiful Farmhouse Table
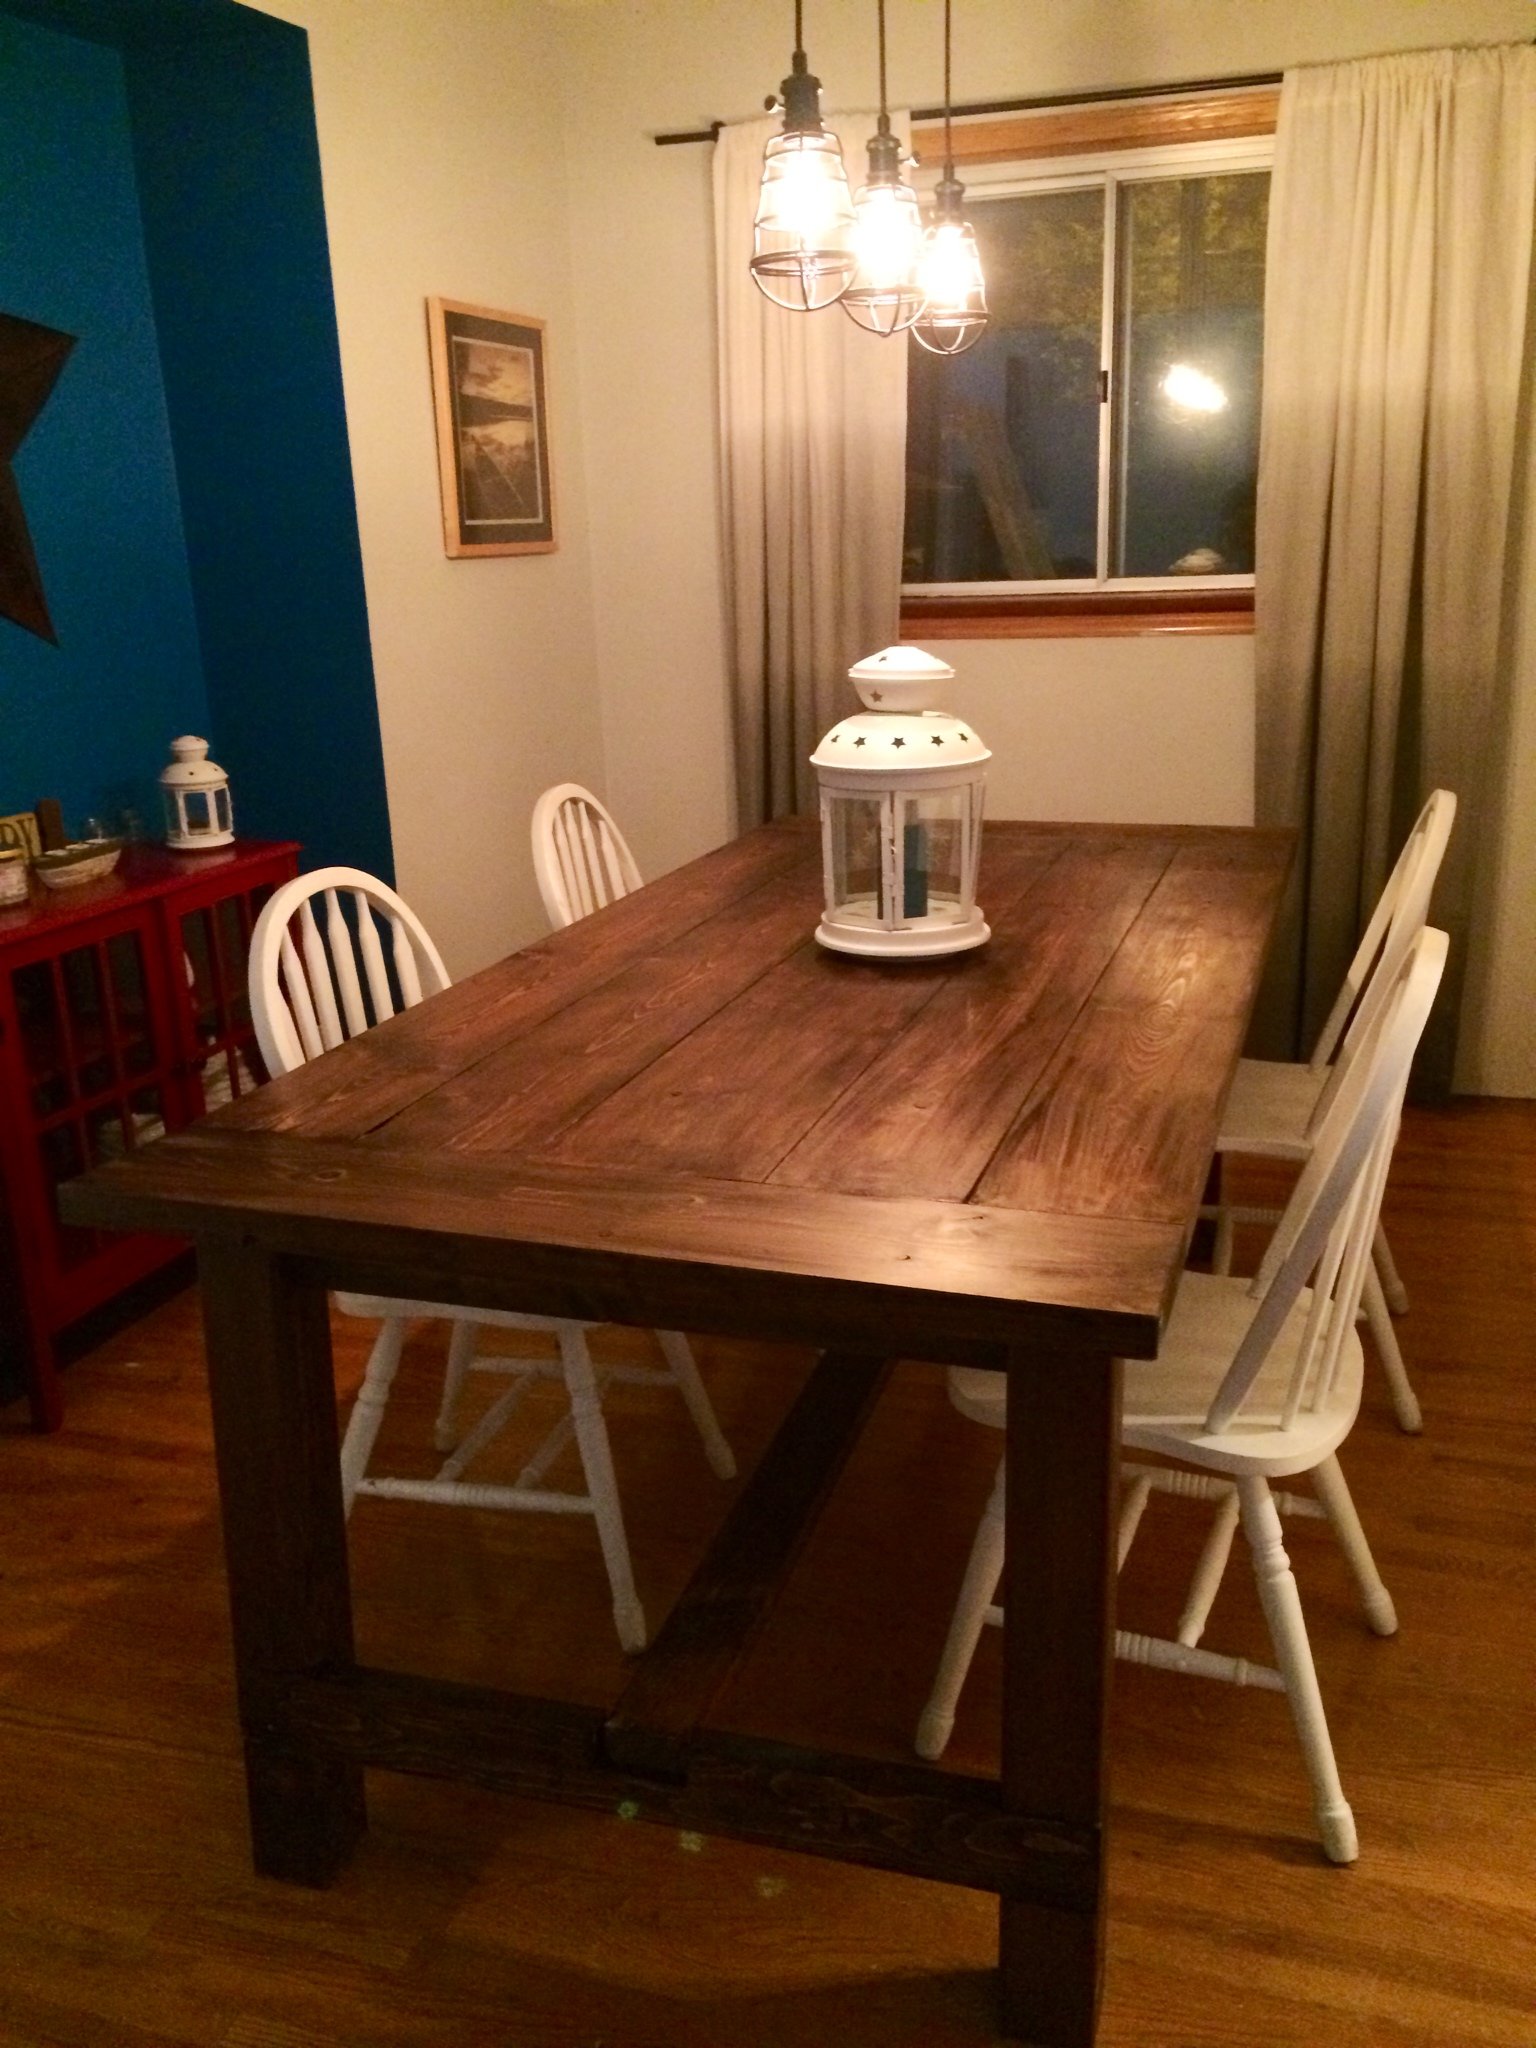
Our first DIY project and although we were a little nervous getting started I couldn''t be happier with how it turned out! It's exactly like all the tables I loved in stores and magazines and the plan made it so easy! It's hard to believe we did it ourselves. To anyone who is nervous about getting started don't be! I recommend you read the whole plan start to finish before you start and the brag posts are awesome for trouble shooting.
A few recommendations I have would be to sand down condition and put a single coat of stain on before building. I found it difficult to get stain in the cracks between the table top boards. I would also cut the notches out on the base of the table based on the size of the board not the measurements on the plan to make sure you get a snug fit. We have a few gaps which I can live with but would change if we do it again. I also learned the hard way DO NOT use wood filler. Even if it says it's stainable it's all lies! Mix together wood glue and saw dust. The wood filler did not absorb stain so we had to sand down the entire table top again and start over.
Overall the plan was easy to follow and produced a beautiful table that I can't wait to entertain with!
Built from Plan(s)
Estimated Time Investment
Weekend Project (10-20 Hours)
Finish Used
Combination stain of Minwax American Walnut and Minwax Special Oak no finish yet.
Recommended Skill Level
Beginner
Comments

Mon, 07/28/2014 - 06:38
great job!
Beautiful table, I love the way your finish mixture came out and want to try that on my next project! Thanks for sharing the details!
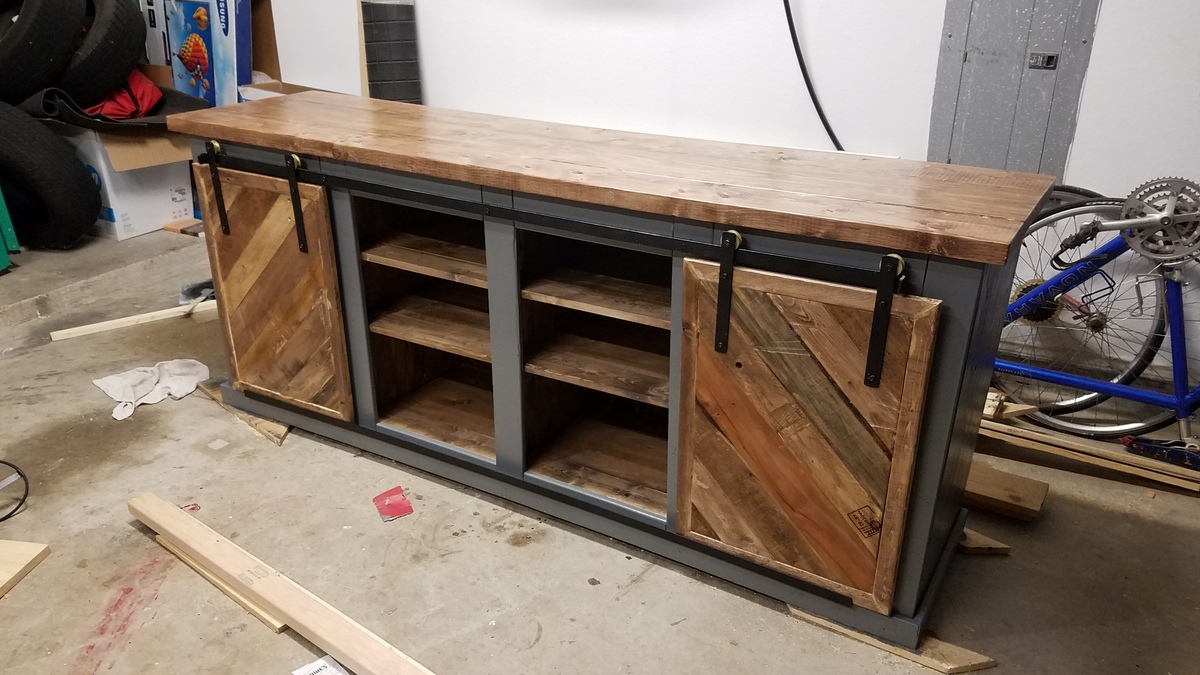
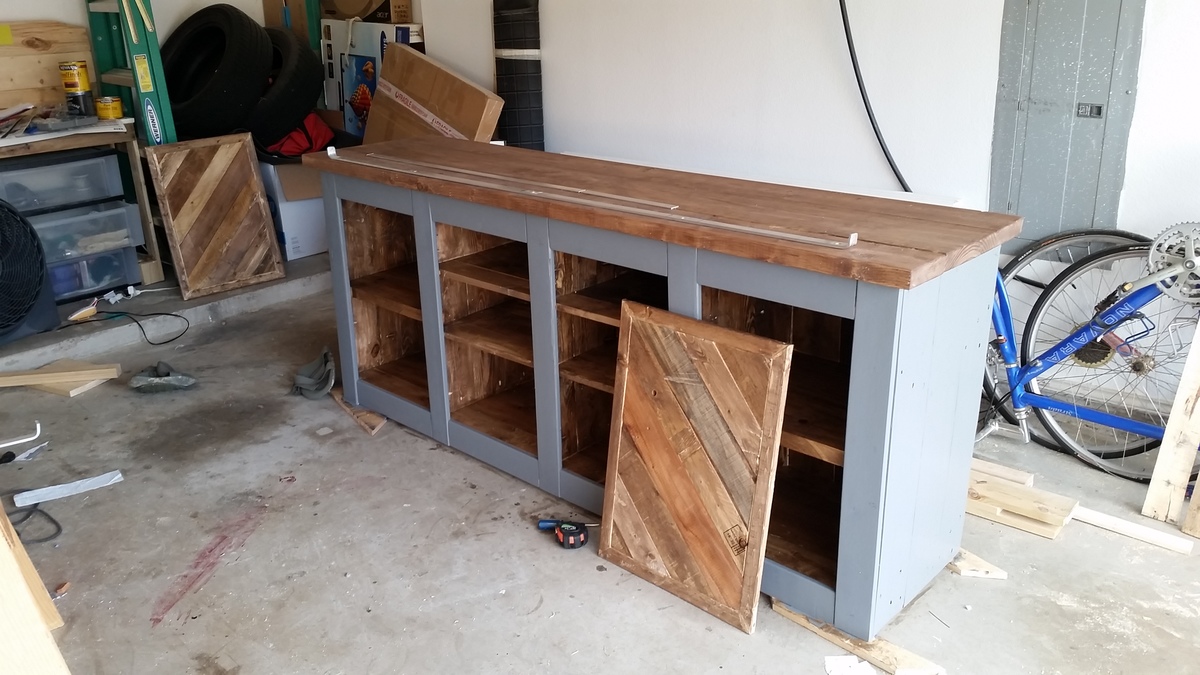
Sliding Door Console
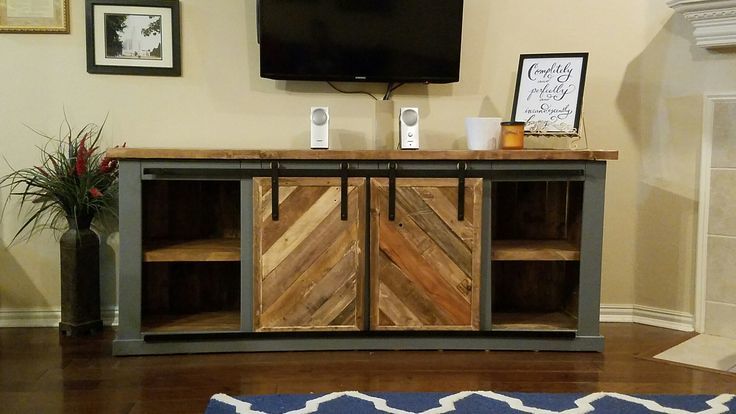
My wife and I had a great time building this sliding door console. Most of the vertical pieces (doors included) were build with pallet wood. Horizontal pieces and frame were build from wood from local hardware stores. Sliding hardware was constructed with aluminum and pulley wheels. Unlike Ana White's original plans, we decided to isolate each cabinet section of the console. The far left and right areas are separated into two, whereas the middle sections are split into three. Using a Kreg Jig was exceptionall helpful. Please visit https://www.pinterest.com/pin/263319909442699999 if you have any questions.
Estimated Cost
$250
Estimated Time Investment
Weekend Project (10-20 Hours)
Recommended Skill Level
Beginner
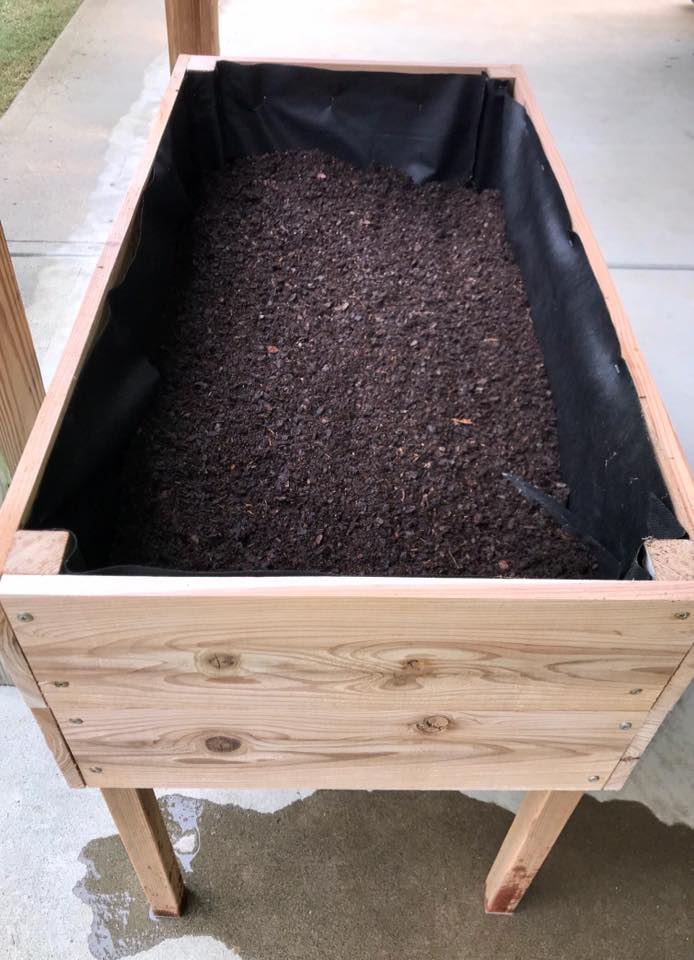
Grandkids built Cedar Planter
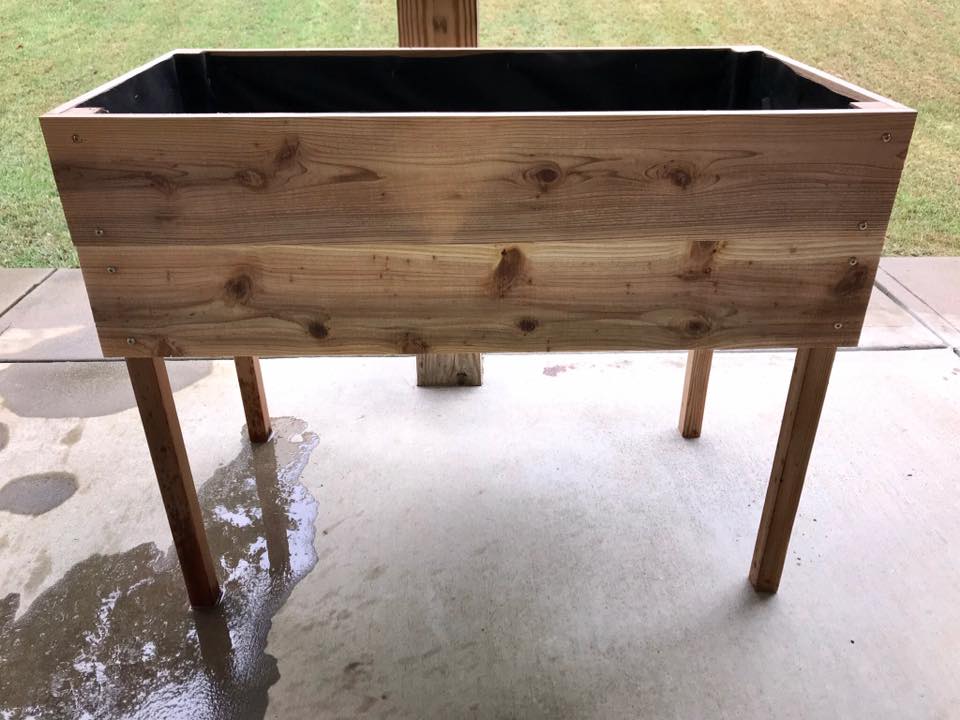
Two of my grandsons built this cedar planter after I did the cutting of the wood. They did all the measuring and put it together very nicely!
Built from Plan(s)
Estimated Cost
15
Estimated Time Investment
An Hour or Two (0-2 Hours)
Finish Used
Natural
Recommended Skill Level
Starter Project
Rustic Table

I wanted to make a table for our daughters birthday to put a spread of food on.
I went out in search for pallets and threw a quick sketch together and brought it to life.
Currently it is my computer table, but only for the next week then on to it's purpose.
Start to finish took 3 days
Estimated Time Investment
Weekend Project (10-20 Hours)
Finish Used
jacobean stain and polyurethane satin finish
Recommended Skill Level
Beginner
Comments
Fri, 10/05/2012 - 10:17
Finish?
How many coats of the Polyurethane did you use? I just finished with my first build. I have painted, stained, and put 2 coats of the Polyurethane on it. The table is still very ruff and it just overall doesnt feel finished. Im not sure what I should do...
In reply to Finish? by jamielynntaylor06
Wed, 06/05/2013 - 18:35
A Little Late
So I forgot I had my account. My advice might be a little late but we used 3 coats on that table. We normally go through the grits prior to starting the staining process. 150...220...300 after every coat do a very light hand sanding till it is smooth but try and avoid putting too much pressure. Then give it a wipe down with a damp cloth and let dry before applying next coat. 3 is a good amount of coats for something indoors like this one. Again so sorry I did not get back sooner. I use pinterest more for putting up my project images.
Oak hall tree
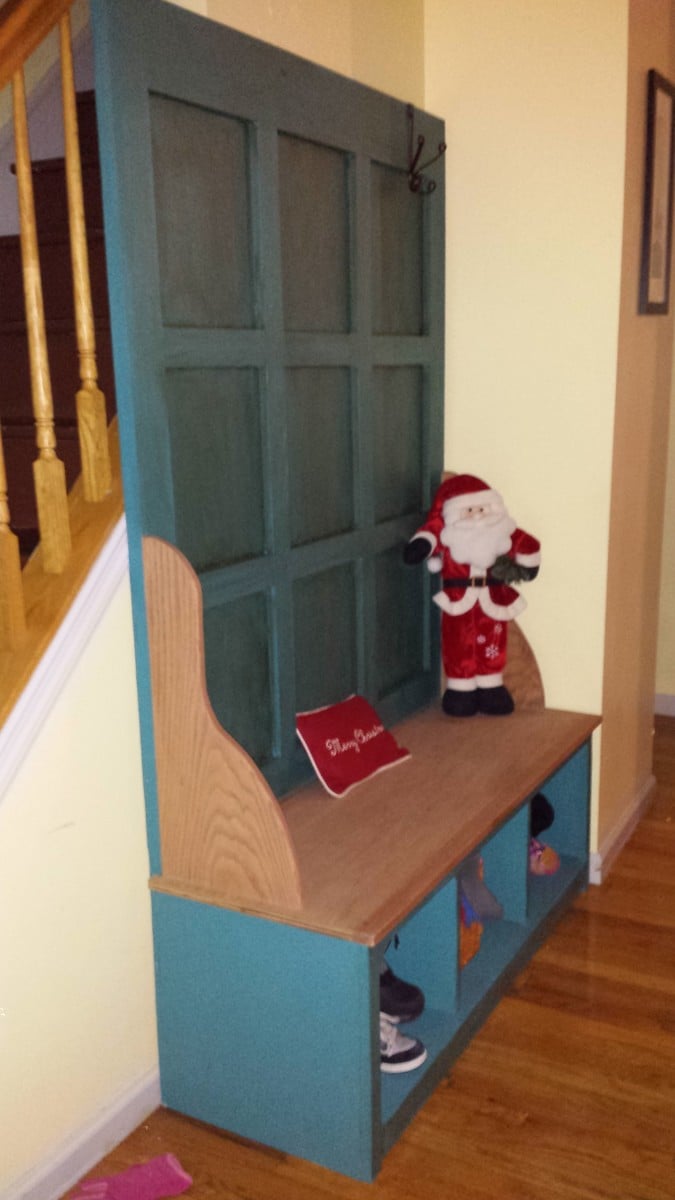
This was the first furniture project I have ever done. My wife seen this at Pier 1, of course it was all particle board and pine and "cheap feeling" but not cheap in price. She showed me the one on here and of course I was up for it. The deal was, I make it she paints it and of course I need a miter saw. Probably would not make this my first project because it was a bit challenging. Getting the long cuts square with a circular saw proved challenging and getting the squares on the back square was tough. With it being oak I learned that oak is not forgiving, especially without a nail gun. The pocket hole jig and their application are great and easy though. It did take me a while due to time constraints and the price to build may be off because I really didn't count as I bought things. All in all, I use this piece of furniture everyday. It is the first thing you see when you walk in the house and I am very proud of it, as is my wife. She did a great job with the finish and the glaze really gives it a nice look. The hooks are cast iron that we got at an antique store. This is the only picture I took, no in-process pics.
Built from Plan(s)
Estimated Cost
Not sure, maybe 200 bucks
Estimated Time Investment
Week Long Project (20 Hours or More)
Finish Used
Behr ultra Pacific Sea Teal with Rust-oleum decorative glaze, and Weathered Oak Stain with Polyurethane finish.
Recommended Skill Level
Beginner
Comments
Tower in the Czech Republic
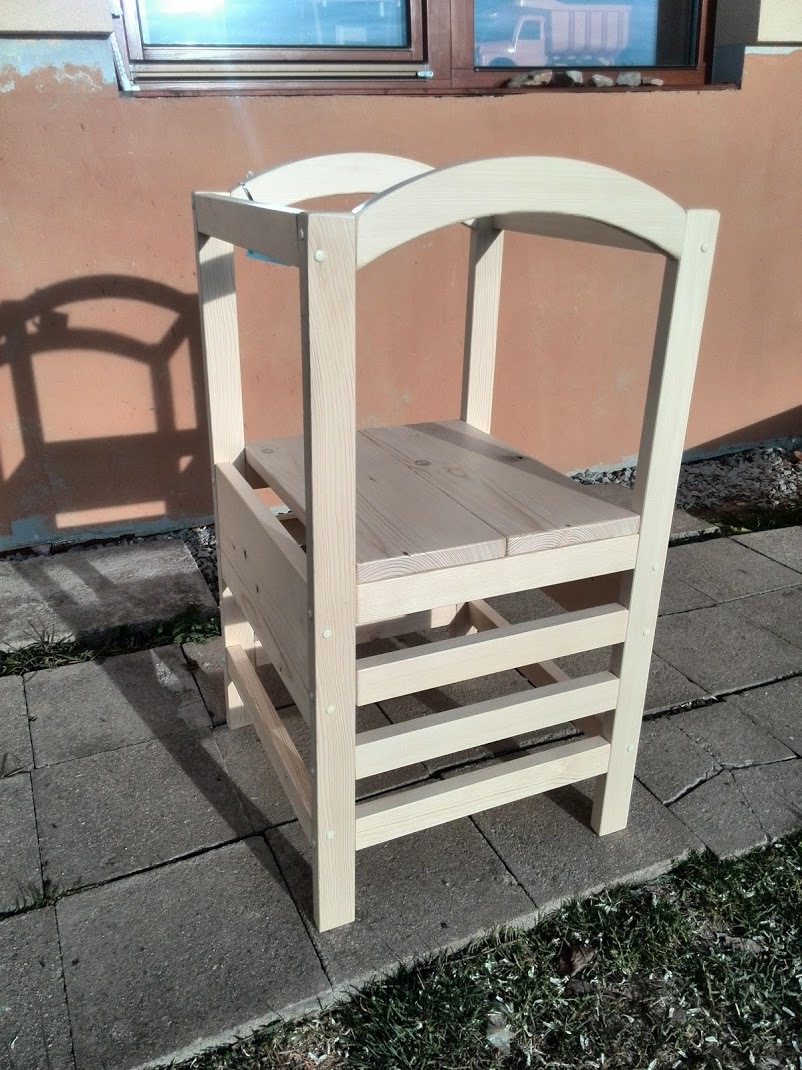
I built it twice for my son and nephew, both love it and use it every day.
Estimated Time Investment
Weekend Project (10-20 Hours)
Recommended Skill Level
Intermediate
Comments

Farmhouse Table & Bench

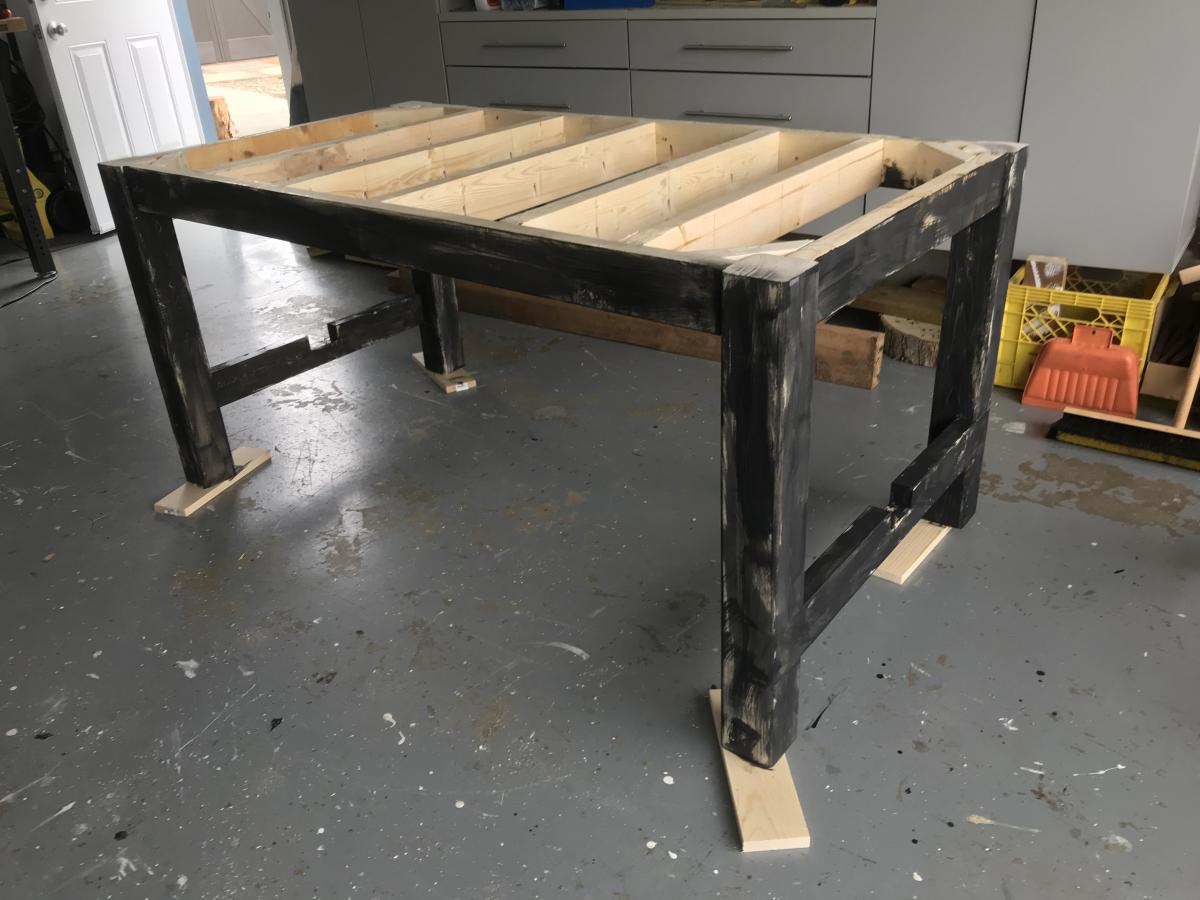
I've built tables from this plan several times. This one was a little different in terms of the colour wanted. I also beefed up the support in the table frame itself.
Built from Plan(s)
Estimated Cost
$120
Estimated Time Investment
Weekend Project (10-20 Hours)
Finish Used
Varathane "Worn Navy" mixed with some "Espresso" to darken it up. Then followed up with three coats of satin varathane. Table support was first painted a diluted black and then two coats of a diluted white were applied with light sanding in between coats to reveal some of the dark.
Recommended Skill Level
Intermediate
Wood Truss Bench

Fun build. Every pic looks like an optical illusion though 😂
Rockowoodworks
Built from Plan(s)
Craft Organization Cabinet
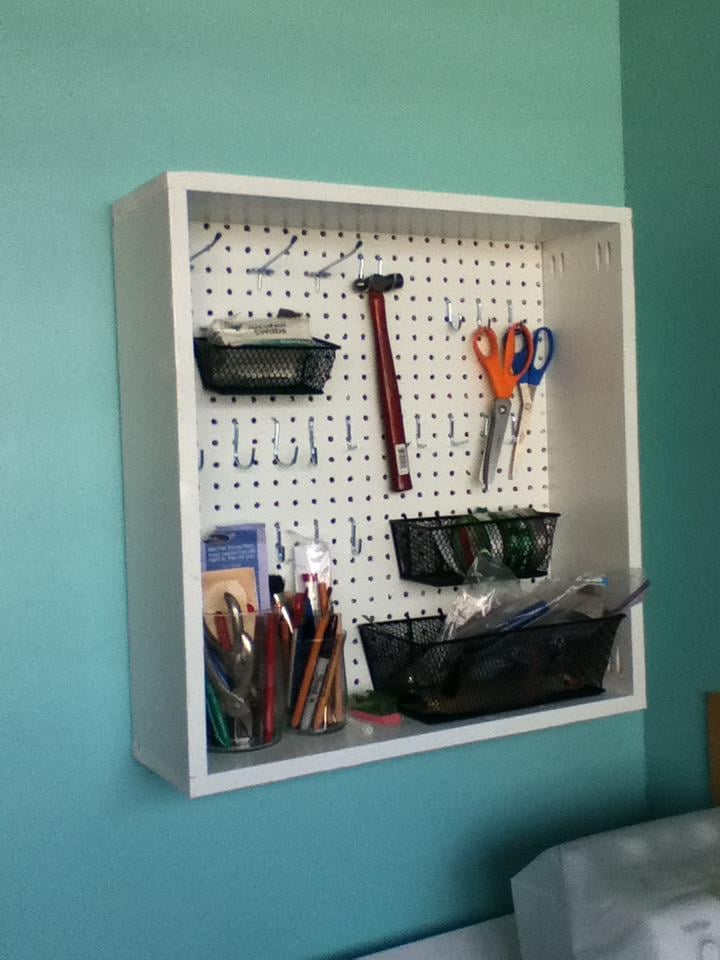
I have been needing to create more storage, while organizing my craft/spare bedroom. I had a piece of pegboard, and got some inspiration while pouring over Pinterest.
I decided to venture out and try something really new to me - routing. Bear in mind I only have a Dremel with the cheap router attachment - not the routing table thing. I'm happy to say it came out great! I have more pictures i'll upload soon of the actual routing. I did craft up a jig of sorts to keep my routing line (or whatever its called) straight. I did run into some math errors, which resulting in me having to cut things down a couple times. But now I know how things work when piecing together routed frames.
I had 2 pieces of 1x12x36. To keep the routing lines as even as possible, I did the the routing before I cut the pieces.
I used my Kreg Jig to join the sides. I assembled by attaching the 2 sides and the bottom. Then slide the pegboard in, and attached the top piece. Then since my routing line was a bit wider that the pegboard, I used caulk in the back to fill it in, keeping the pegboard nice and tight.
I plan to add doors to the cabinet at a later date. Right now it definitely fills my needs!
Estimated Time Investment
Day Project (6-9 Hours)
Finish Used
White paint
Recommended Skill Level
Intermediate
An easy and special first birthday gift
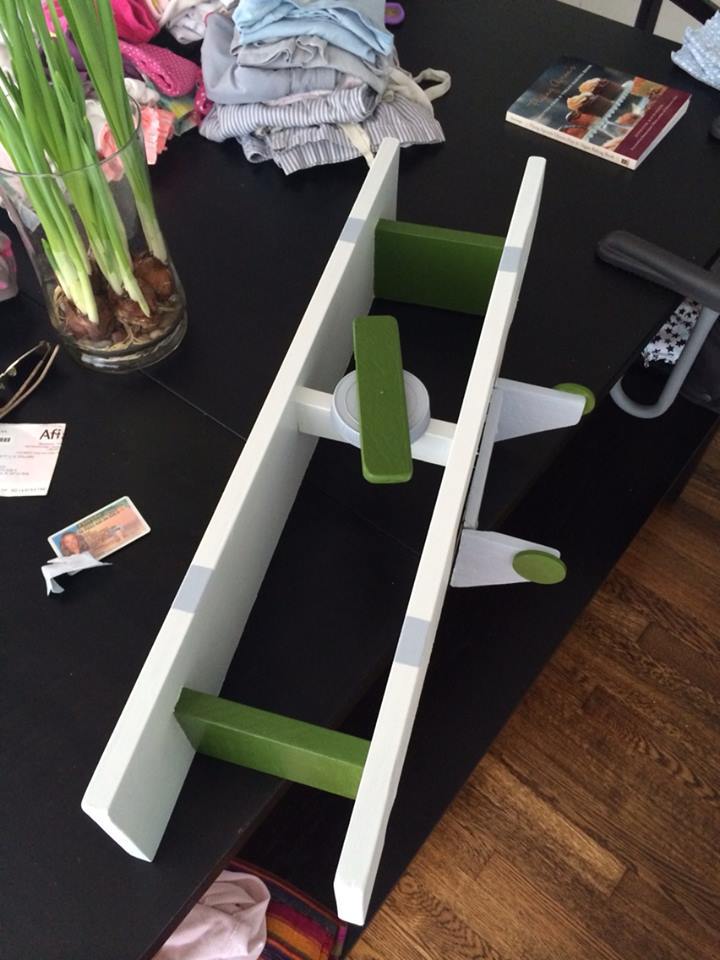
It was friends son's first birthday and had no idea what a could get a couple that didn't like gifts, or many toys for that matter. I search the site and stumbled upon this great addition to any little boys room, an airplane shelf! So it took me about 2 hours to make it with taking break for things to dry, and I didn't follow the exact directions just because I didn't have all of the items, in fact it was all from scraps I had around the house and the front round piece was actually the top of a peanut butter jar painted.
Estimated Cost
10.00
Estimated Time Investment
An Hour or Two (0-2 Hours)
Finish Used
basic glidden primer+paint
Recommended Skill Level
Starter Project
X-less console
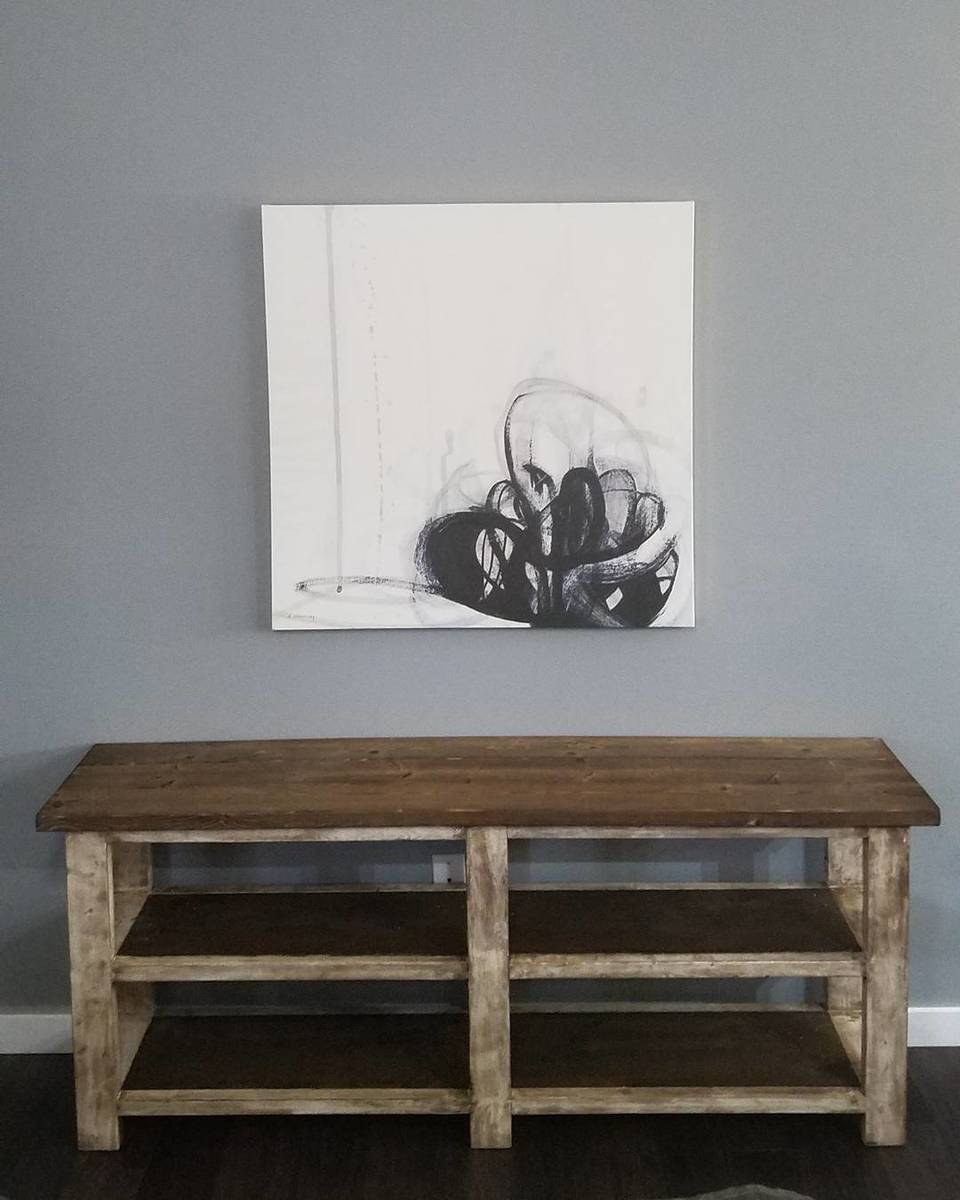
Used the plans for teh x-table, but left out the Xes and opted for 2x4 pieces on each side to fill the gap. Went "fancy" and made it two tone for added interest. Have developed my "signature look" of staining over paint for the base.
Built from Plan(s)
Estimated Cost
$70
Estimated Time Investment
Weekend Project (10-20 Hours)
Finish Used
Minwax espresso stain, and Glidden oil based furniture paint in antique white
Recommended Skill Level
Intermediate
Comments
sheppard71
Mon, 09/24/2012 - 08:50
farmhousebed
nice weekend project if you need a new bed