Outdoor buffet table
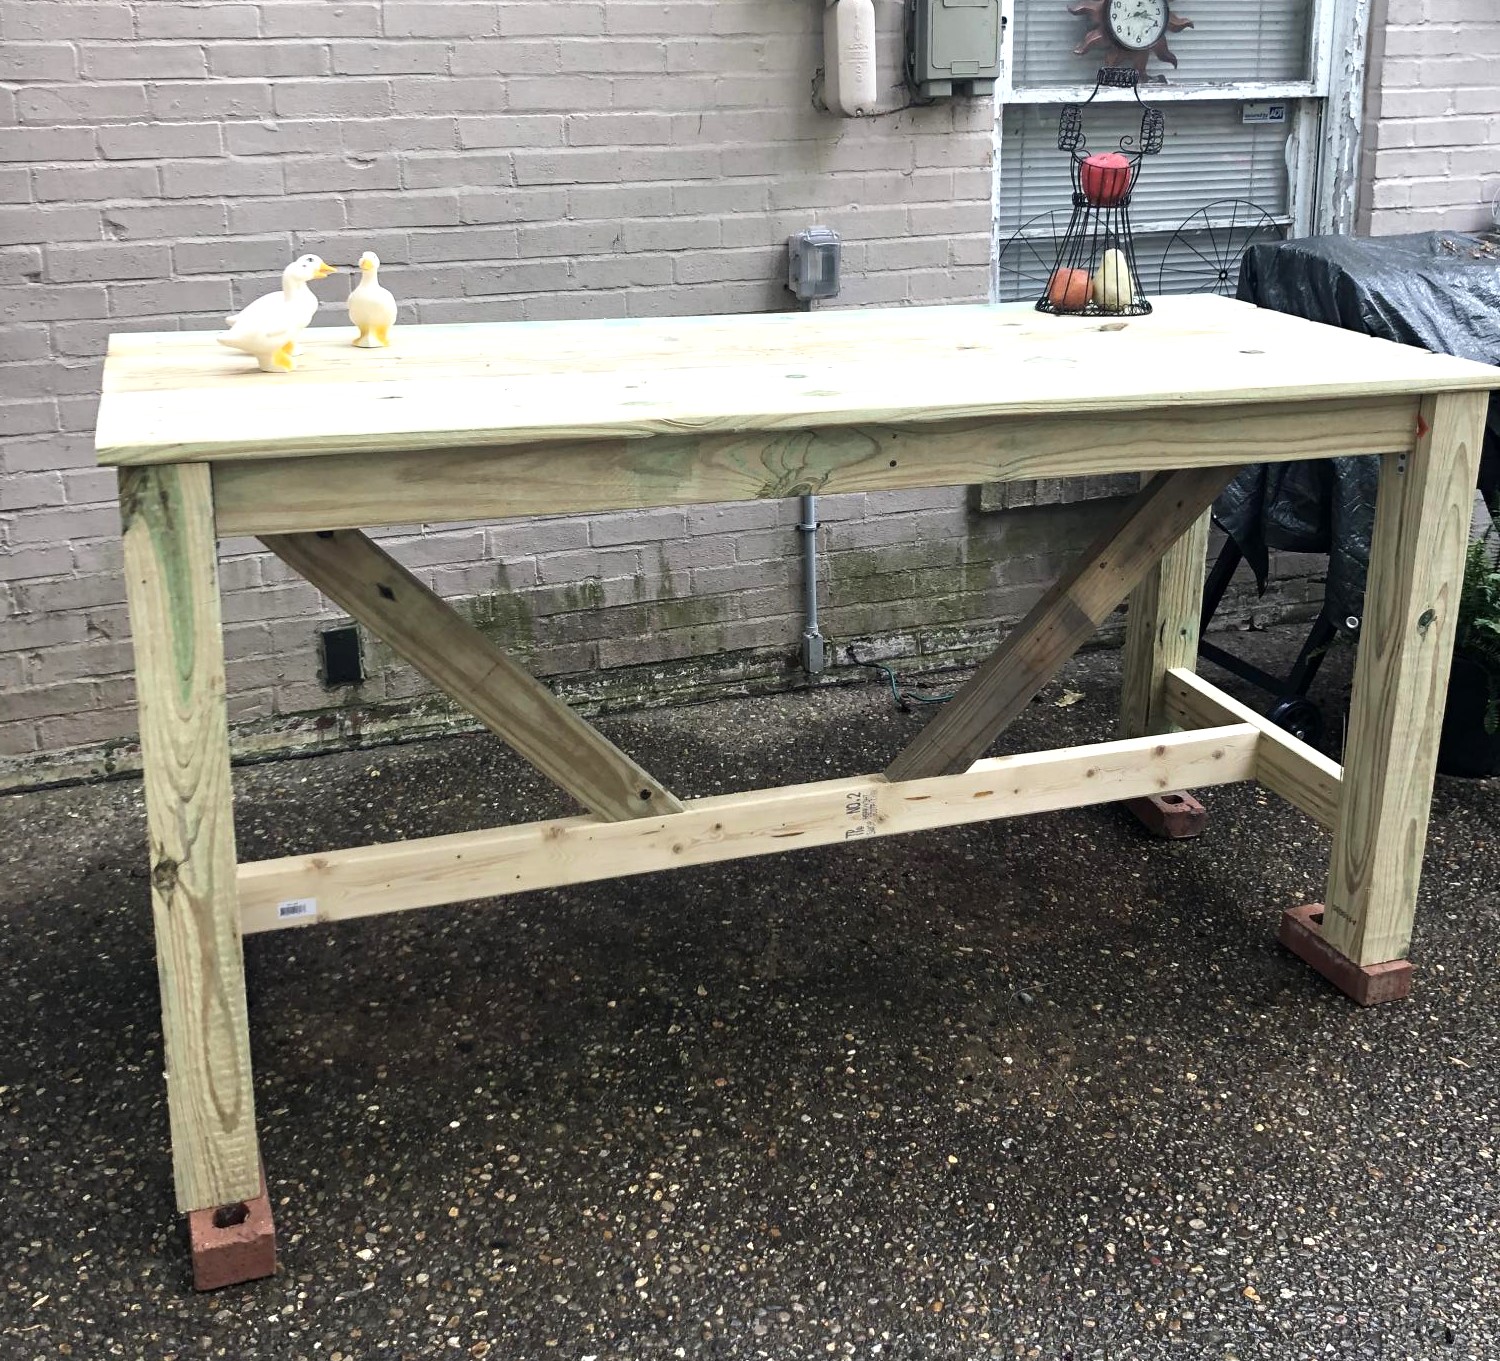
My first project using Ana White plans. Used pressure treated lumber and Kreg pocket hole jig. Cost: $126.
Built from Plan(s)
My first project using Ana White plans. Used pressure treated lumber and Kreg pocket hole jig. Cost: $126.
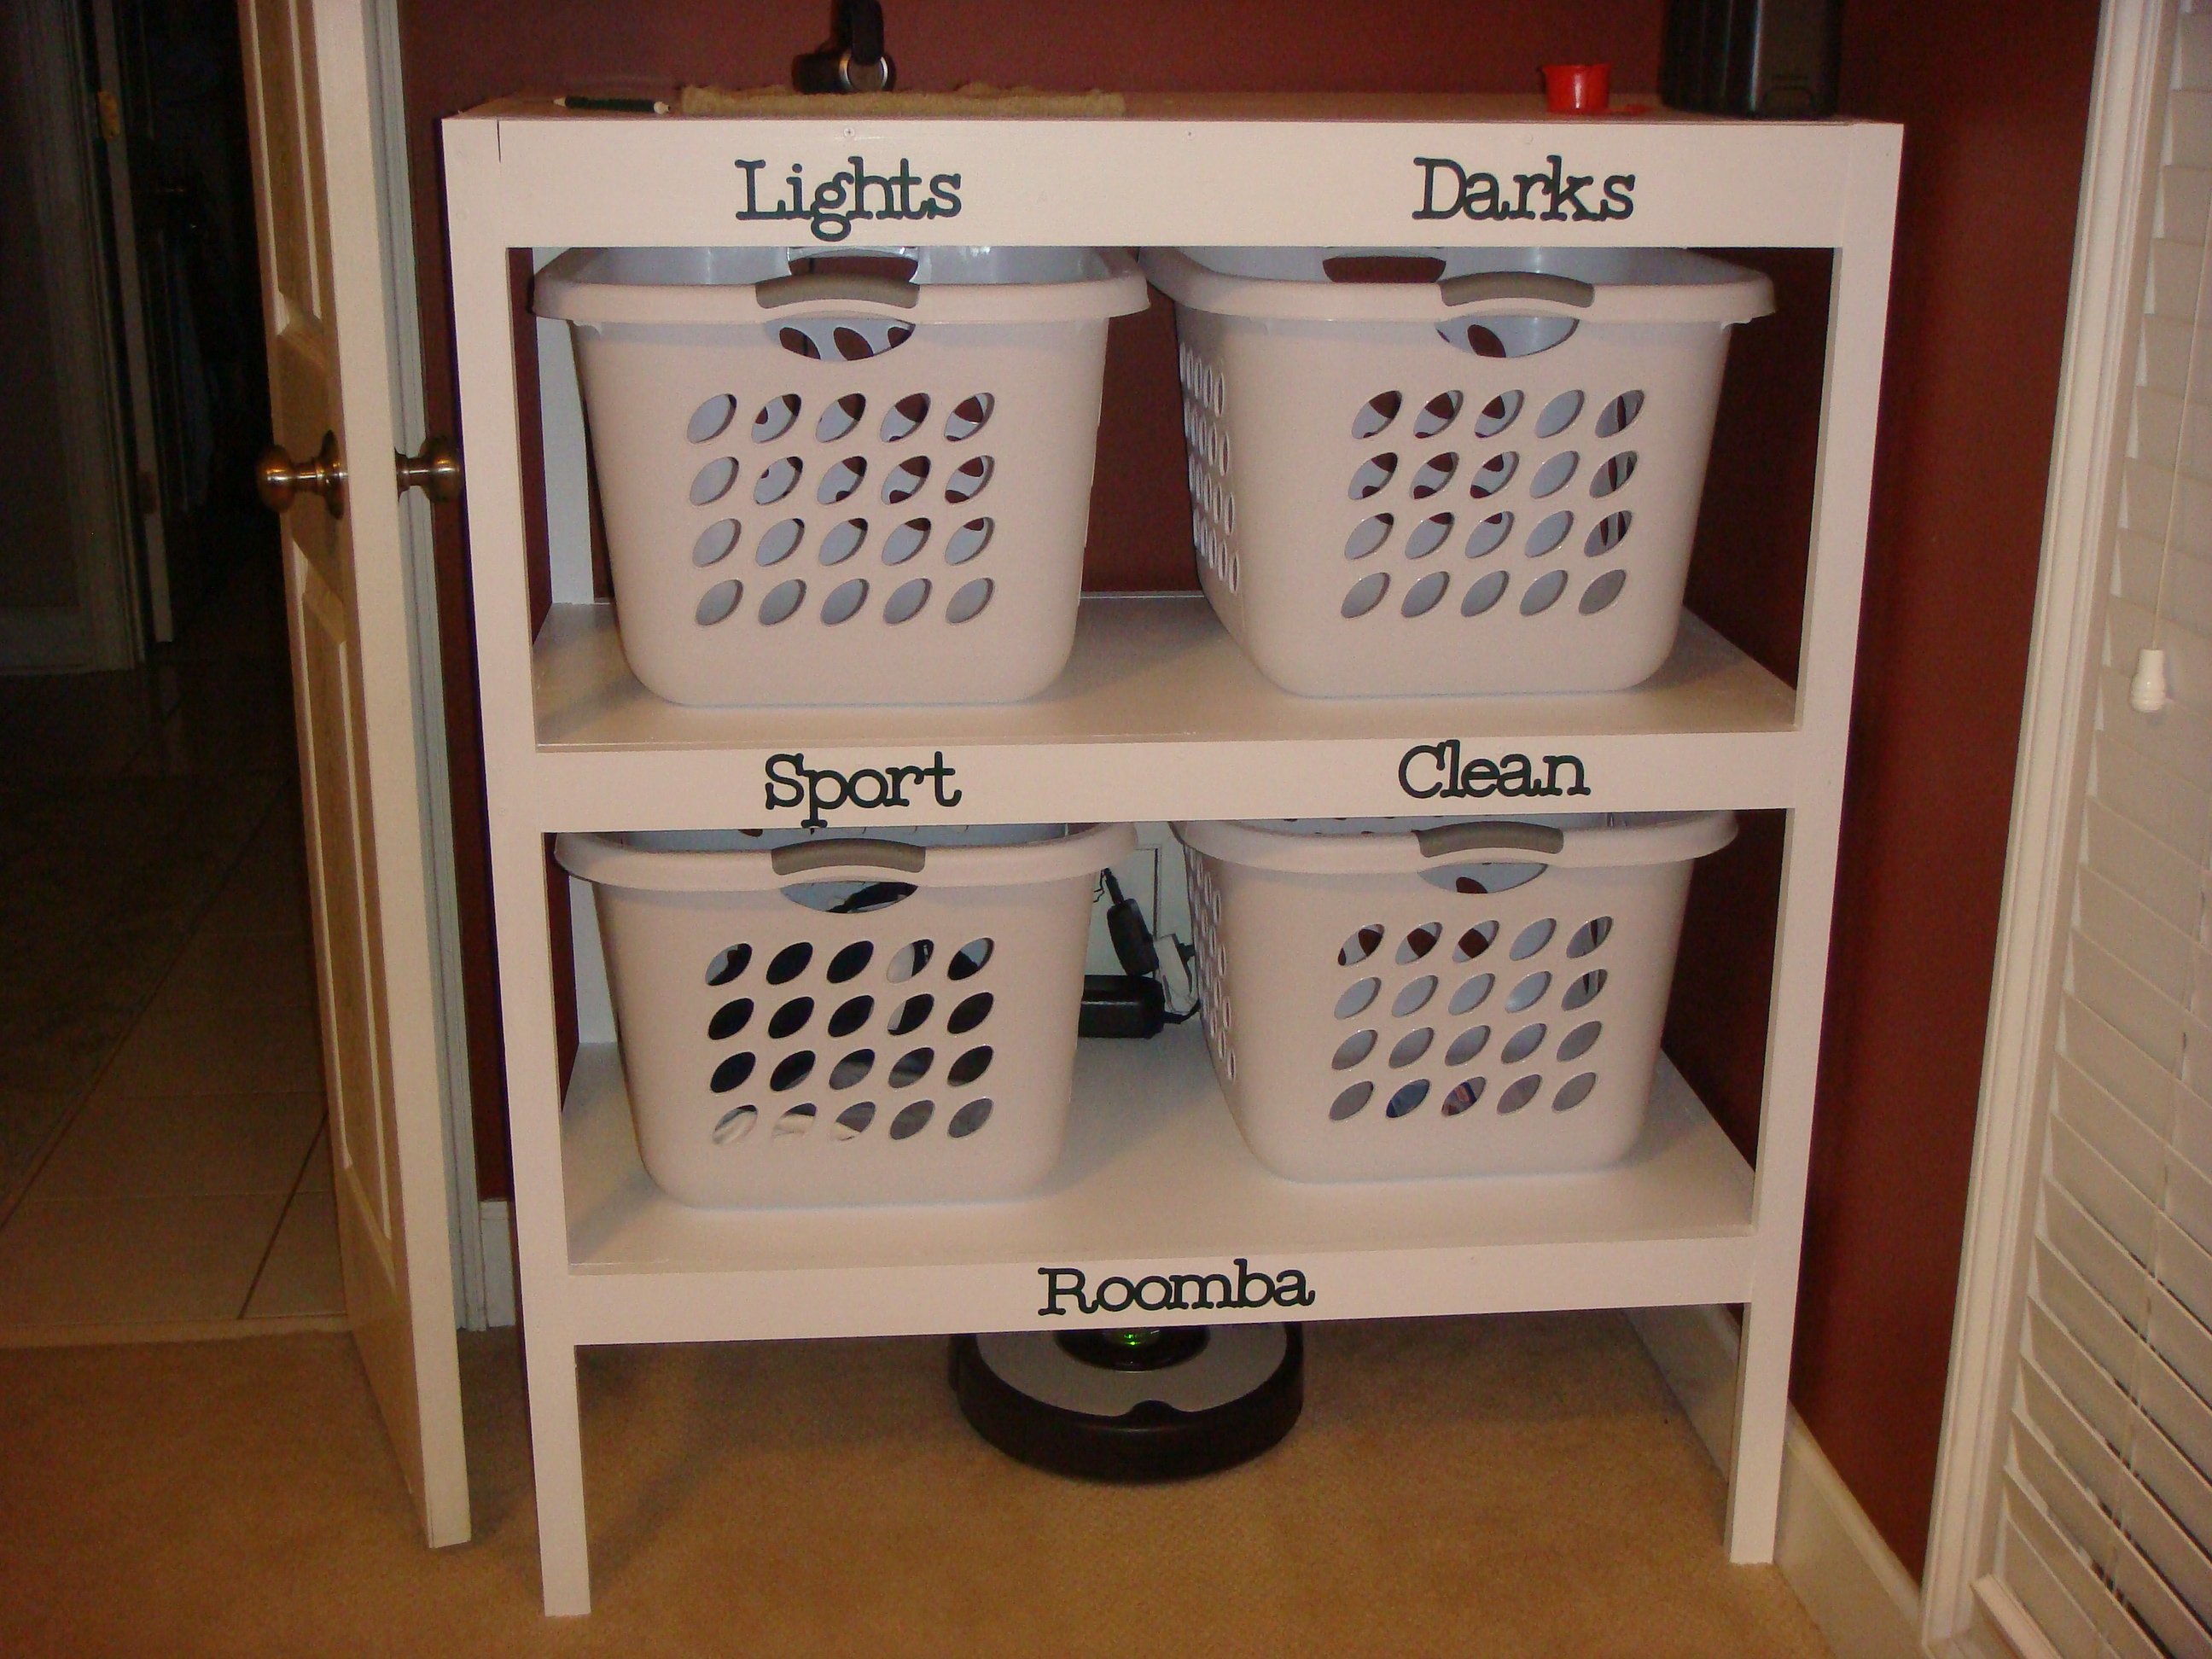
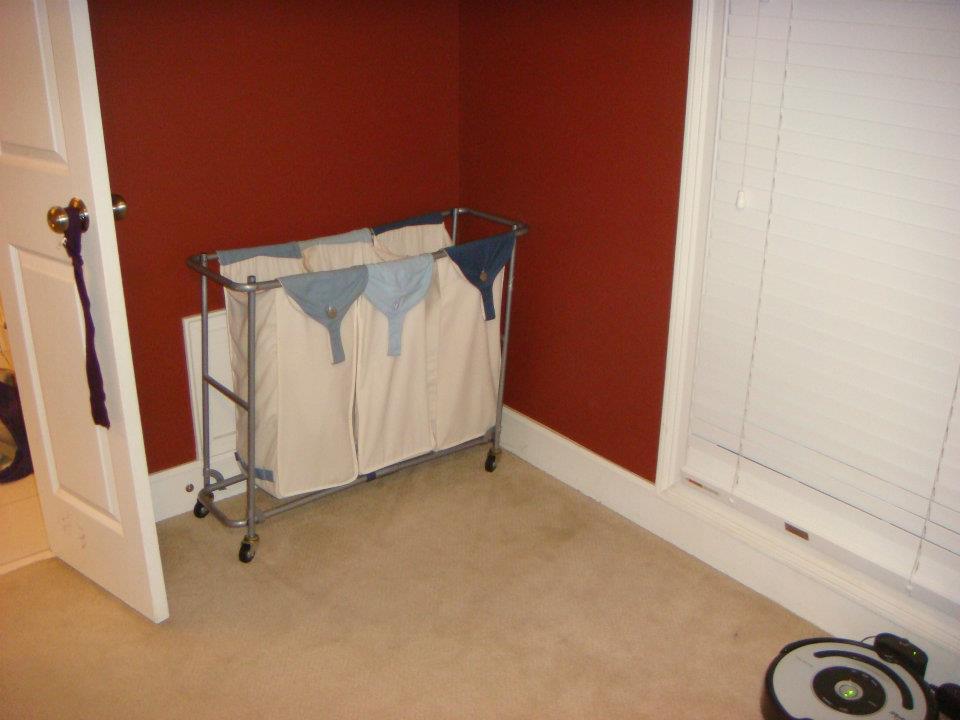
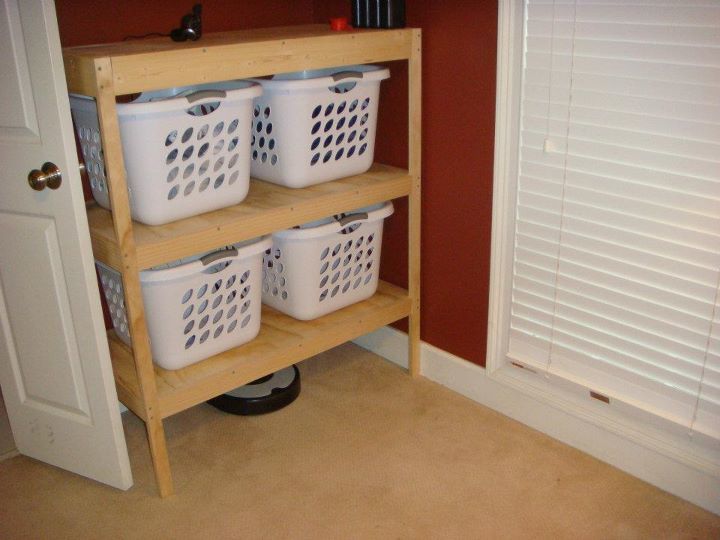
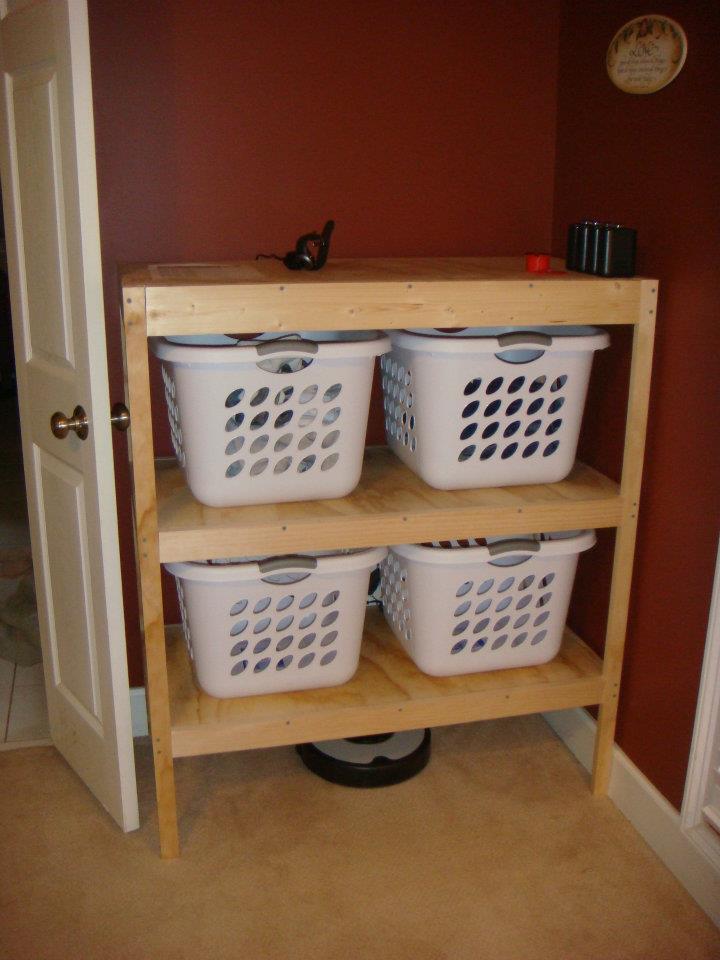
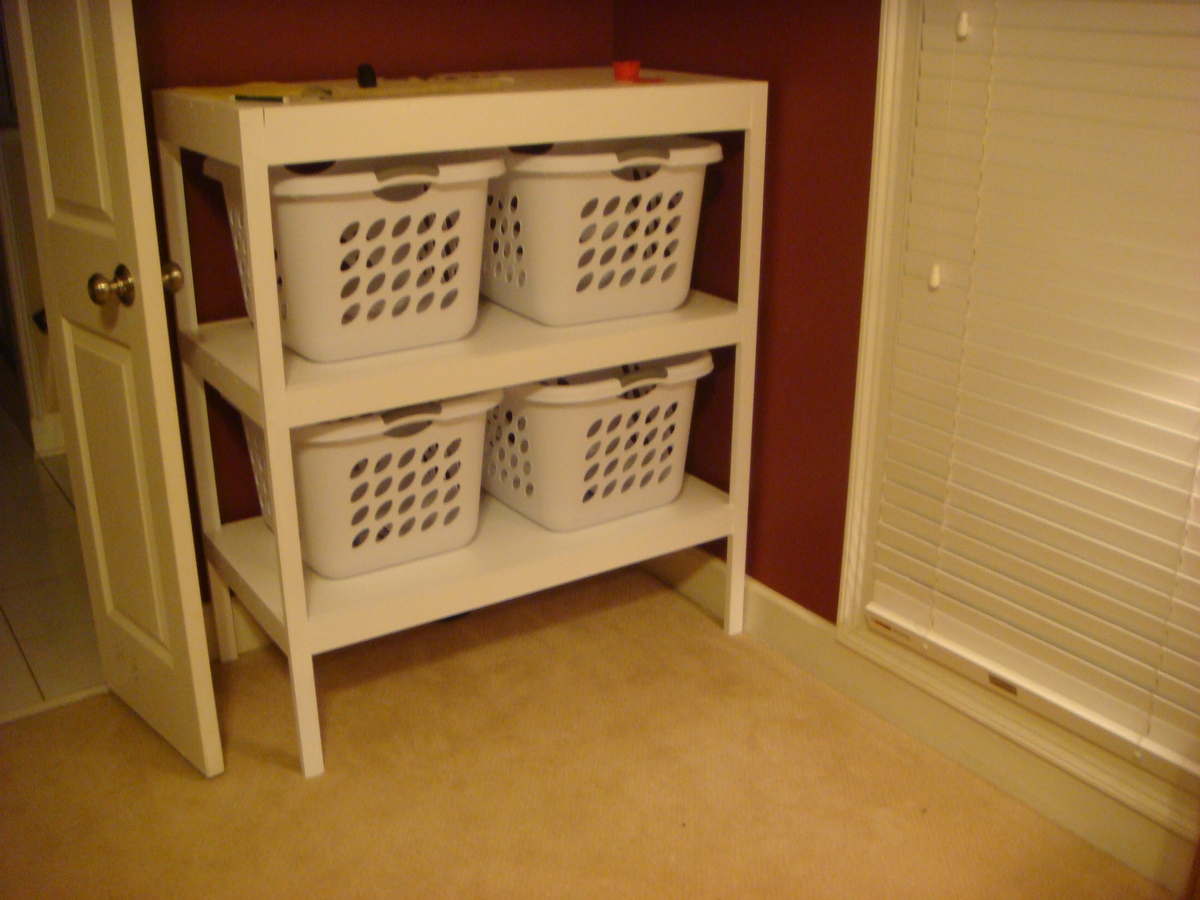
My original plan was for a laundry cart or stand for laundry baskets. I ended up building one that is pretty big for 4 baskets, a shelf on top, and elevated 10" on the bottom for our Roomba vacuum to be stored.

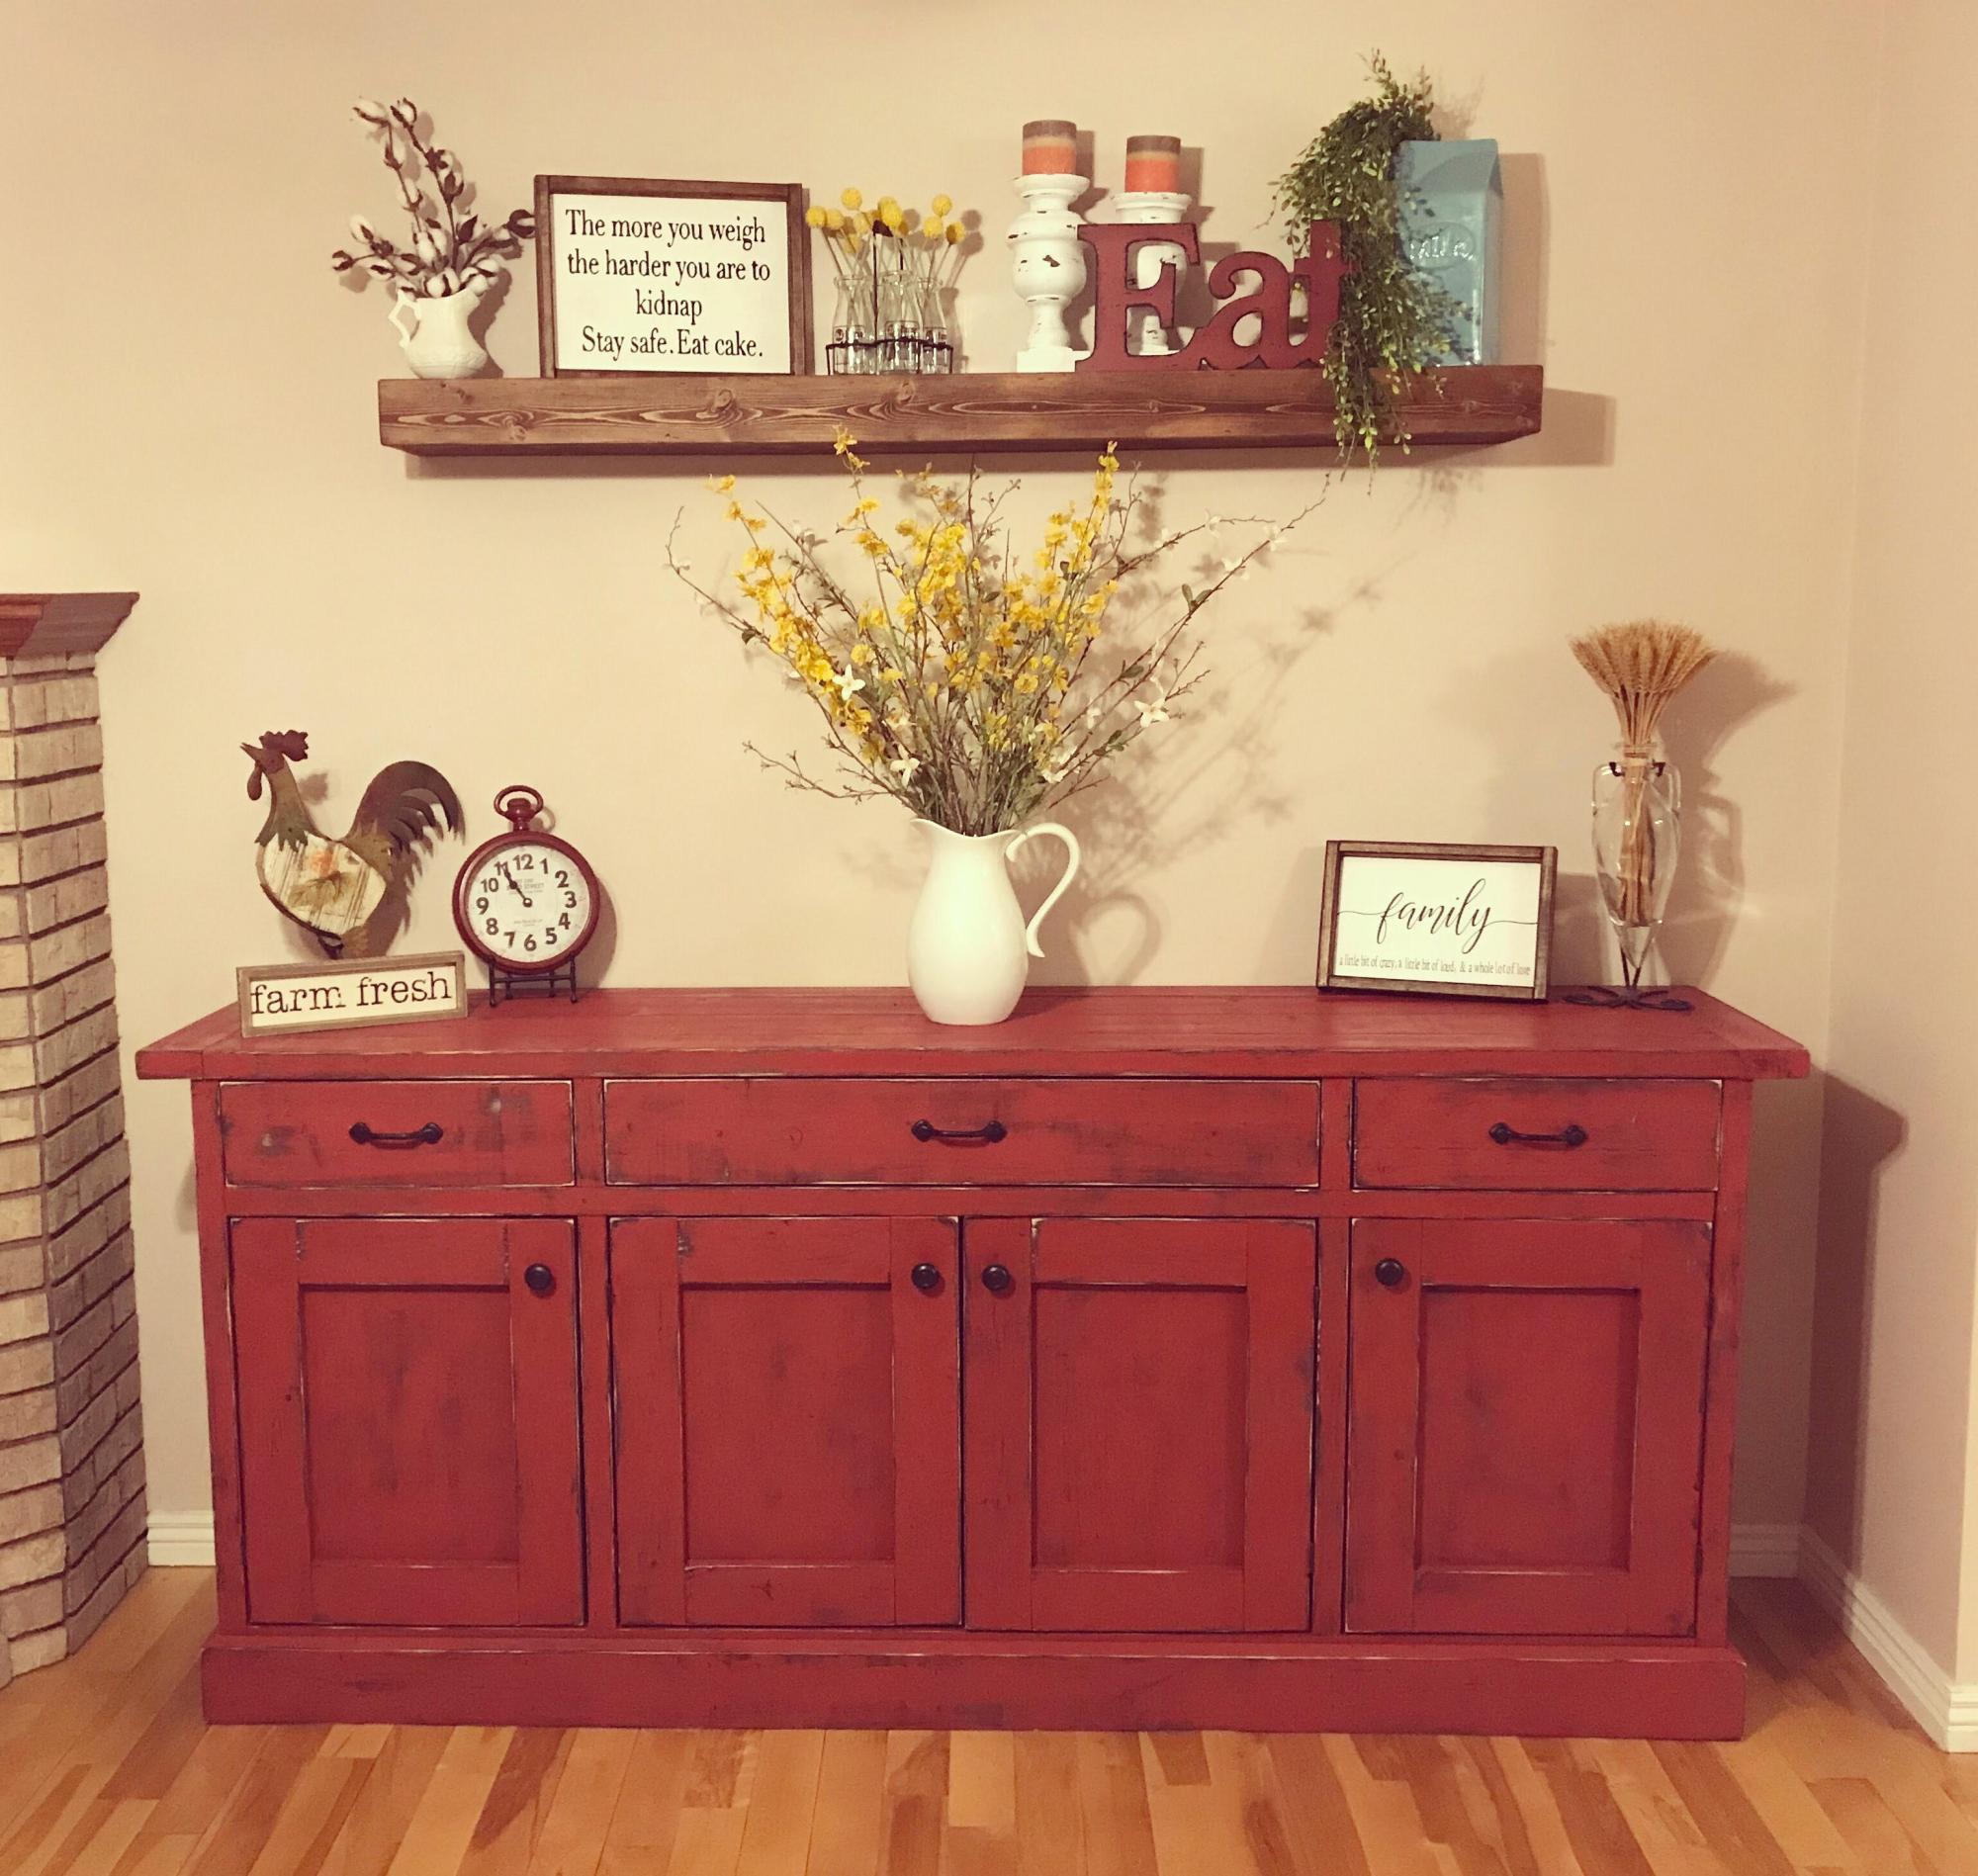
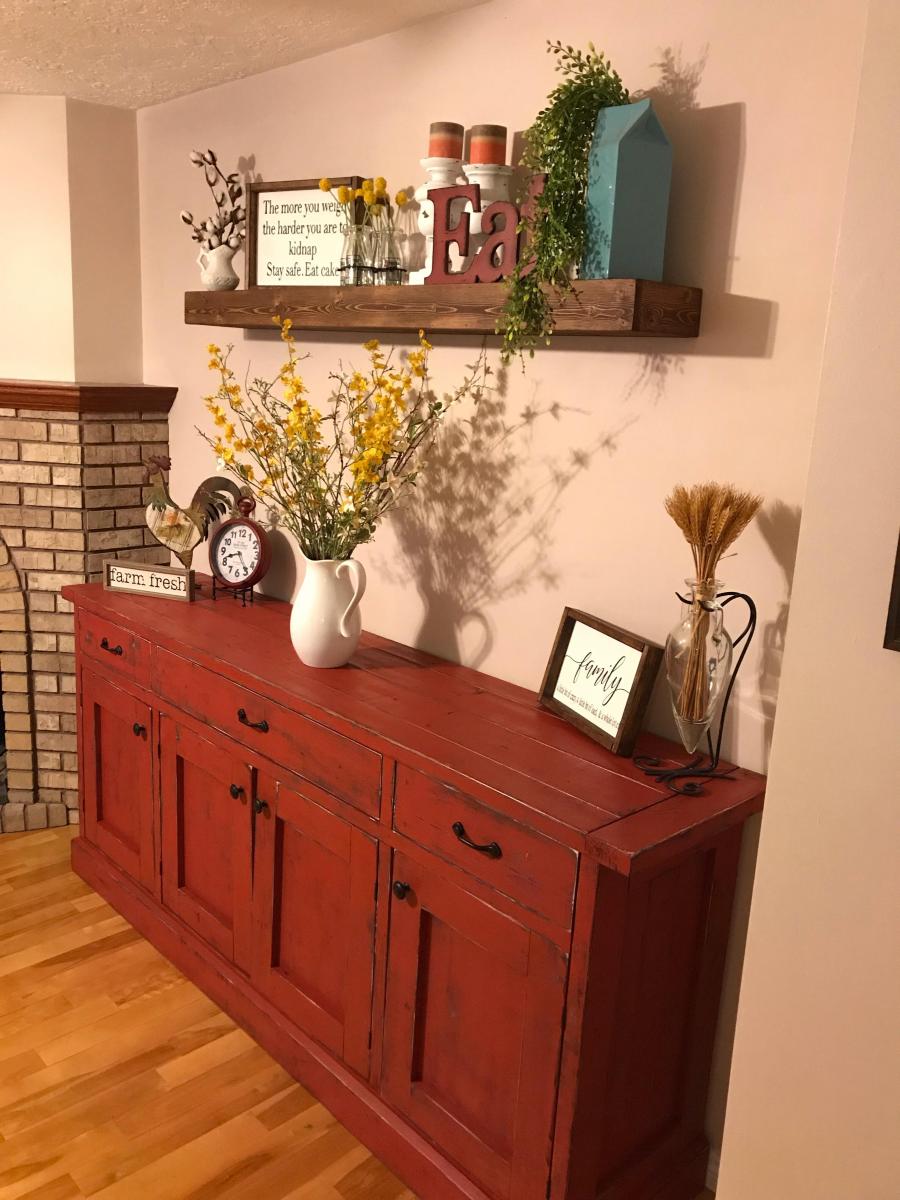
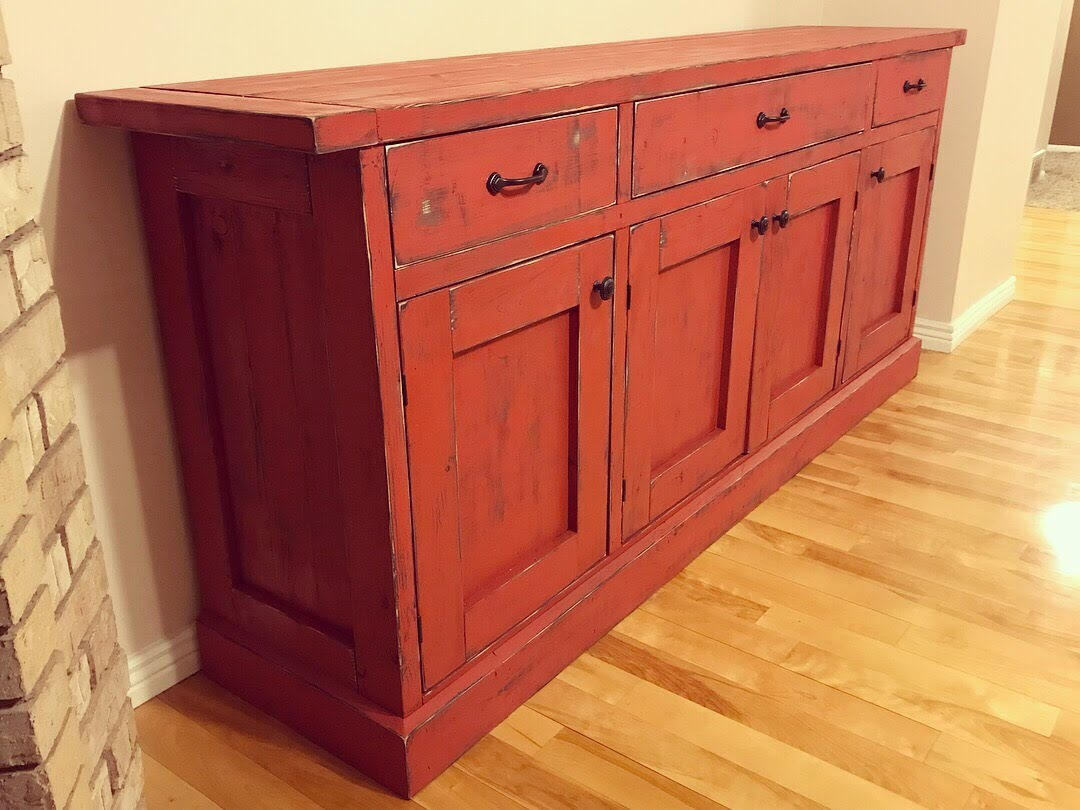
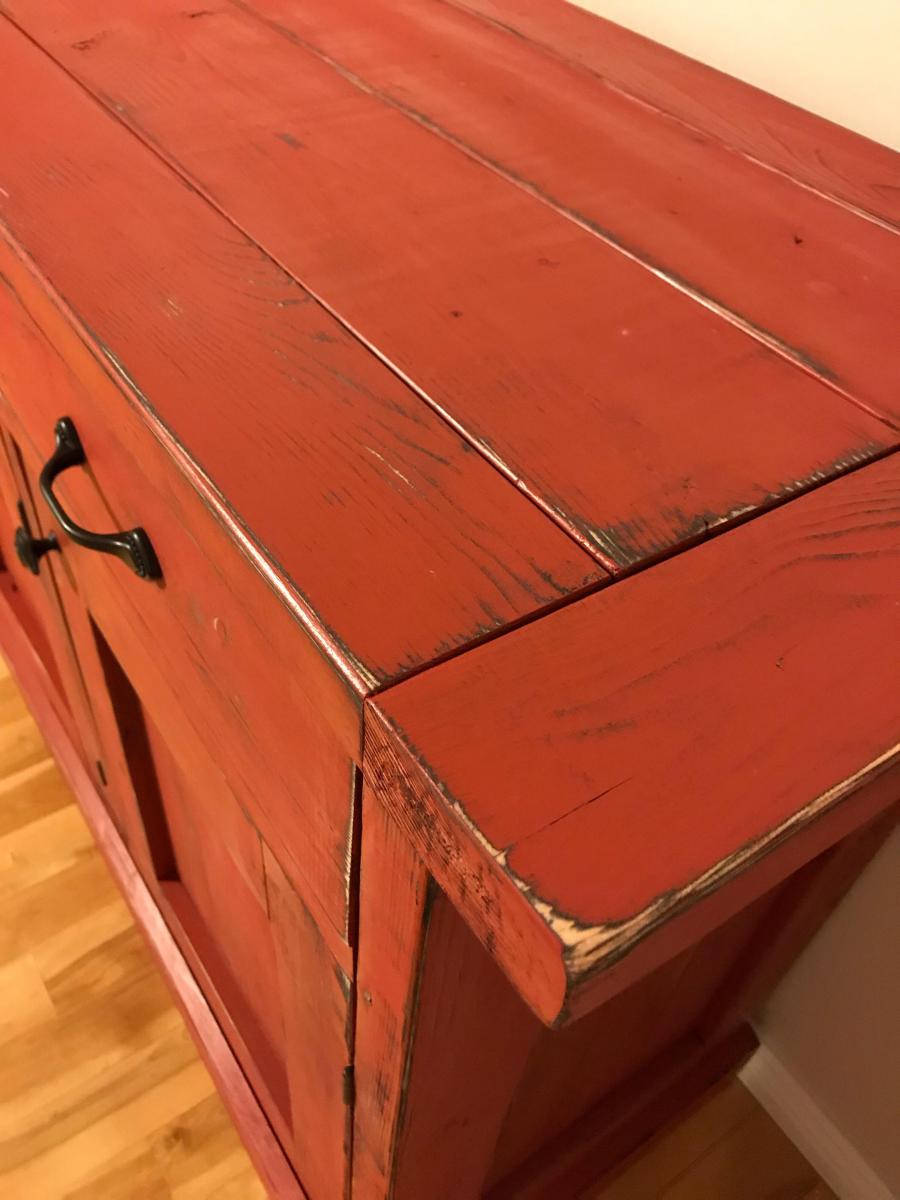
My wife and I originally saw this Ana White planked sideboard and knew it was exactly what our dining room needed! We had the perfect spot for it! The plans were generally easy to follow and it was actually my first time installing drawers! It turned out amazing and we all love it! We love the added storage it provides for dishes and other kitchen accessories.
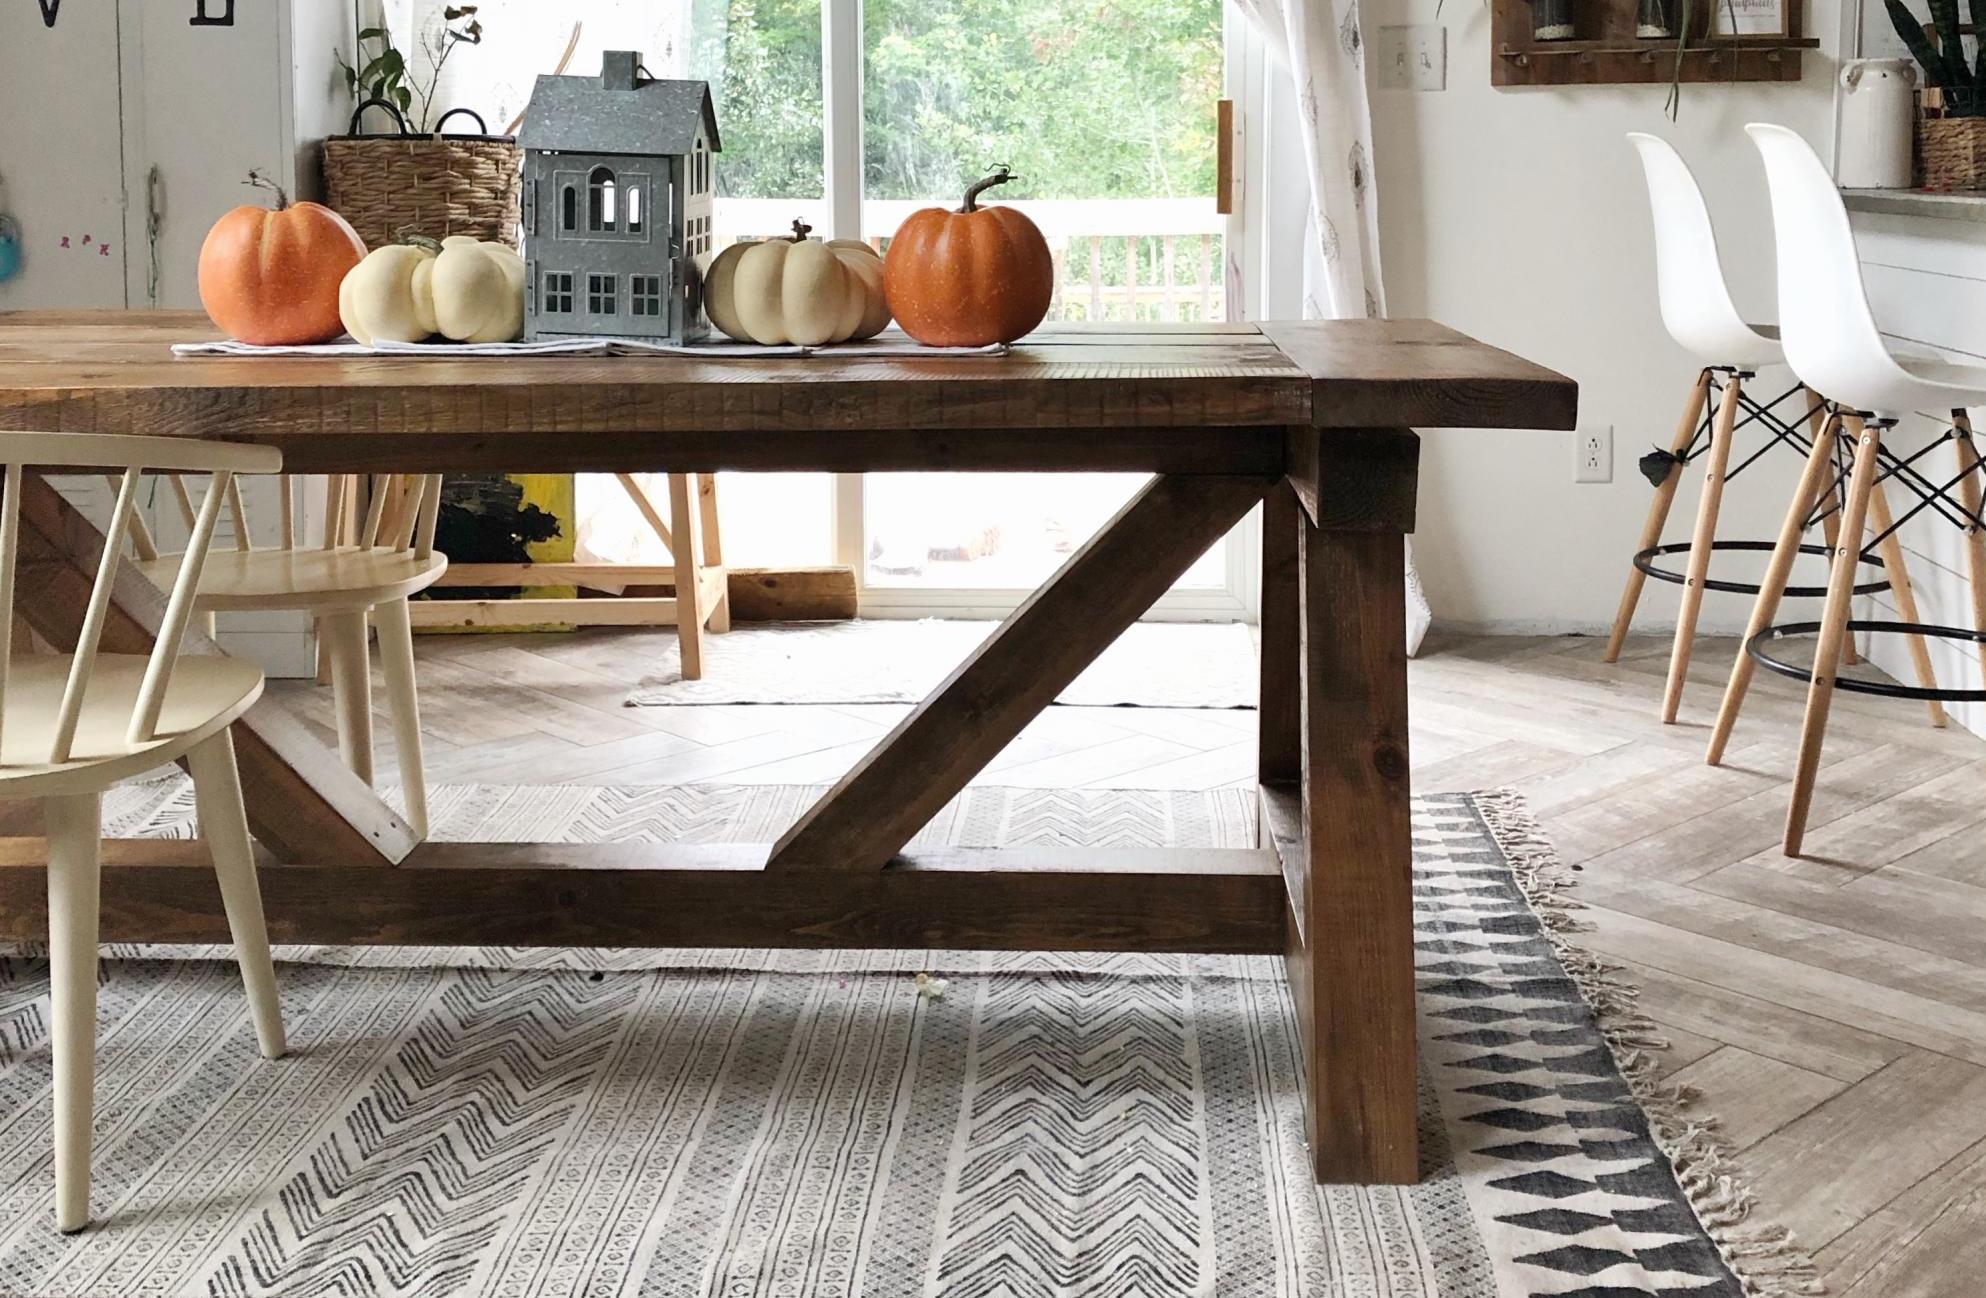
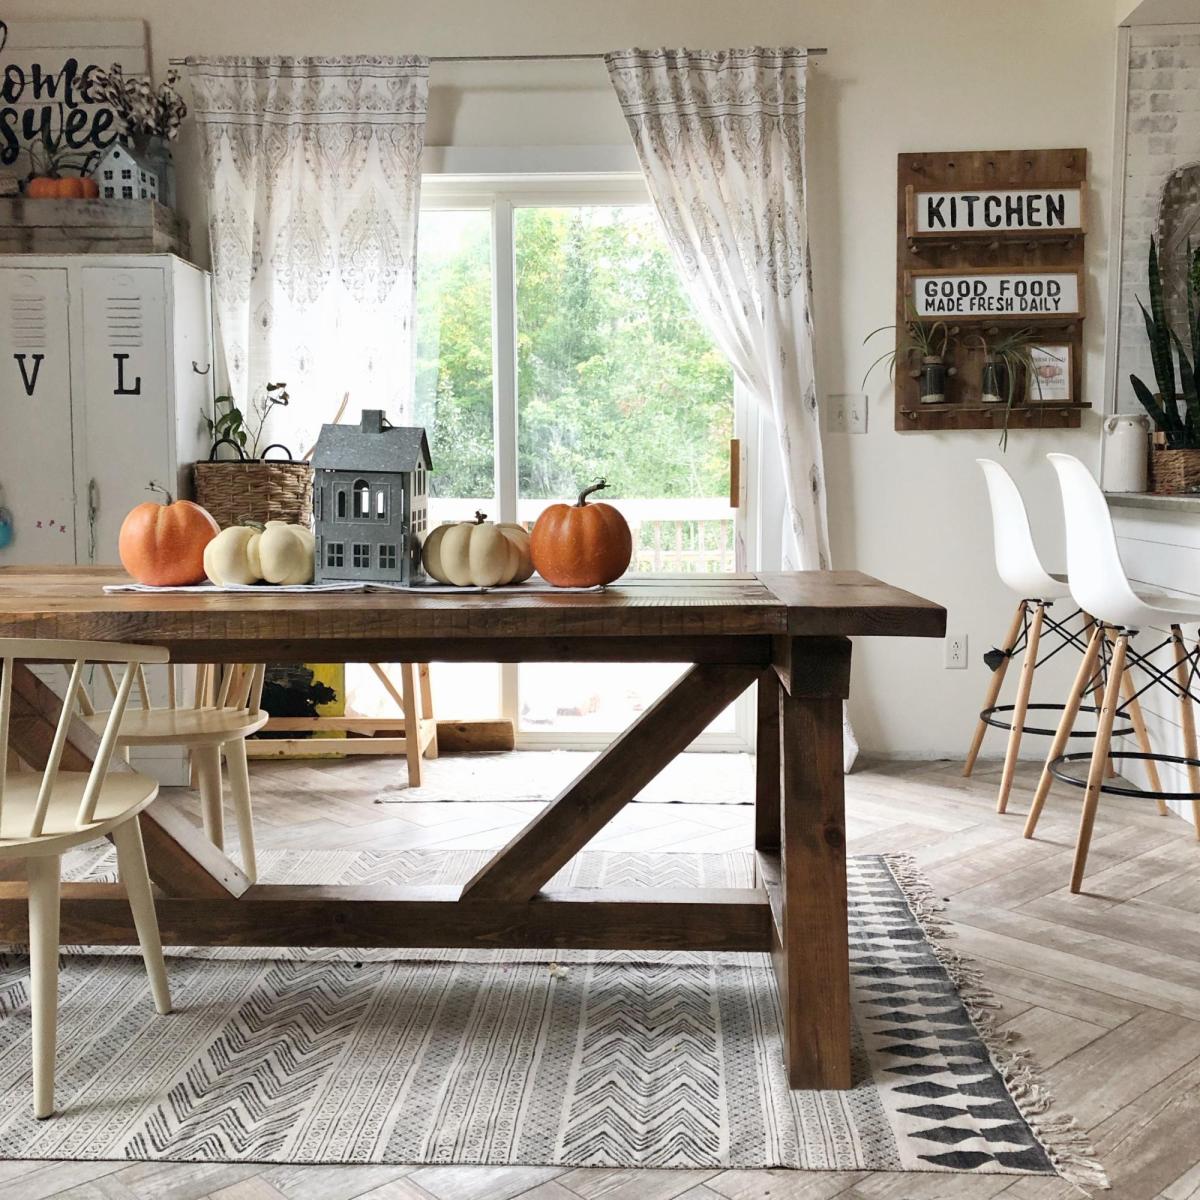
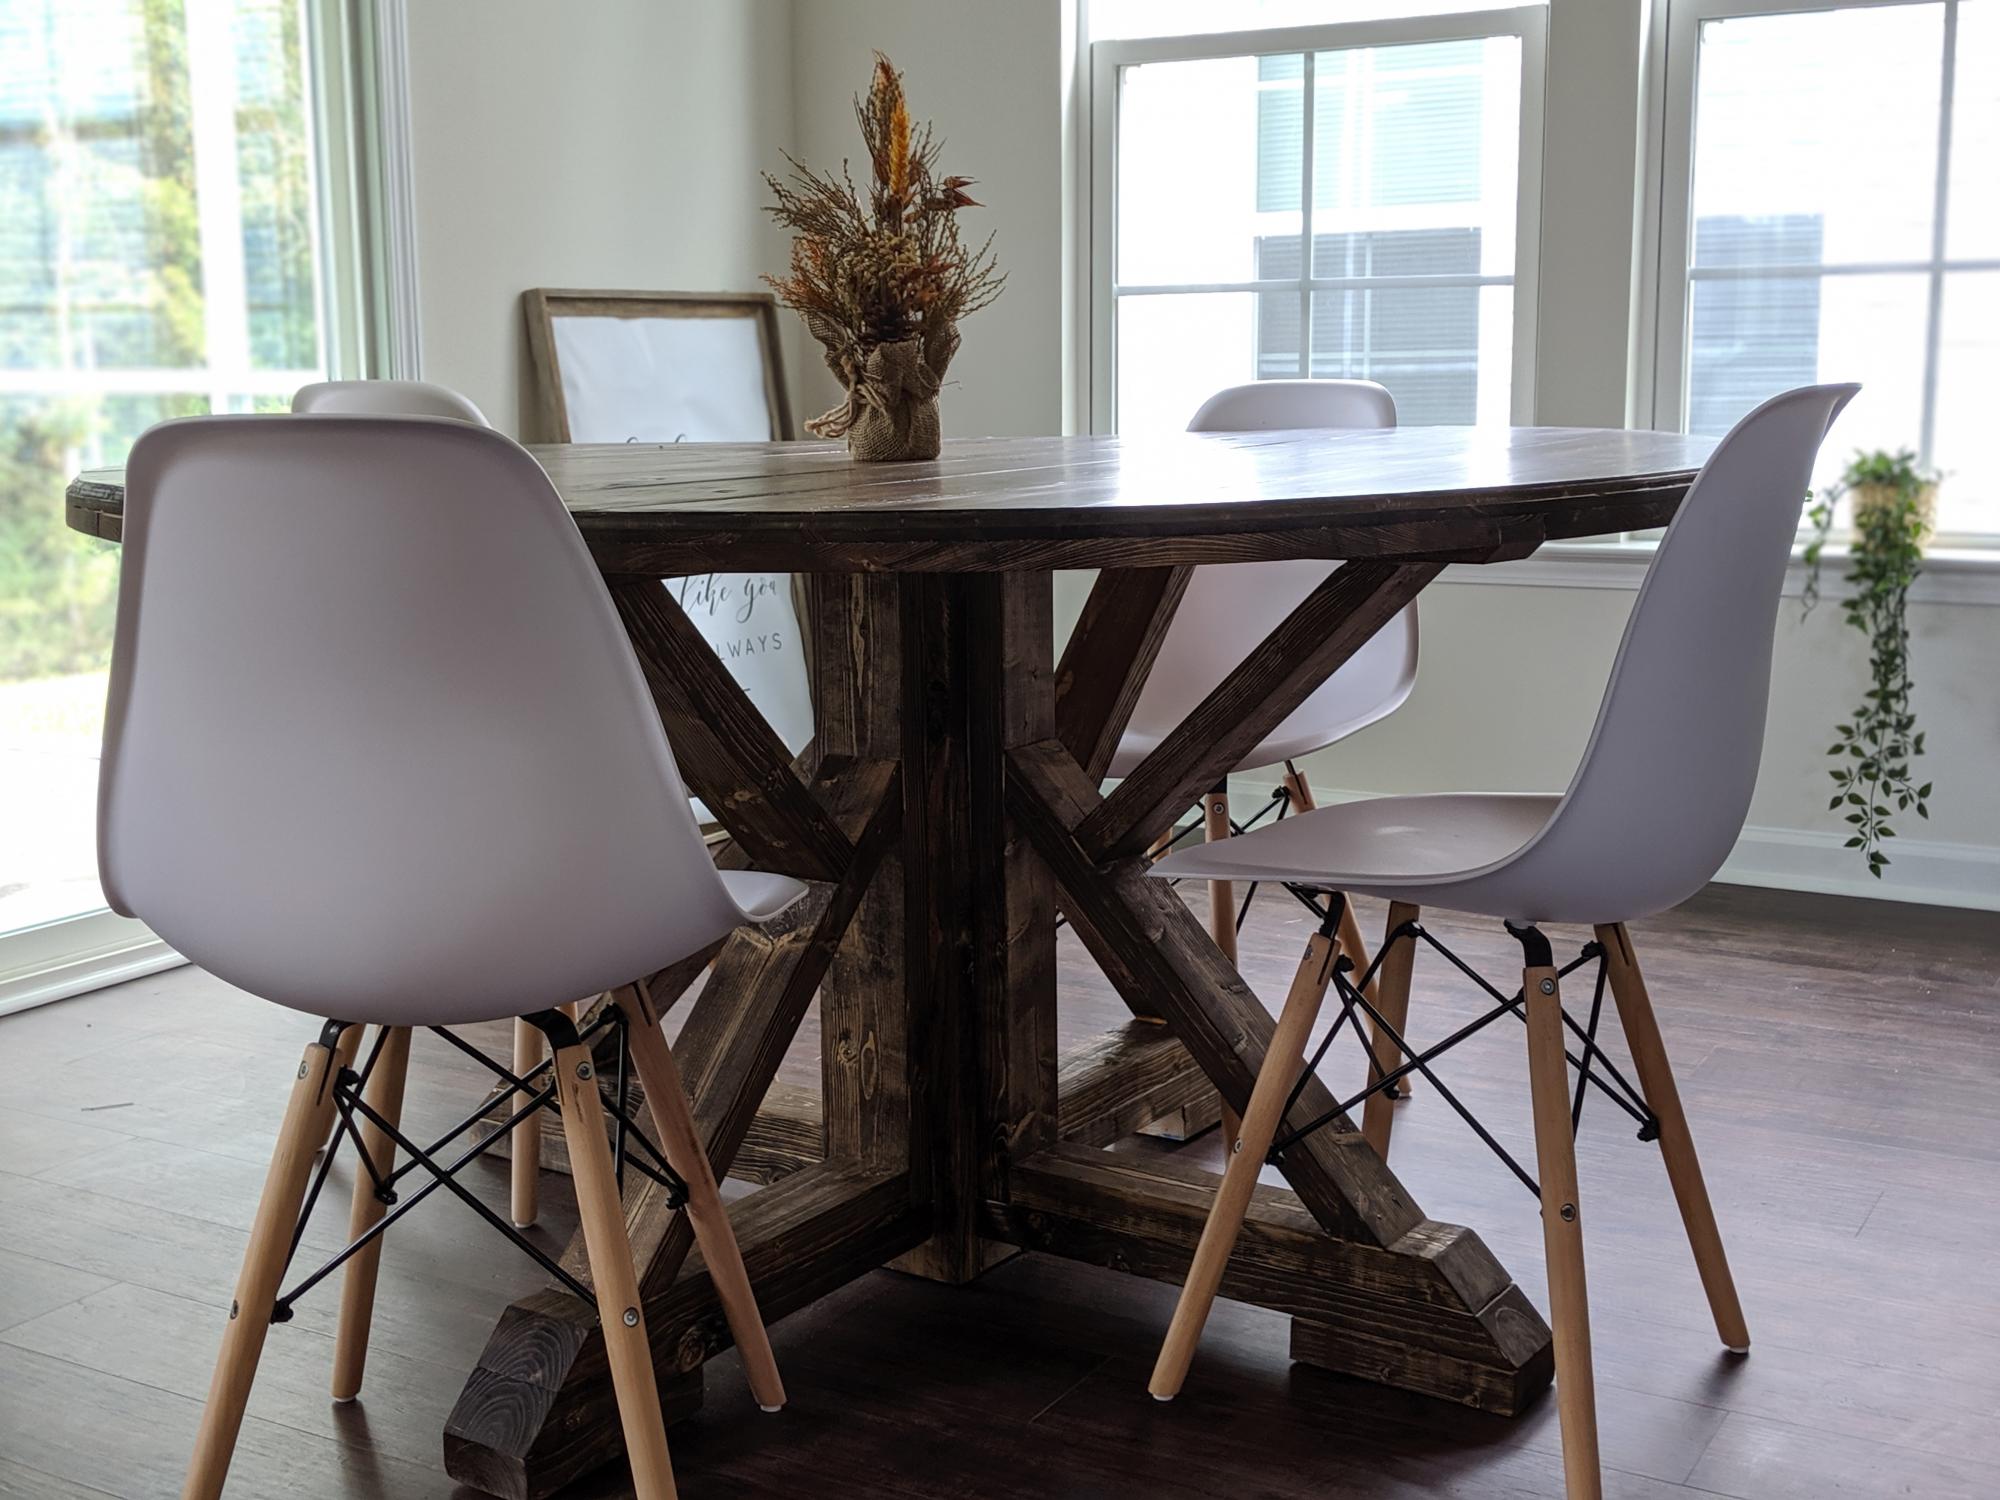
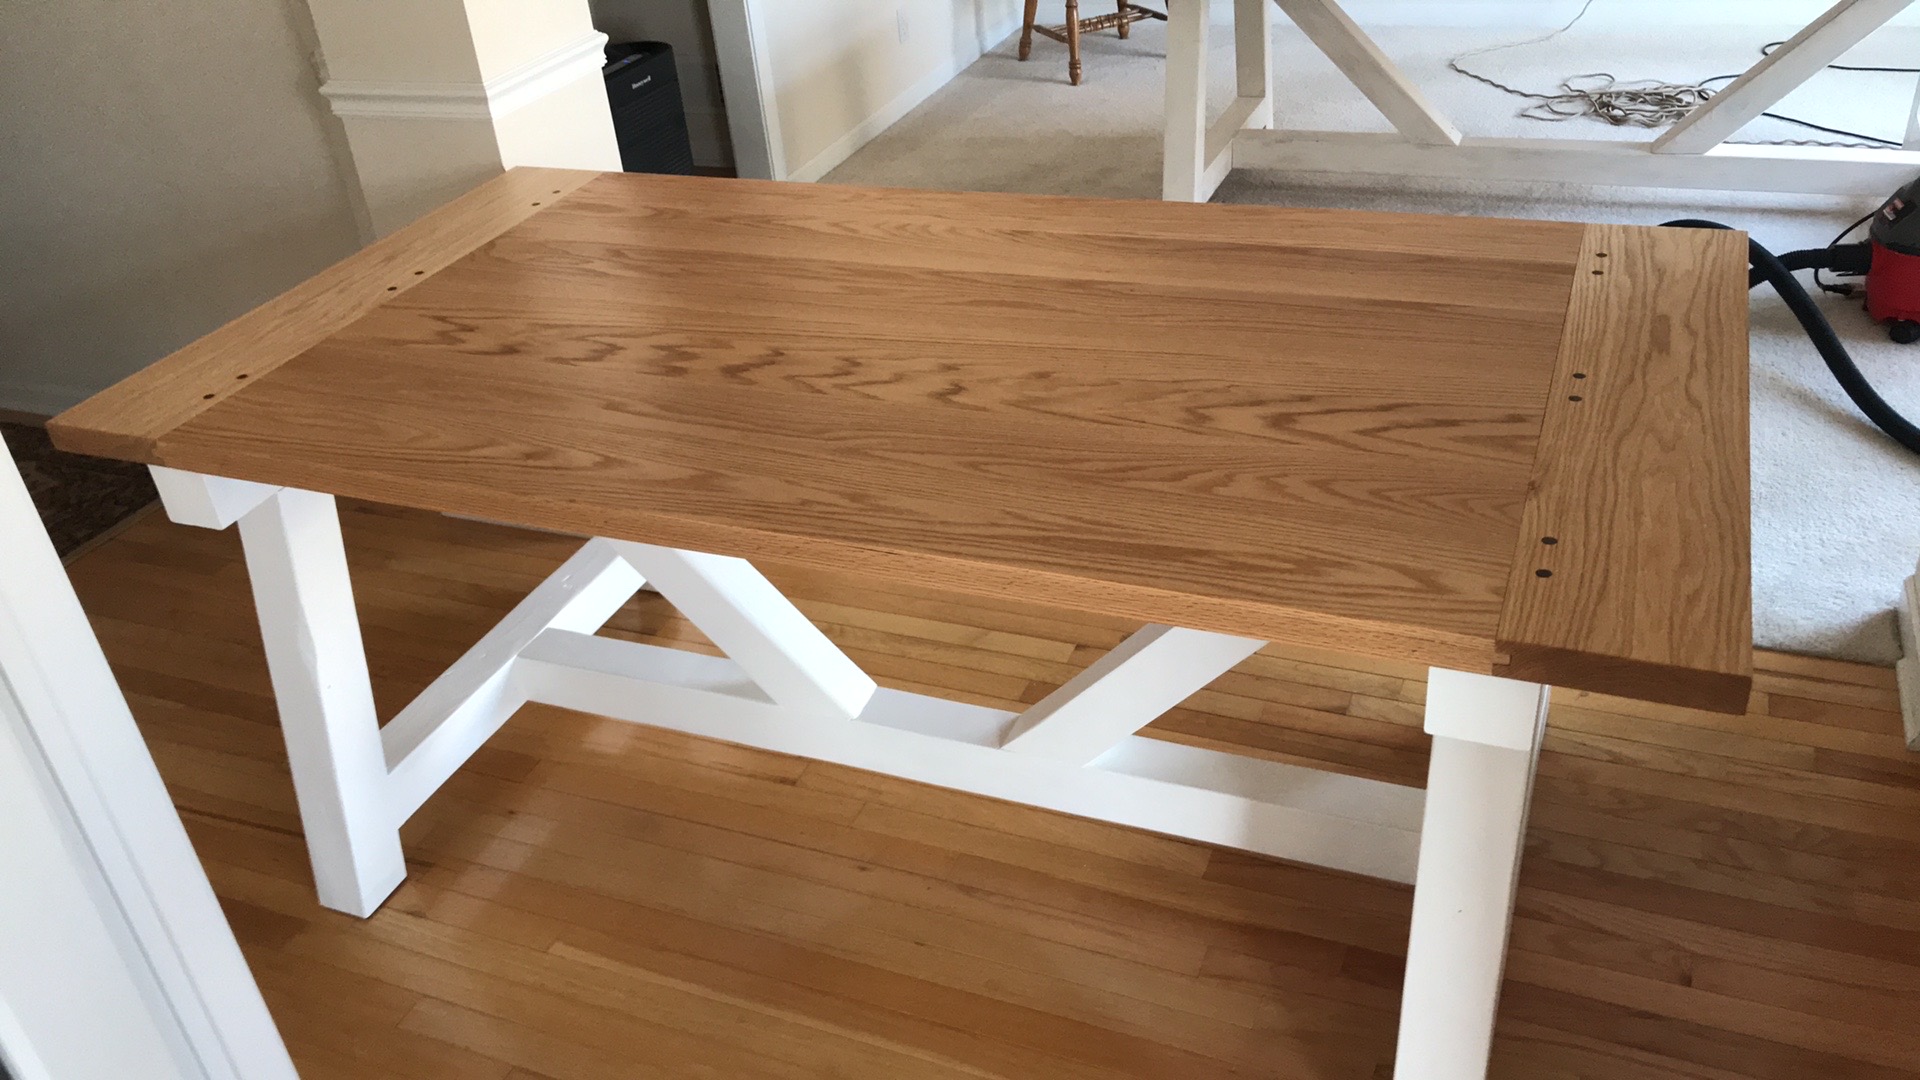
So this DIY Farmhouse Style Table has been on my “make it” list for a while now. And what better time to make it than now, since we just got a saw mill. Check out the blog link below to read all about it.
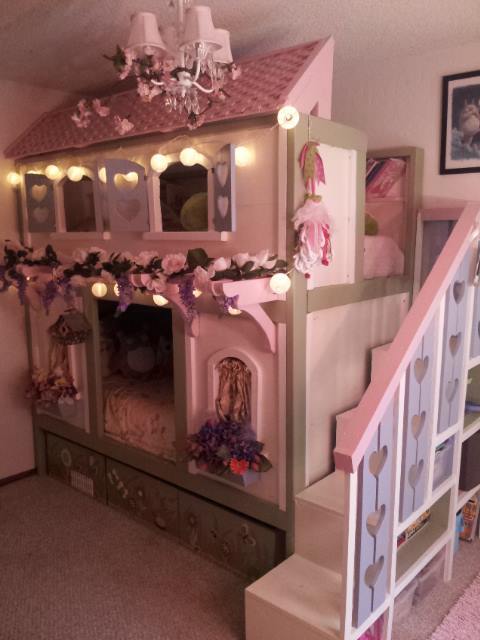
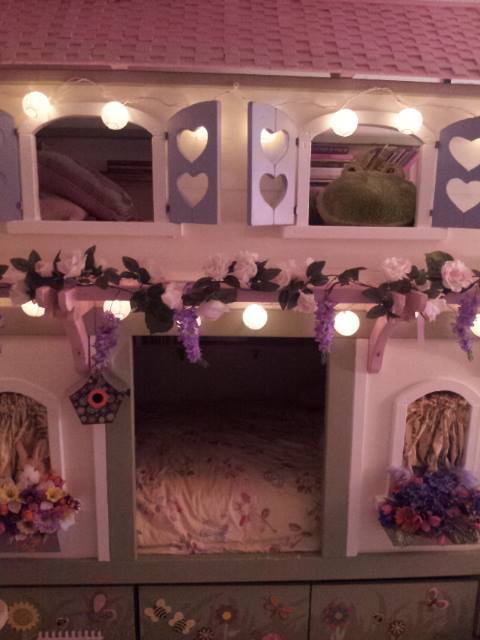
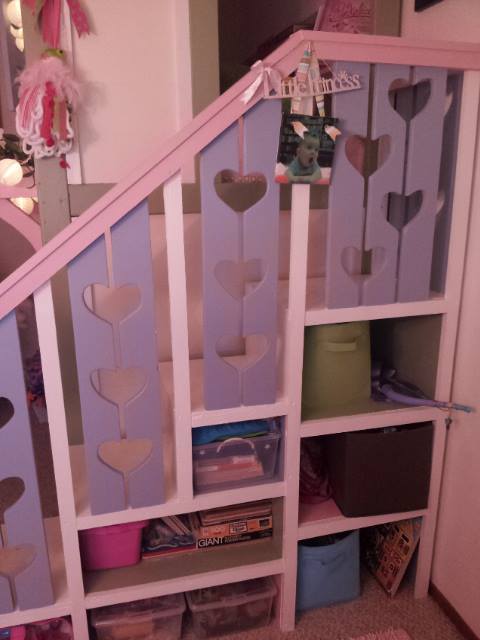
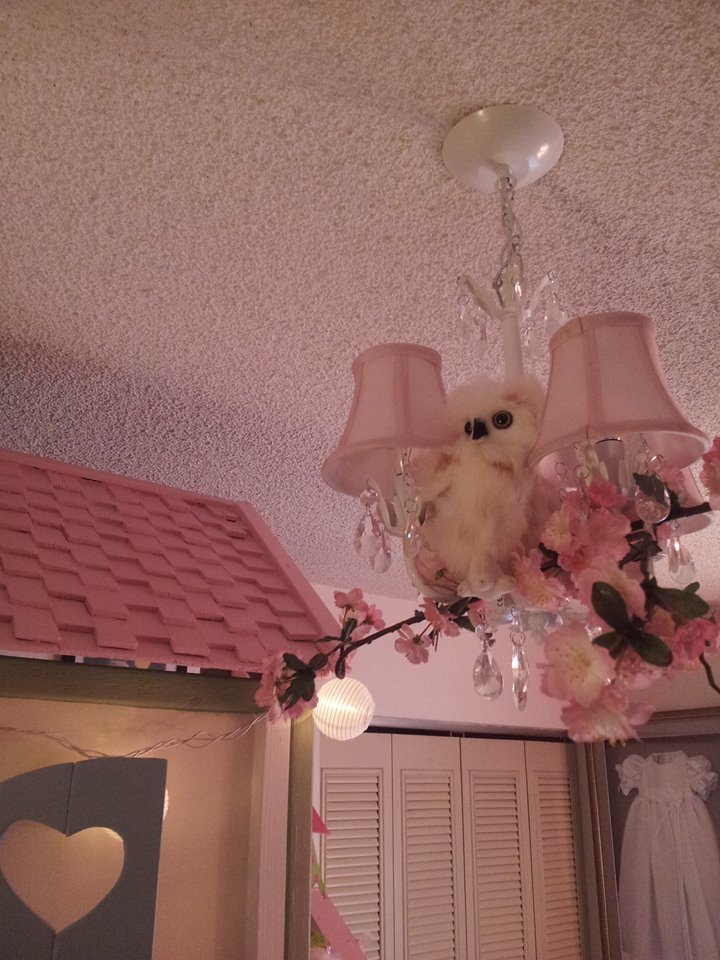
After yet another move (this time to Monterey, CA) and with a baby on the way, it was time to build the girls some big-girl beds of their very own. I was going to need to re-convert their double bed back into its original crib form by September, so in June, I started looking for plans. When I stumbled on Jenny's "Sweet Pea" bunk beds, I knew I'd found a winner! She also made it sound so easy, and I'd only assisted my dad on remodeling projects, never built anything from scratch. But I was familiar with the tools and terminology, so six months pregnant and in a serious nesting phase, I got to work. My hubs helped with the heavy lifting and I had some friends assist with sanding and priming -- many hands do indeed make light work! It took just under a month working four to six hours a day (on average), five to six days a week. I used screws for EVERYTHING, as this baby has to come apart easily for future moves (and does it ever -- Jenny's not kidding when she says you can have it up and down in ten minutes!). I'm most proud of the roof -- I had originally planned on finding real cedar shingles, but those babies are expensive! So I came up with idea of using door shims. A pack of 12-15 is only a couple bucks, and it took about 24 packs to cover the entire roof. I found some light wood trim and glued/screwed it to the edges, slathered on some pink paint, and voila! A wood shingle roof! The whole project ended up costing nearly double what I'd originally budgeted, but I'm so happy with it and my girls love it so much that I don't really care. Plus, if I'd had this baby custom made, it would probably have cost quadruple (at least!) what I paid in building materials. Let me know if you have any questions -- I'm happy to share what (little) I know :)!

Thu, 01/02/2014 - 01:16
Awww...This is so SWEET! You did such a great job- the roofing is ingenious! I wish I had thought of that! And you are right, wood shingles cost a fortune. You came up with such a clever way around it! Love how your bed turned out, I'm sure your girls feel like little princesses!
In reply to Awww...This is so SWEET! You by birdsandsoap
Thu, 01/02/2014 - 08:12
Thanks :)! And yes, they do love it -- bedtime has not been an issue since completion!
Thu, 01/02/2014 - 01:16
Awww...This is so SWEET! You did such a great job- the roofing is ingenious! I wish I had thought of that! And you are right, wood shingles cost a fortune. You came up with such a clever way around it! Love how your bed turned out, I'm sure your girls feel like little princesses!
Wed, 04/09/2014 - 15:35
hi do you happen to havea copy of the plans the pdf link is broken and id love to build thr bed for my daughter
In reply to copy of the plans? by thomen
Mon, 05/19/2014 - 16:18
So sorry this took so long -- I only just now noticed your comment! I do not have a copy of my plans, unfortunately. They were pretty much destroyed by the time I finished!
Mon, 05/19/2014 - 14:51
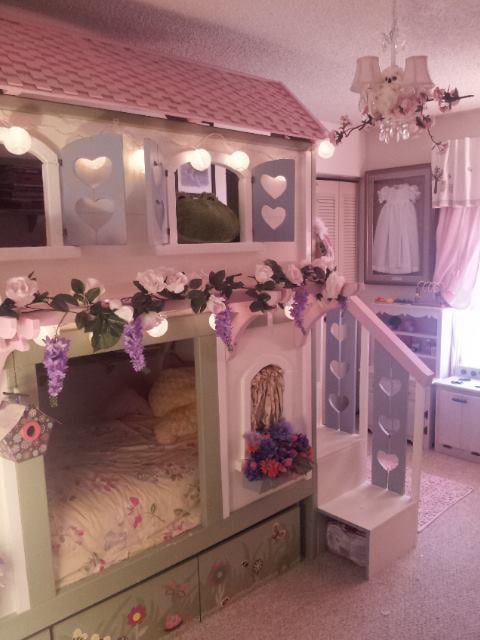
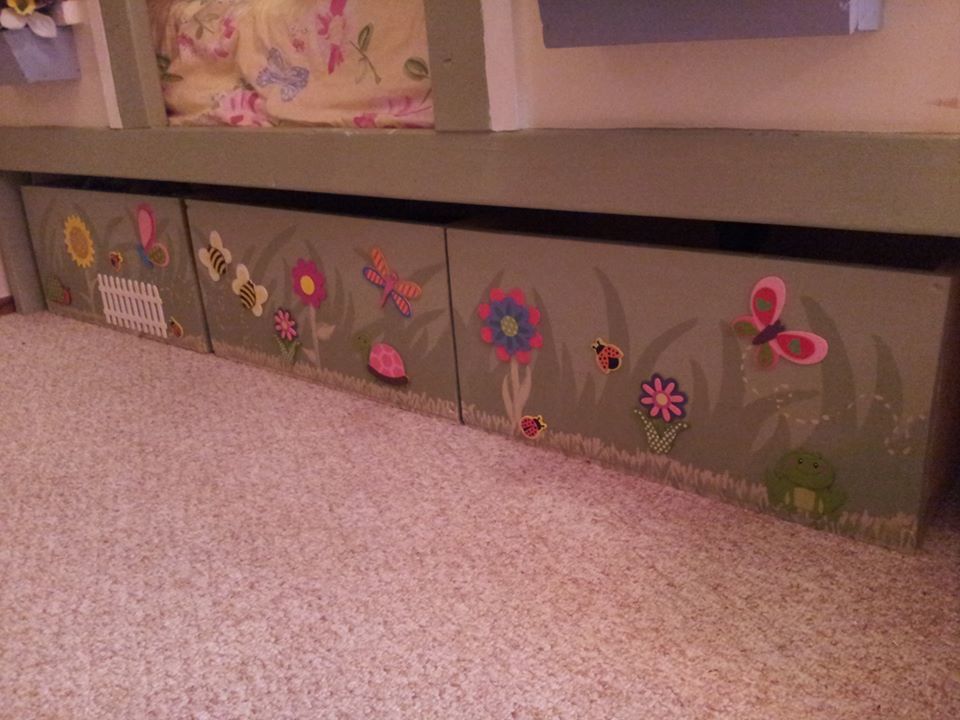
This is marvelous! My husband says this is the best he's ever seen and wants to do exactly this. You have a designer's eye. The paint pallette is very pleasant. Can you tell us the specific color names of each paint you used and where you used it?
Did you use stencils to paint the flowers, etc? If so, where did you buy them from?
Also, where did you get the lights and what are they called specifically?
Thank you so much!!!
In reply to Specific Paint Colors and Other Details? by Bountiful Acre
Mon, 05/19/2014 - 16:23
Thanks for your kind words! I do not know the exact names of the paint colors I used -- they were sample cans, by Behr. The cream color was actually a very pale yellow, though. I free-handed the green on the drawers, and the flowers are actually made of wood and came from Michael's (in the craft department, where they keep wooden letters and stencils). The lights are oriental paper lights, and I got those at Ace Hardware. Hope this helps!
Tue, 05/20/2014 - 11:20
Yes, that was helpful. Thank you for taking the time. It is appreciated!
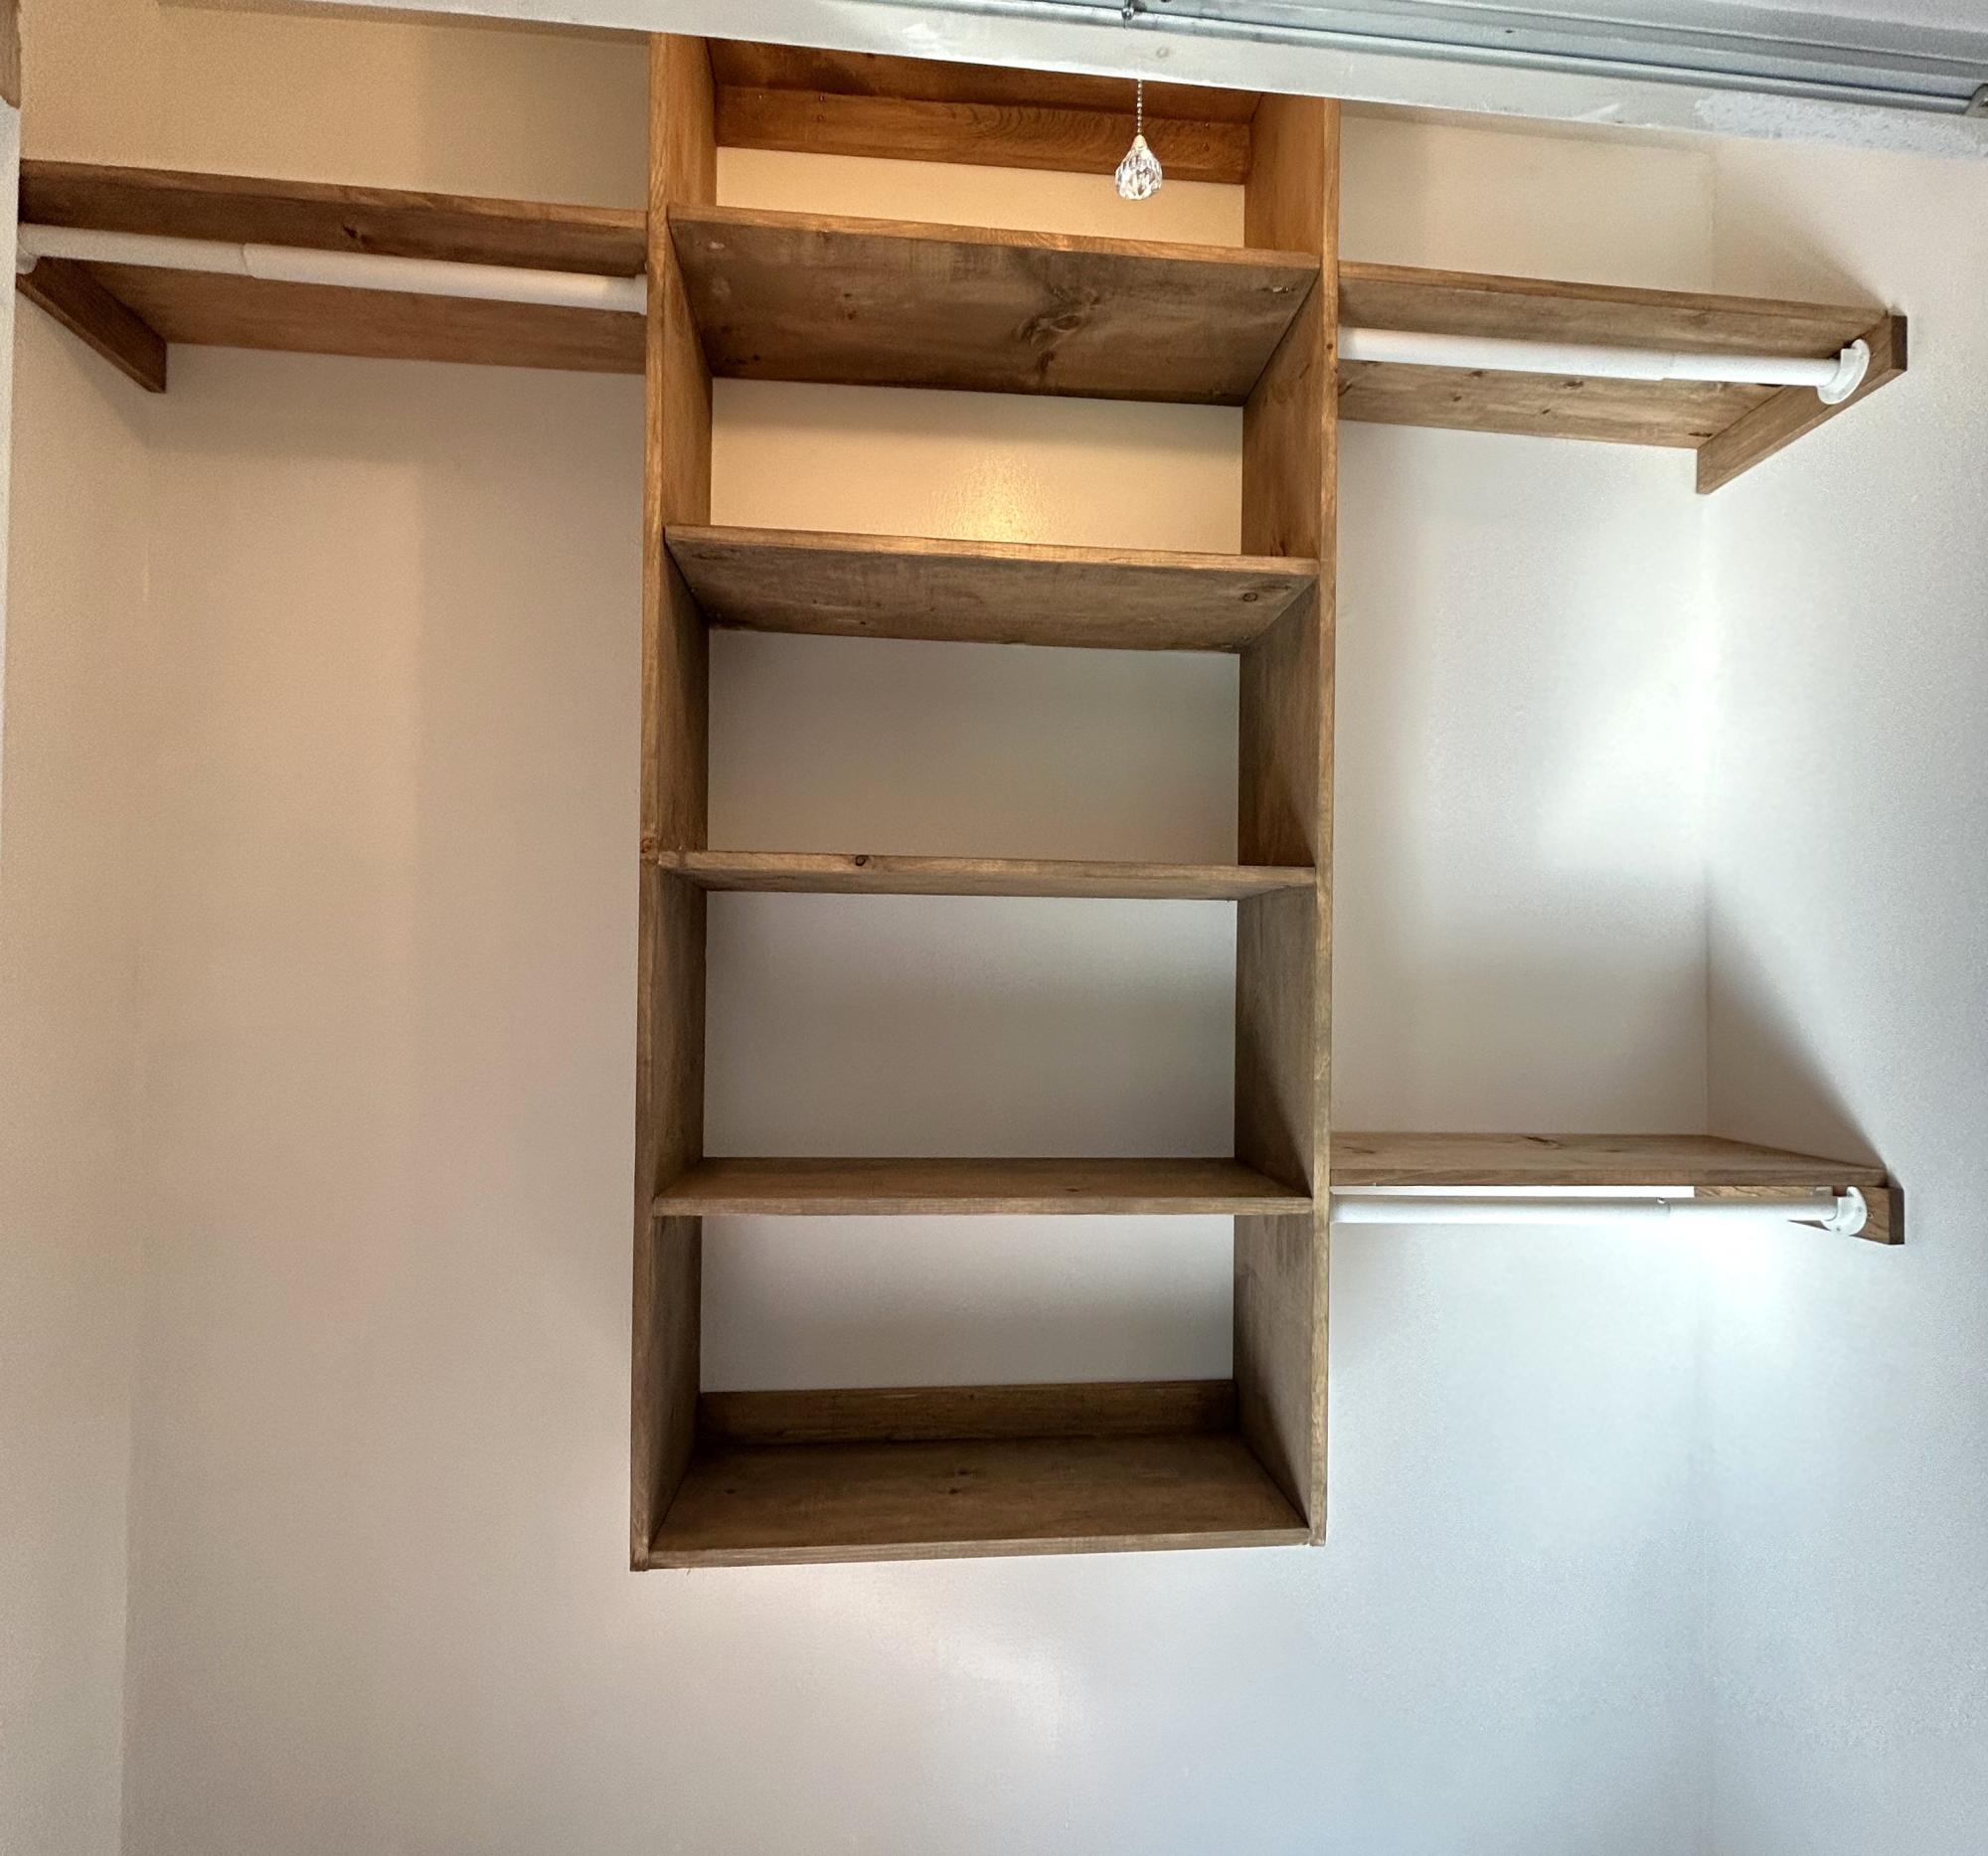
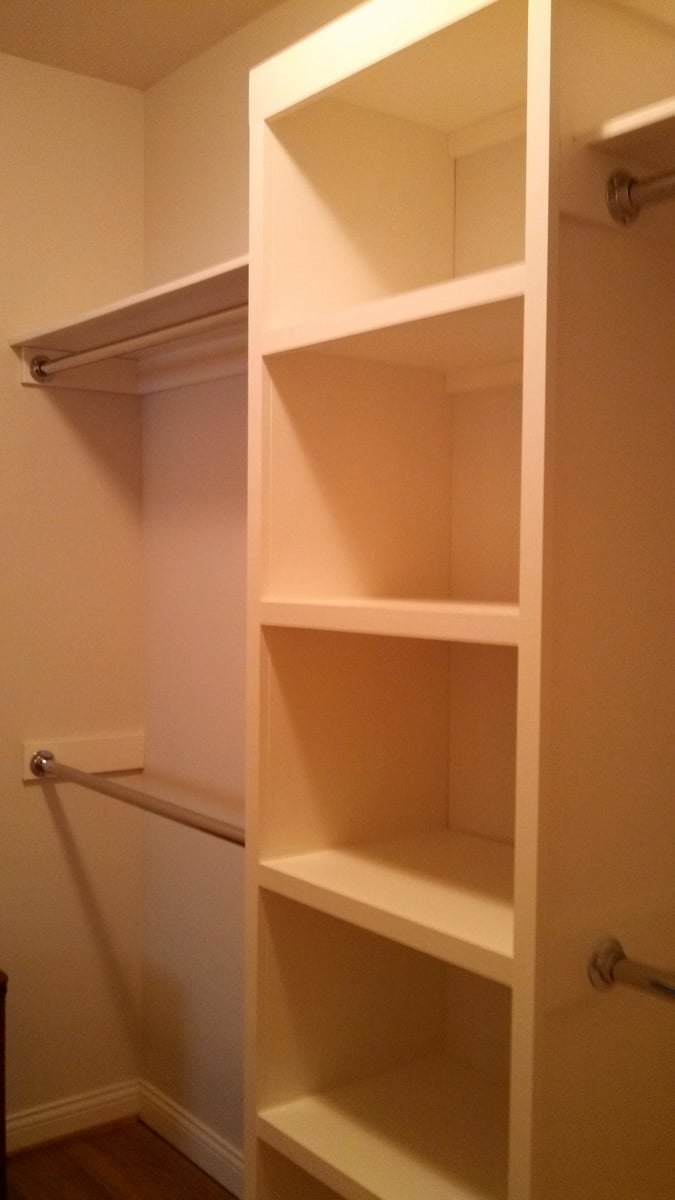
Closet by Joanie

I took on a little bit more than I could chew with this one, but after a little R&I(Resourcefulness, and Ingenuity) I was able to figure it out. I love how it turned out though! Thanks for the inspiration!
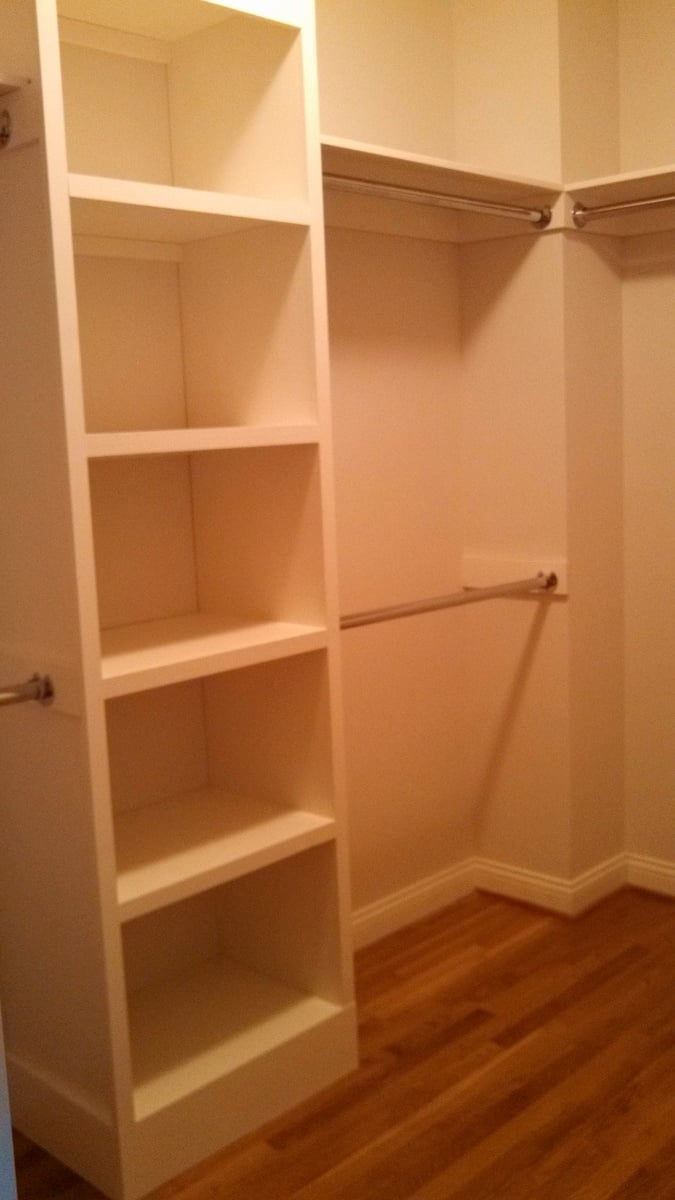
We built this master closet using the simple closet plan. It looks wonderful and wasn't too difficult to do once we determined the measurements we needed to use to fit our closet. My husband does not have much building experience at all, but he was able to do this with Ana's fabulous plans. Thank you so much for saving us hundreds of dollars! We have real wood in our closet and we love it!
We used plywood and painted all surfaces with indoor latex trim paint.
Sun, 01/12/2014 - 19:02
It looks very nice. May I ask what dimension of the plywood you used?
They look more than 3/4'' thick to me, right? My husband and I are planning our very first project!! Any info /advice would be highly appreciated.

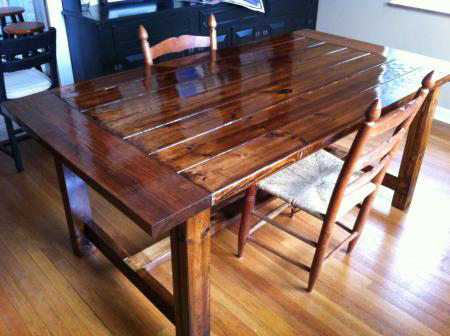
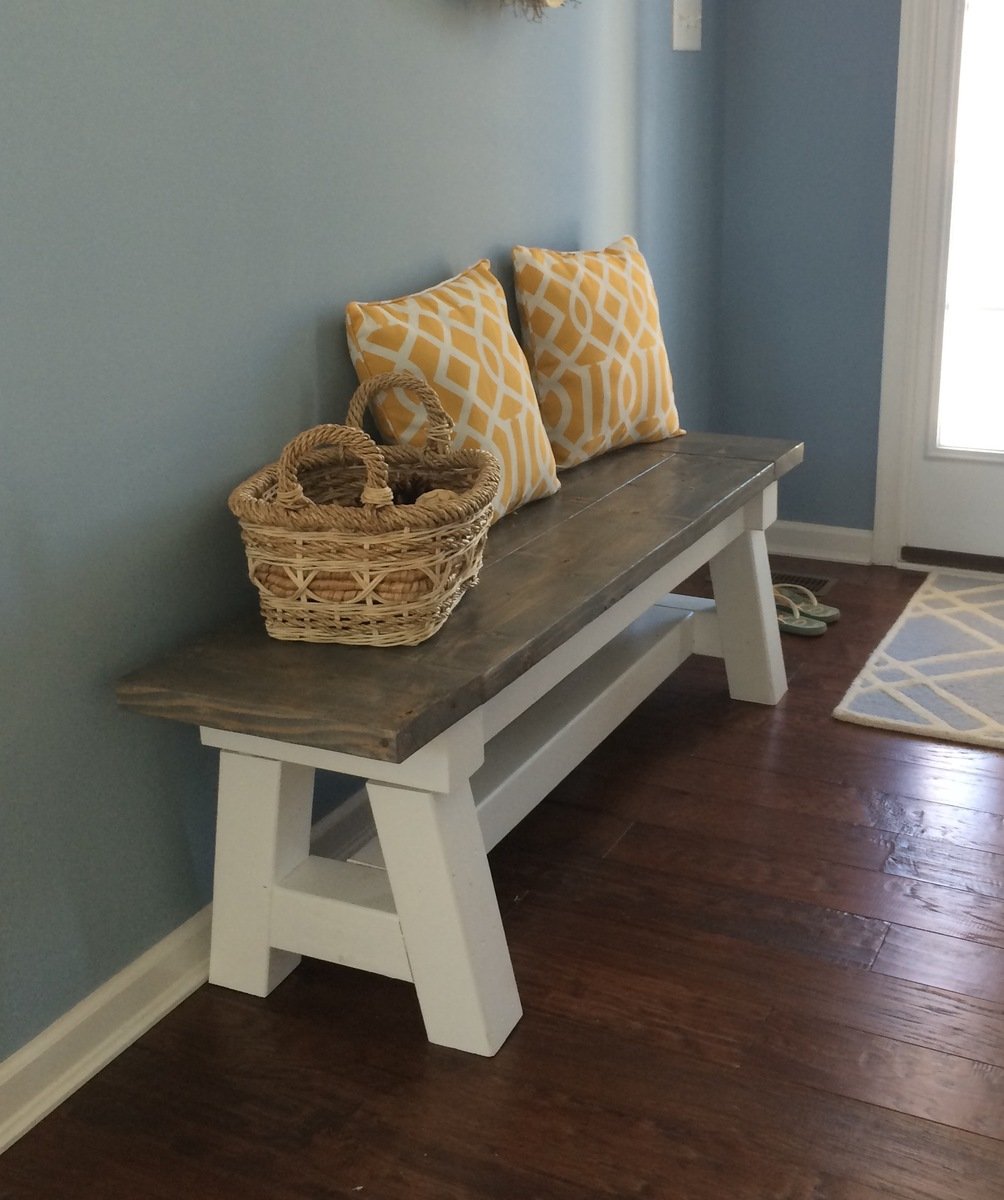
This was our first project; and definitley and inspiration to do more. I am so excited to have this in our dining room. Project took about 8 hrs to build and 4-5 days to stain and poly. We used a Gunstock stain with 2 coats of Walnut over that.
Overall cost was about $150 with wood, stain, materials and poly. We ended up working with 2 types of wood (yellow & white pine) which proved frustrating as we tried to match the stain color. All ended up OK after a couple of trial and error on some scrap wood.
I can't wait to make the matching benches. Thanks Ana!

Fri, 03/30/2012 - 10:01
Gorgeous table!!! I can't believe this is your first project! Yay! Now it'll never end! Ha! My husband thinks I'm nuts - I want to build everything!
I wish I had used Pine instead of Hemlock. I made a table very similar to this, but my HD only carries 2x stock in hemlock. Apparently Lowes carries 2x pine. I like the sharp square edges of pine better. Hemlock has rounded edges. Blah blah blah, your table looks awesome!
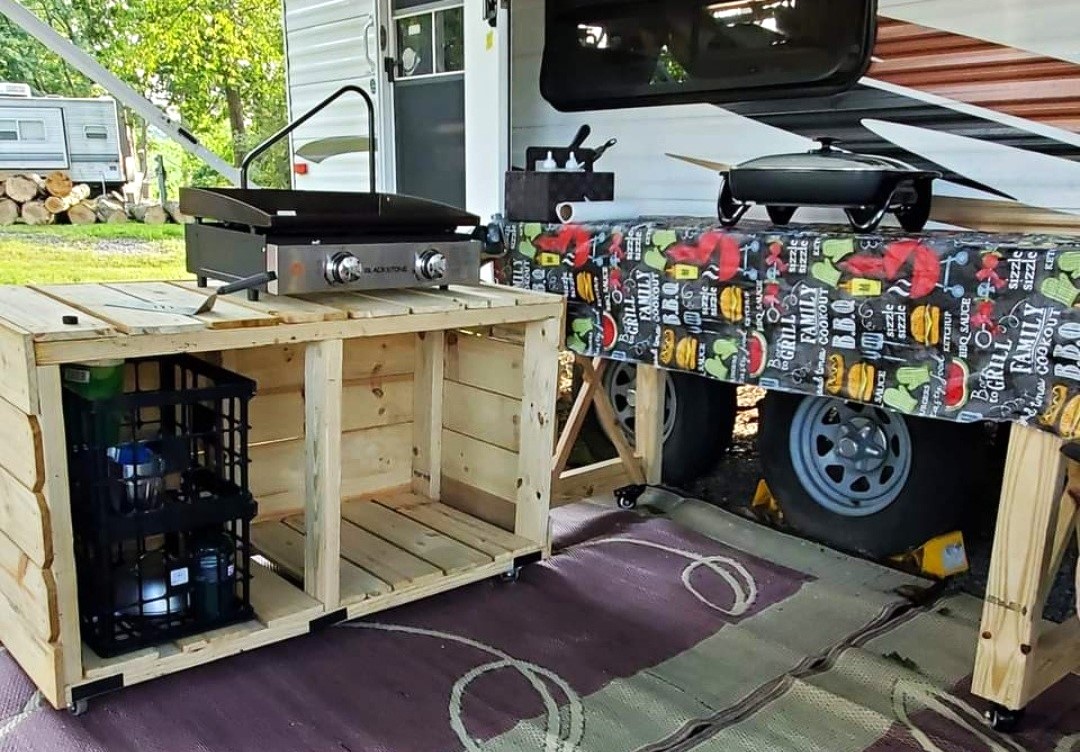
We made the grilling station to keep at our seasonal campsite and it's absolutely fantastic! We have since added some L brackets and 2 shelves, and this is where we store our extra cases of water, soft drinks, outdoor cooking utensils plus an air fryer! Super easy plans, with well written instructions for even the novice (me and hubs) diy builders!
Ali W.
Thanks for the plans, Ana!
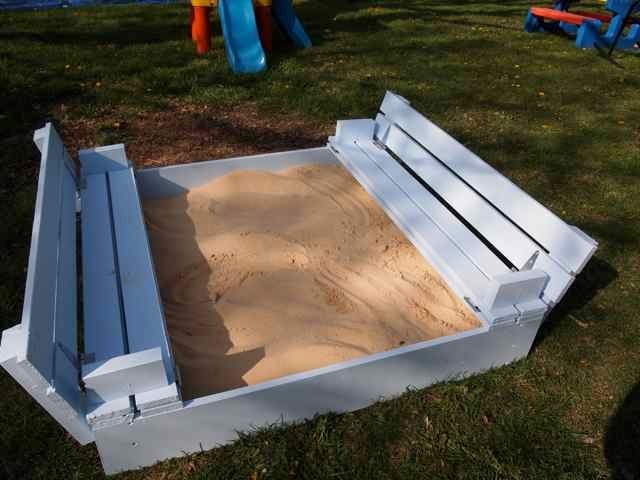
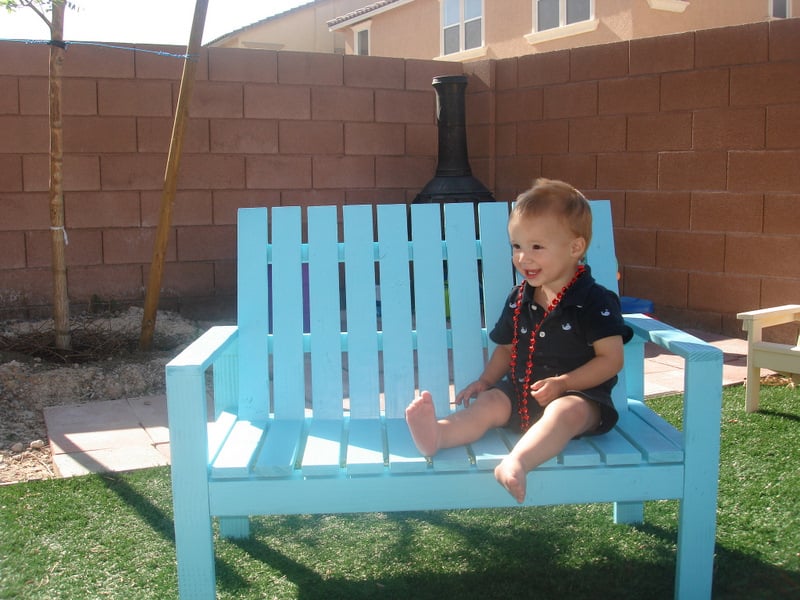
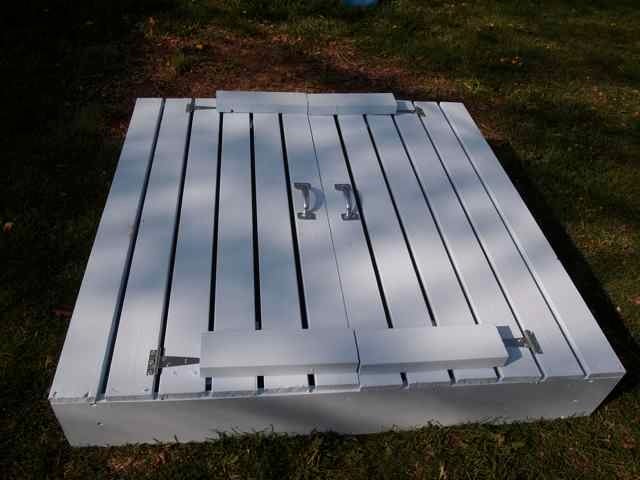
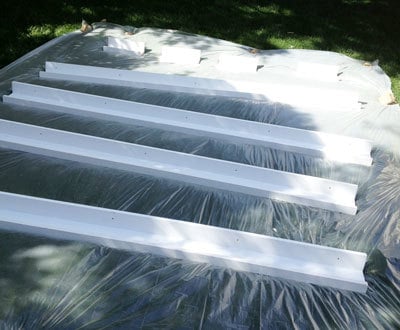
I knew I needed a sandbox for my toddler, and saw the original on pinterest. I was so happy when I came here looking for designs and saw that someone had created a plan for this. I think I'm more excited about it than my little guy is.
The plan was easy to follow, and it went together quickly. Thank you very much for these plans


Tue, 04/10/2012 - 10:45
Your son is adorable, and I totally "get it" when you say that you're more excited than he is! haha. Great job!
Wed, 04/11/2012 - 19:43
Great sandbox, it looks awesome! Your son is going to have so much fun in it this summer.
Tue, 10/16/2012 - 19:32
You rock Ana! Your plans are some of the best quick builds with lots of features. I built this sand box in two hours and my son is having the best time. This is a Texas winter replacement for the beach and the backyard pool.
Mon, 05/23/2016 - 19:44
So I just started making this box and it's truly an awesome design but I couldn't get 1x8 lumber instead I got 2x8... For the box base, will this make an difference in the mechanics of the seat and back opening..and the overall size of the box is 1.5" longer at 49" instead of the 47" the plans detail.. I was hoping that it won't but I think it might interfere with the 2x4 support the seat back..
I right in the middle of this project so I need to get on with it as it's nice tomorrow..
THANK YOU
ED
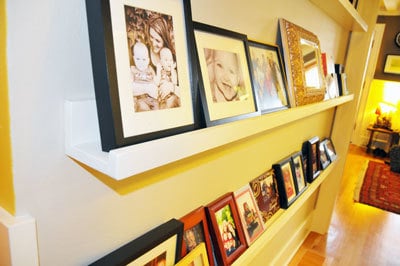
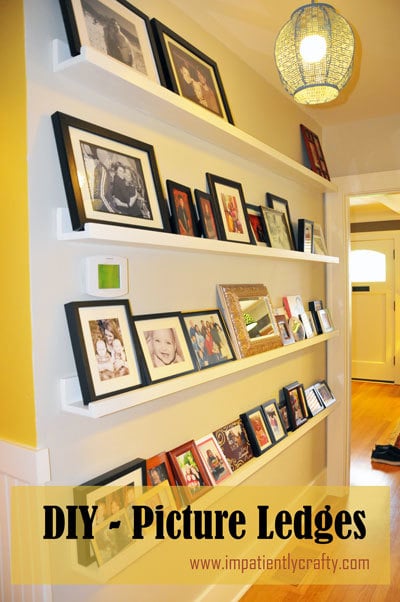
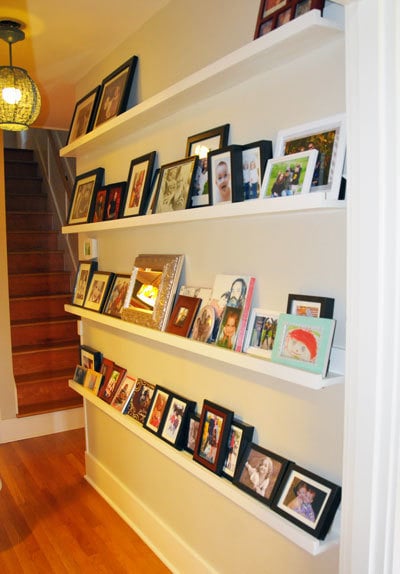
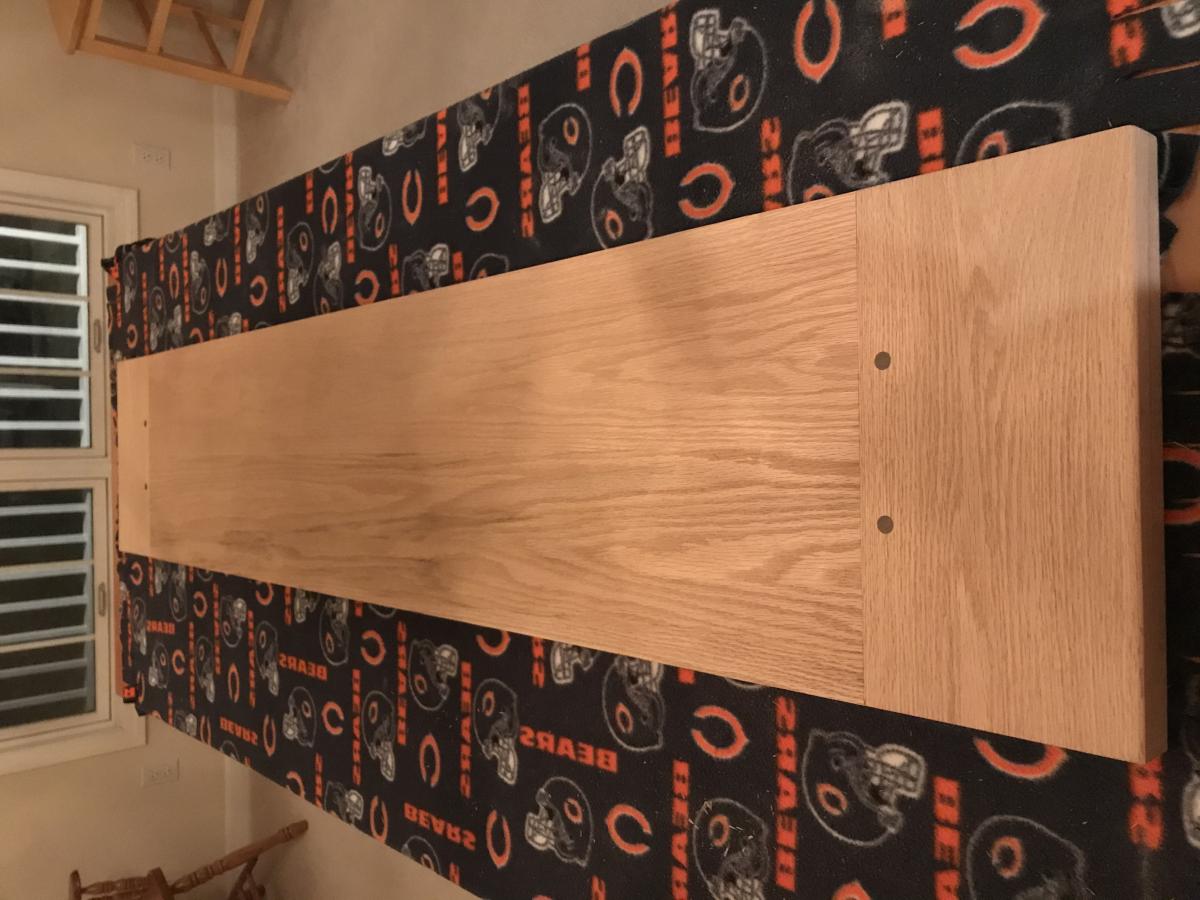
I think I get more compliments on these galley shelves/picture ledges than anything else I’ve made, and these were probably the easiest things to make!
It cost me about $25 a piece but they were nearly 8 feet long each. I used a paint sprayer to paint them, WAY easier than brushing on the paint! watch for drips though (my first time using a sprayer, treat it like spray paint, light easy coats!)
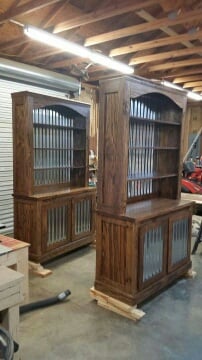
I saw this on Shanty2Chic and loved the plan. I had a friend that wanted me to build her two of these with tin in the door and back. The tin was a challenge but it all worked out. She loves them. Thank you for the plans. I could not have done this without them.
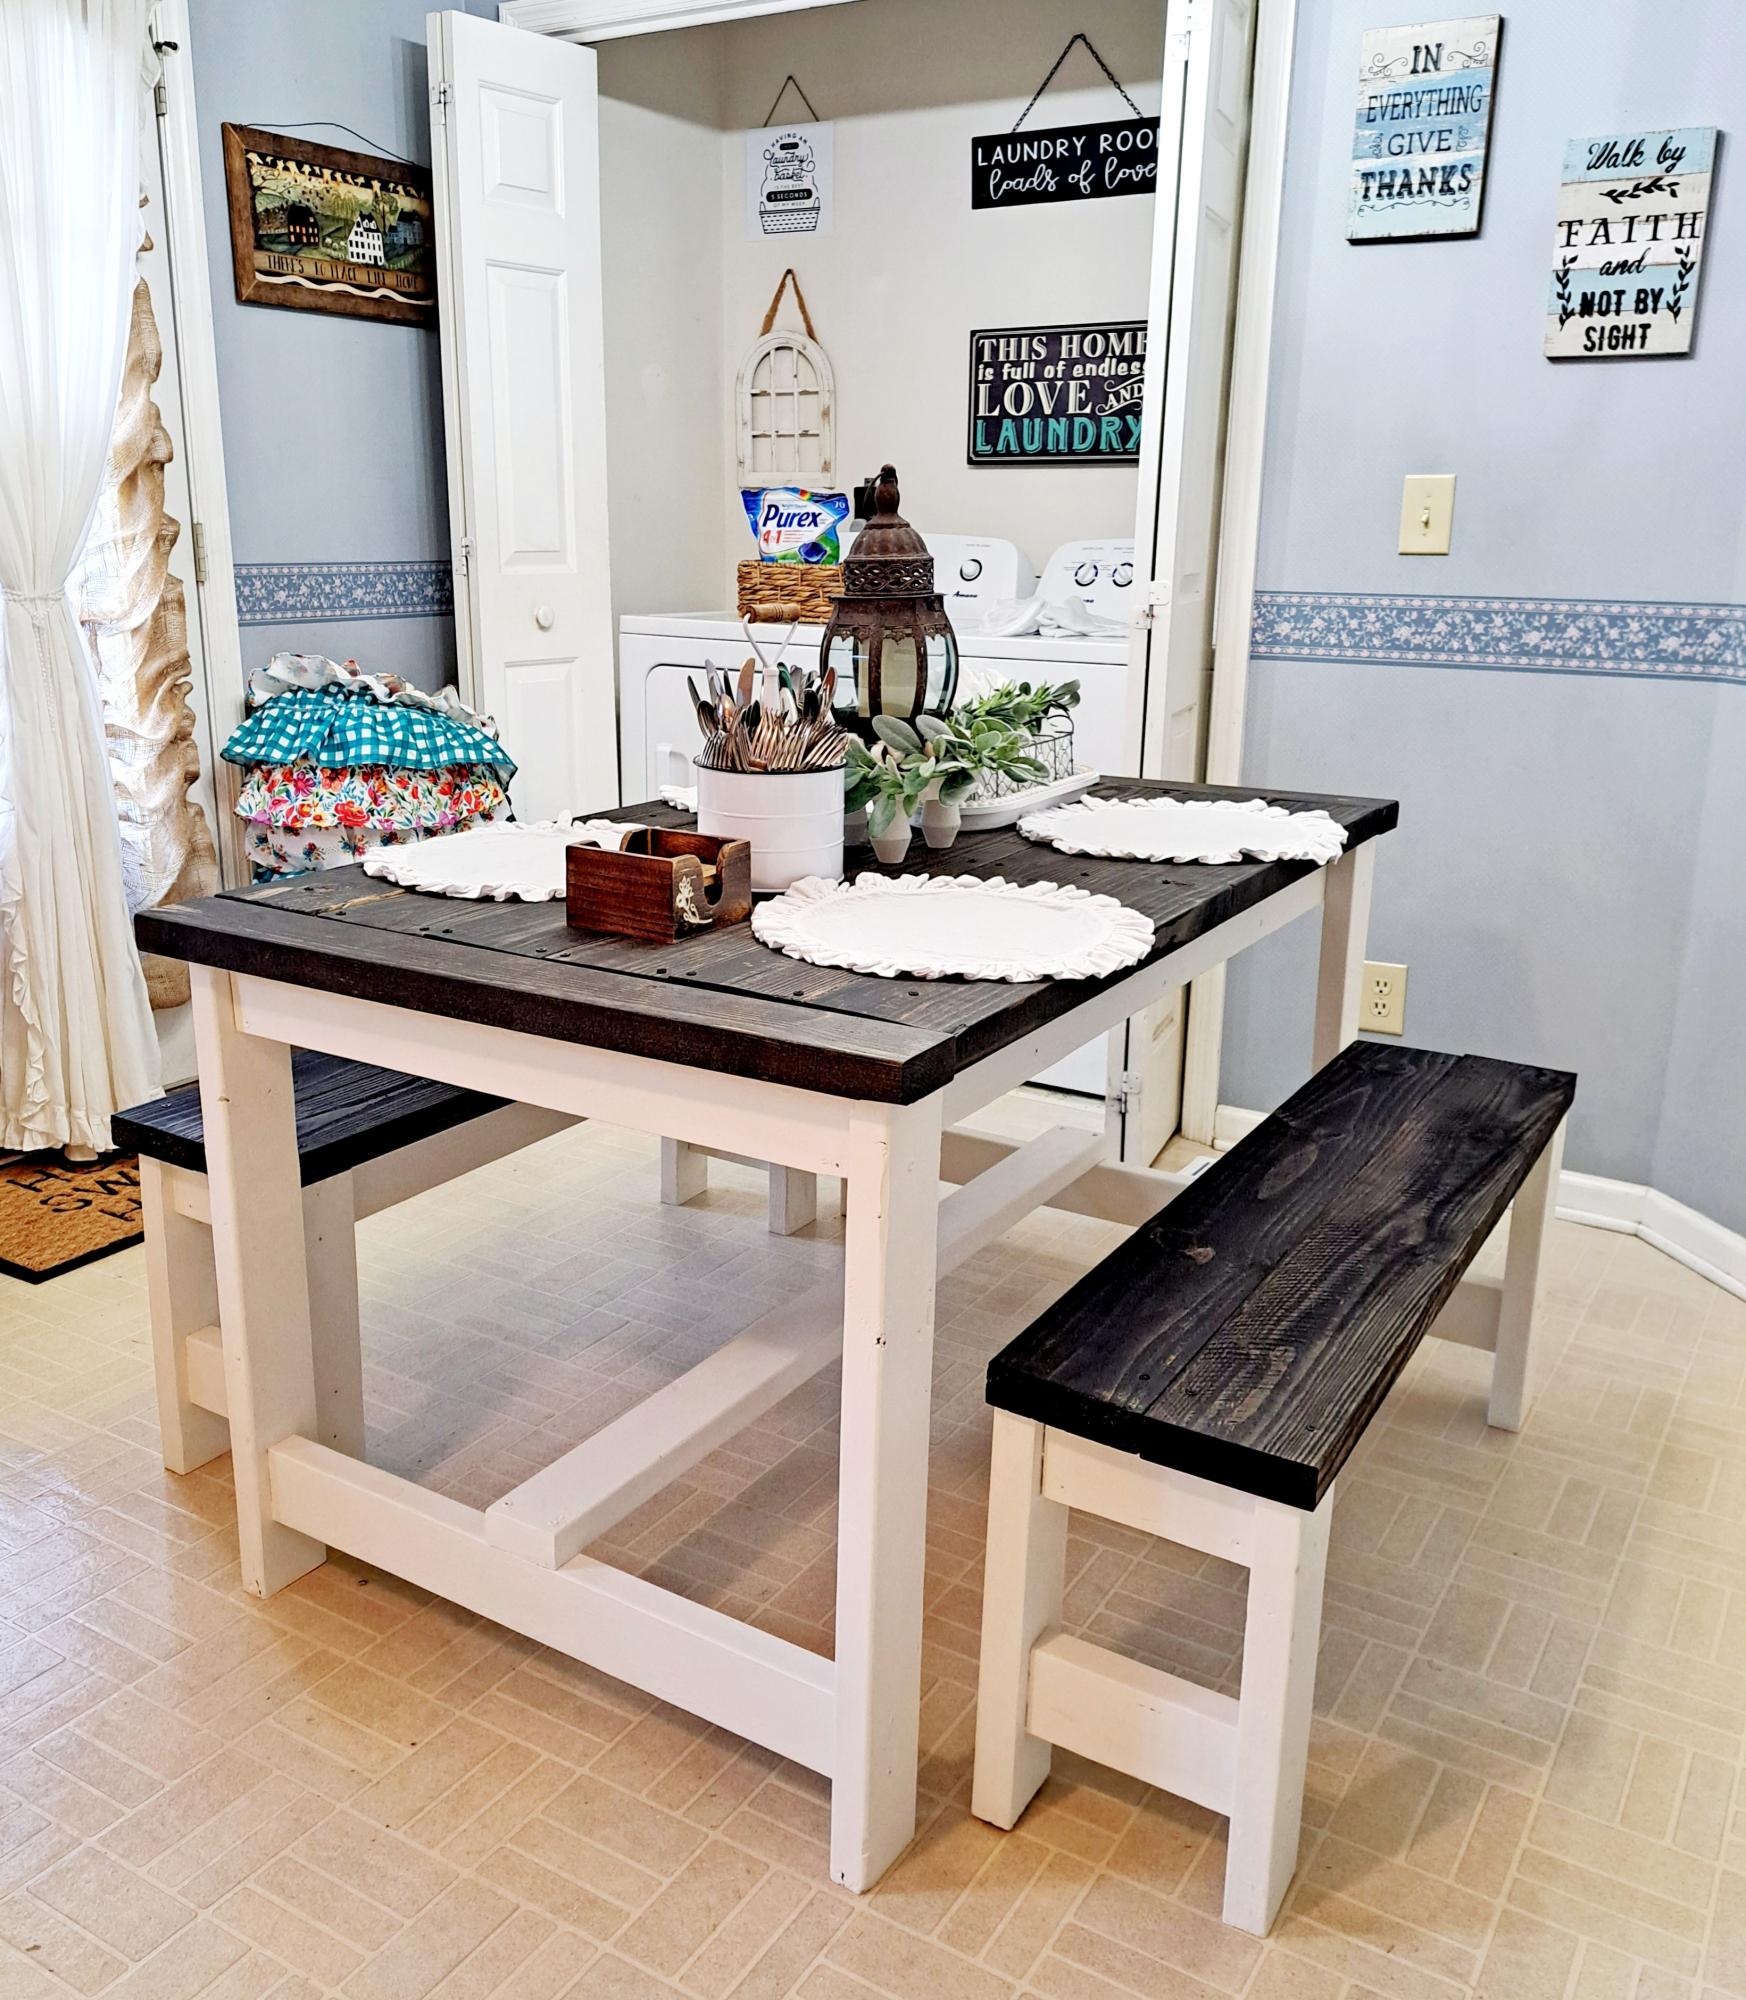
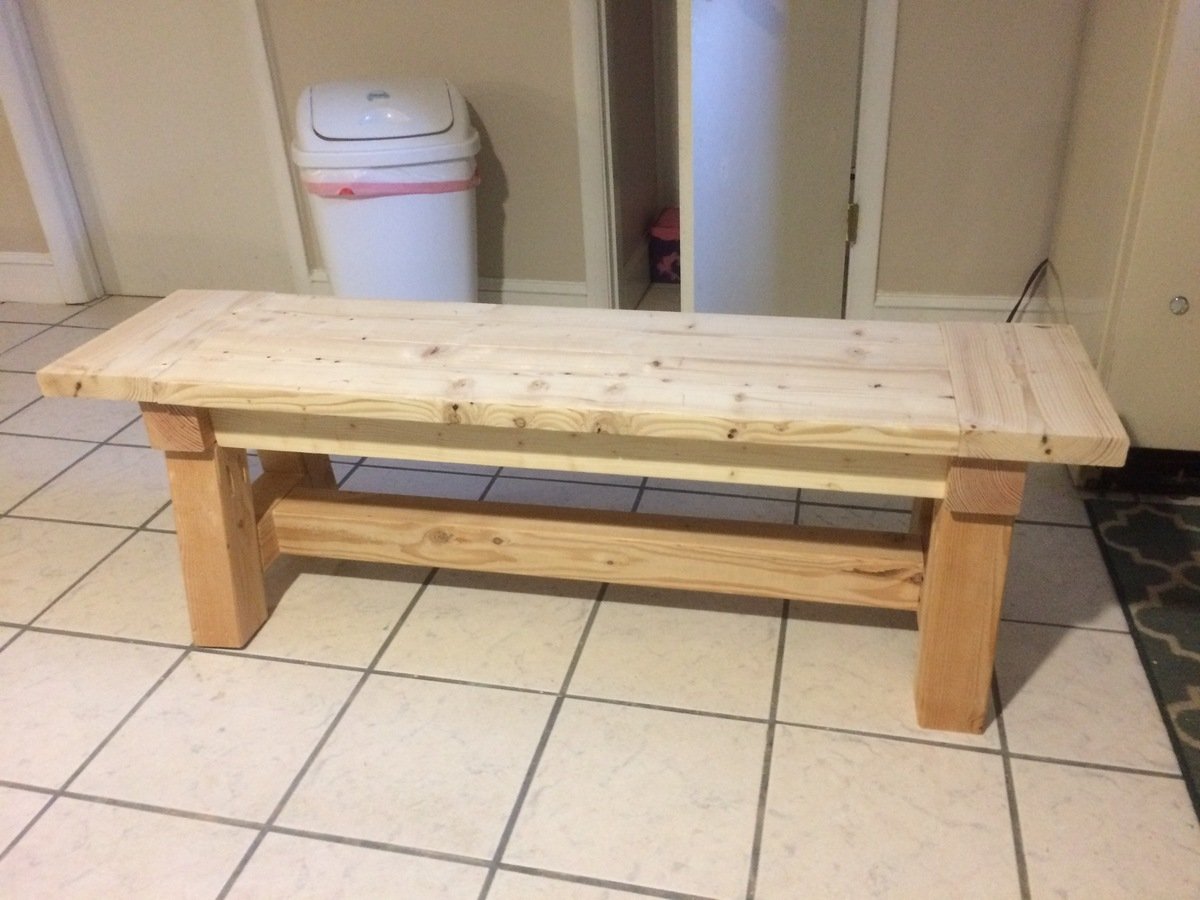
This was my first time building furniture. I've restored and refurbished antique furniture for years and but never imagined building my own before. I have a small kitchen and had to modify the size to accommodate area space. I also added breadboard ends to the tabletop. I am now planning to build more furniture using your plans. Thank you Ana White for providing such a wonderful resource to help beginners build their own furniture!
Fri, 09/22/2023 - 08:01
WOW, you did such a great job! Love the finish choice and added breadboard ends. Thanks for sharing:)

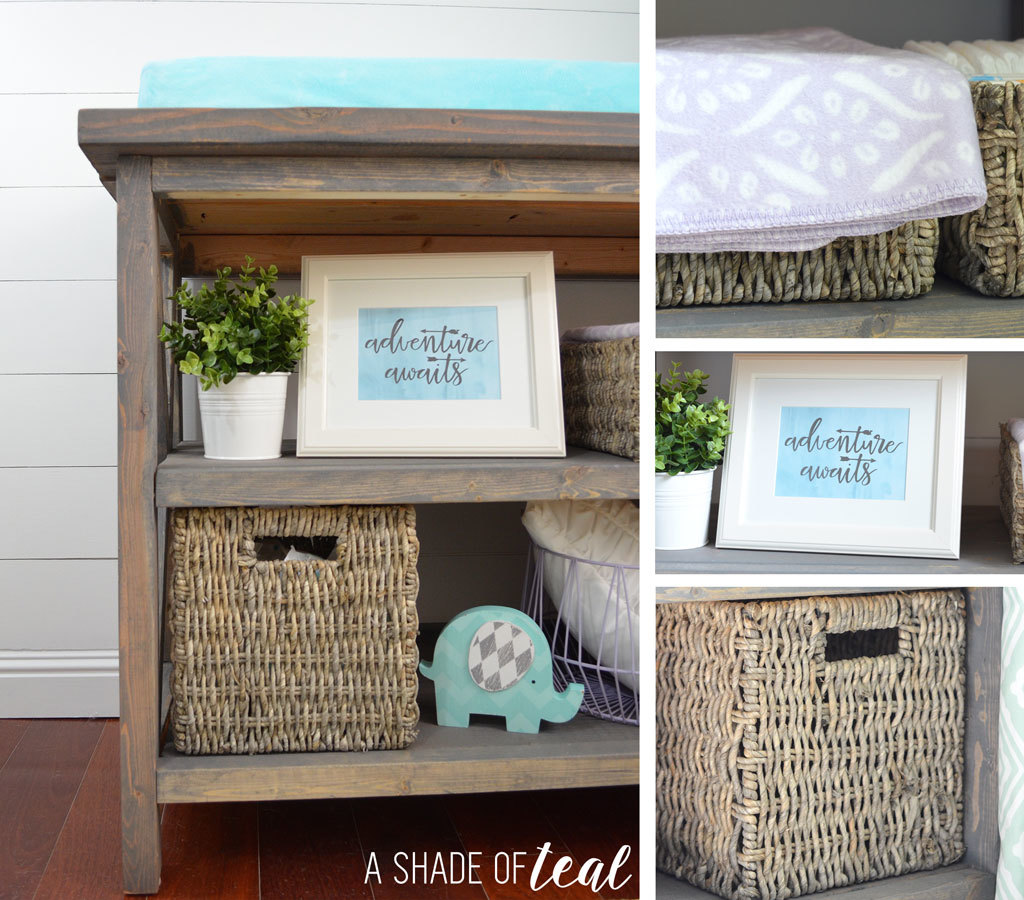
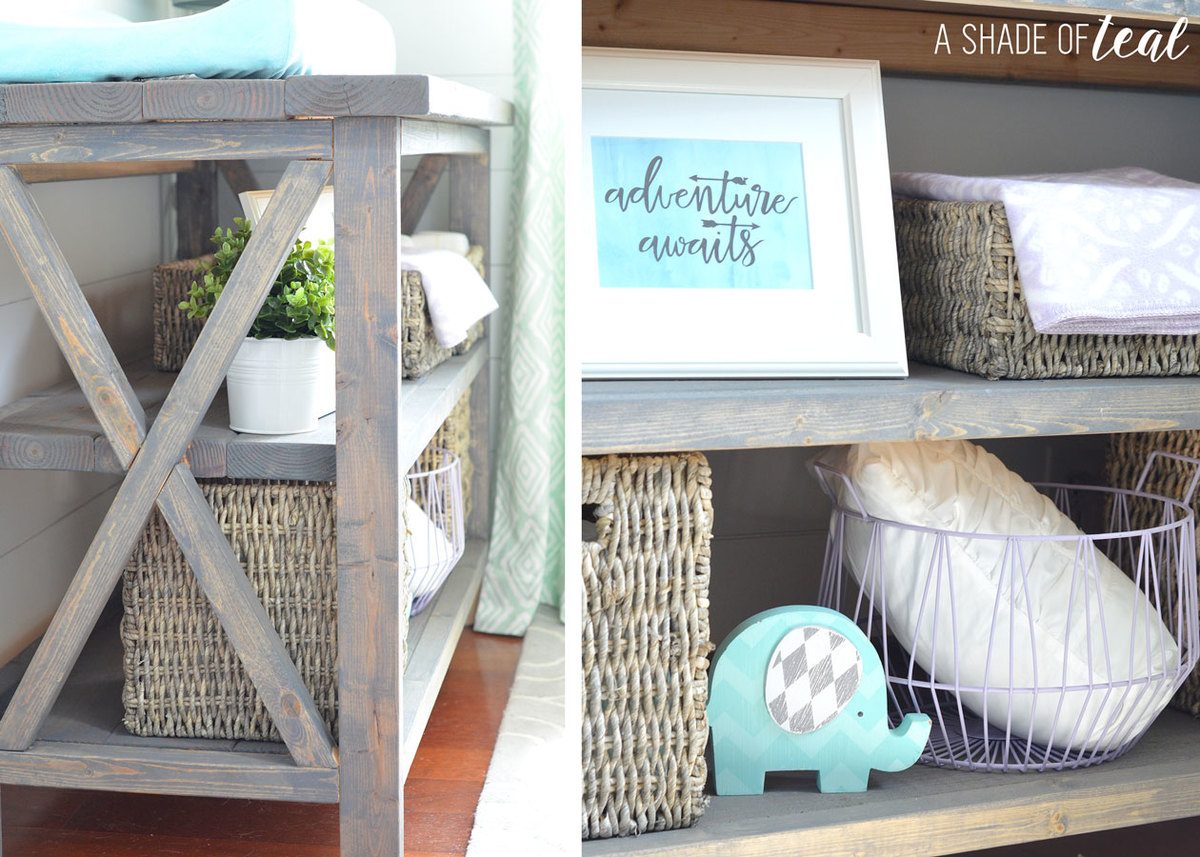
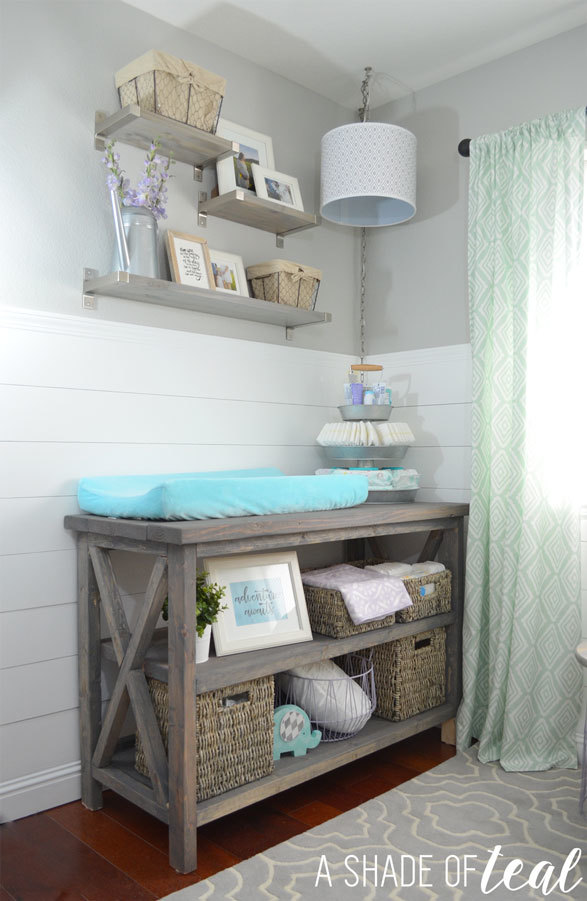
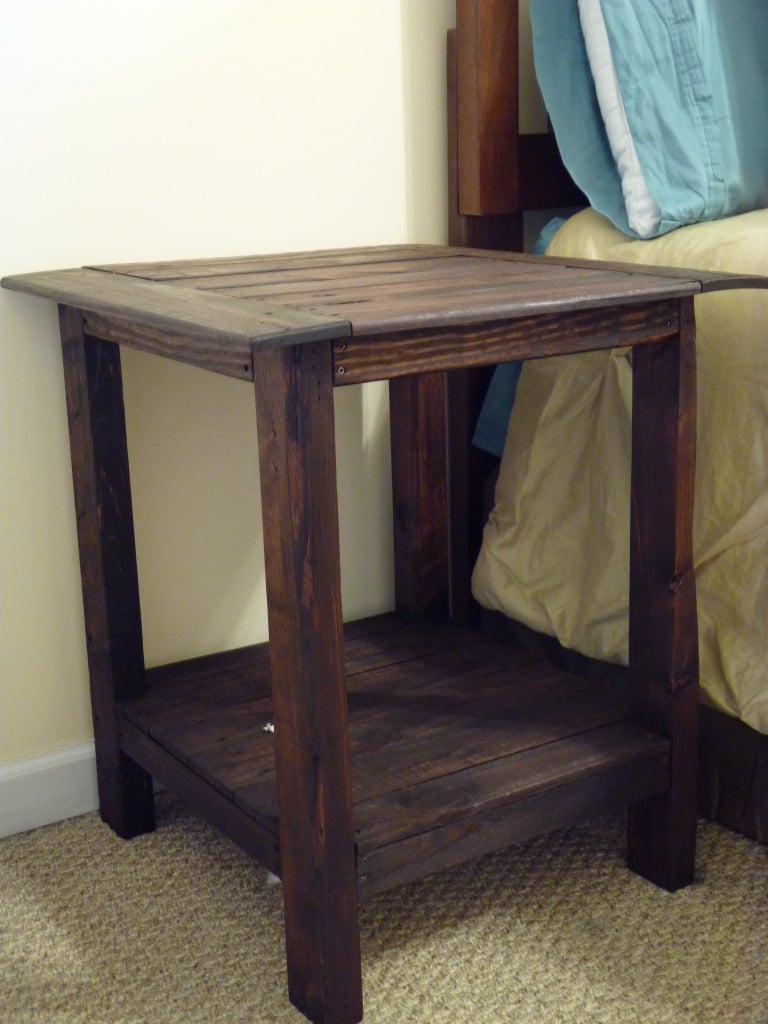
Rustic farmhouse changing table without the framed top box. I built this for my daughters nursery.
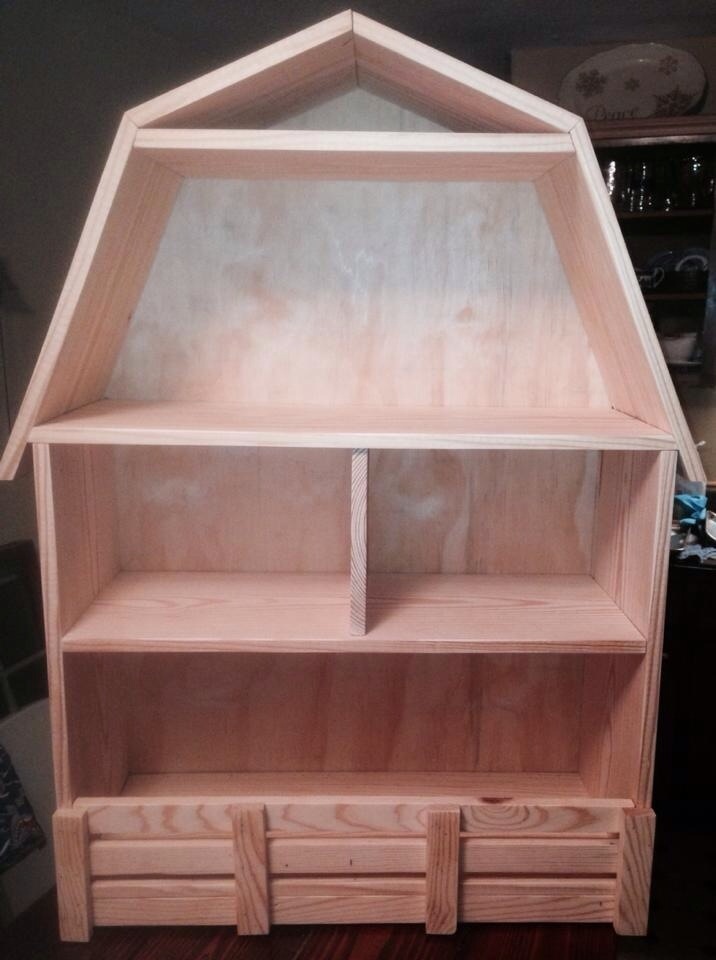
I built this for a friend's daughter who collects the Tractor Supply farm animals. This is the first time I have cut on angles to make the roof. The directions say built it from bottom to top but I found it easier to start for the top and work down. Then attach the whole roof where it marched on the barn... Hope this helps. I did not finish it cause the friend wanted to stain it herself...

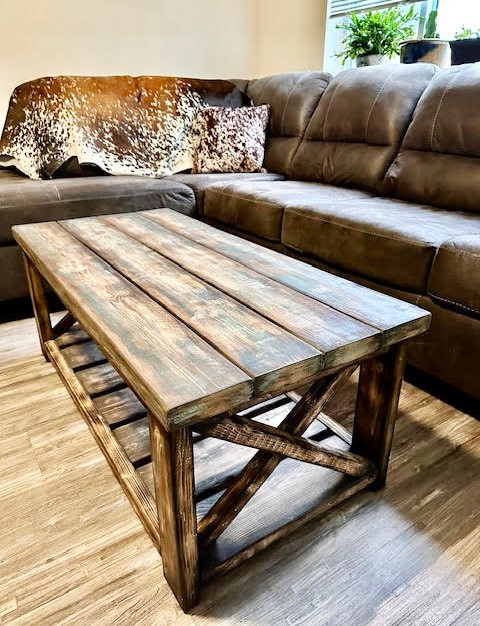
Great coffee table by April!
For the Finish:
First I lightly burnt the wood. The base is minwax in ebony. I actually sprayed water on the wood and used a damp cloth to apply.
The top I used random spots of regular satin paint in grey, a couple shades of blue and an olive green and a chalk paint white. Then sanded it down removing most of the paint and stained it with minwax provincial. And went over some of the edges with the ebony.
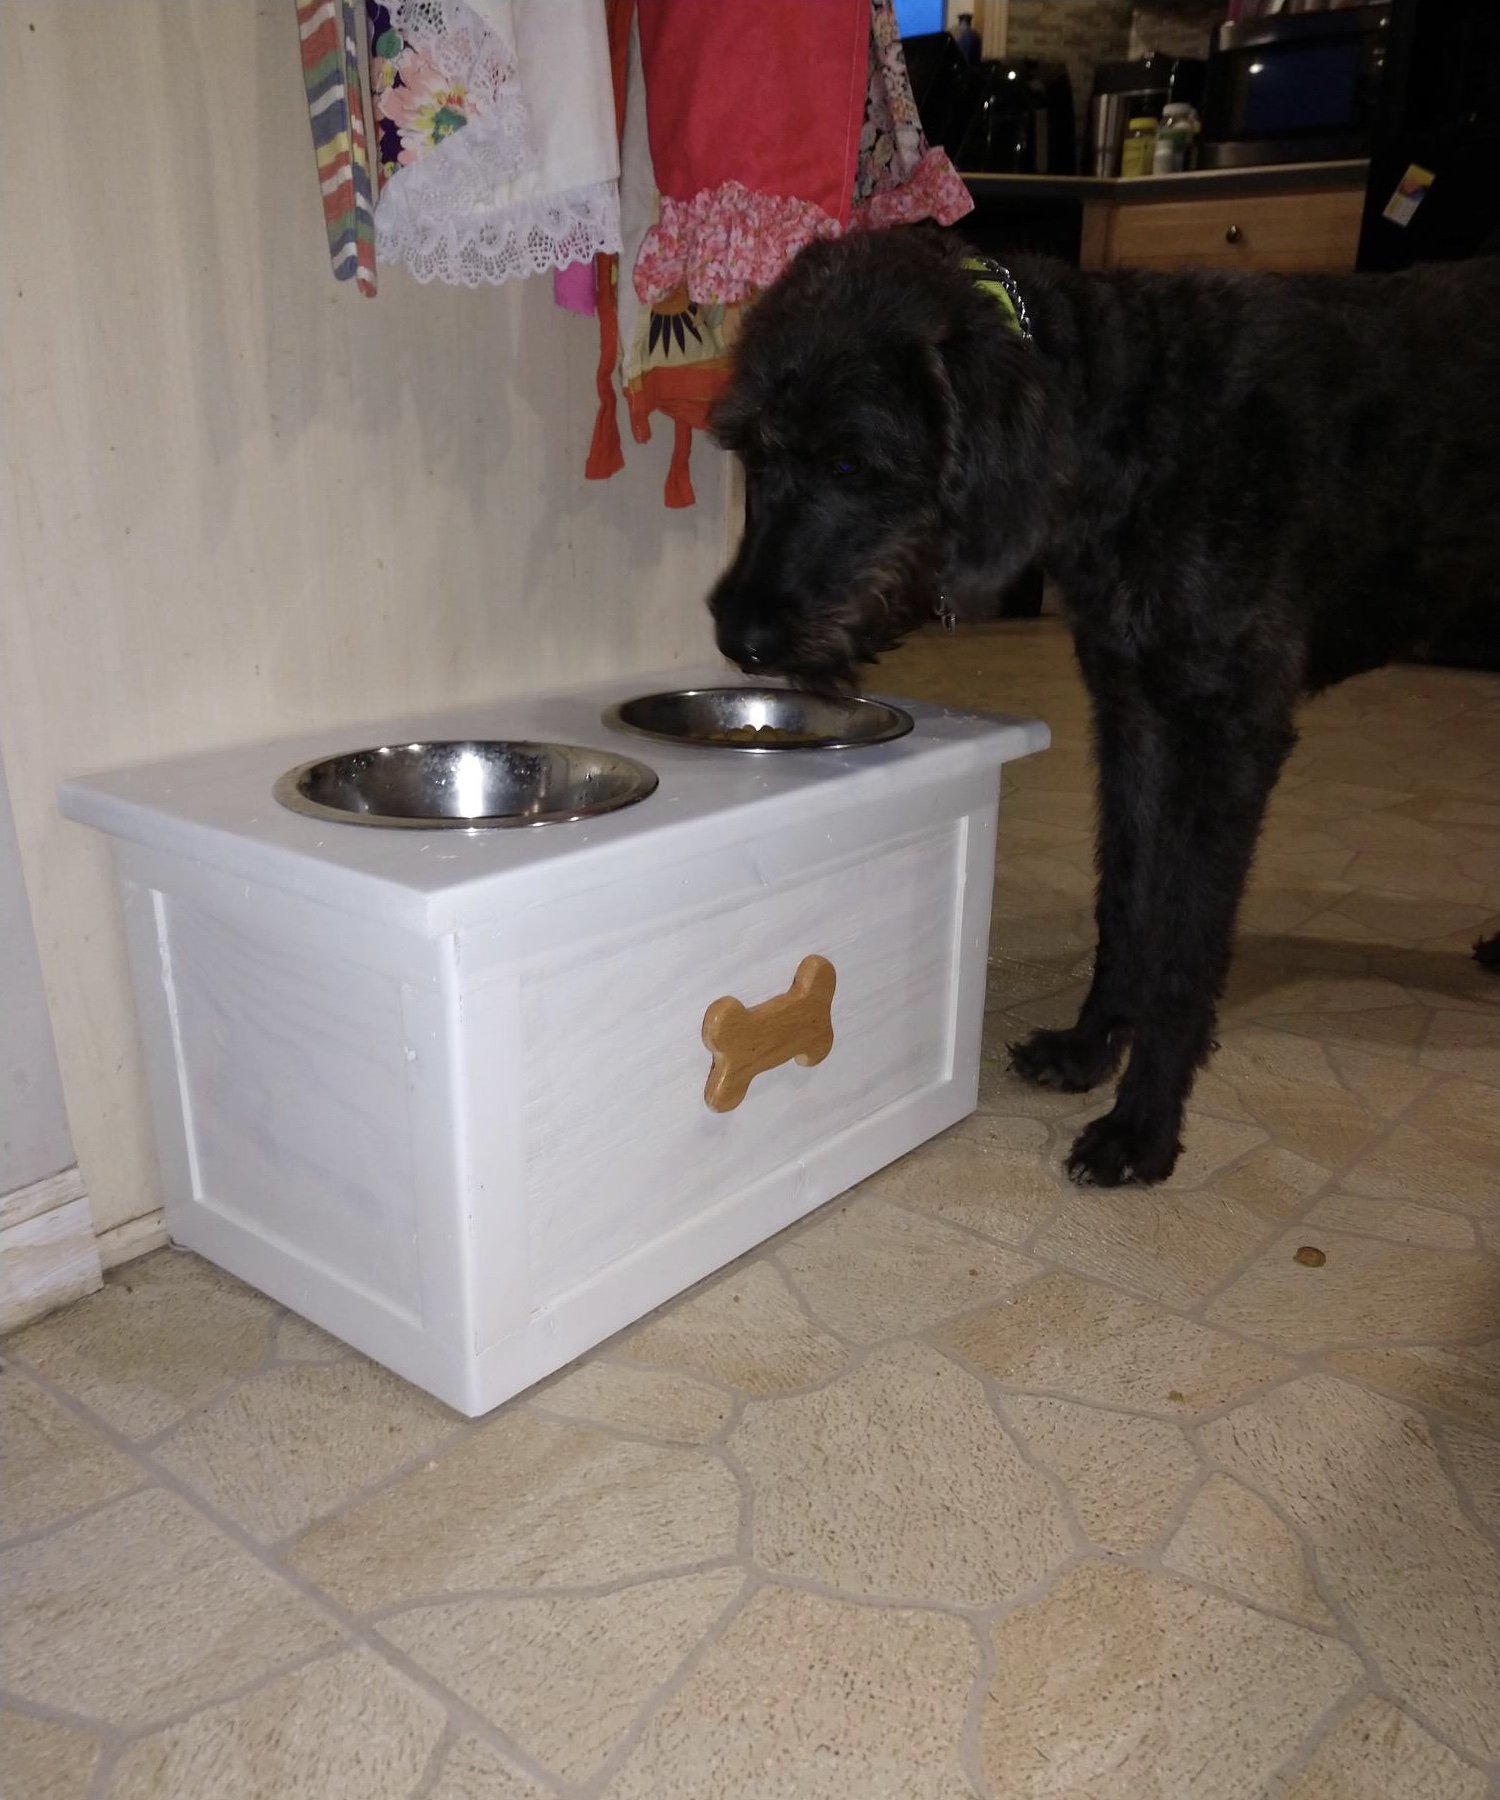
Dog feeding station with storage. Have a container of dog food underneath. Whipped up with some scraps while quarantined today.

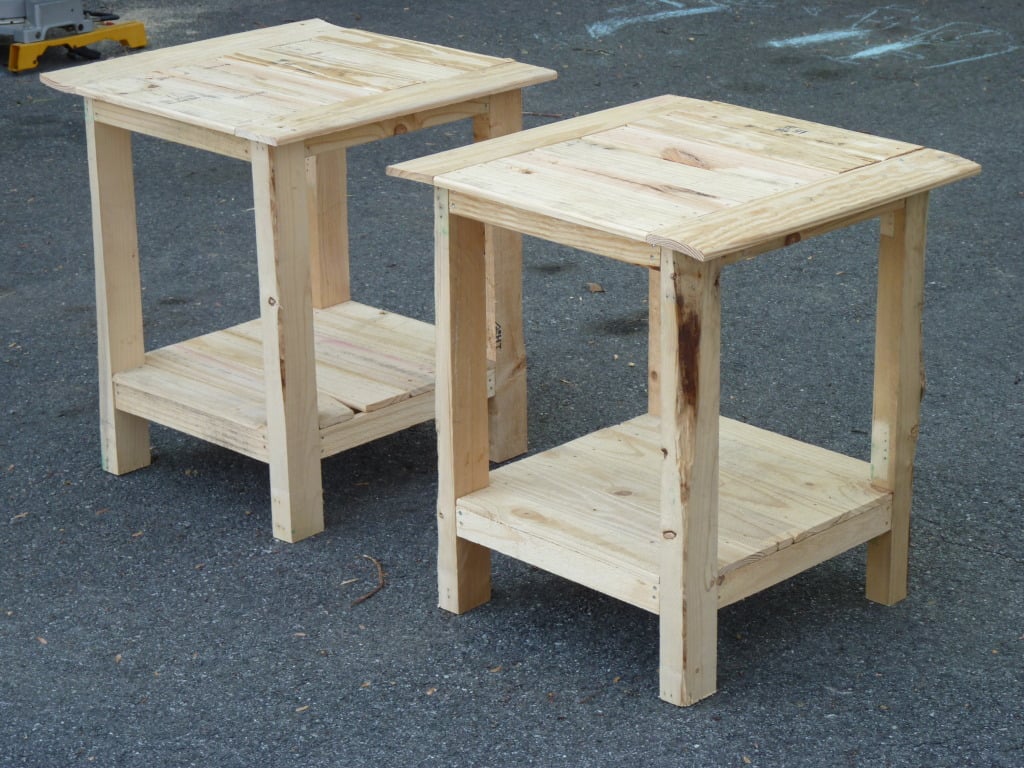
All the wood is from pallets, which you can find for free at local big box stores.
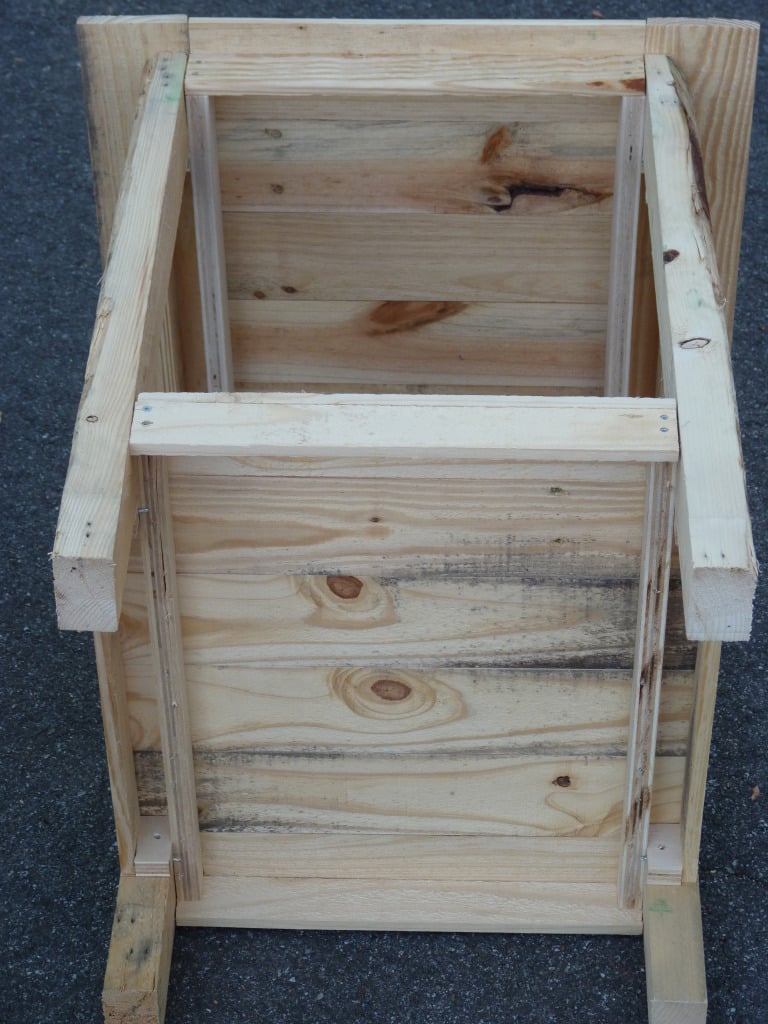
I added the shelf with the same support system used for the table top.
Made with as little cost as possible so materials are not too much.
Material:
A few pallets
Wood screws
Tools:
Table Saw
Miter Saw
Drill
Sander
Measuring Tape
Square
Pencil and Paper
Stain
Brush
Shop Cloth
This is my first Project :)


Comments
Ana White Admin
Mon, 06/05/2023 - 19:18
Great buffet table!
Thanks for sharing, it looks fantastic!