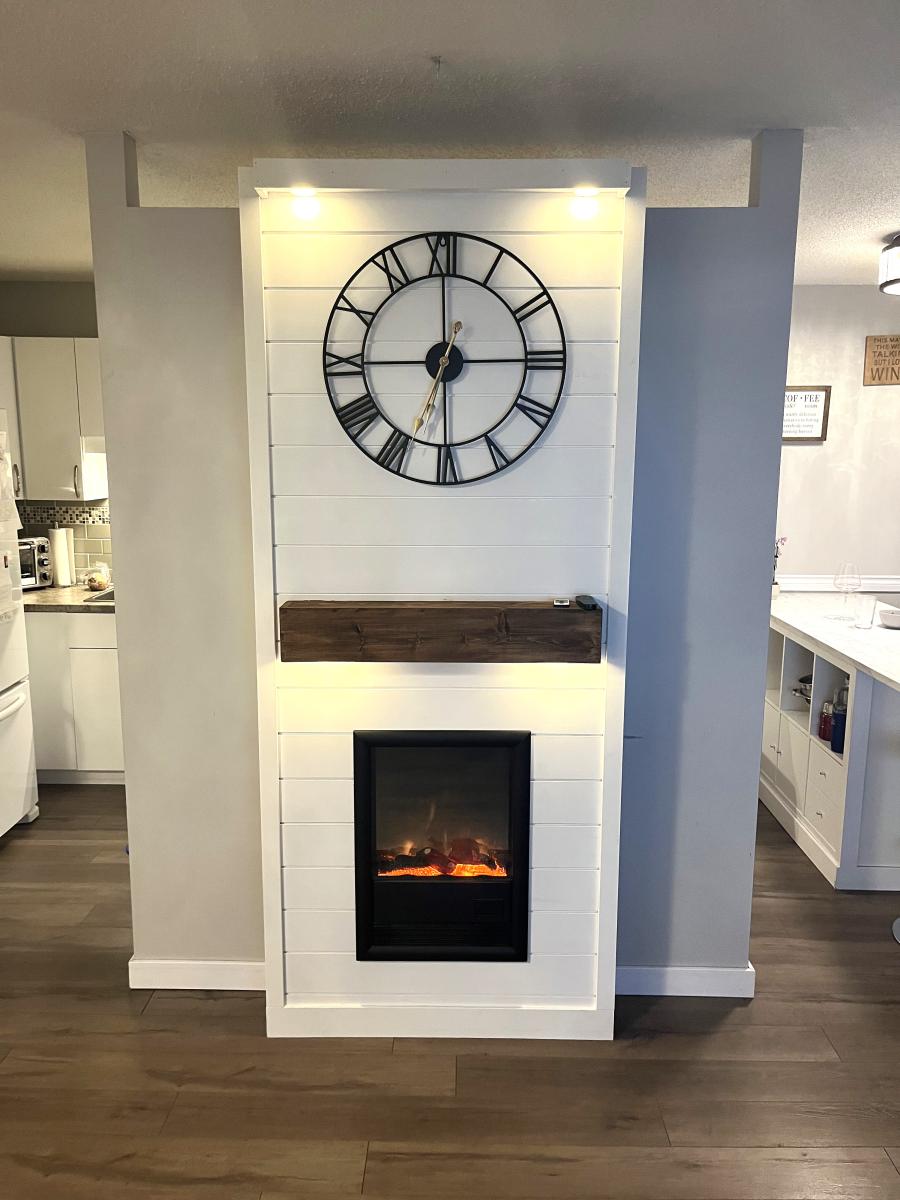
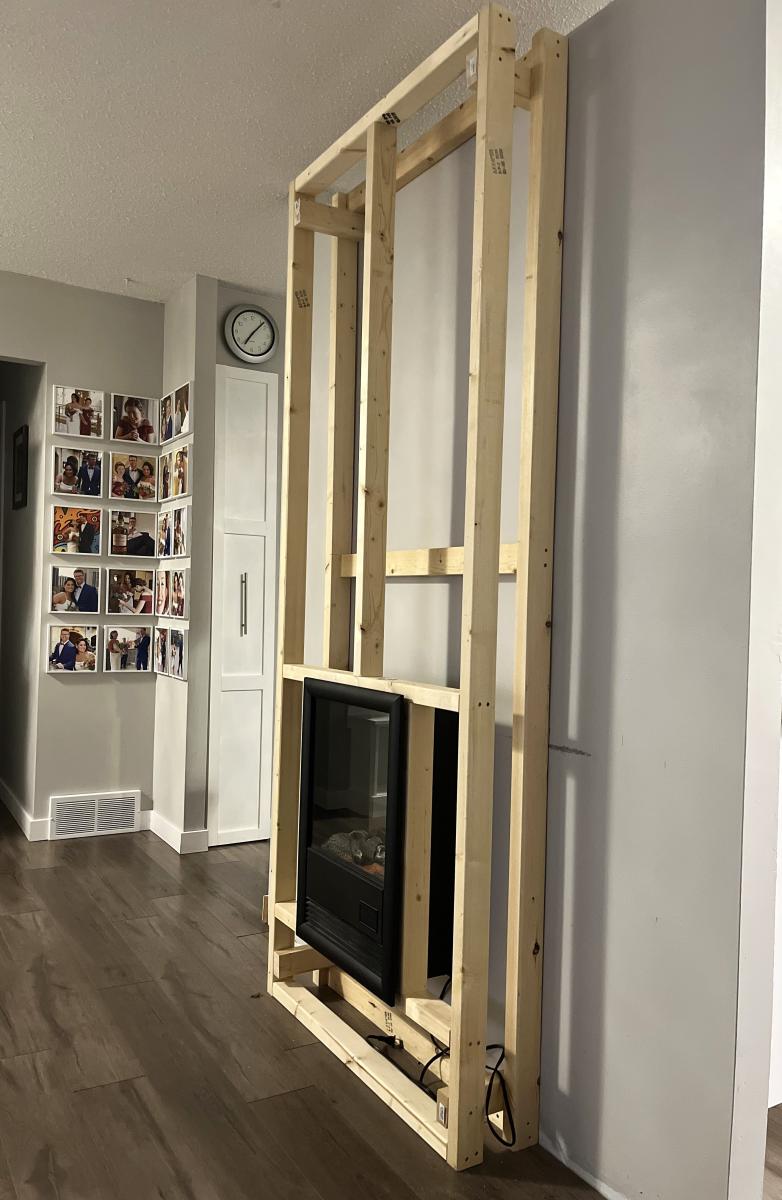
Small Shiplap Fireplace Wall
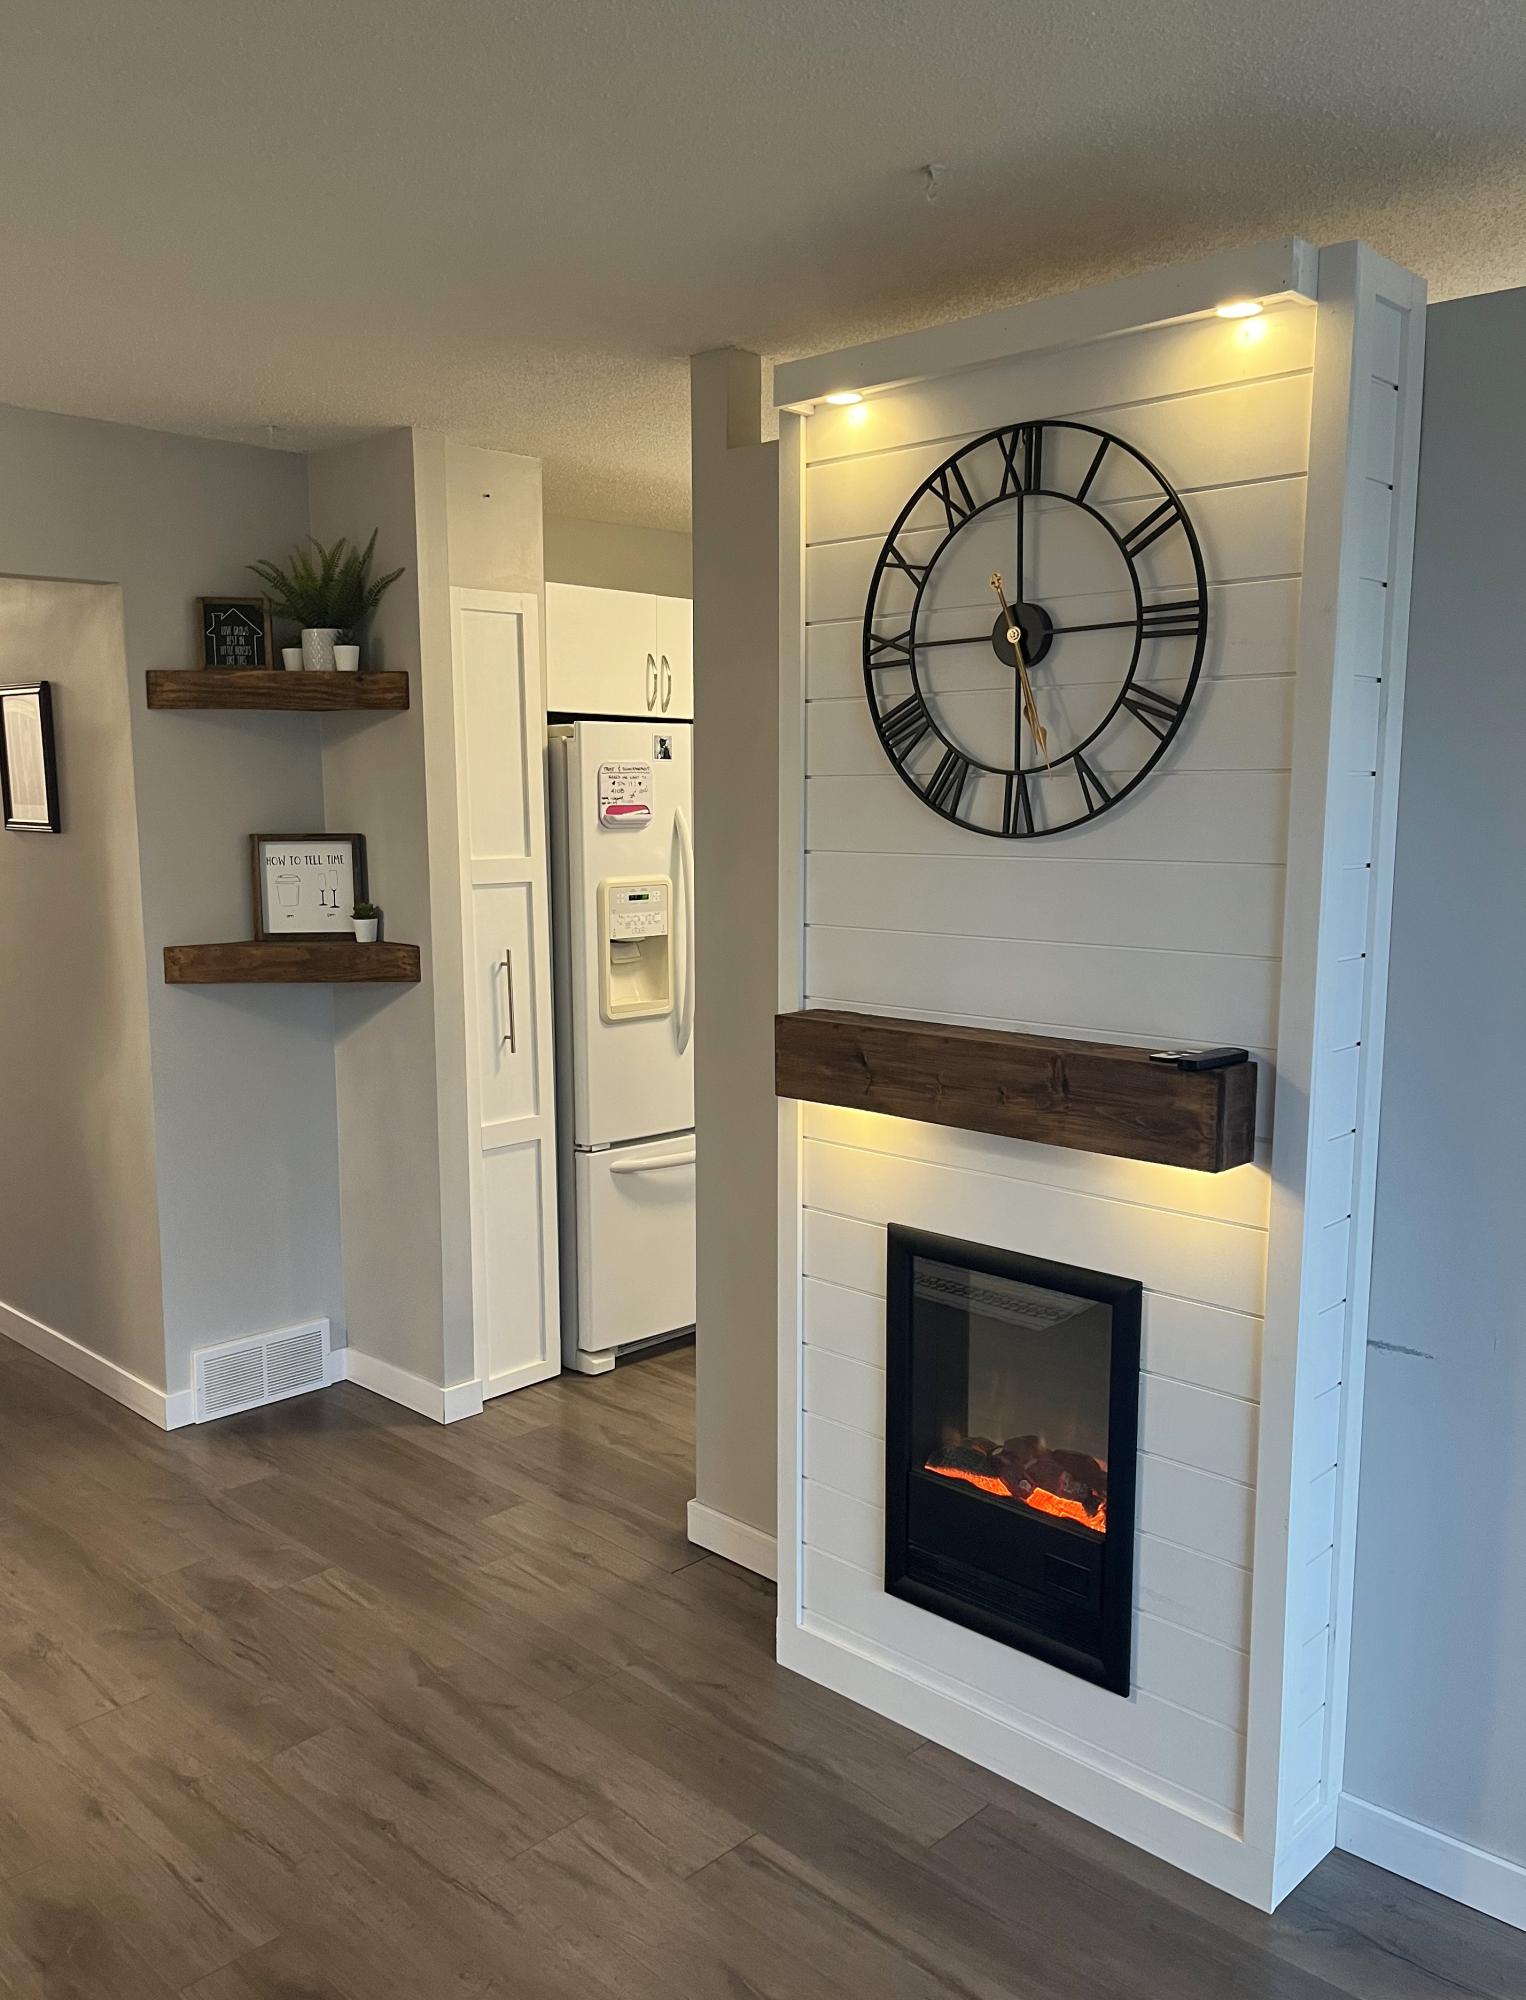
I copied Ana’s fireplace insert design. So easy and looks amazing.
It’s my favorite so far.
Thanks Ana!
Al
Built from Plan(s)
I copied Ana’s fireplace insert design. So easy and looks amazing.
It’s my favorite so far.
Thanks Ana!
Al
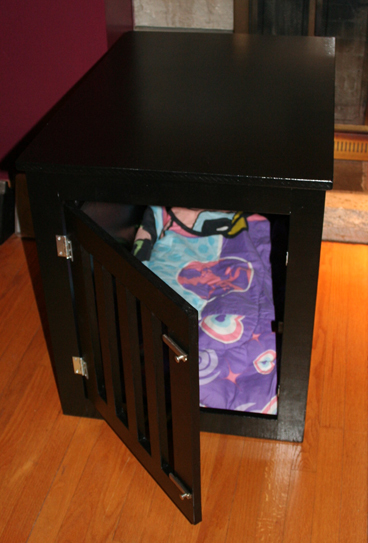
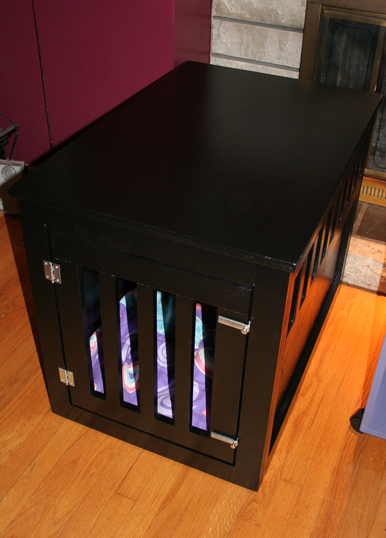
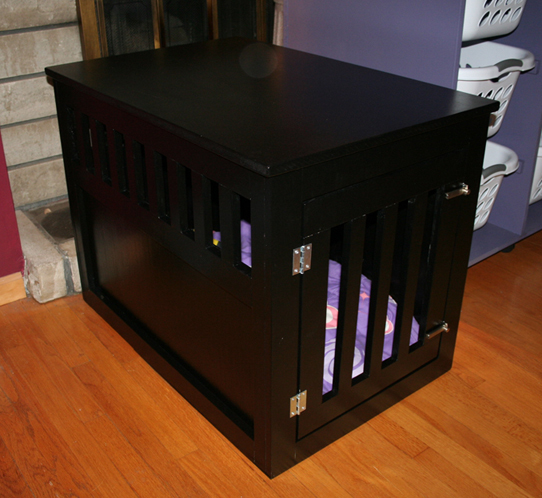
I'm fostering two mastiff puppies and they quickly outgrew the old plastic kennel they were sharing. So, I built them a new and improved kennel! It's so much nicer than that old one and looks great in my living room. The puppies appreciate the additional room, too! Now hopefully a family comes along soon to adopt them before they outgrow this kennel, too! :)
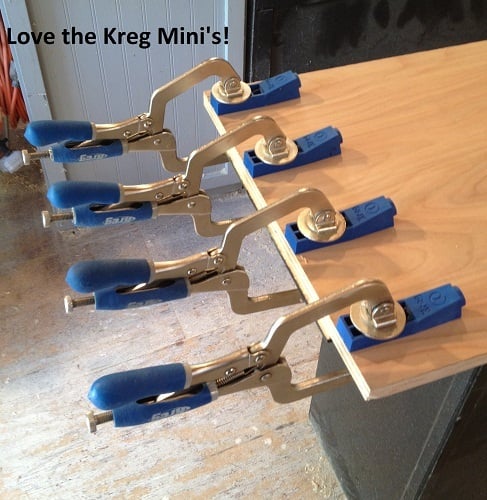
Building this kennel was the first time I used a Kreg Jig. I LOVE it! I will be using it a lot more on future projects.
I put a stop plate on the inside of the door frame so that the door stops right where it should to latch it and not swing inwards.
Fri, 09/13/2013 - 20:41
Just wanted to say that I just started fostering and have a German Shepherd/Border Collie mix that came with a large wire crate. If I keep up with this fostering, I think I'll need a small, medium, and large one! Love it, thanks for posting....I'll be buying more lumber again.
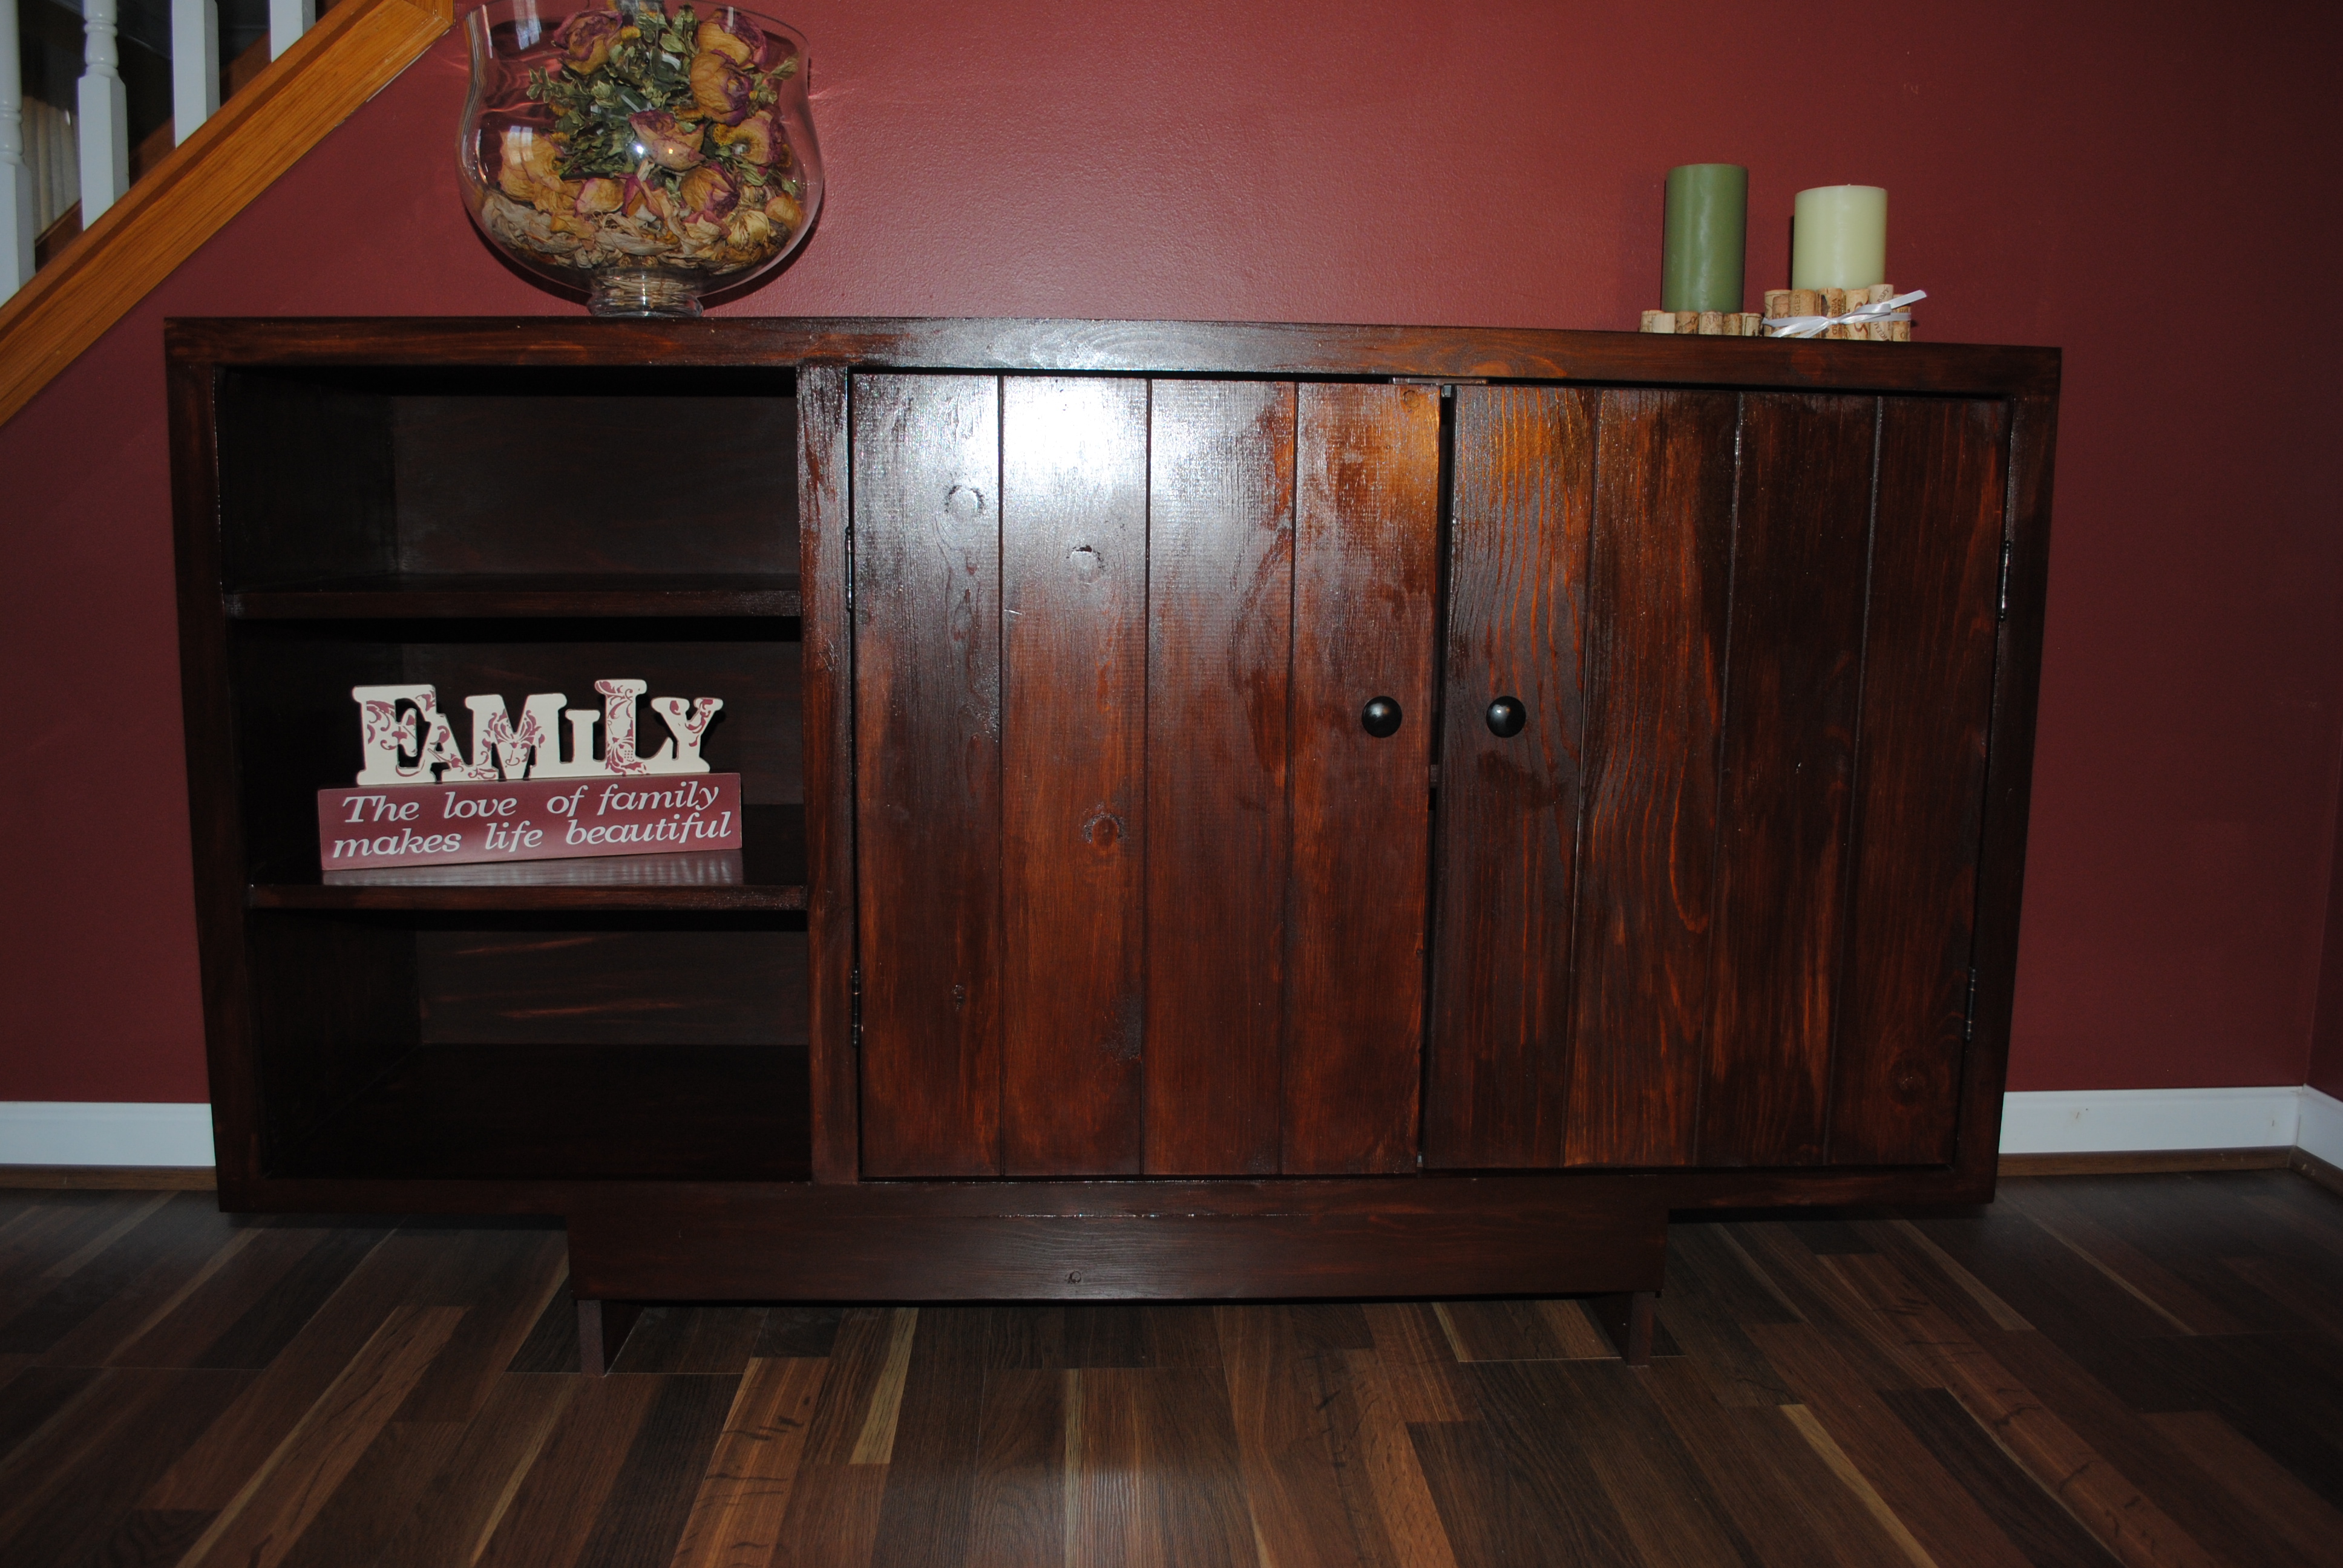
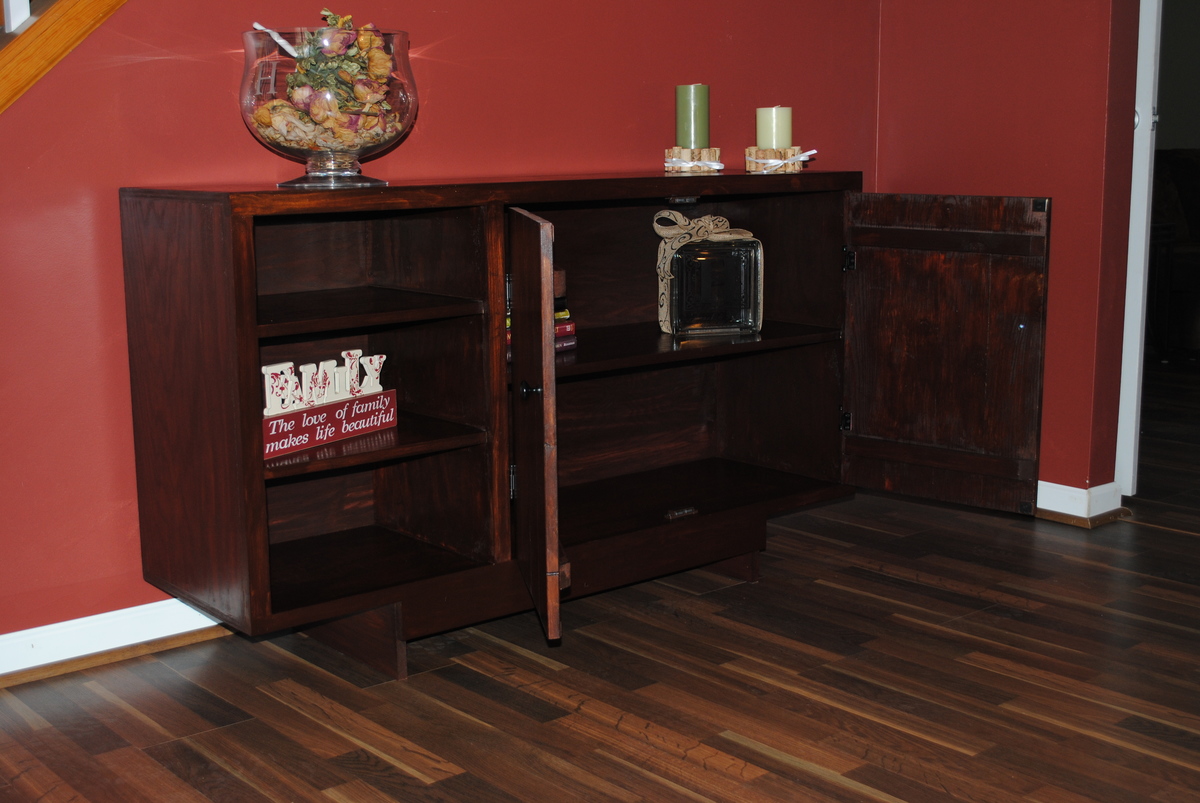
I installed the shelves and the center dividers with dados. I suggest planning ahead for your hinges, I had a rough time finding the perfect hinges for some reason.
A big, big, BIG suggestion though, is to stain BEFORE assembly!! I nearly destroyed the piece with the difficult staining in the inside corners. It is very difficult to keep stain even in them. I used General Finishes "Black Cherry" water based stain, the first time using a water based stain. I found it very unforgiving and it left bad blotches, brush and rag marks. I topped it with General Finishes Arm R Seal.
In the end, this came together well enough that I felt a little guilty for not using better lumber than pine. It's nice enough, I think, to warrant spending a little more on quality hardwood.
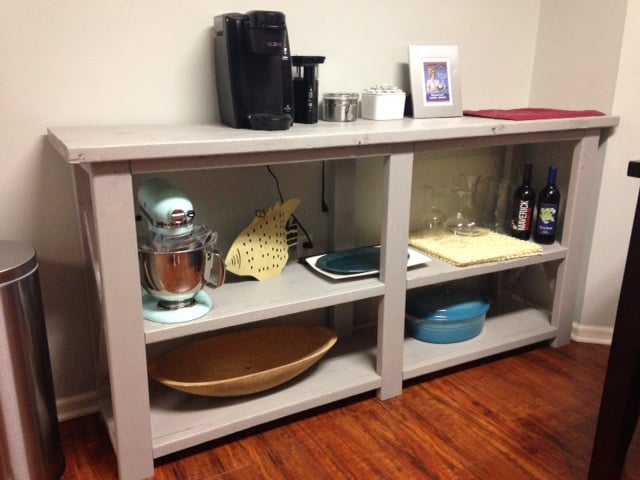
My birthday present from my hubsand. He built it following Ana's plans, then I stained it in Sunbleached by Varathane. I had him make the top shelf higher than her plans called for, though, so that my KitchenAid mixer would fit.
Have a long wall and this was perfect! I love everything about it! I enjoyed working with miters for the 1st time! FUN!!!!
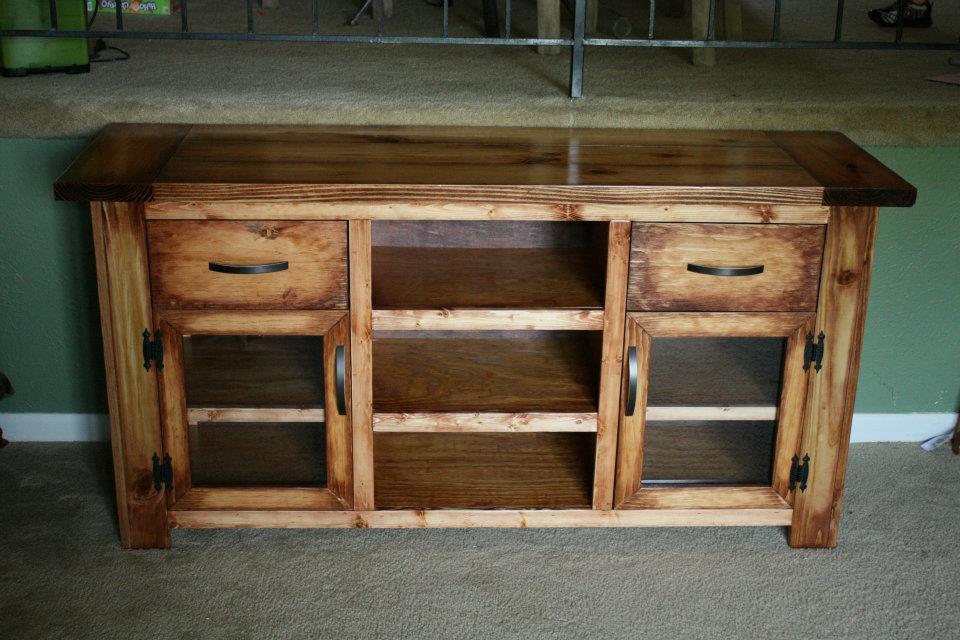
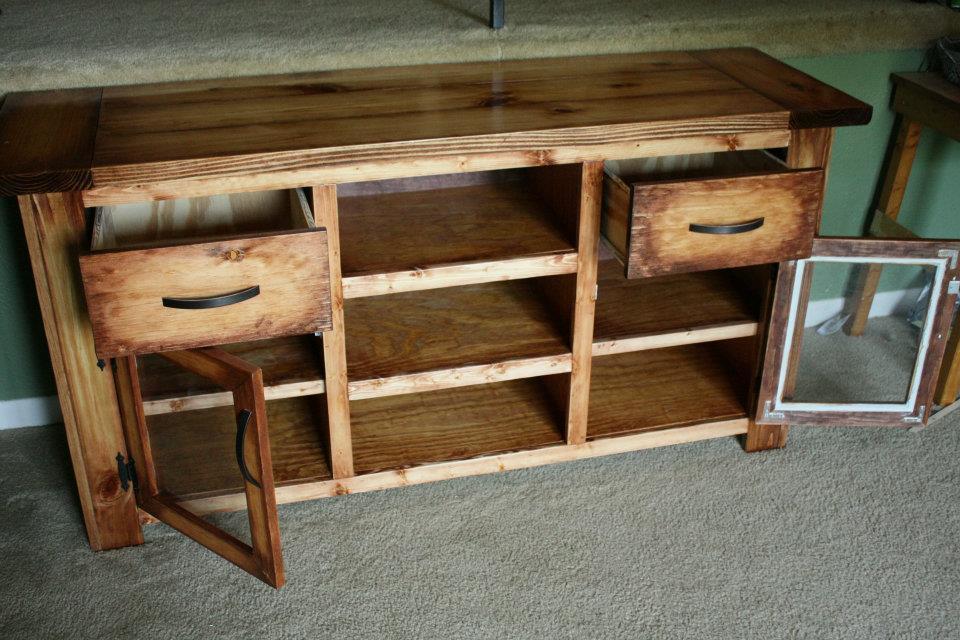
I made this TV Stand for the family that bought the coffee table that I made before. I loosely based the design from a medley of things on the site, but ended up drawing up plans myself in Sketchup.
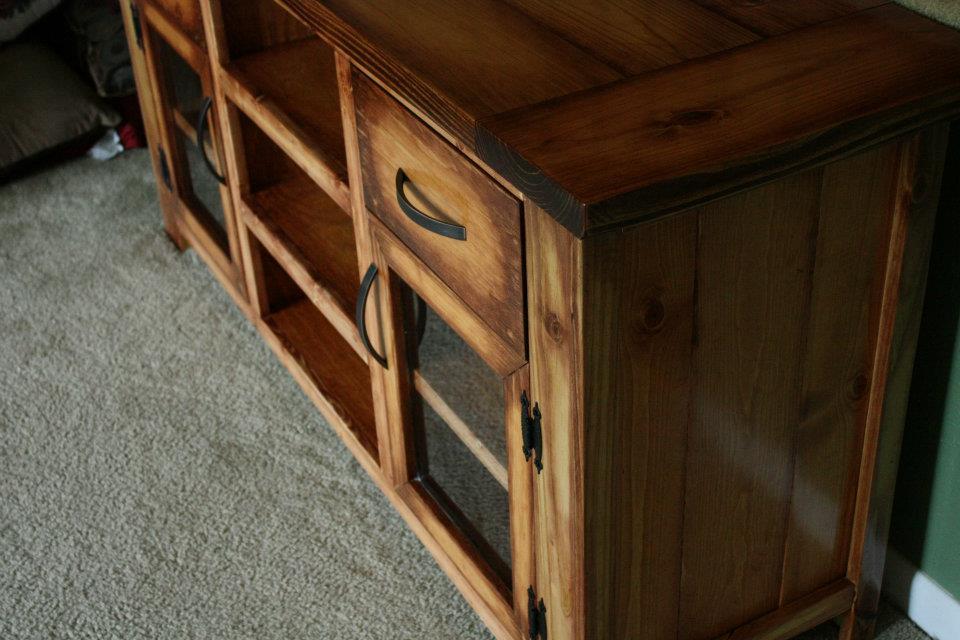
This took a while because I had to think through alot of the design things - like how to best do the glass panel doors and how to compensate in the plans for some bowing in the plywood.
It is basically a plywood box, trimmed out like most of the things we DIYers do.
My biggest challenge in this project was cost... I severely underestimated how much it would cost me to build it, so I ended up with only $50 profit on the job... Does anyone have suggestion.. if you are building things to sell them how do you price your products? Just curious.

Mon, 05/21/2012 - 09:42
Love this, really great job! As for pricing, I wish I could give you great advice, but I know there can be a lot of variables, such as cost, hours spent, overhead, etc. I know you should at least price the cost of materials and double it at the very least. If you want to consider your time spent, etc, it would go from there. There are some good articles available on-line.
Mon, 05/21/2012 - 18:35
I will do some research online. For quotes I've been giving since I realized that I was not going to profit on this work was exactly that... take a complete materials cost breakdown and just double it. I'm finding though that I have much more work available to be done than I'm ever going to have time to do....so I think that I will start going a little higher once I start needing more work. Really what I need is more time to do the work. I think I could do well if my son were in school but he isn't yet, so the only time I can work on these projects is during the weekends when he is gone. That means I need to get about $200 profit from one weekends worth of work to pay my bills. :)
Mon, 05/21/2012 - 08:34
Amazing work. I agree, cost is a tough one. I always figure out my materials and charge for full sheets and lengths, then add 20% to cover screws, glue and anything I missed (kind of a OH cover). I figure out my hours, and charge those back at whatever "rate" I would be charging for the piece....try your best to pad these a bit too. I worked in estimating for several years; so you kind of get a feel for it after awhile. Good Luck!
I LOVE the finish on this and your coffee table; mind sharing your technique??
Mon, 05/21/2012 - 18:45
There are more factors than just materials... also have to consider how much money I need to make within the month to pay rent. :)
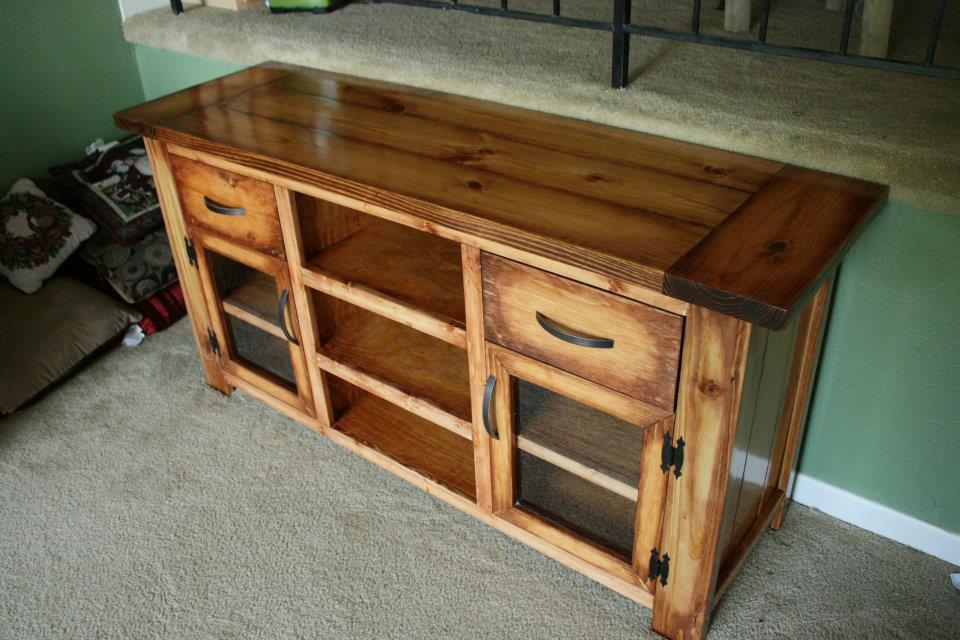
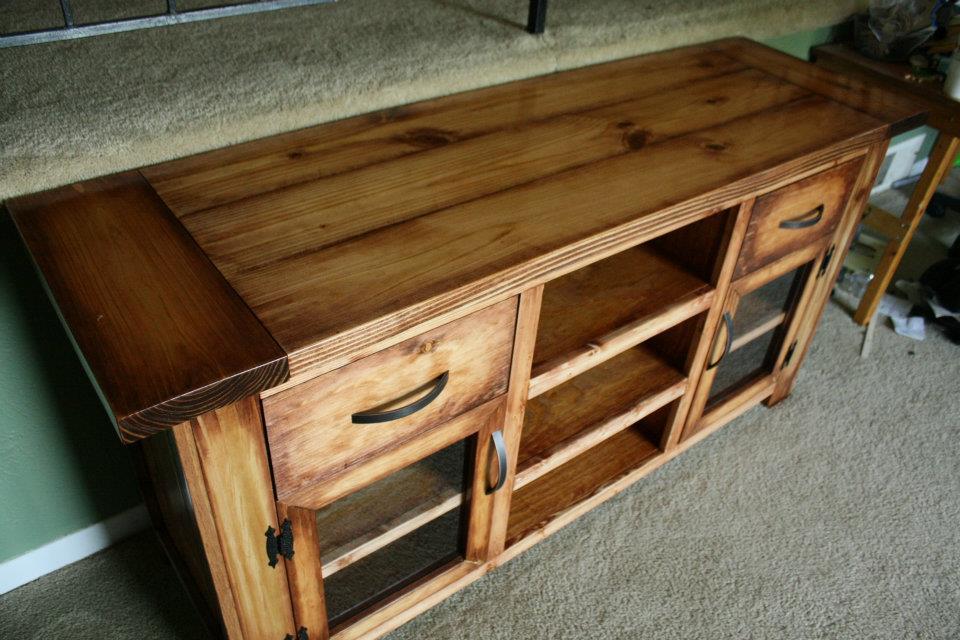
For the finish, I sand everything down completely working my way up to 220 grit. I used Minwax Golden Pecan with a thin layer using a foam brush. I let that dry completely, without removing the excess. Then I use a cloth and my finger tip with Minwax Red Oak and dip the cloth in my stain, then rub it slowly onto the edges, rounding them out a bit. I go slowly so I can blend it in because I don't want any sharp lines. I also use the darker color to accent some of the knots. My basic idea is that each board has darker ends/edges and is lighter in the middle. This part of the job is the "artistry" - the rest is all pretty straightforward. The poly is the hardest part for me.
By the way, I advertise my work with that coffee table, and I have had a tremendous response to it - in large part due to the finish. Everyone loves the finish.
I got the idea from the 20 second tidy up table here on this site.
What I love about it is that it ties together all the other different wood colors in my living room. You know when you go get a rug with multiple colors or a pattern to tie everything together that would otherwise seem mismatched? THAT is what this finish does for a room. :)
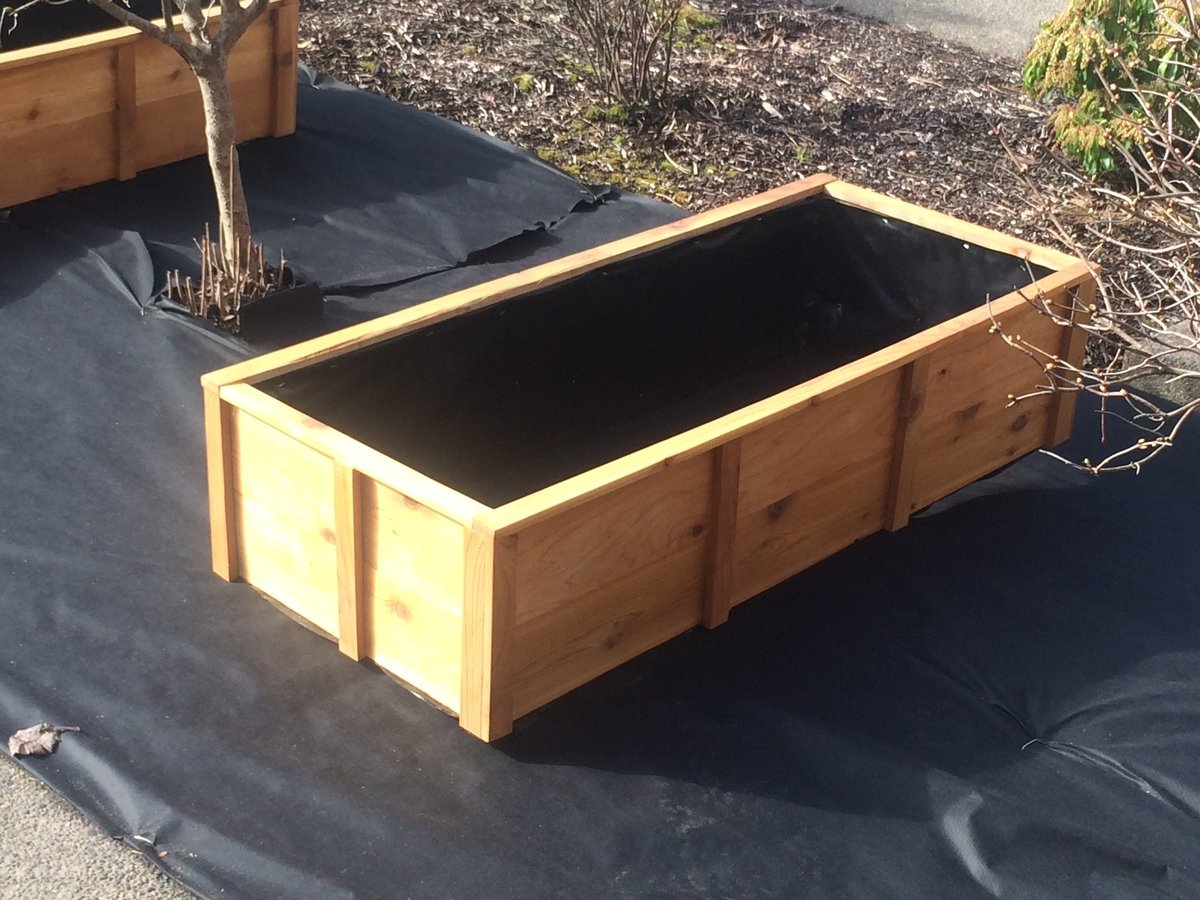
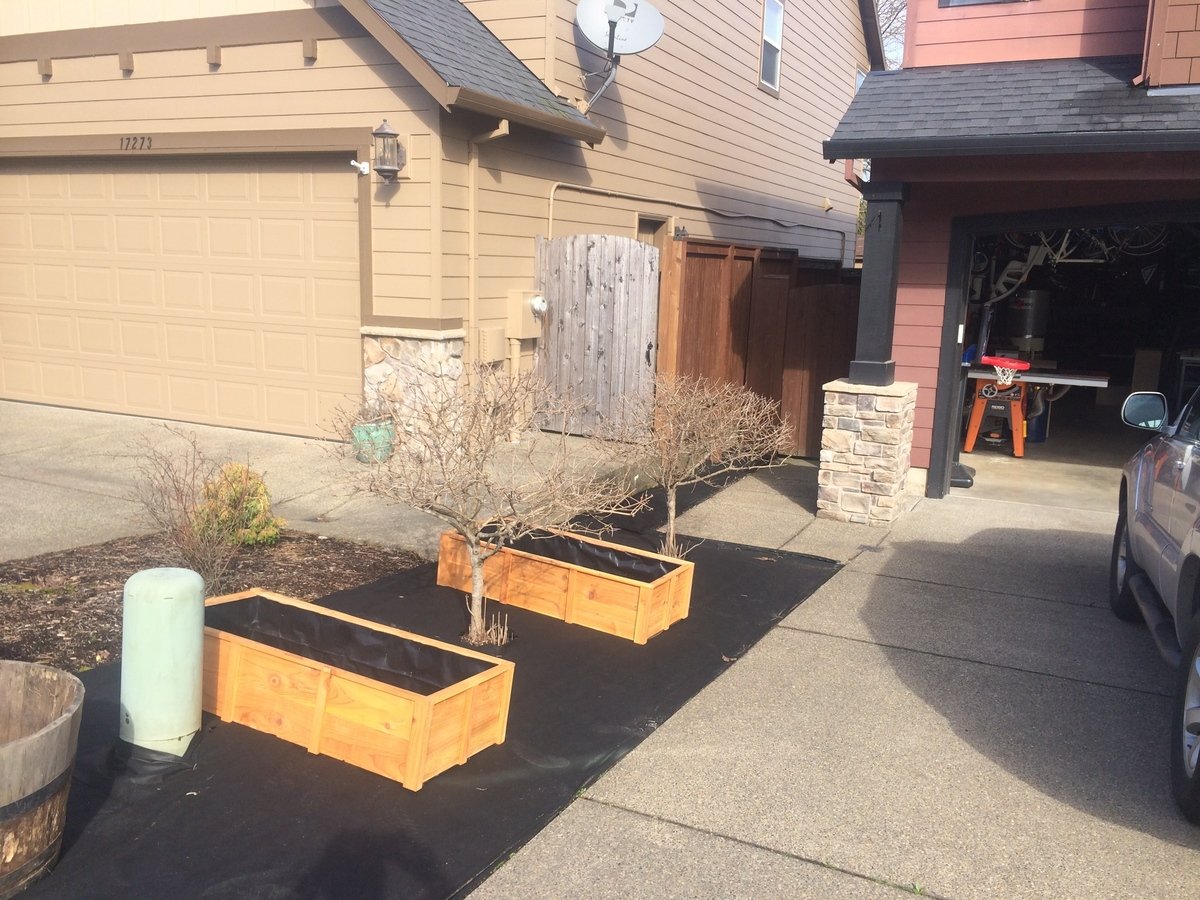
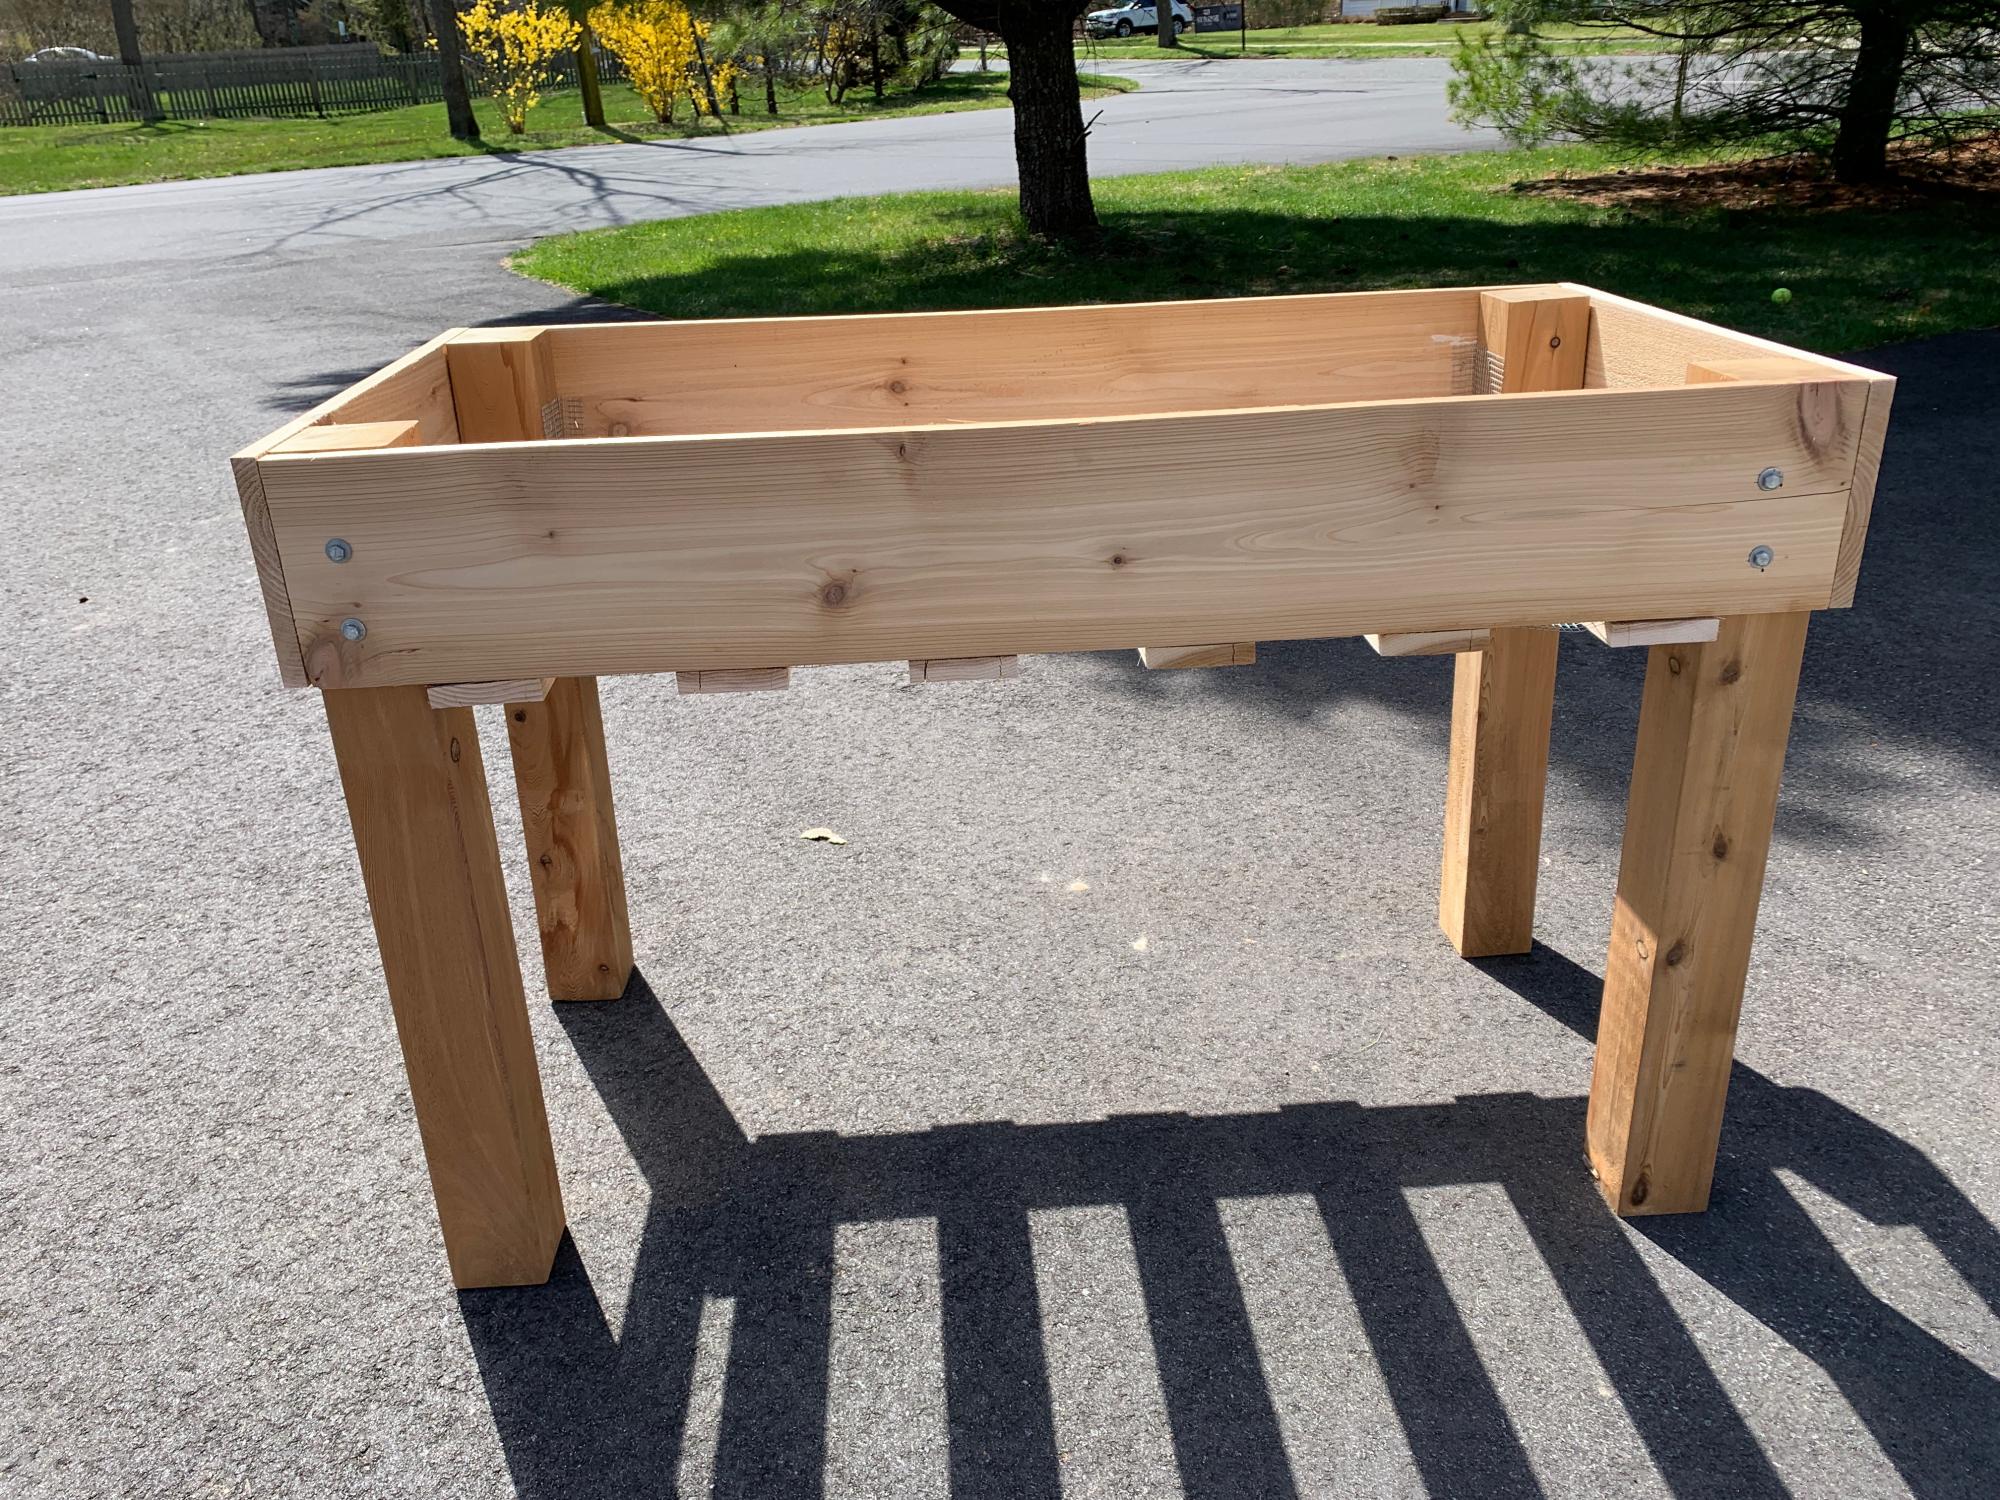
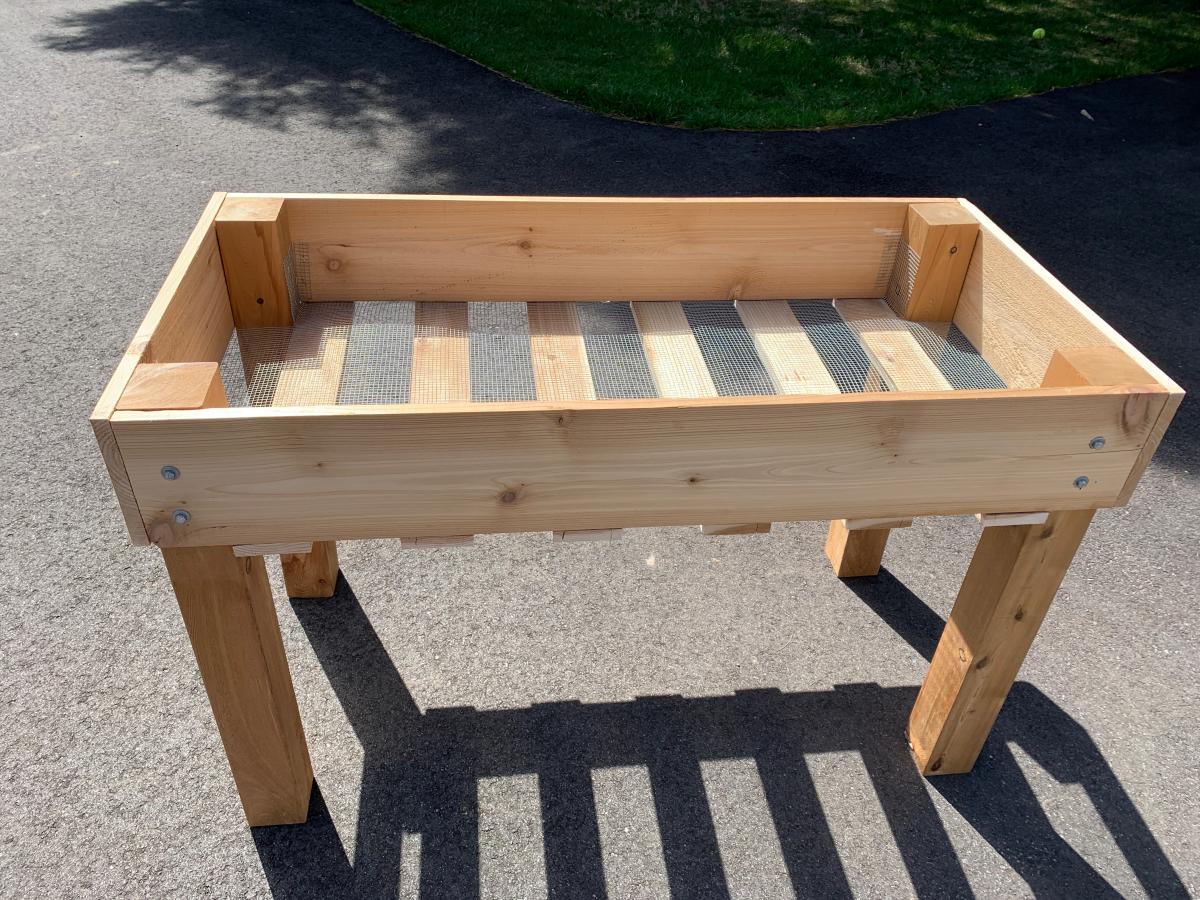
With Spring near I decided it's time to finally make some vegetable boxes. These plans were super easy, and easy to add a few little features.
I live in Oregon and even though cedar is tough, with all the rain we get, the color fades fast!! I was also worried about the inside rotting away from the solid like you see at the bottom of a fence!
I was surprised there weren't a million different stains that were "Organic" with that be so popular. I new my kiddos would eat most of the stuff before it made it into our house, so I decided to leave the inside natural and line it with heavy duty visqueen.
I stained the outside to protect the wood, using some Australian Timber oil I had left over from another project!!

Our Post & Plank is grand in both scale and beauty. The large fir posts anchor this bed, and give it a proud, weighty impression.

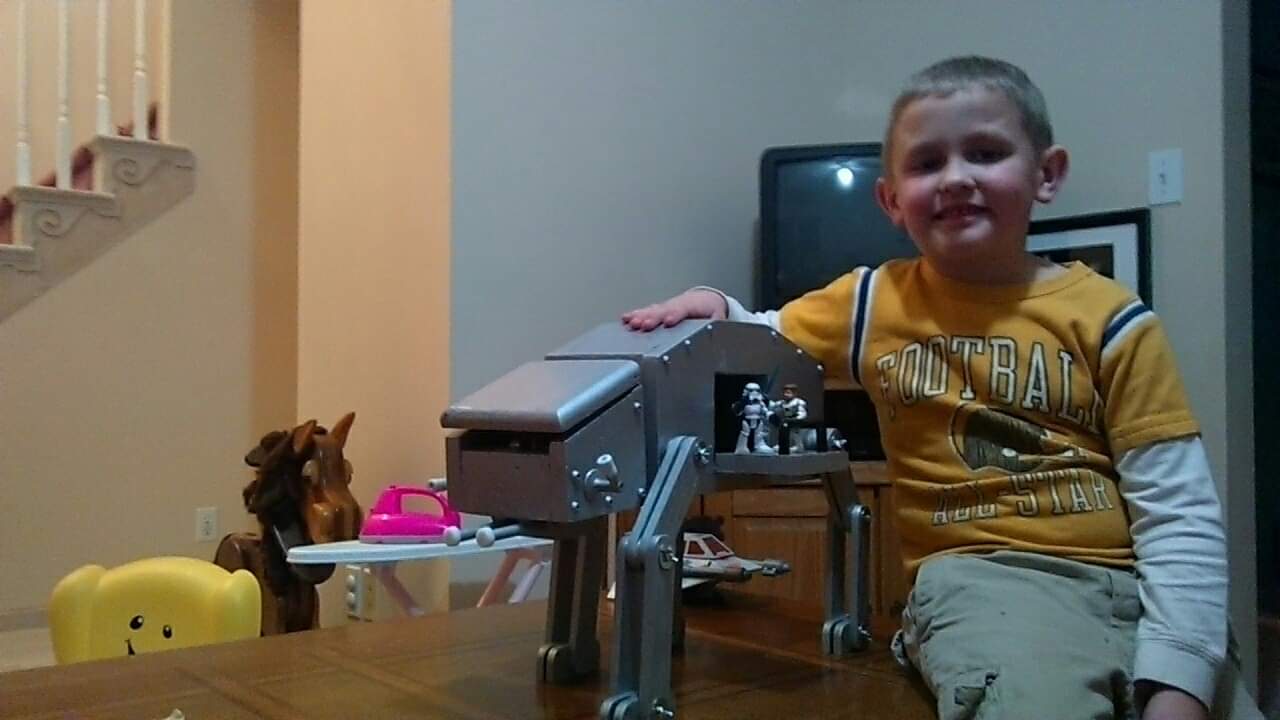
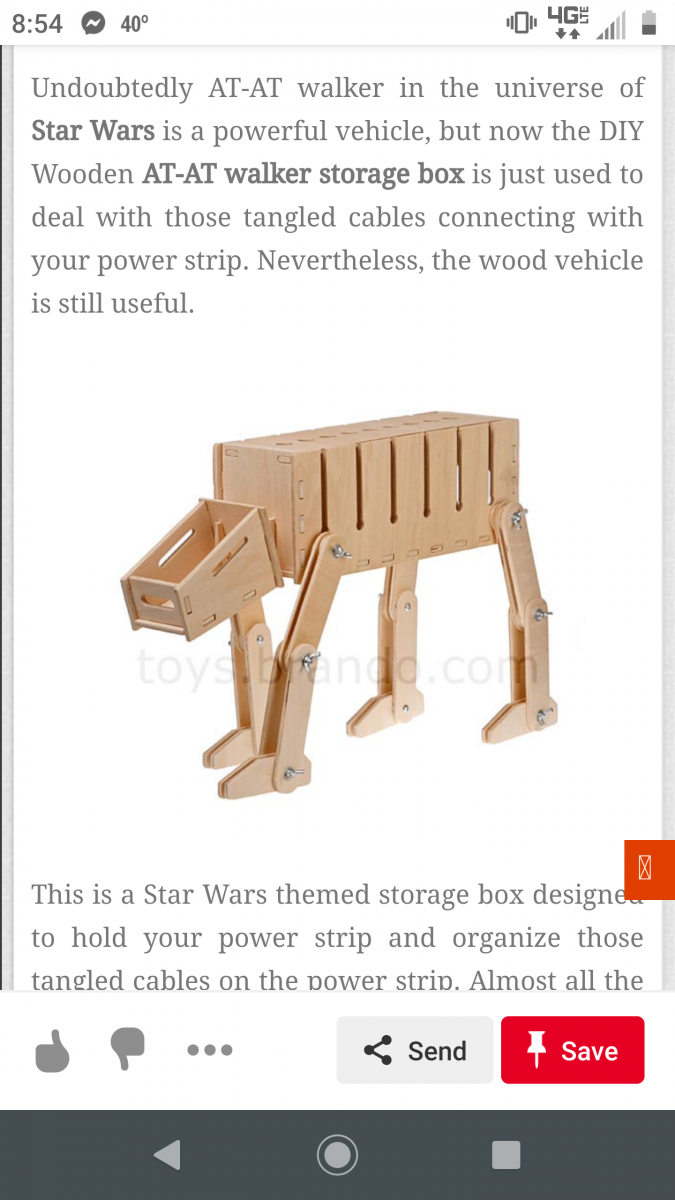
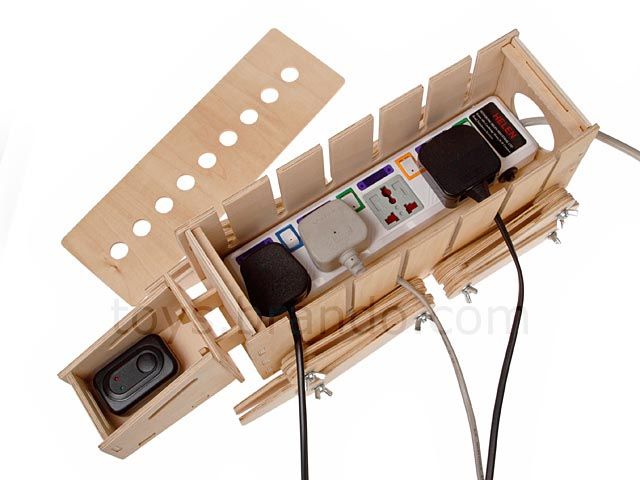
We couldn't find one in the store and my son wanted one for his birthday. I found an example online of a starwars themed charging station and he has played with it for years. Used some scrap wood and most of the cost was hardware and accessories.
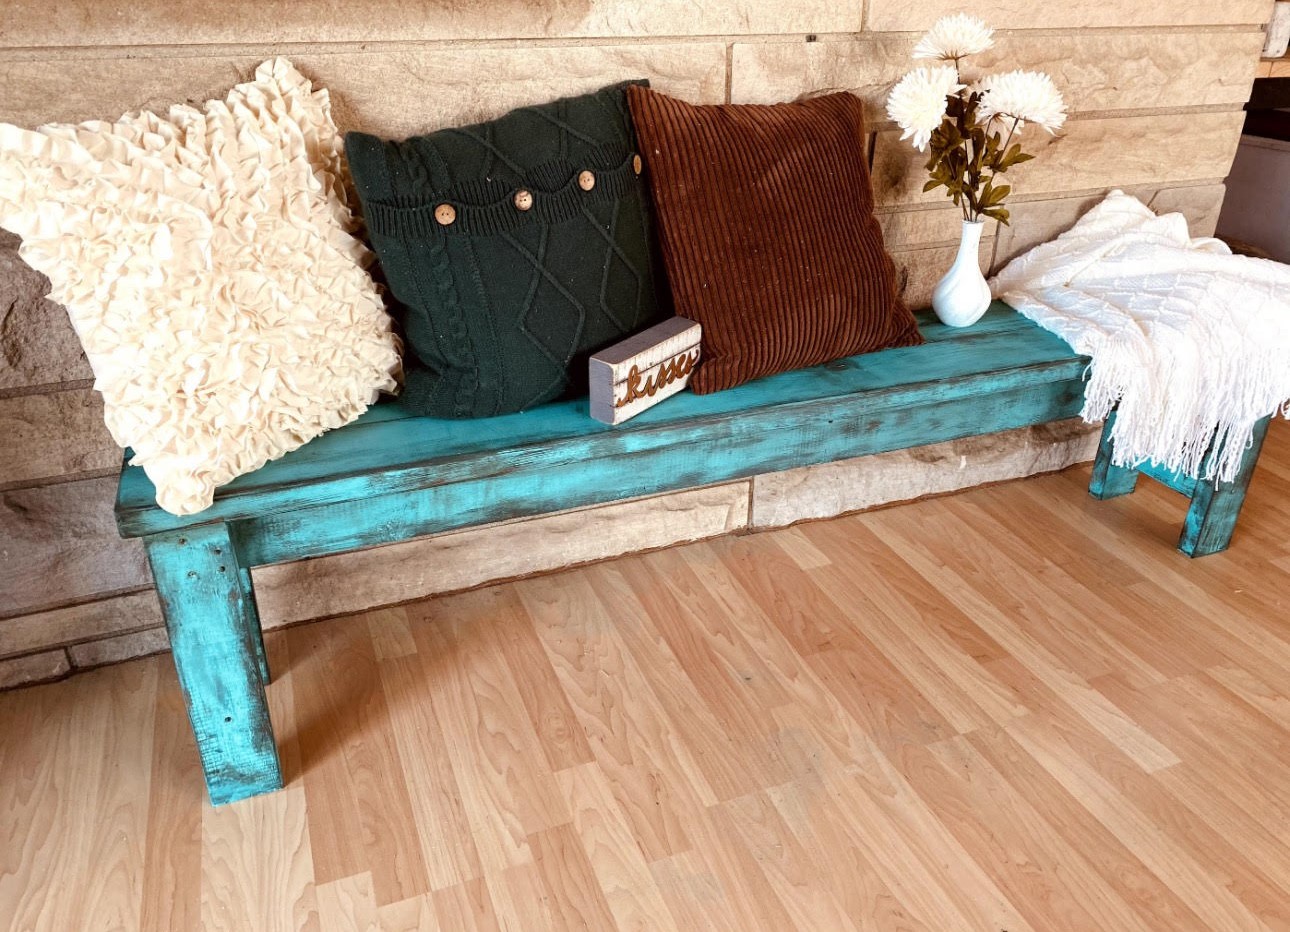
Beautiful farmhouse bench by Leila Adams
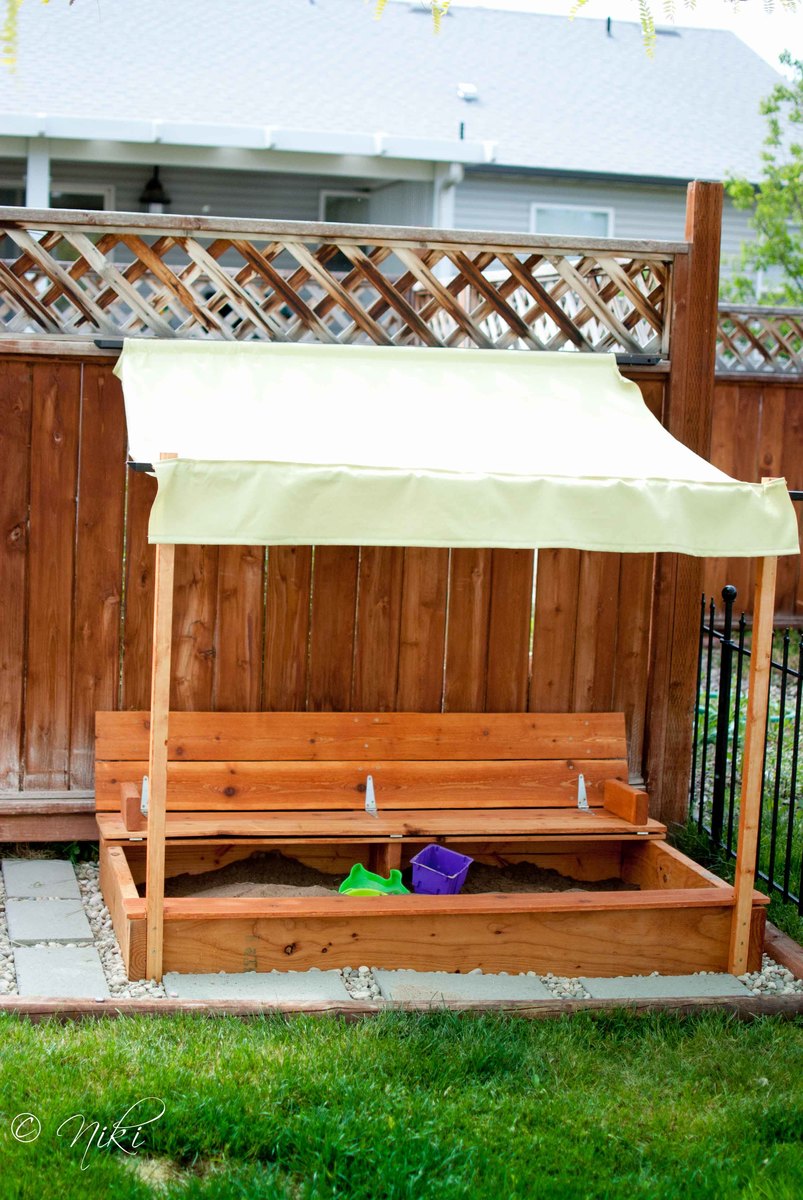
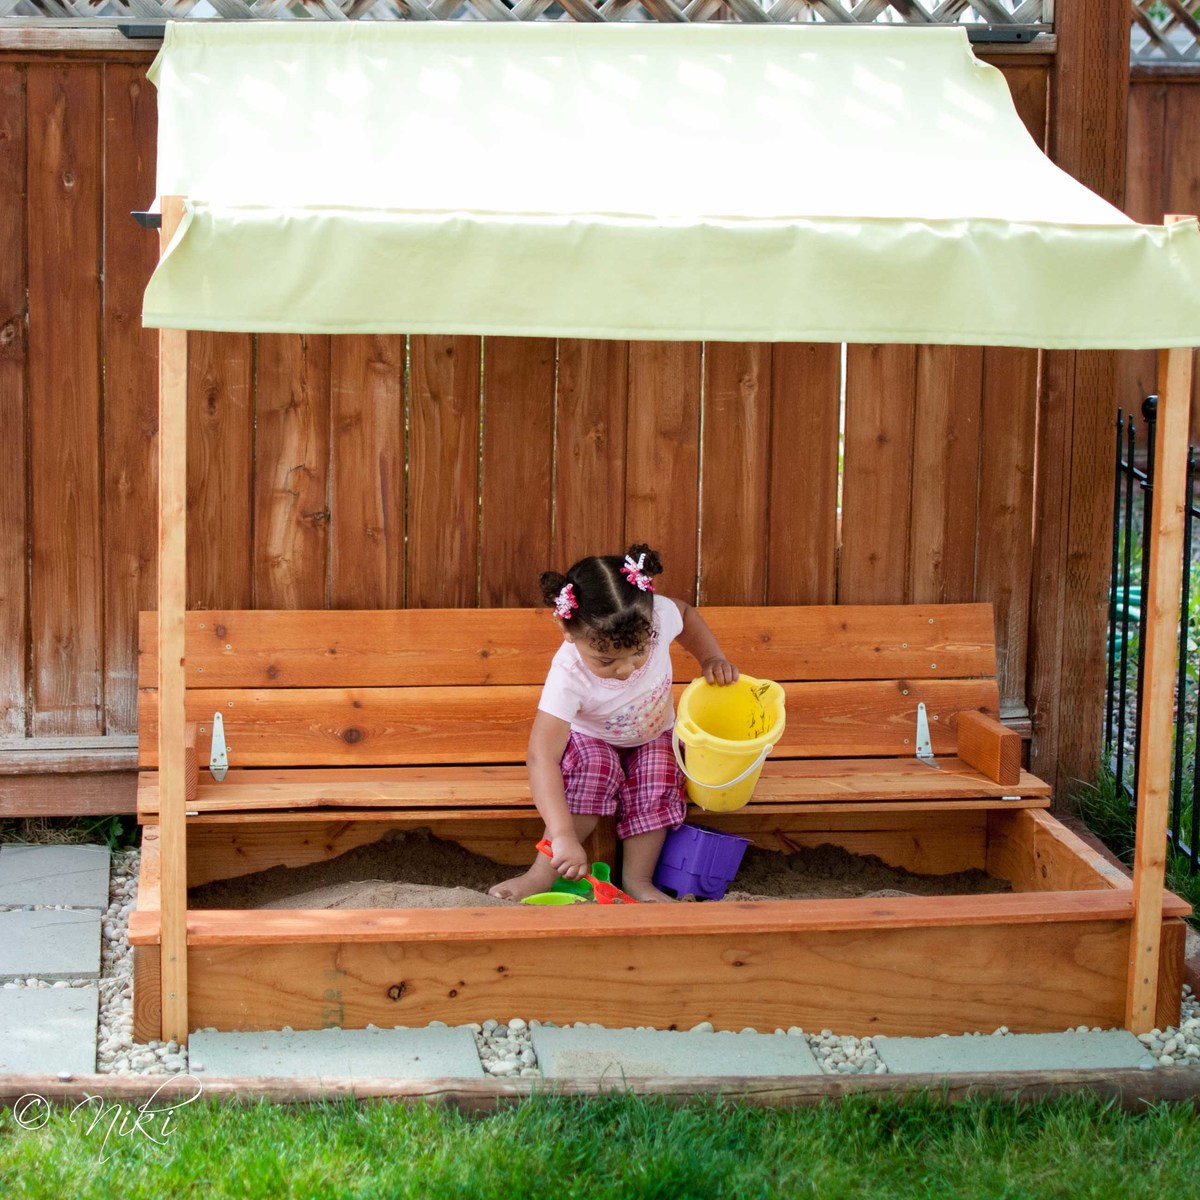
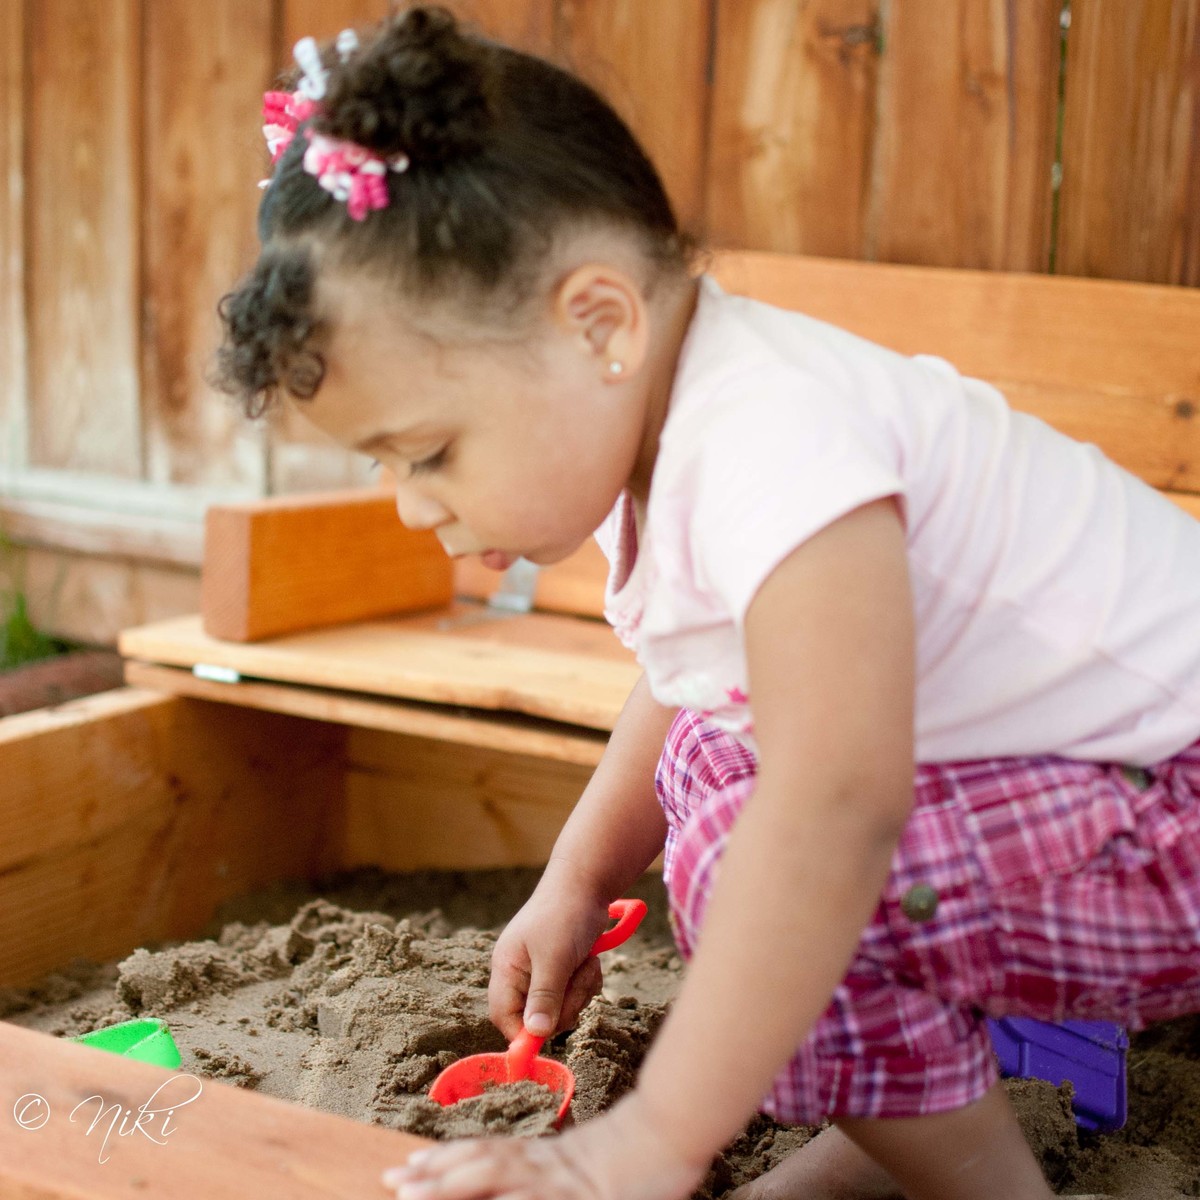
"Cellar? What cellar? We don't have a cellar... Oh, you mean the new sand box! Here, let me get some shade too."
I'm not sure why, but I can never seem to follow plans exactly. I guess that's not entirely true. I CAN follow plans exactly, but I almost never do. Maybe it's some sort of passive rebellion or something, but I usually have to put my own spin on the things that I build. Sometimes it works out in my favor. Sometimes not. This build was a little of both.
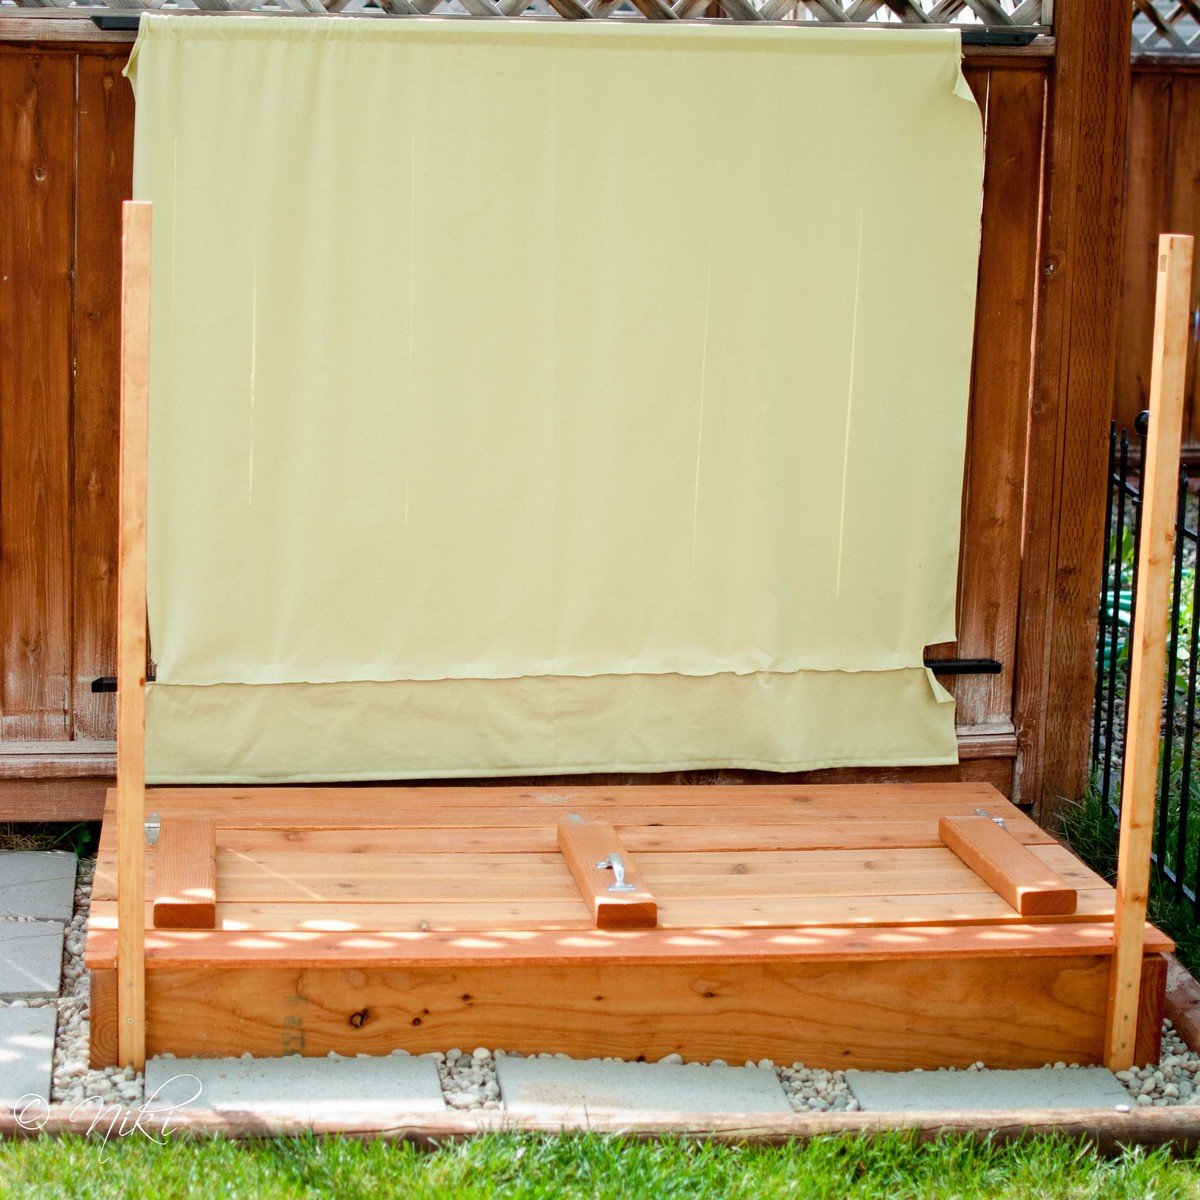
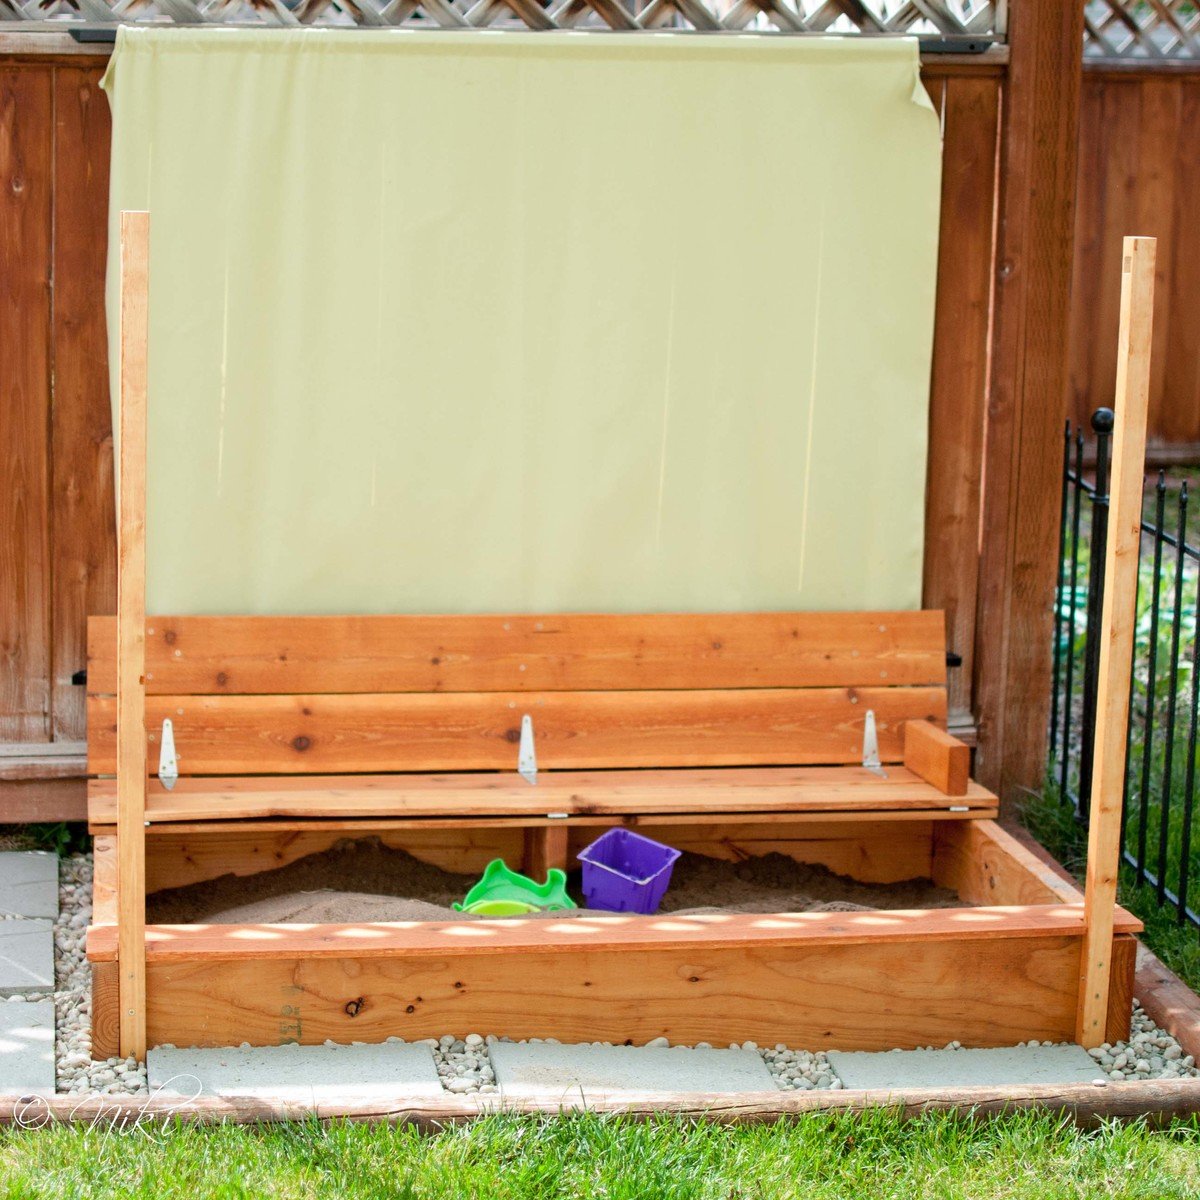
I decided to only build one bench in our sand box. This cut down on a lot of supplies. By making it longer a single bench and making it longer, it covers about the same amount of square feet, just in a rectangle instead of a square. When pricing lumber, I noticed that 2x8's were cheaper than 1x8's. So I went with those instead. It can't hurt to beef up the sides a little, right? This required some easy calculations on the cut list. I also decided to use 1x6 fence planks instead of 1x4 whitewood or pine. The fence planks were cheap, and I figured they would look nice in the back yard. They are also naturally pest and rot resistant. They required extra sanding to take the rough off. However, this is one place that I'm thinking the modification didn't work in my favor. The fence planks are not as thick as the whitewood. This combined with the increased length makes the the top pieces feel pretty weak. I put a little support piece under the bench. I'm quite sure the bench would not have held up well without the support.
Because this is an outdoor piece, I dry fit everything, and then stained everything before assembling it, to make sure all of the edges were well protected.
Cost breakdown (not including canopy)
Fence planks $14
2x8x8 $11
hinges $9
handle $2
stain $10

Thu, 03/07/2013 - 08:49
I just love the changes you made to this sandbox! Can you tell me what you used for the construction of the canopy? Thanks!
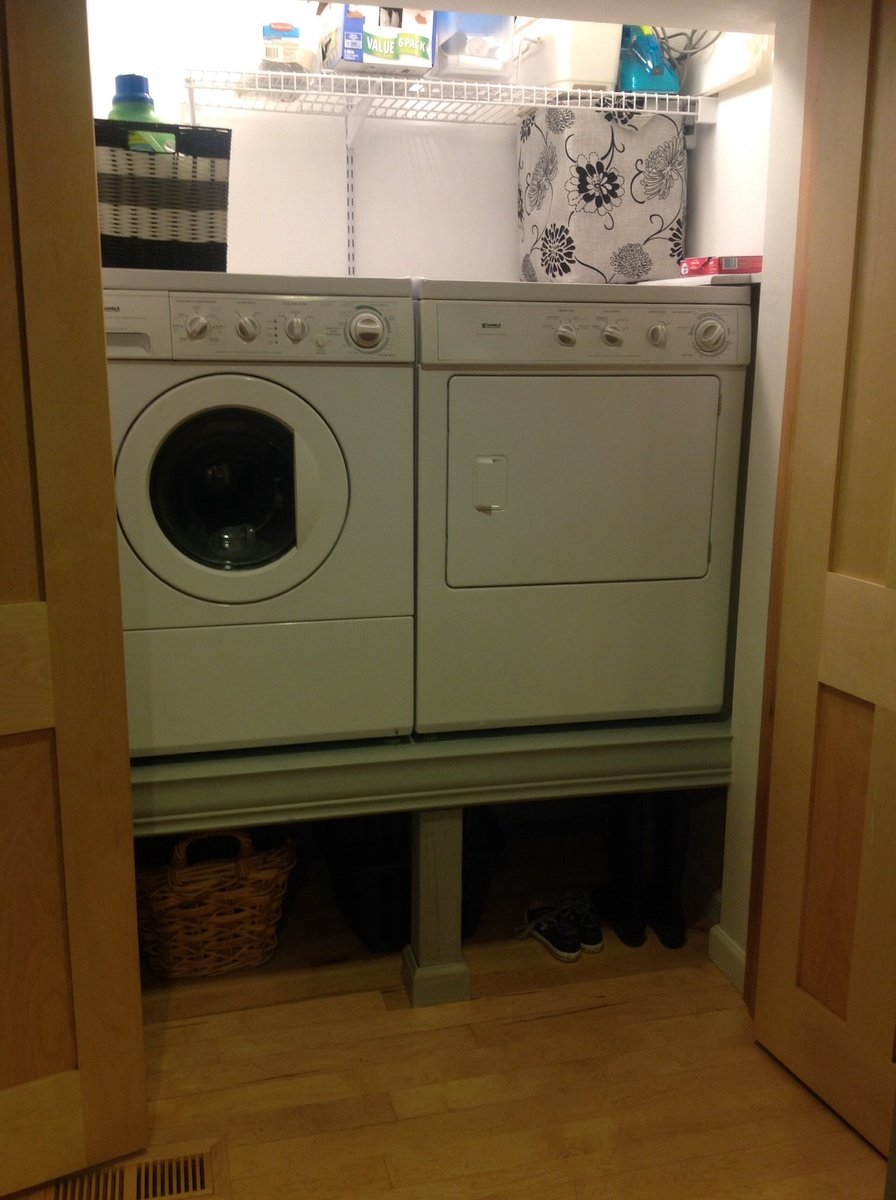
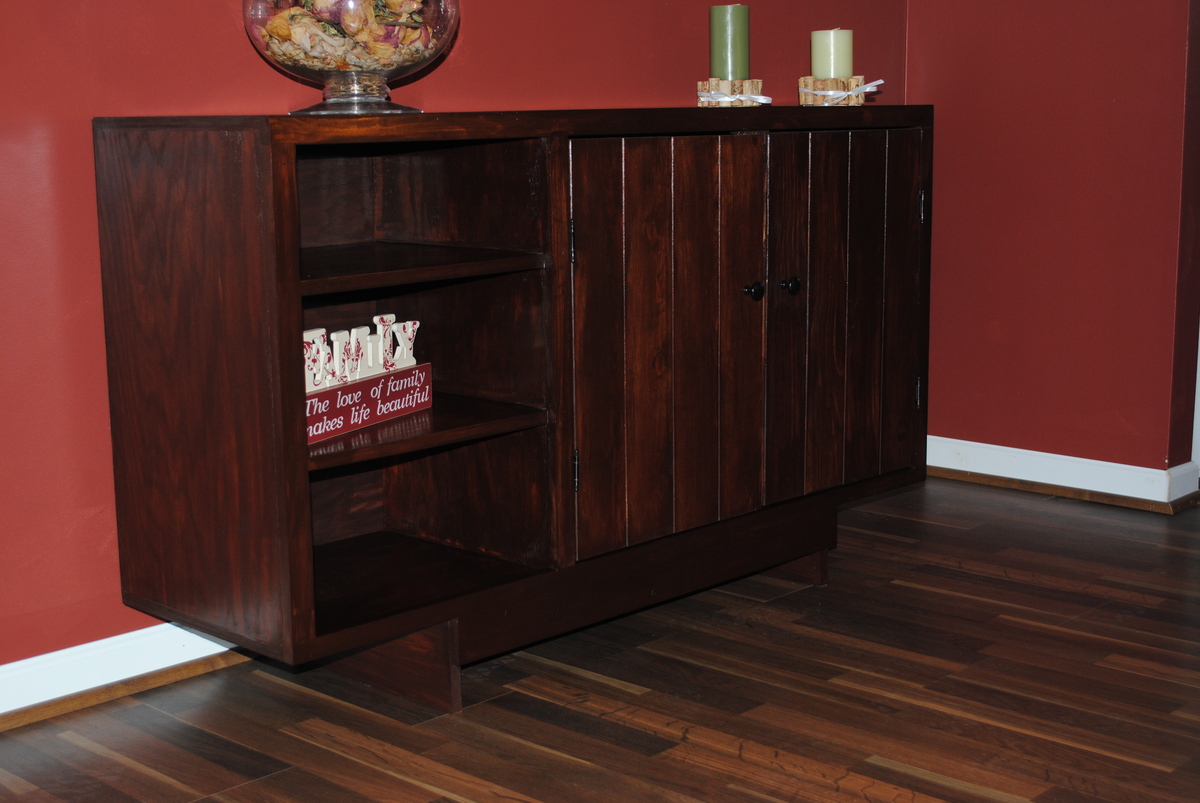
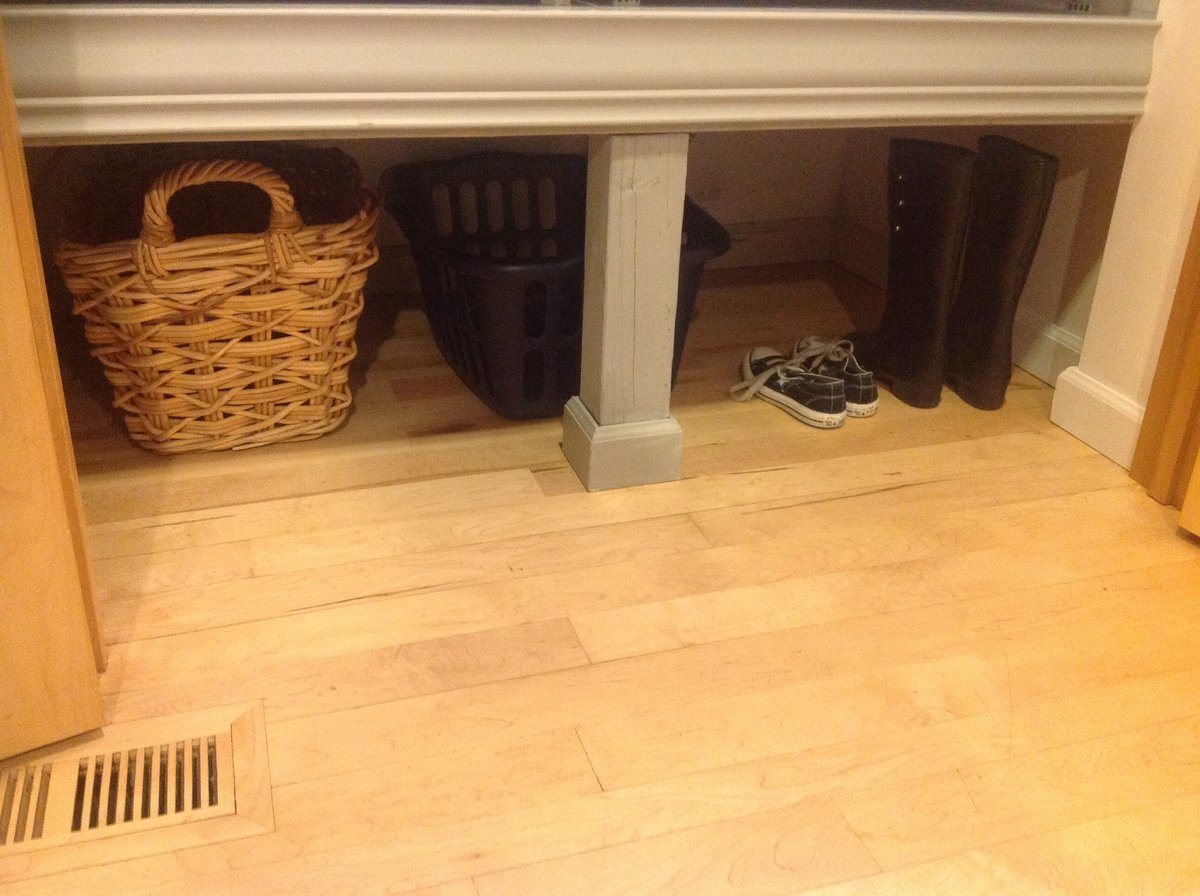
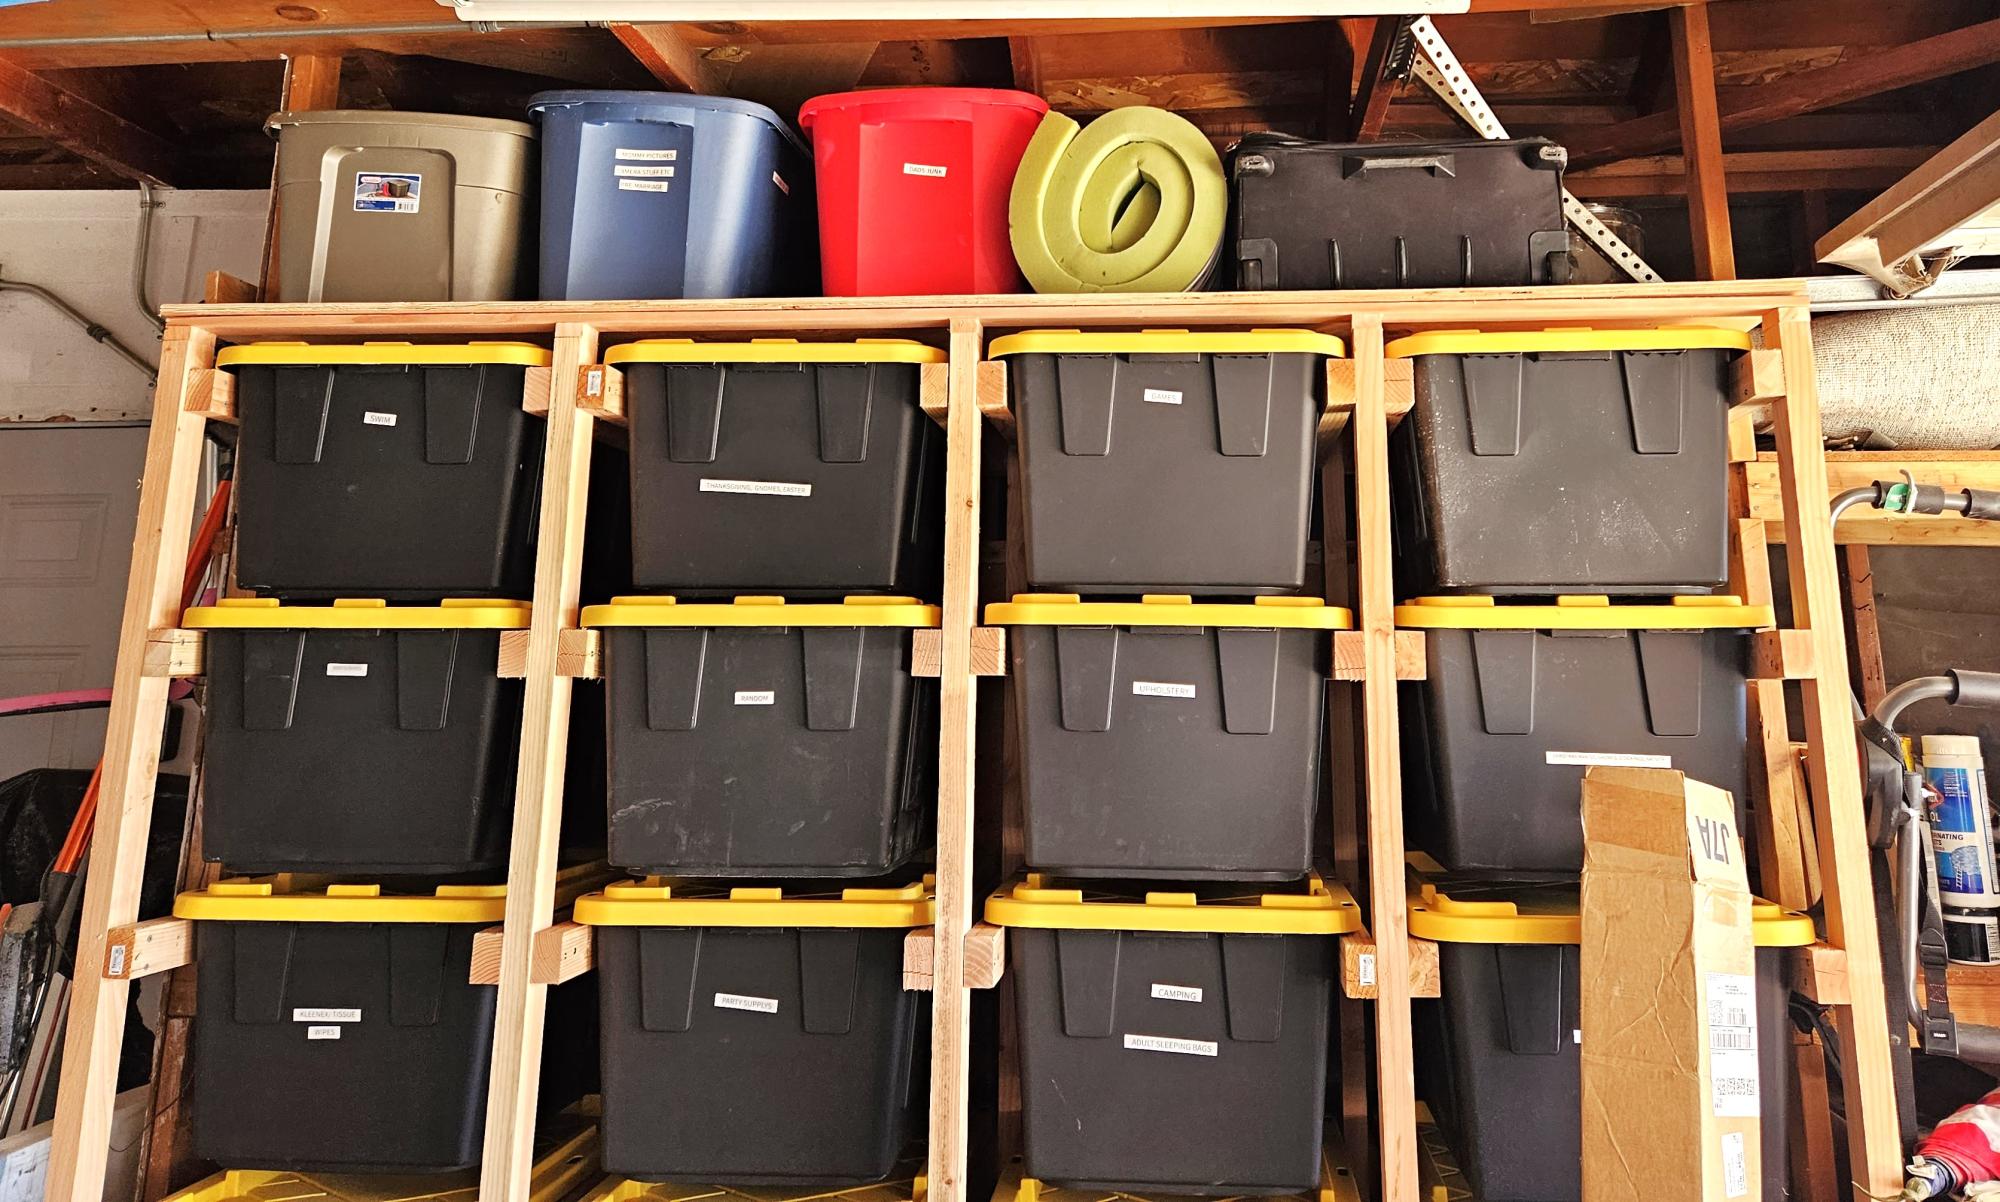
My hubby built this from saushas washer/dryer pedestal plans. He modified it a bit because we needed the storage taller underneath for shoes and baskets. Our closet is right by the front door and it was always a mass of shoes in front of the washer and dryer that you couldn't shut the door! It works great. We have beautiful hardwood floors (that was my hubby's trade for 12 years) and didn't want to cover them up either:)

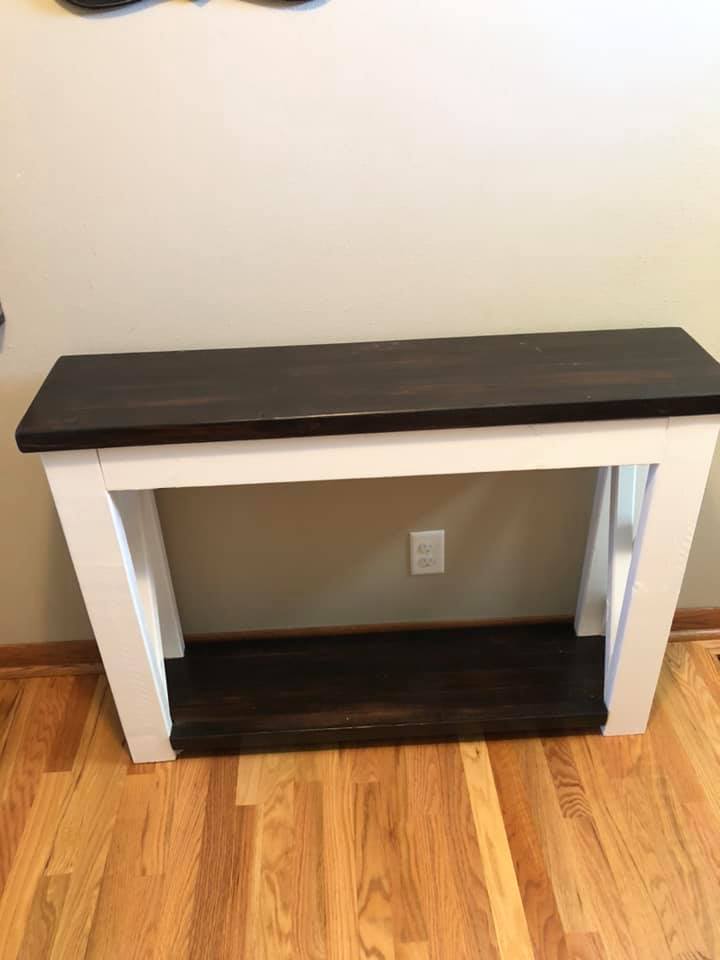
Saw the basic 'c' looking shape end table on Pinterest, but it didn't have any plans. So I drew up my own plans, used different types and dimensions of lumber, and added the black iron pipe to our design to truly make it our own. These took my quite a while, and were a lot more expensive then I wanted them to be. So these will probably be staying in my home. Lol
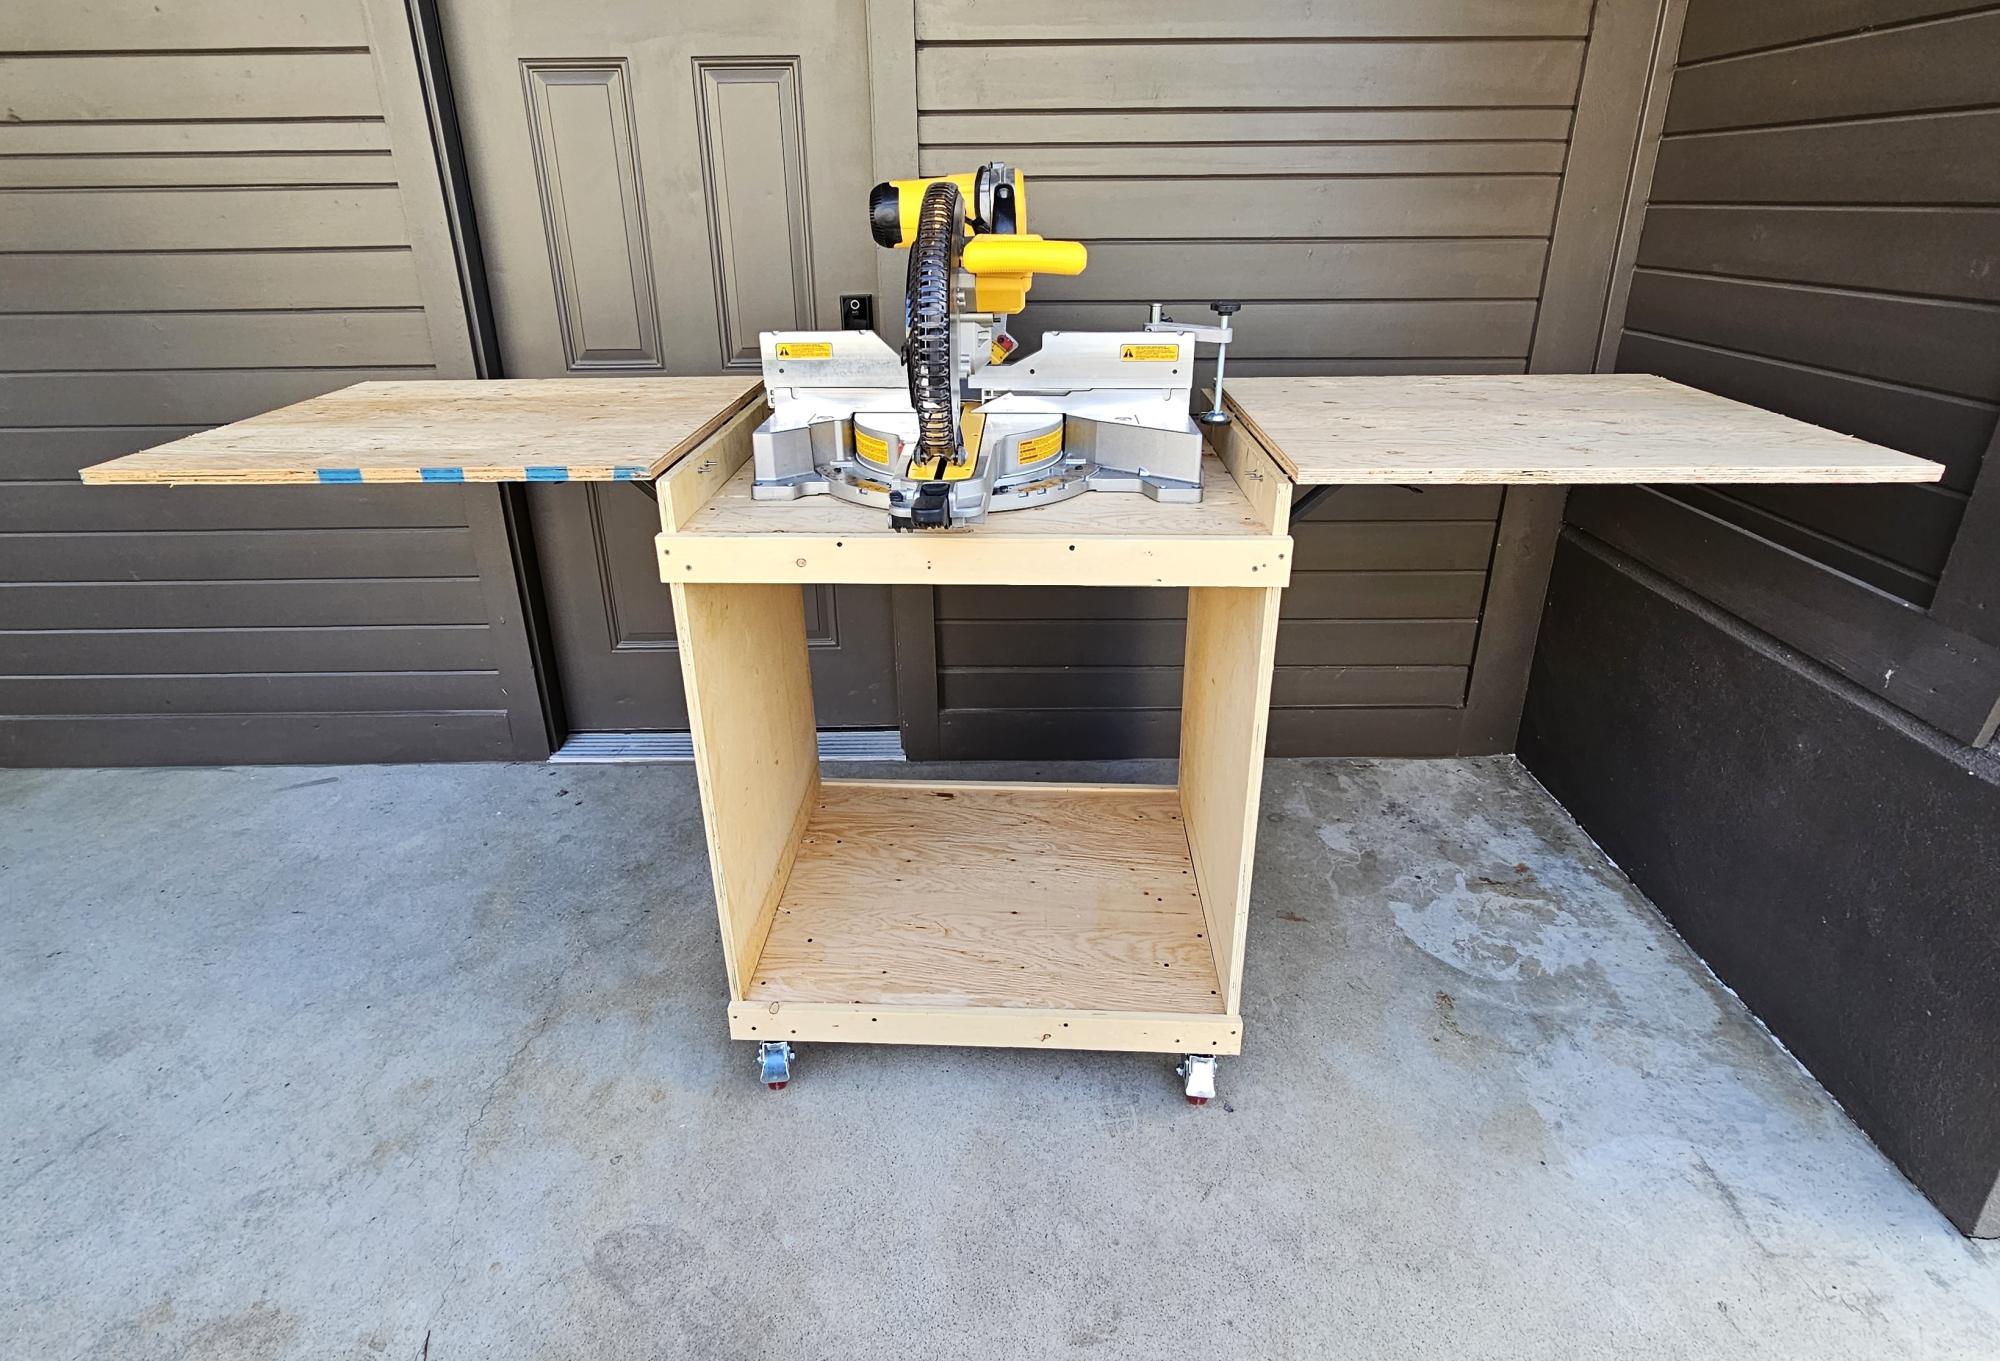
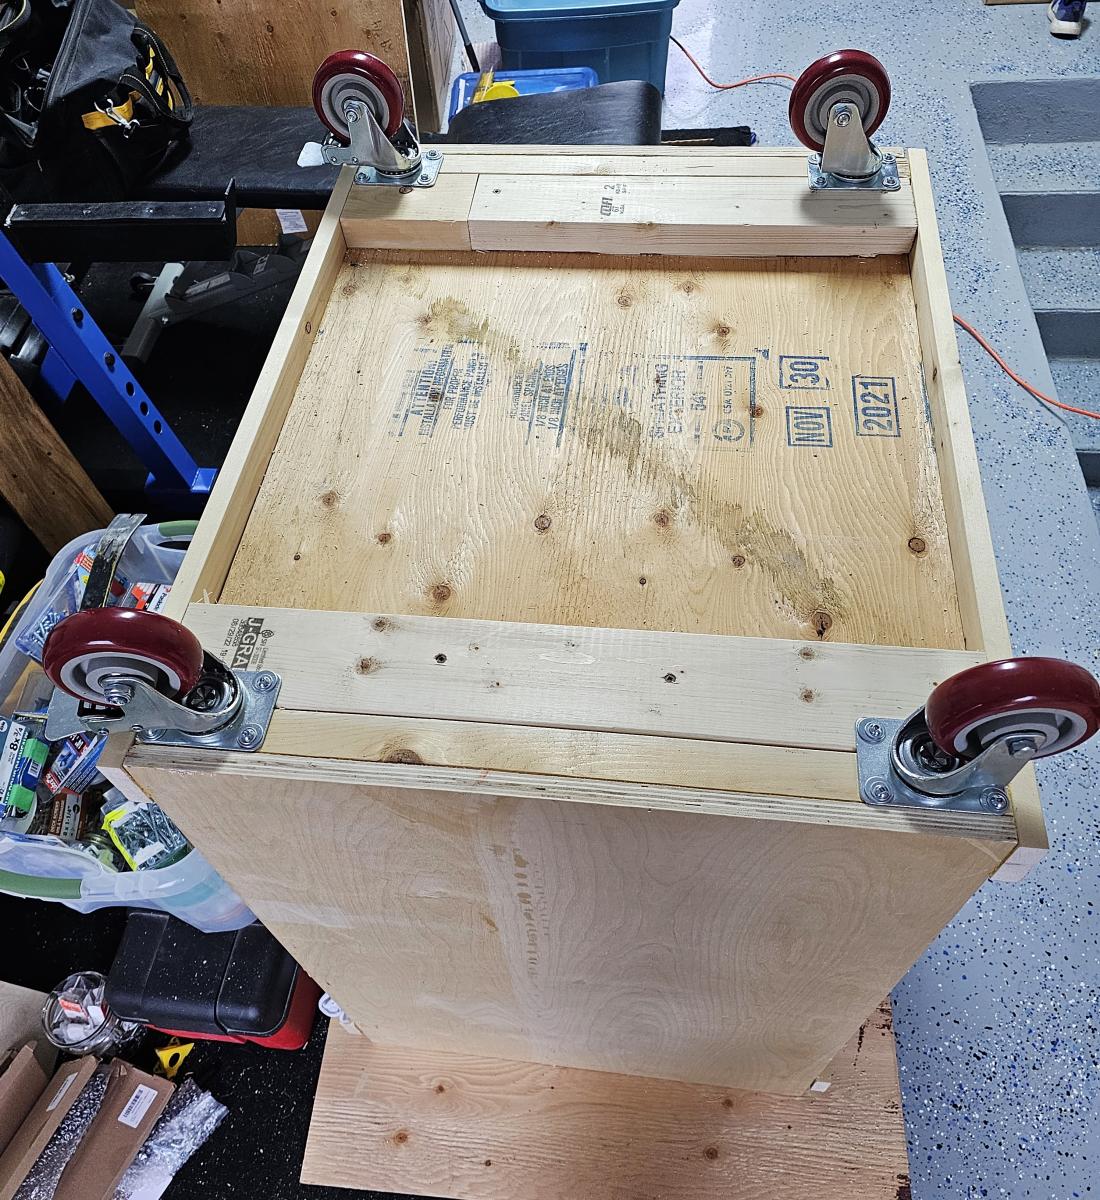
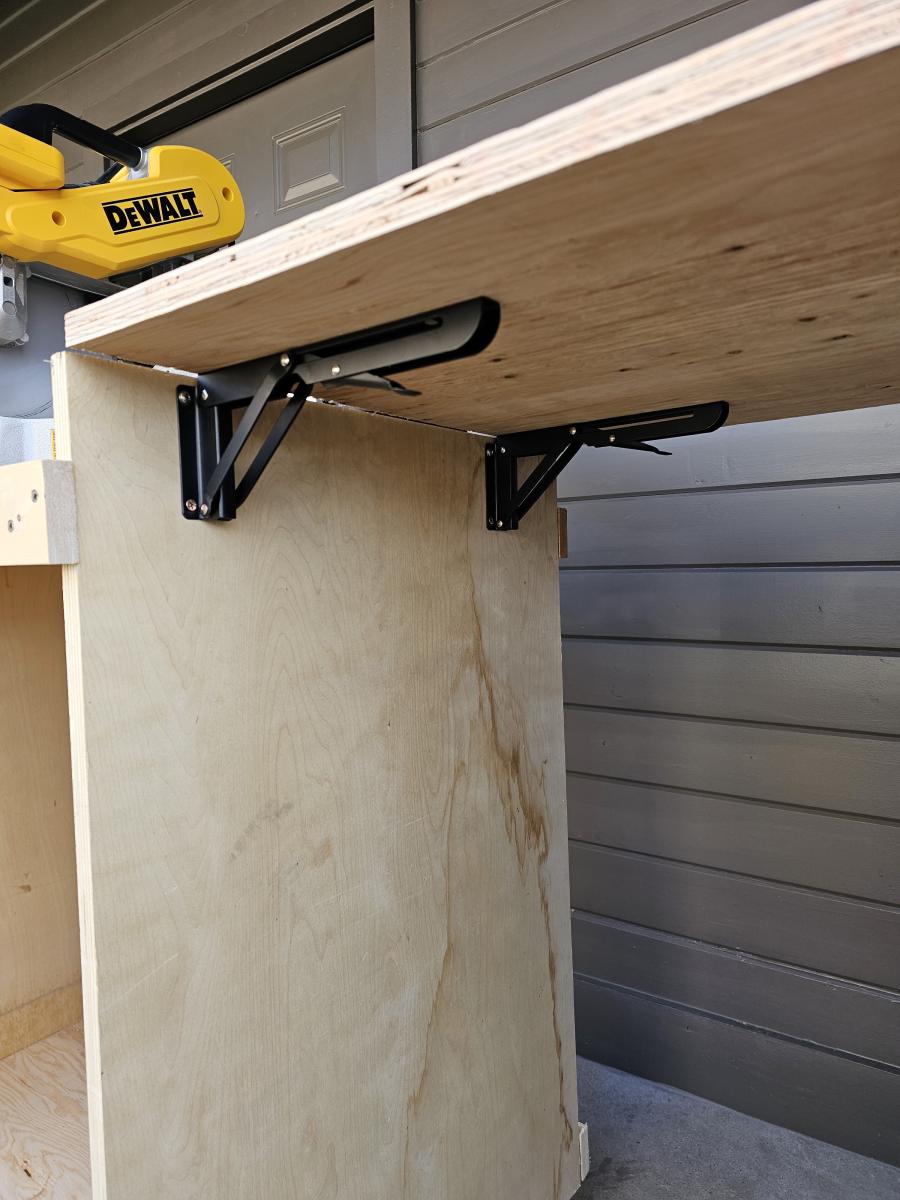
I pretty much followed the plans exactly as provided. The folding brackets I used are supposed to be heavy duty and able to handle up to 100 lbs. per pair of brackets. We'll see how they do. If needed, I might add the 2x2 or 2x4 braces I've seen many others do on here. It's nice to finally have my mitre saw off of my workbench.
These are the brackets and wheels I used.
https://www.amazon.ca/gp/product/B08PVFJ87Y/ref=ppx_yo_dt_b_asin_title_…
https://www.amazon.ca/gp/product/B093FQVV8P/ref=ppx_yo_dt_b_asin_title_…
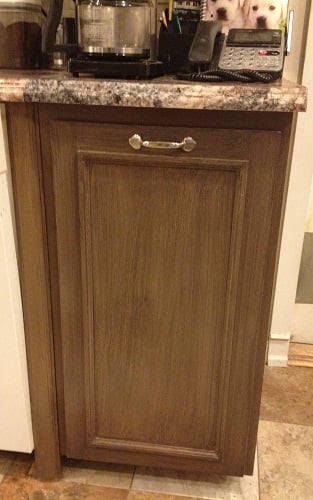
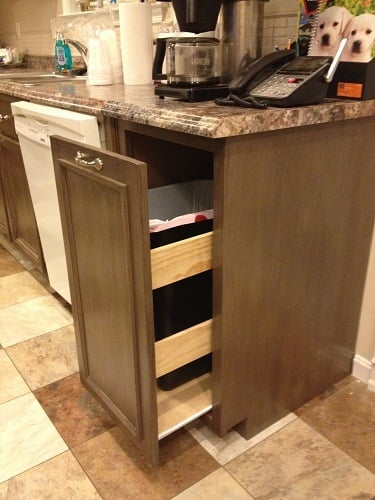
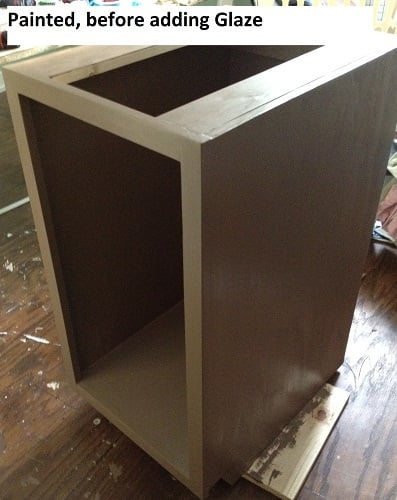
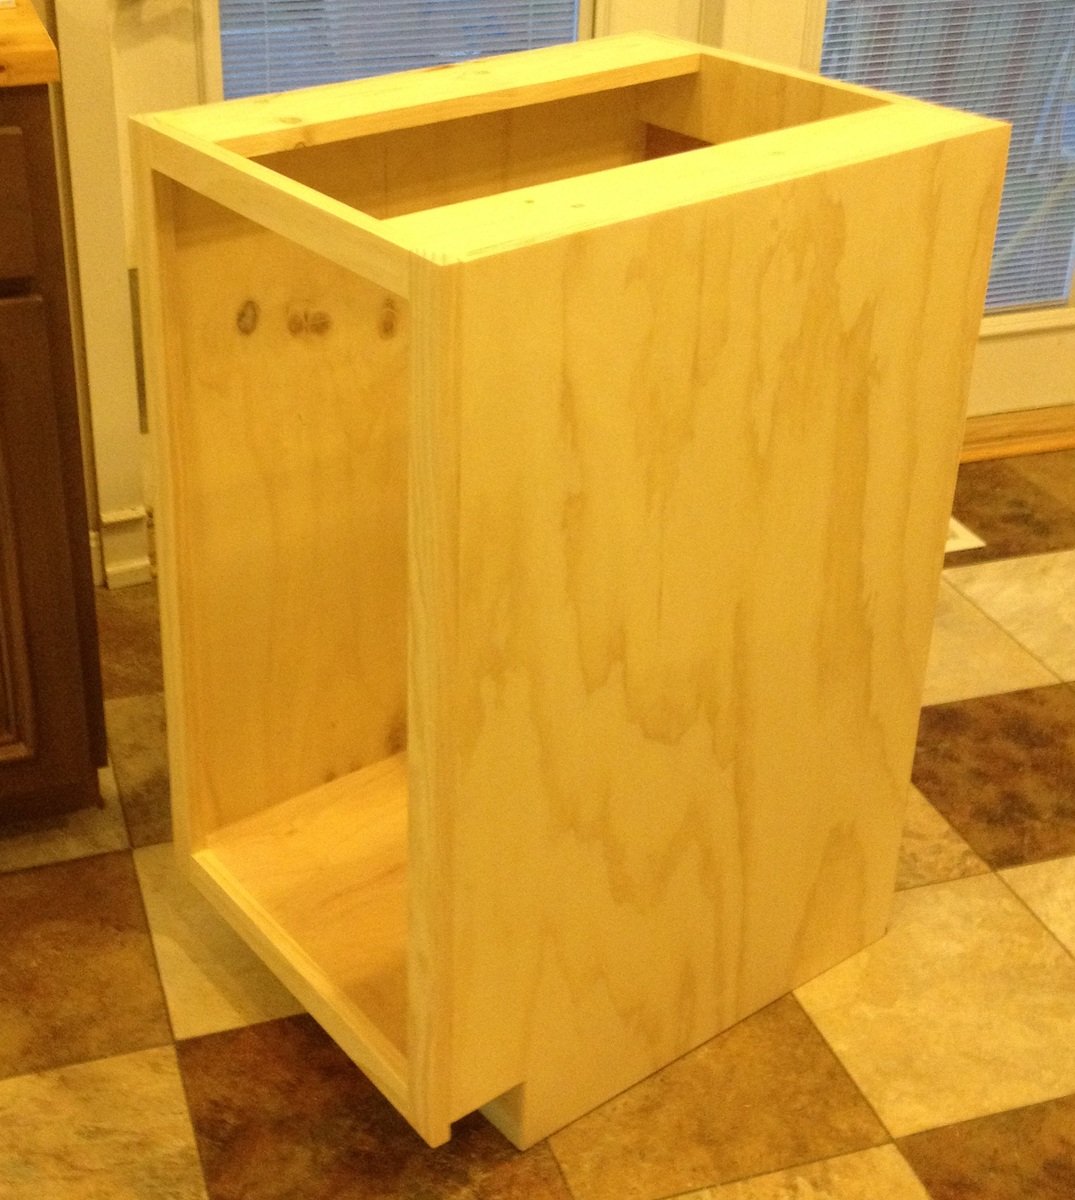
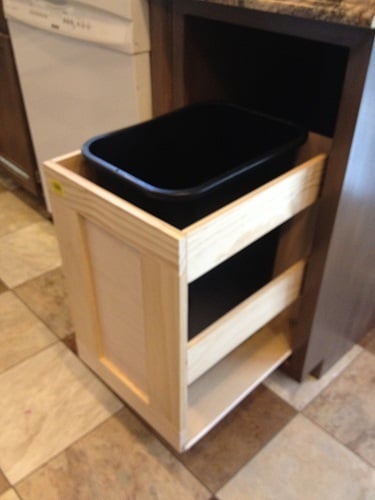
Plan was super easy to follow. Built a drawer type pull out so I could fit in odd sized trash cans. Made the pull-out part like an open sided drawer box, out of lightweight wood, and attached the door to it - used 75-lb euro drawer slides. Construction took a couple of afternoons, and finishing took a couple of afternoons. The finishing materials were all left over from other projects, and the plywood for the cabinet sides was left over from our kitchen island build. Topped with a leftover piece of countertop. The contractor who installed our new countertops said I did a good job on the cabinet build. I was very flattered! Ana, thank you for your wonderful plans!

Thu, 07/26/2012 - 15:16
Thank you Gina! Yep, I built the door too! :) This one is made from an edge glued Aspen wood panel (available from Lowes, ripped to size with the table saw), and then I added the wood mini-stop moulding 2" in from the edges (did these measurements and attached the trim before sanding). I did the glaze pattern over the paint so it looked like a frame and panel door when it was all done. This door is the same style we did for our pantry and island. I'm planning to do all the rest of my cabinet doors over (one at a time - ;0) to match this one. PS - I used the edge glued panel instead of plywood for the door so the edges wouldn't need any extra covering up, and also they are nice and flat and super smooth so they don't need much sanding. Aspen wood took the paint beautifully, and the grain doesn't even show through once it's painted. I had used stain grade pine panels for the pantry and island, but I think I'll stick with the Aspen for the rest of them, to save myself some sanding. ;)
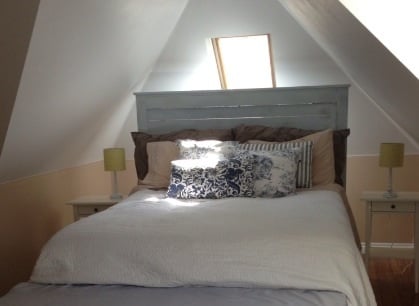
We made this for our master bedroom. We had wood that was already primed so it made the project go faster. Also, the wood for the back panelling isn't entirely straight which I like because it allows slits of lights to flow through and looks a little more rustic. I used a soft blue paint for the color called abracadabra. I hand sanded in some areas to give it a worn look and then I placed a stain over the top in which I almost immediately wiped off because I wanted it to be very minimal.
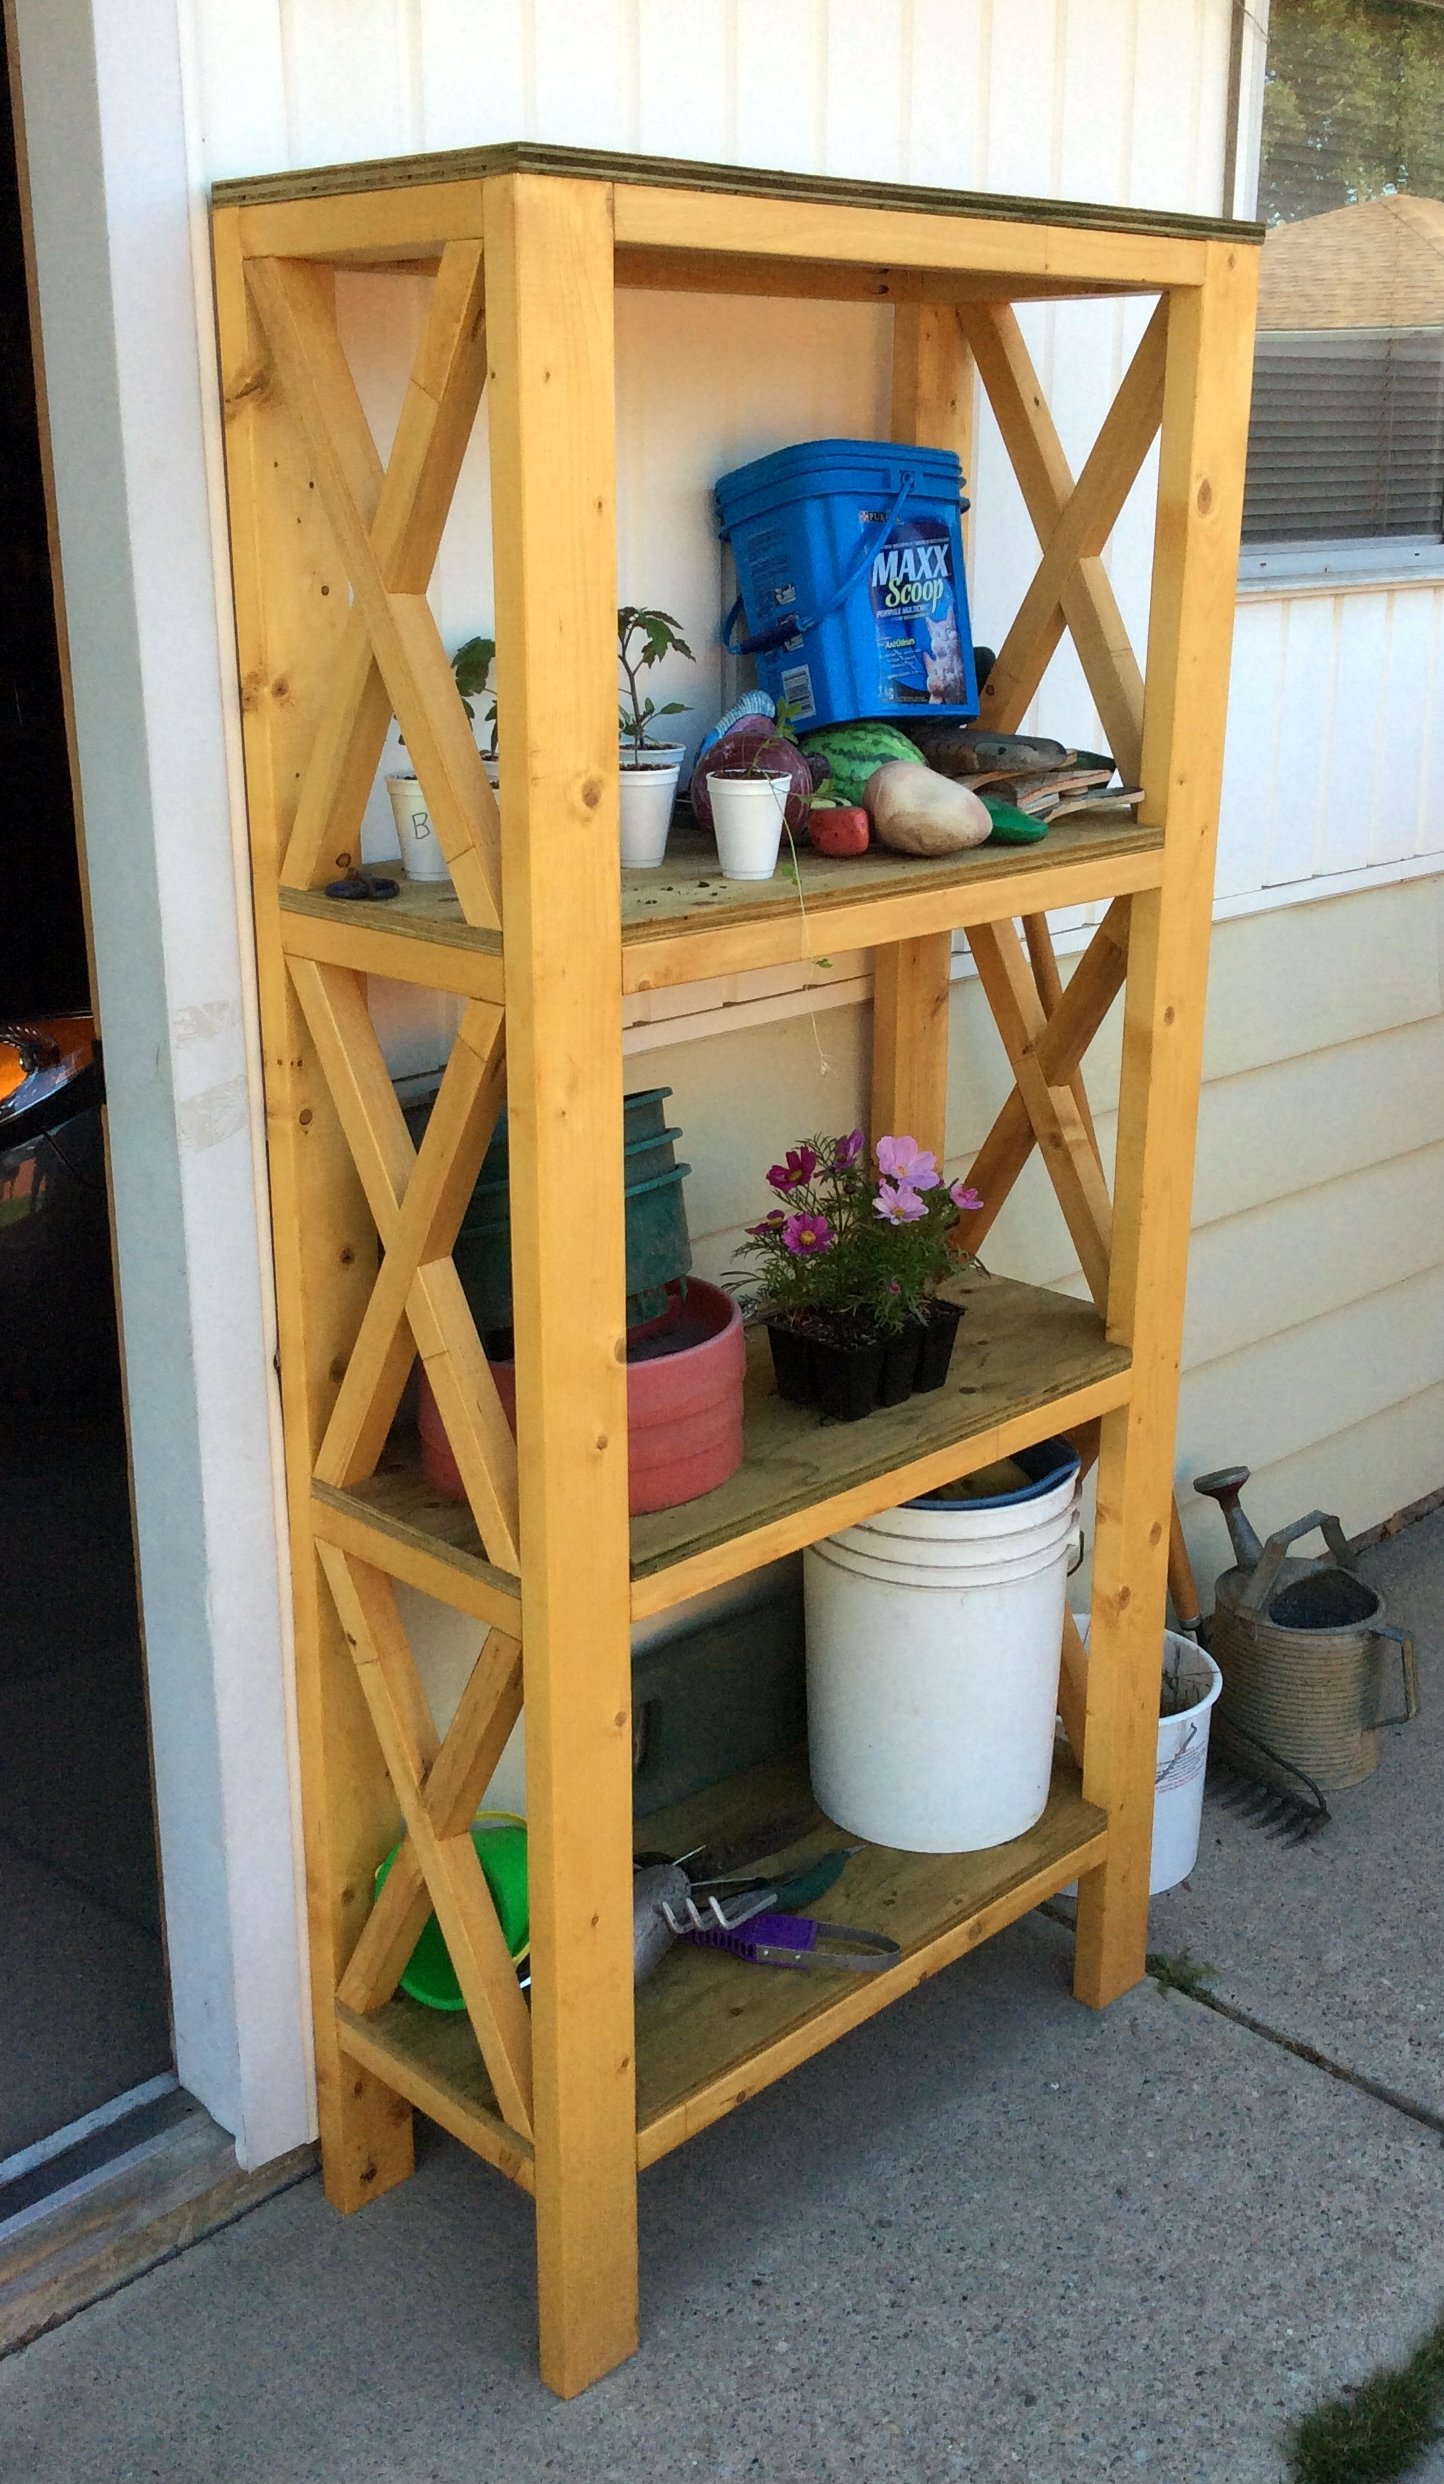
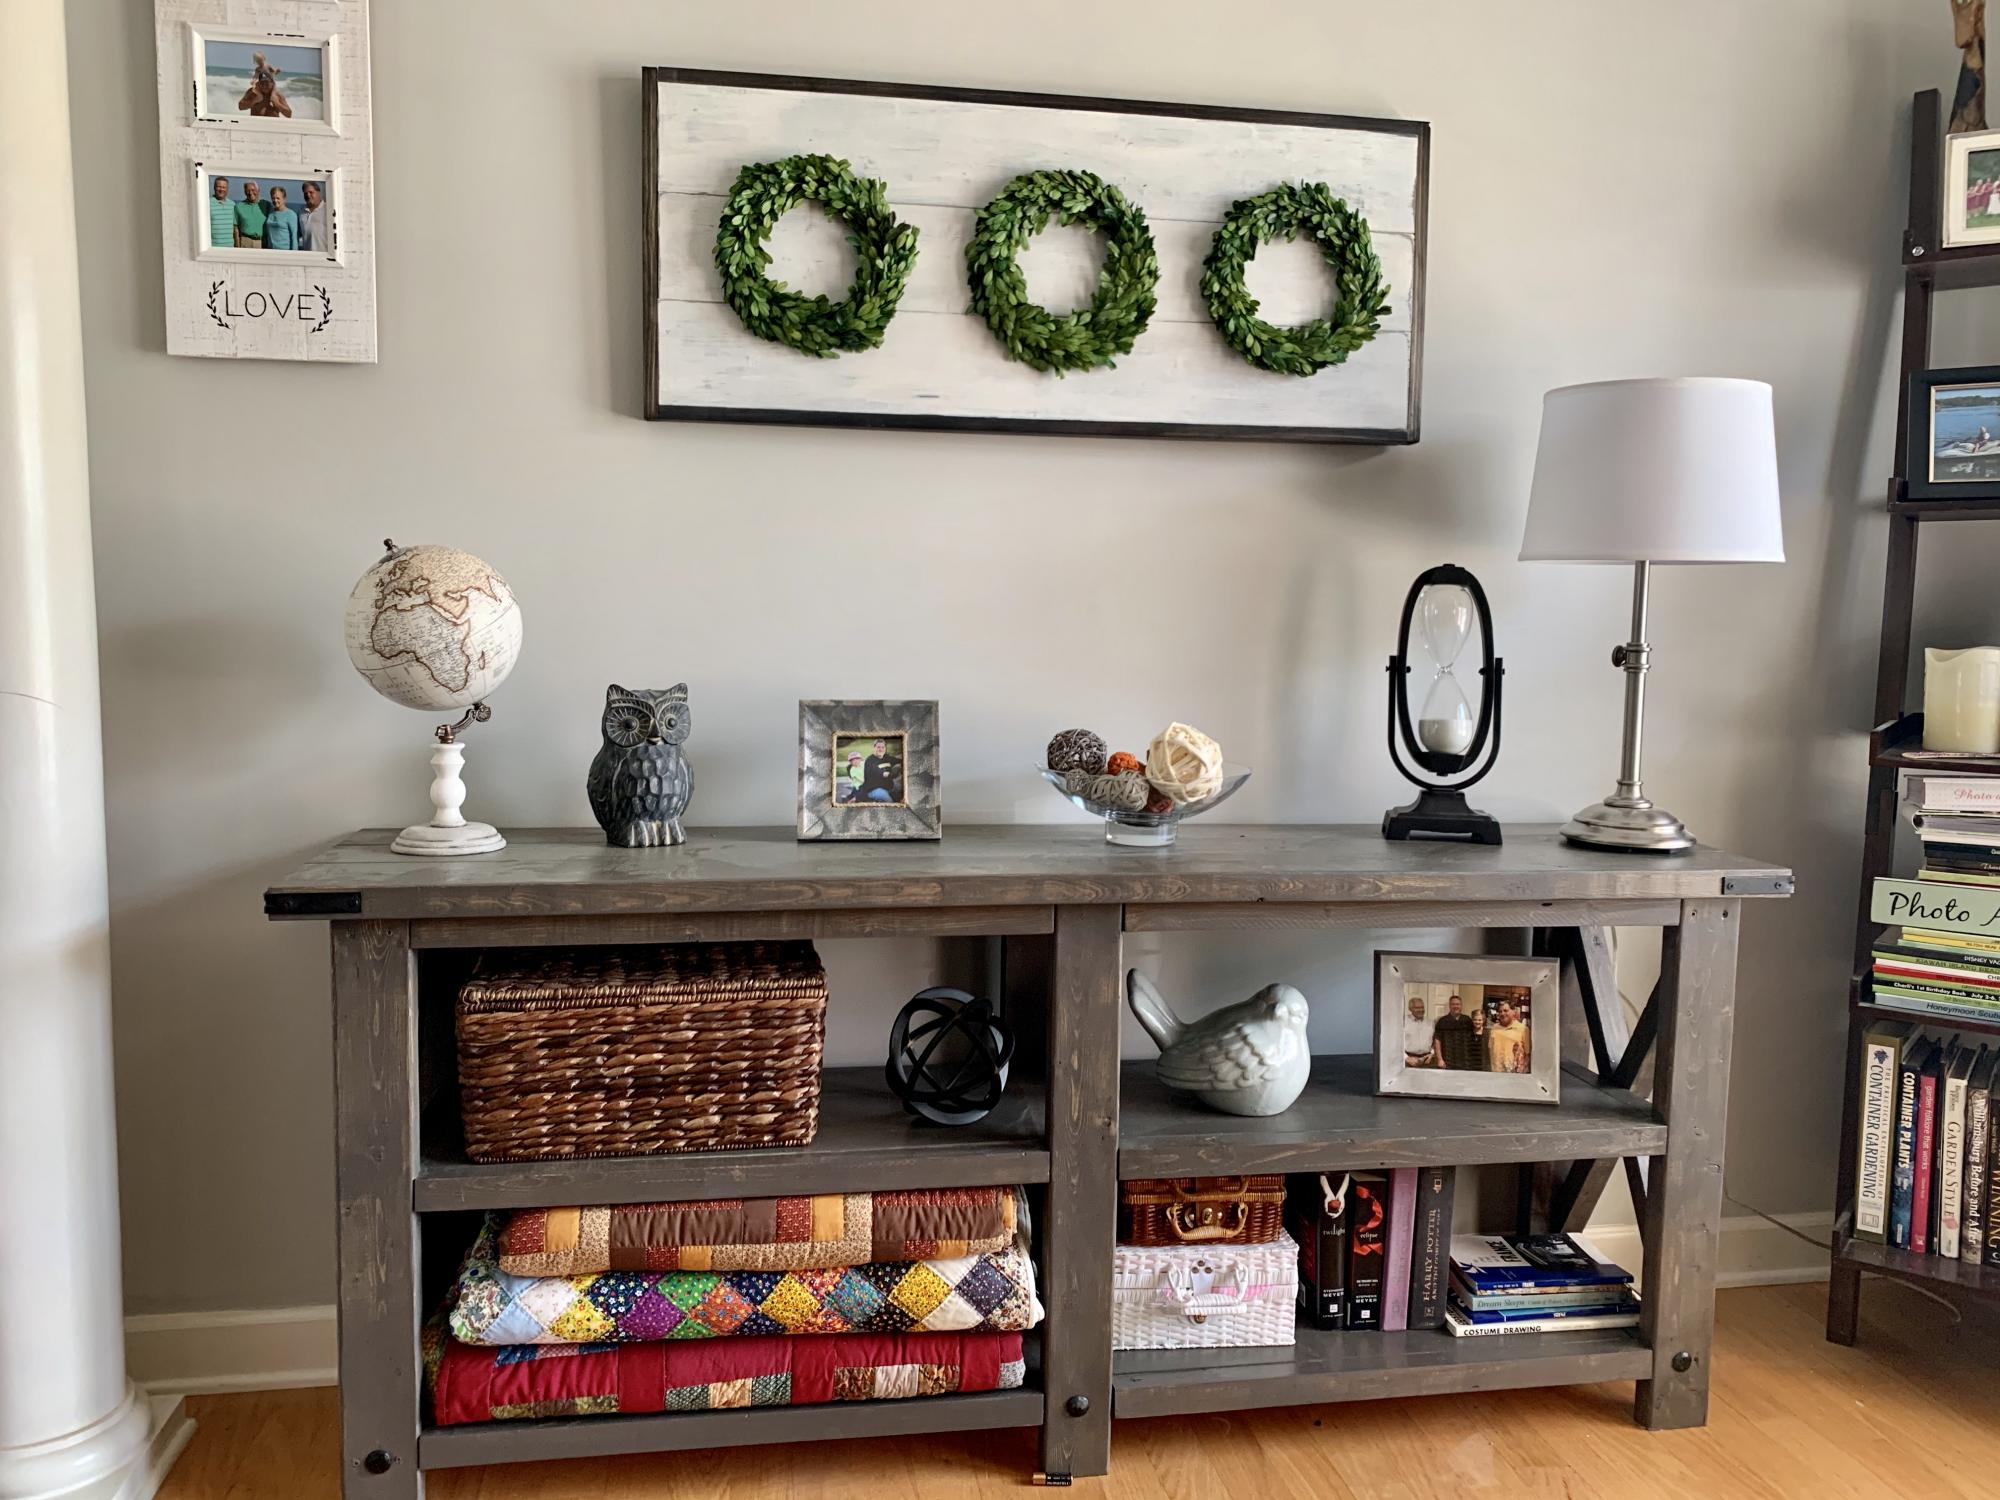
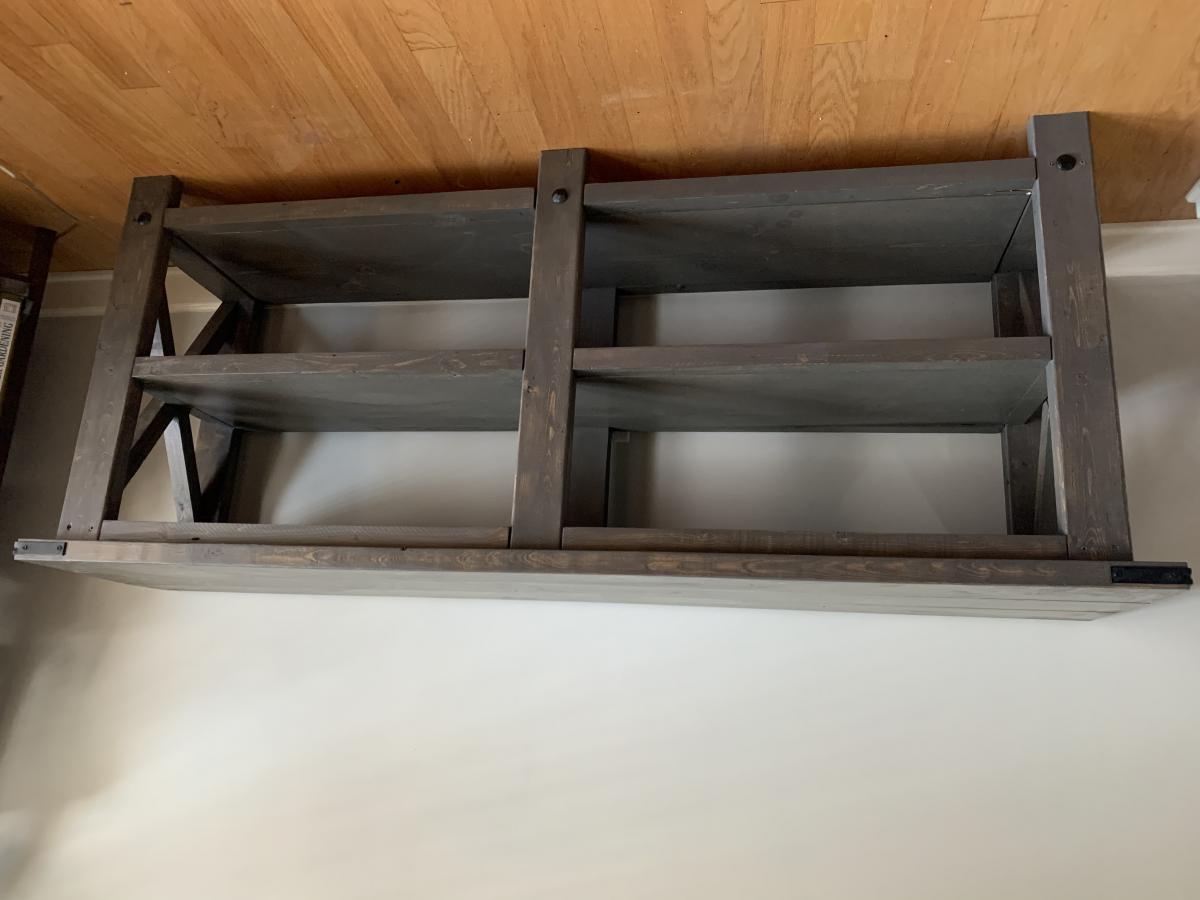
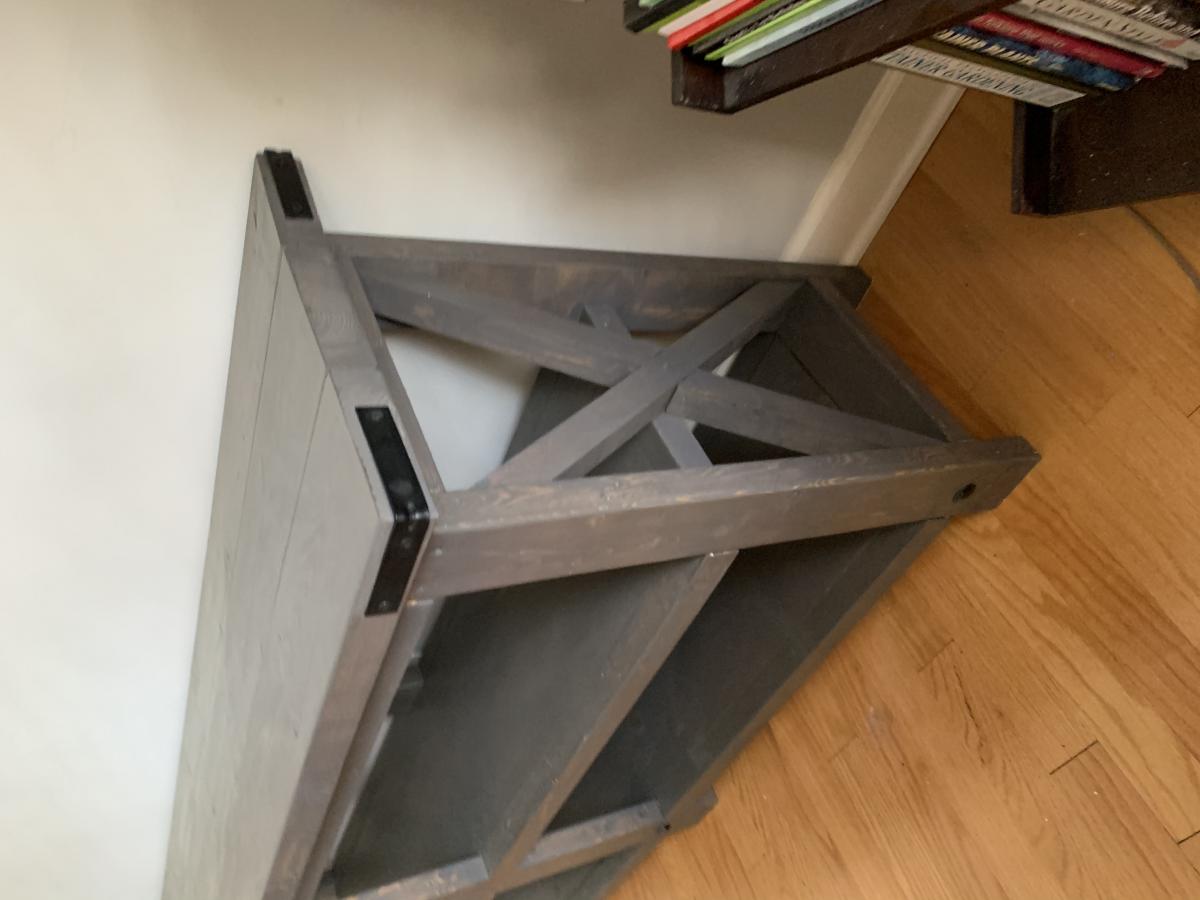
My wife wanted a Garden Shelf to replace the one that just gave up the ghost, so I browsed my favorite site for plans similar to what I was thinking. Thats when I found the Rustic X Book Case. Perfect.
I need to stuff larger objects then books in there, so I changed it to 3 shelves and I put those on top of the cross members. That was easier and it gives it that work bench look.
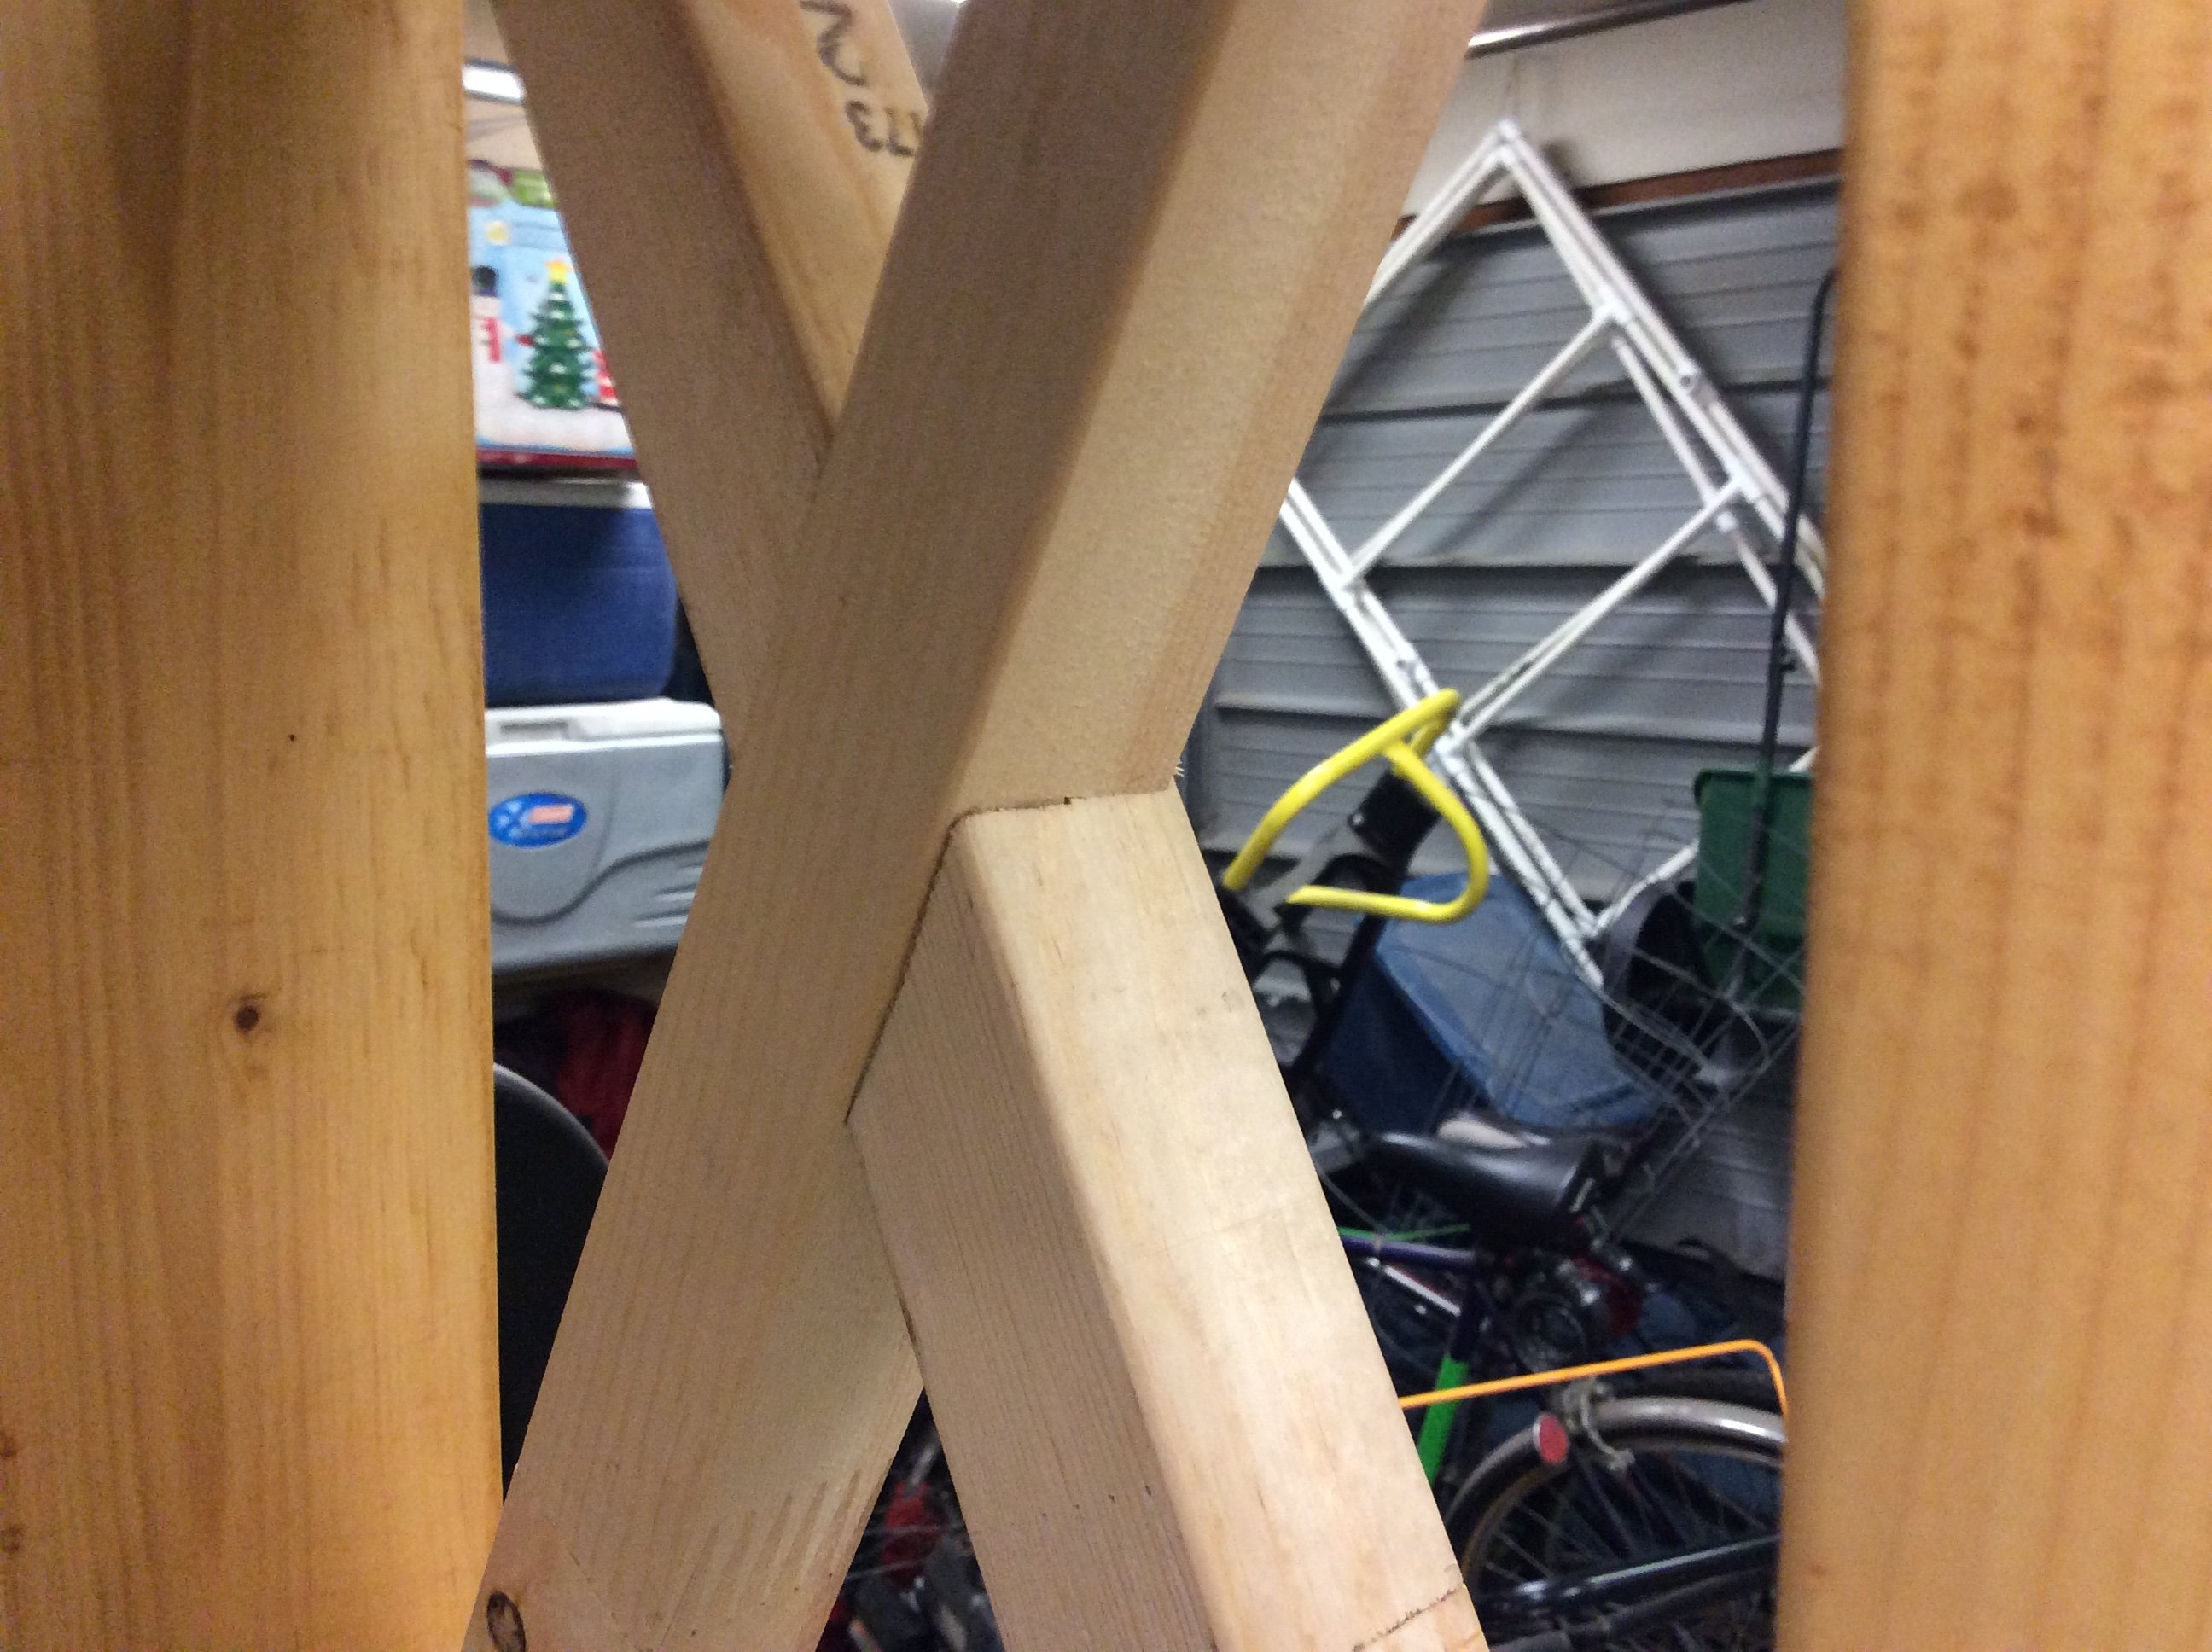
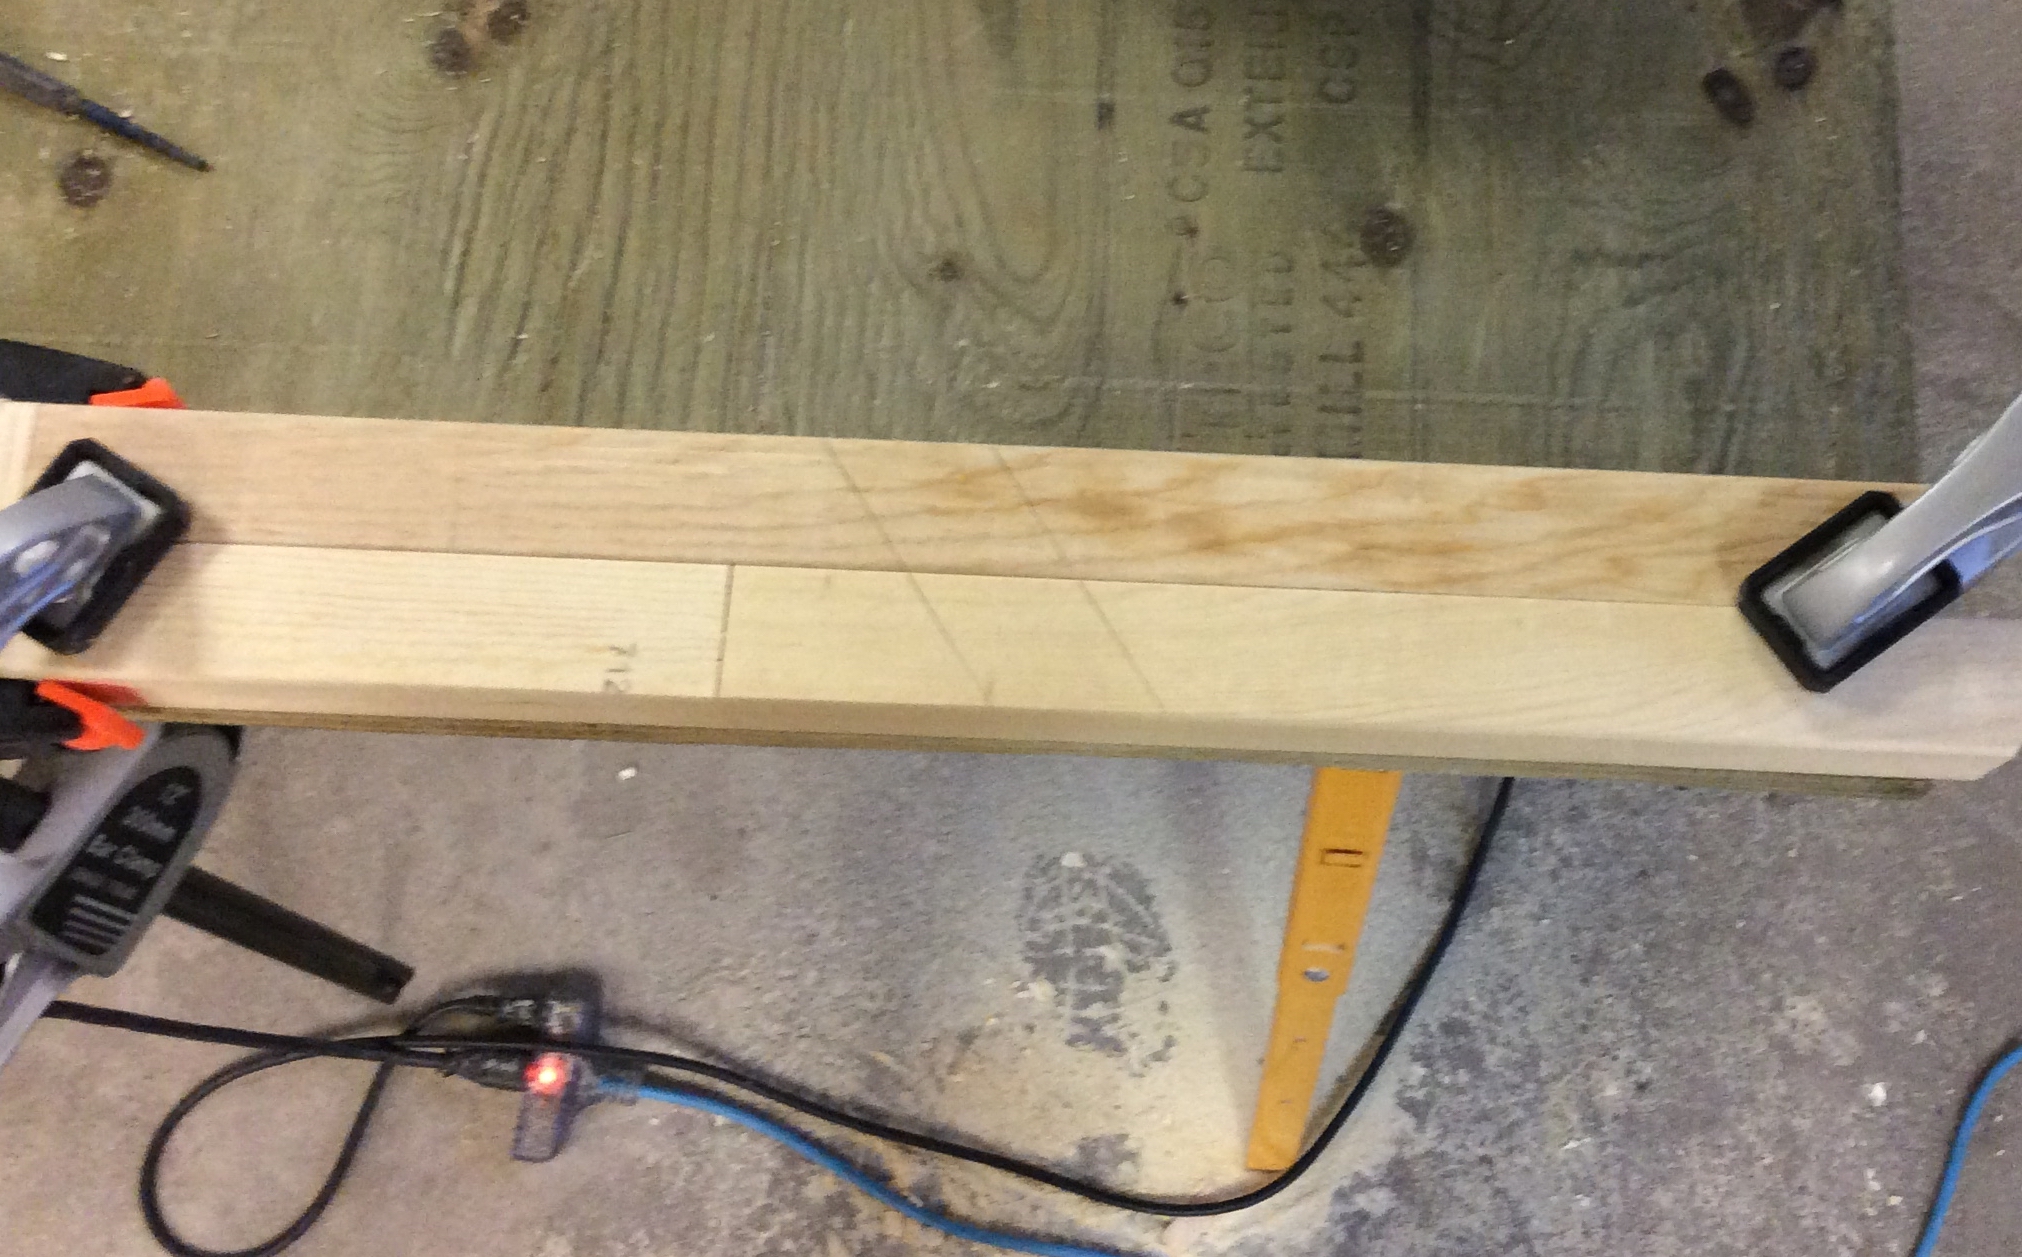
For the X's, I had the wood to risk so I tried recessing them. I dry fitted (chop saw highly recommended) and marked them and when I flipped them over, they aligned perfectly. With a circular saw set to just slightly less then 1/2 depth, and some very careful cutting, they fit together quite well.
Sturdy with a bit of class. I'm pleased. Thanks.
My 15 and 12-year-old sons made two of these for me. Super easy, they followed the step by step instructions which were perfect, easy to read. They made two in only a few hours!
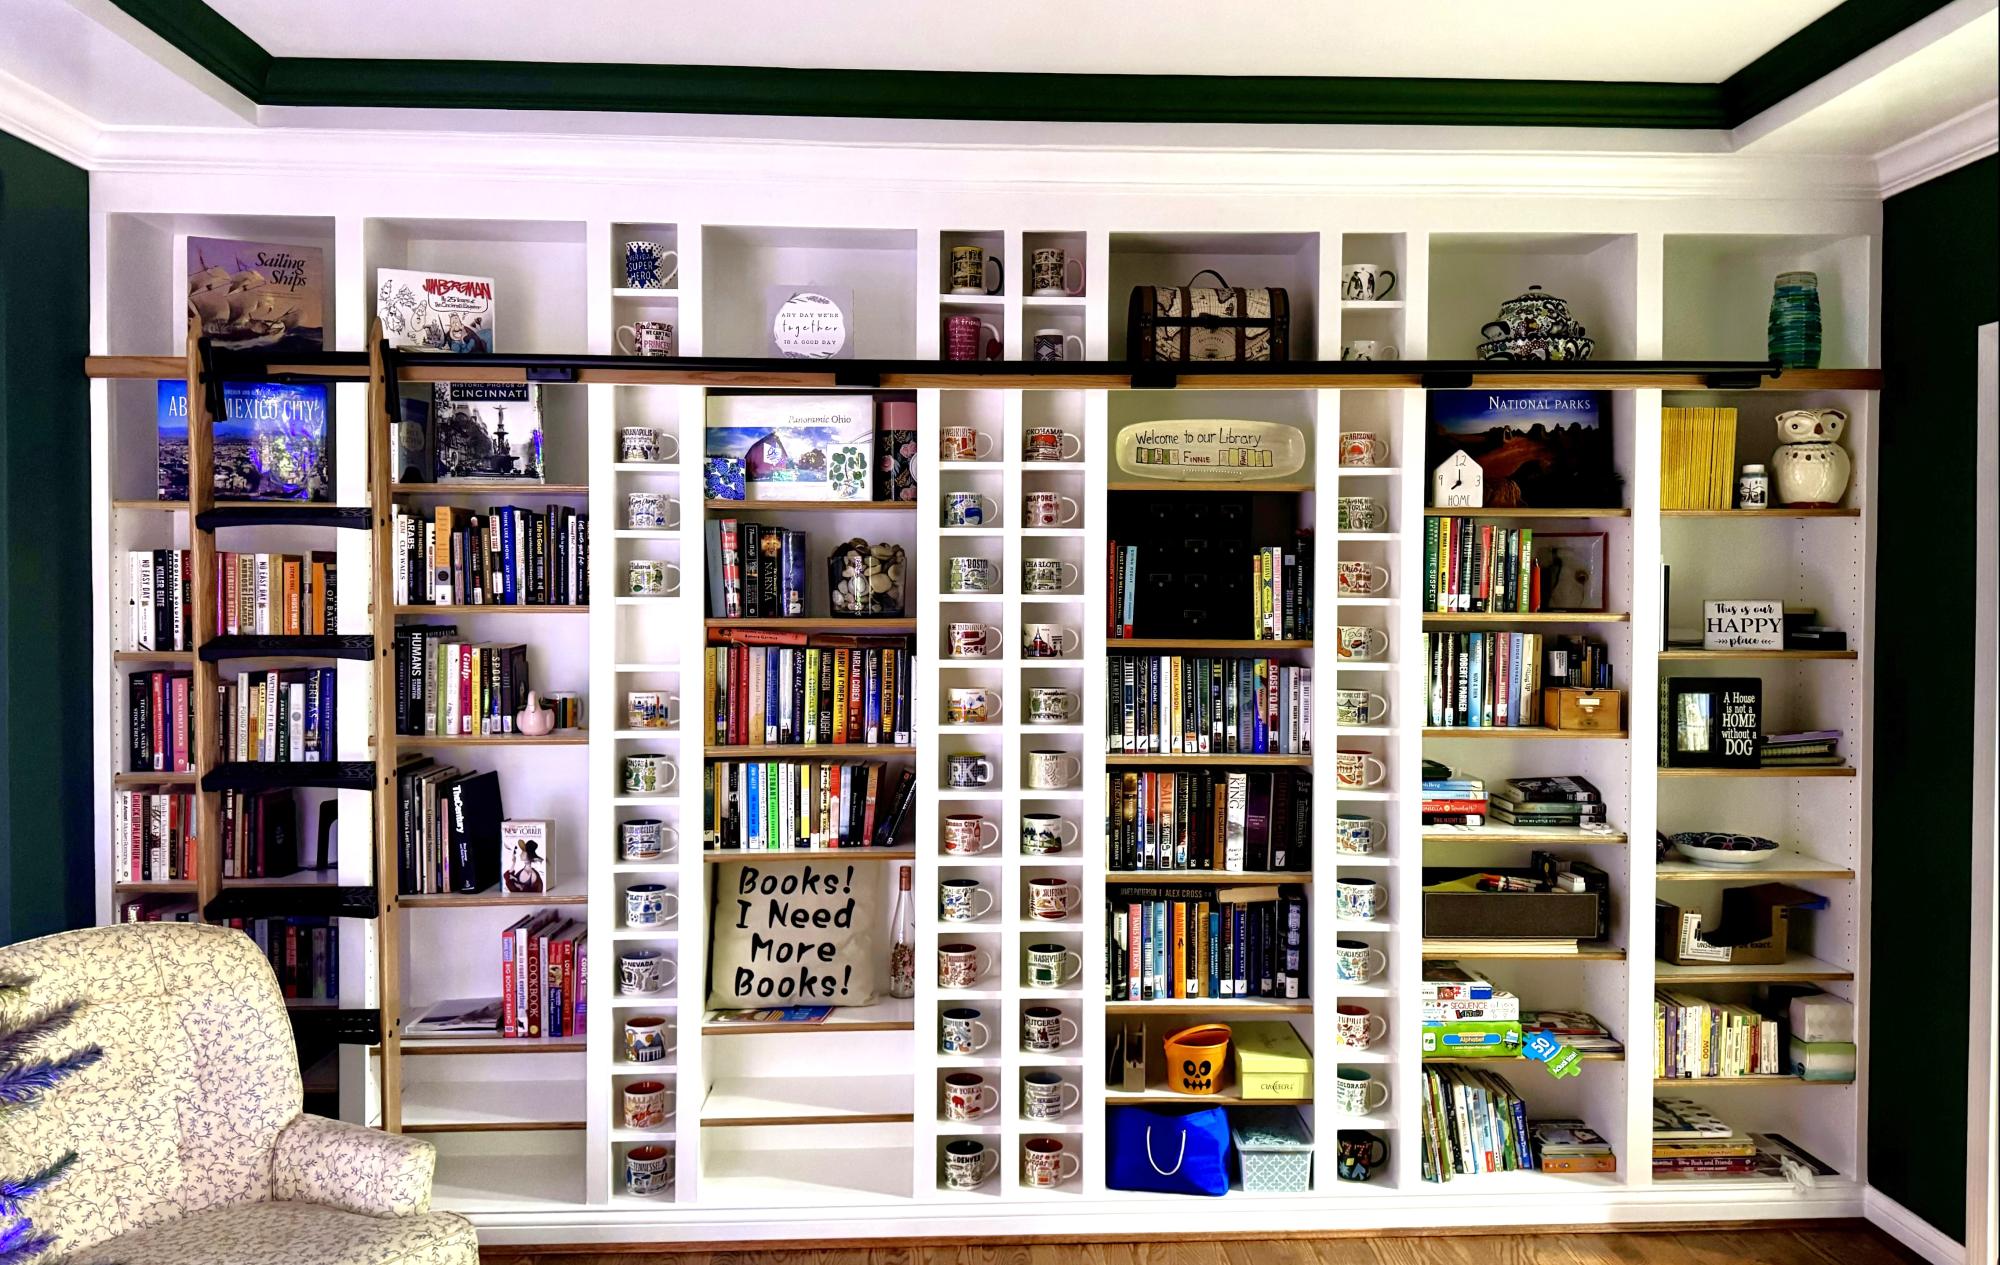
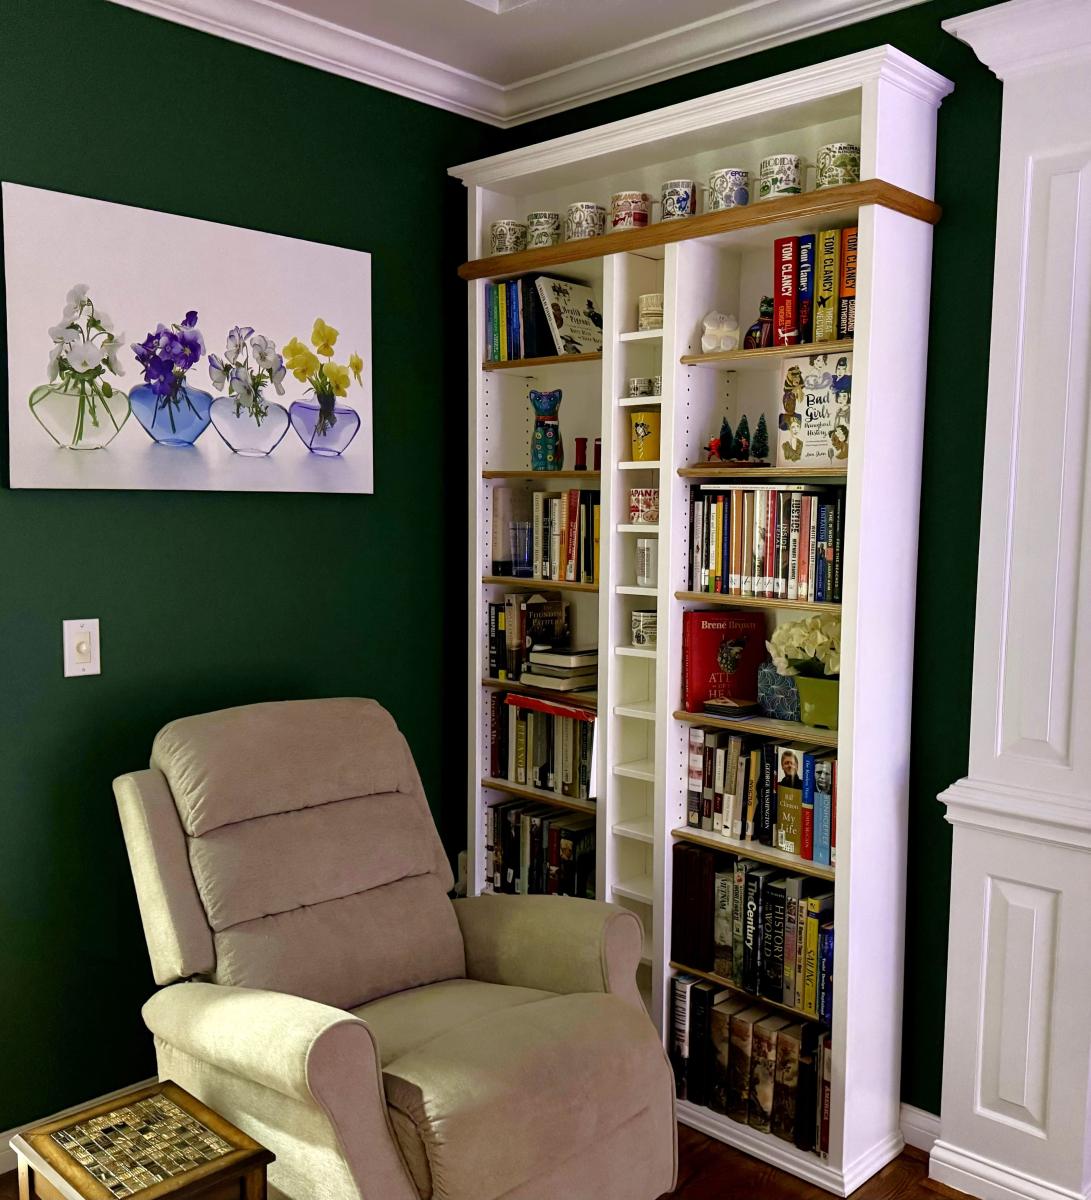
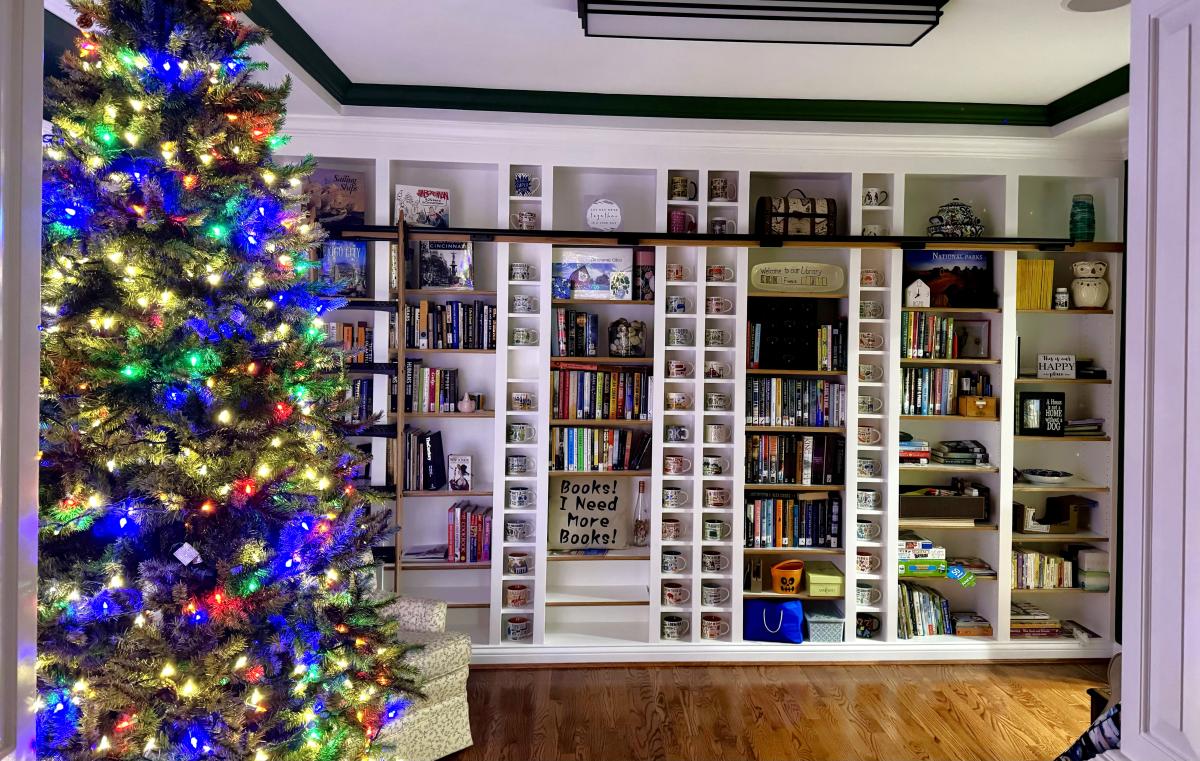
These bookshelves are modified from the Extra Wide Console Bookcase Plans from your website. They were constructed using 3/4 inch plywood for the bookcases, 6” MDF boards for the cup cubbies, and 1/2 inch plywood for the shelves. Purchased a jig from Rockler to drill the 1,000+ shelf holes and built the rolling ladder from oak using the plans and parts from Rockler. What began as a plan for a simple bookcase morphed into selling the dining room furniture and converting the room (which we had only used once in over 2years) into a library that we enjoy every day!

Comments
Ana White Admin
Thu, 10/26/2023 - 19:09
Love your fireplace wall!
Looks great scaled down! Thank you for sharing.