Community Brag Posts


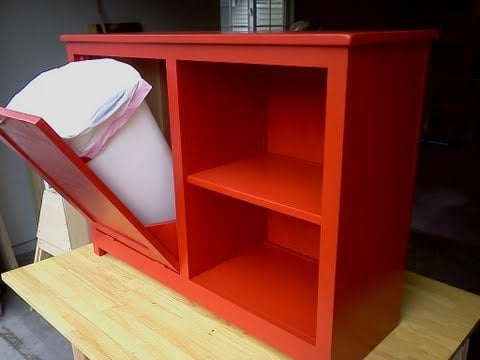
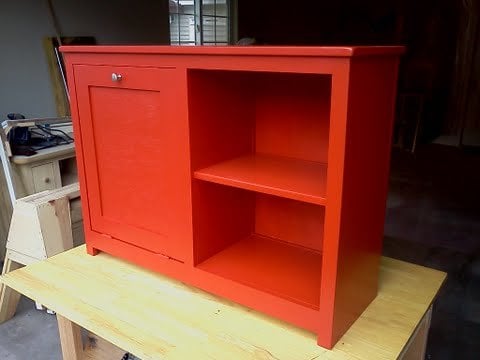
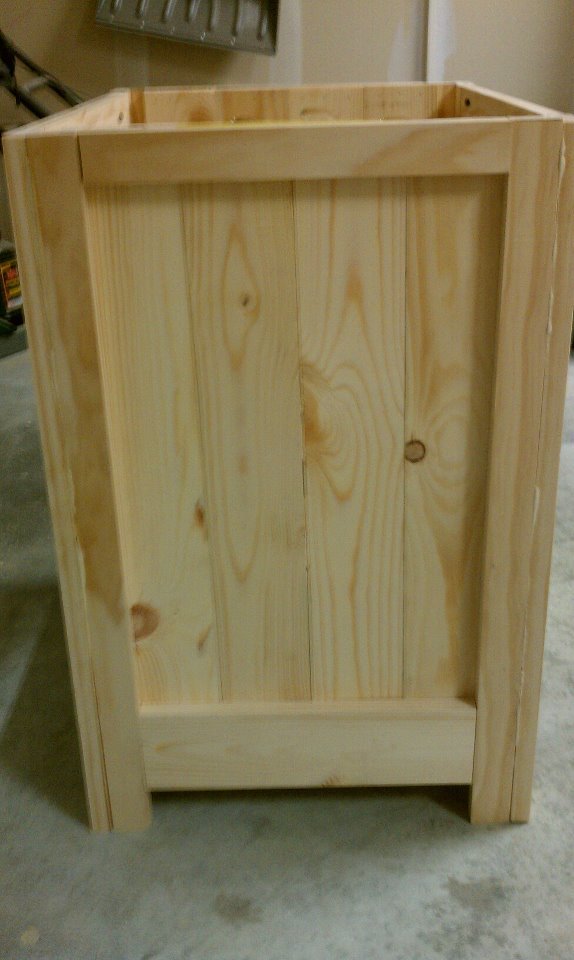
Tilt Out Garbage Center with Shelves
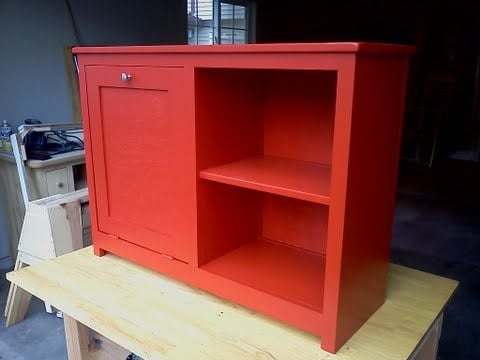
This was made for a friend. I looked up Ana's original plan and modified it a little. The end result was something she was very happy with.
Built from Plan(s)
Estimated Cost
$80
Estimated Time Investment
Afternoon Project (3-6 Hours)
Finish Used
Primer and red spray paint.
Recommended Skill Level
Beginner
Comments
Mon, 07/09/2012 - 20:39
I love your modifications..
I love your modifications.. Think I'll take it bit further and add another pullout on the other side of the shelf. This way I can put one hamper in each, and my whites and darks will already be separate.
Fri, 11/02/2012 - 05:54
Dimensions of trash bin with shelves
What were the completed dimensions for the tilt out trash bin with side shelves
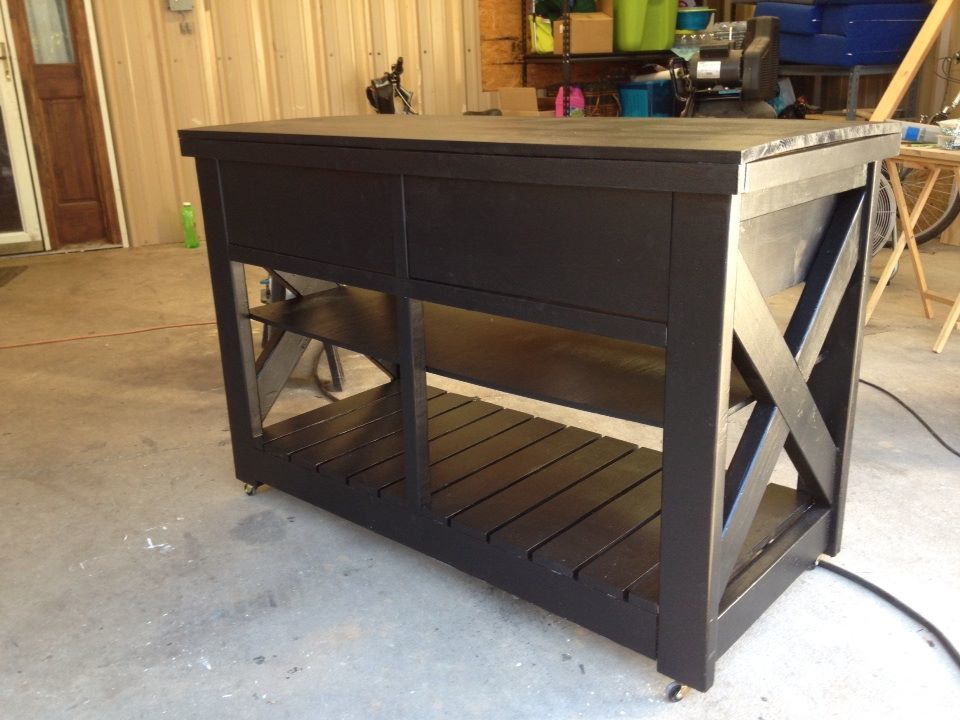
Rustic X Kitchen Island - Double
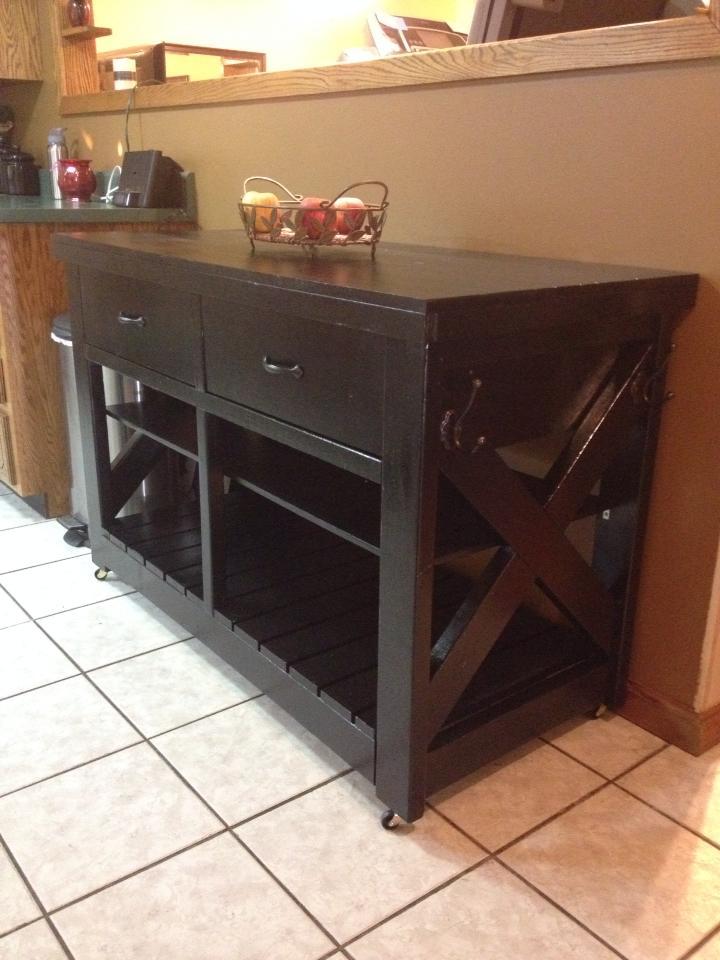
I was in love with the plans, but I knew it needed to be wider to fit my space and be usable. Plus, I didn't want to have the space in the back for stools. I wanted something that had a good amount of storage so I extended the box that was the shelf area and did away with the back board and side boards. I also extended the drawers to the back of the piece.
Built from Plan(s)
Estimated Cost
$175
Estimated Time Investment
Weekend Project (10-20 Hours)
Finish Used
Painted with Valspar Satin Black Paint
Recommended Skill Level
Intermediate
Comments
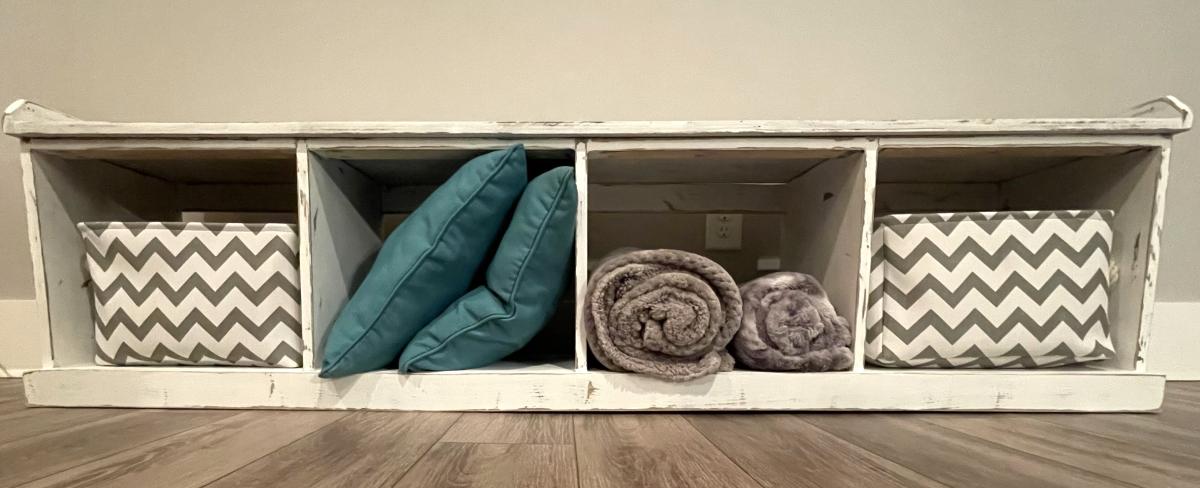
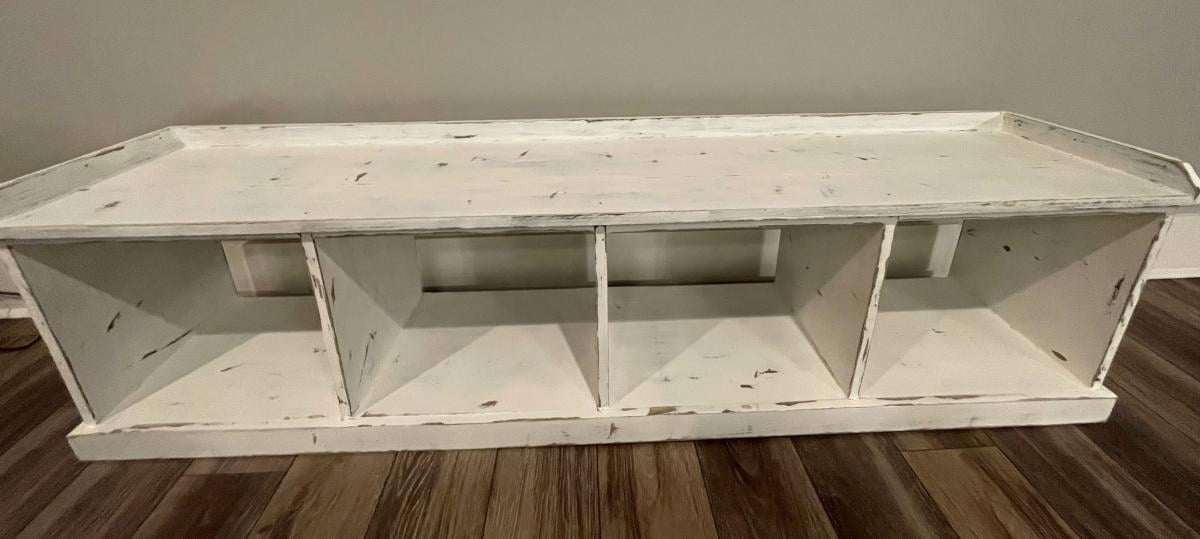
Cubby Storage Bench - First Project!
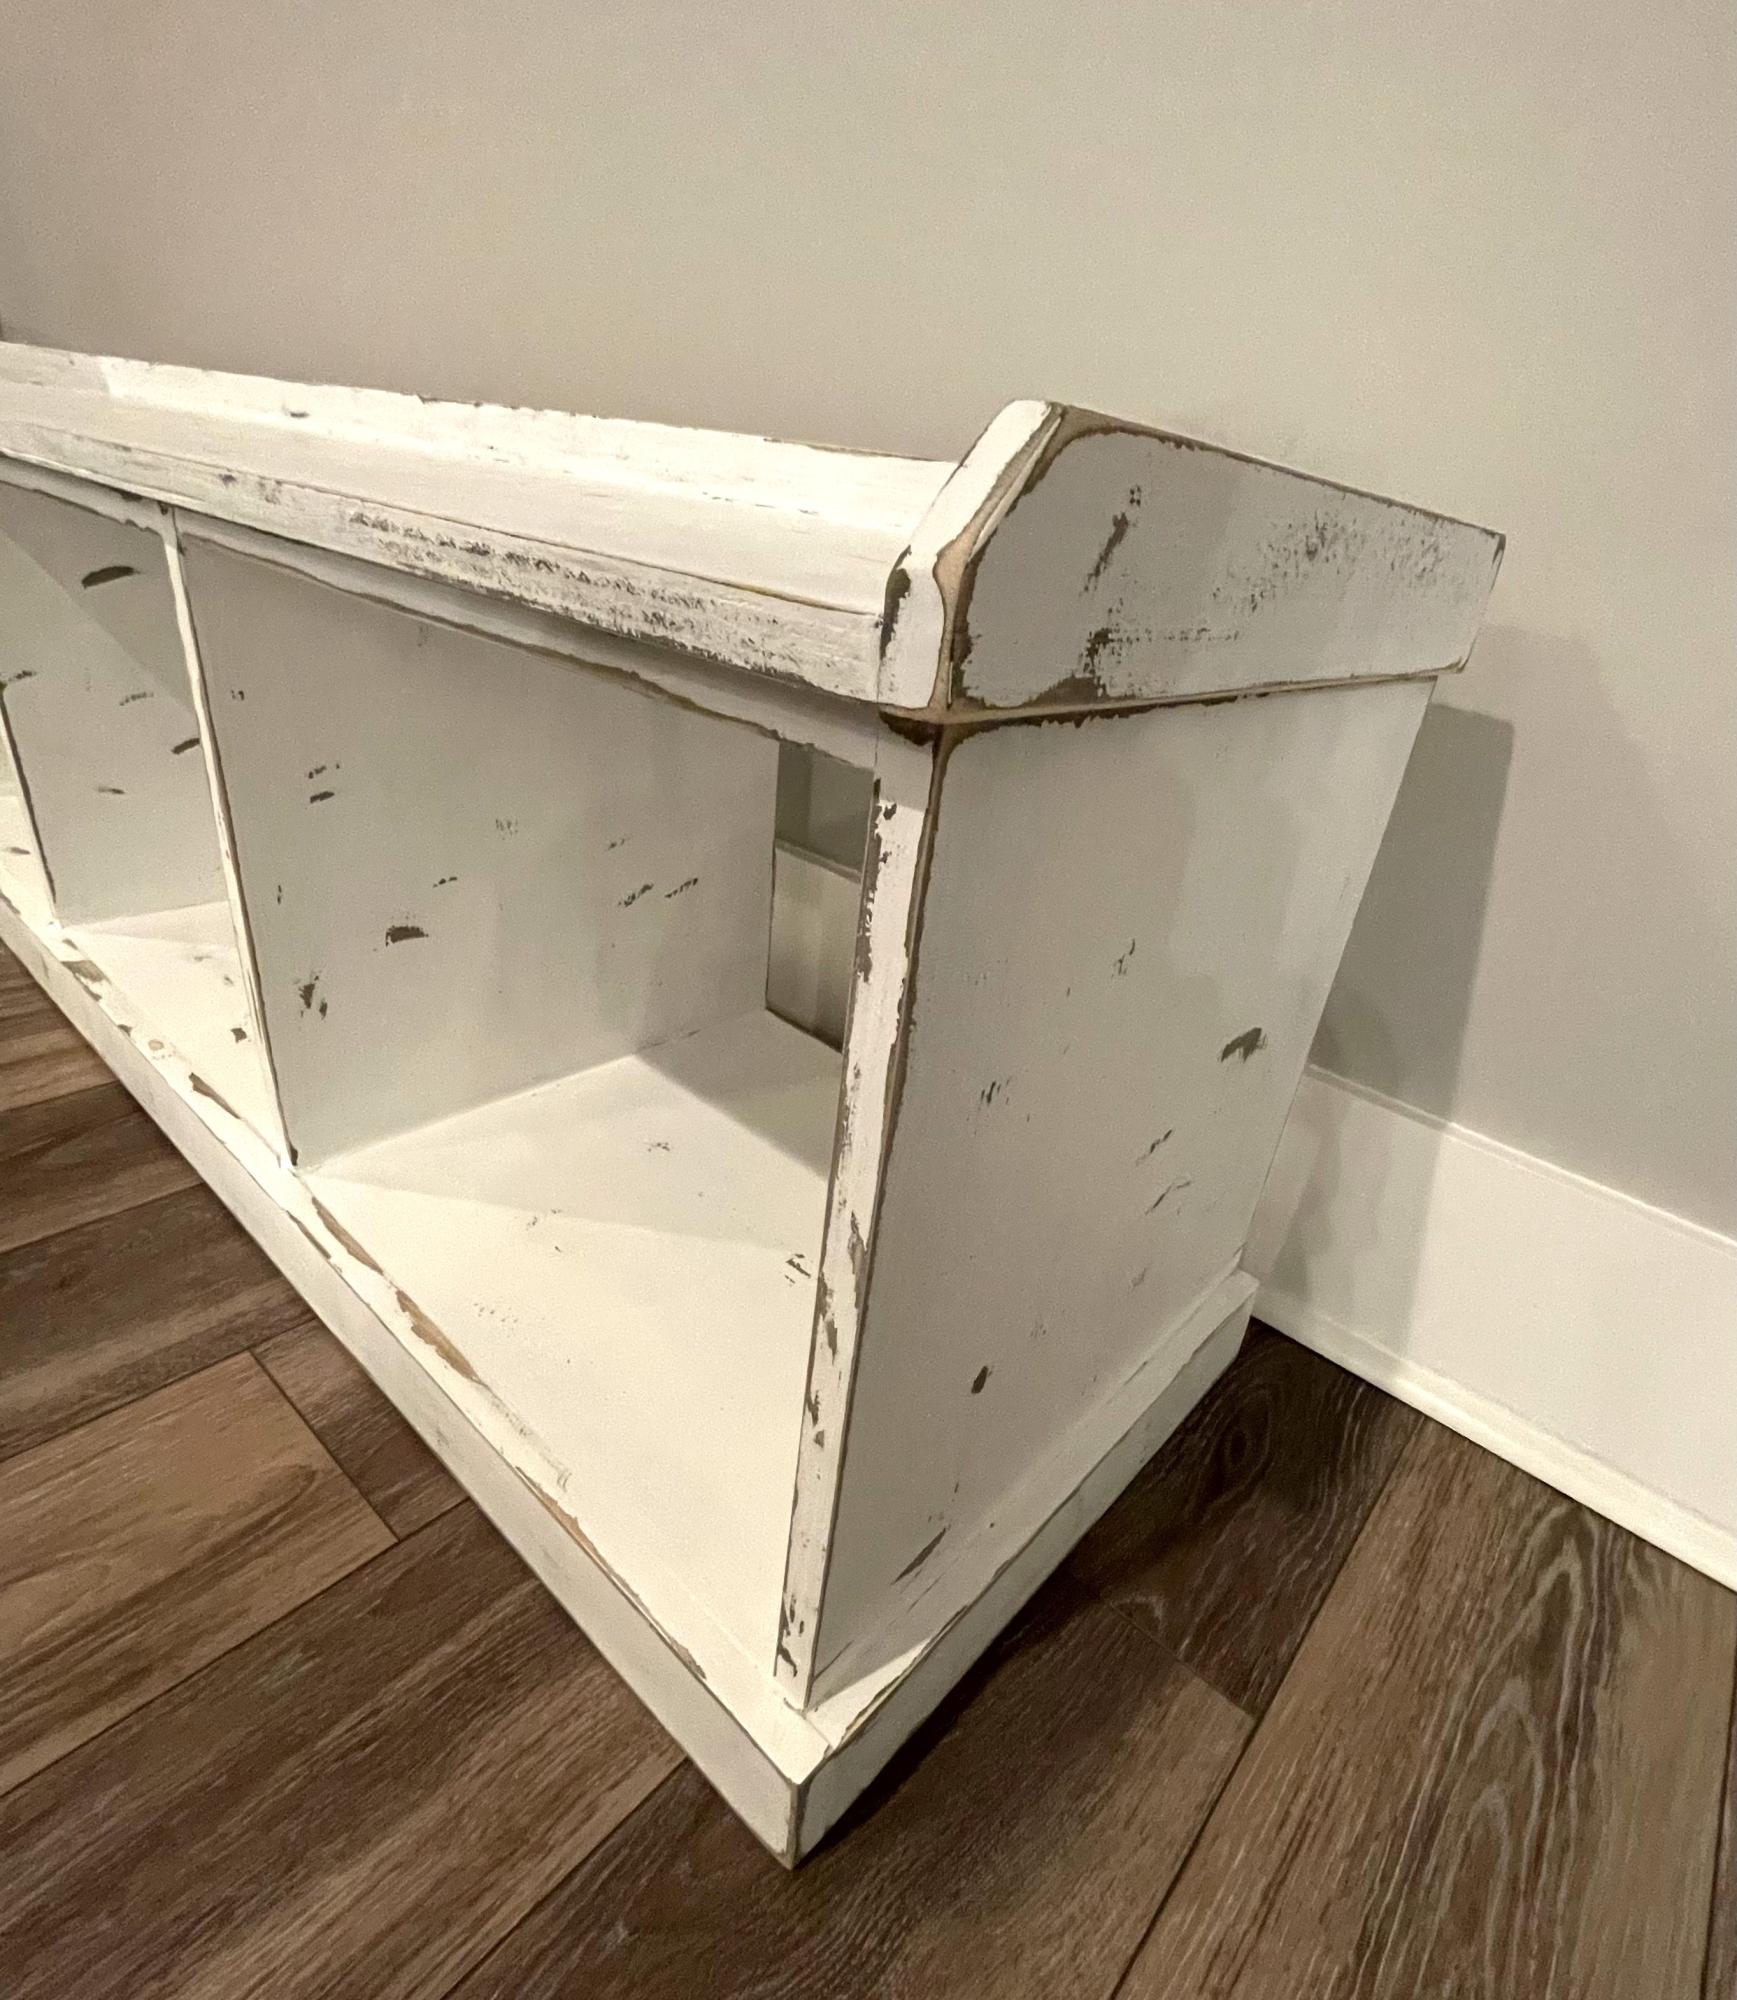
This was our first attempt at making furniture and even though the difficulty rating was ‘intermediate’, the detailed instructions made the process less complicated. Our version of Anna White Essential Entryway Bench turned out better than we expected! Once it was built, I stained it grey, painted it white, then distressed it to make it look antique. I added a custom made foam cushion to the top and, voila!
TammyA
Built from Plan(s)
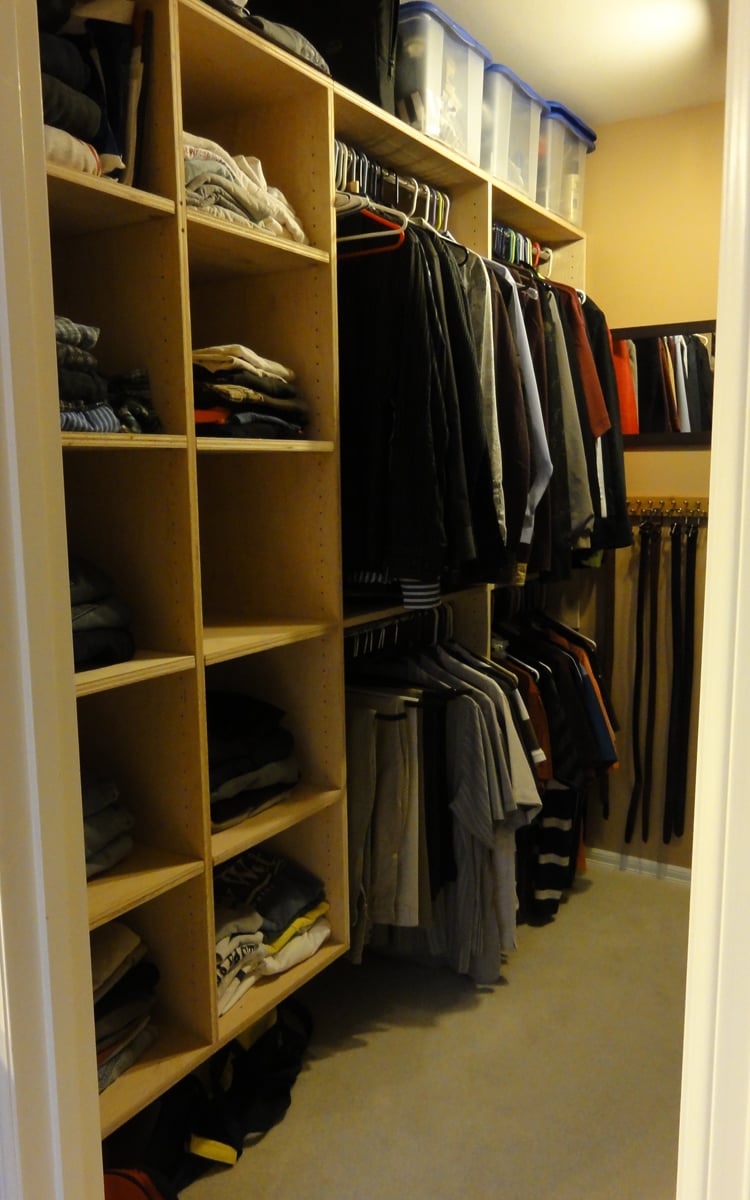
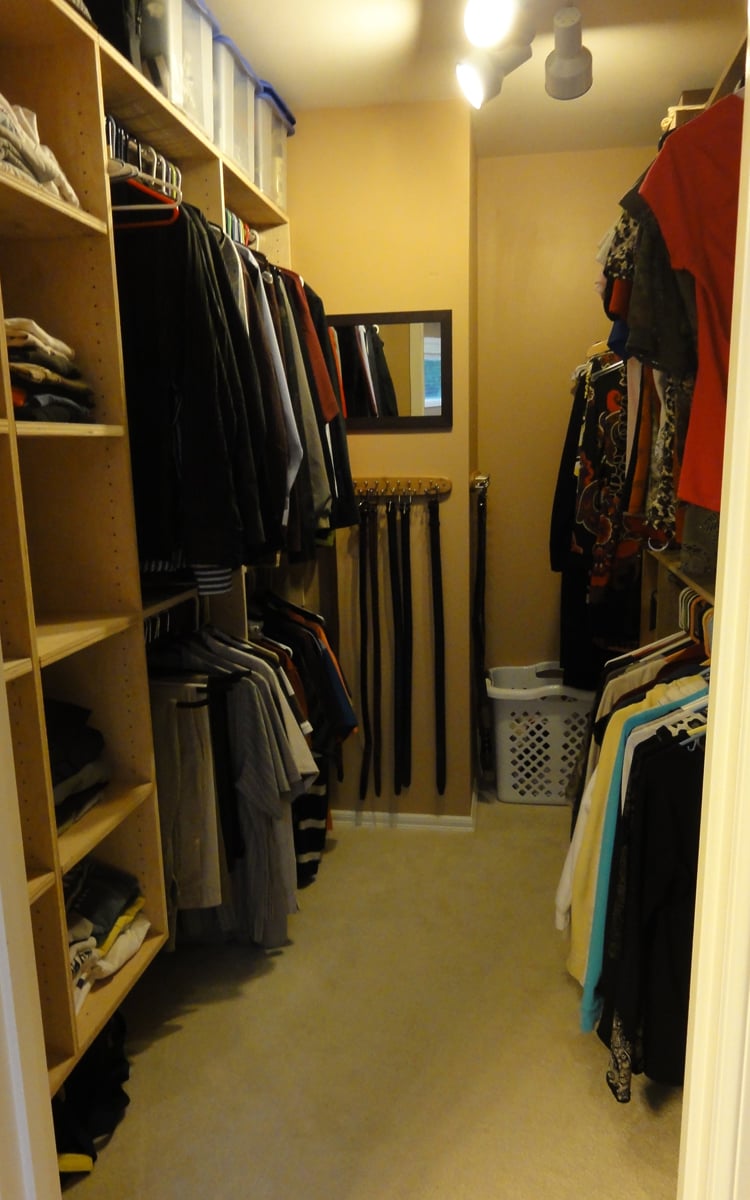
Surprise Master Closet Makeover!

After over a year of other projects, I finally had the chance to completely redesign our master closet! I used EasyClosets.com to come up with the design again. :) I still have a few more tweaks here and there, but I absolutely love it! I surprised my husband for his birthday by doing this project while he was on a business trip. :)
Other than mounting these boxes to the studs, this project was built exclusively with my Kreg Jig. I drilled all of the adjustable shelving holes with a nifty Rockler Jig-It shelving jig - wish it had been the Kreg shelving jig, but I bought mine before Kreg came out with theirs. The Rockler one works great - I just love Kreg's stuff so I'm sure theirs is awesome too. ;)

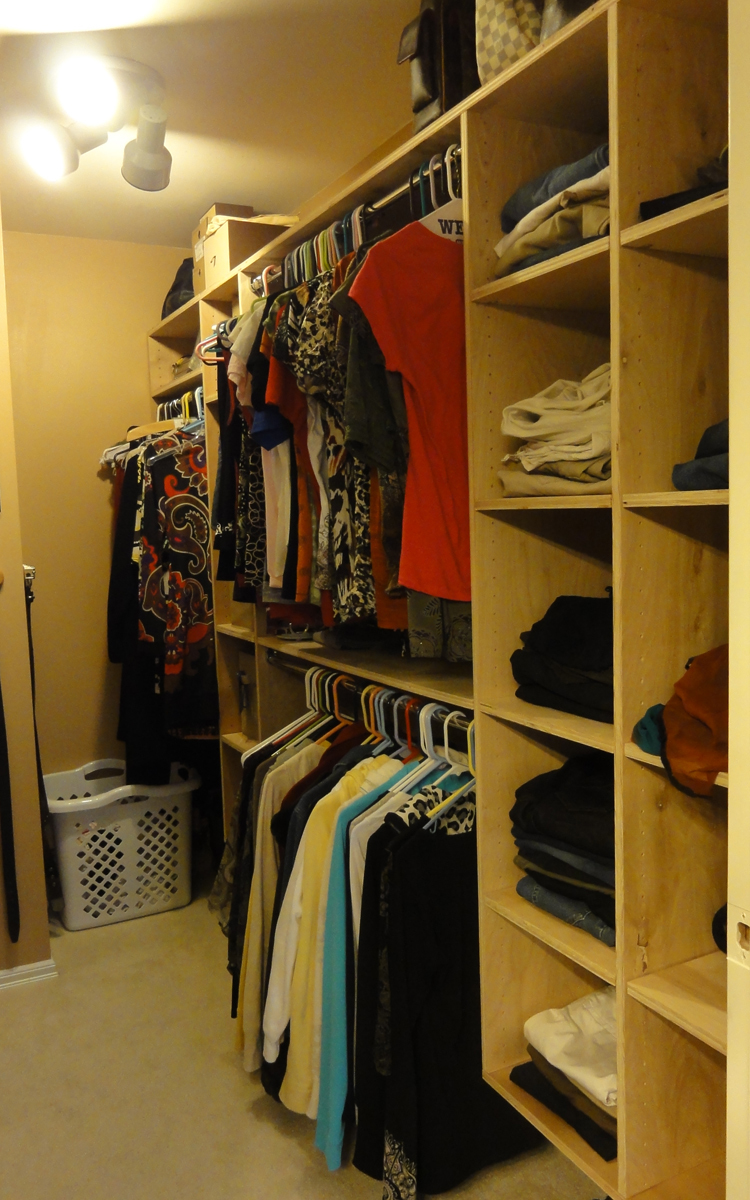
I begged Kreg to let me buy their new circular saw rip cut product early for this project, but they said no. :-( Bummer because I saw Ana using hers and was so jealous! I had to rip all of my plywood the old fashioned way on the floor with my circular saw and lots of clamps. Yuck!
This time around, I used birch plywood. I used white pre-drilled melamine for both of my daughters closets (brag post here), but I didn't like working with that stuff. Too sharp, slippery and HEAVY. I did our spare bedroom closet with pine 1x12 boards a few months back. I think I liked working with the pine best..
After a few months, I purchased a bunch of Closetmaid Fabric Bins/Drawers and they look so good!

Built from Plan(s)
Estimated Cost
$300
Estimated Time Investment
Weekend Project (10-20 Hours)
Finish Used
none
Recommended Skill Level
Beginner
Comments
Mon, 03/26/2012 - 15:20
Amazing! What depth are your
Amazing! What depth are your boxes, and where did you find your rods?

Mon, 03/26/2012 - 18:00
Box sizes and rods
My husband has more room on his side of the closet so his boxes are 16.5" deep. I think that's a bit too deep, but I was trying to use existing wood that had already been cut for shelving on that side. Heavy to hang though. :)
On my side of the closet, the depth is 14.5" deep.
The rods are awesome! Super cheap at The Container Store. You buy them in 2-foot, 3-foot or 4-foot lengths and they cut them on site for you. I posted hyperlinks to the rods and the rod hanging hardware on one of my other brag posts. Love them!

Mon, 03/26/2012 - 18:13
Jennifer, the closet is
Jennifer, the closet is AMAZING!!!! But then again, you do make the best closets!
Thu, 05/16/2013 - 15:00
Amazing closet
The closet is amazing. Yesterday I finally took off the builder installed shelf and dowel. Took a while, still need to patch up the drywall. I am now research to get the closet renovation started. I have tons of questions.
I understand that the shelves itself were attached by kreg jig holes. How do I hang the shelves on the wall?
Tue, 11/19/2013 - 06:47
Advice on the wood
Yours closets are awesome. Can you please advice as i am a newbee.
White closets: For the white closets we buy the regular plywood from Home depot and then do primer and paint. Can you please advice on the primer and the paint I should use to make it white color.
Wood closets: I like the wood color closets. Do we need to do any polish. What sheets should we buy in home depot to make wood color closets. What are our options for wood color closets
Thank you
Thu, 11/21/2013 - 11:16
How to hang
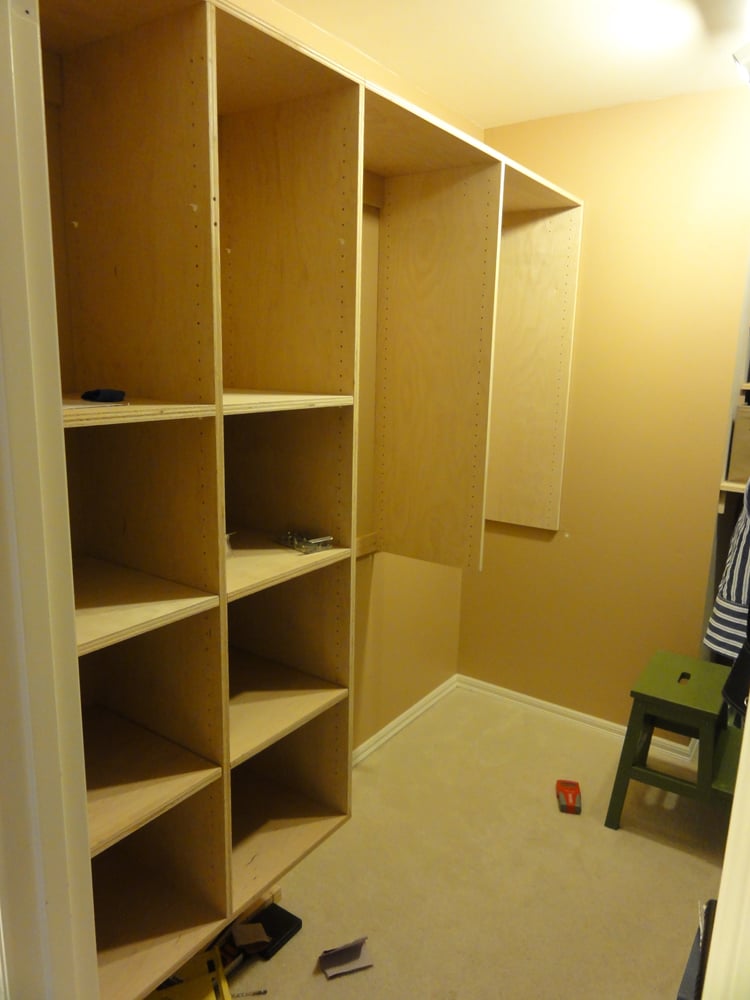
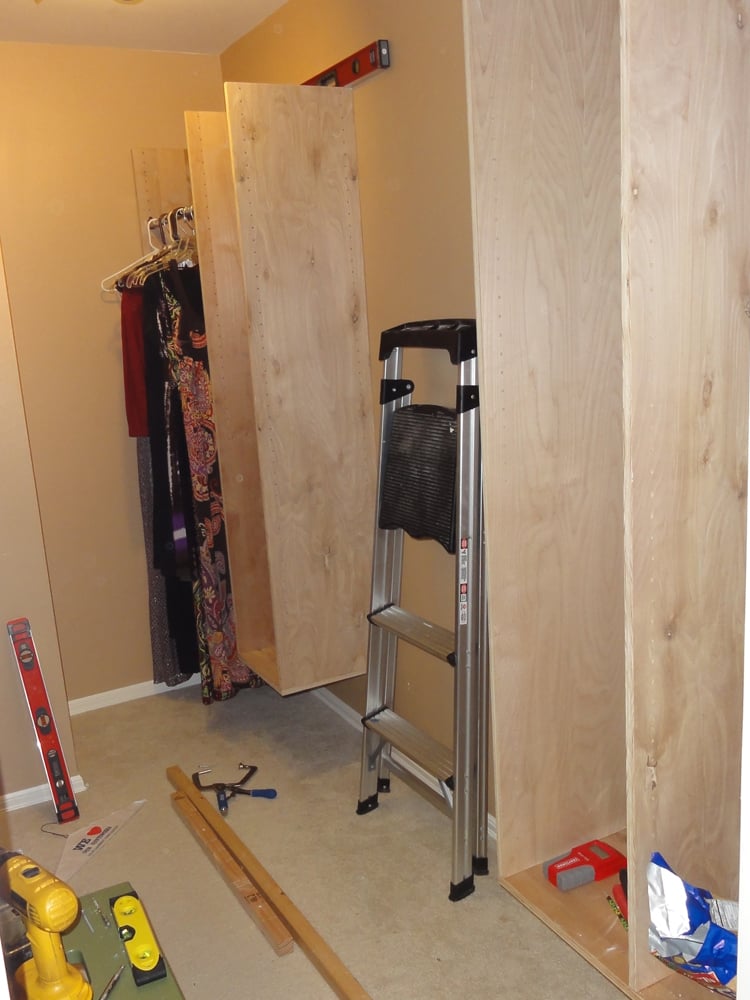
Rhea, take a look at Ana's kitchen cabinet plans and look at how she braces them along the back. That's what you screw through into the studs. To make it easier, I screwed in a scrap 2x2 into the studs at JUST below where I wanted the closet shelves to go (sort of like a temporary shelf). Then I carefully set the closet box on my temporary shelf and screwed it into the studs.
Also, if you click on my username, I explain how I hang them in a bit more detail in one of my daughter's closet makeovers. :)
Thu, 11/21/2013 - 11:24
Type of wood for closets
Hi jyothianil,
I have done both actually. I did both of my daughter's closets using pre-peg-hole-drilled white melamine from HD. You can get it in two widths and it saves you a ton of time not having to drill all of those holes. A few things to consider... Melamine is HEAVY and a total pain to work with. The edges are sharp after being cut and it slips everywhere when trying to kreg-jig it together. But it's DONE once it's put together...
On two other closets, I just used ripped sheets of birch plywood or 1x12 sheets of pine. I didn't finish mine, but I probably should have. It doesn't snag the clothes, but it does create dust. If I had at least put one coat of poly on, it would have eliminated a lot of the dust that collects on the clothes.
If you want to paint them white, I would just use some sort of primer and any white paint. It's all personal preference, but I would get semi-gloss or gloss white paint because it won't show fingerprints and clothes will slide on and off the shelves easier.
Thu, 11/21/2013 - 11:26
Floating on wall
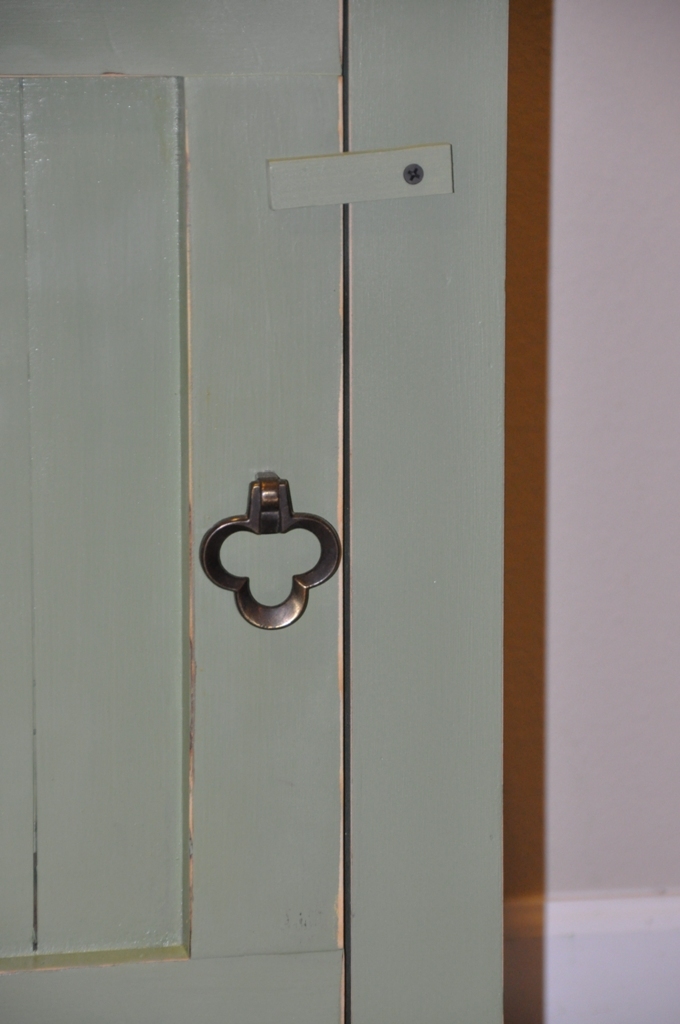
Here is my other post. I explain a bit more about how I hung them on the wall. If you look at the main photo at the top, you can see one of the "hidden" boards I used to screw it into the studs. I painted it the same color as the wall so it would be less noticeable. http://ana-white.com/2011/03/closet-organized
Doll Farmhouse Bed

Love this bed! Fell in love after seeing it here and on That's My Letter, so my dad and I built the beds according to the plans (did add a center support under the mattress) and I made all the bedding. My daughters' dolls love their new bedroom set!


Built from Plan(s)
Estimated Cost
$20 for wood & paint
Estimated Time Investment
Afternoon Project (3-6 Hours)
Finish Used
Primer then semi-gloss spray paint.
Recommended Skill Level
Beginner
Comments
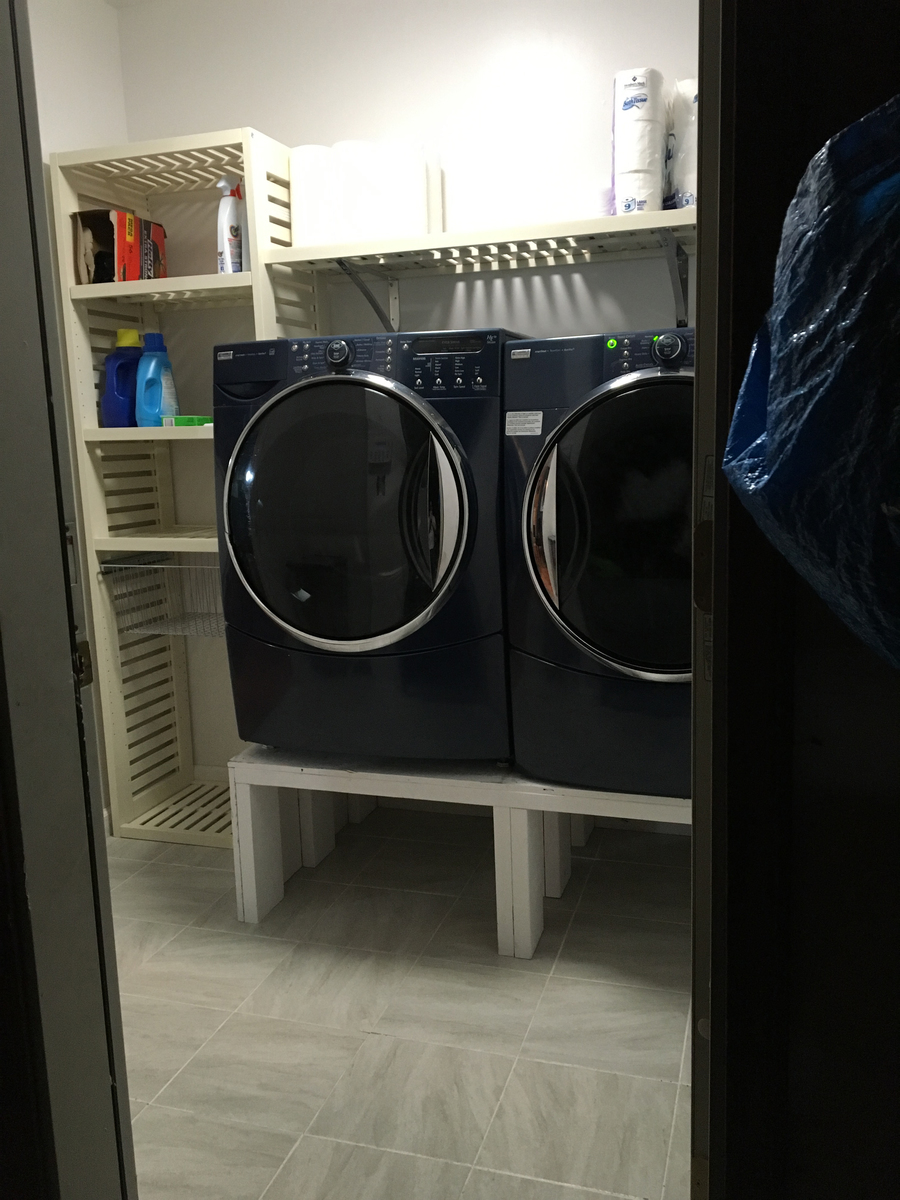
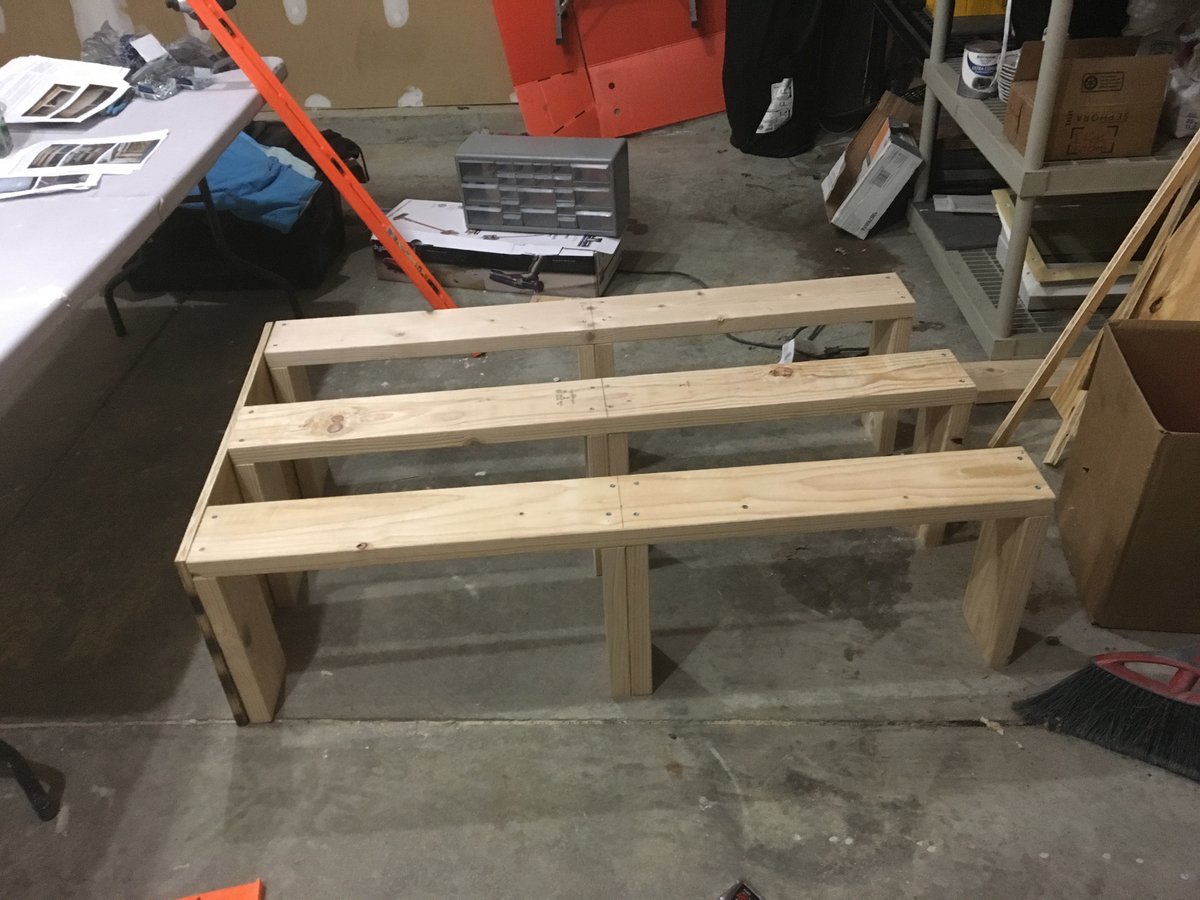
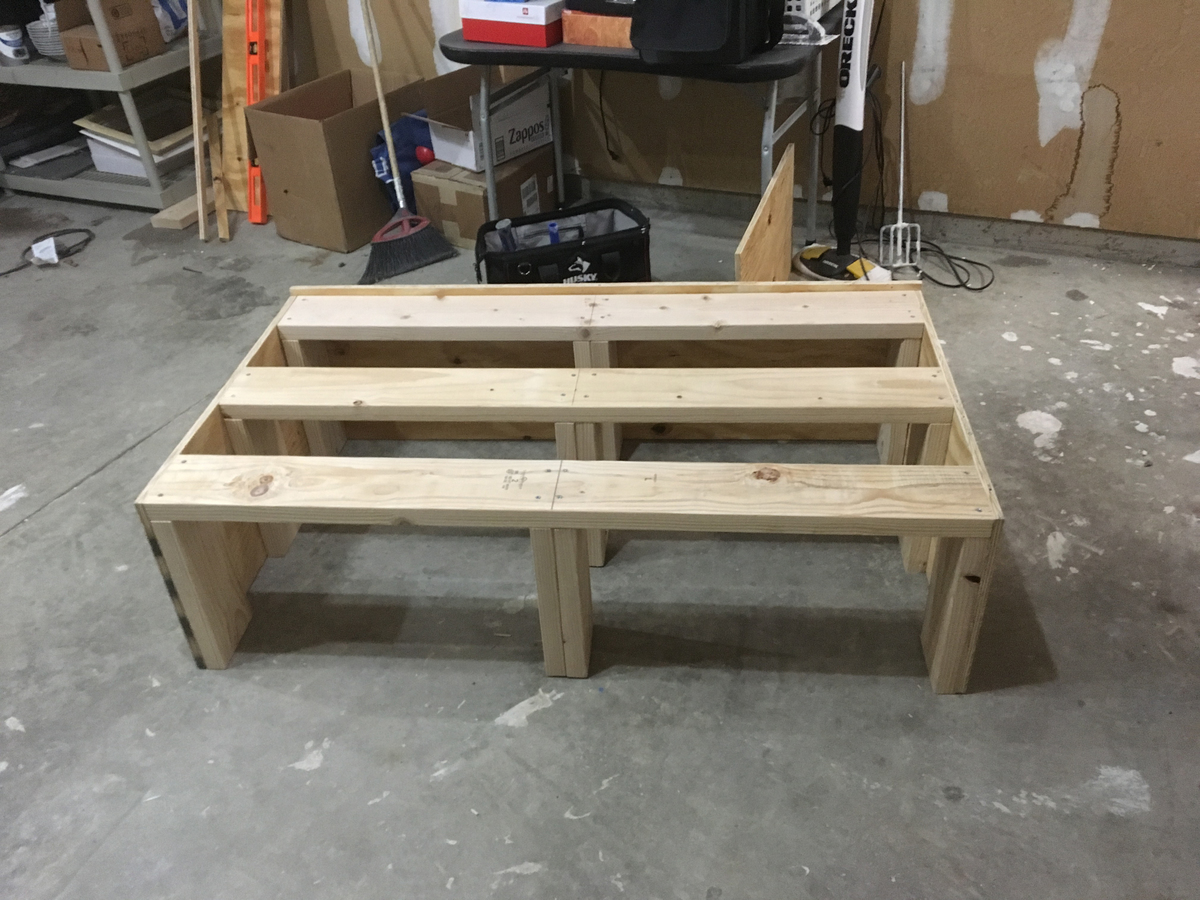
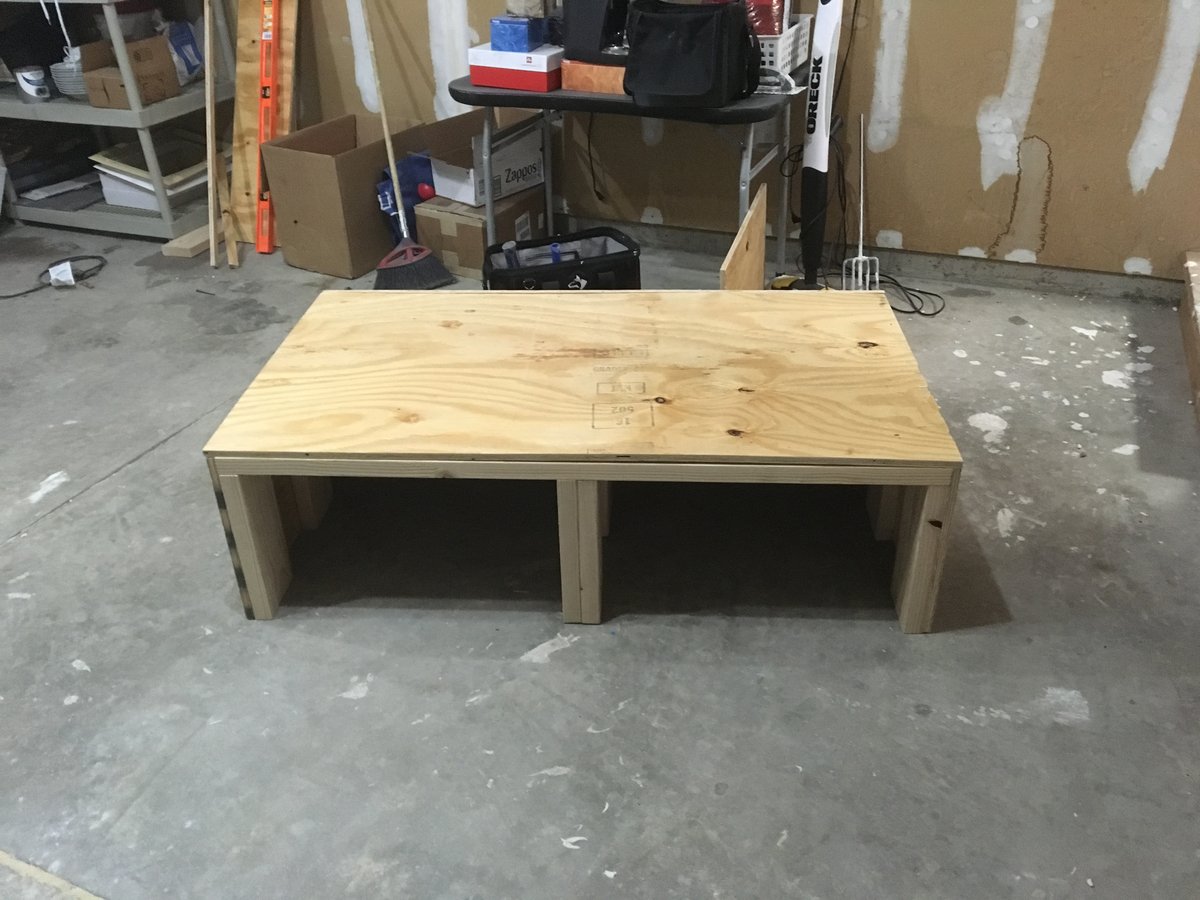
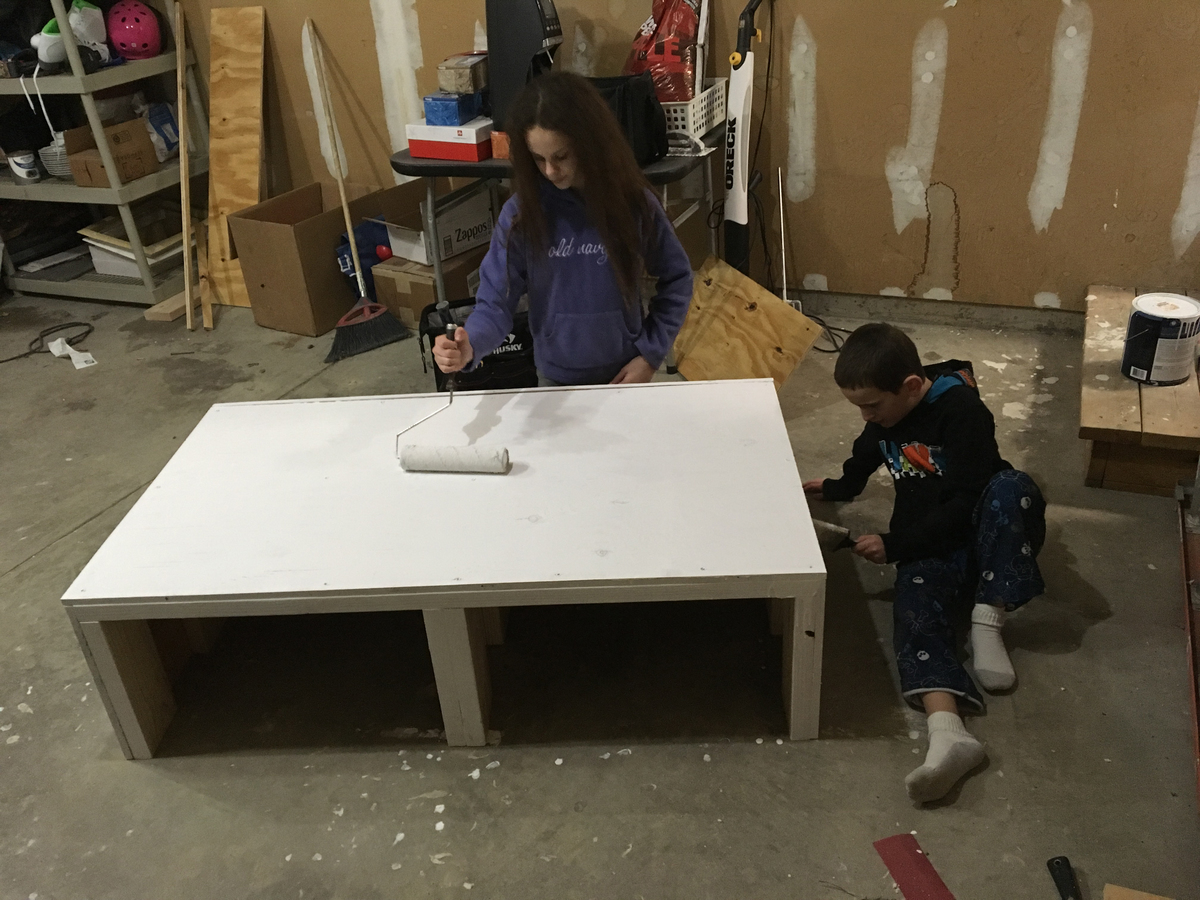
Washer & Dryer Pedestal
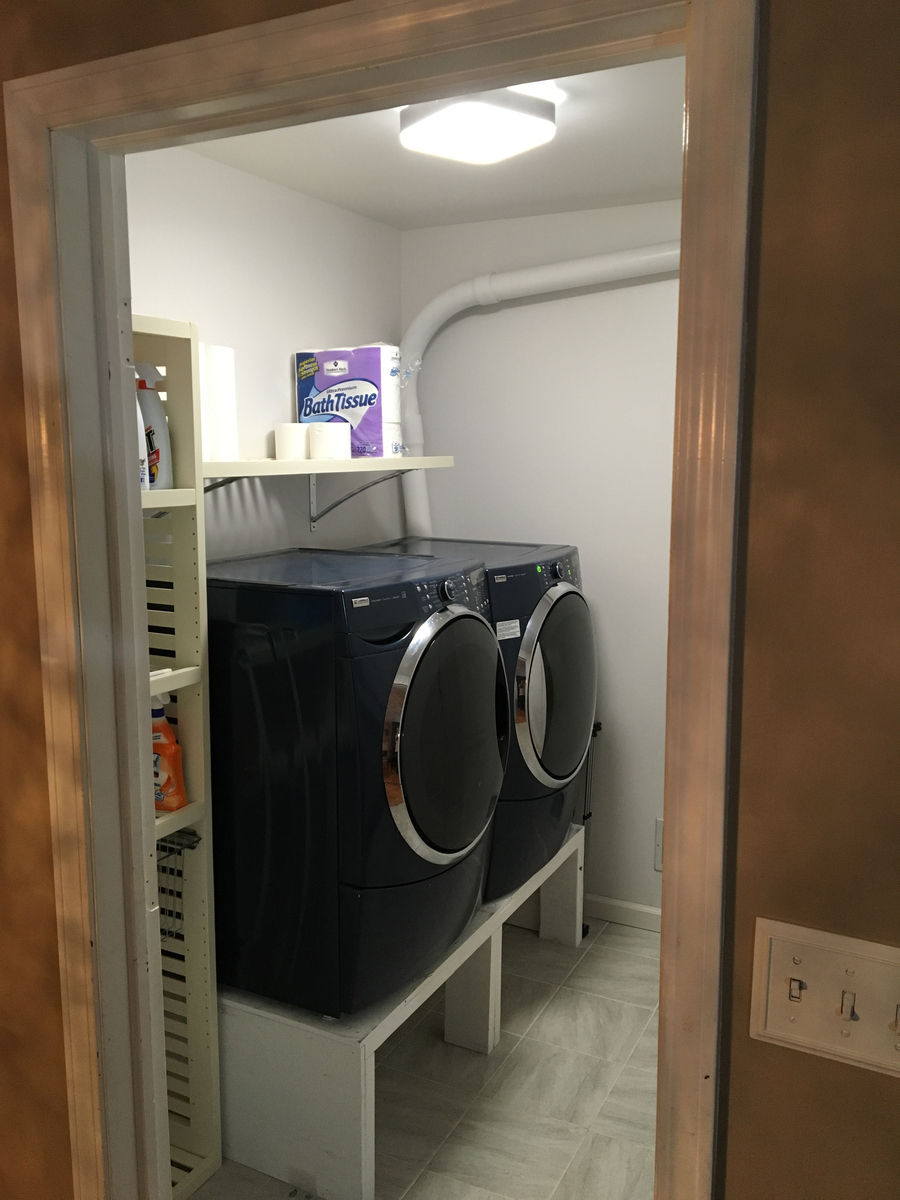
Thank you dmccoy!! Washer & Dryer Pedestal / Platform with Drawer
Followed your plan and these came out sturdy and solid.
I adjusted it to 55 inches to fit my smaller space and decided to not build the drawers.
So simple to put together and saved over $400
Built from Plan(s)
Estimated Cost
About $100
2X6 wood, plywood, screws
I had extra paint in the garage
2X6 wood, plywood, screws
I had extra paint in the garage
Estimated Time Investment
Afternoon Project (3-6 Hours)
Recommended Skill Level
Beginner
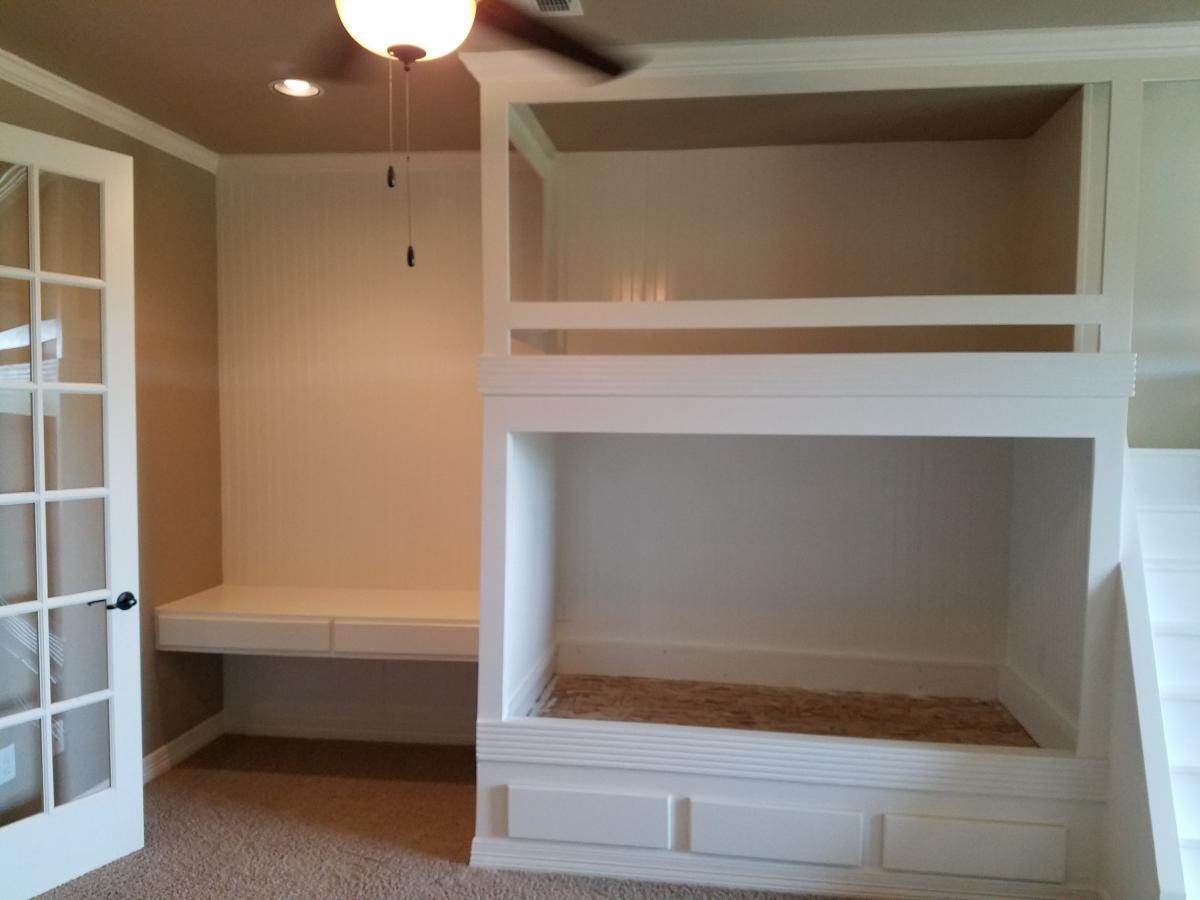
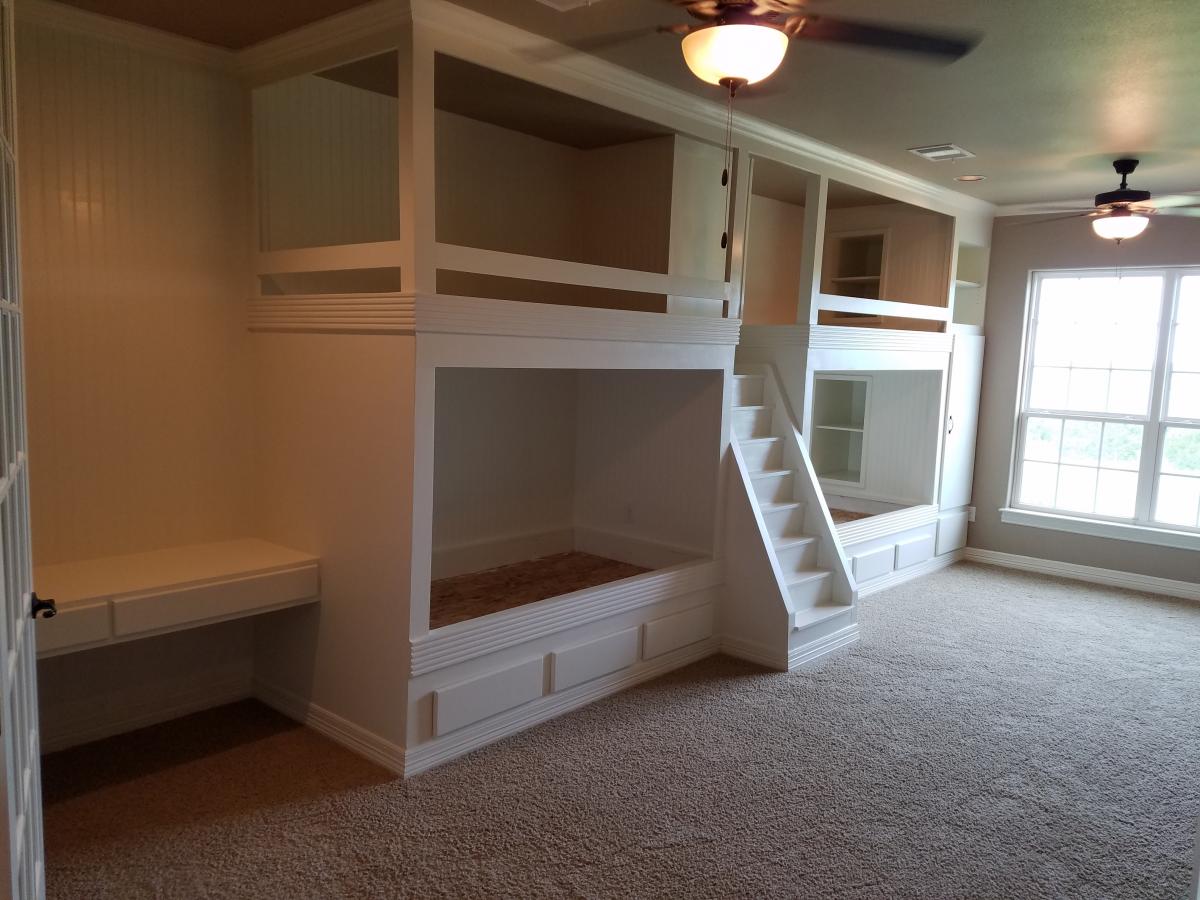
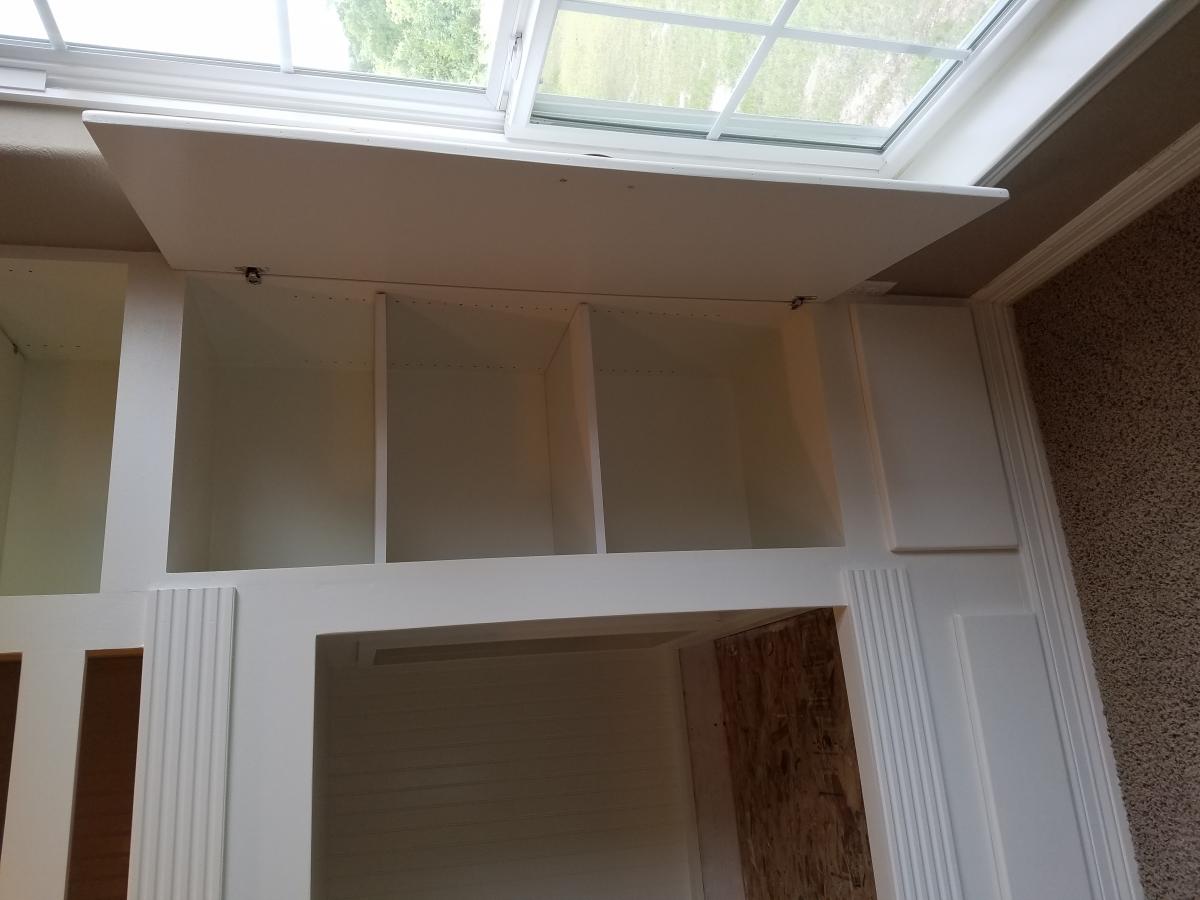
Bunk beds
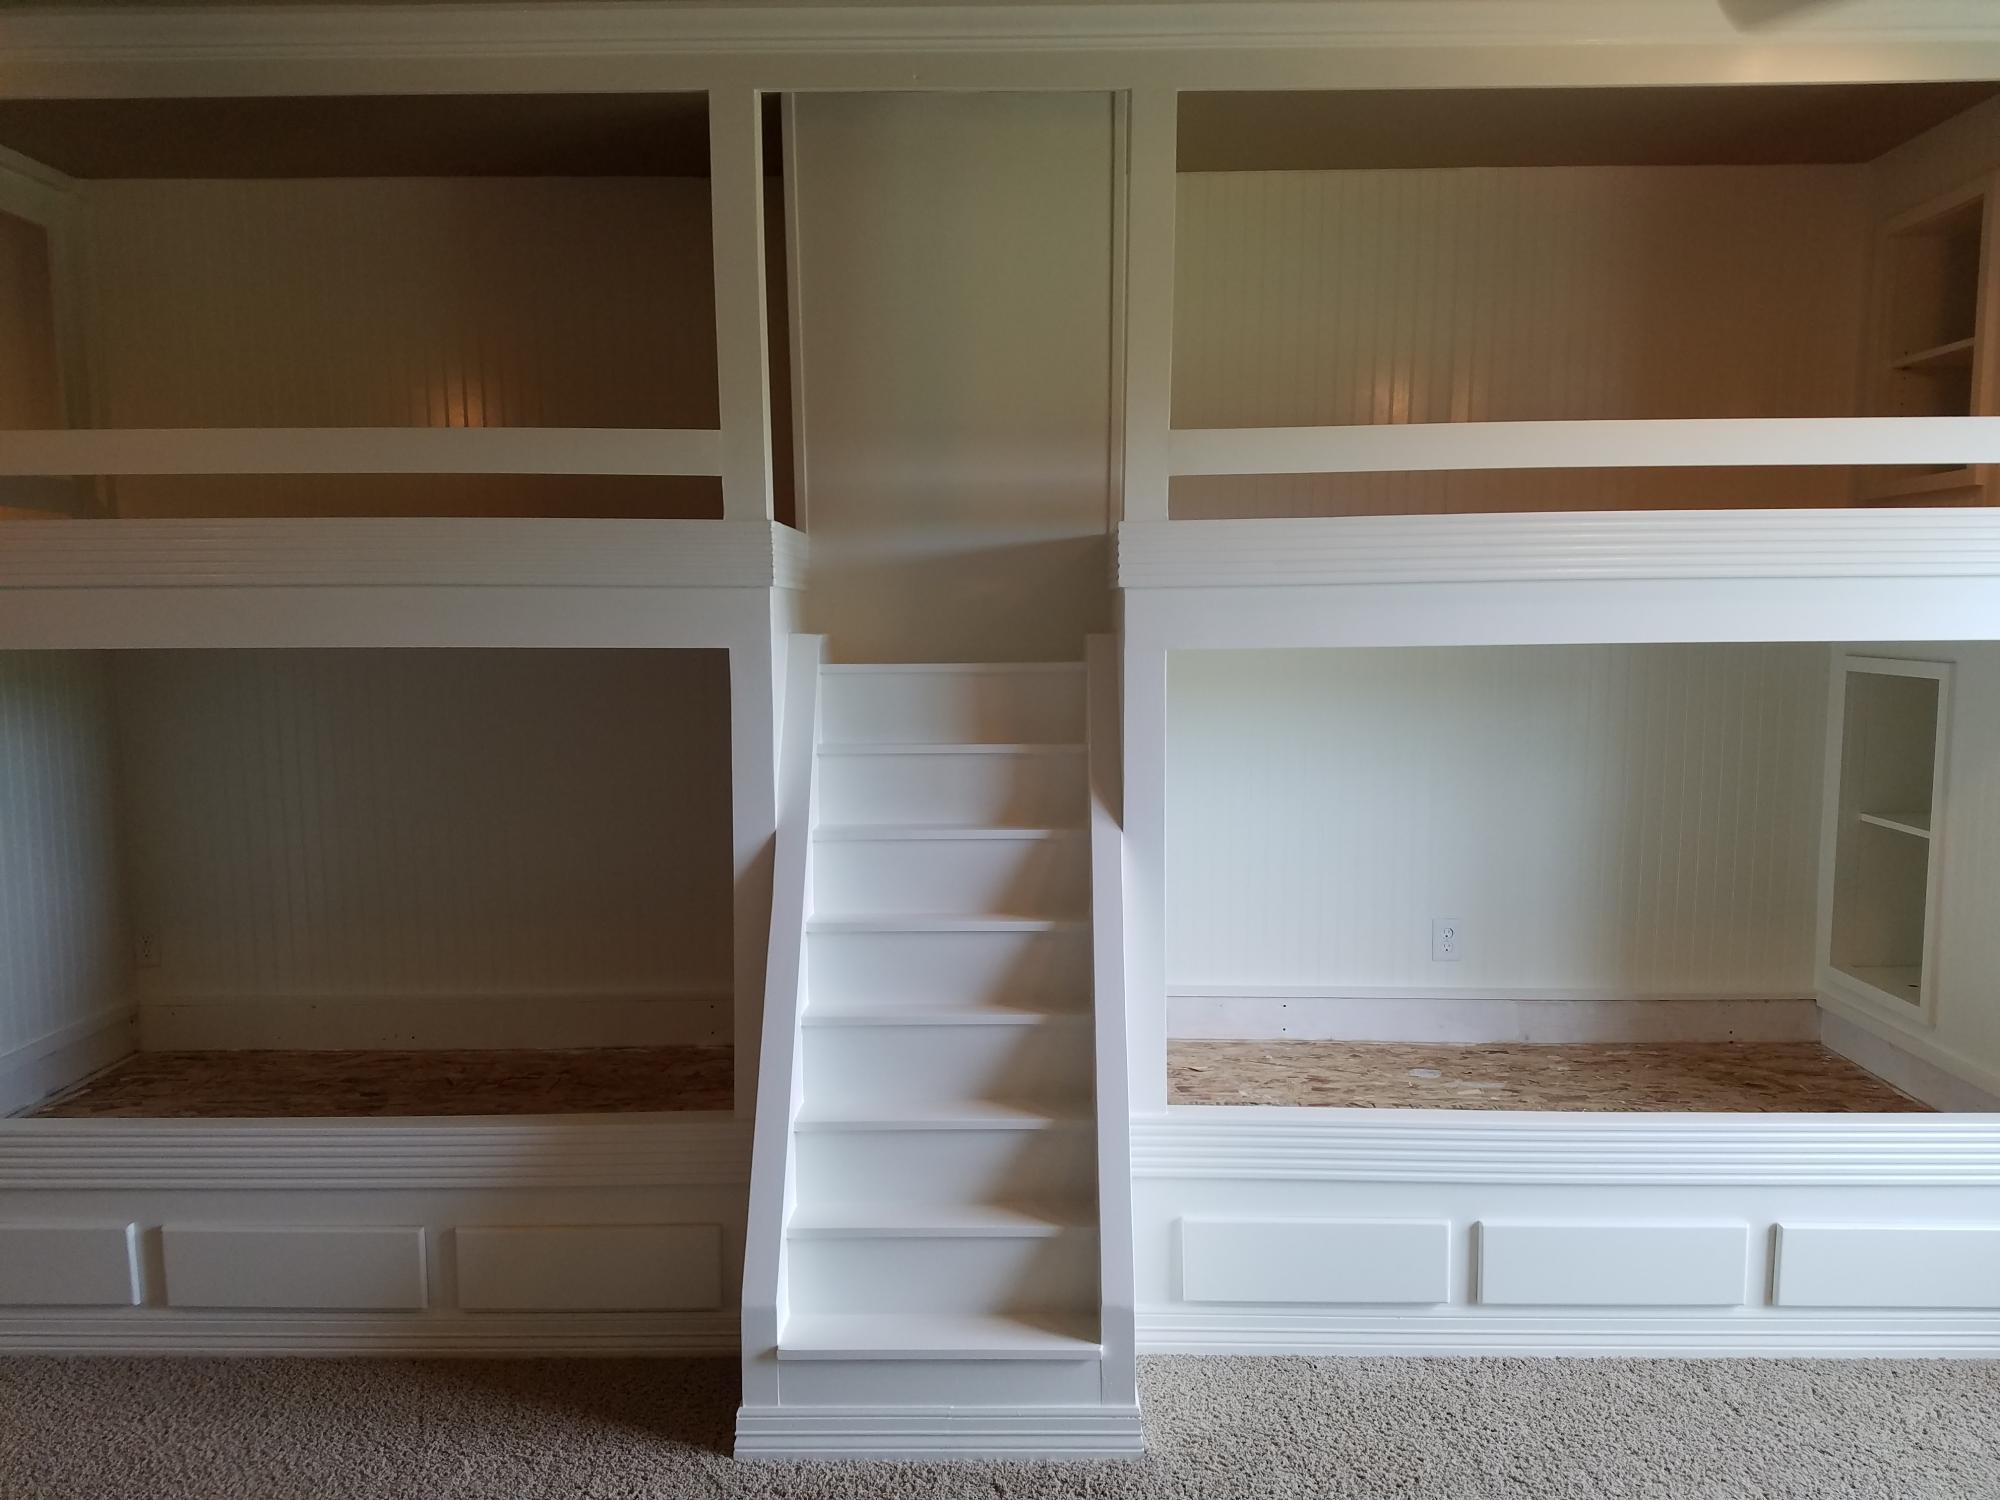
Customers wanted bunk beds for their grandchildren. Everything was custom and change orders galore lol.
Estimated Cost
2200
Estimated Time Investment
Week Long Project (20 Hours or More)
Finish Used
Sherwin Williams solo paint
Recommended Skill Level
Advanced
Comments

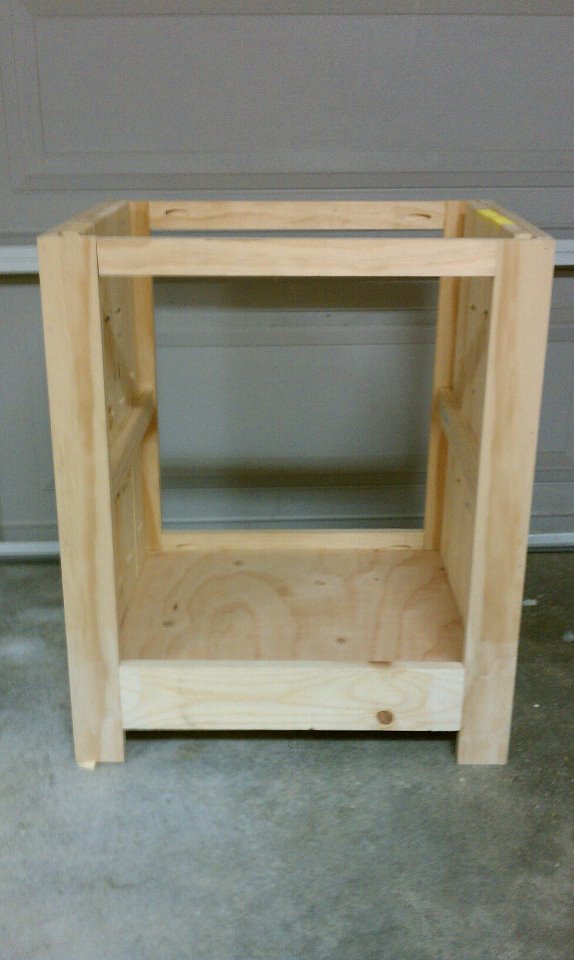
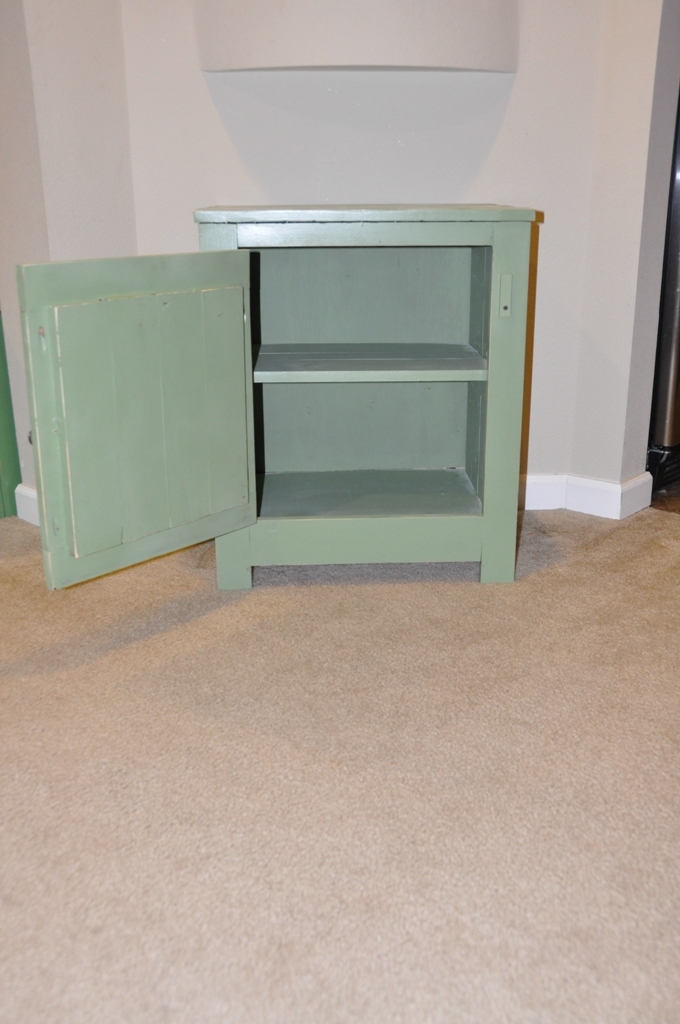
Kentwood Nightstand
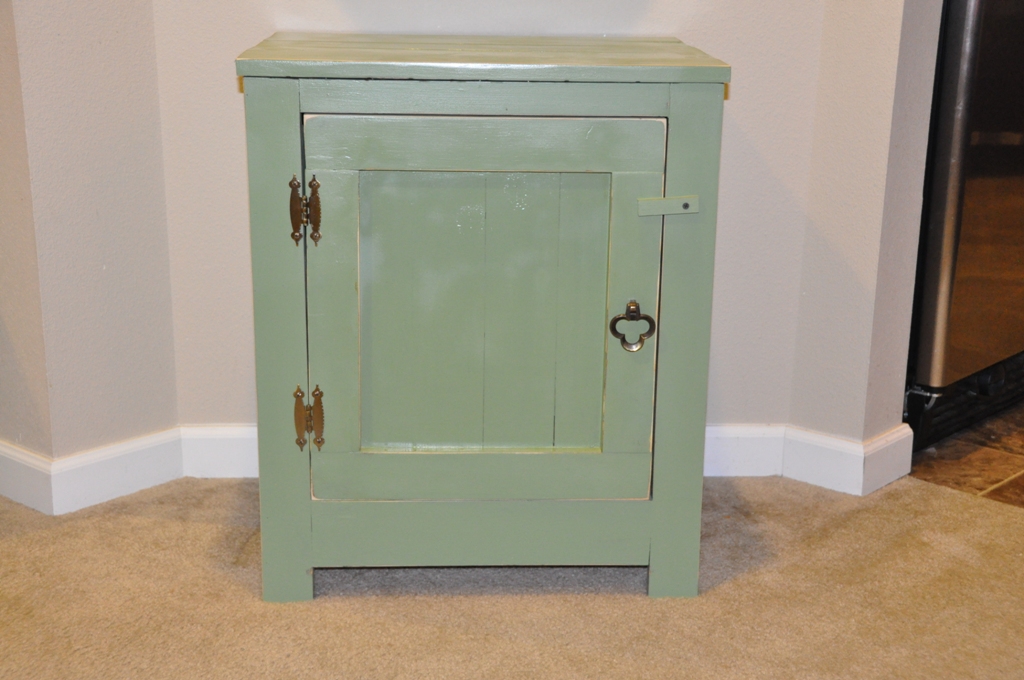
I decided to take the Kentwood nightstand and add my own spring time twist to it. I got bored and built this out of spare wood in the garage and free paint from Ace. I think it turned out pretty well.
Built from Plan(s)
Estimated Cost
$15-$25 if you need to buy wood
Estimated Time Investment
Day Project (6-9 Hours)
Finish Used
Ace Hardware free paint with poly seal
Recommended Skill Level
Beginner
Comments
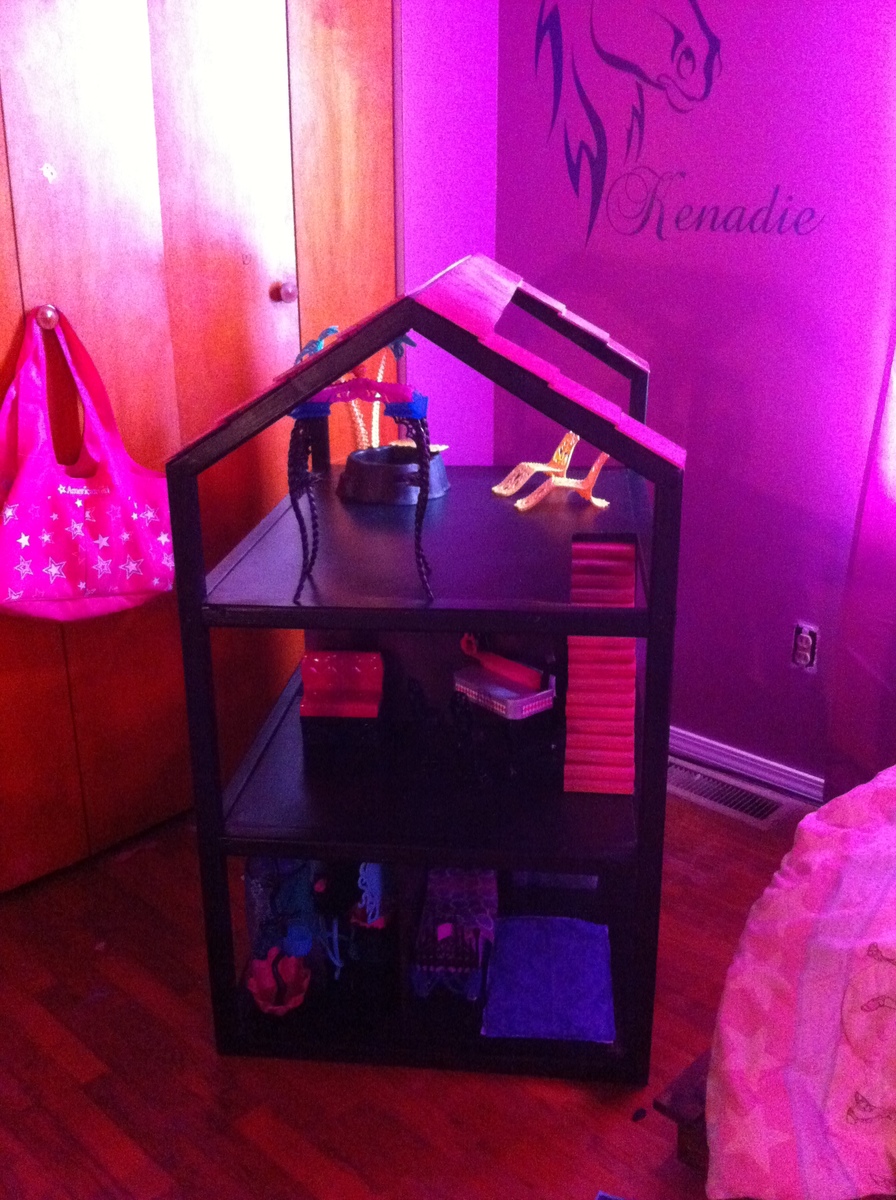
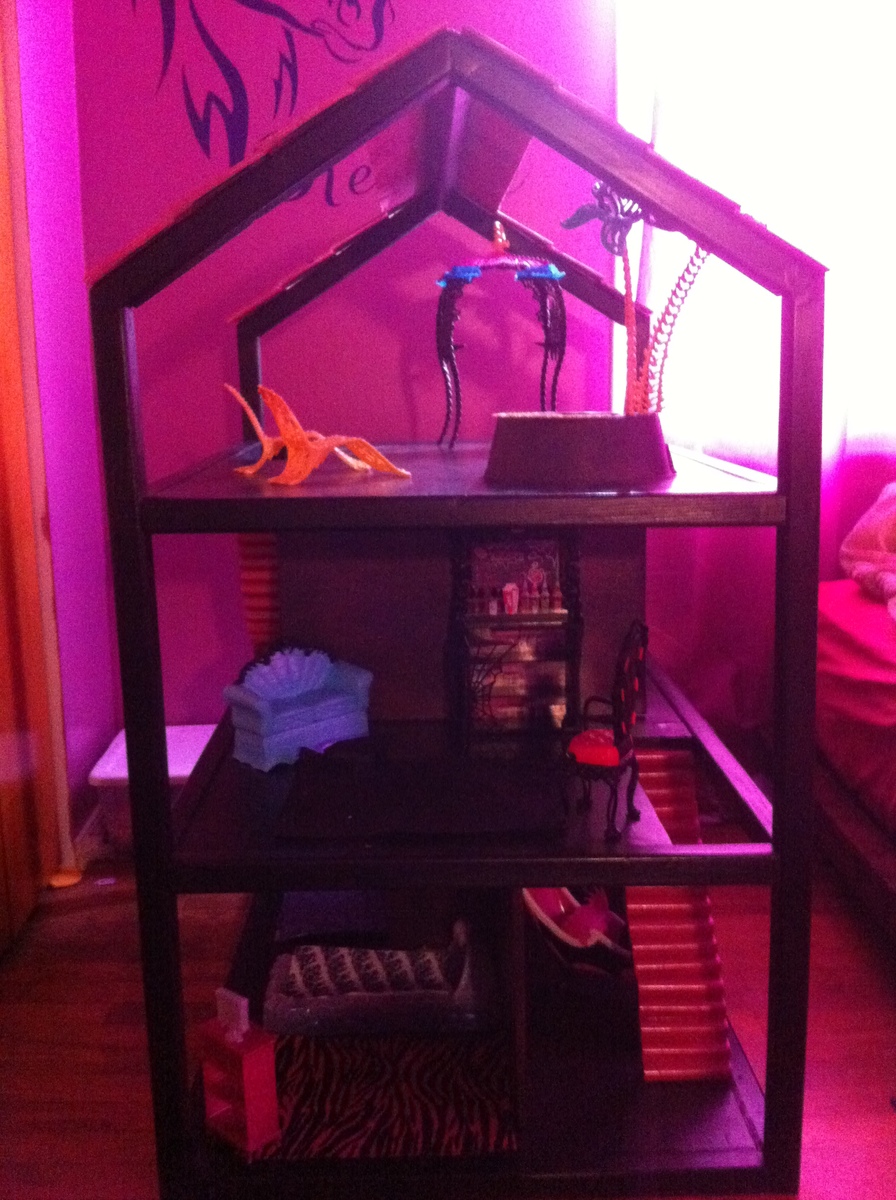
Dream Dollhouse
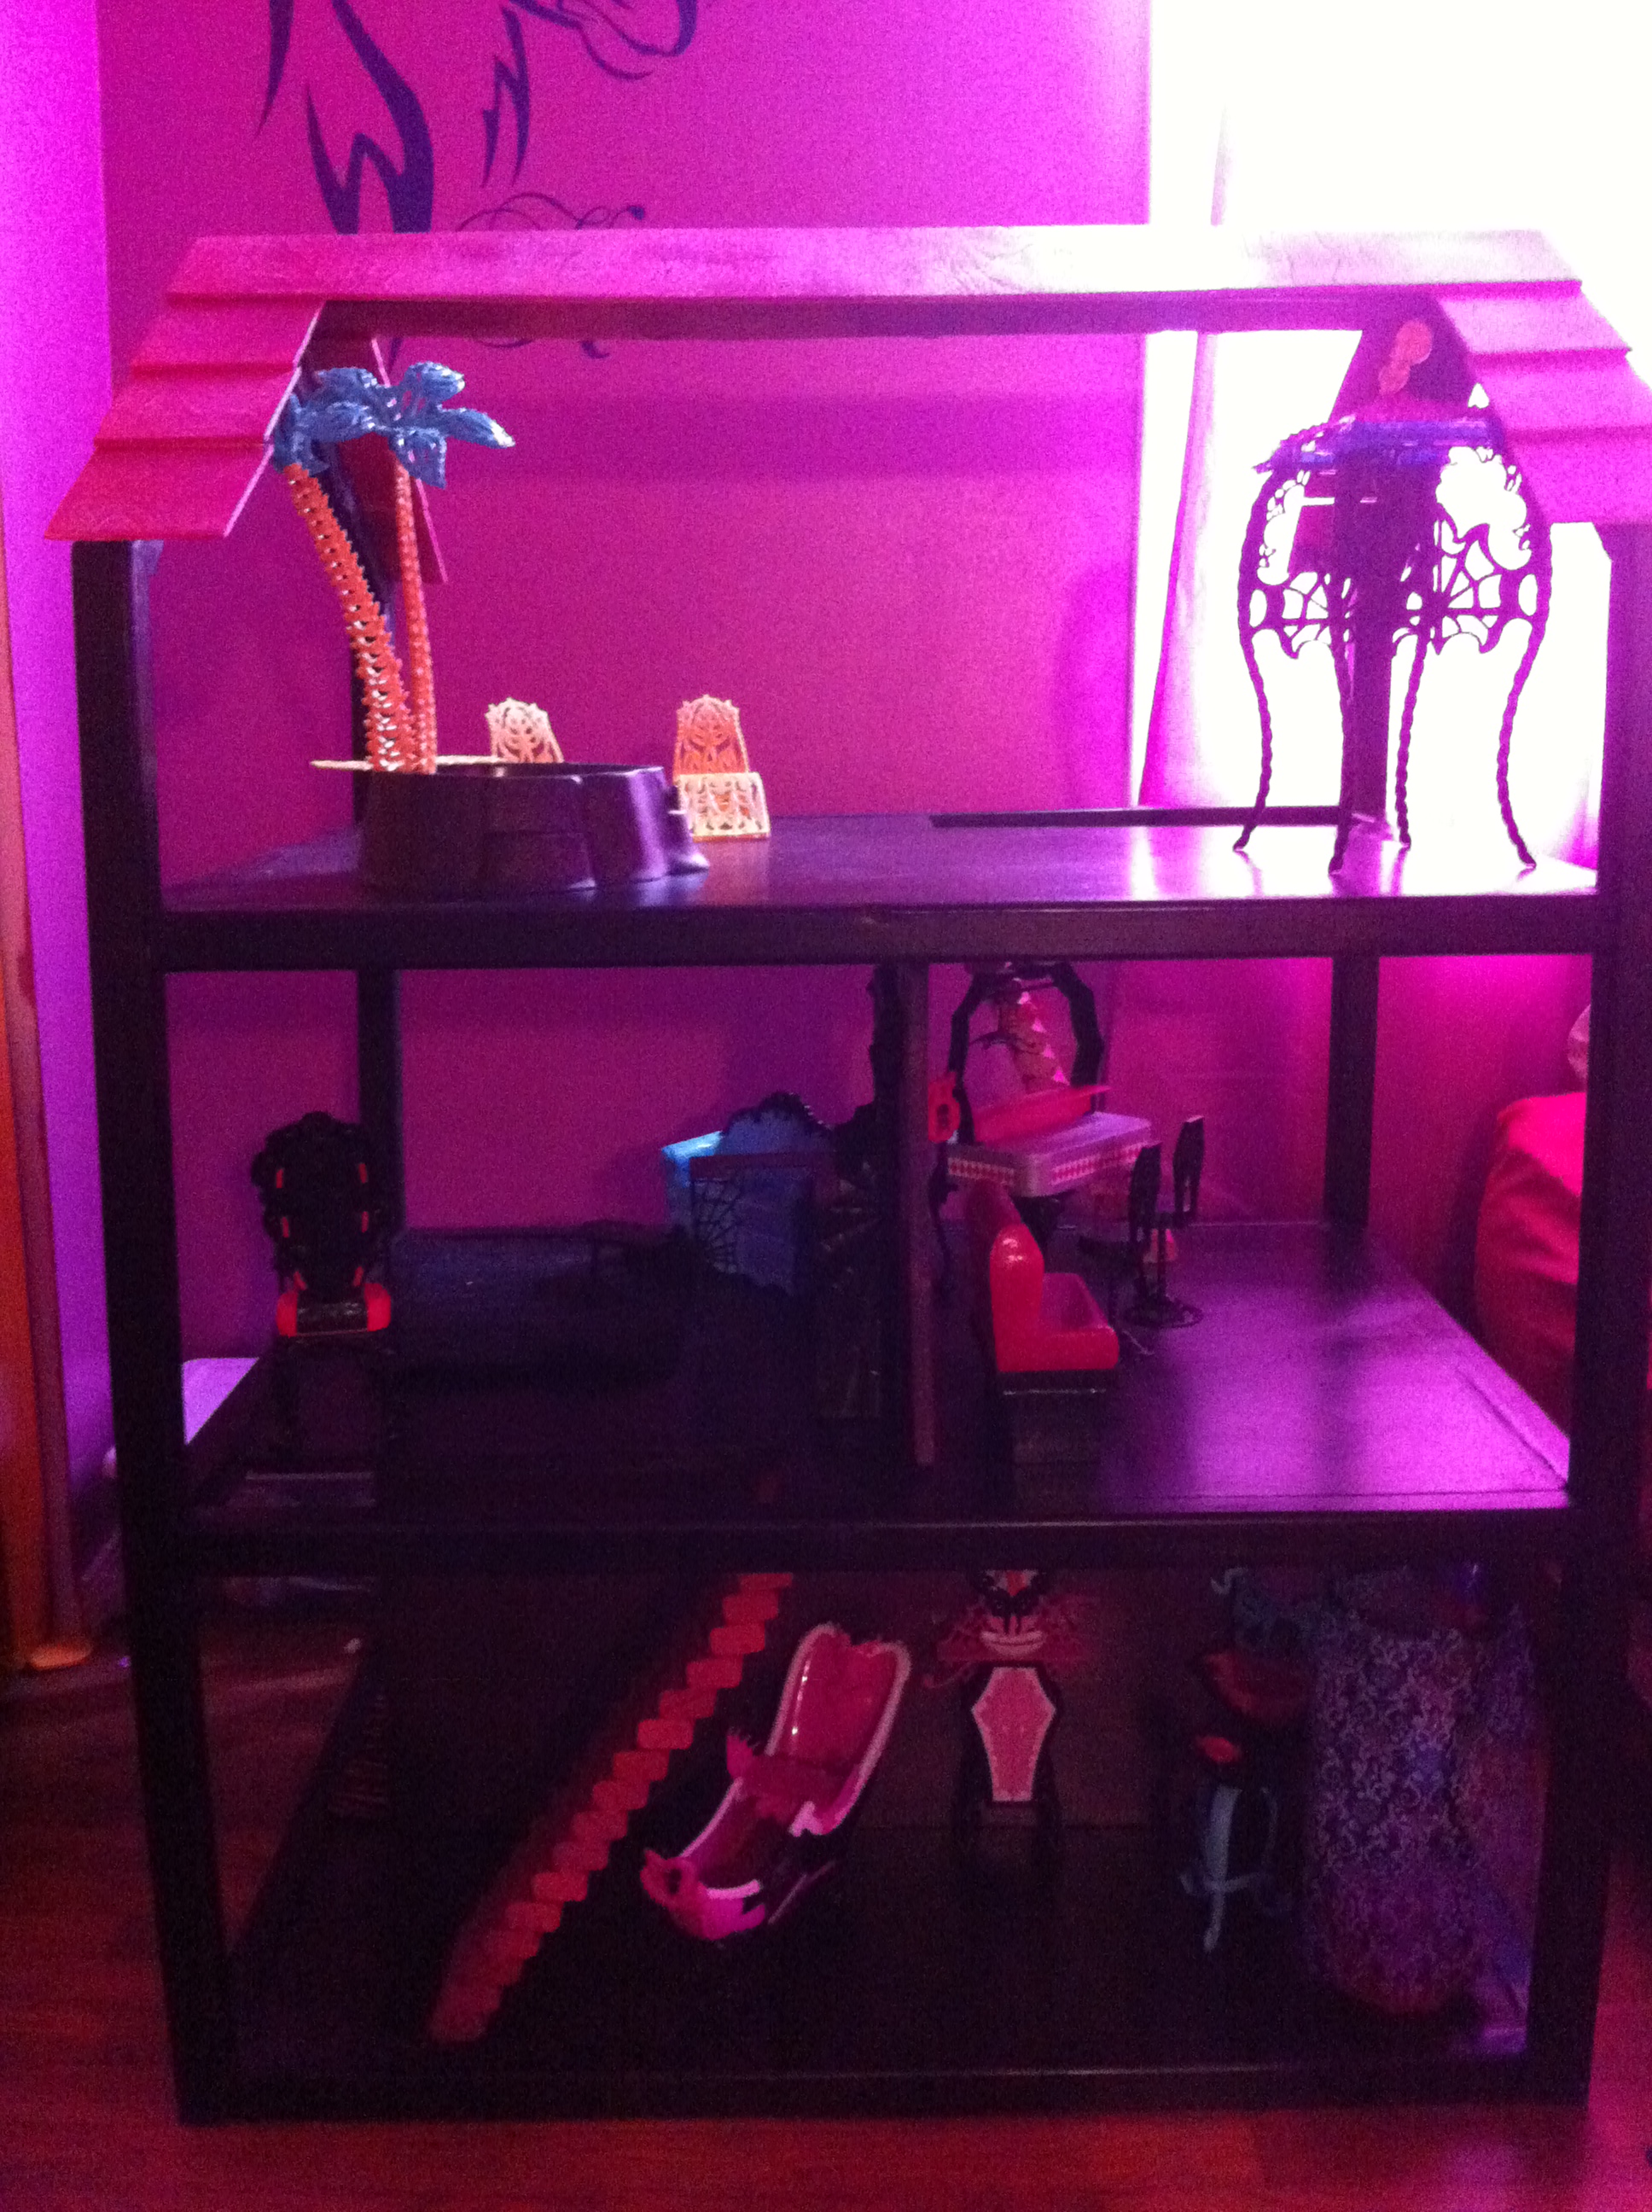
My girls love Monster High so we did black , Magenta to go with all their Monster High dolls and sets.
Built from Plan(s)
Estimated Cost
$100
Estimated Time Investment
Weekend Project (10-20 Hours)
Finish Used
Black semi gloss paint, and Sparkle Magenta Spray paint
Recommended Skill Level
Beginner
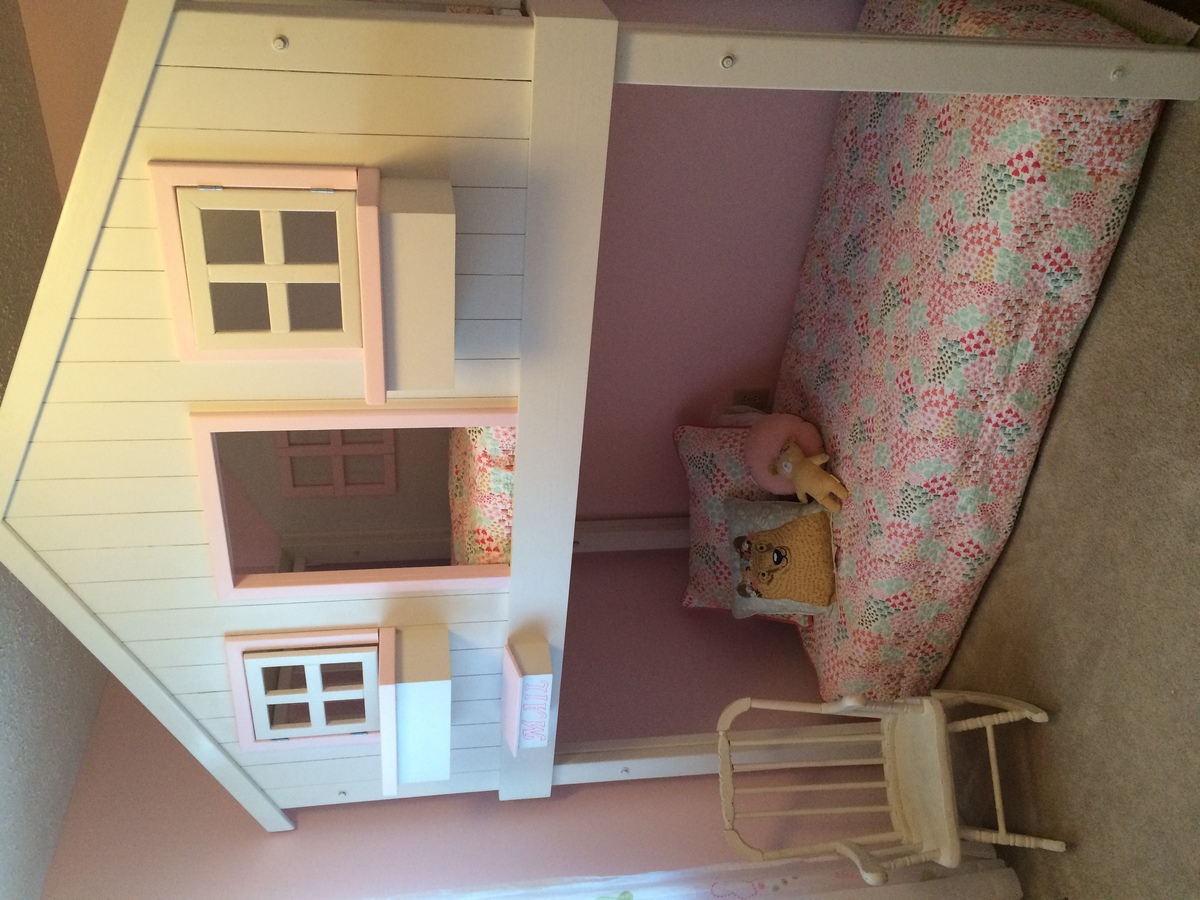
A little upgraded version!
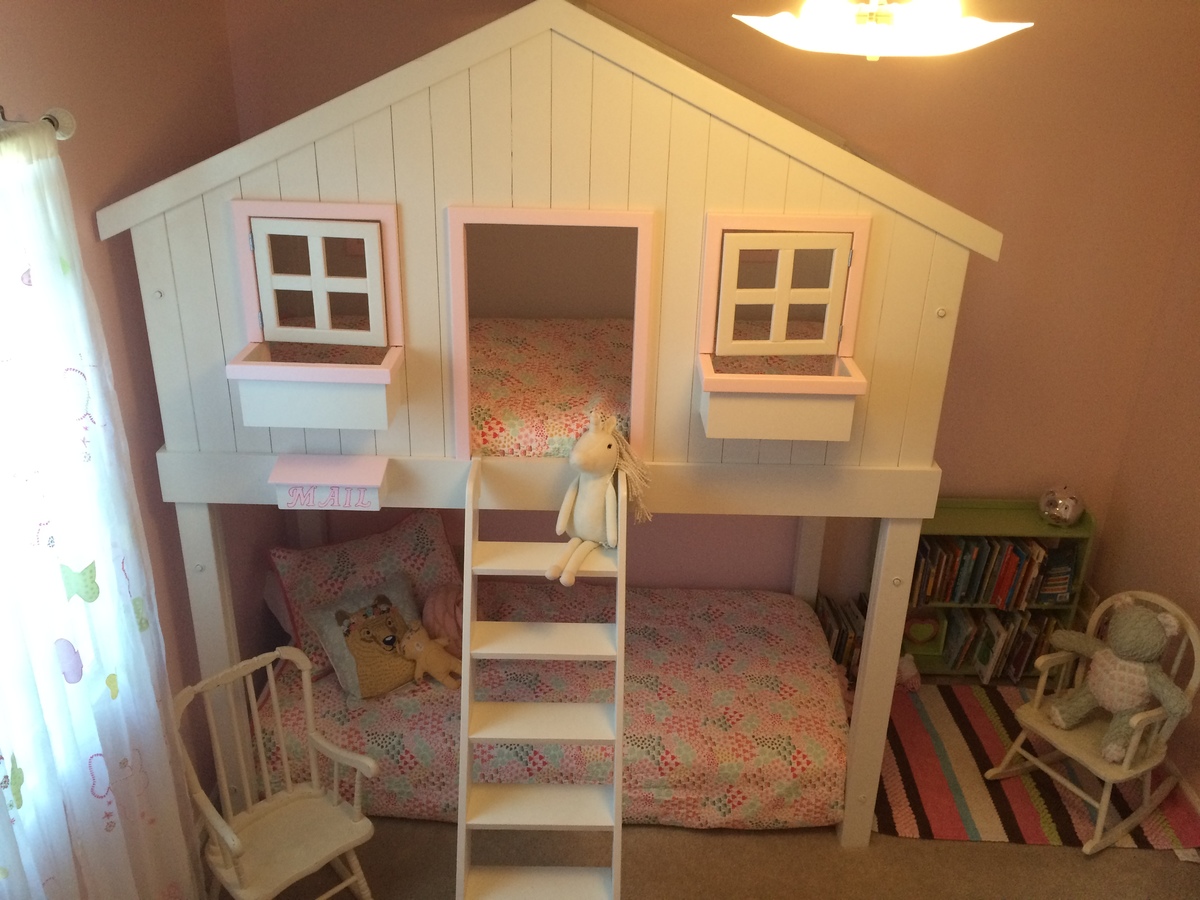
A little upgraded version. Made it a little taller so little sister could sleep below!
Built from Plan(s)
Estimated Time Investment
Week Long Project (20 Hours or More)
Recommended Skill Level
Advanced
Book Nook Tent
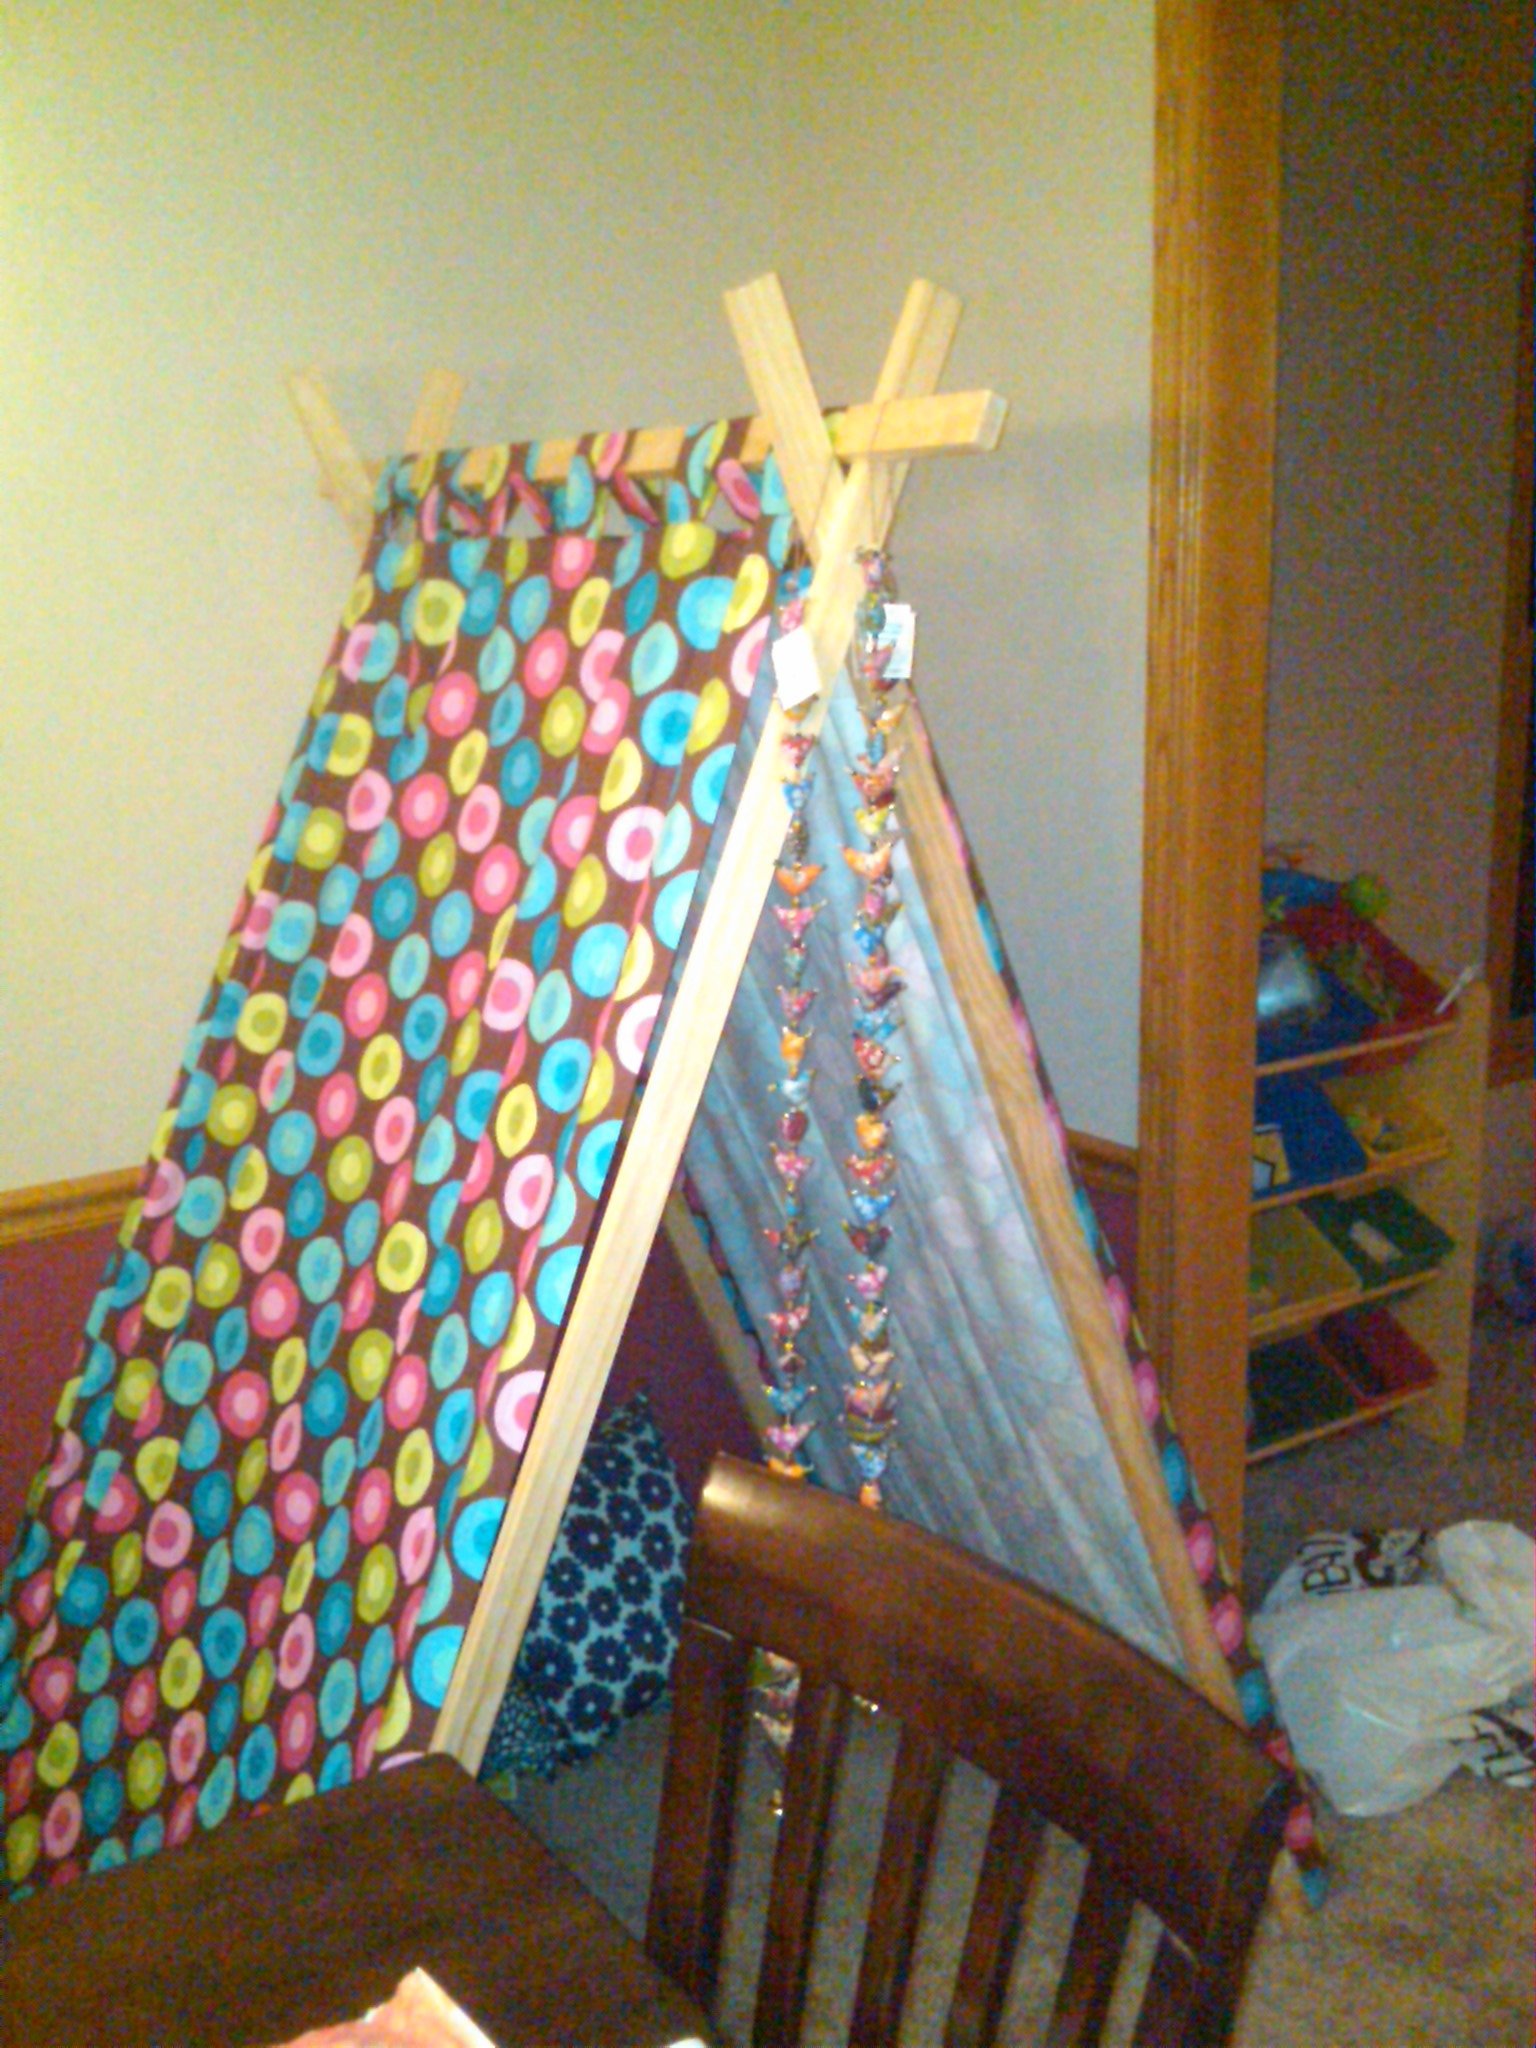
Only one cut and easy-to-follow instructions make for a kid-sized reading nook that you can build today!
This is a simple project that comes together in an hour or less. You need recycled material for the panels and approximately $20 worth of supplies, assuming you own a drill, staple gun and wrench.
Built from Plan(s)
Estimated Cost
$20
Estimated Time Investment
An Hour or Two (0-2 Hours)
Finish Used
No finish.
Recommended Skill Level
Starter Project
trundle for bed or storage

This was my first DIY furniture project and I am so thrilled with the outcome that I am already trying to figure out what to make next! I made all my measurements and then had all of the wood cut to size at Home Depot. The assembly went much more quickly and smoothly than I had anticipated.This is a very sturdy piece of furniture. My 6 & 8 year-old girls were so excited to have the trundle put together. They have been taking turns sleeping on it and are even pulling it out to have a comfy spot to read or crochet. Thank you Ana, I am SO HAPPY to have found your site!
Built from Plan(s)
Estimated Cost
$120
Estimated Time Investment
Day Project (6-9 Hours)
Recommended Skill Level
Beginner
Comments
Rustic X Coffee Table
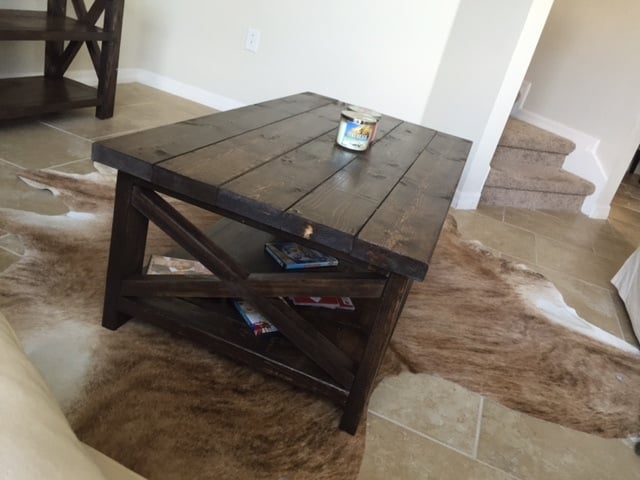
My take on the Rustic X Coffee Table
Built from Plan(s)
Estimated Time Investment
Weekend Project (10-20 Hours)
Finish Used
Kona
Recommended Skill Level
Intermediate
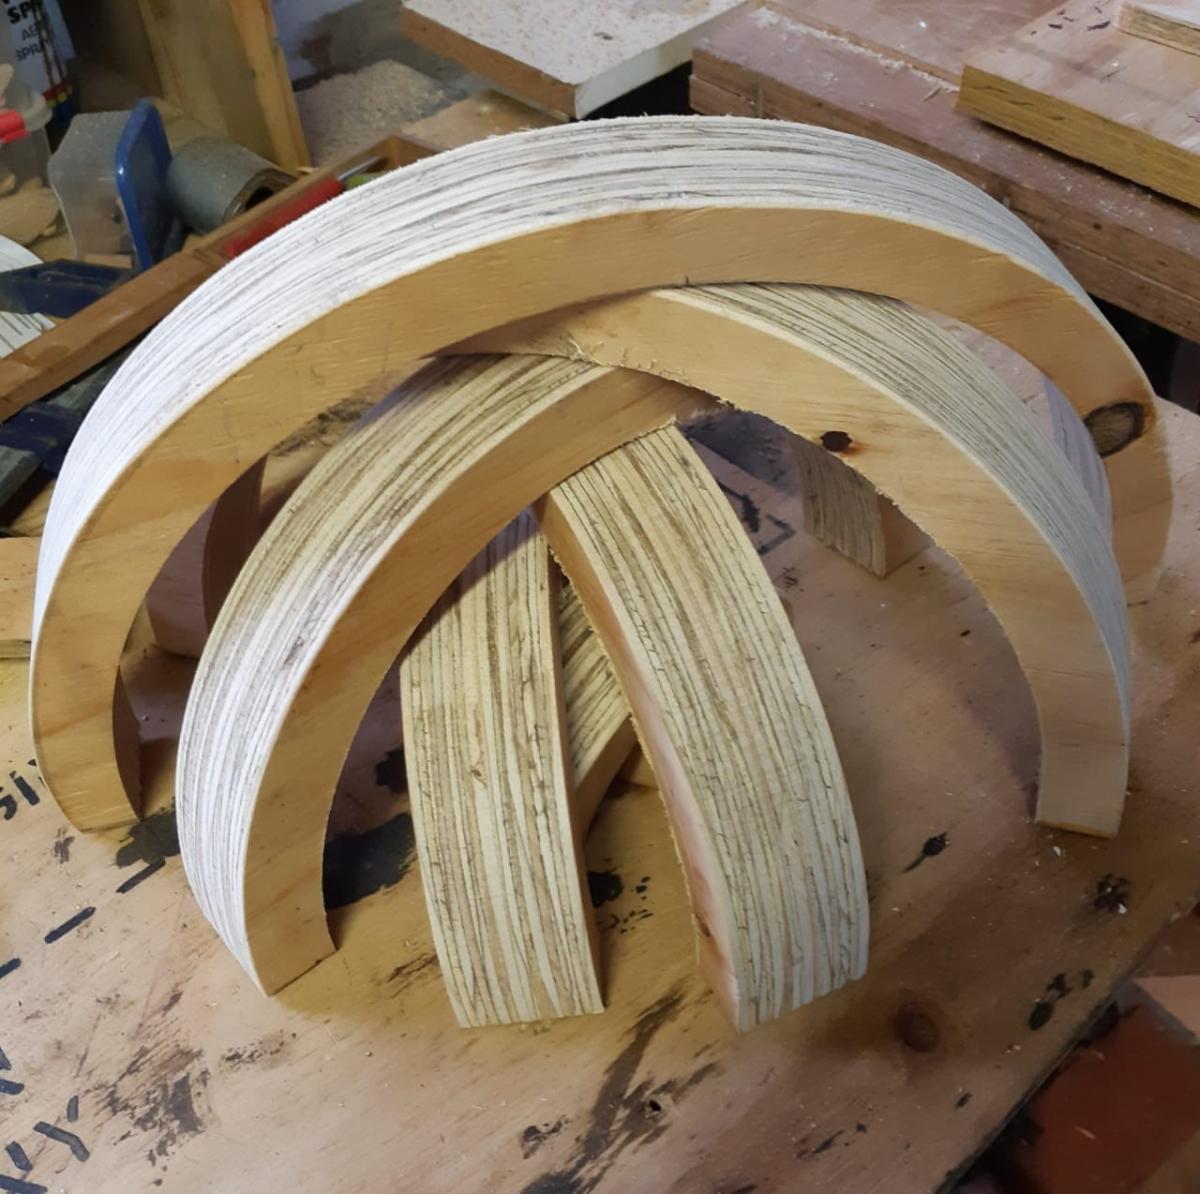
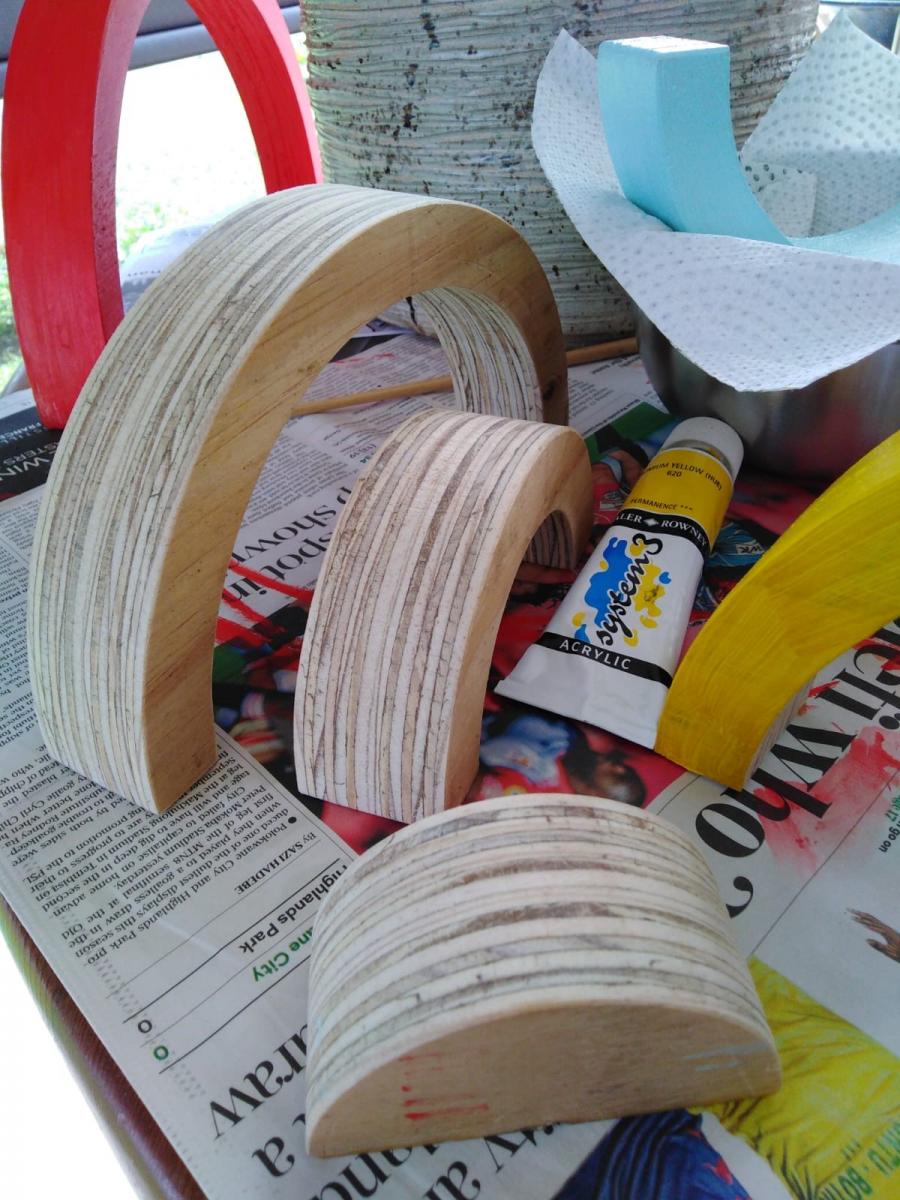
Wooden Rainbow Toy
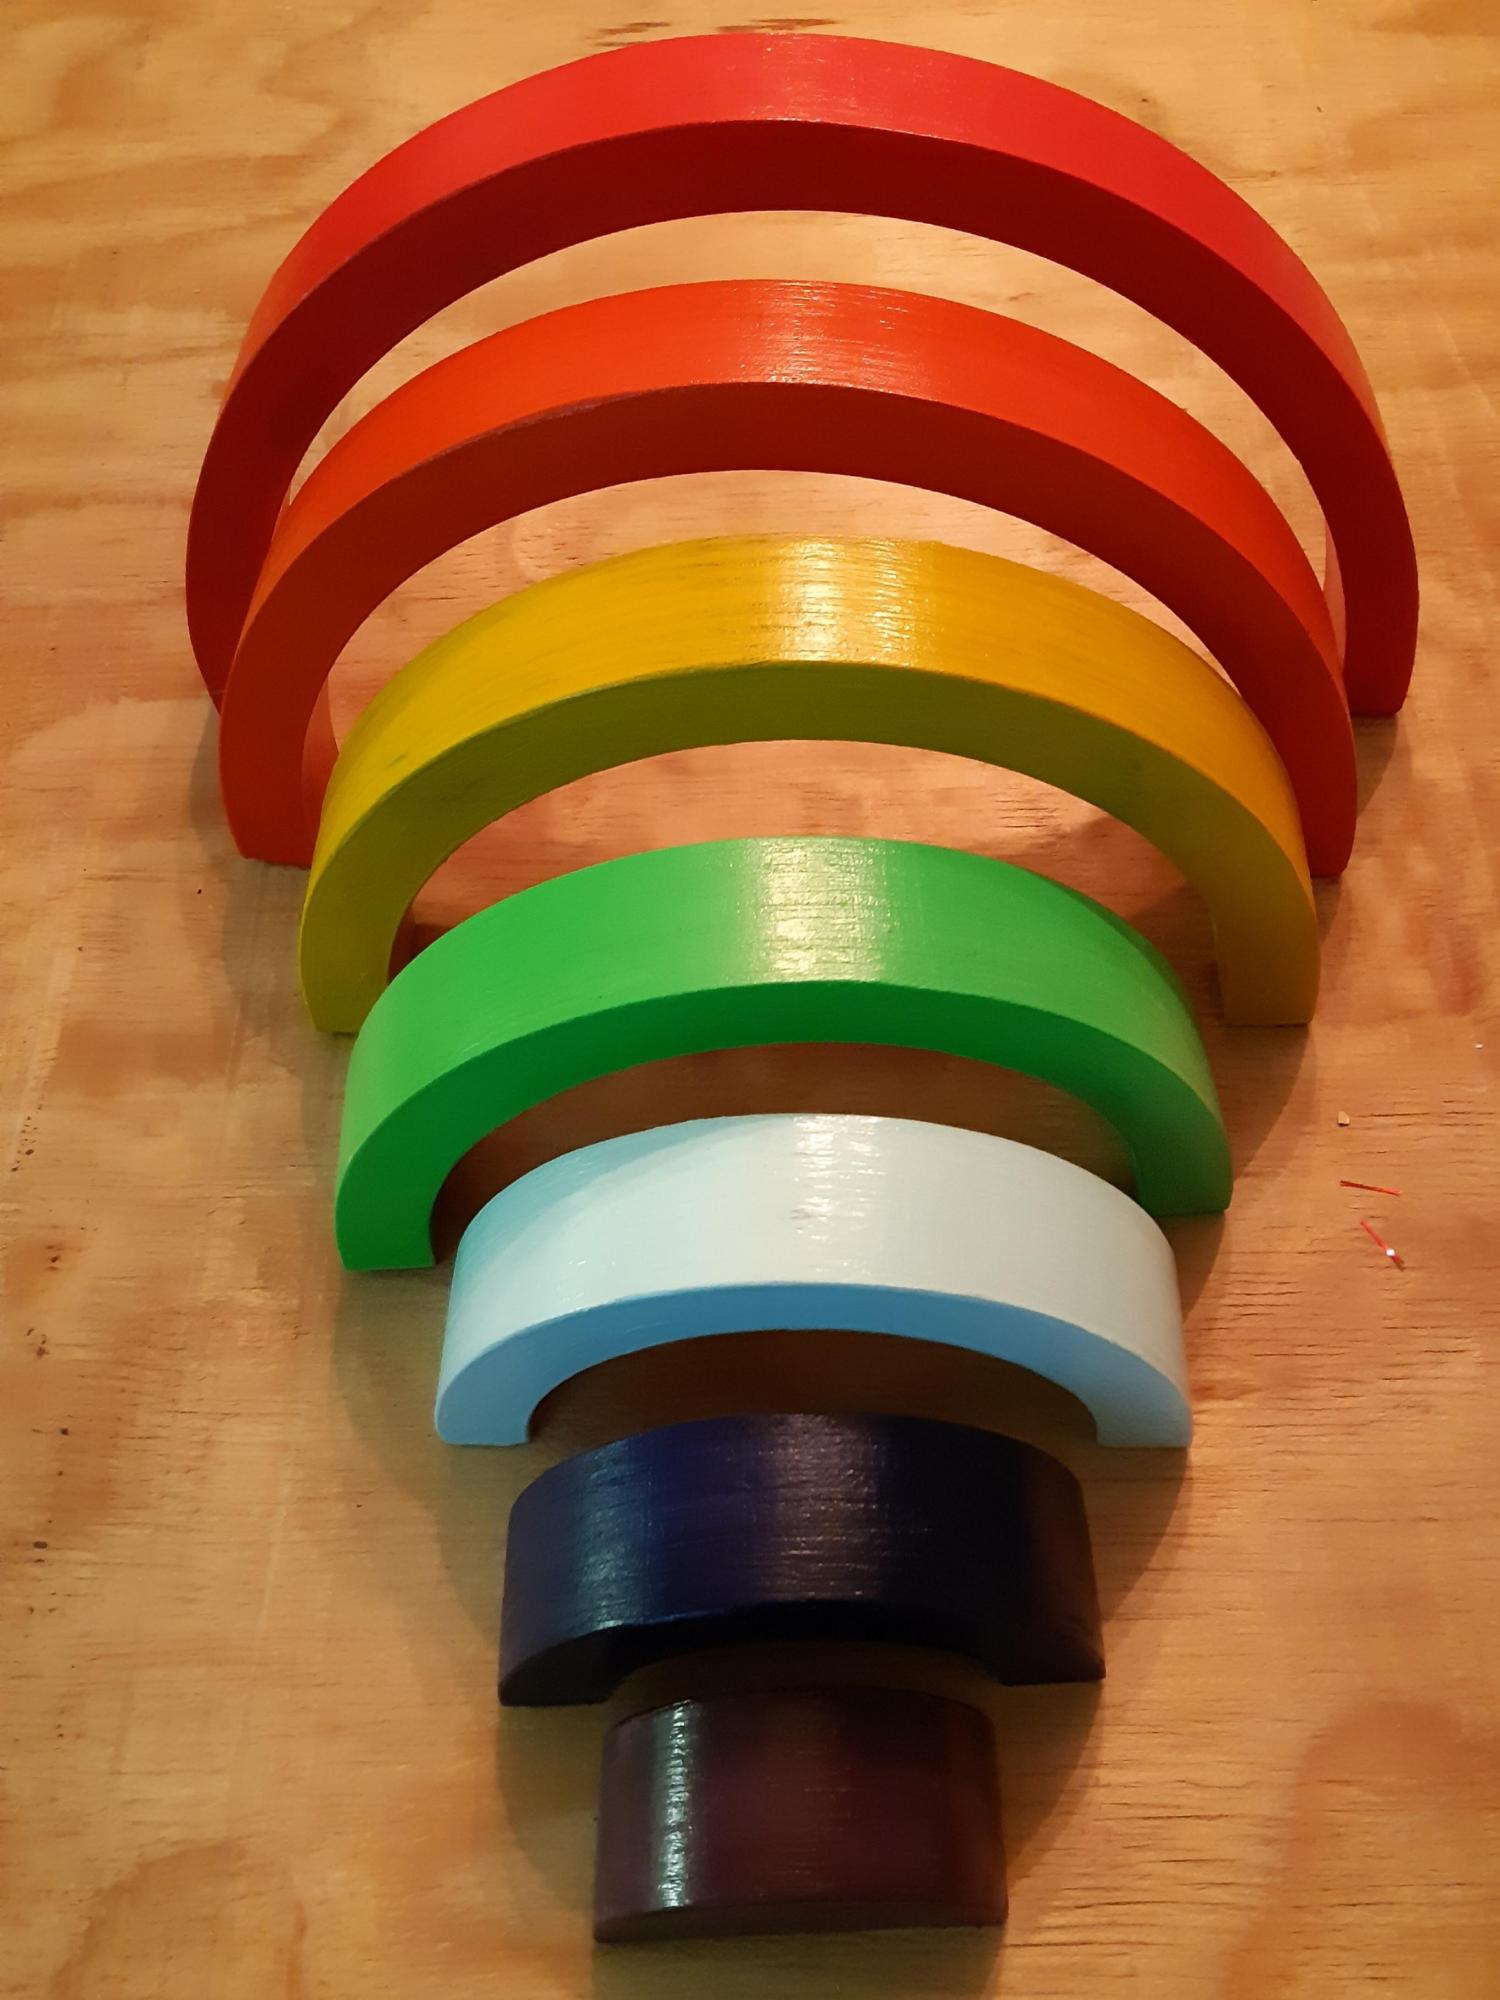
This is a copy of a creative toy for toddlers seen on Amazon. I glued two pieces of 21mm plywood (400mm X 200mm) together and then using a jig on the band saw, cut out the rainbow shapes 25mm wide. I made up a drum sahnder using circles cut out from the same double layer of plyywood using a hole saw, with a bolt through the middle, to sand the the inner edges. My wife painted the rainbow colours using acrylic paints as this is what we had to hand (I would suggest rather using using a water-based enamel).
Estimated Cost
R100
Estimated Time Investment
Week Long Project (20 Hours or More)
Finish Used
Acrylic paint coated with a floor sealer
Recommended Skill Level
Intermediate
Bar Height Outdoor Table
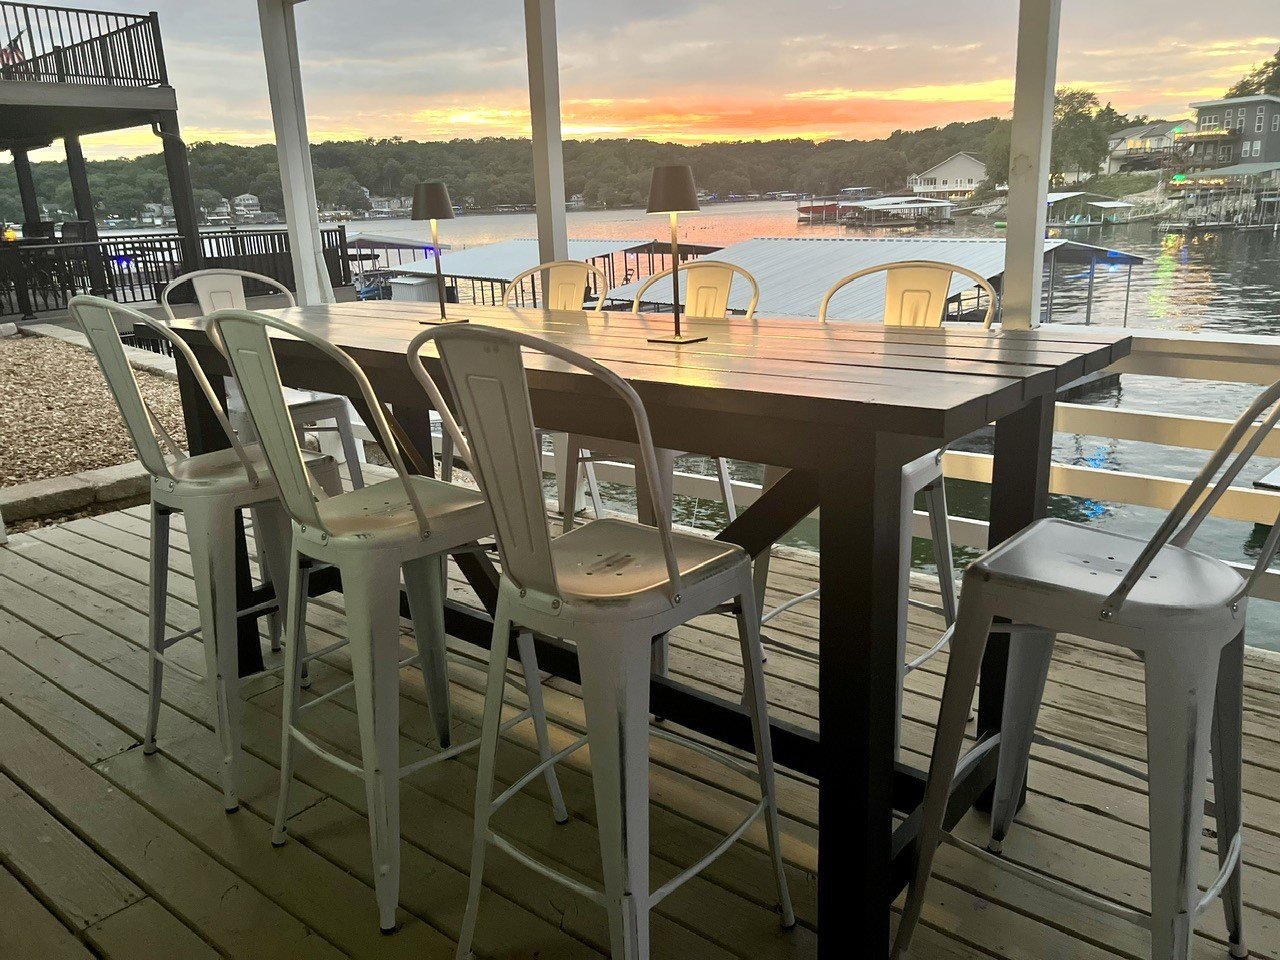
We had this unused lower deck and this bar height table was the perfect addition. We have place now to hang when too hot or it’s raining. My husband and I built it in one weekend and your plans where great.
Julie Moran


Built from Plan(s)
Comments
Sun, 08/27/2023 - 12:48
Stunning table and view!
Love this view and what a gorgeous table to go with it! Thanks for sharing.
First Project!
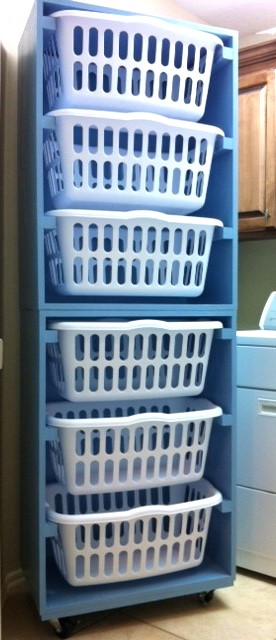
I saw this and thought - FINALLY...the answer to my laundry chaos! My husband built it for me this weekend with a couple of minor modifications. He put casters on the bottom, so I can move it to clean and sweep. He also added clear plastic drywall corner protectors over the 2x2's so that they paint is protected when the baskets slide in and out! Pretty clever! Oh, and I thought I was being super creative when I picked the color - and then saw that it is the EXACT color that you painted it! So much for that creative spark - but, I'll work on it! Thanks for the plans!
Built from Plan(s)
Estimated Cost
$100
Estimated Time Investment
Afternoon Project (3-6 Hours)
Finish Used
Primed and painted with high gloss finish.
Recommended Skill Level
Beginner
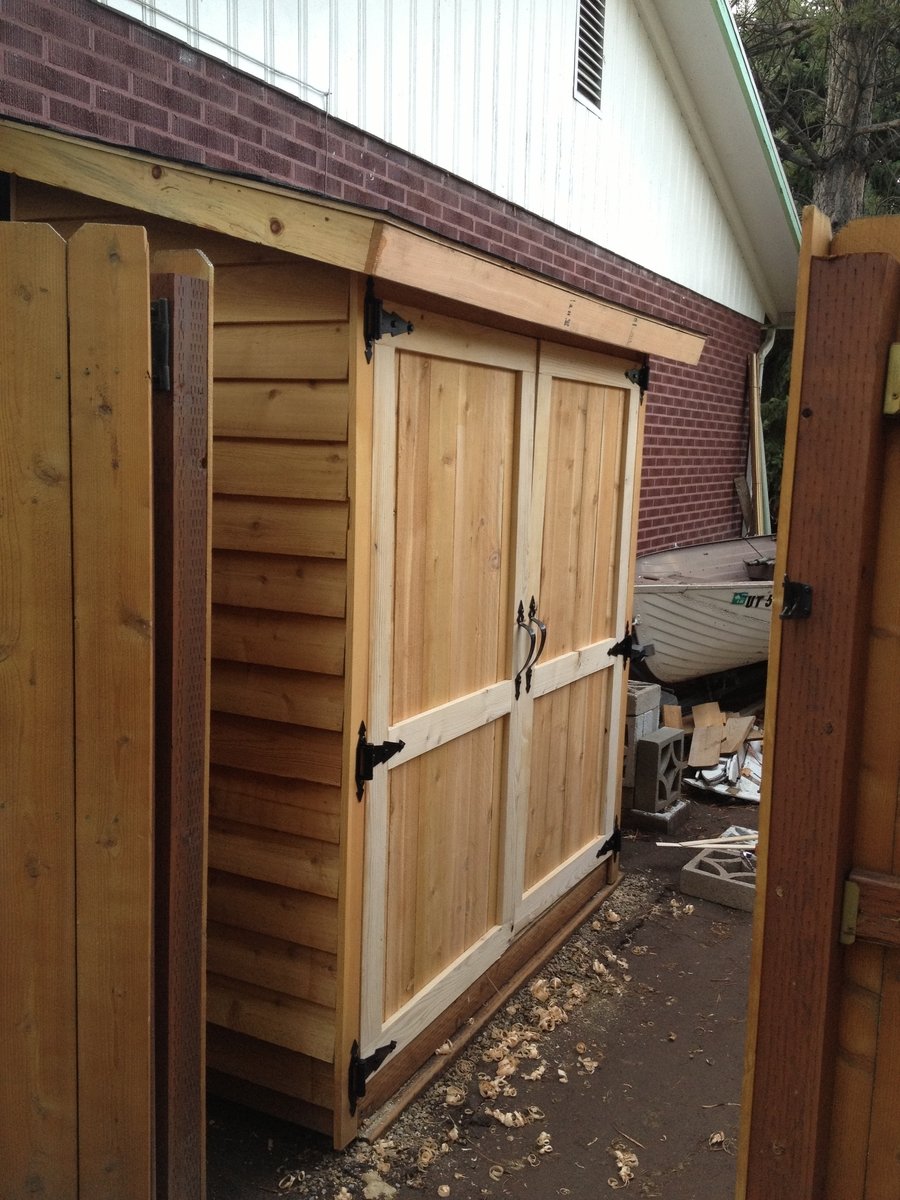
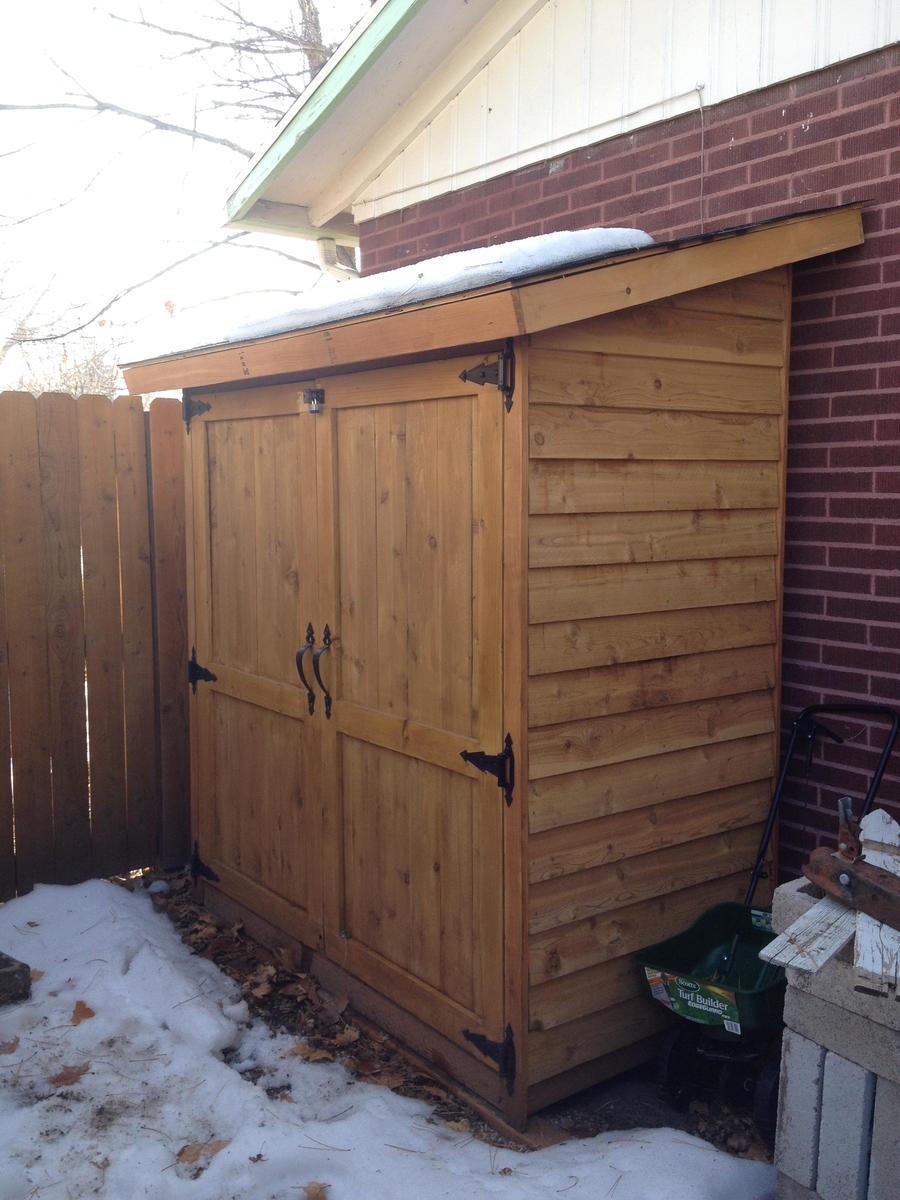
Extra Room for Little House
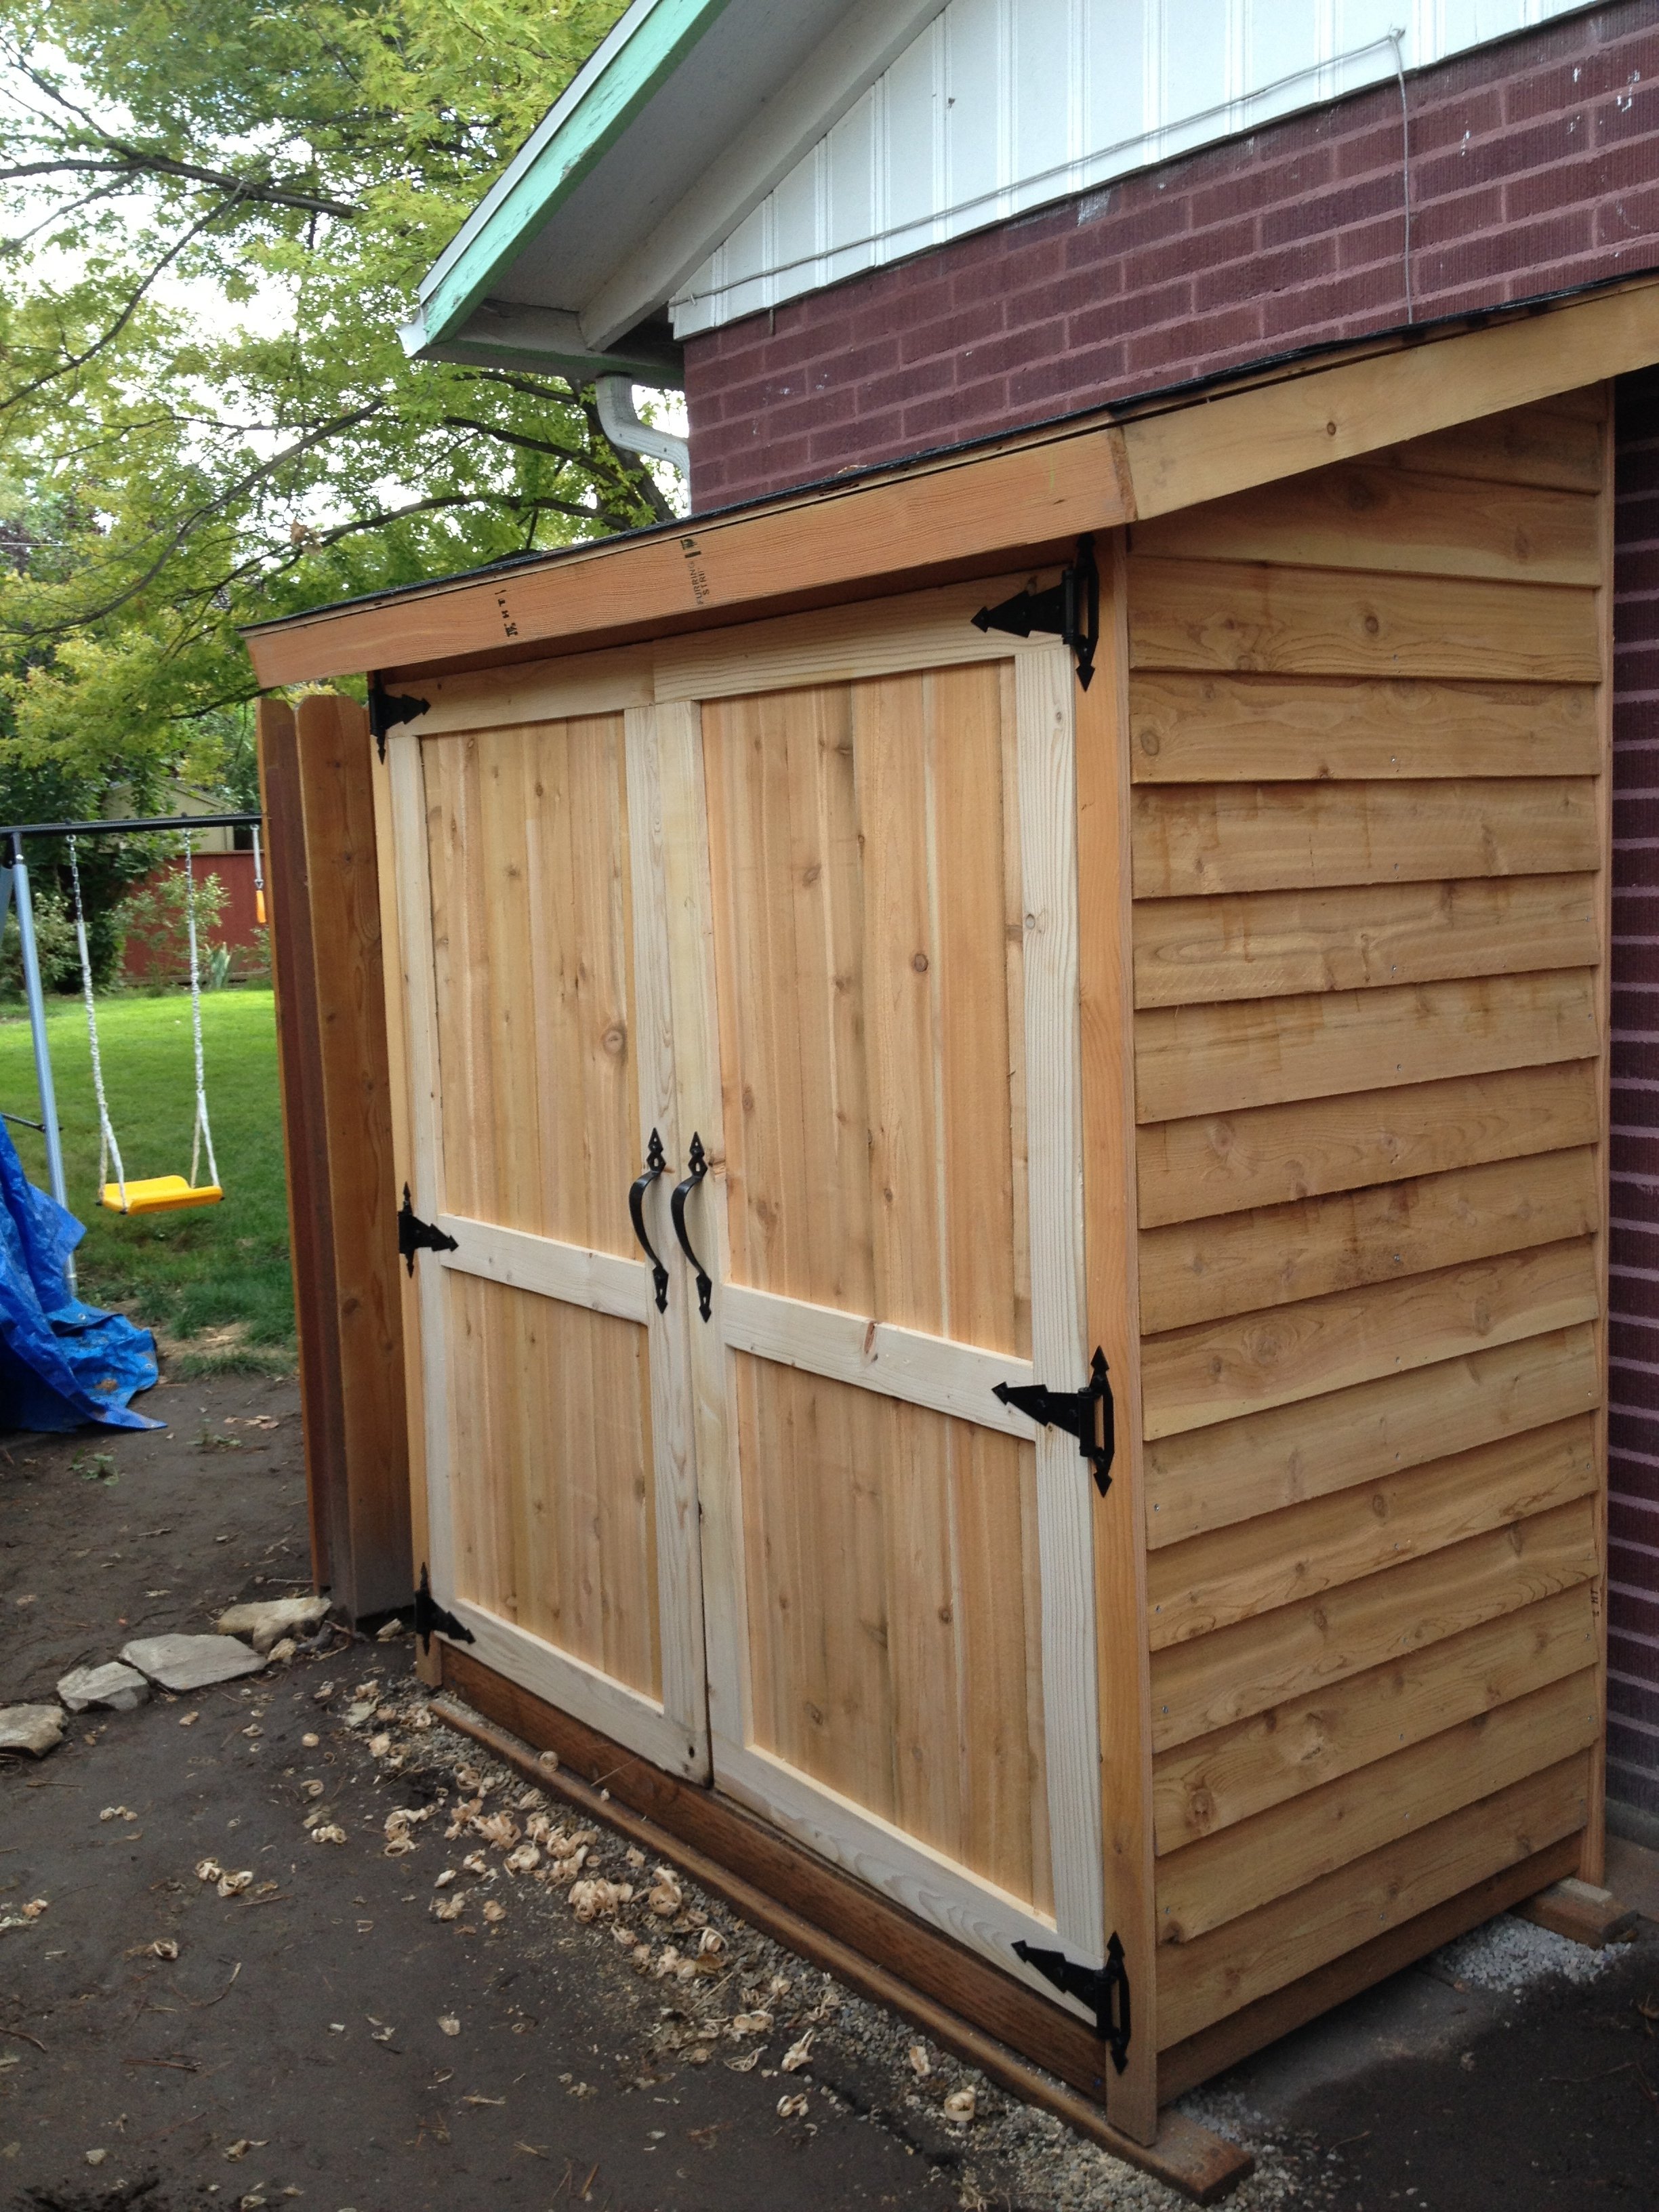
I have a tiny house and for additional storage I've been drooling over building this for a good long time. I finally got some extra money that I could dedicate to it. Having to have a major surgery at the end of last summer I knew I couldn't do a garden because of how every day I didn't know how I would feel. I did know that I could work a little at a time when I felt I could and get as much done as possible on a shed. By the end of the summer I had an awesome shed thanks to Ana and her plans. I had to do my own research for the base and how to sit it on the ground. I chose to dig 2 trenches in the dirt, put small gravel in and put 2 pressure treated sleepers to rest my bottom deck on. I also primed the plywood floor to try and help with less moisture through the different cycles of the year. Checked on it last week to put the Christmas decorations away and dry as a bone inside and all looking as good as I had hoped on the outside.
Built from Plan(s)
Estimated Cost
$450-$500
Estimated Time Investment
Week Long Project (20 Hours or More)
Finish Used
Be sure to glue as you are attaching the cedar pickets or whatever material you use to the frame. I chose not to at first and my nail gun staples ended popping out. I went back and glued after the fact. Not a great use of time, but live and learn. I also used on the fir stripping, front and side pickets some 'natural' color BEHR wood treatment. It doesn't have to be removed or treated in order to apply another coat in the future. Gives the wood some good moisture and a tiny bit of color to help it not turn gray.
Recommended Skill Level
Intermediate
Comments
Thu, 01/23/2014 - 15:36
Very nice! I like what you
Very nice! I like what you did for your foundation.
Thu, 01/23/2014 - 18:18
Thanks moosmani, it seemed
Thanks moosmani, it seemed the most simple for least amount of money and time.