Community Brag Posts


kitchen stools

Scaled these to fit counter height and cushions already owned. Used pocket screws and wood filler.
Built from Plan(s)
Estimated Cost
Probably in the range of $25.
Estimated Time Investment
Weekend Project (10-20 Hours)
Finish Used
Valspar paint + primer
Recommended Skill Level
Beginner
Farmhouse buffet from altered cabin dresser
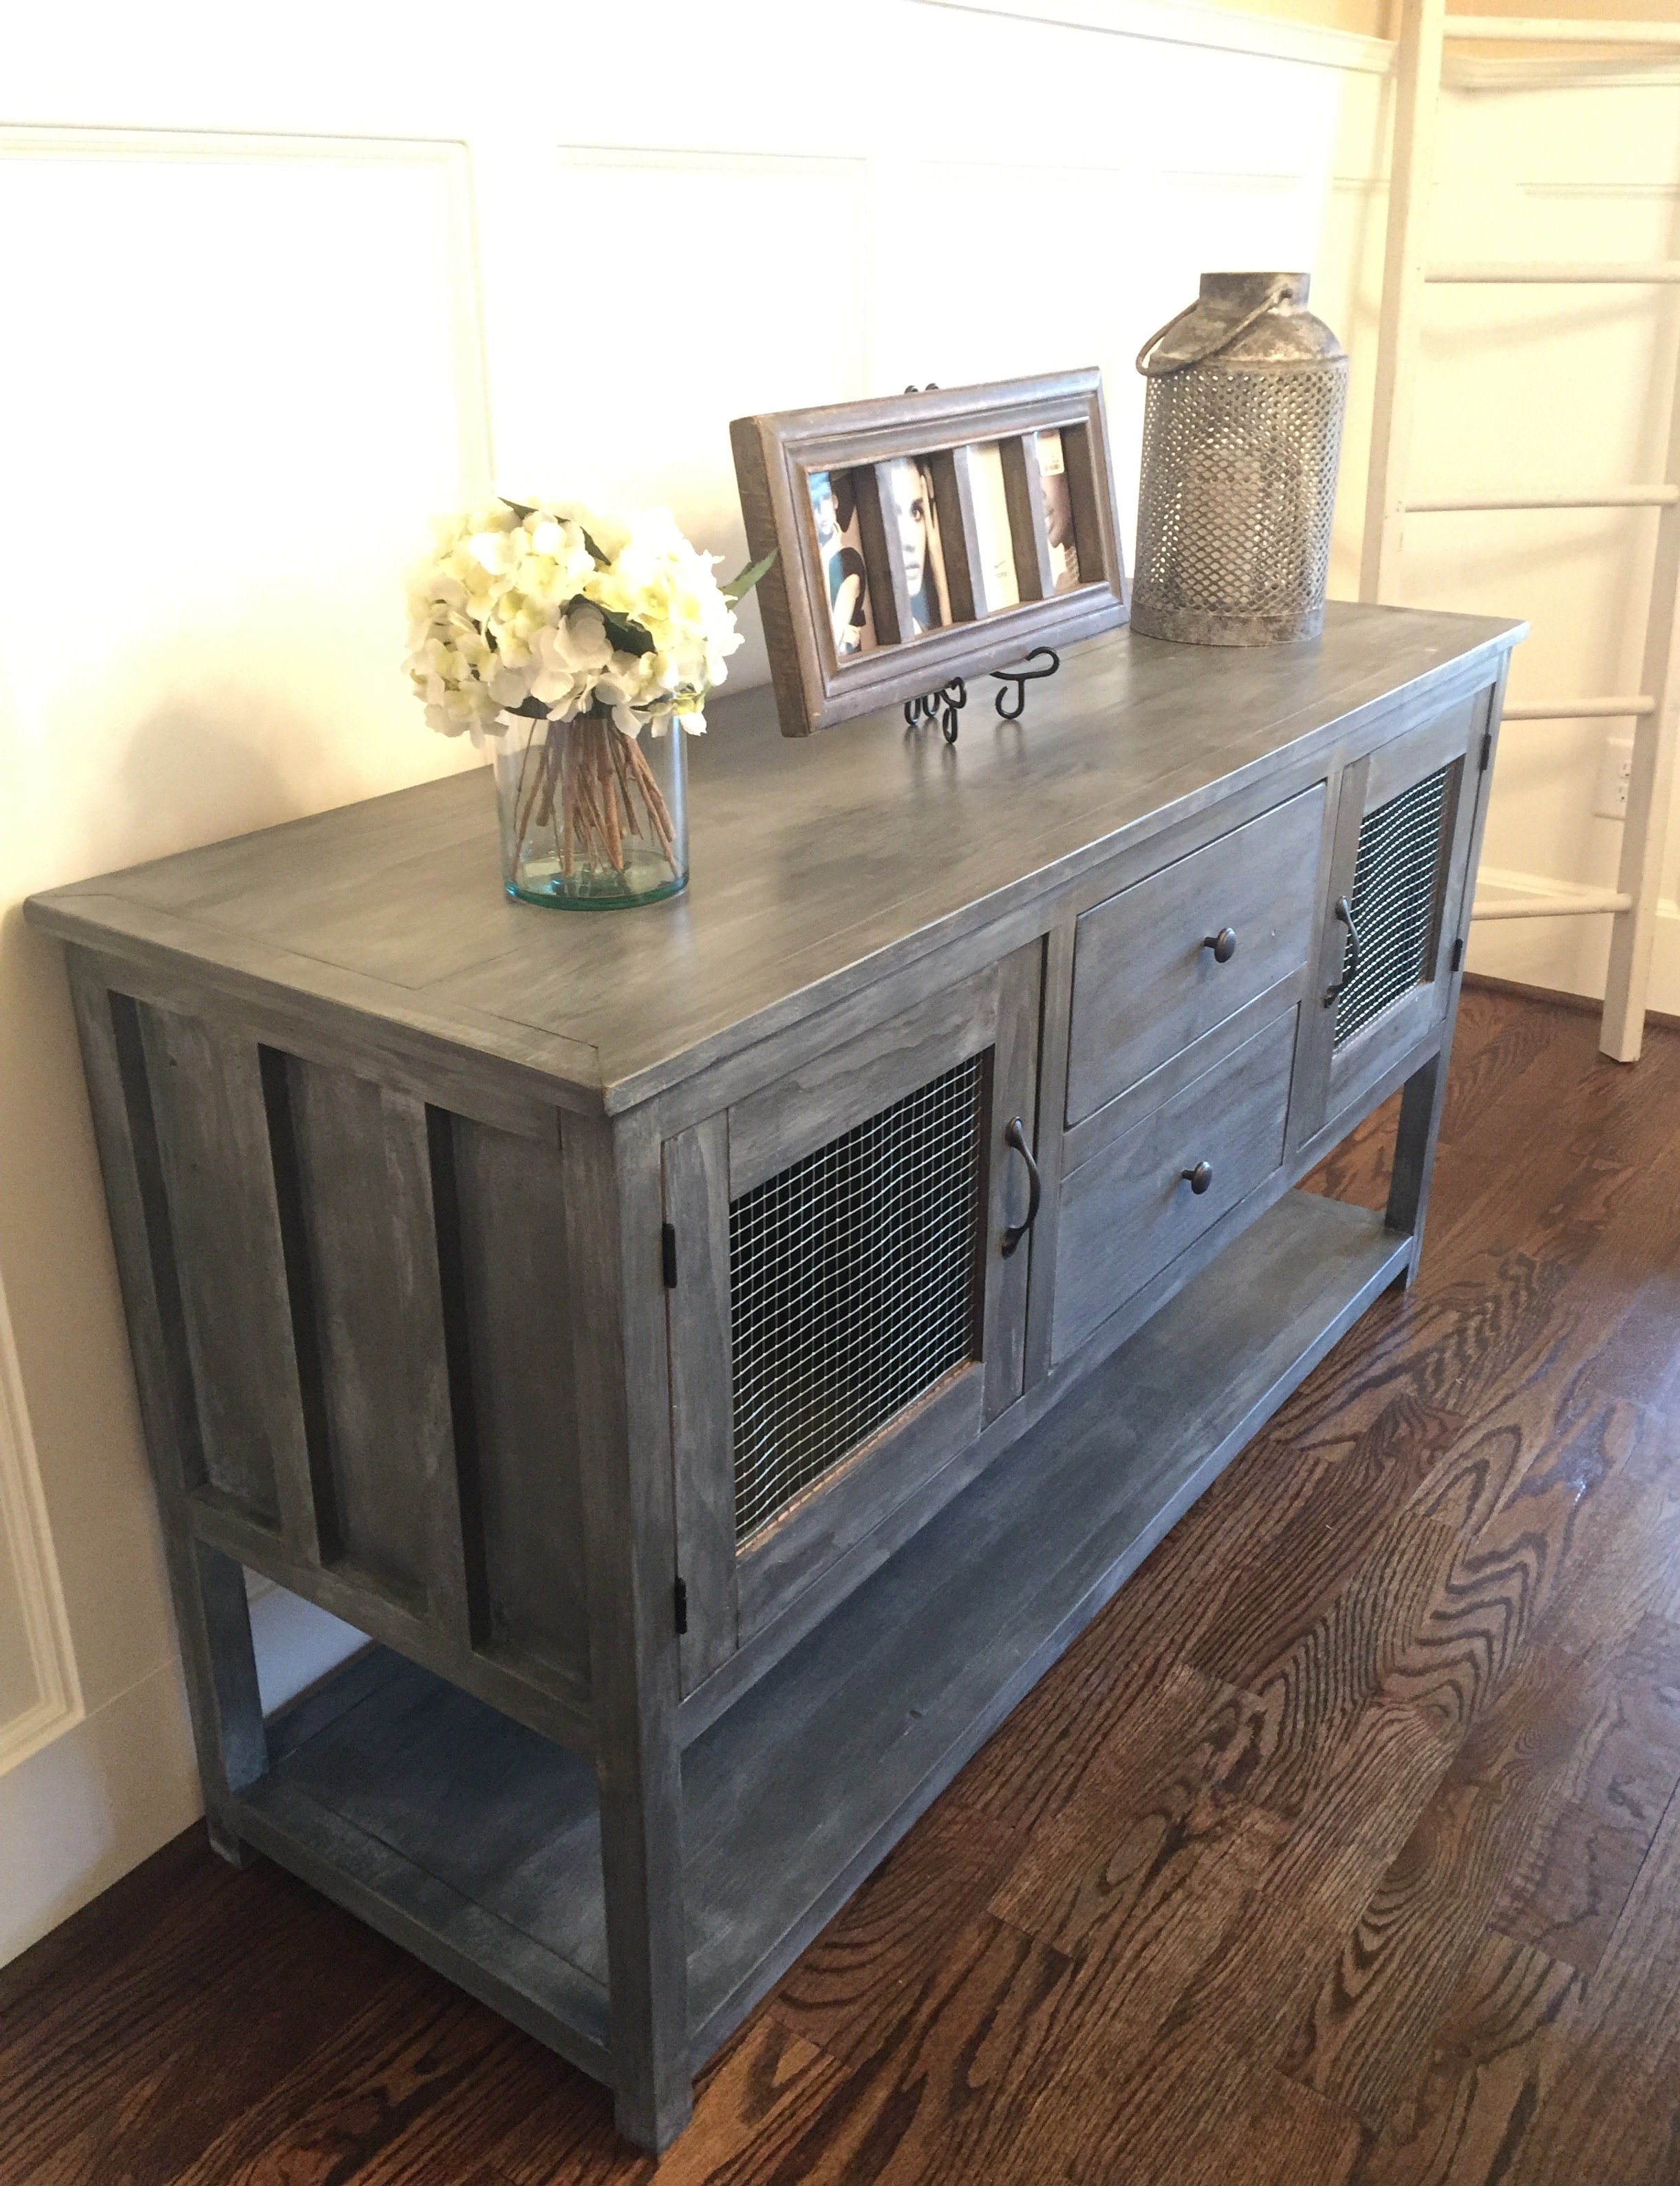
This project took about a day. I used furniture grade pine. Very solid.

Built from Plan(s)
Estimated Cost
$250
Finish Used
Dark carbon gray Valdosta furniture paint then dove gray over that lightly and wiped then wiped thin coat of carbon gray rustolium stain and wiped off immediately to give antique look.
Recommended Skill Level
Intermediate
Comments
Wed, 02/01/2017 - 05:06
What are the dimensions of this?!
Hello! I've searched your site trying to find the plan and or the dimensions for the farmhouse buffet (altered from
cabin dresser). Do you happen to remember what these are?
Mon, 04/05/2021 - 10:29
Hello, i'm trying to find…
Hello, i'm trying to find the plan and or the dimensions for the farmhouse buffet thank you
Blaire’s Desk
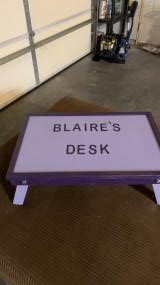
My granddaughter absolutely loves purple! She is almost 3 years old and she uses it for snacks putting together little puzzles and coloring. Very fun and easy project. I added a frame around the edges so it’s nice and smooth and her colors won’t roll off the desk.
Built from Plan(s)
Estimated Cost
$15
Estimated Time Investment
An Hour or Two (0-2 Hours)
Finish Used
Latex paint
Recommended Skill Level
Beginner
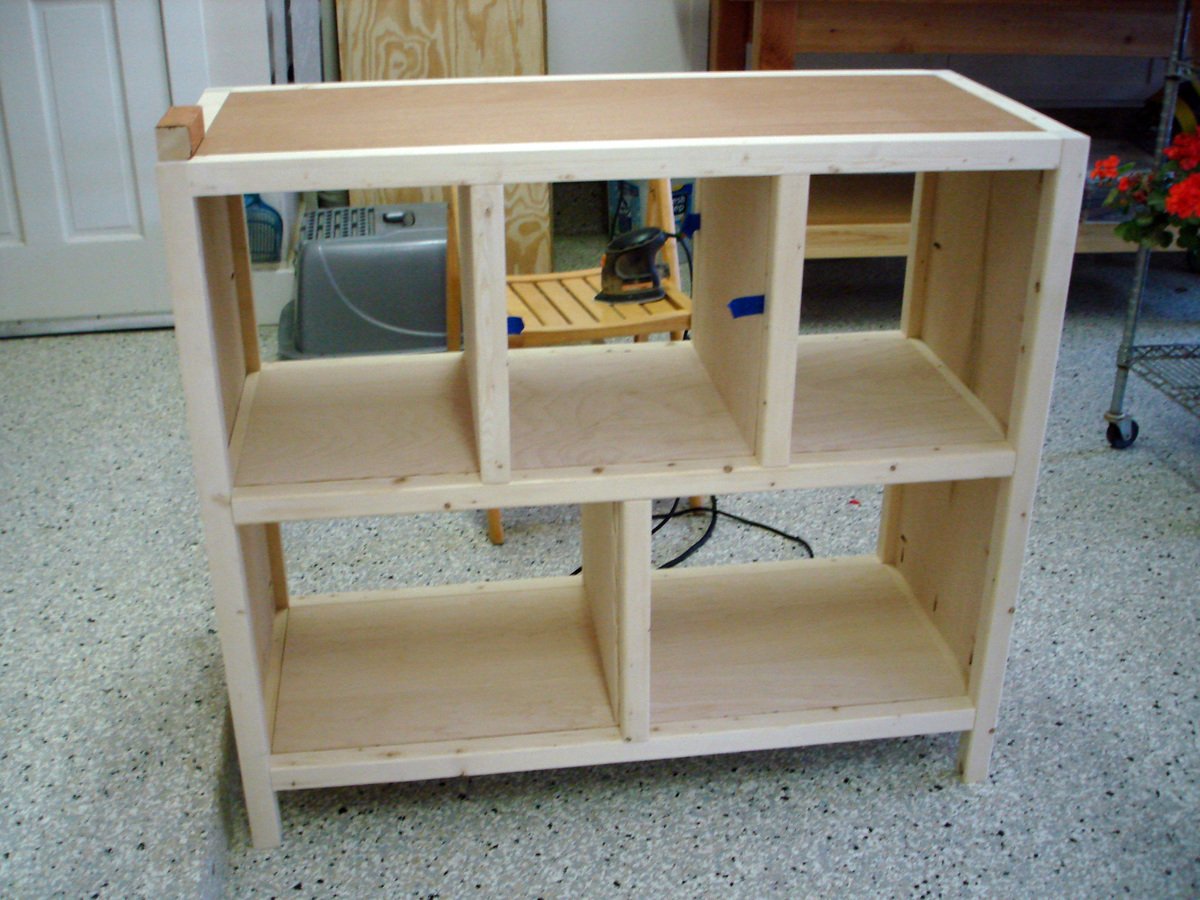
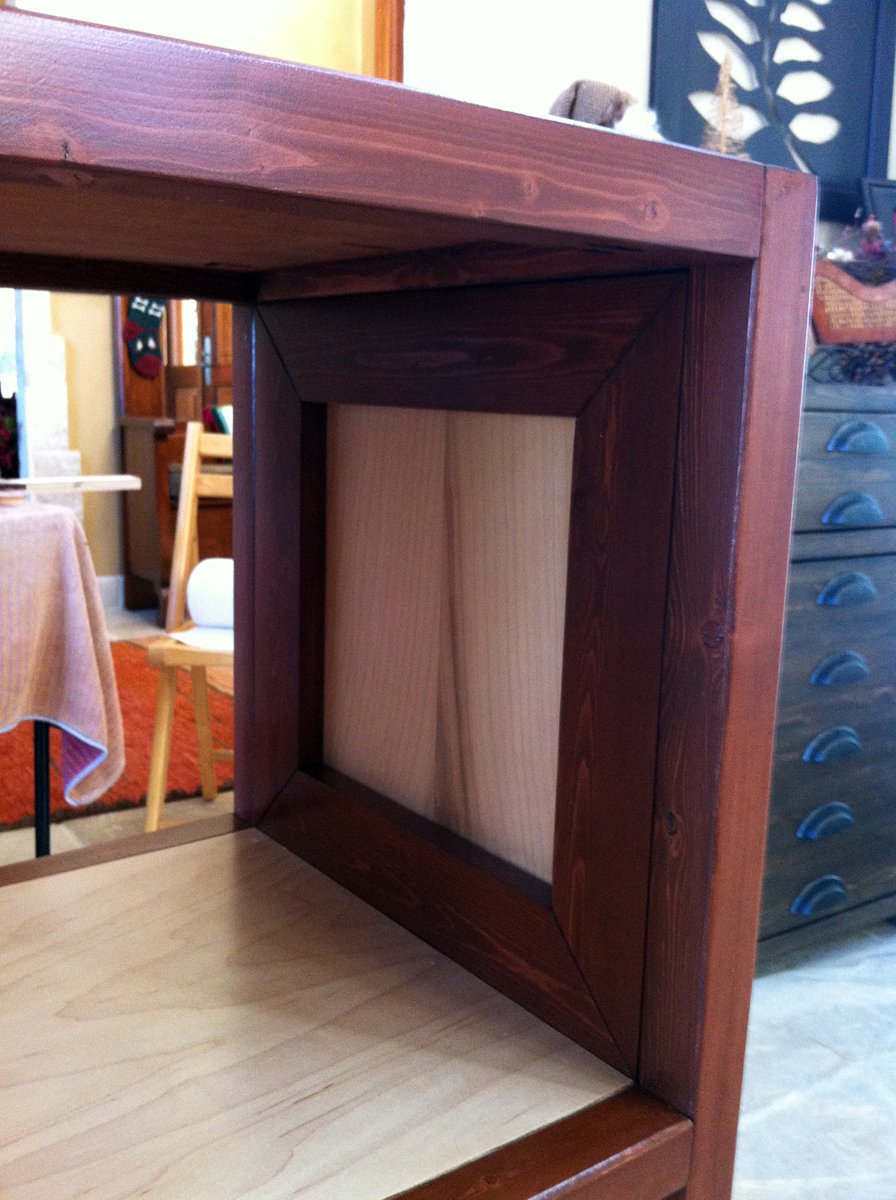
My first plan-free project...
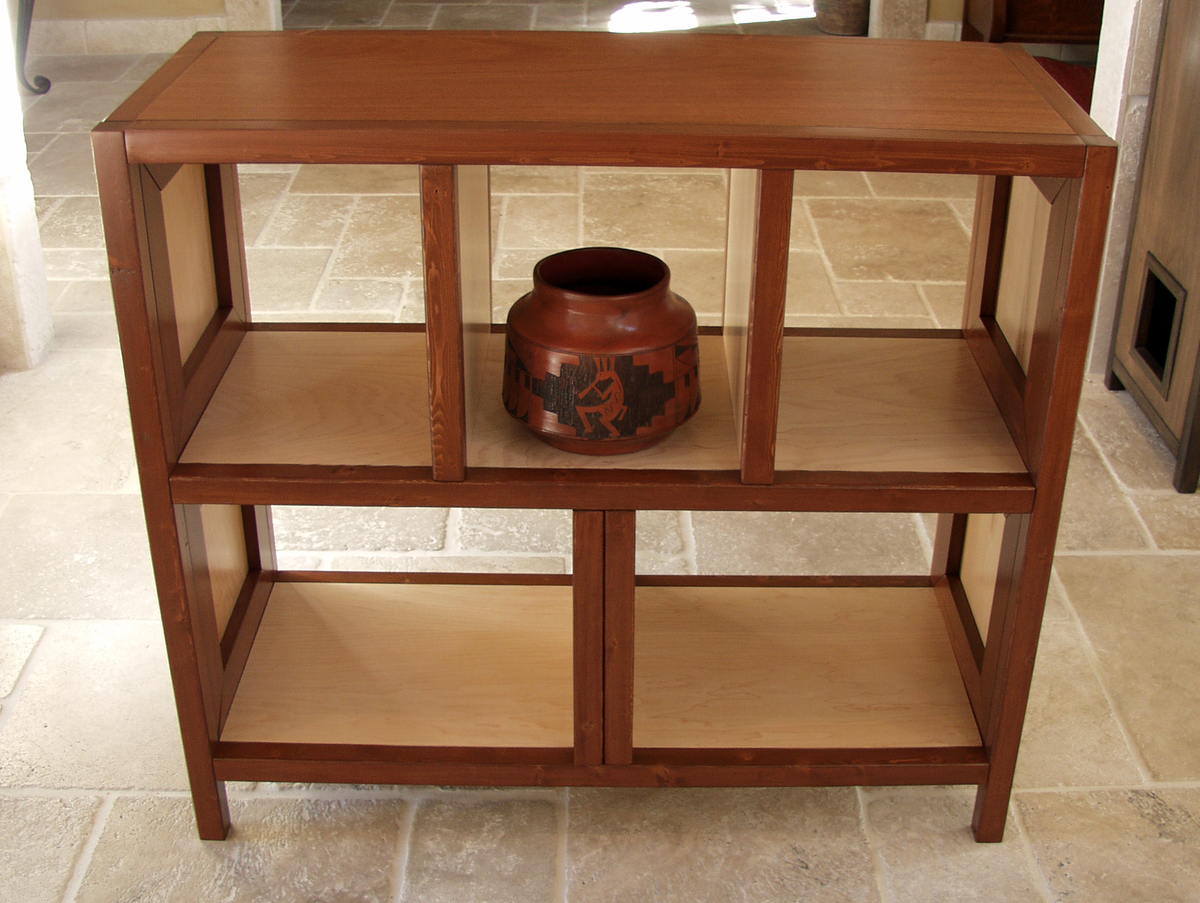
This was my first project without a set of plans, and all I had was a pitiful hand-drawn diagram and a lot of good ideas from prior Ana-White projects/plans (Google sketchup seems beyond my intellectual capacity!). I started with a spare piece of cherry that I wanted to use somewhere, so it became the basis for the top of this office shelf unit. I had to go with the dimensions of the cherry, so everything was built around that.
I used maple plywood for the base and sides of the cabinet, and pine furring strips for the frame/edging. Then, once I had the entire unit put together, I decided that I would like to stain just the frame. I had to take the whole project apart (all 51 pieces), stain the frame/edges, varnish the interior portions of the maple, and re-assemble without ruining the finish.
I try to never use glue because it's the one action that can't be reversed. I made a critical error on this (in a rush) when I installed the lower shelf in the wrong place and glued in a panel that hid all the screws. I thought the thing was totally ruined. My husband suggested adding a 2nd divider and calling it a "design feature". It saved the whole project.
Once re-assembled, I didn't want my Kreg holes to show, and I haven't had much luck with the Kreg plugs. So, I added a mitered frame around the insides and stained it cherry to match the edges.
Minwax didn't have a water-based cherry that I liked, so I mixed my own out of various water-based stains. That process took over a week to get just the right tone. This was the first time I've used Minwax Polycrylic, and I will be using this product forever...it is fantastic.

Estimated Cost
60
Estimated Time Investment
Week Long Project (20 Hours or More)
Finish Used
Minwax Pre-stain conditioner, Cherry water based stain (made from 6 parts Antique Walnut, 2 parts Cinnamon Toast and 1/2 part Colonial Pine), followed by 4-5 coats Minwax polycrylic
Recommended Skill Level
Beginner
Comments
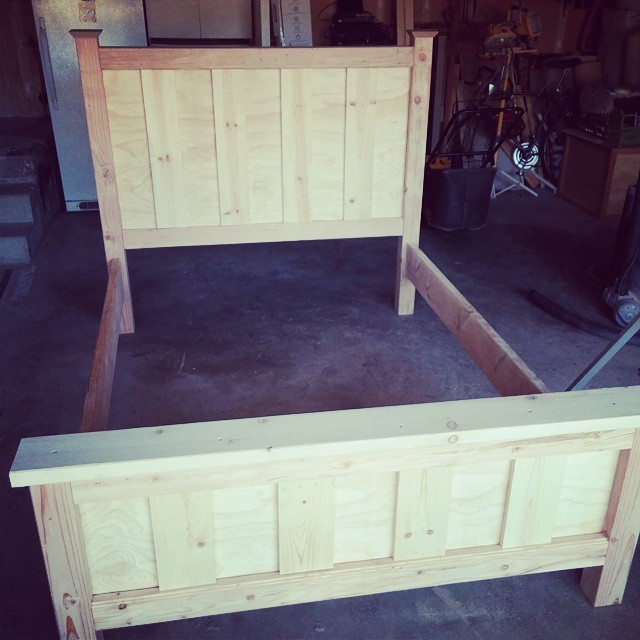
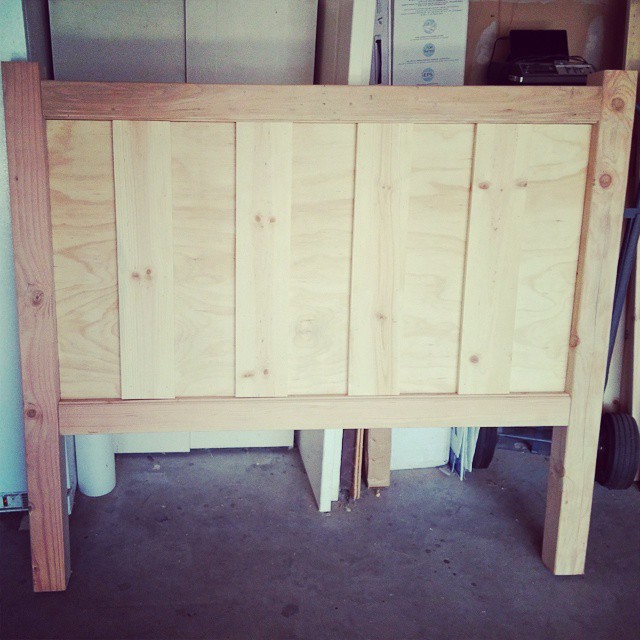
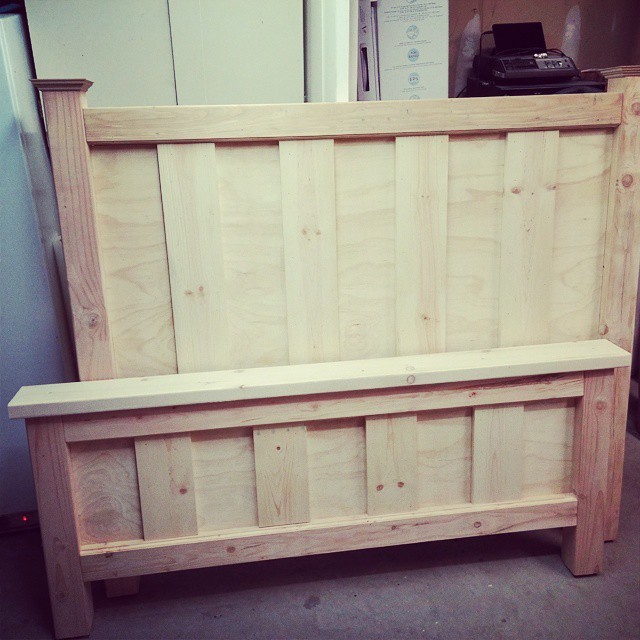
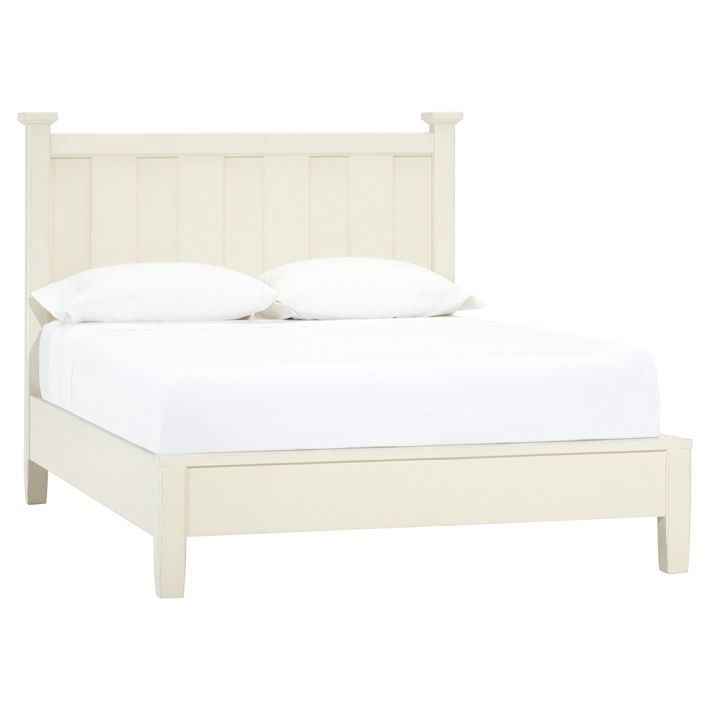
Full Farmhouse Variation
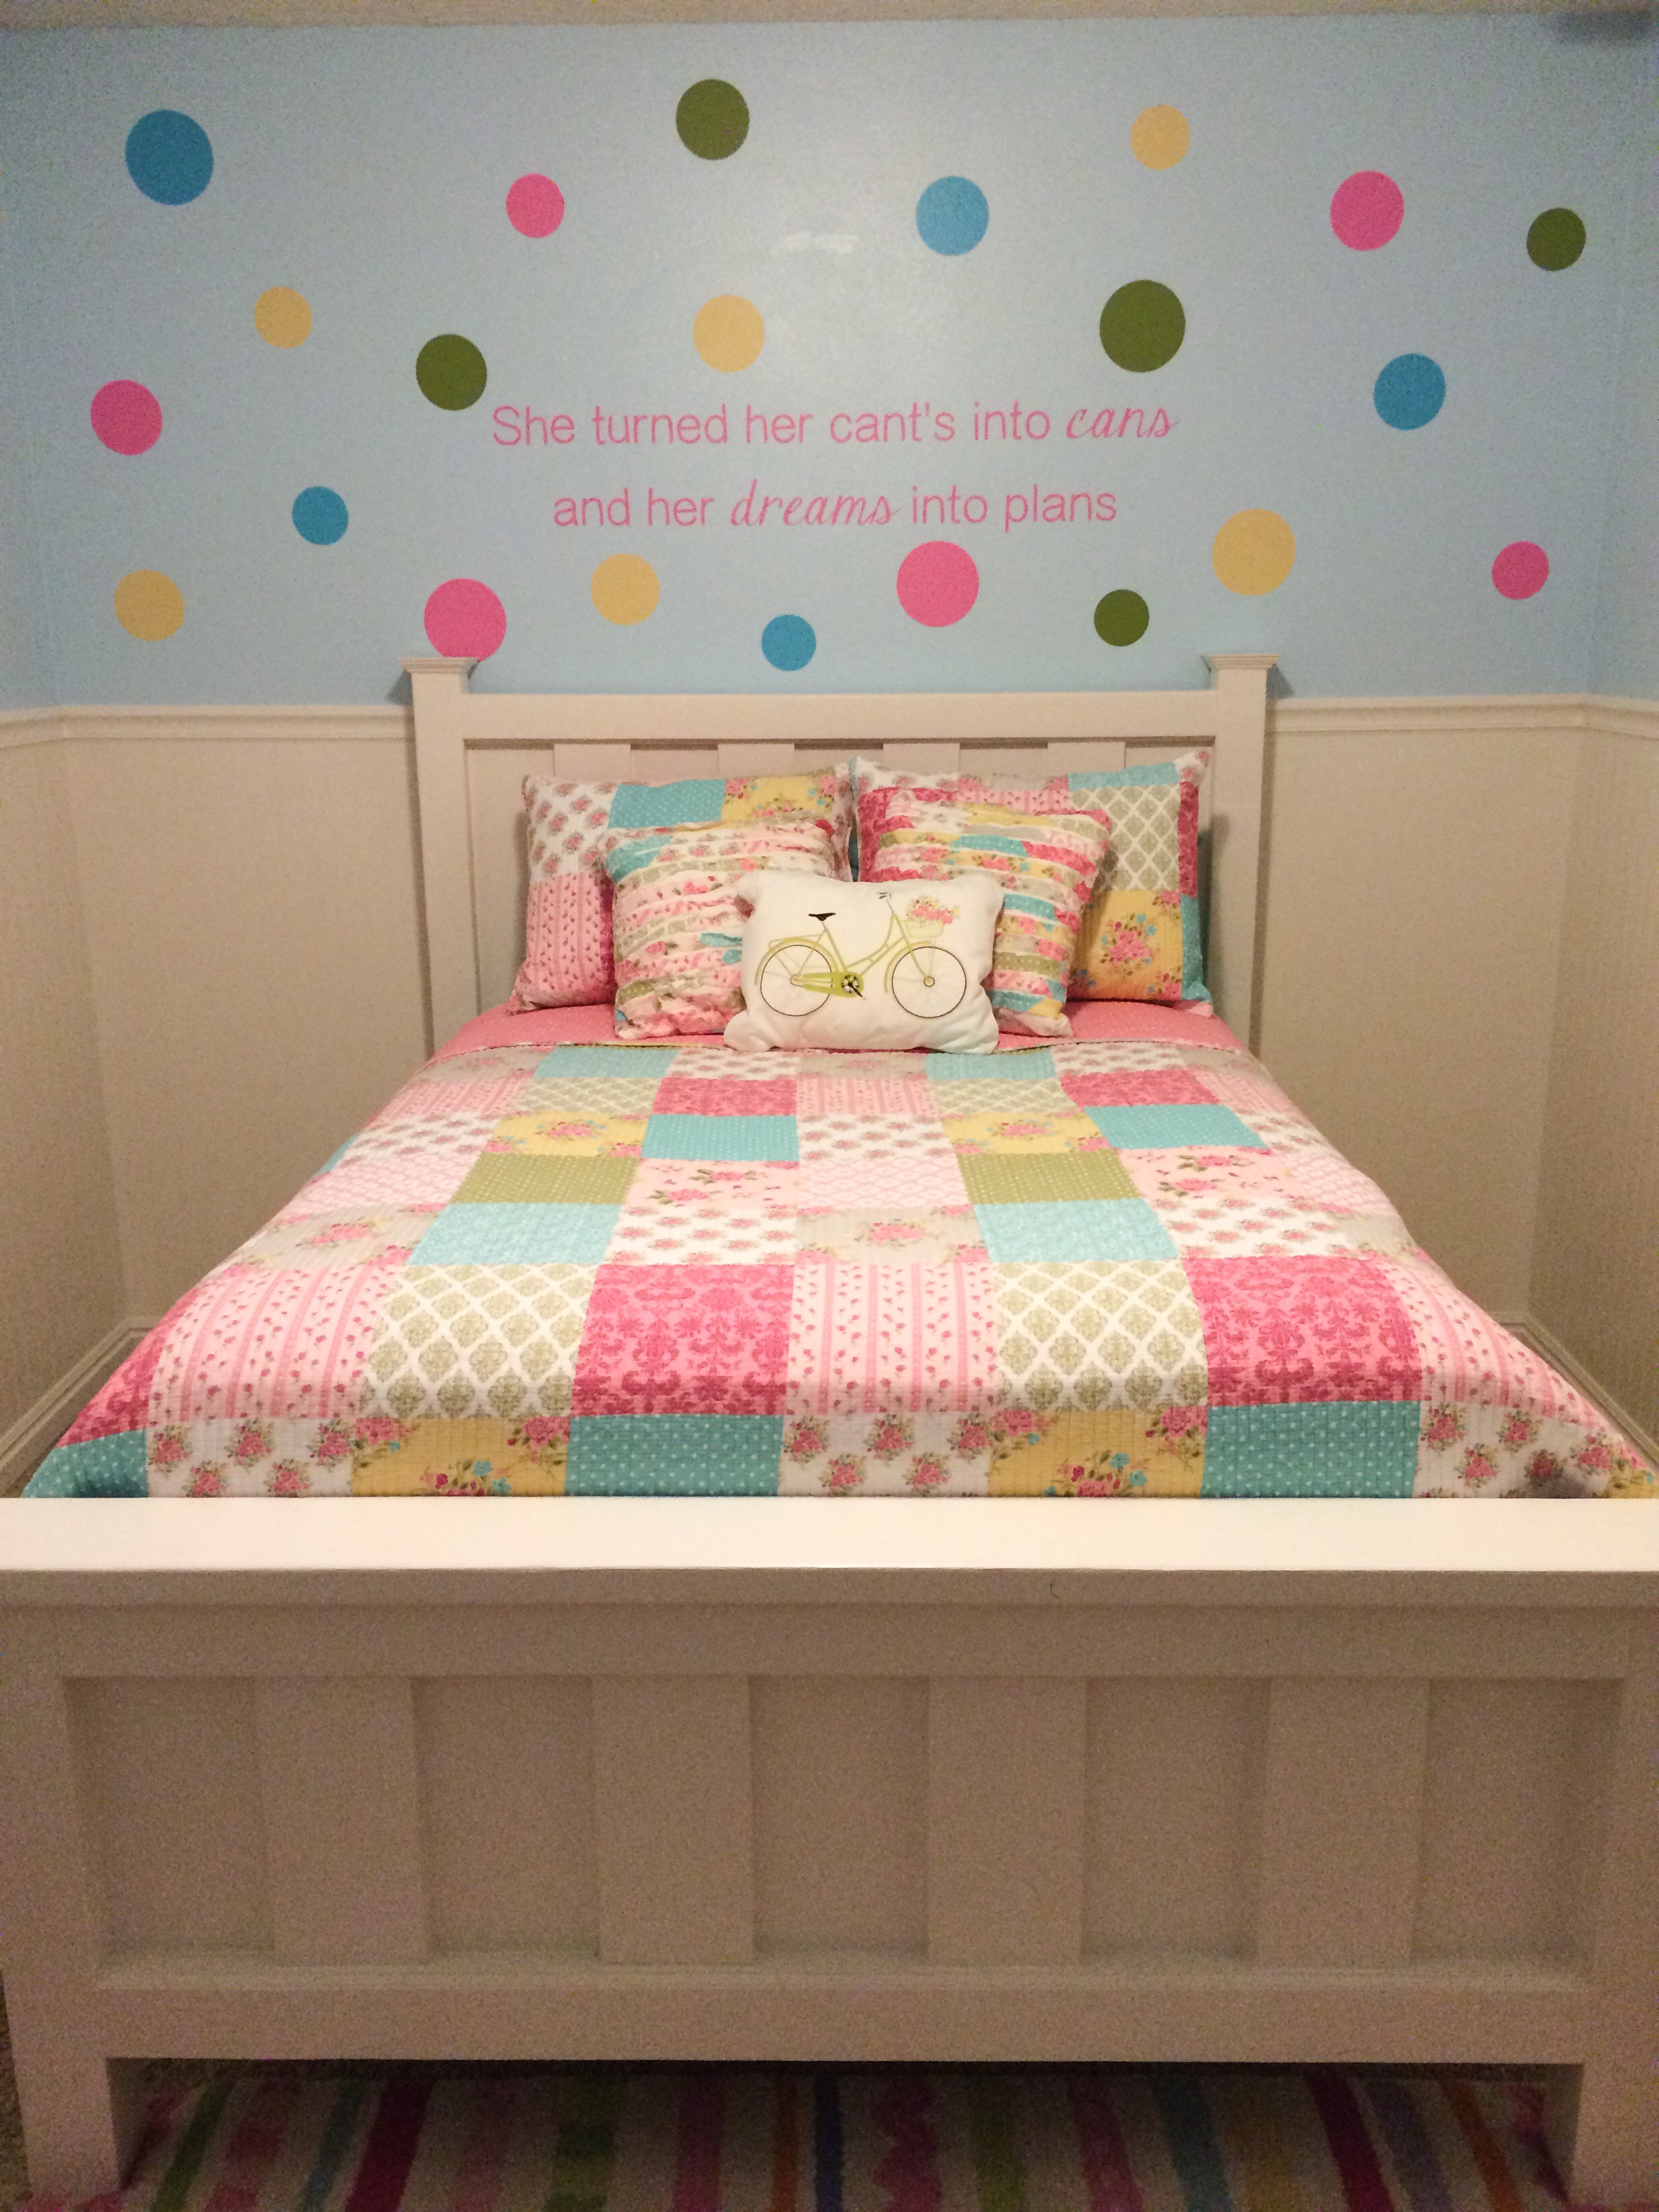
I just took the idea of the farmhouse, and crossed it with a bed in a photo my wife found on Pottery Barn Teen.
The back is one peice of plywood, and I just used the planks for accent. The top of the headboard is a 4X4, with a routed bottom edge. I made the crown pieces on the posts out of a couple of routed squares of MDF stacked.
The footboard is quite similiar to the Farmhouse footboard just with the plywood and accent planks instead of just planks.
It was super easy and cost less than $150.
Built from Plan(s)
Estimated Cost
$150
Estimated Time Investment
Day Project (6-9 Hours)
Finish Used
Latex Paint
Recommended Skill Level
Intermediate
Comments
Garden playhouse

Our little girls playhouse....
L2.2m x W1.2m x H to apex 1.8m,
Made from overworked pallets and a rough sketch!
All planks were 2.2m in length which determined the house length and were 40mm thick.
Made in panels to ease assembly and if we decide to move it as it weighs an awful lot!!!


Estimated Cost
total cost: all timber was free pallets,1 roll of roofing felt about 35 euros, about 400 screws at 10 euros, paint 30 euros and hinges etc 10 euros.
Estimated Time Investment
Week Long Project (20 Hours or More)
Finish Used
painted
Recommended Skill Level
Intermediate
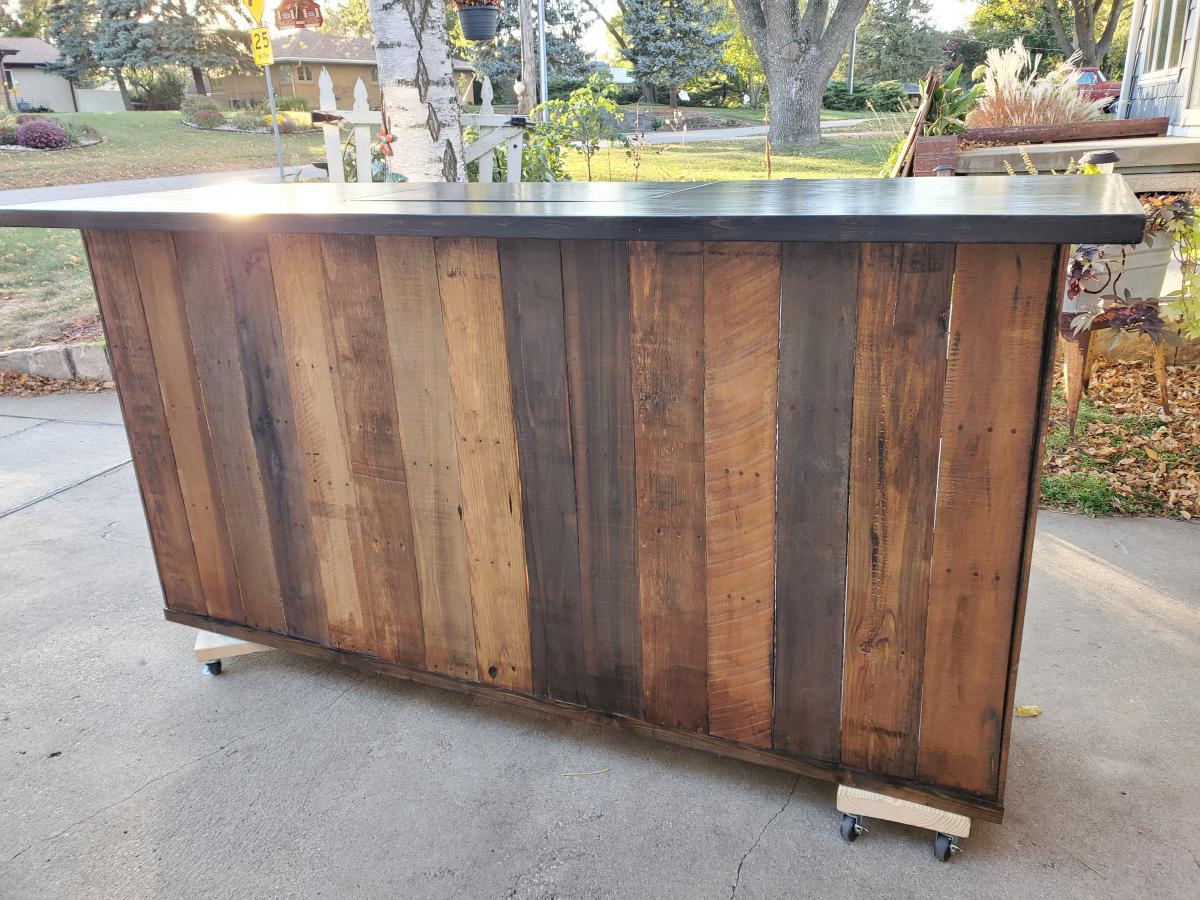
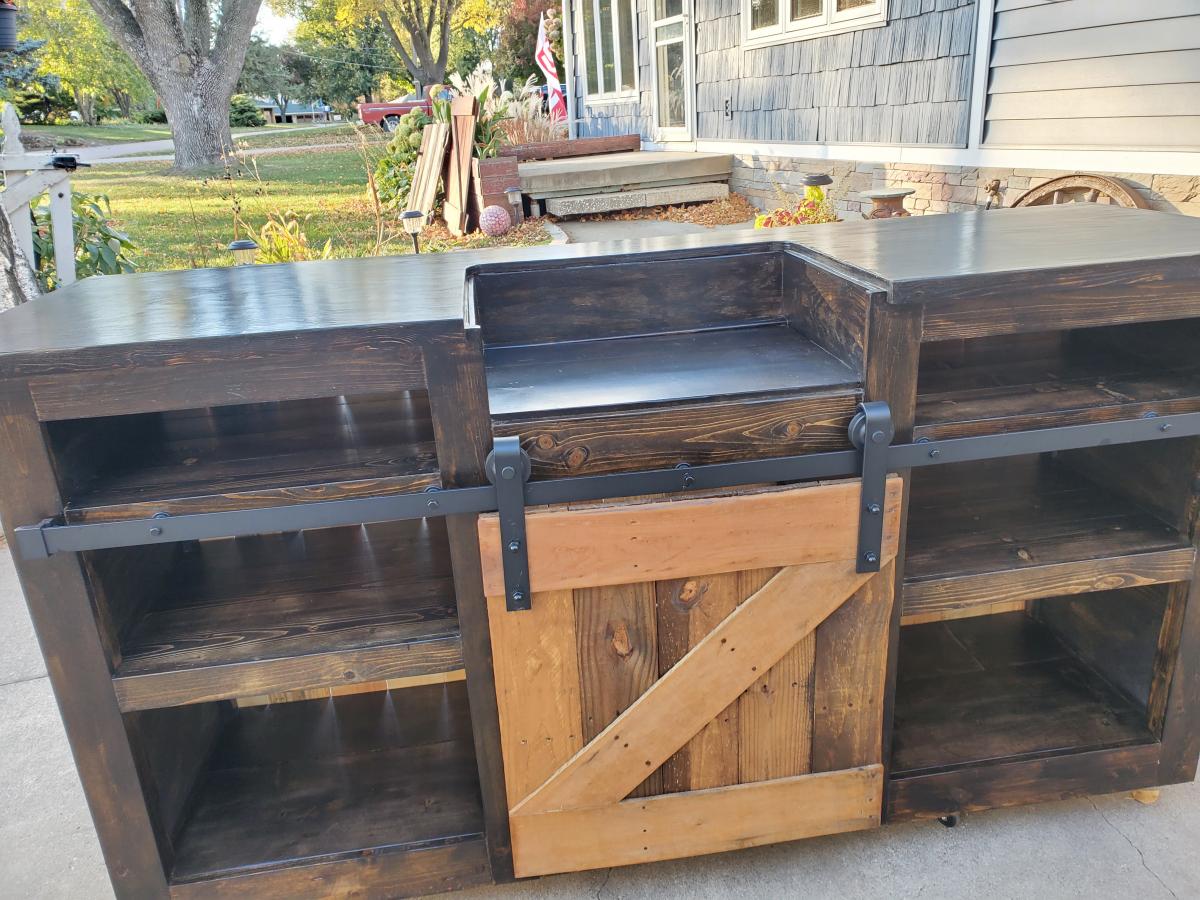
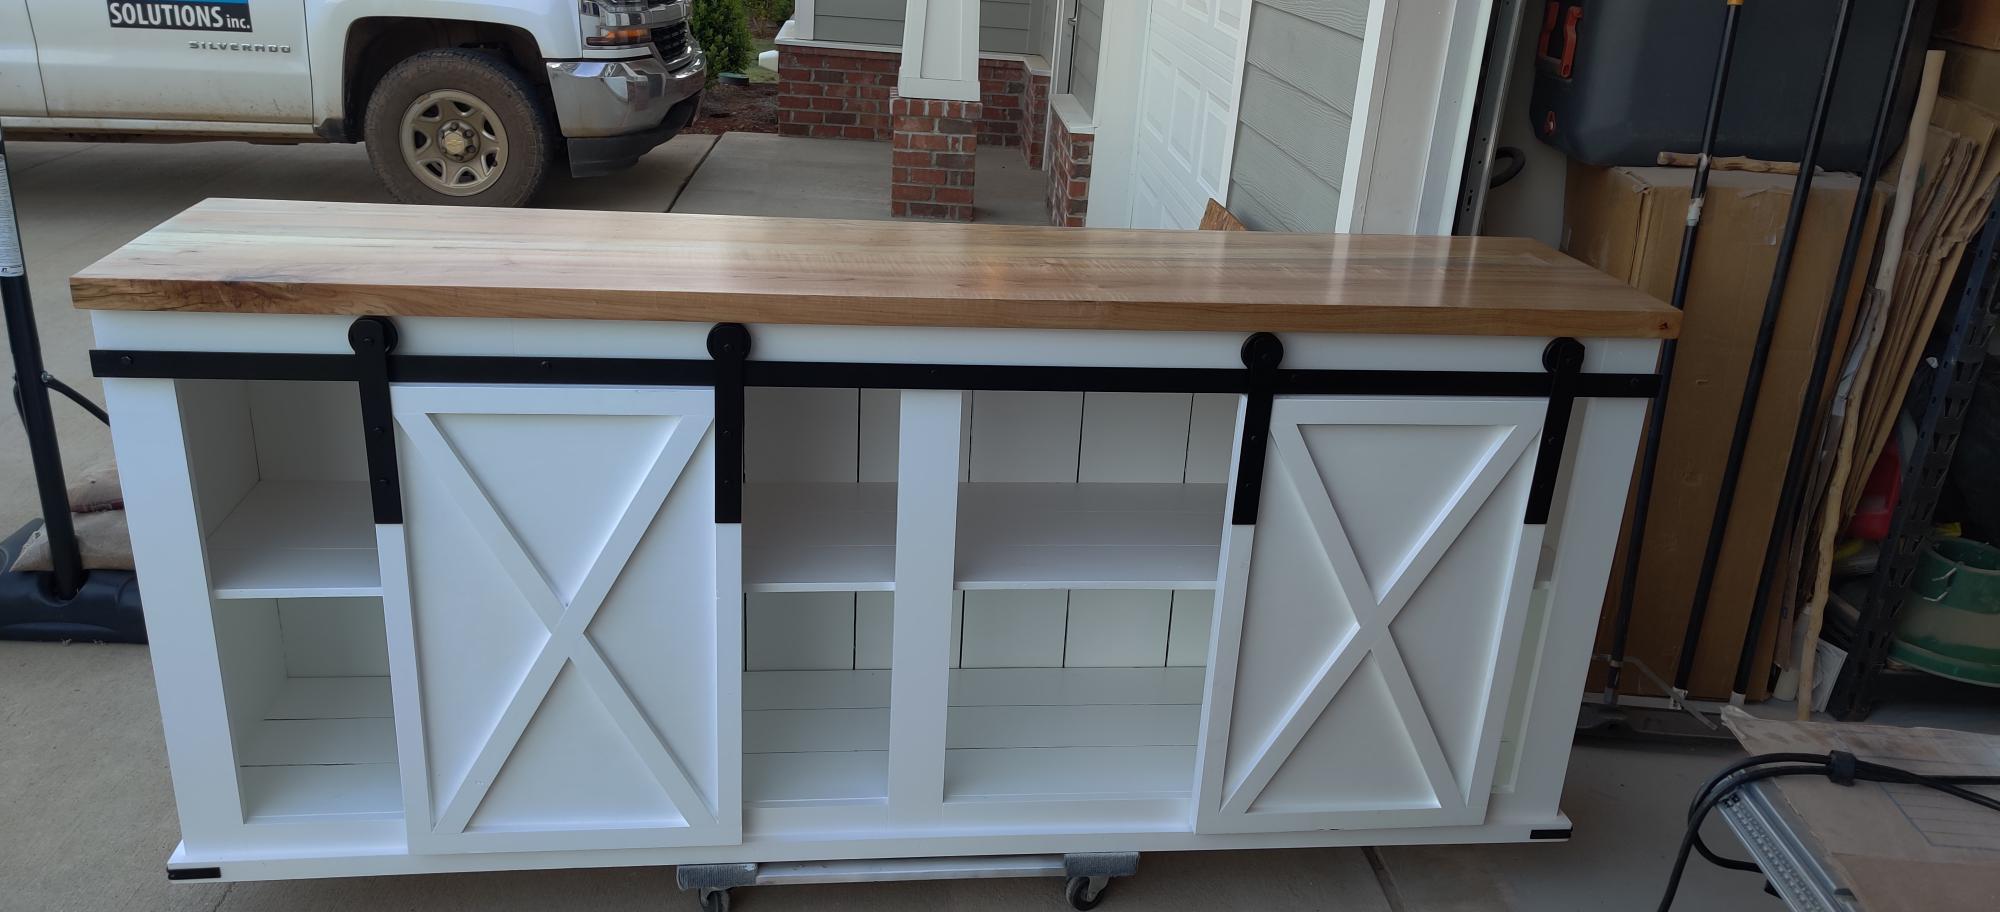
Grandy barn door console
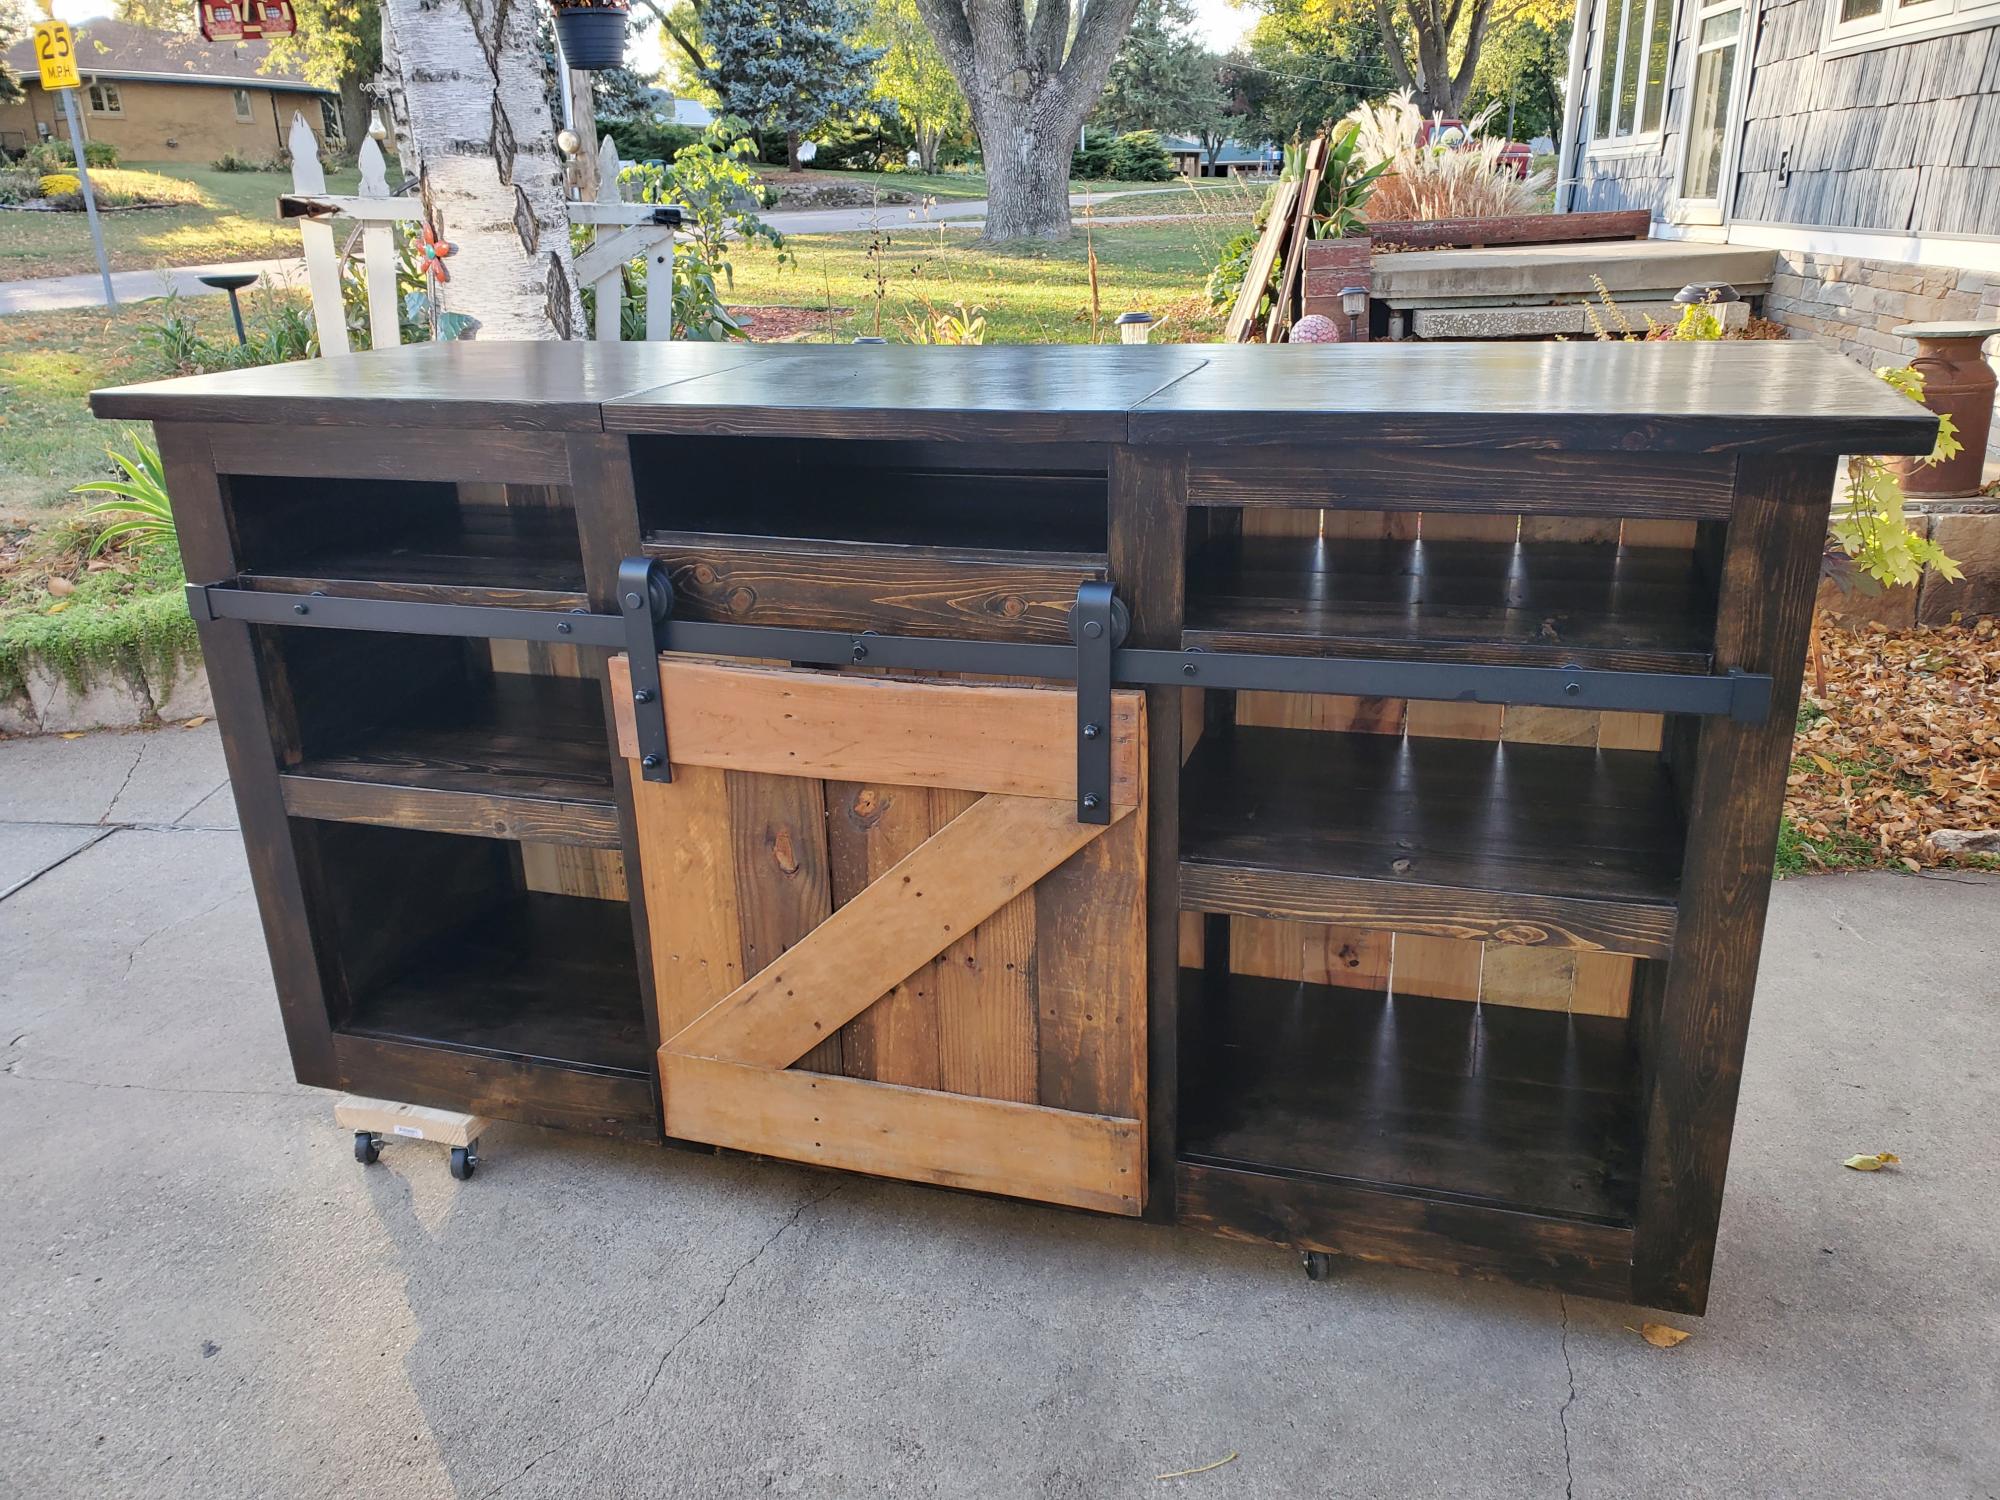
I followed the plans for the Grandy barn door console. Made modifications to meet the customers height requests. There is a removable portion of the bar top that covers the mixing station when not in use. The exterior is wrapped in pallet wood that was treated with a homemade stain(vinegar, steel wool, coffee grounds).
Built from Plan(s)
Estimated Cost
$200 in materials
Estimated Time Investment
Weekend Project (10-20 Hours)
Finish Used
Homemade stain used on pallet wood. Dissolve a piece of steel wool in a gallon of vinegar. Add used coffee grounds to darken the color. When steel wool is gone, strain and use. The vinegar oxidizes the wood and creates an aged look. Structure and top stained epresso.
Recommended Skill Level
Beginner
Rocket Town Loft Bed
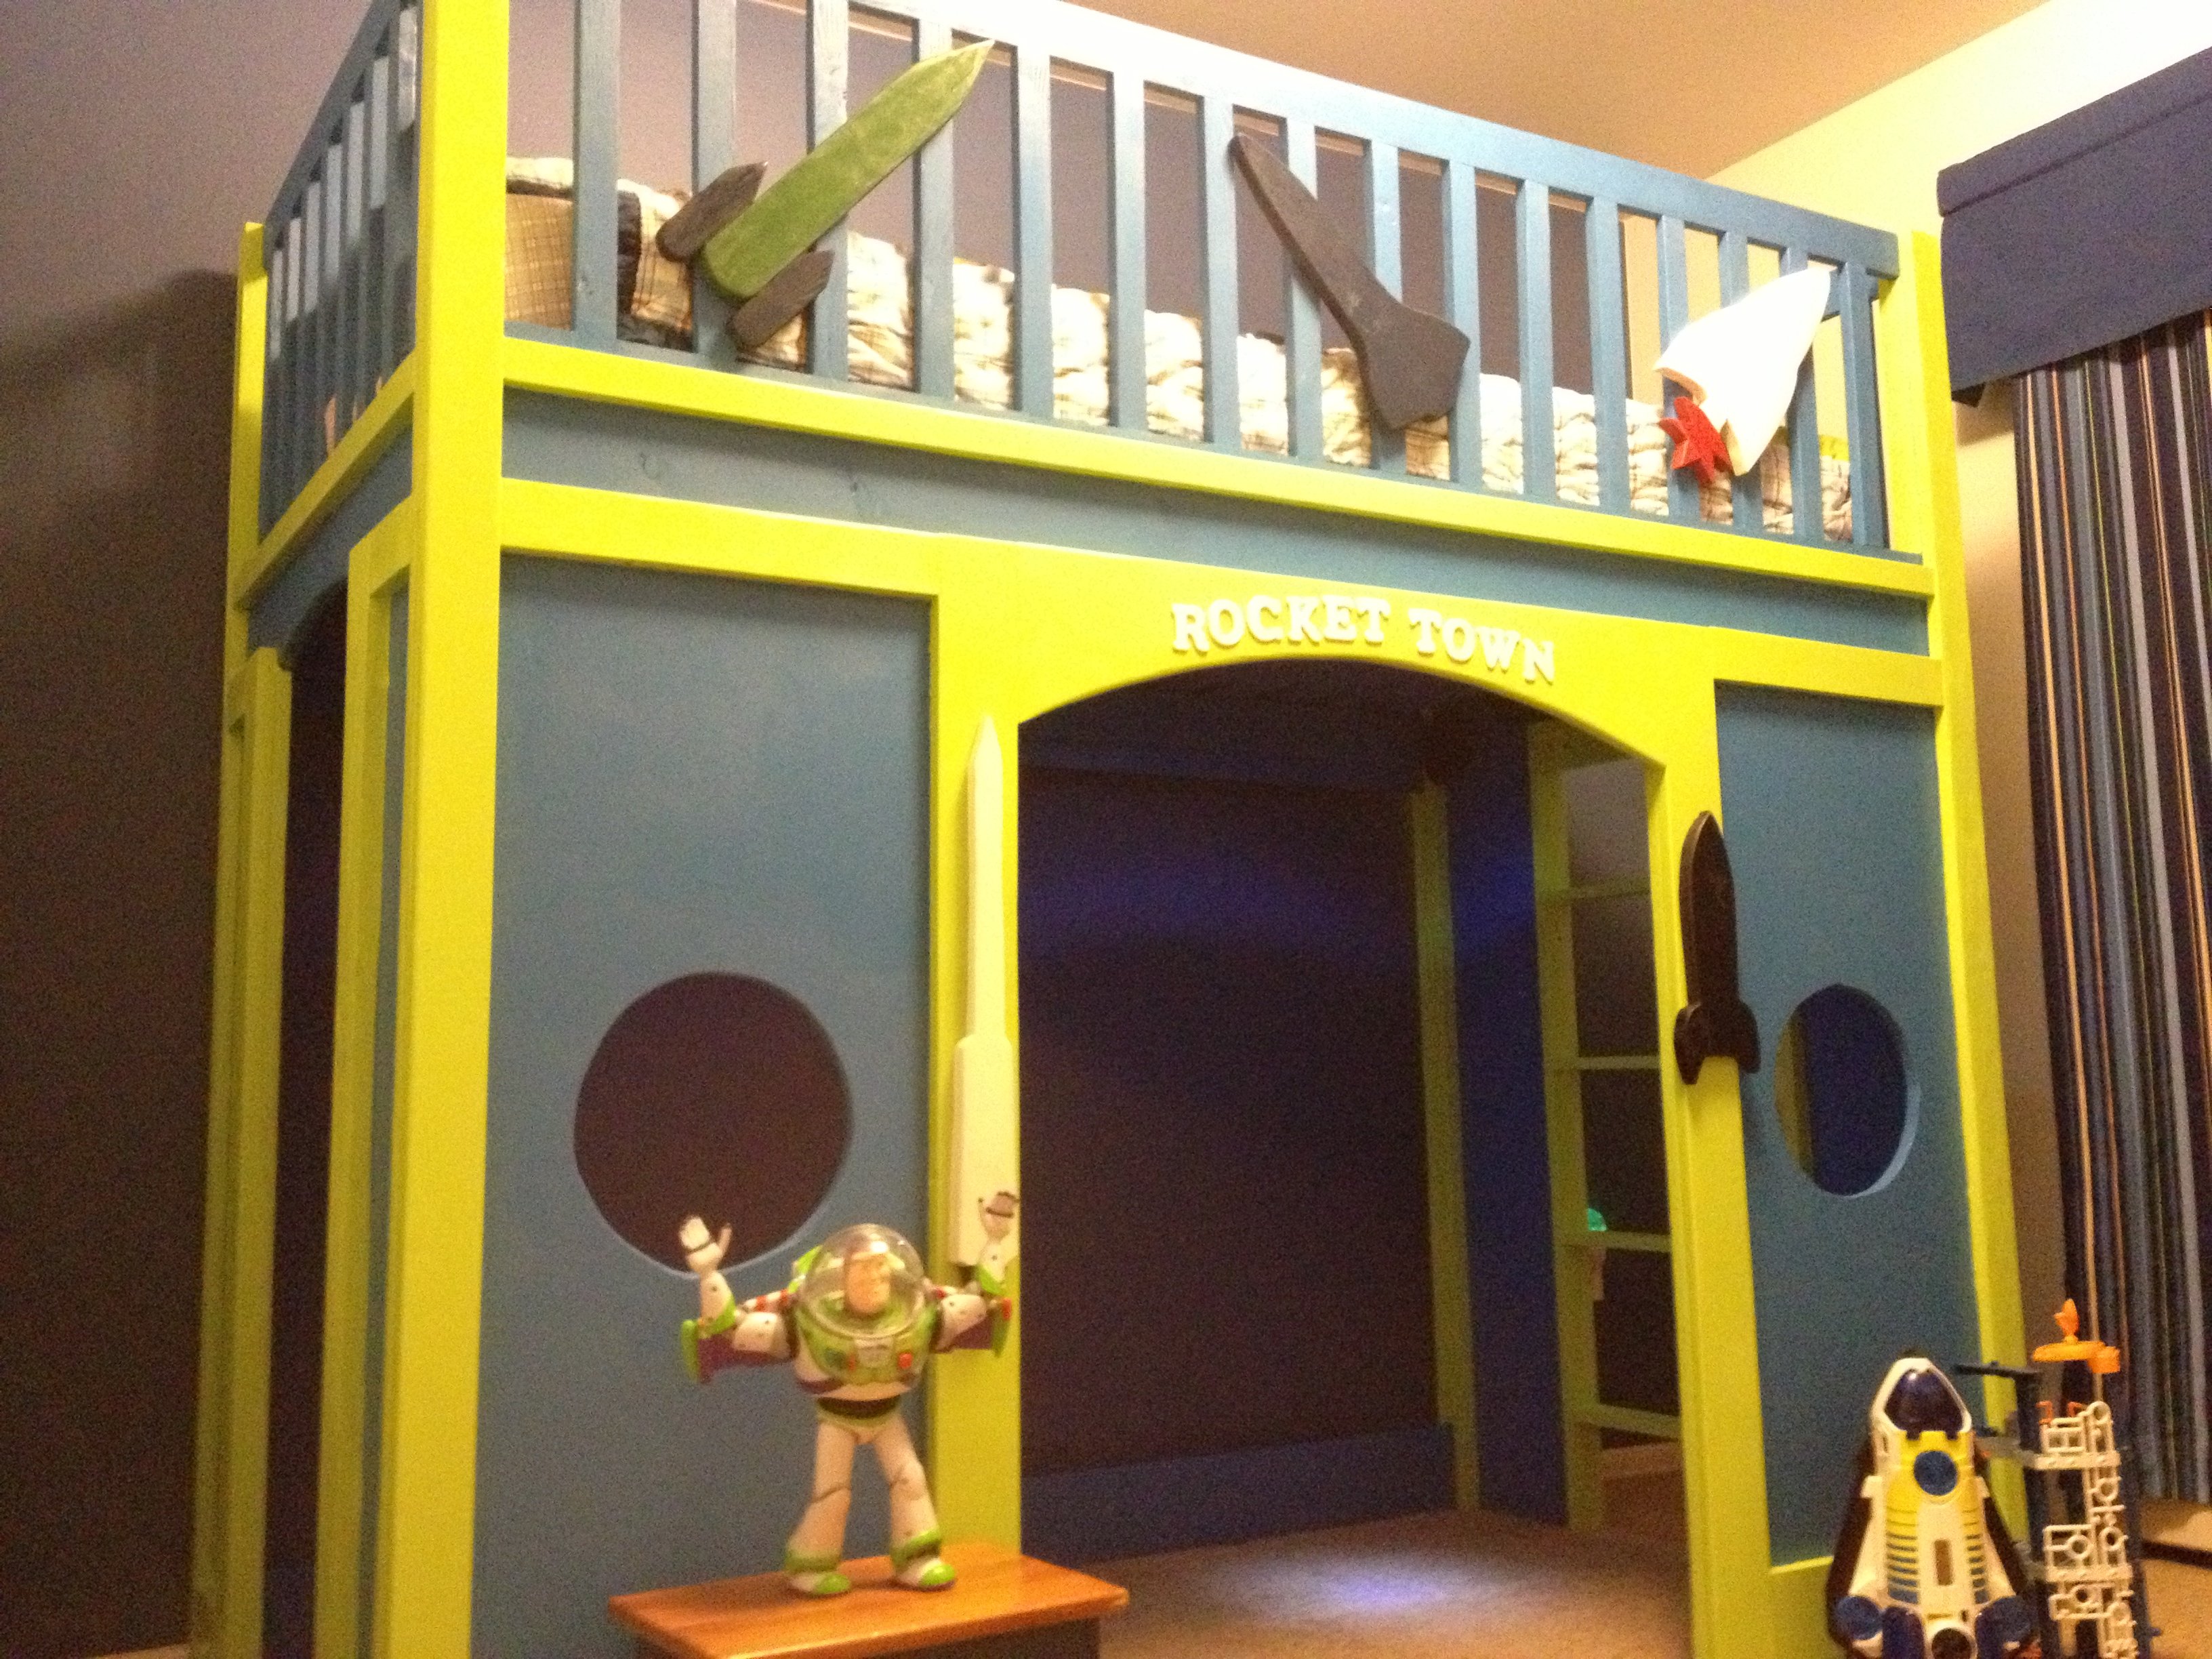
Used the plans for the Fire Station Loft Bed up until the final finish, then slightly customized. Used scrap pieces and jig saw to create some fun rockets. Plans were wonderful and easy to follow. Kreg Jig was so cool to use. Recommend using screws, even if countersunk, so that the bed can be taken apart as needed. Also recommend that you measure the path you must take from your work area to the final destination before gluing and nailing (thus the screw comment) so you don't have to take it apart and build a second time!
Thanks to my dad for partnering with me on this one. Did it 100% as a team. Couldn't have done it without your help!
Built from Plan(s)
Estimated Time Investment
Week Long Project (20 Hours or More)
Finish Used
Behr Self-priming Interior Semi Gloss
Recommended Skill Level
Beginner
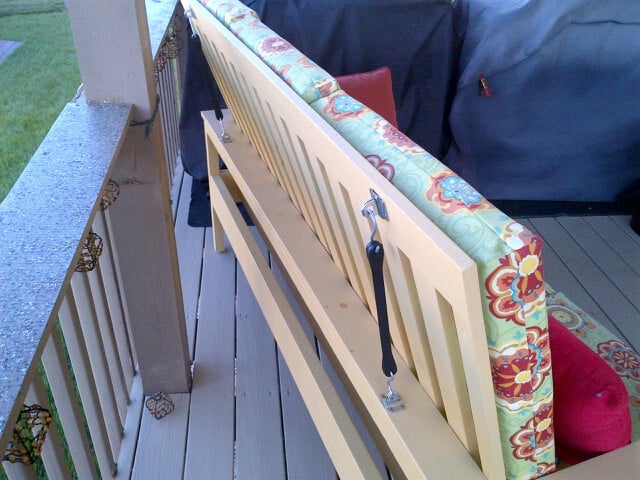
Simple White Outdoor Sofas
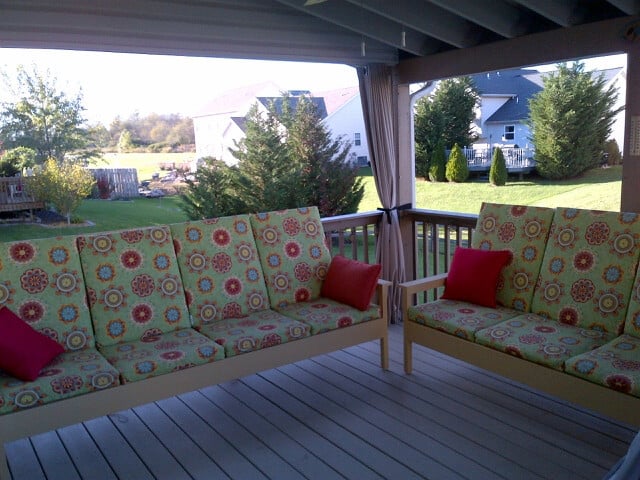
I followed the basic design plans with just two modifications. I did not screw the sofa back to the bottom frame - instead I propped into place with bungee cords so I can fold it down for easy Winter time storage! I also added arm rests to each chair. I used a Kreg jib to screw it all together.
Built from Plan(s)
Estimated Cost
The cushions were twice more than the wood and screws and paint combined.
Estimated Time Investment
Week Long Project (20 Hours or More)
Finish Used
Behr outdoor deck opaque stain
Recommended Skill Level
Intermediate
Kids rolling cart for tea or toys
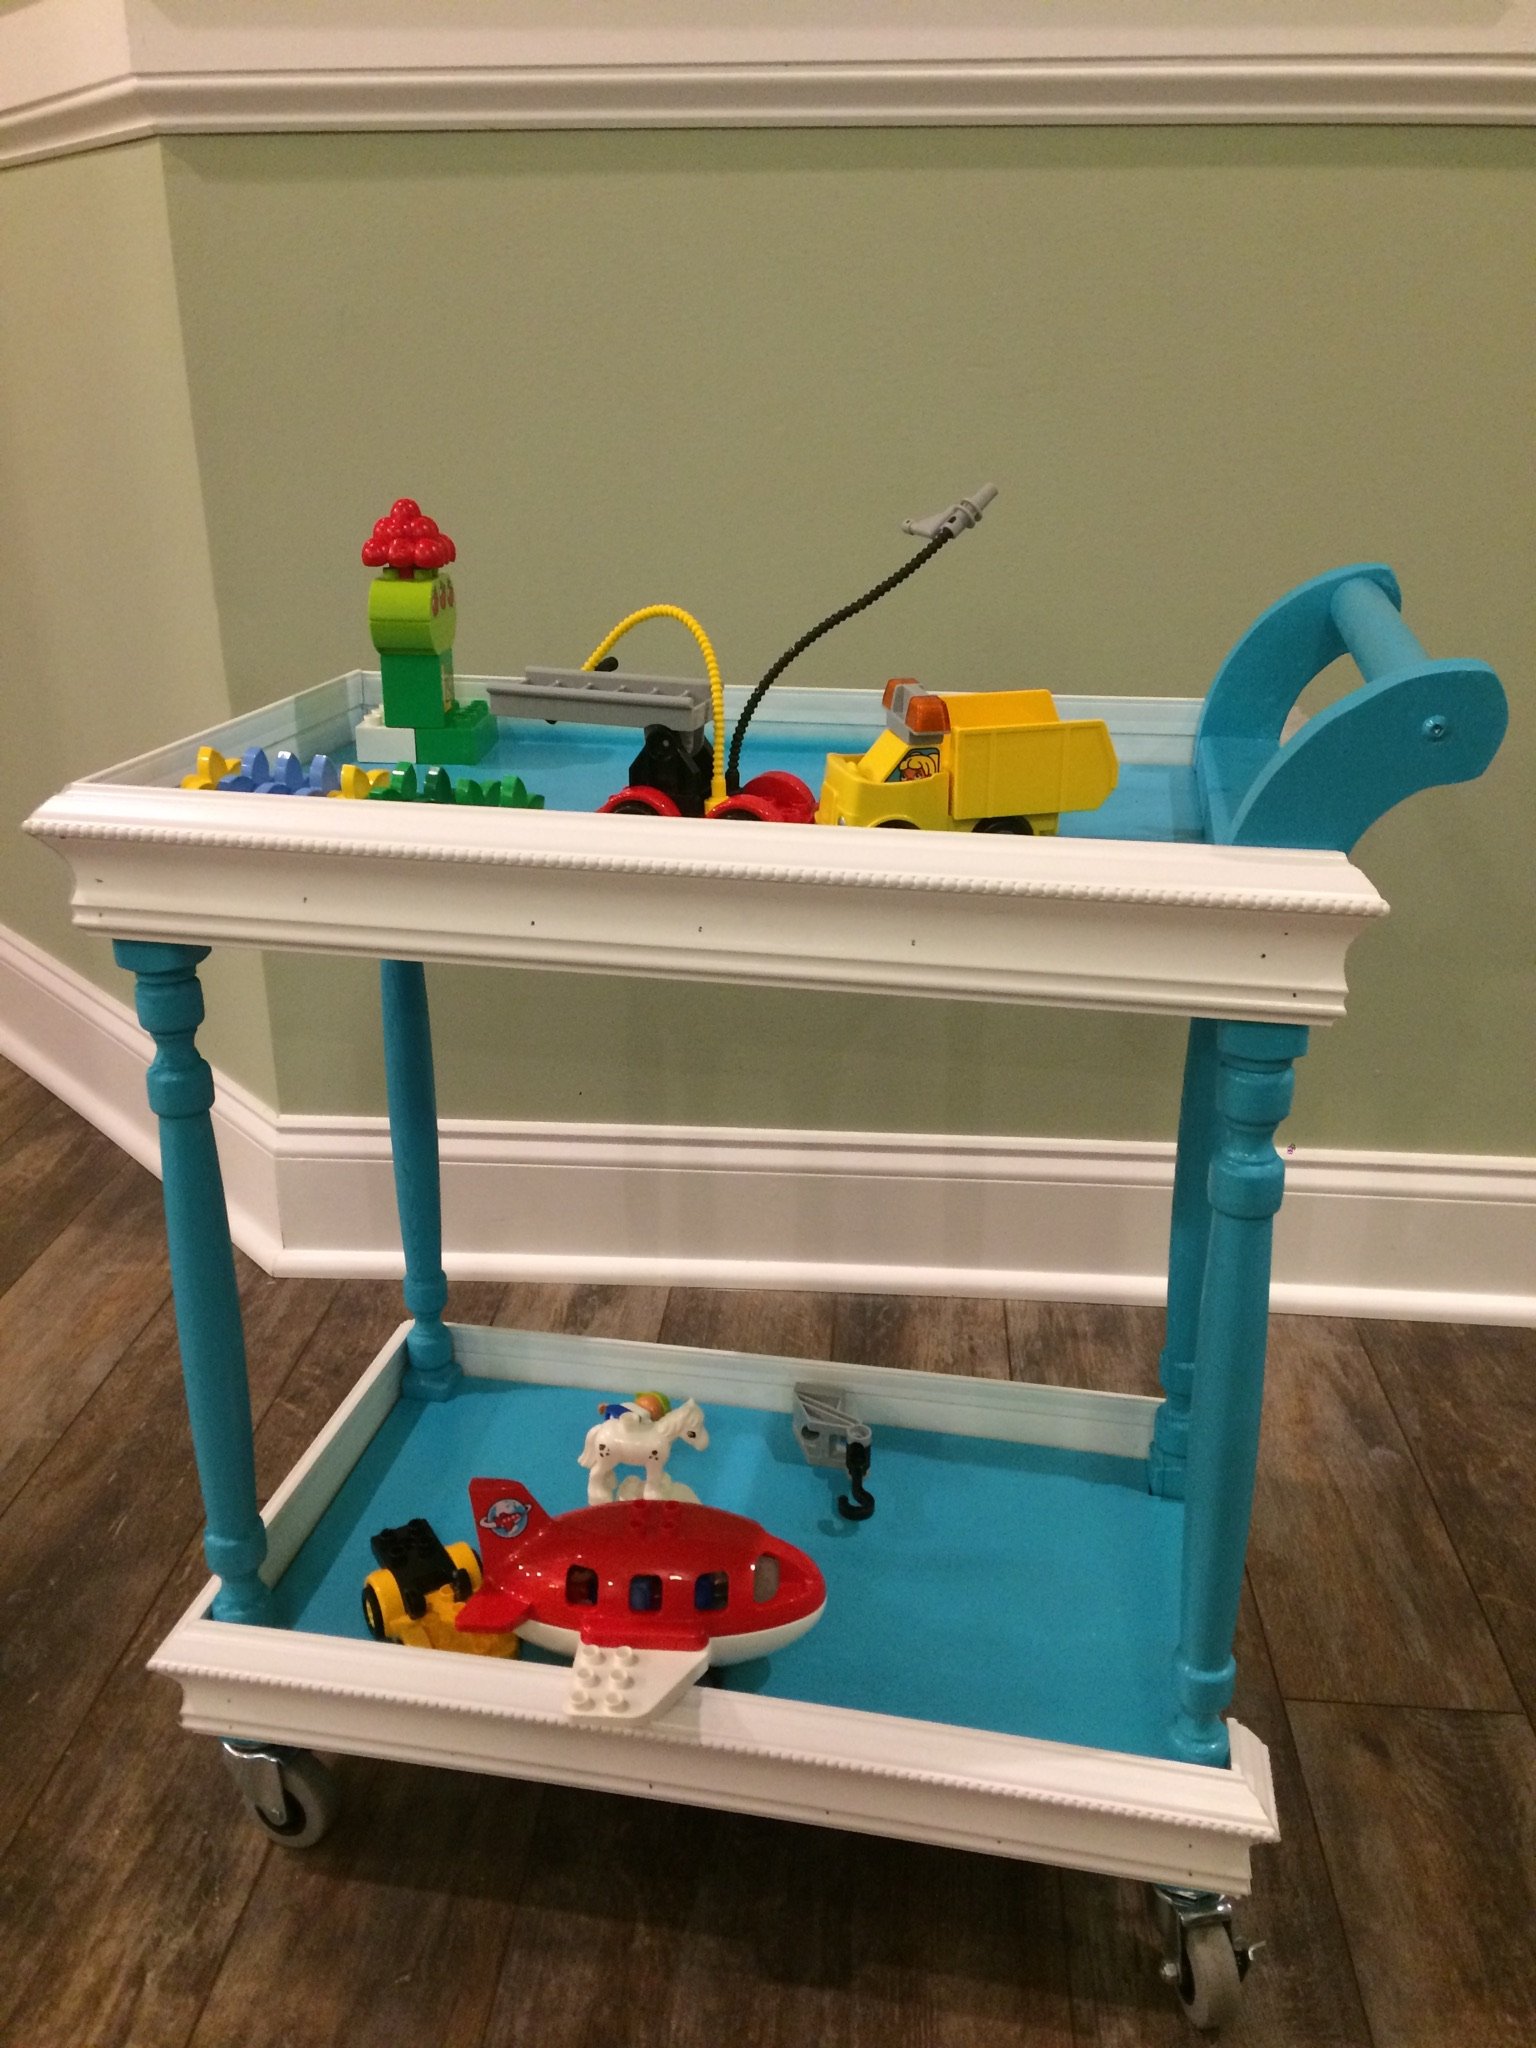
We followed the tea cart plan (mostly). Since the scalloped edge looked hard to us, we bought molding for trim instead. We had a mitre saw so used that to cut the molding at 45 degree angles. The kids have been putting all sorts of toys on it and right now it's their legos.
Built from Plan(s)
Estimated Cost
Most of our cost was tools since this was our first project. Thankfully our local pawn shop had great deals on tools.
Estimated Time Investment
Afternoon Project (3-6 Hours)
Finish Used
1.5 cans Rustoleum Seaside spray paint
Recommended Skill Level
Intermediate
Comments
Sat, 01/28/2017 - 19:33
Our project
This was our first project (I didn't realize I wasn't logged in when I posted).
FARMHOUSE DOLL BED

I made this doll bed for my niece for Christmas. I made it a bit smaller than the original plans, and I was really happy with how it turned out! I sewed the pillows and bedding from quilting pieces. It's the perfect size for a baby doll. My sister loved it, my niece is only 10 months old, but she will grow into it soon. Had a lot of fun making it!

Built from Plan(s)
Estimated Cost
15$
Estimated Time Investment
Week Long Project (20 Hours or More)
Finish Used
Valspar paint, an off white sample color I had already. I used Minwax matte poly for the finish.
Recommended Skill Level
Beginner
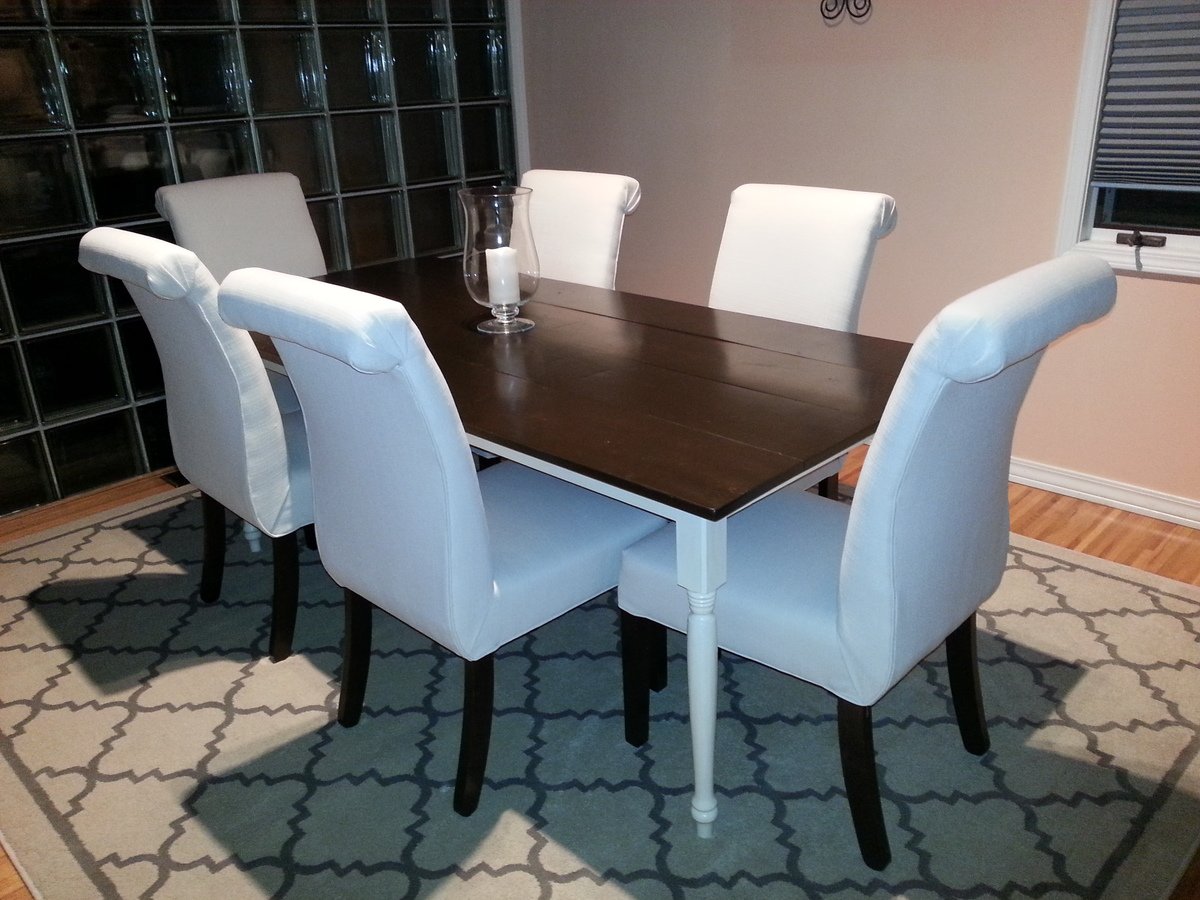
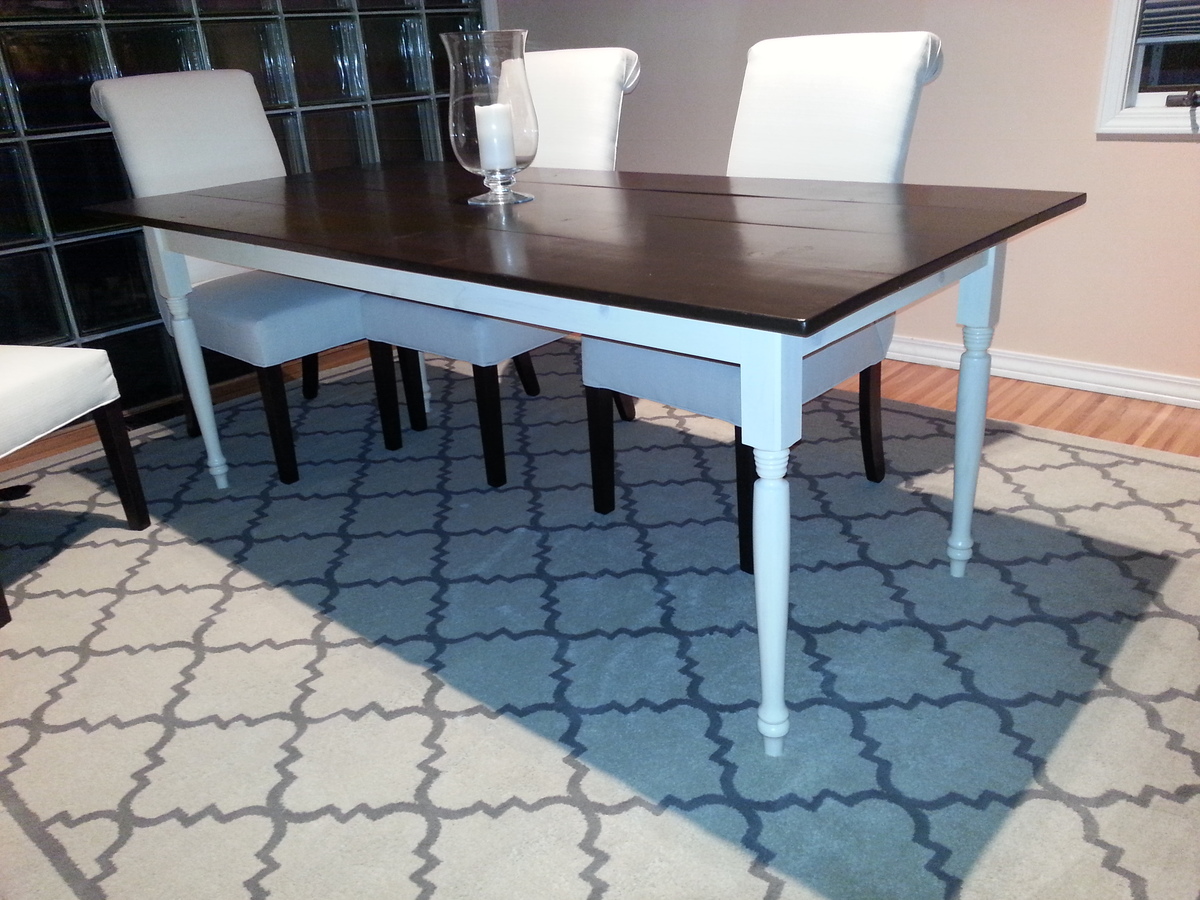
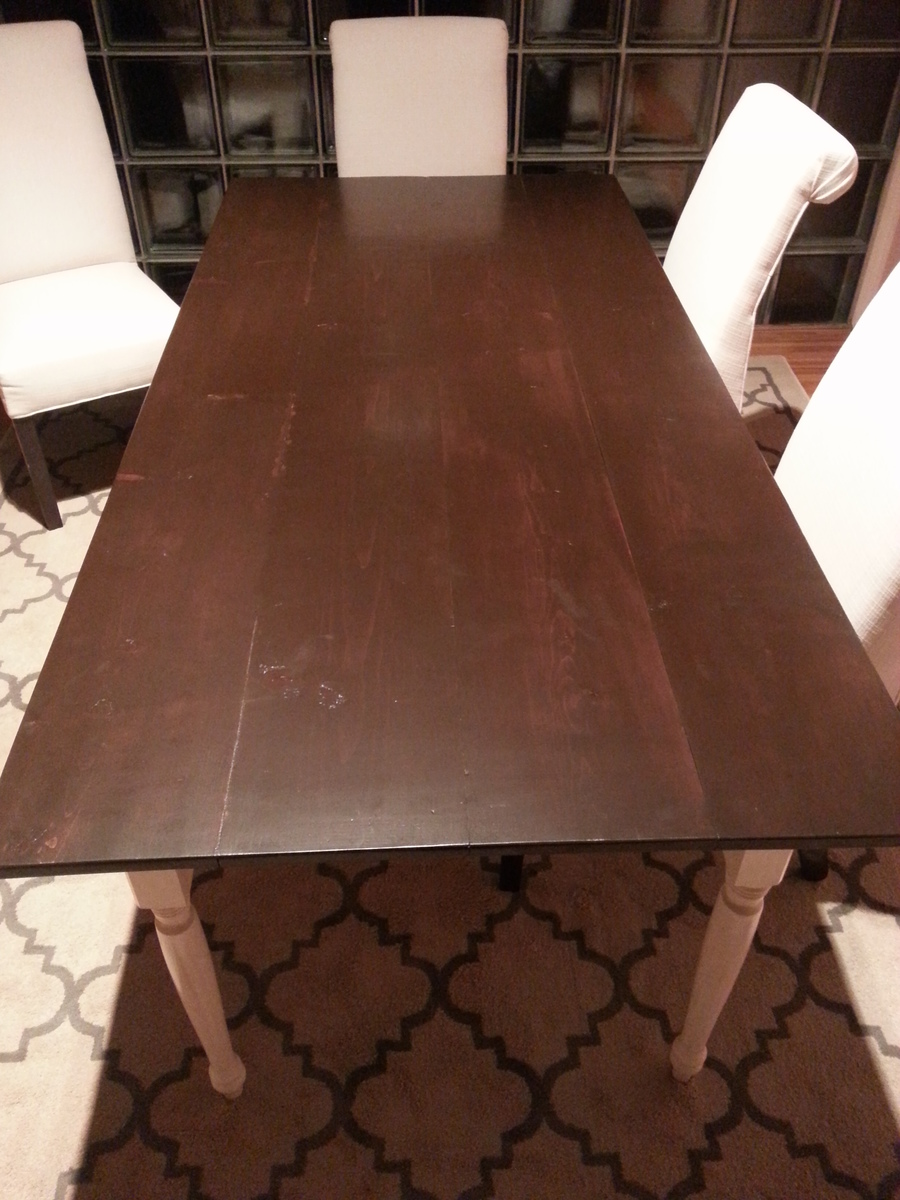
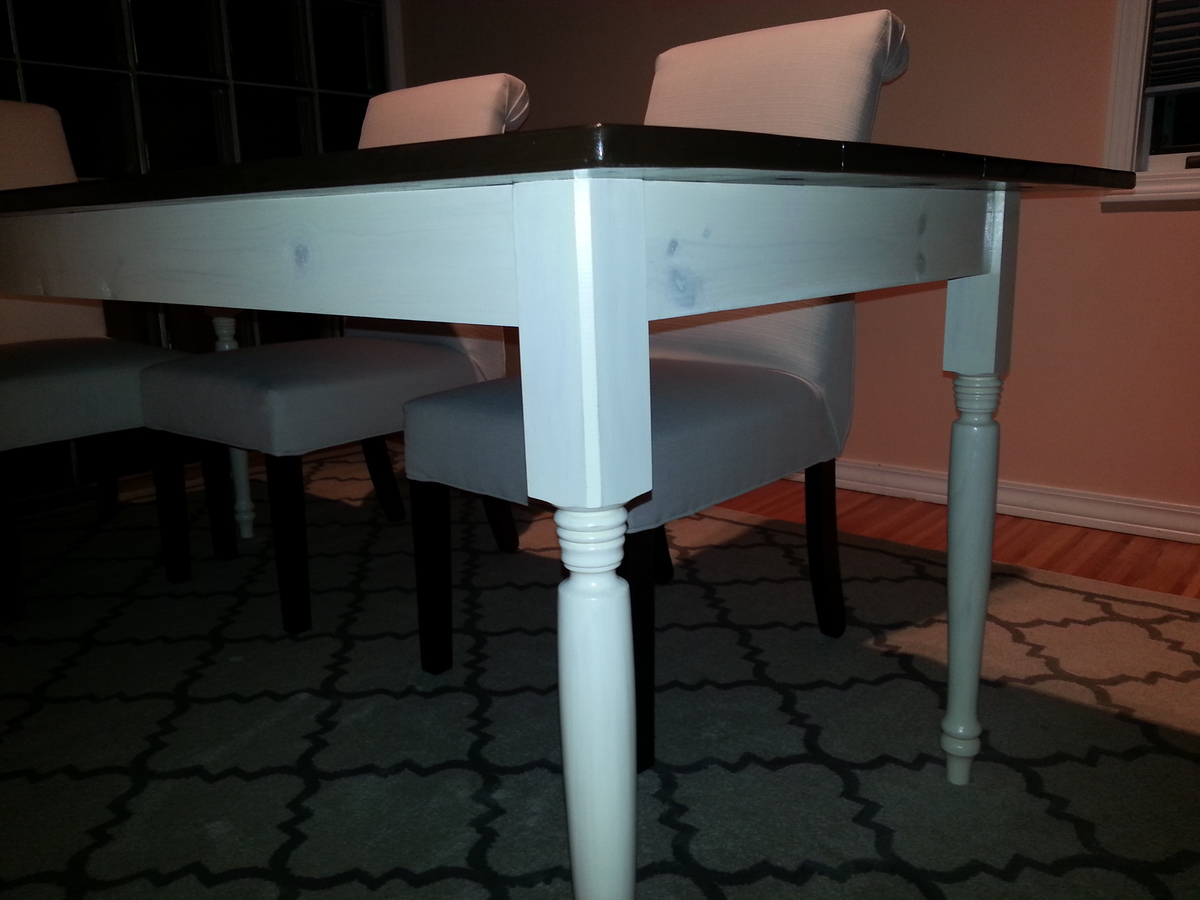
Two Toned Turned Leg Farmhouse Table
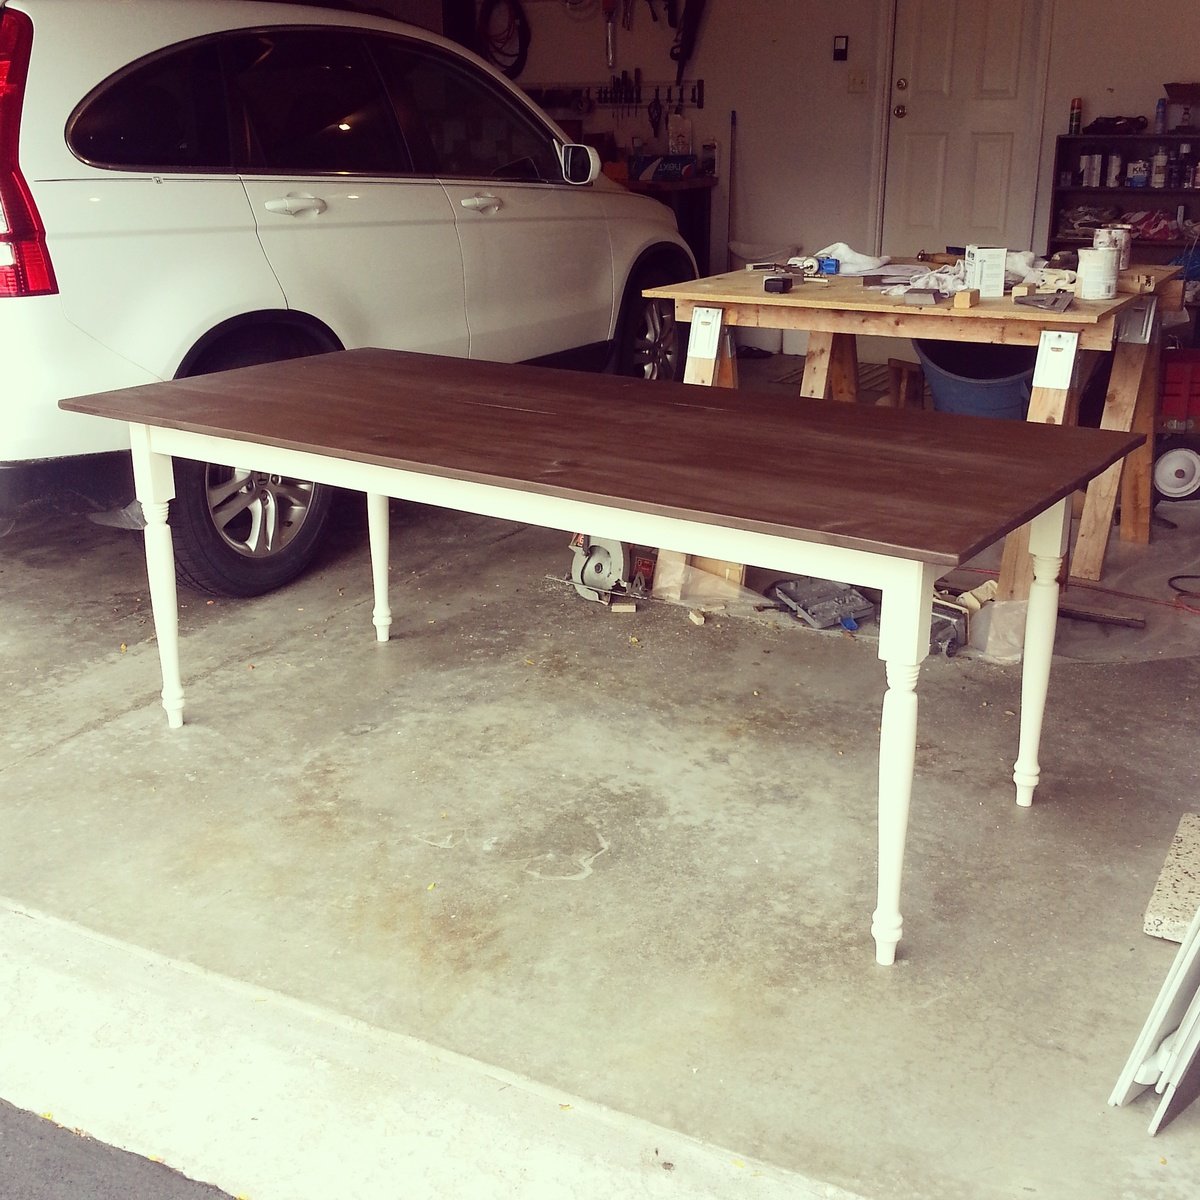
I saw a table similar to this at Pier 1 and loved it, but didn't want to spend $400. I saw the plan for a farmhouse play table, then found one for a turned leg farmhouse kitchen table. The plan for the turned leg farmhouse table was not detailed at all though. The instructions for building the table top included, "put together the table top." LOL this was my very first project... I needed some more instruction!! So I went on YouTube and watched Ana's video where she made a coffee table pretty much the same style and kind of went off those instructions. I love the way it turned out! Everyone was so impressed that I was actually able to build it! (With a little help from my husband, father, and brother-in-law)
I want to eventually build another one like this, but use better quality wood. I purchased all of the wood from Lowe's, even the legs. I figured since this was my very first project I shouldn't use good, more expensive lumber since there was a good possibility I might mess something up!
Built from Plan(s)
Estimated Cost
For wood, stain, and protective finishes, roughly $125
Estimated Time Investment
Weekend Project (10-20 Hours)
Finish Used
I used Rustoleum Dark Walnut stain for the table top (2 coats) and Rustoleum Willow stain for the legs and aprons (about 4 coats). I put Minwax waterbased Polycrylic on the legs and aprons as the protective coating. I didn't want them to turn yellow/amber from an oil based polyurethane. I put Minwax Polyurethane Clear Satin on the table top because I wanted a really durable protective coating.
Recommended Skill Level
Starter Project
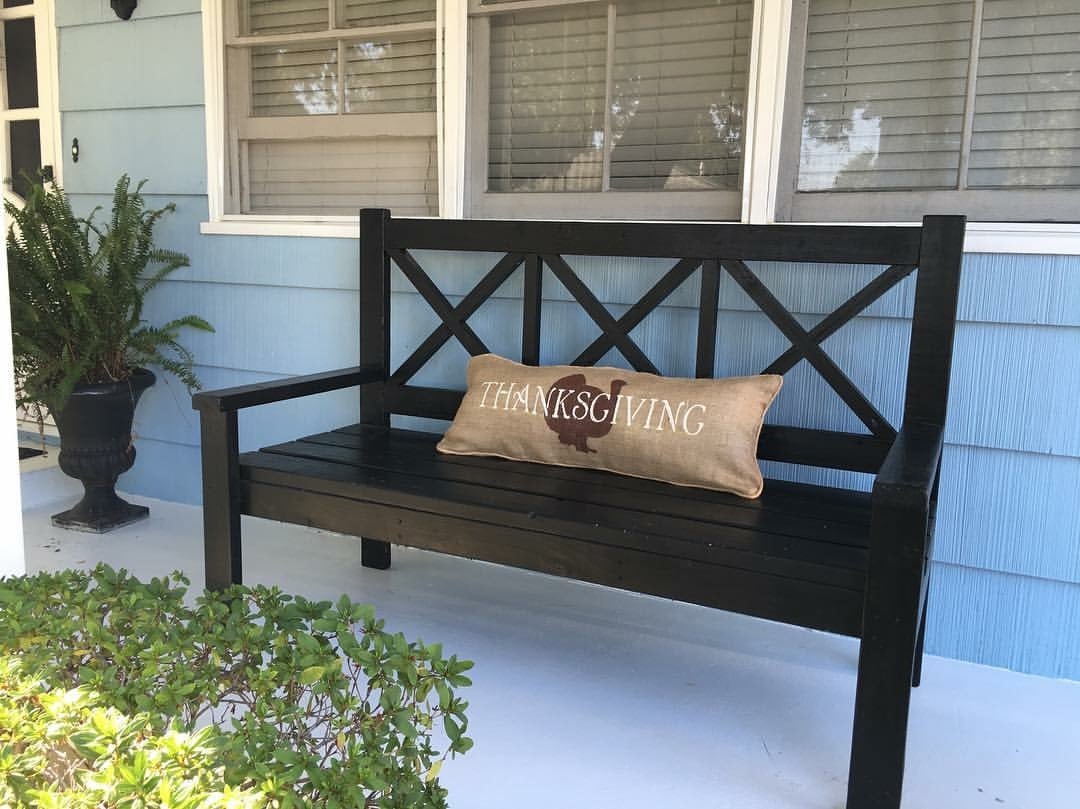
Large Porch Bench
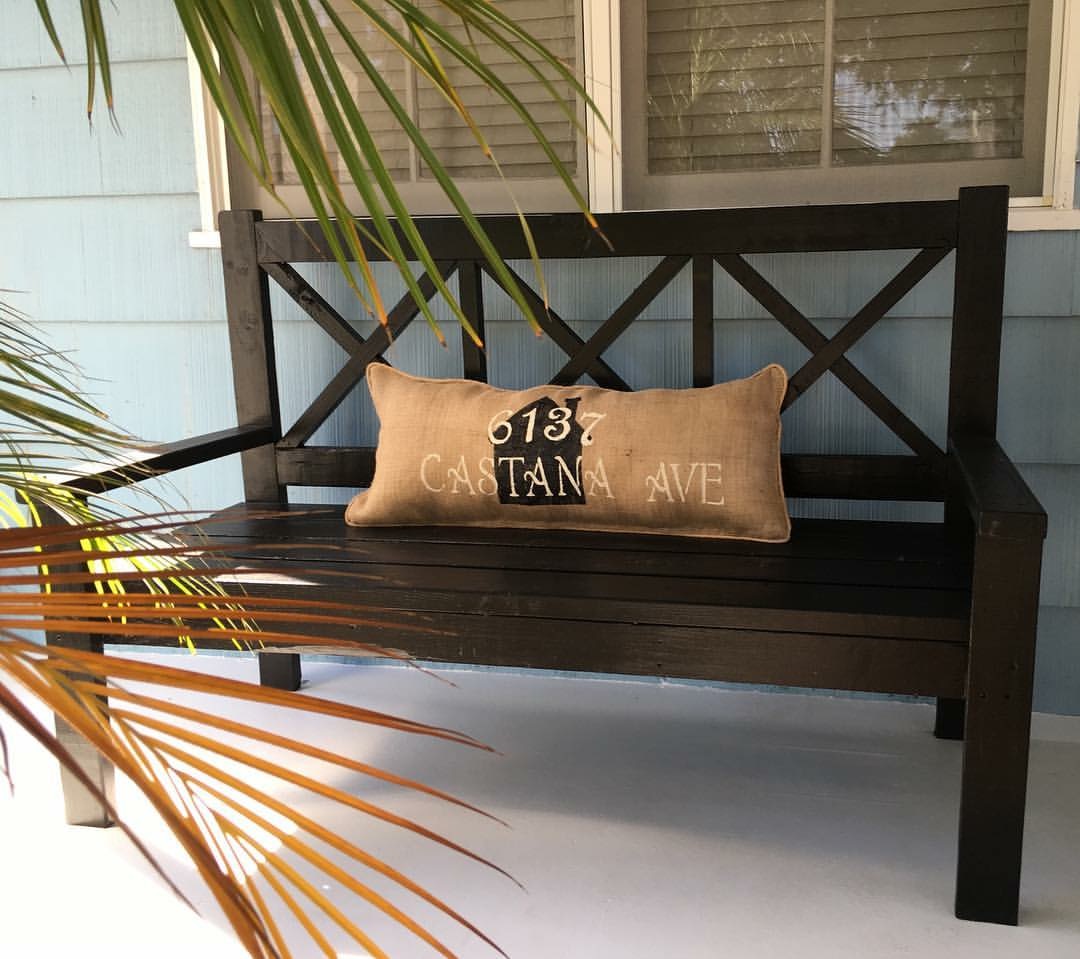
We built 2 XLarge Porch Benches,they where easy to build & look fabulous! Best part was it was a fraction of the cost if I were to buy these new!!! Thank you Ana!!!
-Sandra
Built from Plan(s)
Estimated Time Investment
Weekend Project (10-20 Hours)
Recommended Skill Level
Beginner
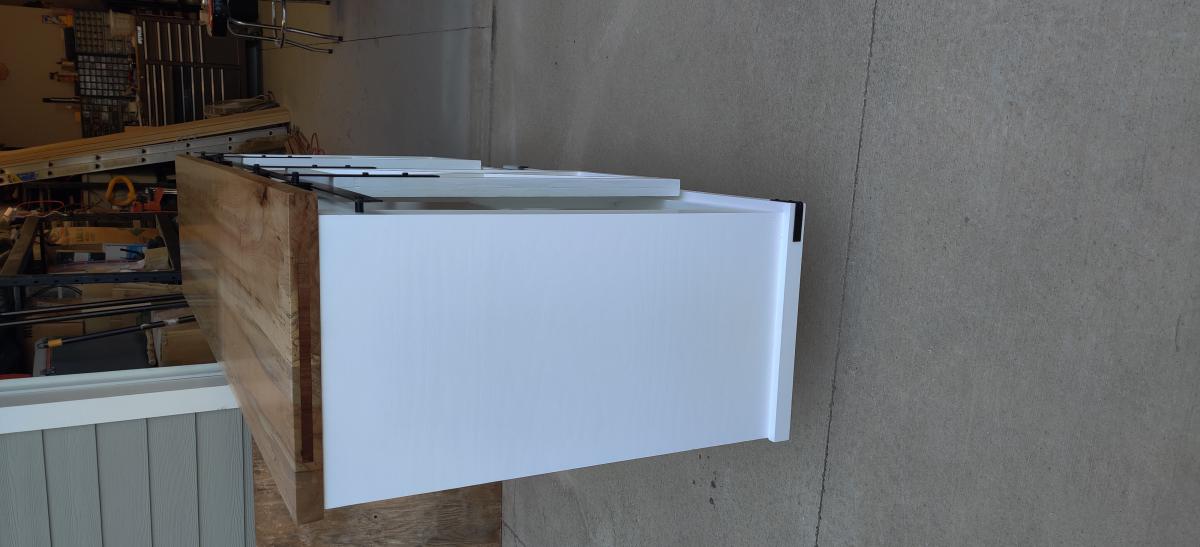
Farm House Console
I really liked the idea of making a TV console for our house. I used your plans as a guide and then added a few features to it. I made all of my rail system hardware vs. ordering a kit. I also added some Walnut accent inlays on the ends of the table top.
Built from Plan(s)
Estimated Cost
Materials alone roughly $550.00
Estimated Time Investment
Week Long Project (20 Hours or More)
Finish Used
Lacquer for the table top
Black under coat of paint
White top coat paint
Black under coat of paint
White top coat paint
Recommended Skill Level
Intermediate
Comments
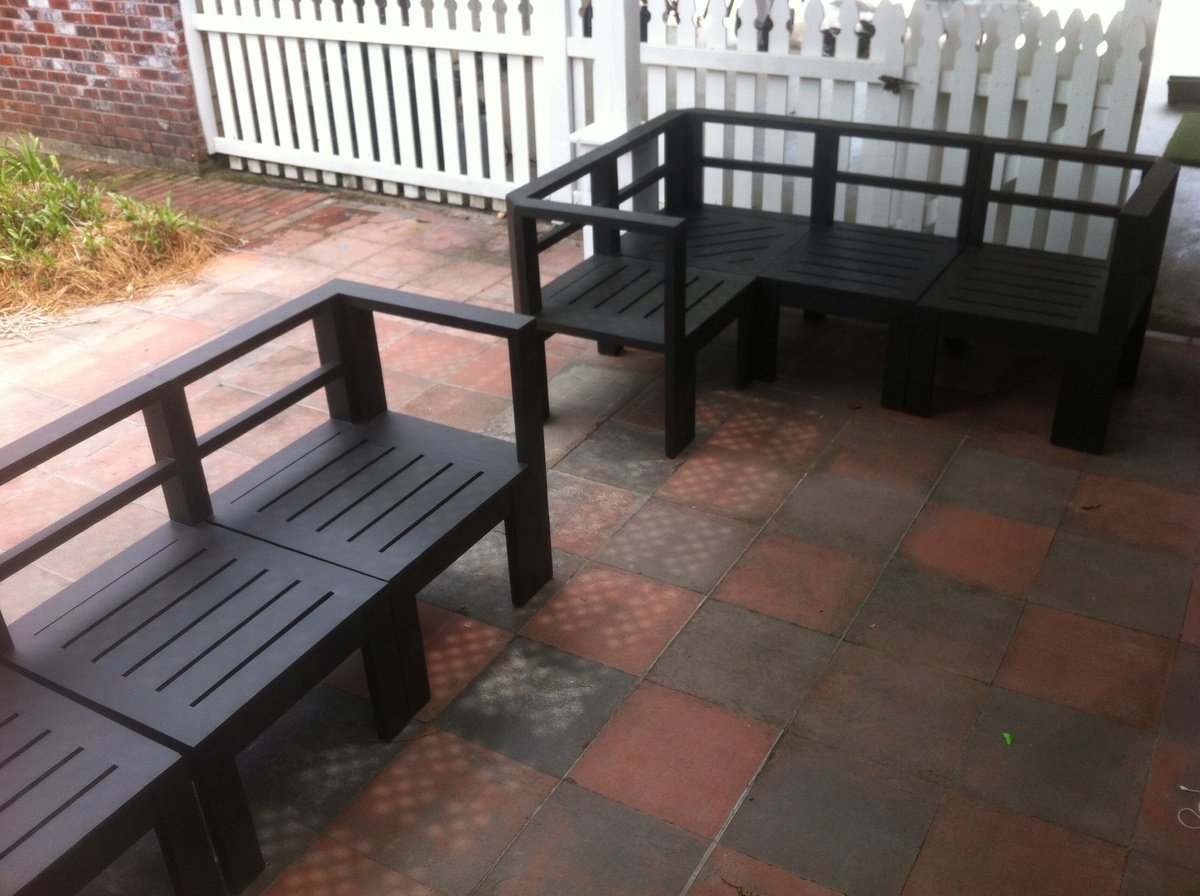
Simple outdoor sectional

Outdoor collection is the best. Used 2x4's instead of 1x4's for all of the legs and backs. 1x4's for all of the seating areas.
Built from Plan(s)
Estimated Cost
150.00
Estimated Time Investment
Week Long Project (20 Hours or More)
Finish Used
Home Depot exterior stain
Recommended Skill Level
Beginner
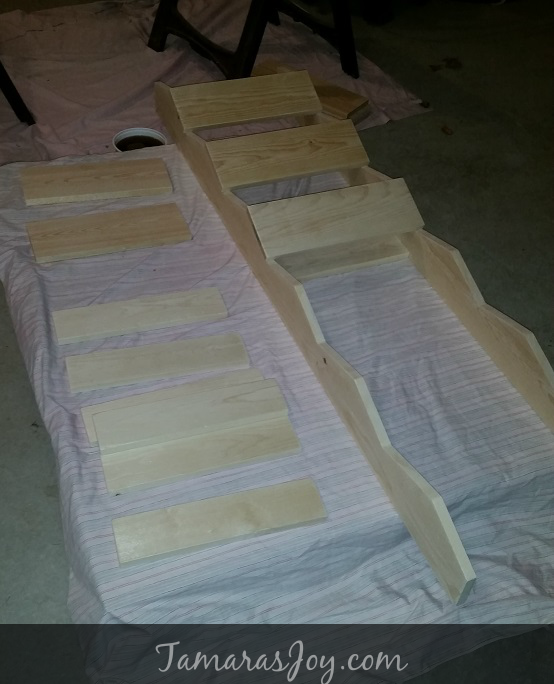
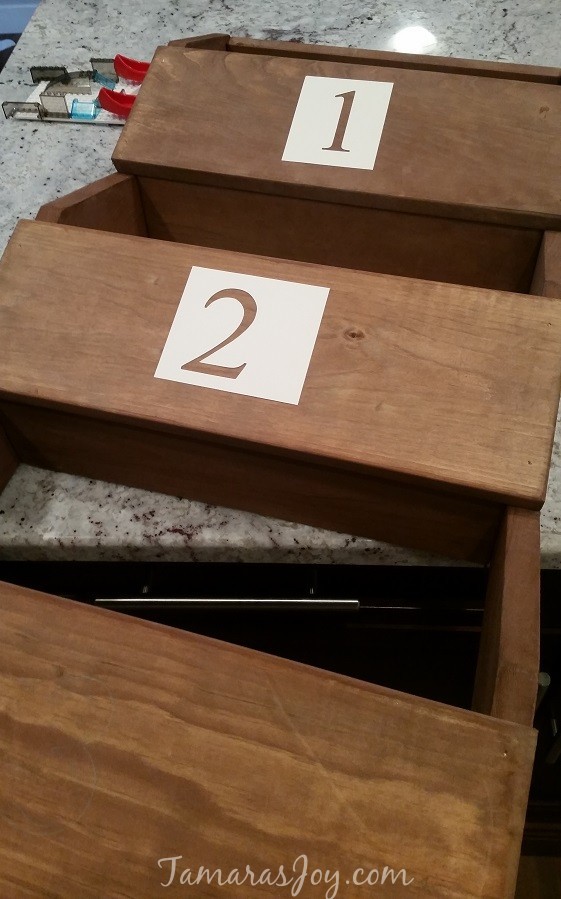
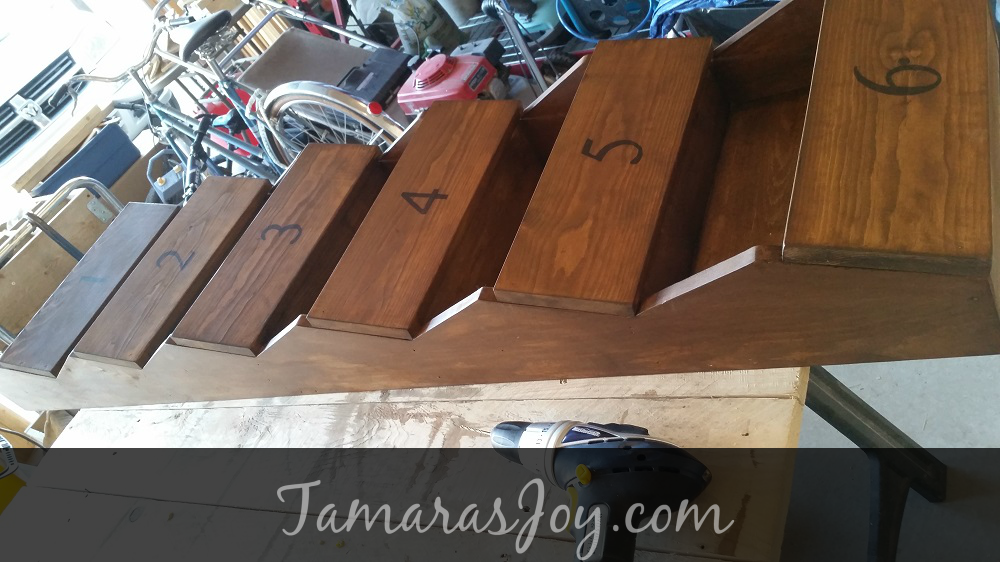
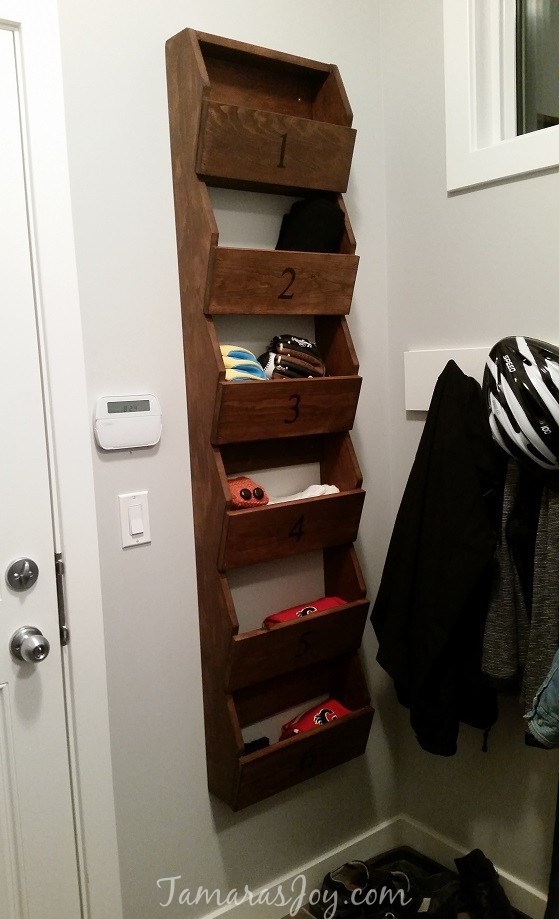
Mudroom Storage

Full Tutorial of my DIY Mitten Storage HERE!
This was the first pic I took of my mitten storage slowly coming together.
EEEEEKK! I can’t wait to have my mudroom organized!!!
Estimated Cost
$20
All you need is three boards of pine & some stain.
All you need is three boards of pine & some stain.
Estimated Time Investment
Afternoon Project (3-6 Hours)
Finish Used
I made a homemade stain from steal wool & vinegar. Didn't like it so then I used a Bri Wax that had some stain in it.
Recommended Skill Level
Starter Project
Caribbean Farmhouse X Desk
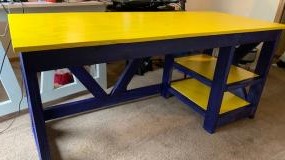
A little taste of the Caribbean in Ohio . Inspire on the concept of Farmhouses and been a Caribbean working from home I decided to have both culture mixed together. Is like home away from home for me. I'm a Buckeye fan and not a Michigan, the colors was a coincidence .
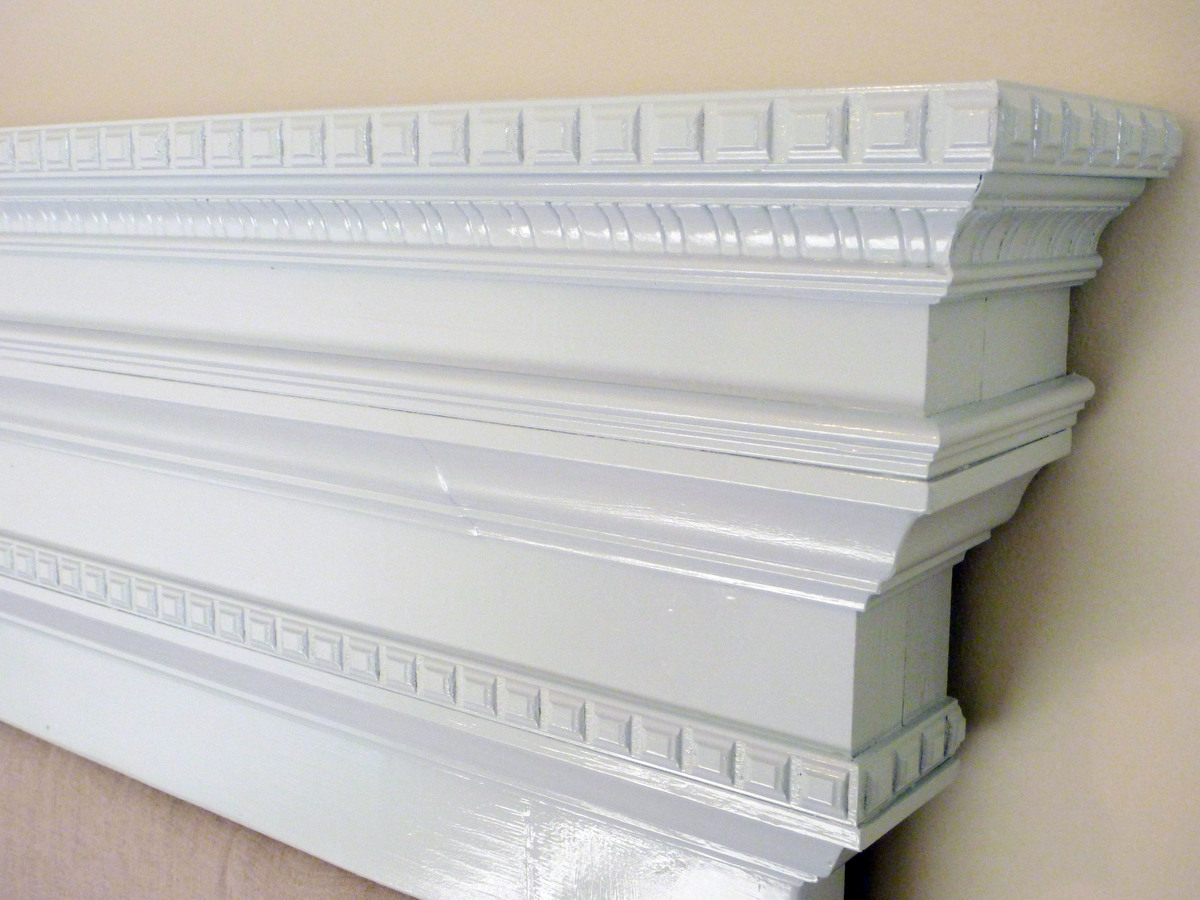
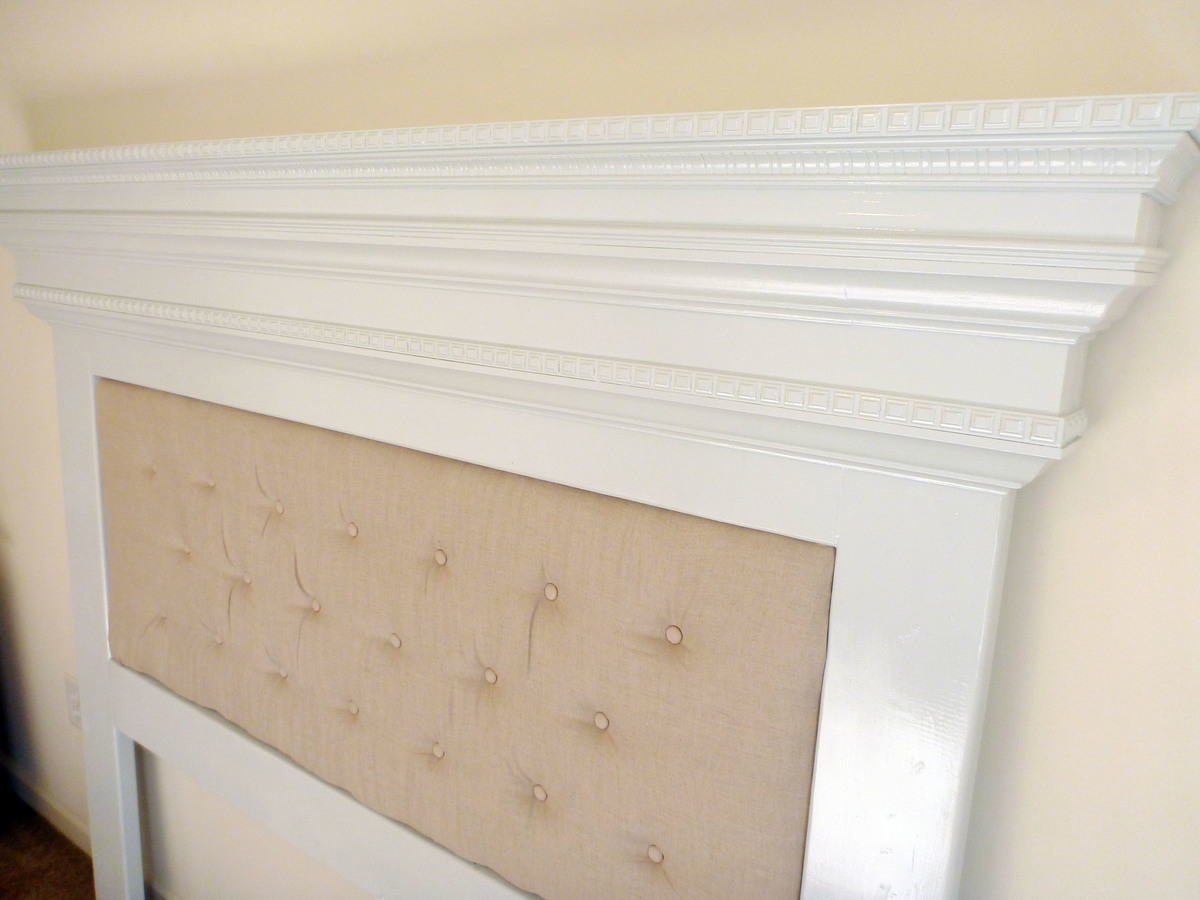
Our Mantel Moulding Headboard with a Unique Twist
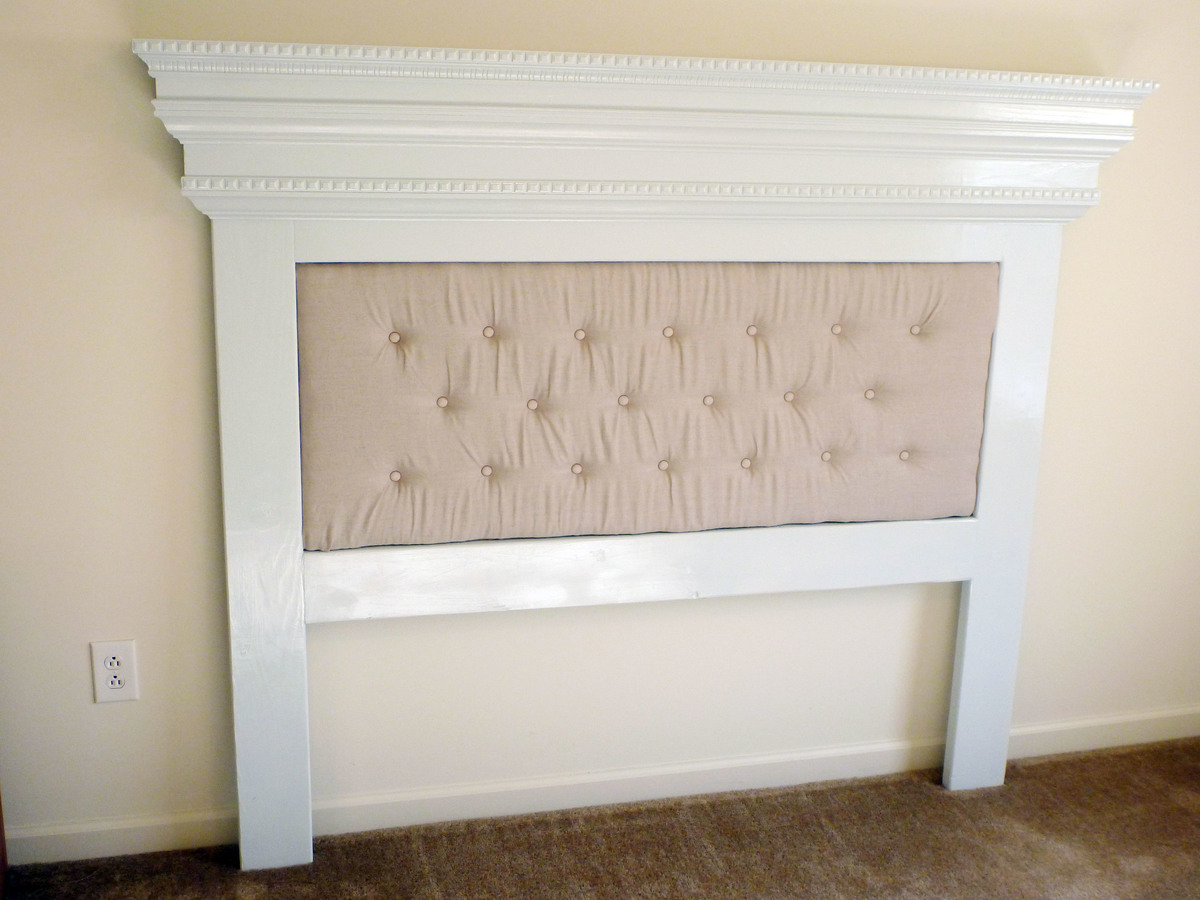
The charming Mantel Moulding Headboard with a unique accent feature where the "fire" would normally be. We created a tufted cushion for this open space to create a unique twist.
My wife and I completed this project over 4 days, but still under 20 hours not including wait time for wood filler and paint to dry.
Built from Plan(s)
Estimated Cost
$165
Estimated Time Investment
Weekend Project (10-20 Hours)
Finish Used
After sanding down the wood with a medium grit sandpaper, we brushed on an initial coat of primer. After the primer dried we applied between 2-3 coats of Valspar Radience Paint and Primer (spray paint) Gloss Azure Snow. This awesome color gives you the classic white with hints of grey and blue.
If you go the paint and primer combo you do not necessarily need to brush on the primer first. For a more smooth and glossy look of the wood accents more counts may be needed but please wait until the first coats are mostly dry.
If you go the paint and primer combo you do not necessarily need to brush on the primer first. For a more smooth and glossy look of the wood accents more counts may be needed but please wait until the first coats are mostly dry.
Recommended Skill Level
Beginner
Comments
Sun, 02/10/2013 - 13:50
I love the twist to this
I love the twist to this headboard. Any way you can tell the rest of us how you accomplished that, please???
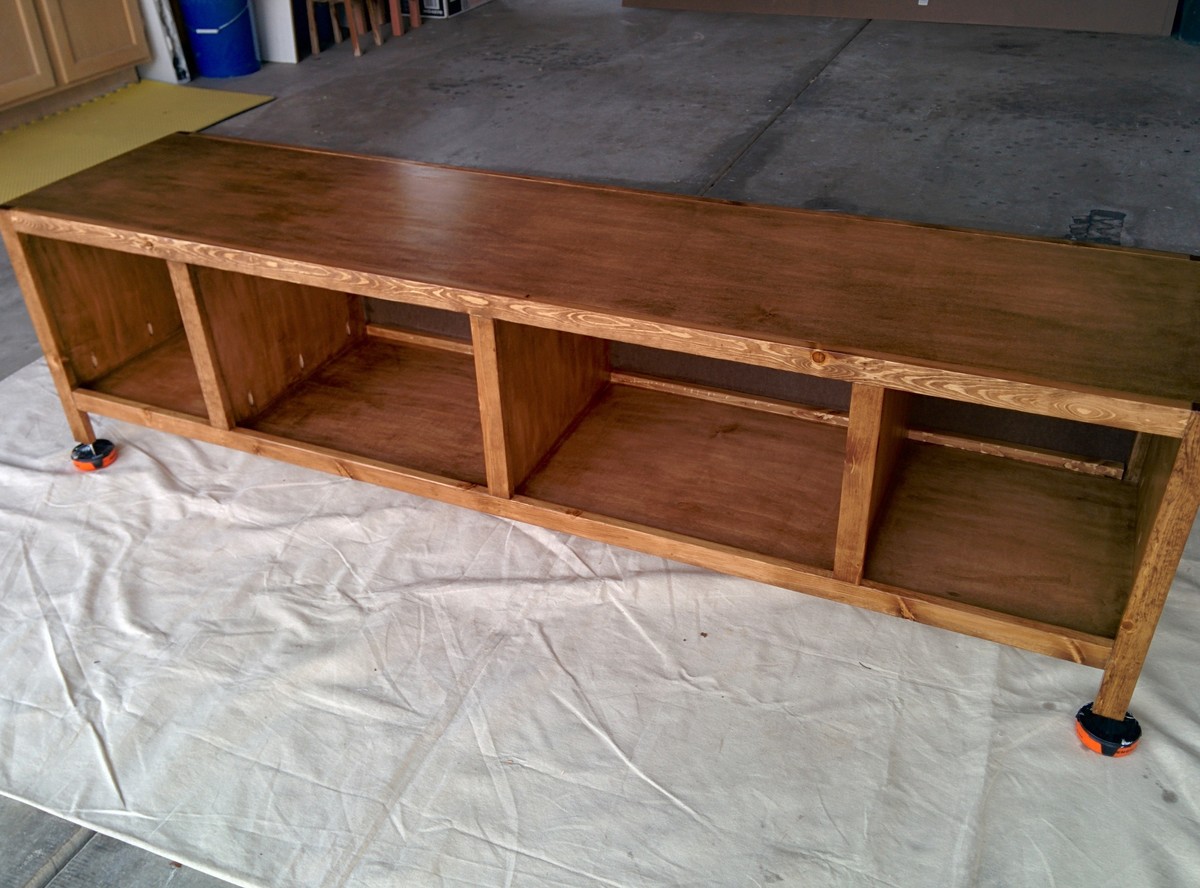
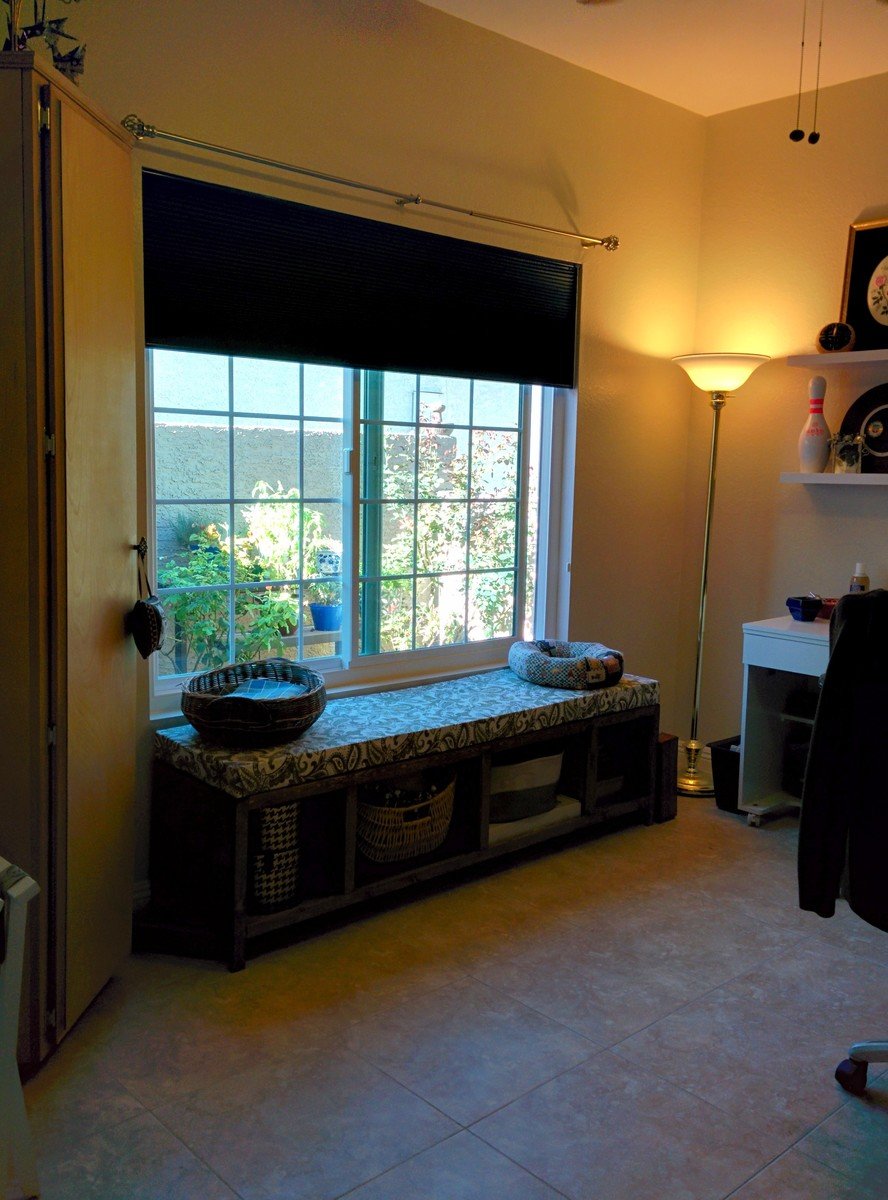
Window Seat & Storage Bench
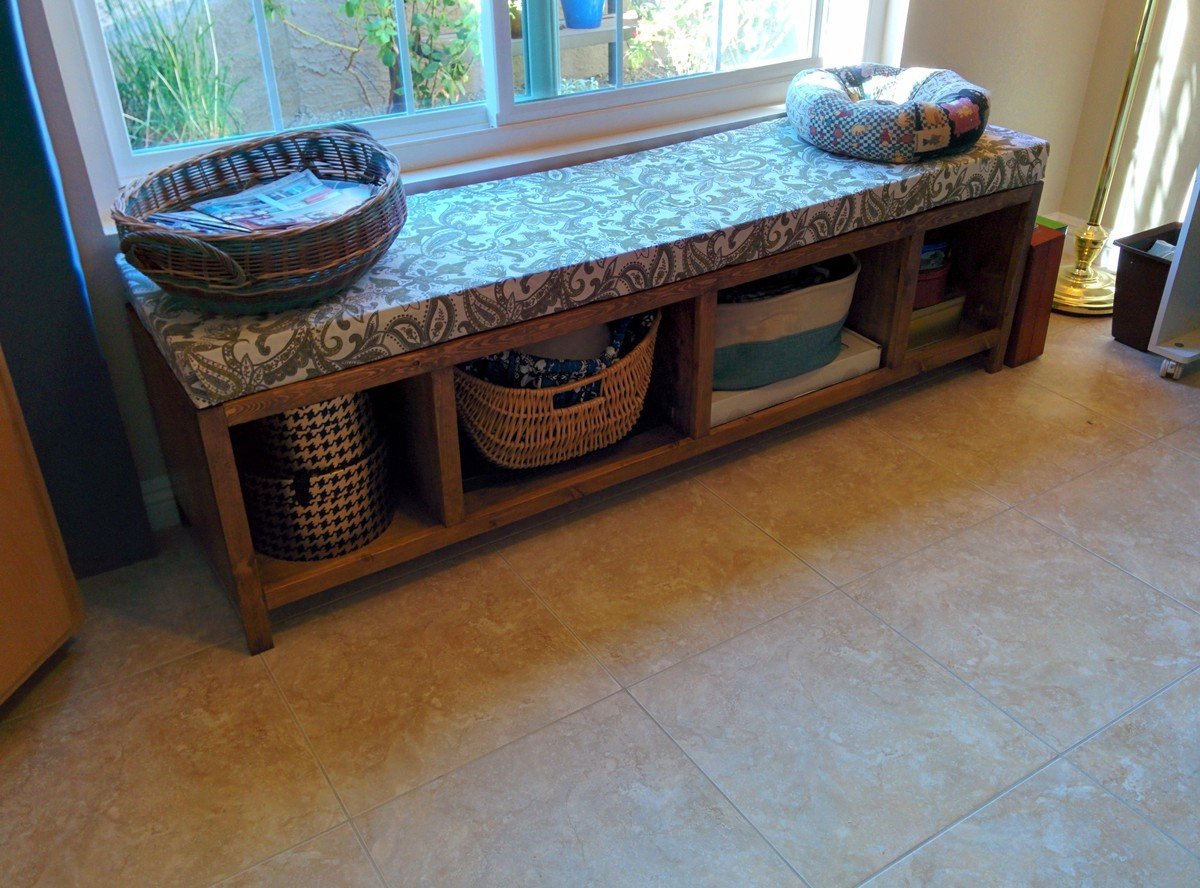
I used the Hailey Storage Bed (twin) as my inspiration for this window seat. Built just one of the benches fitted to match the exact width of my window. I also added trim to the cubbies to make it look more finished. I bought the foam from Home Depot and covered it with a table cloth I loved but never really used on my table. I had the baskets and boxes laying around and they give it a nice touch. I was going to put doors in the center when I started, but liked the look of the open storage, so just trimmed out the cubbies.
This is my fourth build from Ana's plans and I'm so pleased with how it came out.
A note on finishing - to me the hardest part of any project! I stained it with minwax Early American and used 2 coats of Spar Varnish over that. I was very nervous after I put the first coat of stain on as it wasn't the color I thought it would turn out to be. I toyed with the idea of adding another color over the top, but decided just to leave it overnight and relook at it in the morning. I'm so glad I did. It had mellowed significantly overnight and was just the right color. I added a second coat to try and cover up any of the streakiness, then added the spar varnish (satin finish) and it made it gleam.
Built from Plan(s)
Estimated Cost
Maple Plywood $50
1x2's, stain, etc about $10
Foam from HD $25
Total = $85
1x2's, stain, etc about $10
Foam from HD $25
Total = $85
Estimated Time Investment
Week Long Project (20 Hours or More)
Finish Used
minwax Early American (2 coats) and Spar Varnish (satin, 2 coats)
Recommended Skill Level
Beginner
Comments

Tue, 10/28/2014 - 17:42
Beautiful bench!
Awesome build! Love the finish and the pretty fabric on the cushion. Great job!

In reply to Beautiful bench! by JoanneS
Tue, 10/28/2014 - 19:57
thanks - bench
Thank you JoanneS - I enjoyed making it!
Board game cabinet / charging station

After Xmas I decided we needed a better place to keep our growing collection of board games. I made mine a bit deeper to fit our longer board games. Also, put a 3rd door on it. We also needed a central place to charge our phones and tablets. Paired with the top of the bedside charging table this cabinet is the perfect solution. Thank you!
Built from Plan(s)
Estimated Time Investment
Week Long Project (20 Hours or More)
Finish Used
Valspar Satin Paint
Recommended Skill Level
Intermediate
Comments
Ana White Admin
Mon, 12/29/2014 - 14:14
So Awesome!
I love this, thanks for sharing!