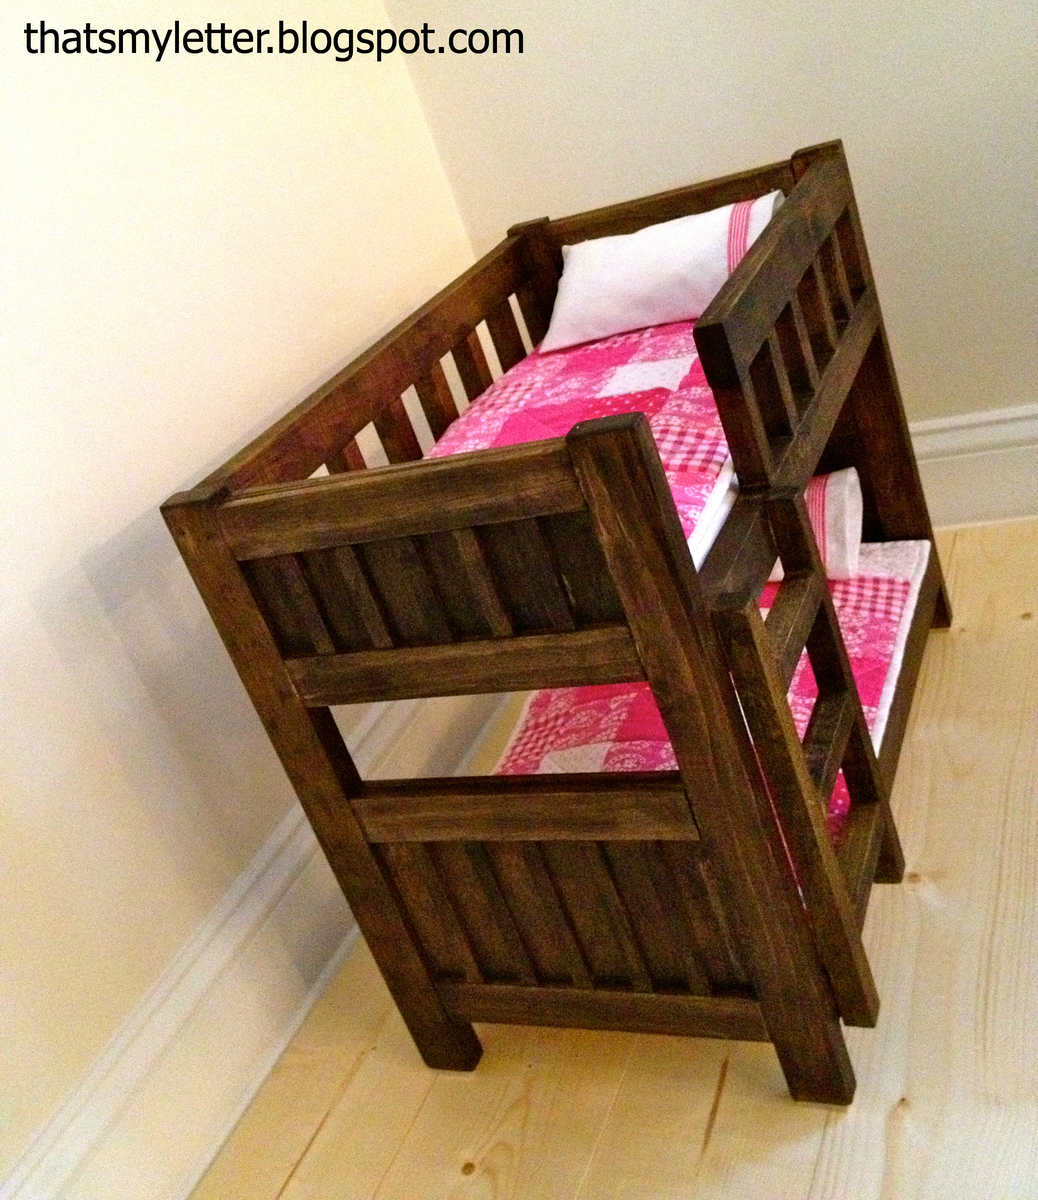
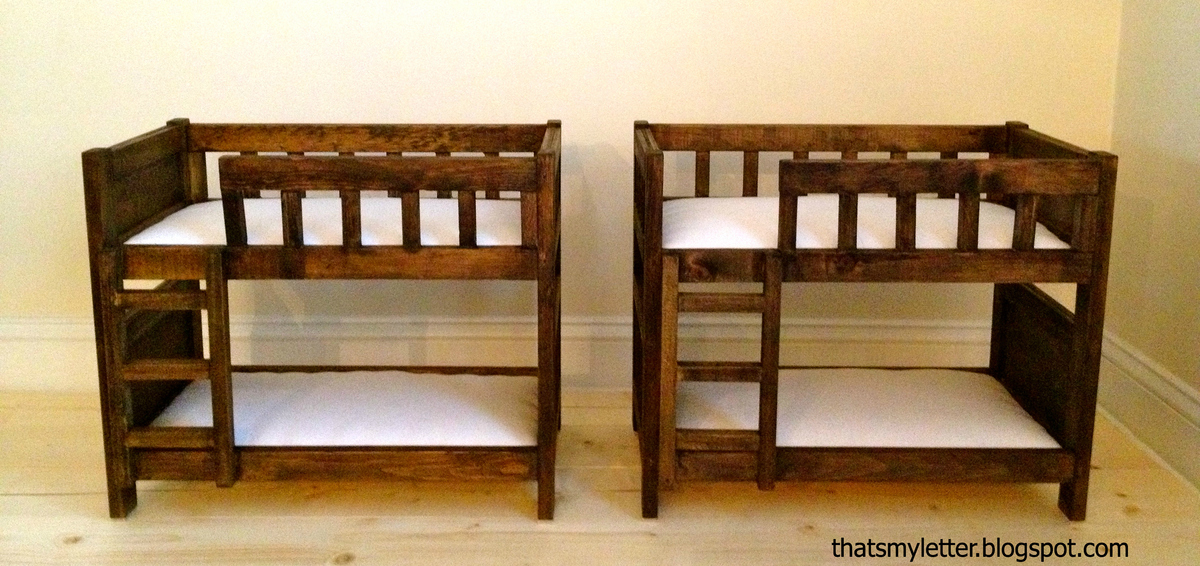
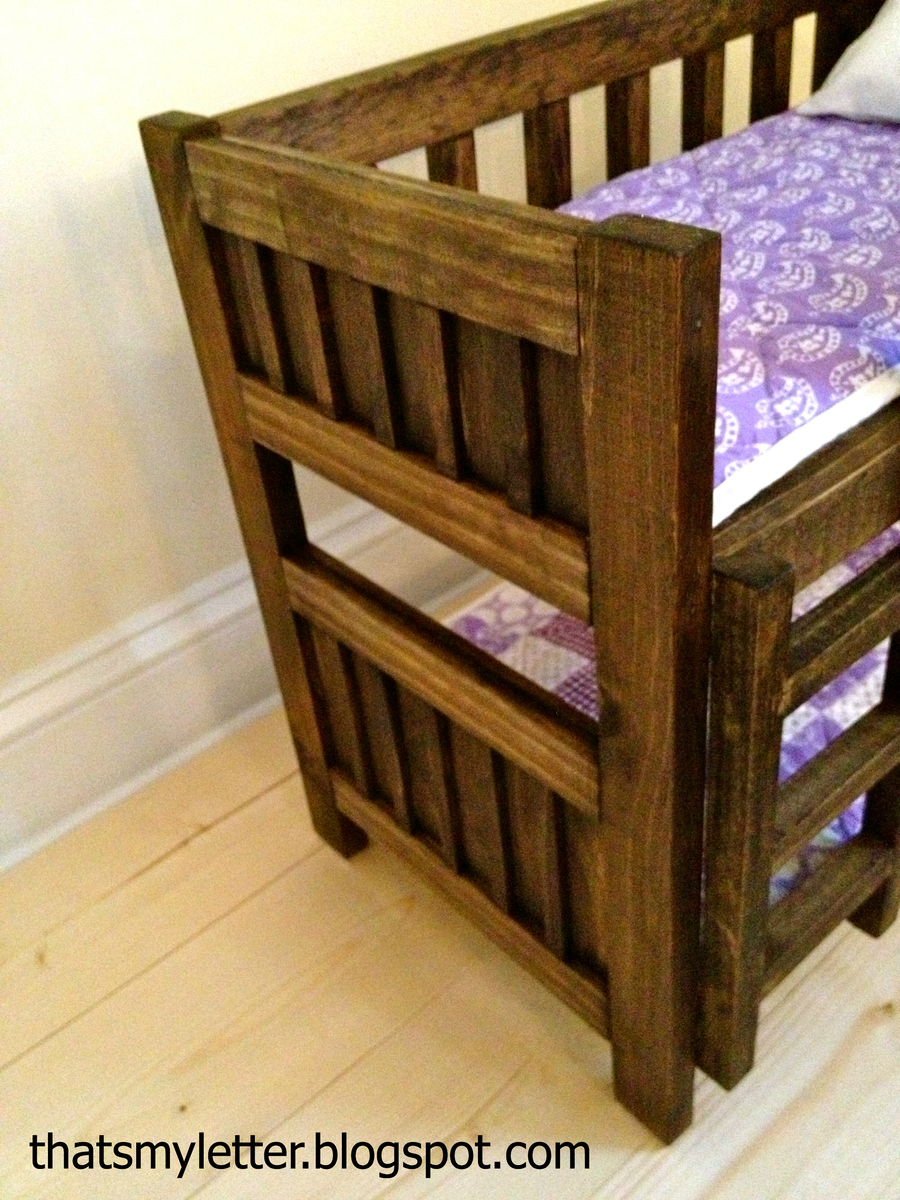
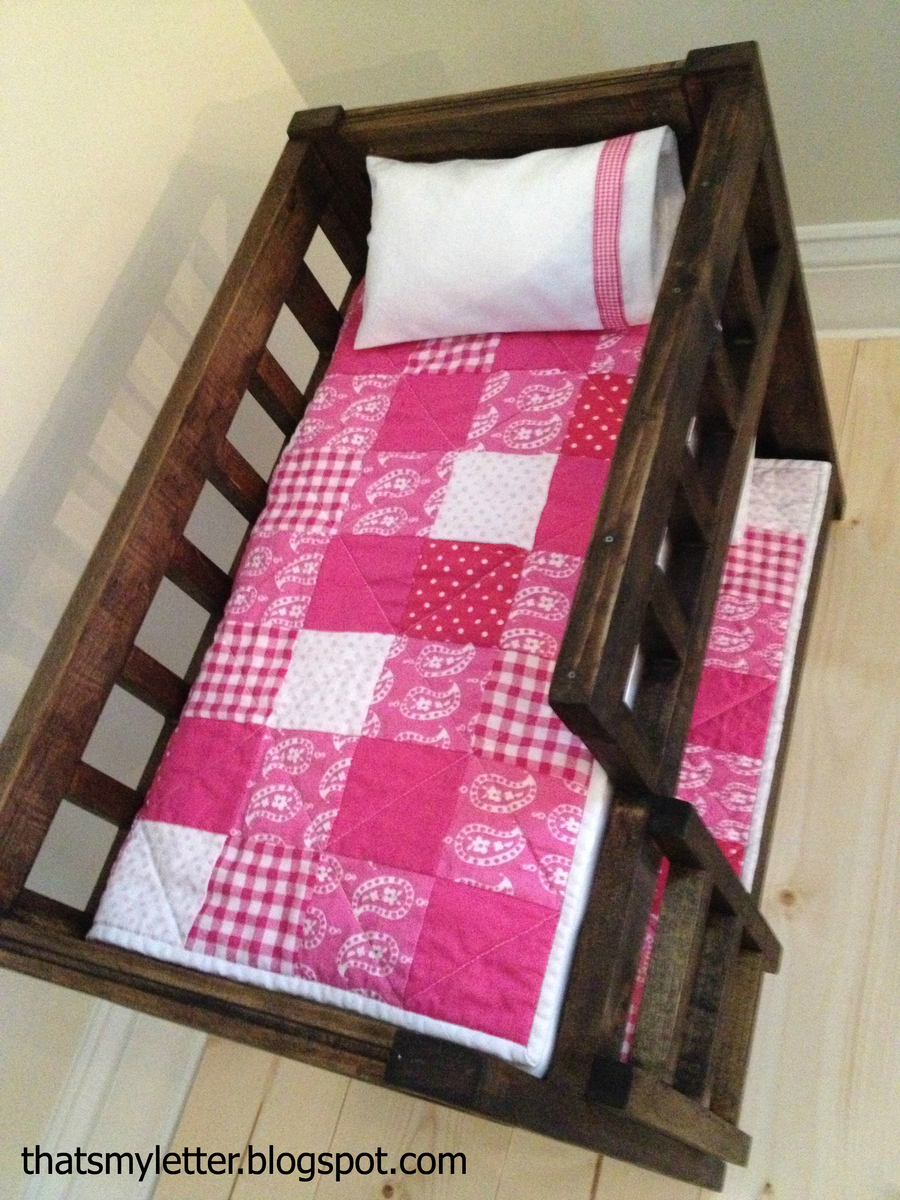
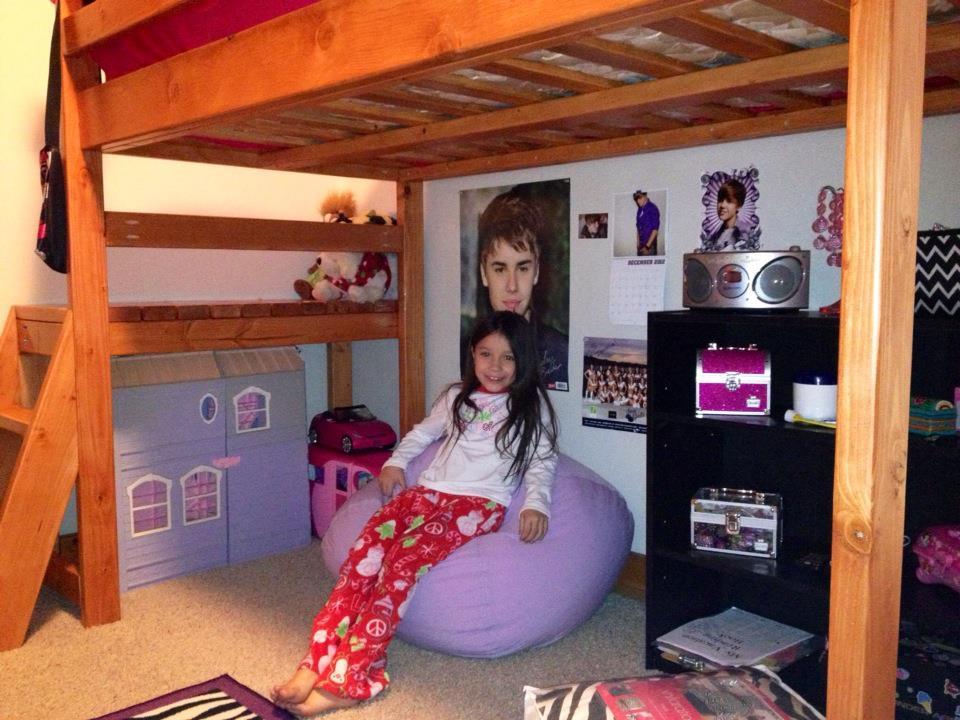
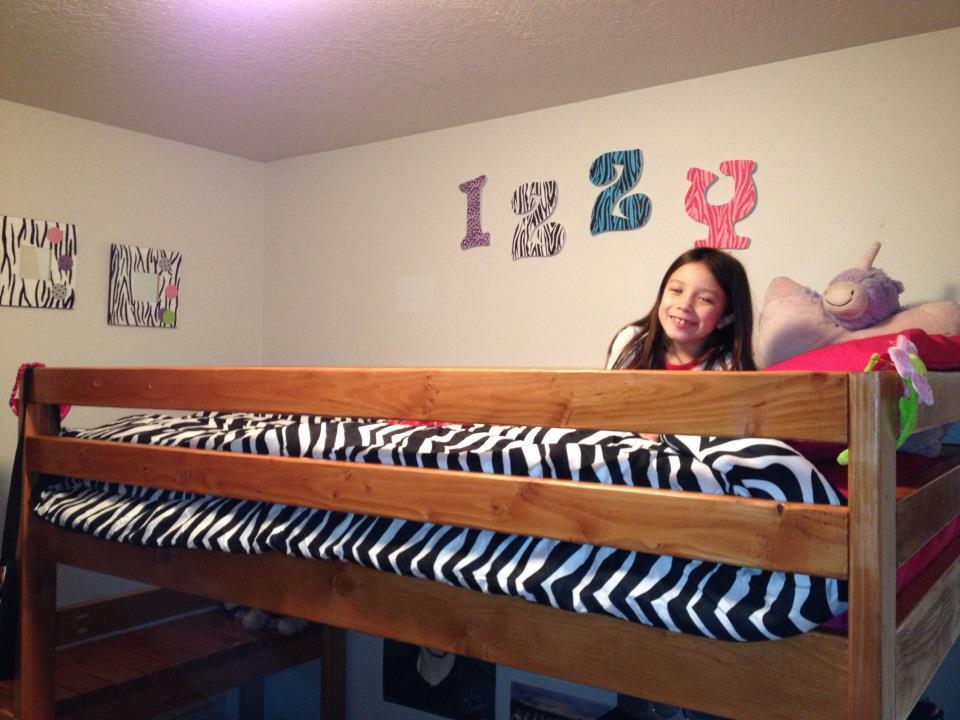
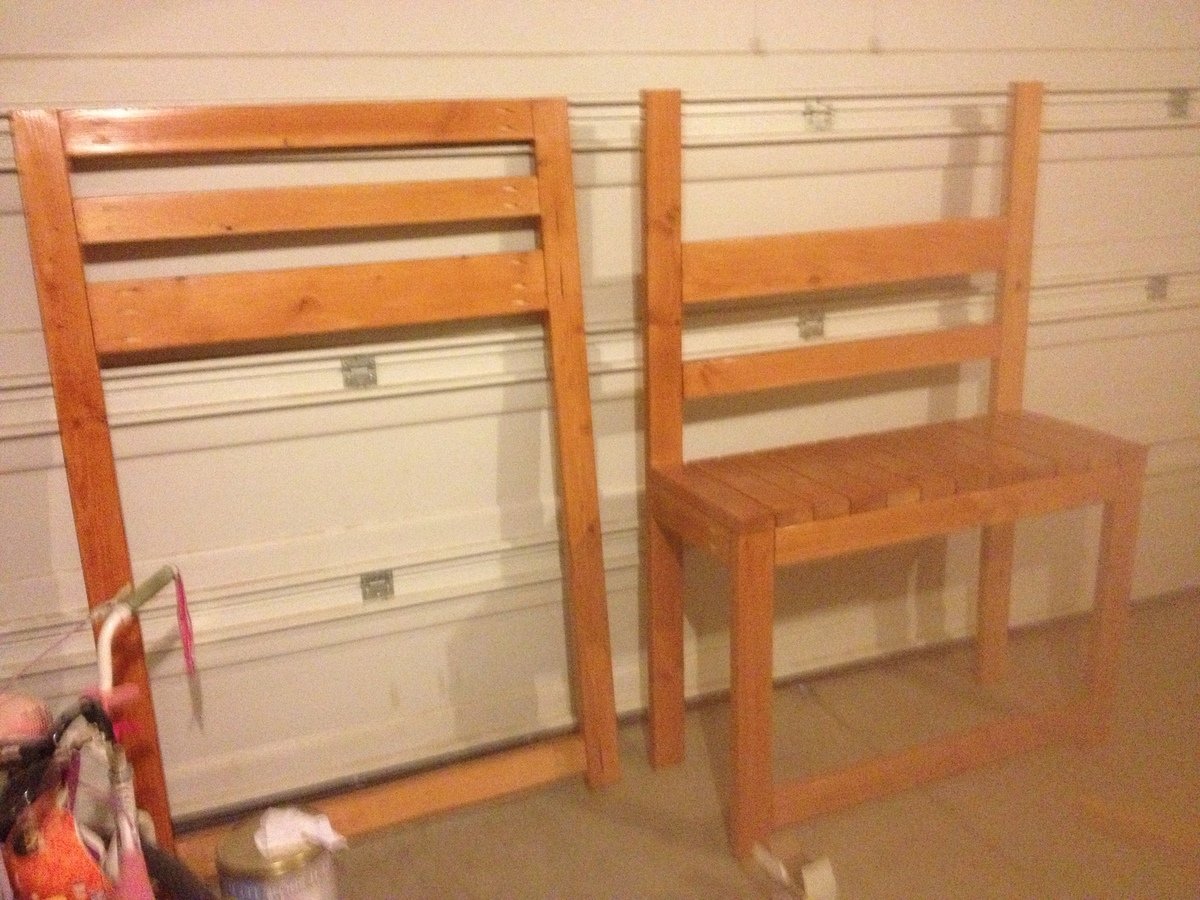
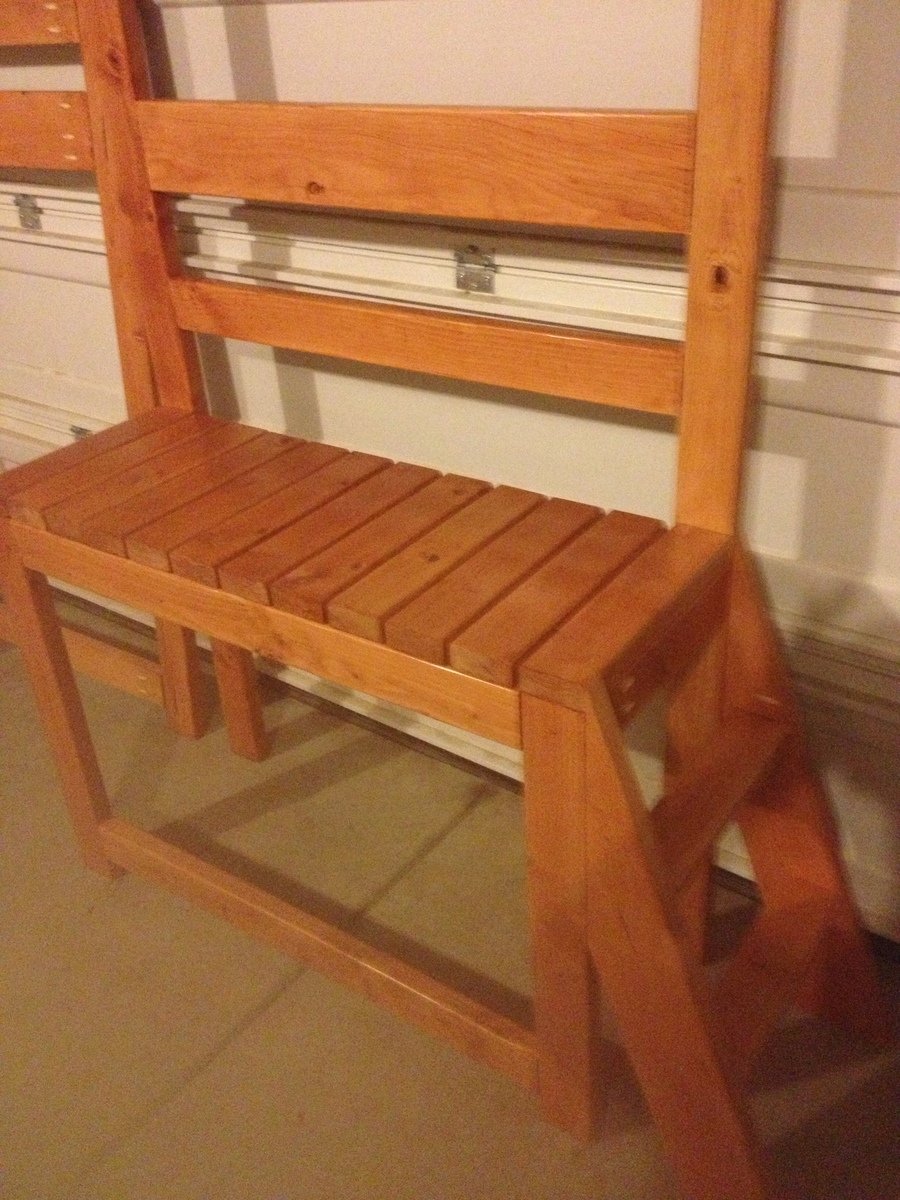
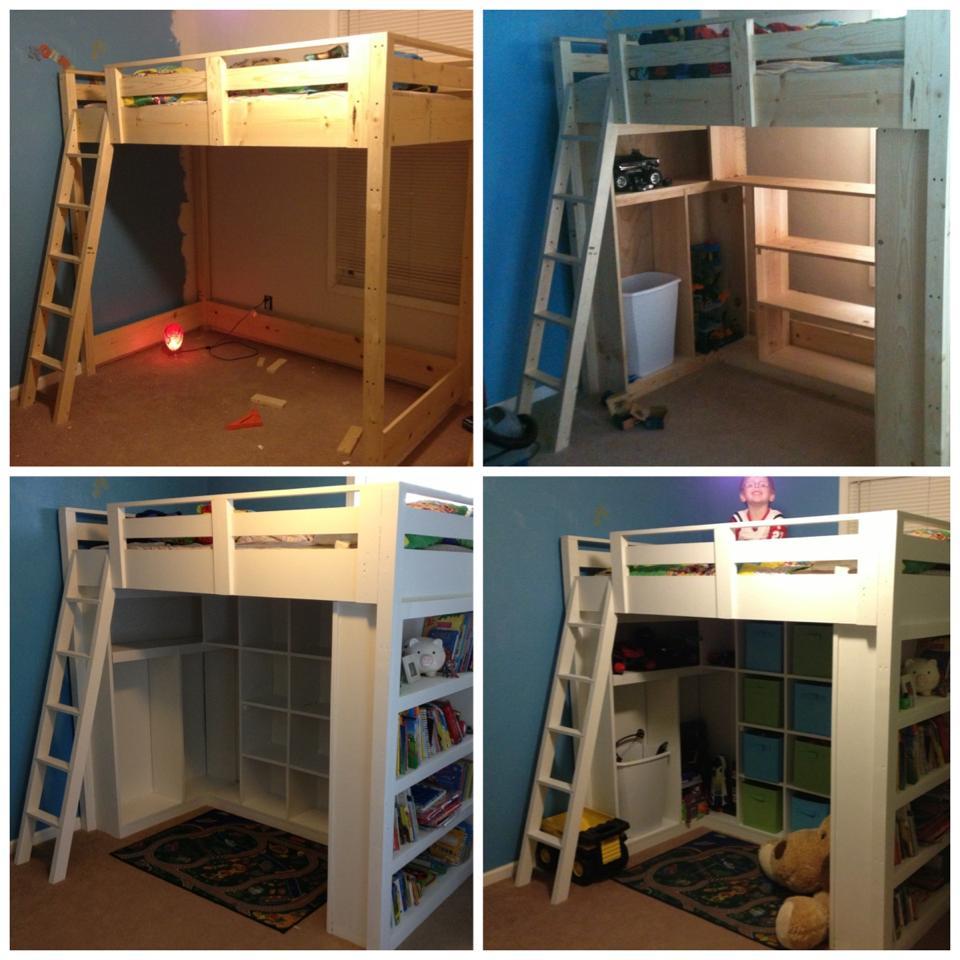
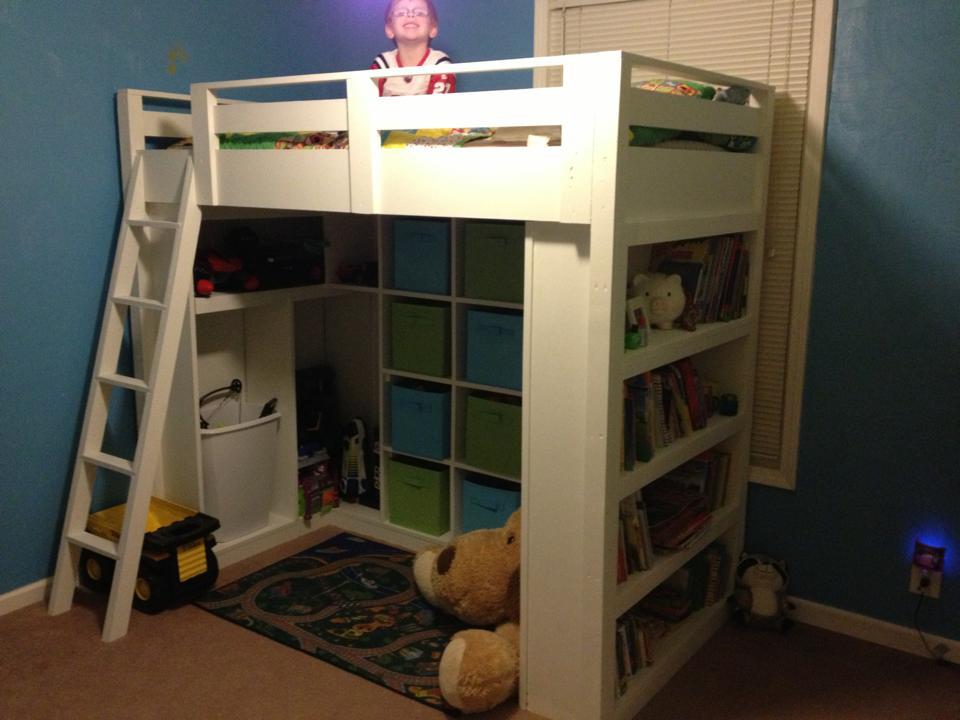
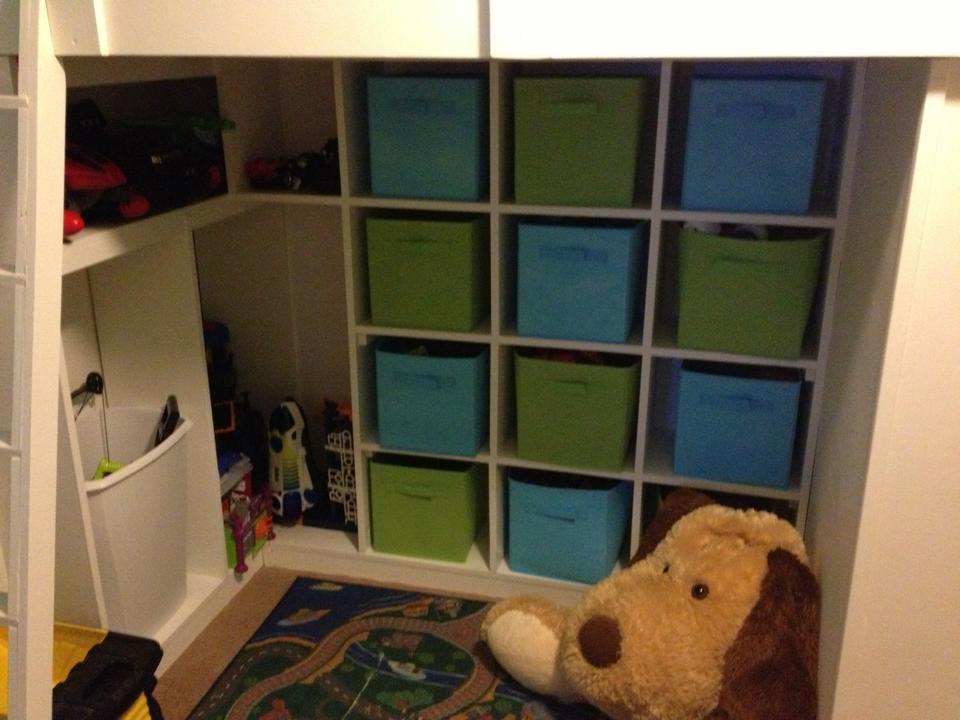
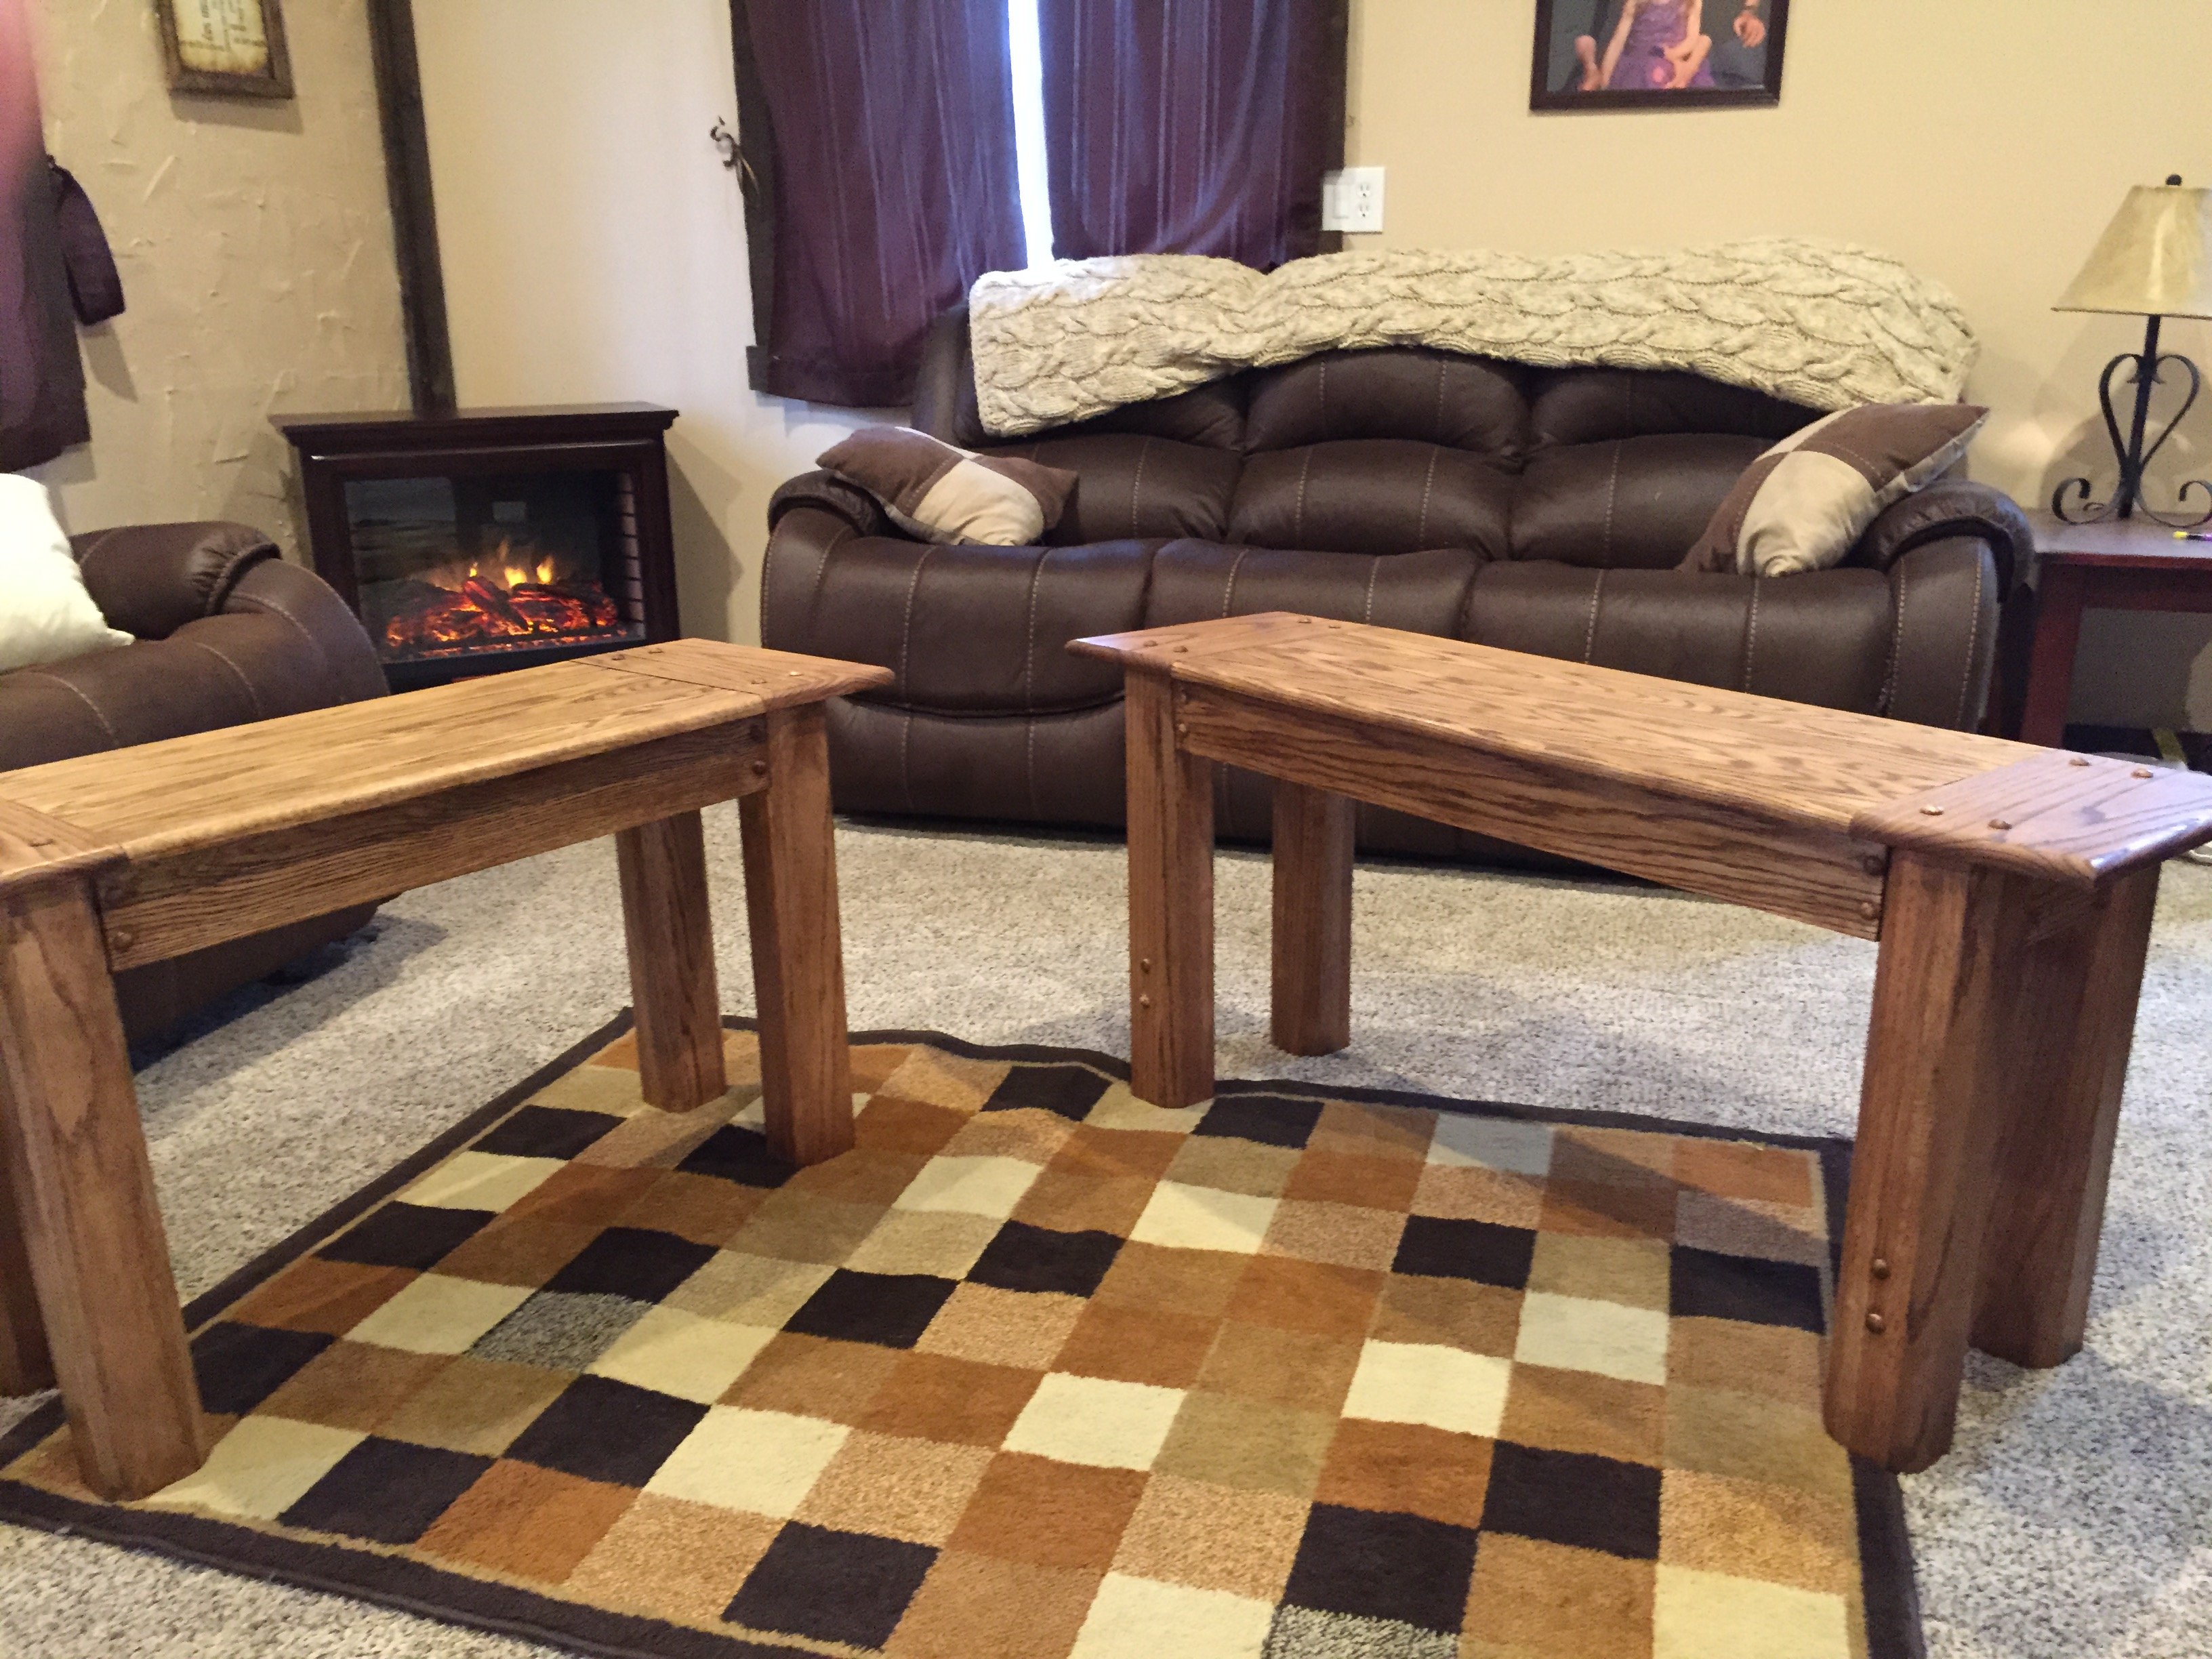
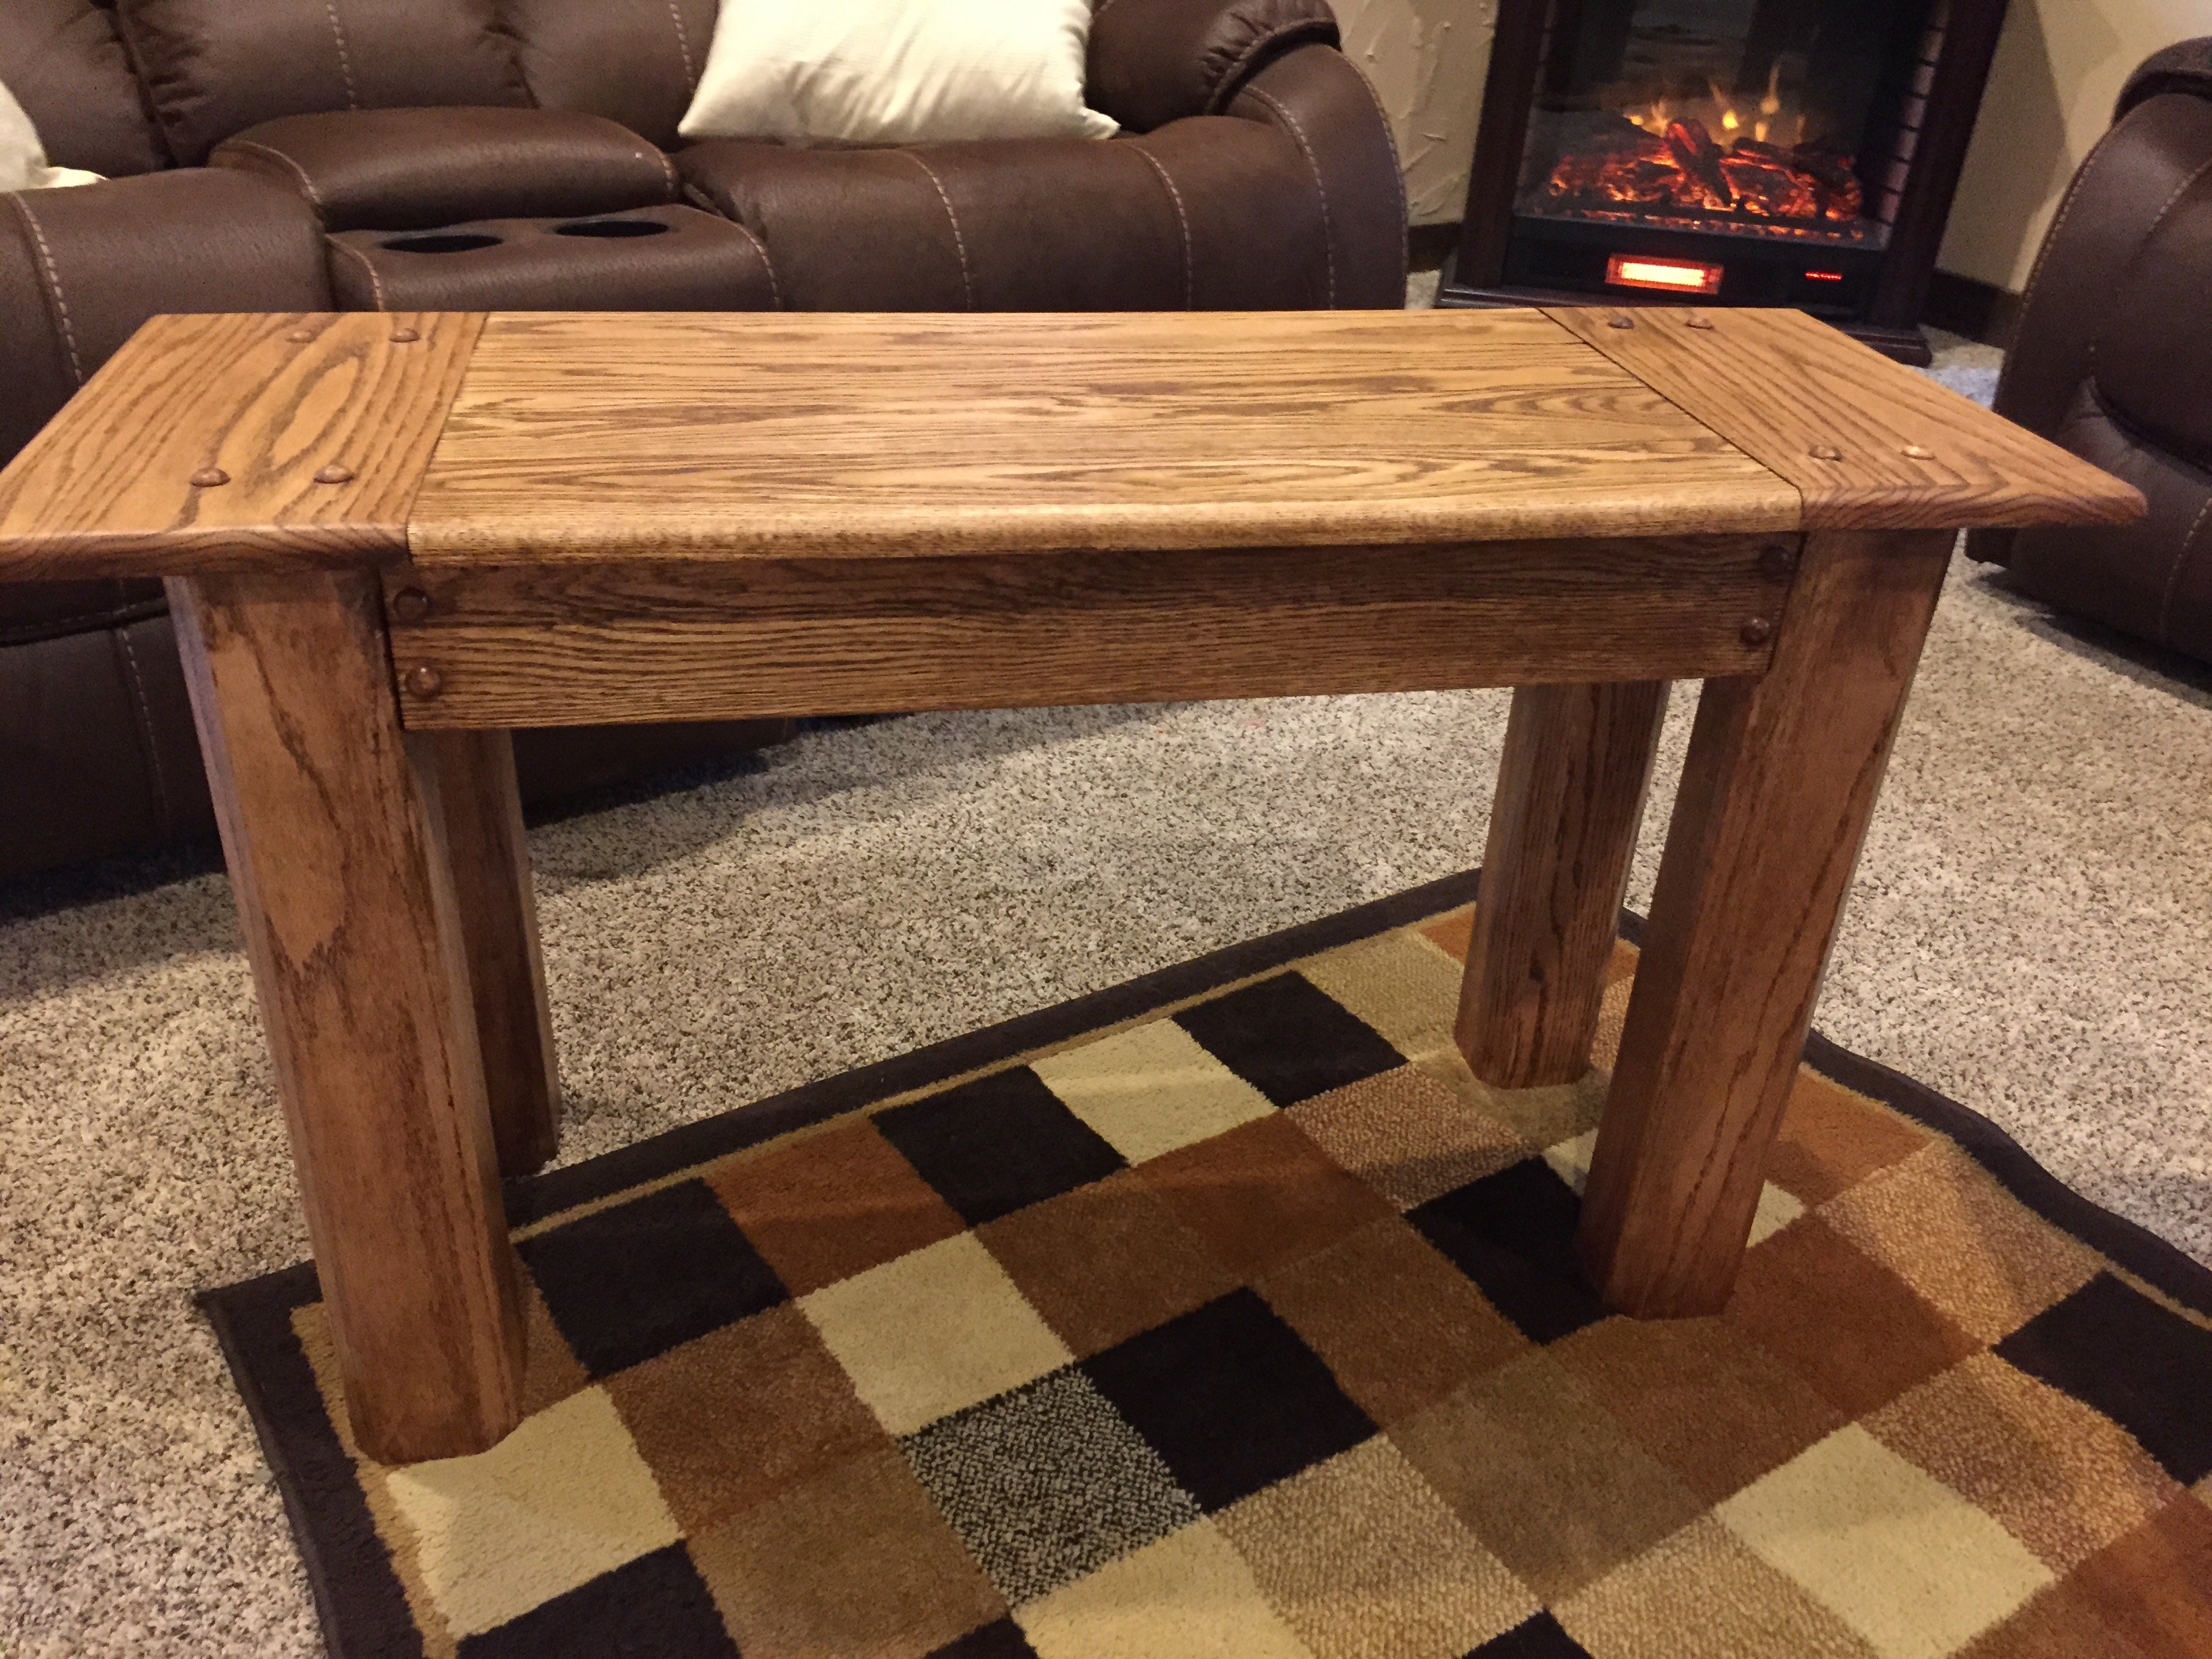
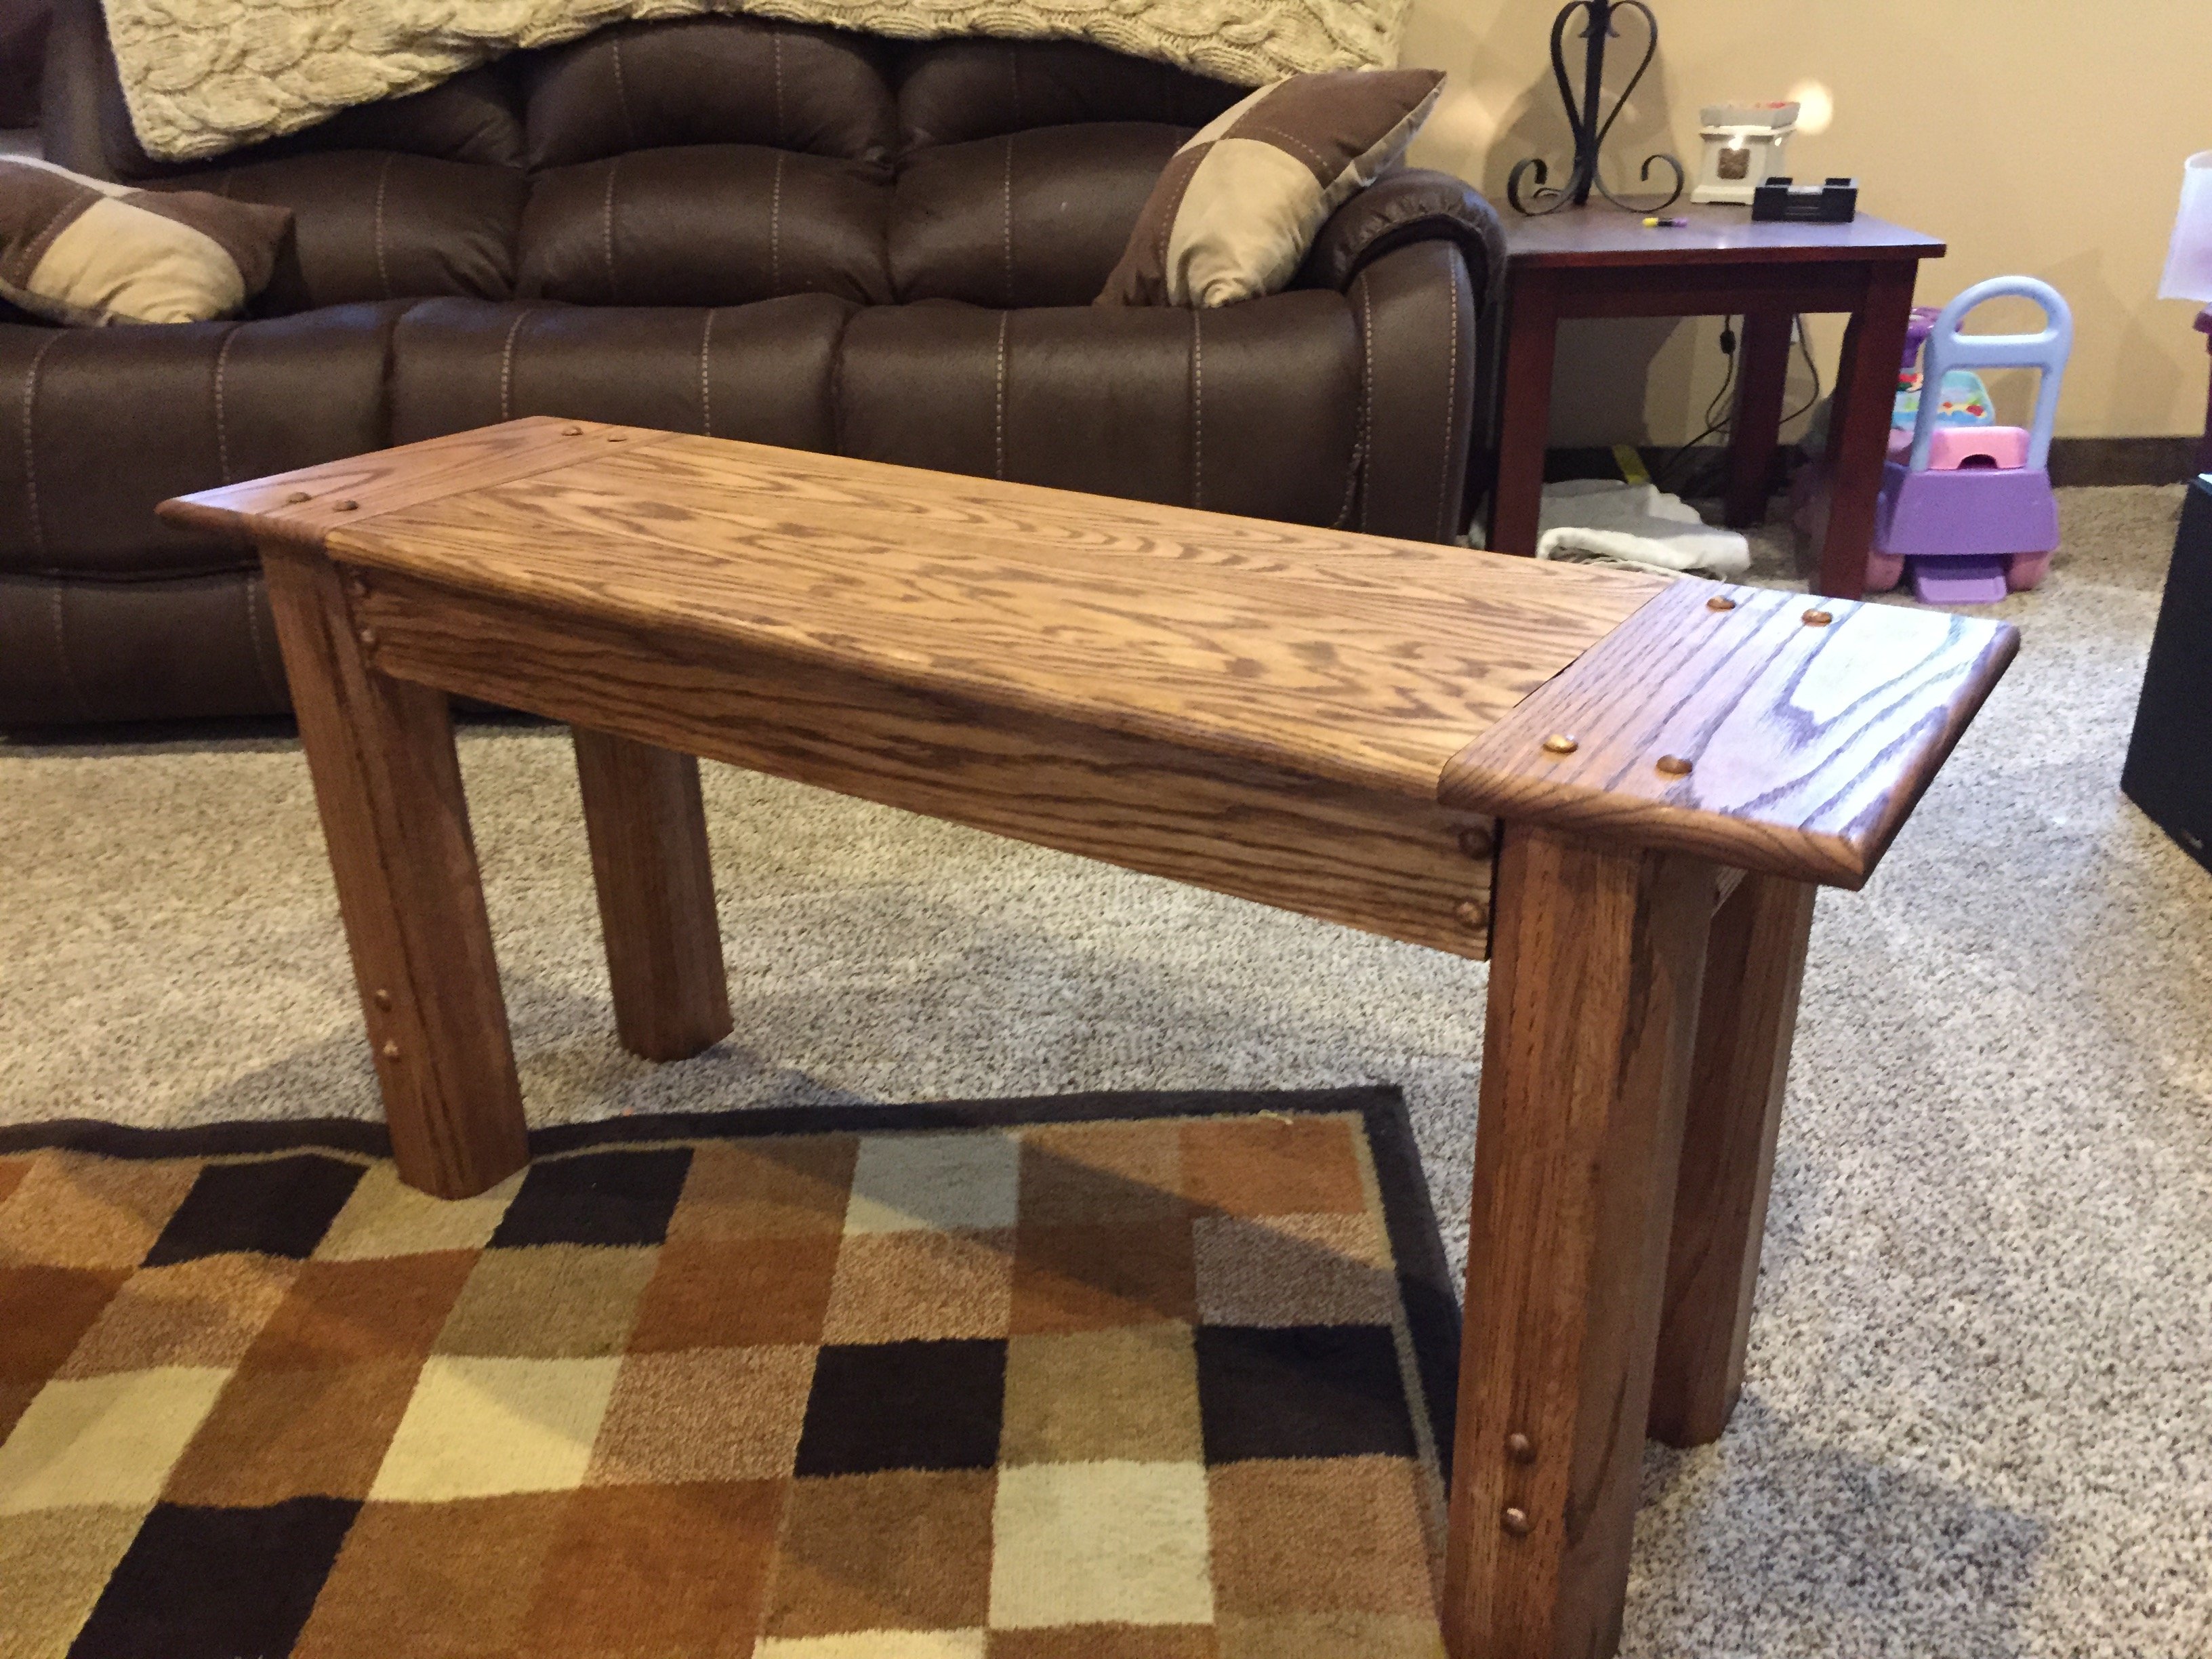
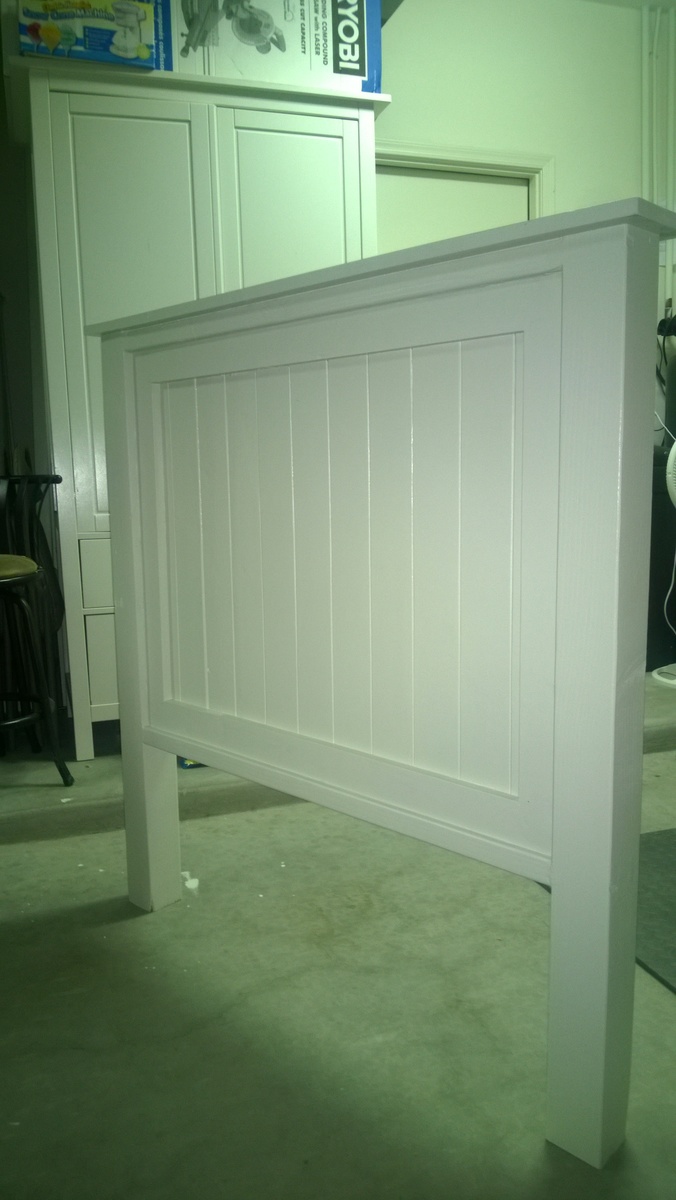
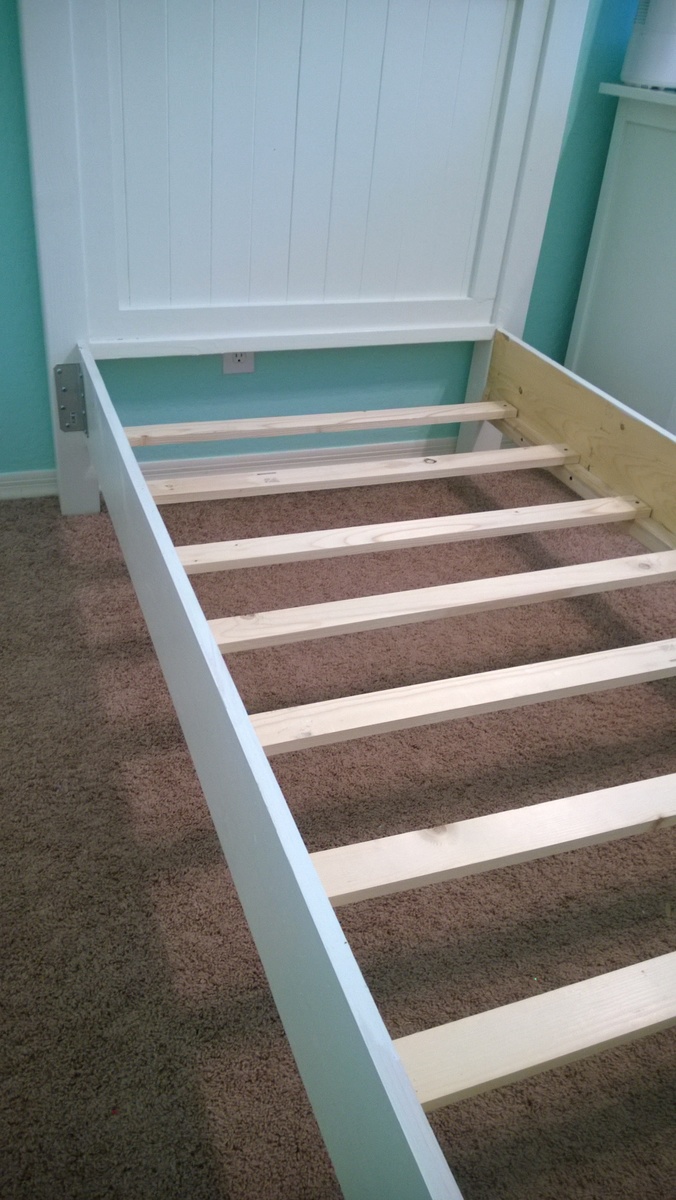
Community Brag Posts

Deck Chairs

Submitted by Anonymous (not verified) on Mon, 10/04/2021 - 20:57

During Covid, we had hybrid classes going on. As a teacher of Stagecraft Technology, we had no sets to create, no large flats or walls to build, so I took your Adirondack chair design and had each student build one using any type of repurposed or up cycled wood. It was a great success, and many of the teachers and staff members started placing orders. The students worked their fingers to the bone, got lots of tool experience, and in the end were proud of their creations, many that we donated to charities, families, etc. Thank You for such a great design.

Comments

Best Farmhouse Bed (Q)

Our fifth build.

Built from rough pine.

Modified for 1x2s in both panels.

Footboard is stacked a little different because silly me got carried away and cut a board, before it was time to cut, and cut it too short. Oooops. Still works though. And looks superb I think.

We did not screw the joists vertical, and through the sideboards. I cut 1 inch pieces off the scraps from the joists, and mounted them from the inside, then laid the joists thick side up, and screwed them down into the mounted pieces.

For step by step instructions, and details on where to buy everything, see my blog. I blogged each step of the way. It took us a month to build this due to life obstacles and bad timing on baby naps, but you should be able to do it in one good afternoon.

Built from Plan(s)
Estimated Cost
$115.94 - 10% + Coupon = Less than $100, seriously!
Estimated Time Investment
Afternoon Project (3-6 Hours)
Finish Used
Rockler's General Finishes Espresso Stain, and General Finishes Aqua Poly
Recommended Skill Level
Starter Project

Vintage Step Stool

Submitted by chrisiross on Mon, 05/27/2013 - 08:18

I made this awesome step stool for my daughter to be able to reach things a little bit better. It works perfectly. And the heart adds the perfect touch, don't you think?

Built from Plan(s)
Estimated Time Investment
An Hour or Two (0-2 Hours)
Finish Used
paint and poly
Recommended Skill Level
Beginner

4x4 Truss Beam Table

Submitted by ___Ron___ on Mon, 08/21/2017 - 16:06

This is the dining room table I built for my house. It was based on the 4x4 truss beam table plans I found here on Ana's website. I opted against stain, and decided on a clear polyurethane finish to highlight the wood's natural beauty. I've had this table for over a year now, and it has withstood the rigors of young children quite nicely. Thanks Ana!

Sincerely,

Ron Floyd

Portland, OR

Estimated Time Investment
Week Long Project (20 Hours or More)
Finish Used
polyurethane
Recommended Skill Level
Beginner

Rustic X Bookshelves

Submitted by hnick78 on Tue, 10/05/2021 - 06:22

I was commissioned to build these bookshelves to go along with the “Rustic X” consoles table. The finish is distressed white and True Browns stain.

Built from Plan(s)

Comments

Doll Farmhouse Bed

Submitted by kari on Fri, 03/11/2011 - 21:33

I love this little farmhouse bed. I made it for my daughter for Christmas. It is spacious for one doll and cozy for two.

Estimated Time Investment
Afternoon Project (3-6 Hours)
Finish Used
I painted this a bright red that I had, then applied a dark brown glaze. It is finished up with a few coats of minwax water based polycrylic.
Recommended Skill Level
Beginner

Our First Project: Console Table

This was our first project. The directions were easy to follow. We used wood screws to put this project together as I do not have a nail gun. My five year old was in charge of the electric screwdriver. I just used 1 peice of wood for the table top and diagonally screwed into it from the bottom. It took us a few days to complete as when you are working with a little one, everything takes quite a bit longer. This was the perfect project for us to work on together! My husband requested a table to put next to the hottub so he could put his drink on it, but I don't want this to move outside! Maybe I'll have to make another one. :)

Estimated Time Investment
Afternoon Project (3-6 Hours)
Finish Used
Rustoleum Ultimate Wood Stain in Kona, Semi Gloss Spar Varnish Spray (bc it will be used outside)
Recommended Skill Level
Beginner

Rope / Ring Puzzle

Submitted by mtairymd on Mon, 09/04/2017 - 07:51

This is a really easy project to make. The goal is to separate the ring from the puzzle. Refer to the solution video if you can't figure it out.

Build Instructions:
https://www.instructables.com/id/Rope-Ring-Puzzle/

Solution: 

https://youtu.be/0juqeATz29I


Estimated Cost
$2
Estimated Time Investment
An Hour or Two (0-2 Hours)
Finish Used
None
Recommended Skill Level
Starter Project

Modified Island

Submitted by Anonymous (not verified) on Tue, 10/05/2021 - 12:24

Custer wanted something larger, so I just super sized it. Cabinet is 30" deep and 60" long

Comments

Toddler Farmhouse Bed With Canopy

Submitted by christy on Sat, 03/12/2011 - 19:18

When I saw the farmhouse toddler bed plans on Ana’s site, I knew I had to build it for my daughter. I added siderails (modified from the bunk bed rail plans) and a canopy (modified from the adult size farmhouse bed canopy plans).

I can’t really give an estimate of how long this project took…I had to work on it while keeping my five year old and one year old entertained. If I’d had no distractions, it probably would have taken only 3 or 4 hours to build it (more for the painting).

Built from Plan(s)
Estimated Cost
$100
Estimated Time Investment
Afternoon Project (3-6 Hours)
Finish Used
Primed with Kilz then painted with leftover paint from an old project. The color is a dark charcoal gray.
Recommended Skill Level
Intermediate

Toy Box Gone Wrong

Submitted by vtmelody on Thu, 05/30/2013 - 10:08

We went exactly as planned in the Build a Toybox outline, but bought 12x1 instead of 16x1. This caused a problem when we started putting it together. The two short sides were taller than the long sides. We decided to make lemons from lemonade and turn it into a toolbox/toybox, and in the end really liked the result. We added an additional cut with 1.5" holes on either side and a 1.5" diameter 36" long dowel rod for the handle. We added casters to the bottom and poof! done. Fun project! We made it for our soon to be nephew and filled with gifts for the baby shower.

Built from Plan(s)
Estimated Cost
$50
Estimated Time Investment
Afternoon Project (3-6 Hours)
Finish Used
Wood Stain with blue paint on top and cut out a mustache for the design then painted around it.
Recommended Skill Level
Beginner

PB Connor Table

Connor table

Estimated Time Investment
An Hour or Two (0-2 Hours)
Finish Used
Special Walnut
Recommended Skill Level
Beginner

Platform bed

My first build!!!! I live in an apartment, so I was nervous to undertake any project... luckily I was able to borrow a garage one weekend to build it, and then moved it in and finished it. It took more than just the weekend to complete.  It probably took me a lot longer than if I had more experience and knew what I was doing...I stopped every two minutes to double check myself and reread the directions lol. I'm so happy with how it turned out. I used the IKEA center beam from my old bed for the center support, and cut wood slats for my mattress to rest on so I don't have to use a box spring. It looks so much more expensive than it was. my  next project is a headboard...as soon as I have a space to build it in :)

Estimated Time Investment
Weekend Project (10-20 Hours)
Finish Used
Minwax polyshades- satin honey. I used minwax wood conditioner as well.
Recommended Skill Level
Beginner

Turquoise Lockers

Submitted by gertie1208 on Mon, 03/14/2011 - 16:15

Always wanted lockers, now I have them! We built these in a couple of afternoons, but took forever to sand and finish (of course, the sudden onslaught of winter didn't help.) Added 10 inches to the height of the hutches to fit our adult coats better. We are absolutely in love with them!

Estimated Cost
$150
Estimated Time Investment
Weekend Project (10-20 Hours)
Finish Used
Oops paint, in a lovely turquoise and several coats of minwax polycrylic.
Recommended Skill Level
Beginner

Spa Side Table

I completed this table with my 5 year old daughter as my assistant. My husband requested a table to put next to our new hot tub to set his drinks on and this is perfect. We only put one board on the top because I felt since it would be outside, I wanted a smooth top. I just screwed it in diagonally from the bottom. I also used spar varnish since it would be outside.

Estimated Time Investment
Afternoon Project (3-6 Hours)
Finish Used
Rust-o-Leum Ultimate Wood Stain in Kona
Semi-gloss Spar Varnish (3 coats)
Recommended Skill Level
Beginner

Small shop layout

This week's project was to reorganize my small garage shop for a better layout. Hopefully you can get some ideas from my shop to better organize your own.


Blog: http://www.lanebroswoodshop.com/2015/04/new-shop-layout.html


Video: https://www.youtube.com/watch?v=VuRVXdg-YNA

Estimated Cost
Free!
Estimated Time Investment
Weekend Project (10-20 Hours)
Recommended Skill Level
Beginner

Rustic Bathroom Cubby with Makeup Box, Mirror, and Jewelry Hooks

Submitted by Malka on Wed, 09/13/2017 - 01:25

Fiance wanted some rustic bathroom decor, and asked for 3 things. It should have a makeup box, jewelry hooks, and a touch up mirror. She was super happy with the finished product. Stained in Early American and given a Semigloss poly.

Estimated Cost
$16 for 1x12 board, $4 for jewelry hooks. Everything else was scraps and stuff on hand.
Estimated Time Investment
Afternoon Project (3-6 Hours)
Finish Used
Minwax Early American, Minwax Semigloss Poly
Recommended Skill Level
Beginner

Clubhouse Bed -Full Size with Slide

Submitted by Heatherdee on Sat, 05/02/2015 - 17:44

Thank you Ana for the clubhouse bed plans! I added 15" to the width of the rails to accommodate a full size mattress. On the other side I made a slide platform! I chose a standard plastic slide because I couldn't find a way to make a wooden slide at home with the swoop at the bottom to keep the kids from hitting the carpet hard :). We couldn't have a green outdoor-looking slide, am I right? I used Rustoleum  spray paint made for plastic in French Lilac color.  After the paint I used a top a coat of Minwax 3x polyurethane. I also used the Rustoleum spray paint for the window grids. 

To accommodate the slide specs I needed to raise this bed 5".  I just made each leg 5" longer.  Also, the ceiling in my daughter's room slopes down so I cut the point off the back of the bed.  Totally not noticeable.  I needed to do this even if I hadn't raised the bed :)

I also added full window frames around the window to make the bed a little more girly!  One unexpected result is that the bedroom looks BIGGER with this bed in it. She had a twin size step 2 plastic castle bed before but now there is so much more room to play. Win!  Changing the sheets isn't too bad but you need to get in the bed to do it.

I built this bed by myself. Don't be afraid, you can do this! Once the panels are assembled they get a bit heavy so you have to be sort of creative to drag them across the garage floor :)

Next up: mailbox for the bed, shelves under the slide and window boxes!

Built from Plan(s)
Estimated Time Investment
Week Long Project (20 Hours or More)
Finish Used
Valspar Flat White Paint in Glacier; Minwax 3x Polyurethane (I would maybe use wax or something next time! Maybe even semi-gloss paint)
Recommended Skill Level
Intermediate

Comments