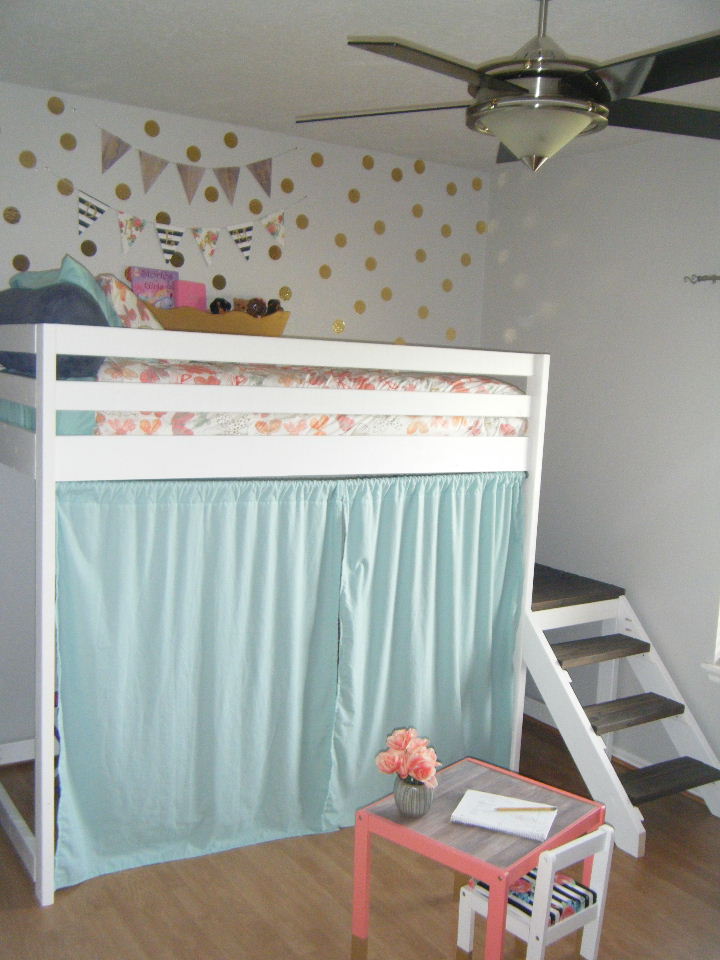
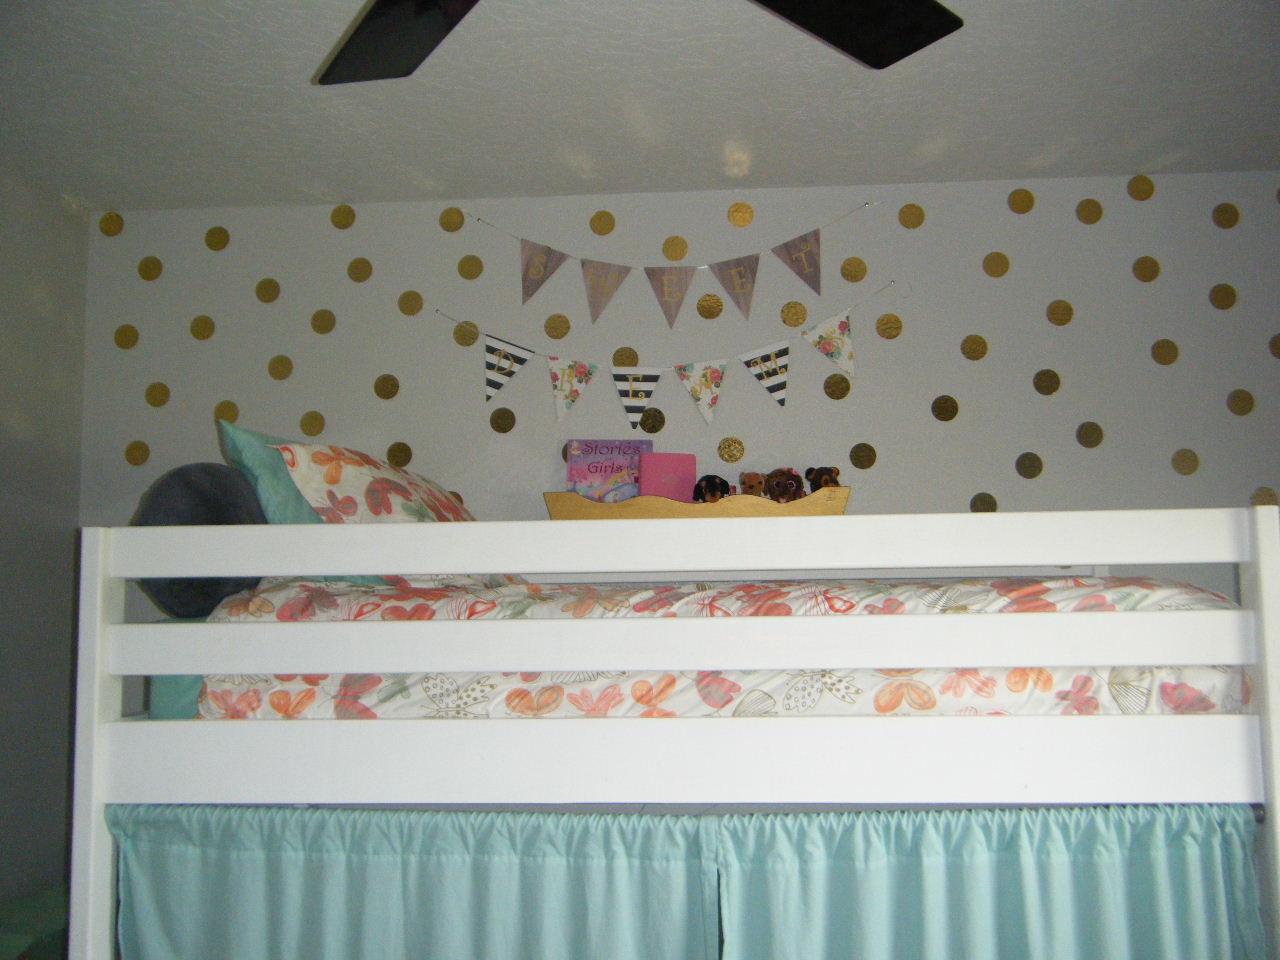
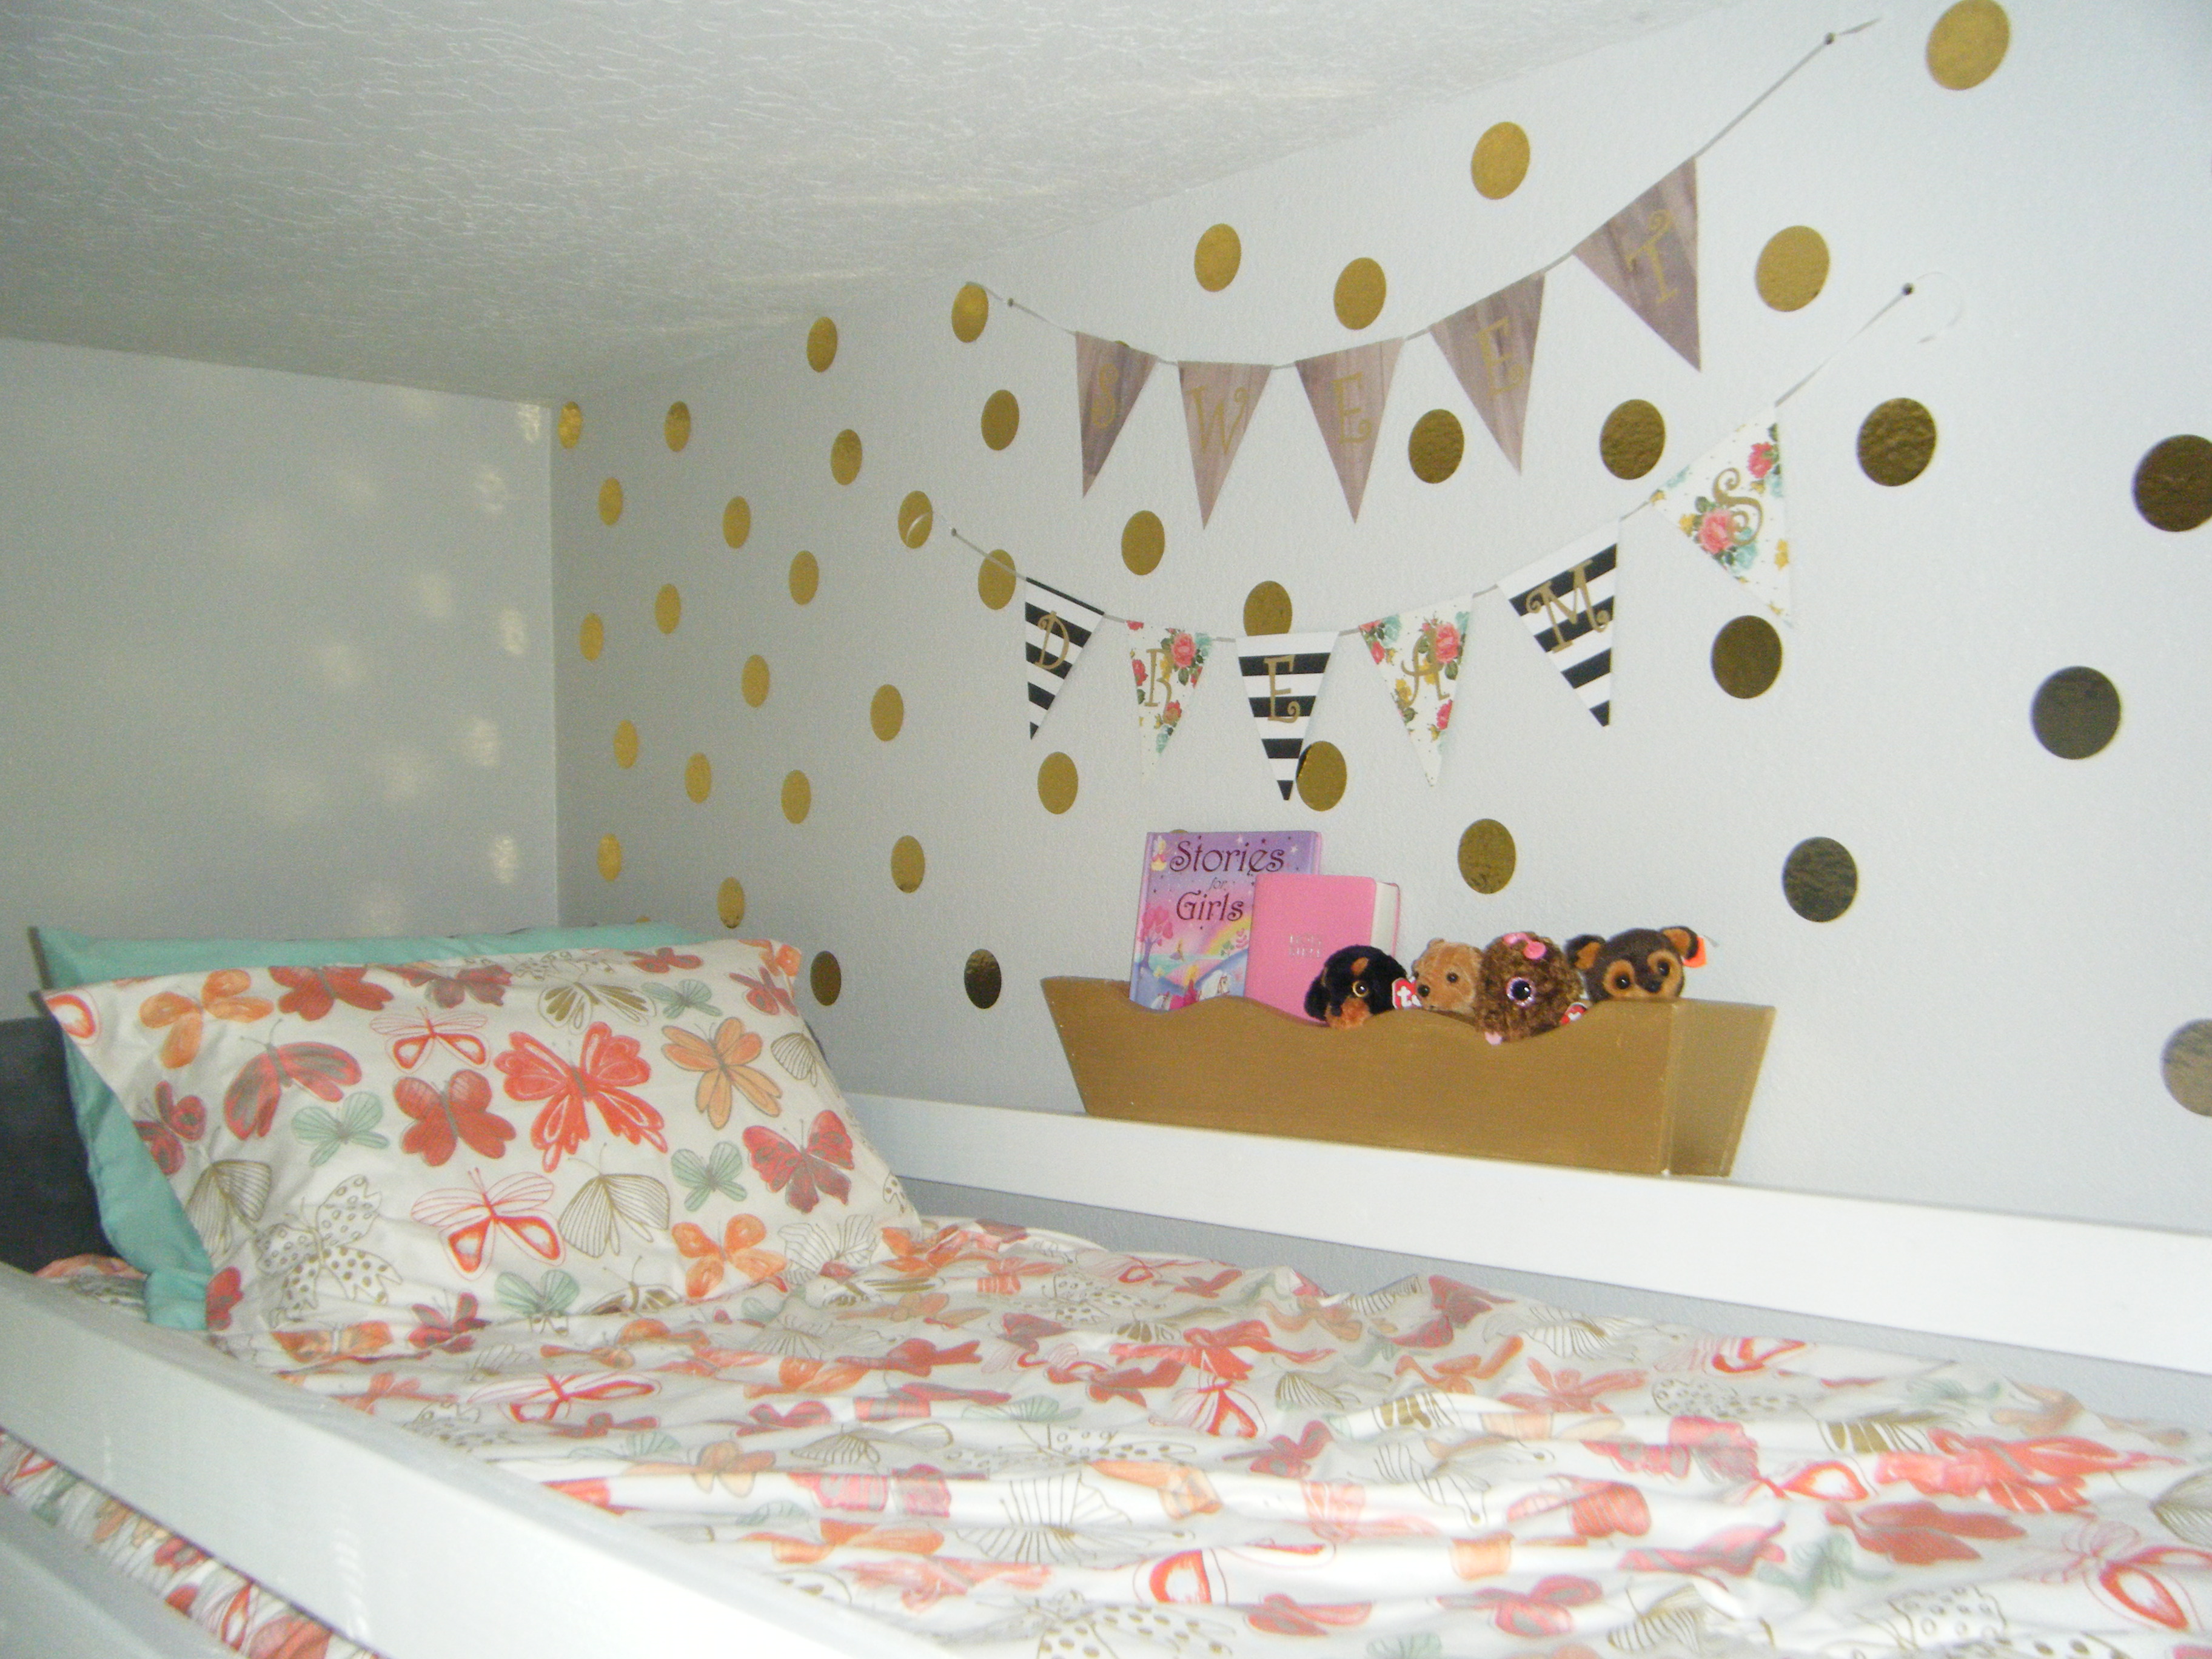
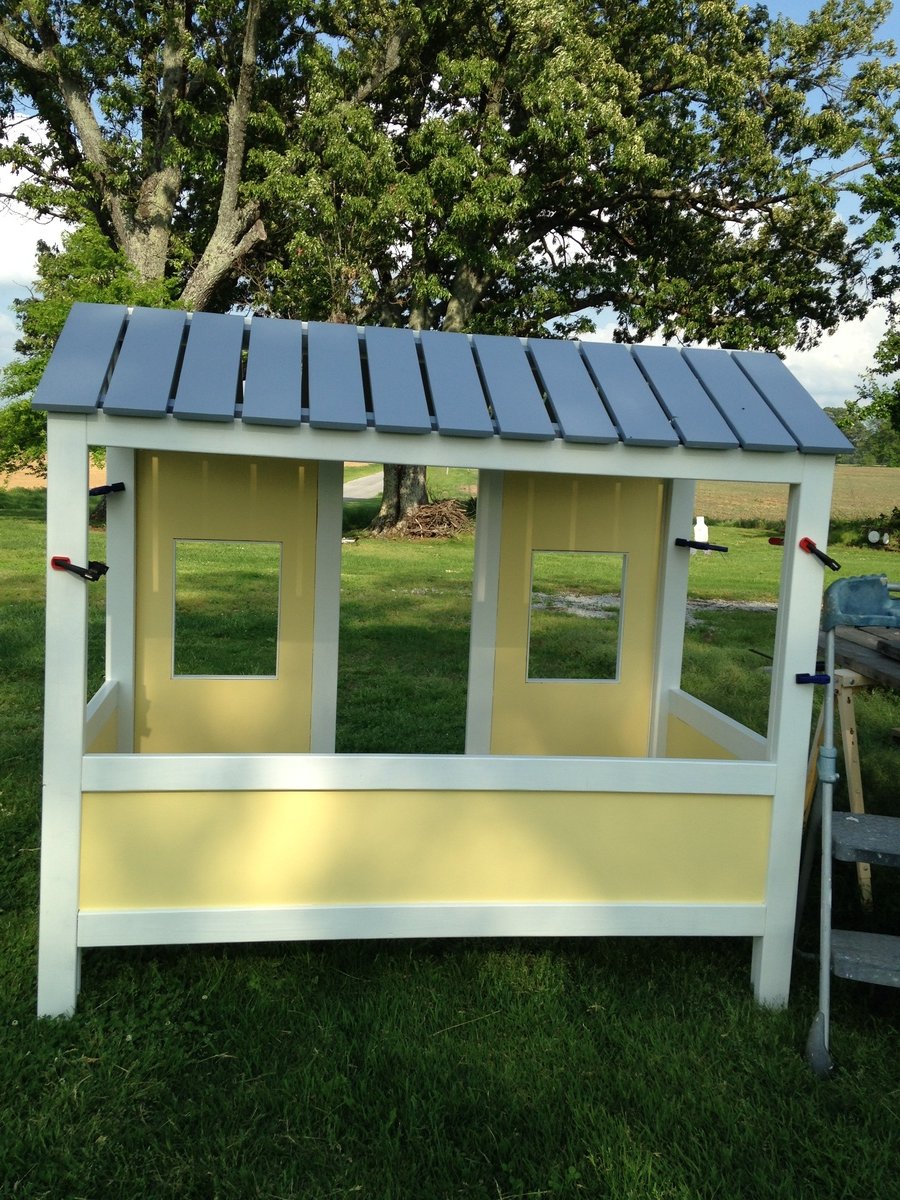
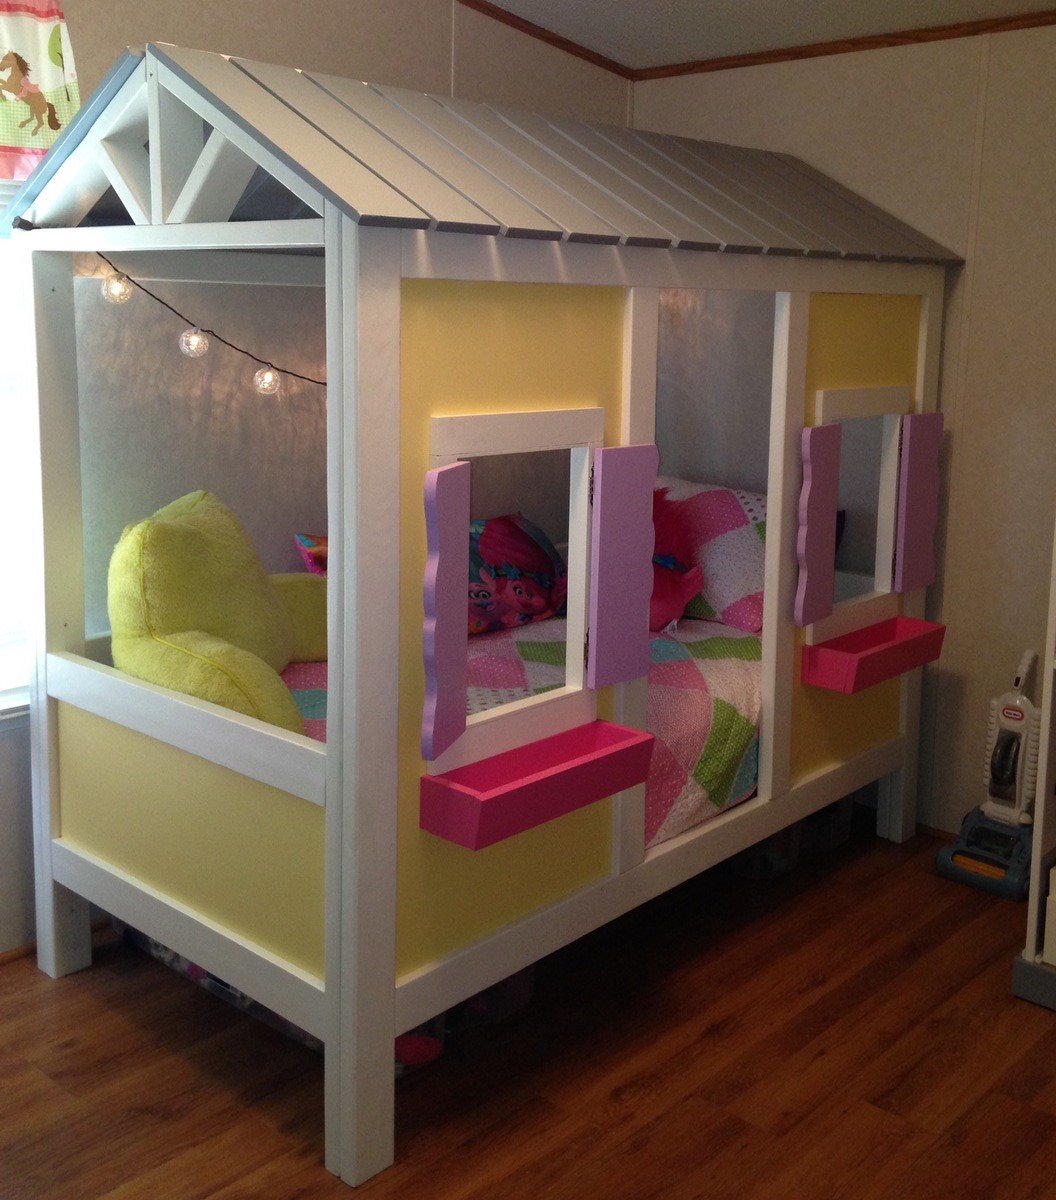
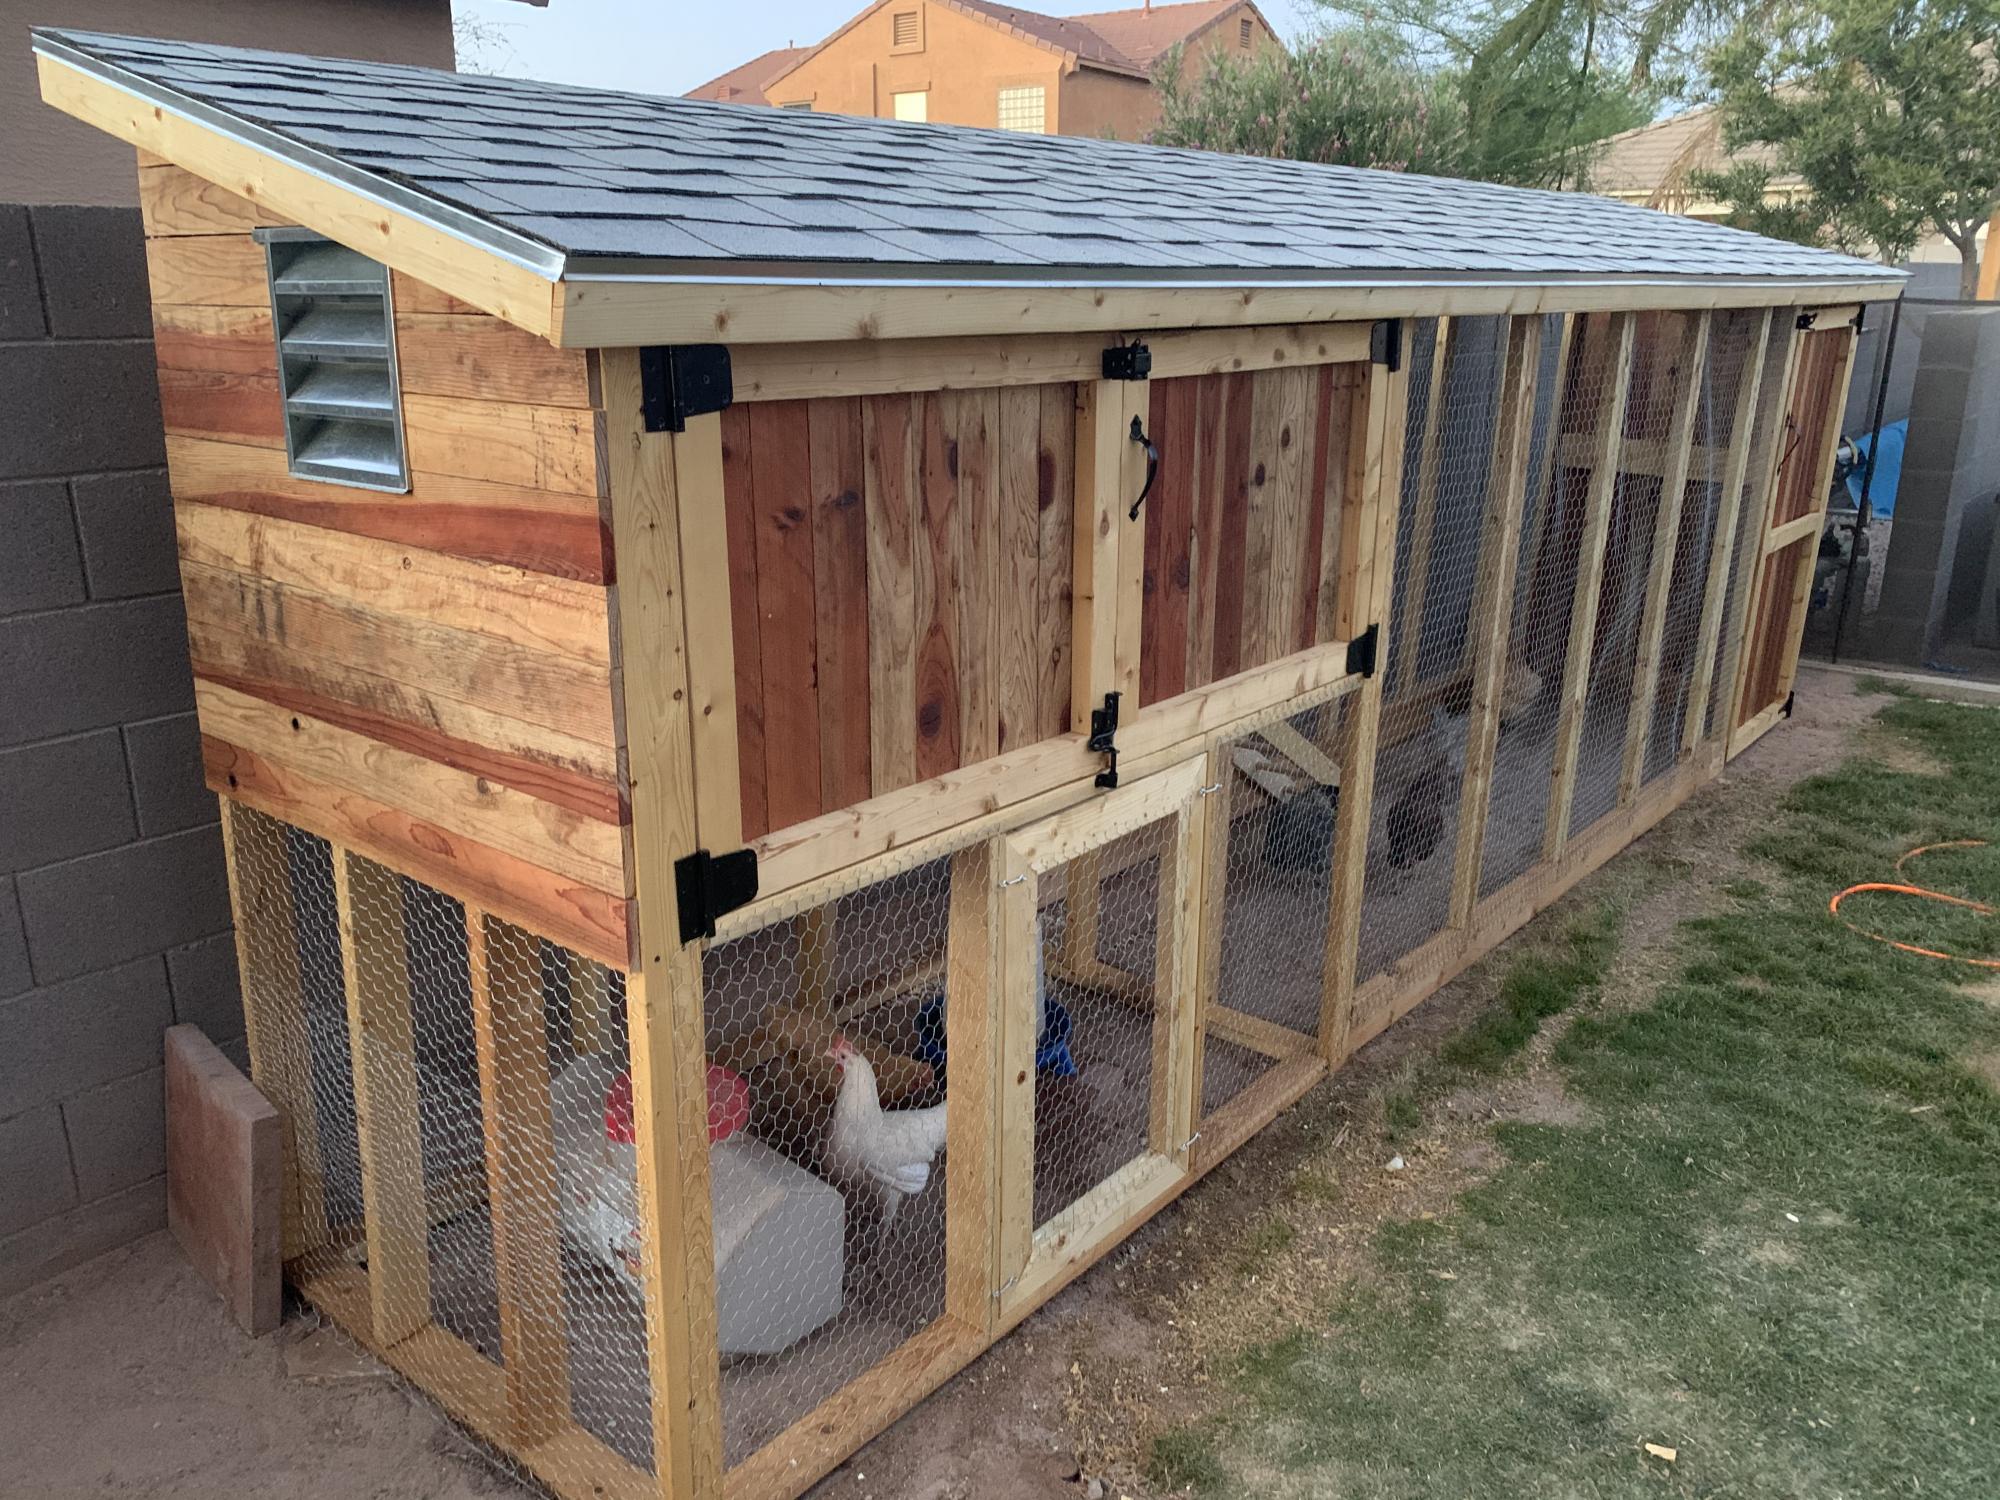
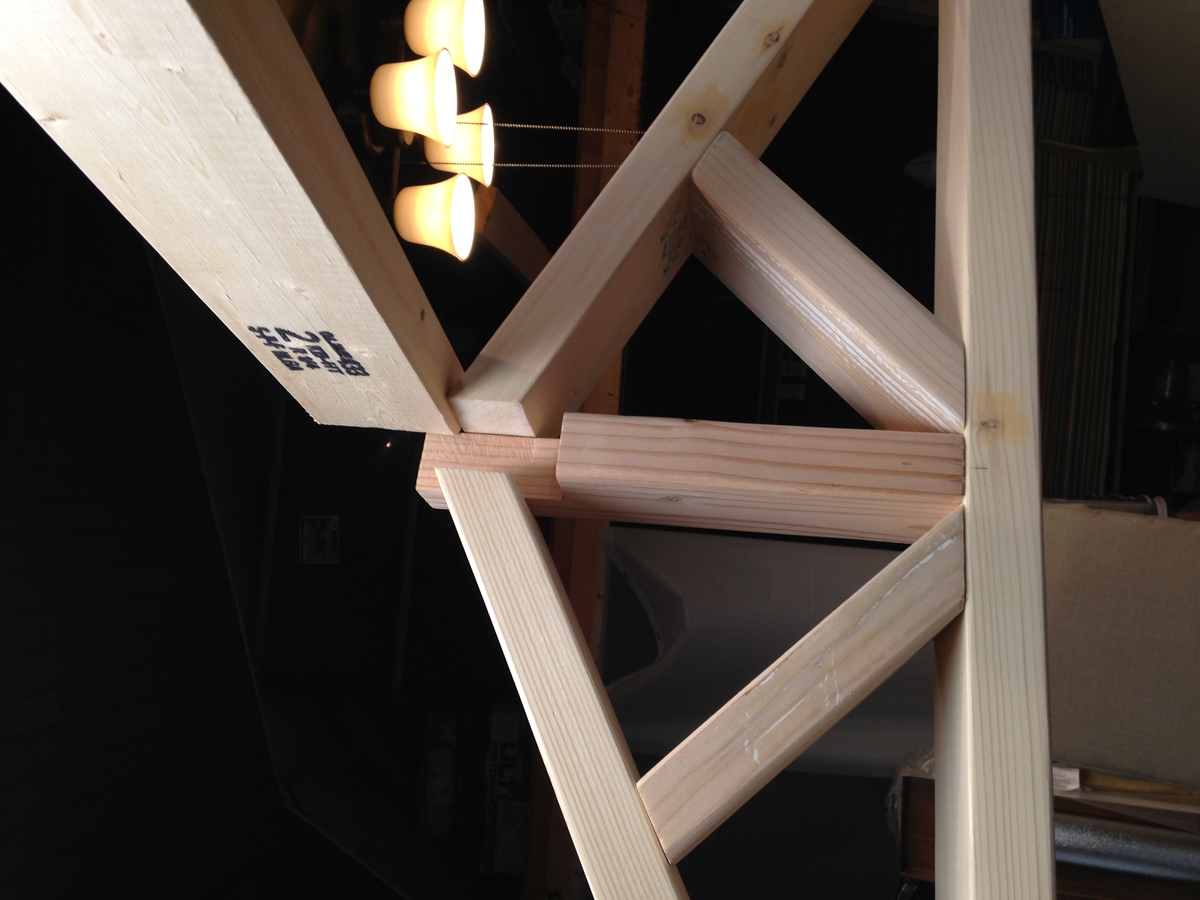
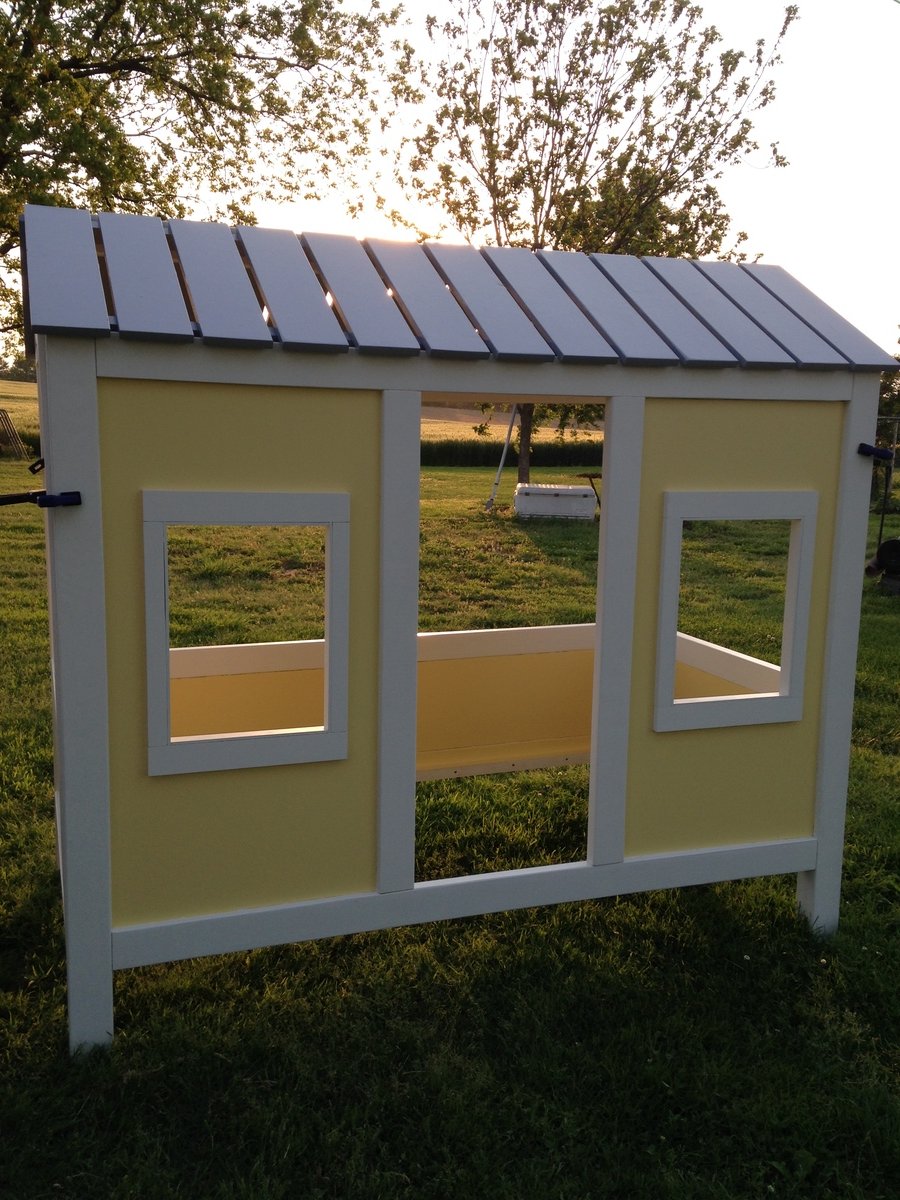
Community Brag Posts

4x4 Truss Beam Table and Benches

Submitted by MakinDust on Sat, 01/18/2014 - 08:36

Table and benches were made to plan, except I shortened the overall length and added another 2x10 to the top to give it some additional width. The benches were also shortened slightly so the legs of the benches slide between the legs of the table; which allows the benches to be pushed further under the table when not in use. Avoid my rookie furniture making mistake and go to a specialty lumber store that sells wood that is already aged (dry). Most everything you find at the big box stores will still be wet and shrink/warp on you if not completely dry first.

Built from Plan(s)
Estimated Time Investment
Week Long Project (20 Hours or More)
Finish Used
MinWax English Chestnut Stain and 3 coats of MinWax Satin Poly
Recommended Skill Level
Beginner

Comments

MakinDust

Tue, 05/20/2014 - 16:23

Appreciate the compliments. Sorry for the delayed response, but the final dimensions turned out 72" x 46". Let me know if you have any other questions.

No Closet... No Problem

Submitted by Anonymous (not verified) on Sun, 04/10/2016 - 17:40

No more IKEA for me!

Built from Plan(s)
Estimated Time Investment
Day Project (6-9 Hours)
Finish Used
Left natural
Recommended Skill Level
Beginner

Gopher Hole Puzzle

Submitted by mtairymd on Fri, 12/20/2019 - 09:09

This is a fun little puzzle that goes by the name of Golf, Nine Hole and, my favorite, Gopher Hole Puzzle. The goal is to fit all six pieces into the box. The possible combinations make it pretty challenging.

Estimated Cost
$5
Estimated Time Investment
Afternoon Project (3-6 Hours)
Finish Used
Oil & Paint
Recommended Skill Level
Beginner

DIY Double Queen Size Lounge

Submitted by Anonymous (not verified) on Sat, 08/26/2023 - 12:13

A friend asked me to build her a durable queen sized lounger for beside her pool. I used this platform style and added the multi-adjustable tilt. The lounger looks amazing and will double as a spare queen size bed for guests.

Mary Wikene

2 projects combined

Submitted by cmsklein on Wed, 04/04/2012 - 17:09

This replaced a huge formica countertop in our laundry room. The counter collected unfolded clothes on the top, and piles of shoes underneath. Also, we had a 4 hook shelf from Target holding all 3 of our kids bags and backpacks. My husband was against this, because "where would we put all the laundry?" Well, this is the solution and we both love it!

I measured this out and drew diagrams and then finally decided this was too big of a project to do for the first time. I did hire someone, but he said the measurements were right on.....he had never built something like this before. The outside of the door is painted with magnetic primer and holds magnets. So much more functional that the counter.

I know I didn't build this myself. I think I could have done it, if I could have a week to do this without interruption, but that was impossible and I needed this YESTERDAY (the 4 hook wall shelf fell out of the wall). But I wanted to share in case anyone else is having a space dilemma! We LOVE it!!!!

Estimated Cost
$1100 hired/ $200 self
Estimated Time Investment
Week Long Project (20 Hours or More)
Finish Used
paint sherwin williams
Recommended Skill Level
Intermediate

Comments

Guest (not verified)

Thu, 04/05/2012 - 12:10

What a great idea! Very well planned out! I would love to build something like this in our mudroom.

Guest (not verified)

Tue, 04/10/2012 - 16:33

Just what we need! Thank you! And I love the door covering the baskets and the magnetic paint - I hadn't thought of those! Thanks so much for sharing! It gives met the confidence to try it myself!

Grey wash bookshelf

Submitted by DutchDIY on Mon, 01/20/2014 - 06:09

Thanks Ana for your wonderfull website! even in The Netherlands your designs are shown.

Built from Plan(s)
Estimated Time Investment
Afternoon Project (3-6 Hours)
Finish Used
grey-wash paint
Recommended Skill Level
Beginner

Comments

Modified from Farmhouse Table

Submitted by Anonymous (not verified) on Tue, 04/12/2016 - 19:15

Modified the plans from the farmhouse table to add leaves in order to extend it another 15" total. Turned out well with the locking latches.

Estimated Cost
200-300
Estimated Time Investment
Weekend Project (10-20 Hours)
Recommended Skill Level
Beginner

Comments

Horse Tack Storage Shed

Submitted by Anonymous (not verified) on Wed, 08/30/2023 - 09:09

We have been in need of a place to store our horse tack for several years, and finally got around to it. We modified the small cedar shed with a little extra support and added saddle racks and bridle hooks. Super pleased with how it turned out!

Gabi Johnson

Built from Plan(s)

Comments

Seasonal And Holiday

Pet feeder

Submitted by Milhouse on Sat, 04/07/2012 - 23:07

I love my cat, and felt she needed a pretty feeding dish. I stole some old spindles from my sister's garage, cut them down and threw this plan together. It was actually harder than I expected because getting into tight little spaces with my drill to drill in the pocket holes was almost imposible. The wood split, nothing is square and the holes for the dishes are messy...but it doesn't really matter, it looks good from a distance and my cat doesn't judge. Not that I know of, anyway.

Estimated Cost
Free - made from scraps
Estimated Time Investment
An Hour or Two (0-2 Hours)
Finish Used
Flat white paint
Recommended Skill Level
Intermediate

Comments

Corner Cupboard, Corner Cabinet

Submitted by Anonymous (not verified) on Fri, 04/15/2016 - 21:33

I saw the plans on Ana White website and and used them to put this together. I changed it slightly to fit my needs. I made this for my in-laws and it was a lot of fun to do. Hardest part was using blue tape on stain and paint.

Built from Plan(s)
Estimated Cost
125$ includes four cans of Rustoleum White Satin primer and paint from Home Depot, hardware, and lumber. Measure twice Cut once and all will be well.
Estimated Time Investment
Week Long Project (20 Hours or More)
Finish Used
Min wax Red Oak
Min wax satin poly
Rust oleum White Satin Paint and Primer
Recommended Skill Level
Intermediate

Chalkboard frame

Submitted by Kate_14 on Sun, 12/29/2019 - 08:39

I built these in different sizes. I added hooks on one to hang keys. I nailed hardboard with chalkboard spraypaint on the back.

Built from Plan(s)
Recommended Skill Level
Beginner

Indoor Punee/ Daybed

Submitted by hawaiitara on Mon, 04/09/2012 - 20:18

In our living room/sun room we needed a place to lounge as well as a place for guests to sleep. We used the chunky leg bed frame plans with the full size modifications to build 2 of them to make a giant Hawaii style Punee. We were able to build both of these easily in 1 day. We modified the legs and used 4x4's to make them taller and more rustic looking.

Estimated Cost
$200 for both
Estimated Time Investment
Day Project (6-9 Hours)
Finish Used
After priming, I spray painted them with Rustoleum 2x coverage in Satin Moss Green.
Recommended Skill Level
Beginner

Comments

theHammerGirl (not verified)

Sat, 05/19/2012 - 14:47

Nice beds! They are very tropical looking - really blends in the outdoor with the indoors.

Junior Size Classic Bunk Bed

We built this in our living room start to finish - we live in an NYC apartment. Because of the small room size we chose to modify the plans to a small mattress - hoping that it will last our boys until they are about 5 and 7 (currently 2 and almost here). This blog post outlines our buy and cut list for the modified size: http://wp.me/p3DCu3-Kd

Built from Plan(s)
Estimated Cost
$215 (plus $200 for mattresses and bedding)
Estimated Time Investment
Weekend Project (10-20 Hours)
Finish Used
None
Recommended Skill Level
Beginner

How to make a 2 year old happy (the long way)

Submitted by Anonymous (not verified) on Mon, 04/18/2016 - 13:23

I started this in my garage this winter so that it was ready for spring. Nothing in this is too complicated but it requires some patience. It was all worth it to see how excited my daughter was to finally play with her friends.

Estimated Cost
$500
Estimated Time Investment
Week Long Project (20 Hours or More)
Finish Used
Exterior paint from SW
Recommended Skill Level
Intermediate

Comments

Christmas Helper Towers

Submitted by papamike on Sun, 01/05/2020 - 13:25

I built two of these for my grandkids for Christmas.  One for each of my kid's homes.  I used Phillip Moore's folding modification where each side is a separate panel.  (Great mod!). I used one T-Nut per hinge on the side where short screws had to be used.  I just felt a little safer having that connection that cannot come apart since my grandkids can get pretty active.  The kids love them!!  Thank you for this plan!

Built from Plan(s)
Estimated Time Investment
Day Project (6-9 Hours)
Finish Used
Paint and semi-gloss clear coat for easy cleanup. I recommend spray paint because no matter how hard I tried to avoid it, the sharp inside corners formed drips with a brush. Finally sanded them off and spray painted with much greater success.
Recommended Skill Level
Intermediate

Tall Cedar Planter

Submitted by zzjb2 on Fri, 09/08/2023 - 08:29

Made a tall wood planter from cedar and pine fence posts using Ana’s plans this weekend! Modified slightly and added a frame around top to give it a more finished look.

Awesome plans! Thanks Ana.

Built from Plan(s)

Rustic X Bench

Submitted by mweir on Thu, 04/12/2012 - 18:29

My first real project from your site. This was my first time to use my pocket hole jig. Wow did it work great. The video was great made it very easy to follow the plans

Built from Plan(s)
Estimated Cost
$20.00
Estimated Time Investment
An Hour or Two (0-2 Hours)
Finish Used
Stain and polyurethane one step (2 coats)
Recommended Skill Level
Beginner

Buffet Changing Table

Submitted by T S on Mon, 01/27/2014 - 09:29

So I altered the Emersen Buffet a little. We needed a changing table and I liked the idea of having the baskets handy for diapers, ect.. I will add the changing pad topper after we get the actual pad.
The door is from a weathered pallet I reclaimed.
I must say this is my first large project of this type. I would have NOT been able to do it without Ana White's site. However, now I feel capable of a lot more.
Thanks so much.
T S

Estimated Cost
Probably less than $80 but even plywood is expensive!
Estimated Time Investment
Weekend Project (10-20 Hours)
Finish Used
Minwax - Special Walnut 2 coats, sand lightly, then coat of polyurethane - satin
Recommended Skill Level
Beginner

Kreg Jig Fun

Submitted by Anonymous (not verified) on Thu, 04/21/2016 - 13:12

I used whitewashed clear pine for the bases and maple for the tops. I also built a corner table to match. I used a Kreg Jig for the first time for all 3 tables.

Built from Plan(s)
Estimated Cost
$200
Estimated Time Investment
Week Long Project (20 Hours or More)
Finish Used
Whitewash stain for the bases. Polyurethane for the tops.
Recommended Skill Level
Intermediate

Rustic X DIY changing station w/ removable top

Submitted by Anonymous (not verified) on Sat, 01/11/2020 - 15:42

A Christmas gift for a friend who recently had a baby.

I went with one inch (3/4") project panels. The top shelf is 1"x 20". The lower shelves are 1"x 16", but I added 1 1/2" with two 1"x 2" banding. For the "x" brackets, I used 1"x 2" and added a middle piece to connect the legs and double as a side shelf ledge. The baby changing station top is secured by an L-bracket, where I added a block to keep the spacing even around the station top and screwed from underneath. (Note, you might have to trim the L-bracket to fit on the underside of the lip.) Also, I put on furniture felt under the baby changing station top to prevent any marring to the top shelf.

The removable top allows the changing station to become a standard shelving unit once the baby outgrows the changing station top. There are no holes drilled onto the topside of the top shelve as it's being secured by two L-brackets.

Built from Plan(s)
Estimated Cost
The wood cost was about $70.
Estimated Time Investment
Weekend Project (10-20 Hours)
Finish Used
Cherry stain, white paint, and poly.

I stained all three shelves first. I painted the rest of the project white, which needed two coats. Then I assembled the unit together. Afterwards, I applied three coats of poly with a foam brush. After the second coat of poly, i used a gray finishing pad. On the third and final coat of poly, I used a white finishing pad (finer than the gray pad).
Recommended Skill Level
Intermediate
Back