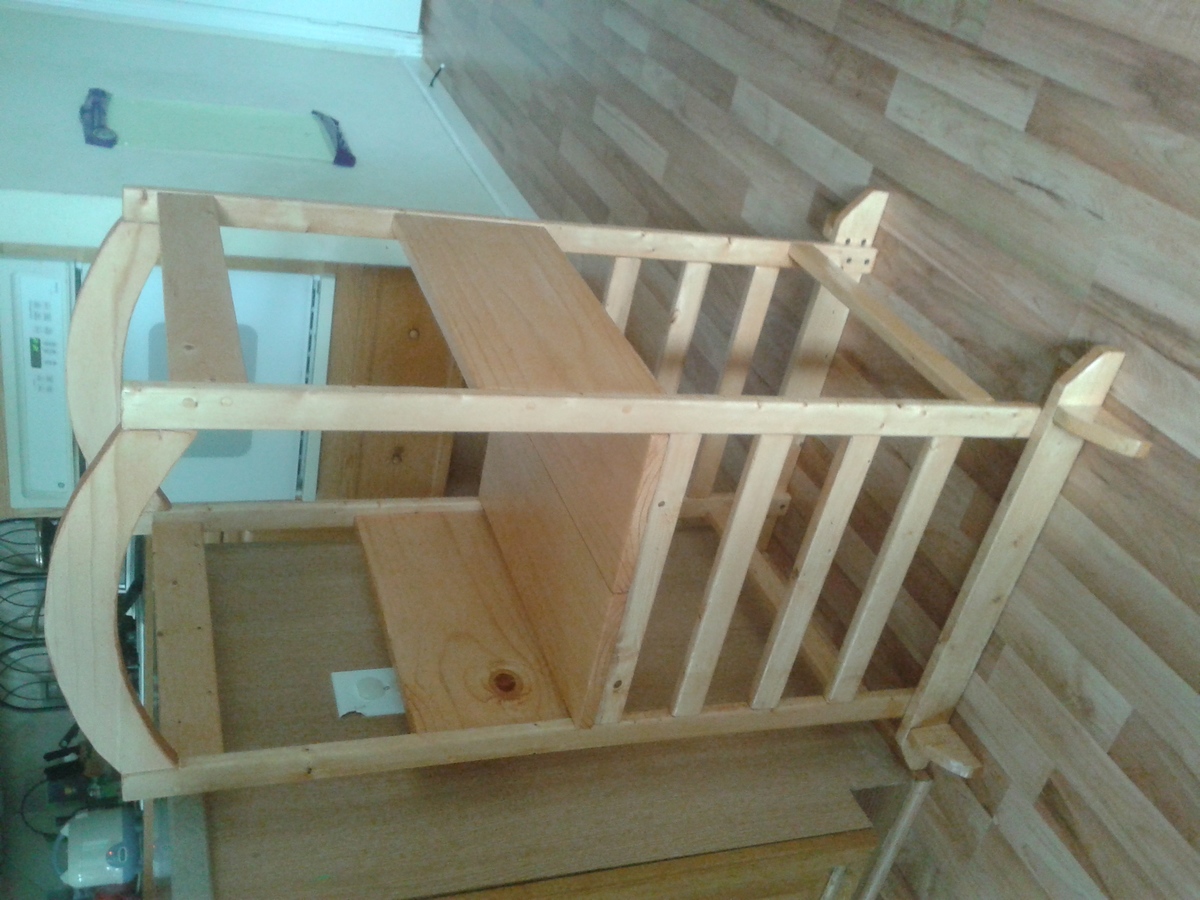
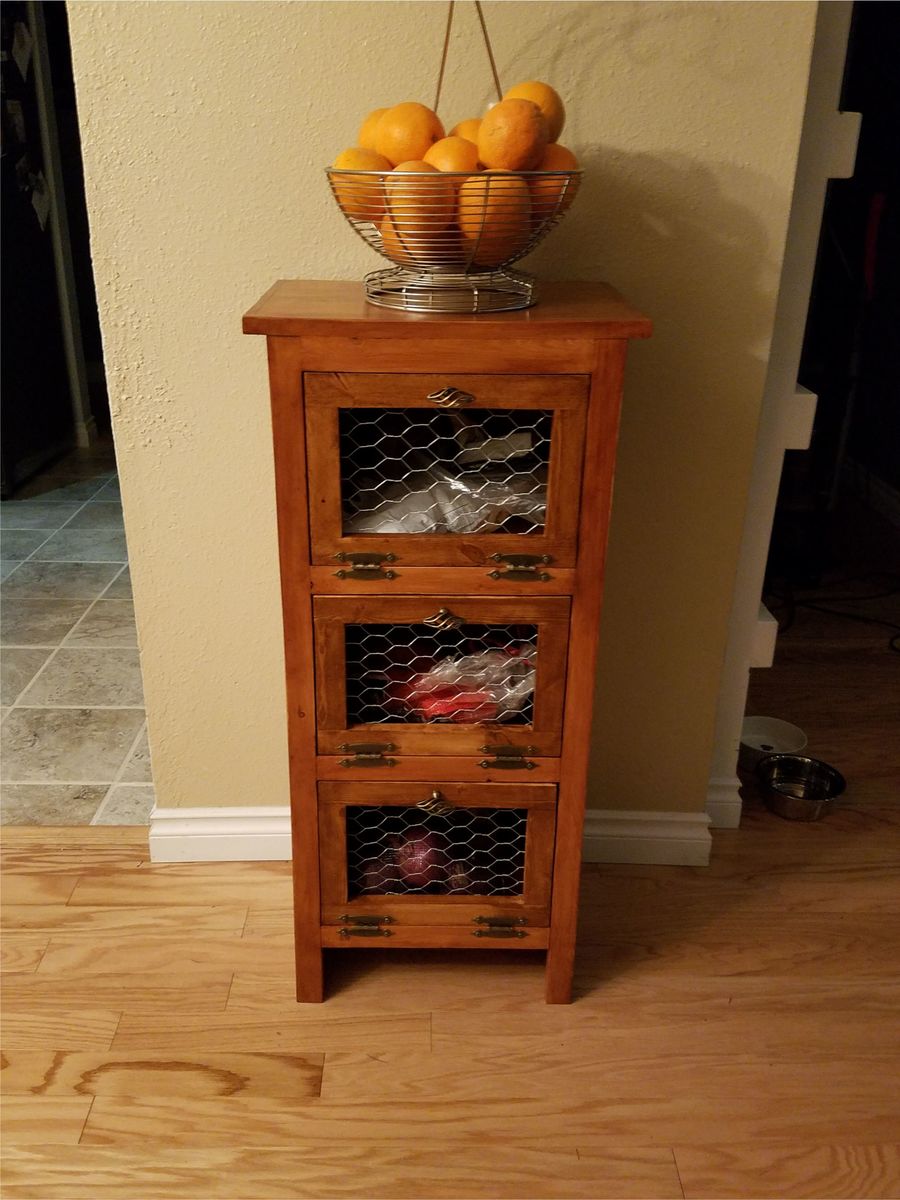
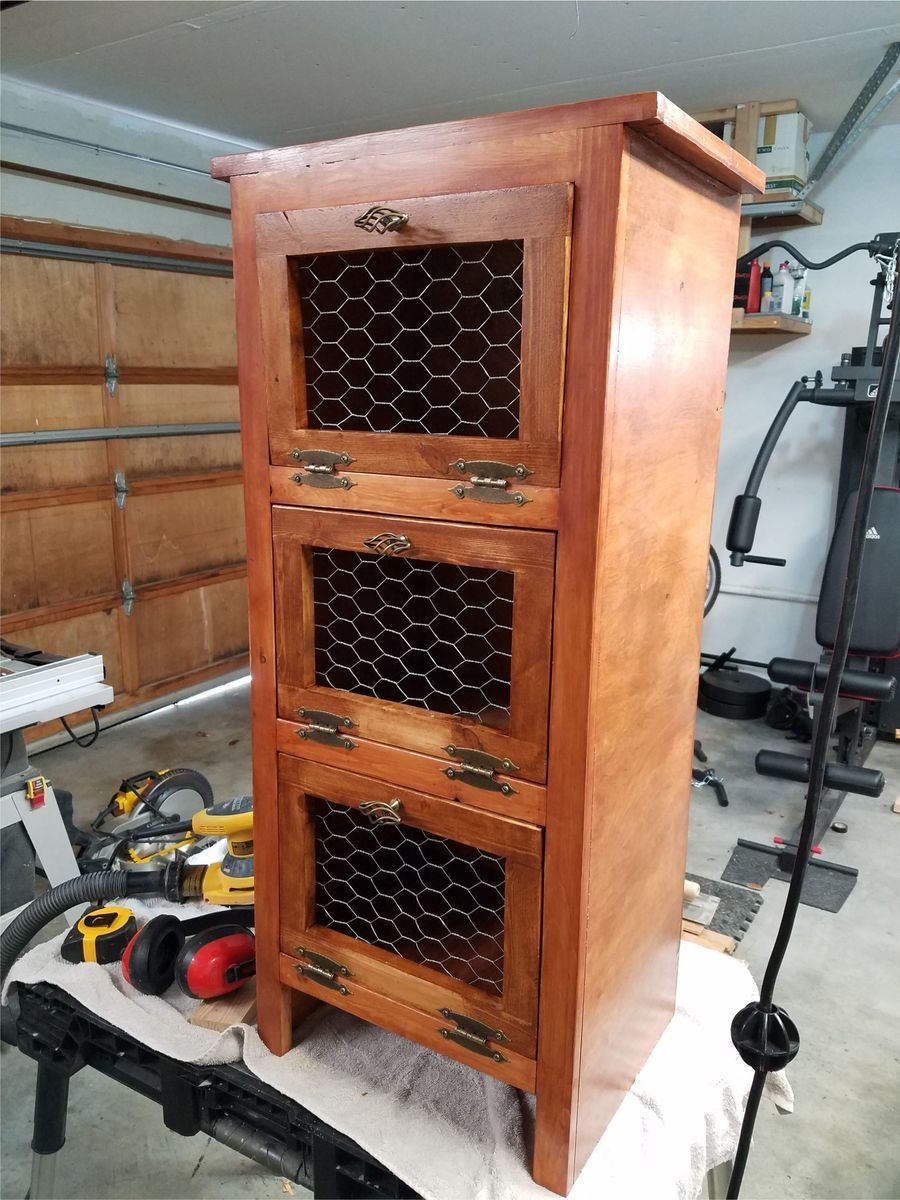
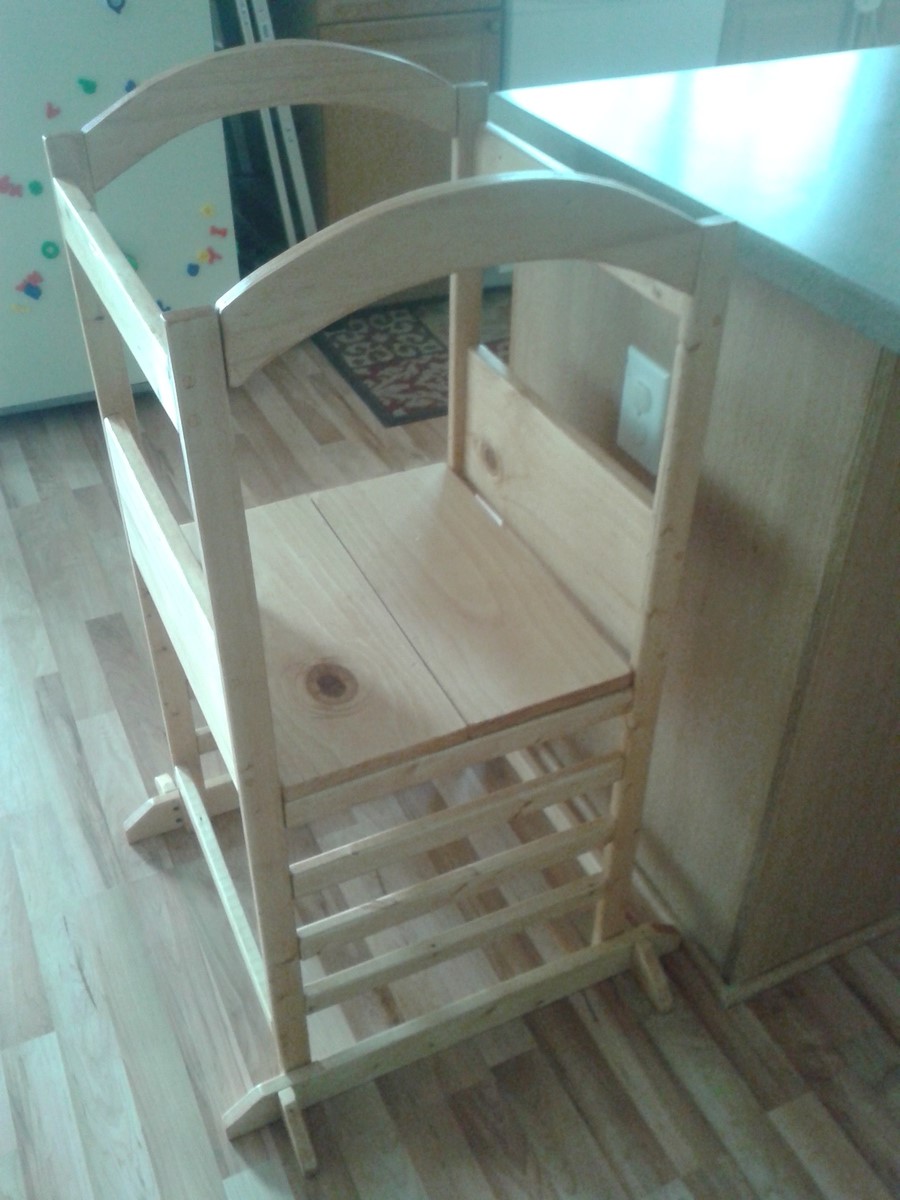
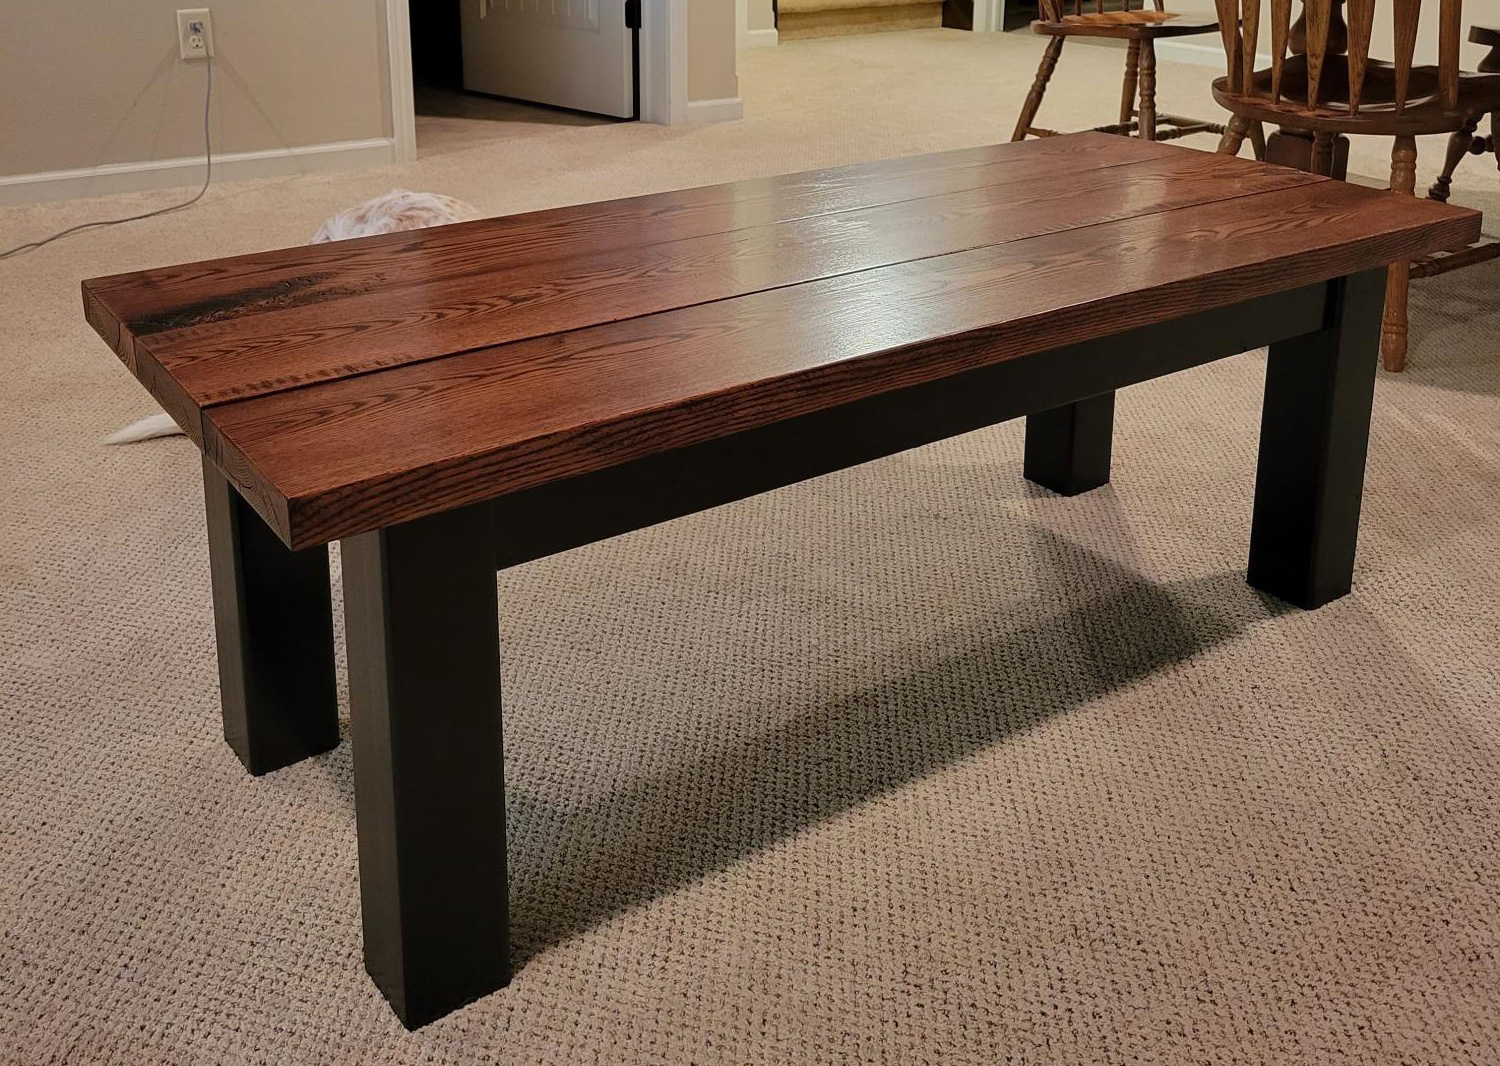
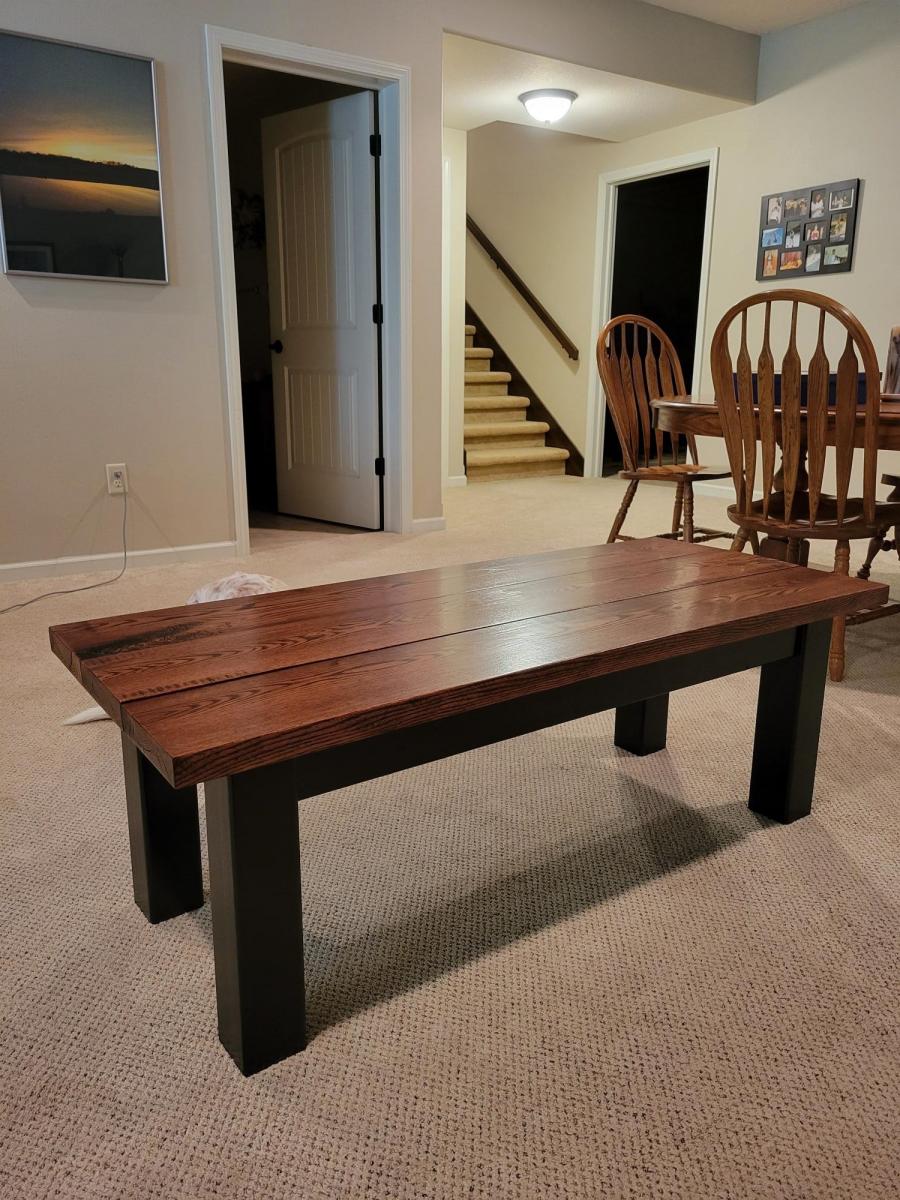
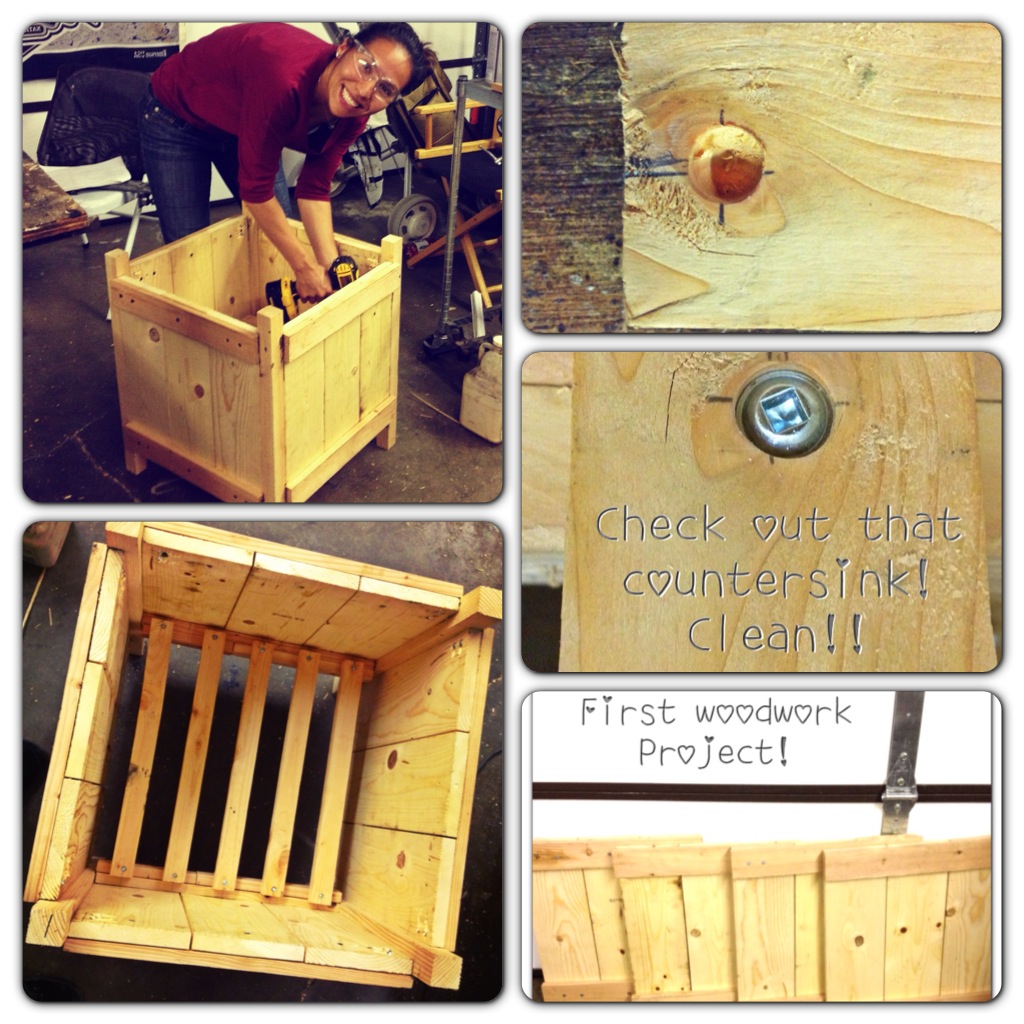
Rustic x coffee table
![](/sites/default/files/3154821082_1359304444.jpg)
This was a fun weekend project!
I used the Cabin Bunk Bed system as a starting point for these plans. This was my first major build of any kind of furniture, except for a small basic coffee table and pantry. I took all the dimensions of the lumber, then put them into SketchUp to make sure the bed would fit in my daughter's room first. My major mistake was using regular dimensions instead of board dimensions. That cost me a couple days at least because I would have to go measure, then cut, then fit together.
I decided not to do the drawers because I didn't know how to do it and was exhausted by the time this was finished, so I'm using it as a cubby and robe hanger instead. I designed the steps myself using 3/4" plywood. I then painted the bed with semi-gloss white, 2 coats for durability.
Structurally, I was wary because it shook pretty bad, but put an angled brace on the desk side. That side was the weak point by far, but I got it sturdy enough for my daughter.
Wed, 11/26/2014 - 12:15
This is really awesome! I love the way that it turned out! Thanks for sharing!
Only 2 more to build. LOL
Hinges from Lee Valley and knobs from ikea.
Very easy garage shelving
Thu, 12/04/2014 - 21:57
Wow that looks alot like mine! Quick and easy...great job!
Fun project
I enjoyed making this chair. Even though I am a beginner at wood work, it really was easy to make and the instructions were very clear. I made it for my daughter. She will be 3 years old in May and she loves it. Our next project is making her a table to go with the chair. Thanx for sharing the plan
This was my first attempt at building a bed. My wife wanted to buy my 2-year old a twin bed from one of the big box stores. I asked her to let me take a crack at it before she spent several hundred dollars (and hours of assembly for me!). I immediately went to Ana's site first and found this plan. Since my wife loves all things PB, it was an easy sell.
I spent about $75 on lumber at Blue and about $20 on hardware at Orange. I also used this project as an excuse to buy a random orbitsl sander, so altogether, I spent less than $150. The mattress is a Serta Benson that we picked up for $180 after taxes and a Black Friday special. It came with a free box spring, but I declined because I used slats and didn't want the bed any higher.
I followed the plans in terms of measurements and dimensions. However, I modified the headboard and footboard. I omitted the cross pieces on the headboard and used quarter-round pine trim to hide some imperfections on my plywood cuts. I think it turned out OK.
Thu, 12/04/2014 - 22:47
This looks great! Thanks for sharing! Love the colors for your son's room!
I rushed to get this done for christmas for my son and daughter between working 60 hours a week and spending time with them and ALOT of painting help from my elves (husband and brother), we got it done! They were so excited to see what Santa brought.
Since everyone else is making them, I had to jump on the bandwagon. Typical end table, but I left off the metal trim (for now at least) and used a wire brush on the top boards to eat away at the wood and raise the grain. It gives it tremendous texture and really makes it look more like old reclaimed lumber.
Built this for my grandson for christmas. First woodworking project I've done.
I changed the size of this to fit underneath my sons playhouse loft bed. It fits perfectly in the space between the door and wall of the bed. Put a kids leather chair in there and now he has his own personal man cave :)
After following Ana and a couple other talented ladies I decided to get a Kreg and take some action! I made a few adjustments to the size and I used pocket screws to put this together. It is solid! Found the baskets at Lowes and fell in love. It was super easy and my husband couldn't believe I put it together so fast. I has added much needed storage to the front door and we just love it.
Sun, 12/07/2014 - 17:48
This looks super! You did a great job and it looks beautifully constructed. Congrats! The finish is lovely. :)
Tue, 12/09/2014 - 06:57
It looks like something right out of a trendy (and expensive) home store! Love the baskets and color choice.
Tue, 12/09/2014 - 07:03
Very nice. Looks professional. Contemporary, yet minimalistic.
We used leftover white oak from the railing in our house, so our cost was just the zinc top, which we got from Rotometals. Total cost was around $200, all said and done.
This was my first time making a project with plans from the site. They were easy to follow and modify to my sizes. I am extremely happy.
The cost of wood is higher due to the pandemic, however. A 2x4 was nearly $5.50 in Ohio.
My husband and I built this bed for my sister-in-law for Christmas. It took us about a week of working an hour or so a day on it. Most of that time was staining. The actually assembly took about 2 hours.
I included a picture of how we attach the siderails to the headboard/footboard. We use a bracket that the 1x2 slides into. It is screwed to both the siderail and the headboard with 1 1/4" screws. We also attach a small L bracket to each corner with helps remove any wiggle that was there previously. It really makes the bed much more stable by adding those little L brackets. Again, we used 1 1/4" screws to attach them.
Wed, 12/10/2014 - 13:55
I had some trouble with the submission of my form and now it's not allowing me to edit so I'll write the details in the comments.
The assembly took about 2 hours but we worked on the bed about a week due to the many coats of stain etc.
Here's how we finished the bed:
1 coat of Minwax pre conditioner
1 coat of Minwax Early American
2 coats of Minwax Mission Oak stain with poly, satin
Steel wool the project after each coat of stain with poly
I included a picture of the hardware we use to attach the side rails to the bed. The big bracket holds the side rails up. The little "L" bracket in each corner makes it so the bed doesn't wiggle or move. This is our 4th bed to build and we have found this set-up to make a very secure, sturdy bed.
Wed, 12/10/2014 - 14:01
I had some trouble with the submission of my form and now it's not allowing me to edit so I'll write the details in the comments.
The assembly took about 2 hours but we worked on the bed about a week due to the many coats of stain etc.
Here's how we finished the bed:
1 coat of Minwax pre conditioner
1 coat of Minwax Early American
2 coats of Minwax Mission Oak stain with poly, satin
Steel wool the project after each coat of stain with poly
I included a picture of the hardware we use to attach the side rails to the bed. The big bracket holds the side rails up. The little "L" bracket in each corner makes it so the bed doesn't wiggle or move. This is our 4th bed to build and we have found this set-up to make a very secure, sturdy bed.
I doubled the height of the Classic Storage Bed to create 6 side drawers and 4 bottom doors for my daughter's twin bed. She lives the extra storage in her small bedroom. Thanks for the inspiration!
Comments
nkfuller09
Wed, 10/29/2014 - 13:28
bottom?
Hey great job! Just wondering if you used 2x6 for the bottom as well and if the table ended up being very heavy due to it? Thanks :)
In reply to bottom? by nkfuller09
Jodie
Thu, 12/31/2015 - 07:16
I used 1x6's, i think 2x6's
I used 1x6's, i think 2x6's would've made the table much too heavy... it is already extremely heavy, but super sturdy as well!
sergiontami
Tue, 01/16/2018 - 16:26
Corner Brackets?
Just wondering where you got them from? We've been looking all over the internet and have yet to find them...
In reply to Corner Brackets? by sergiontami
Jodie
Sat, 06/23/2018 - 12:15
I fashioned them myself out
I fashioned them myself out of some flat steel brackets. I bent them to 90 degree angles in a vice, then spray painted them black.