Community Brag Posts

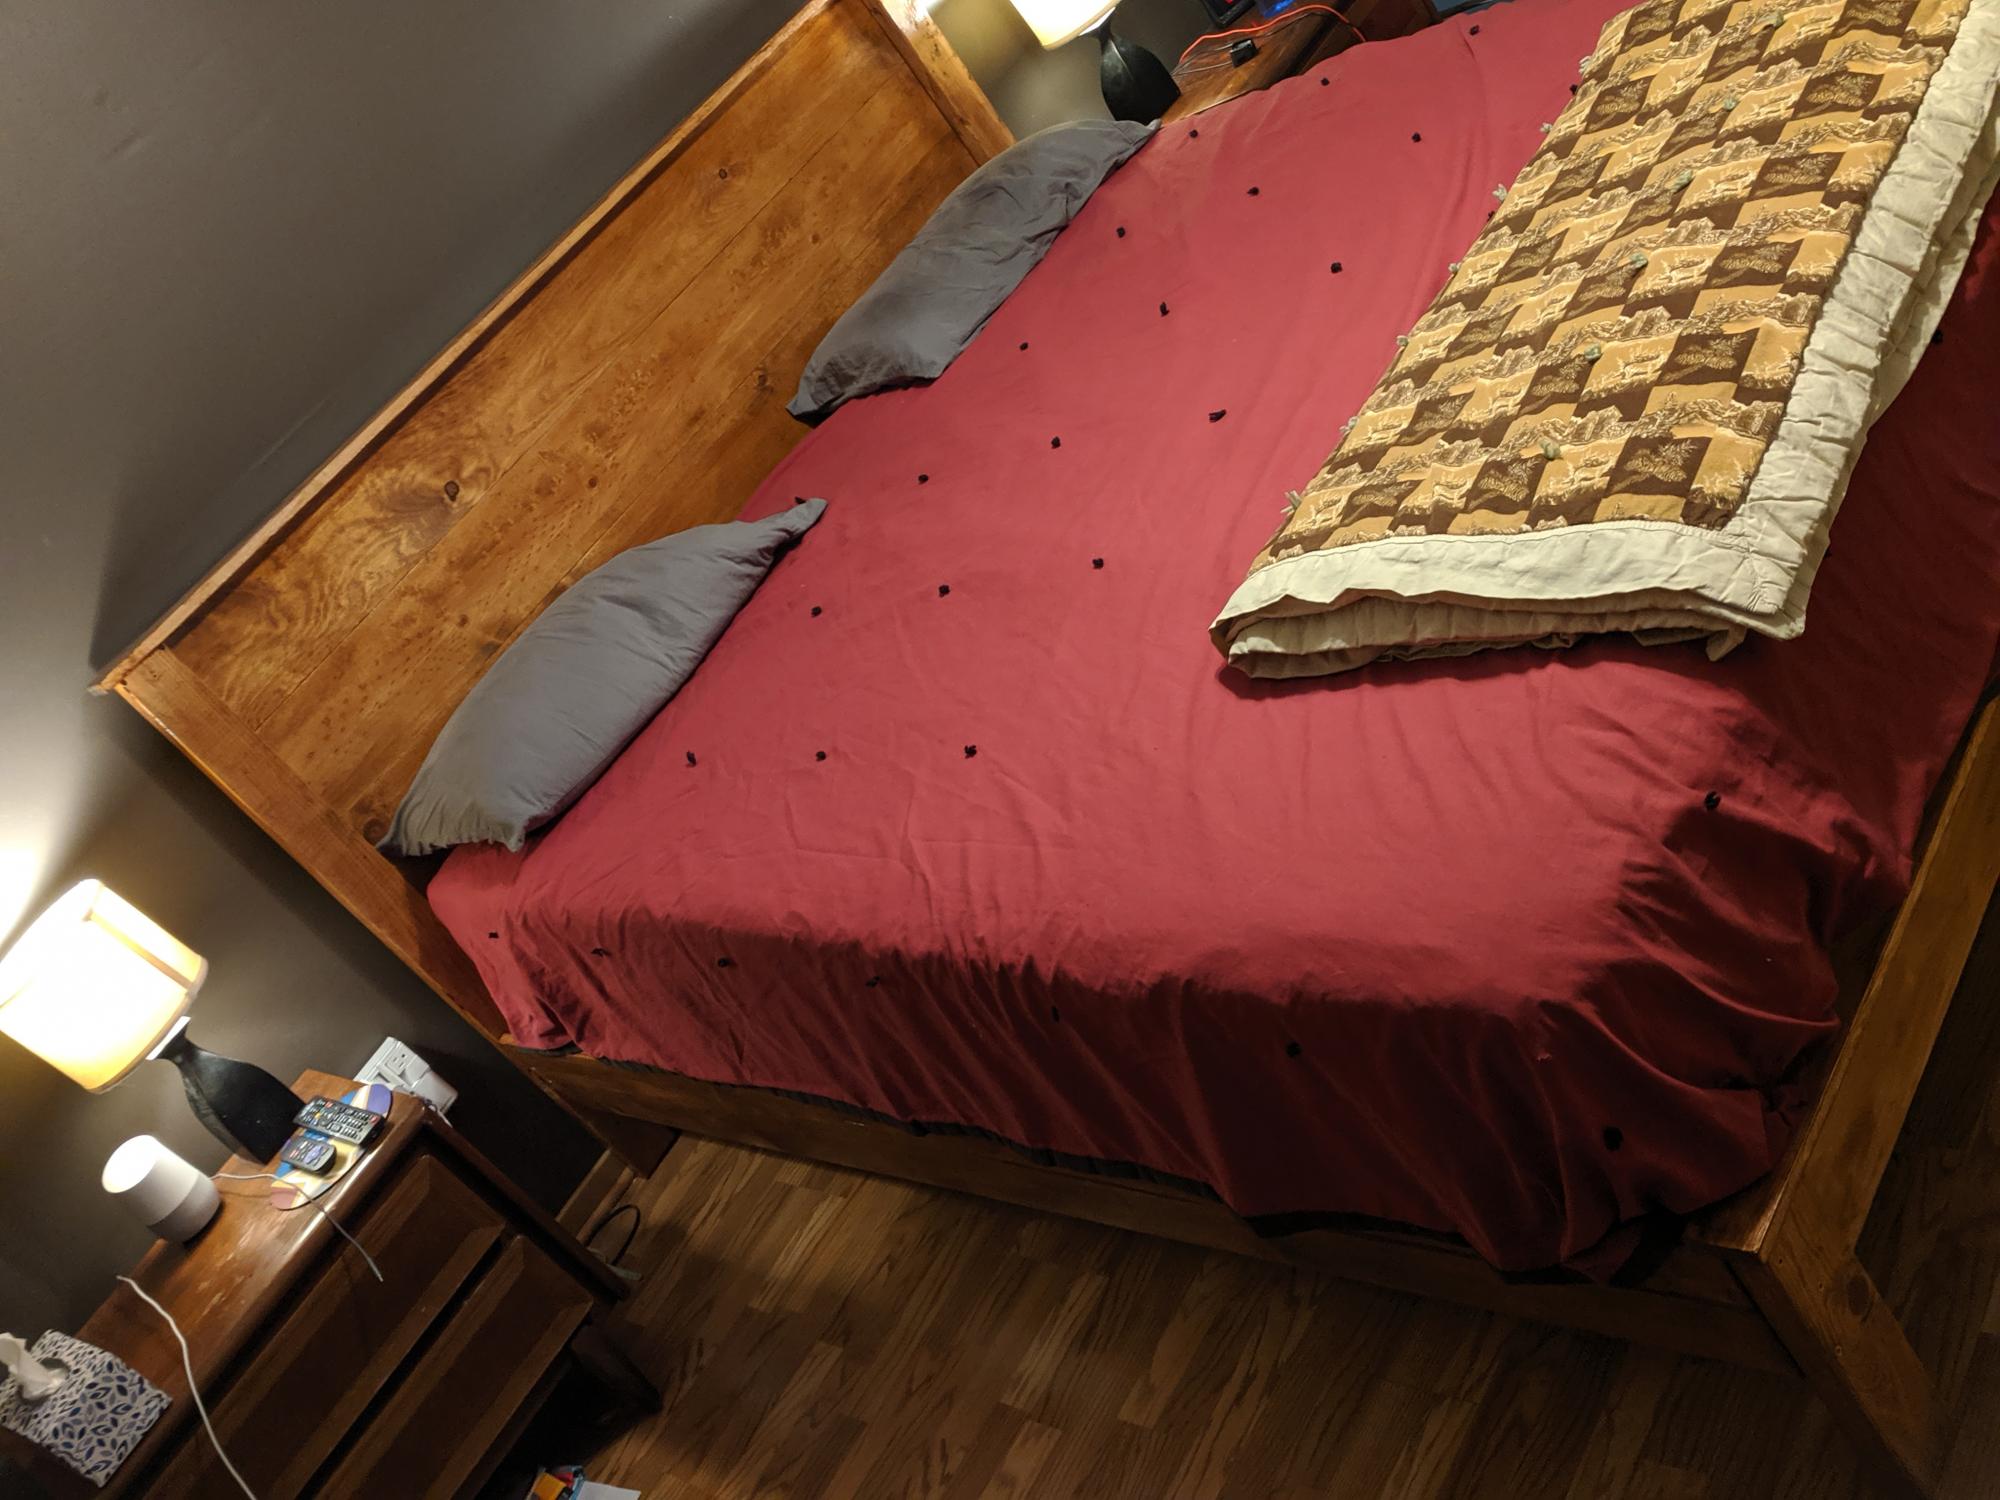
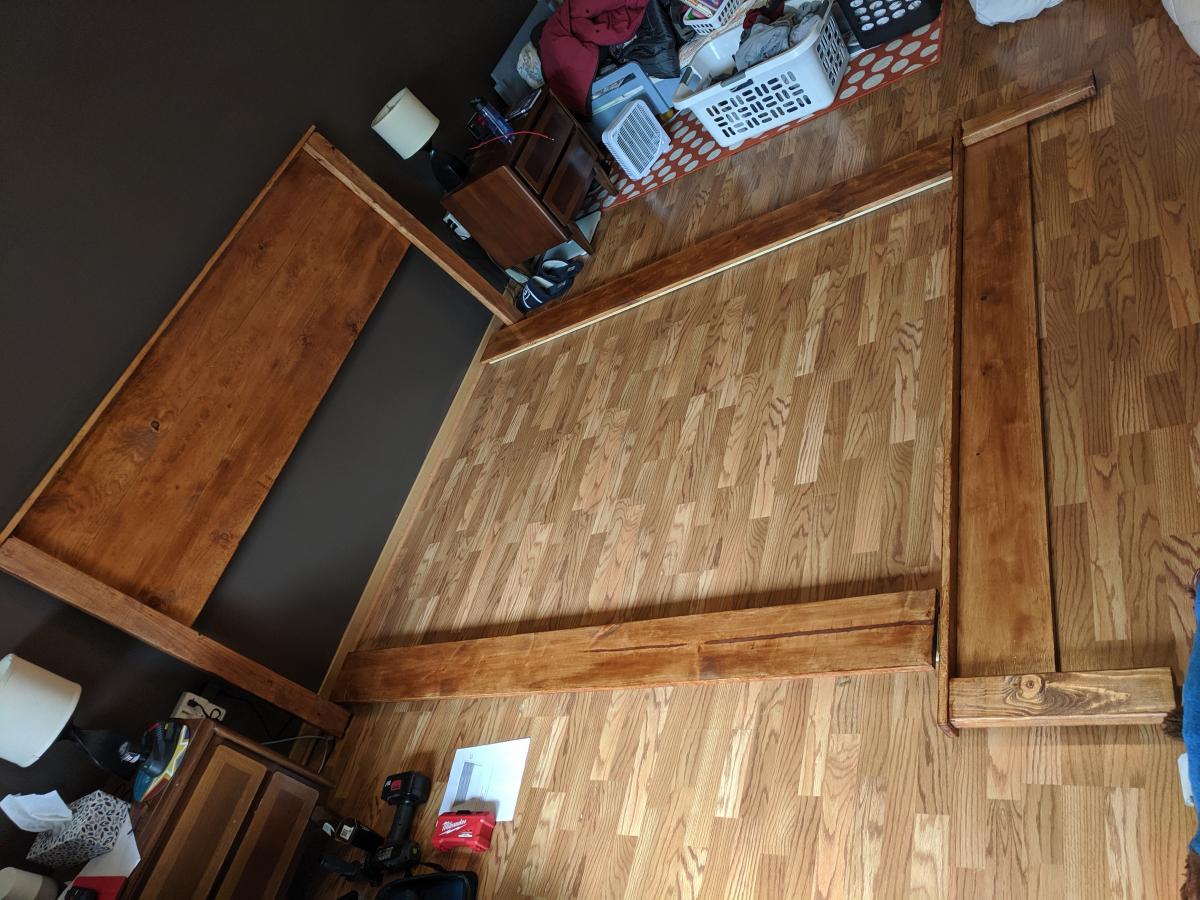
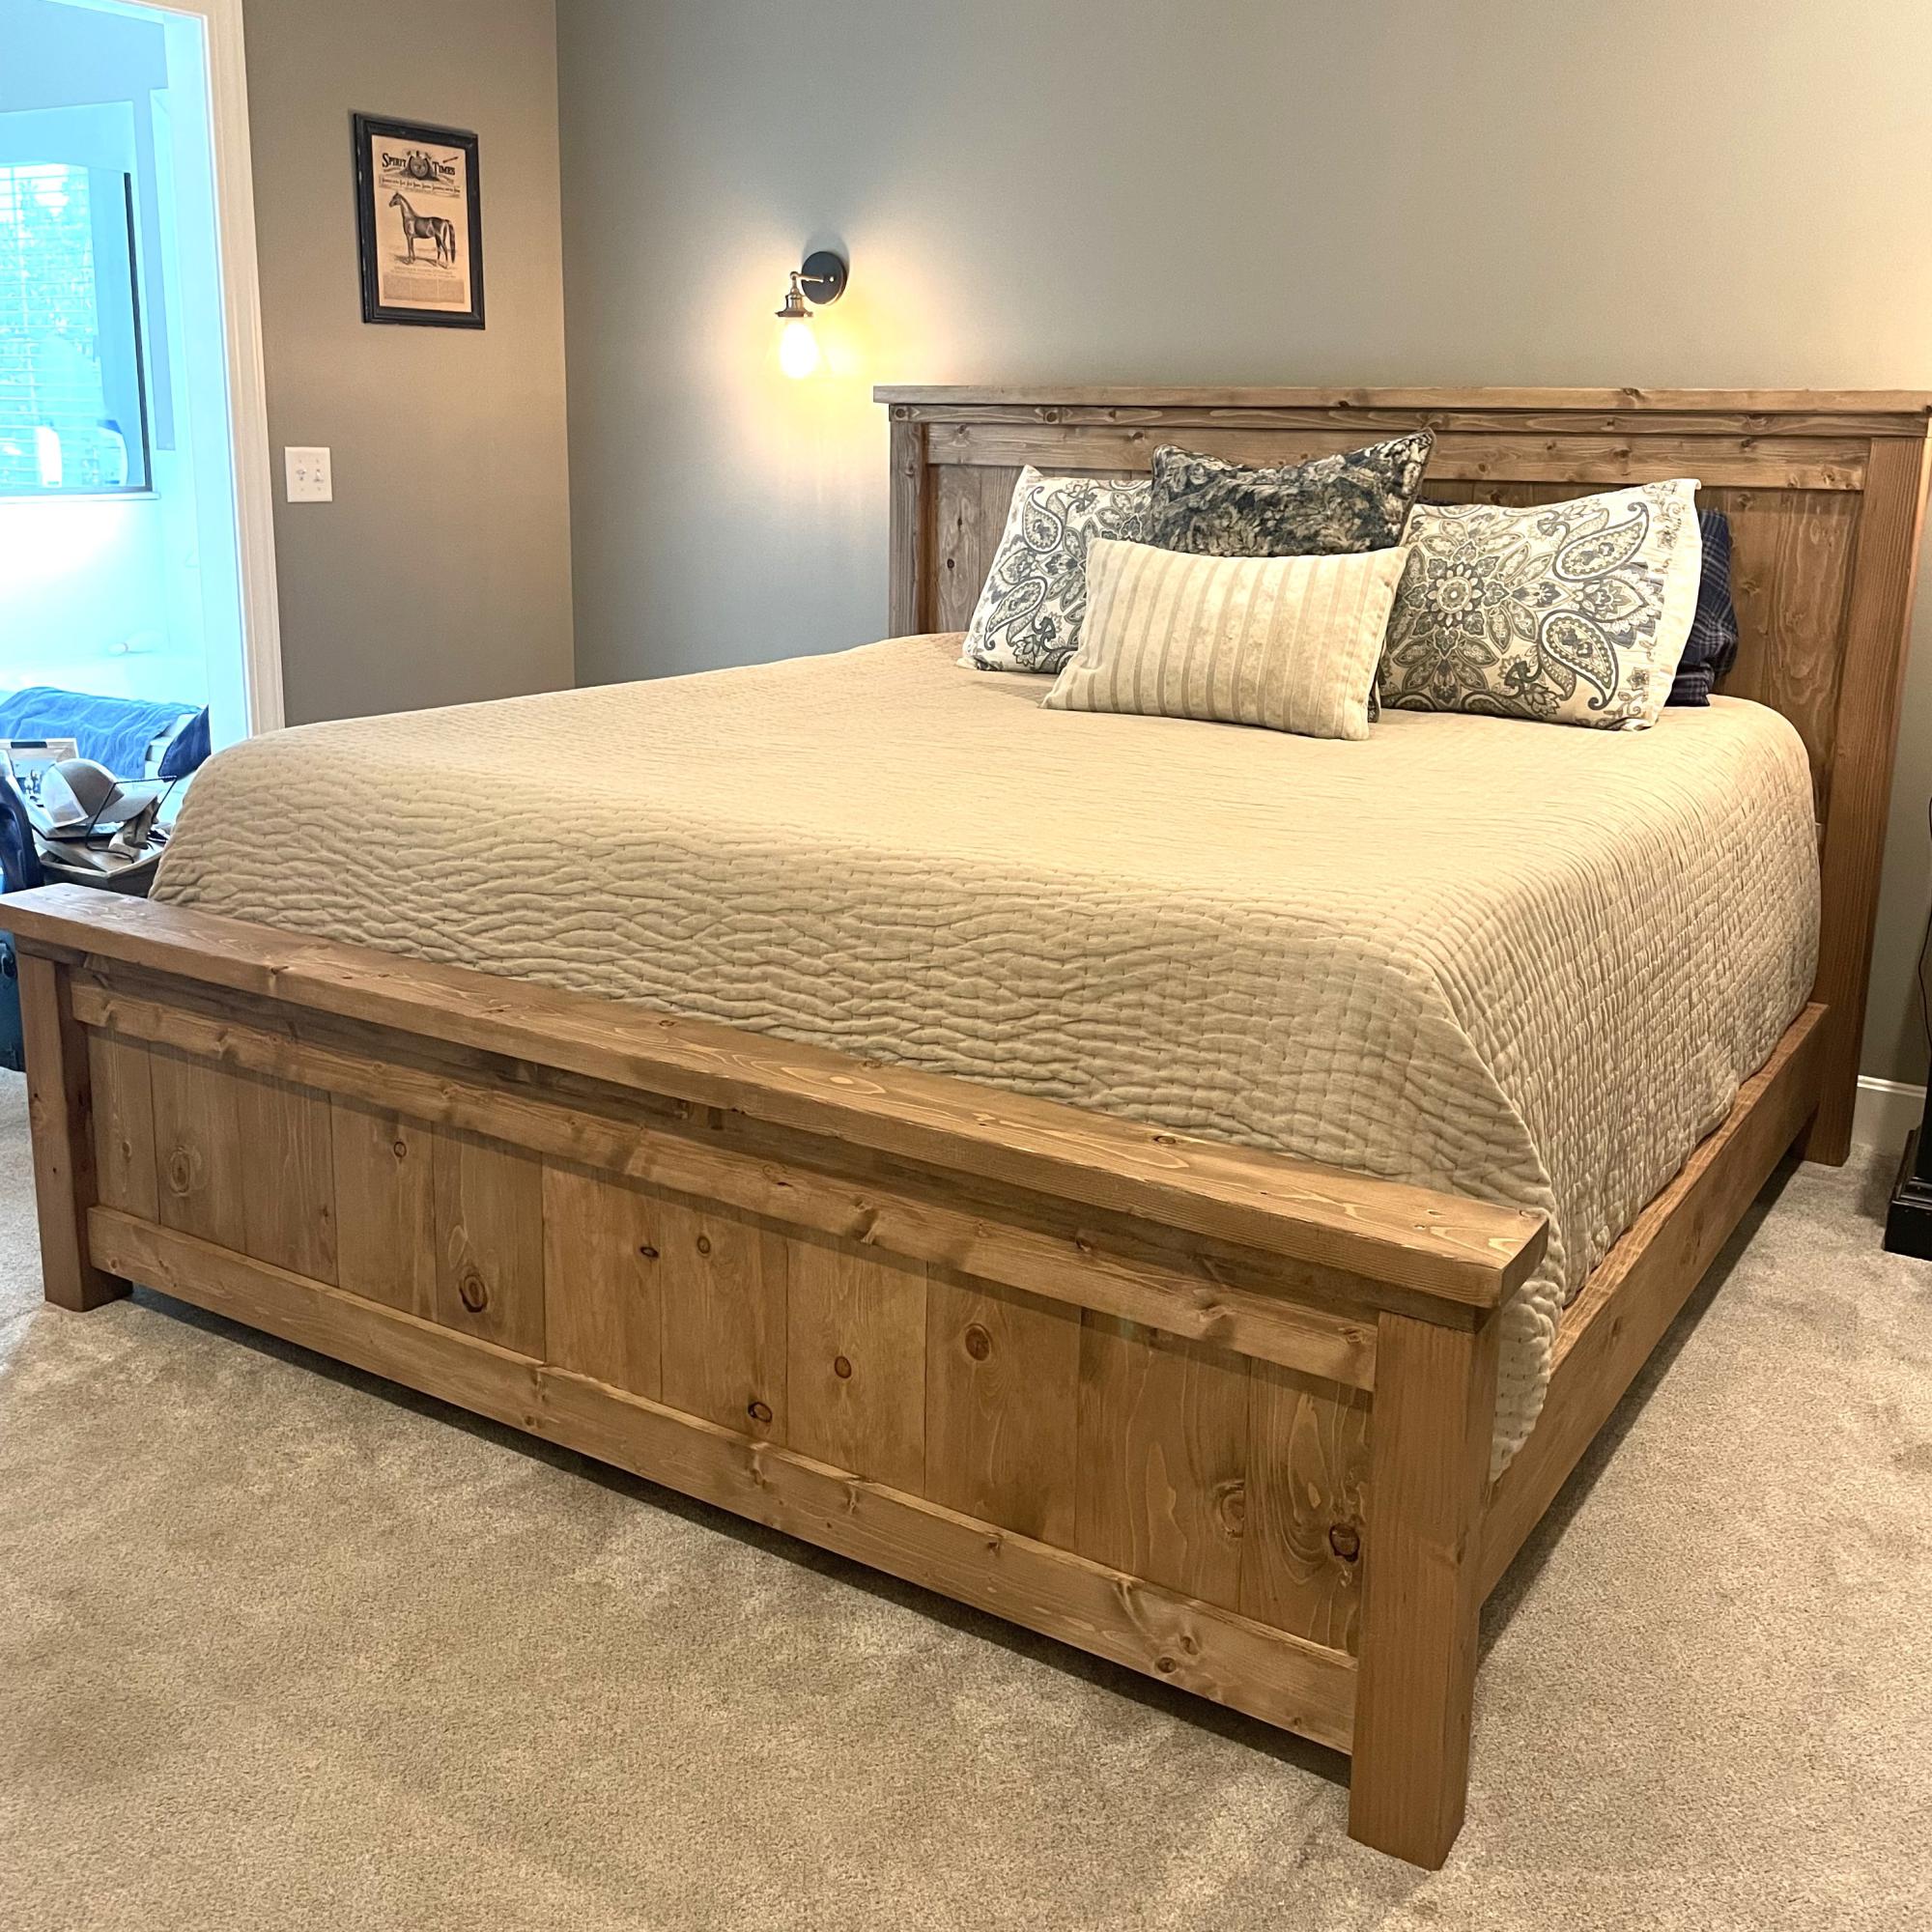
DIY Farmhouse Bed wth Boxspring

Submitted by Anonymous (not verified) on Sun, 07/16/2023 - 10:49

Wood = Pine
Finish = Minwax Special Walnut (after Pre-Stain)

This was a pretty straight forward build, but nice to have an extra set of hands. On the top board of the head/footboard, a countersink bit was used to recess the screw heads (otherwise, all fasteners in the plan are concealed). Then a mixture of glue/sawdust was used to smooth over the countersink hole. The whole project was sanded starting with 60 working up to 220.

We followed the plan, and in the photo this is the height of the bed with box springs and mattress. The bed feels sturdy and comfortable. It was a fun project and my first shot at interior furniture.


Dani & Brandon's Patio Set

Submitted by Laurie Mac on Thu, 03/08/2012 - 14:47

I gave my son's girlfriend a "gift certificate" for her birthday that said I would build her anything she'd like. There is a small patio outside my son's apartment that faces a lake. She decided to ask for some chairs so they could sit out on a warm night and watch the ducks swim by.

Estimated Cost
Not real sure... maybe $50...
Estimated Time Investment
Week Long Project (20 Hours or More)
Finish Used
Cabot Stains Australian Timber Oil
Recommended Skill Level
Beginner

My new TV X Console!

Submitted by chlag on Thu, 01/02/2014 - 21:53

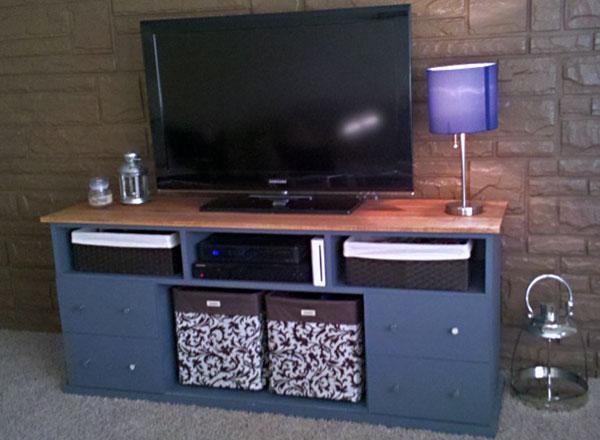
I Modified the plans to add enough shelves for my audio video equipment and leave place for the woofer. I also shorten it to fit in the space I had available. Notice the 2x4 legs became 2x3 to keep a decent aspect ratio.

Love the oxidizing finish!

Built from Plan(s)
Estimated Cost
80$
Estimated Time Investment
Weekend Project (10-20 Hours)
Finish Used
Tea - Vinegar/steel whole - Wax
Recommended Skill Level
Starter Project

Comments

Adirondack Chairs and end table

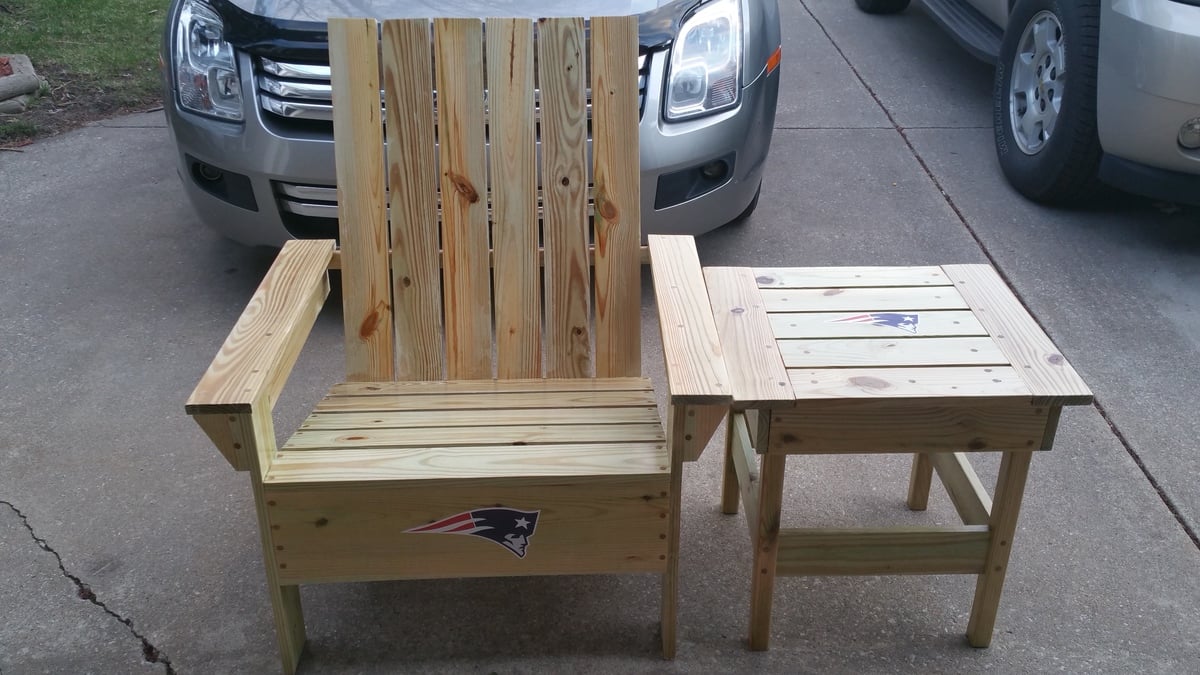
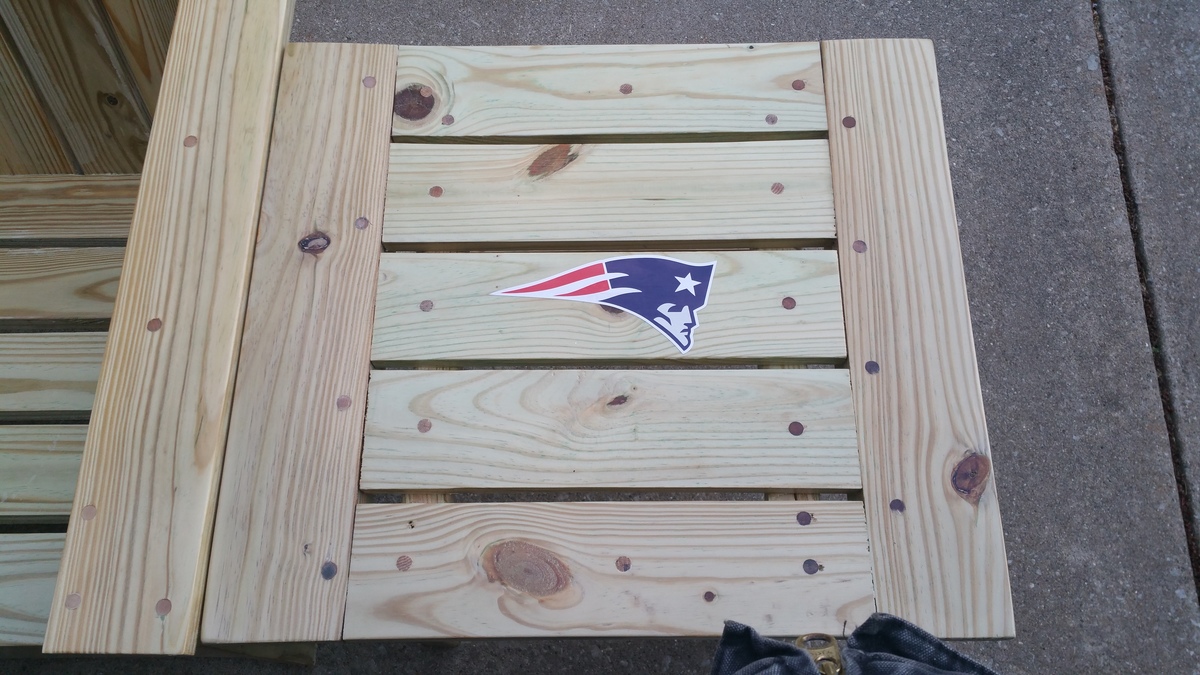
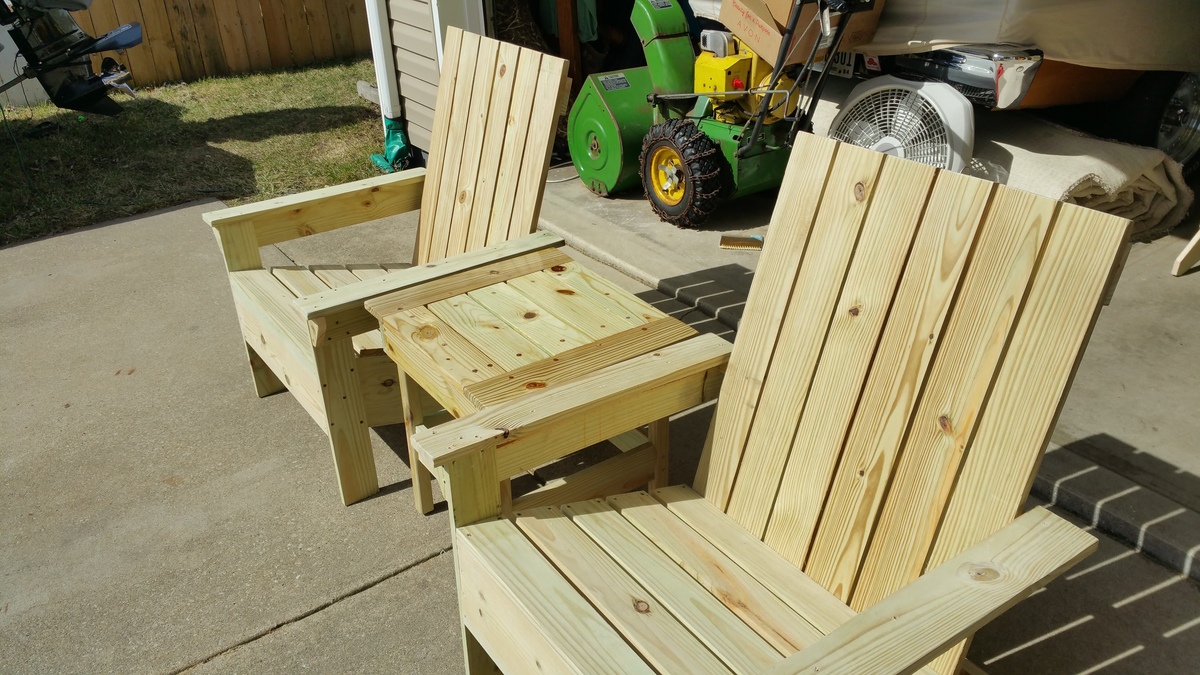
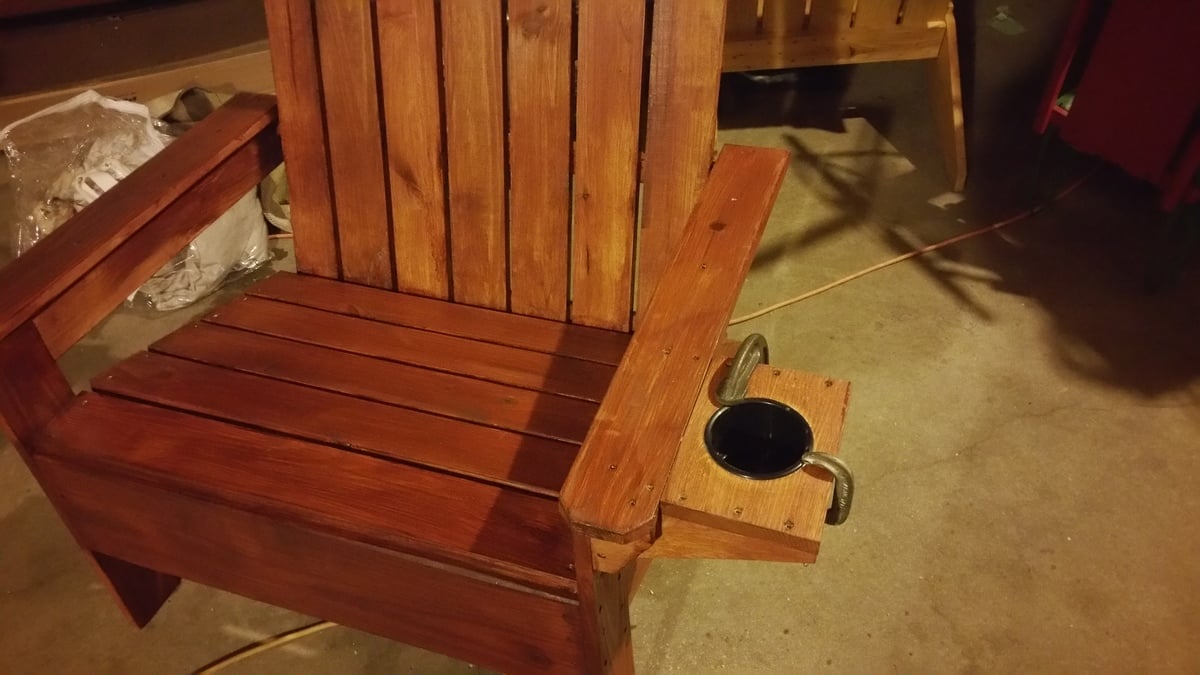
Easy project to build. I added a full board to make chair 4in wider. I also counter sank all screws and used wood plugs to cover screws. I also used 1x4's for all the slats and arm rests. Didn't use 1x3's at all. I added cup holders with some scrap left over wood. Got some plastic cup holder inserts.

Estimated Cost
Roughly $40
Estimated Time Investment
Day Project (6-9 Hours)
Finish Used
3 stage sanding with 320 grit finish. A coat of sanding sealer followed by outdoor urethane. Then added some 10yrs outdoor vinyl decals. I also urethaned over the decals.
Recommended Skill Level
Beginner

Simple Panel King Bed

Submitted by Bradnag on Sun, 11/03/2019 - 09:43

Needed a quick and simple plan for a new king frame, so I went with the simple panel bed. Stuck mostly to Ana's directions, but used pocket holes on the back of the headboard to get the 1x8's really tightly flush against each other. Since I was assembling it myself I definitely followed Ana's tip about cutting some spacers to prop up the sideboard while securing them to the headboard. Even with as minimal as these plans are, the bed is pretty heavy and very sturdy.

Estimated Cost
75.00
Estimated Time Investment
Weekend Project (10-20 Hours)
Finish Used
Minwax Polyshades
Recommended Skill Level
Intermediate

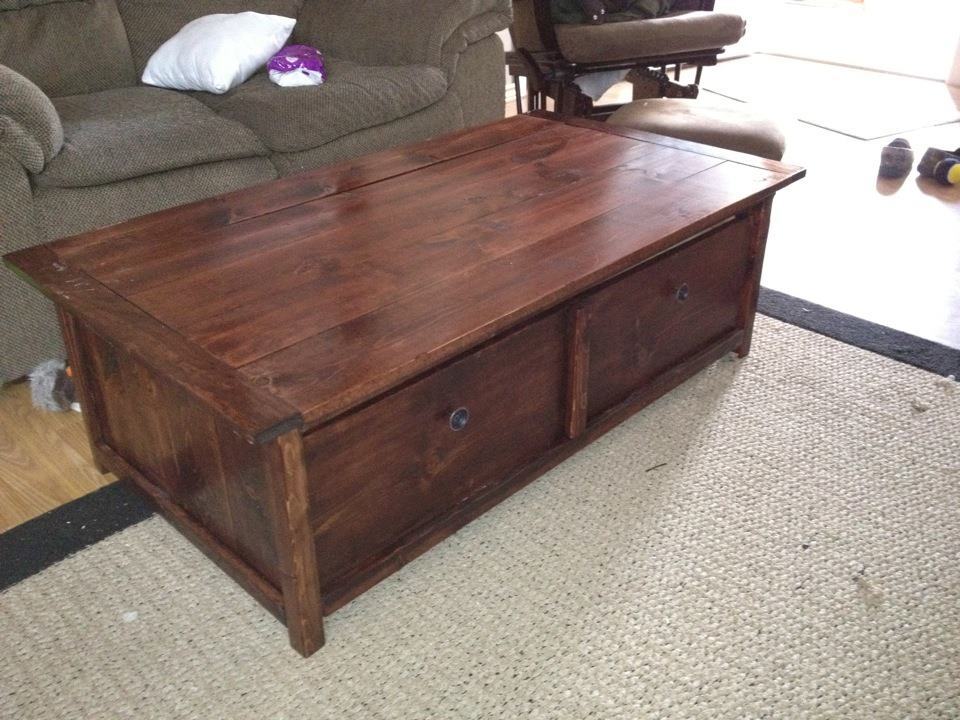
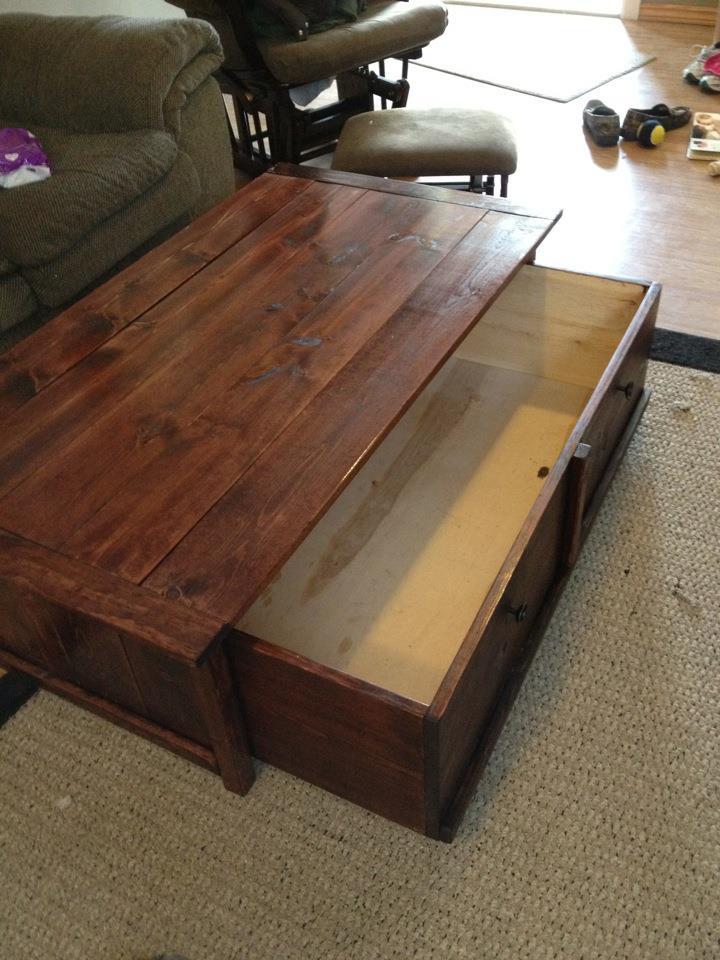
20 sec tidy up coffee table with trundle toy box/storage

This is a project we built this weekend. My husband and I desperately needed some sophisticated storage space in the living room that is kid friendly, so we accepted the challenge. We together built a coffee table with trundle storage inspired by a plan on ana-white. We are truly inspired by her designs and plans help a LOT! Check out our work!

Estimated Cost
$100
Estimated Time Investment
Day Project (6-9 Hours)
Finish Used
We used one coat of red oak minwax stain with a layer of red mahogony stain over top. We finished with clear polyurethane.
Recommended Skill Level
Beginner

Comments

Bunnie1978

Tue, 03/13/2012 - 07:11

That looks very nice. This is the next project on my list I think.
It's really great to see the project with a different kind of finish also. How do feel about the functionality of it now that you have it "up and running" in your living room?
And... how do your kids feel about it?
Any drawbacks to this design for your needs, or tips that you can give me for building it over the next couple weeks?

In reply to by Bunnie1978

Windycrocodille

Tue, 03/13/2012 - 07:53

Thank you for the compliments! So far we absolutely LOVE the functionality! It really is made for easy clean up, slides back and forth nicely (we used wheels that only go one way, not swivels.) and our one year old seems to enjoy it. The table and storage compartment are just short and sturdy enough that she can pull herself up on them and because the storage compartment is not on swivels it doesn't move when she does. She is the first grand-baby on both sides of the family so she has approximately 175 toys that we have to find a place for and they all fit very nicely. With the large storage we have noticed that she is pulling out and playing with different toys that she could never get to or find before. As far as design is concerned we did have to modify it a little bit to work with the tools that were available to us. We wish the side legs were sturdier, even with 6 screws in each side they are still a bit wobbly. With the storage box underneath it helps to support it from swaying but we are still talking about ways to make it better. A possible support beam on the bottom of the back side? All in all we love the piece it fits perfectly into our space and offers a LOT of storage that we didn't have before. My husband and I had tossed around the idea, before we started, of making the piece smaller but we are glad that we didn't.

Suggestions: if you are going to buy based off of the shopping list provided make sure you also buy 2" screws. They forget to include that in the shopping list but include that in the directions. If you have any other questions feel free to ask. It was a really really fun project for us.

brookifer86

Tue, 03/13/2012 - 09:10

I just finished my Tidy Up Table too (brag post coming!) and I decided to add one L-bracket to each corner because of the wobble. I've also got a baby (7 months) and it's nice to have that added stability just in case. Now the sides are solid as a rock!

Bunnie1978

Tue, 03/13/2012 - 13:08

A little bit of medal support would probably be really good... I was actually thinking of modifying the design a little bit already, which will probably serve the end result to provide better stability. I think I'm going to make the storage trundle a little shallower, and put a row of small square drawers above it on each side. That is of course, much more complex, and then detail the trundle with the small squares so it looks like a cabinet of drawers all the way down...
What do you think of that idea? I mentioned that on the plan post too... still kicking it around a bit.

Farmhouse table

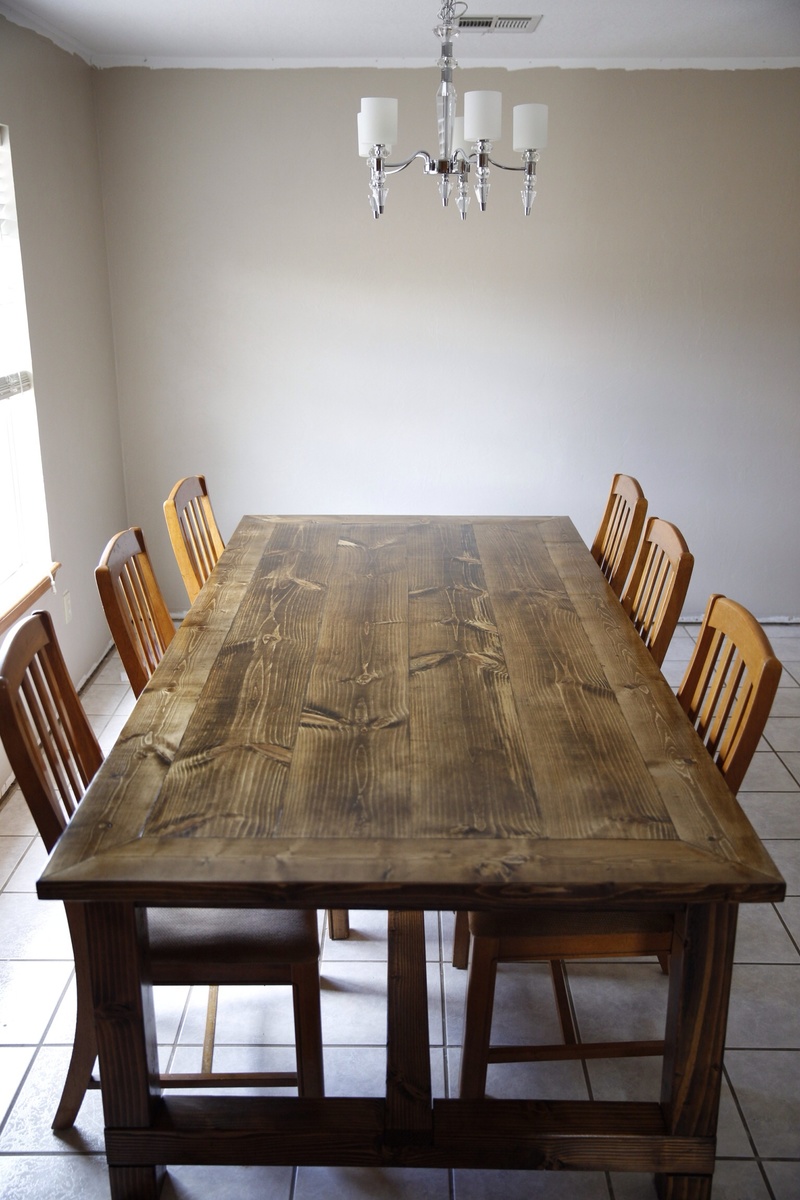
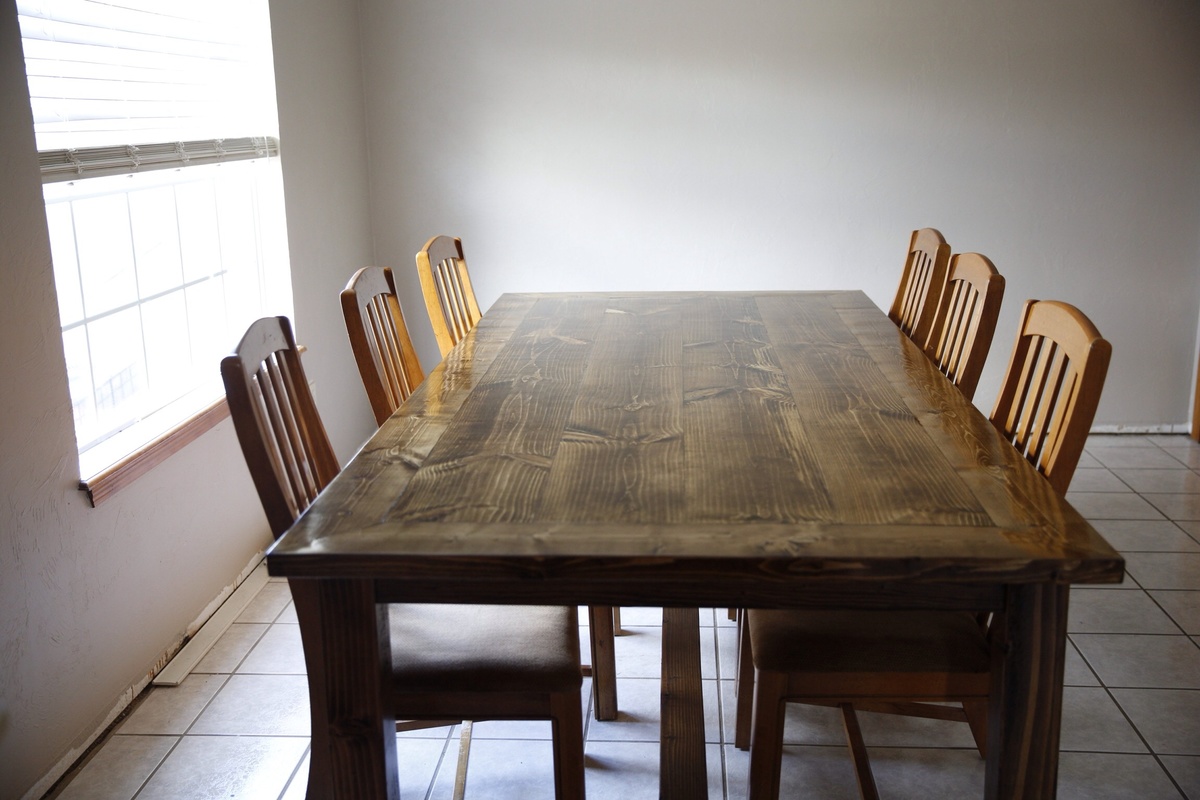
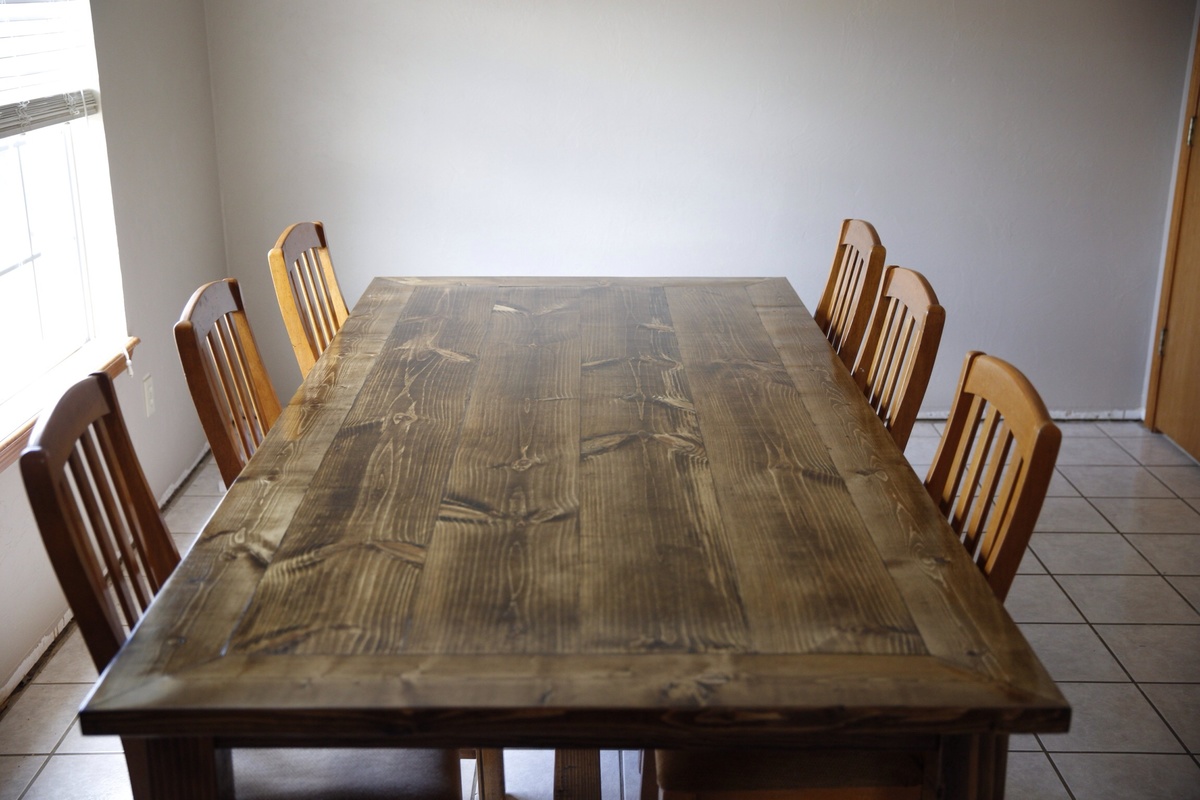
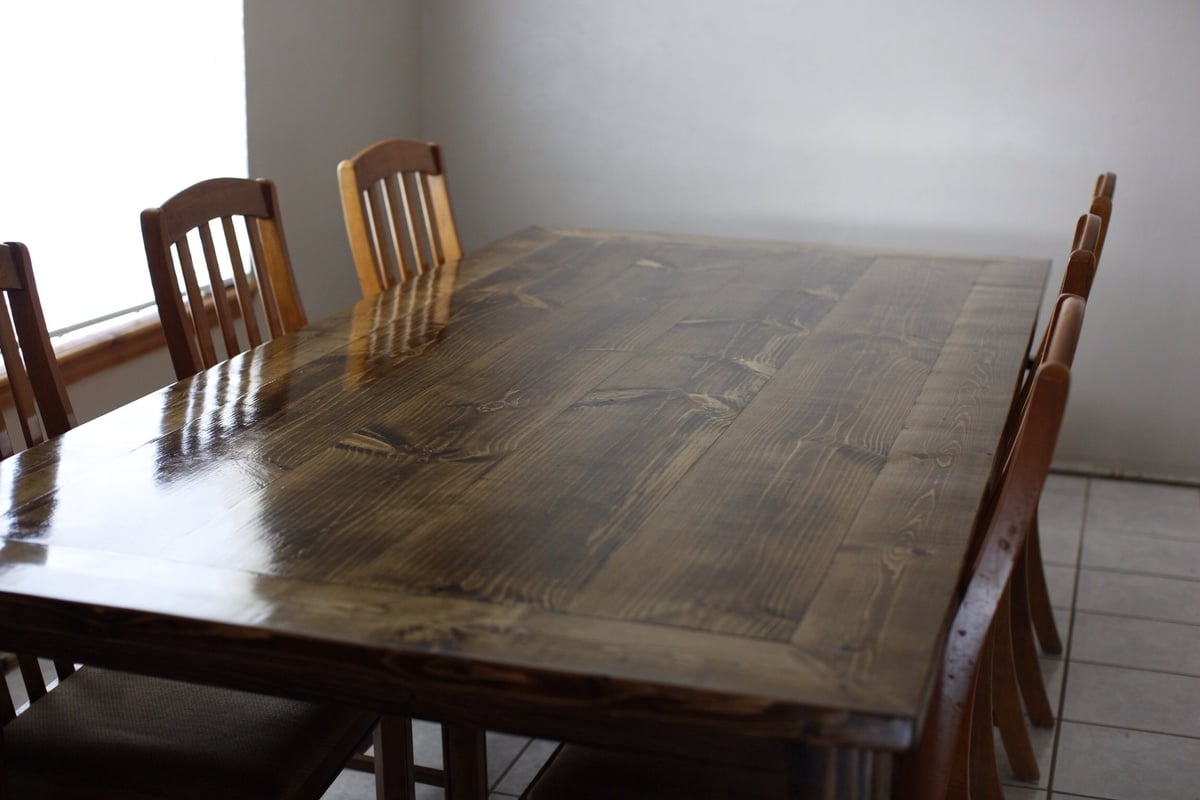
Farmhouse style table, 4 2x10 with 2X6 border. All Doweled and glued. Seems most plans are with square "breadboard" ends, i thought this style was a bit cleaner with no raw ends. 4X4 legs with 4X4 cross stretchers. Table ended up 4'X8' matching bench to follow.

You really need a dowel-jig, Kreg-jig, and bar clamps to do this project. You can also use a biscuit cutter instead of dowel jig, but I think it lines up better with dowels.

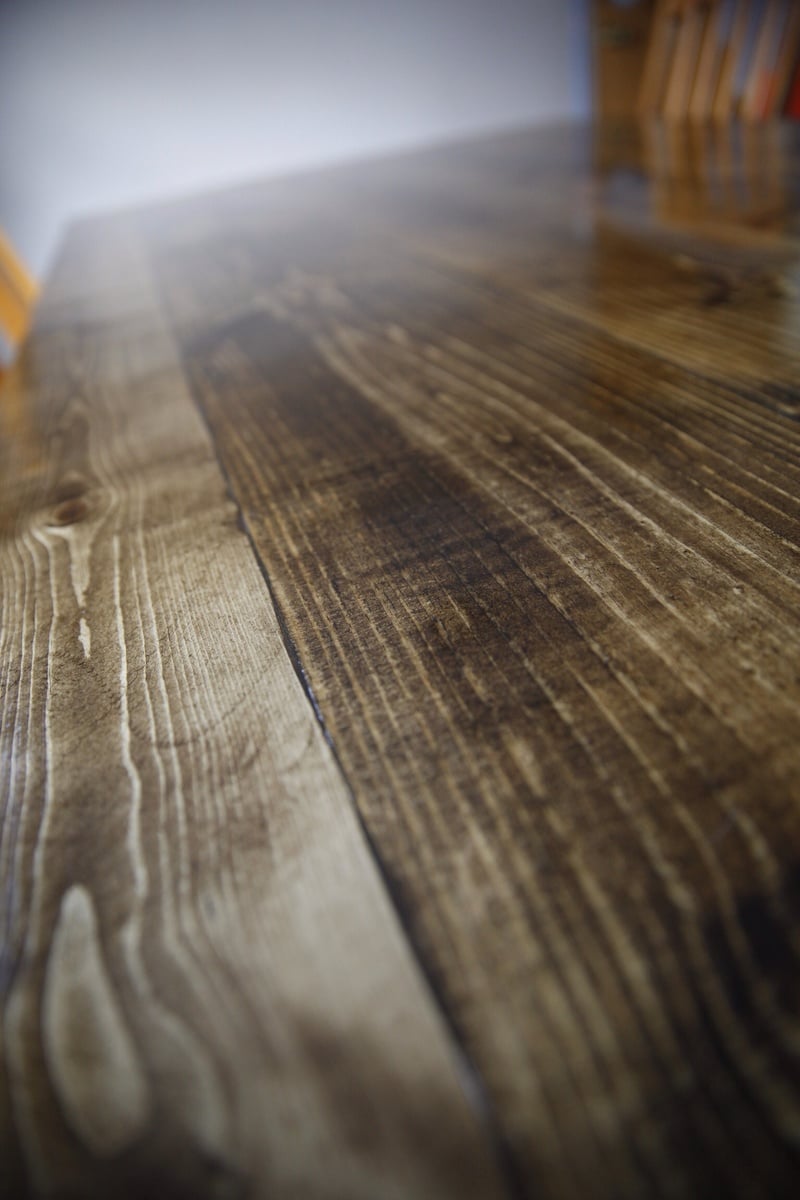
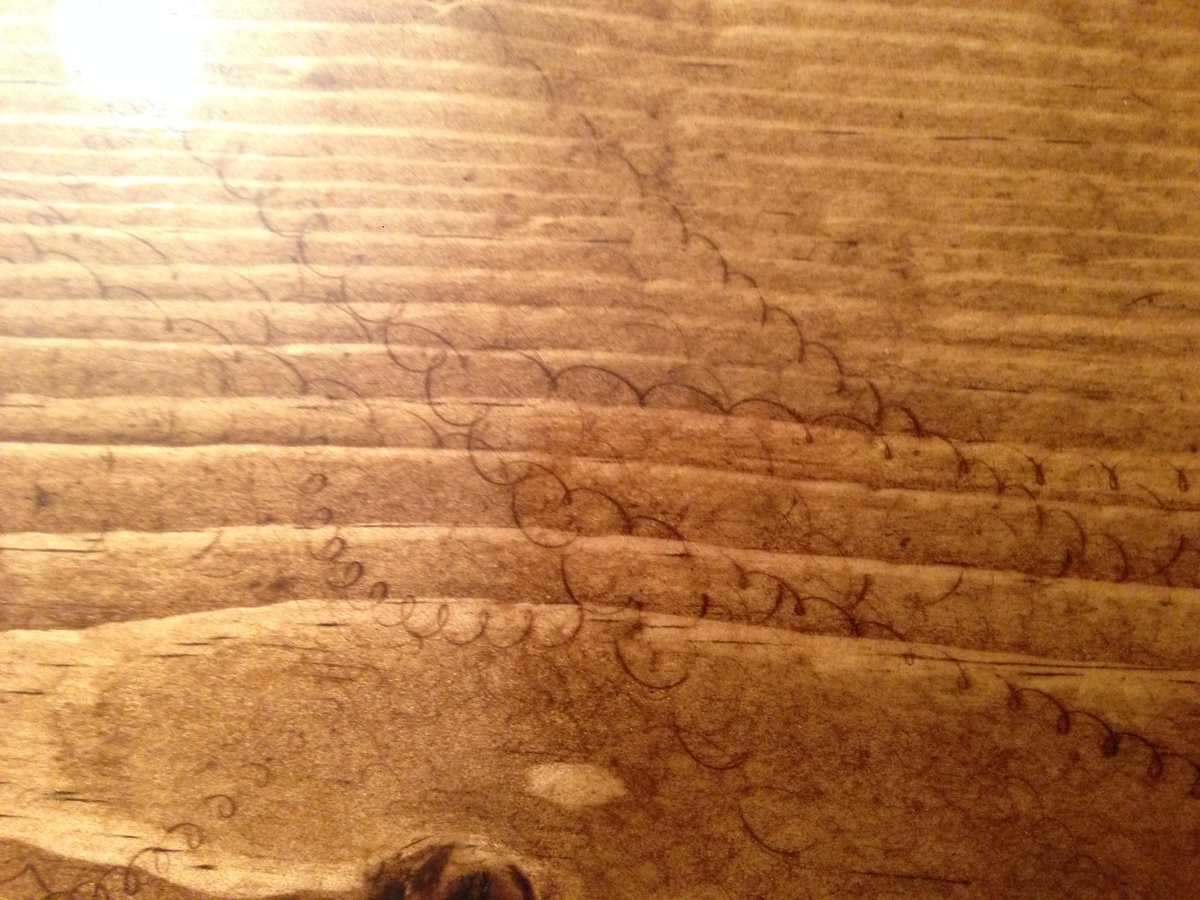
Close up shot shows swirl marks from 80 grit sandpaper used on an orbital sander... Even using 180 grit final sand it left them there, actually a nice distress look.

Estimated Cost
150.00
Estimated Time Investment
Week Long Project (20 Hours or More)
Finish Used
Min-wax dark walnut, min wax wood conditioner, 5 coats satin poly.
Recommended Skill Level
Intermediate

Triple Pedestal Table 12ft long

Submitted by Anonymous (not verified) on Sat, 03/26/2016 - 12:01

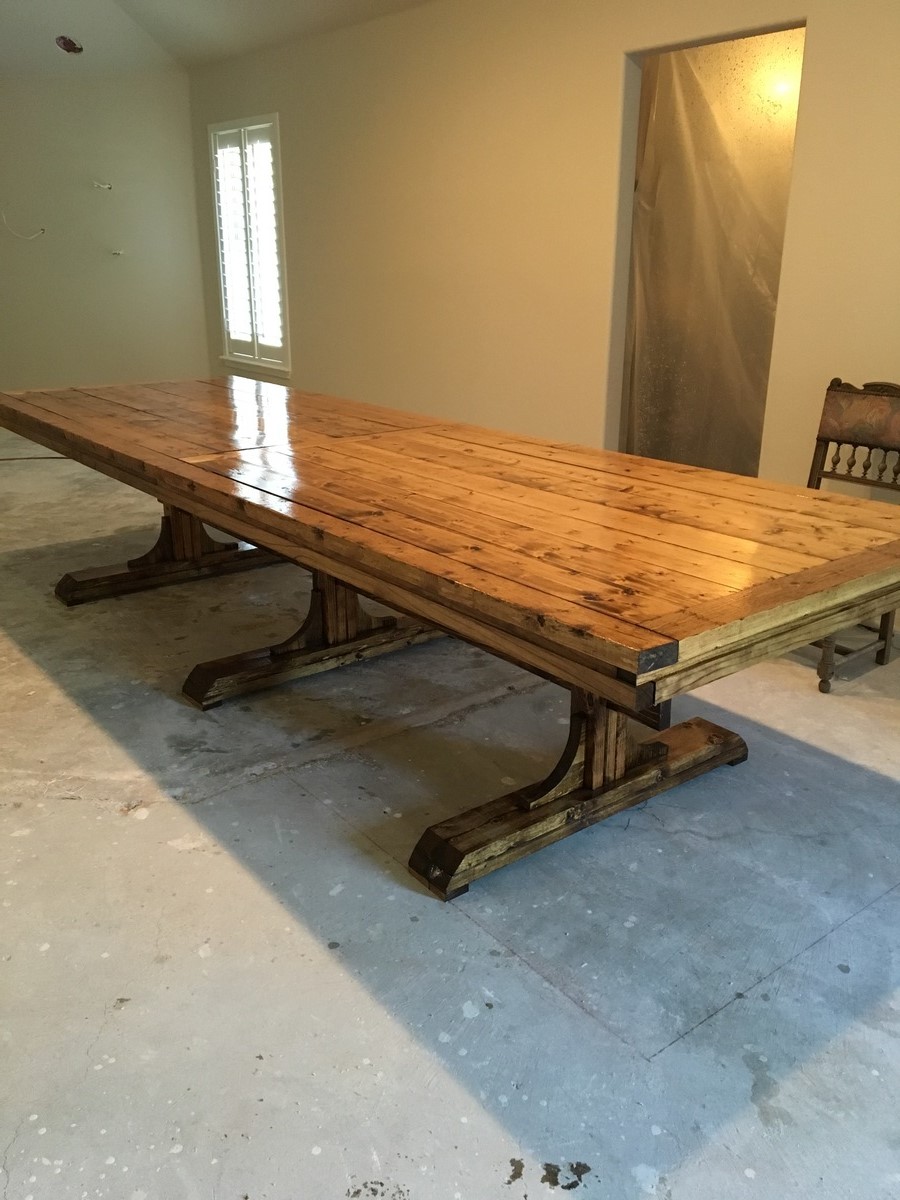
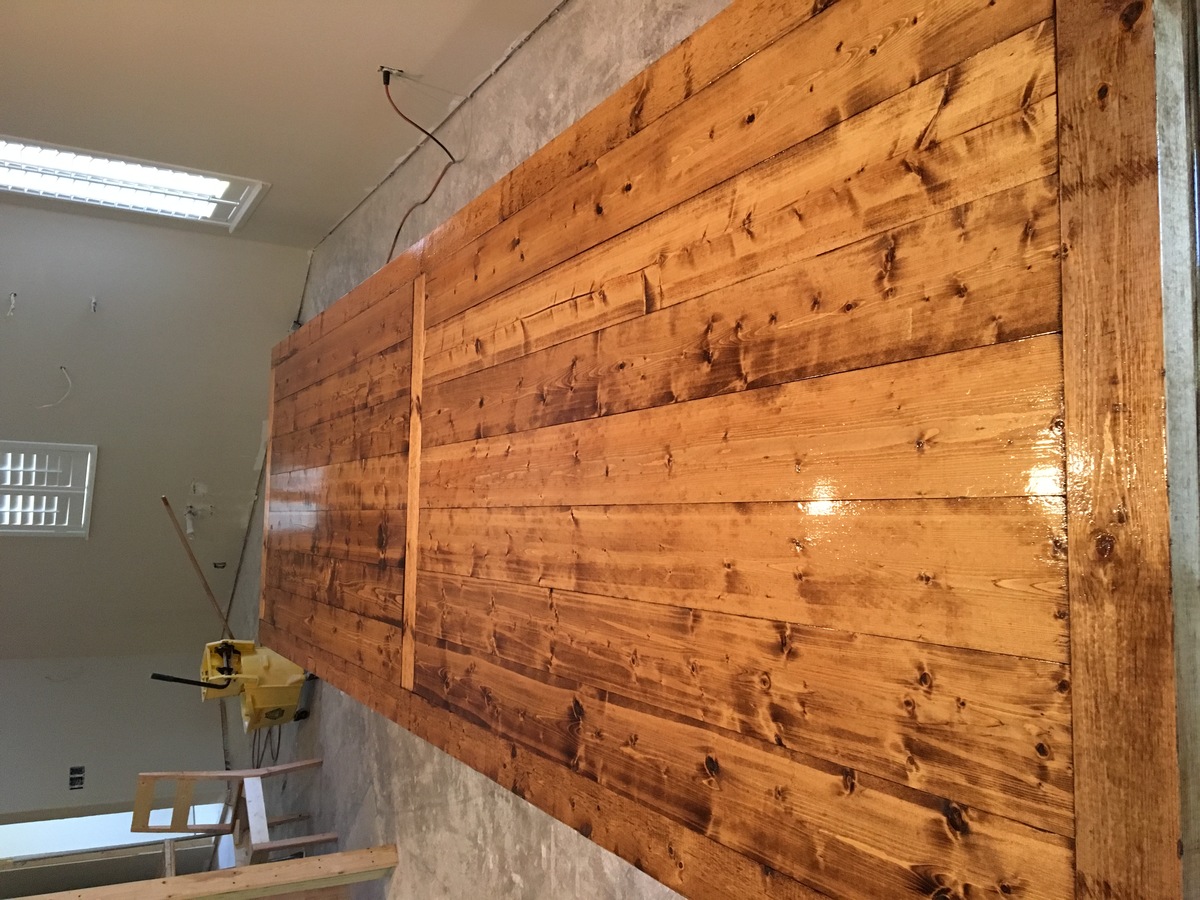
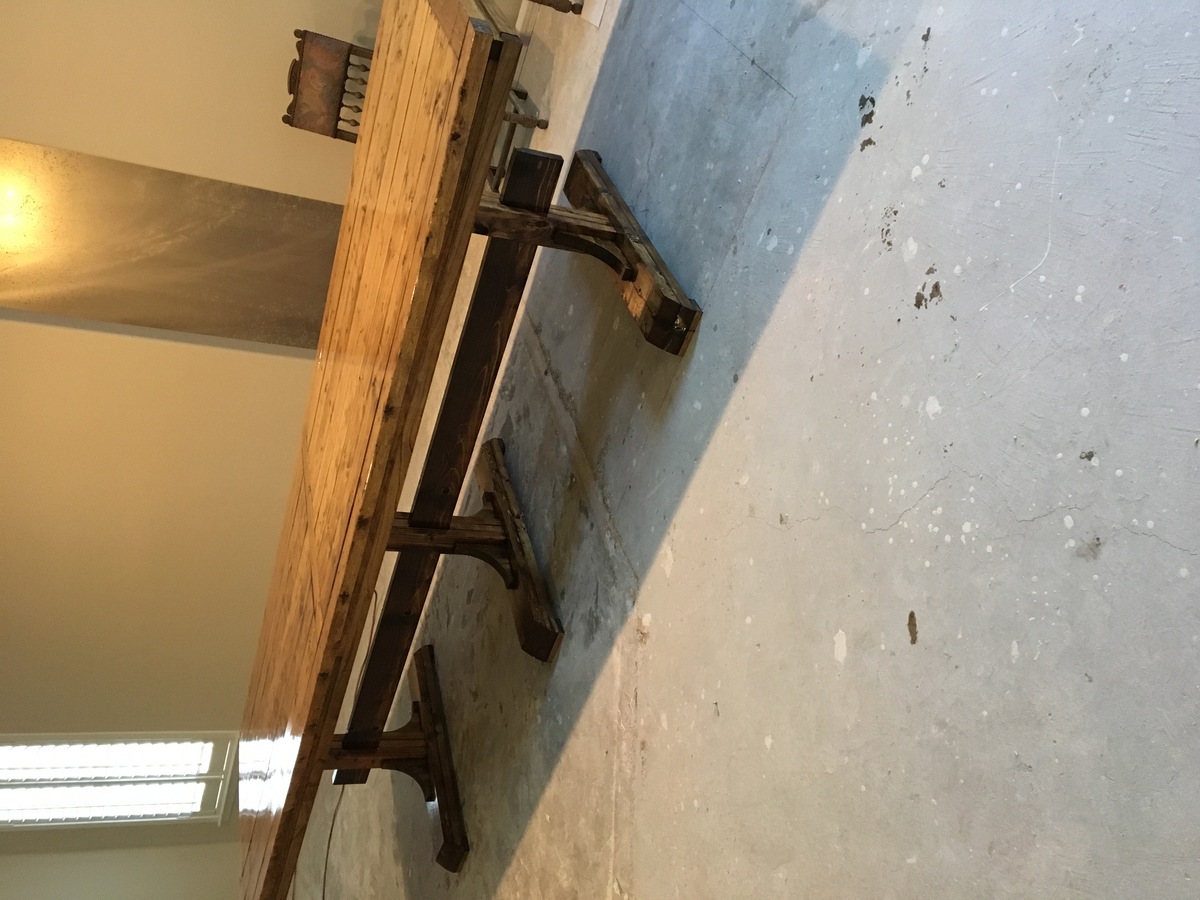
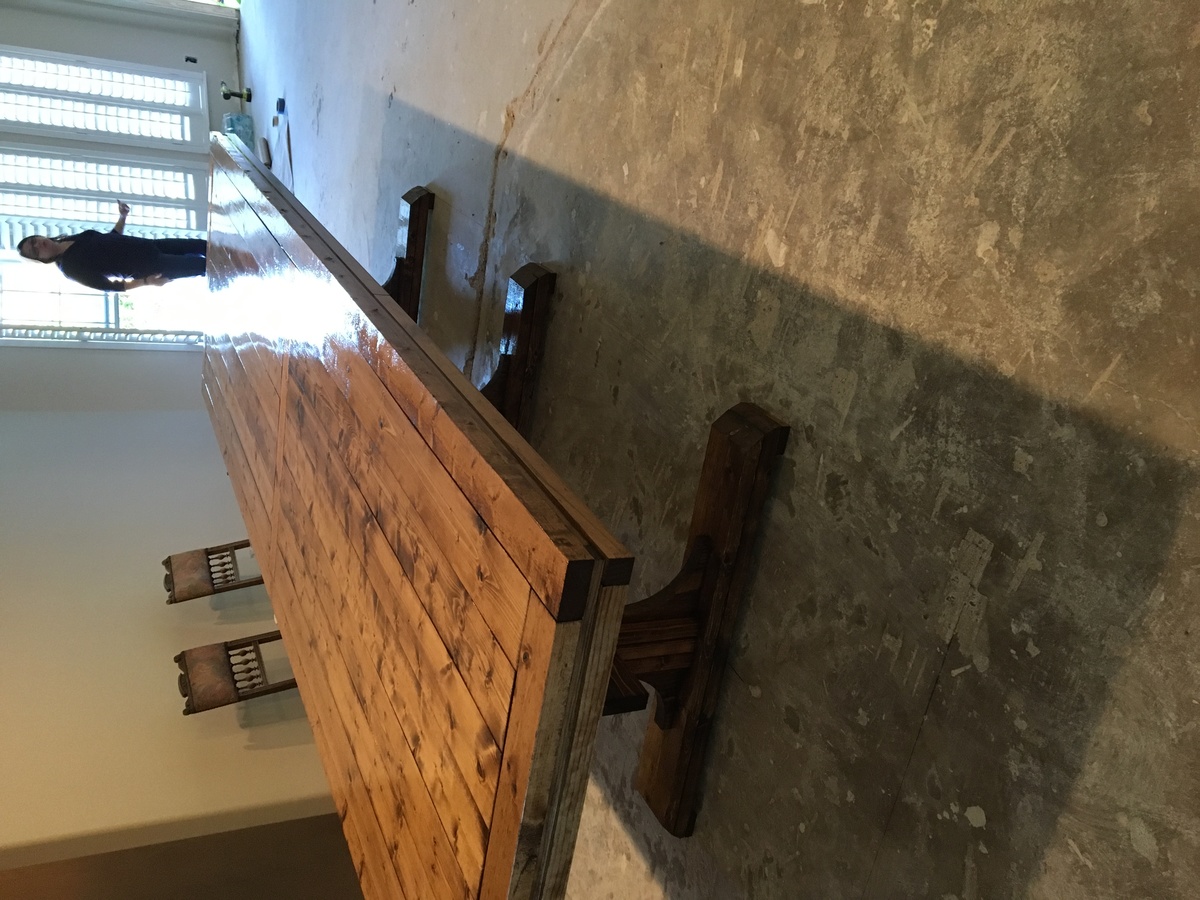
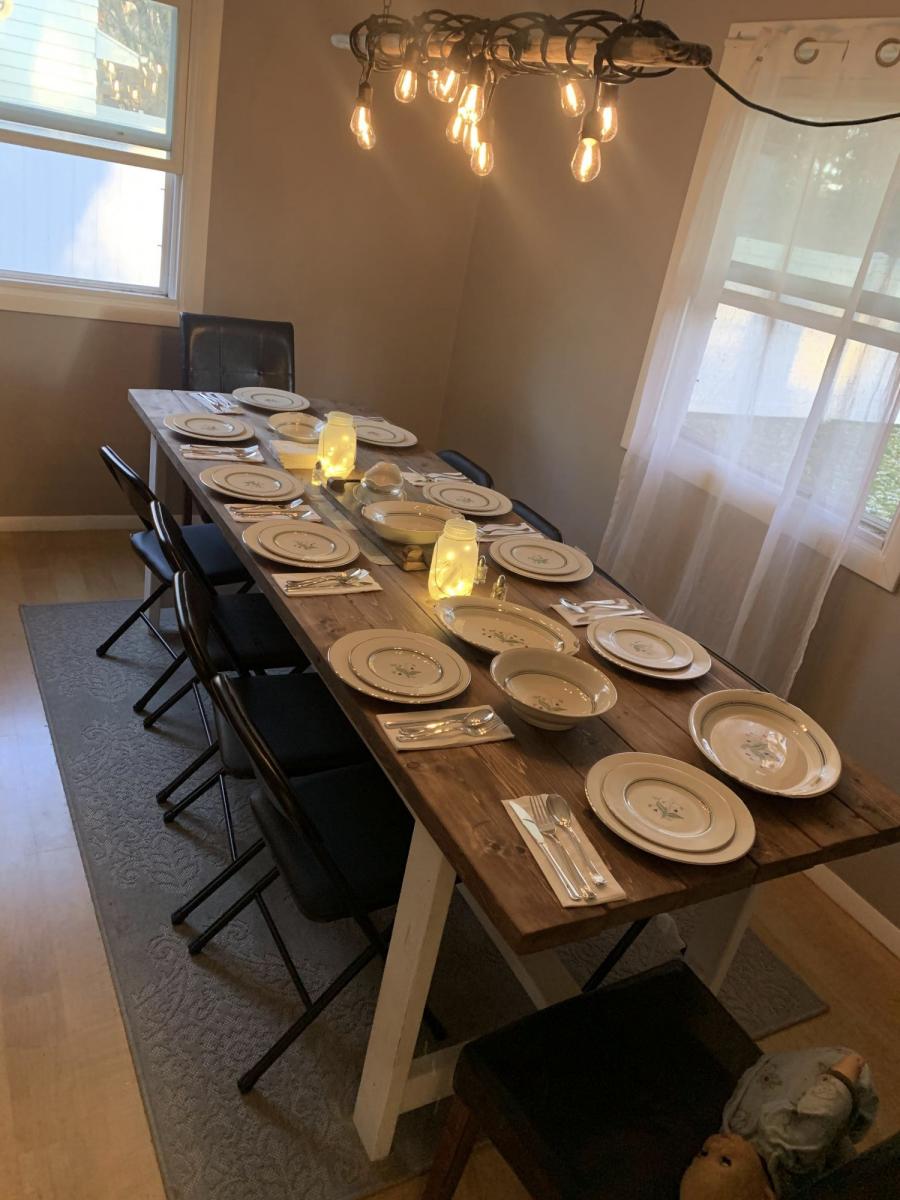
First DIY, my twin brother and I decided to build a table for my parents; as they are currently remodeling their house. Thank you so much for these easy-to-follow yet very thorough set of plans! We made some adjustments to the length and width: 144inches (12ft) long by about 45inches wide!! It's a monster of a table! We made the legs wider as well to compensate for the adjustments of the table top. We are all extremely happy with the results- thanks!

Built from Plan(s)
Estimated Cost
$160
Estimated Time Investment
Weekend Project (10-20 Hours)
Finish Used
Early American
Recommended Skill Level
Beginner

Beautiful DIY Computer Desk Under 50 Dollars

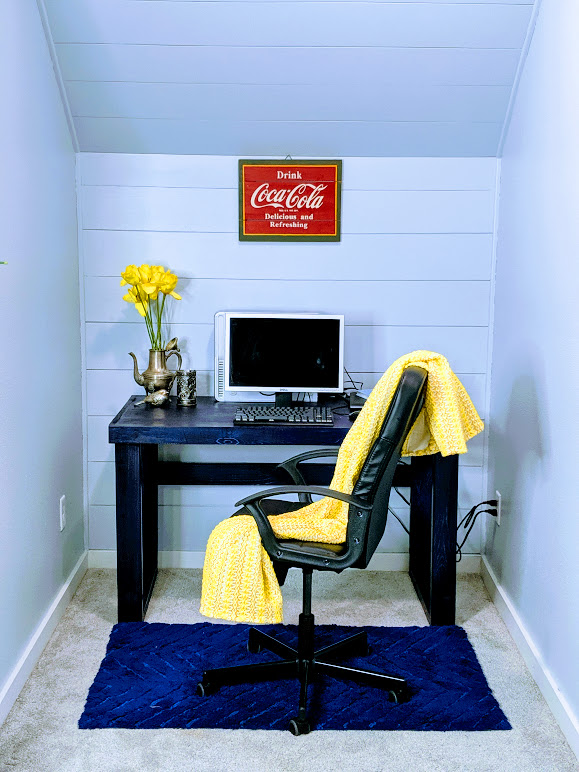
We were looking for a table with custom dimensions for our little office nook, but it was really hard to find. Most of them were very expensive, too. We decided to make our own table and share it with all of you as well. It's an easy project to do and minimum tools are required. You can also always use substitute tools as opposed to using the exact one we did in the project. 

Step-by-Step Tutorial

Step one: Cut the Wood

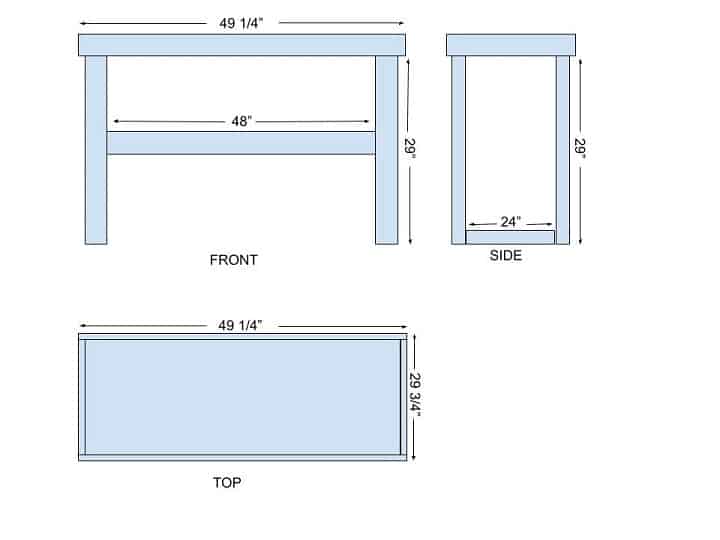
You need to cut 4 (2 x 4's) pieces for the legs using a miter saw, or you can have The Home Depot or Lowes cut it for you. You can adjust your own measurements according to the plan above. The plan is according to our space. We drew it in Google Drawings, and you can get that idea and draw your own.  

Step Two: Pocket Holes

Drill pocket holes in the legs using a Kreg Jig but if you don't have that tool it's okay too. Tou can use regular nails as well. I am in love with the Kreg Jig though, and I highly recommend the product to everyone as it makes your joints stronger. 

Step 3: Put The Leg Together

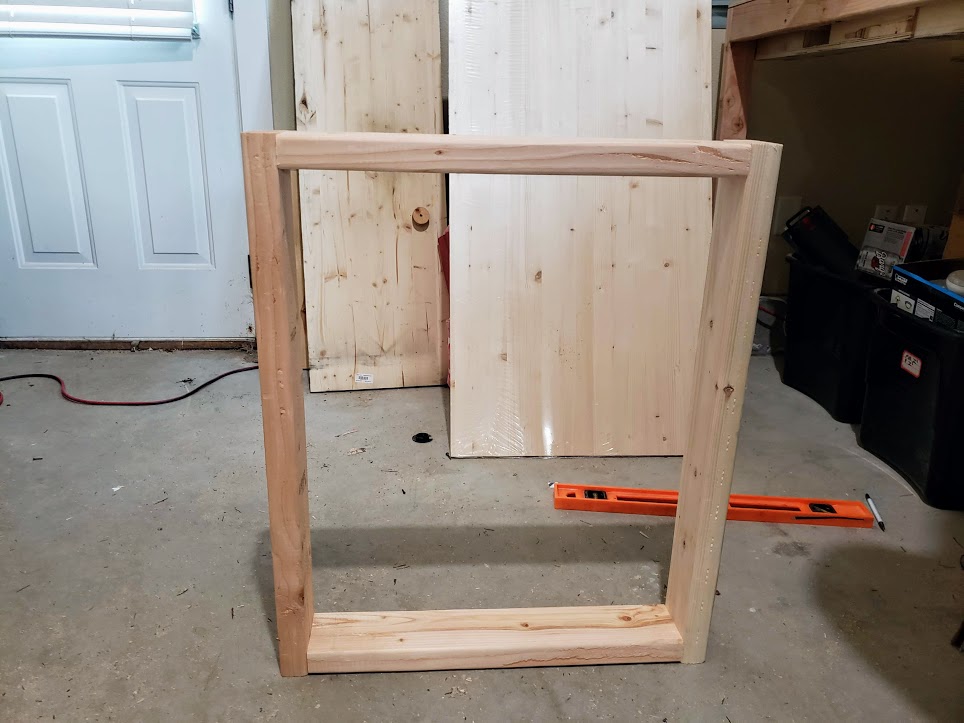
Once you are done with making the joints, it's time to screw the legs together to make it like a frame. See the picture. It should look like a rectangular box. We also placed scrap wood in the middle just to give extra support to the table, so it will not go wobbly. 

Step 4: Attach The Top 

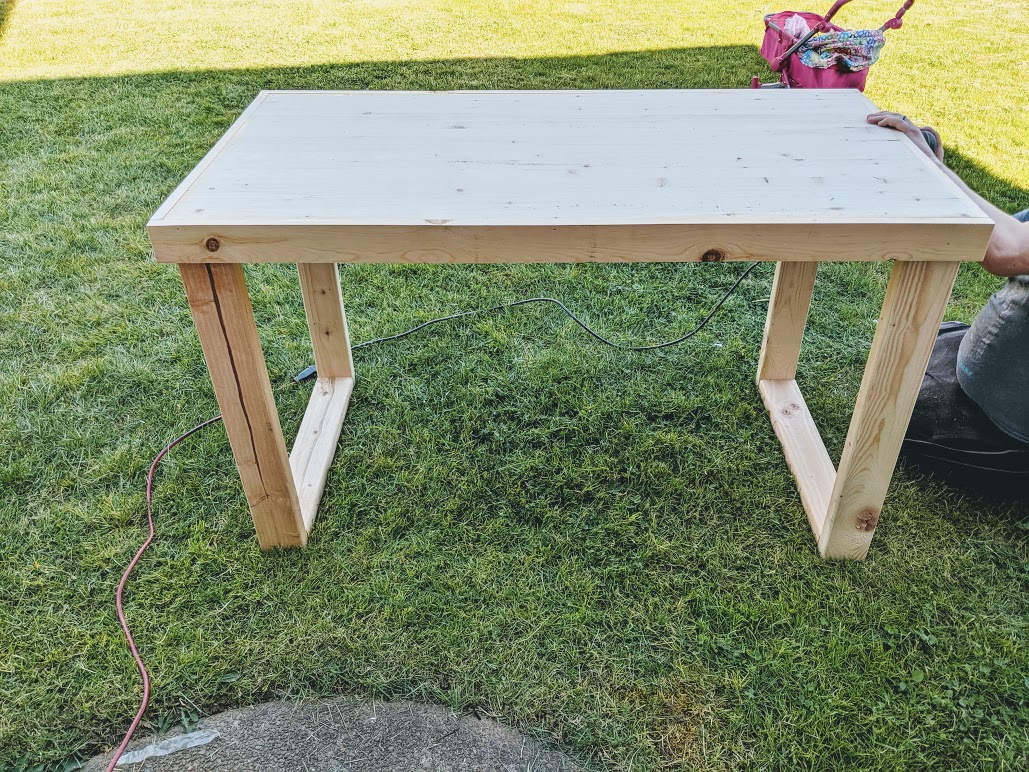
Now, since your legs are ready, it's time to attach the top onto the legs, which is also an easy process. You can attach them using a brad nailer or regular nails. We just happened to have those tools but you don't have to buy everything. 

Step 5: Cut the lips 

In the end, we placed lips or edges around the table to make it both more sturdy and prettier. 

Step 6: Sand It 

Now, since your table is ready, you need to sand it to paint or stain it. Sanding is a very important part. Otherwise, your paint won't adhere to the wood unless you are chalk painting. We used an electric sander but you can use any 120 grit sanding block from your local store. Just use your elbow grease to sand it nicely. 

Step 7: Paint or Stain It

Paint it with whatever paint you would like We wanted to stain it so we used color stain to match with other furniture in the room. We are pretty happy with the project turned out. It saved us tons of money and looks nice in the room as well. 

Hope you liked it and I would love to see your project using my plan. You can read the whole blog post in-depth on my blog. Let me know if you have any questions or concerns.  

Happy DIY'ing! Love,

Bushra
Estimated Cost
$50
Estimated Time Investment
Afternoon Project (3-6 Hours)
Finish Used
Blue Stain a bit shiny look.
Recommended Skill Level
Beginner

Comments

Box Frame Console with Bottom Shelf

Submitted by Anonymous (not verified) on Mon, 07/24/2023 - 13:46

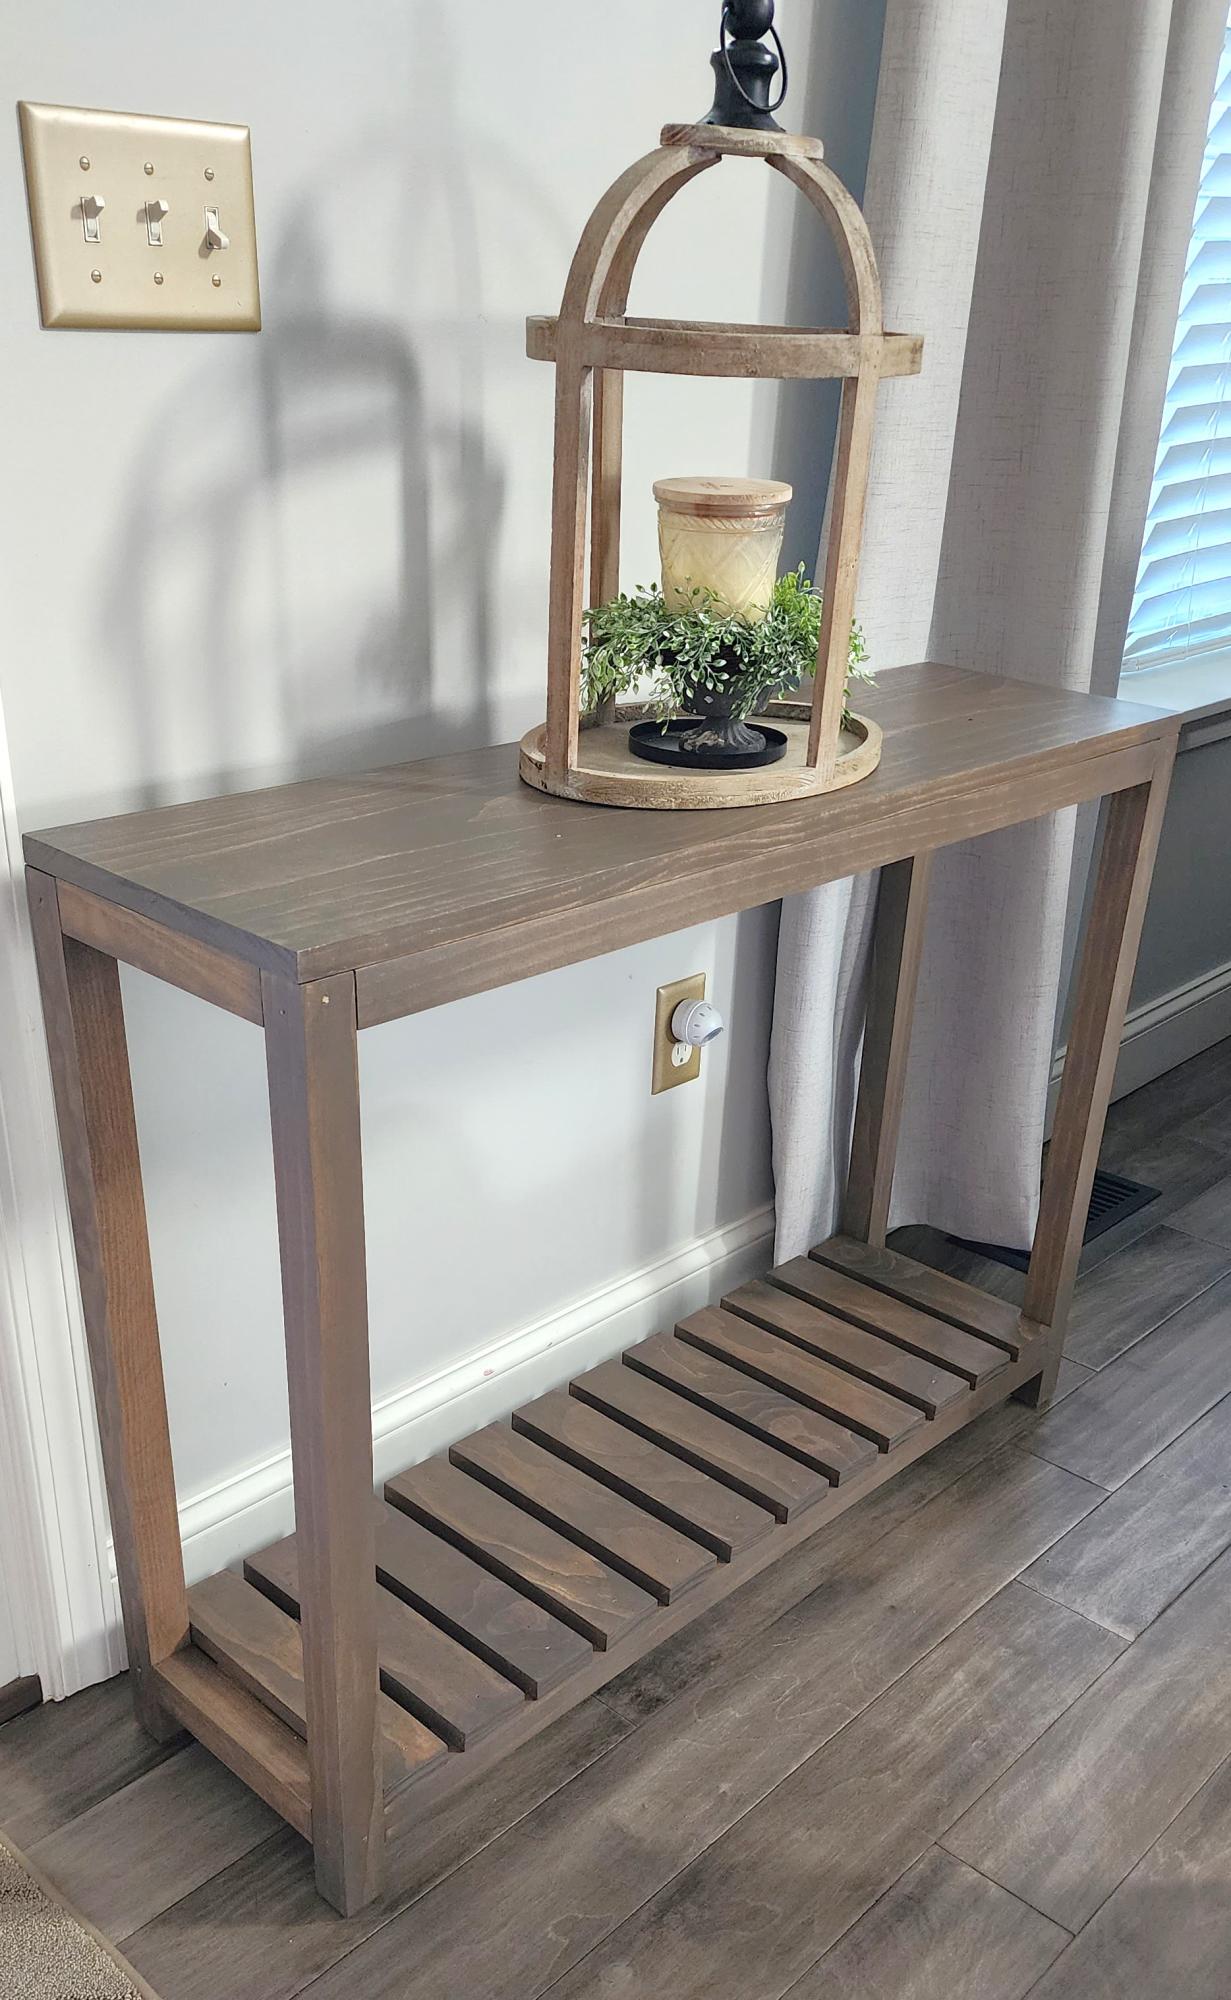
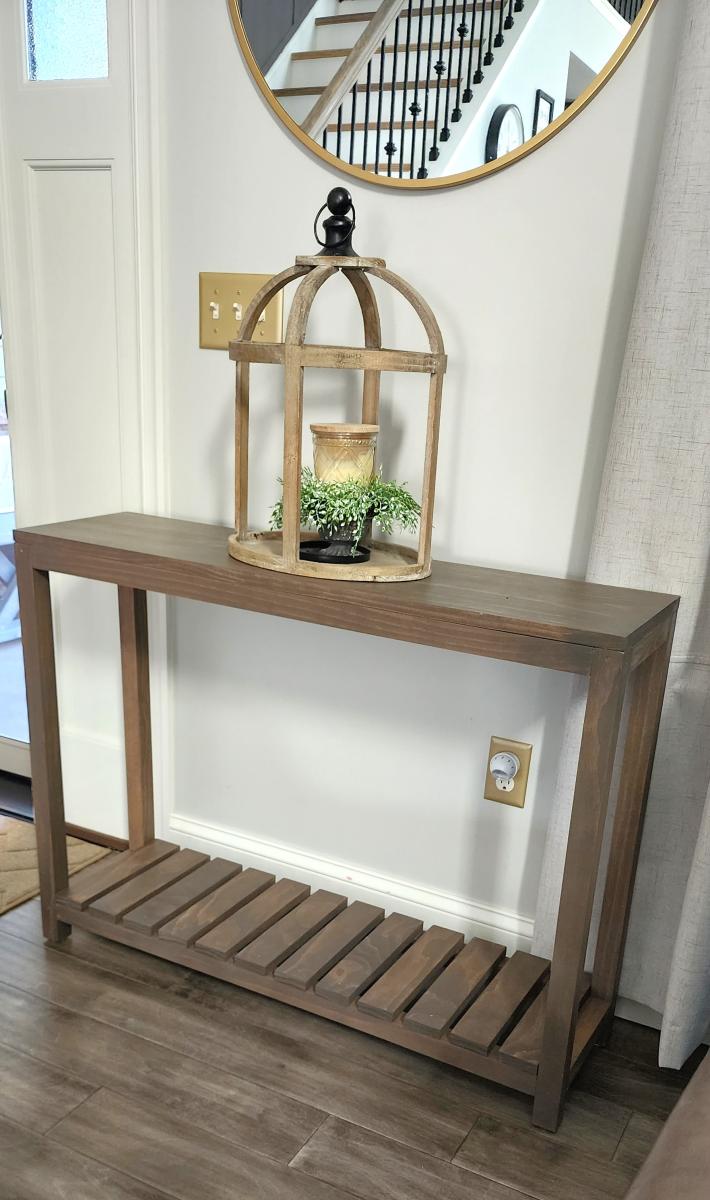
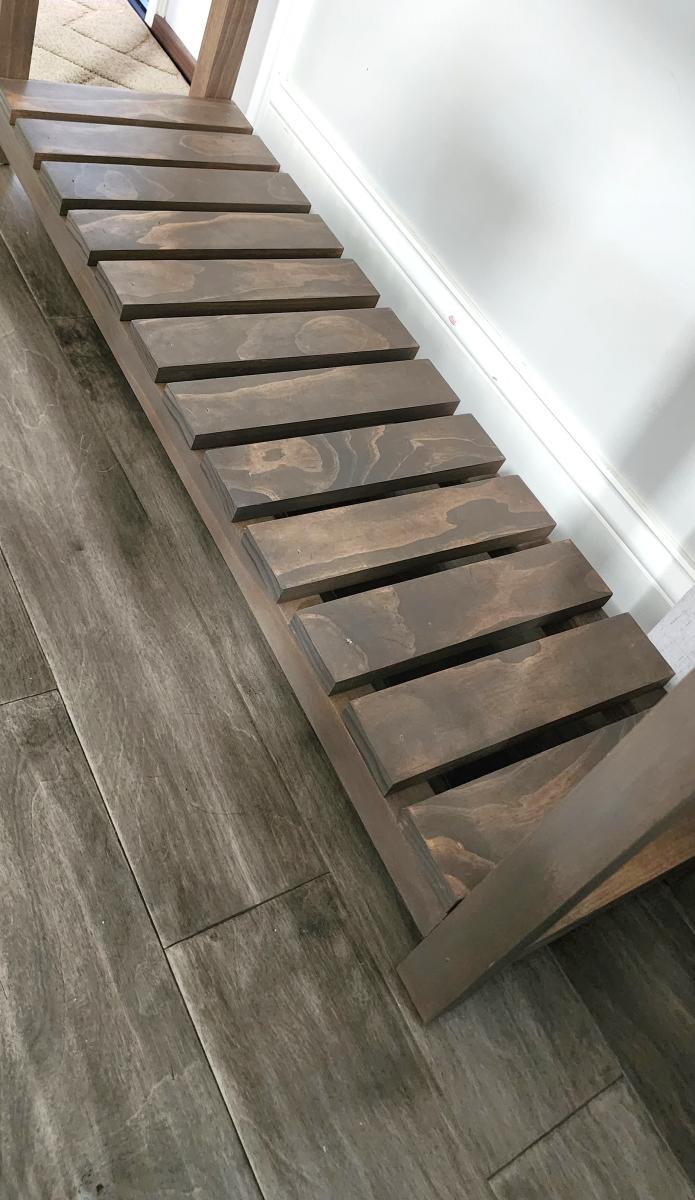
Entry Way Table with Slatted Bottom!

by Missy J Zee on Facebook

Built from Plan(s)

Comments

First Project

Submitted by amy2789 on Fri, 03/16/2012 - 13:48

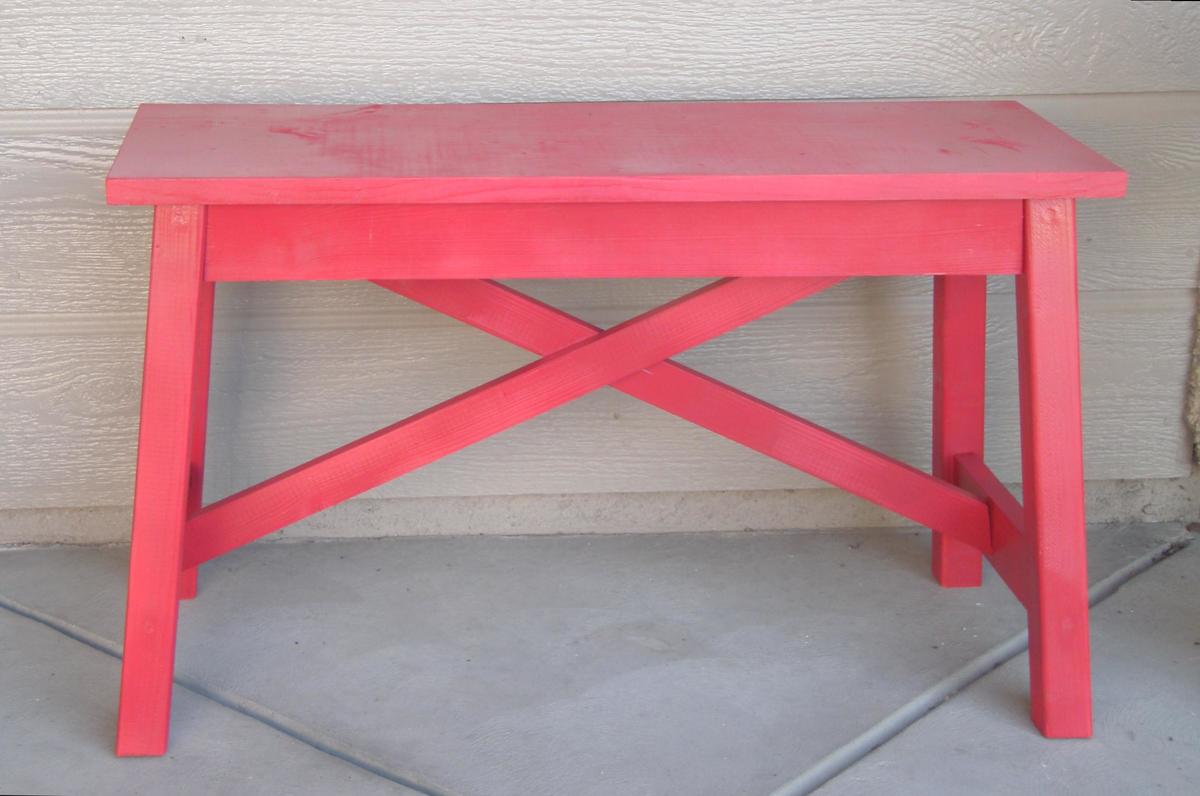
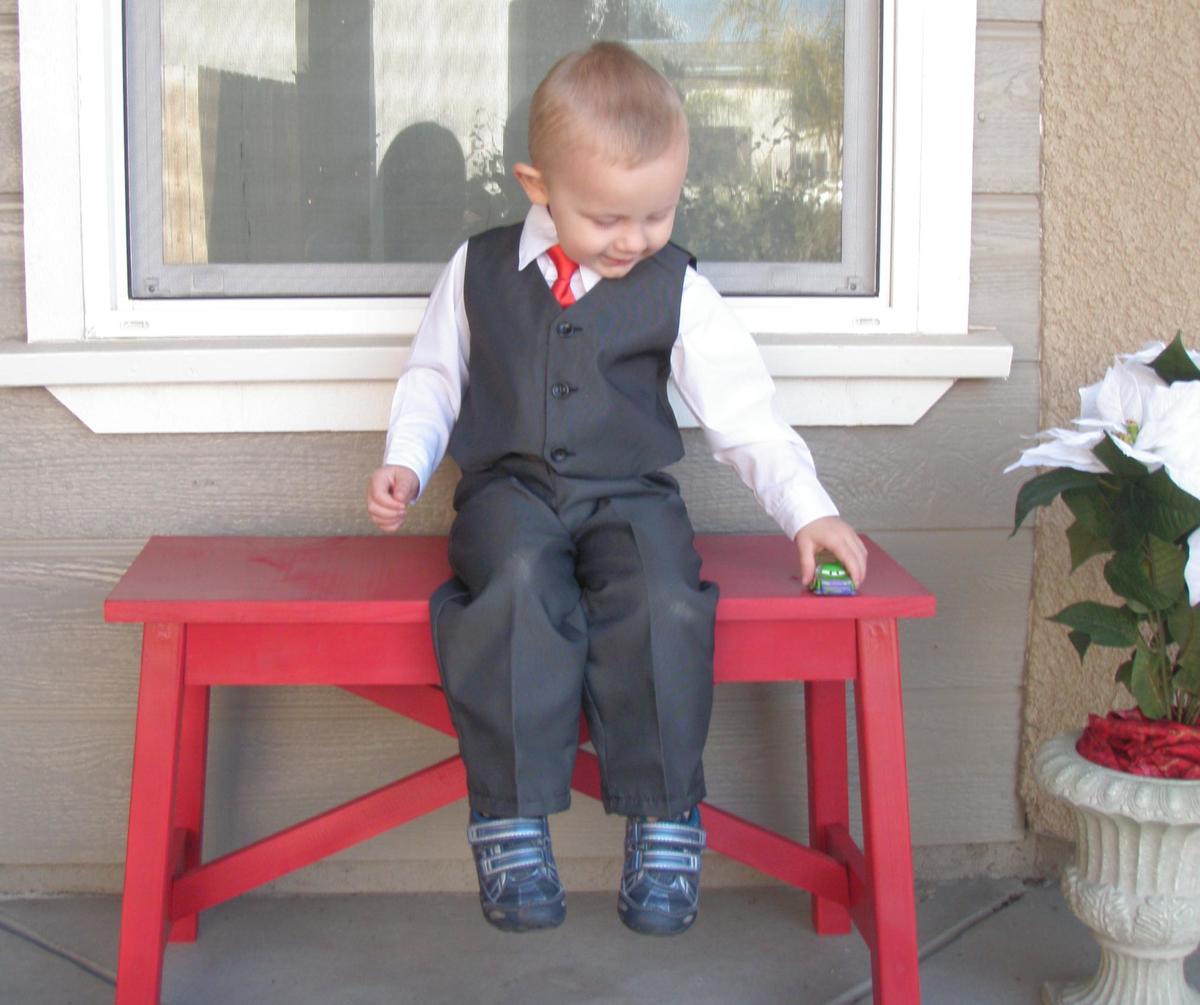
When I saw the plans for this bench I knew I had to make it. I had been looking for something to put on my porch, but hadn't found anything I liked.
I, or should I say, my husband had all the tools just sitting in the garage.

It was a great starter project. I definitely felt the learning curve. Thank goodness for wood filler and paint!

Estimated Cost
$30
Estimated Time Investment
Afternoon Project (3-6 Hours)
Finish Used
Cheap red spray paint from Wal-Mart. I had it on-hand from another project.
Recommended Skill Level
Beginner

Comments

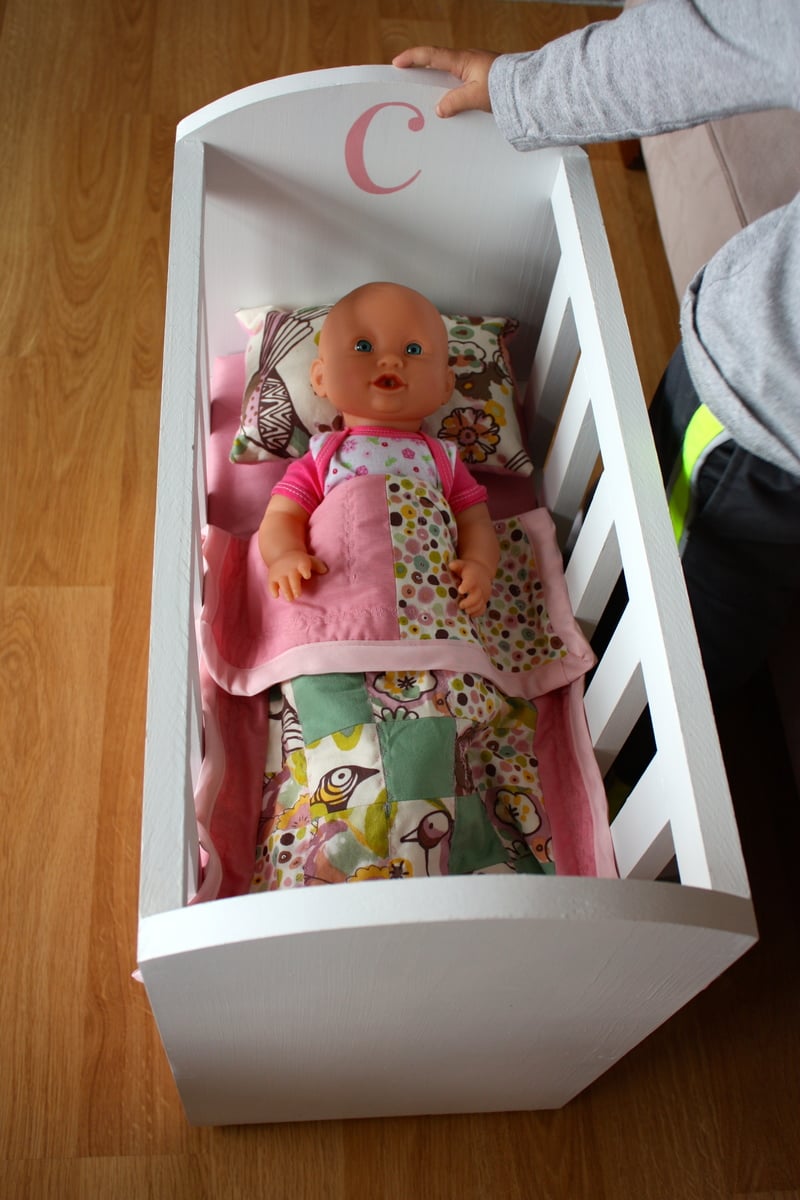
Olivia's Doll Crib

Submitted by ellie_pete on Tue, 01/07/2014 - 12:51

The moment I saw these plans I knew it would be the perfect Christmas gift for my daughter. We followed the plans fairly exactly, only using knobs instead of a notch in the drawer and adding some small furniture slides on the bottom. I had some left over fabric from the linens I sewed for my daughter's room and used these to create a mattress cover, pillow, and small quilt. She loves it. The drawer underneath is great for extra doll clothes, bottles, diapers, etc.
Built from Plan(s)
Estimated Cost
$50
Estimated Time Investment
Weekend Project (10-20 Hours)
Finish Used
Rustoleum satin paint and primer in white and pink. Victorian faux-crystal cabinet knobs for the drawer.
Recommended Skill Level
Beginner

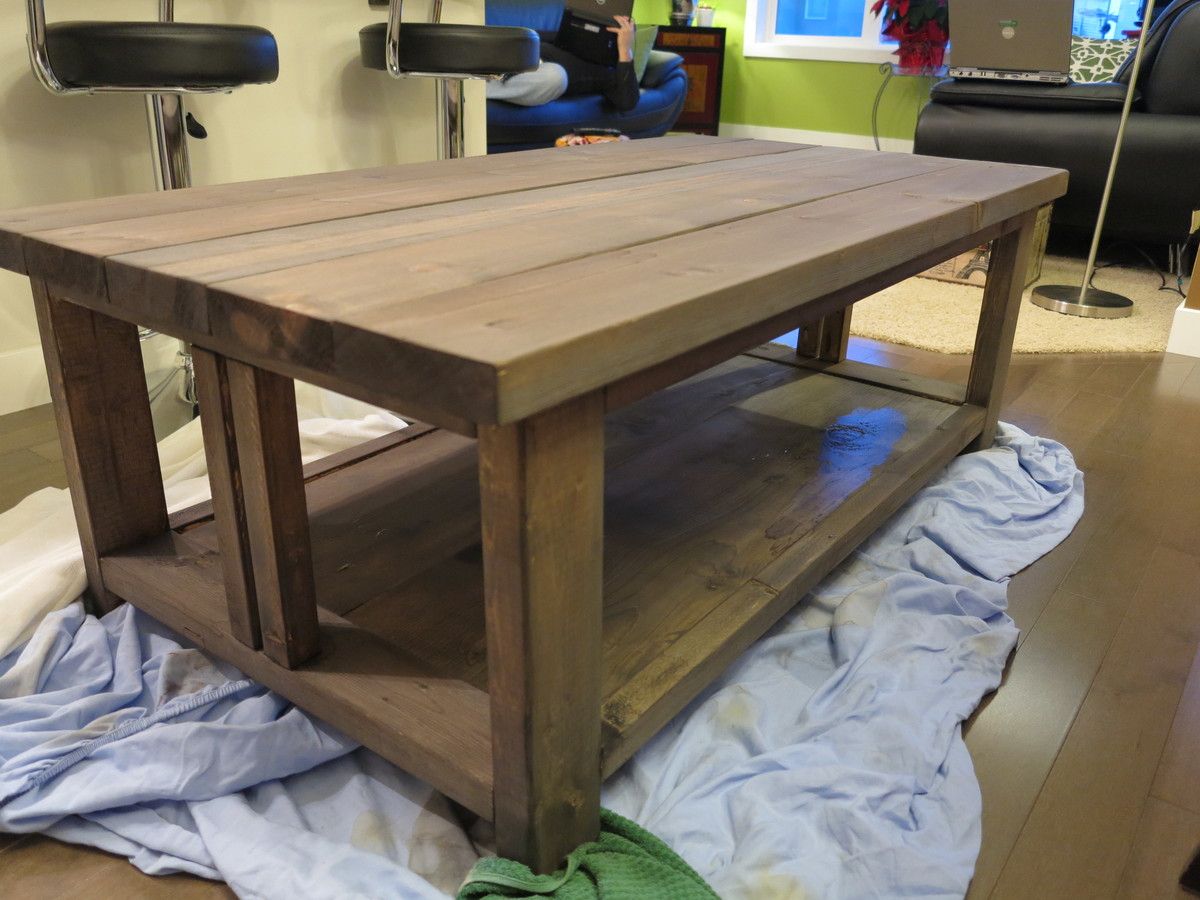
Coffee table and matching side table

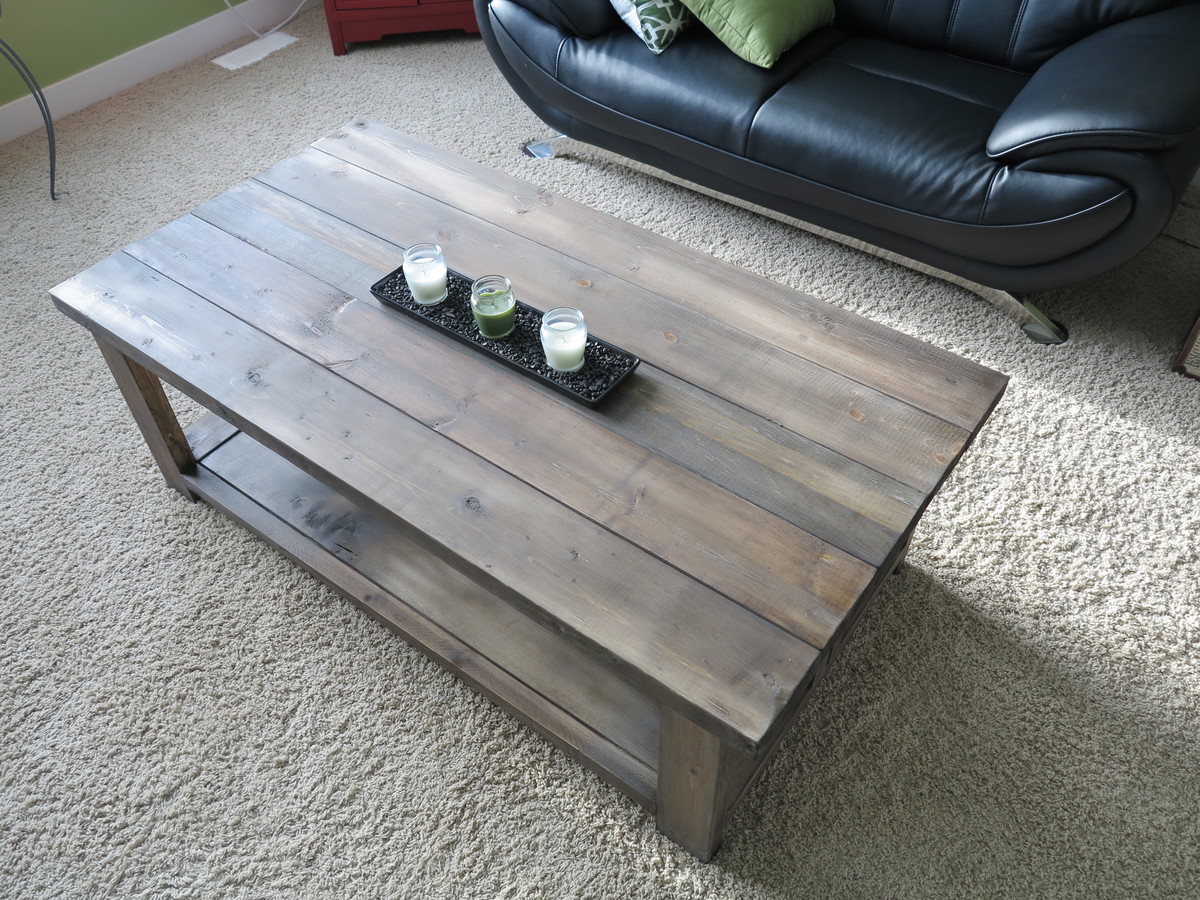
Submitted by Anonymous (not verified) on Tue, 03/29/2016 - 07:20

Great plans. I got a lot of attention for these tables. I think they're easy to build and a few bad cuts/mismatches can make it look more rustic so no need to worry about perfection with these. I use them in my apartment and they're both really nice. I stained with miniwax jacobean and used a satin clear poly on it after. I only needed one layer of stain.I think a dining room table version of this plan would be really awesome too!
Built from Plan(s)
Estimated Cost
stain/poly/lumber/screws all were around 50$

Can be alot cheaper if you already have these things. I had a bunch of the lumber in scraps already.
Estimated Time Investment
Afternoon Project (3-6 Hours)
Finish Used
Darker Stain (jacobean) with clear polyurethane.
Recommended Skill Level
Beginner

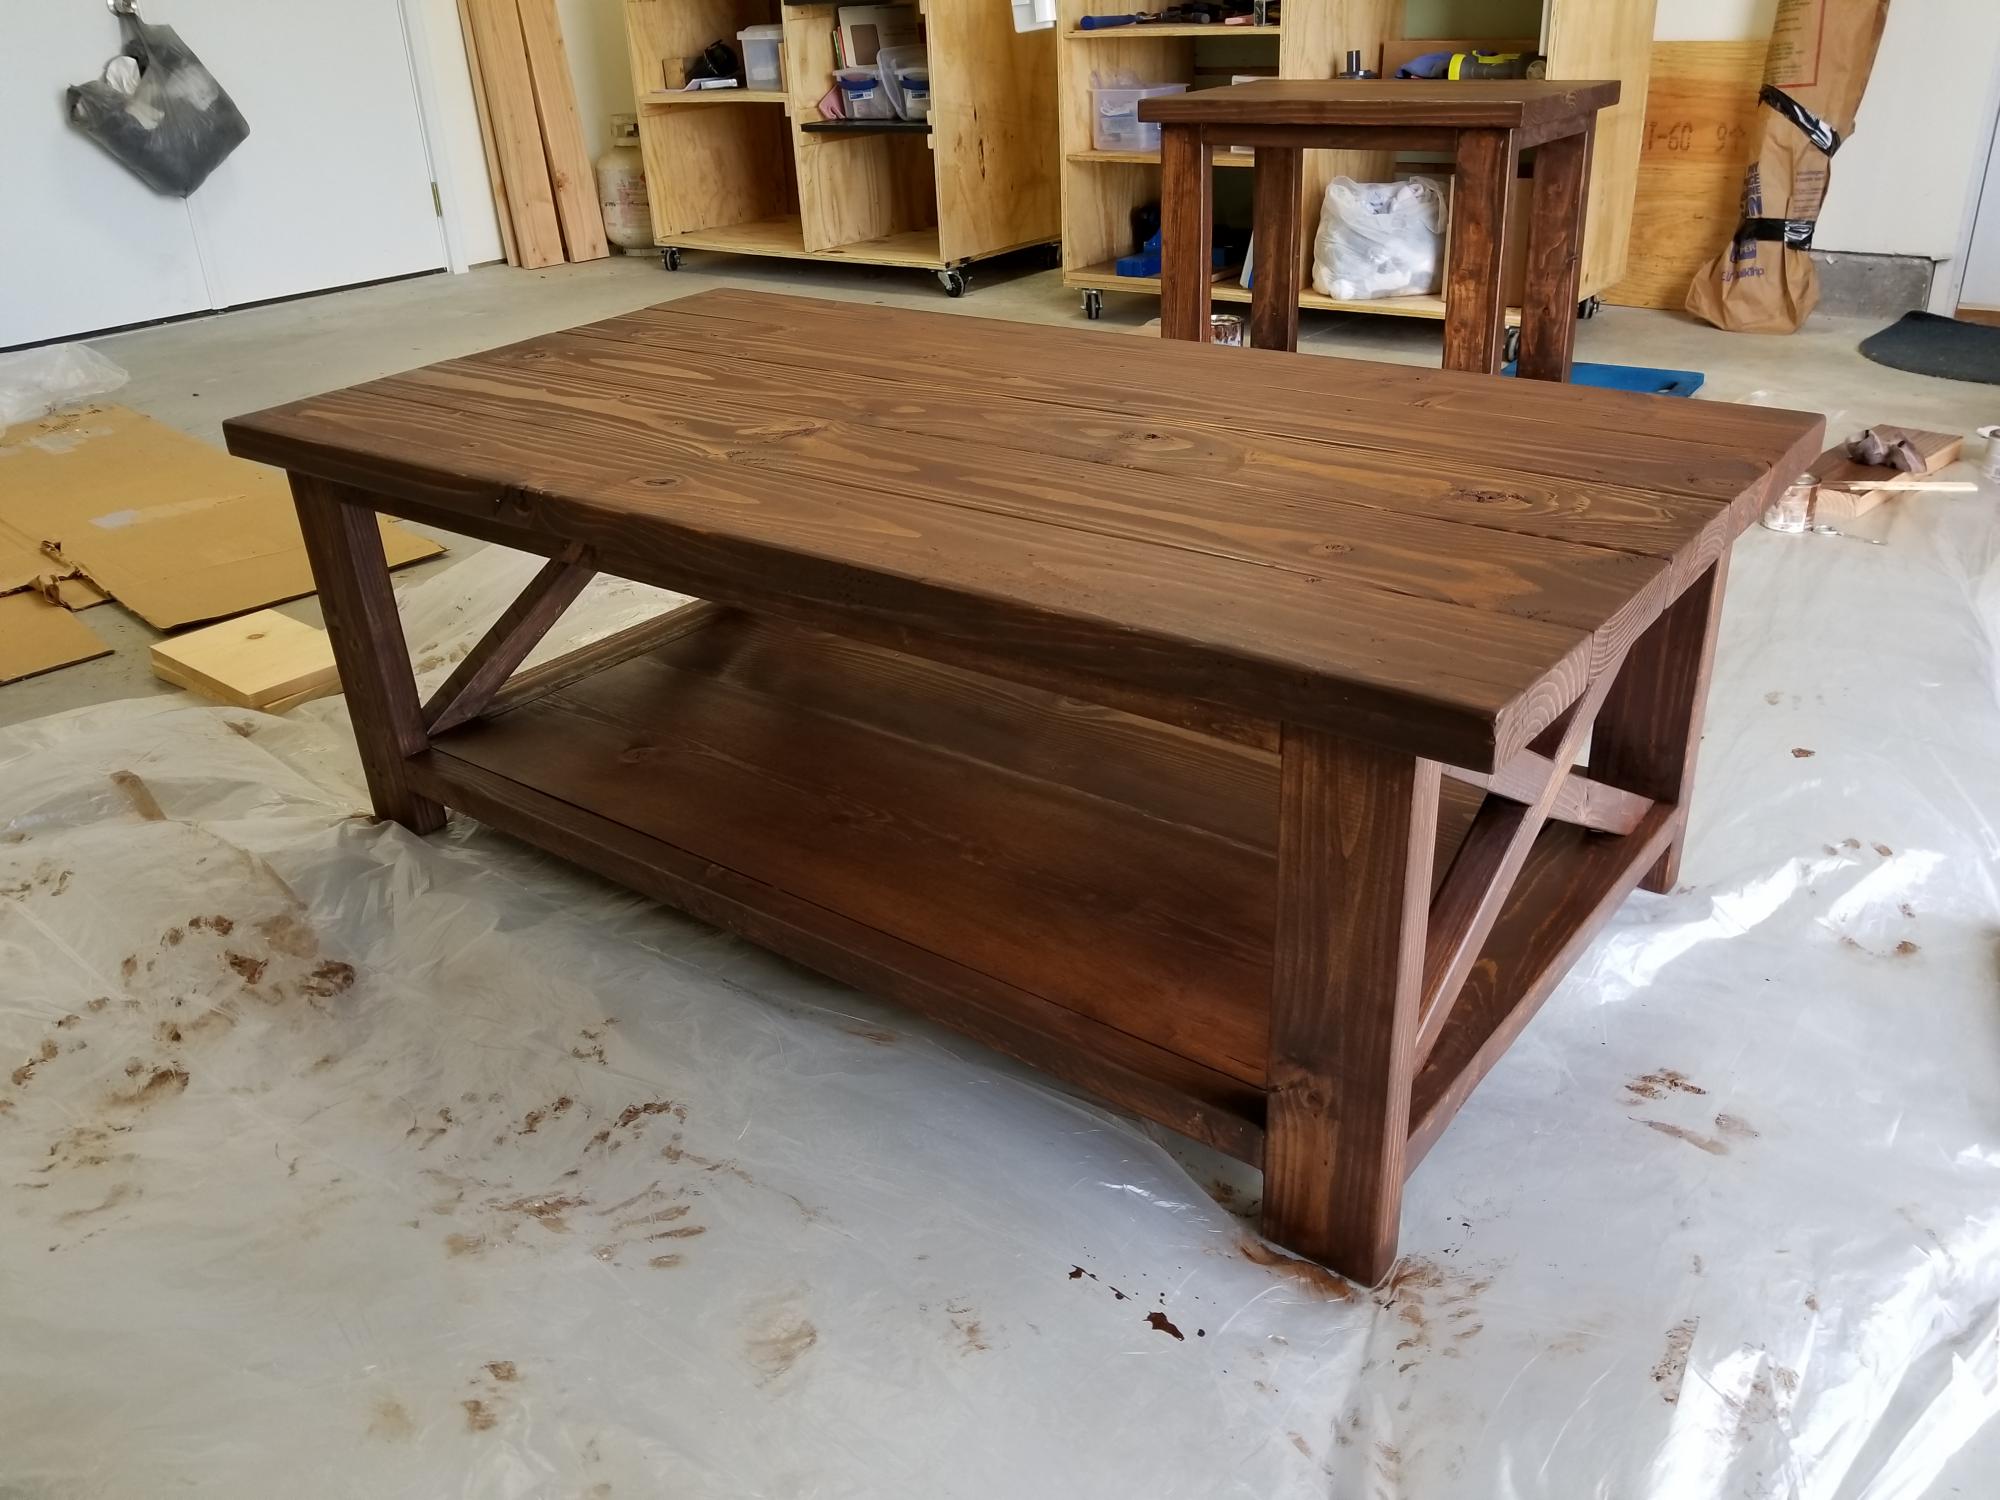
Rustic X coffee table

Submitted by LampAtFeet on Fri, 11/22/2019 - 13:57

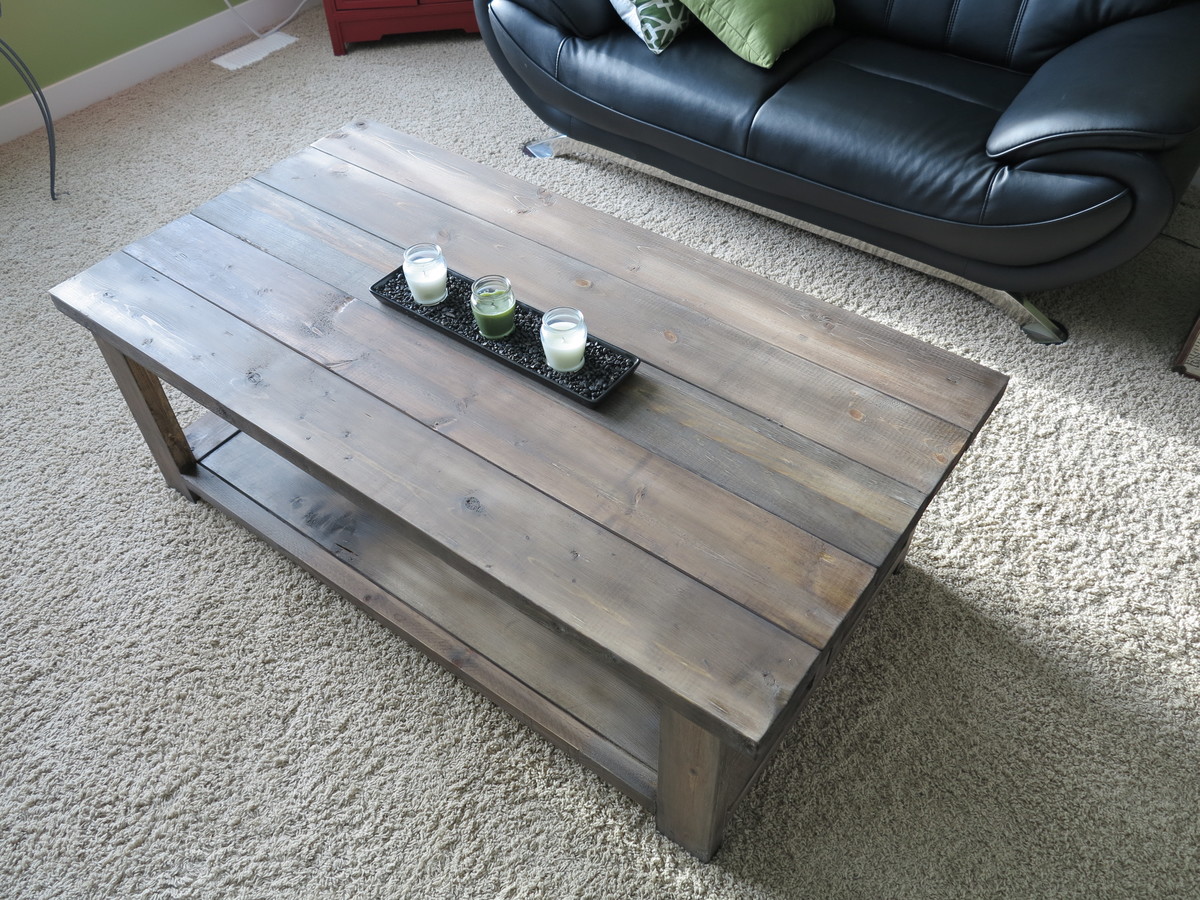
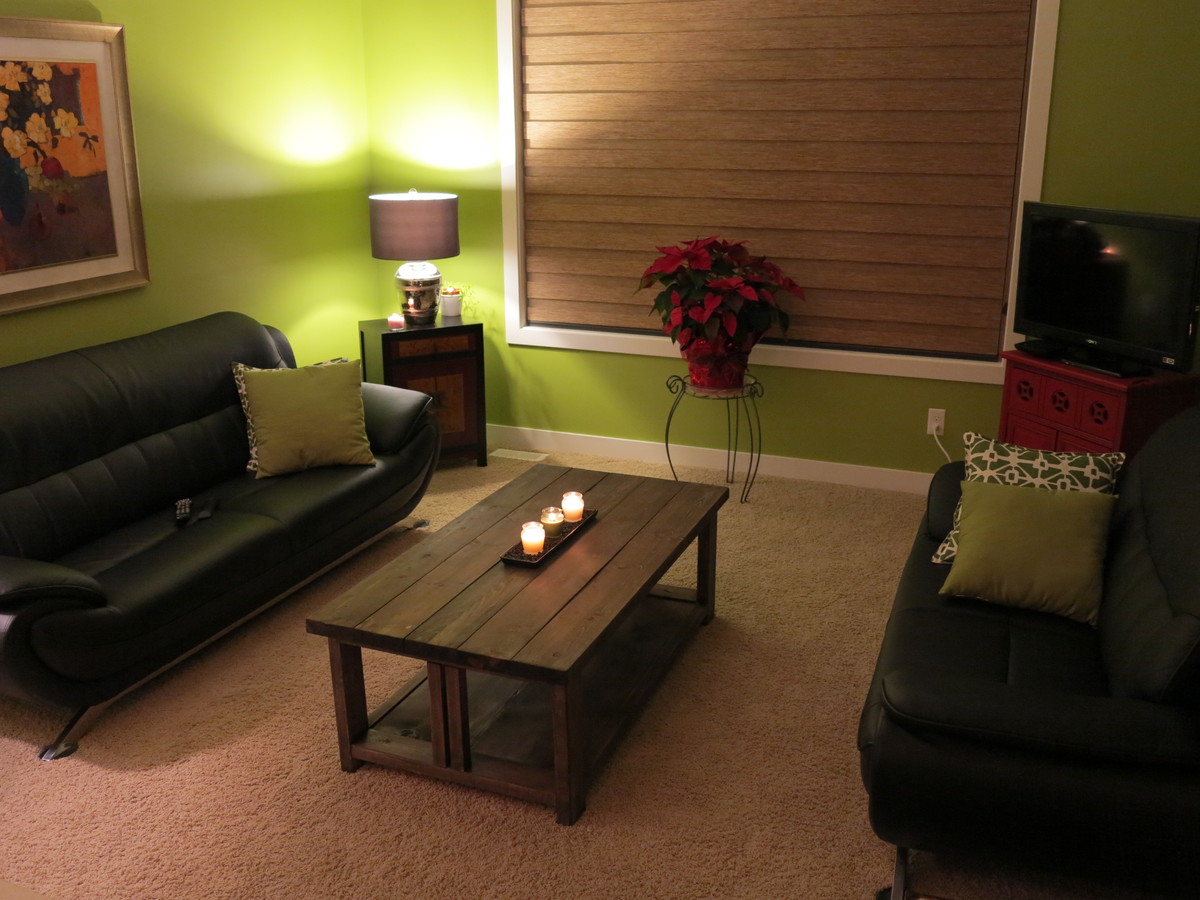
I built this coffee table for my son's first apartment, along with the rustic X end table. It's a very sturdy table and the plans were easy to follow! It's so much fun being able to build my kids furniture!

Built from Plan(s)
Estimated Cost
$50
Estimated Time Investment
Afternoon Project (3-6 Hours)
Finish Used
Dark Walnut stain, then a coat of satin wipe on polyurethane to seal it.
Recommended Skill Level
Intermediate

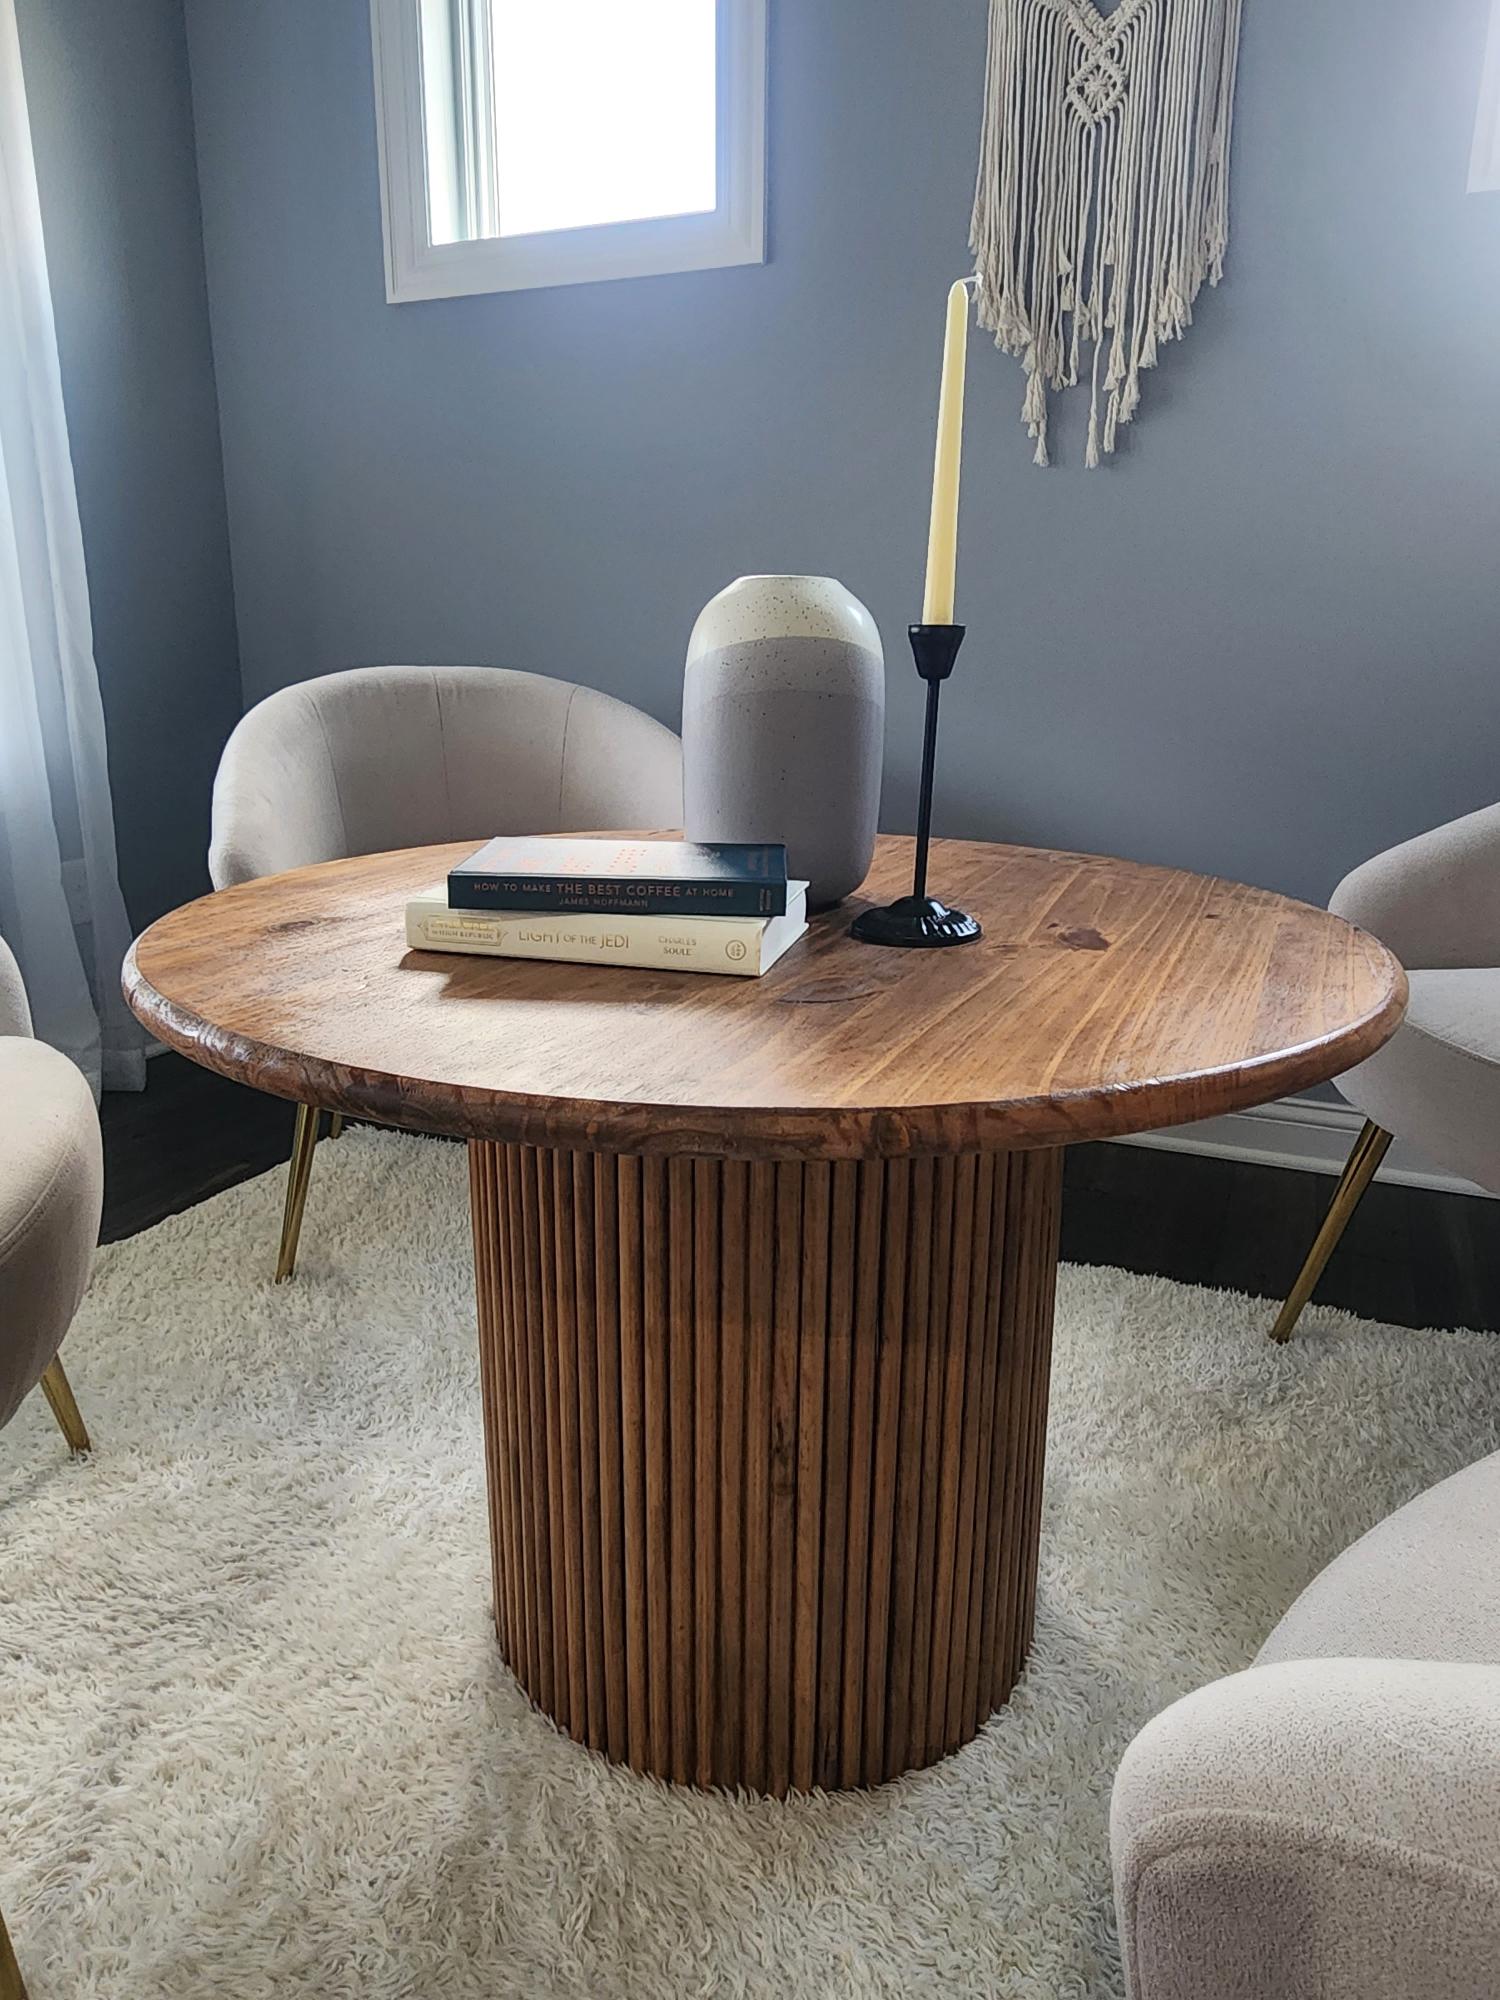
Round Accent Table

Submitted by Anonymous (not verified) on Sun, 07/30/2023 - 14:29

This is my very first build ever! I learned so much from this project. I also bought my first power drill and brad nailer for this project. My husband helped me cut the wood pieces to my measurements and I did everything else. I never knew how fun woodworking can be!

Emily Mangiaracina

First project - Play Kitchen

Submitted by trotter on Mon, 03/19/2012 - 07:33

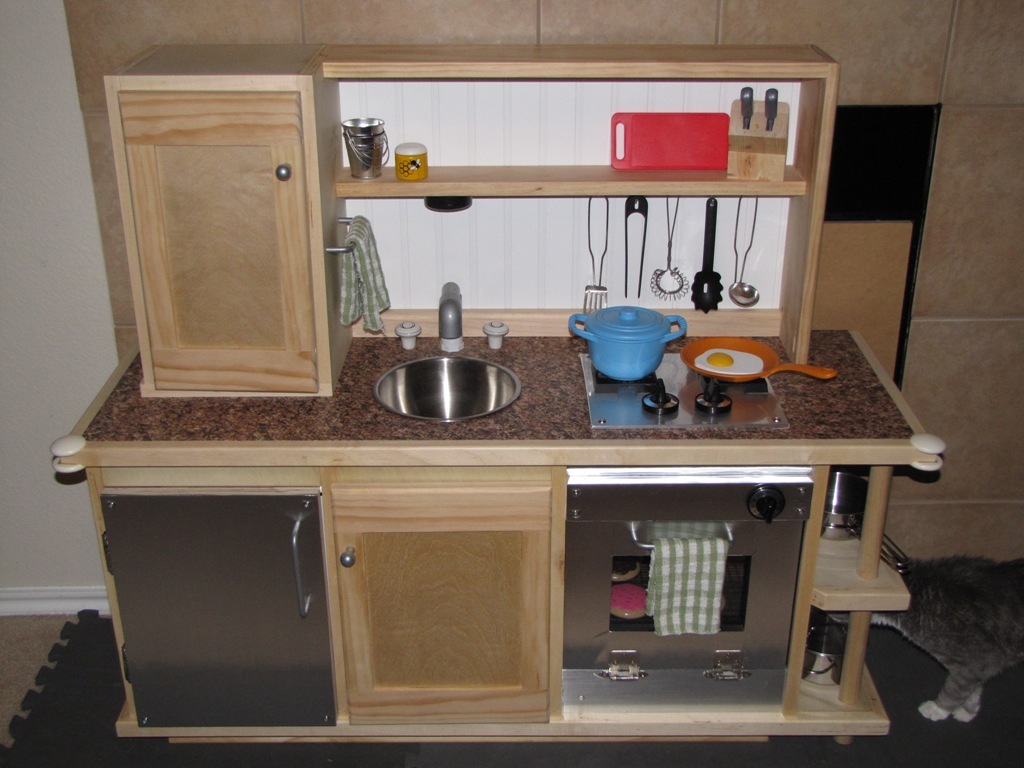
After my wife commented how much our son enjoyed playing with a pretend kitchen during play group, I began thinking about building one of our own. Searching online I found all of the amazing work that had been posted here and drew inspiration from all of the examples already shared.

Yesterday was the grand unveiling and I'm happy to report it was well received. Our son had to be dragged away from it for his bath and bed after hours of opening and closing all of the door and restacking his dishes. Thanks to all of you for the great ideas and the confidence to build on my own!

PS: The Kreg jig is the greatest DIY invention of all time.

Estimated Cost
$230
Estimated Time Investment
Week Long Project (20 Hours or More)
Finish Used
Minwax Spar Polyurethane (spray can) followed by sanding with 400 grit sandpaper after drying for 24 hours
Recommended Skill Level
Beginner

Comments

TIffonie

Fri, 08/31/2012 - 19:15

Im in love with this. It's perfect for a boy. Your alterations are very nice. What did you use to do the countertop and stainless steel appliances?

Tanner (not verified)

Sat, 09/01/2012 - 16:05

The countertop and appliances were both done with just plain old Contact Paper. I found both at Lowe's. Good luck!

My first ever woodworking experience!

My primitive mitre plastic template didn't allow me to get a 60 degree angle so I went with the very simply upright thingies instead! The vinegar, wire wool and tea oxidisation worked a treat and was far easier to apply than stain.

Estimated Time Investment
Afternoon Project (3-6 Hours)
Finish Used
Vinegar and wire wool applied 24hrs after dark tea application.
Recommended Skill Level
Starter Project

Garage shelves

Submitted by Queequeg on Thu, 03/31/2016 - 14:35

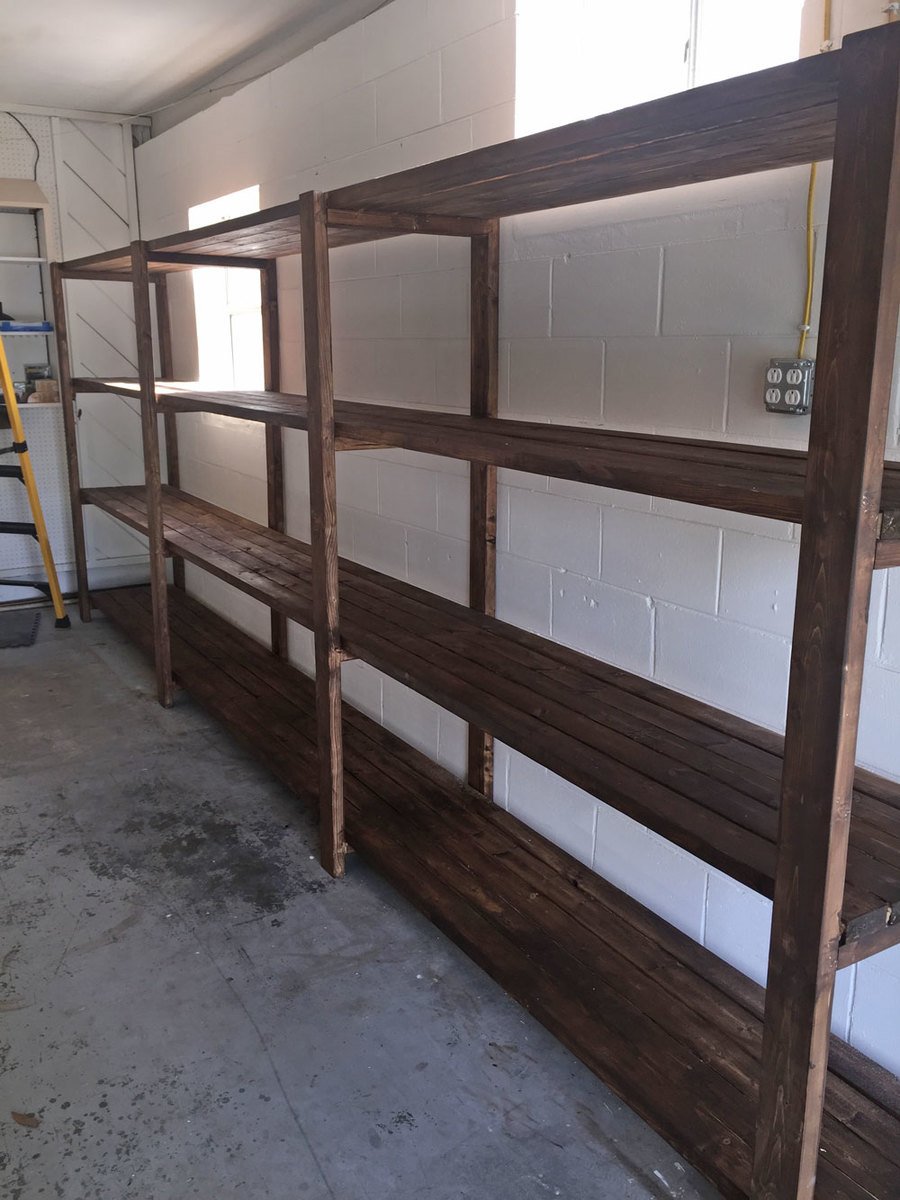
This is my first project ever built. I can't thank you enough for this site. I already have several other projects I want to build around the house because of this site. Thank you so much!

Estimated Cost
$150 for the wood. And some extra for the stain.
Estimated Time Investment
Weekend Project (10-20 Hours)
Finish Used
Minwax walnut water-based stain
Recommended Skill Level
Beginner

Comments

Queequeg

Thu, 03/31/2016 - 14:36

Didn't realize the photos were rotated. Can't figure out how to fix that!  Oh well.  :)


Super easy farmhouse dining table !

Submitted by Anonymous (not verified) on Wed, 11/27/2019 - 07:15

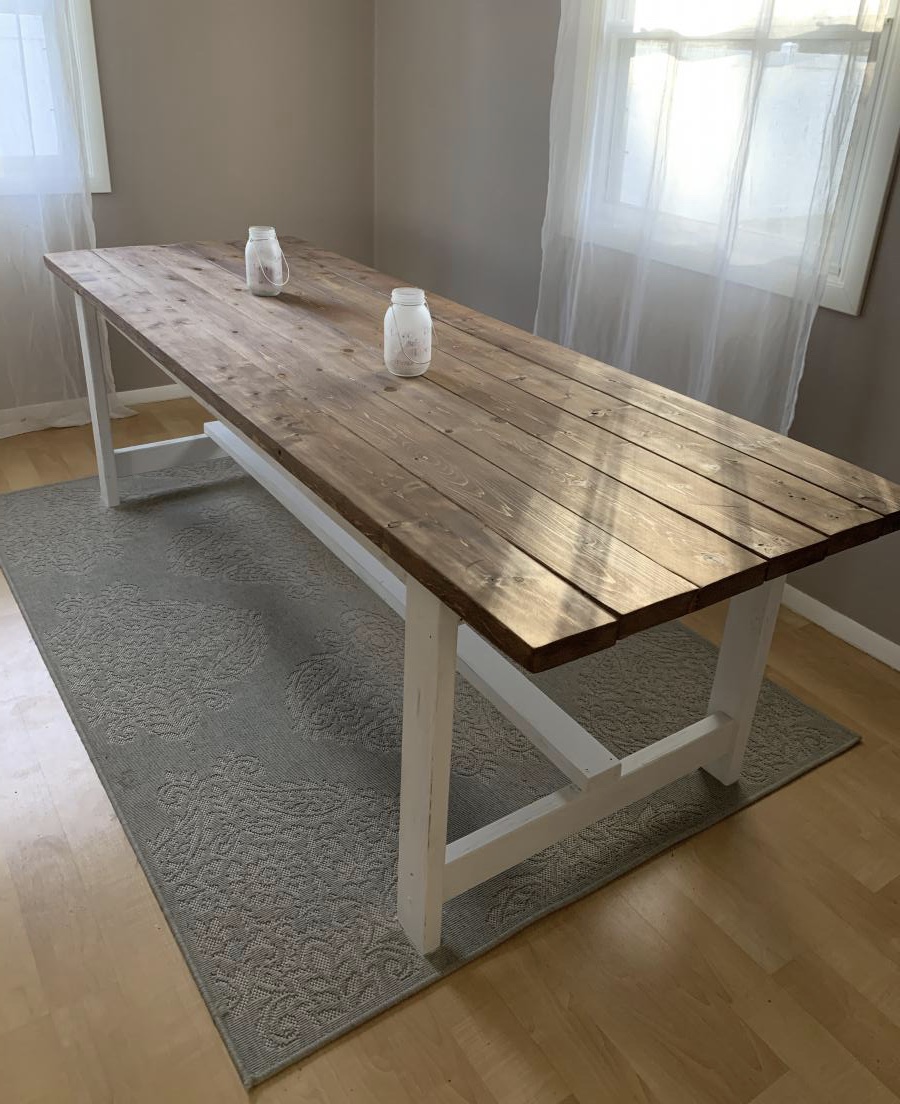
This was our first project like this .. was last minute cost about $64 with lumber and screws , we already had the stain and paint .. only took 2 days ! I’m so happy !!! The only thing different I would do is put pocket holes in which we might add . Perfect project for a beginner !

Estimated Cost
$64
Estimated Time Investment
Weekend Project (10-20 Hours)
Finish Used
We didn’t use any finish yet as we are still deciding lol
Recommended Skill Level
Beginner

Outhouse with Skylight

Submitted by Anonymous (not verified) on Fri, 08/04/2023 - 11:03

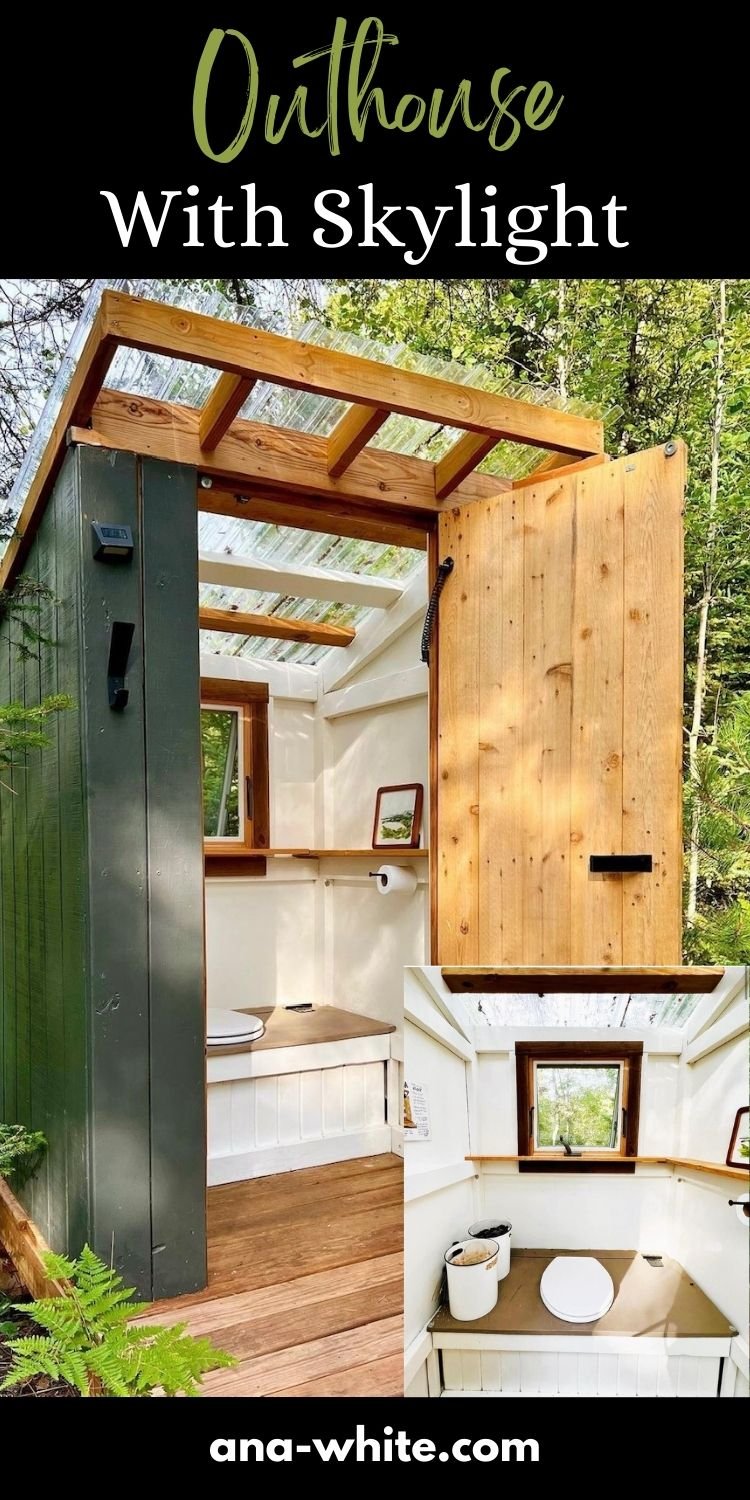
Our favorite throne in town.

My daughter and I built the outhouse in the snow a few years ago. Once the TwoGa was named after the Stuga, the outhouse quickly became “The PooGa” (aka “The Ash-Hole “🤣). We use ash in the winter and sawdust in the summer, to keep away the stink, which works like a charm.

This is an adaptation to an Ana White outhouse design.


Pin For Later!

Outhouse with Skylight

Built from Plan(s)

Comments

Back