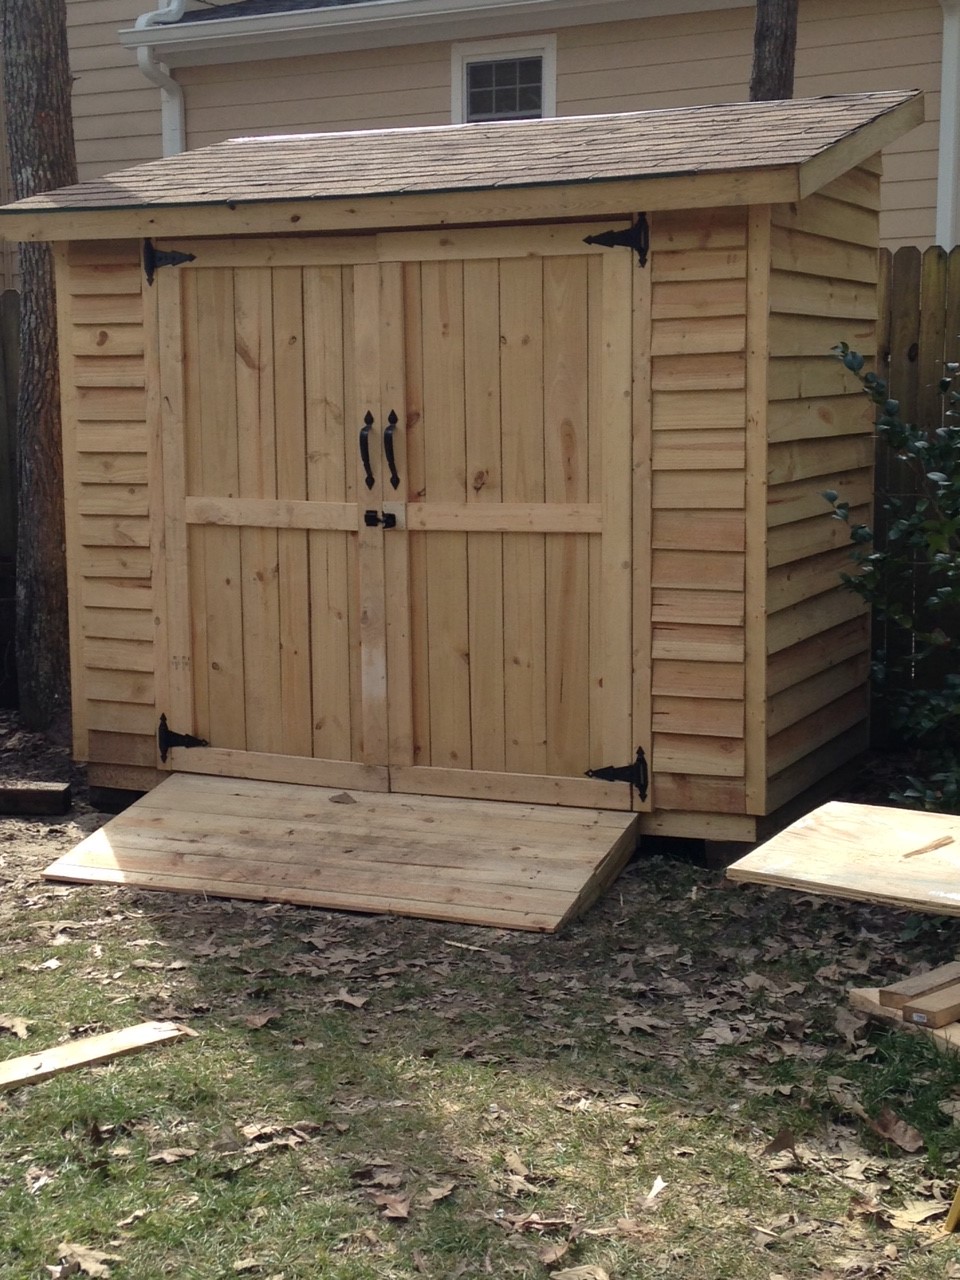
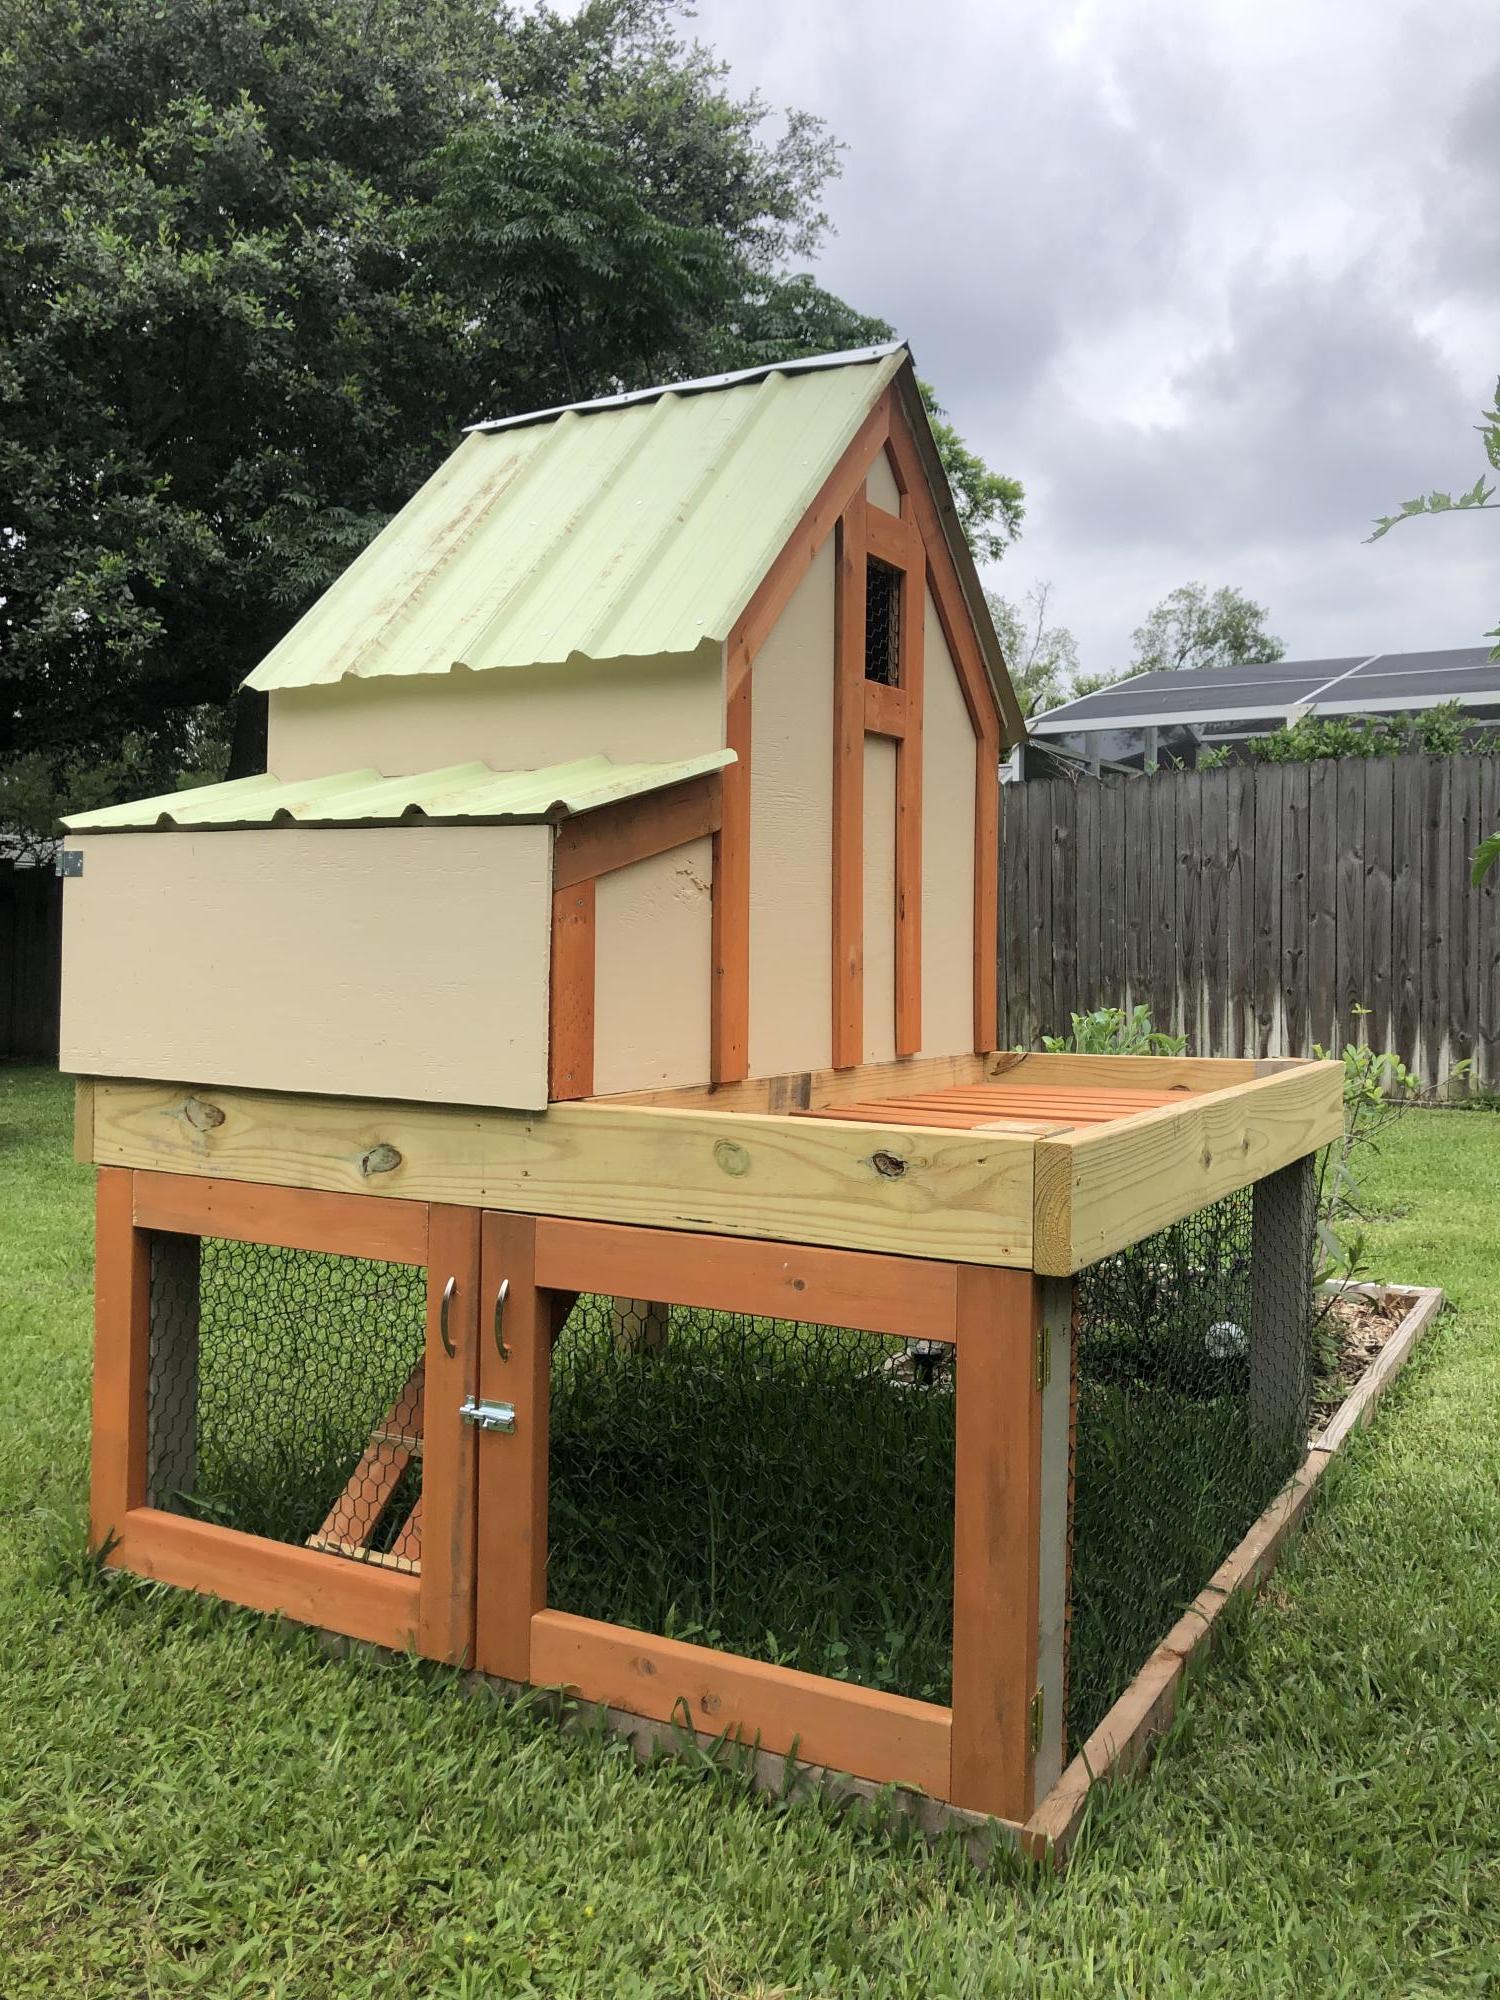
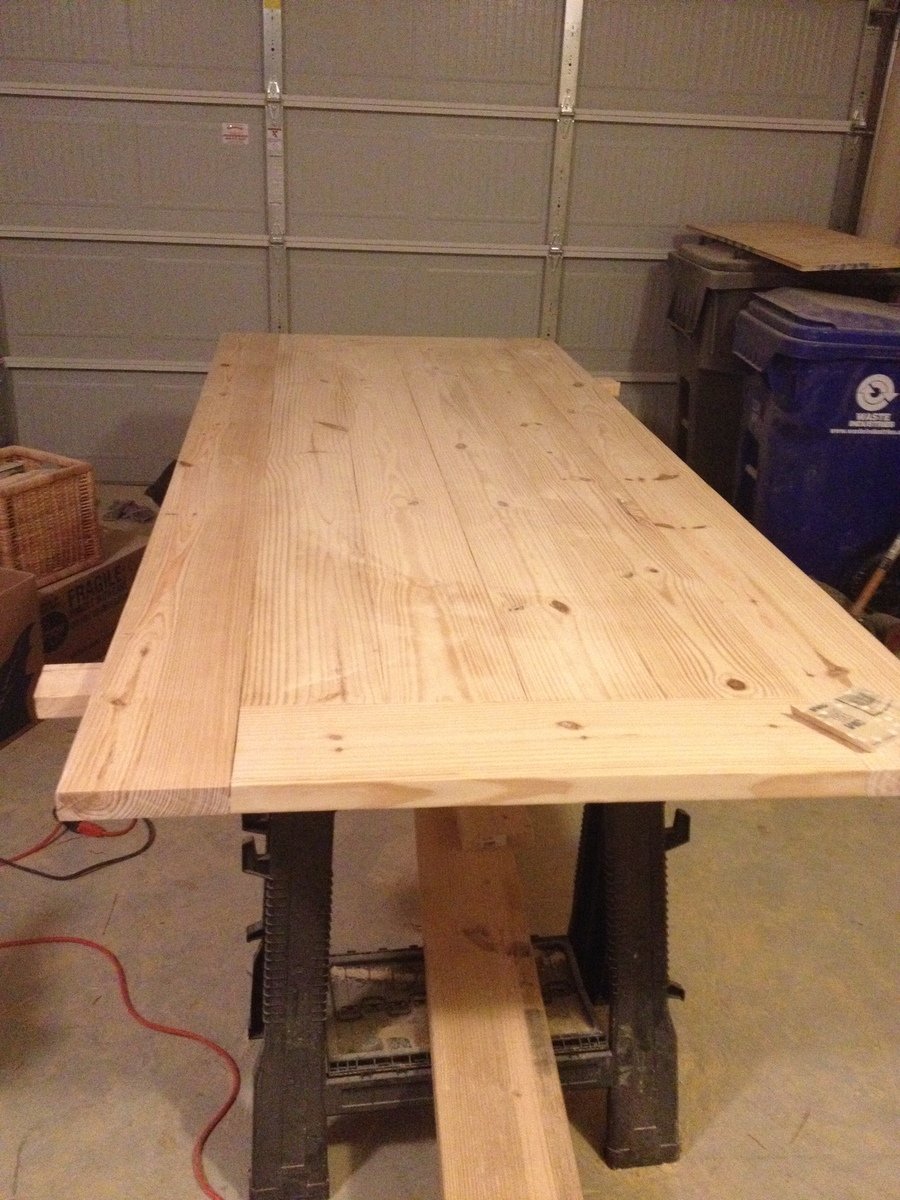
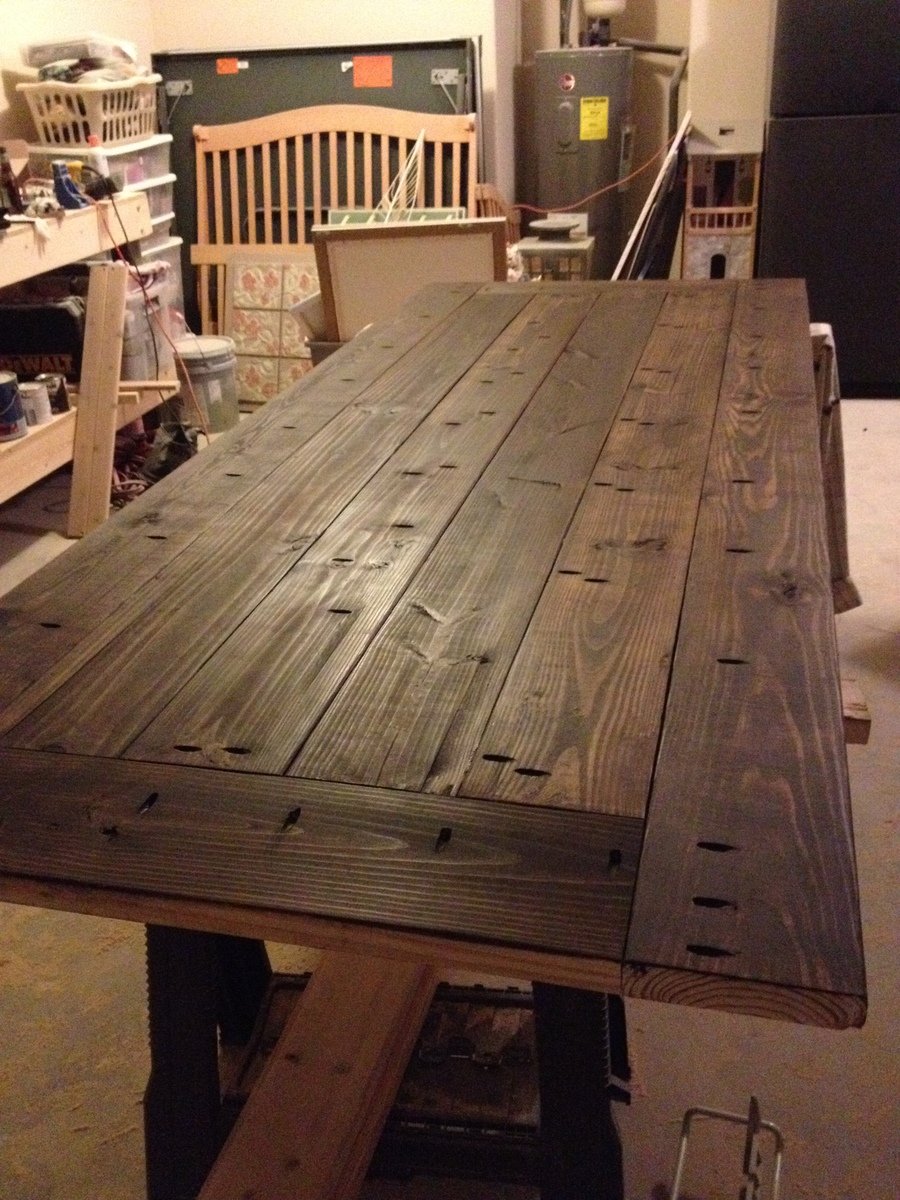
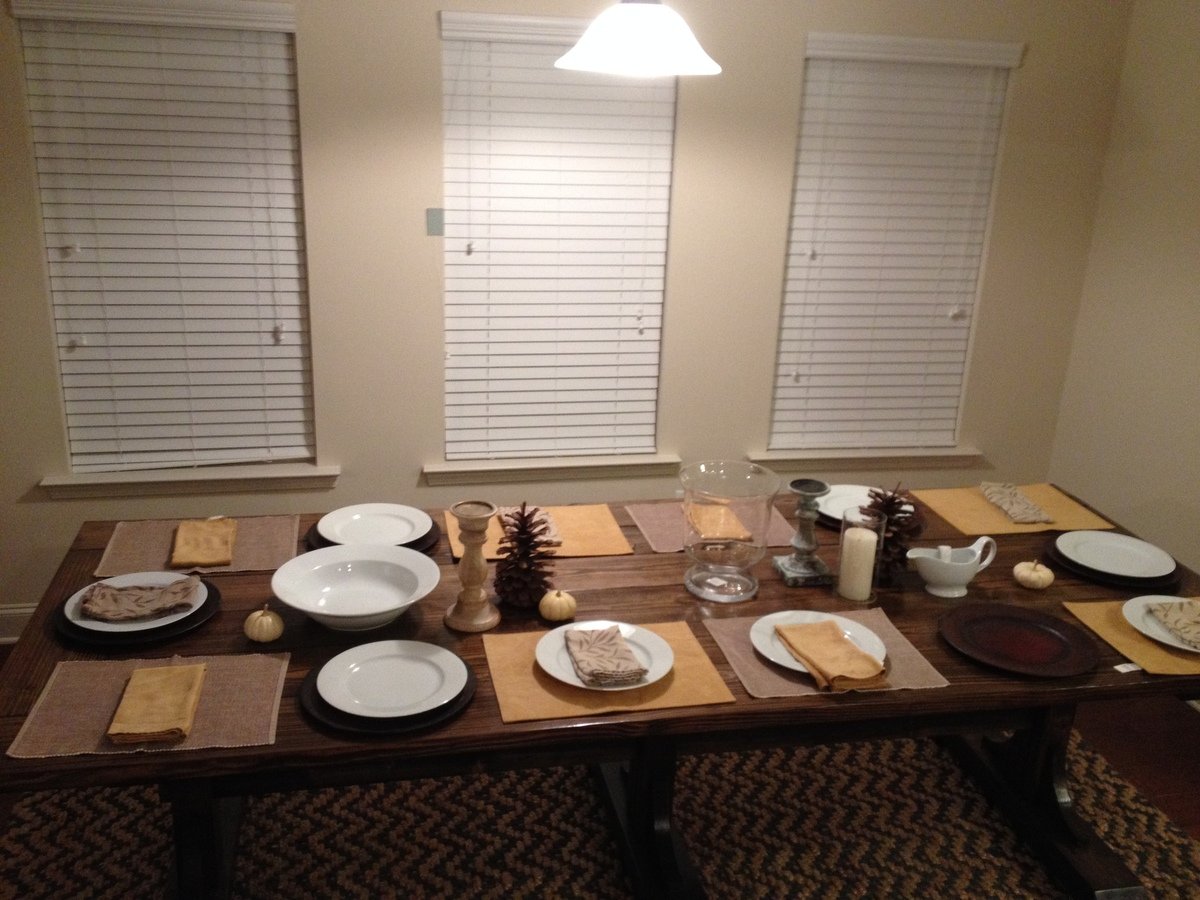
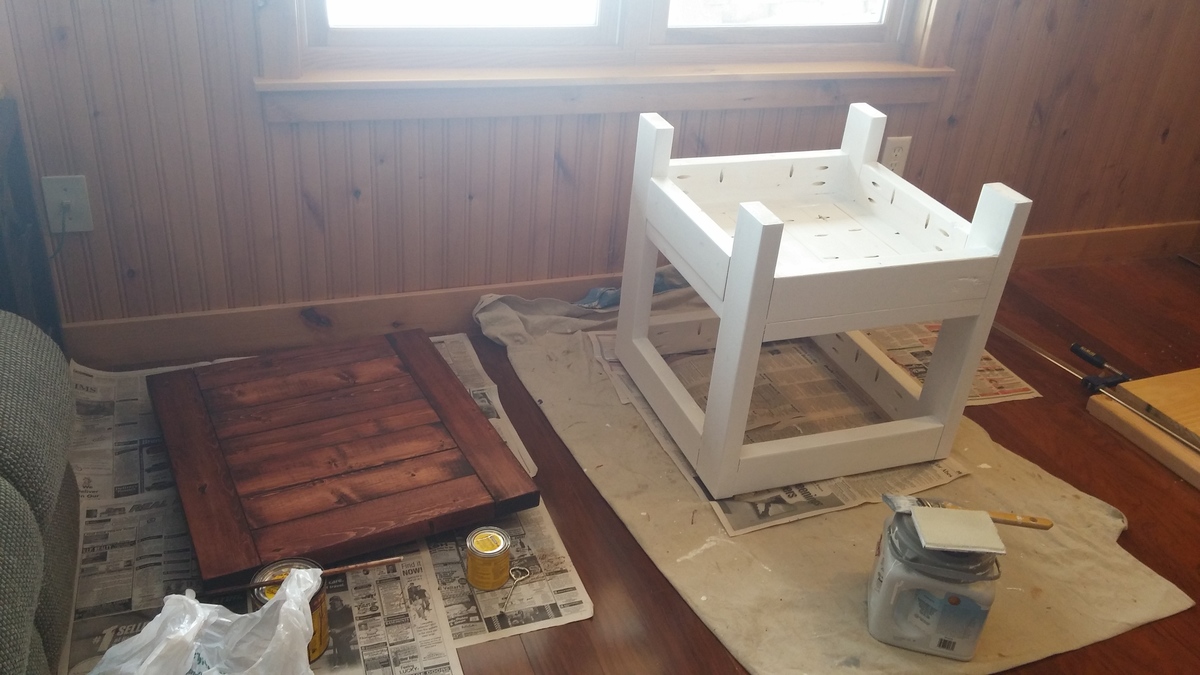
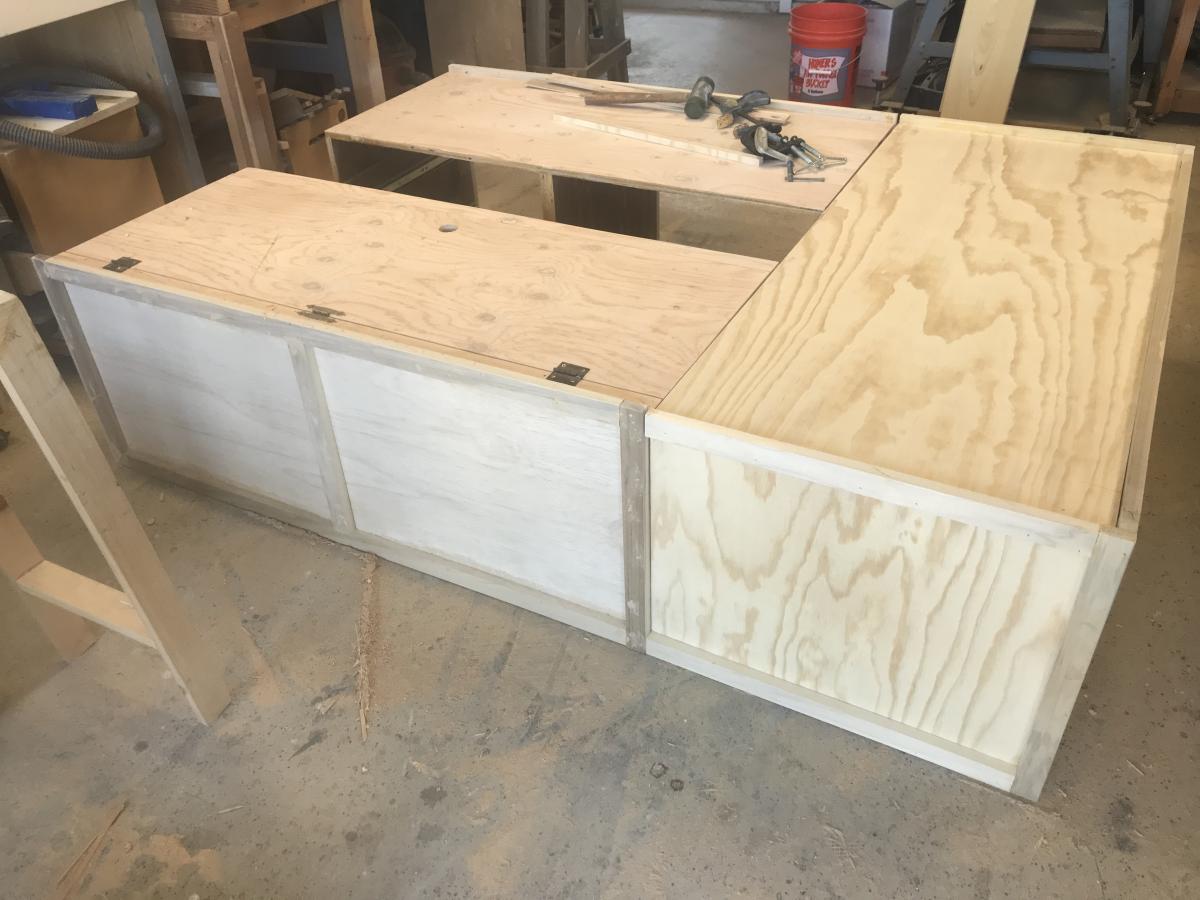
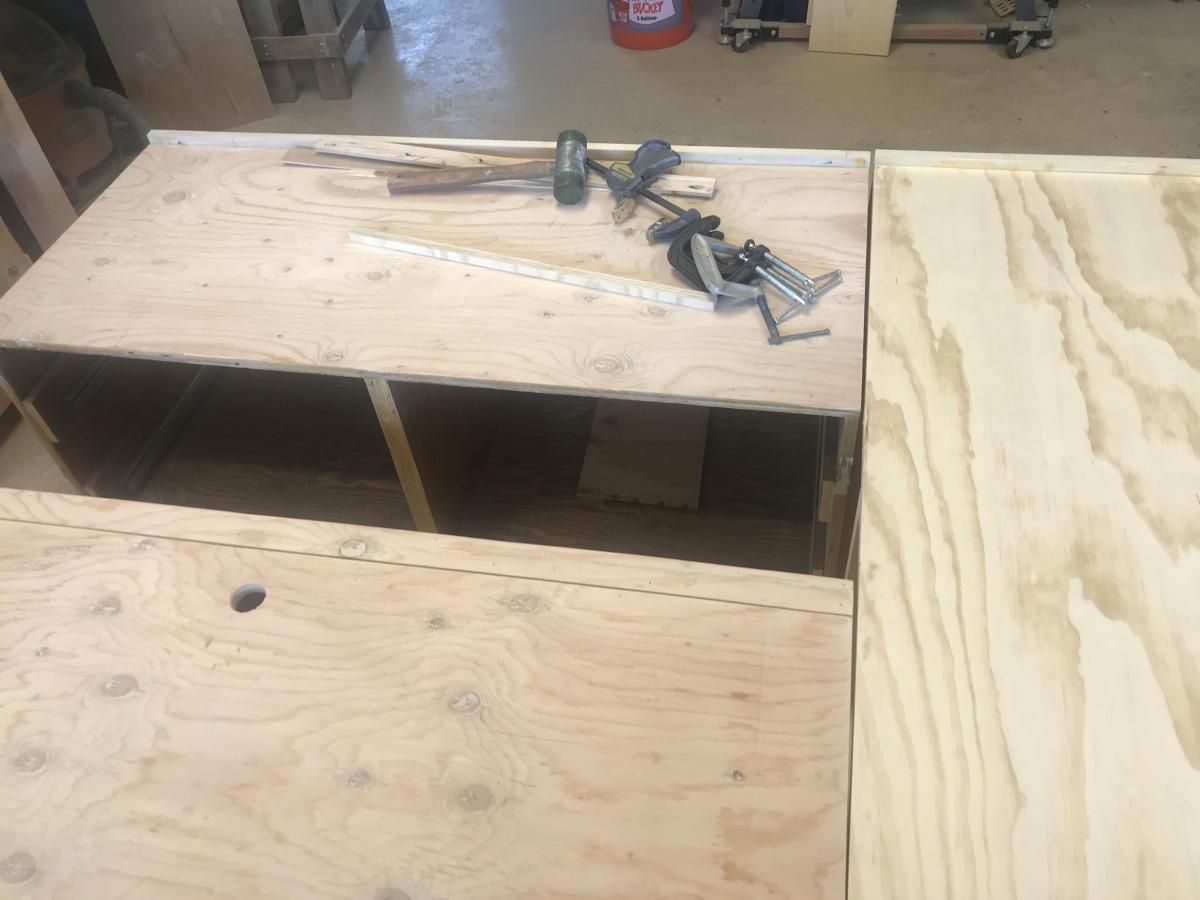
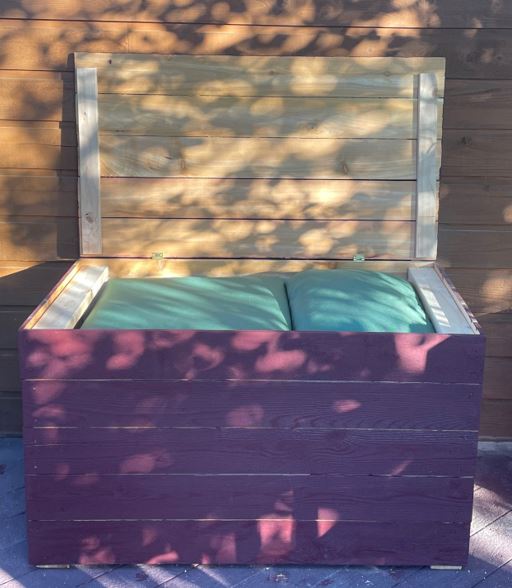
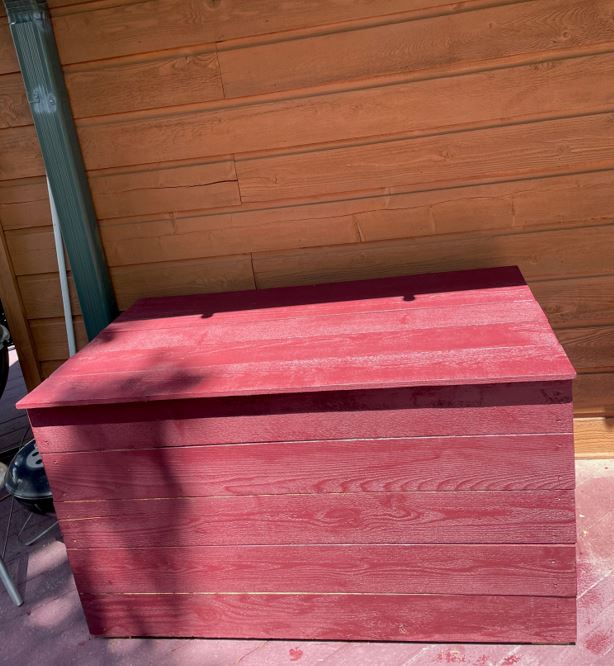
Community Brag Posts

Who's Afraid of the Simple Bed?

Submitted by QueenMahin on Thu, 03/10/2011 - 21:11

Building Ana’s farmhouse doll bed went so well that I felt ready to take on a full-sized bed.

Each project seems to come with its own set of lessons. I learned the hard way about the “Measure twice, cut once” rule with a couple of “oops” cuts that sent me back on another trip to the Blue store.

Sourcing untreated 4×4′s was also an issue. I ended up gluing and screwing 2×4′s together to use as the headboard and footboard legs.

The biggest issue, though, was my own fear. Sure I hit some stumbling blocks during the build, but resolved them and got the headboard and footboard all put together… and then choked. Who the heck makes her own bed? Is this really going to work? I delayed and delayed the final steps of screwing the siderails to the legs and attaching slats until I finally had to give myself a stern talking-to and a self-imposed deadline! Has anyone else ever been scared to push through to the final steps?

OK, here goes! I wasn’t sure that I understood the step about toenailing lagbolts through the end of the cleats into the legs until I got out the drill and tried it. Yup, it worked just fine! Next came the slats, and then when I hoisted the mattress on and saw that I had built a bed…. Well, I don’t even know how to describe that feeling of success and empowerment. Wow!

Ana, I wish I could thank you for all that you do.

Estimated Cost
$100
Estimated Time Investment
Week Long Project (20 Hours or More)
Finish Used
Paint or Stain Color/Type:Minwax American Chestnut
Finishing Technique: Was stuck in indecisive mode for a while and sanded and stained and sanded and stained, which resulted in a kind of weathered looking finish. Not what I thought I was going for, but now I count this as a success story and I love it!

Recommended Skill Level
Intermediate

Fancy*farmhouse table and benches

Submitted by Michael M on Mon, 05/27/2013 - 08:52

Used pressure treated (copper) and will allow to fade to grey with sun and sea air. Built to enjoy PEI mussels, lobster and beer in the open air and not too worried about the finish or surface. The table took 3 hours, start to finish - benches x 2 took longer at about 7 hours. Am getting a little lateral movement with the benches so will replace the 1 x 3 spacer with 2 x 4 and may add a diagonal 2 x 2 support as well (to match the table). I don't have/didn't use a Kreg so that may be the issue...?
Plans on Ana White are fantastic - I made the see-saw this weekend too in about an hour....thanks!

Estimated Cost
$120 in wood and $20 in screws for table and benches
Estimated Time Investment
Day Project (6-9 Hours)
Finish Used
Outdoor table and seating
Recommended Skill Level
Intermediate

Chicken Coop

Submitted by Steve_PA on Tue, 08/29/2017 - 14:17

I have more pictures, but I've hit the limit...

The coop is 100% cedar except for the plywood sides/doors.

Fun to build.

The plans are great, but not prefect. Make sure you measure everything out before cutting. I had several problems with errors in the plans. Use them as a guide, and like I said, measure before making cuts.

This project could be done in a weekend, but I ended up putting a lot of time into it. Close to 4 weeks from start to end, probably 3 full time days, and a few hours here and there on odd days. It just depends how anal you are I guess, haha! The finished product speaks for it self.

Estimated Time Investment
Week Long Project (20 Hours or More)
Finish Used
All the cedar was left natural and untreated.

All the plywood was painted with "HGTV HOME by Sherwin-Williams Weathershield Tintable Satin Acrylic Exterior Paint" Color was Backcountry Green...
Recommended Skill Level
Intermediate
Seasonal And Holiday

Outdoor sofa and table

Submitted by Anonymous (not verified) on Tue, 10/05/2021 - 07:01

Ana Whites easy to follow plans. Lake house. Love the way it turned out!

Built from Plan(s)

Comments

Storage Daybed - Lessons Learned

Submitted by QueenMahin on Sat, 03/12/2011 - 05:12

Hello Builders!

I made this bed for my daughter right after finishing Ana’s Simple Bed for myself. This bed is great because it is cool-looking (the most important factor for my middle-schooler) and because it adds tons of storage space (the most important factor for me, the mom!). Ana has this bed marked as easy, and it was easy. After working on the Simple Bed with lots and lots of cutting and gluing and nailing, I was amazed at how quickly this bed started looking like itself.

As a newbie builder, I read and read and re-read Ana’s plans and the comments on the plans and any similar plans until I feel comfortable. The Storage Daybed is just three separate benches that sit side-by-side and the mattress just lies on top. Somehow, when digesting the plans, I was really confused about the divider in the middle of each bench, but eventually the light bulb went on (the divider is necessary to support and strengthen the top, but the end result is that there are three cubbies in the front of the bed and three cubbies in the back – perfect for storing off-season clothes).

So I went to the Blue home improvement store and decided on birch plywood. Special thanks to Jen for working up the plywood cutting layout that Ana included in the plan. I don’t think I could have figured out how to get the pieces cut without you. The associates at the large home improvement store were very nice, and they offered to make the cuts for me even though they said that they really weren’t supposed to make “project cuts”. The problem was that their cuts were oh, so bad! They marked out all of the cuts at once, which doesn’t account for the sliver that the blade takes out, and when measuring they didn’t even have the tape measure blade flush against the top in the first place.

On my other projects, I made plenty of mistakes. But they were my mistakes, you know what I mean? On this build, I spent so much time trying to fix bad cuts. But it’s my fault. I was concerned, but I second guessed myself and didn’t speak up while they were cutting. I ended up having to cut a thin strip of plywood to lengthen the side of one of the benches, and had to sand and sand and sand. Also ended up having to re-cut the dividers.

Oh, well. I got a little life lesson in assertiveness, and I got to add a circular saw to my toolkit! After all was said and done, this really is a great bed, and it made my heart glow to hear my daughter going around telling folks: “My mom is making my bed!

Built from Plan(s)
Estimated Cost
$150
Estimated Time Investment
Week Long Project (20 Hours or More)
Finish Used
Glossy white paint on the trim, flat white on the sides and top. We're debating about repainting it in a bold color.
Recommended Skill Level
Beginner

Puzzle Bookcase

My Hubby and I built this bookcase on the livingroom floor on mothers day morning! It was so simple and fun. I had all the wood cut at Lowes and we just had to put it together and paint it!

Built from Plan(s)
Estimated Cost
175.00
Estimated Time Investment
Afternoon Project (3-6 Hours)
Finish Used
paint
Recommended Skill Level
Beginner

Bar with zinc counter top

I used the "how to build" from the Shepherd Kitchen Island plan to help me create my own dimensions for this bar... 60" long, 24" deep, 35" high.  It has a space on the left for an under counter ice maker and the wine rack is built in inside the right hand cabinet.  

The counter top is plywood covered with a sheet of zinc I bought from rotometals.  Fairly easy to do after watching their videos on how to apply and how to patina.

Built from Plan(s)
Estimated Cost
$450
Estimated Time Investment
Week Long Project (20 Hours or More)
Finish Used
General Finishes Milk Paint. Used 2 coats of the color Driftwood, then sealed with a coat of poly. Then applied 2 coats of the color Snow White and distressed. The poly helps keep you from going straight down to bare wood when sanding.
Recommended Skill Level
Intermediate

Farmhouse Table

Submitted by hnick78 on Tue, 10/05/2021 - 15:06

This was my first Farmhouse Table build. 8ft long with 2 benches. Distressed white with True Brown tops.

Comments

Farmhouse Dining Room Table

Submitted by SaraLodise on Mon, 04/27/2015 - 06:18

Farmhouse dining room table built for my mom. Unstained.

Table top is 2" White Pine Boards, legs are cedar, and everything else is whitewood studs. Left the leg assemblies and stretcher board unattached for the two hour transport to Charlotte.  Attached them with screws and some glue upon arrival. Loved the plan and finished in two days!

Estimated Cost
White Pine 2x8s = $183
Cedar 4x4 = $48
Whitewood studs = $10
Screws/filler/plugs = $25
Estimated Time Investment
Weekend Project (10-20 Hours)
Finish Used
Unfinished
Recommended Skill Level
Intermediate

Modified Hannah Canopy bed - queen

Submitted by Cos on Mon, 09/11/2017 - 08:25

This "pin" was my inspiration (https://www.pinterest.com/pin/540643130244817922/) and I was very happy to have the Hannah canopy plans to modify!  The upper canopy was eliminated,  a "whimsical wave" was cut in the headboard using a jigsaw, and the foot board posts were shortened. In addition, measurements for the bed were modified to fit a queen size mattress. I used hardwood plywood and hardwood side boards, as I wanted a durable bed. The posts were pine 2x2's as I could not find hardwood of this dimension at my local stores. I also used hardware from the Rockler company (http://www.rockler.com/5-surface-mounted-bed-rail-brackets) to mount the head and foot boards to the side boards, as I wanted to assemble and disassemble the bed easily.

Built from Plan(s)
Estimated Cost
~$150
Estimated Time Investment
Weekend Project (10-20 Hours)
Finish Used
paint
Recommended Skill Level
Intermediate

Custom Closet

Submitted by Anonymous (not verified) on Wed, 10/06/2021 - 06:59

This is a guest bedroom. The closet had 6 panel, colonial bypass doors. The bypass doors leave the center unusable. To save room, I built a dresser in the center. The bypass doors are getting converted to swing doors. I used shelf help to design the project.

Built from Plan(s)

Comments

first build saushas laundry pedestal with a few adjustments.

Submitted by Herv on Mon, 03/14/2011 - 16:17

weekend project that had been put off for about a year and finally got done. was not that challenging even for a rookie. turned out well and most of all the mrs. was pleased with it.
photo 1: materials
photo 2: lower level on left and upper level on right
photo 3:close up of each level, bottom level was stacked 2x2's plus 3/8 ply on top and 1/8 vinyl so that a 1x4 would cover the front flush and not have a lip so that tha baskets wont get caught.
photo 4: base with corner posts
photo 5: all set minus the trim boards!
final trim on the top level overlapped by 1/2" to act as a lip to hold w/d in place if they decided to "move" on me.

Estimated Cost
~$100
Estimated Time Investment
Weekend Project (10-20 Hours)
Finish Used
stain was ipswitch pine not sure of the brand
and the loose lay vinyl was leftover fom the flooring as you can see i think it adds to the project
Recommended Skill Level
Starter Project

A bench for a future table

Submitted by Al Lulu on Fri, 05/31/2013 - 14:59

This is the third project I've done from this site and the first that came out absolutely perfect. The others were GREAT but this one....it just soared.
Took me all of 1 afternoon to build and 3 days to stain and finish. I used Early American by Minwax to match the existing dining room table.
My goal is to build the table that goes with it.
But, for now, this is the perfect addition to the house.
One thing.
The plans for this bench call for 1x4s for the breadboards and that doesn't make sense. I think it's a typo.
You will need extra 2x4s to make the project really soar. But, heck, who can't use an extra 2x4 lying around?

Estimated Cost
$40
Estimated Time Investment
Afternoon Project (3-6 Hours)
Finish Used
Minwax Early American
Varathane satin
Recommended Skill Level
Beginner

Comments

Rustic X Coffee Table

My wife was wanting a new coffee table so I decided to build one instead of goin and buying one. This being really the first somewhat hard wood working project that I had tried it turned out very good. My wife did her handy work on staining and making it look very old and rustic.

Built from Plan(s)
Estimated Cost
$50-$75
Estimated Time Investment
Weekend Project (10-20 Hours)
Recommended Skill Level
Intermediate

Porch is My Happy Place

Submitted by Malka on Wed, 09/13/2017 - 01:46

My father asked for a porch sign for his birthday, and as he enjoys sitting and watching the hummingbirds feed, thats the theme I went with. Sign is made with a redwood fence board that was sanded down and biscuit joined together, then given a decorative routered edge. Painted with Rustoleum paint, and given a few coats of spar urethane. Used jute cord on the back to hang the sign with.

Estimated Cost
$15
Estimated Time Investment
Afternoon Project (3-6 Hours)
Finish Used
Minwax Spray Spar-Urethane
Recommended Skill Level
Beginner

Vintage Step Stool

Submitted by alifrancis on Thu, 03/17/2011 - 15:54

I LOVE this stool!  I love the style, the function and how easy it was.  I  made this in just an hour while the kids were out front riding their bikes.  The best part was it was a gift for my dear friend for her nursery.  

I already have two more rooms in my house that are in need of this stool, so a few more are in my future. 

Built from Plan(s)
Estimated Cost
$10-15
Estimated Time Investment
An Hour or Two (0-2 Hours)
Finish Used
Primed it with the Kilz oderless spray primer. Painted it with two coats of Ocean Breeze Spray paint. Sanded and distressed the edges of the stool. Finished it off with two coats of a spray on poly in a satin finish.
Recommended Skill Level
Beginner