Community Brag Posts
Balin console table modification
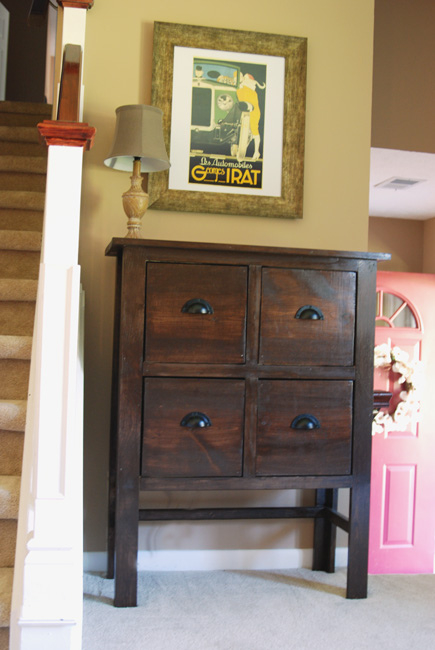
I absolutely loved this table but needed to modify it to fit into a specific area of my house, so I put two drawers on top of each other instead of having all four across. I also shortened the legs as a result. I really love the way it turned out. It is so pretty.
The only thing I dislike is the drawers. They are incredibly heavy, don't slide that well (not because of any mistake on my part, just because they are wood sliders and not metal or plastic), and the shape and size don't make them very usable. They're sort of awkward. I originally wanted it to be a place for my boys to store their Thomas train tracks and Legos, but there's really no way a kid can use drawers that heavy and deep. So that's a bummer.
But overall it's a really nice addition to that part of our living room!
Built from Plan(s)
Estimated Cost
$75
Estimated Time Investment
Weekend Project (10-20 Hours)
Finish Used
Minwax's cognac
Recommended Skill Level
Intermediate
Comments
Thu, 08/02/2012 - 10:40
Heavy drawers
Your console table is beautiful! I read a recent post that addressed the awkward drawer slides. This person used teflon tape on the slides and said it worked well. Here's the post...
Submitted by alexnb on Thu, 2012-08-02 00:30.
That might work for you, too, so that you could actually use the drawers for those pesky little toy train and Lego pieces! :-)

Thu, 08/02/2012 - 10:44
This is GORGEOUS!
I've loved the Balin console since Ana first posted the plans, but haven't gotten a chance/place for it. Your modifications are amazing, and the finish is stunning. WOW!

Mon, 08/06/2012 - 09:13
Thanks guys. Your nice words
Thanks guys. Your nice words made me feel so good. Linda, can you send the link again? It didn't post here.
Thanks again. :D It was a fun project and the mods make it unique.
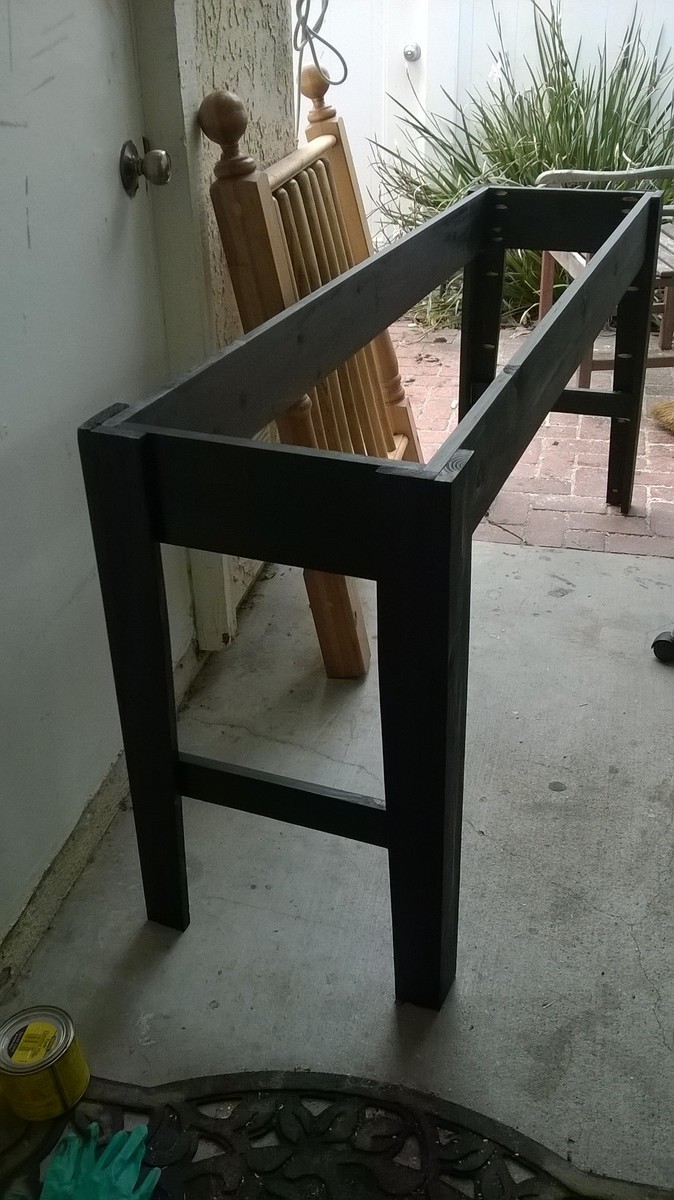
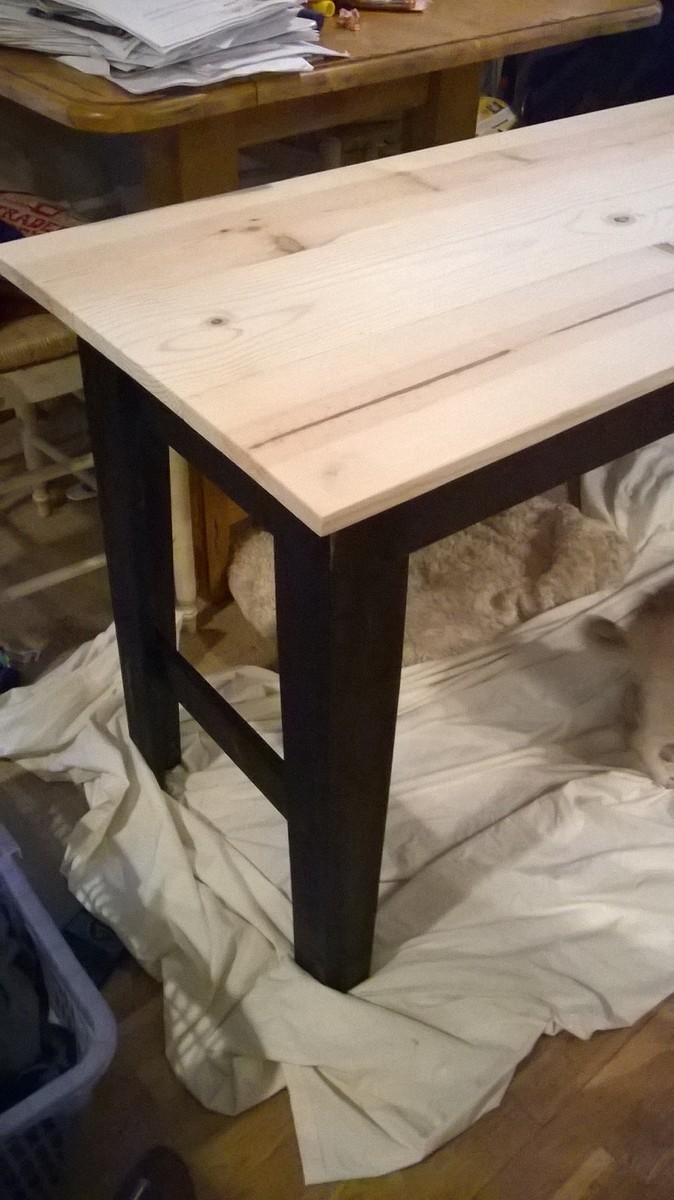
Narrow Farmhouse table

This is my third project - built the Full Farmhouse bed and Haley platform bed. Son wanted a 6 ft table to accommodate all of his computer/gaming devices.
Came together quickly - sanding/stain/finish took majority of time. Stained base with Minwax ebony (2 coats), used Minwax weathered Oak on table top (1 coat) and 3 coats of Satin Polycrylic.
I now have a long list of projects....
Estimated Cost
$60
Finish Used
Weathered oak stain
Satin Polycrylic
Ebony stain
Satin Polycrylic
Ebony stain
Recommended Skill Level
Beginner
2x4 Adirondack Chairs
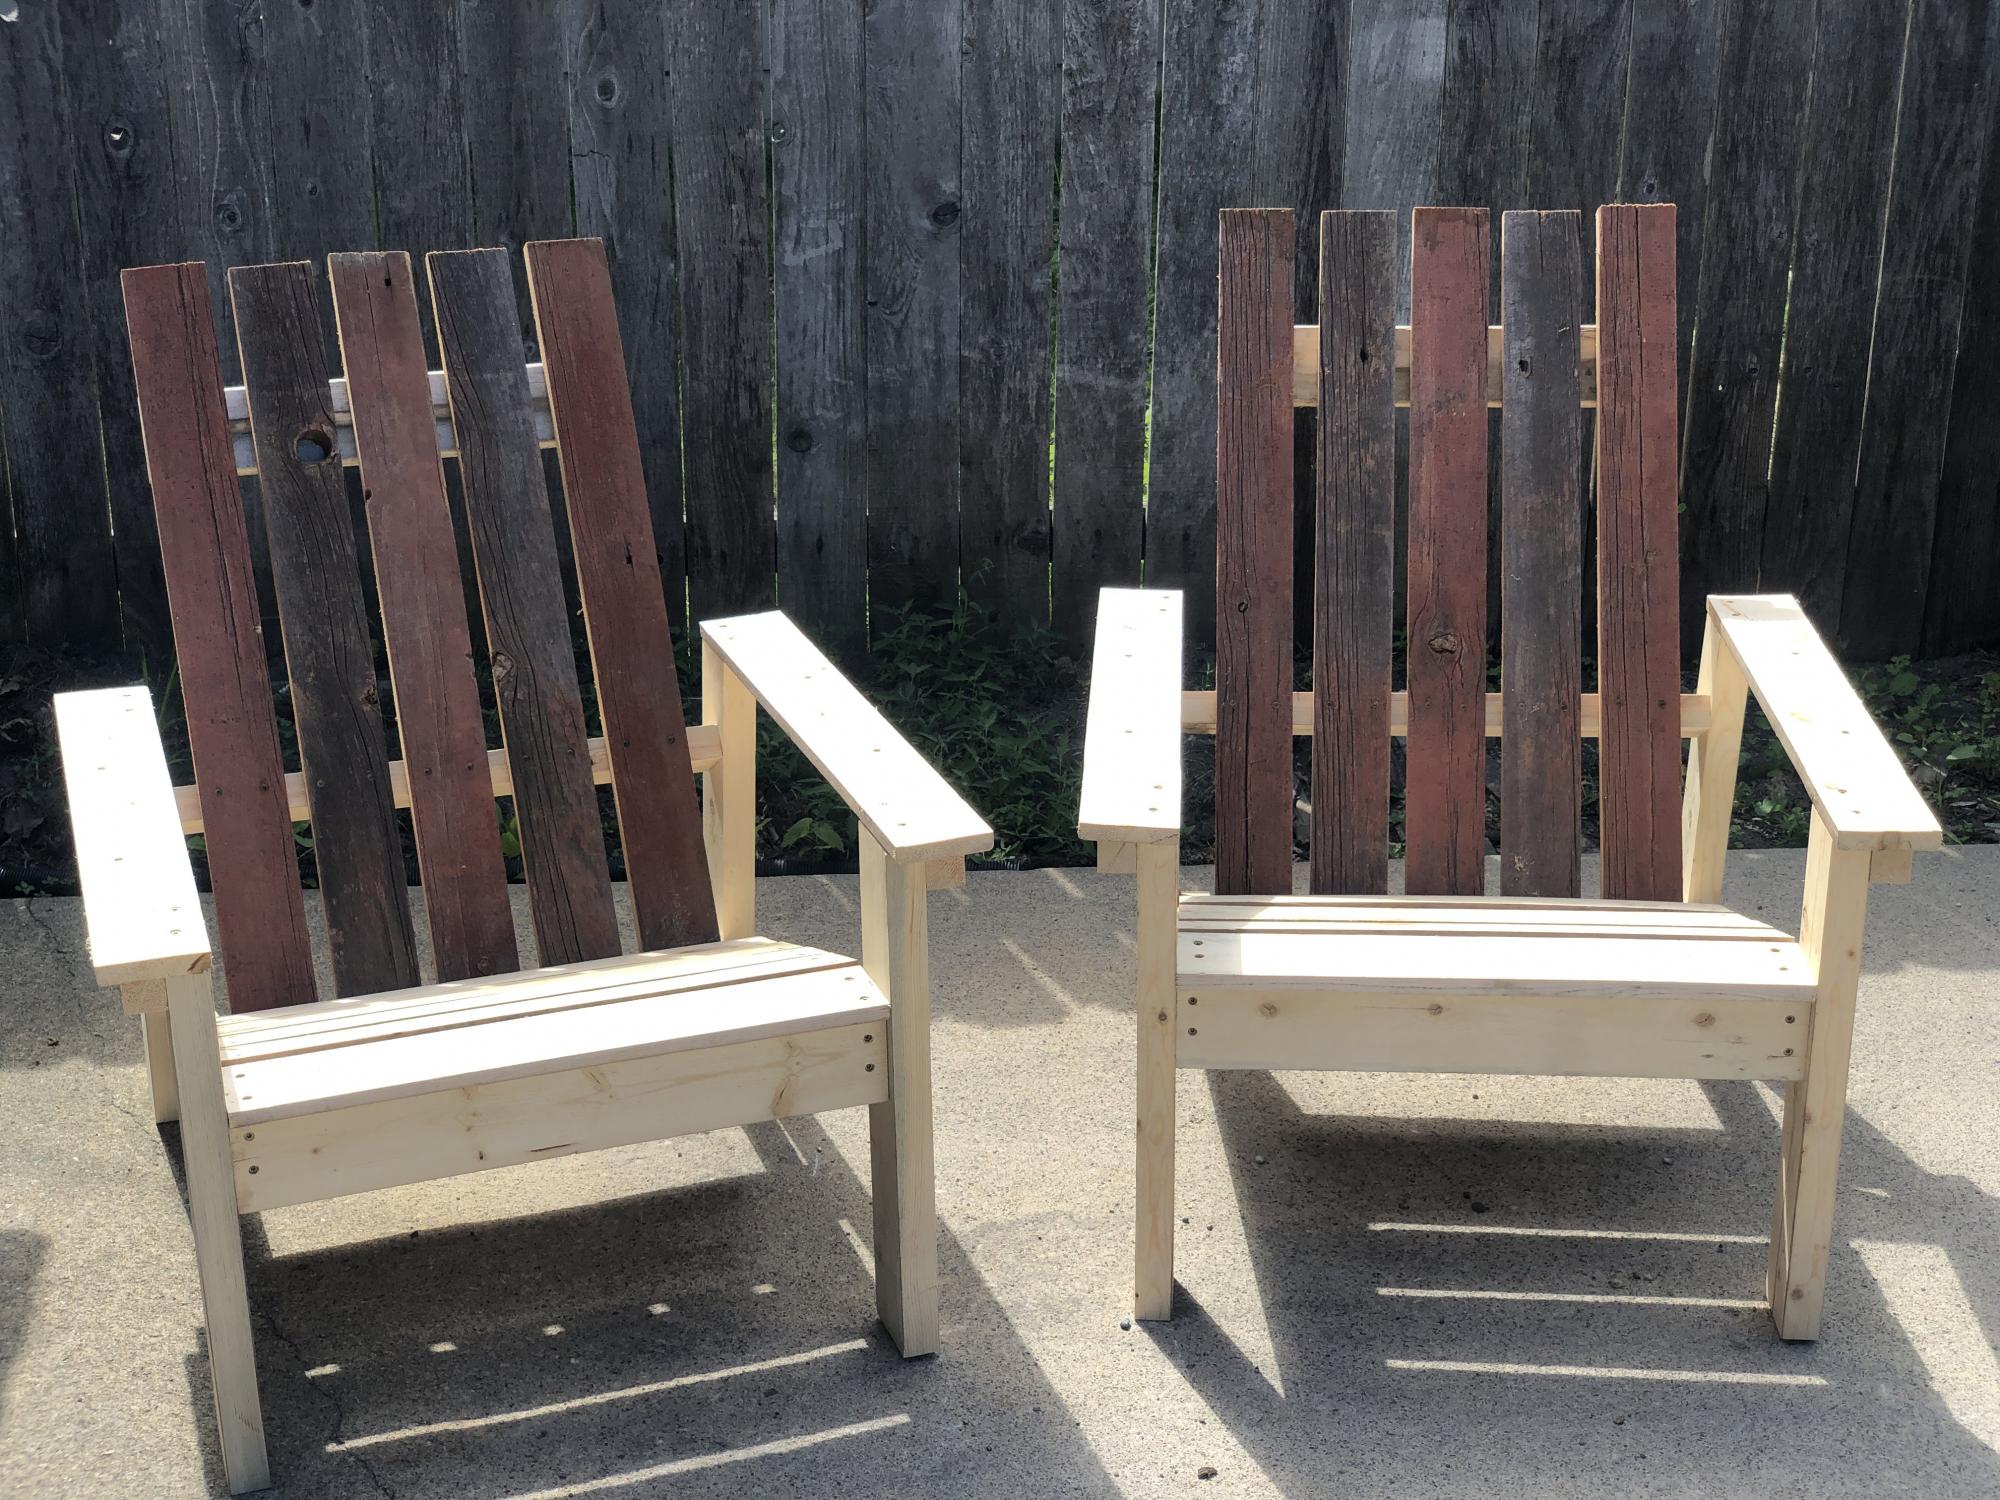
This is the regular (not modern) plan for an Adirondack Chair. The plan worked great and was easy to follow and even more importantly the chair was easy to build! I swapped out the 1x4 for old barn board for the backer and didn't cut the scallop. Nana loved them for her birthday present!
Built from Plan(s)
Estimated Cost
< $20 as everything was recycled! I had to buy the screws and glue.
Estimated Time Investment
An Hour or Two (0-2 Hours)
Finish Used
The beautiful part about this gift is that Papa can finish them how Nana wants!
Recommended Skill Level
Beginner
Coffee and Drink Station
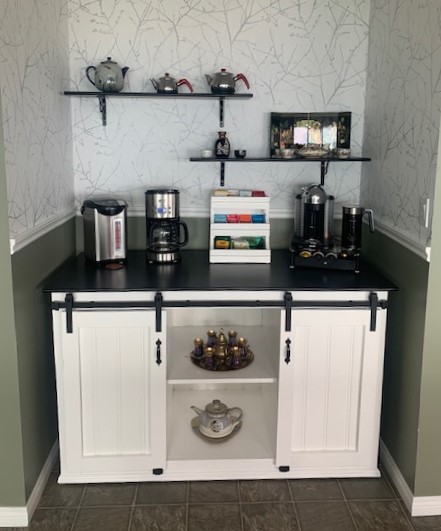
Using Ana White's plans, I created a coffee station where there used to be a roll top desk,,,
Built from Plan(s)
Console Table
I built this in just a couple of hours. I thought it would look good in our living room. I also wanted to try the Gel stain and thought this would be a good project for that.
Built from Plan(s)
Estimated Cost
$44
Estimated Time Investment
An Hour or Two (0-2 Hours)
Finish Used
Sand, Minwax Red Elm Gel stain
Recommended Skill Level
Starter Project
Providence bench
My first project from plans found on this site. Thanks!
Built from Plan(s)
Estimated Time Investment
Afternoon Project (3-6 Hours)
Recommended Skill Level
Beginner
Built 8-29-16 in a couple of hours. Thanks Ana!
Easy plans to follow and my wife loves the results! Will be used as a book shelf for home schooling our 3 kids.
Built from Plan(s)
Estimated Cost
$55
Estimated Time Investment
Afternoon Project (3-6 Hours)
Finish Used
Black base followed by a layer of mossy green then sanded so some of the black came through.
Recommended Skill Level
Beginner
Board and Batten Hall Tree
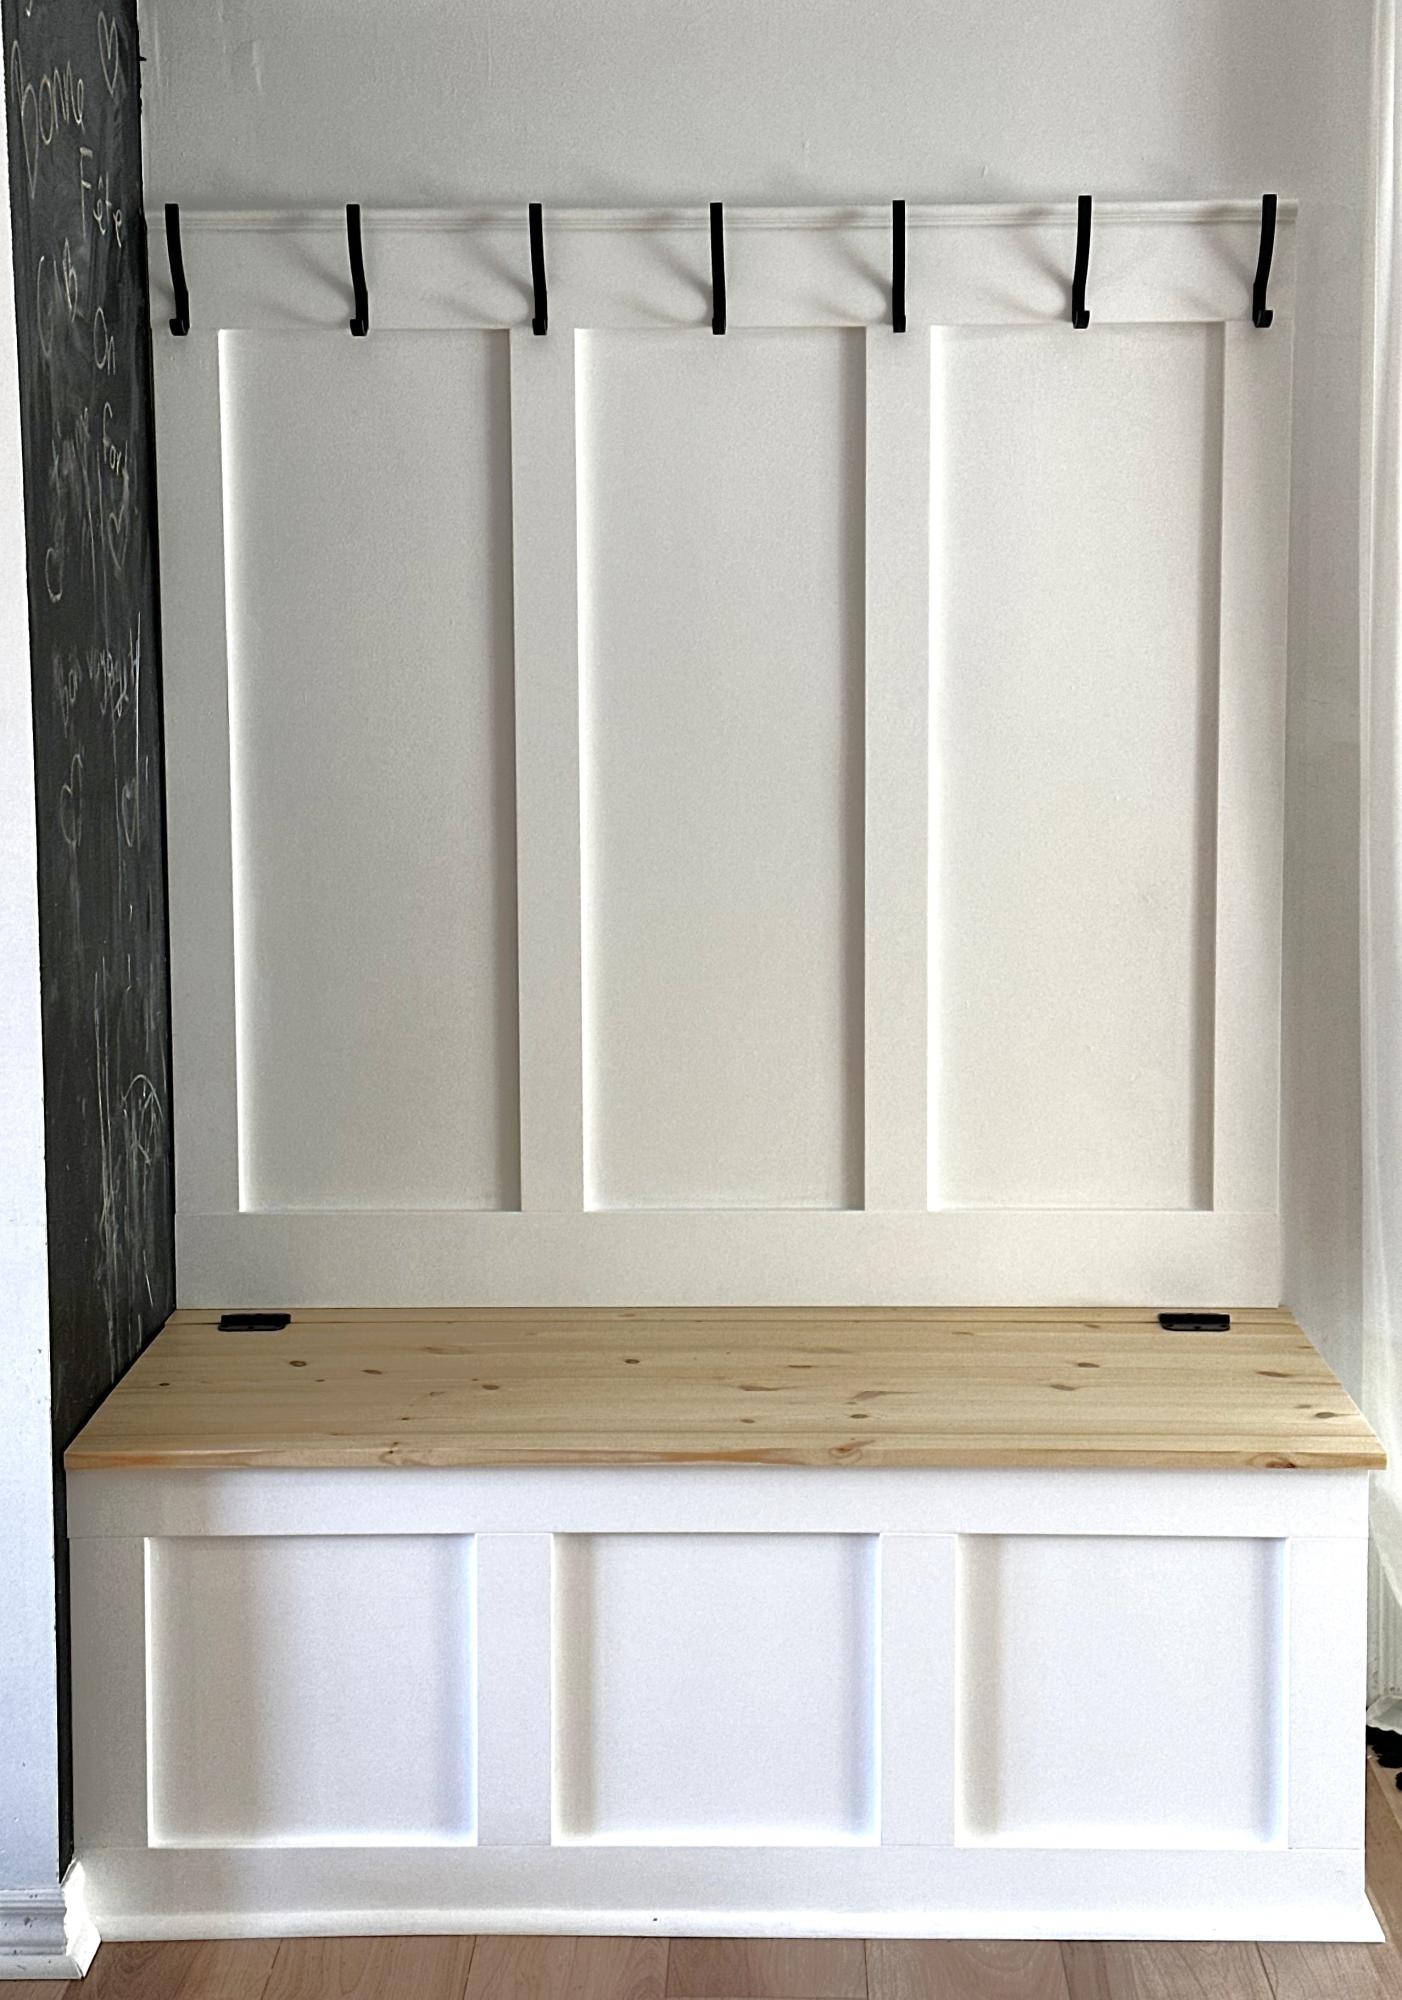
Just love this and there is storage inside the bench.
Sylvie
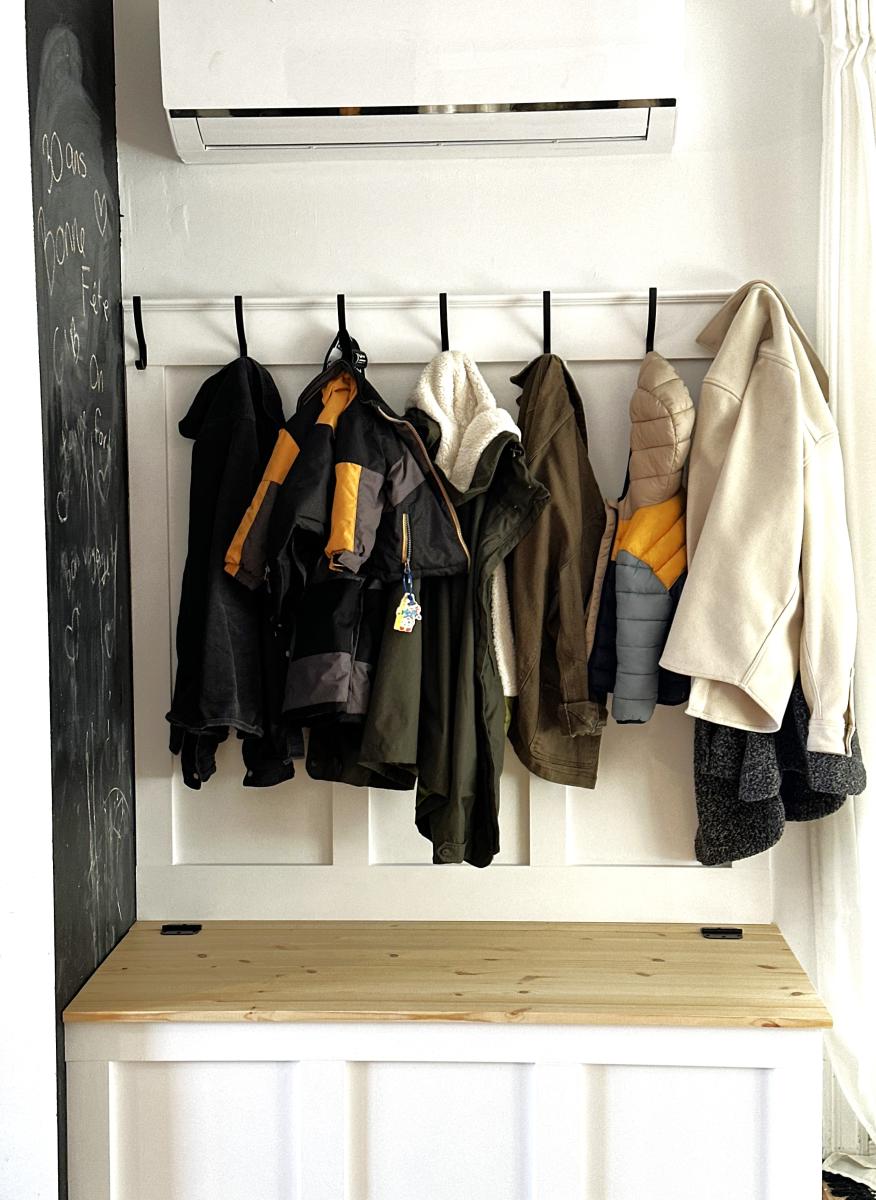
Built from Plan(s)
Back to School Lockers
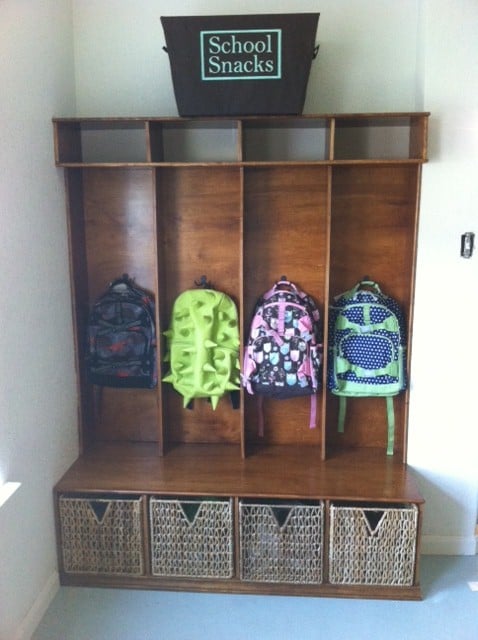
It is almost back to school time (20 days) and I am home alone with my 4 kids while my husband is away on business for 2.5 weeks. What is a woman to do? Find a project.
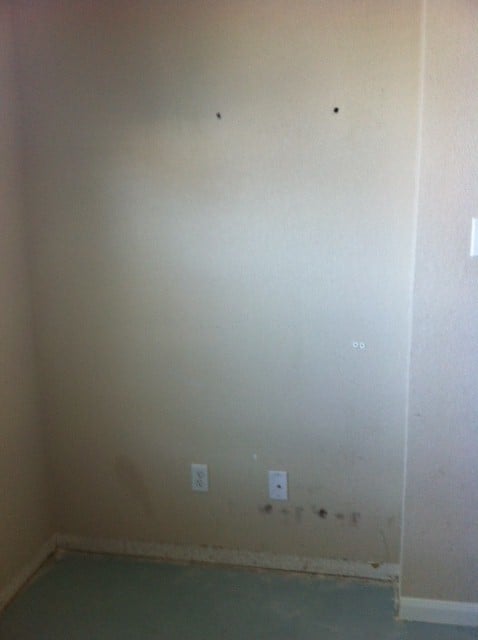
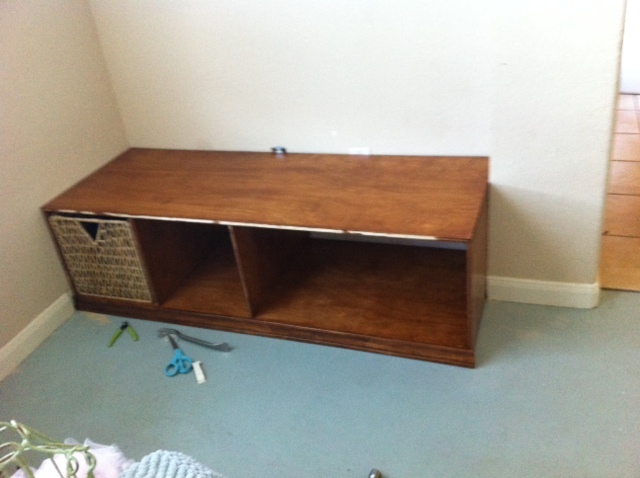
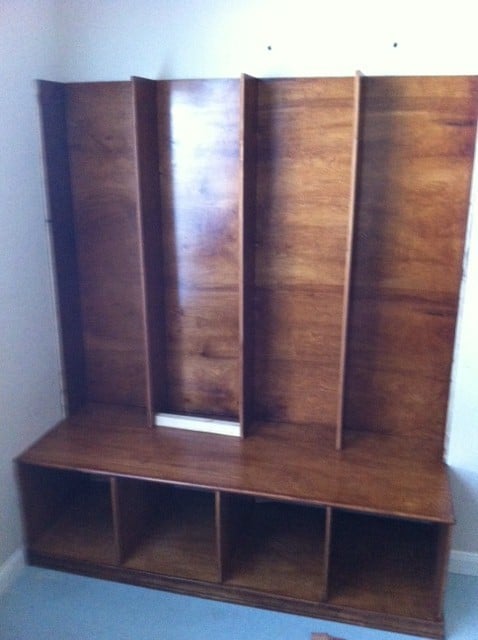
There has always been this weird little nitch in the front "formal living room" that I use as my photo studio. It is only 55 1/4 " wide and 7" deep so nothing I could find would fit there- I usually have a coat rack there- and last year I had my boys' backpacks for school hung there. But... This year my twins are going off to school- which means 4 backpacks. Enter project! I modified the Small Locker Project (http://ana-white.com/2010/08/still-not-locker.html) and built the lockers to 1.) fit the space 2.)to fit their existing shoe baskets that used to be in an Ikea Expedit shelf.
I am soooo pleased with how they turned out.
I built this in pieces- first the bench, then the dividers and backing, and then the cubbies above. I built it using 1/2 in birch veneer plywood (that happens to be Purebond) from home depot. I had Home Depot cut the wood (which I normally do for the easiness factor- but this time it was a mistake. My favorite cutting guy was on vacation and I wanted to start now so I let Moose cut it. So not a good idea. One piece was 15" wide at one end and 15 1/4 " at the other... I gave him a cutting guide, hello?
Good thing I have my own table saw so I could fix it. (from when I built my girls beds: http://ana-white.com/2010/05/plans/corner-unit-twin-storage-bed)
I sanded and stained the wood with custom stain from Sherwin Williams. I then gave it 3 coats of waterbased Poly .(sanding between each one)
Then I glued and nailed it together (for the record, 1/2 plywood is harder to shoot nails into- just sayin')
Then I had the wood cut for the dividers and back (sand, stain, poly, glue and nail, install)
Finally the cubbies at the top: (sand stain, poly glue and nail, install)
After that I put on the trim so now I have a built in lockers for my kids- their backpacks and shoe baskets fit exactly, and there is room for when they grow for the backpack hooks to move up. I plan to use chalkboard vinyl to put their names above the hooks. Thanks Ana again for inspiring me!!!!!!

Built from Plan(s)
Estimated Cost
$80
Estimated Time Investment
Weekend Project (10-20 Hours)
Finish Used
Sherwin Williams stain, with 3 coats of Minwax Semigloss Poly
Recommended Skill Level
Beginner
Shelf for Organizing Supplies
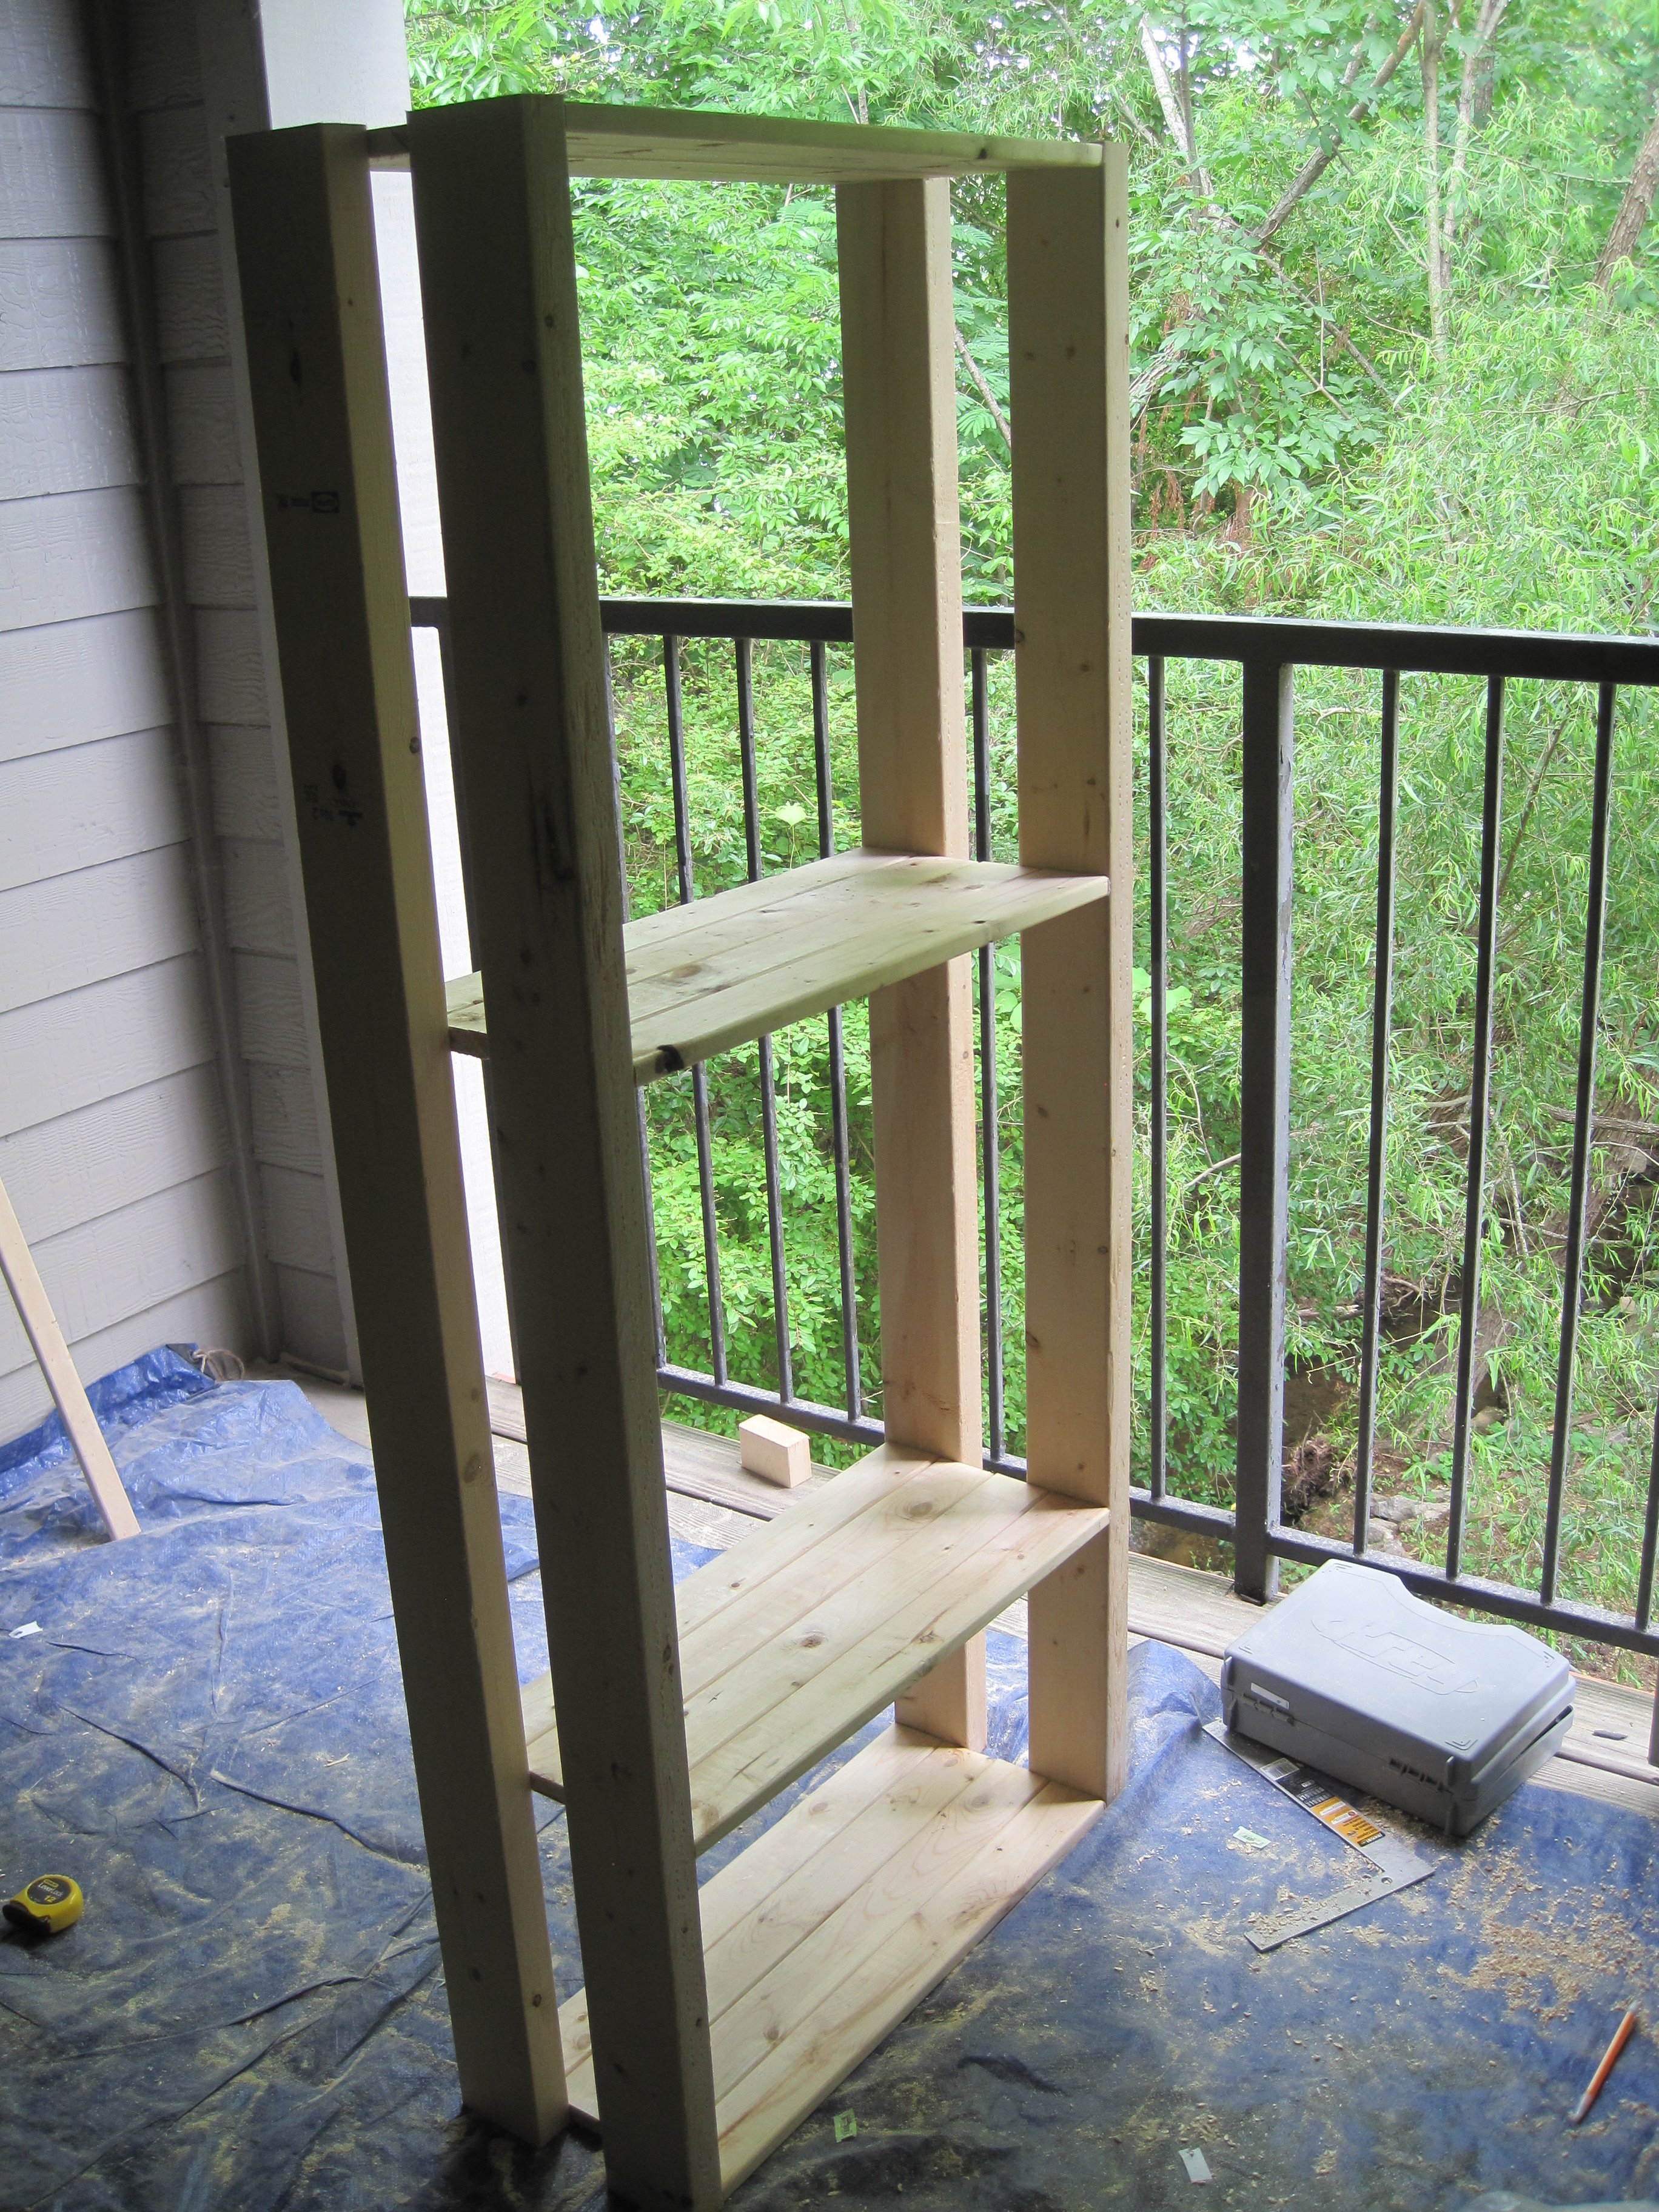
We were throwing all of our woodworking supplies into this closet off my patio, and it was really hard to find what we needed when we needed it.
So we made this shelf using two 2x4x10s cut to an inch less than 5ft each for the legs, and 4 1x3x8s cut to half inch less than 2ft each cut. (one board per shelf). (Measurements are for minimum waste)
Kreg jigged the 1x3s together 4 deep for each shelf. Used 1 1/4" Kreg screws.
We might go back and add a shelf or two to fix the odd spacing at the top and give us more shelves for the little things.

Estimated Cost
$12.50
Estimated Time Investment
An Hour or Two (0-2 Hours)
Finish Used
Didn't finish as it's just going on a closet on the balcony and we needed it quick and finishing is the most time consuming.
Recommended Skill Level
Starter Project
Dollhouse bookcase

We did make some revisions to the plans, including making it shorter and not as wide.
Built from Plan(s)
Estimated Cost
$200
Estimated Time Investment
Weekend Project (10-20 Hours)
Finish Used
Hi gloss Behr Marquee paint
Recommended Skill Level
Beginner
Farmhouse Table
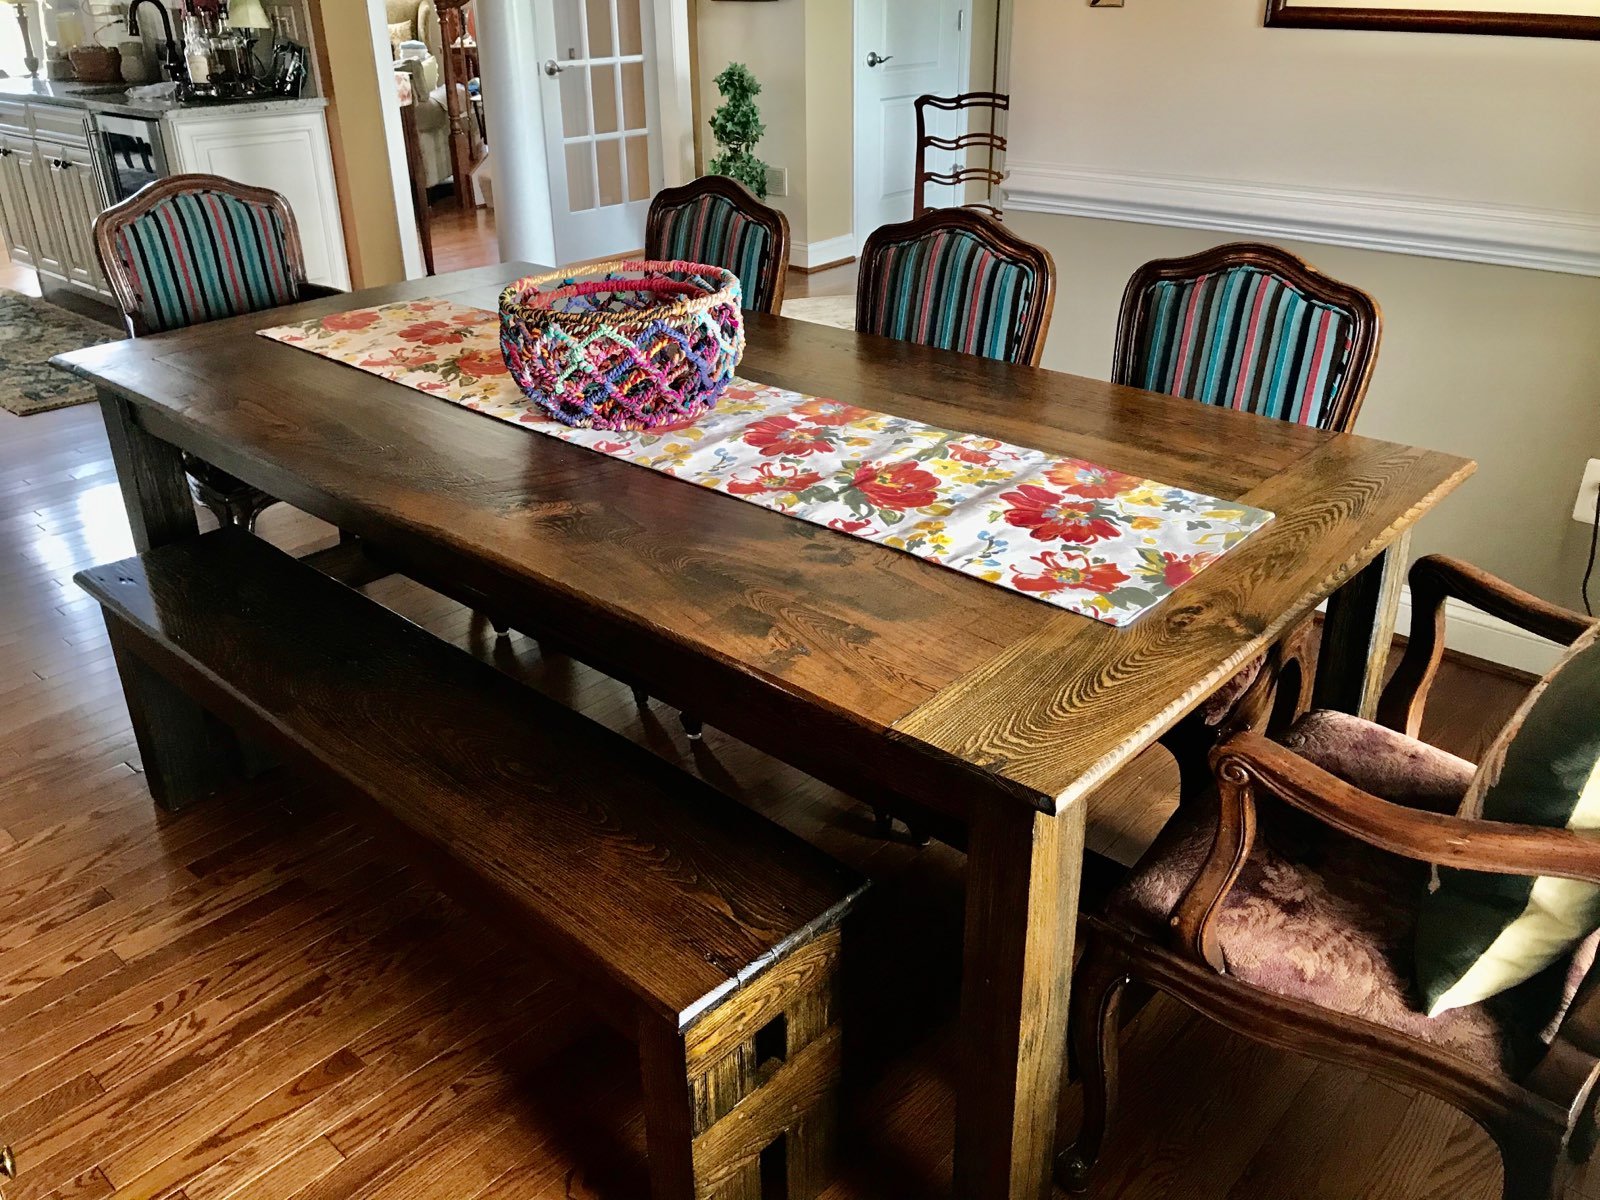
I used the farmhouse table plans but substituted almost 100 year old wood from our family farm. Pocket hole joints on the table top and lots of sanding...! The bench was made from the same wood and followed roughly the plans for the dining bench.
Built from Plan(s)
Estimated Time Investment
Week Long Project (20 Hours or More)
Finish Used
Minwax pre-stain and oil based Minwax Jacobean and finished with oil based satin spar varnish.
Recommended Skill Level
Intermediate
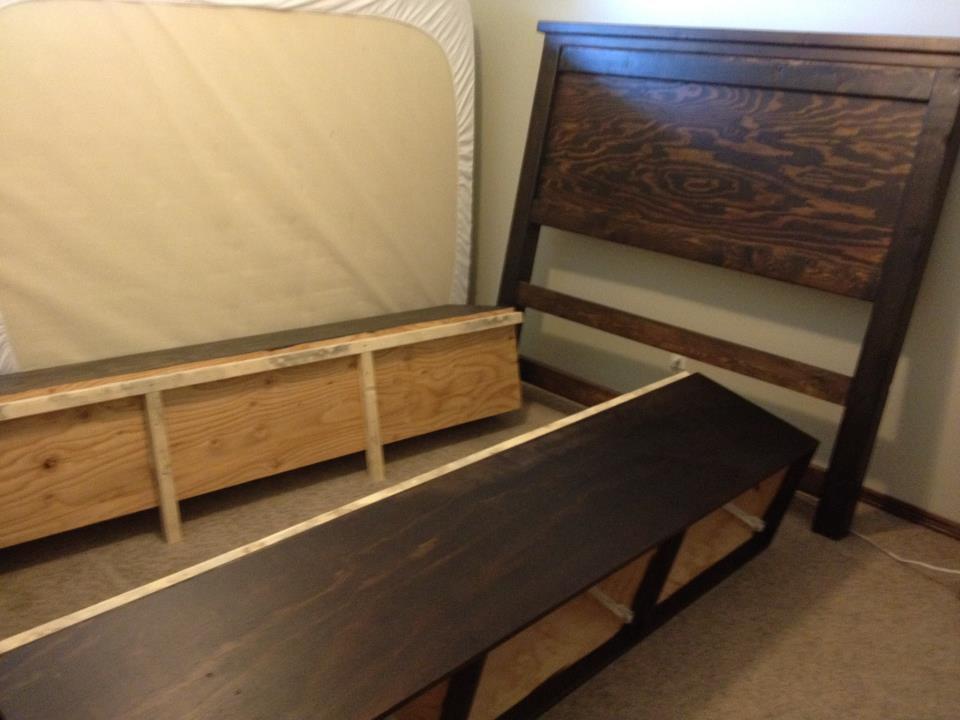
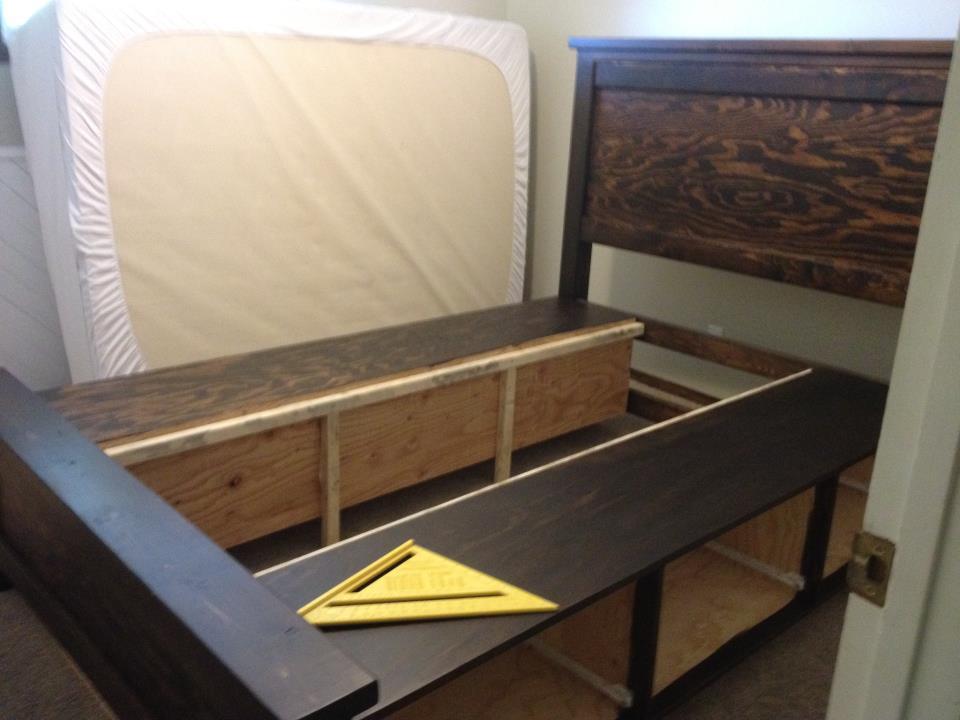
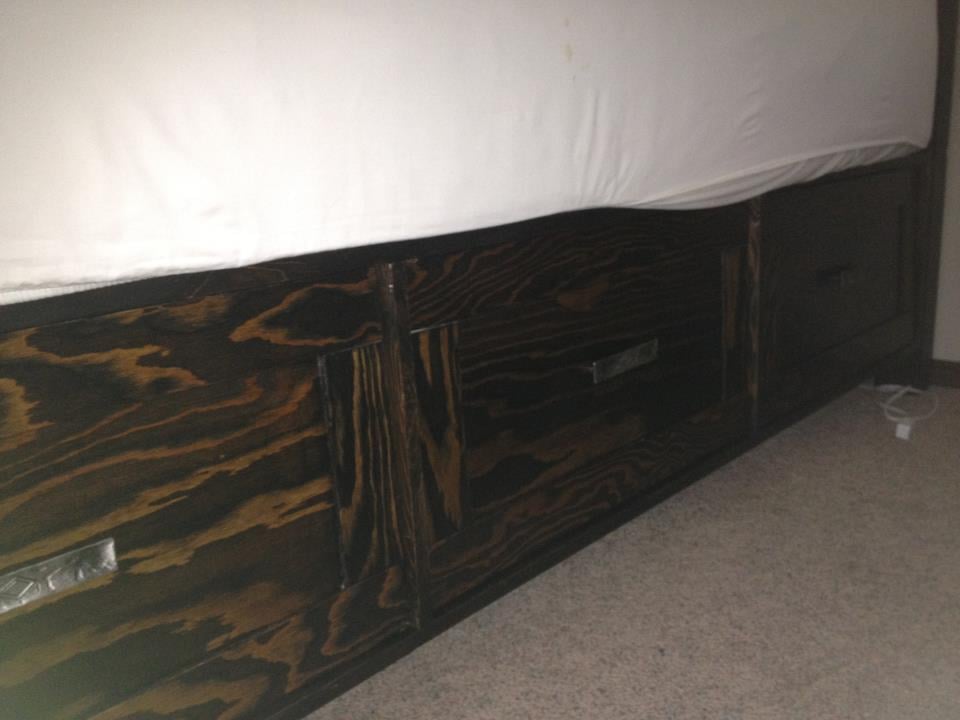
Storage Bedframe
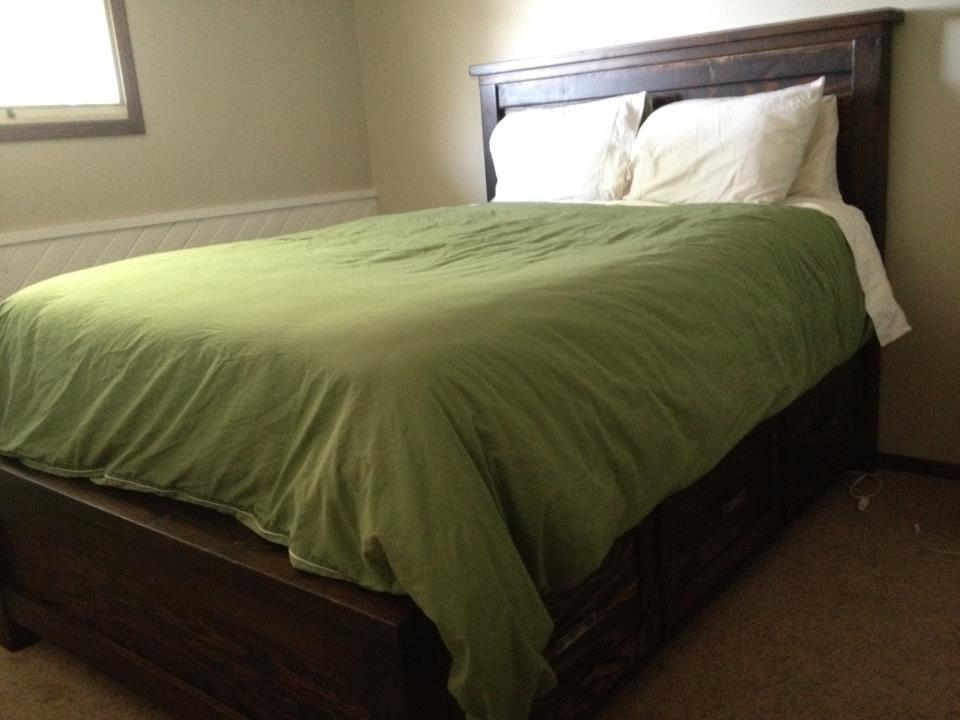
I used pine for the 2x6's and 2x4's (and 1x3's) and fir plywood for the headboard, footboard and drawers. I also modified the drawers and used a square piece of 3/4" plywood for the bottom - made it way easier to build the drawers square so they slide nicely!
The pulls are from Lee Valley.

Built from Plan(s)
Estimated Cost
200
Estimated Time Investment
Week Long Project (20 Hours or More)
Finish Used
2 coats of Minwax Dark Walnut stain and 3 coats of Verathane Crystal Clear Satin Interior. I applied the first 2 coats, then lightly sanded then a third thin coat and it turned out super smooth!
Recommended Skill Level
Intermediate
Comments

Sun, 08/12/2012 - 17:36
Looks great!
I love how the storage drawers are off the floor. The finish looks great and the "in process" photos help a lot. Great Job!
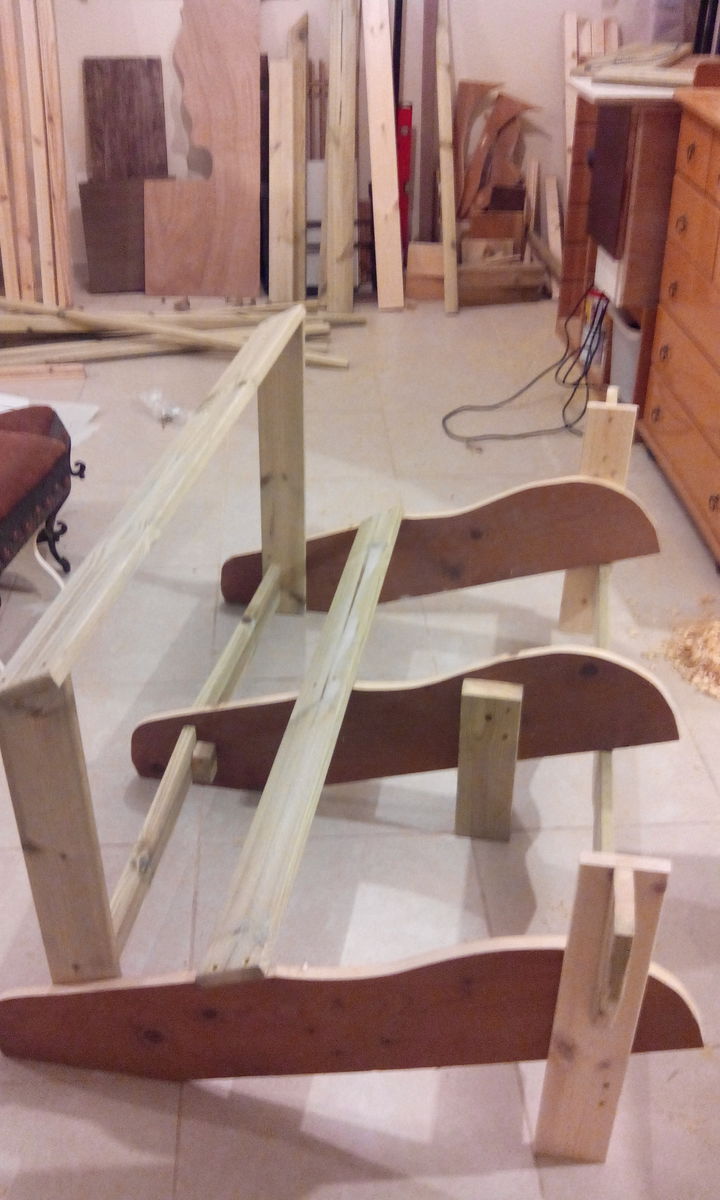
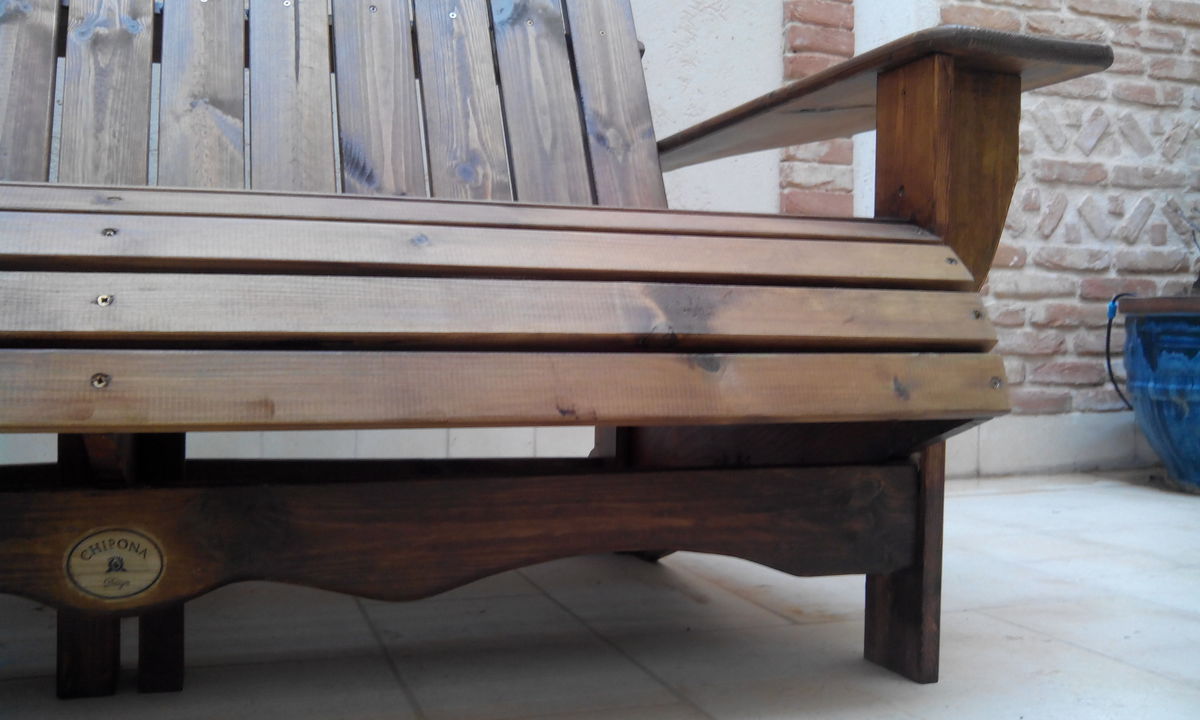
Patio bench
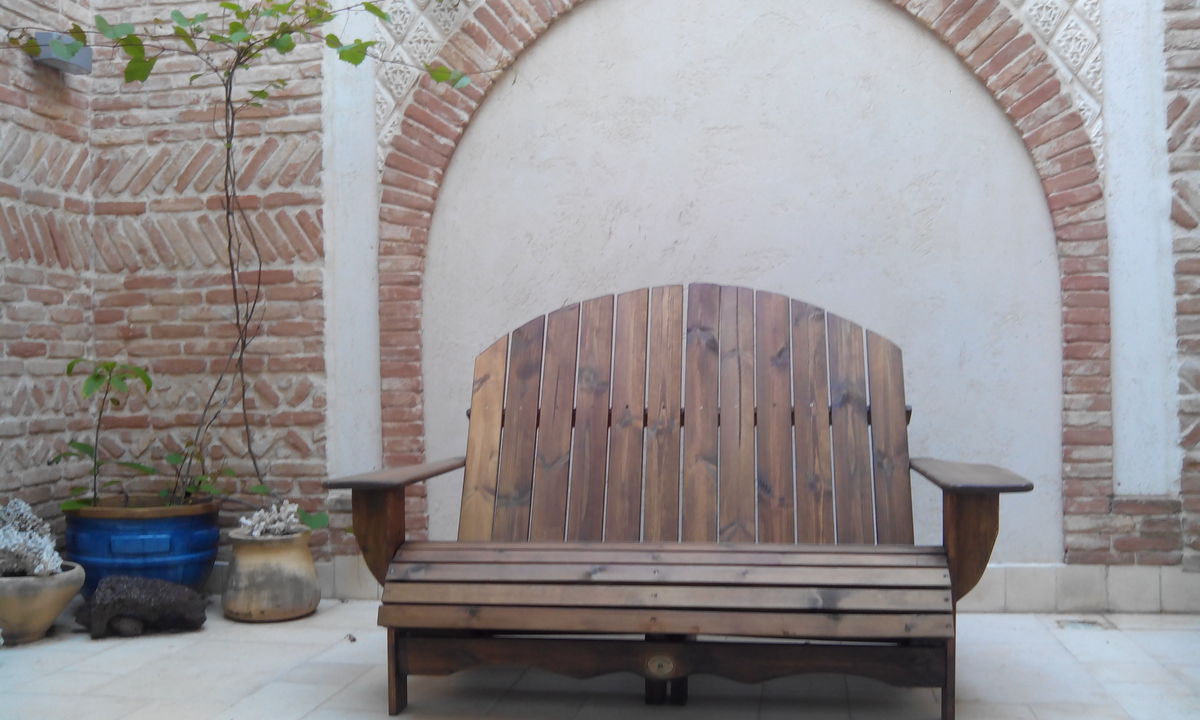
This bench for 2 was made of leftover pine wood planks I had in my cellar. I used different saws and a router to make sure the ends where smooth and give the overall project a elegant touch. Since I love to see the texture of wood I chose a walnut stain.

Estimated Time Investment
Weekend Project (10-20 Hours)
Finish Used
walnut stain
Recommended Skill Level
Intermediate
Comments
Simple Rolling Bar Cart
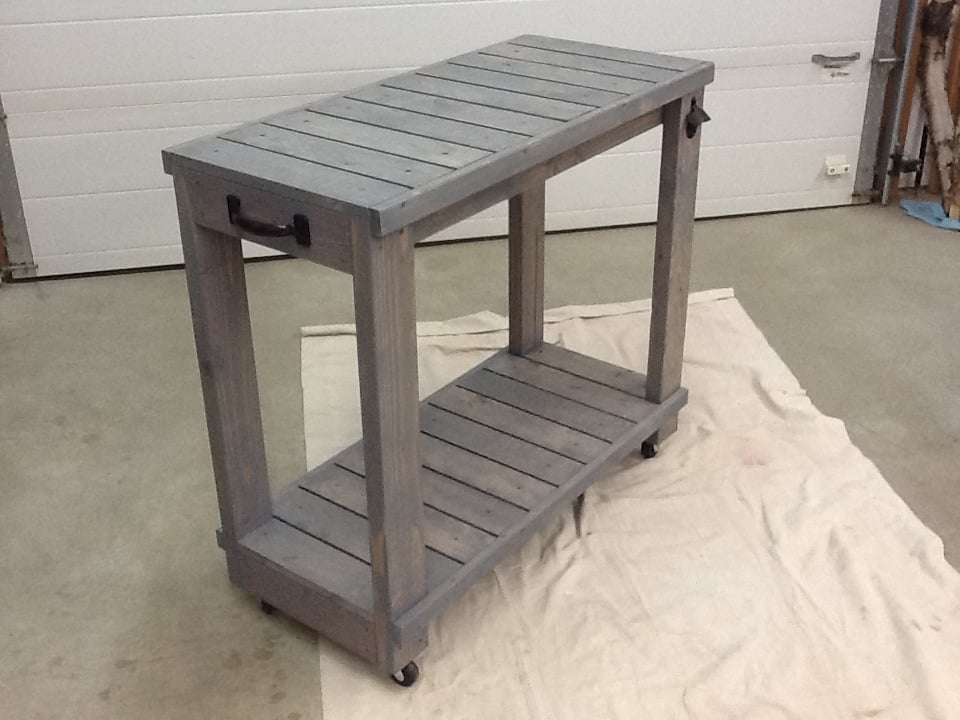
Made this over the weekend with my Daughter. Gray oil based stain.
Built from Plan(s)
Estimated Cost
$70 with wood, casters, fasteners, and stain.
Estimated Time Investment
Afternoon Project (3-6 Hours)
Finish Used
Oil based gray. Brushed on then wiped with rags.
Recommended Skill Level
Beginner
Planked Wood sideboard
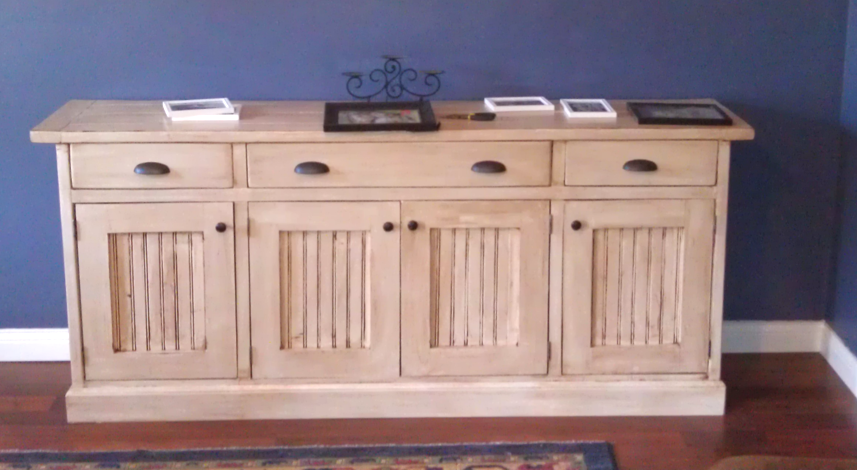
A sideboard I built. Took about two weeks. Finish is General Finishes antique white milk paint with a van dyke brown glaze over it. Finished with a top coat of polycrylic
Built from Plan(s)
Estimated Time Investment
Week Long Project (20 Hours or More)
Recommended Skill Level
Intermediate
Comments

Mon, 08/13/2012 - 18:33
Looks great :)
It does look great and I second birdsandsoap, love the finish and beadboard. On a side note... I also like the color of your wall! What is it?
Tue, 08/14/2012 - 09:20
wall color
thank you for the commnets. The wall color is Distance by Sherwin Williams and thats funny you say that I have been thinking about changing it because it seems a little too dark
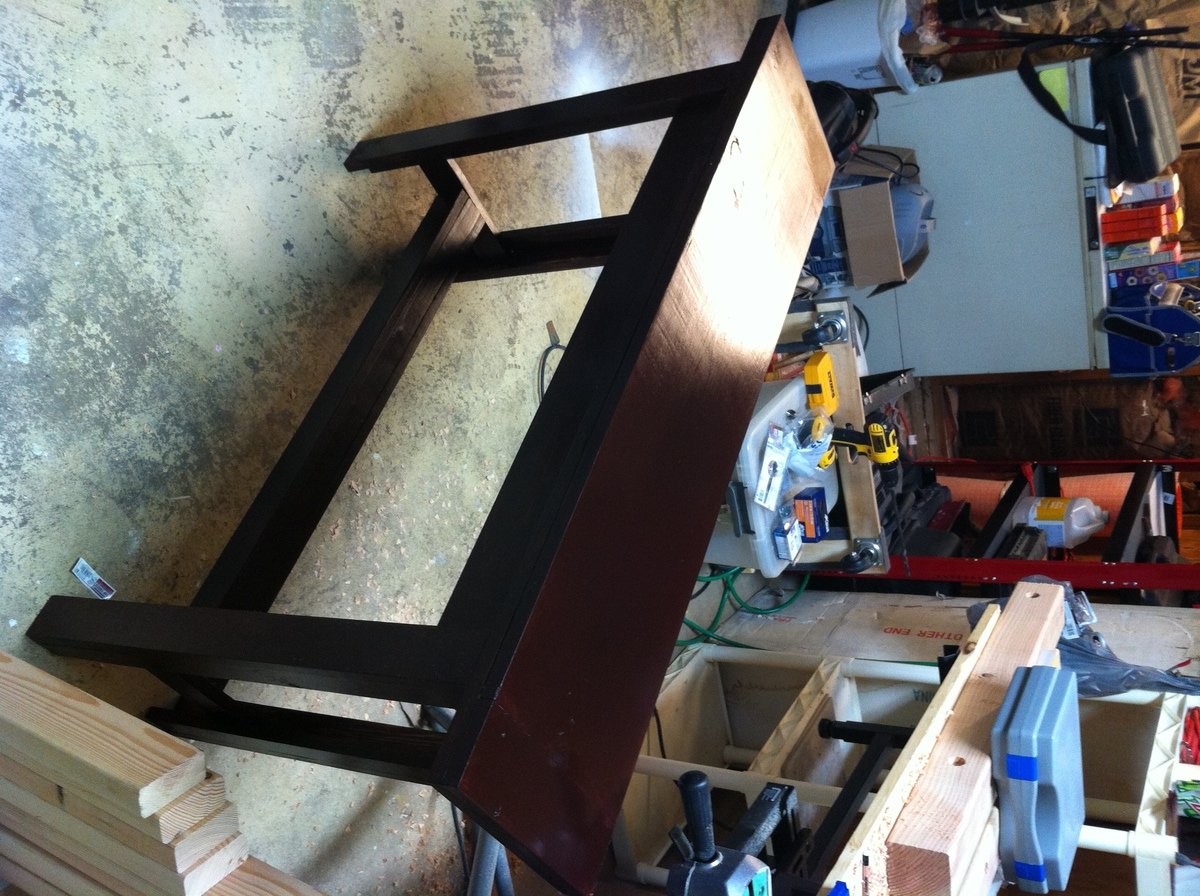
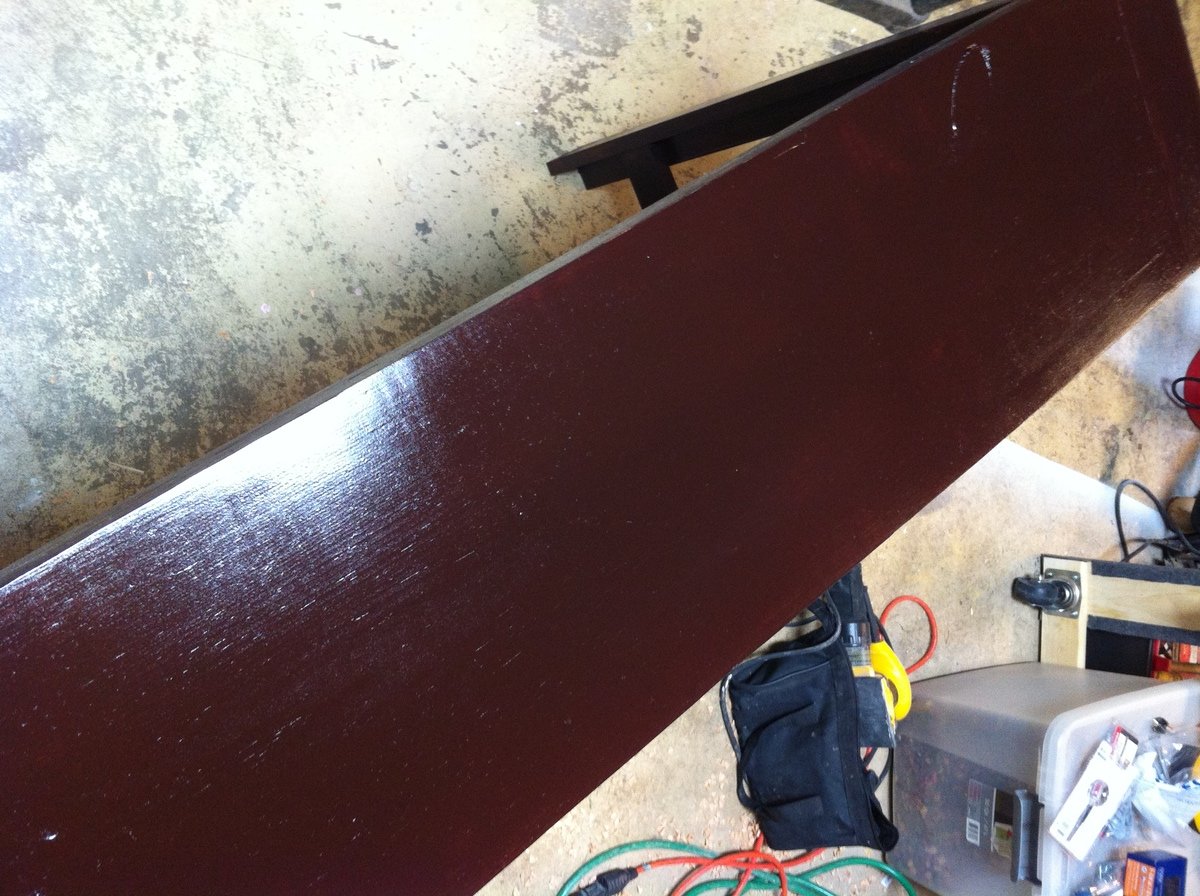
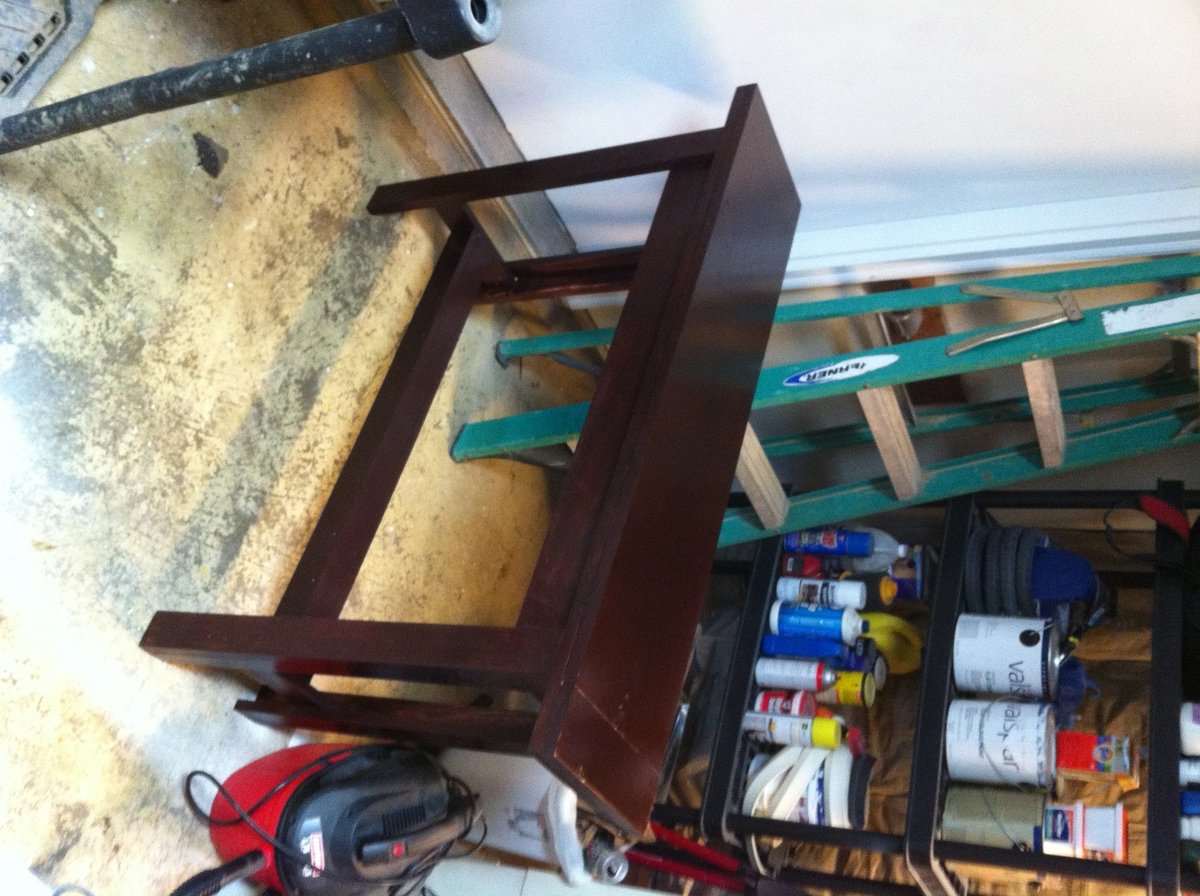
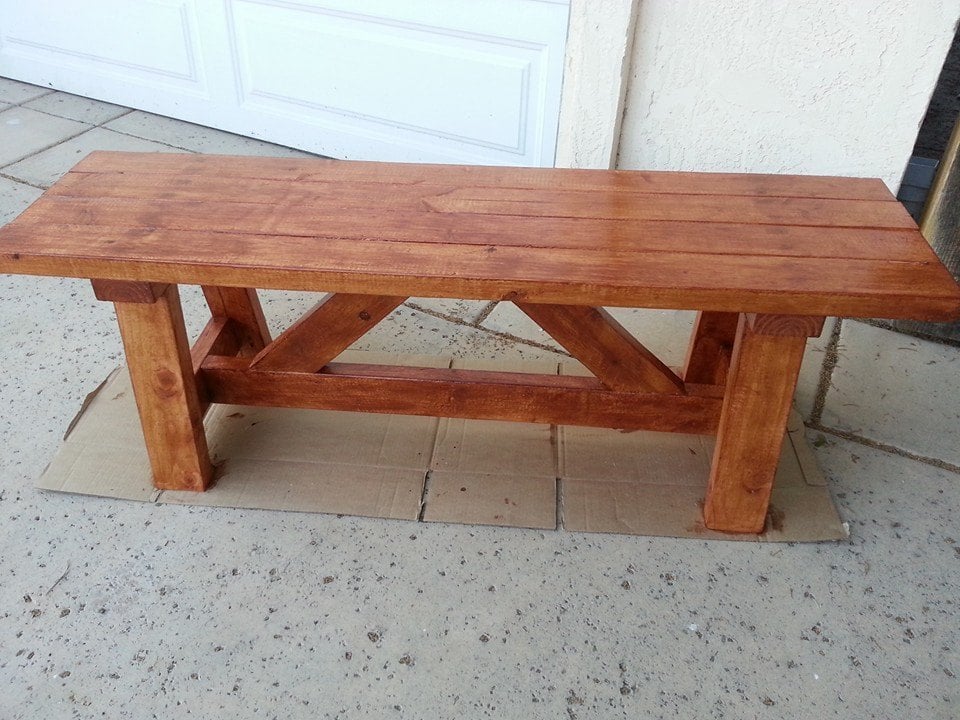
Rustic X coffee table

This was my first woodworking project and I absolutely love it. I think it turned out amazing and was actually very simple to do. I just got some construction grade lumber from Home Depot and borrowed some tools and got started. I did have to buy a Kreg Jig, which is an amazing tool by the way. I am not complaining about having to buy it since I have used it on many projects since!
Built from Plan(s)
Estimated Cost
$180
Estimated Time Investment
Weekend Project (10-20 Hours)
Finish Used
I used steel wool dissolved in vinegar to chemically distress the wood. Then I sanded it down and applied a dark stain, I can't remember exactly which one. I applied two coats of stain, then I applied 3 coats of polyurethane, sanding in between each coat.
Recommended Skill Level
Beginner
Maple Edge Grain Cutting Board
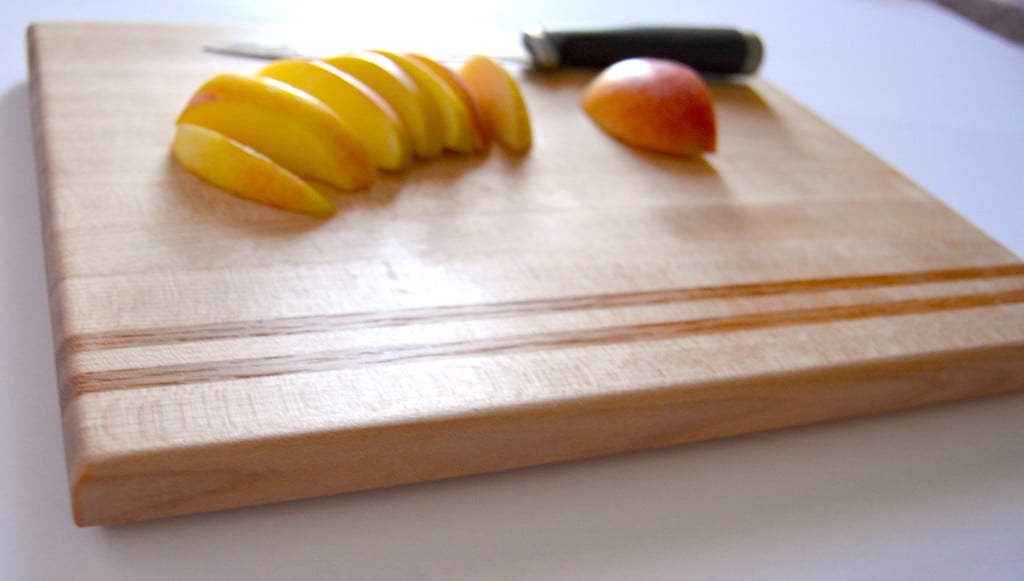
A cutting board seems to be a right of passage for any new wood worker, that and making a mallet! I’ve already made a mallet and have been putting off making a cutting board so I figured now was as good a time as any. I’ve always liked the look of edge grain maple and I had some scraps of maple that were too narrow for most projects so I figured that I would go for that look. To spice it up a bit I decided to add a couple of accent strips of Oak.
Estimated Time Investment
Day Project (6-9 Hours)
Recommended Skill Level
Beginner
Modern Bunk Bed - Side Street - Triple Bunk
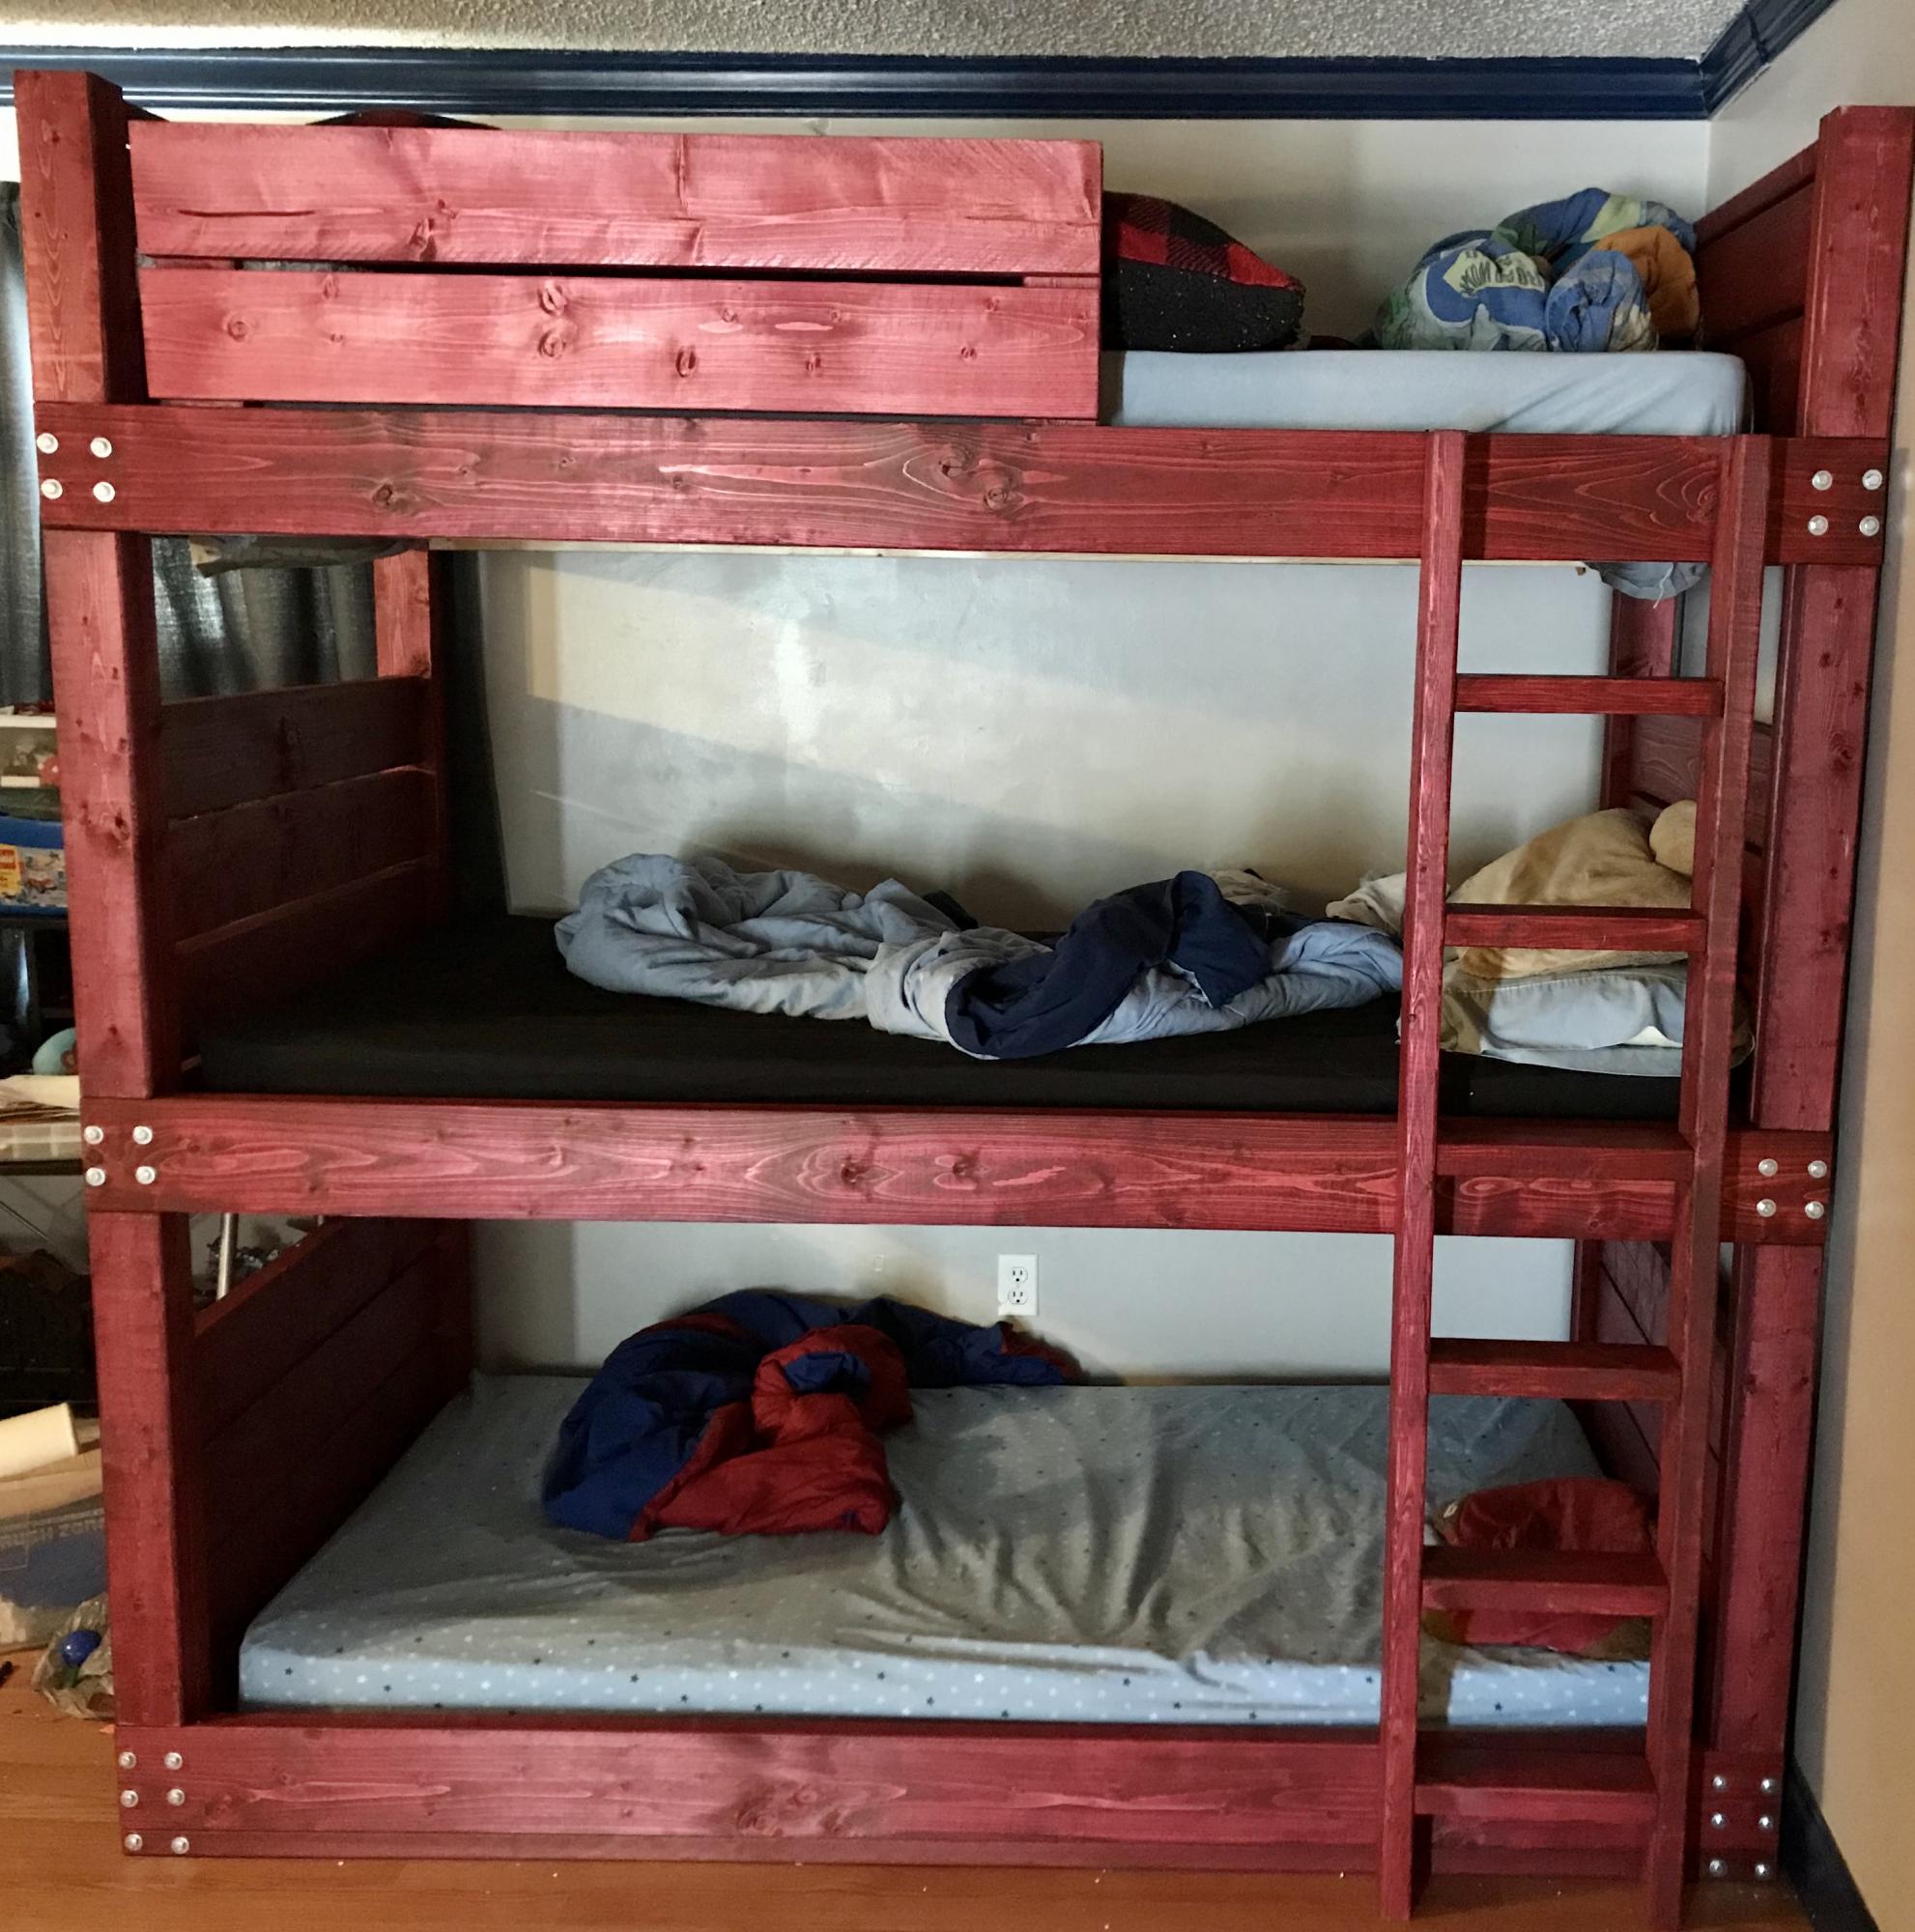
Our four boys matching double bunk beds recently succumbed to being used abused by four boys for 12 or so years, and I have always wanted to make them a pair of triple bunk beds for when friends come over. The broken pieces of a bed that had survived numerous military moves finally gave me the jump start I needed to finally get this job done. After about a day of measuring, pondering, and configuring, I came up with what I thought were good dimensions for the project. I increased the height of the corner posts to seven feet to allow for a higher top bunk, and squished the bunks a little tighter together as well. This ended up giving me a 26” gap between the bunks. When I build the next one, I will cut this down to 24” between each and give a little room room to the top bunk. Trial and error I guess. I added a 2x2 all the way around the bottom because although I wanted it very low, I didn’t want anyone feeling like they were sleeping on the ground, but I also didn’t want some 1” or 2” gap below the bottom bunk for balls, cars, and LEGOs to be lost. The guardrail was shortened a little based on what wood I had left at the end. The ladder I decided to build upright/no angle, which necessitated that I fashion the ladder myself out of some strip of metal that I think is meant for some sort of roofing purpose. Oh well, it worked. I wanted to do this because the bed is meant to be able to be disassembled, and if I had simply screwed the ladder to the bed, it would have gone against the “disassemble-bility” of the project. Last thing to note, the barn red staining was quite messy and a huge time investment, so although I stated it took 10-20 hours, probably 12 of the 20 hours was in the staining. We are all thrilled with the look of it though, so I guess it was worth it in the end. I hope this project was worth the read. Enjoy!
Built from Plan(s)
Estimated Cost
$275 including wood, screws, stain, brushes, etc
Estimated Time Investment
Weekend Project (10-20 Hours)
Finish Used
Minwax Barn Red
Recommended Skill Level
Beginner