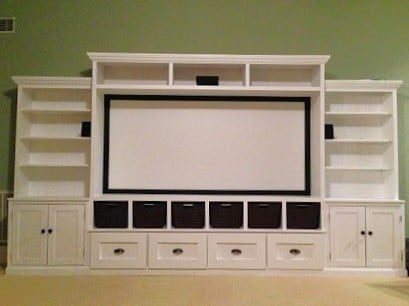
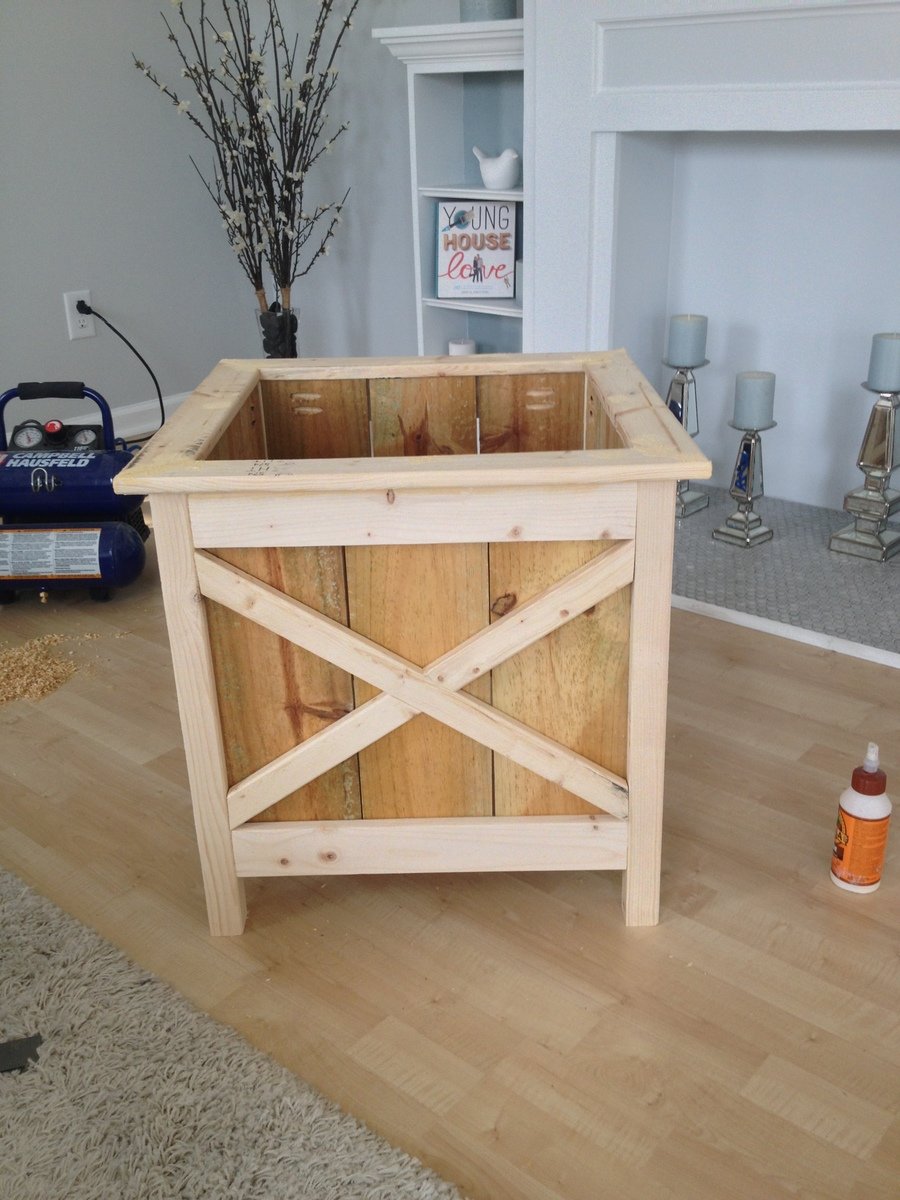
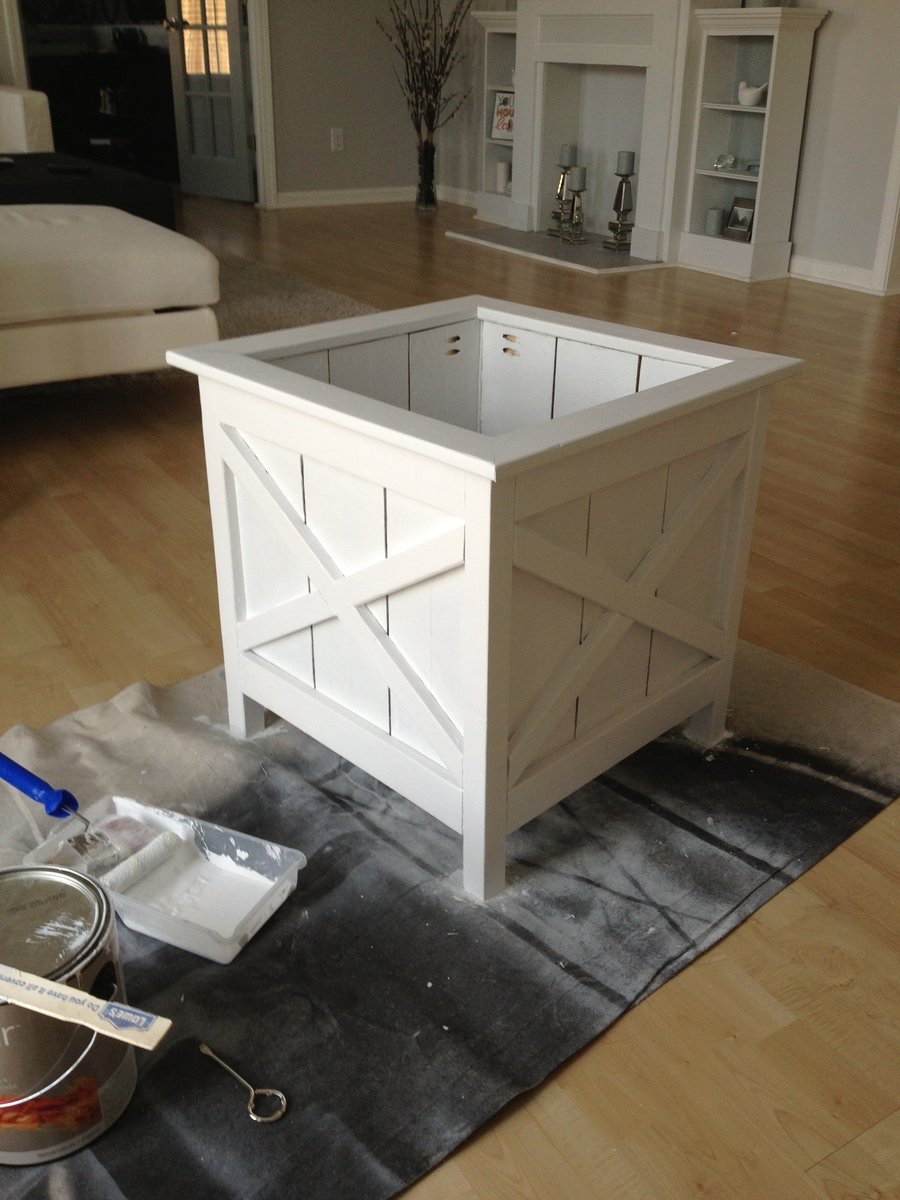
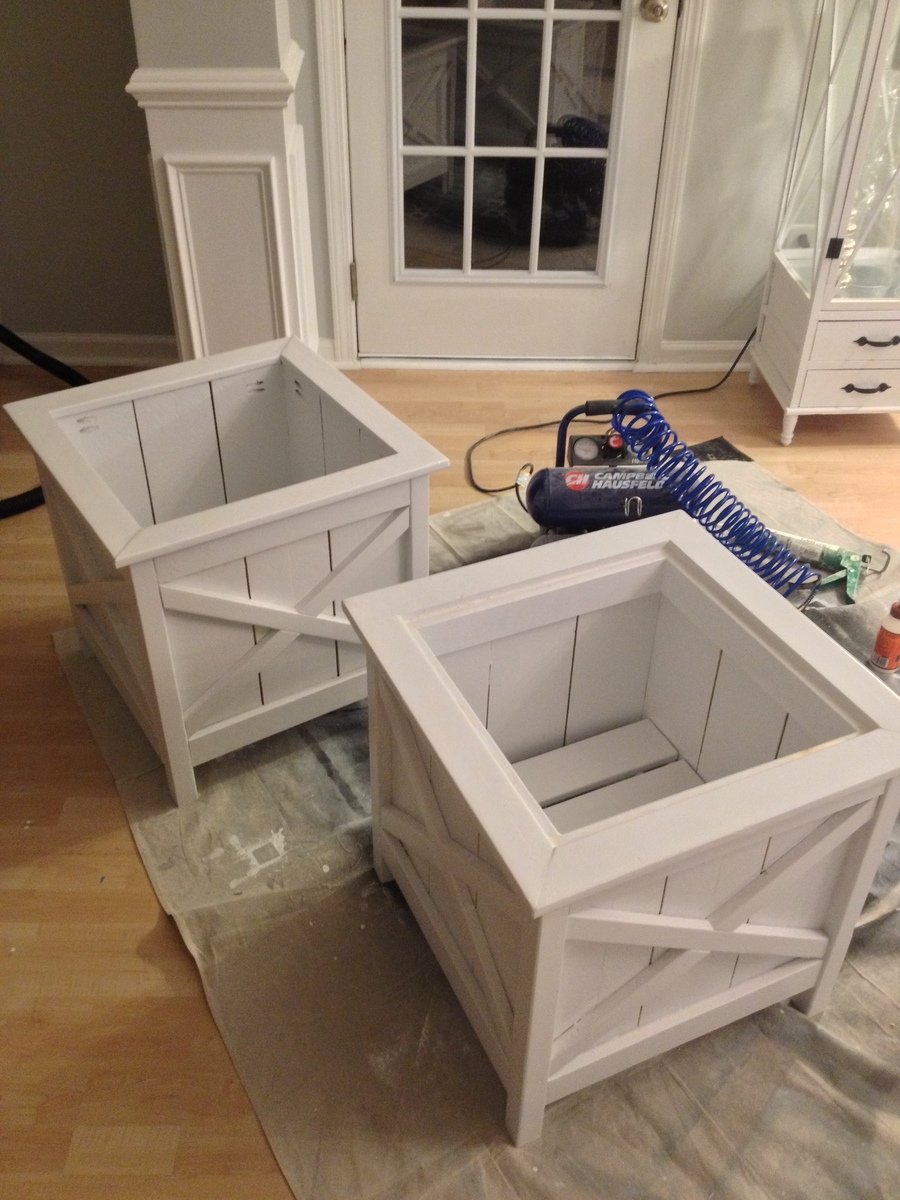
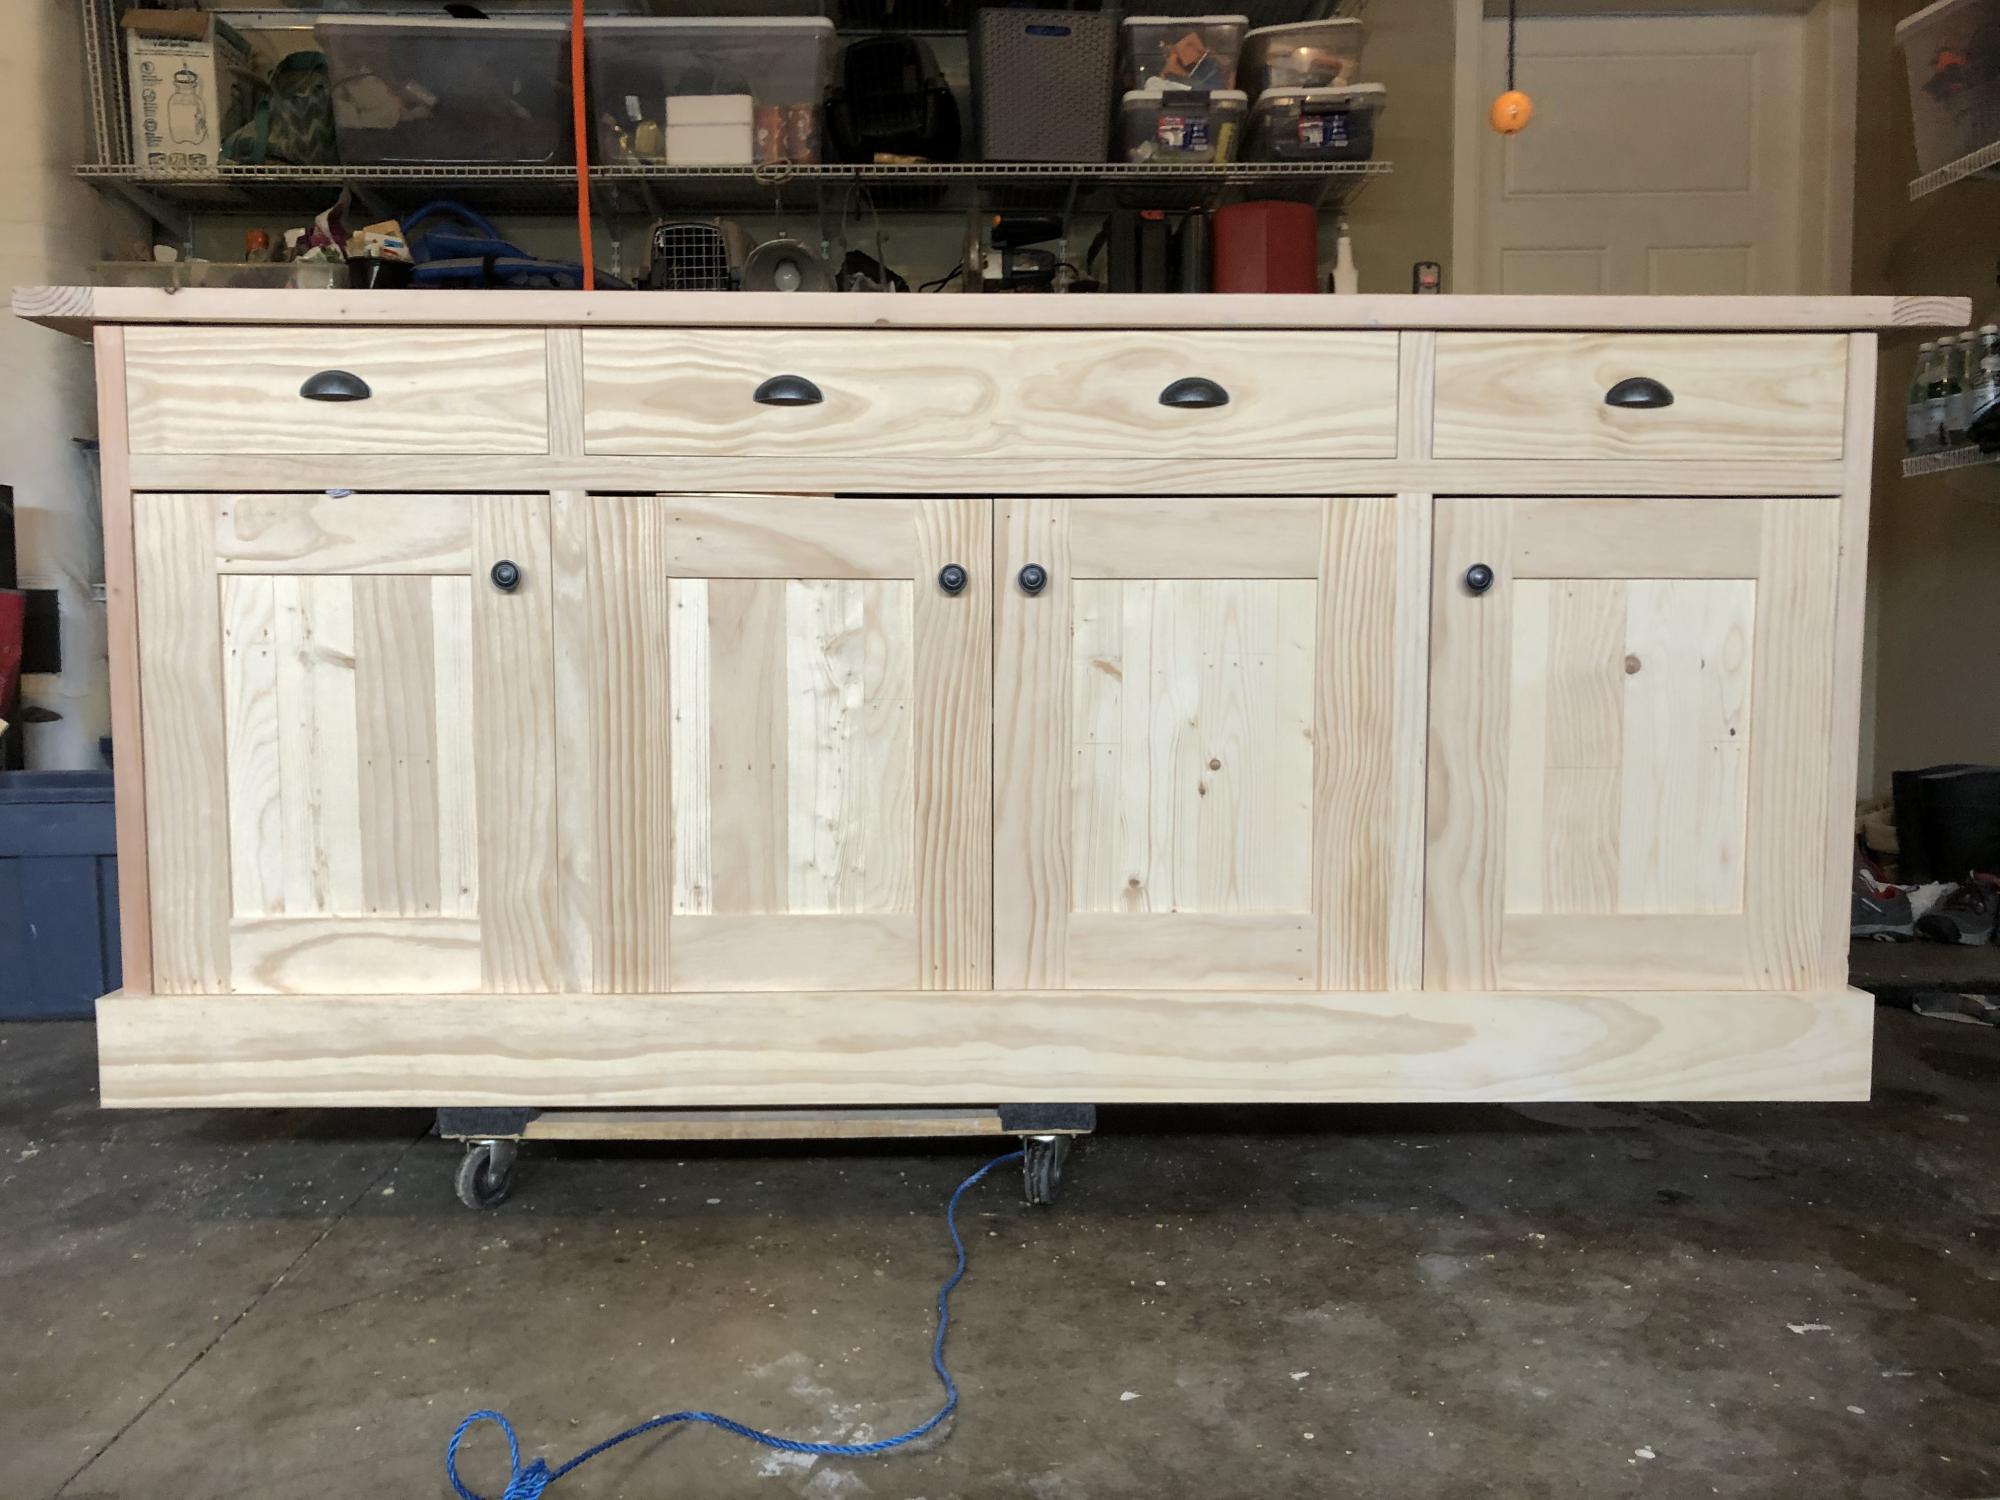
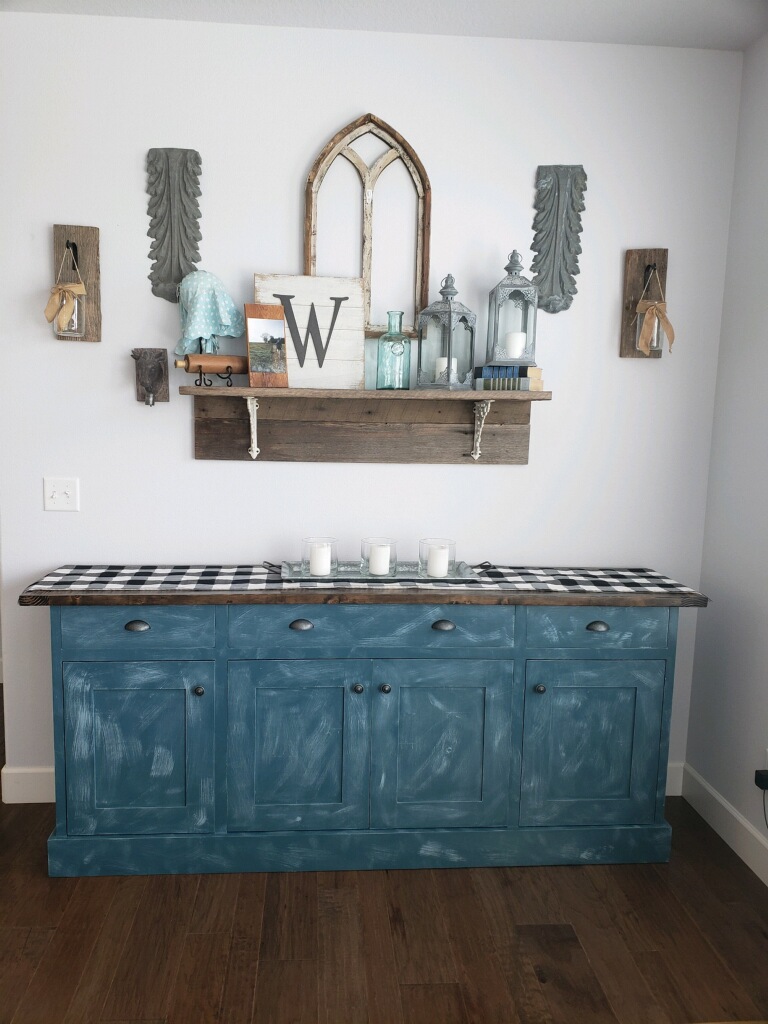
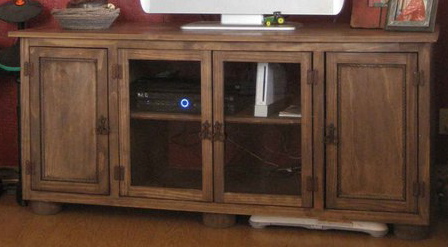
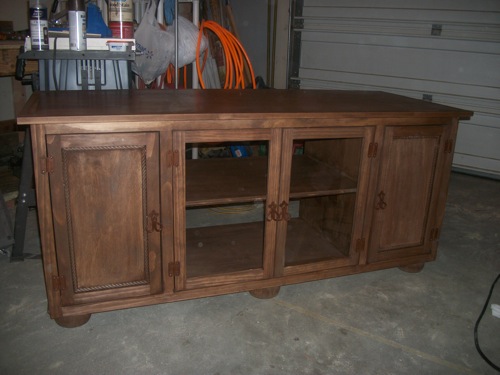
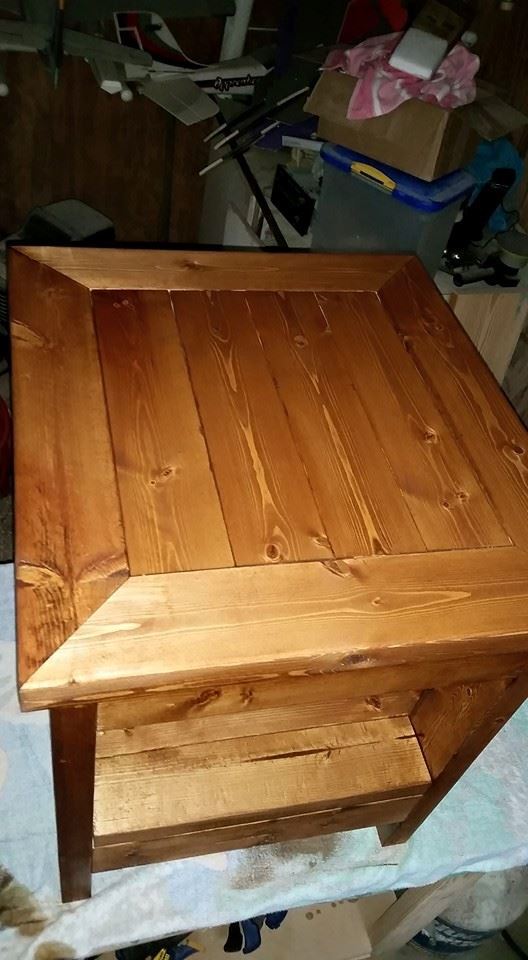
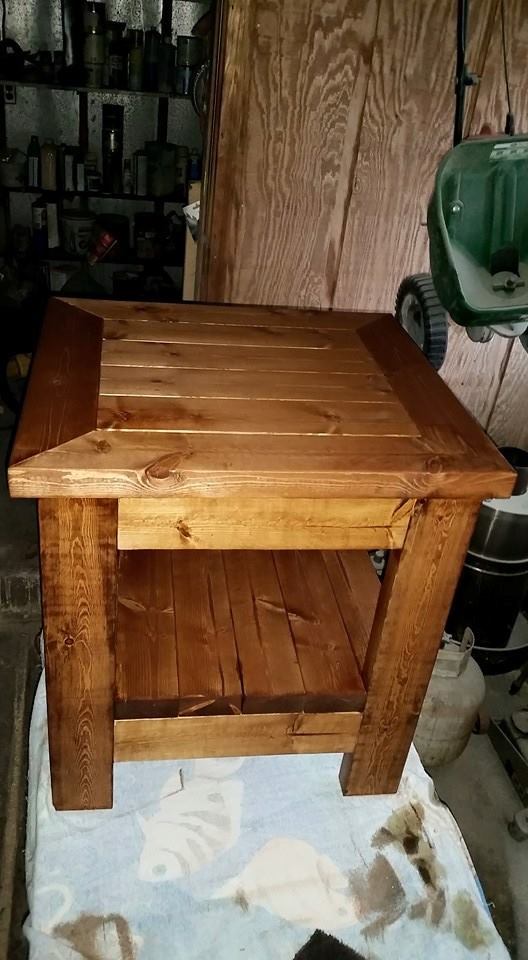
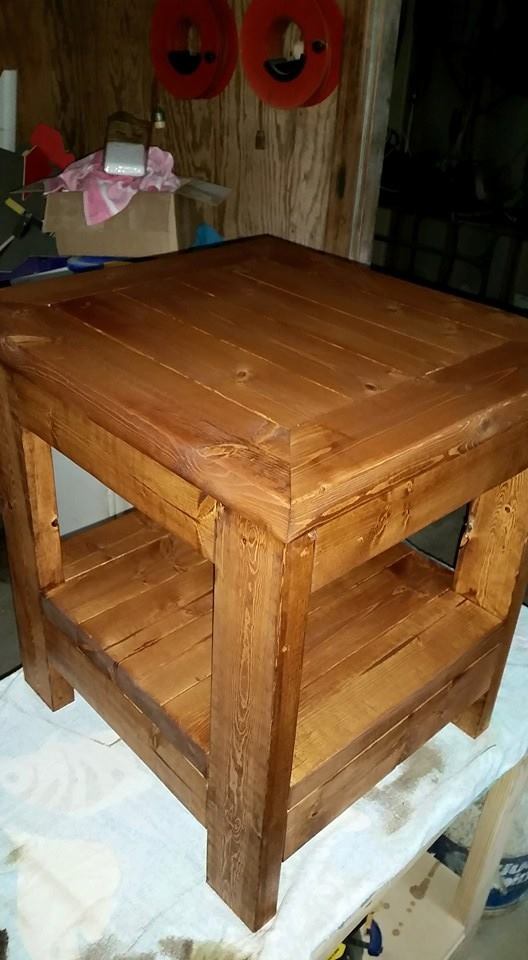
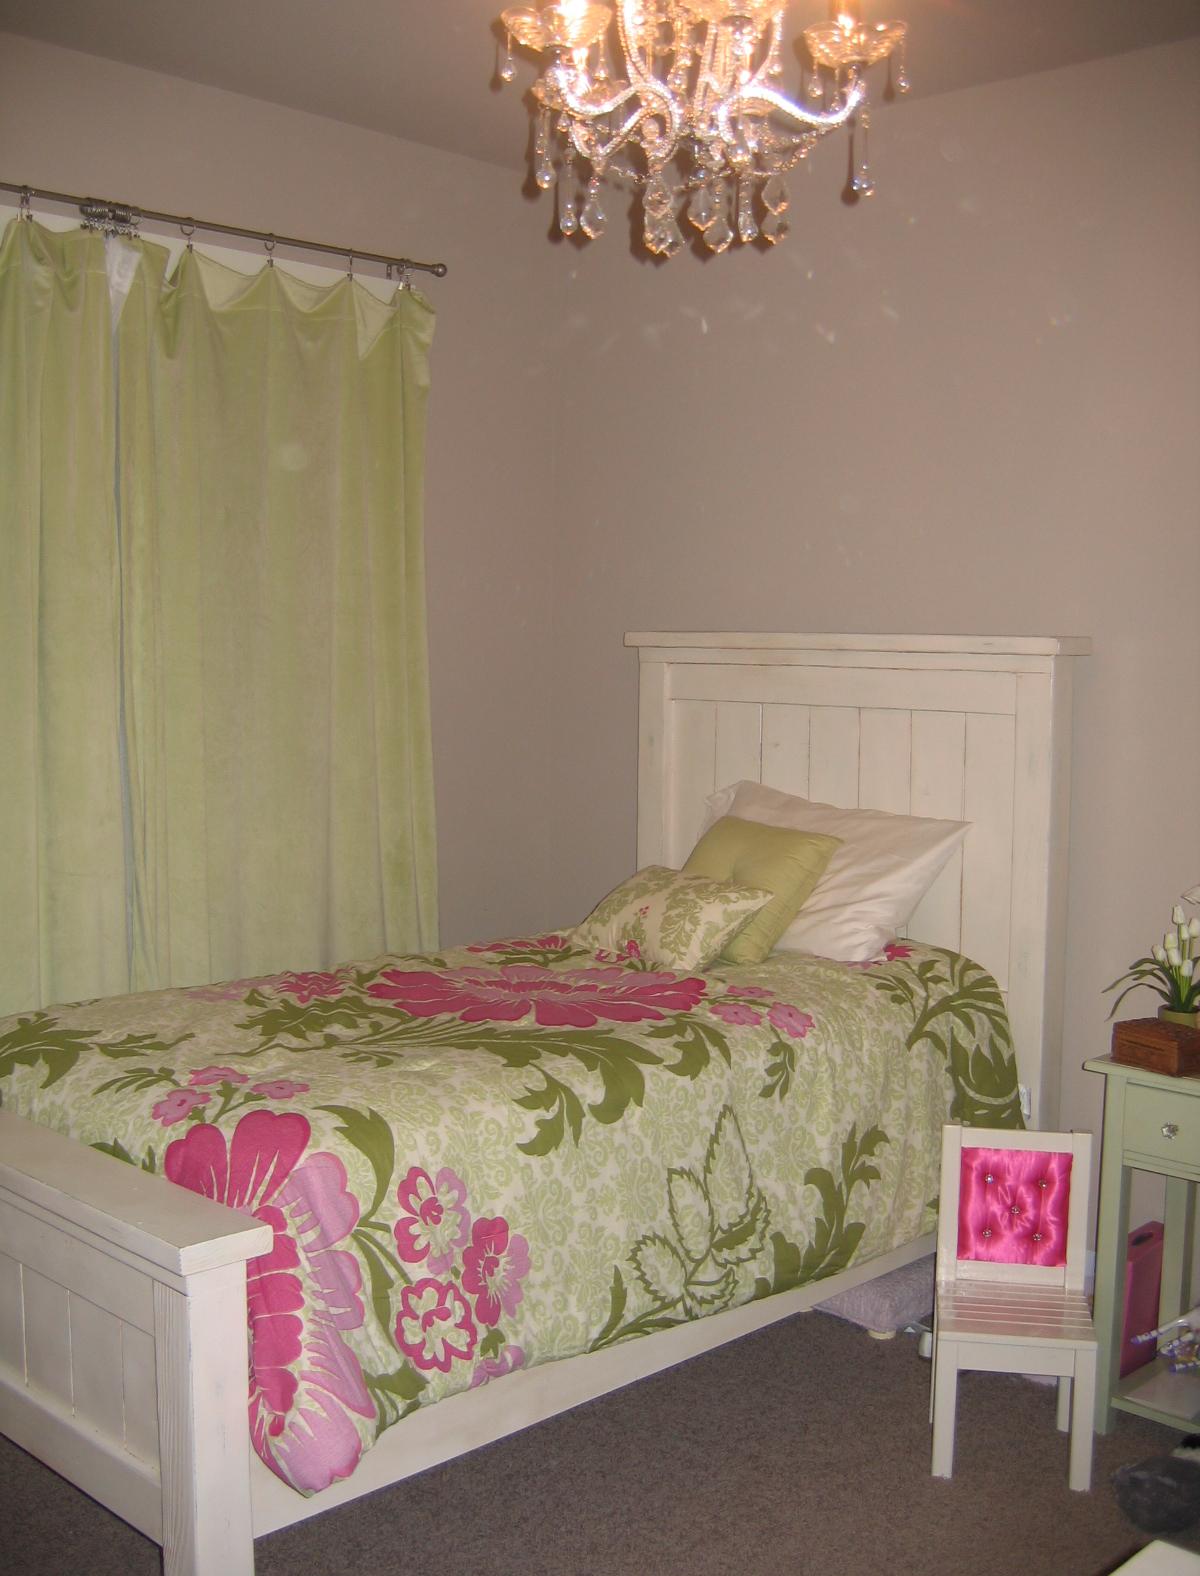
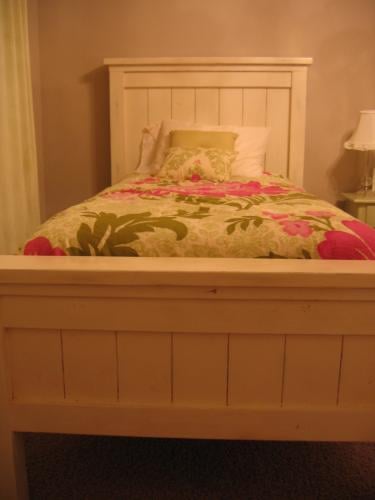
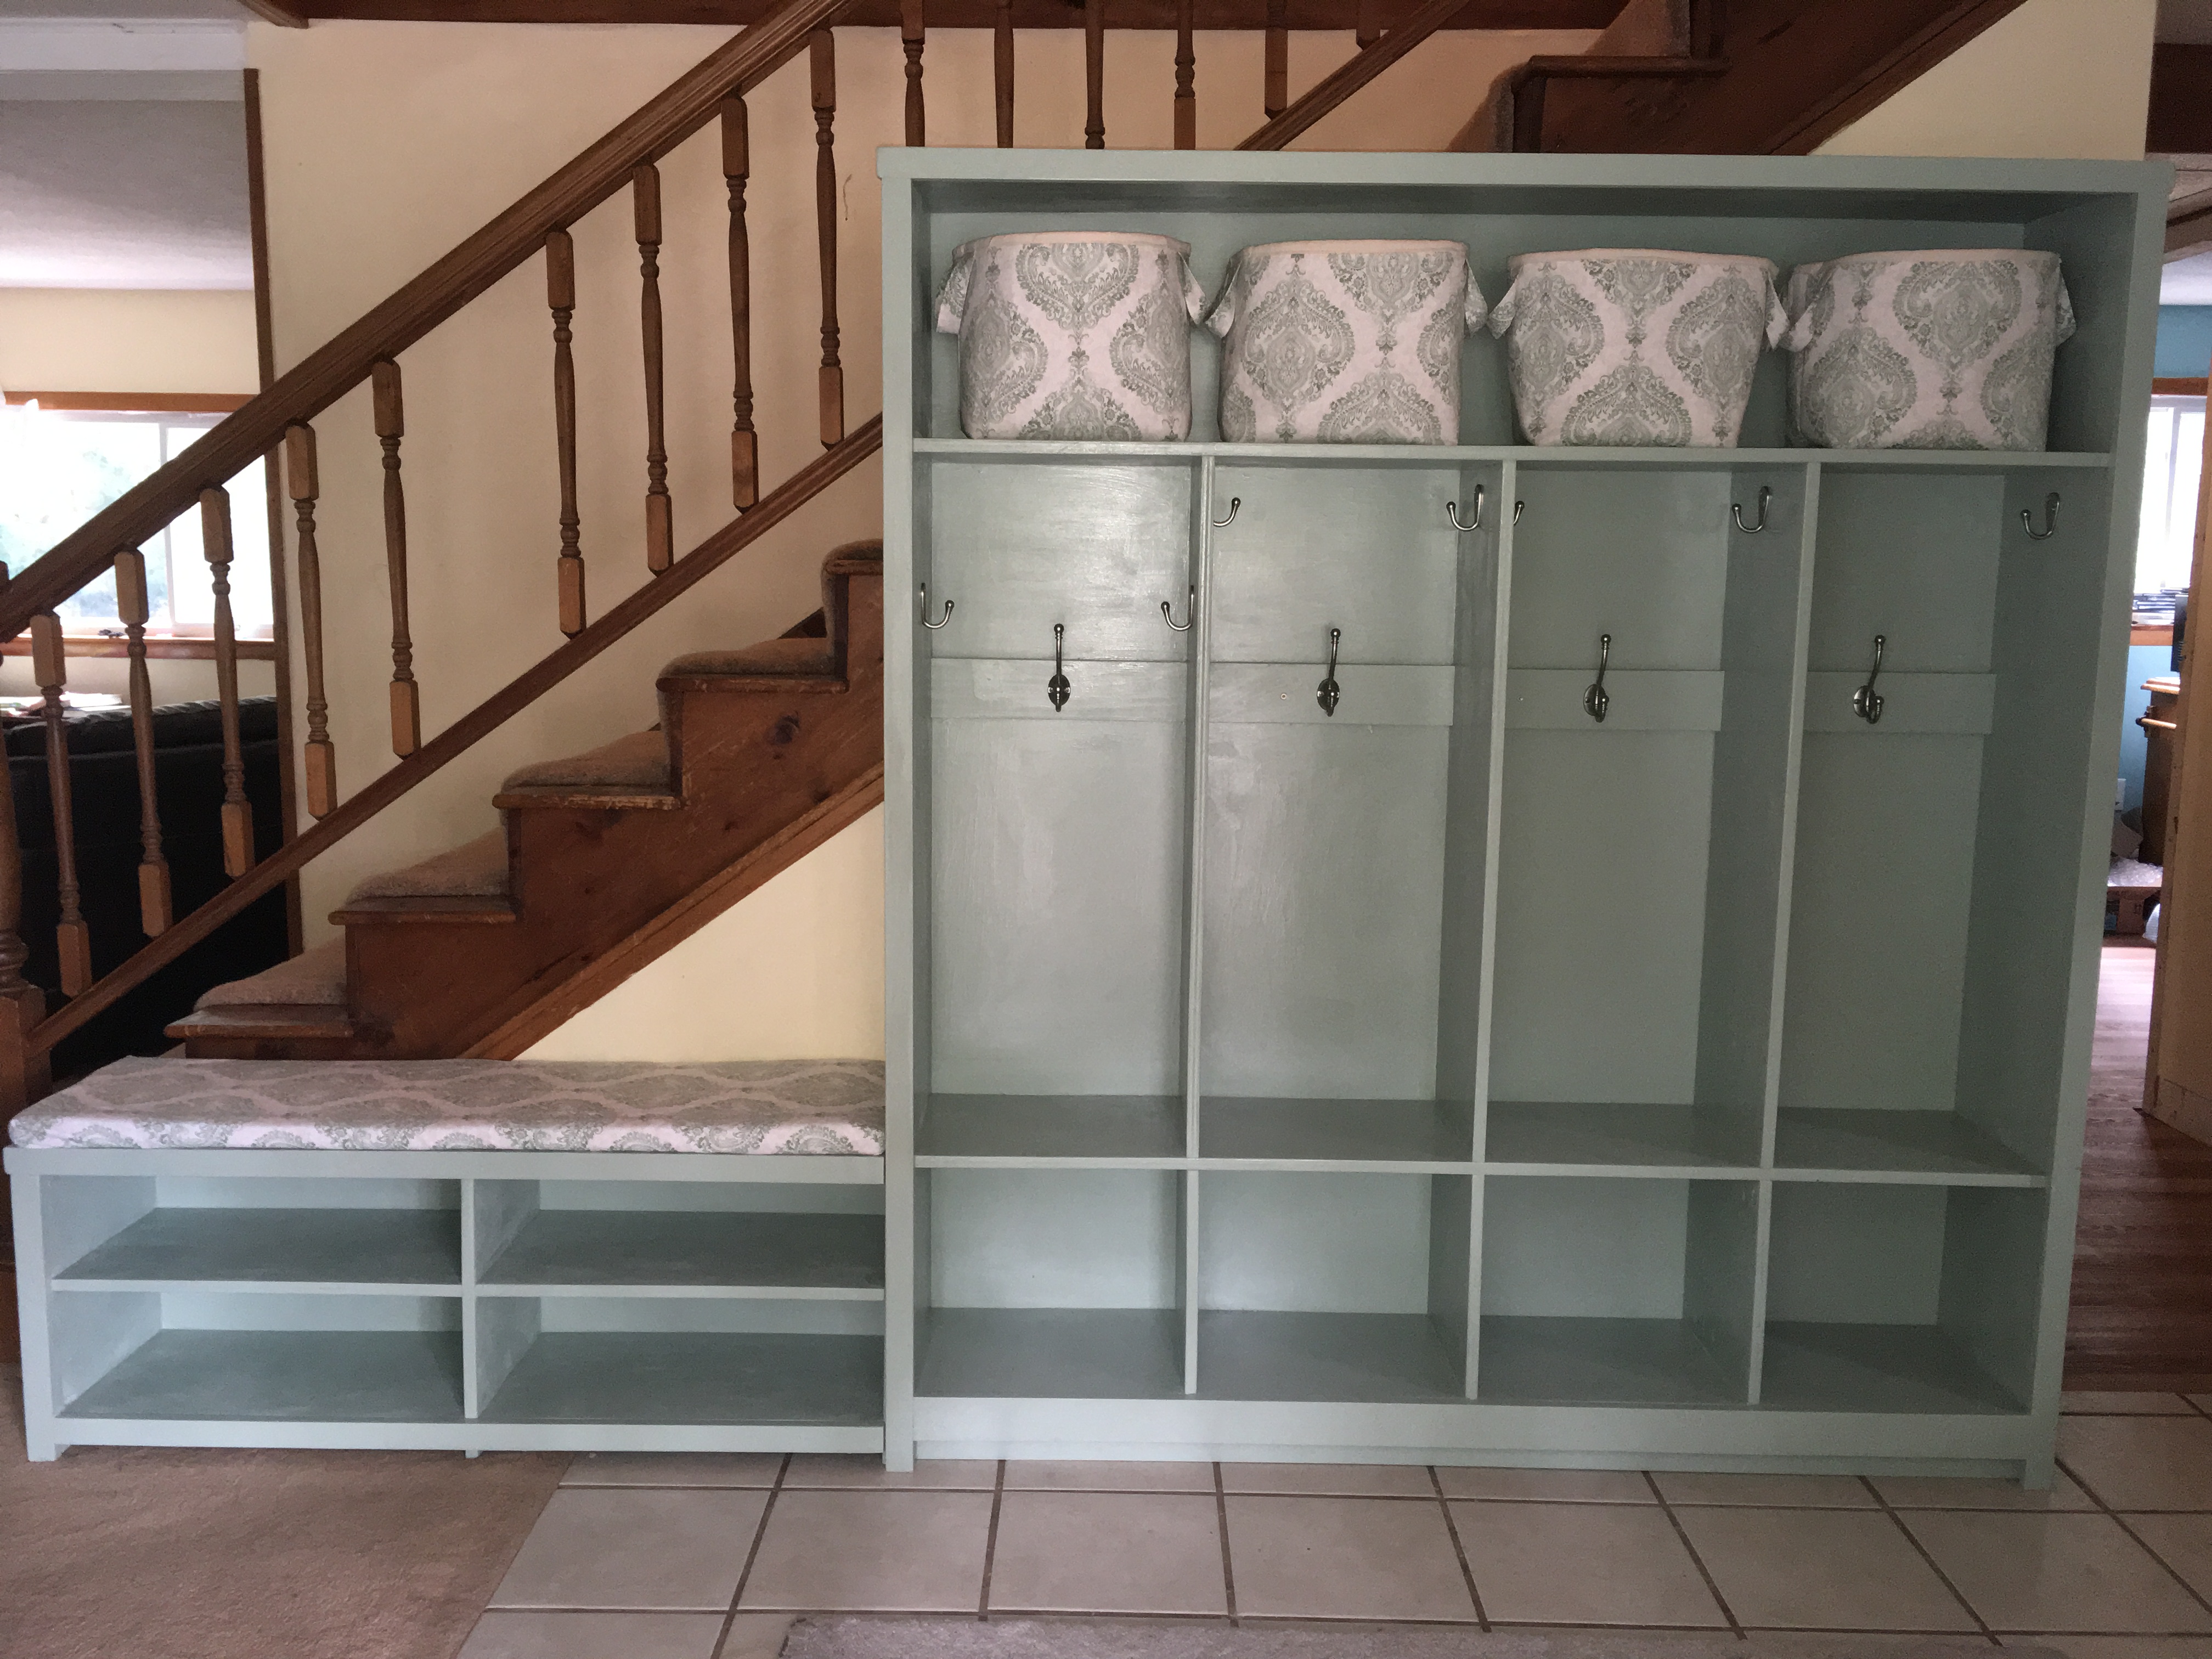
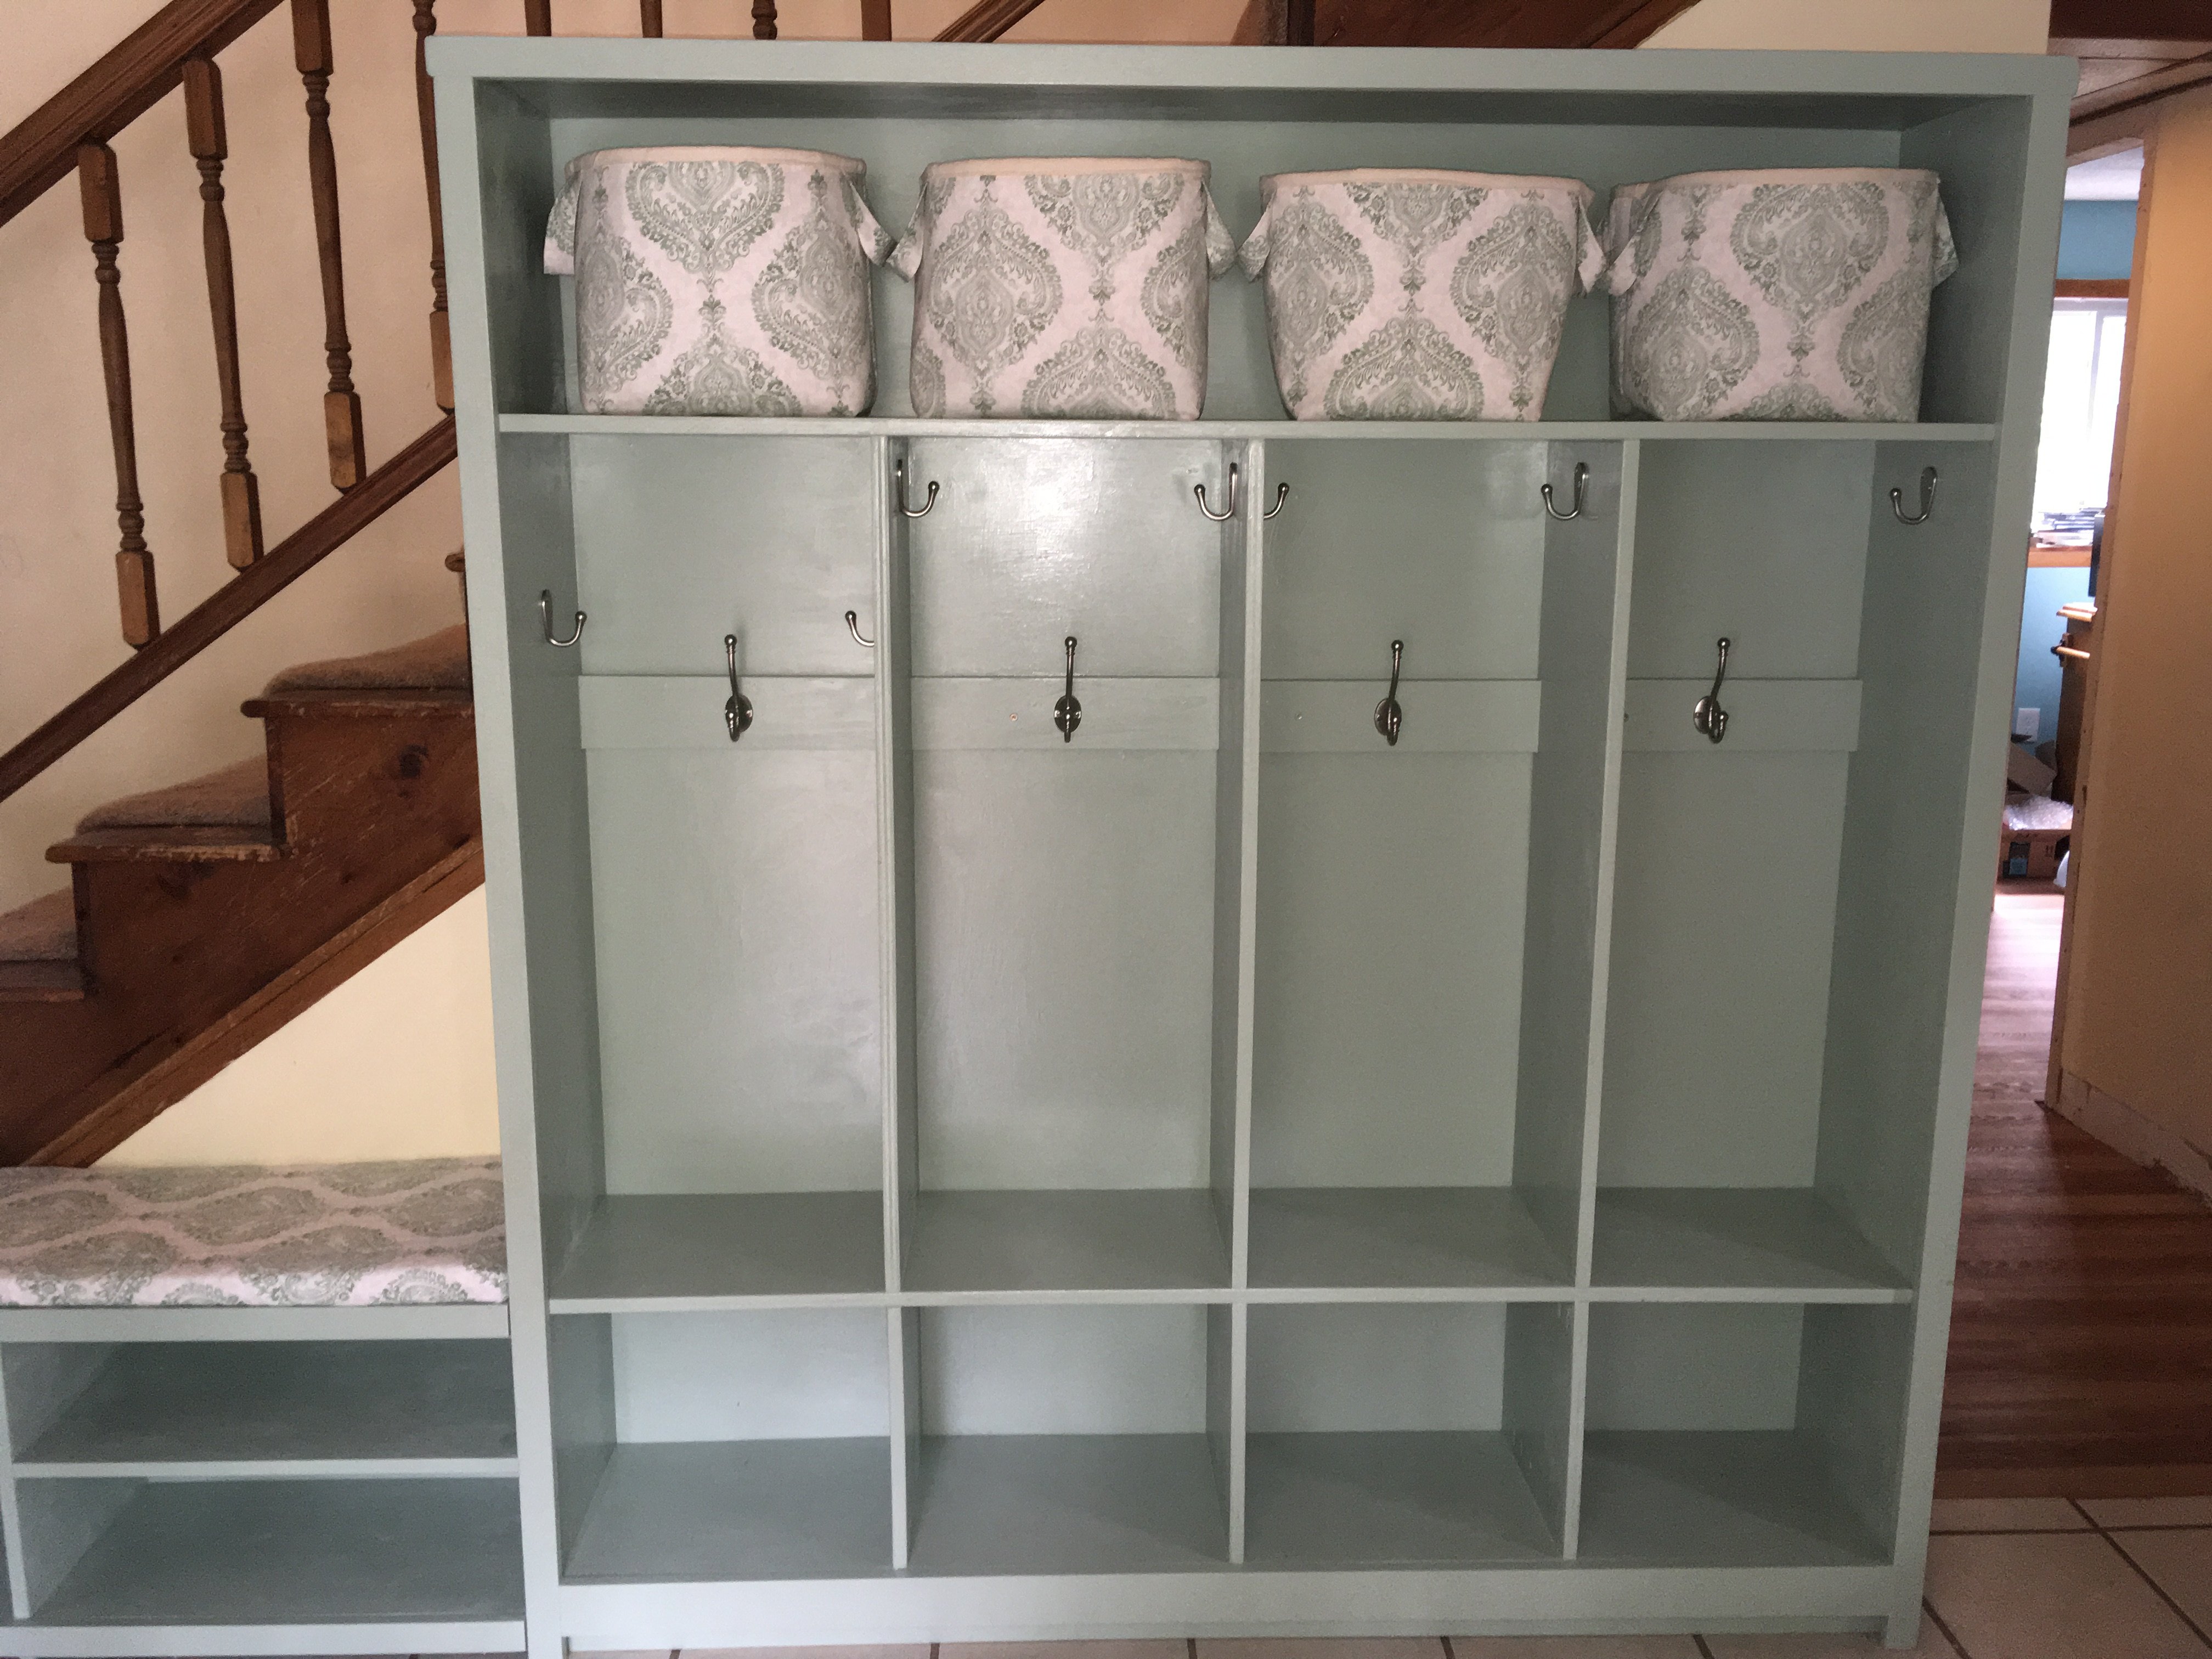
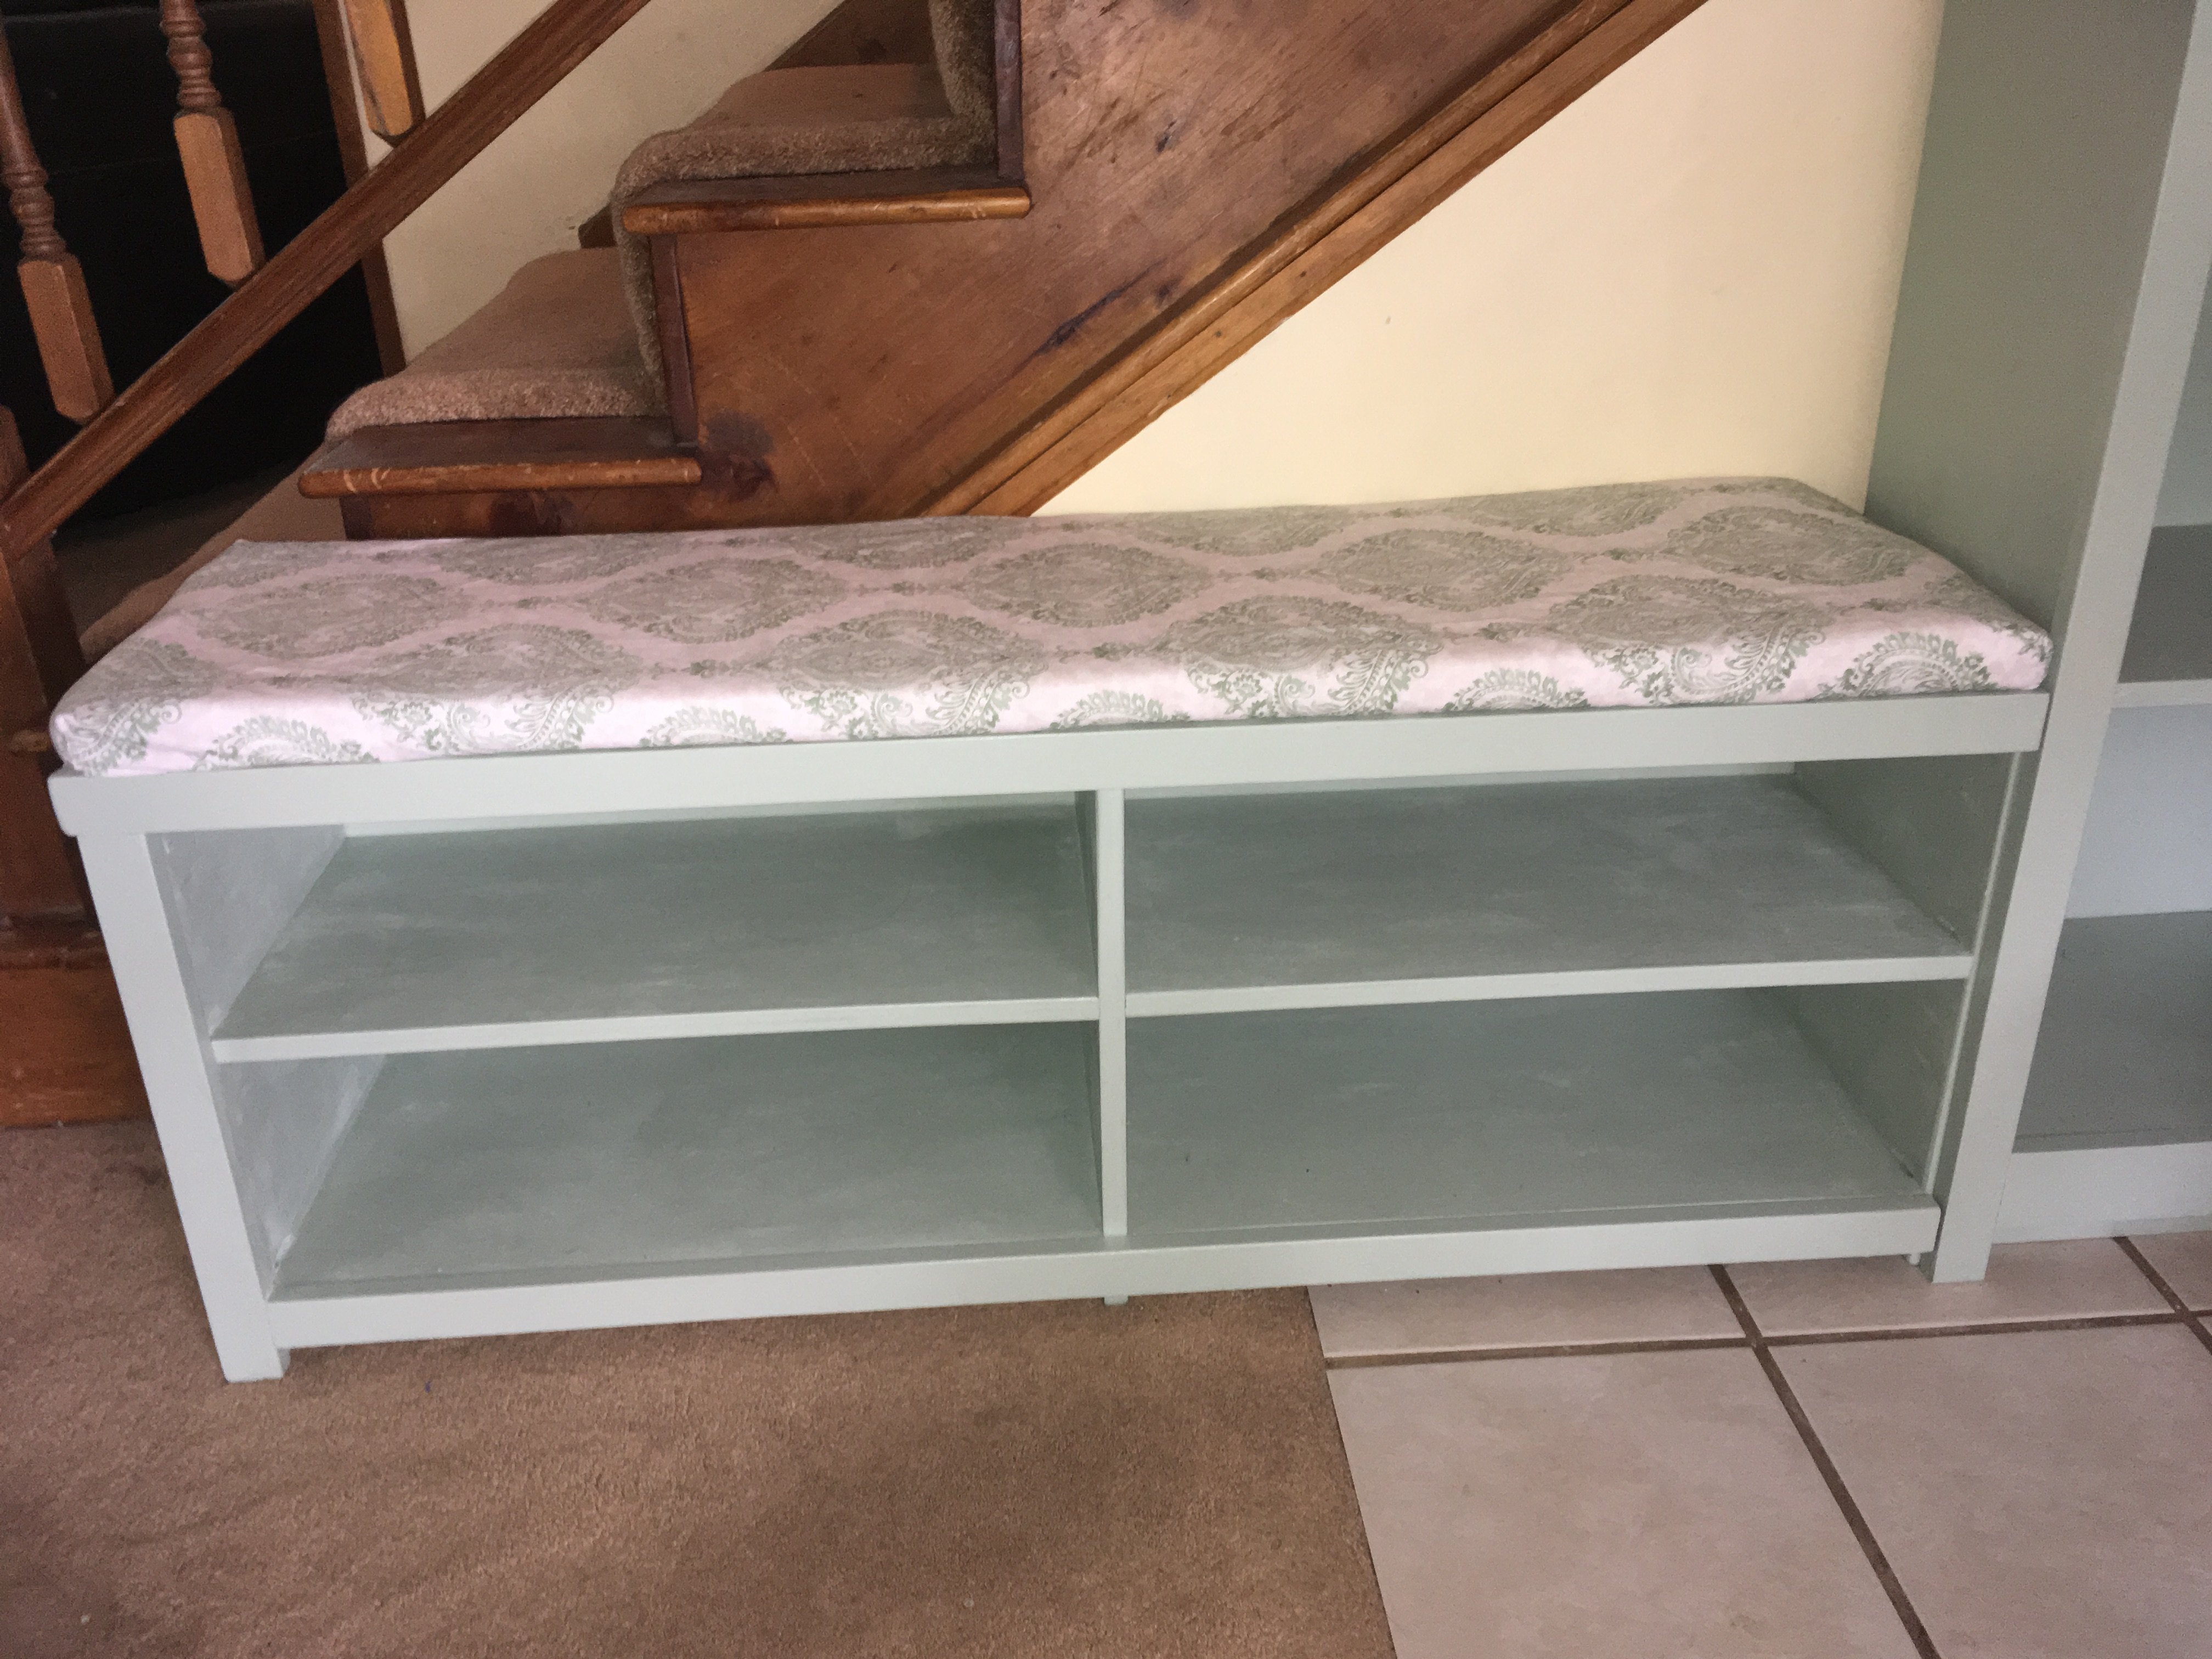
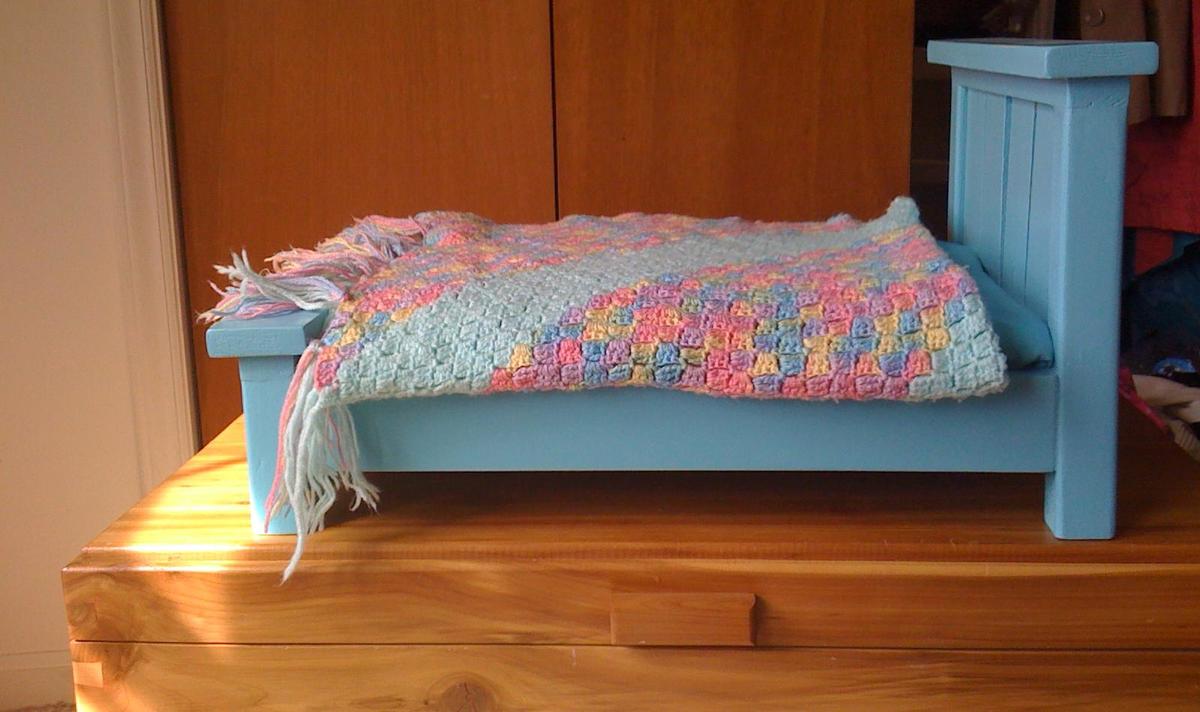
Community Brag Posts

Fancy Arch King Size

My husband calculated the dimensions to extend the plans from a queen to a king size bed.  It was our first project together and we're both really excited about how it turned out!  

Built from Plan(s)
Estimated Cost
$150
Estimated Time Investment
Weekend Project (10-20 Hours)
Finish Used
MINWAX - Provincial
Recommended Skill Level
Beginner

Comments

Tall Wood Planter

Submitted by Anonymous (not verified) on Wed, 10/06/2021 - 09:36

Those are the first projects that I try to make. Thank you Anna White .

Built from Plan(s)

Comments

PB Logan Classic Storage Wall Side Base and Hutch--modified

Submitted by kristen on Mon, 03/14/2011 - 18:24

This is my third Ana White project and I modified it quite a bit from the plan. I was inspired by the PB Logan Collection that Ana has a knock off plan of called the Classic Storage Wall and Hutch. You can read more about the whys and hows of this project on my blog pinktoesandpowertools.wordpress.com in the Cabinet and Hutch-laundry room category under woodworking (there are currently 17 posts about this project--yowza!). But the modifications that I made from Ana's plans were that I had to make it less wide, I added two drawers in the cabinet, and I put a back on this that mimics the PB picture (which happens to be the wall behind their open-backed units, not an actual back). The base also hides a cat litter box behind it, so the back is open and the doors do NOT open--they are a fake front. No need to peek in at a litter box and it eliminated the cost of hinges. I learned A LOT during this build! First experiences were: using a circular saw, making a straight cut jig for a circular saw to cut plywood, using a jigsaw, using a compressor and nail gun, cutting crown and base molding miter cuts, tearing out base molding to fit the cabinet, cutting out an electrical outlet in the cabinet and extending the outlet, learning how to remove pneumatic nails that find their way out to the front of your project, and probably more that I can't think of now! The back isn't quite done, but it won't be too much prettier than what the picture shows, and you can see how the litter box looks. I might turn it sideways and cut out a hole in the side--haven't decided on that yet... I am really pleased with how this turned out and I'm excited to start on my next Ana White plan (probably modified, knowing me!).

Estimated Cost
$250 for modified version
Estimated Time Investment
Week Long Project (20 Hours or More)
Finish Used
Primer and White paint are Olympic (Lowe's) No VOC paint. I topcoated it all with General Finishes High Performance Water-Based Poly and Minwax Water-Based Polycrylic in a satin finish (didn't have enough of either to do the whole project).
Recommended Skill Level
Intermediate

outdoor sofa from reclaimed wood

Using Ana's plan as a guide, I built two of these sofas to fit an outdoor cushion I already had. I used wood from our old deck -- a great way to re-use and save money, too!

Estimated Cost
$110/sofa (lumber was free)
Estimated Time Investment
Weekend Project (10-20 Hours)
Finish Used
None, although eventually I will probably seal it with outdoor PolyWhey by Vermont Natural Coatings.
Recommended Skill Level
Intermediate

Backyard Oasis

Submitted by nengel21 on Tue, 10/04/2022 - 11:17
The beauty in these plans were the very basic construction. Using mostly 2” x 4” and 1” x 4”, the chairs were super easy to put together and are sturdy enough to hold up to any backyard oasis bash. The biggest takeaway from the project: Don’t buy paint while hungry. You end up with ‘Carrot Cake!’
Estimated Time Investment
Week Long Project (20 Hours or More)
Finish Used
Exterior Latex Paint
Recommended Skill Level
Beginner

Comments

bobaina

Mon, 05/11/2015 - 03:24

Ok, I was thinking of just how great these chairs would look around a fire pit.... and then I seen this. I may have to talk my husband into this for a summer project! Great build. Love the bright colours! And the poochies are cute too :)

Chelsea Loft

Submitted by Bradnag on Wed, 09/13/2017 - 05:09

Wanted to make a loft bed for my 4-year-old son's room that could accommodate a toddler bed beneath it for when my 1-year-old daughter eventually starts sleeping on her own. I was torn between the Chelsea and Cabin bed plans, but eventually settled on the Chelsea because I liked the look of the headboard better.


I looked through all the brag posts to get modification ideas. I ended up mostly stealing ideas from "chadwickstafin", and like him took the great idea from "groovymom2000" to use chalkboard paint (though I only used it to paint the side of the desk end, since I knew the bookshelf end would be mostly blocked by a ladder). I decided to skip the decorative feet and just extend my 2x2s to the floor for extra strength, a mod that most people appear to be doing with this plan. I saw some people using 2x3s in place of 2x2s for added strength, but I can confirm that 2x2s are plenty strong enough on their own (2x2s are stronger than people give them credit for, and there's 8 of them here to distribute the load).


Like chadwickstafin, I cut my headboard a little differently, and I used short lengths of scrap 2x2s cut at 45-degrees to brace the top and bottom corners of both end units. There is no wiggle to the bed at all, it's stabilized so well. I also added a middle support to the short rail, just for a little extra safety, and secured the inside ends of the railings to the headboard/footer with pocket screws. I skipped the filler pieces for the railing, and just did a little extra sanding to make sure all exposed corners were smooth and splinter-free. I made the opening to the bed a bit wider than the plans, 15" instead of 13". I used 2x3s for the ladder, which gave me the sturdiness I wanted without the full bulk of using 2x4s, which looked especially chunky next to a loft unit made with mostly 1x boards. I played with some different angles, but eventually went with a 15-degree ladder. There were some leftover plastic handles sitting in my garage (originally from an outdoor playset ladder before I replaced it with a climbing wall), so I added those near the top of the ladder for some extra safety. I put some color-changing strip lighting under the bed, so there would be plenty of light for the desk and bookshelves (my little guy loves to just plop down on the ground beneath his bed and read).


I spaced the 1x3 slats about 3.5" apart (used scrap 2x4 blocks as spacers). Because my wife or I will lay in bed and read to our son at night, I easily added a couple 2x2 support rails under the 1x3 slats for extra mattress support. I'm a big dude at 6'3 and 250 lbs, and the slats alone WERE strong enough to hold me when I did a test, but they bowed just enough in the center (unnoticeable to me up on the mattress, but I had my wife watching the slats for me below) that I felt I should add a bit more support. Now there's no bowing at all.


I also used Ana's Top Bunk Organizer plans to give my son a little extra storage up top (and a place to set a glass of water during the night), and painted it to match the bed's color scheme. Everything was sanded, painted, sanded again, repainted, and then given a couple coats of polycrylic (the painting process took longer than the cutting & assembly!).


Cost-wise I was extraordinarily lucky. We have a Habitat For Humanity ReStore near us, so I was able to get my paints and a 3x6 sheet of MDF for $15 total. I also had some rebate cards from Menards (regional hardware store, similar to Lowes or Home Depot), plus happened to go there on a week when pine wood was on sale, so I got all my lumber for less than $60.


I could not be happier with the end results, and my son absolutely loves his new bed.

Estimated Cost
$100
Estimated Time Investment
Week Long Project (20 Hours or More)
Finish Used
PPG Speedhide semigloss paints, Minwax Polycrylic finish
Recommended Skill Level
Intermediate

Garden Shed

Submitted by Anonymous (not verified) on Thu, 10/07/2021 - 16:20

This was my first big Build! Thank you Ana for the free and easy to read plans.

Built from Plan(s)

Comments

Upholstered Toddler (Not) Daybed

Submitted by Alyssa on Thu, 03/17/2011 - 16:32

My first "real" project! 


Of course I can't just follow directions though... I converted the upholstered toddler daybed into a non-daybed. In the process I messed up the measurements (not sure where) which made it tough to attach the headboard securely and also made it a couple of inches too long for the crib mattress. Oh well! It's solid now and we filled the gap with a rolled towel for the time being. I might make her a little box to fit in that spot and hold treasures.

Lesson learned is that building is fun, but I should let someone else worry about the math! ;)
Built from Plan(s)
Estimated Cost
Can't remember exactly, but it felt like a lot in the end. Fabric, batting, and extra bits for structural support (because I didn't follow directions) added up. The wood was cheap.
Estimated Time Investment
Weekend Project (10-20 Hours)
Finish Used
White paint on the legs, distressed a little for practice (even though you can't really tell unless you're up close), polyacrylic over top (not sure what the topcoat should be, but I had it on hand!).

Note about the "Estimated Time Investment" - I'm sure this would not have taken as long for someone that had done more woodworking than I have. I've made a kitchen set and a bike ramp previously (not Ana's plans) but that's about it... Also it's a TODDLER bed, which means I have toddlers and that always makes things take twice as long!
Recommended Skill Level
Beginner

We did it! Our first every project!

Submitted by parwald on Sun, 05/03/2015 - 10:58

We are in desperate need of toy storage in our playroom. We are planning to build several more of these bulk bins.

Built from Plan(s)
Estimated Time Investment
Day Project (6-9 Hours)
Recommended Skill Level
Beginner

Comments

kcasabella

Sat, 04/09/2016 - 21:03

They turned out beautiful! What type of wood did you use, if you remember, and did you paint before assembling?

parwald

Sun, 11/20/2016 - 10:39

It was just standard pine. We painted afterwards with grey paint leftover from a kitchen project.

Traditional Farmhouse Bed with Storage

Hello, fellow makers! 

I really enjoyed this build - it was a challenge for me, but in the end, I'm thrilled with the results!

I modified two of Ana's plans to come up with this storage bed and I share more pictures of the process and how I finished this project over on my blog Tinsel + Wheat.

I used the Twin Bed Farmhouse plans to create the headboard and footboard, which turned out beautifully, but because of the storage base needing to be installed flush with the edges of the 4x4 posts - this made the bed a little wide for a standard twin size mattress. I don't mind the extra 2.5" of base on each side of the mattress but if you decide you would rather have the mattress edges match right up to the bed you will need to subtract one of your center 1x6 panels from both the headboard and footboard. This will give you the perfect size headboard and footboard for this build.

So grateful to Ana for these plans!  

Happy building!

Miranda


Estimated Cost
$200
Estimated Time Investment
Day Project (6-9 Hours)
Recommended Skill Level
Intermediate

Comments

vstroud

Sat, 03/02/2019 - 10:02

Might you have the lumber shopping list for the storage boxes to go with this modified Twin Farmhouse with storage bed? I looked at you personal website but you just have the cut list for them not lumber list. Desperate  need to purchase my wood Monday.Thank you so very much!

Cedar planters

Submitted by mmarsha9 on Sun, 10/10/2021 - 14:08

My wife wanted some planters for the front porch. Thanks to Ana whites page for these plans. Also loved the top modification that I think is a must.

Built from Plan(s)

Comments

Seasonal And Holiday

Rustic X end table

Submitted by damonawsgt on Tue, 06/04/2013 - 18:58

My first attempt at making something this caliber!

Built from Plan(s)
Estimated Time Investment
Afternoon Project (3-6 Hours)
Finish Used
Apple Cider vinegar and steel wool. Lots of thin clear coats of poly sanding in between to get the high gloss on the top.
Recommended Skill Level
Beginner

Extended and Customized Sausha's Laundry Pedestal

Submitted by jtshaver on Tue, 05/05/2015 - 07:44

This was my first ever project. I would have done a good amount differently if I had to reconstruct it now, but it came out pretty good and definitely serves its purpose.

These are the changes I made compared to the original design:

  • Increased the length to 69" to fit our room
  • Added center posts to support the extended length
  • Doubled the top thickness
  • Routed an ogee on the underside of the top
  • Extended the top and bottom deck by 1' all around
  • Increased the post height to 12"
  • Chamfered the corners of the vertical posts
  • Enclosed the sides with inset panels
  • Painted to match our baseboard trim
  • Added furniture slider feet to make it easy to move on the tile

It definitely took longer than I would have liked, but I could do it much faster if I had to do it again.

Estimated Time Investment
Weekend Project (10-20 Hours)
Finish Used
Oil based primer with semi-gloss Behr "Swiss Coffee" enamel on top. 2 coats of each, and an extra coat of paint on the top.
Recommended Skill Level
Beginner

Simple Kitchen Island Poplar Top

Submitted by sc.kennedy on Wed, 09/20/2017 - 09:41

First project in a quite a while for me so wanted to go with something simple.  Was able to complete on a Saturday.  Only thing I wanted to do different was 2" thickness on the top.


Estimated Time Investment
Day Project (6-9 Hours)
Finish Used
Krylon and Mineral Oil Food Grade
Recommended Skill Level
Beginner

Simple Farmhouse Bed Single

Submitted by lindslar on Fri, 10/15/2021 - 05:40

This was my first project and I’m beyond proud. Thank you for the instructions!!!

Comments

Changing table for my Baby. First project

Submitted by Jason on Tue, 03/22/2011 - 20:33

This was my first wood working project ever. I followed Ana's plan exactly except for the trim and partitions. I learned a lot from this project such as the correct pre-drilling hole size and the need for countersinks (I had quite a few split boards). I used Pine for the boards and MDF for the shelves but if I had to do it again I think I would go for plywood. All in all it was a rewarding project. The hardest part was the wood putty.

Estimated Cost
$100
Estimated Time Investment
Day Project (6-9 Hours)
Finish Used
I used KILZ primer and High Gloss white paint.
Recommended Skill Level
Beginner

One of my first projects!

This was one of my first projects. I had some challenges with the cuts... I rushed through (since I had my 1 & 3 year old assisting) and didn't make exact cuts... as a result, there was a lot of trimming to do on the legs. Also, the pressure treated wood that we purchased was very weak and even with drilling pilot holes, I experienced quite a few splits when putting together the legs of the benches. (This is why I only have one bench, actually... I still need to buy more wood...) Otherwise, I love the table!!! I think I attached the legs of the table differently than instructed, though I can't recall what I did.. and we ended up cutting a 2x2 to tie in the legs (from mid-X to mid-X) for extra support. (My 3 year old son was leaping from the table and we wanted to make sure it could meet his demands.) We LOVE it overall!

Estimated Time Investment
Day Project (6-9 Hours)
Finish Used
No finish
Recommended Skill Level
Beginner

Little Bear's Loft Bed

My daughter had talked about wanting a loft bed for a long time so after of plenty of research, we went for it. The shelves of the bookcase, except the top and bottom, are made from 3/4 plywood I had laying around. I did my best to utilize as much lumber that I already had in the basement to reduce costs.

Underneath the bed is LED Rope Lighting and the gaps under the rails were stenciled with the bear paws since my daughters nickname is Little Bear.

People have loved it enough I think there's a couple people that are going to buy the supplies so I can build it for them. The one thing I wish I had during the construction was an oscillating multi-tool to trim off the Kreg plugs. I now have one and plan on using it a fair amount.

On to the next project!!

Ben

Estimated Cost
Around $200 since I used higher quality lumber and Ohio is expensive
Estimated Time Investment
Week Long Project (20 Hours or More)
Finish Used
Semigloss paint and bear paw stencil
Recommended Skill Level
Intermediate

Comments

Sliding Door Media Console

Submitted by BobC on Sun, 10/08/2017 - 11:26

Built this to replace a shorter, store-bought media table that was just a dust collector.  I really enjoyed building this, especially making the hardware by hand. Thanks to one of the other builders for the plans to build the iron door hangers.  

Built from Plan(s)
Estimated Time Investment
Week Long Project (20 Hours or More)
Recommended Skill Level
Intermediate