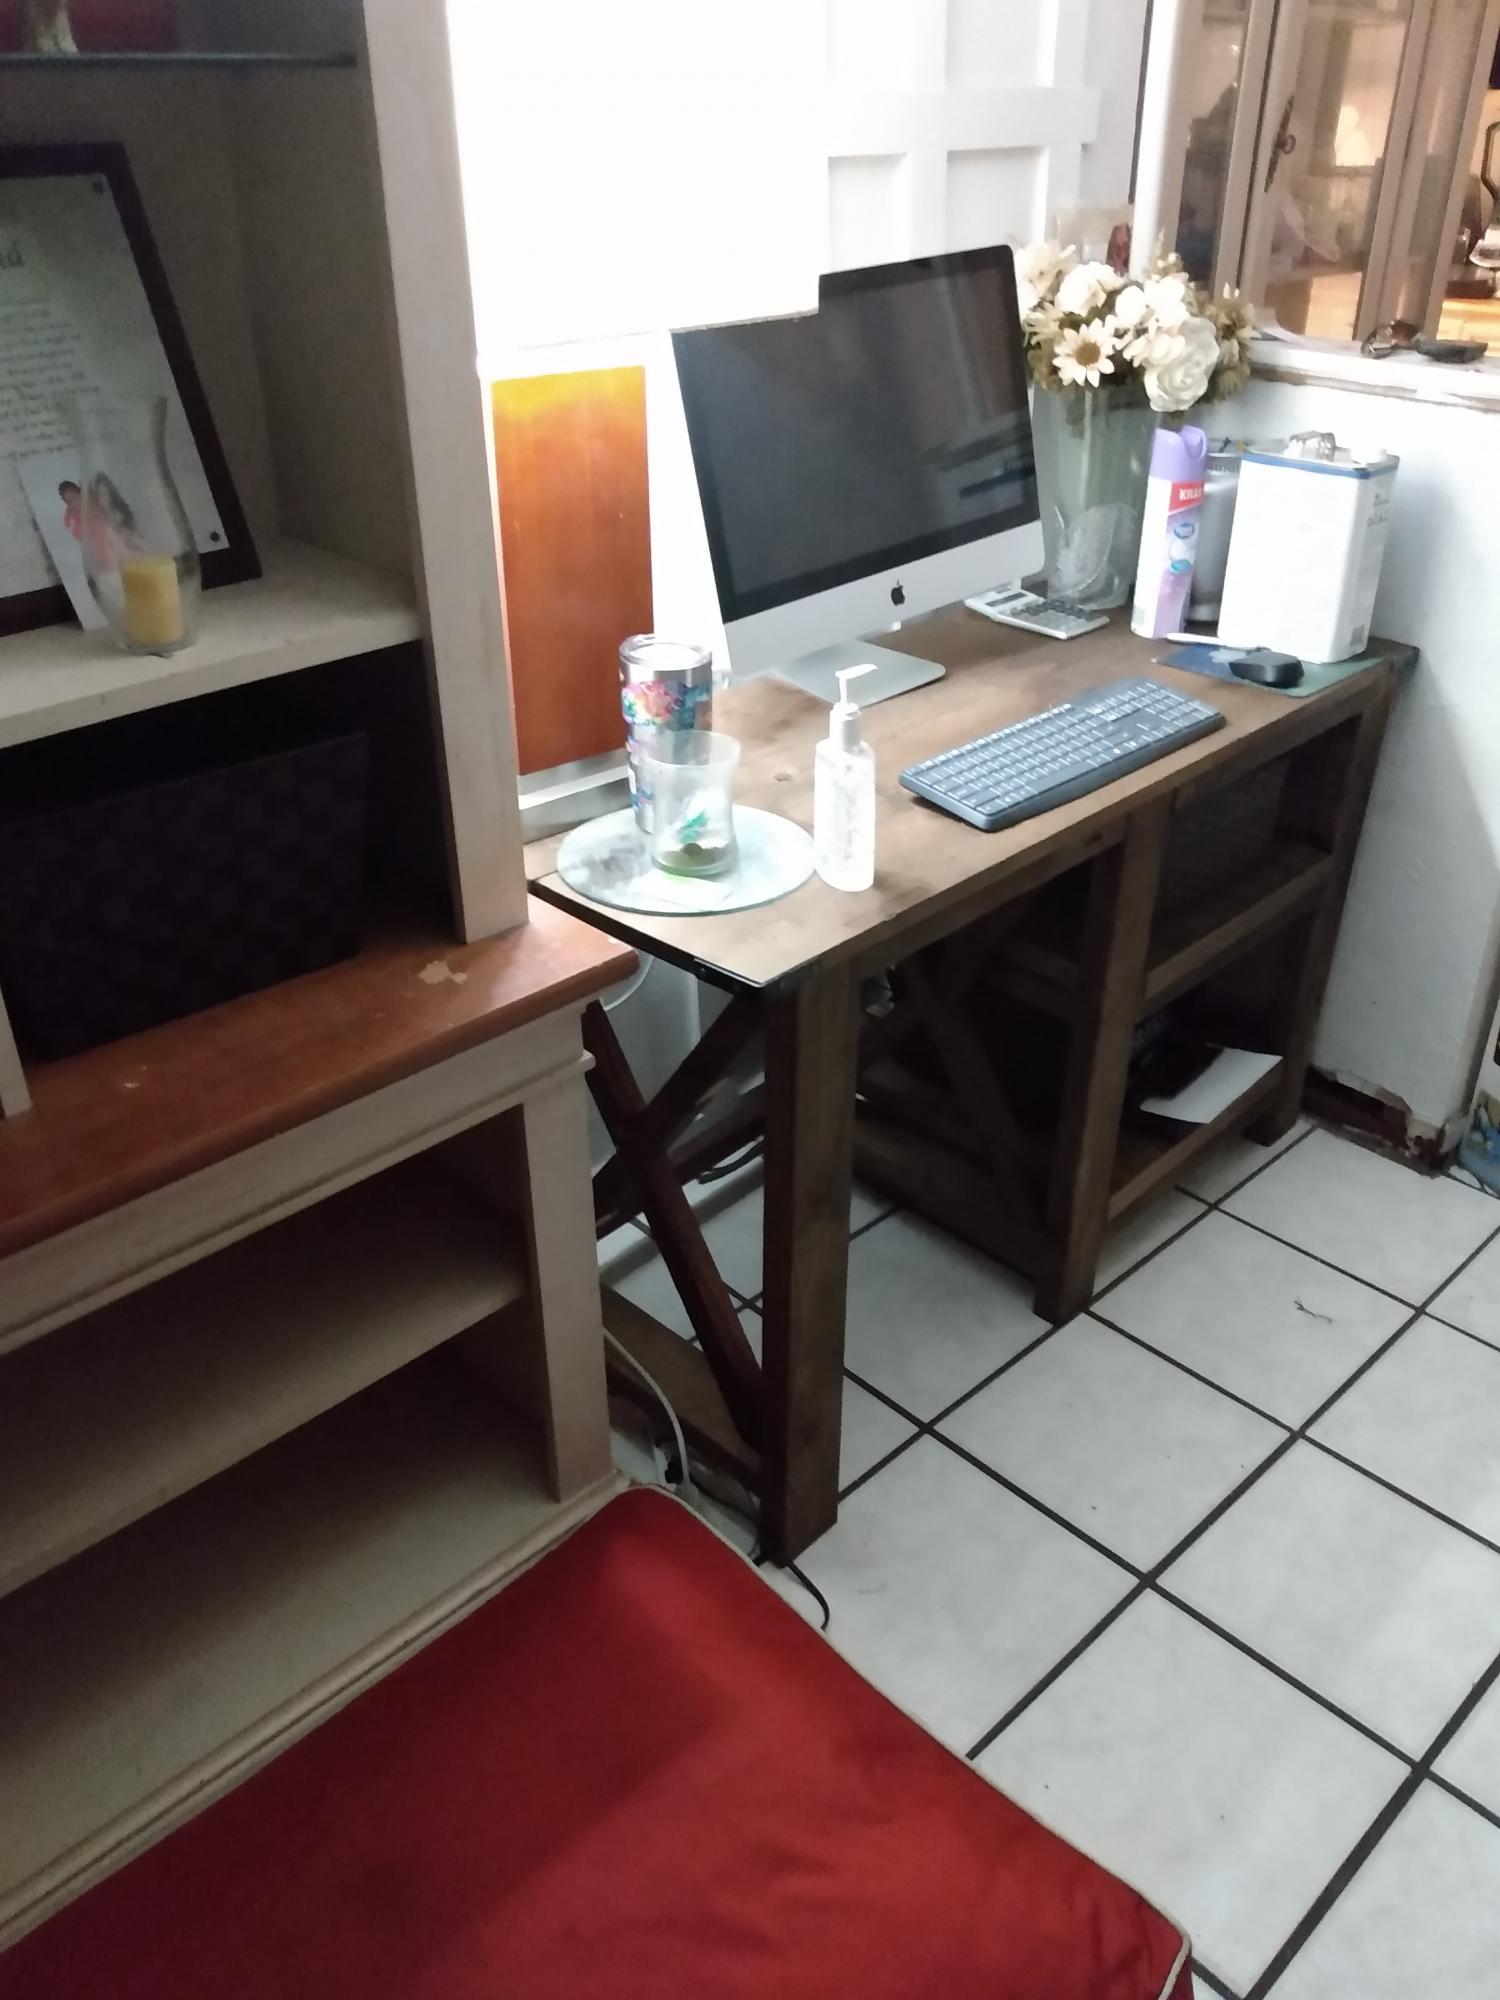
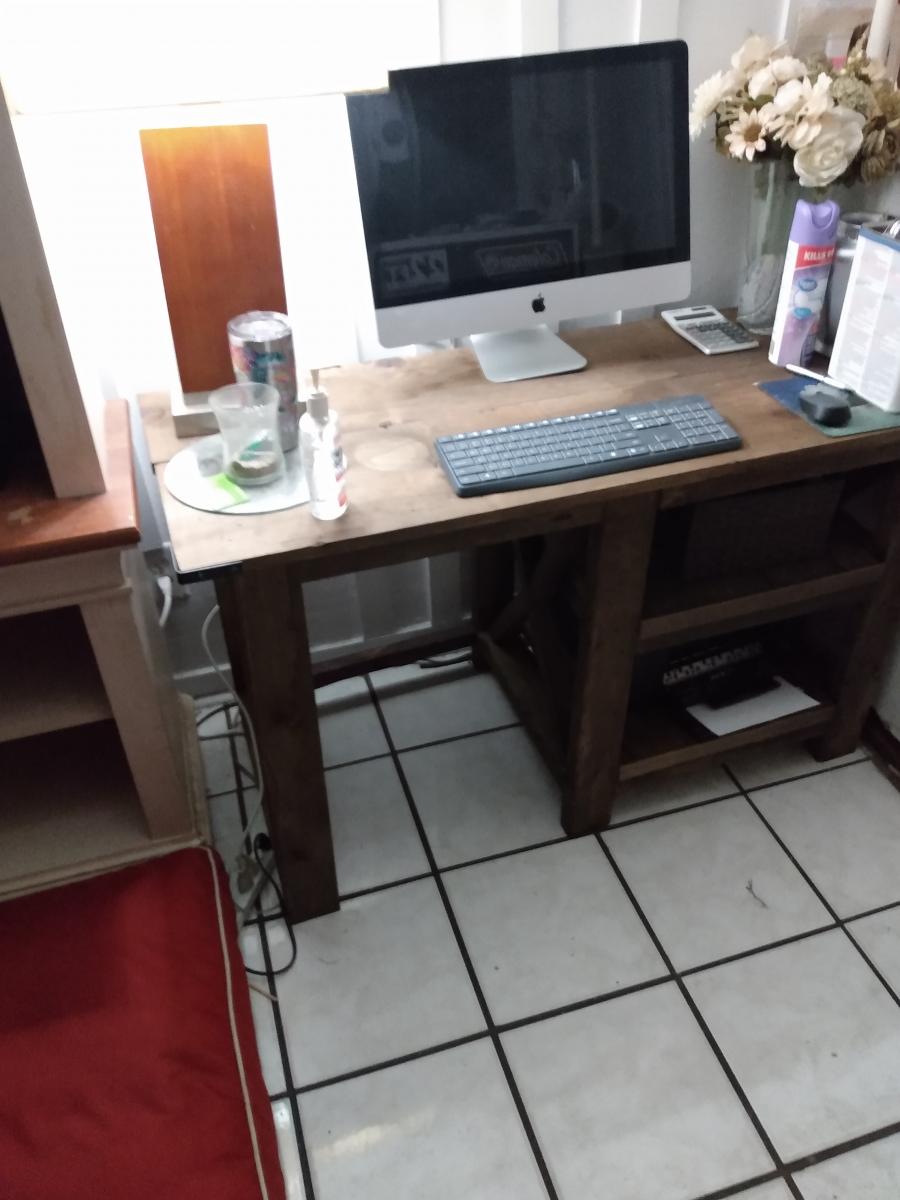
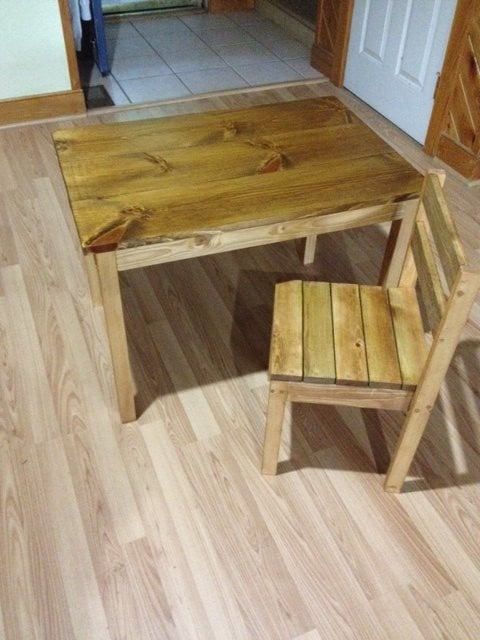
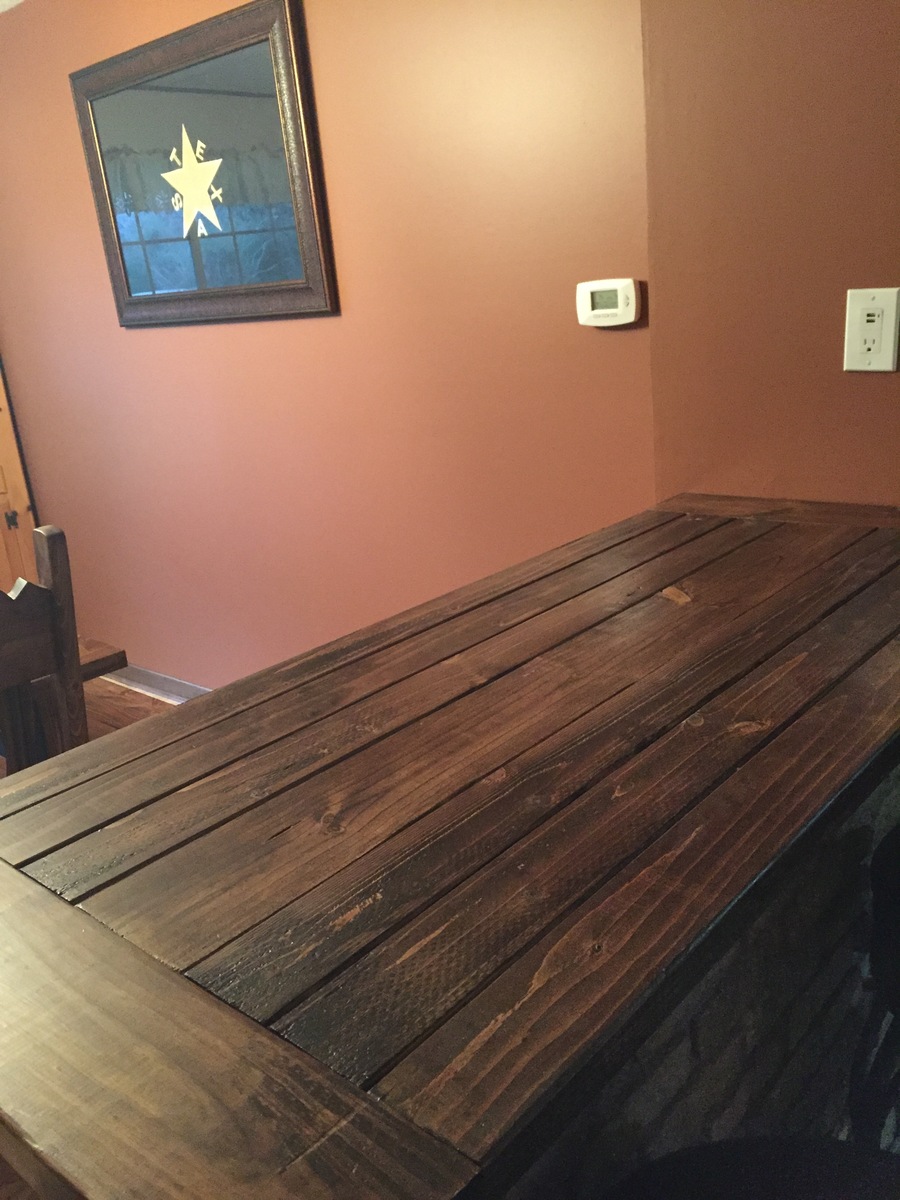
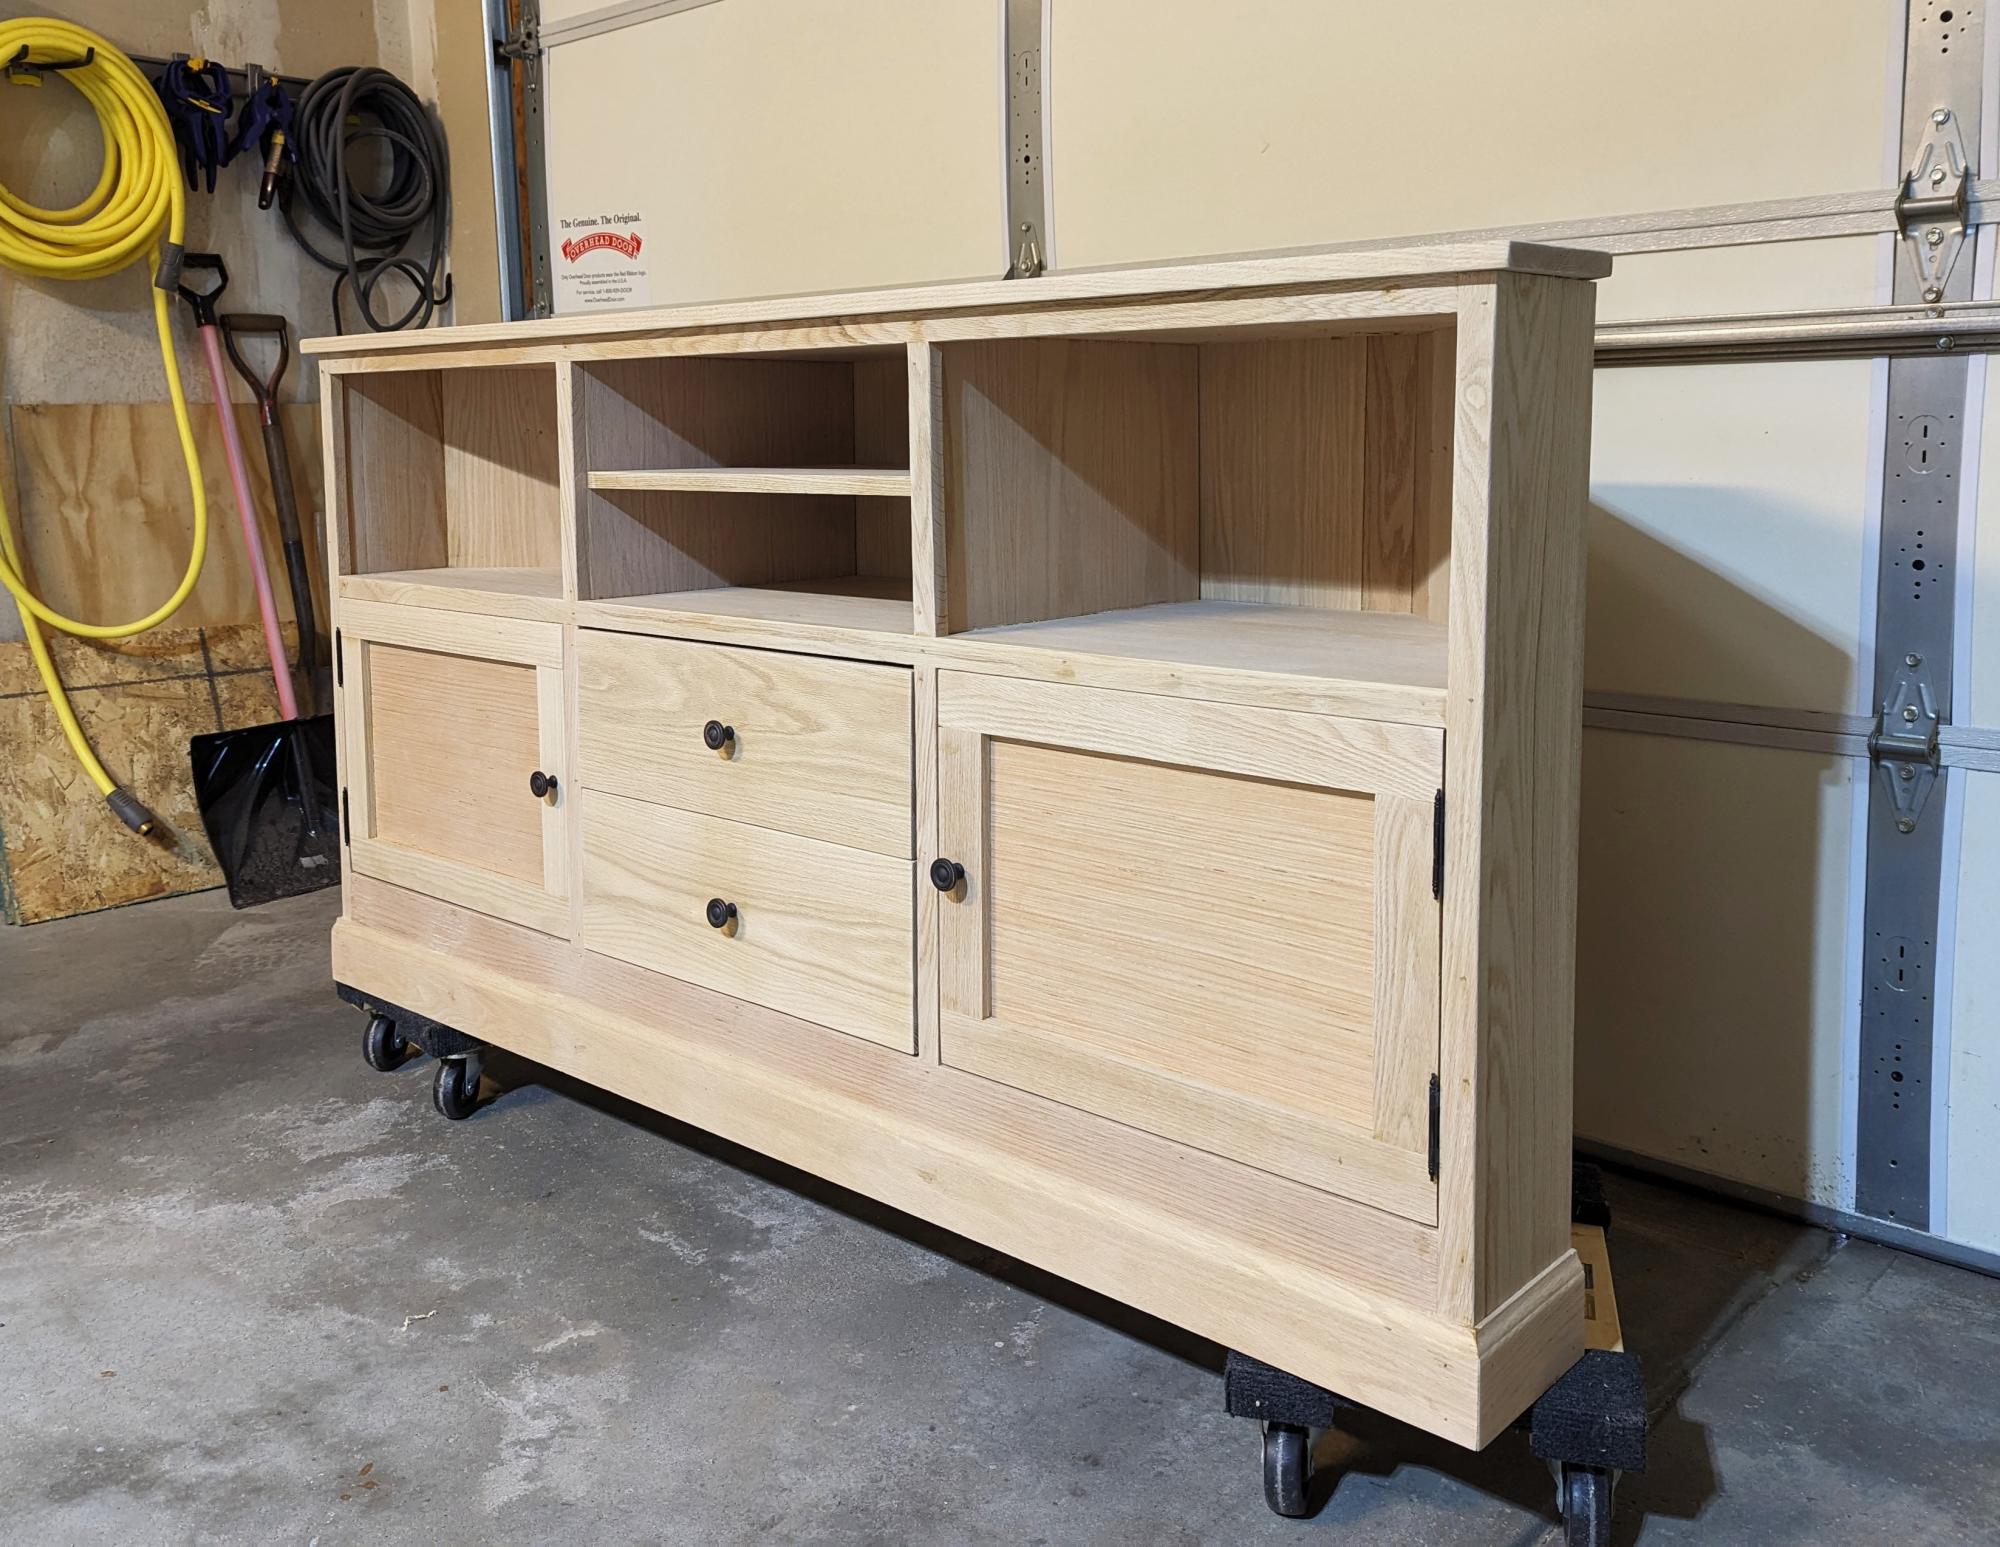
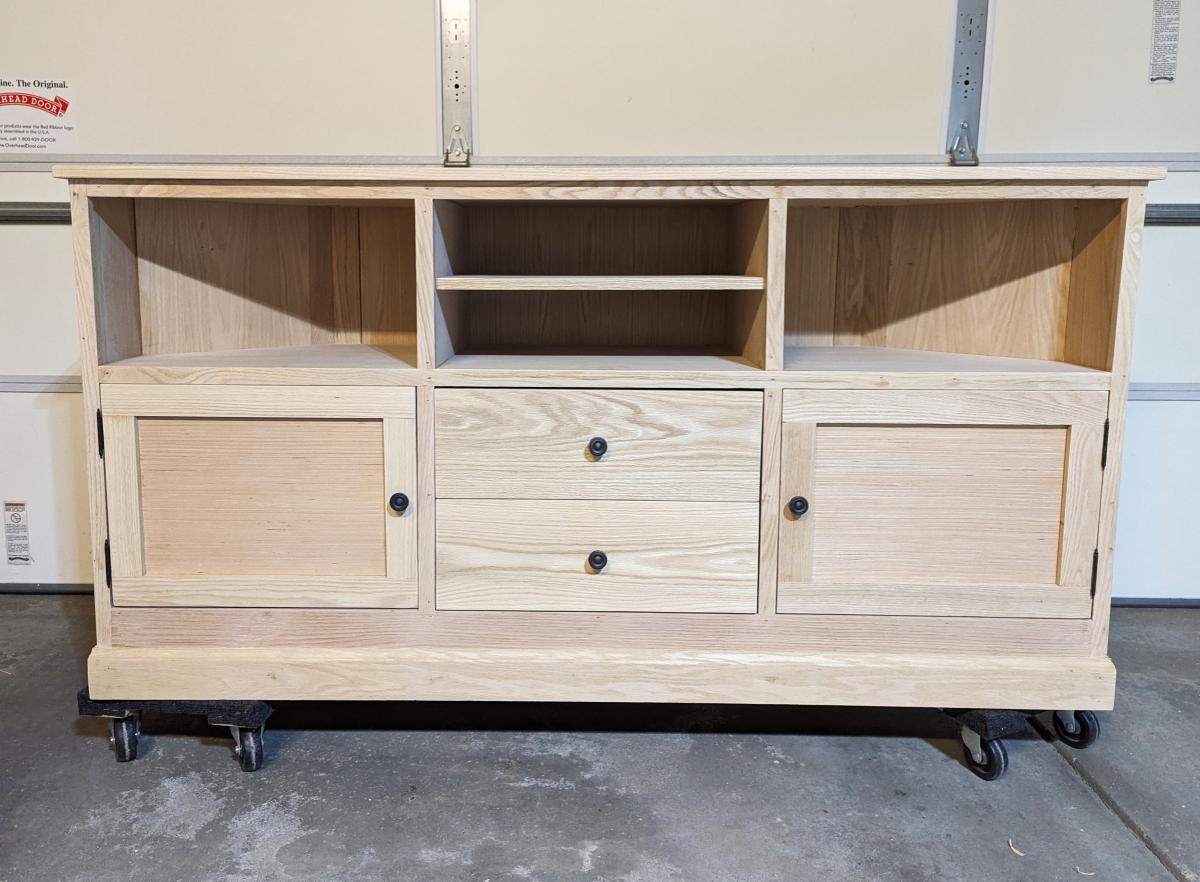
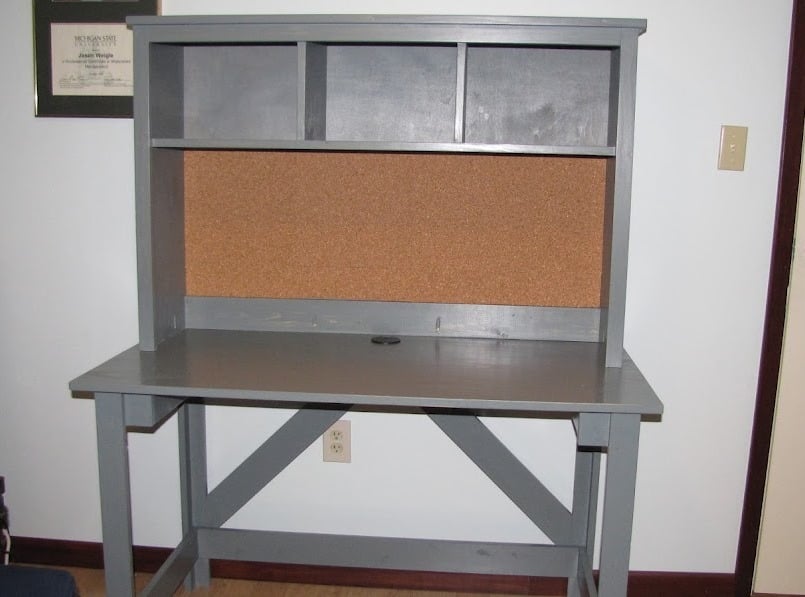
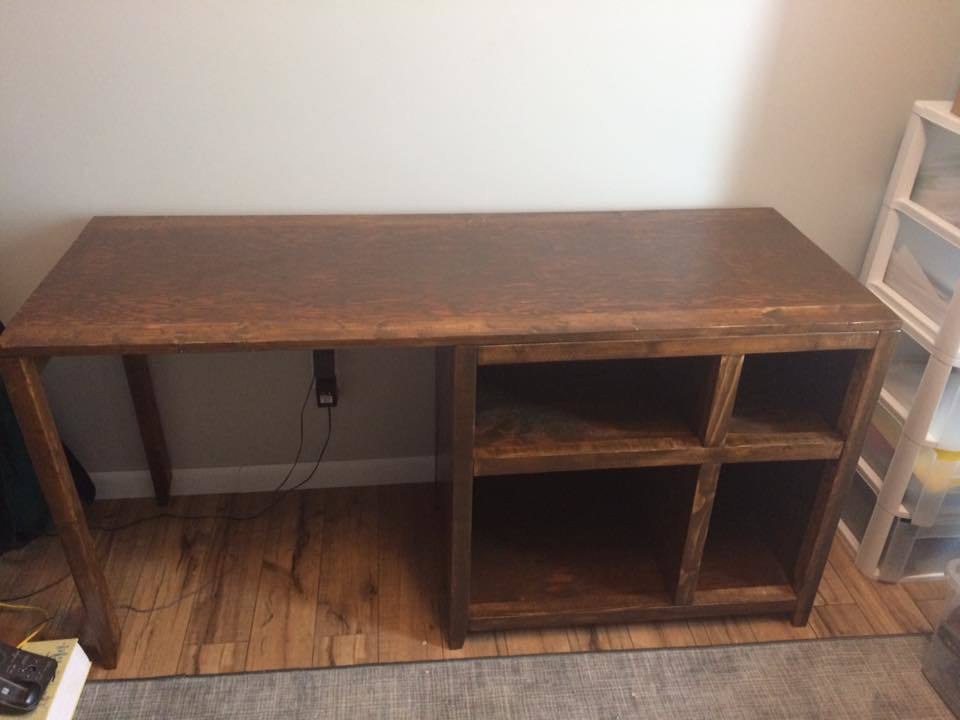
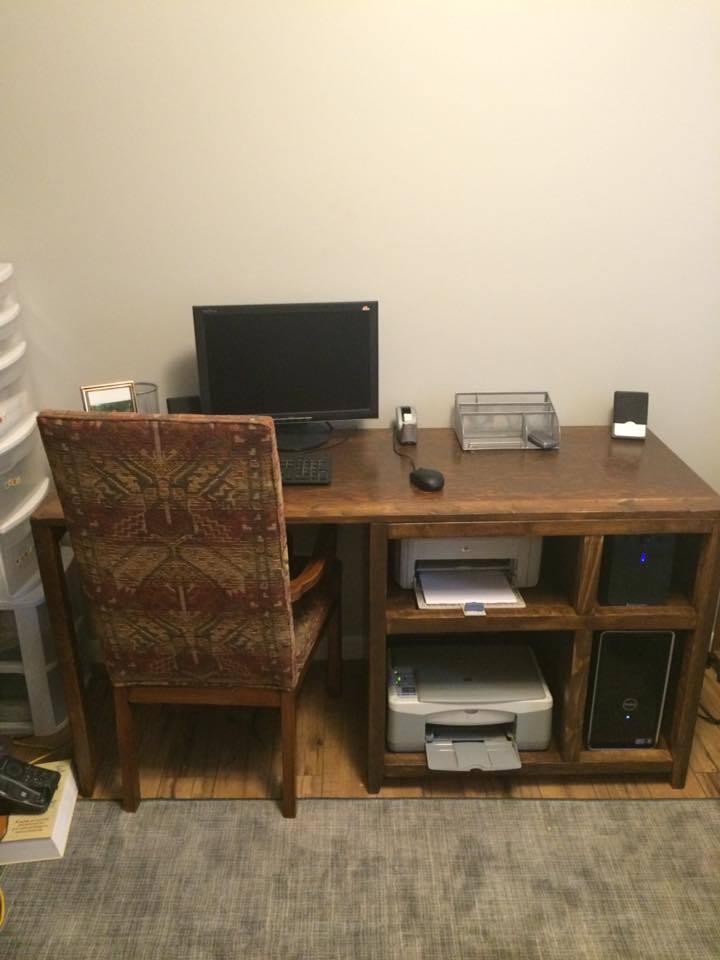
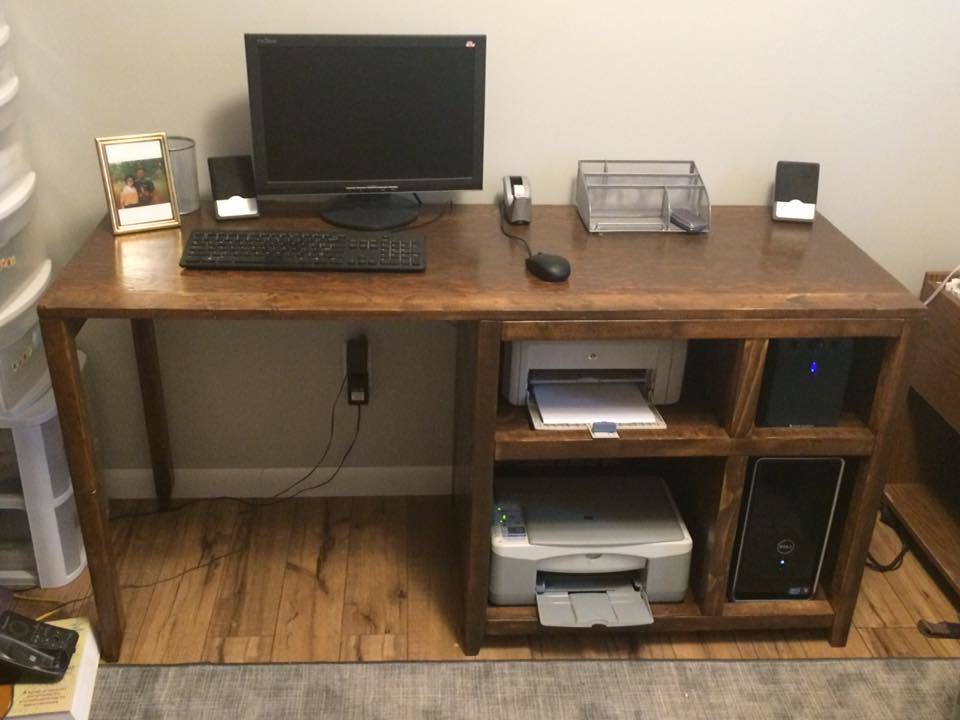
Community Brag Posts

Media Storage Entertainment Center

Submitted by Beaker on Mon, 09/17/2012 - 15:21

Entertainment center with Bluray/DVD storage in the doors. Based on the Cynthia media stand by Pottery Barn. I drew it up to my personal preferences using Draftsight (free 2d cad software). Used 3/4" oak for everything except for a few trim boards. It came out great, we are very proud to call it our own.

Estimated Cost
$250
Estimated Time Investment
Weekend Project (10-20 Hours)
Finish Used
Minwax dark mahogany
Minwax clear gloss polyurethane (2 coats)

-assembled
-sanded
-wiped with mineral spirit dipped rag
-stained with a brush
-1st coat of urethane using a foam brush
-light sanding with 220 grit
-wiped with mineral spirit dipped rag
-2nd coat of urethane using a foam brush.

It has an almost mirror finish now.
Recommended Skill Level
Intermediate

My first project! Thanks Ana!!!

Submitted by Sherice on Tue, 07/15/2014 - 07:29

I recently resigned from my job to stay home with my kids. This gave me time to begin a long desired hobby! Thanks to this website and the awesome, easy to follow plans, I have been able to start practicing with some very practical pieces. I have been looking for extra tall stools for over five years, since moving to our current home, and have not been able to find any I'm willing to buy. They have to be special ordered and are ridiculously priced for the chintzy pieces they are. I had fun making these ones and they look gorgeous in my home.

It took me several days to complete all three, but for a more experienced person it would take much less time. I used the Kreg Jig for all holes possible. And with each stool I learned something, and each one was completed in less time than the last.

THANK YOU ANA!

Built from Plan(s)
Estimated Time Investment
Week Long Project (20 Hours or More)
Finish Used
Two coats of stain, two layers of urethane with sanding in between the first and second.
Recommended Skill Level
Starter Project

Night Stands

I made this project with all 2X4's and 2.5 in pocket holes. This took 8 2X4's. To add the industrial look, I added some metal casters on the bottom. I haven't finished it 100%, but will add some metal corner brackets on it as well. This project was super easy to make. Took me about 6 hours to cut and build (2 tables). And another 3-4 hours to sand, stain and finish.

Estimated Cost
$55 per table ( because of the cost of wheels, screws, and corner brackets). The wood only cost $20-$25 per table.
Estimated Time Investment
Day Project (6-9 Hours)
Finish Used
1 coat of Minwax Weathered oak. Let that dry. Then 1 light coat of minwax special walnut. After that dried, I used minwax finishing wax instead of Poly. I like the rough/natural look that it gave in the end.
Recommended Skill Level
Beginner

Olivia's Doll Crib and High Chair sets

Submitted by Linda7 on Fri, 09/28/2012 - 16:15

I have three granddaughters and four great-nieces. I was able to find vintage 50's baby doll cribs for the older two, but not for my youngest granddaughter. I was so excited when I found Ana's doll crib, realizing that I could make the beds and high chair sets for all of the girls. I wanted to use water-slip decals to make the beds look vintage like the older g'daughters', and I found this great website: www.decalcottage.com. I wanted each set to be slightly different, so for the first two sets for sisters, I followed Ana's plans exactly for one, and using the idea from another brag post, used just a rectangle for the ends.The high chair backs are also slightly different. I have since made two more sets which I'll post later, but they all have vintage lambs on the beds and high chairs. It has been so much fun!

Built from Plan(s)
Estimated Cost
About $20 per set for the lumber. I already had the paint and pocket hole screws.
Estimated Time Investment
Day Project (6-9 Hours)
Finish Used
I first primed with one coat of Kilz, then used Olympic brand white gloss spray paint and the clear spray finish.
Recommended Skill Level
Beginner

Outdoor Sofa & Coffee Table

Submitted by Ulrike on Fri, 07/31/2020 - 09:38

This project took a while. Stained everything before assembly which made it easier. Plans are easy to follow. Thank you for making them available. Our property is starting to look a lot like your website.

Estimated Cost
180
Estimated Time Investment
Weekend Project (10-20 Hours)
Recommended Skill Level
Beginner

Comments

jwood4

Mon, 08/02/2021 - 08:35

Looks amazing! What method did you use (pocket holes, dowels, deck screws, etc) to join the visible portions like the arms?

Ladder Shelf DIY

Another one bites the dust. Made this out of Ana instructions for a ladder shelf. Like the way this turned out alot. Ana White knows whats up :)

Built from Plan(s)
Estimated Cost
$100
Estimated Time Investment
Day Project (6-9 Hours)
Finish Used
Minwax Wood Finsih; Classic Grey
Recommended Skill Level
Starter Project

Folding Garage Workbench

Submitted by SaraLodise on Sun, 08/10/2014 - 06:11

I wanted a good flat and level workspace to continue projects. This workbench folds up to the wall in my garage so I can still park when not working on anything. I made it pretty stout with 2x4s and 2x6s since it would need to support fairly large pieces of furniture without deflecting. It is very heavy as a result though (good core workout folding it up and down :) )

I used two folding shelf brackets on the legs to keep them from accidentally being kicked out from under the table while it's out. (http://www.woodcraft.com/Product/2001690/2615/Folding-Shelf-Bracket-8-P…)

I used four heavy strap hinges to connect the table to the 2x6 (which was lag screwed into studs). Two gate latches were used to secure the edge of the table to studs when the table is folded up.

I cut the legs approximately, and then when the table was hung I cut and shimmed them to get the table level on the uneven surface of the garage floor.

Estimated Cost
Total = $81.10 (Lumber = $33.40, Hardware = 47.70)
Estimated Time Investment
Day Project (6-9 Hours)
Finish Used
none
Recommended Skill Level
Beginner

Comments

HD

Fri, 08/15/2014 - 16:32

I really like this fold up bench design. It may be heavy, but I bet it's incredibly sturdy. I also have a really compact garage. I have pegboard on my walls, so a bench that folds UP doesn't work for me when I want to get a tool.

My own bench is more light duty. It's a sheet of 2x4' plywood attached to a frame made from dimensional lumber. It folds down so I have access to the tools at all times. It's based on a design on the Family Handyman website, although you can find the same design all over the web.

bschultz26

Thu, 02/05/2015 - 18:50

Great idea! I need to build this. Can I please get a picture of it folded up, so I can see the hinges on the legs and the latches holding it while folded?

webklob

Fri, 11/06/2020 - 13:55

Can you show another picture of the hinges you used on the legs that can fold out when lowered?

Thanks! Kate

My daughter’s first project assist

Submitted by tcorstange on Sat, 09/05/2020 - 20:05

My daughter wanted to help with building her loft bed. She handled drilling all the pocket holes, sanding, painting and some of the assembly. This was her first project. We opted to not use the landing from the plan. Increased height to 70 inches. Used 1x4’s for the mattress supports. Anchored to the wall to eliminate any shaking in the bed when climbing up

Estimated Cost
$100
Estimated Time Investment
Weekend Project (10-20 Hours)
Finish Used
Semi gloss white paint
Recommended Skill Level
Starter Project

Modified Husky Farmhouse Table

We built this farmhouse table for my Mom's house, to create a space big enough for our growing family to gather at holidays and birthdays. We added to the size- the final dimensions were 82″ (long) x42″ (wide) x 30″(tall). It is a huge, chunky table! My parents prefer natural finishes, so we gave the natural wood several protective coats of polycrylic. 

Built from Plan(s)
Estimated Time Investment
Afternoon Project (3-6 Hours)
Recommended Skill Level
Beginner

Small island with storage and two stools

Submitted by Anonymous (not verified) on Mon, 09/14/2020 - 12:07

I had a friend who was interested in a small island with two stools that looked like this offered by a fancy home interior store. The reviews weren't all that great, even for the half off sale price. They needed something small to fit their space that would basically serve as a dining area for her and her husband. It is build out of spruce and whitewood lumber. White paint and dark walnut stain, with poly on top. The legs are two 2x4s glued together , then ripped each side to square it off making it an actual 3" x 3". The stools came from Ana's farmhouse counter stool plan. The island I just went with overall demensions and built it from there. Pocket hole screws and finish nails.

Built from Plan(s)
Estimated Cost
140
Estimated Time Investment
Day Project (6-9 Hours)
Finish Used
Valspar Dark Walnut stain, water based poly
Behr ultra white paint
Recommended Skill Level
Intermediate

Comments

Benchmark TV stand

My wife and I wanted a nice TV stand for our new living room. Like always, we did not want to spend tons of money and I thought about building something anyways. My wife found the Benchwright series at Pottery Barn and loved it, but for almost $1,000 that was not in our budget. Of course I came straight here and found these plans! I had a great time building this. The measuring and cutting took only an afternoon, and the staining took a long time as this was my first real staining project. I also wanted to get nice glossy coats of clear coat, which took time.Overall we are thrilled with how it turned out! The biggest headache was the euro hinges. I followed the directions that came with them and they did not turn out right at all. It was trial and error to finally get this placed correctly.

Estimated Cost
$300
Estimated Time Investment
Weekend Project (10-20 Hours)
Finish Used
I used miniwax pre-stain for most of the project (although I couldn't tell much of a difference honestly). We used miniwax Dark Walnut for the color. I put on 2 coats of stain followed by water-based clear coat. 5-6 layers of clear coat were put on the gorgeous top and about 2-3 coats were put on everywhere else.
I tried out both oil based and water based polyurethane on this project to try them both out. I highly prefer the water based clear coat over the oil based. The water based is almost twice the cost, but it goes on much thicker so it is easier to apply and took less coats to get a glossy finish.
Recommended Skill Level
Intermediate

Comments

spiceylg

Thu, 12/13/2012 - 05:24

Really great job! Isn't it nice to have options rather than dropping so much money in over priced stores?!

Finally patio furniture that won't blow away!

Submitted by lisa97 on Fri, 10/16/2020 - 20:31

Very clear plans and directions. My husband and I built these and the table in a weekend. We added a back and made a table from the scraps. First time of not chasing furniture that has blown away! We love them!

Estimated Time Investment
Day Project (6-9 Hours)
Finish Used
Behr Premium Seminare transparent stain and seal in Chocolate 5129
Recommended Skill Level
Beginner

Comments

Shoe Dresser

Submitted by Anonymous (not verified) on Sun, 10/25/2020 - 07:57

I've been wanting to make this for so long! I still have a couple blemishes to touch up but I'm super pleased with how this turned out. Easy construction and tons of customization options! THANK YOU ANA!!!

Built from Plan(s)
Estimated Cost
$150.00
Estimated Time Investment
Weekend Project (10-20 Hours)
Finish Used
Minwax Polycrylic. Semi-gloss.
Recommended Skill Level
Intermediate

Comments

Buffet Table / Hutch with Wall Collage

Submitted by JD Corey on Sat, 10/25/2014 - 19:08

My wife wanted something to fill up a large wall in our kitchen so I designed a collage centered over a buffet table. I used the plans from the Salsa Console that I found on this website for the table. I had to modify the plans quite a bit in order for the table to fit the space that we had. After I had the design the way I wanted it, my wife and I found the frames that we needed and painted them with a black, brown,  and terquoise theme. I built the hutch using pine that I bought from the hardware store. I used quarter round moulding strips to accentuate the drawer faces and the cabinet doors. I added glass to the center of the cabinet doors and then backed the glass with the material from one of those cheap ceiling light panels to give the glass a 3D frosted appearance. I then painted the interior of the cabinets with that same terquoise color and ran lights inside the cabinets so that the terquiose color would show through the forsted glass. I finished the table off by staining it with a dark red maple stain (to match our kitchen table and island) and then added a few simple drawer/cabinet knobs. Everything came together nicely when we hung it all up over the table. Now all we have left to do is add our pictures to the frames.

Built from Plan(s)
Estimated Cost
$250
Estimated Time Investment
Week Long Project (20 Hours or More)
Finish Used
Minwax Red Mahogany
Recommended Skill Level
Intermediate

Large Porch Bench with X Backs to highlight feature wall

Submitted by Anonymous (not verified) on Mon, 11/09/2020 - 16:29

Using the Ana White plans of Large porch Bench with X backs I was able to create this amazing area in the entrance way of our home. The bench was part of a larger project where I added the modeling and shelves to the wall. The plans were great, I just made the bench a bit smaller, as the original size was a bit overwhelming inside the home.

Estimated Time Investment
Weekend Project (10-20 Hours)
Recommended Skill Level
Intermediate

Comments

Farmhouse Table (wooden pallets)

Submitted by dak1ne on Thu, 01/31/2013 - 20:36

Hello, I'm doing furniture with wooden pallets and I found your awesome website with nice explanations and plans so I decided to make this nice farmhouse table but with wood from shipment wooden pallets.
Thank you very much for all your work and plans !

I will make other furnitures from your plans with wooden pallets :D and post the brags here soon.

Estimated Time Investment
Afternoon Project (3-6 Hours)
Finish Used
mahogany wax
Recommended Skill Level
Beginner

Joe Shape

Submitted by Anonymous (not verified) on Wed, 03/15/2017 - 21:19

Fun and easy project. I couldn't be happier with the end results. Great plan from Ana White. 

Estimated Cost
$83 for coffee and end table.
Estimated Time Investment
Weekend Project (10-20 Hours)
Finish Used
Waterlox on top and Sherwin Williams furniture paint on frame.
Recommended Skill Level
Intermediate

Rustic X Square Oversized Coffee Table

Submitted by Lotus1 on Fri, 12/19/2014 - 18:56

We could not find a large enough coffee table that we wanted so we decided to make our own.  We loved the Rustic X plan and thought if we put two tables toghether we could get the pefect table size for our living room.  Project cost us around $120 and it took us a week to complete, but we are happy with the results.  The color is a dark expresso.

Built from Plan(s)
Estimated Cost
$120
Estimated Time Investment
Week Long Project (20 Hours or More)
Finish Used
The stain is called Kona
Recommended Skill Level
Intermediate

Comments