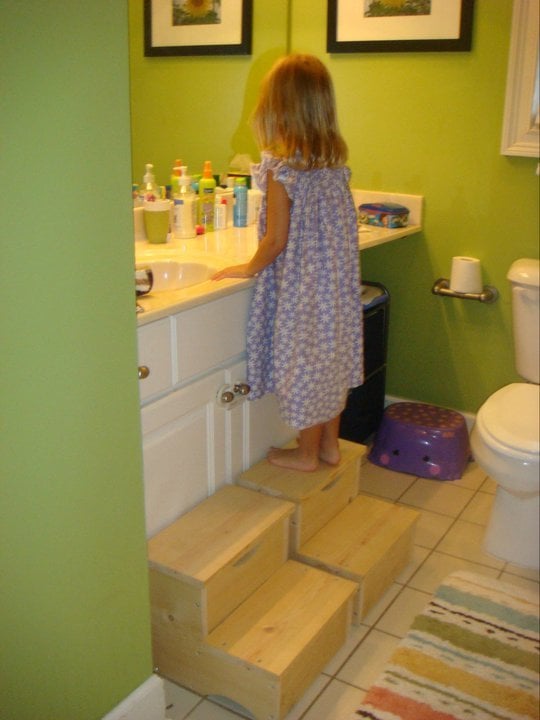
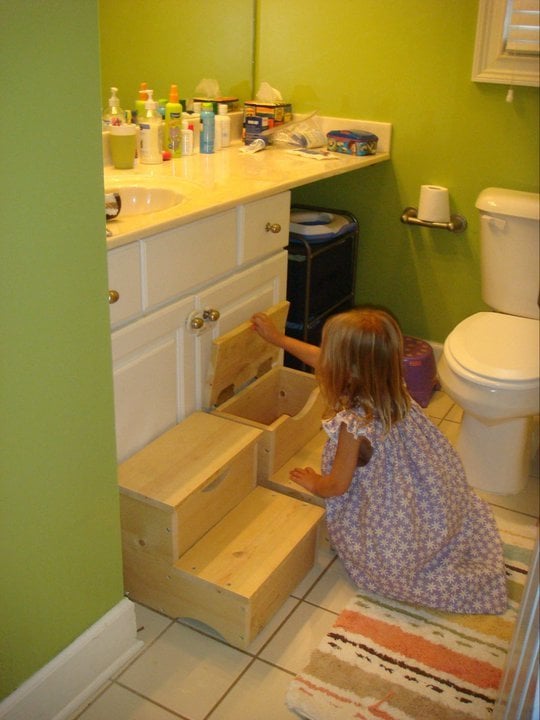
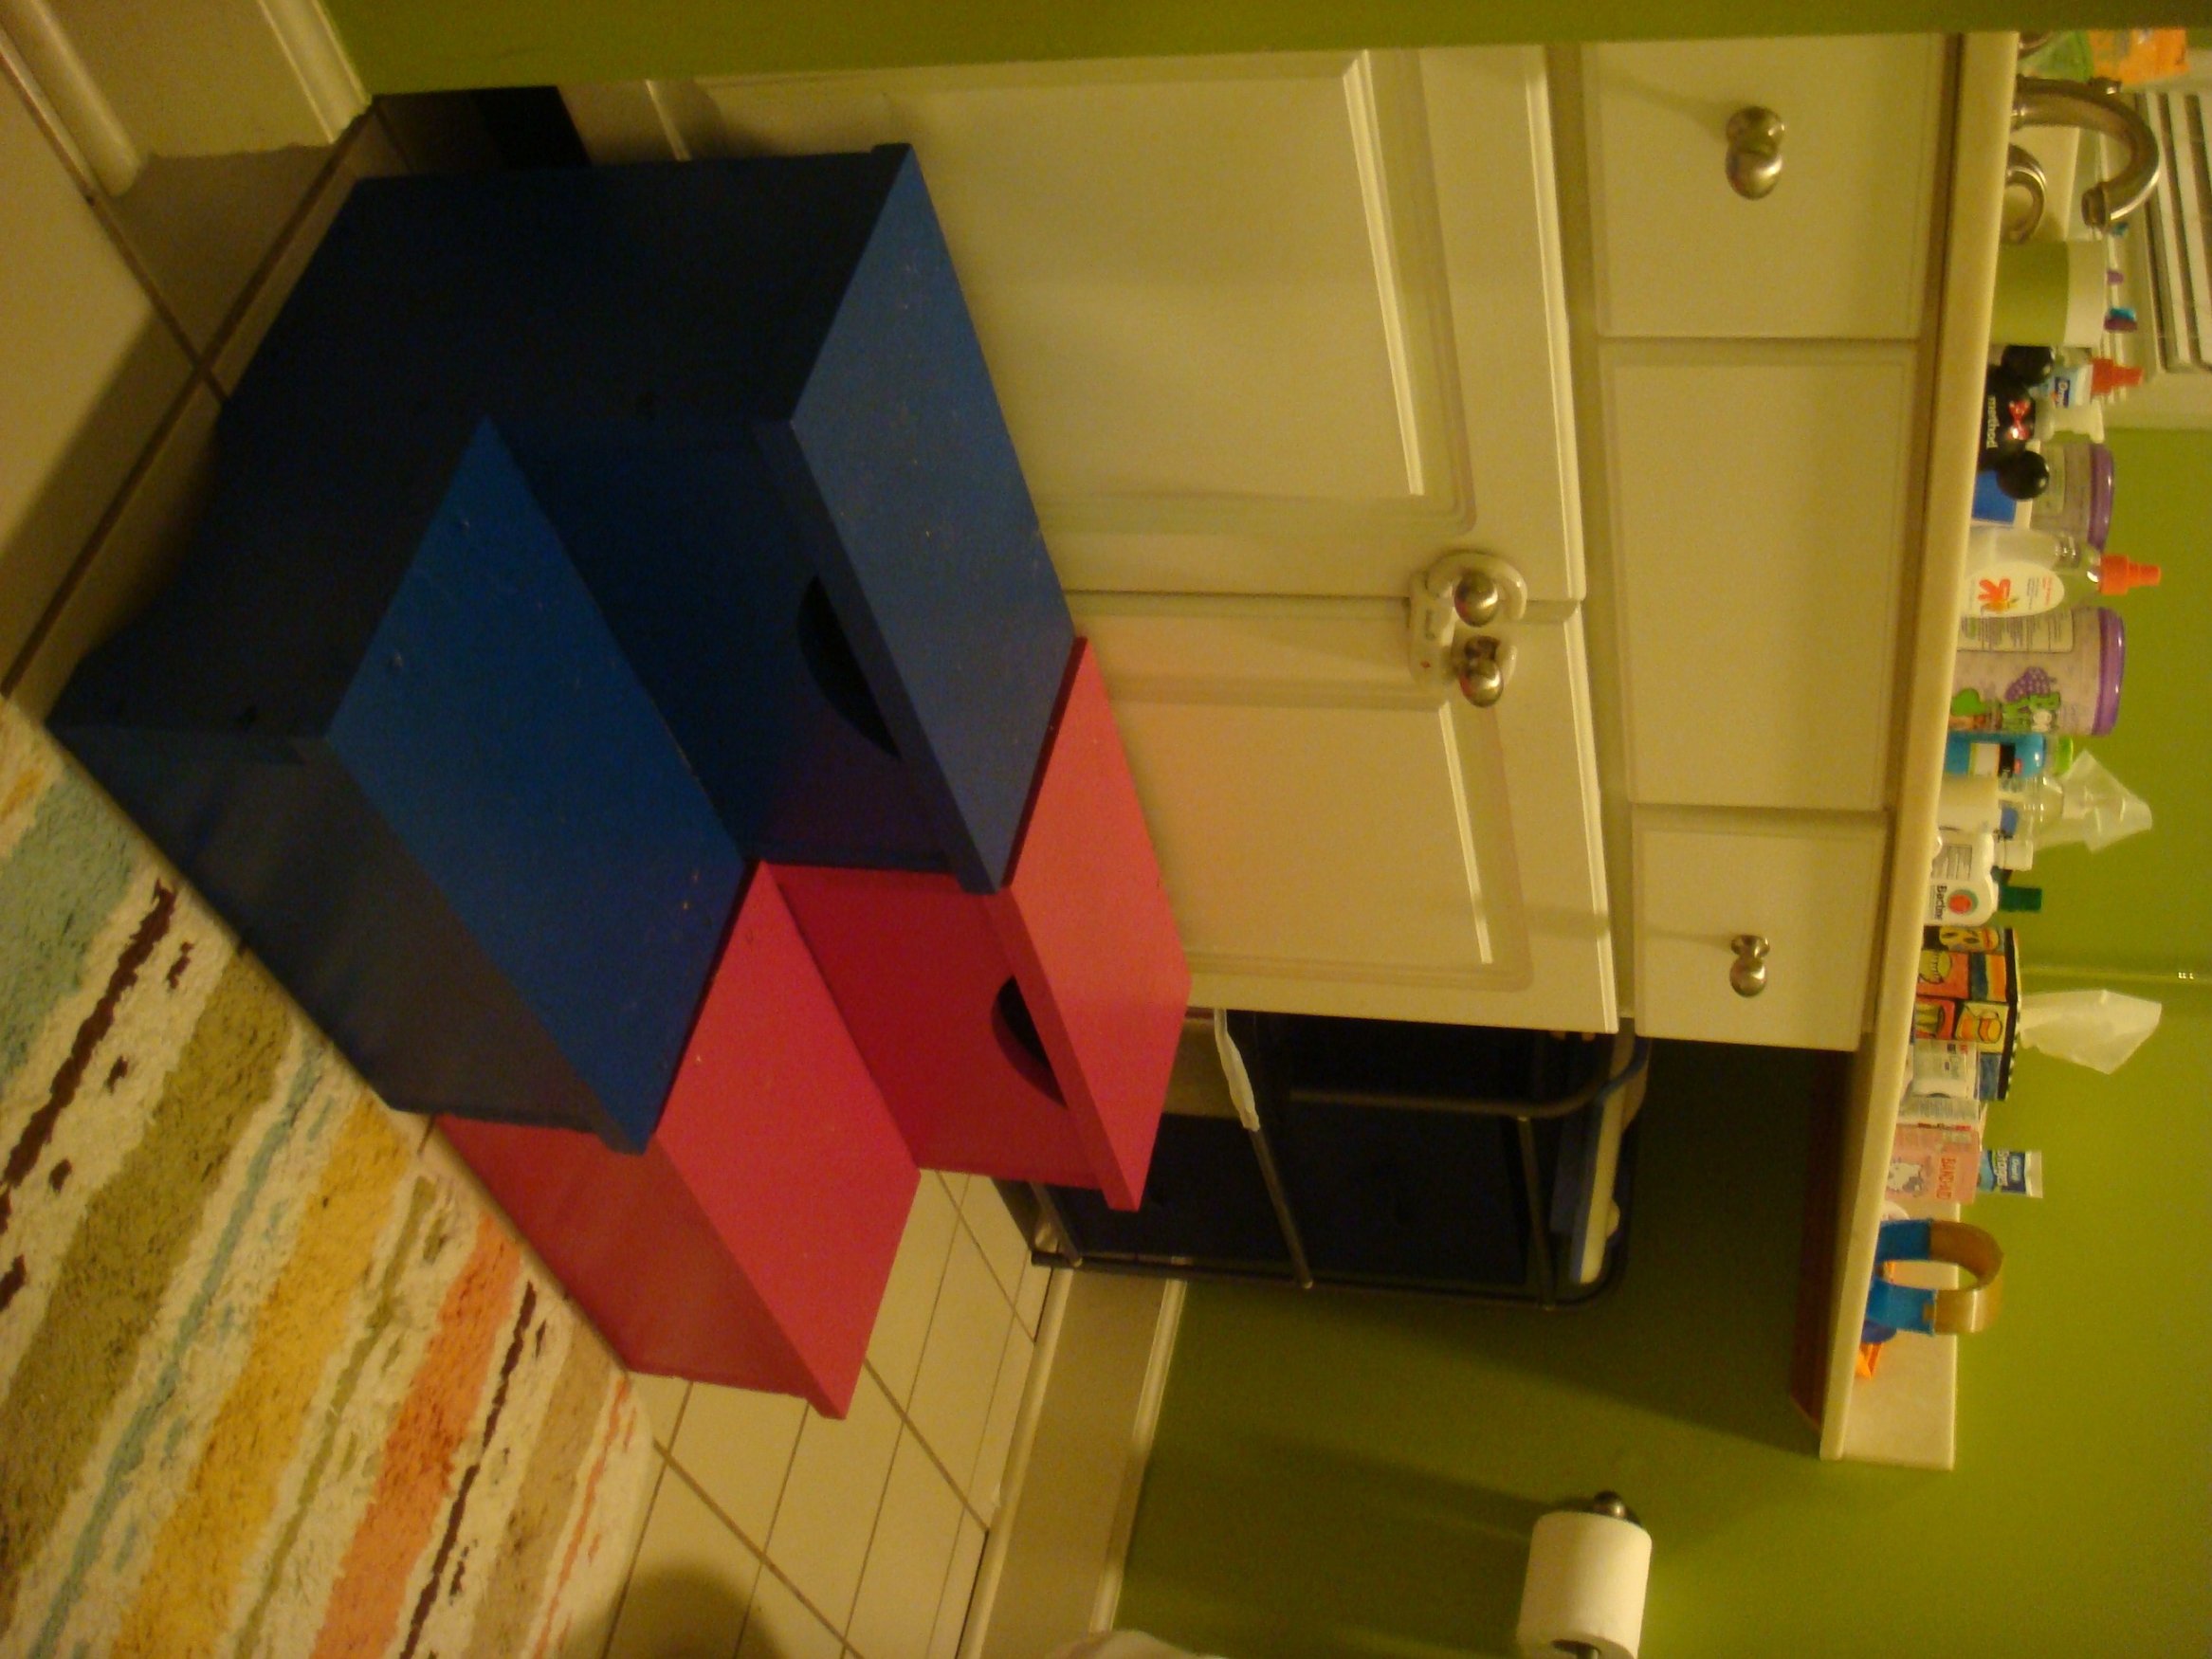
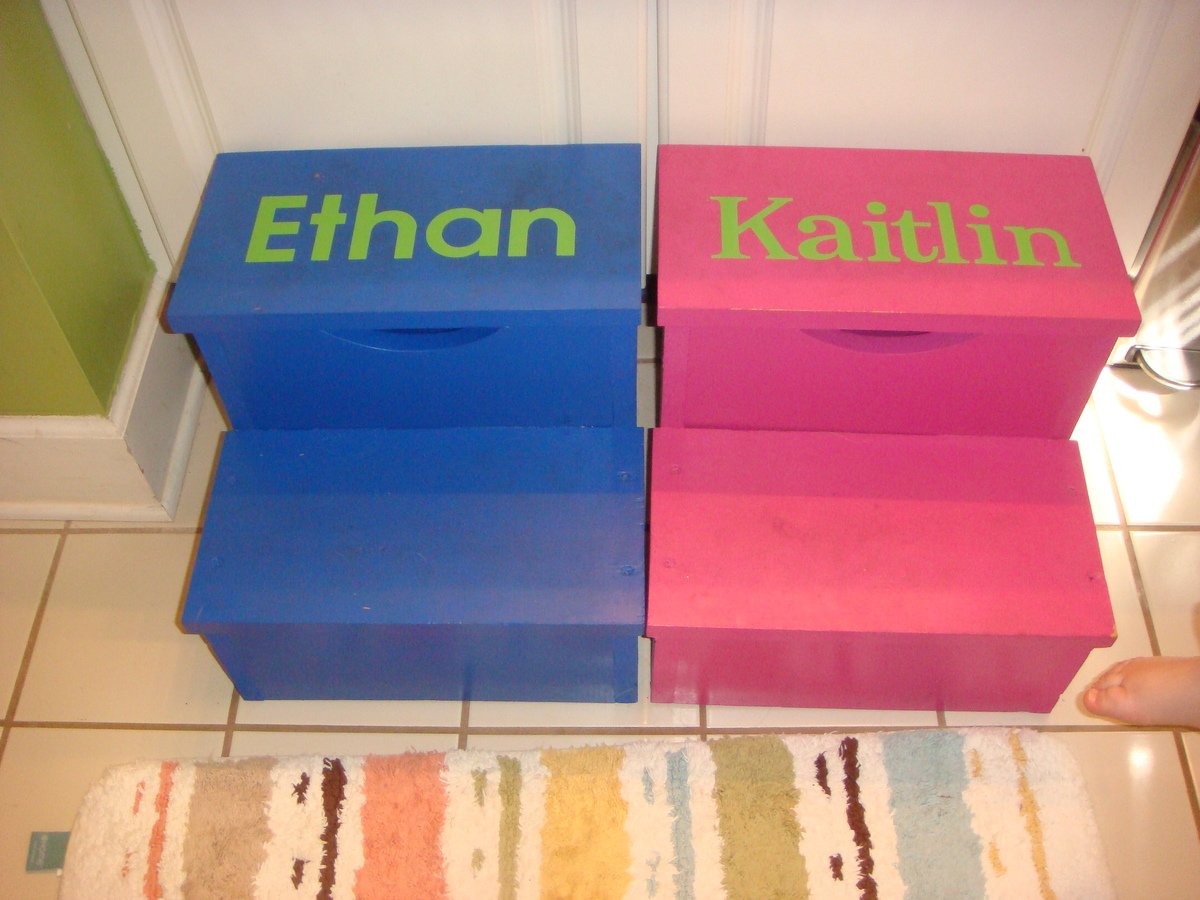
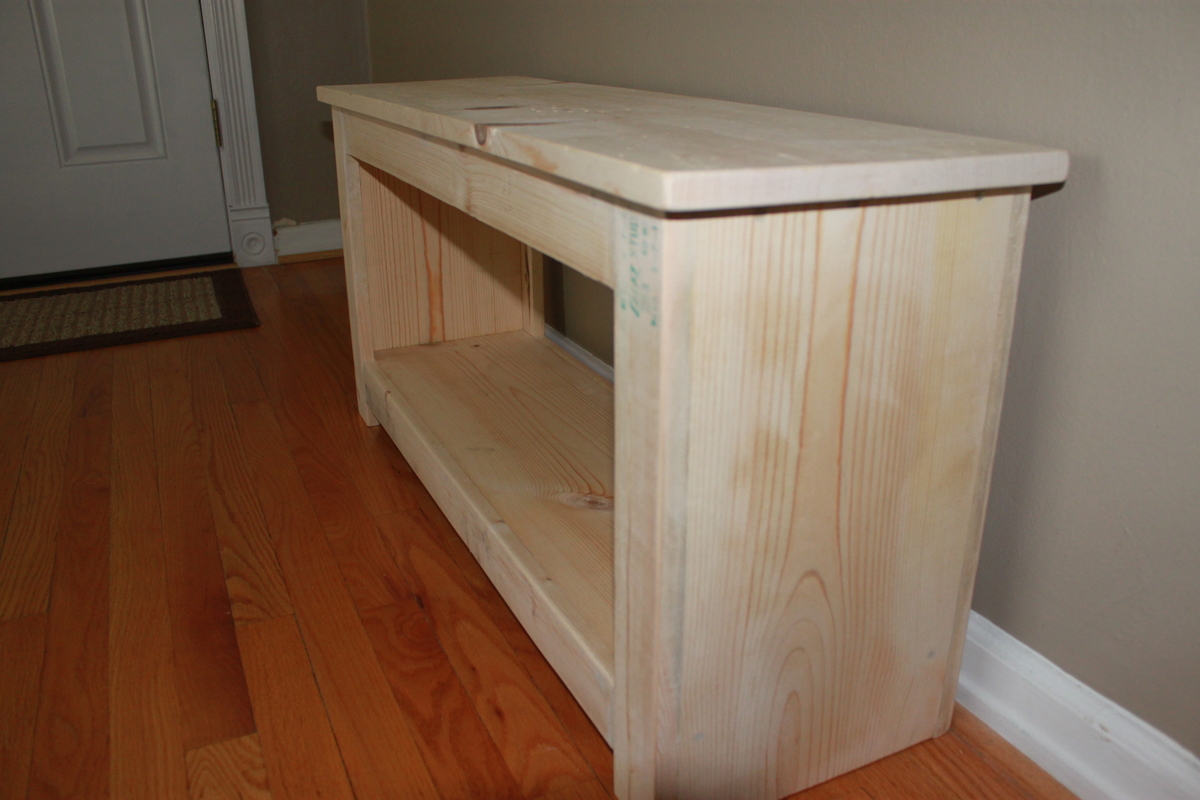
Kids' Step tools
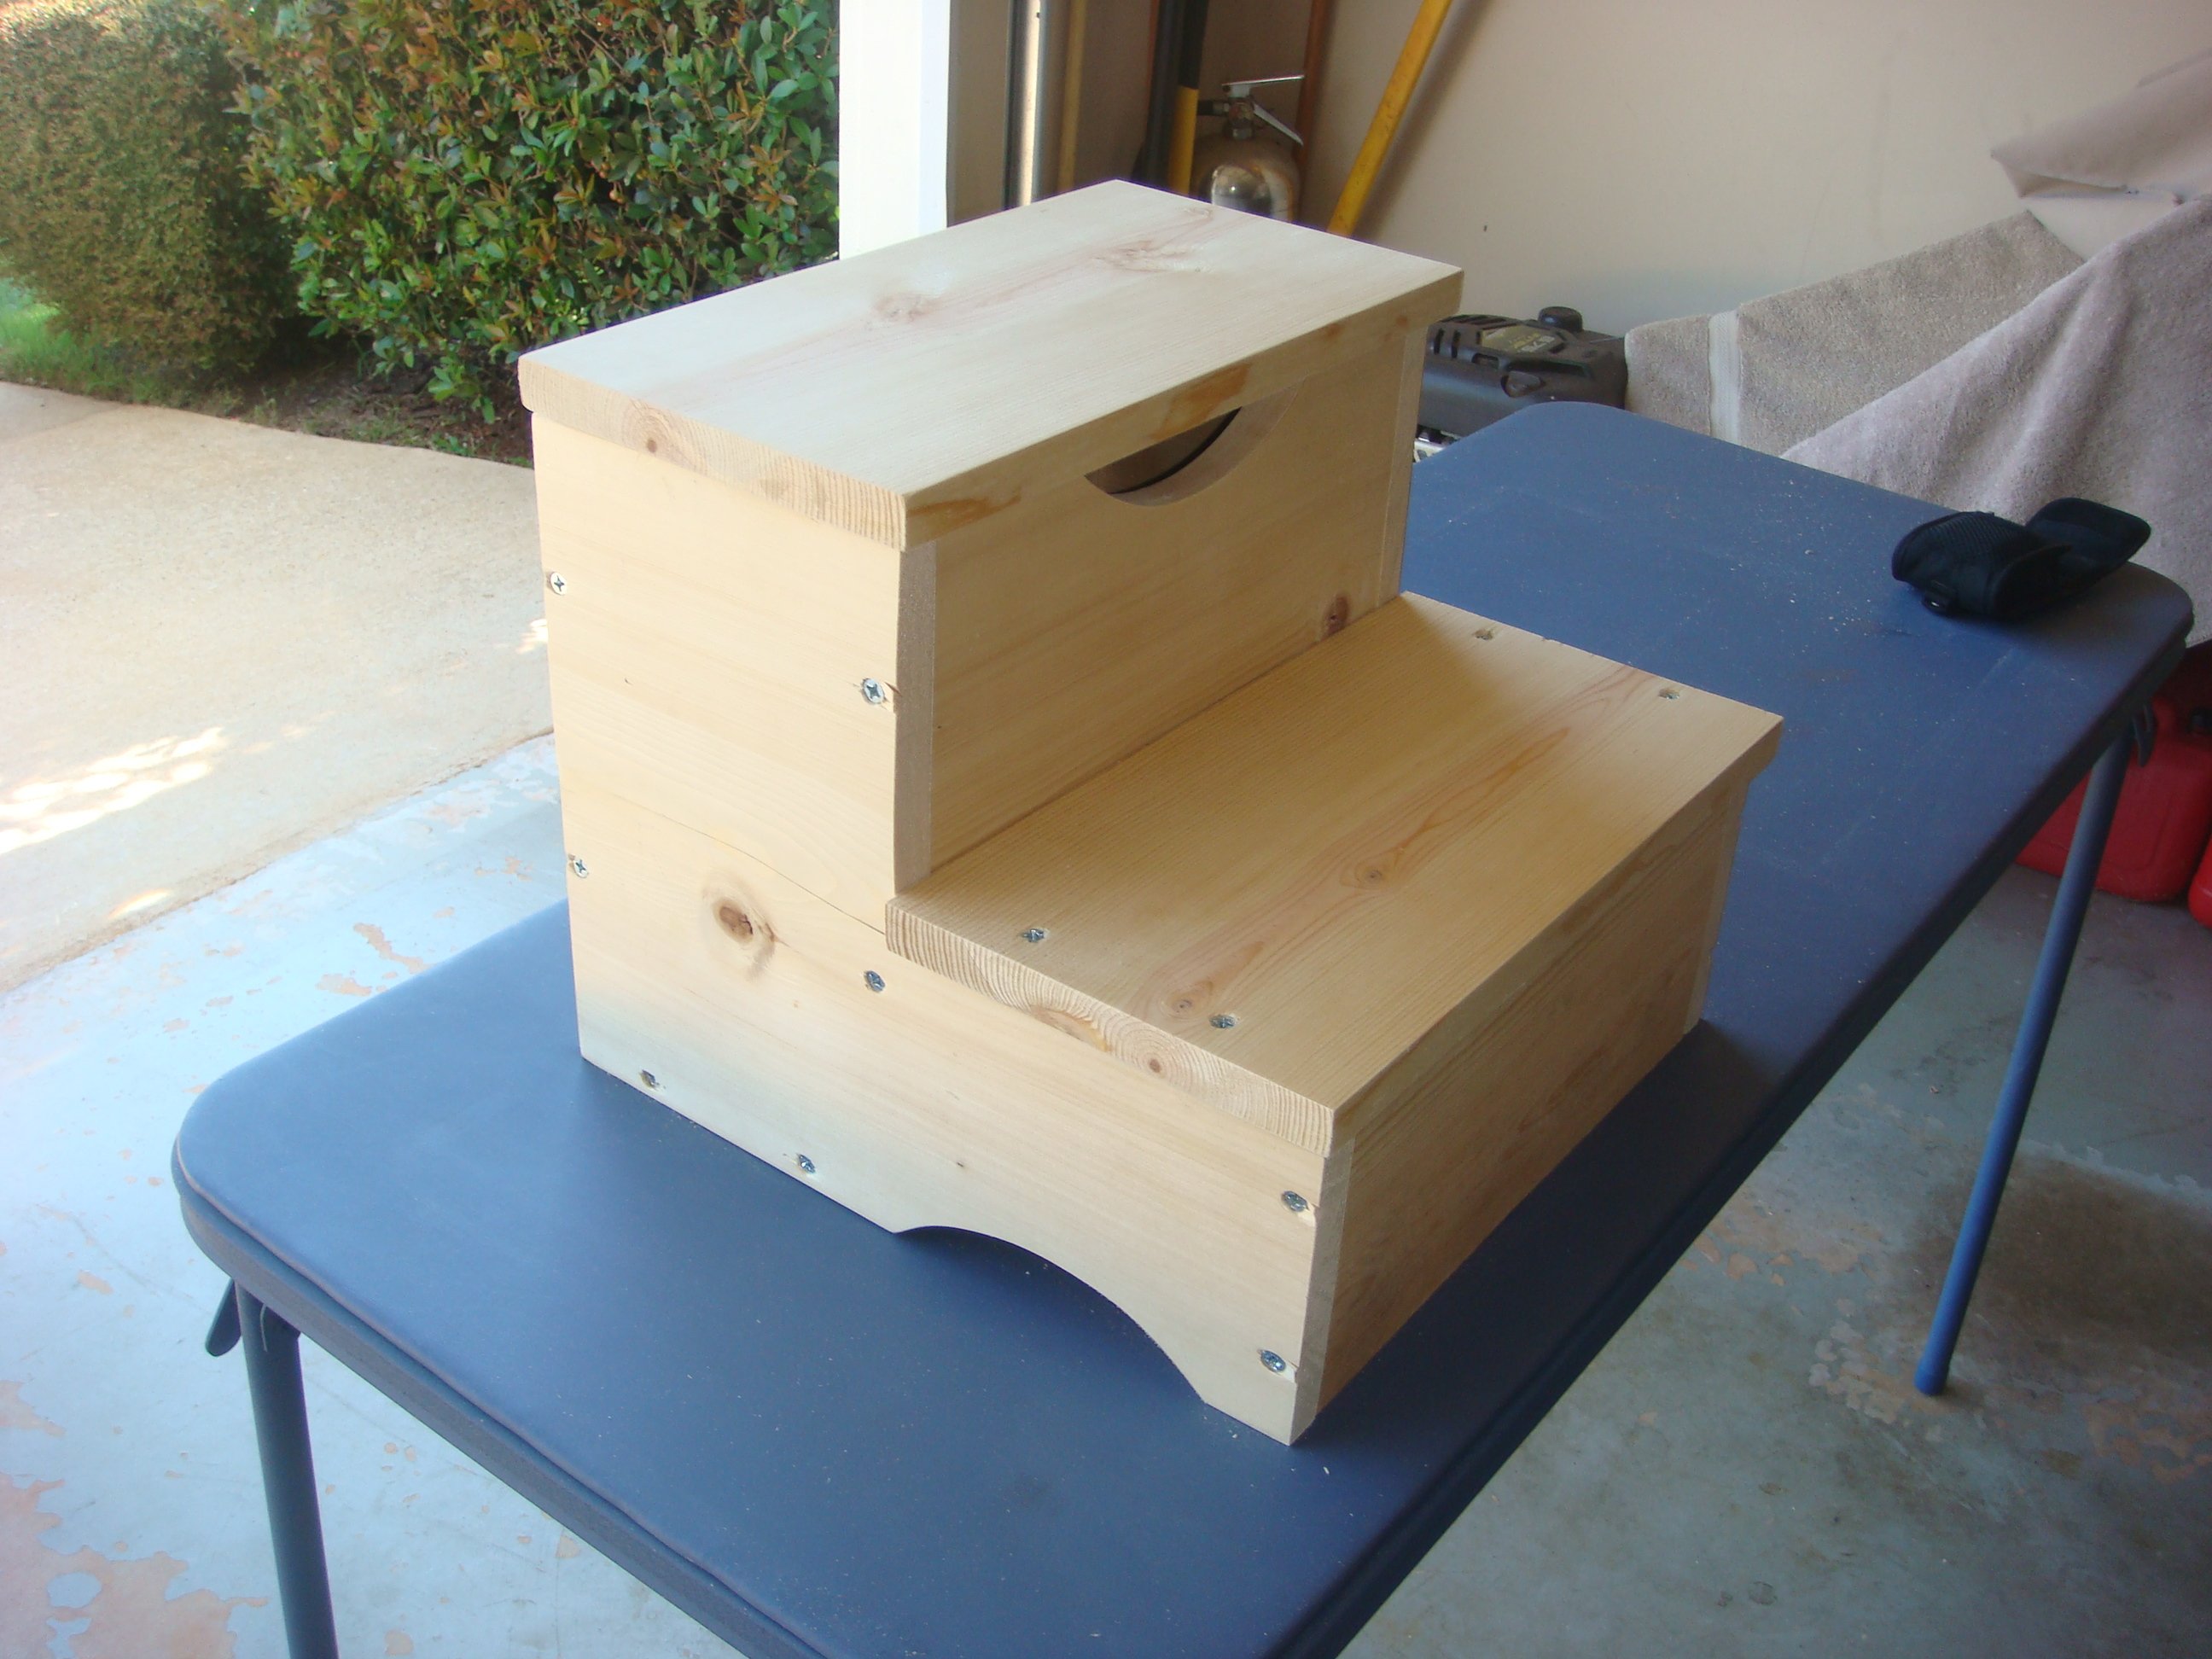
I made matching step stools for my kids.
Built from Plan(s)
Estimated Time Investment
Afternoon Project (3-6 Hours)
Recommended Skill Level
Intermediate
I made matching step stools for my kids.
This was the first table i built a couple of years ago at the age of 19, it is just a simple trestle leg table made from white oak. The dimensions are 10 feet long by 3 feet wide.
I built this for my mom's guest room. She watched my kids and I worked in the garage.. couldn't have been a better vacation! :)
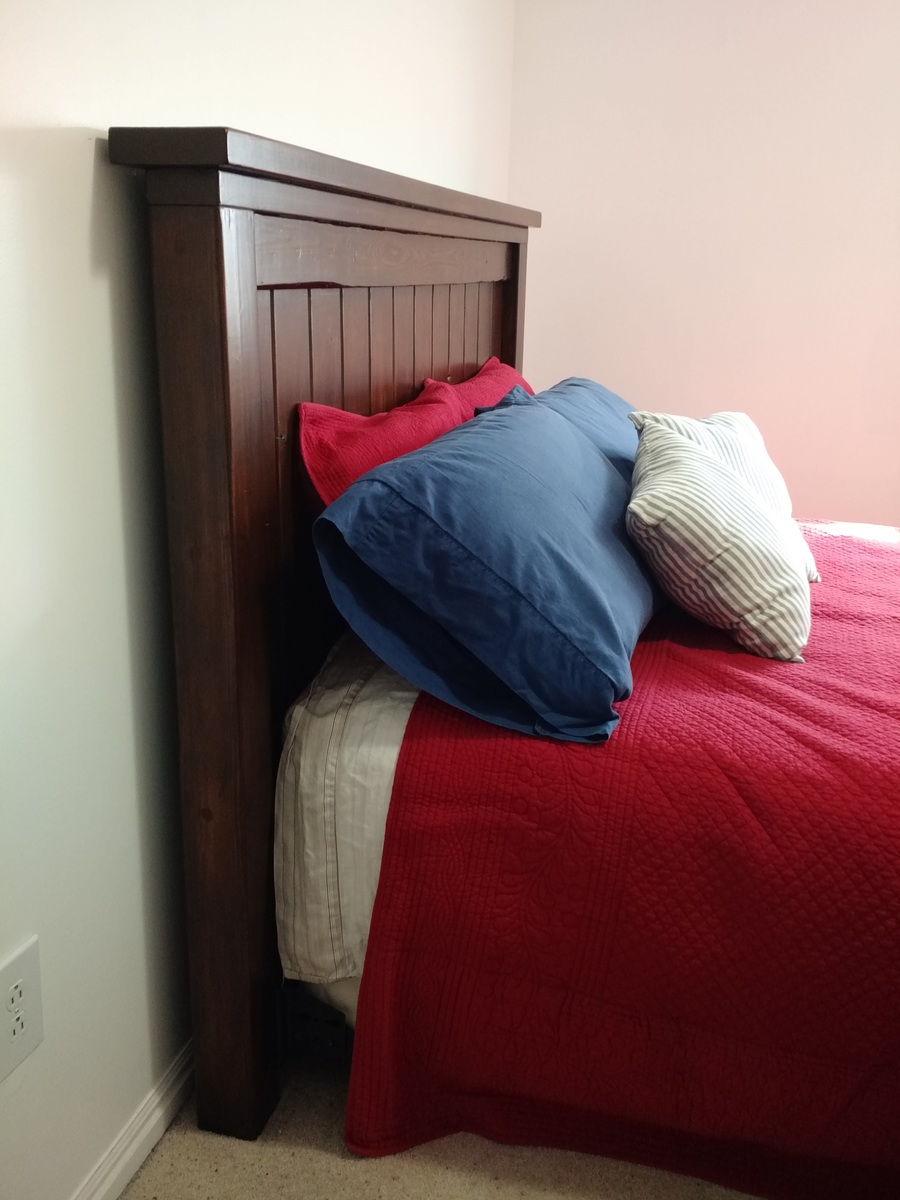
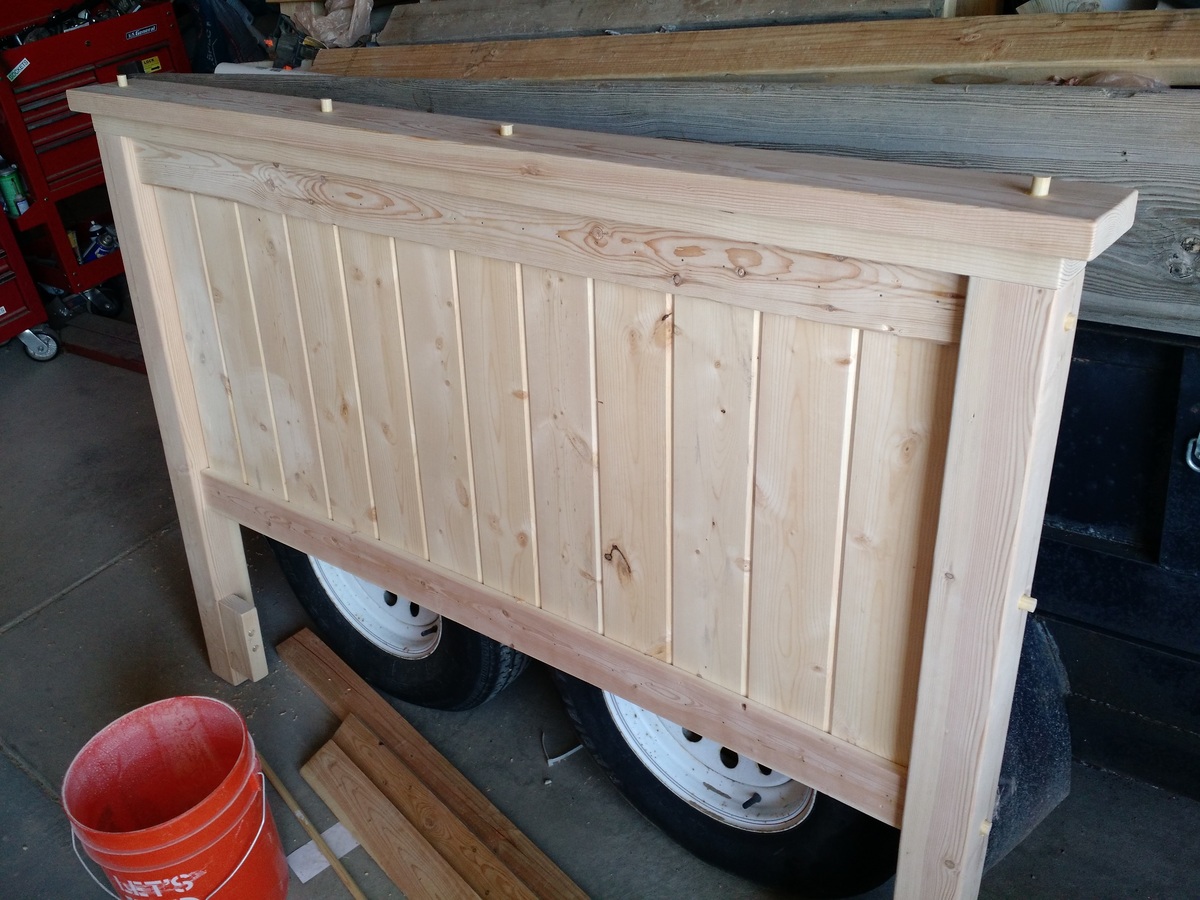
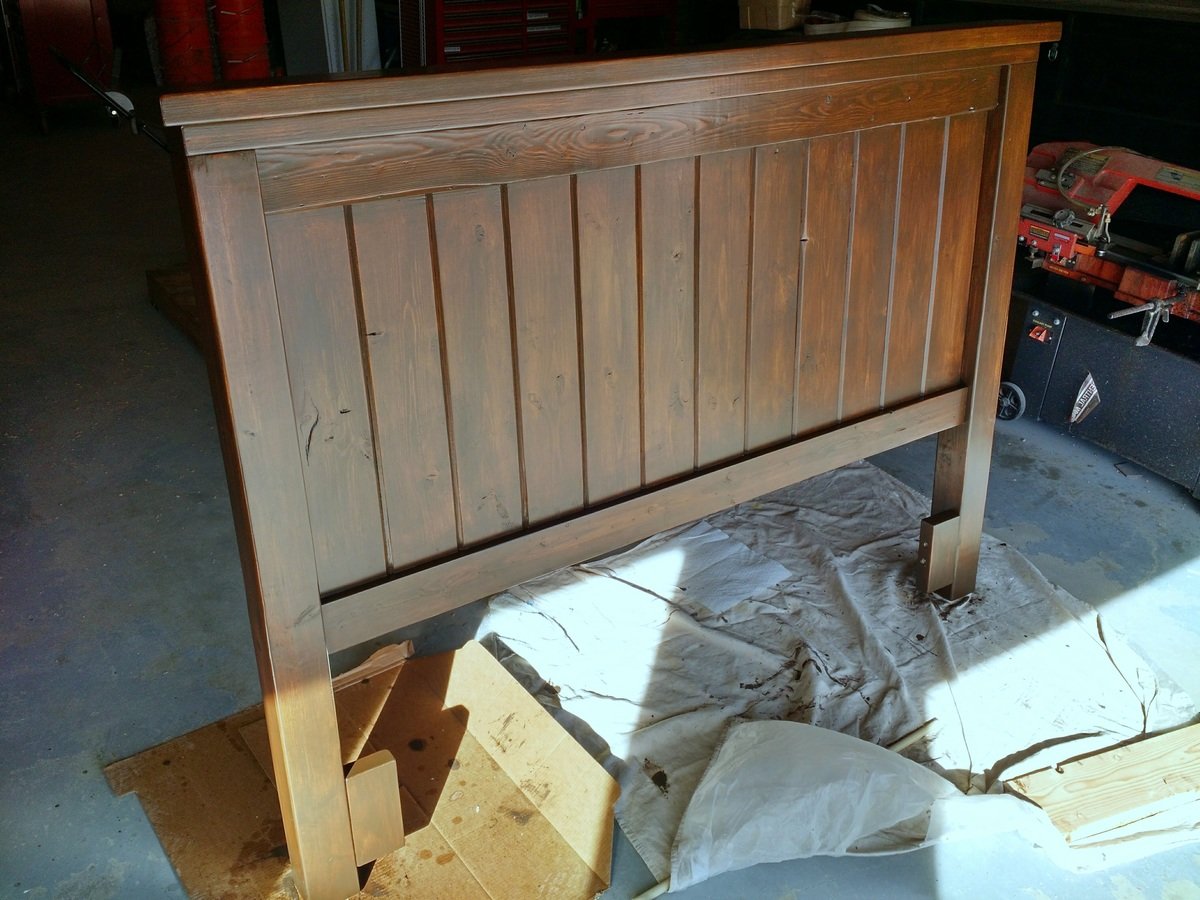
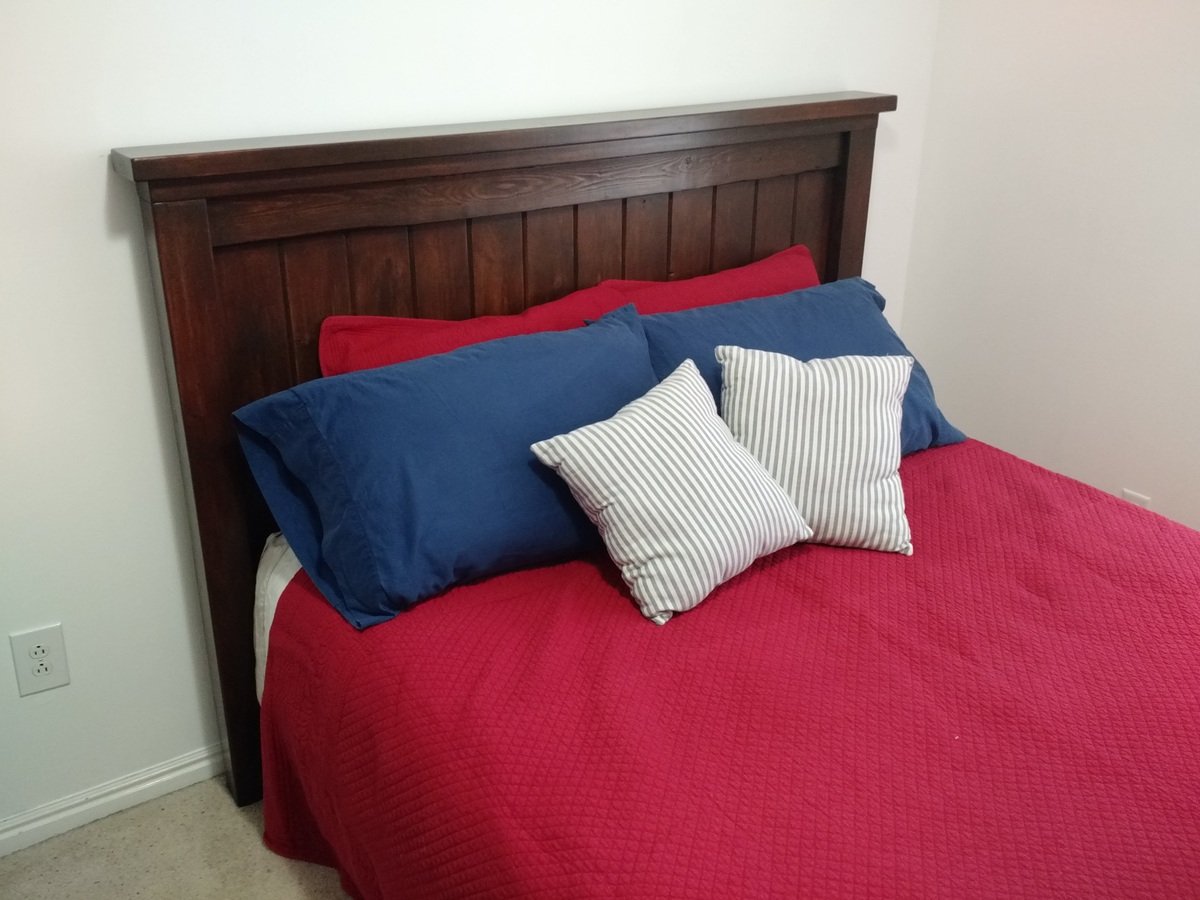
I used 6" (finished size 5") tongue and groove boards for the panel, shorter posts and screwed main structure pieces together using 5-1/2" lag bolts and plugging with 3/4" dowel pieces. I added woodedn blocks at the bottom of posts for attaching metal bed frame.
My dad didn't have any pipe clamps so I ended up using a wratcheting strap! HA! Use what you can and save money! :)

Love this project! Quick, easy and beautiful.
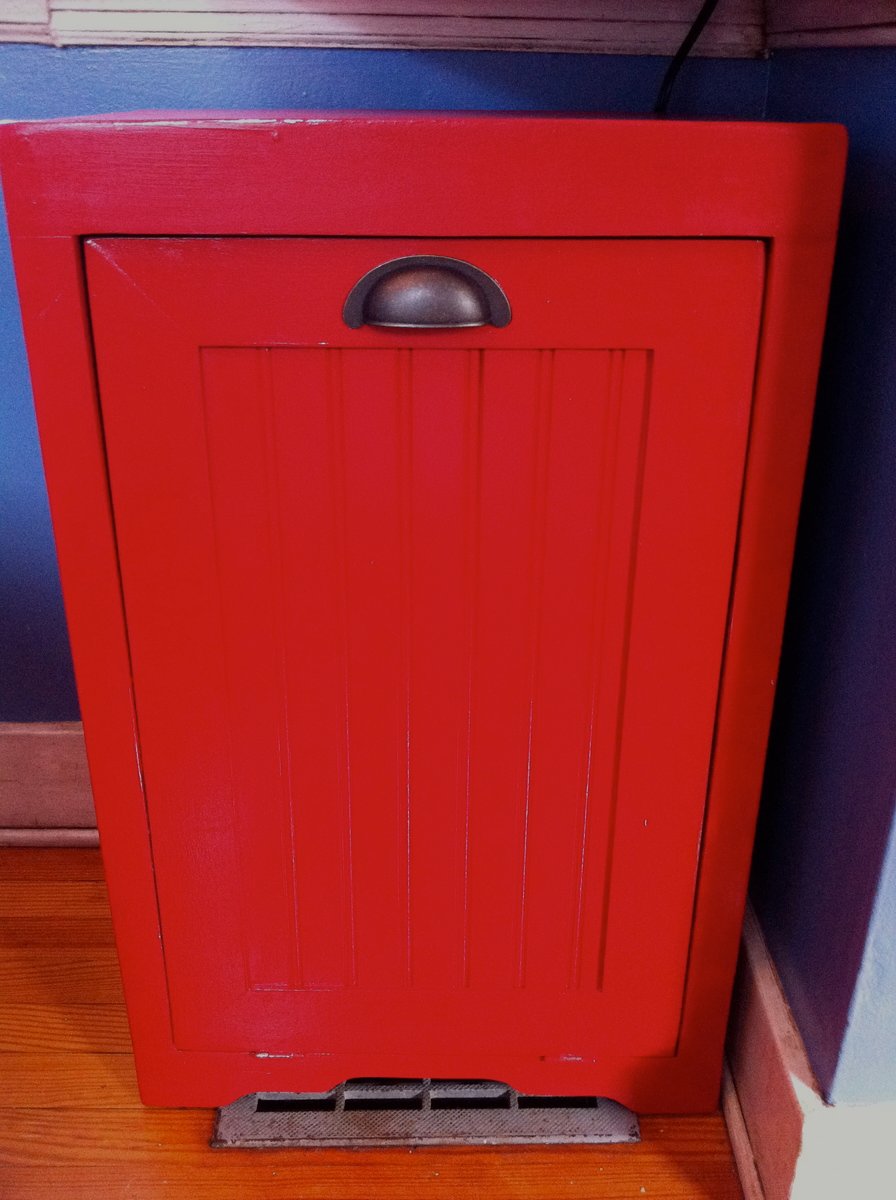
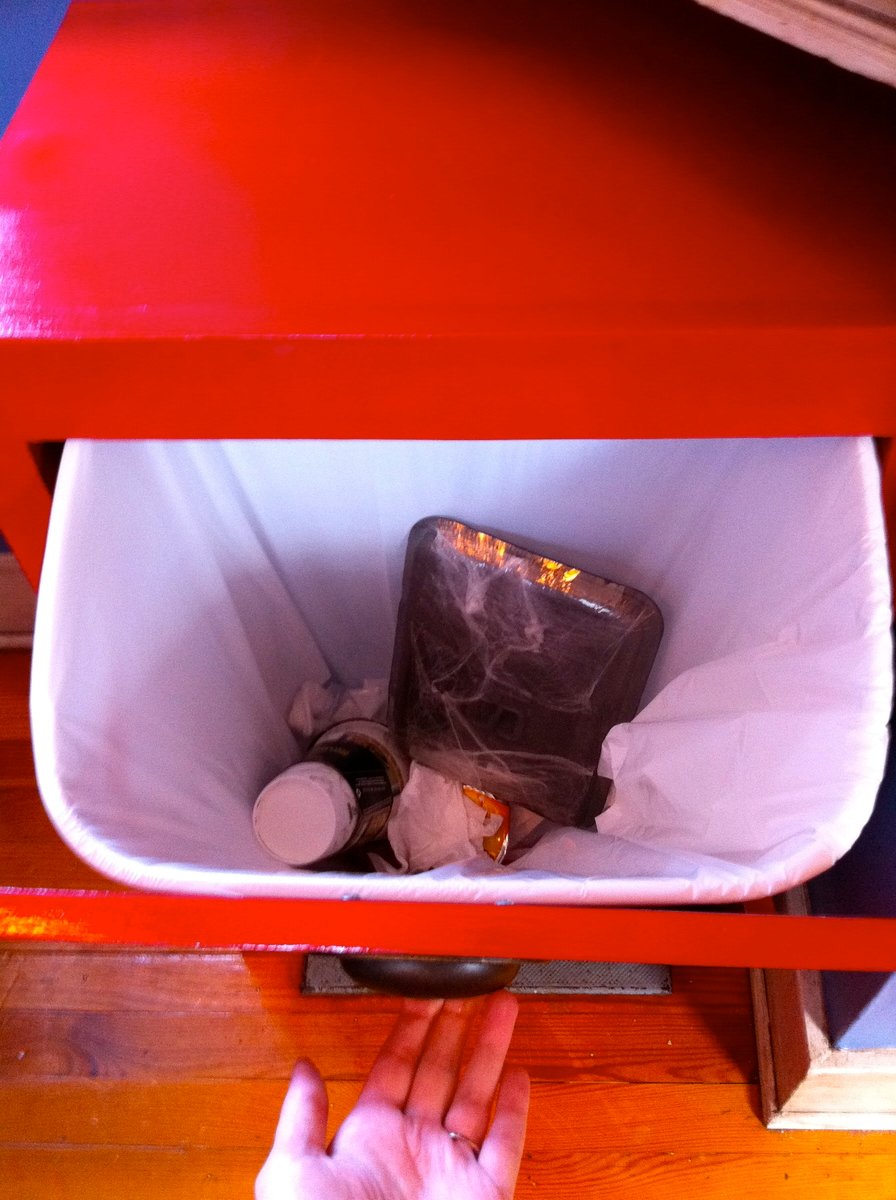
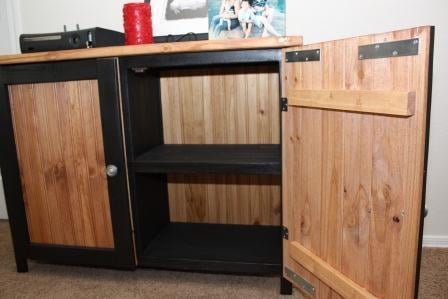
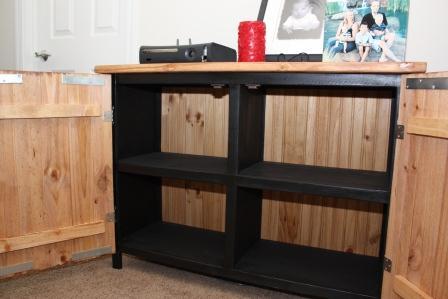
We built this tilt-out cabinet for our trash and plan to build a matching one for our recycling. We modified it a little and used bead board on the face of the cabinet to match some other elements in our kitchen. We painted it bright red using some leftover paint and absolutely love it!
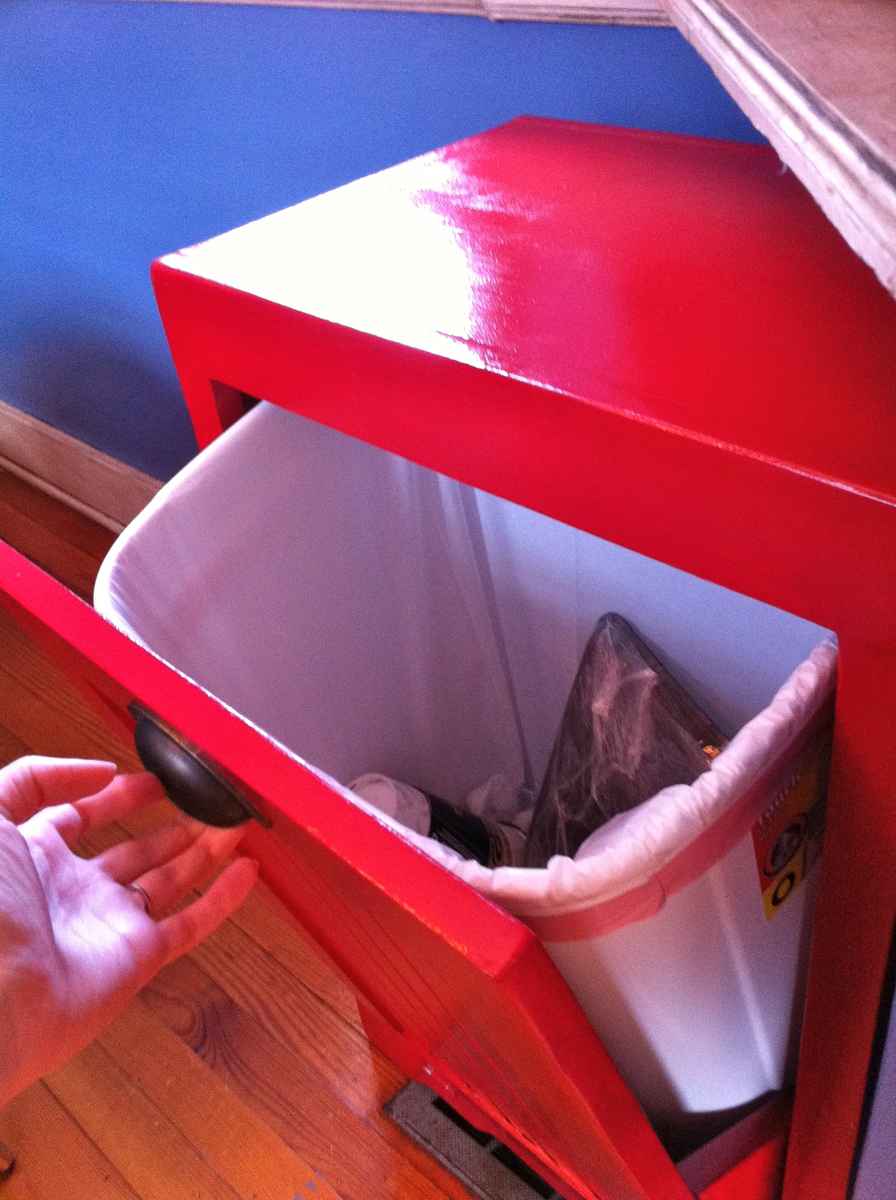
We ended up not using any mechanism to prevent the drawer from falling to the ground - the trash can we purchased is JUST big enough that it stops the drawer from opening all the way, which is great!
There are more pictures below and on our blog, http://strawbridgestuff.com

In reply to plans by project maker
Thu, 03/01/2012 - 09:40
We used Ana's plan for a tilt-out trash can, http://ana-white.com/2011/04/wood-tilt-out-trash-or-recycling-cabinet, and just used some beadboard paneling instead of doing the raised panel on the door. Hope that helps!
Fri, 09/07/2012 - 12:35
Your trash bin looks great. I too love the beadboard. I am putting a lot of beadboard in a small house I am planning on renting until my kids are out of college, then I want to make it into a place I can teach sewing and make furniture covers.
Thu, 10/29/2015 - 08:51
Is there a sketchup file for this plan? I would like to modify it alittle but it would take me awhile to reproduce due to my bad sketchup skills.
Thanks!

Sun, 03/27/2016 - 01:31
I love this! I live in a one bedroom apartment and I just have a space between the fridge and a cabinet for pots and pans where the bin sits. I've always found this ugly to be honest but haven't known how to change it but this is perfect, thank you!
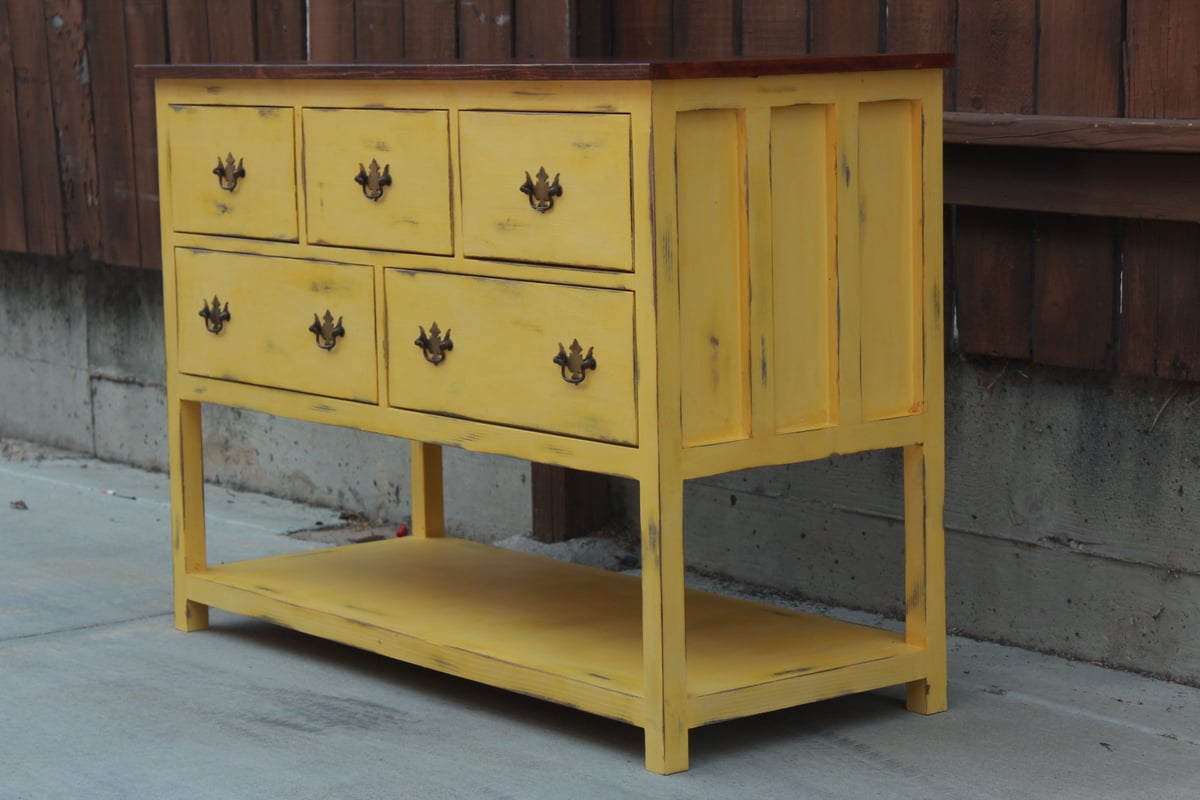
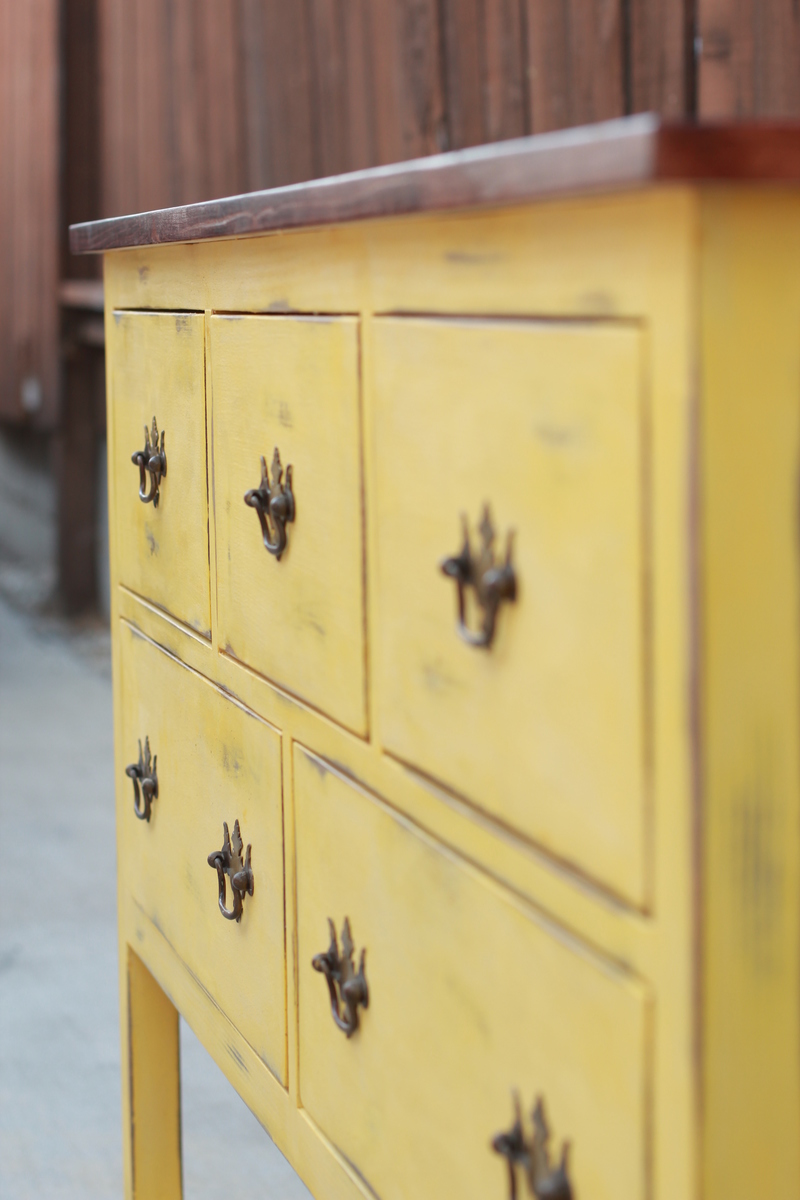
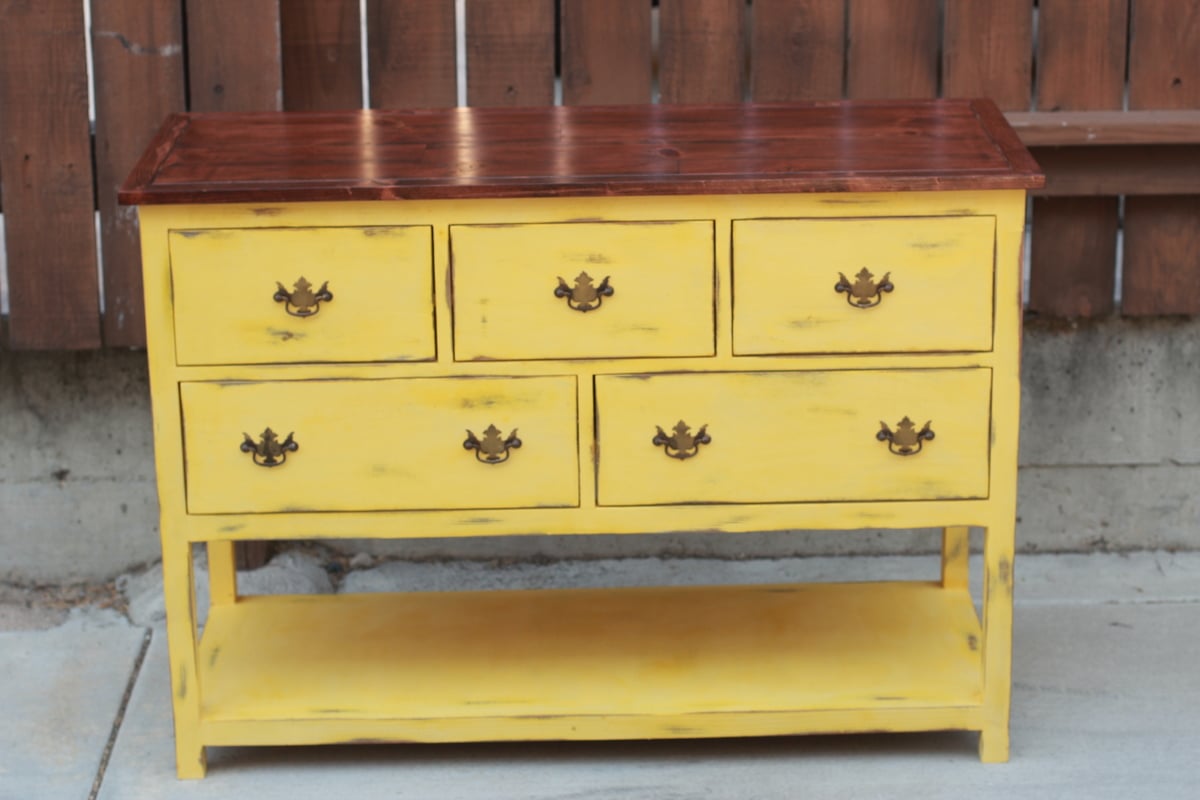
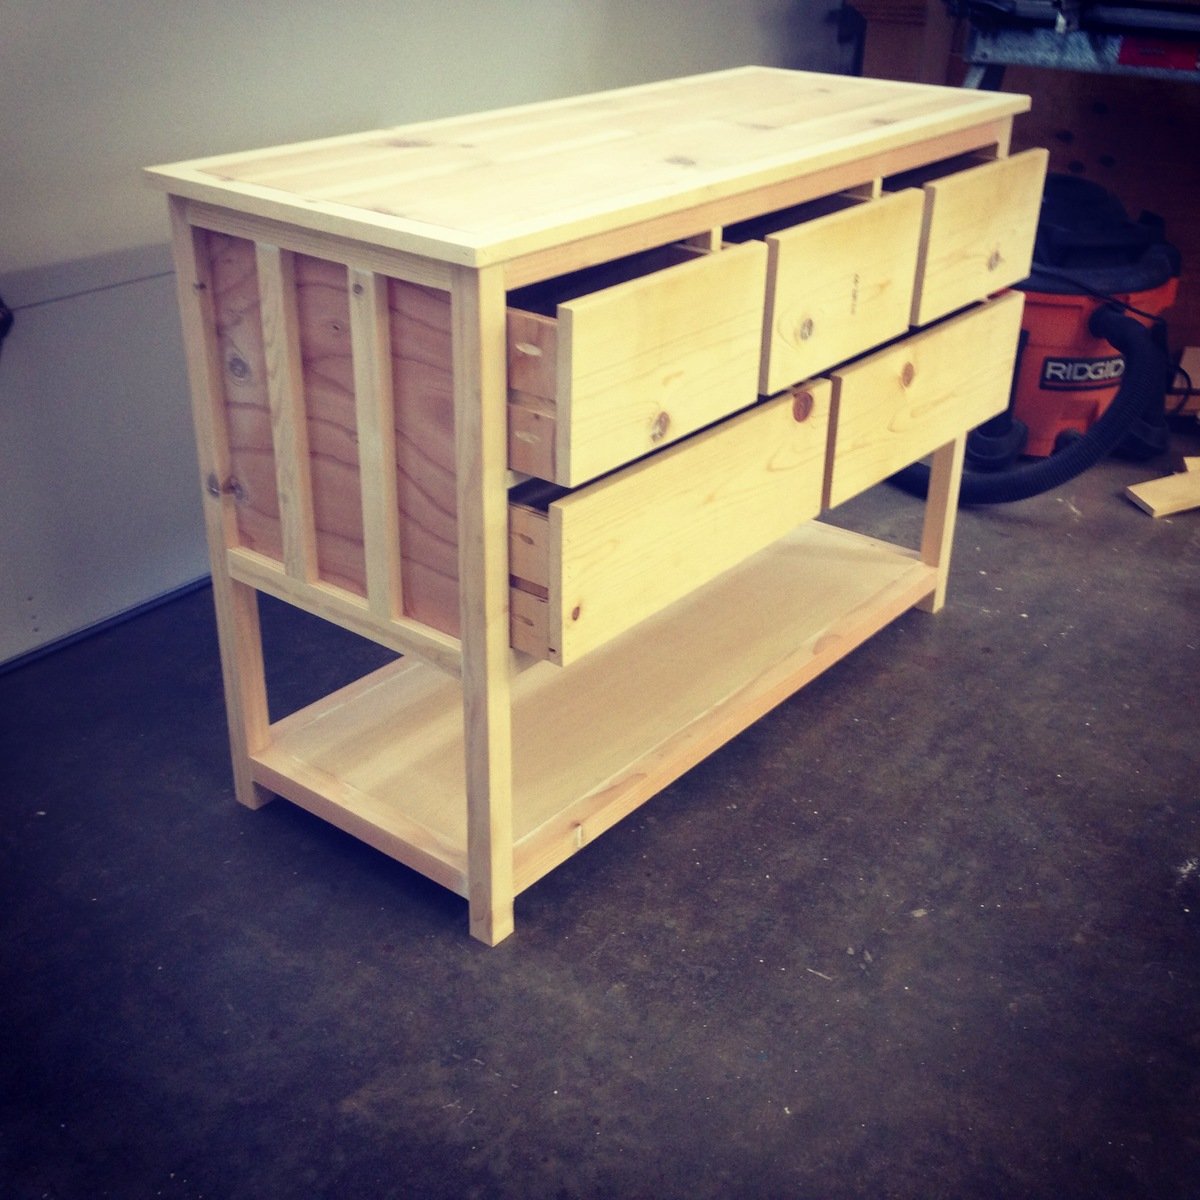
This is a country style dresser I built from one of ana's plans. I slightly modified the top and the dimensions to fit my needs. Painting this dresser was the biggest challenge. First I stained the entire dresser, then I applied 3 coats of ce ce caldwells chalk paint. I then used a wet rag to wipe away the yellow in areas I wanted distressed. Last I applied a paste wax to seal it.


This is my first furniture build! I am thrilled with the way it turned out, and now I am totally addicted. It's going into my son's room.
Mon, 11/16/2015 - 12:47
Perfection, thanks for sharing your first build! Can't wait to see what's next!

I am so happy with how this shelving unit turned out! I adapted Ana's plans to the size of our closet space - the shelves are actually 33" deep. One side of the wall is studs, which is how I secured the unit. Now we can put away all of our Christmas decorations!
This might be my proudest build to date...crazy since it's just a closet shelving unit :D

Fri, 01/04/2019 - 13:32
This is perfect for your space! I know how that is, sometimes a simple project can be the best! Thank you so much for sharing a photo and using our plans. We appreciate you! Ana
One of my first projects and first attempt at sewing since 7th grade!
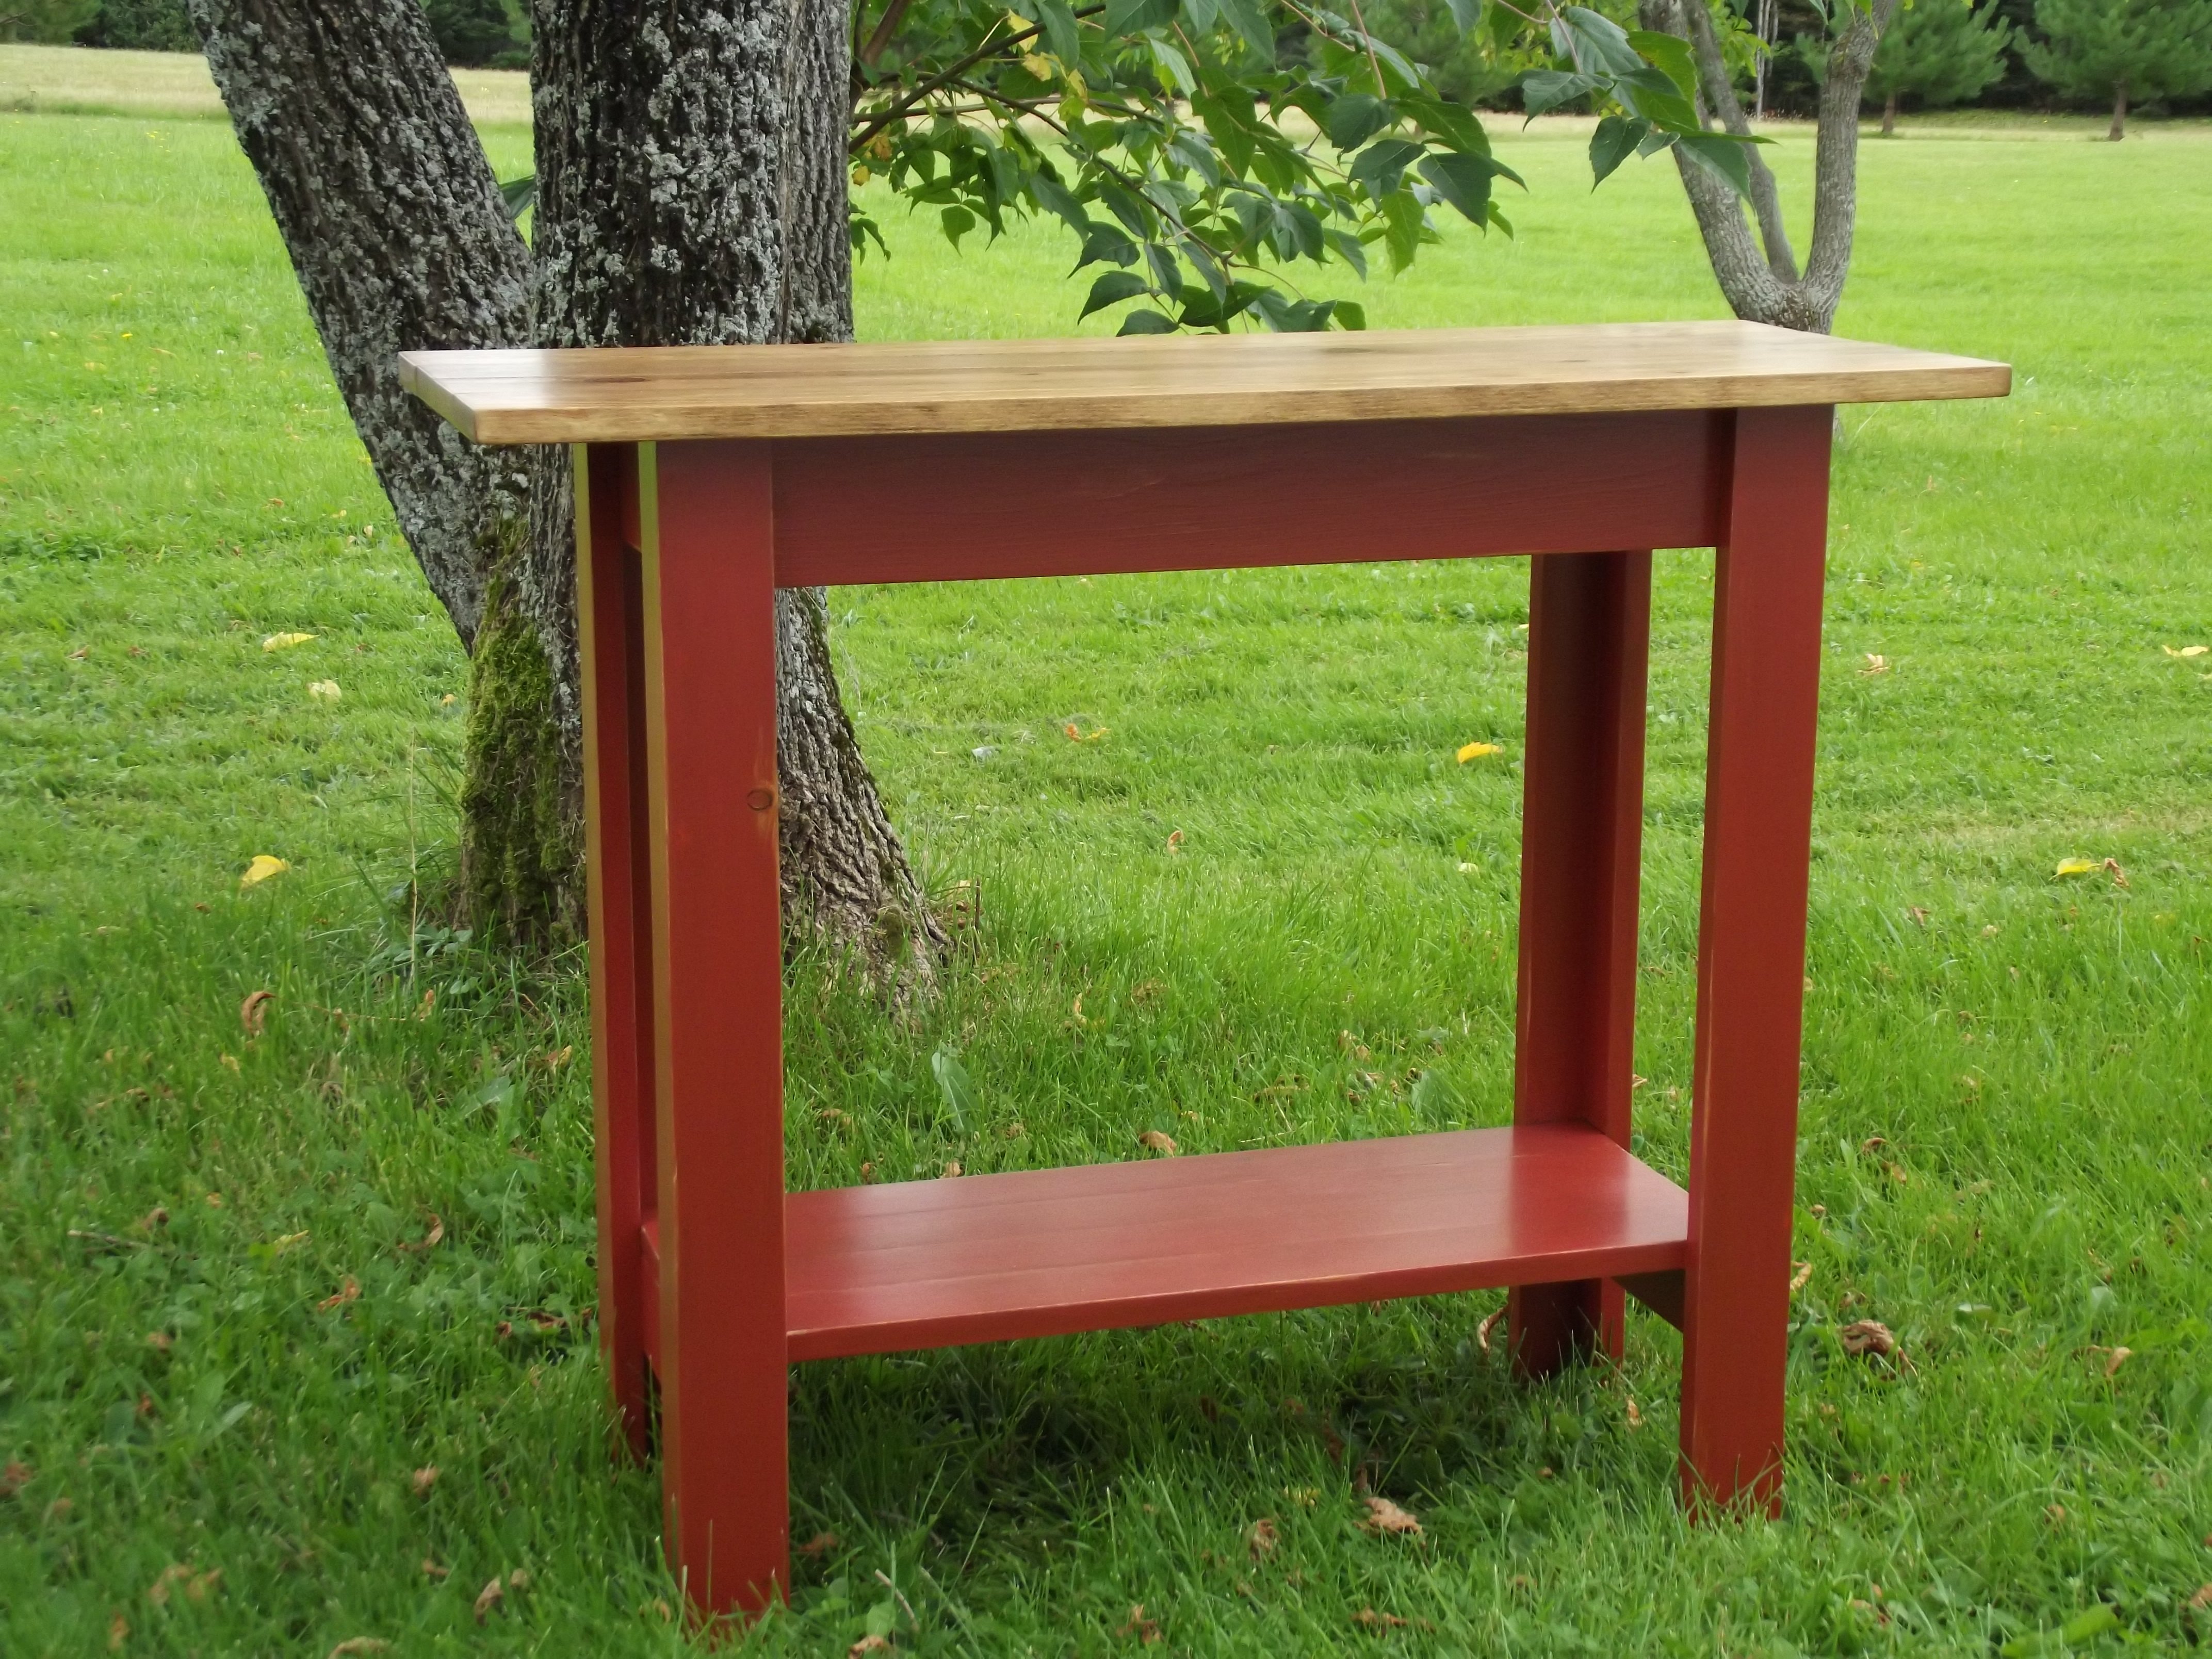
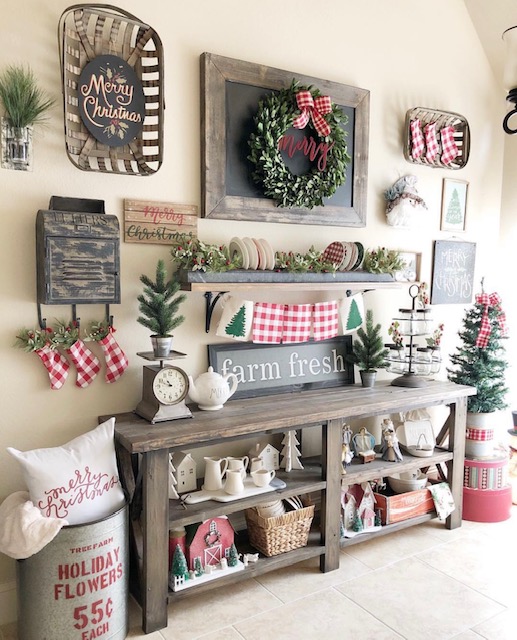
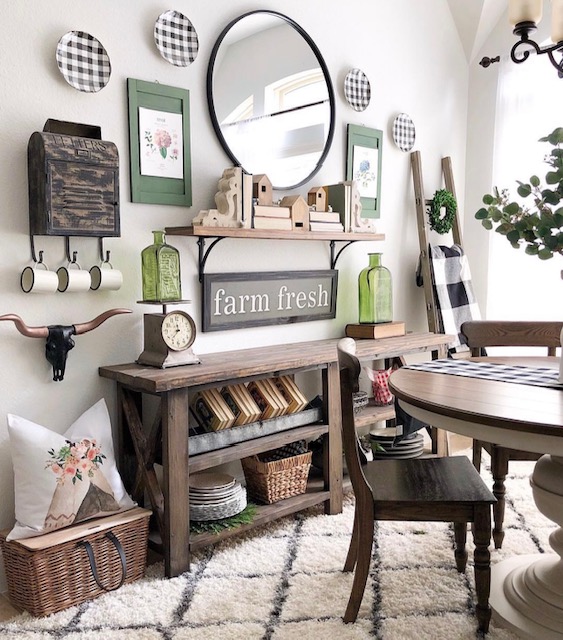
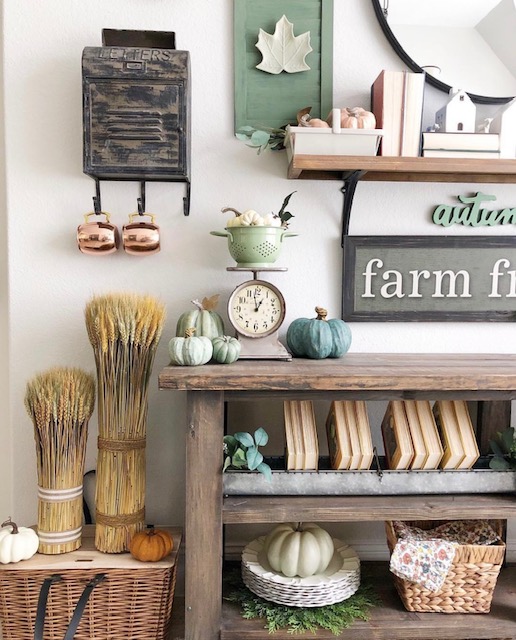
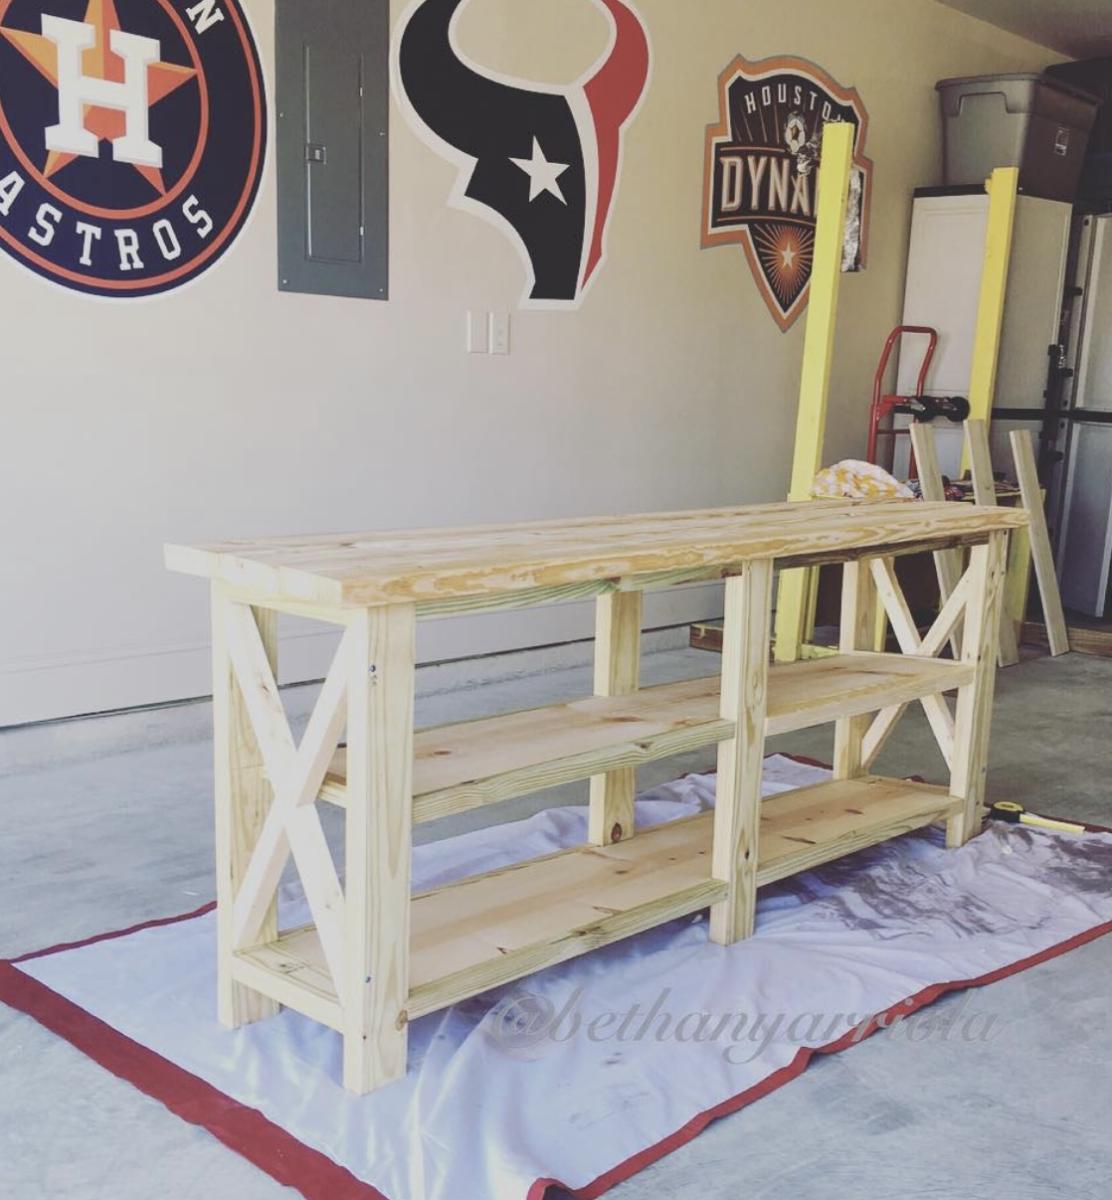
I used Ana's plans for the Simple, Cheap and Easy Console Table and modified it. I used 1x4 boards for the top of my table and added a bottom shelf using 1x3s. The top is stained with Minwax Early American and the bottom of the table has 2 coats of red paint and a chocolate glaze. I lightly sanded some areas of the table (it was my first time distressing a piece of furniture so I didn't want to overdo it) and then I used a chocolate glaze to get a distressed look. I finished it with 3 coats of Polyurethane.

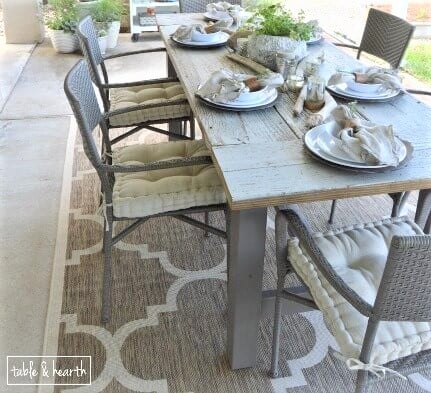
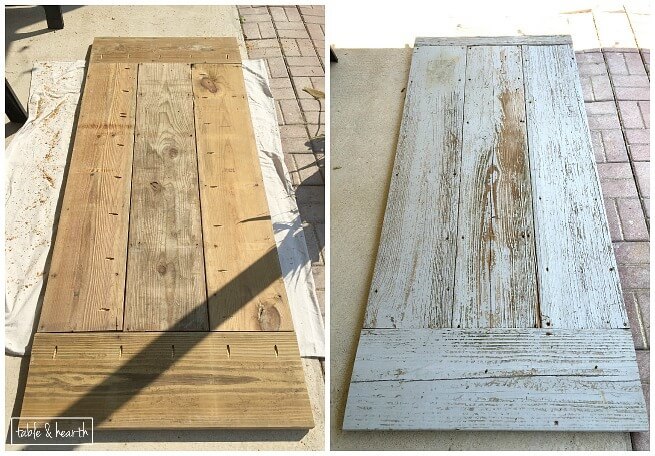
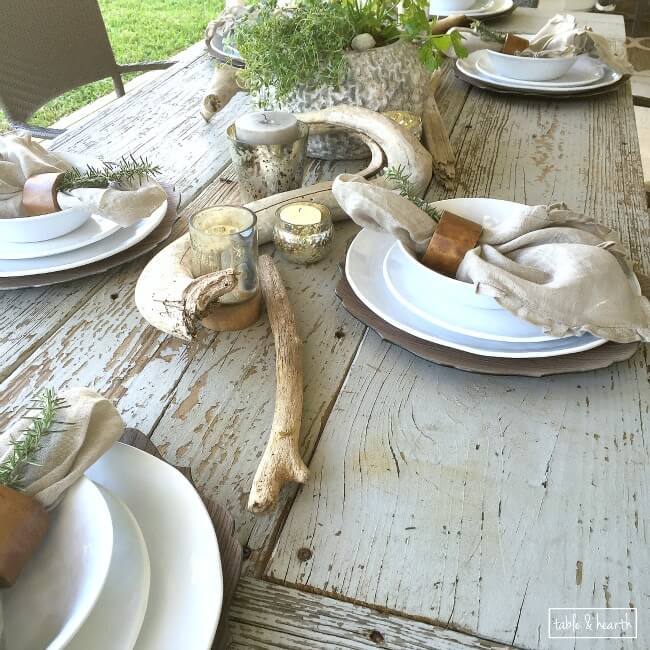
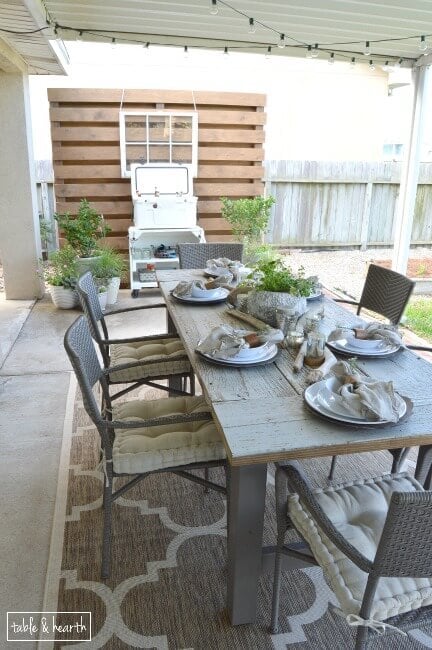
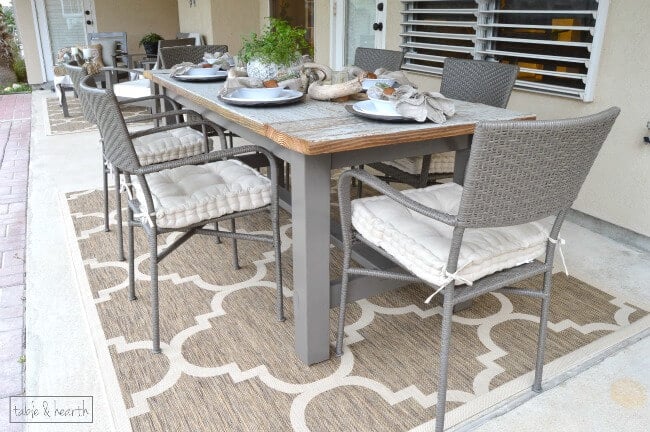
We found this beautifully chippy lumber on the side of the road and snagged it knowing it would make a perfect table top someday. When I decided to build a table for our back patio makeover, I knew exactly what I had to make the top out of.
This was my very first build and the pocket hole plans made it so much easier than I thought it would be! I built the top first then modified the cut list dimensions based on the top. I also flipped the ends around so the braces would show on the inside instead of the outside.
I seriously can't get enough of the top, it's so pretty and I don't have to worry about it at all since it's already wonderfully rustic. The table fits six chairs perfectly. We are looking forward to having many evenings around this table with family and friends!

Fri, 09/30/2022 - 18:16
WOW, this is amazing, thank you so much for sharing your beautiful table!
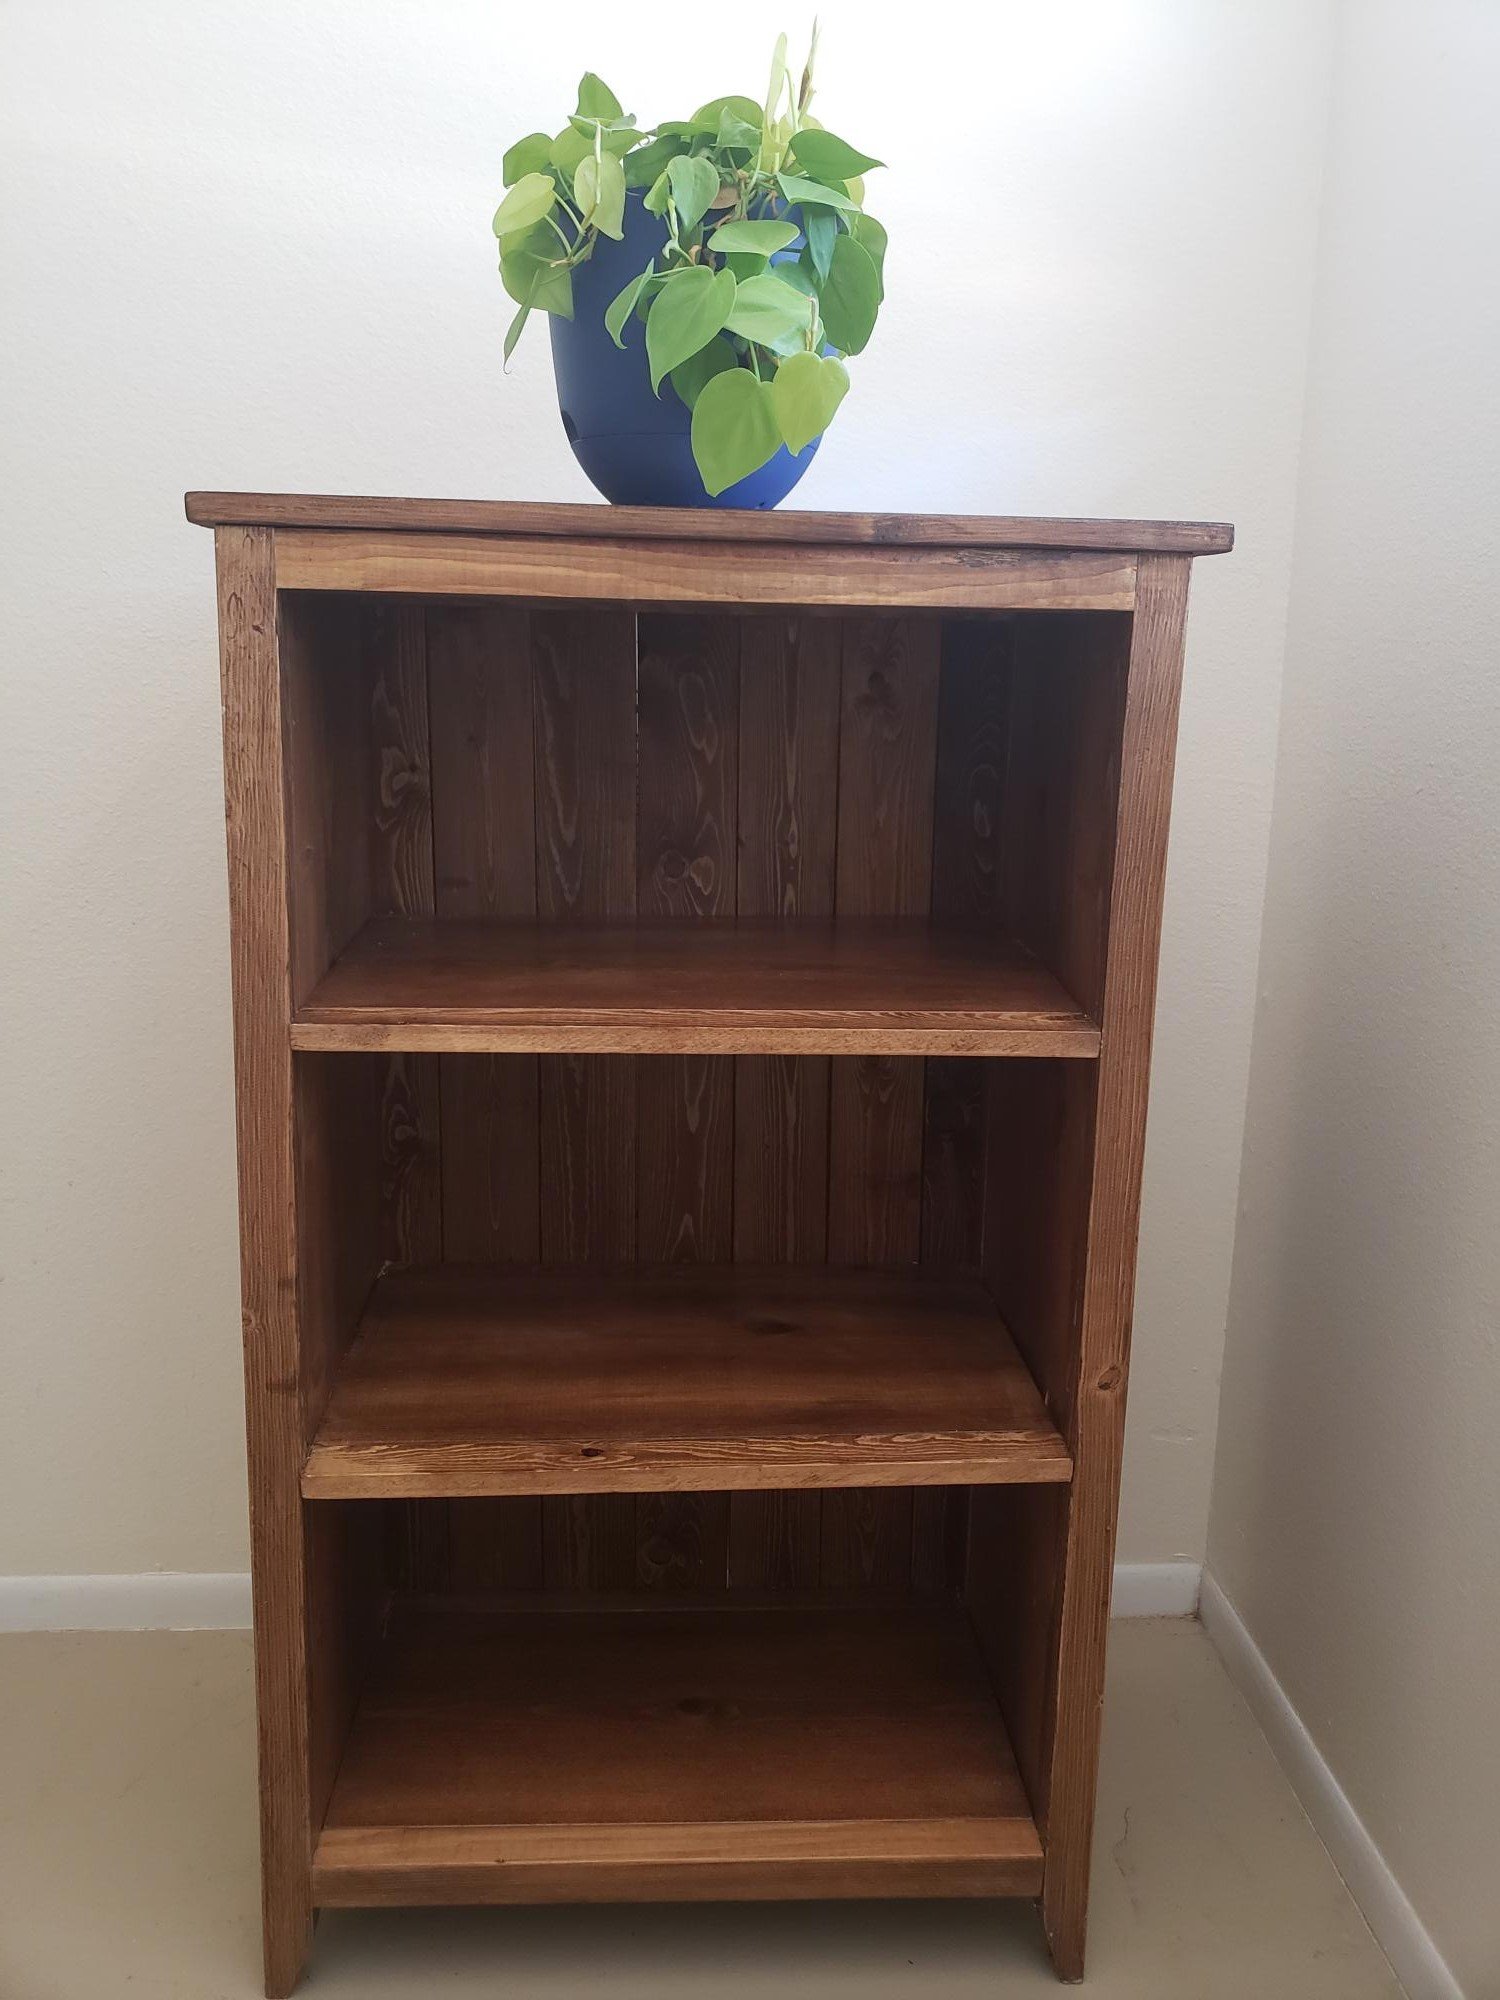
Made from pine with Special Walnut for the stain. I didn't need a tall bookshelf, so I modified a little. Thank you Ana!
Sun, 10/09/2022 - 20:35
Love this, and the finish is stunning! Thanks for sharing.
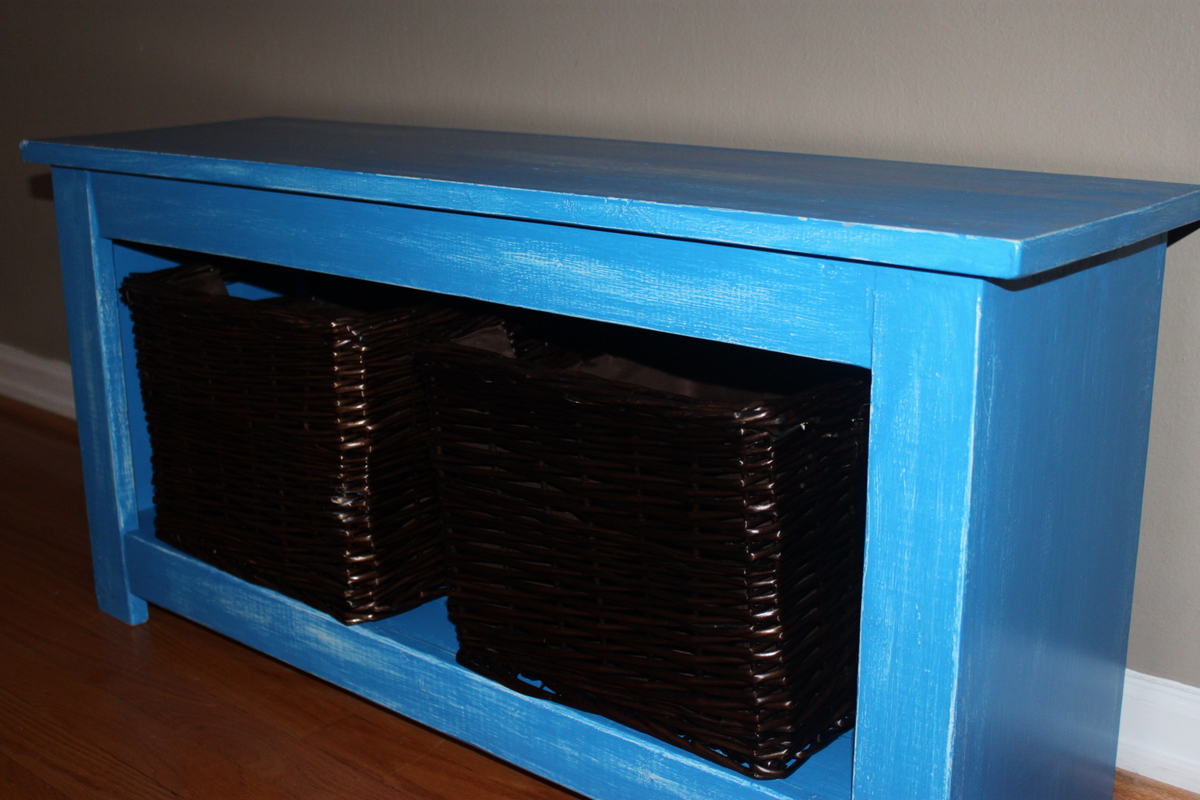
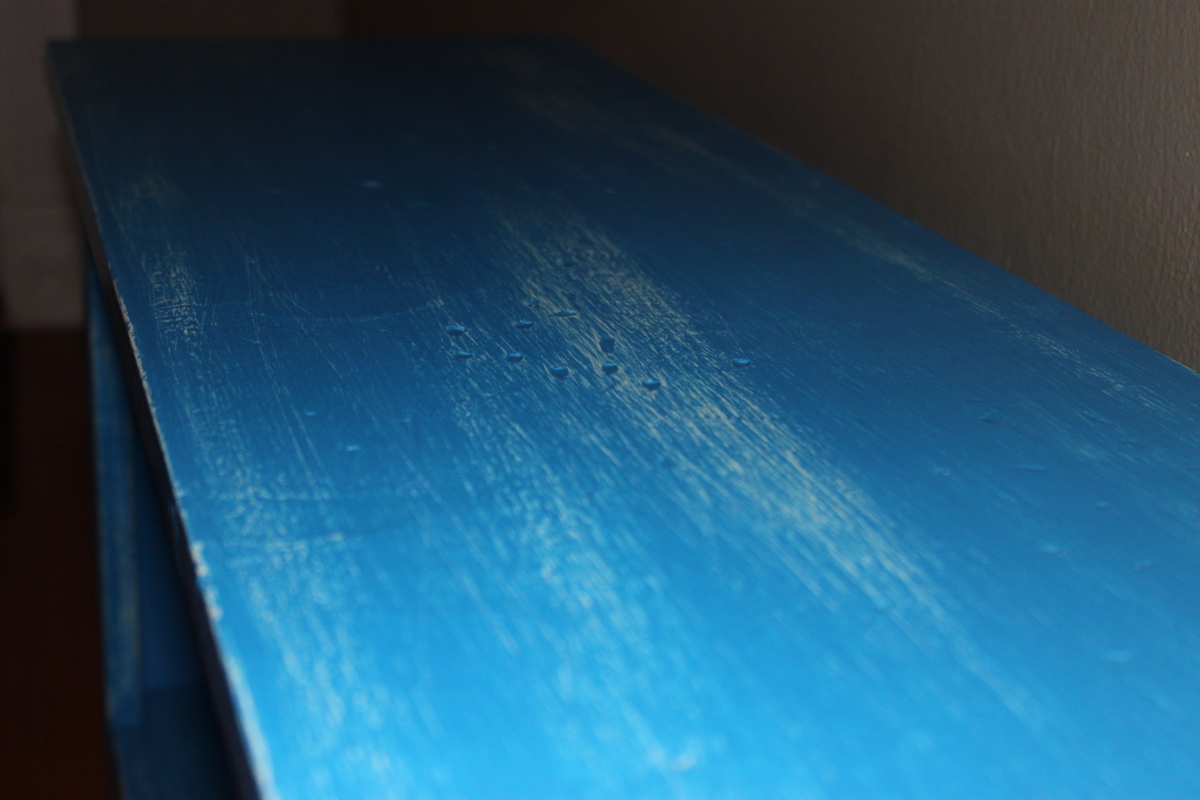
First project. Followed the plans exactly. Since it was my first project I used furring strips to save money. It still ended up costing me a bit for some extra tools (counter sink drill bits, wood filler, sanding paper). Used a cream color water based paint for the base coat followed by a very light coat of bright blue on top. I sanded it to the desired distressed look I wanted then sealed it with a clear coat.
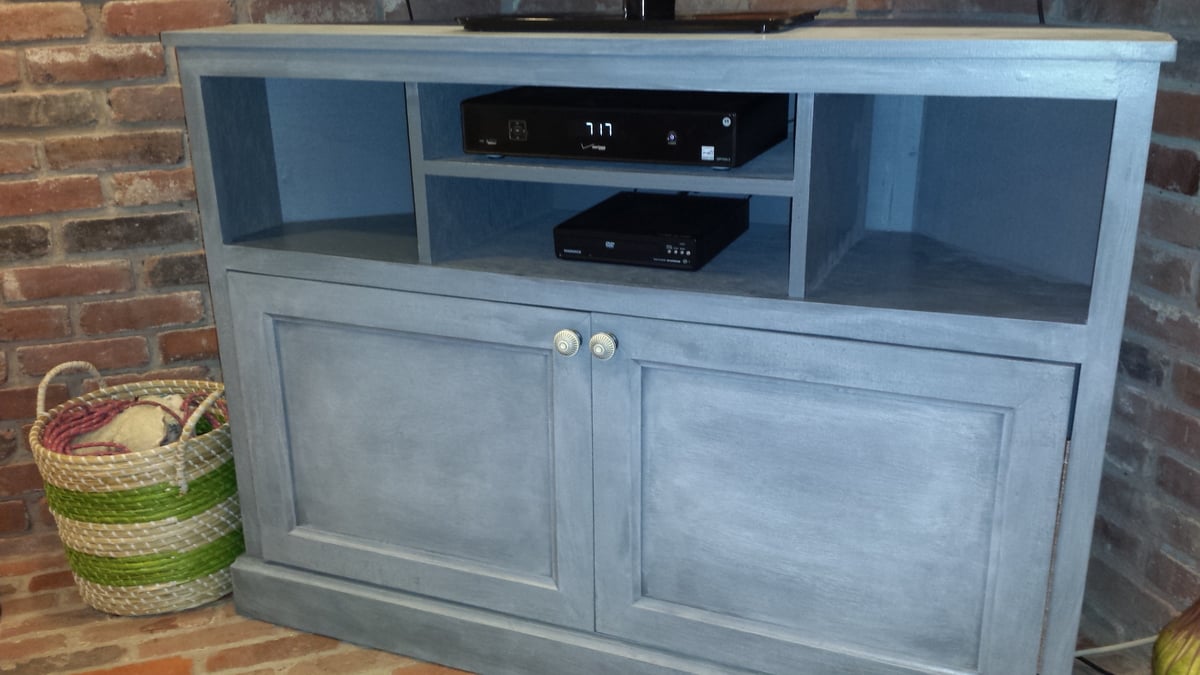
edited the plans a little bit because the original plans were too tall. my cabinet is only 36 inches high. I did the inlet doors but if I had to do it over again i would ABSOLUTELY do overlay doors to cover up any imperfections in the opening. this project is a little bulky to move around and therefore get the shelves level, at least it was for me.
Also, I cut the back two inch strips to fit more snuggly. I ripped one piece at a 45 so it fit more flush against the other 1X2 on the back. This cut around the back of the shelves better in my opinion but isn't necessary.
I chose to do a similar paint treatment. i sprayed on a nice dark grey with my wagner 590 sprayer and then did a white wash with a big 4inch brush and just brushing on liberally (and mostly dry)
GREAT Project and fits the space very well. THANK YOU!

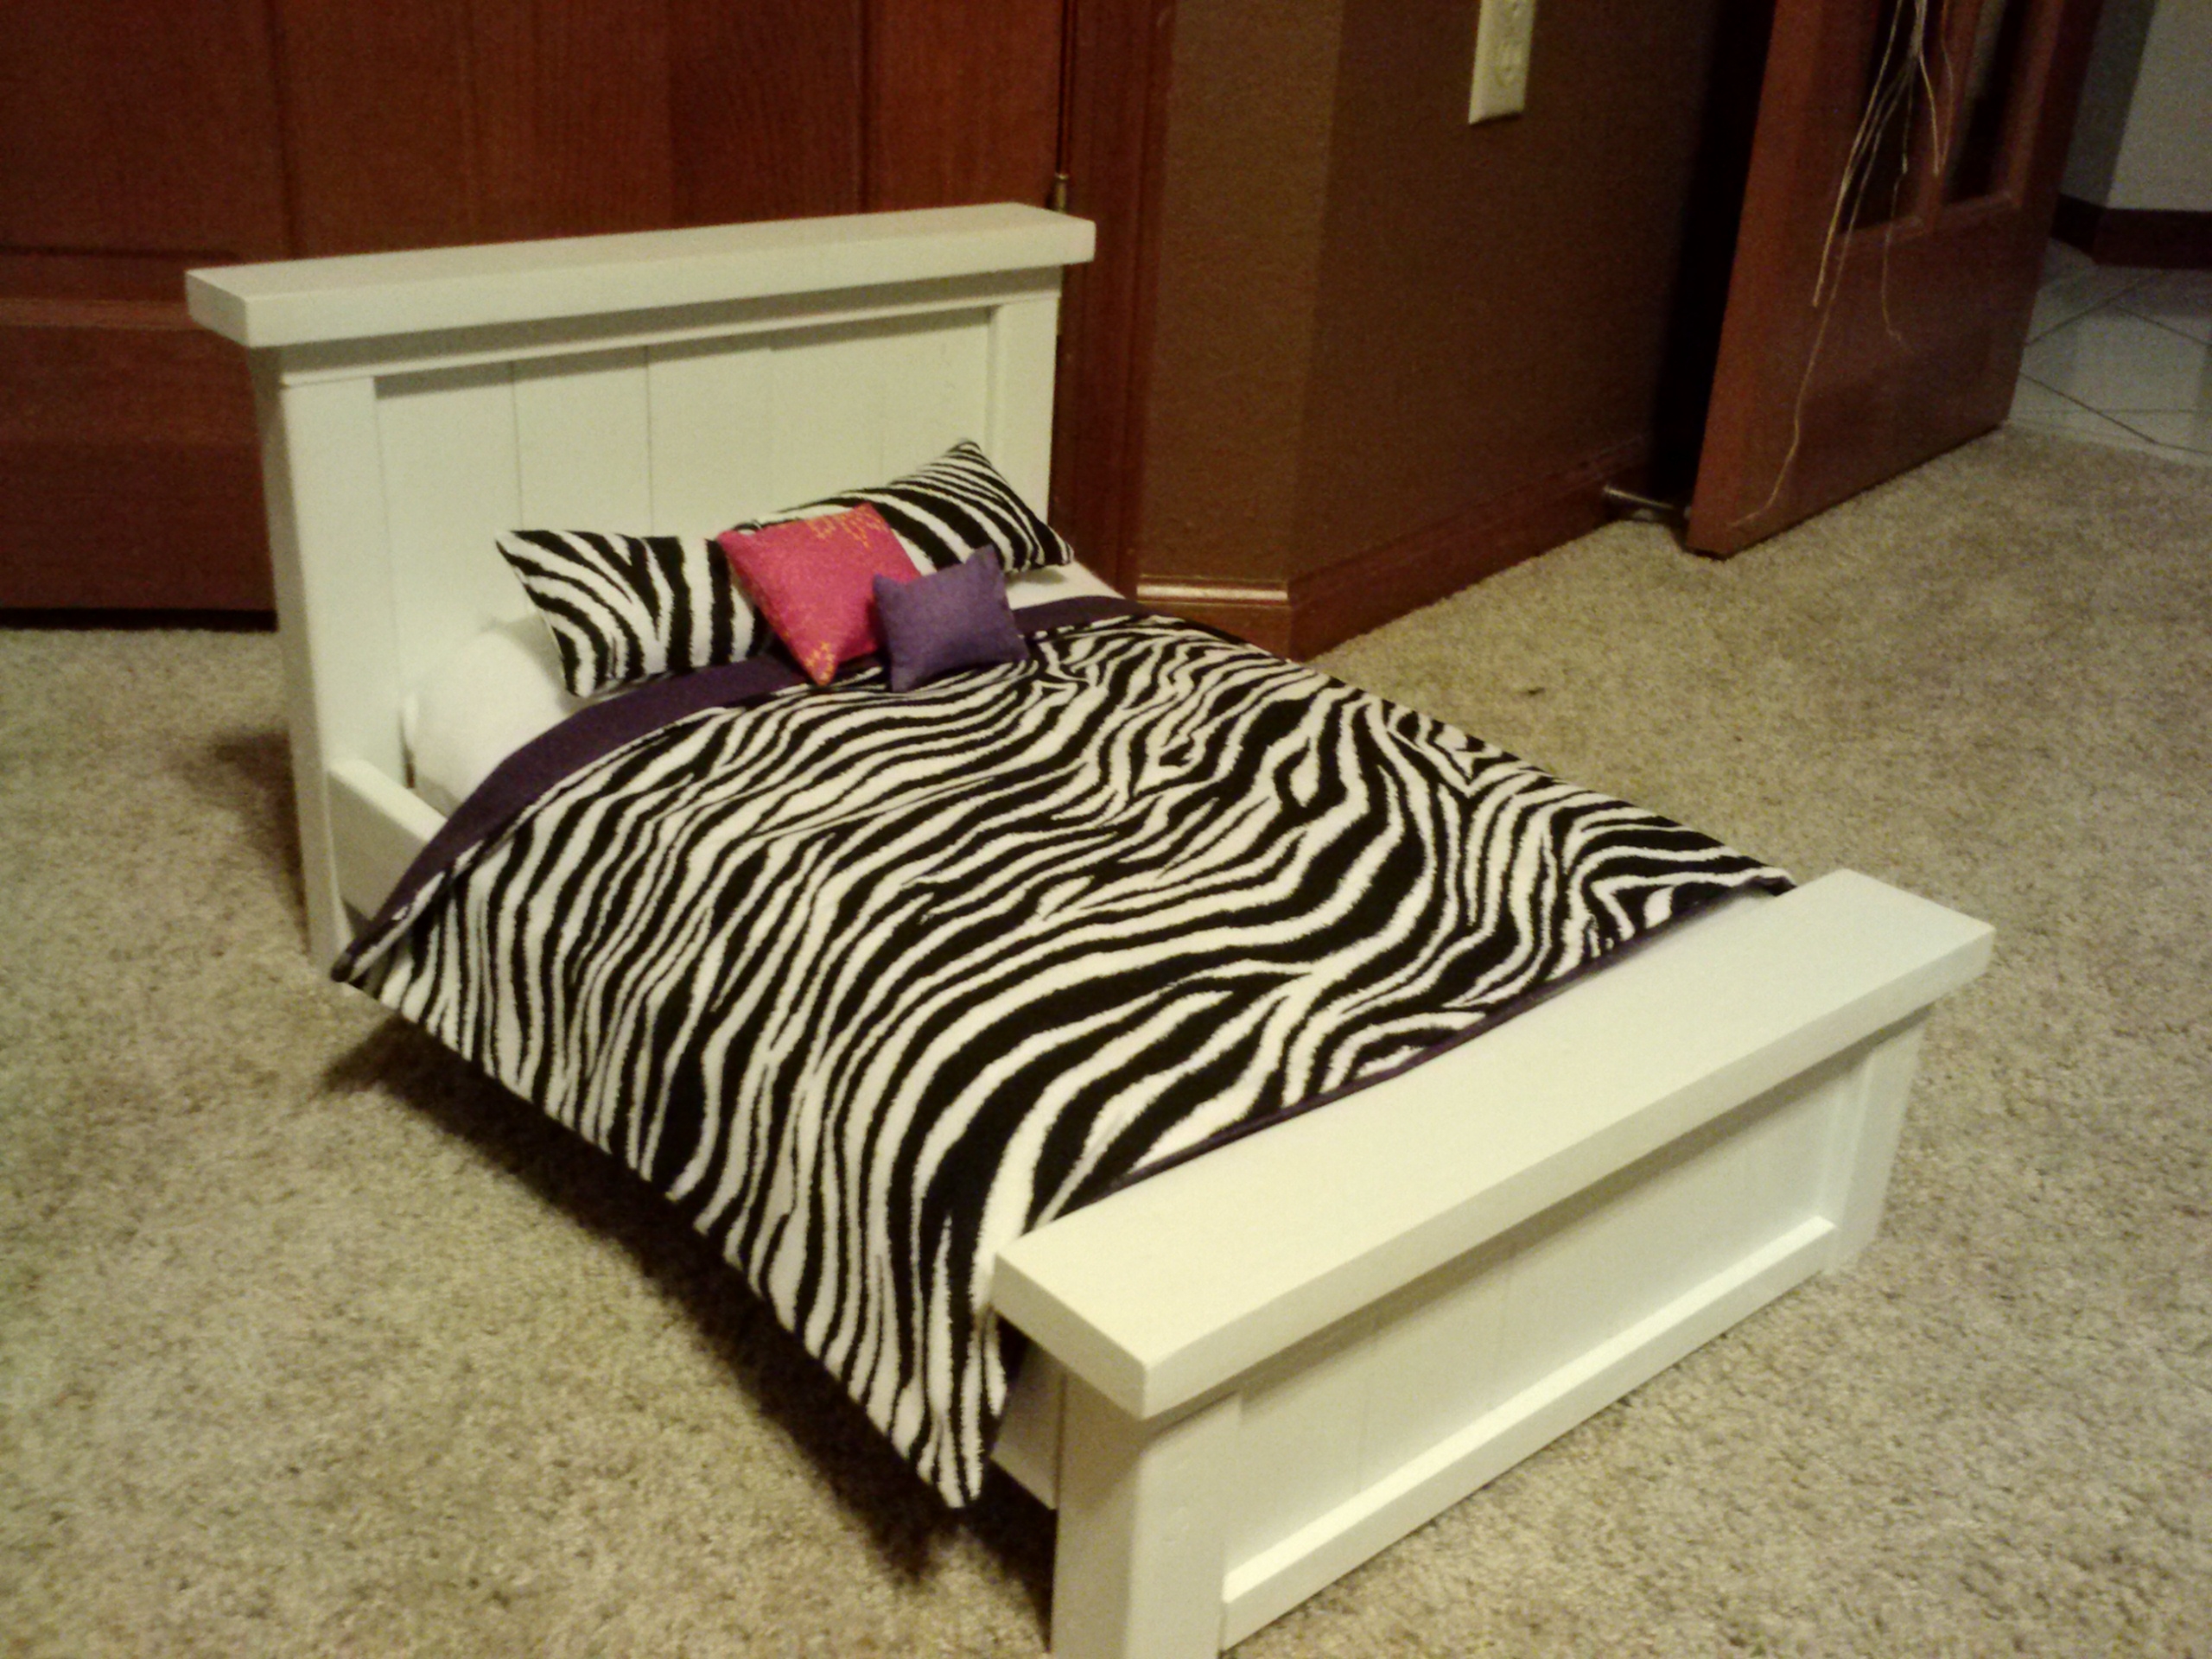
A new crib for a new baby. The foot and head board can be attached with the side rails to put together a full sized bed. In theory, this should be the only bed they need for their little dude with just a few additions (new footboard).
Thanks for the plans!
After building one 6 Cube Bookshelf (http://ana-white.com/2010/07/well-i-did-promise-you-i-would-work-on.html) so my wife would have somewhere to store toys for the kids, I decided to modify the plan to use in our bedroom.
I chose to put doors on it, and learned quite a bit. Rather than 6 standard cubes, I went with a single divider on each shelf. The back and the doors are both made from some Bead Board trim packages that I found for about $12 at my local big-box.
I added a 16" wide board on the top to create the look I wanted.
I also want to note that when you're working alone, some right-angle clamps are lifesavers! Makes it a lot easier to keep square and hold things together while you drill and screw everything together.
I chose some hardware that came close to what we already had in our bedroom. The hinges took me 4 different trips to get right (first was wrong type (did not want self-closing), second was wrong depth, third was wrong color).
Overall I'm very happy with it and so is my wife. We replaced a piece of furniture that was twice as wide and it's amazing how nice it is to not have to walk around it when walking through our bedroom.
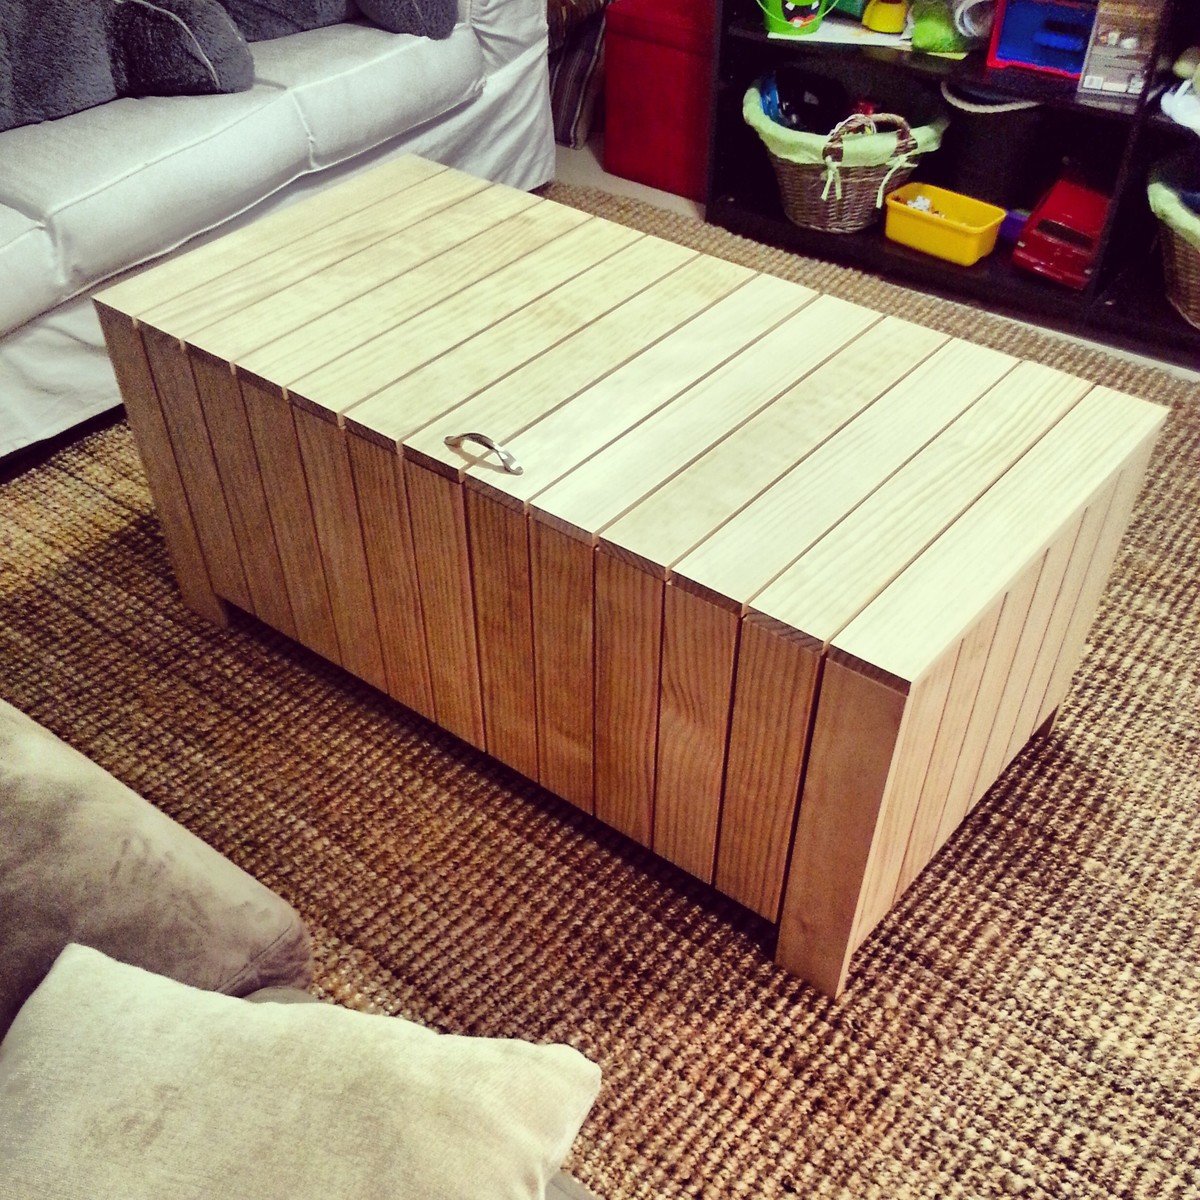
I am redesigning my family, which is really the children's playroom. I have decided to change it to a beach theme. I saw the project on this site and knew immediately it would be a perfect fit as a storage/coffee table. Within 5 minutes of me completing the box, my three year old started filling it up with toys.
I have to admit it is slightly tall for a coffee table, so I'm debating cutting off the legs. It would be easy enough to do without taking the entire project apart and it would make it the perfect height.
I did have to plan my build around my work schedule and the kids, so I did what Ana suggested and built a panel a day. I cut all the wood one day, then built a panel a day. The last day, I started putting the pieces together, put the bottom boards in and made the top.
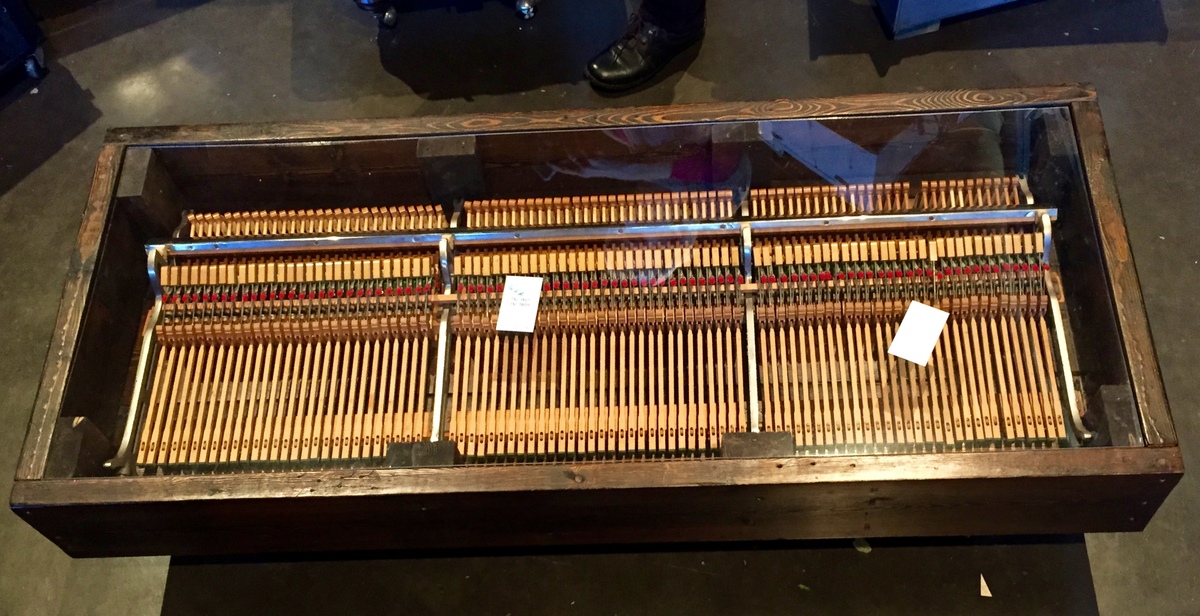
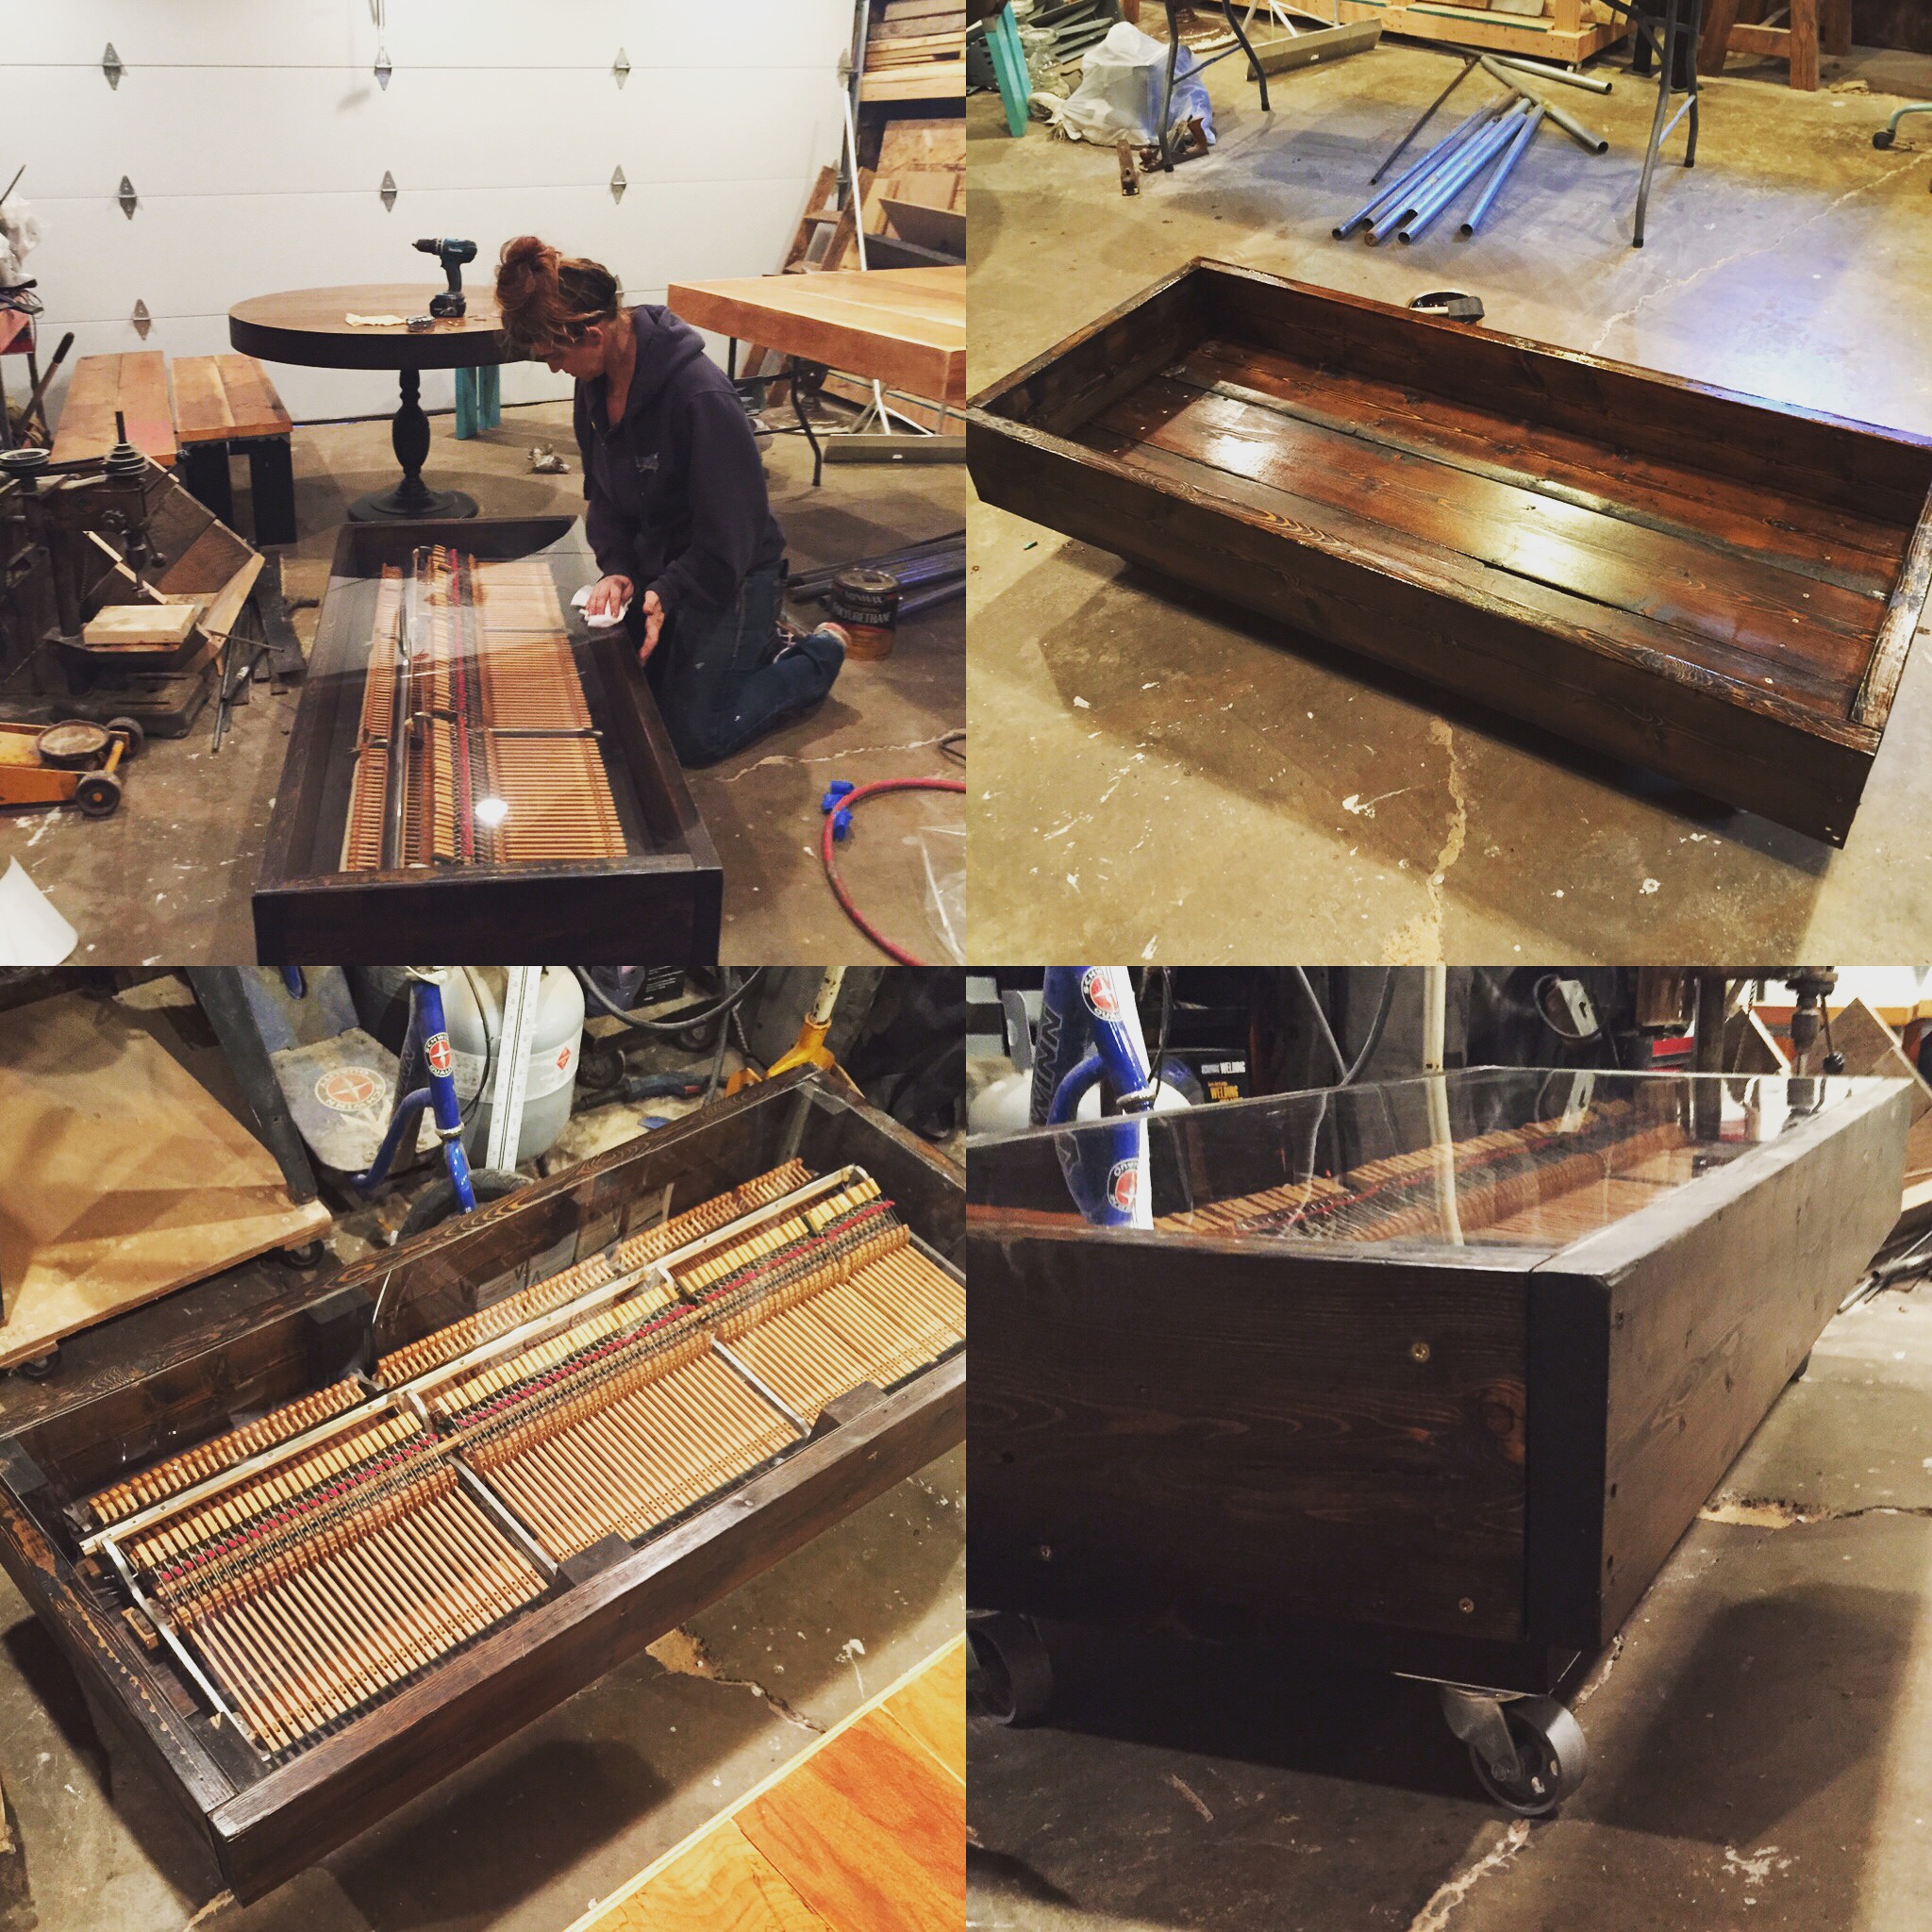
I inherited the guts of a piano, and just had to make them into something funtional. I am a musician, and these piano hammers were great inspiration for my next build. I made a box out of 2x8s, braced them with 4x4's (which also added height) and attached some metal 2 1/2 in casters. I set the hammers inside the box, and topped it off with plexiglass. A functional work of art to be enjoyed for generations!