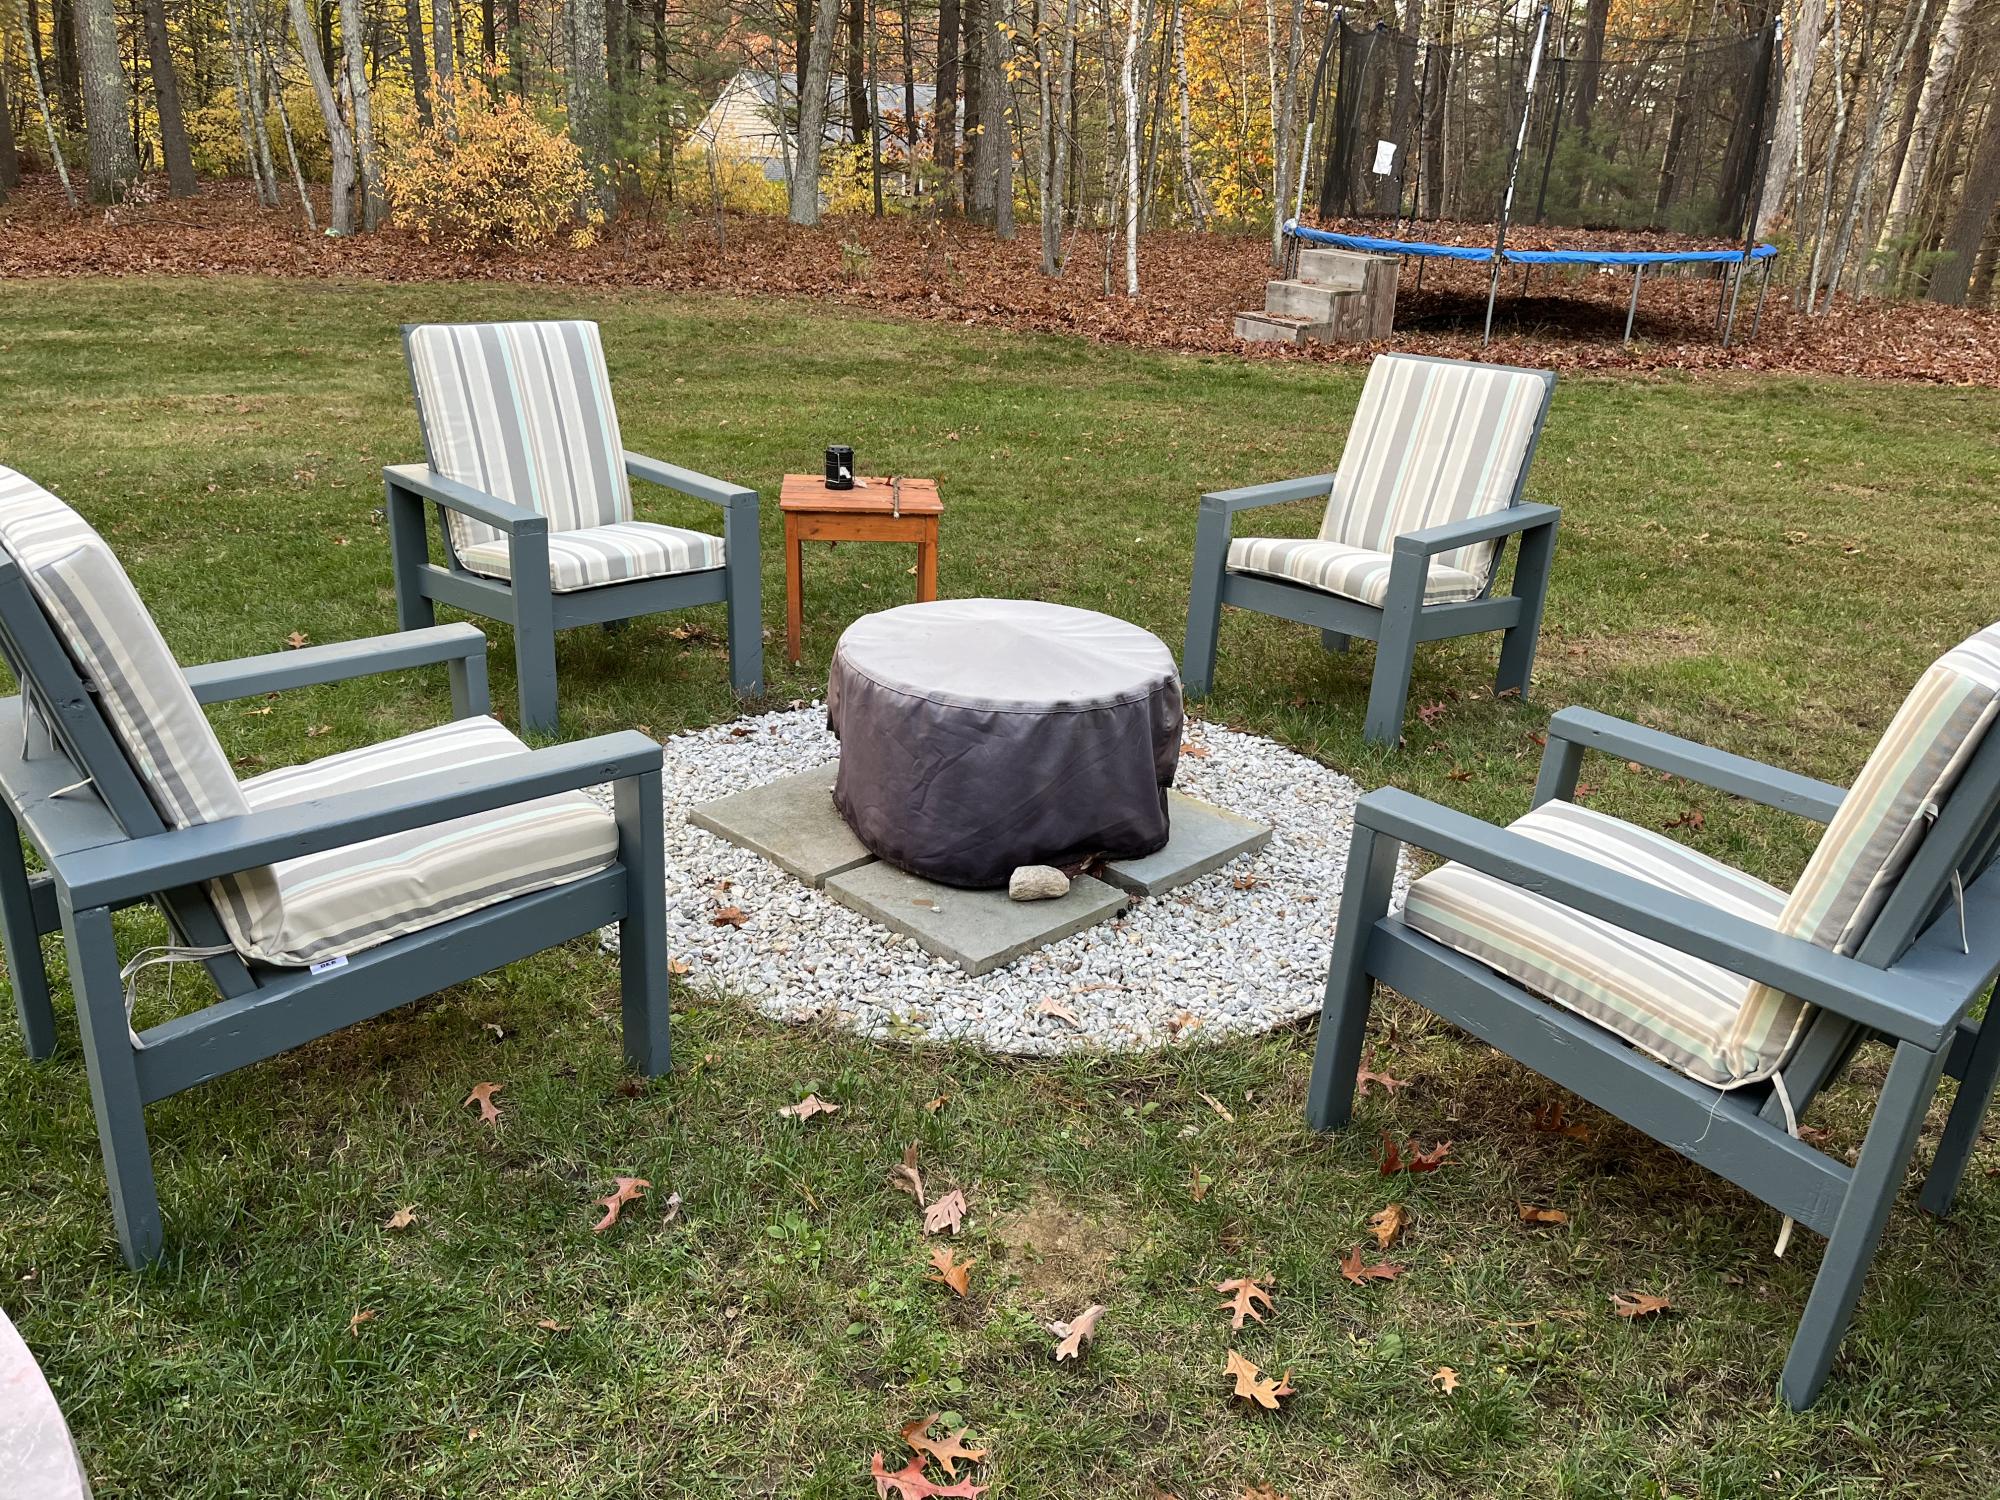
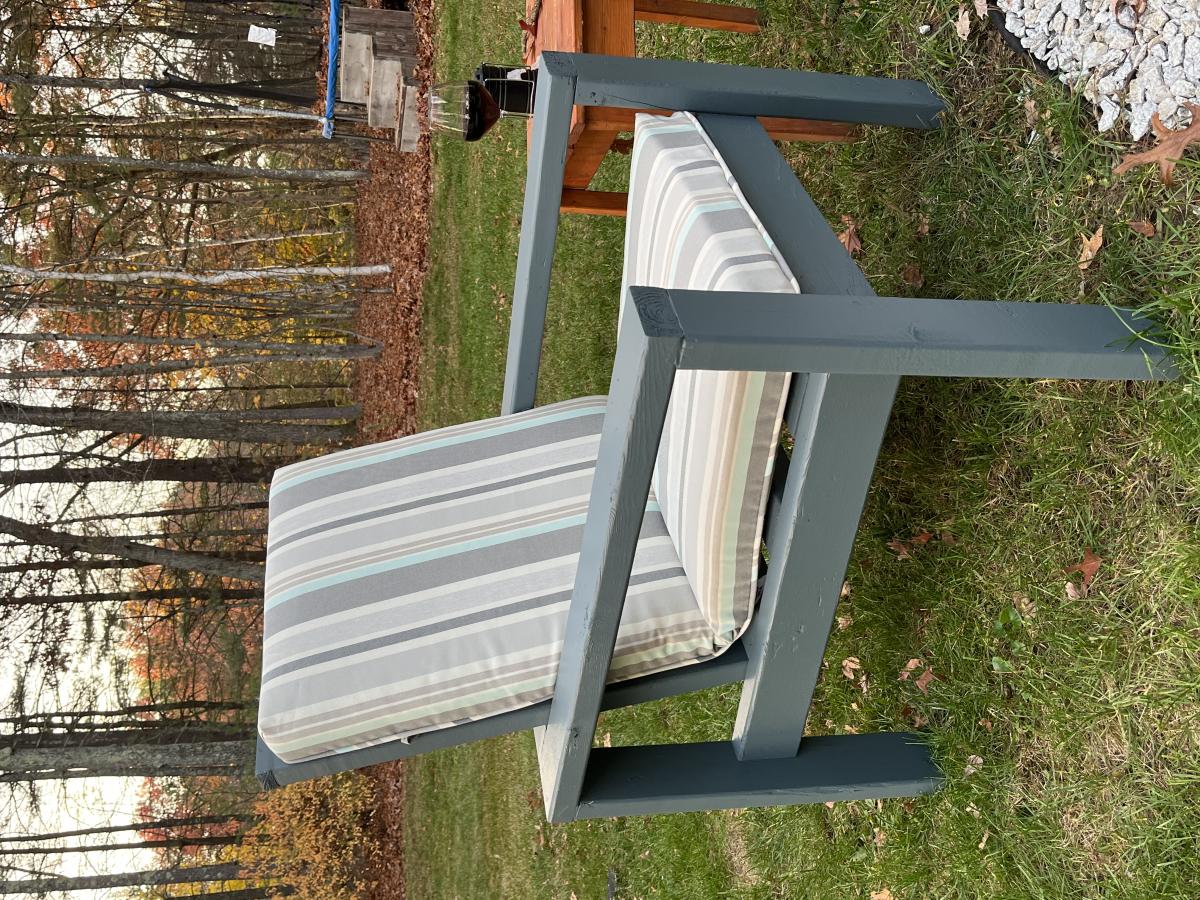
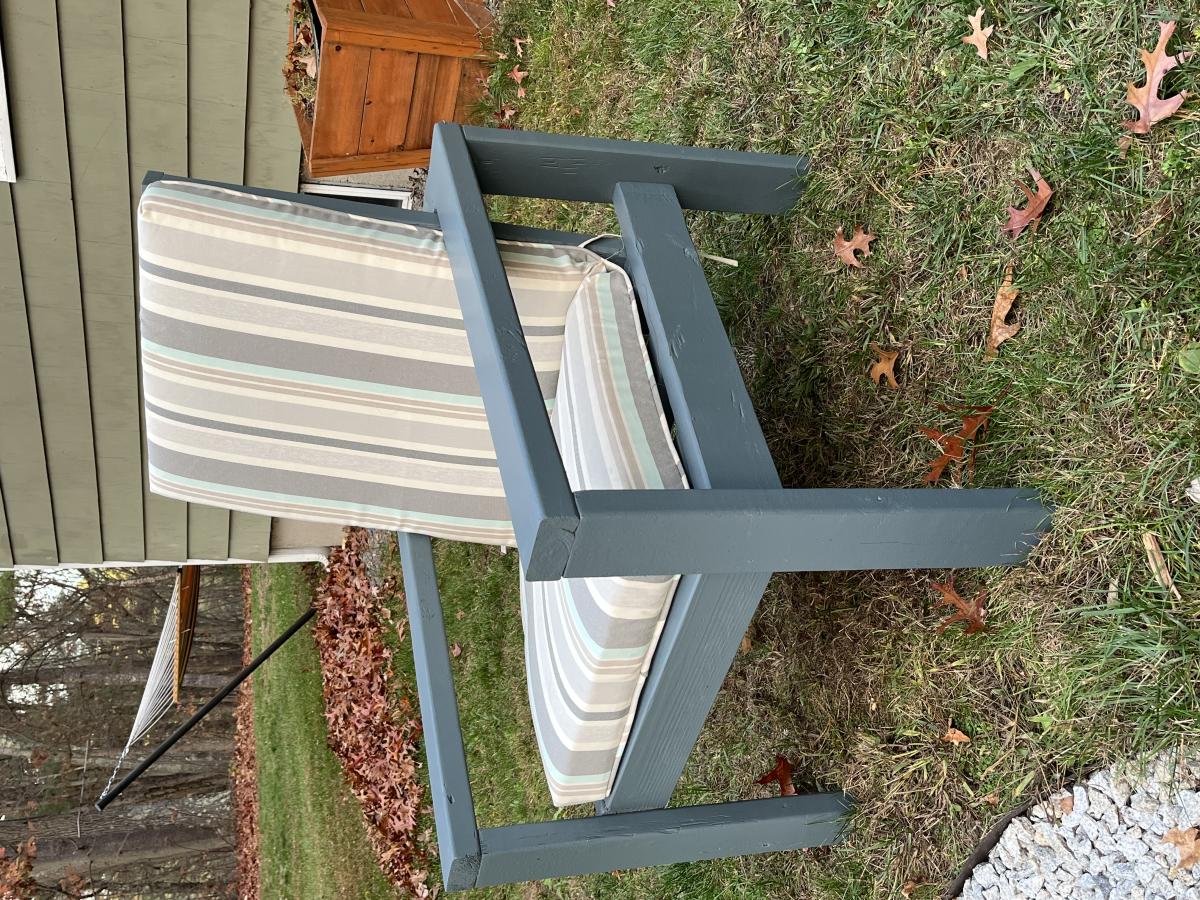
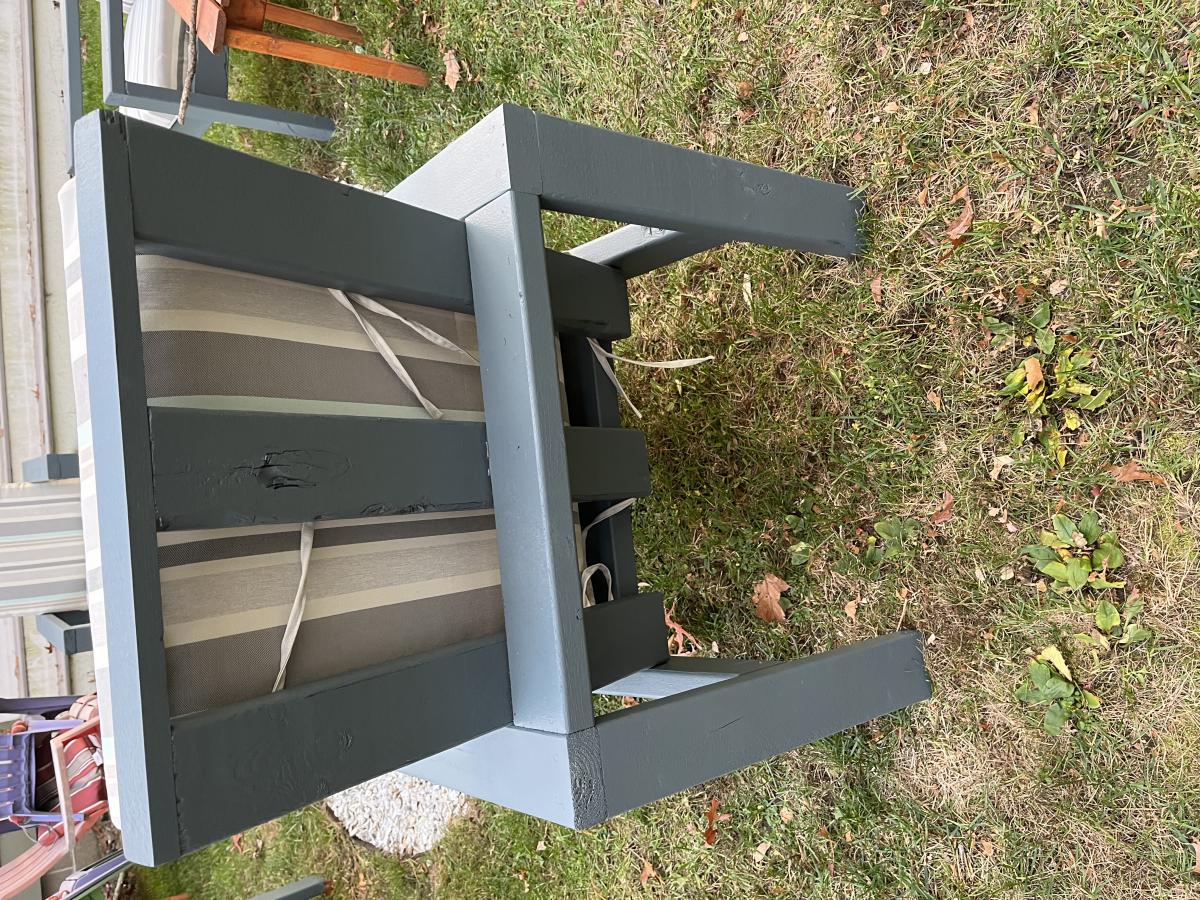
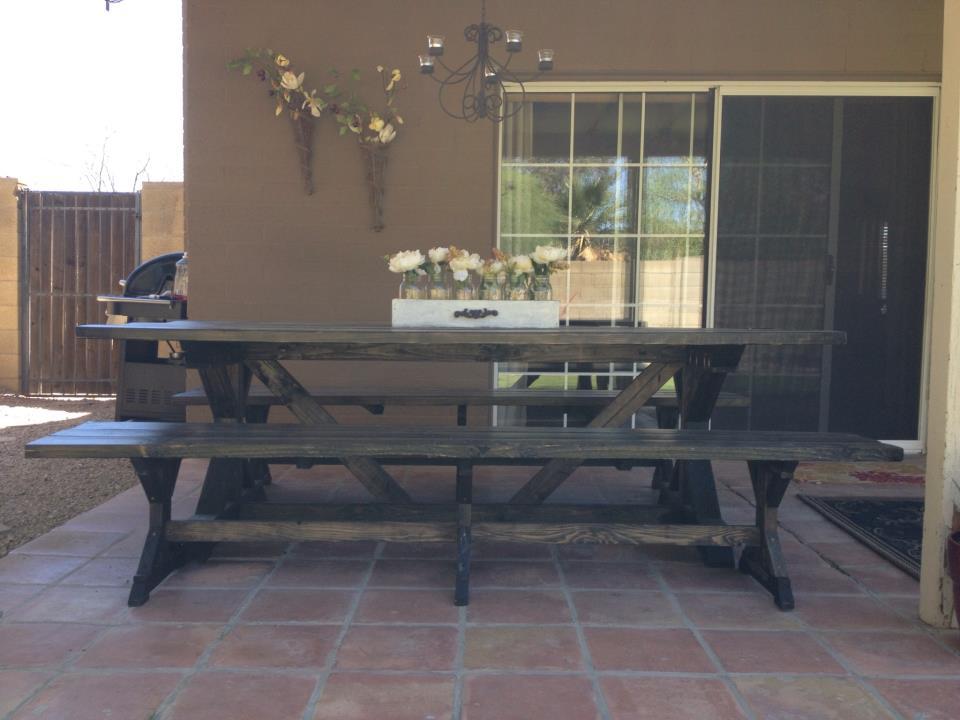
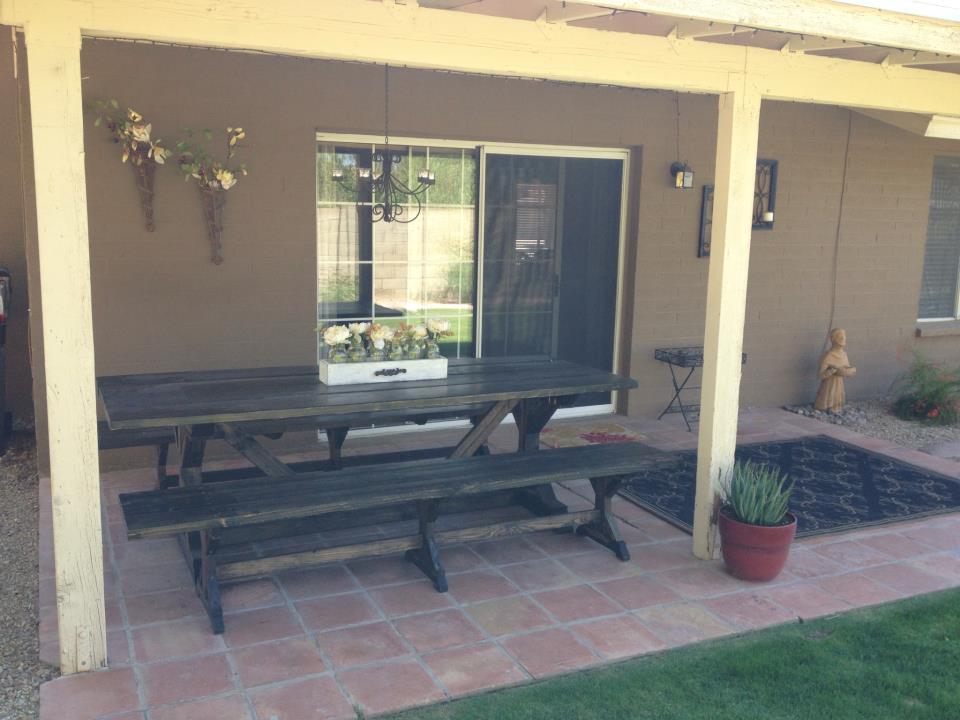
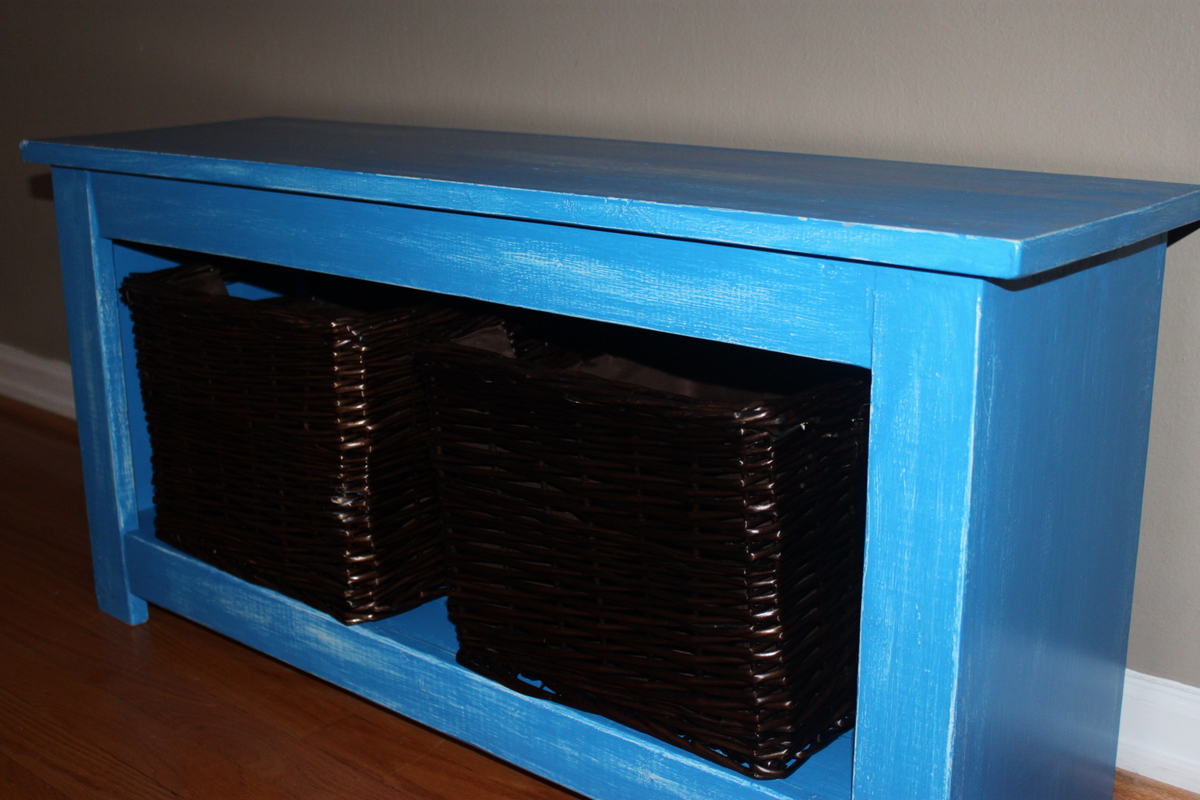
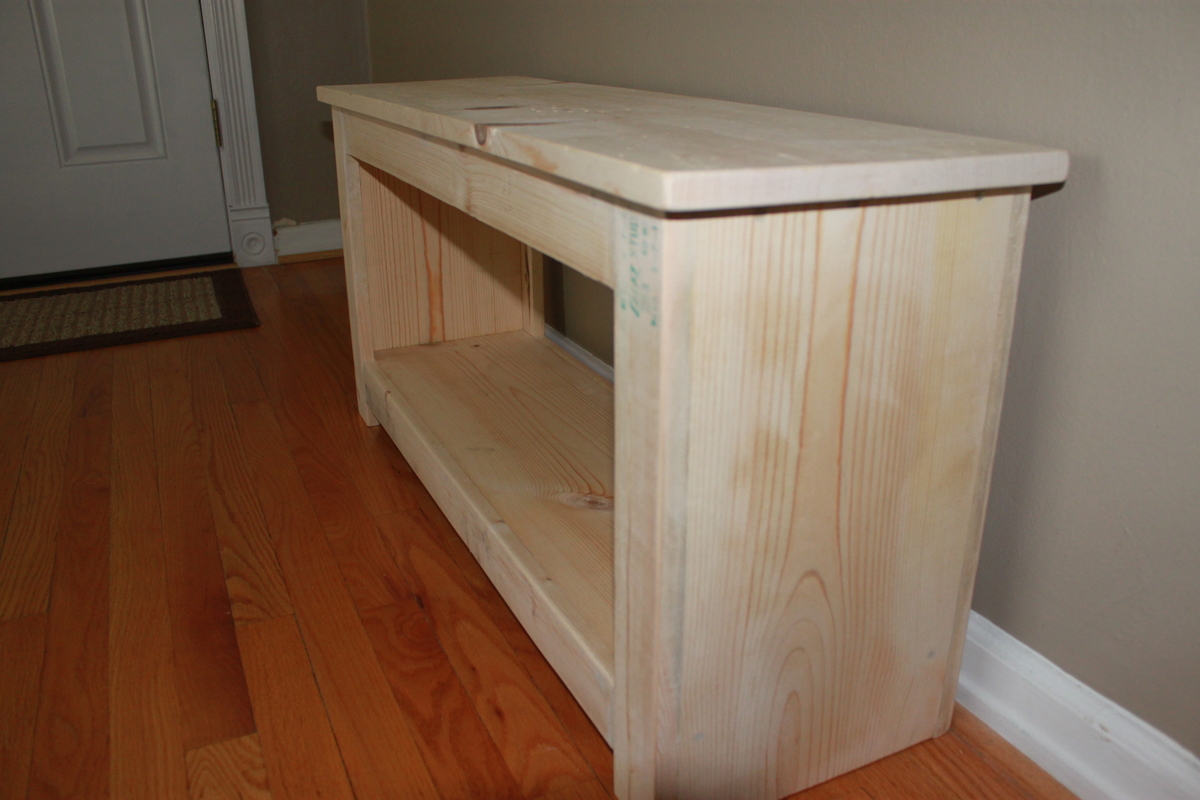
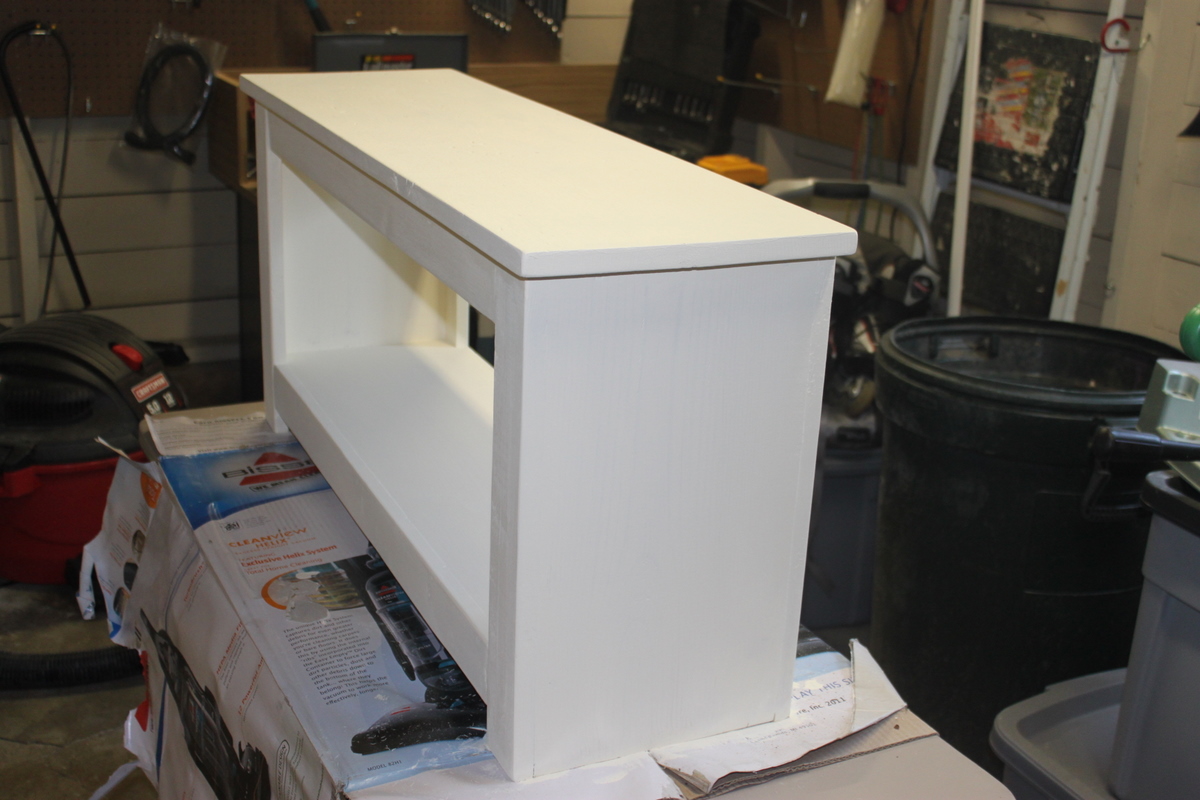
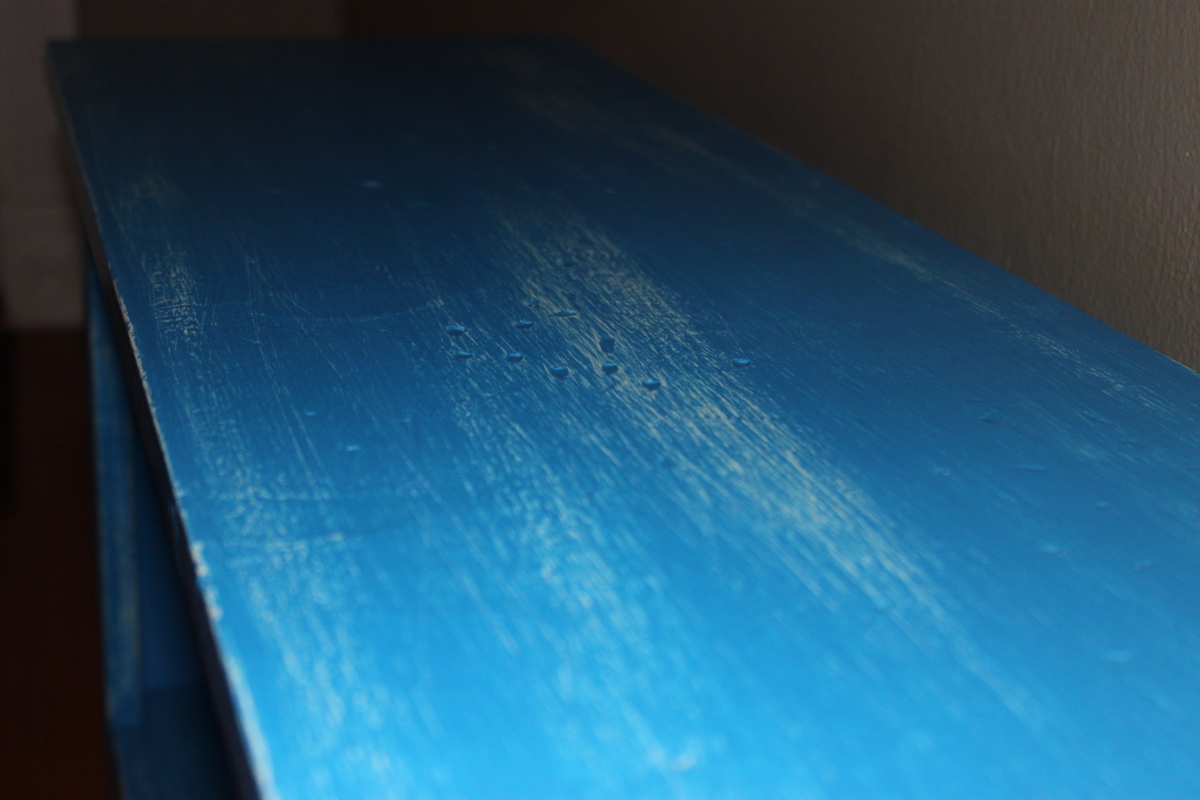
Community Brag Posts
Clubhouse Bed -Full Size with Slide
Thank you Ana for the clubhouse bed plans! I added 15" to the width of the rails to accommodate a full size mattress. On the other side I made a slide platform! I chose a standard plastic slide because I couldn't find a way to make a wooden slide at home with the swoop at the bottom to keep the kids from hitting the carpet hard :). We couldn't have a green outdoor-looking slide, am I right? I used Rustoleum spray paint made for plastic in French Lilac color. After the paint I used a top a coat of Minwax 3x polyurethane. I also used the Rustoleum spray paint for the window grids.
To accommodate the slide specs I needed to raise this bed 5". I just made each leg 5" longer. Also, the ceiling in my daughter's room slopes down so I cut the point off the back of the bed. Totally not noticeable. I needed to do this even if I hadn't raised the bed :)
I also added full window frames around the window to make the bed a little more girly! One unexpected result is that the bedroom looks BIGGER with this bed in it. She had a twin size step 2 plastic castle bed before but now there is so much more room to play. Win! Changing the sheets isn't too bad but you need to get in the bed to do it.
I built this bed by myself. Don't be afraid, you can do this! Once the panels are assembled they get a bit heavy so you have to be sort of creative to drag them across the garage floor :)
Next up: mailbox for the bed, shelves under the slide and window boxes!
![](/sites/default/files/Screen%20shot%202015-05-02%20at%208.21.35%20PM.png)
Comments
Sun, 05/03/2015 - 07:37
This looks amazing! What an
This looks amazing! What an awesome job! I love the slide!
Slat Bench from Palettes
![](/sites/default/files/IMG_4414.png)
This was made from several heavy duty palettes that were used for delivering stone. Because of the wood I could get off the palettes, I switched the thin and thick pieces so that the slat gaps were where the 2x4 pieces were missing instead of the 1x4s.
Armoire for Repurposed door
![](/sites/default/files/Armoire.jpg)
This is modified from Ana's Simplest Armoire plan, re-sized to fit the door (already had this, from another project -- I couldn't part with it when that room was remodeled- that gallery glass insert took me so long to make) and deep enough to hang clothes. Used my favorite new toy, the Kreg jig for this.
Such a fun project, now we're hooked! We've made a bedroom full of pieces to go with this one, and still making more.
Ana, thanks for the inspiration!
![](/sites/default/files/armoireinwork2.jpg)
![](/sites/default/files/armoireinwork.jpg)
![](/sites/default/files/armoireunfinished.jpg)
![](/sites/default/files/ArmoireRepurposedDoors.jpg)
Cedar Planter with Trellis
I put the two planter boxes on this site together to get a perfect little lattice box for the space by my door. I get lots of compliments and hopefully soon I will have yummy jasmine welcoming my guests.
![](/sites/default/files/3154828034_1370556804.jpg)
First nightstand
![](/sites/default/files/2011-04-02_13-19-45_354.jpg)
We used ana's plan but modified the top
Comments
Thu, 05/30/2019 - 13:00
Project Plans
This is EXACTLY what I'm looking for but I can't find the plans that were used to build it. Do you happen to still have the link for them?
Sun, 06/23/2019 - 22:39
Link
Simple Shelf with Hairpin Legs
![](/sites/default/files/jen%20shelf.jpg)
I found some 12" boards that were really pretty unfinished. I used Ana's basic Shelf Help frameless bookshelf design to build this shelf. I added hairpin legs to give it some character and get it the height I wanted.
Farmhouse Daybed
![](/sites/default/files/4d9a7649eddc6c0859005b55.jpg)
I modified the regular farmhouse bed to a daybed for my daughters bedroom. All that is left now is to fill holes, paint, distress, and glaze :) I made the height of the front and back tall enough to fit a trundle I plan on making later. It is up on blocks right now so I could see what it will look like when completed. Will post an update once it is painted and assembled.
![](/sites/default/files/Ellie%27s%20Daybed.jpg)
![](/sites/default/files/4d9a76e2eddc6c07f4005b7b.jpg)
![](/sites/default/files/4d9a77f3eddc6c07c9005ad3.jpg)
![](/sites/default/files/4d9a7818eddc6c07c9005ad4.jpg)
Comments
Mon, 07/27/2020 - 11:16
Farmhouse Daybed
Hello Mrs. Ana. Do you have the modified plans with this daybed? If so please send me a copy. Thanks
Fri, 10/23/2020 - 23:52
Plans for farmhouse daybed with trundle
I love this! I would love to build a twin size farmhouse daybed with trundle for my stepsons’ room. They are only only with me every few months, so I want to have beds for them but this would save a ton of room! I have tried to modify the Haley storage daybed and the farmhouse plans, but am new to this, so I’m having great difficulty. Also, since they are teens, I have twin XL mattresses. 39x80, so again, more modifications. Any help you can provide would be greatly appreciated! Thank you!
Sat, 04/09/2022 - 06:36
Can i get the modified plan…
Can i get the modified plan for this? Trying to make the daybed for my daughter.
Tree Shelf
![](/sites/default/files/image_939.jpeg)
We moved about 18 months ago to a house without a fireplace after having one for almost 7 years. When The Christmas dilemma of where to hang the stockings came up last year, we used an Ana White plan and built a super amazing faux fireplace. After the holidays we decided we'd install it in our bedroom instead of storing it away all year....AND we ended up liking it there so much, that's where it stayed and a bookshelf took its spot in the living room. This Christmas when the stocking question was raised I looked online for ideas and, wouldn't you know it, Ana White to the rescue again!! We are completely in love with our new Christmas shelf. Also as a bonus, we now know how to use a miter saw, which I'm sure will open up all kinds of new project possibilities!
Happy Holidays!
Dog Bunk Bed
![](/sites/default/files/Bunk%20Beds_2.jpg)
We’ve been looking around for some plans for a doggy bunk bed for a while now, but couldn’t find anything that we liked so I decided to build it from scratch. This is a huge bunk bed that was built based on the size of our larger dog’s bed which is 44 x 35. This was pretty simple to build although the stairs we’re quite challenging as I have never done them before so if I can make it, anybody can.
I must stress that before I found Ana’s website about 6 months ago I could barely cut a piece of wood straight. Over this time I have made several things based on the easy to follow plans on this website which ultimately gave me the confidence to go it alone and build this bunk bed. Friends and family are shocked at some of the furniture I’ve made and some don’t even believe I made them and think I’ve bought them from IKEA. My wife has got a list of furniture she wants to make now including a TV console, an armoire and a twin bed for one our daughters. Every spare second I have now is spent is making furniture and I LOVE it.
For anybody who has never built anything and is apprehensive to do so I would just say, do it. Grab what you need and dive right in. You may get frustrated and scream a bit at first, but the reward at the end is well worth it and each project you do will get easier and easier. Be warned though. The better you get, the more people will pester you to make things for them.
Thank you, Ana.
This was made using cheap 1 x 3 and 1 x 4 furring strips for the railings and bed slats, 2 x 4s for the posts and 1 x 10 board for the stairs.
Comments
Sun, 12/31/2017 - 08:26
trying to find the plans on
trying to find the plans on how to make this bunk bed
Loft bed
![](/sites/default/files/56474522-FF7A-4C7E-85A2-8DBD2D2C66D3.jpeg)
I used your loft bed plan and made some adjustments to better suit our needs. My daughter absolutely loves her bed and we love having all the extra room under her bed. Thank you and I will be using many more of your plans.
Justin
Comments
Bunk bed
![](/sites/default/files/0343EFF1-1E91-423C-B73A-00139FB8458A.jpeg)
Great build, easy to follow, very affordable. Thanks so much.
Comments
My new yellow cubby shelf
![](/sites/default/files/IMG00147-20110430-1434.jpg)
Totally lovin' my new cubby shelf. I painted it bright yellow, but I may paint it a more nuetral color after noticing it does not math anything haha! This is a super sturdy shelf...LOVE IT! Thanks ANA!
![](/sites/default/files/IMG00134-20110428-1907.jpg)
![](/sites/default/files/IMG00146-20110430-1434.jpg)
Narrow Console Table - Farmhouse Collection
![](/sites/default/files/Narrow%20Console%20Table.jpg)
I loved this project. Since I can't buy wood, I have to use wood from pallets, or where ever I can find free wood. In this case I used 2x4's from pallets, 1x4 oak slats from an old bed frame I acquired and 1x4's from a large solid maple dog crate I acquired. The top was made from cabinet grade plywood we had left over from cabinets my husband made two years ago when we remodeled the kitchen (so I have to say that was purchased). The maple dog crate had some awesome wood, even tho it had been broken in a couple places. Just had to plane down the reddish finish on it. Since it was going to be painted, I didn't care what kind of wood I used. The only thing I had to buy were the corner brackets. Even the screws were from pallets we acquired, just had to paint the heads black.
Comments
Farmhouse table bench no pocket holes or screws on top
![](/sites/default/files/0-13.jpeg)
Liked very much the general design of the farmhouse plans but wanted to avoid buying the pocket hole jig and the puttying of screw holes on top side (exposed) side of boards.
Increased slightly the table top and bench seat board supports (2x2's) which worked well for holding those down and placed the angled wood piece in corner of table leg to support bread board.
Please with the results. We really wanted to avoid attempting to hide the screw holes with putty. Others have posted and we had similar results of blotches on the surface of the top boards resulting from even "stainable" putty. No amount of sanding seemed to help.
Rustic Bathroom Vanity
![](/sites/default/files/rustic%20farmhouse%20vanity.jpeg)
This was a great first project for my husband and I. First time doing drawers but was amazed how easy it rally was.
Comments
Octagon Picnic Table
![](/sites/default/files/4.9.22.jpeg)
I just finished this octagon picnic table as per your plans
the 2x6 are all clear Western Red Cedar and the skeleton is
Douglas Fir. I think it turned out astonishingly excellent.
Thanks for the inspiration Ana.
![](/sites/default/files/4.9_0.jpeg)
Modified Beginner Farm Table and Bench
![](/sites/default/files/IMG_4945%20%281%29.jpg)
Altered the Beginner Farm Table plans to use 2x8s for the top and 4x4s for the legs. I used pocket holes for the table. I followed the bench plans almost exactly, adjusting slightly for the 2x8 tops. I am a beginner and I did it myself! The table and bench are beautiful and sturdy! Thanks Ana!
Comments
Bedroom Dresser Cubbies / Media Stand
![](/sites/default/files/bedroom%20makeover%20A.jpg)
This is inspired by pieces I've seen here, though I sketched it out on paper myself to make sure it would suit the limited space in our room. I built the simple piece to match our bed (made from Ana and her reader's plans, see my photos below).
Originally, I planned to include cabinet doors, but with the limited space we have, this is better for us.
For nightstands, I stained plain wooden crates I had in the basement. Still working on how to hide the cords.
The baskets under my bed are from Bed Bath Beyond. The baskets in the "dresser" are from Target.
Sorry about the poor photo quality.
![](/sites/default/files/view%202.jpg)
![](/sites/default/files/headboard%20macro.jpg)
![](/sites/default/files/cubbies%20and%20crate.jpg)
![](/sites/default/files/mightstand.jpg)
![](/sites/default/files/whole%20bed.jpg)
Comments
Wed, 07/27/2011 - 14:23
Don't fret -
I see that they all go together, and they look great! I'm especially loving that dresser, it is beautiful.
Sat, 12/10/2011 - 07:41
Plans
Sorry I haven't logged in in so long--the bed follows plans for the king Stratton, combined with the reclaimed wood headboard. The headboard is attached to the wall. We can slide the foot bench part out to hide presents behind, which is really handy (though heavy) to do.
Garage Shelves
![](/sites/default/files/04B1A3BE-5242-44BD-83C8-D3AEFF47B9EB.jpeg)
This was a pretty easy project, but I had to adjust the vertical legs to accommodate the sloping garage floor. I drew a horizontal line for the top edge then measured to the floor at the spacing I wanted the vertical legs. I used these measurements to cut the three vertical legs. It’s level and straight, even though my garage is sloped.
![](/sites/default/files/8D23CF87-977F-45D5-875F-771261F4D8DC.jpeg)
![](/sites/default/files/AF74AFEC-DB01-40AD-A913-1329B463198C.jpeg)
Such a fun build!
![](/sites/default/files/20190101_112827.jpg)
I've used Ana's plans for several builds in my house and this one was so much fun to build. I love the way it turned out and think it looks great! Thanks for all the great plans Ana! Keep them coming and I'll keep building. :)
![](/sites/default/files/20190101_112649.jpg)
Comments
Sat, 01/05/2019 - 14:27
SO pretty! I love this table
SO pretty! I love this table too, it is so easy but very substantial! We are using the same table right now too!
Comments
Ana White Admin
Wed, 10/06/2021 - 09:36
Awesome loft!
Thank you for sharing, it looks fantastic!
mnbentley21
Thu, 03/02/2023 - 19:09
Plans?
Did you have plans for this? Is it a full size?