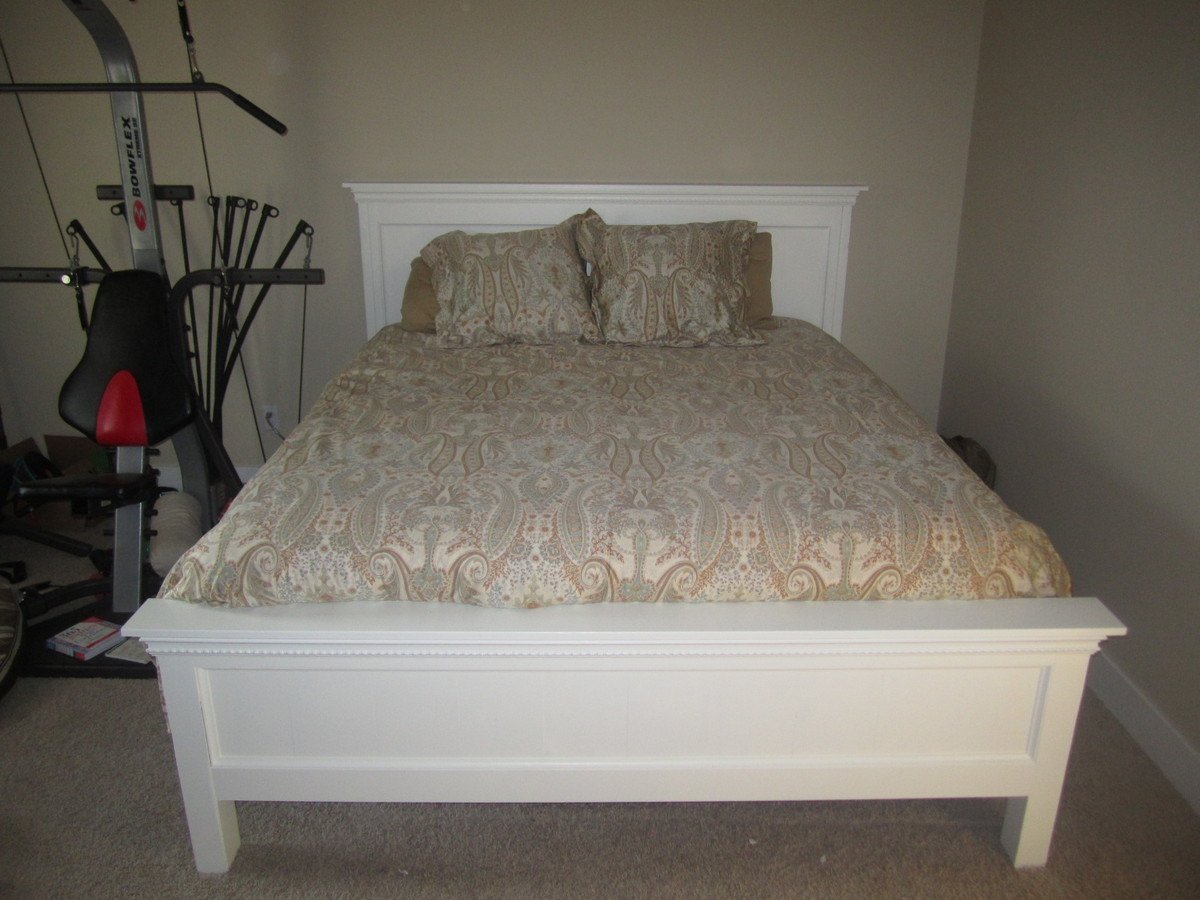
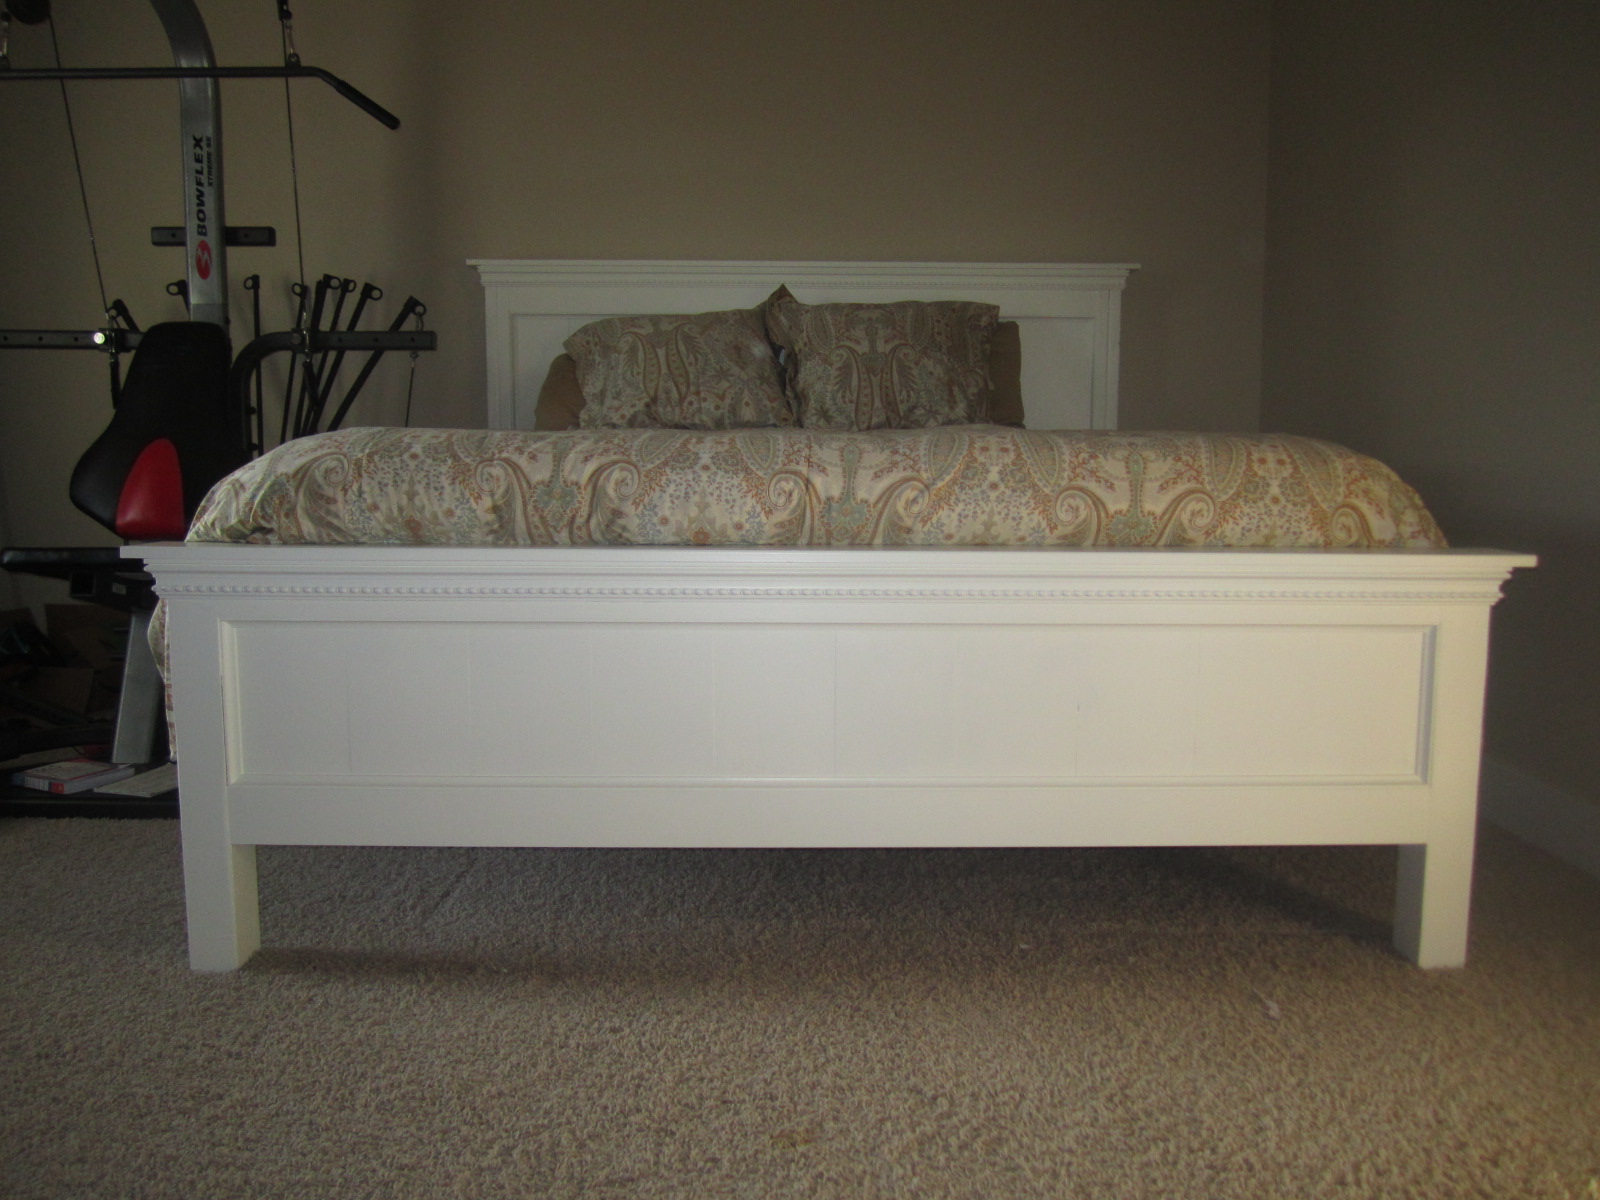
California King Farnhouse Bed Fancy Style
I LOVE the Farmhouse bed but wanted to do something new with it. After looking through some other brag posts for inspiration I made my own blend of things to get what I wanted. There are a a few things I did differently than the original Cali Kinf Bed instructions, which are noted in a list below.
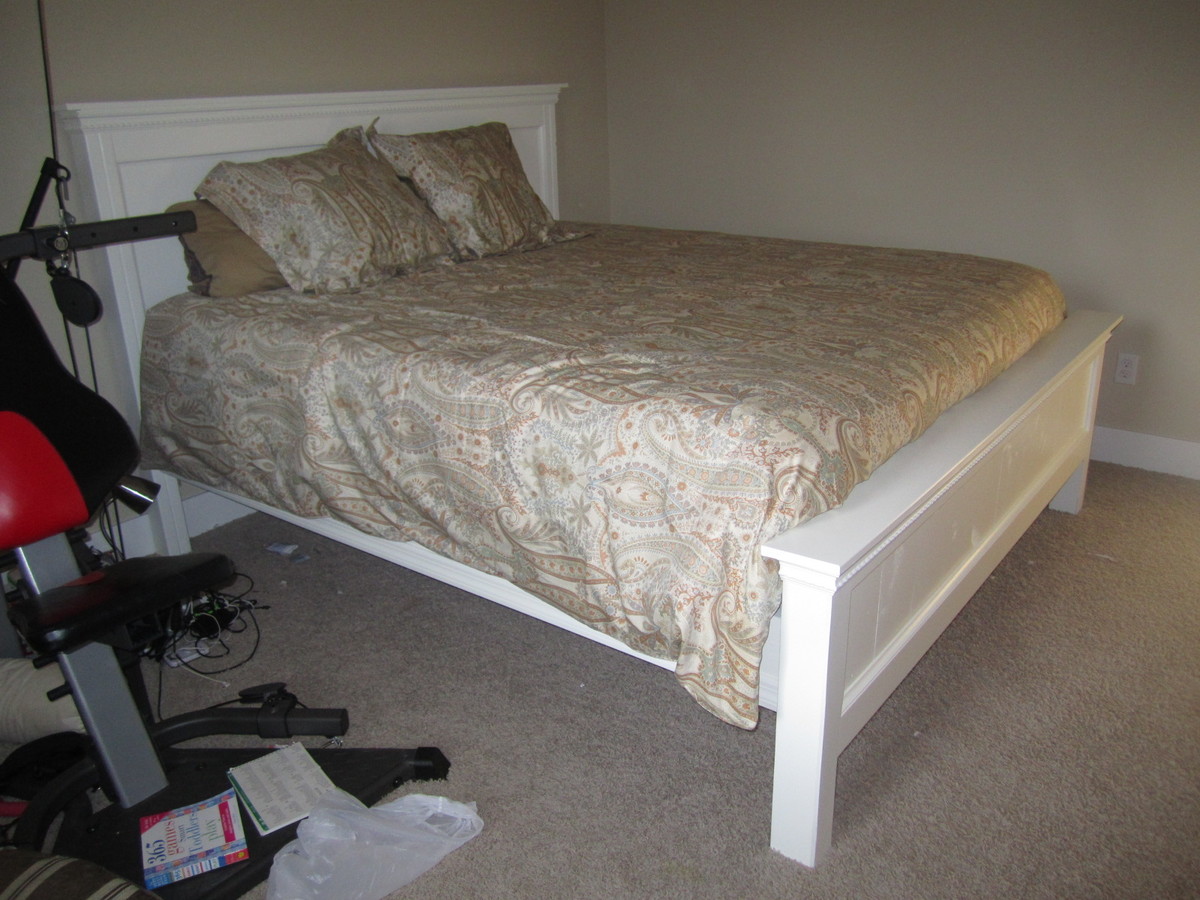
I'm a military wife so whatever I made needed to be easily taken apart, moved, and put back together. For this I used 2x4 joist hangers on the inside of the side rails and cut 2x4's to width. I also wanted to have storage available under the bed so I made it a little higher, 12 inches rather than 10. I should have also made the overall headboard 2 inches higher as well, not just the spot the side rails sit on. Our mattress is a little taller against the headboard than I thought it would be. That's the only thing I'd of done differently.
I didn't use 4x4s for the foot board sides, I did use 2x4's and put them together like the headboard instructions with the slot for the side rail. The difference in mine is that I added thin backer board on the front of the 2x4 and mounted the foot board flush with that, and then used wood filler to smooth around the edges and give it the appearance of a 4x4. Adds a little more work but it was well worth it.
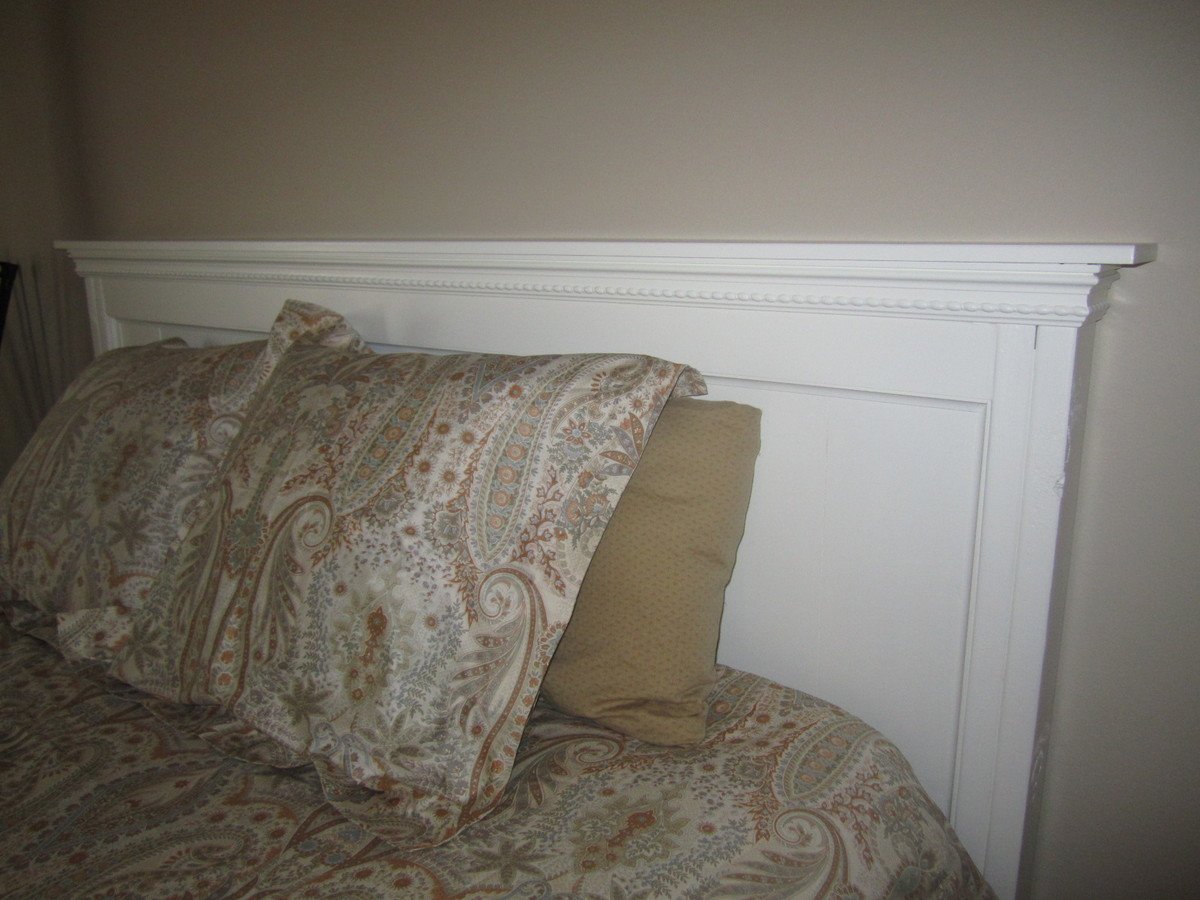
~ I did not use 2x4s laid on top of the finished head and foot boards
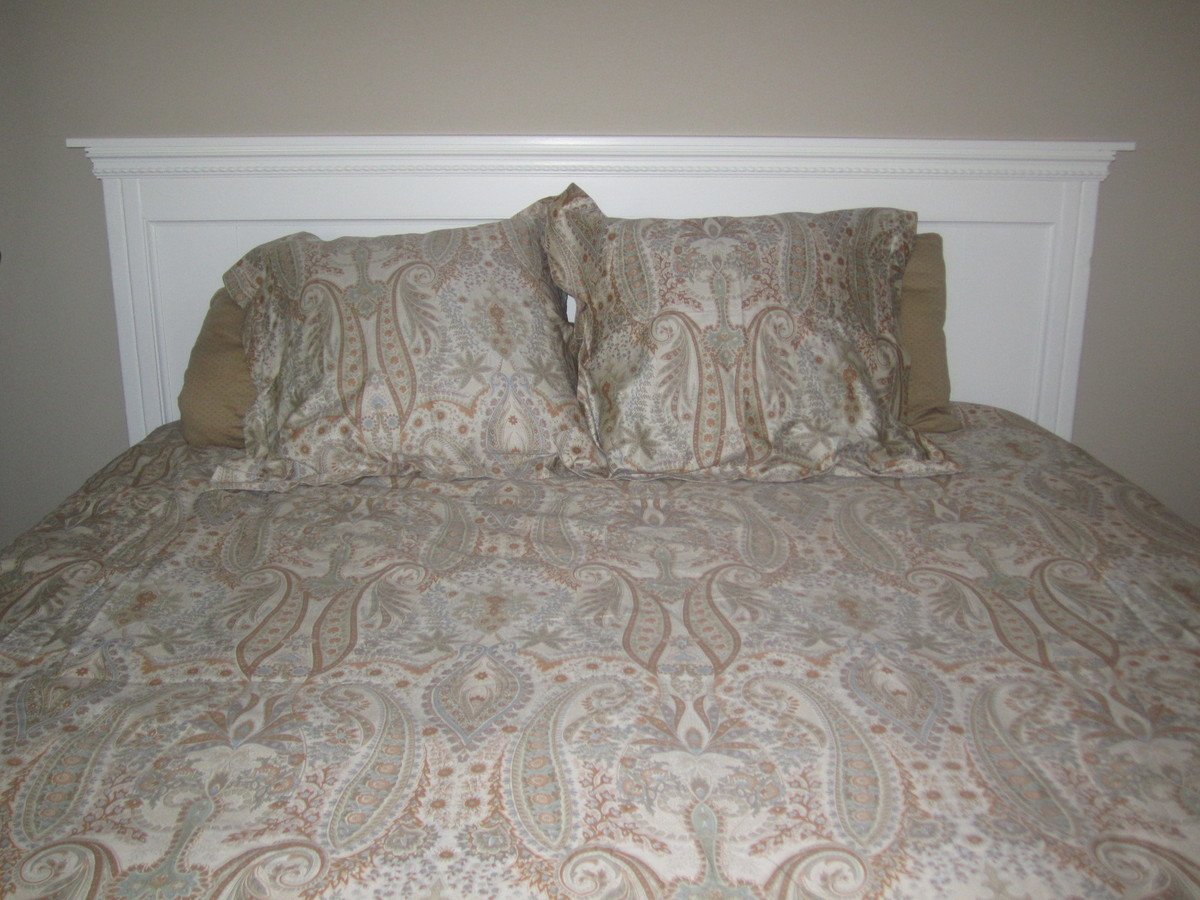
~ The headboard top has a 1x6 rather than the 1x4
~ I added rope chair rail on the tops of the head and foot boards
~ I added cove molding around the plank section of the head and foot boards
~ The very top pieces of wood on the head and foot boards have a 1 inch overlap to the back of the 2x4 sides. This allows space for floor trim behind the headboard and comforter stuffing behind the foot board.
~ I added molding to the bottom of the side rails, they looked too plain with the rest of it together and that made a big different in the overall look.
Overall I'm very happy with the way this build turned out, especially for my first furniture build!