Community Brag Posts


Mud bench
My husband and I love to build together as our hobby so we always look to Ana White for different plans.
It all started originally when I came across Ana’s closet organizer a few years ago and we haven’t stopped! Thanks Ana!
Built from Plan(s)
Storage End Tables
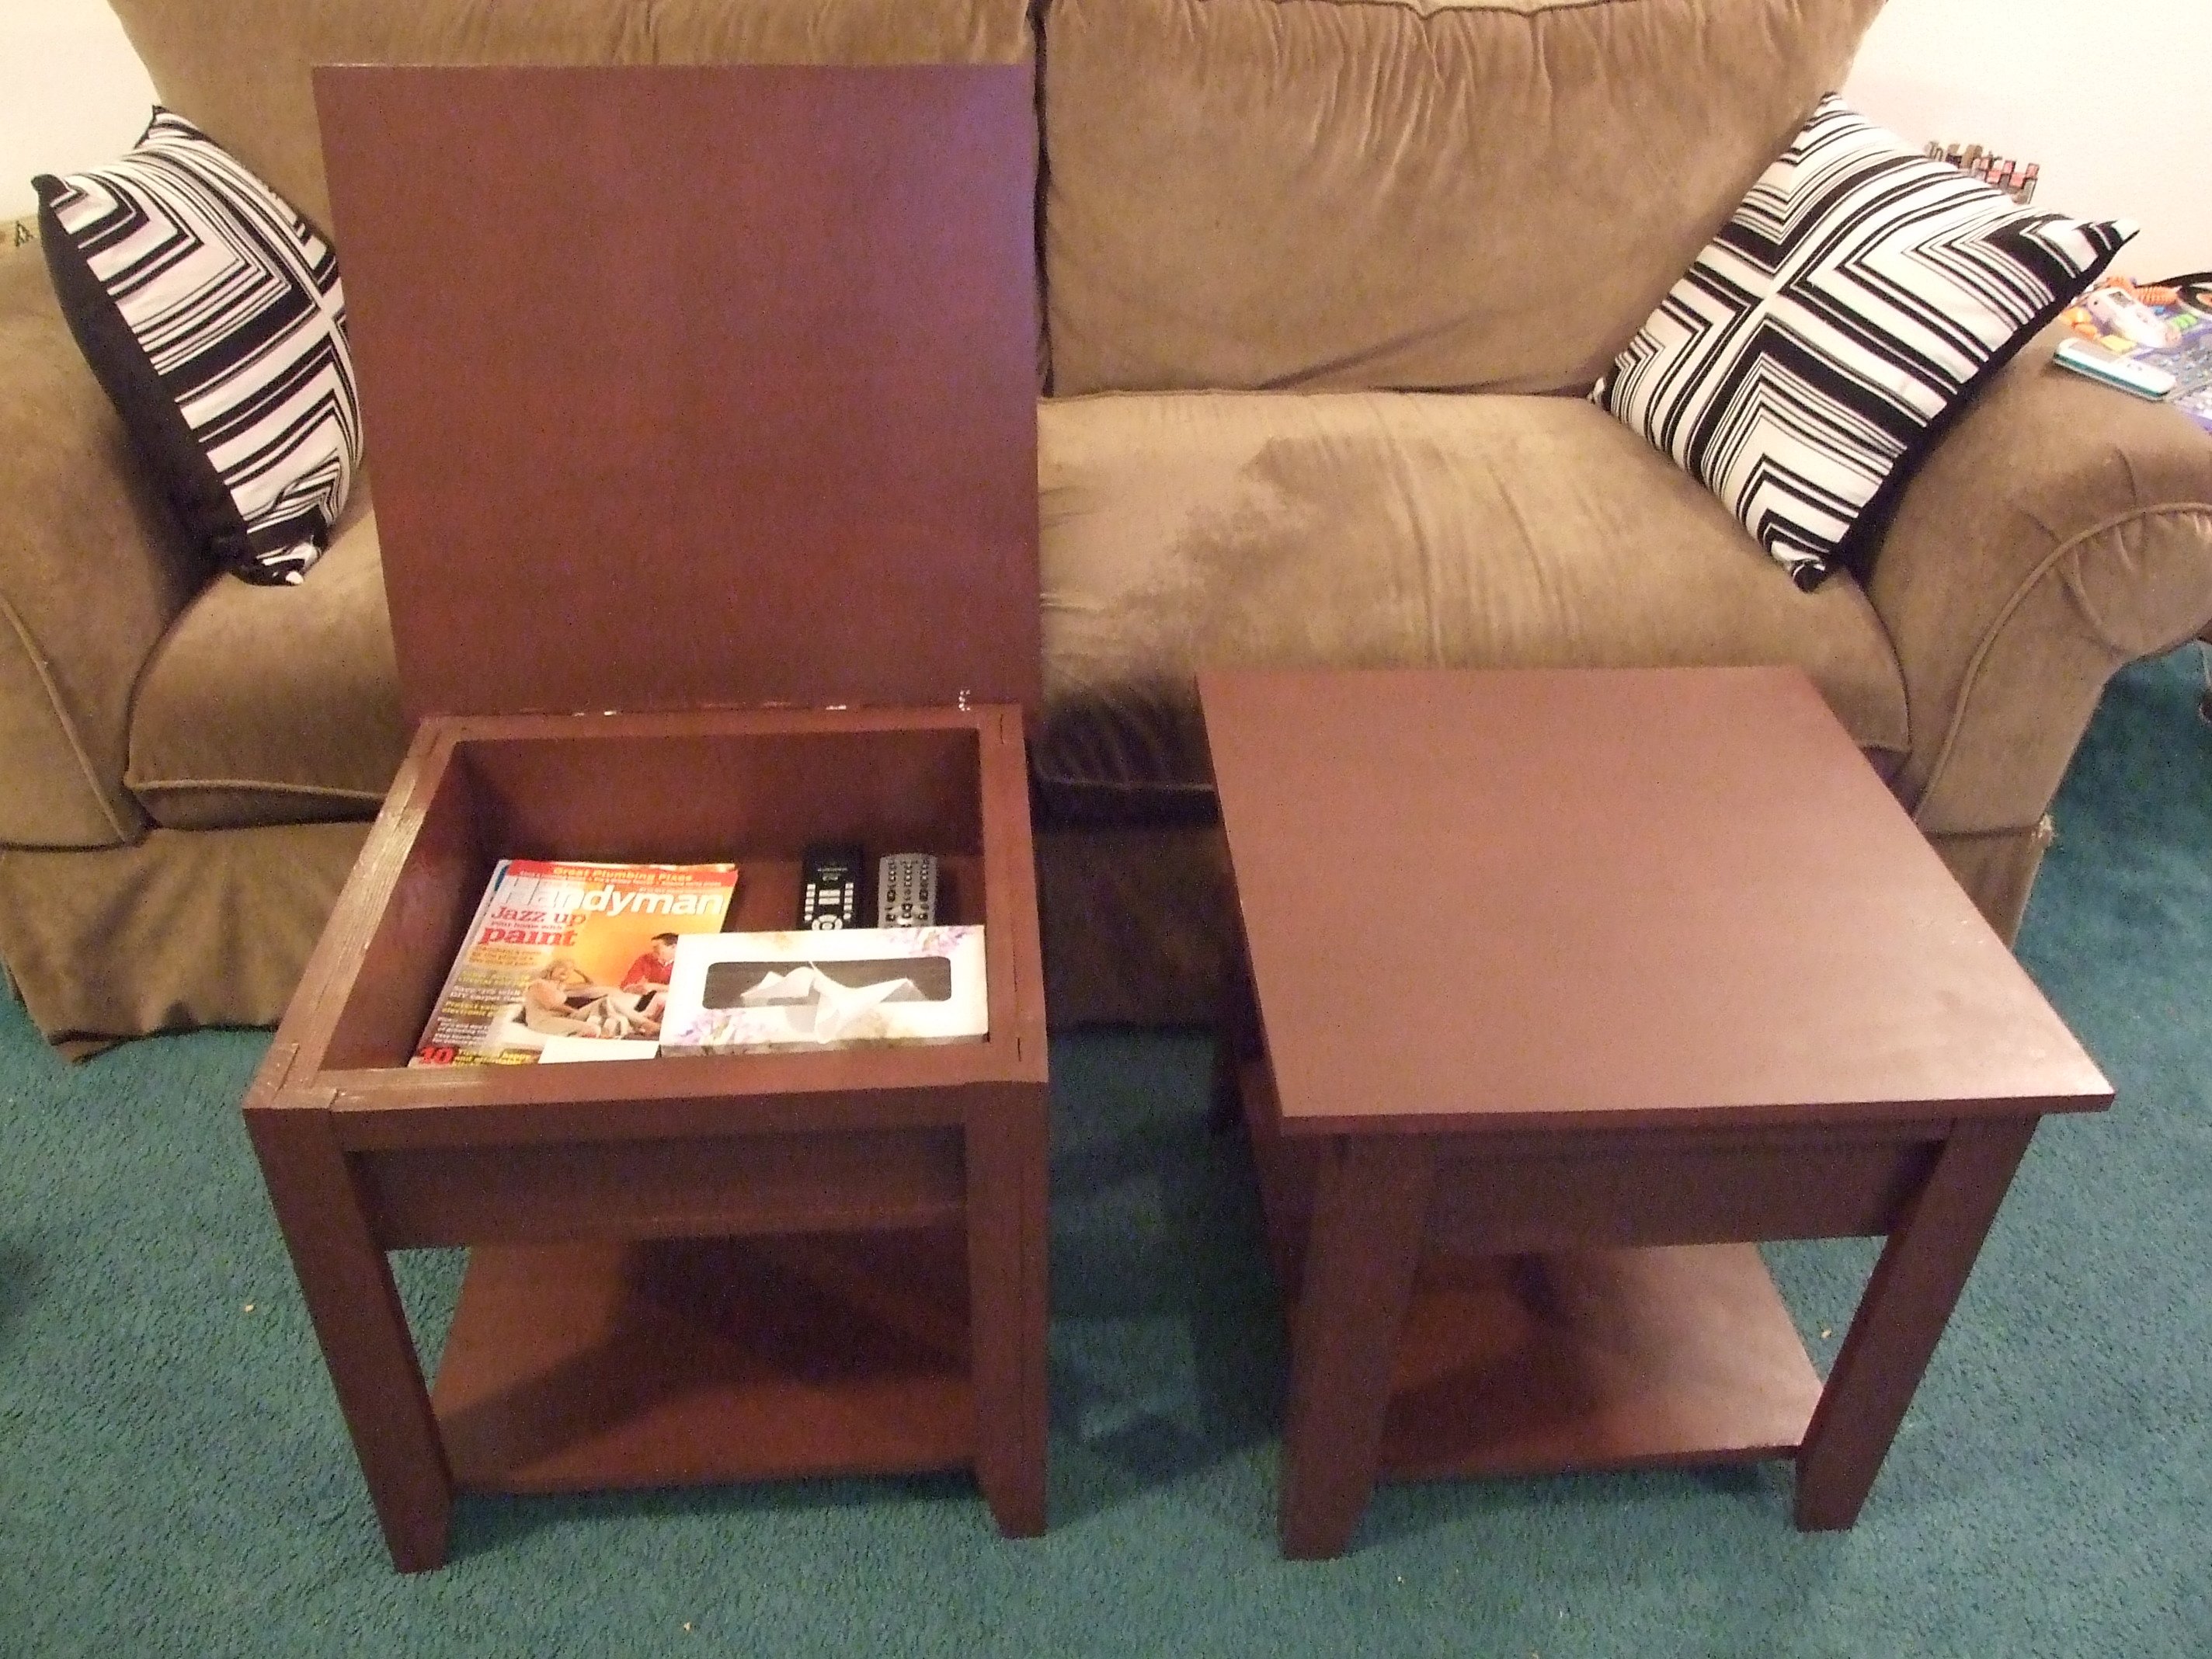
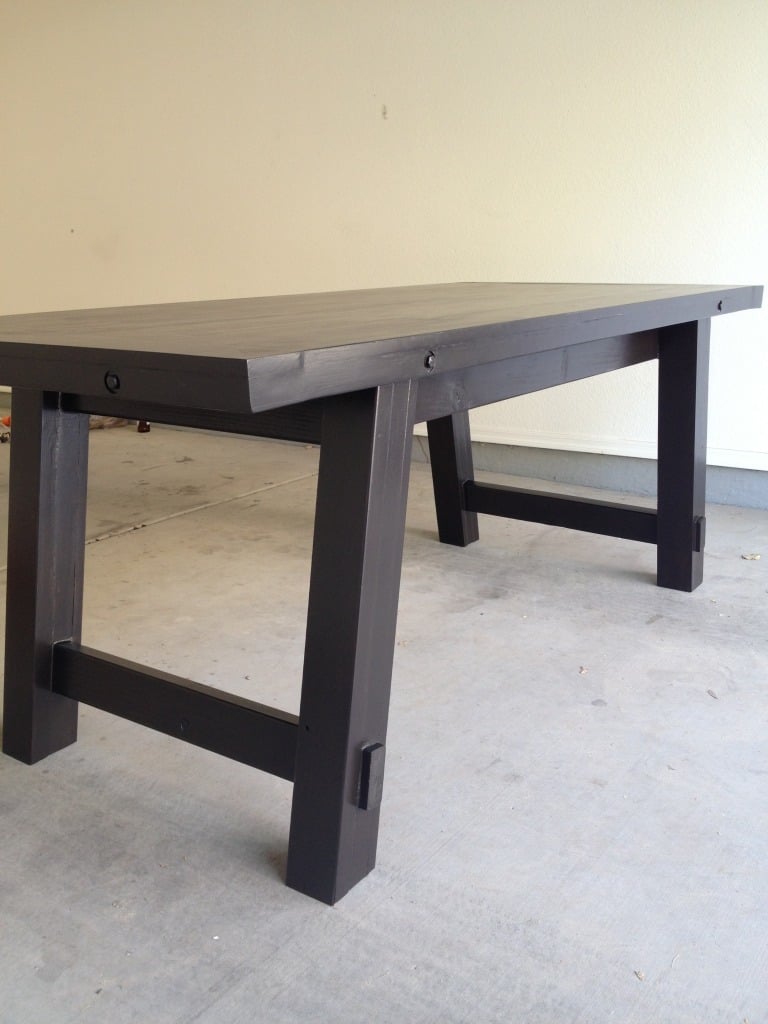
This was my first build ever. I loved the storage lego table, but it wouldn’t work well in our long, narrow living room so I decided to make them end tables instead. I also changed them so that the tops were hinged to the back. I love the way they turned out! Now on to the long list of other things I want to build from this site. Thanks so much Ana!
Built from Plan(s)
Estimated Cost
About $40 each
Estimated Time Investment
Afternoon Project (3-6 Hours)
Finish Used
One coat primer followed by three coats Behr "bear rug"
Recommended Skill Level
Starter Project

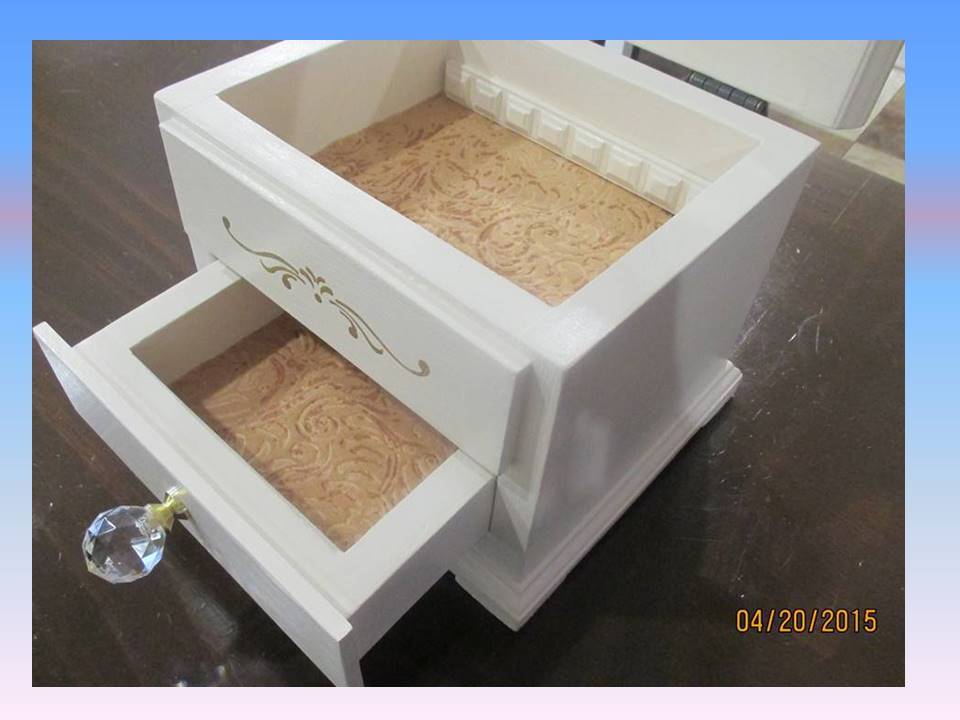
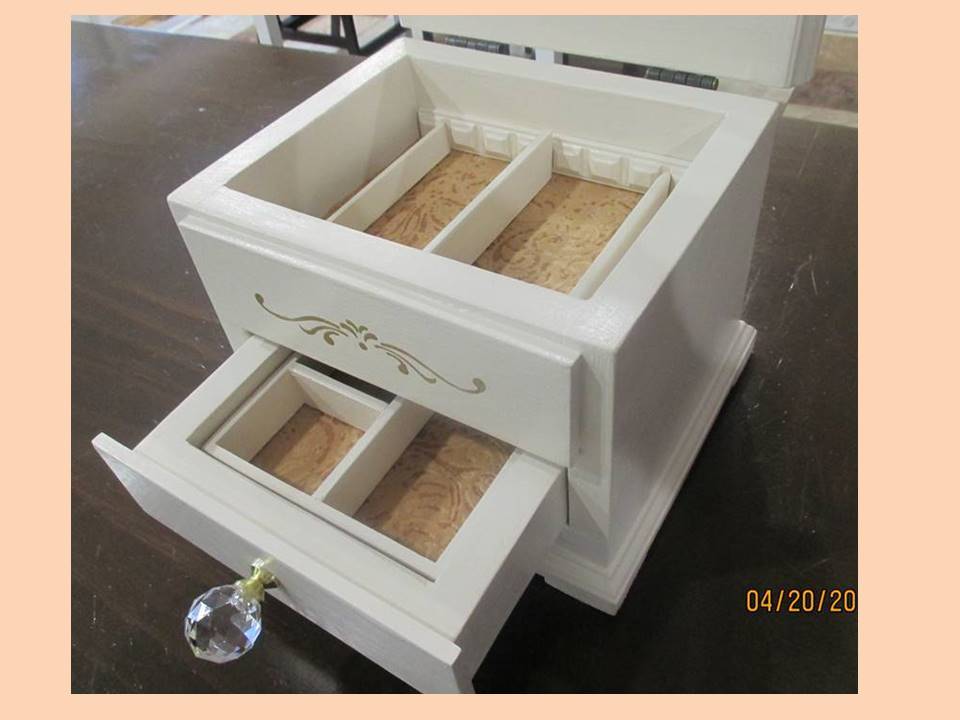
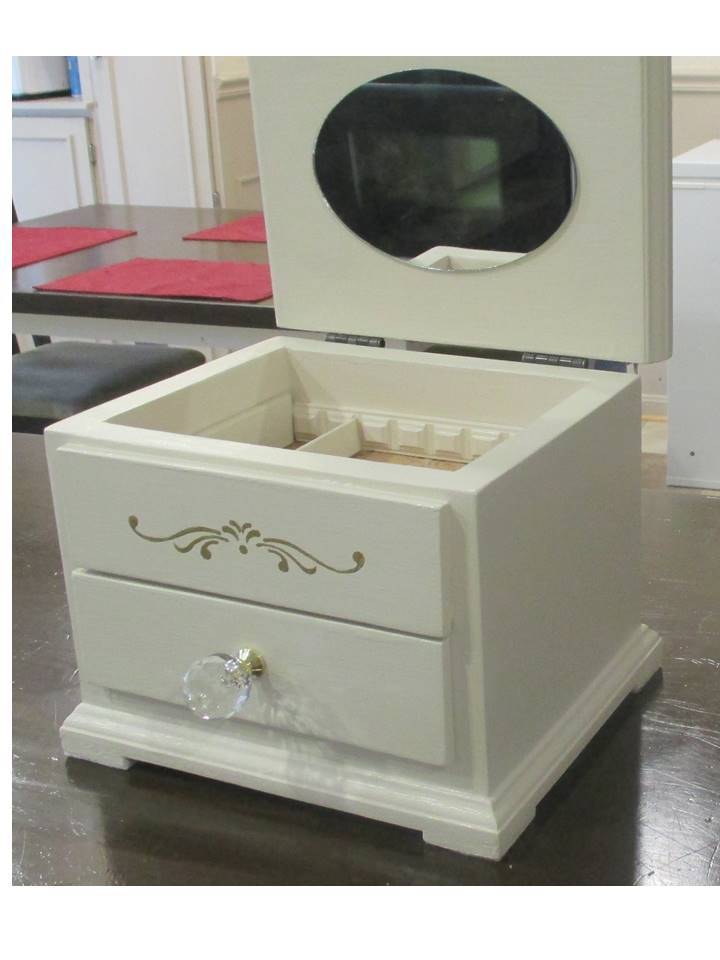
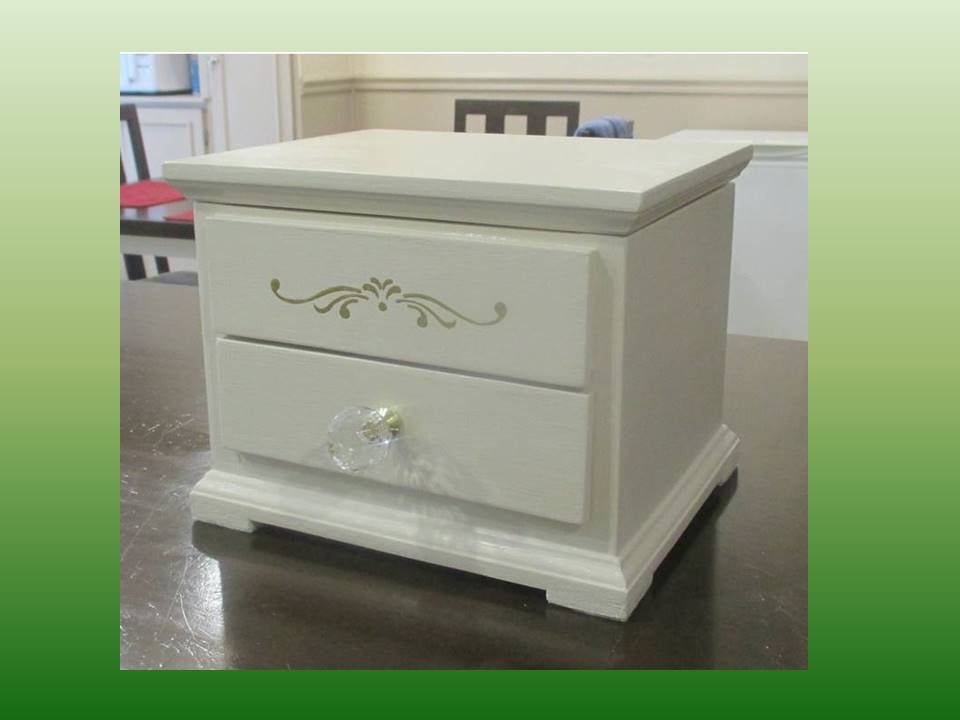
Jewelry Box Retirement Gift

This jewelry box is a gift for a friend at work who is retiring. It is a variation of the Easy Jewelry Box, with the following modifications:
Hinged lift-up top with mirror
Overlay drawer fronts from ¼” craft wood (Gold stencil on top false drawer front, and drawer boxes are 1/8” shorter than the shelf from front to back, to ensure the fronts sit flat against the box front and drawer back doesn't touch the box back at all)
The bottom is 2 pieces thick, to allow space for the drawer overhang and attaching the bottom moulding.
Solid wood back (instead of plywood)
Top and bottom edged with mini stop moulding to make the overhangs, and added feet made from lattice
Removable drawer divider tray and 2 heights of removable dividers for the top, made from dentil, lattice and screen bead mouldings
I really took my time on this build to get everything just right with the build and the finish. Probably spent about 6 hours spread out over the last few weekends.
Built from Plan(s)
Estimated Cost
Cost: 1x8 and 1x2 Lumber and finishes were already on hand (left over from other projects) and I spent about $25 for the mirror, hardware, felt, mouldings, and craft board.
Estimated Time Investment
Day Project (6-9 Hours)
Finish Used
3 coats Clark & Kensington semi-gloss paint + primer in Crushed Peanut, sanded between coats. Stencil: 1 coat Americana Gloss enamel metallic in glorious gold. Soft wax on the shelf and drawer bottom.
Recommended Skill Level
Beginner
Comments

Wed, 04/22/2015 - 18:29
Thank you!
Hi Linda, thank you for the nice comment! This was a fun build, and I'm very glad to say the gift was a big hit! :)

Ladder shelf
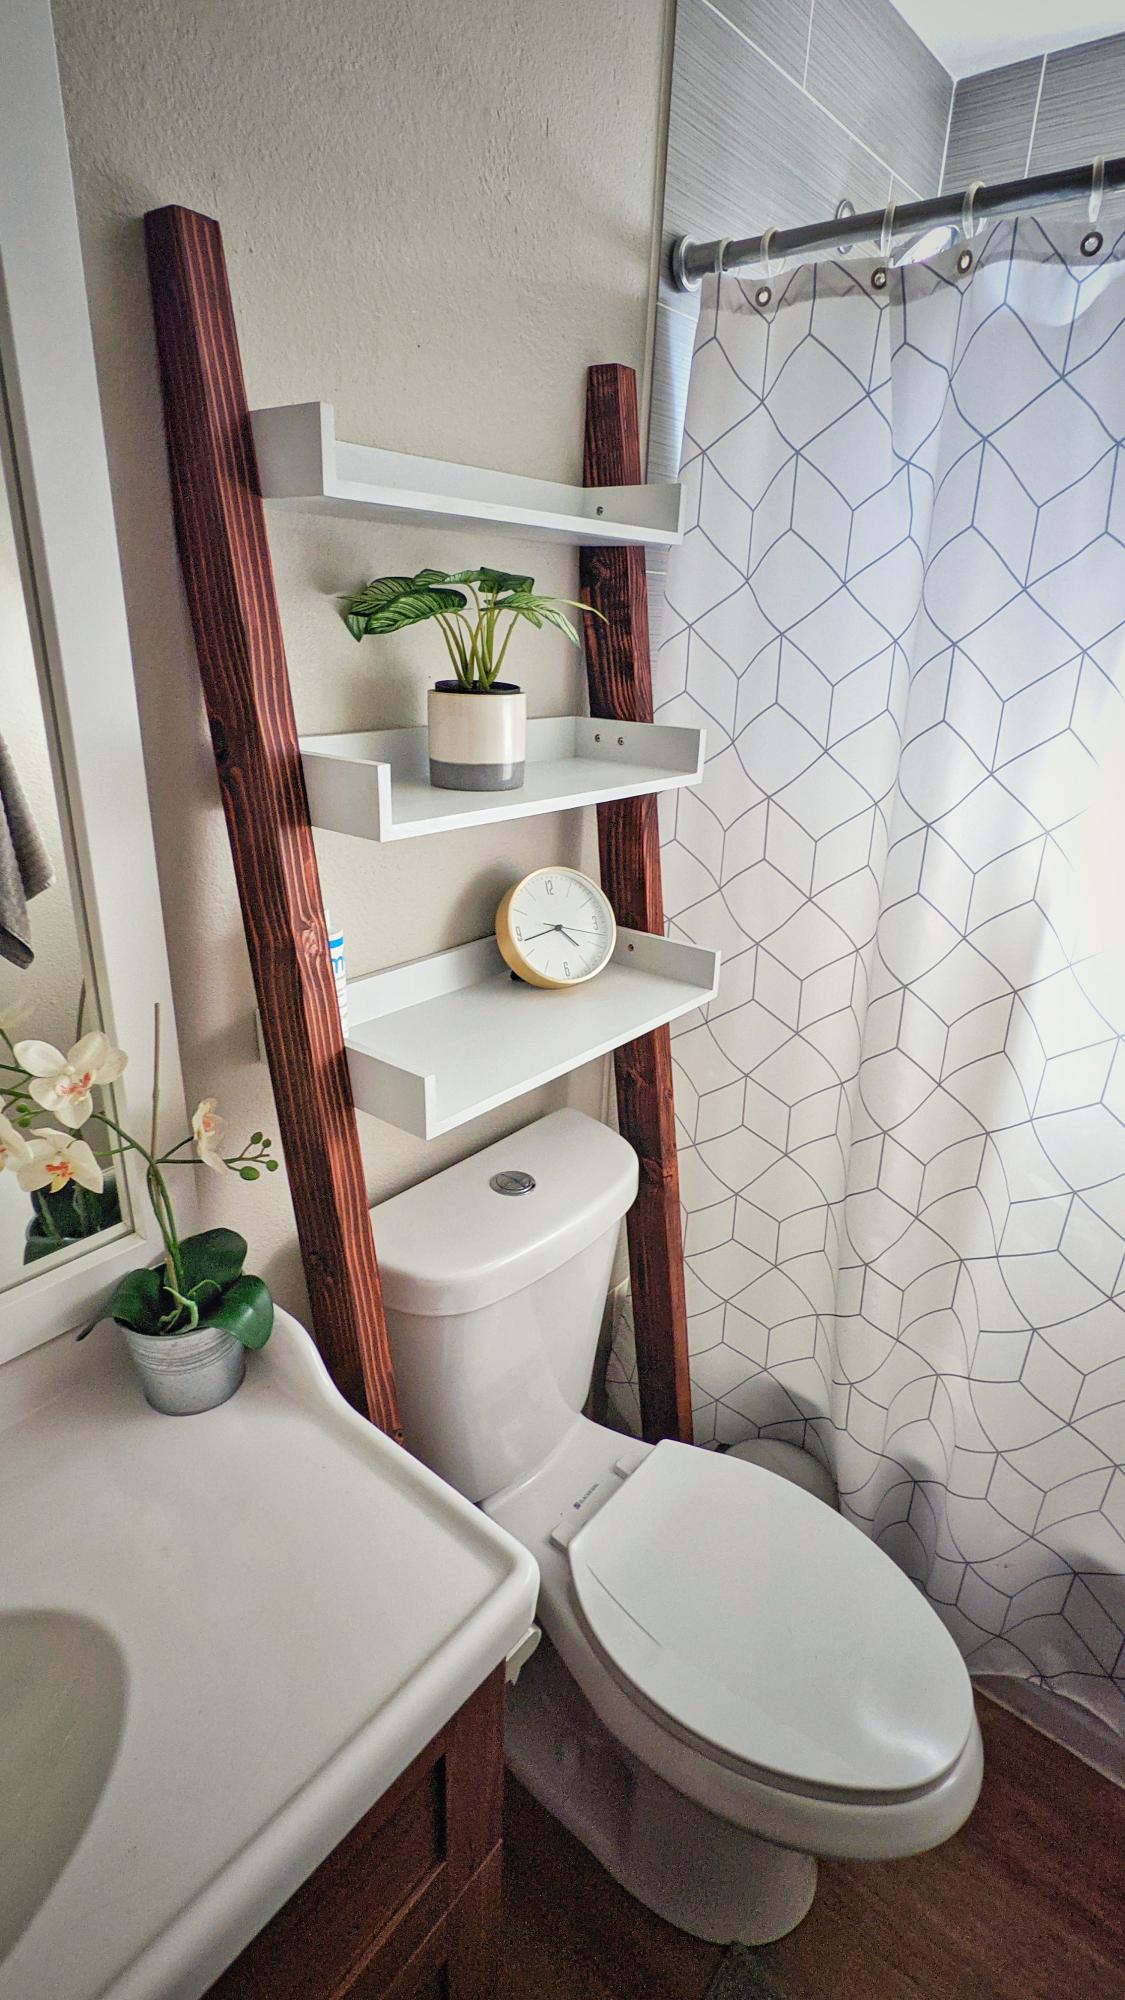
I've made a ladder bookshelf with some leftover mdf board and 2x4's. The plans were very helpful and really happy with how it turned out.
Built from Plan(s)
Comments
Big Kids Picnic Table
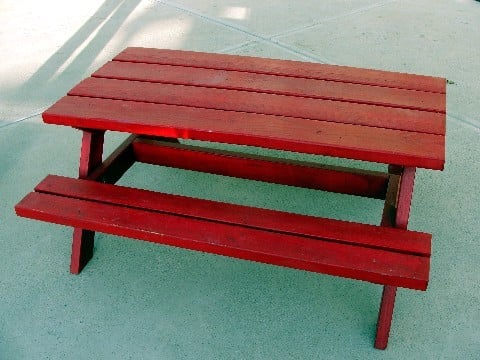
I made this last summer for my neice and nephew. I don't know why, but it did take me a long time. It's all done and cute now though.

Built from Plan(s)
Estimated Cost
can't remember
Estimated Time Investment
Weekend Project (10-20 Hours)
Finish Used
My sister painted it red. It still needs it's second coat.
Recommended Skill Level
Intermediate
Farmhouse Benchright Table Build
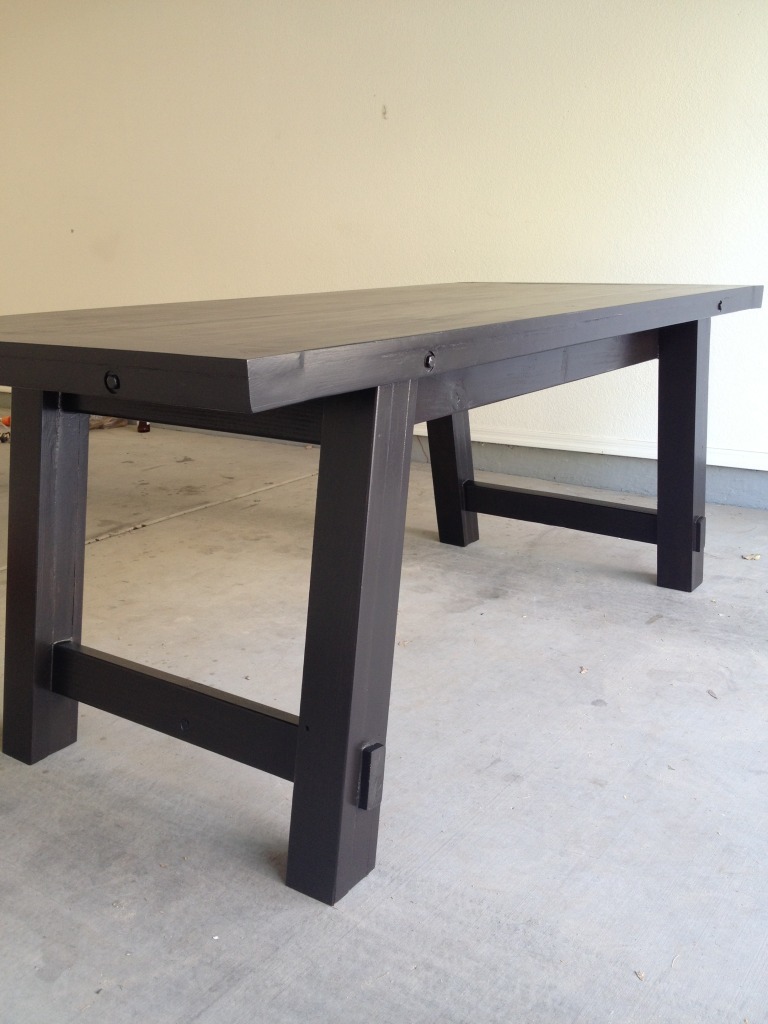
After doing my first build, pallet media center, I was hooked. My family and I desperately needed a dining room table. We wanted a rustic looking table and I was thankful I found the benchright table plan. Thanks Ana!! This build was fairly easy. I did mess up a couple times with the angle/bevel cuts. Totally ruining a couple boards. Which I had to run back to Lowes and purchase a couple more boards. I used 3/8 hardware bolts/washers/nuts in galvanized for the sides (3") and breadboards (6"). The stain basically painted them, which we love. I still need to add the hardware for the bottom (threaded rods, turnbuckle, nuts/bolts/washers, etc). The pics above really dont show the detail with the stain. The pics make the table look black. But you can actually see the wood grain on the table top. The table looks amazing in person, we love it!!! Thanks again Ana!!
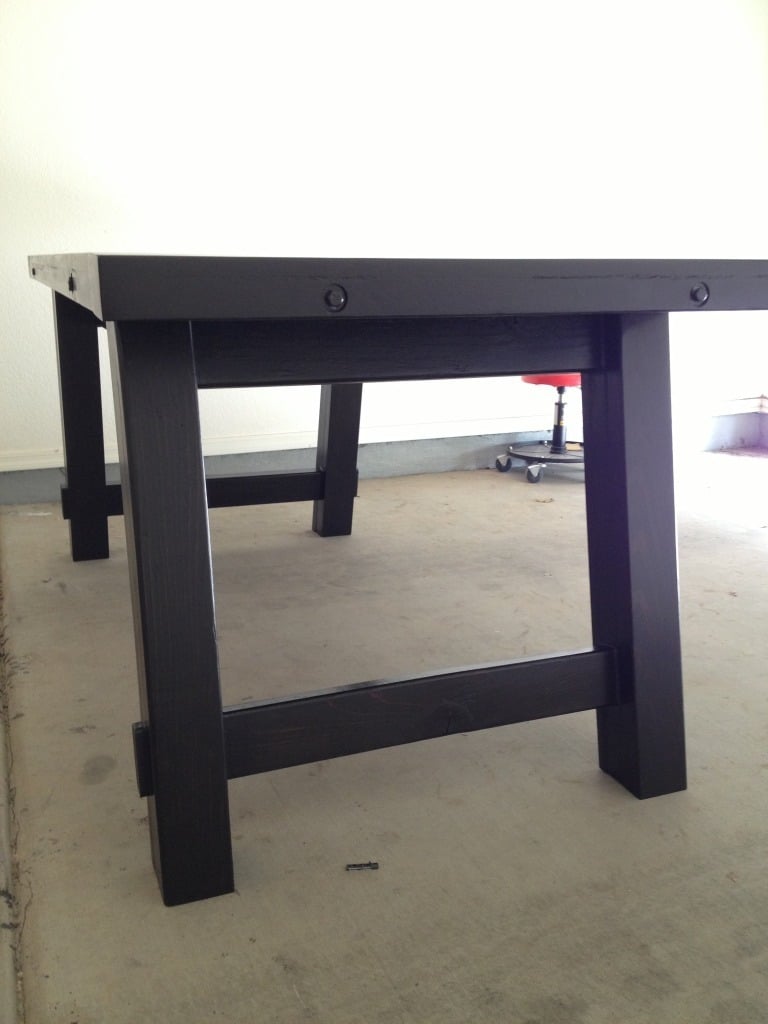
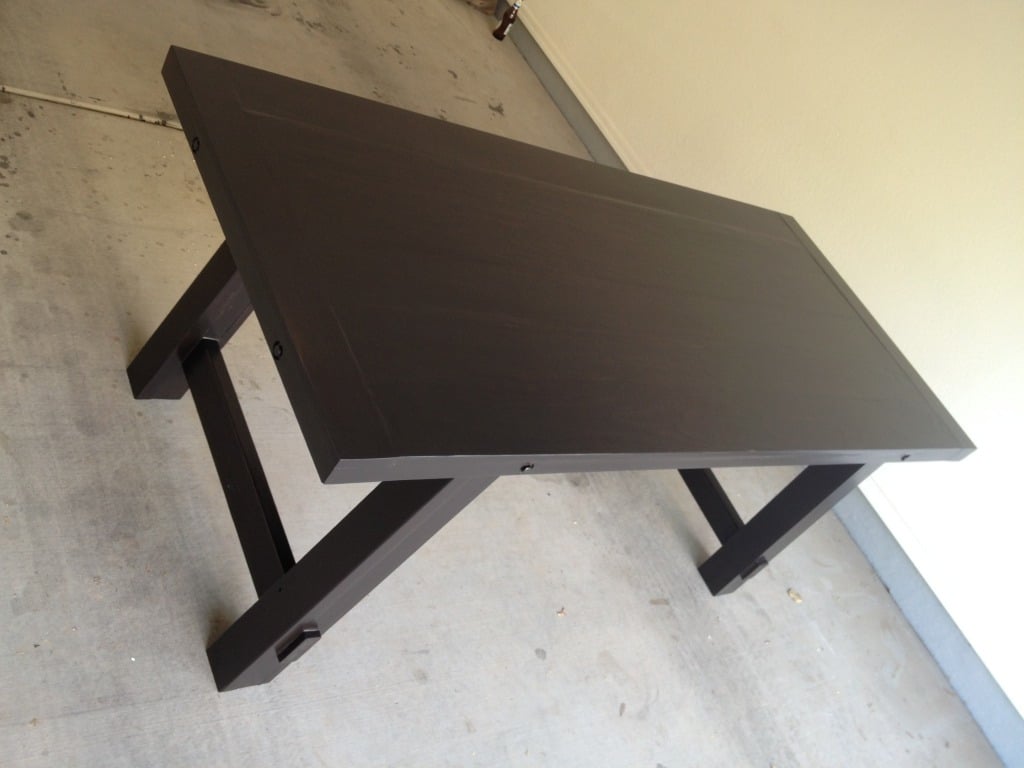
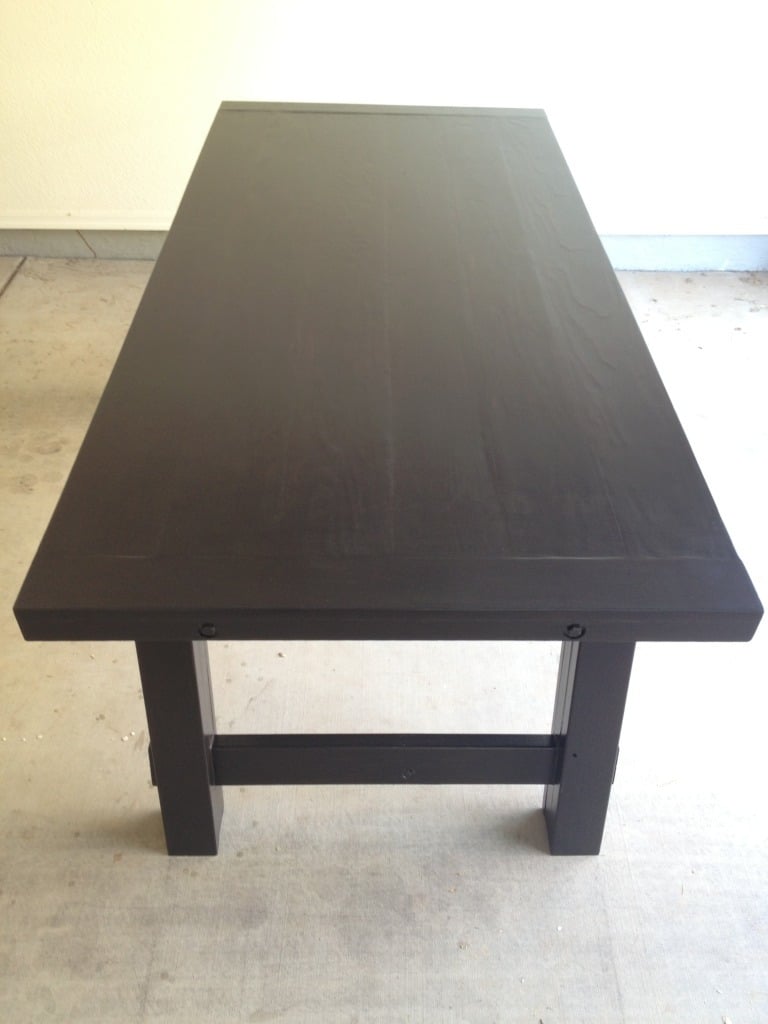
Built from Plan(s)
Estimated Cost
250
Estimated Time Investment
Weekend Project (10-20 Hours)
Finish Used
Rustoleum Kona stain and Rustoleum Satin Polyurethane. 2 coats of stain and 3 coats of urethane.
Recommended Skill Level
Beginner
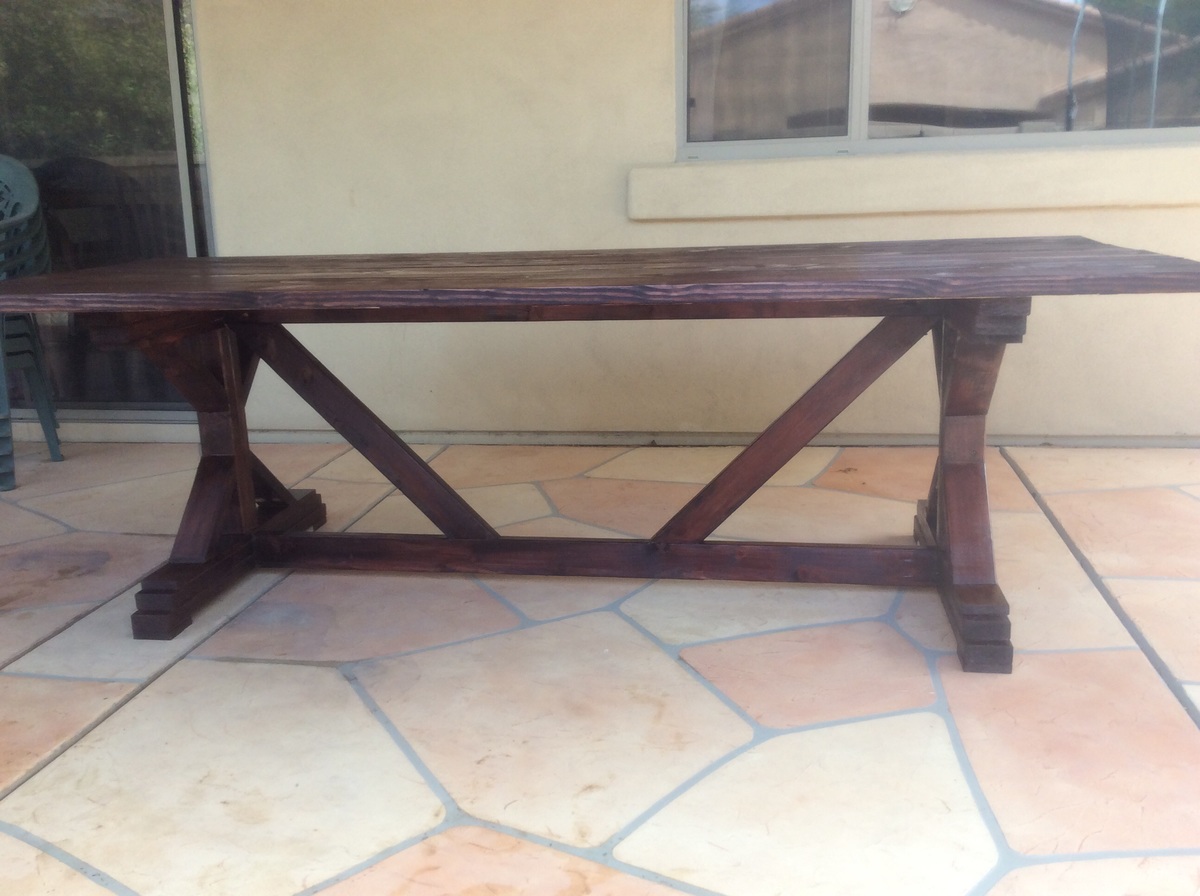
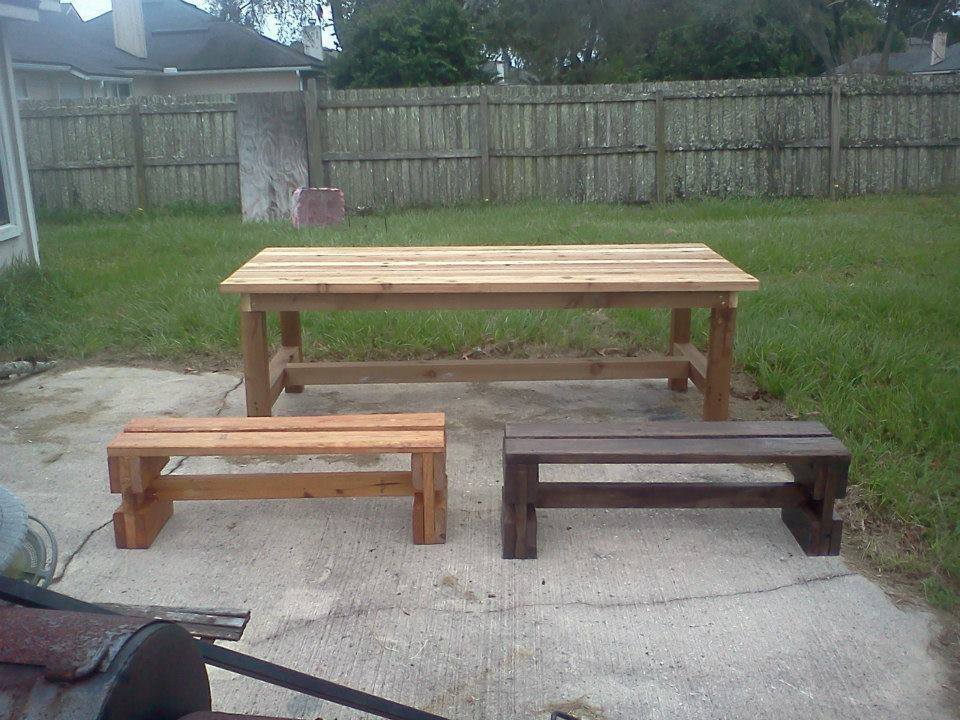
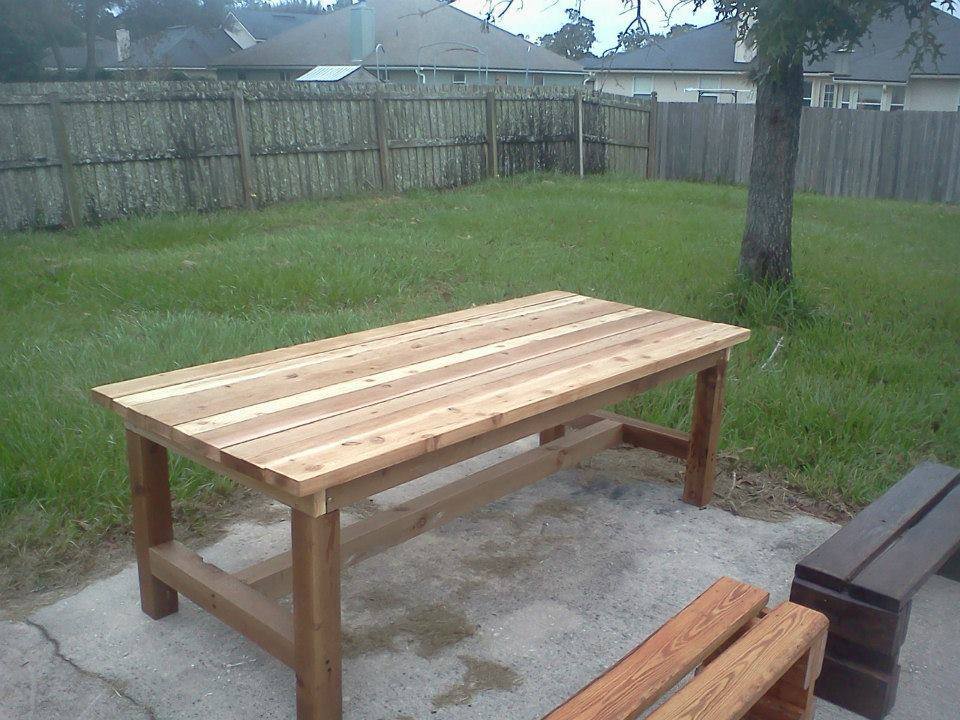
Outdoor patio table
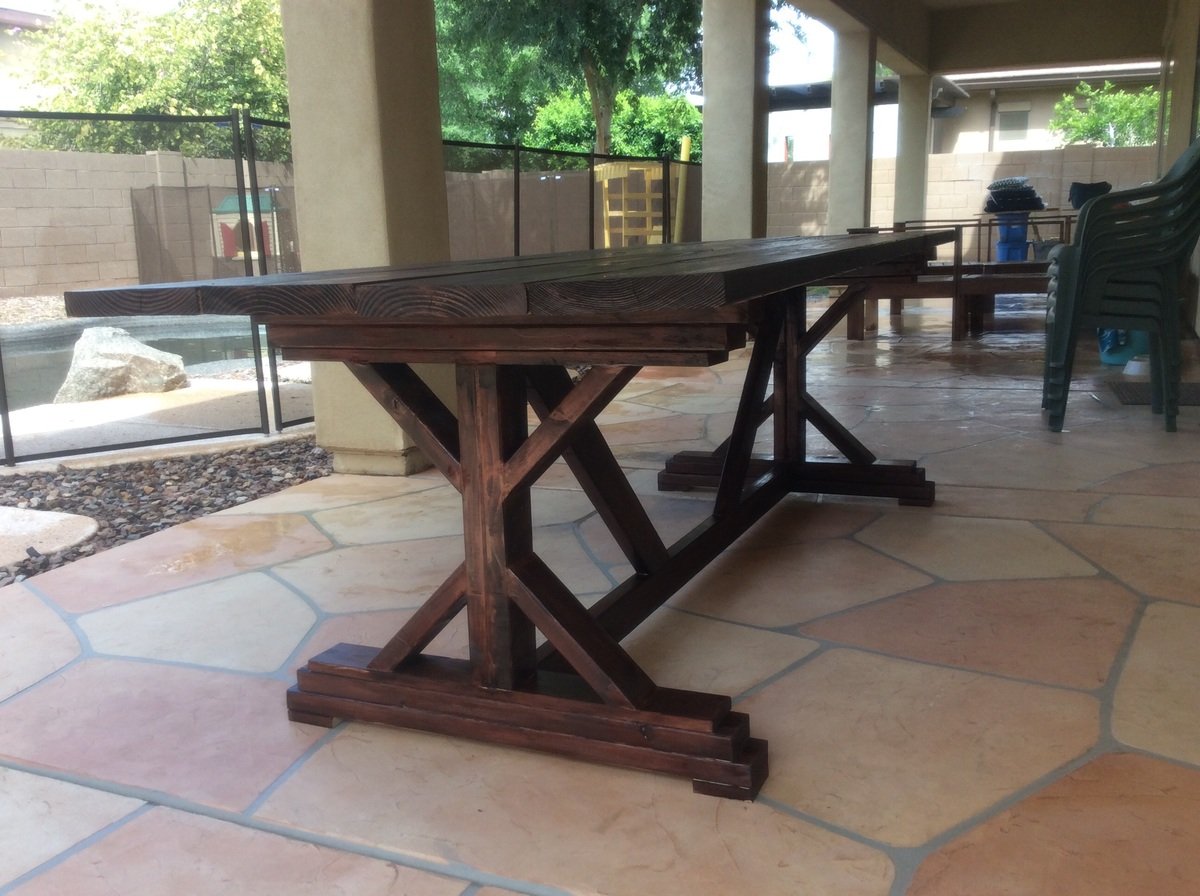
My family of 6 needed and outdoor table that would fit us all. The weather in Arizona is beautiful right now, so I decided to build this so we could enjoy it before it gets too hot. A big thank you to Ana White and the Shanty2chic sisters for this beautiful table.
Built from Plan(s)
Estimated Cost
65.00
Estimated Time Investment
Day Project (6-9 Hours)
Finish Used
Red mahogany
Recommended Skill Level
Beginner
Day bed

My sister needed a day bed for her guest room. I modified the Modern Outdoor Chair plans to fit her needs. We used an old door she found, even using the hinges as a means to attach the door to the bed frame. This was my first real project.


Built from Plan(s)
Estimated Time Investment
Weekend Project (10-20 Hours)
Finish Used
Paint
Recommended Skill Level
Beginner
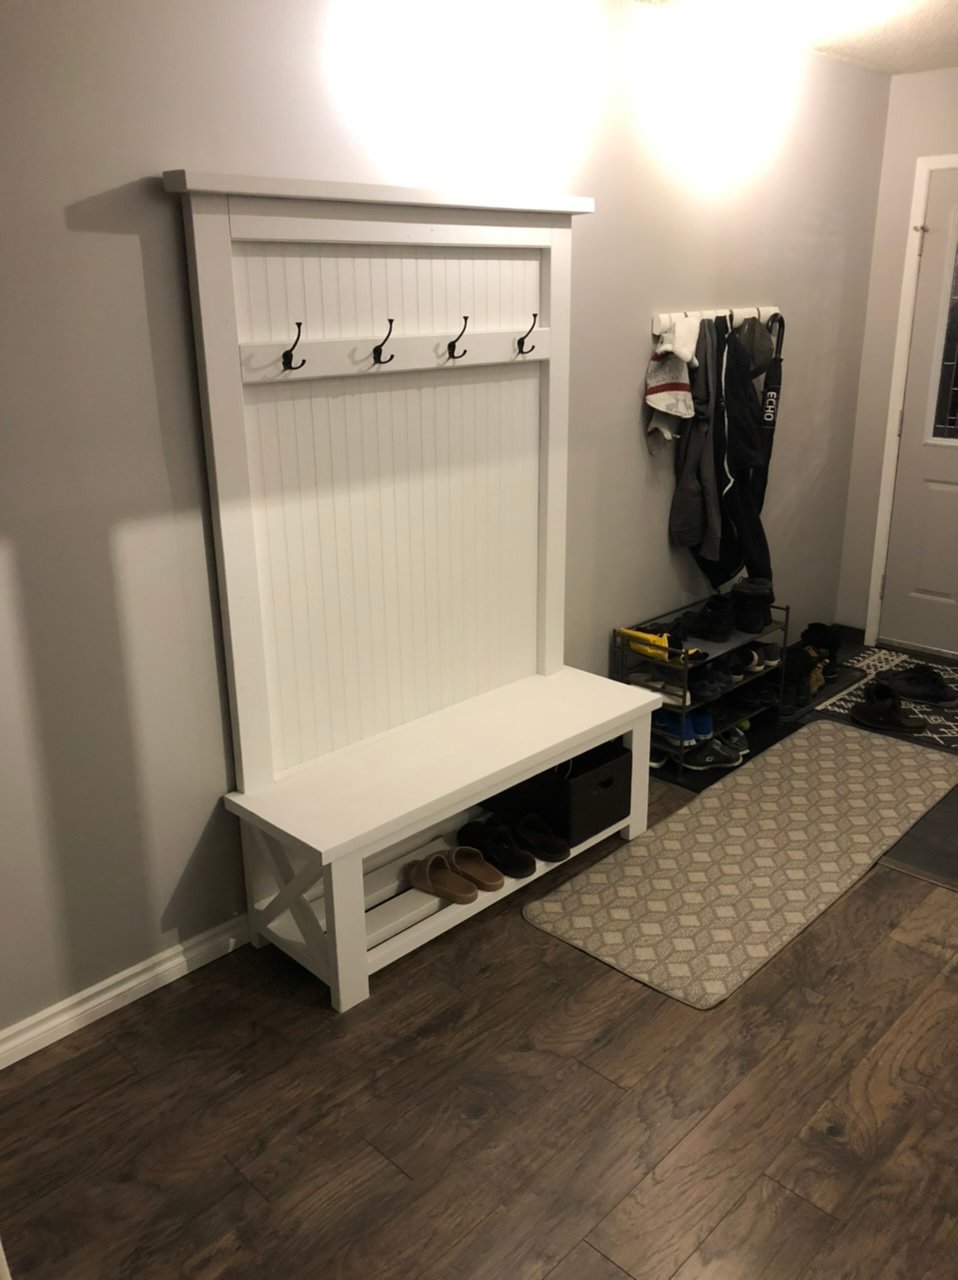
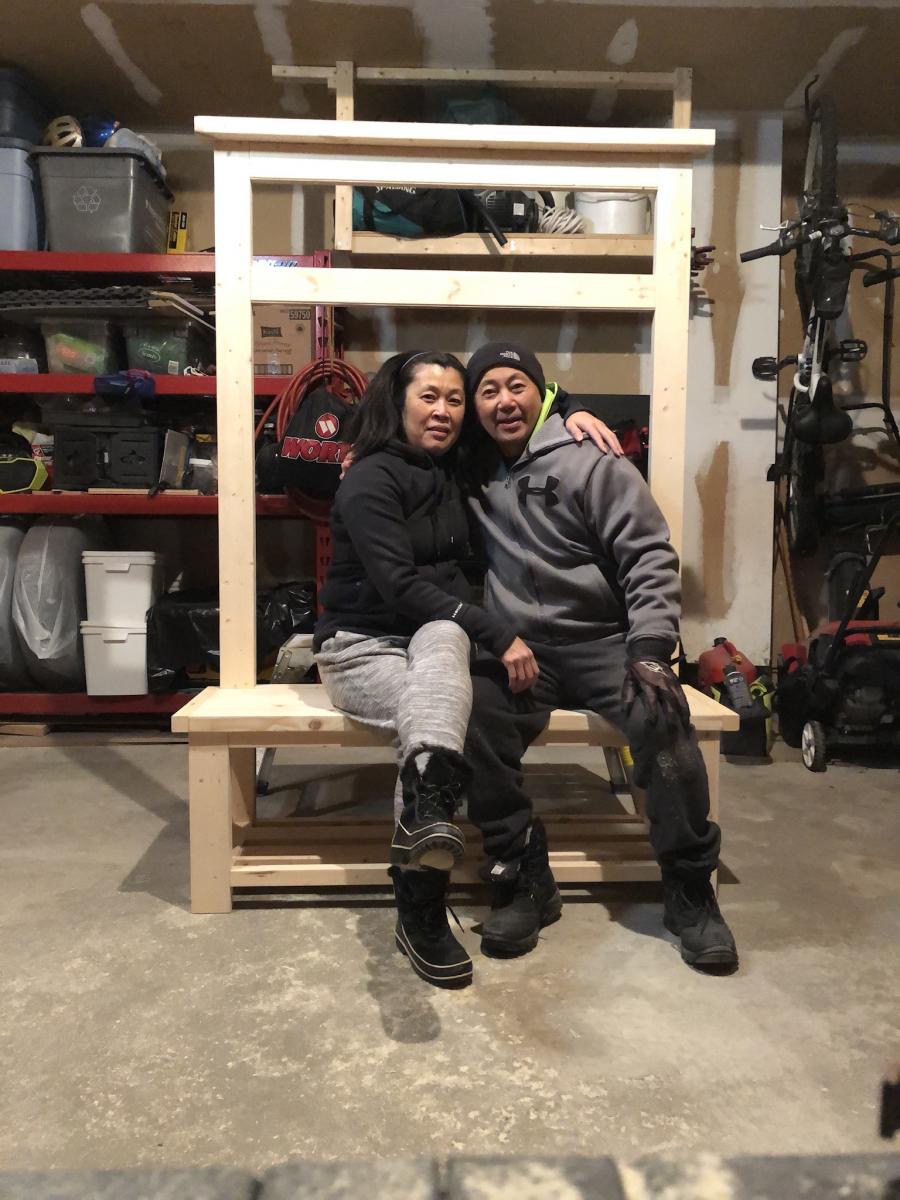
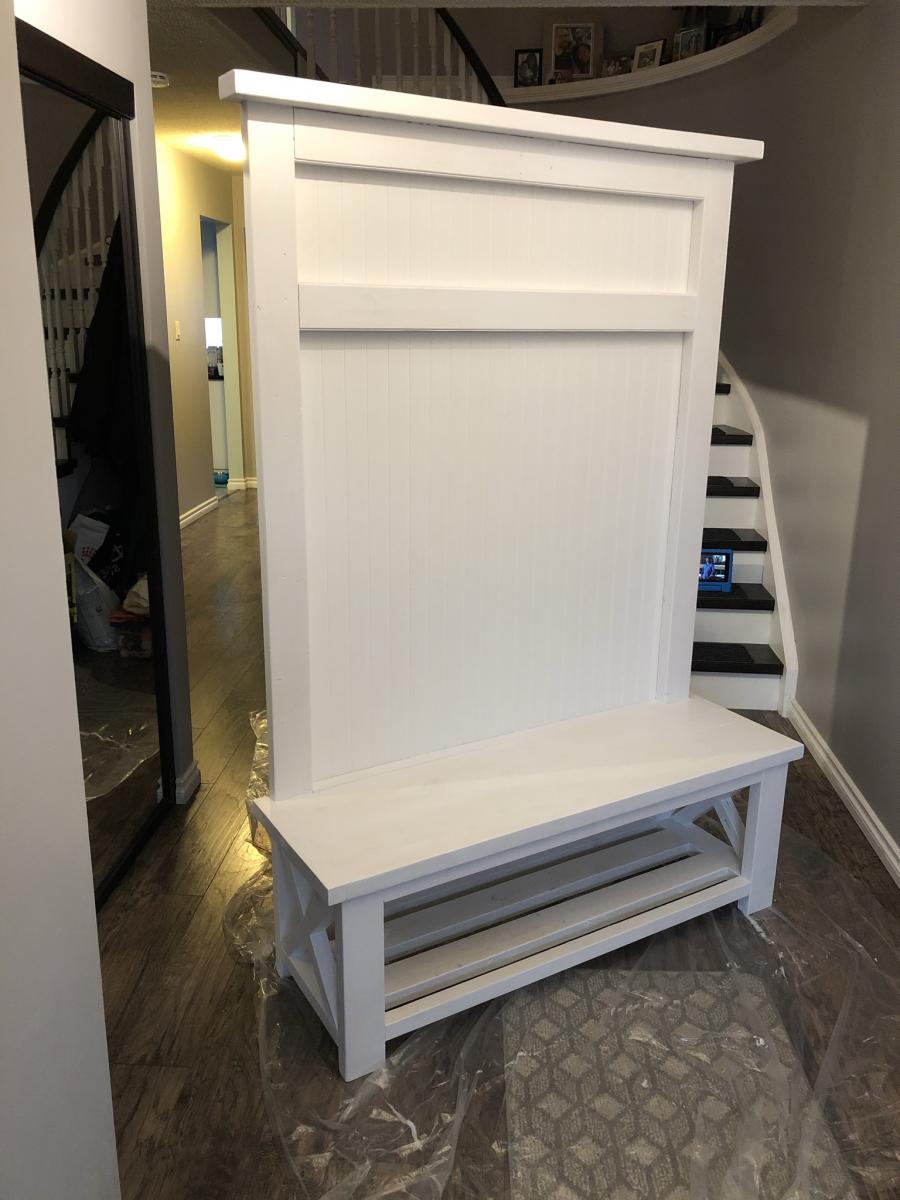
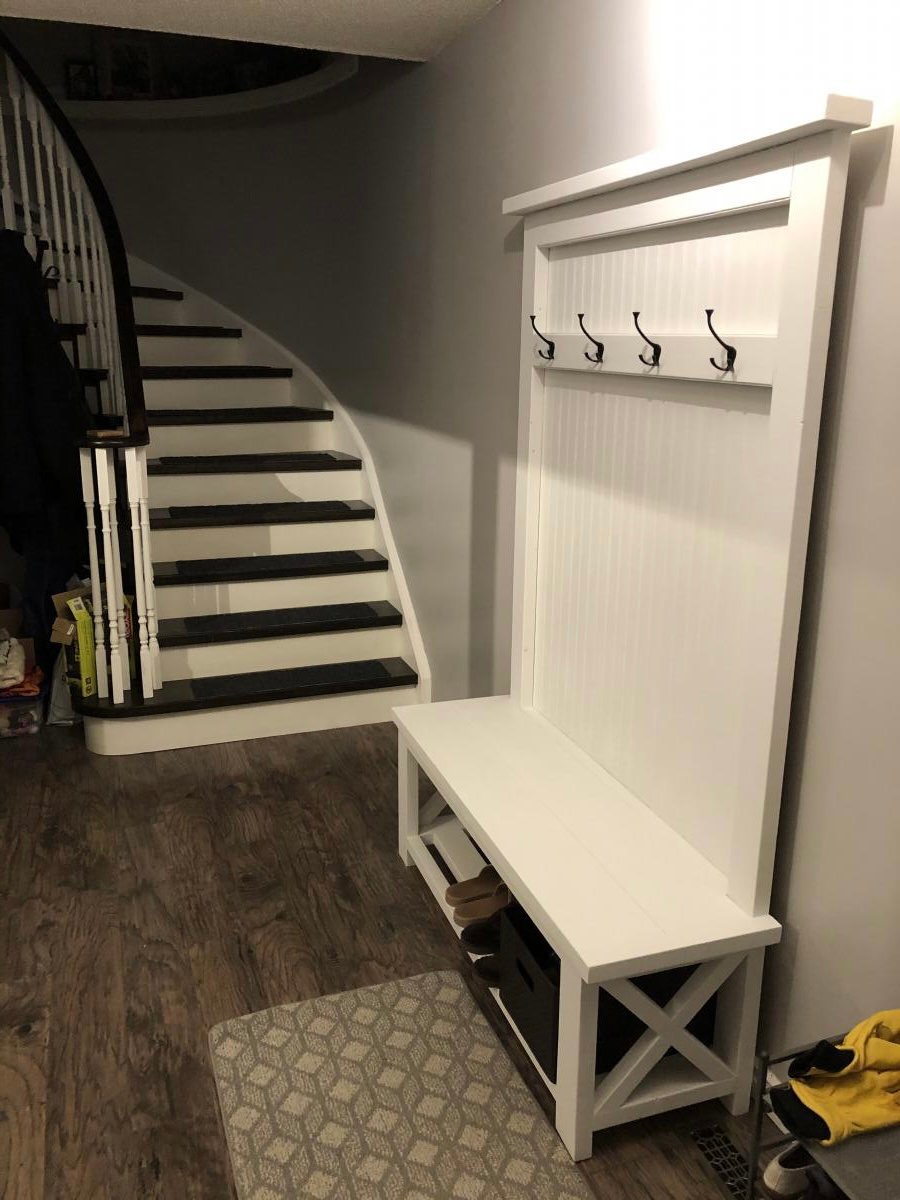
Bench and Coat Hooks
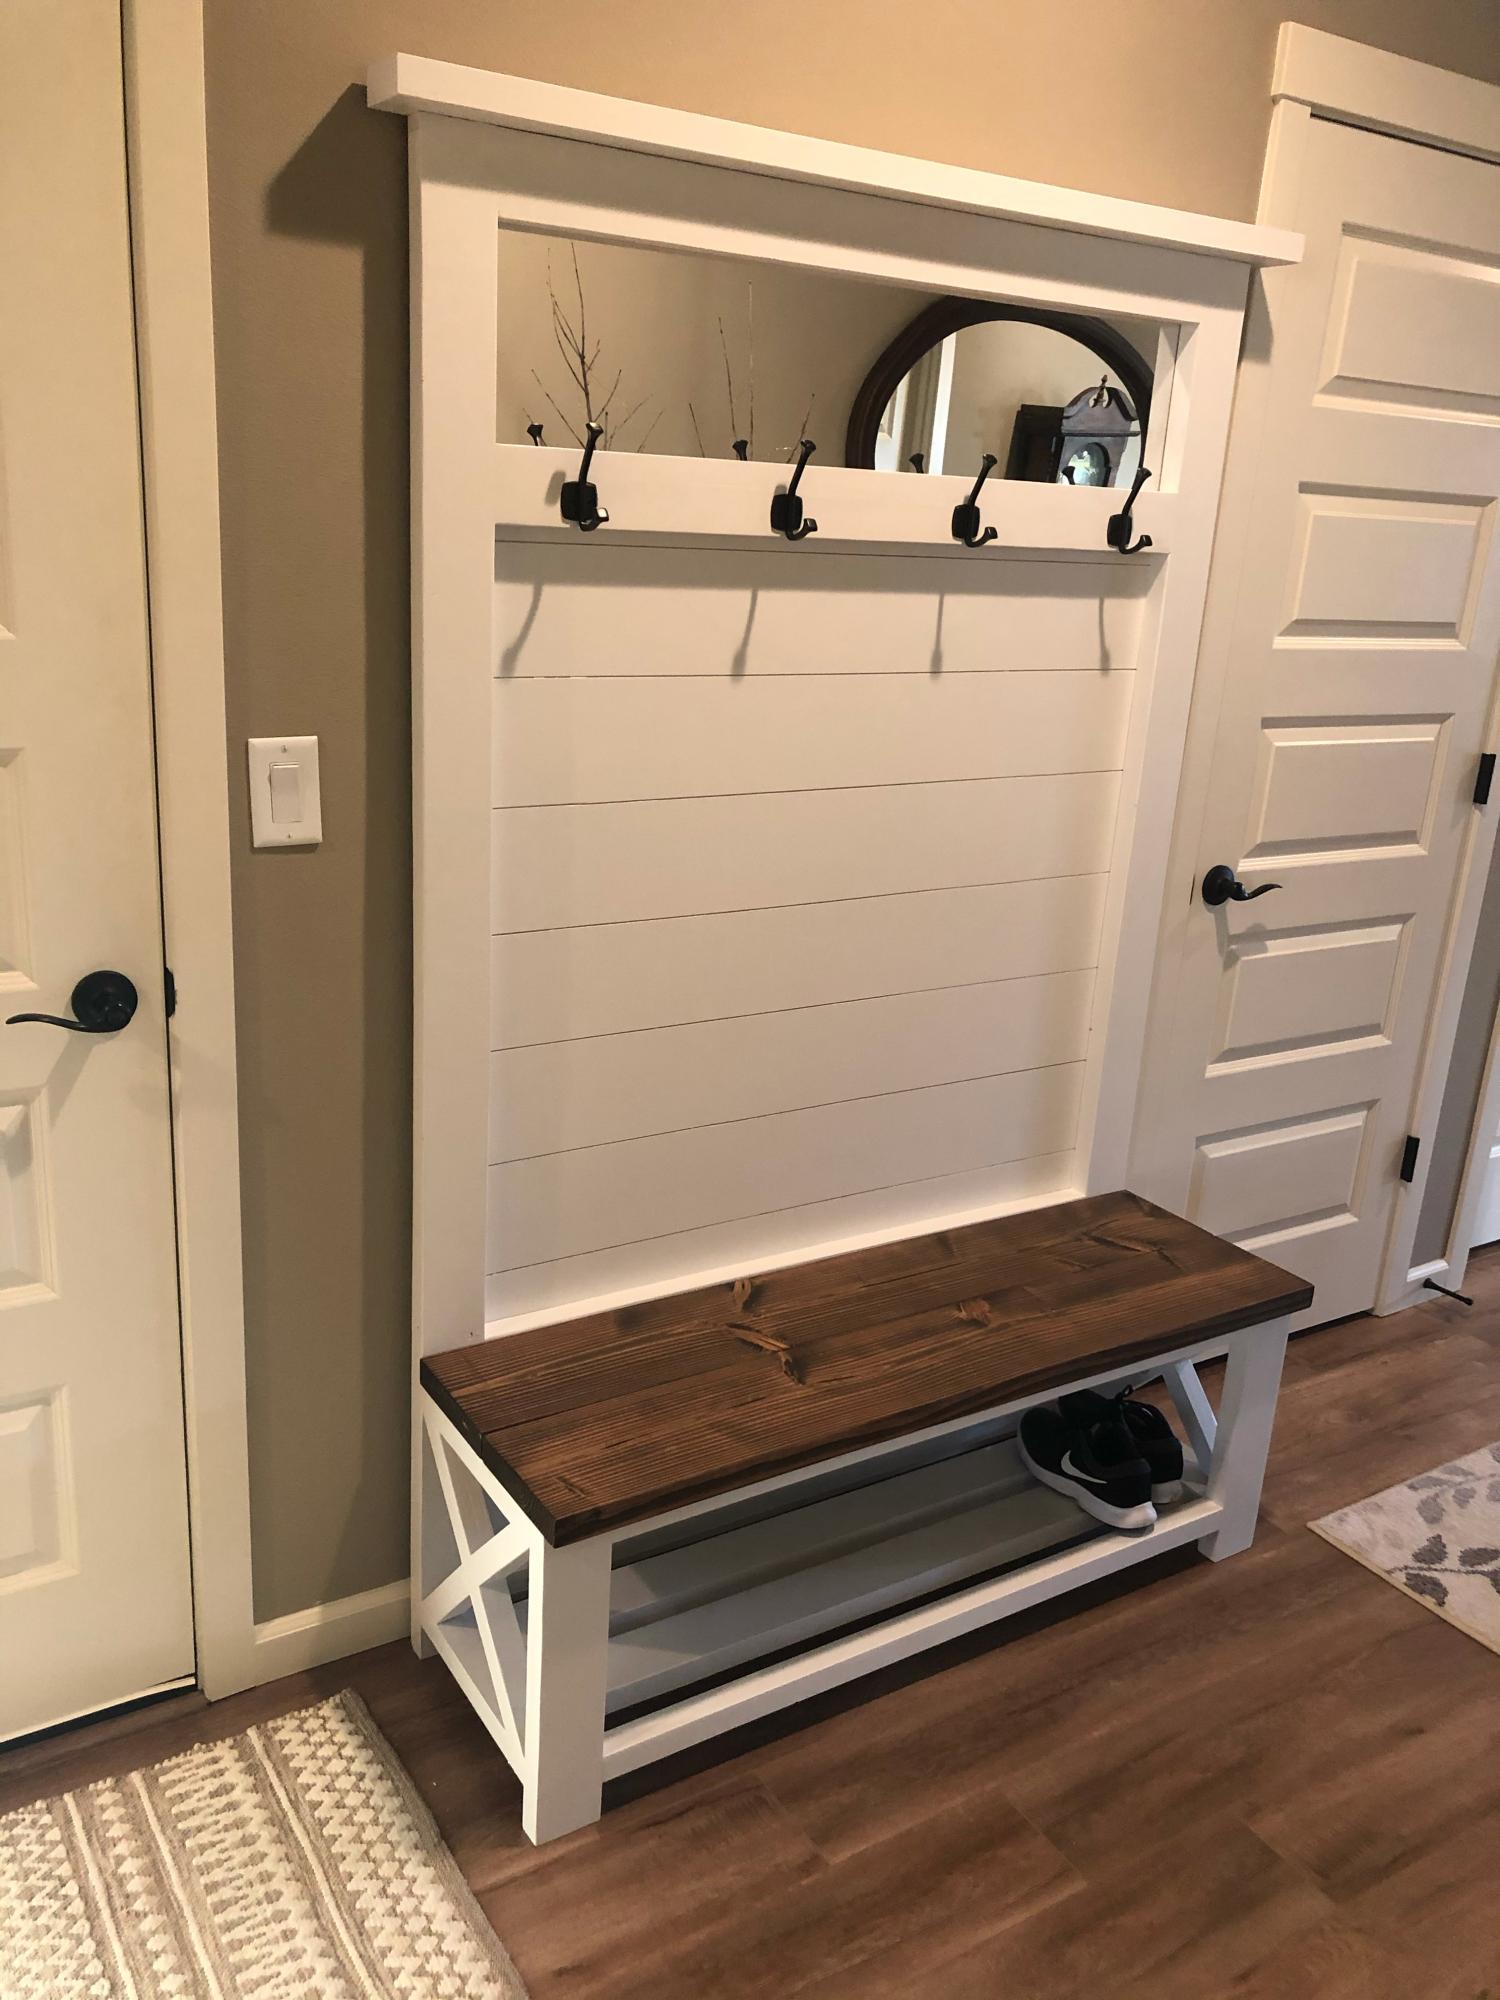
This was a fun, fairly quick project. We use it all the time!
Comments
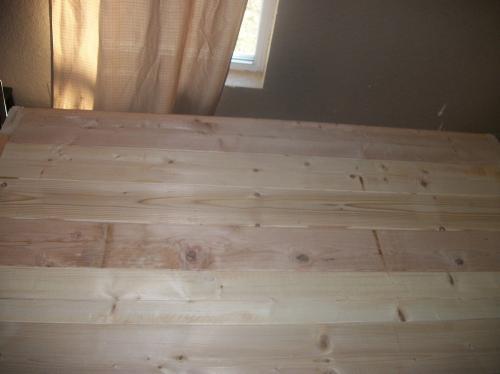
Our New Table...the table of my dreams!!
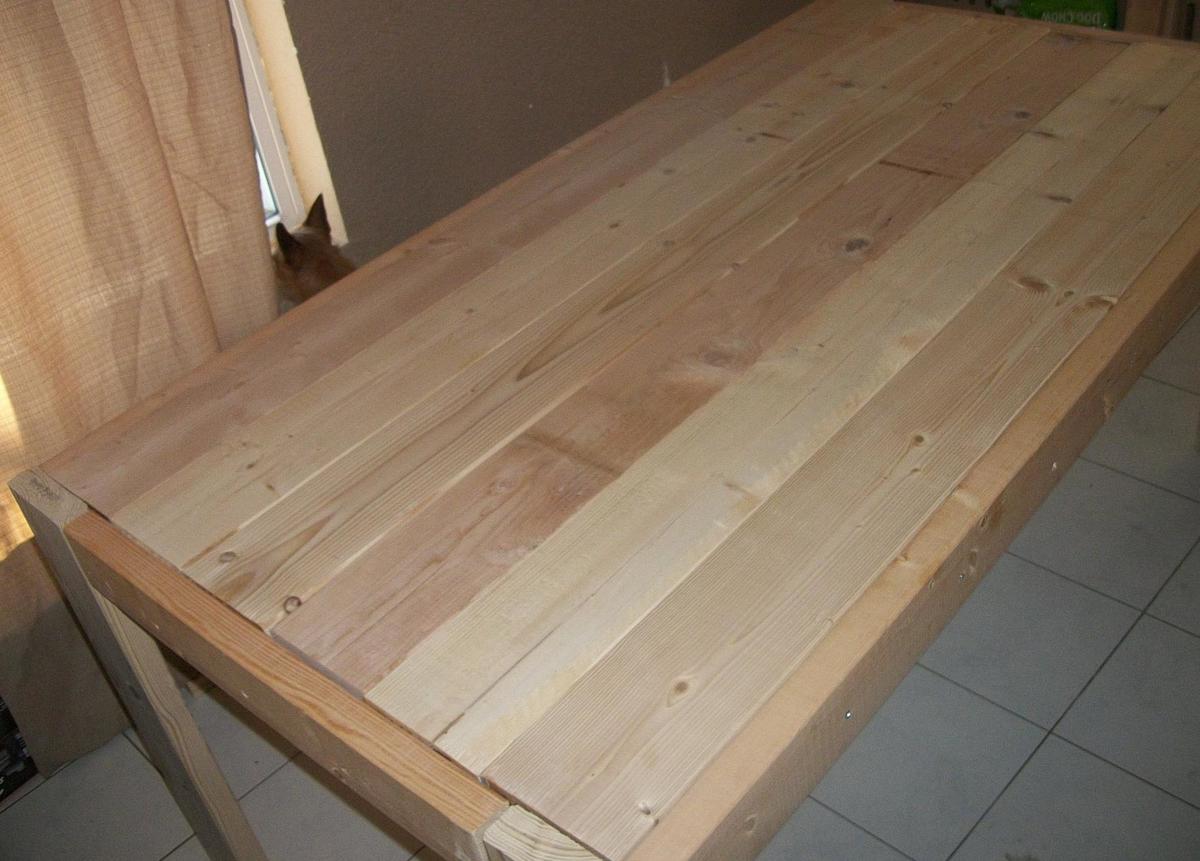
I have added hundreds of plans on my to do list, and some of them may have been a little easier, but I really wanted this table. Badly.
So, my husband and I, decided one weekend to build the Modern Farmhouse Table. Even though we have a saw, we decided since this was our first project, we would have Lowes cut our wood. Big mistake.
When we got home, we organized the wood as to what is what, and measured. It was while we were measuring, when we noticed that a lot of the wood was cut wrong :(
So let that be a lesson...ALWAYS CUT YOUR OWN WOOD!
We went ahead and put the table together, and even though there are some gaps, which I'm planning on filling, I am proud with it.
It's been 3 weeks since we've built the table, and I still have A LOT of sanding to do, and I still need to finish it, but I am proud of what my hubby and I built together so I have to brag!
Next on our list is to build the benches...

Built from Plan(s)
Estimated Time Investment
Week Long Project (20 Hours or More)
Recommended Skill Level
Starter Project
My Garden box

Built this with the help of my Dad! Learned about threads as I've never used them before. Because of all the controversy surrounding having pressure treated wood touch the veggies and because I could not afford or find cedar 4x4's I decided to use the left over cedar to build a little cover around the 4x4's so my soil and veggies will never come into contact with it. Love it and the veggies are growing great!
Built from Plan(s)
Estimated Cost
$50/60
Estimated Time Investment
Afternoon Project (3-6 Hours)
Finish Used
I forget the stain I used on the outside of cedar...something natural looking.
Recommended Skill Level
Beginner
Comments

Fri, 05/31/2013 - 04:22
awesome job
I'm glad you were able to follow my plans. I'm not a plan writer so I wasn't sure if I gave good enough instruction. It is a shame you can not get all cedar. Sealing the legs will definitly help them last longer and with all that work you certainly want them to last! Just a hint...you can make 3 for not much more than you spent making one....Great job and thanks for the brag post LOVE LOVE LOVE
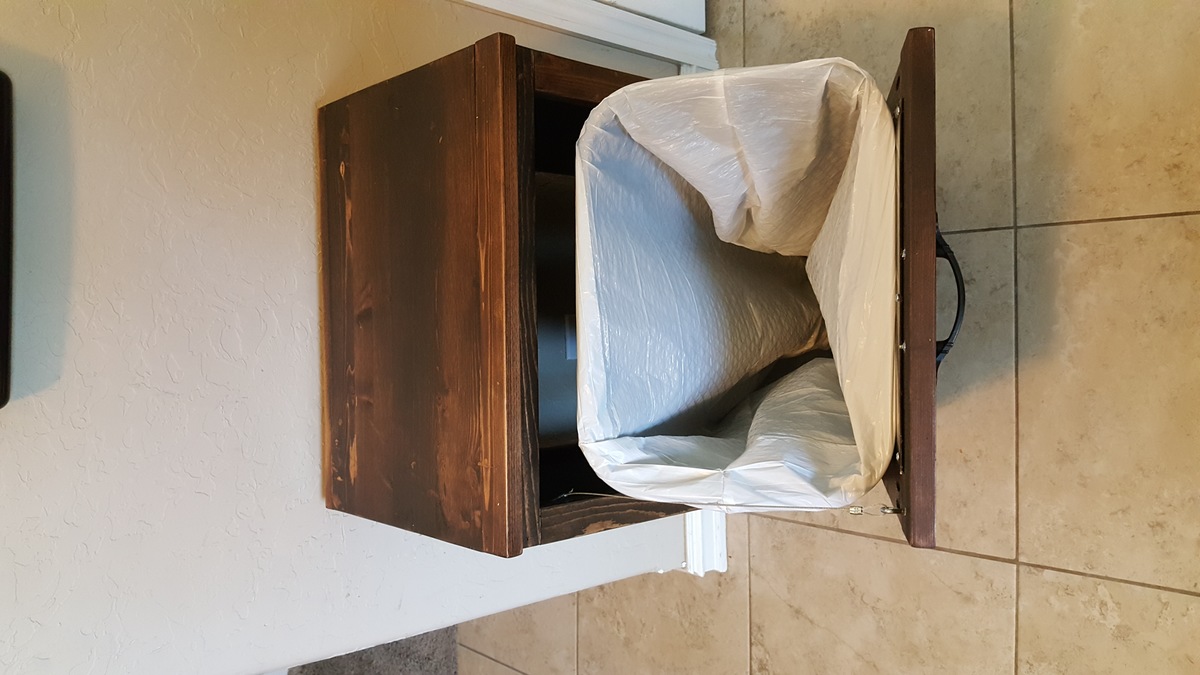
Trash cabinet with diamond plate
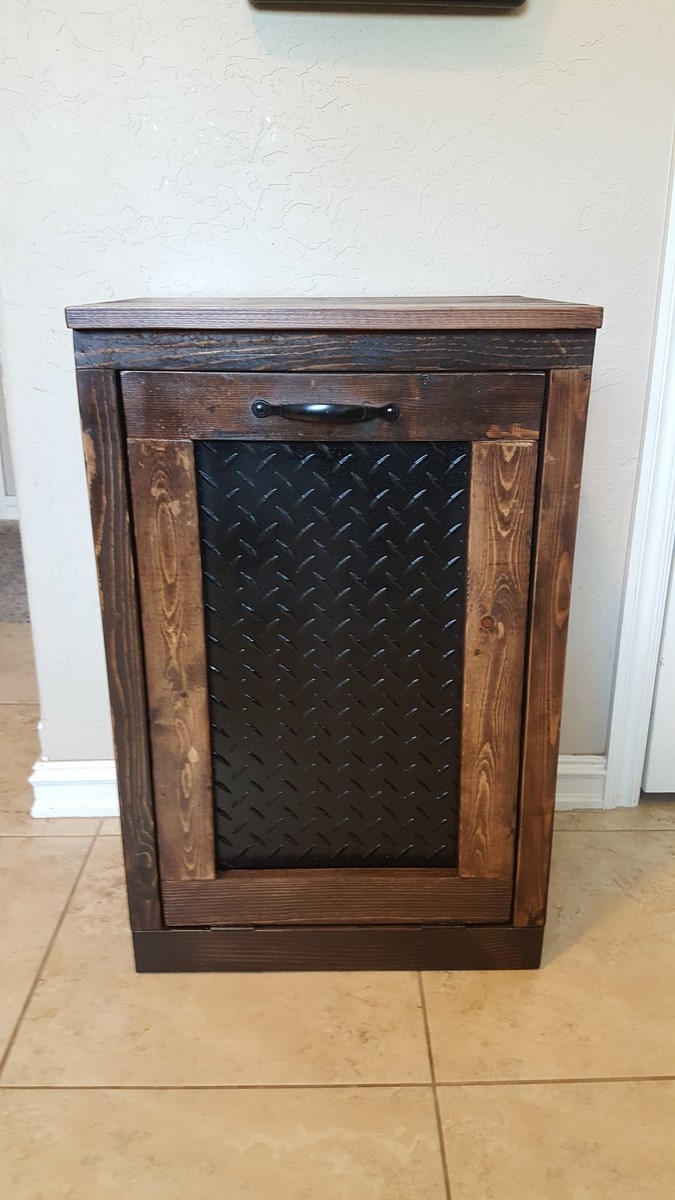
Built this by the plans with one modification. I bought this diamond plate when it was on sale at lowes. It fit perfect. Used small self taping screws to hold it in. Stained the same color(kona) as our caninets.
Built from Plan(s)
Estimated Cost
$25-40
Estimated Time Investment
Afternoon Project (3-6 Hours)
Finish Used
Pine
Recommended Skill Level
Beginner
Rocking horse for my great grand child
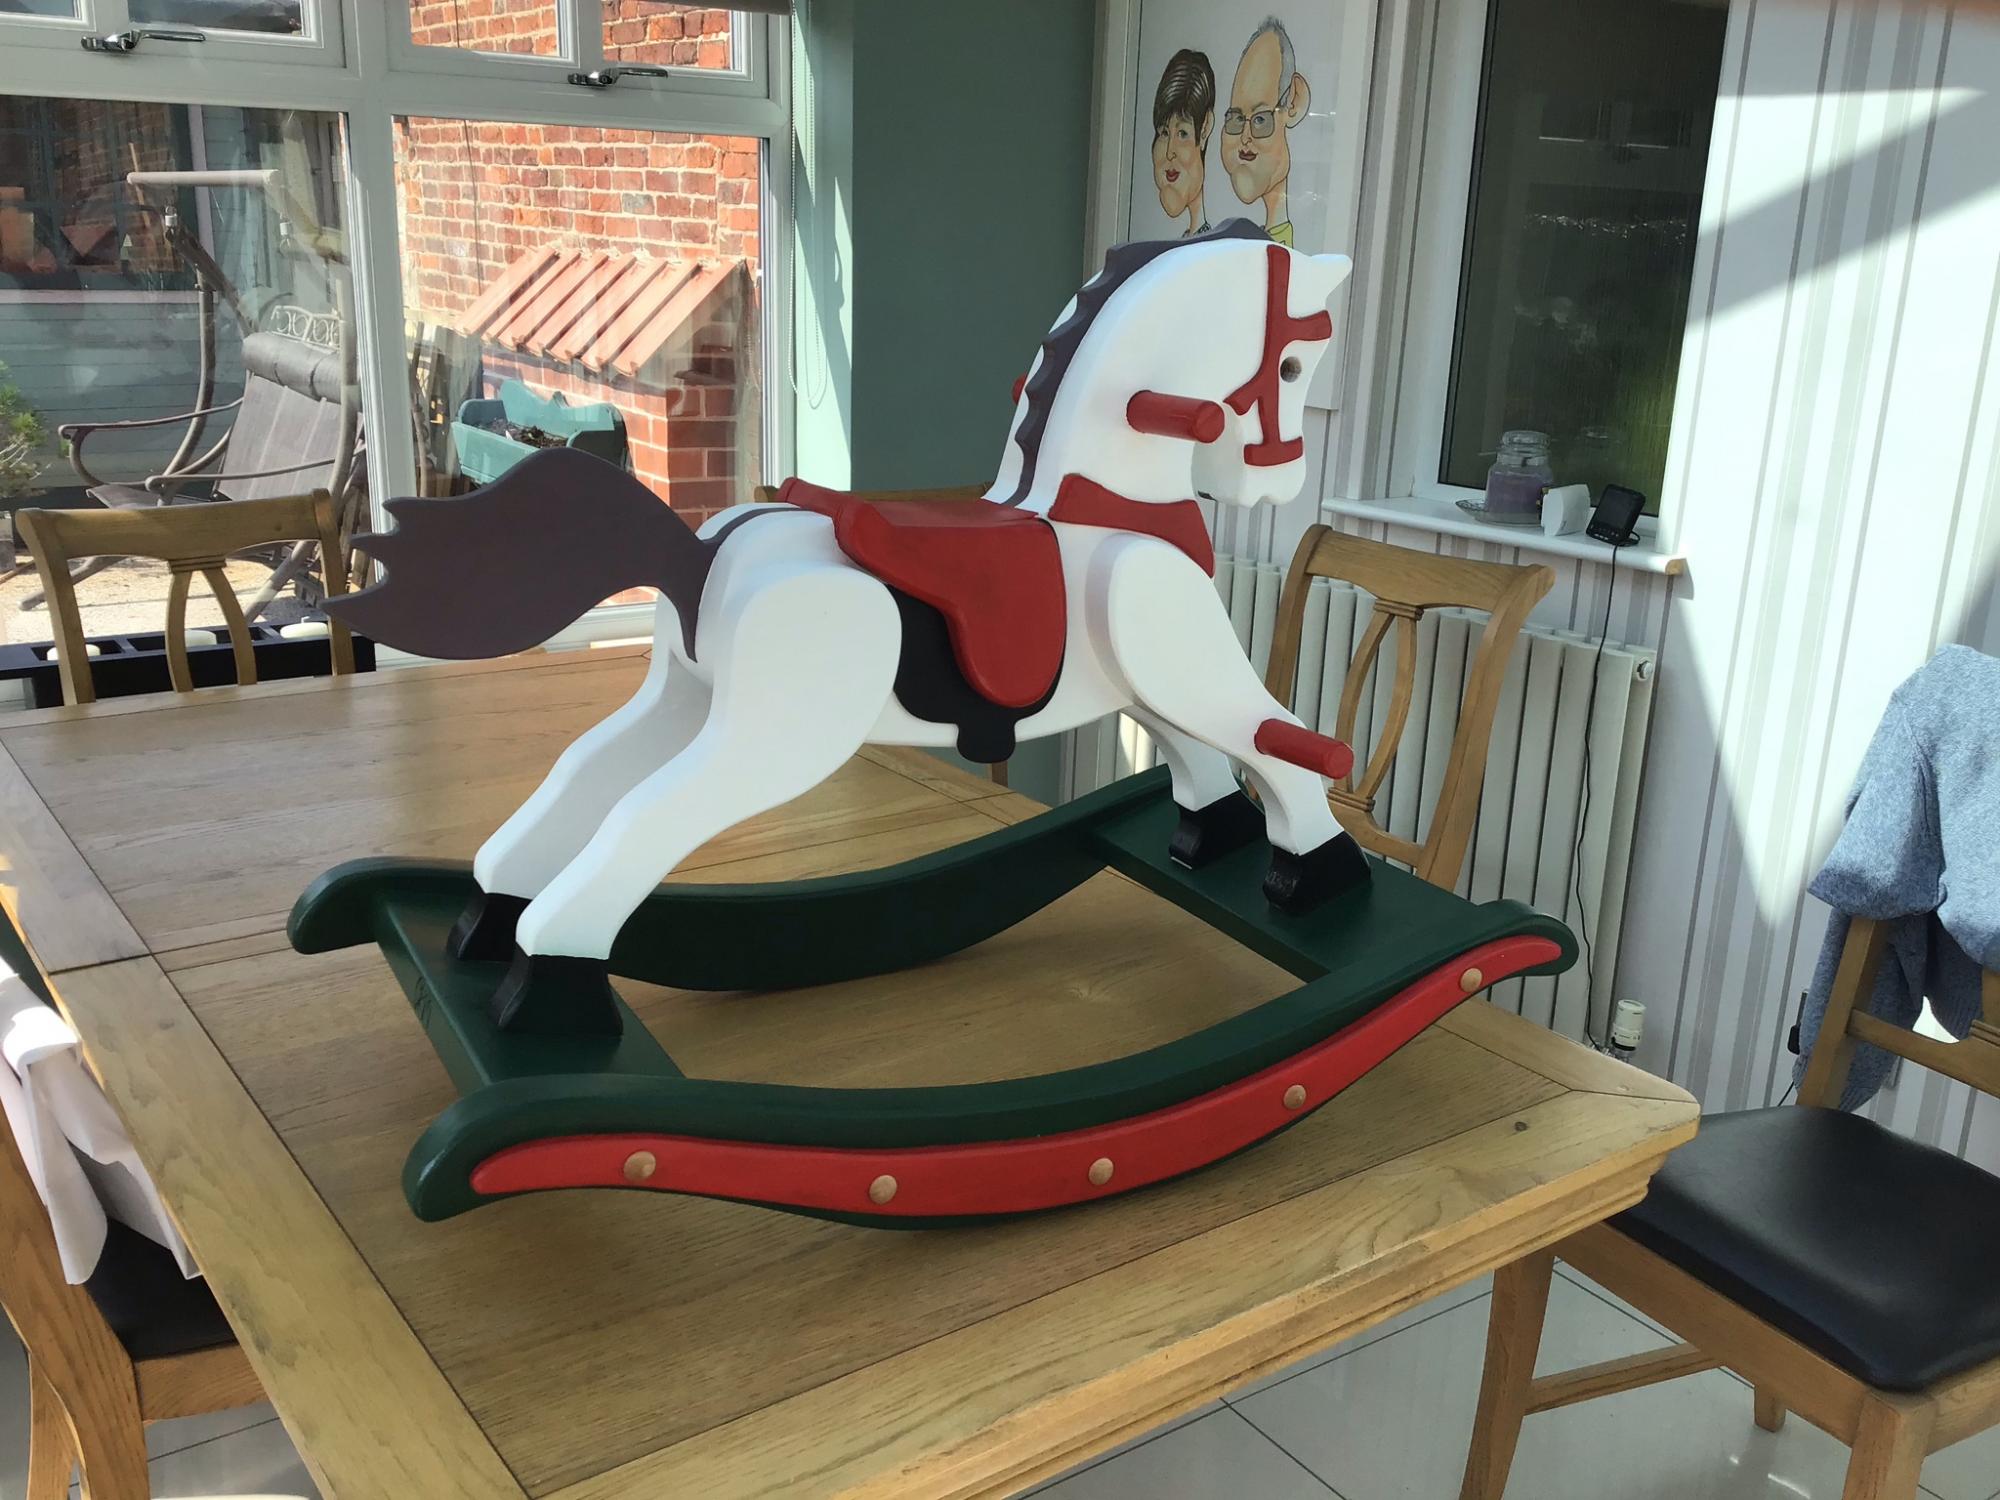
Made from all reclaimed or scrap wood
Comments
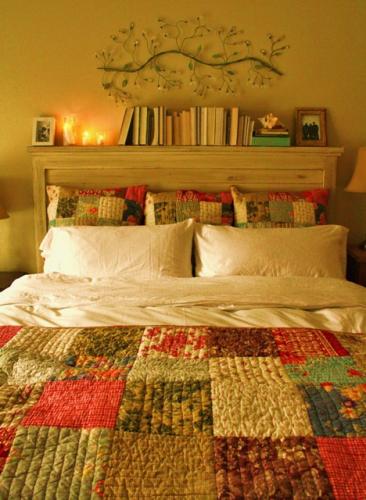
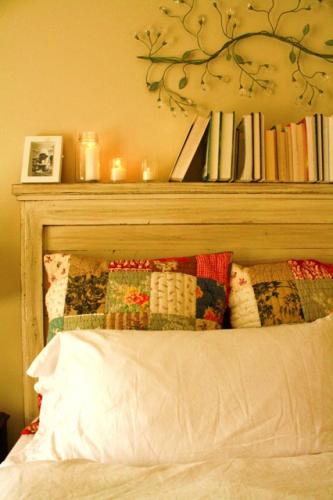
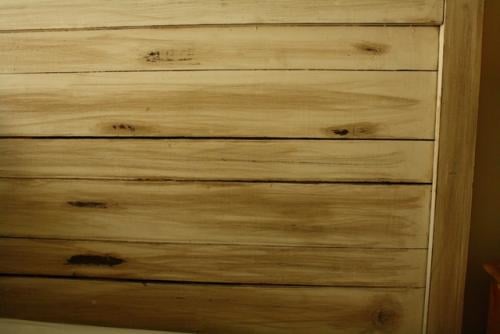
Planked Wood Headboard in Cal King
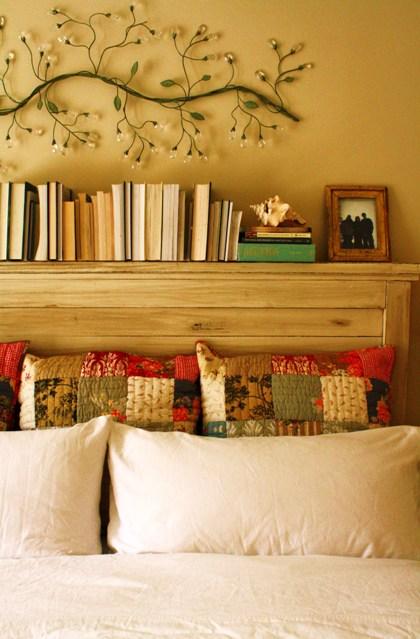
This project was a blast to make. And, it really is doable and a lot less time then you would think. And finishing it with milk-based paint is even more enjoyable. I used screws and a drill (pre-drill!) and it was wonderful.
Here's some advice for the plan:
- Mount the back of the headboard with a piece of wood and use a metal support as shown here. Just make sure the board is wide enough to be level with your back trim, or else the metal support won't be even when you screw it down. And when you pre-drill this board, make sure you don't go all the way through, or else you will have holes through the front! It stunk to have to putty them all in, but thank heavens for putty.
- Although the instructions say to make your top 1 x 3" trim to fit in line with the top of the headboard, I made mine one inch longer on both sides, and then the 2 x 4" one inch longer to go on top of that 1 x 3" on both sides. That was just the look I wanted. Although you can get your wood pre-cut, I would recommend cutting it all yourself, especially since you will need these cut afterward once the rest of your headboard is put together.
- Ana's 'get started' tips are very helpful. Be sure to check them out first!
- Make sure, make sure, make sure you dry thoroughly between coats. Patience is a virtue.

Built from Plan(s)
Estimated Cost
$125
Estimated Time Investment
Week Long Project (20 Hours or More)
Finish Used
I distressed with milk-based paint... it always gives it such a unique look every time! Here's what I did:
- Stain your wood with a foam brush that you can by essentially anywhere--craft stores, home improvement stores--going along the grain of the wood. Do this for all painting and staining. For a dark finish underneath, use a dark stain. I used Minwax in Dark walnut. Leave the stain on for at least 15 MINUTES before you wipe it with an old t-shirt or a lint-free rag, like the one you would use to polish your car.
-Buff with a crinkled brown paper bag. You won't need to do this too intensely, but make sure you're thorough.
- If you want some of those big, antiqued stain spots, take a candle and really rub certain spots, such as the knots and the edges of the wood. However, it can be easy to forget where you rubbed with the candle, so you might want to draw up a rough diagram of a headboard and mark an X where you rubbed the candle. Rubbing with the candle will make the spot of the paint come off much easier--you'll see how well it will come off when you sand. But I would hesitate from rubbing it too much, because it makes your paint 'peel off' eventually if you do it in excess.
- Paint your headboard, giving it at least thee coats. My first coat was really thin so during my first coat I went right ahead and painted it again right then. Then I did a second and third coat. Let it dry completely between your second and third coat. I waited at least eight hours between coats.
- Once it's dry, sand your headboard BY HAND with at least 100 grit sandpaper. If you want your piece to have a more distressed look all-around and not just in certain places, sand your piece after each coat of paint dries. Just rub with your hand smoothly in strokes, and you will see how easily the paint comes off, and how it will give you that distressed look like magic. I did this for my dresser and I loved the look. However, I did not use the candle-wax method because I sanded after each coat. If you wait until after the third coat to sand, you will have to work harder, but your paint will still come off and look distressed very nicely.
- Stain the top of your paint (I used the same dark dark walnut color). Immediately rub off the stain with an old t-shirt or a lint-free rag. Rub it down to get the desired look of your stain. If you choose to have it a little less antiqued, you can skip this step.
- Finish with a Polyacrylic topcoat. They are safe and it really gives a nice, finished (and less DIY) look.
- Mount it with bolts on to your bed frame!
Recommended Skill Level
Starter Project
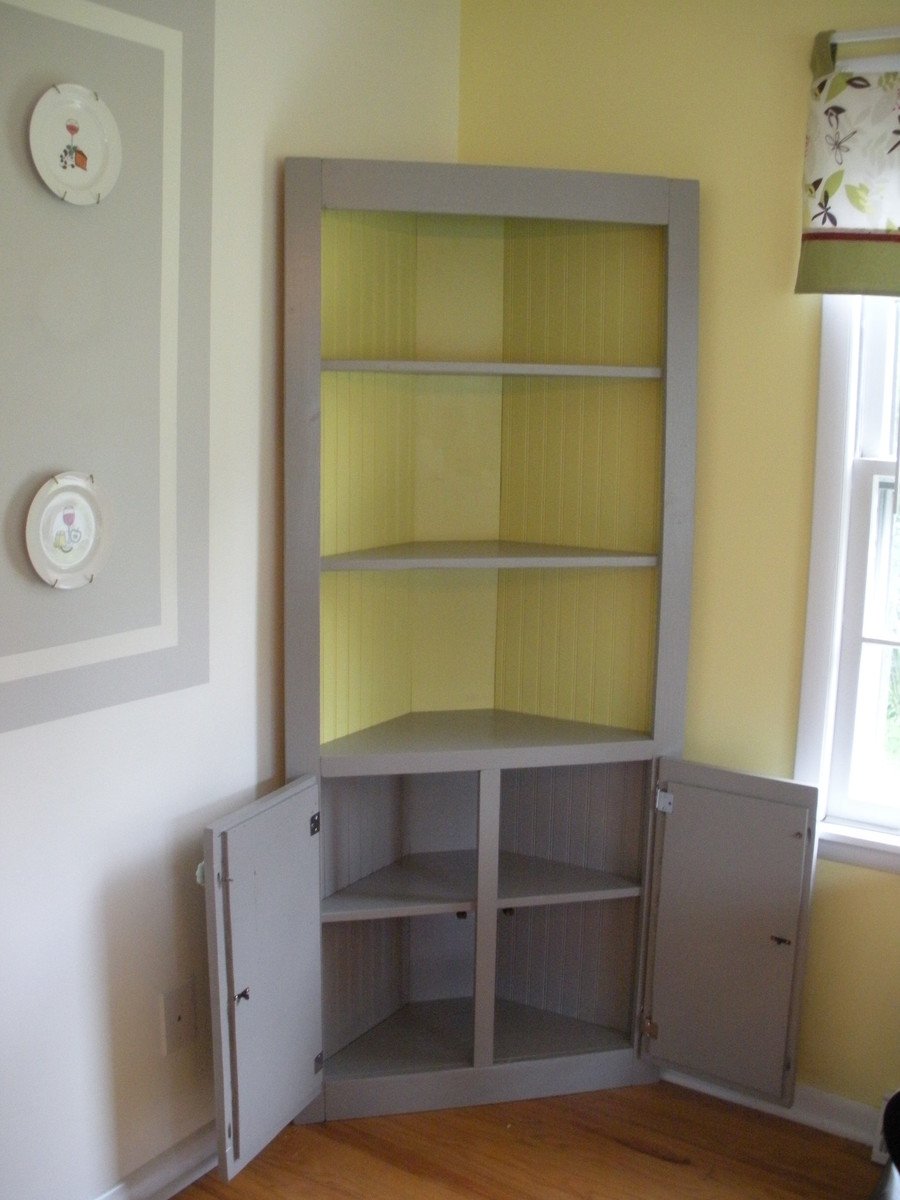
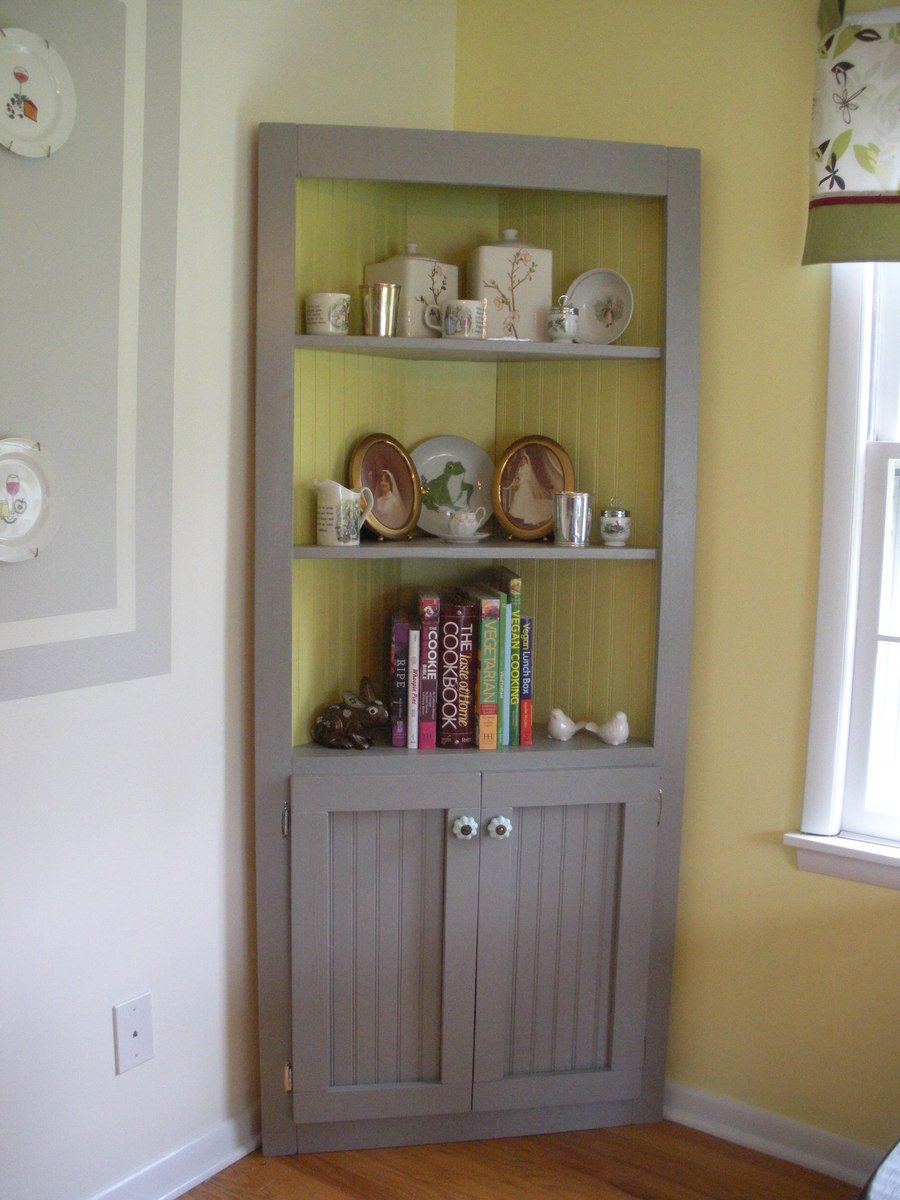
Cute corner cabinet!
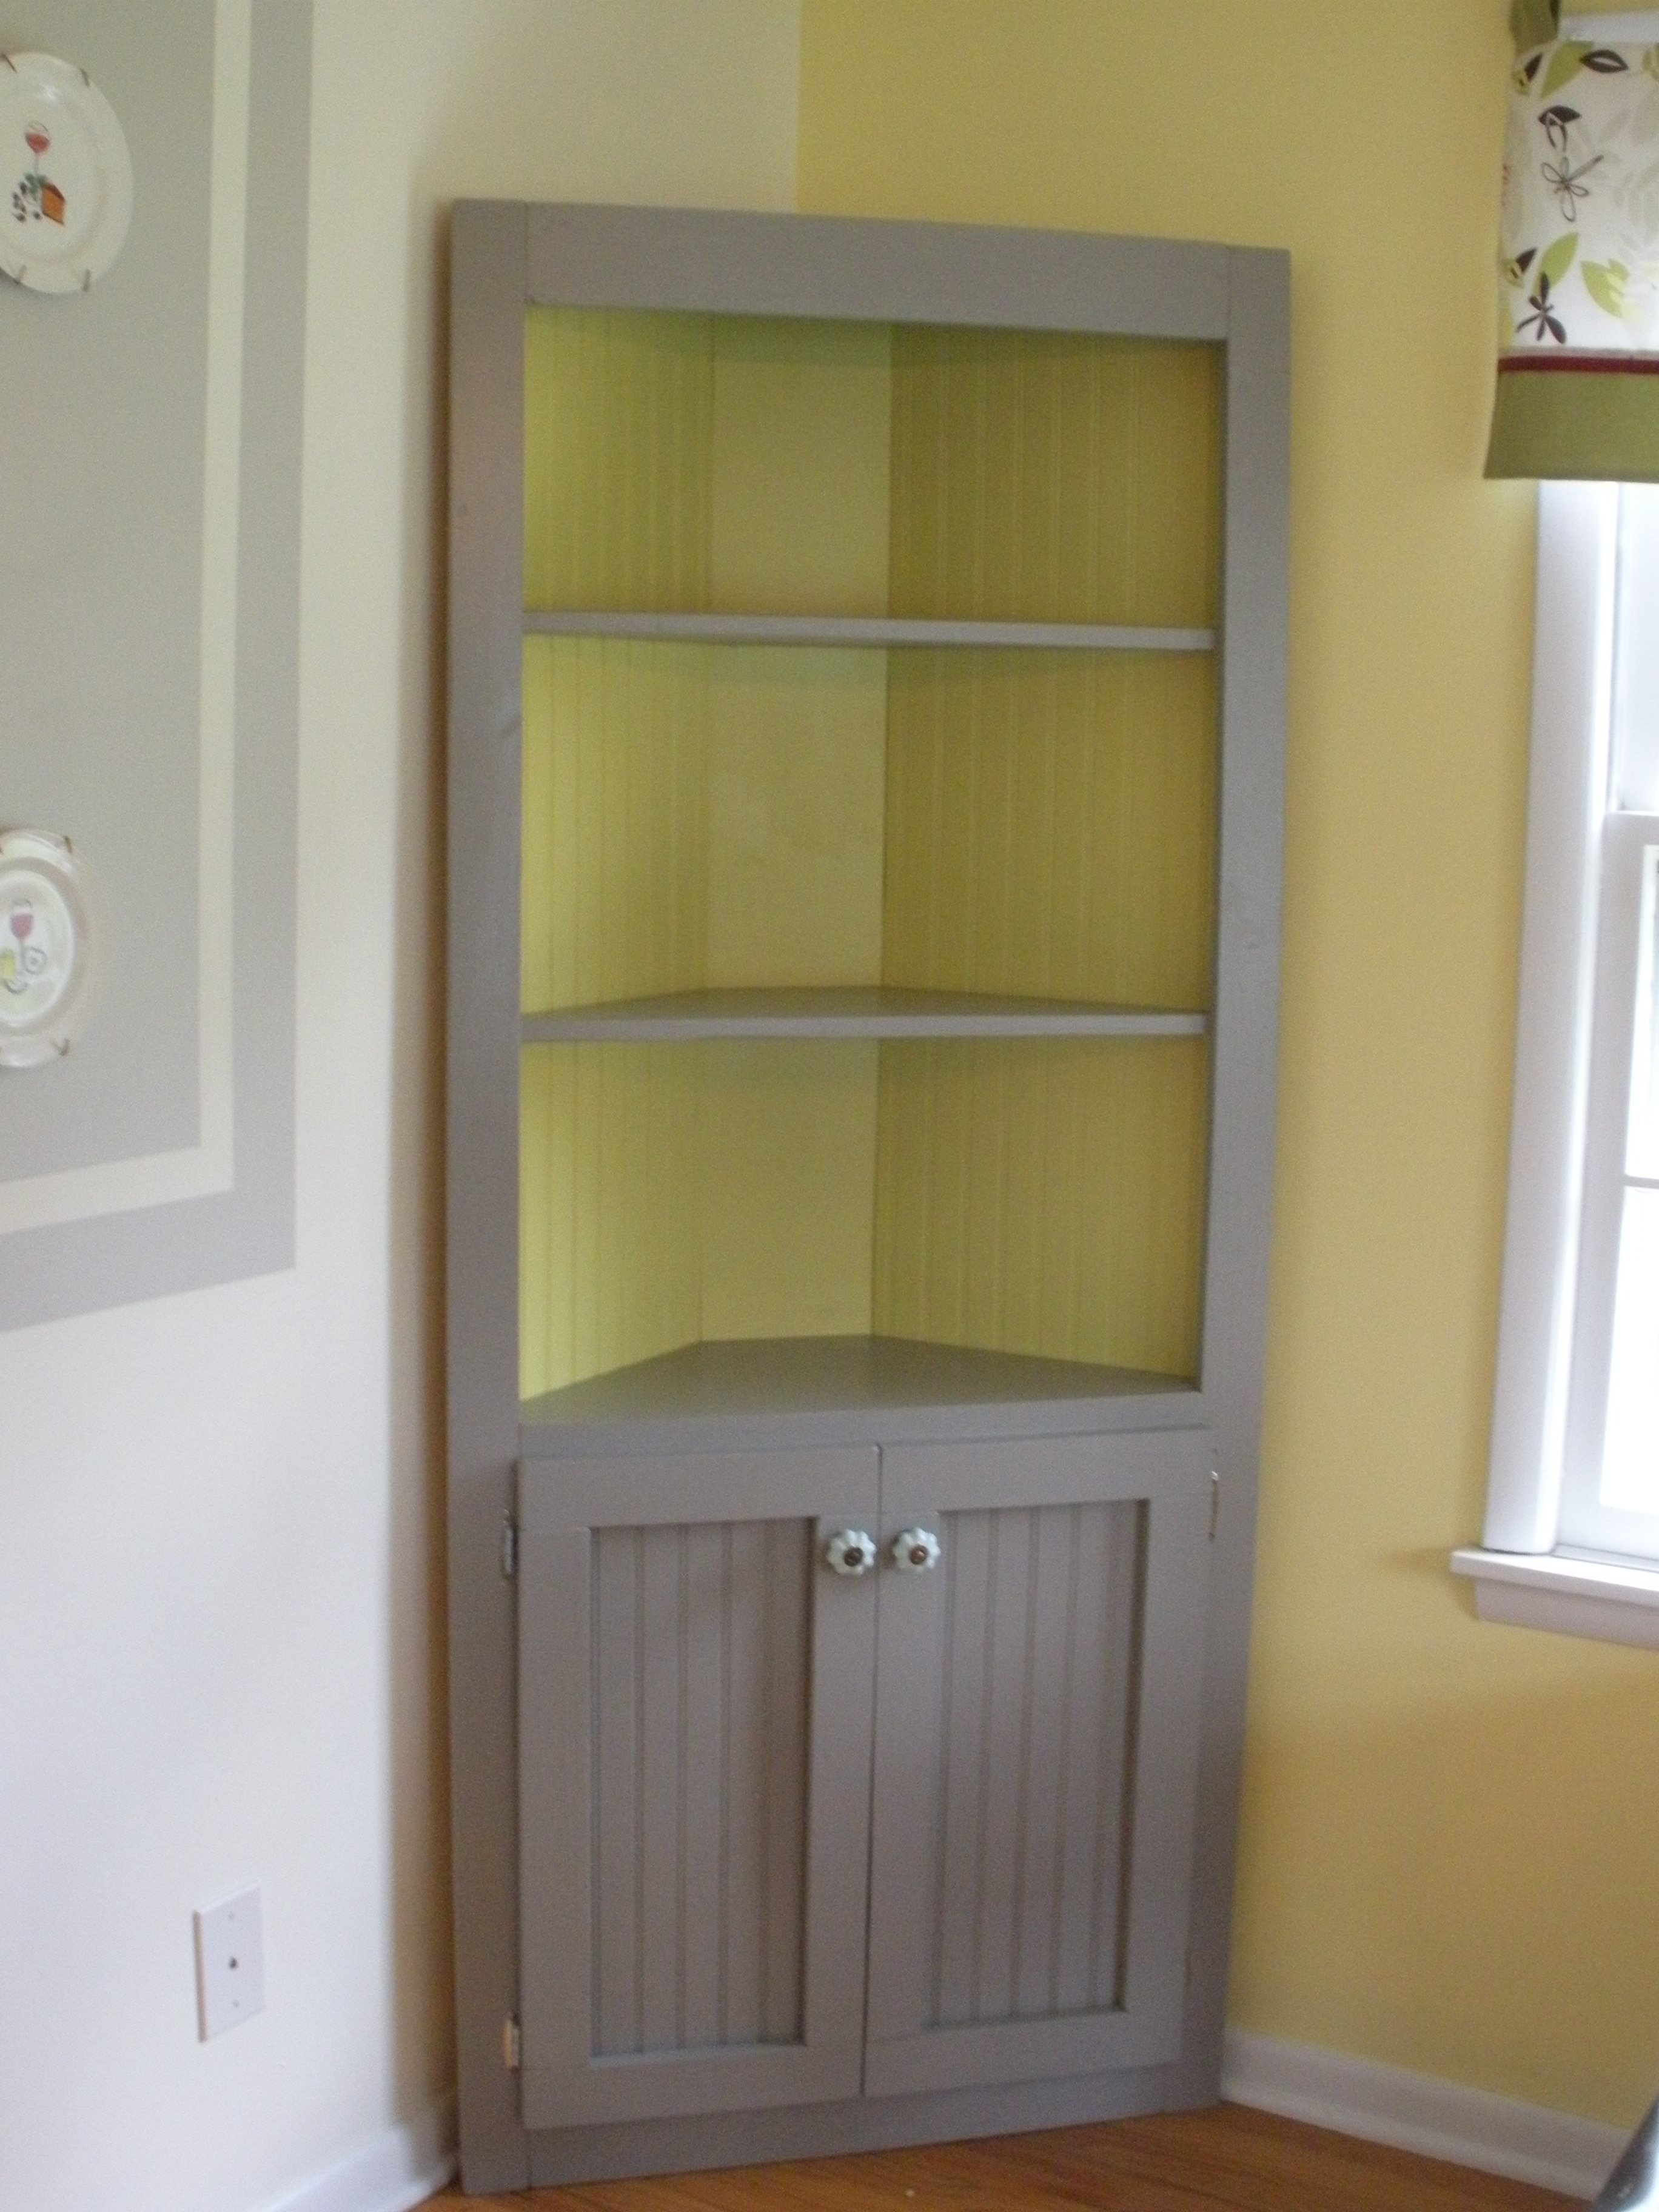
This project took me the majority of a three-day weekend to complete, but it was well worth it! I had the lumber store cut the beadboard panel for me so that it would fit in my car. This was also the first time I built something with doors on it, which was a bit of a learning curve, but came out alright in the end. I used pocket holes to build the face frame, and attached the shelves to the frame first before attaching them to the 1x8 back. I used 1 1/4" pocket hole screws and 2" wood screws. I left off the trim at the top and didn't bother to cut out the footer, but I think it still looks pretty cute.
Built from Plan(s)
Estimated Cost
$110
Estimated Time Investment
Weekend Project (10-20 Hours)
Finish Used
Accent color: Appletini from Valspar
Main color: Earthy Mushroom Taupe from Glidden
Everything was given a good sanding and a healthy dose of primer before painting.
Main color: Earthy Mushroom Taupe from Glidden
Everything was given a good sanding and a healthy dose of primer before painting.
Recommended Skill Level
Beginner
Comments
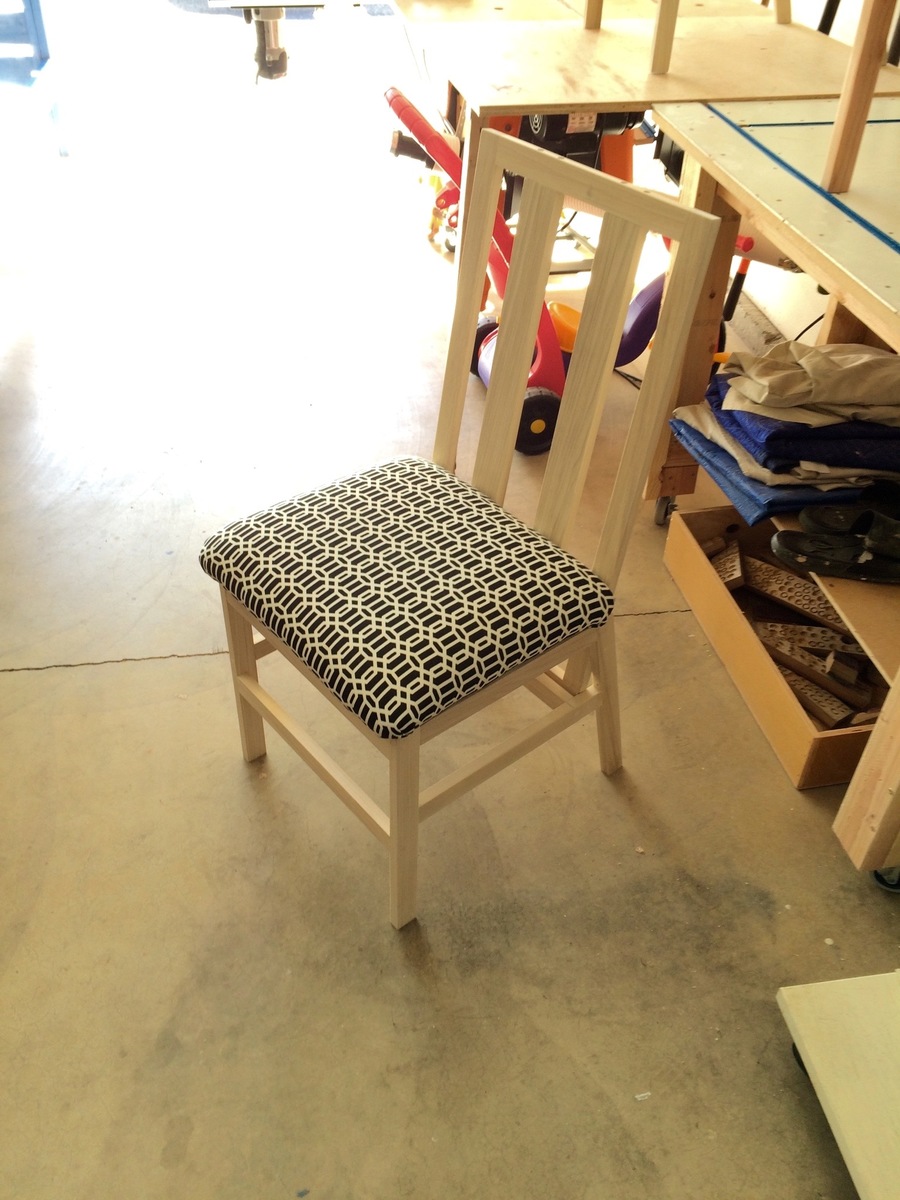
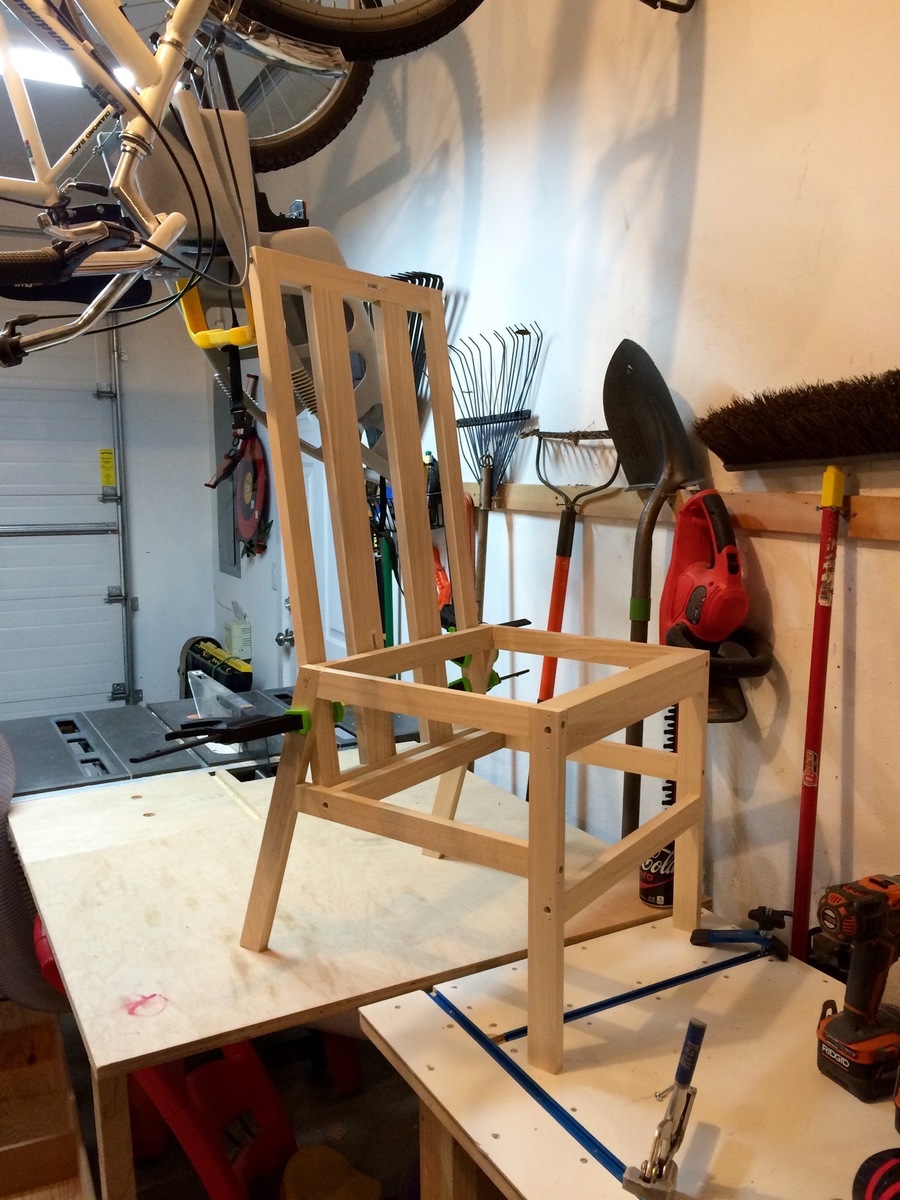
Harriet Chairs (by me)
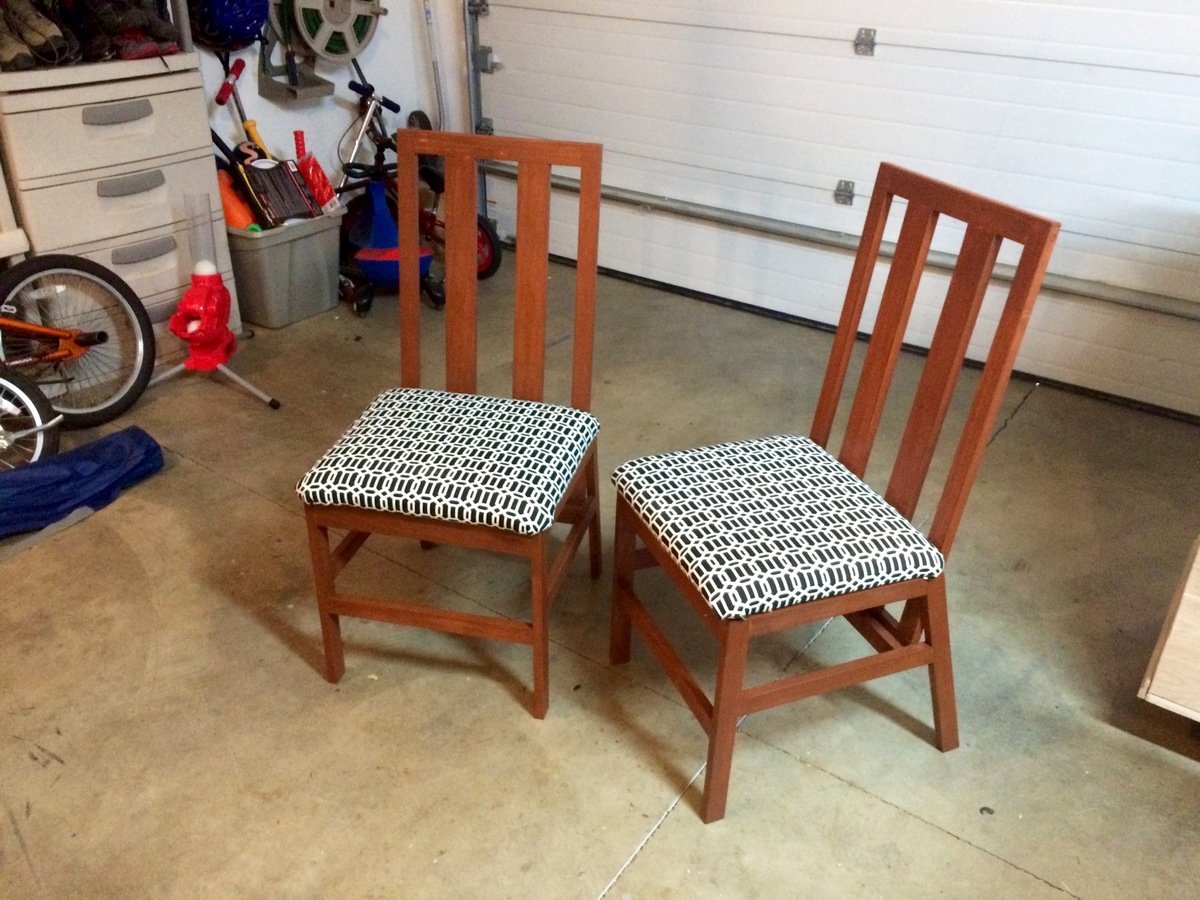
I'm pretty happy with the way these chairs turned out. It was a fun project as I did a few first, which included going to the fabric store (long waits) and got to tackle some upolstery for the first time! I did end up with a few glue drops that did not take the stain, so I'll be researching tips and tricks to prevant that in the future!
Also, I made these out of Popular, which pre stain was a must for cherry stain. Next time, I would use Cherry!
Thanks to Joanne S for the original post and consults regarding the upolserty!!
Built from Plan(s)
Estimated Cost
80-100/chair (depends on materials used)
Estimated Time Investment
Weekend Project (10-20 Hours)
Finish Used
Golden Oak Wood Classics stain from Sherwin Williams. Tinted to match my existing chairs.
Recommended Skill Level
Intermediate
Comments
Fri, 05/01/2015 - 13:29
Awesome job!
These are spectacular! Beautiful build! Love the finish and the upholstery. Also I'm super impressed that you can't see any of the filled screw holes. Would love to know the technique you used to hide them so well - I'm going to copy that! :)
JoanneS

Fri, 05/08/2015 - 12:48
Thank you
Thank you both for the nice comments. I was please with the way these turned out too, despite some glue spots not taking up the stain. I plan on getting more disciplined in this area. For hiding the screws, I finally upgraded to a real countersink like this one: http://www.rockler.com/8-pro-tapered-countersink-bit at Rockler.
Instead of always forcing a dull one in and getting a crooked openings, this razor sharp one cuts beautiful holes with no effort! But watch out, I cut myself just adjusting the depth of the drill bit. I discovered these the last time I made some wine oak barrel chairs!
Fri, 05/08/2015 - 12:53
I almost forgot...
Since I use Kreg screws for almost everything, (even non-pocket hole stuff)because they are self tapping and won't crack the would I sure my countersink matched the head of the Kreg screws and than purchased a plug hole bit. Can be used on a drill, but better on a drill press. You have to keep the drill perfectly straight or the plug can break and get stuck in the bit!
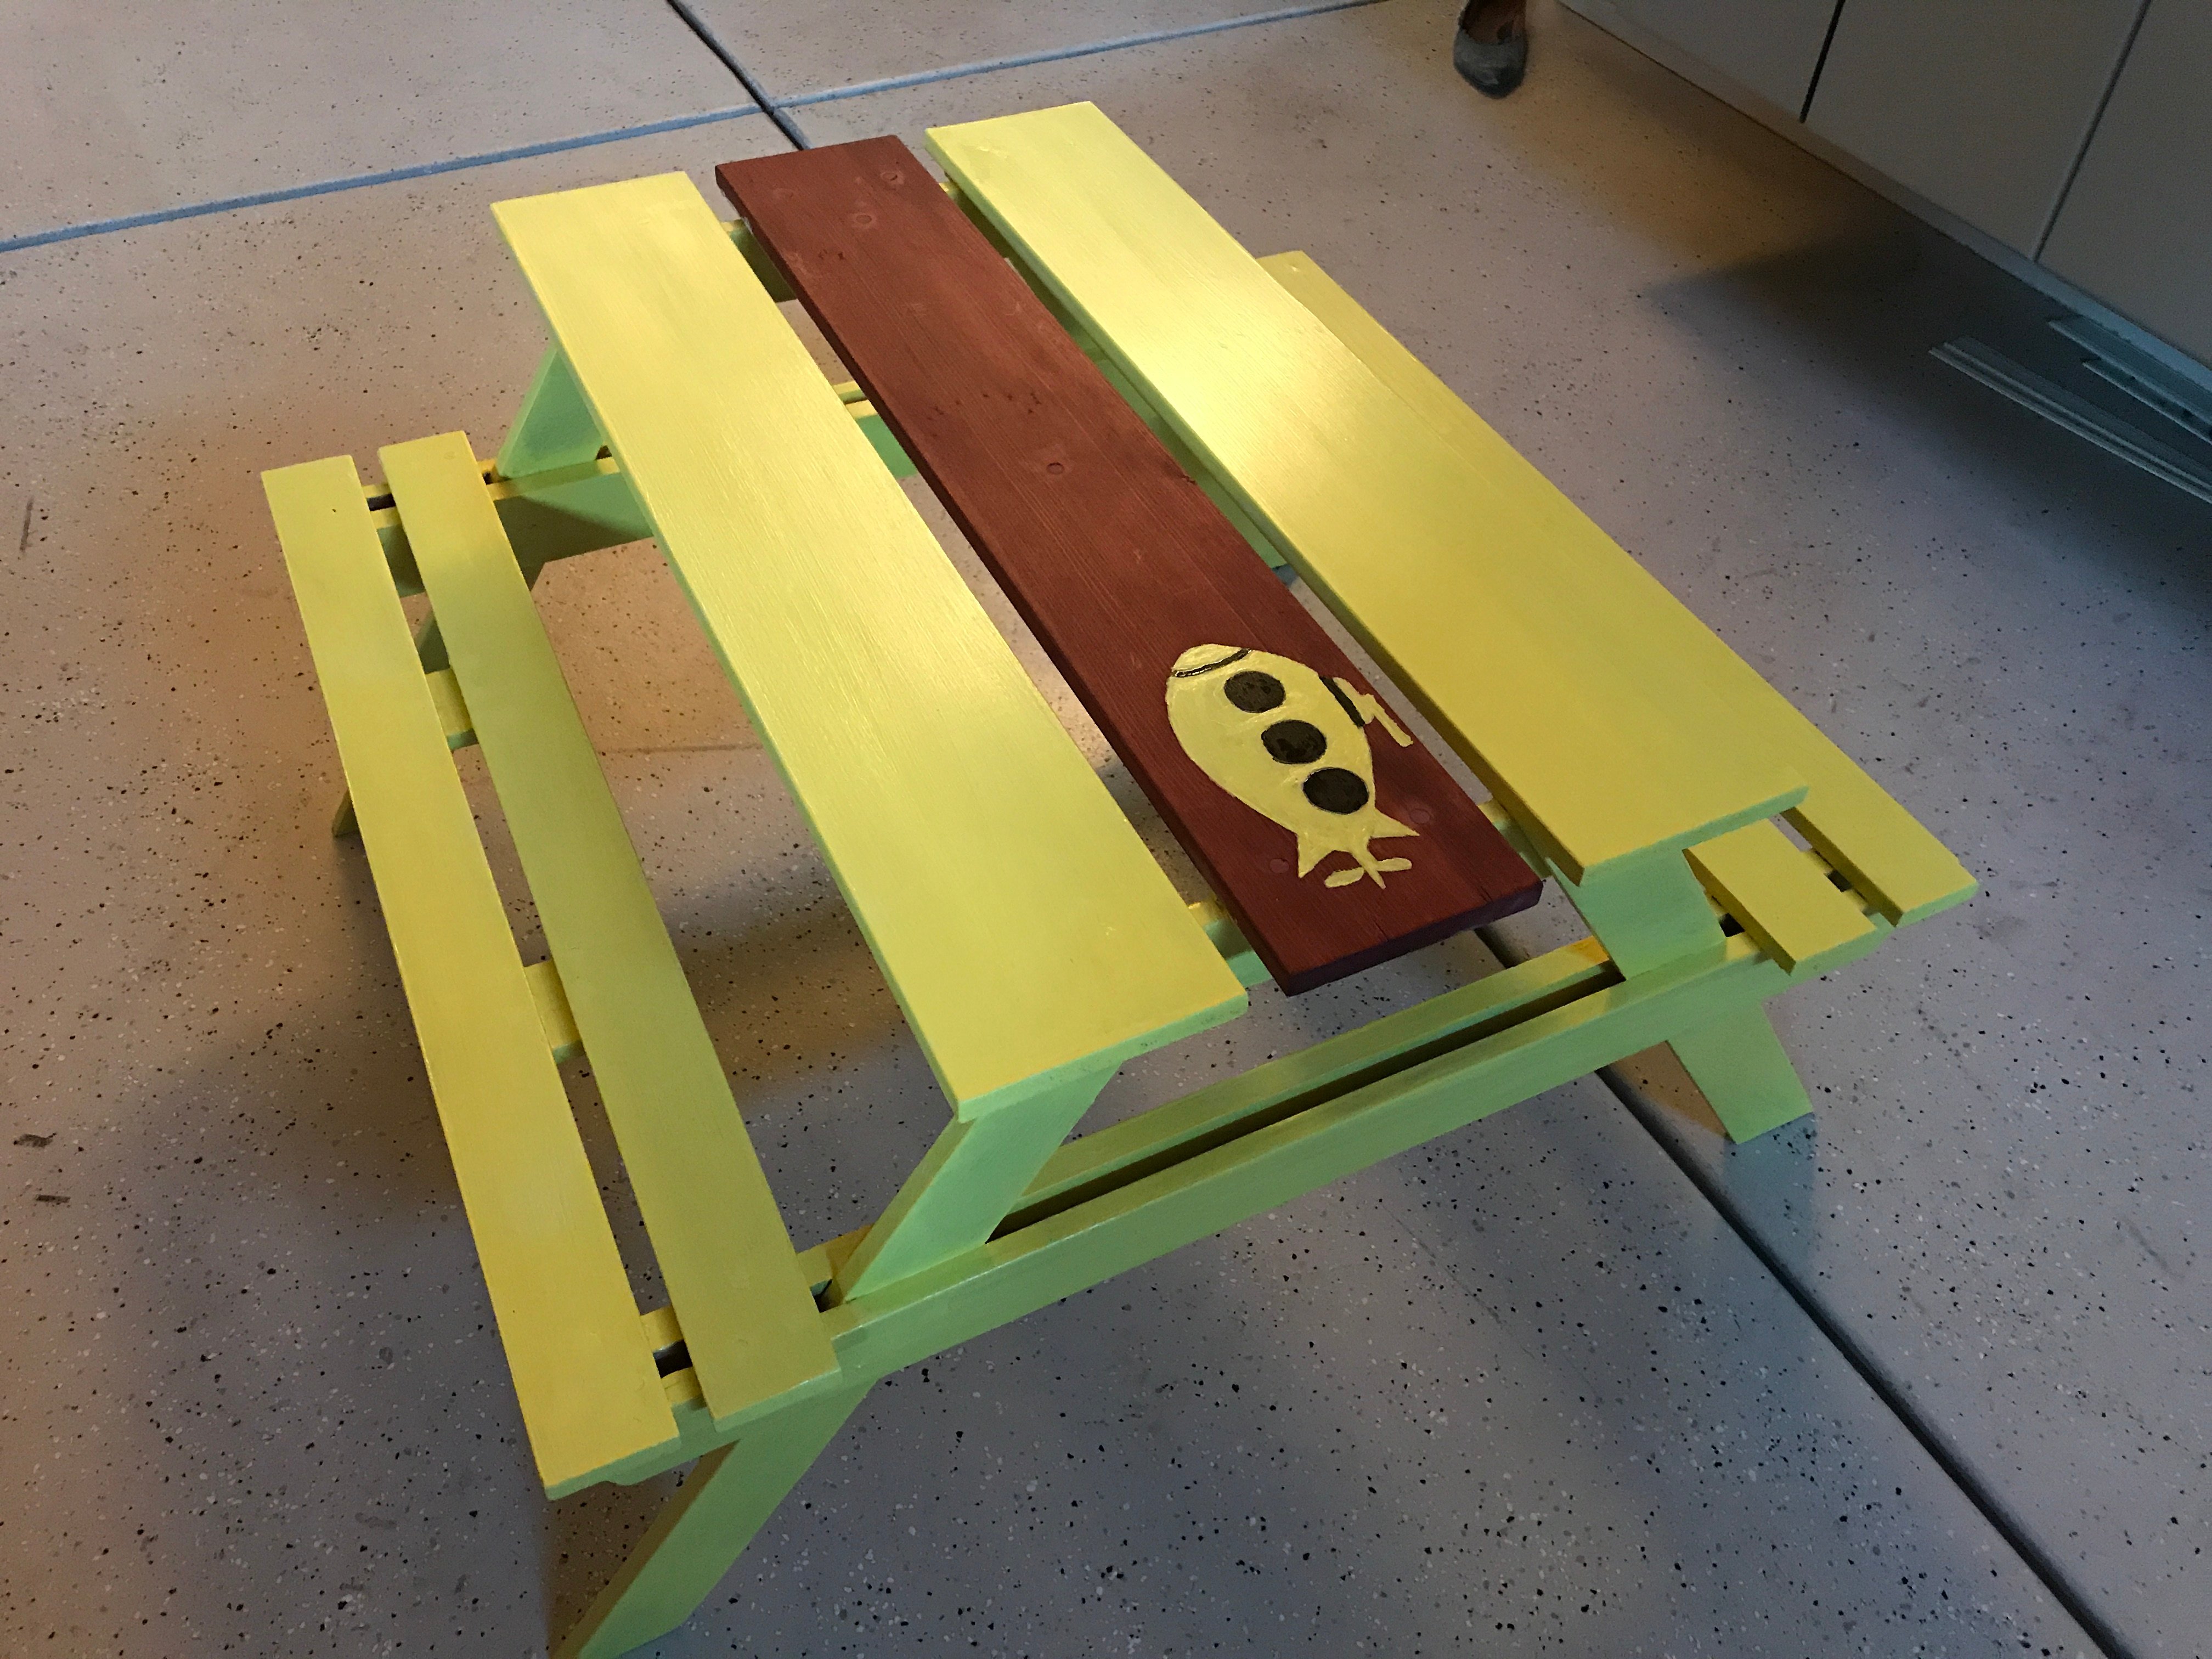
Buzz Lightyear rocket shelf
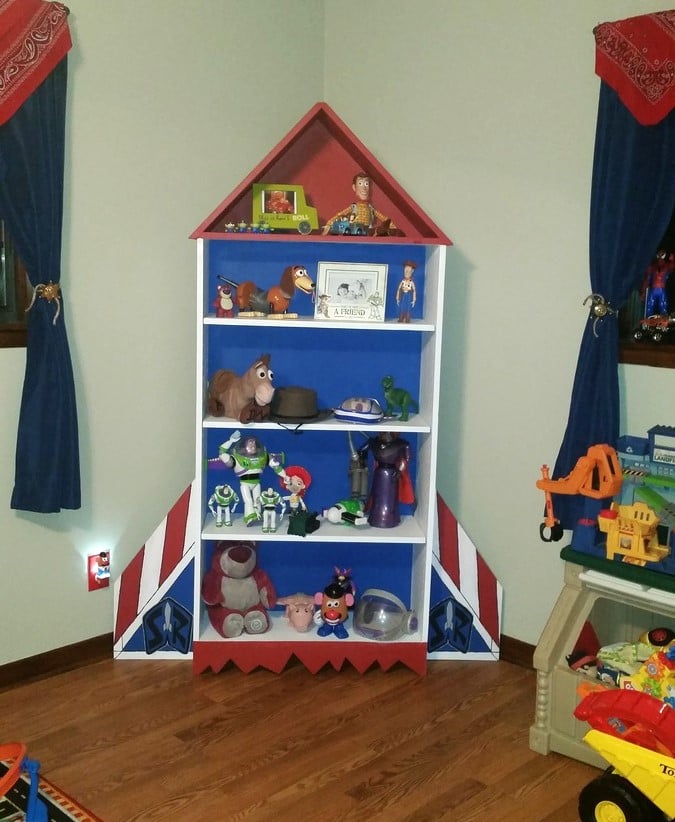
I used Ana's instructional as inspiration but changed dimensions. My little guy adores this shelf.
Built from Plan(s)
Estimated Cost
100
Estimated Time Investment
Weekend Project (10-20 Hours)
Finish Used
Behr flat premium paints with waxed finish
Recommended Skill Level
Intermediate