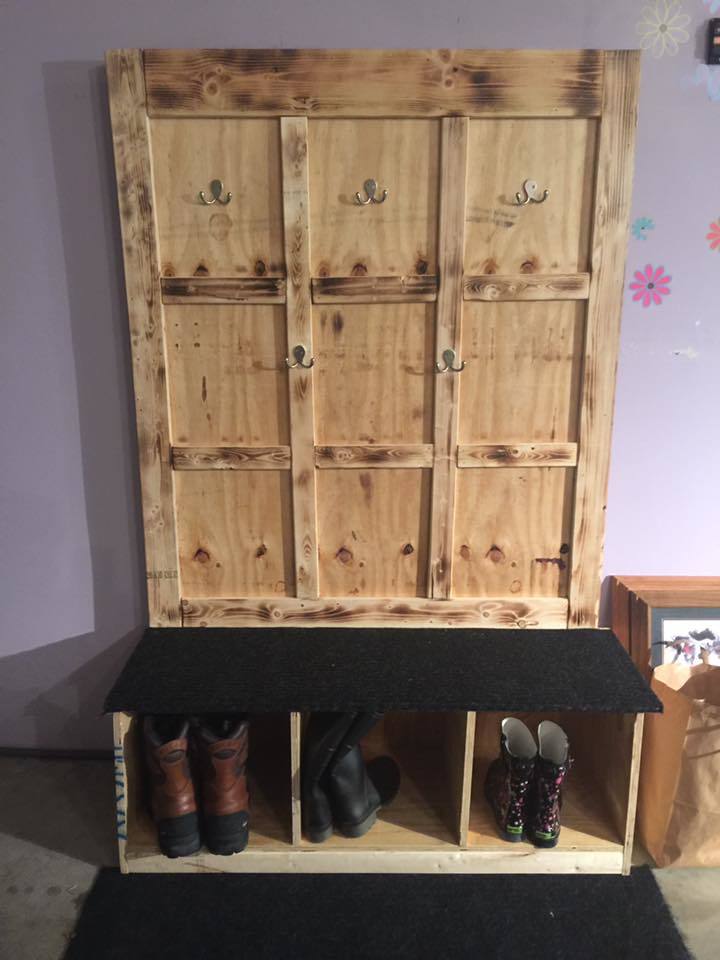
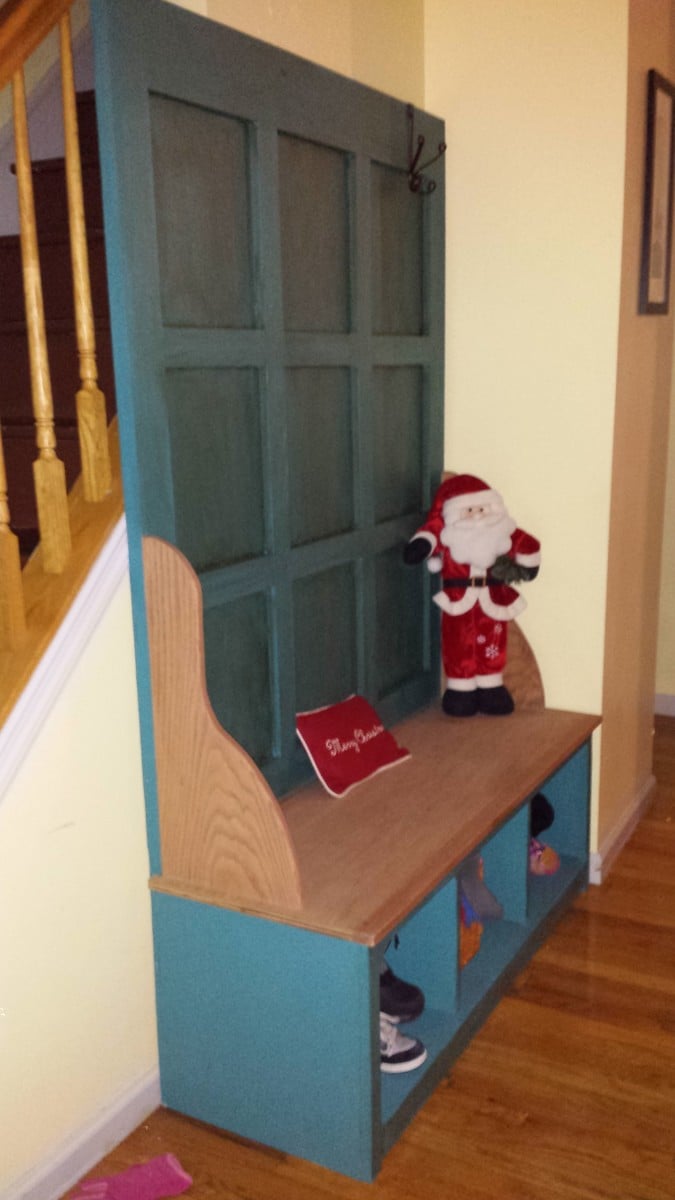
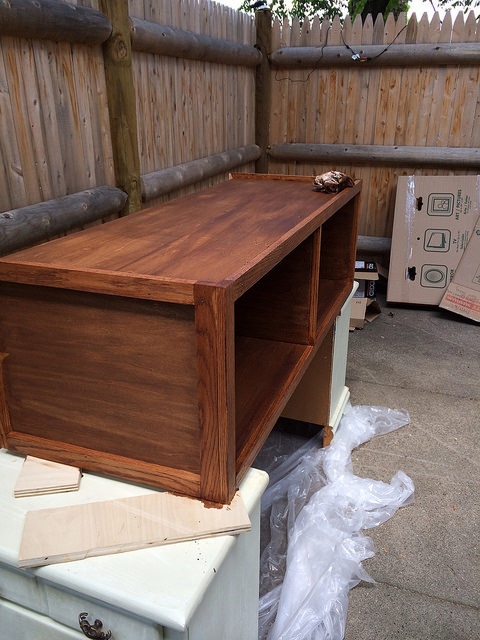
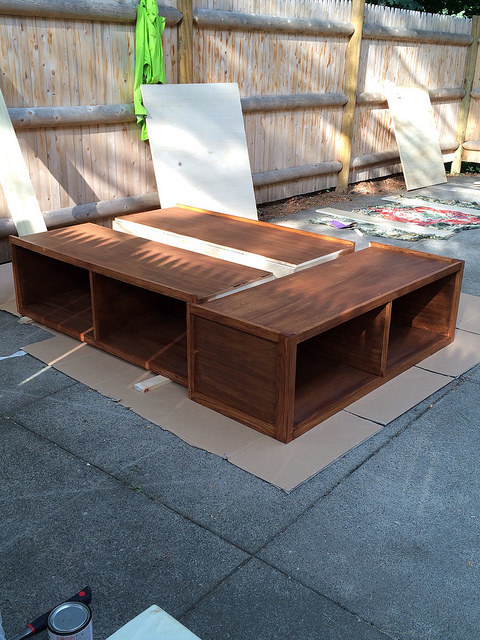
Custom Potting Bench
![](/sites/default/files/potspin.jpeg)
Potting bench with a few modifications to fit our space.
Bill N
Potting bench with a few modifications to fit our space.
Bill N
I used the armless chair plan, and altered the one armed plans to make two chaises. Then I increased the size slightly to accommodate the 25x25 pillows I bought. This took about 12 hours with one person working. I am super proud of it! Finished today, and will eventually stain after the wood has dried out a little. Thank you, Ana, for making straightforward plans that gave me the confidence to do my first woodworking project!
Andrea in Michigan
This was our first furniture building project. It took us about 20 hours to complete and we couldn't be more happy with the results. We used 4x4's instead of 2x4's for the legs. We also changed the dimensions of the table so that it was the perfect size for our kitchen. After completing the table we decided to build a bench as well. It is the same plan as the table, just miniaturized. We used Minwax Jacobean stain on the table and then topped with a clear coat. It is a very heavy, sturdy table.
I built these chairs last summer, they came out amazing! Everybody loves them! Thank you Ana. I also built the sofa for my sun room. Pictures to come.
Sat, 05/04/2019 - 08:18
My husband made 4 of these with some slight modifications like rounded arms and back.
However the best function he added were 2 wooden wheels he attached to the back legs, we now can move these chairs easily on our deck.
Our goal was to make them look like well worn beach chairs, we used milk paint for that effect. It still lets the grain show through.
As part of my backyard overhaul I've added an outdoor shower and chalkboard against the wall of the house. There's also a small sand pit and deck area, so the shower comes in handy to wash the dirty feet. I had a few pallets sitting under the deck for years and finally put them to use. Some cuts here and there and some sanding and they look great. For the floor mat I just cut the pallet piece you can see in one of the photos in half and framed it with treated 2x4". The chalkboard is a plain sheet of 2x4' project board primed and painted several coats with flat black exterior paint. I used this over the 'chalkboard' paint because it's exterior grade. It works great, even better than chalkboard paint imo. The frame is made of the cut slats of the pallet, just glued and nailed on. The fence also is a cut pallet. I just made random cuts about half way through on varying angles which resulted in two mirrored halves of the pallet. They fit the space perfectly. I love the random look of it and may give it some paint eventually.
Since I didn't clean off all the lumber print prior to assembling, I decided to prime and paint the chairs.
The table top is modified from Ana's farmhouse table, the base is modified from the storage table and the chairs are modified from the extra tall bar stool. This project took me the weekend to complete, because of those darn chairs!!!
In reply to Gorgeous by patrickhosey
Sun, 11/04/2012 - 06:52
For the ladder I used straight 2x2s and 2x3's. I like the look of the straight back. I didn't want pocket holes on either side, so I used 3" screws through the legs into the 2x3s. I used a scrap 2x3 as a spacer.
I had made this bedside table before, but this time the bottom two drawers just wouldn't work out. I fiddled with them and cut out and made 6 box drawers before I finally just decided on shelves. I used 1/4 inch plywood and 18 gauge brad nails to secure it. Once all this was done ,I found 2 basket "drawers."
This project actually was a lot bigger than we thought it would be. Hubby and I are almost newbies, and we thought we could knock this off in a week or two! It actually ended up taking us 6 months to finish, although to be honest we didn't work on it consistently.
We needed a replacement for an old coat closet that was falling apart, and decided to tweak the design for the simple armoire to fit what we need, which is basically coats, table cloths, shoes, and just about anything else we want to hide away in our dining room. It's 18 inches deep by 36 inches wide. Since we couldn't find 18 inch wide wood planks, and aren't skilled enough to make them yet, we went with a hardwood plywood and covered the edges of the plywood with iron on veneer. It turned out very well; you can't really tell that it's plywood unless you know what you're looking for.
I will say that I couldn't find the kind of hinges called for in the plans, not even on the internet. So hubby and I went with 1 inch non-mortise hinges. They worked well, though they were a bit hard to hang for a couple of novices.
12/16/14 UPDATE: Posted a plan for this project, linked in this brag post
This is a variation of the Easy Jewelry Box plan. The completed measurement is 11” wide, 14 ½” high, and 7 ½” deep. This one has a center “tower” with 5 drawers 5 ½” wide, and a wide overhang on the top and bottom, which covers the 2 side doors that open out for hanging necklaces. The drawers are lined with embossed felt, and the drawer bottoms and insides of doors are covered with sticky-back felt. The 2 removable ring drawer inserts are some scraps of 1” foam, covered with scraps of the sticky-back felt, with slits cut into the foam with a utility knife (cut the slits into the felt first, attach it to the foam, then cut the slits into the foam). Cost breakdown: antique brass knobs: $28, sticky back & embossed felt: $14, hooks: $15, wood: $35, hinges: $7, paint: $5. (already on hand: finish nails, glue, sandpaper, left over stain & poly) . I worked on this a few hours a day over a long weekend, probably about 12 hours total. Finishing took most of this time, the build was actually only a couple of hours.
Tue, 12/16/2014 - 16:52
Hi jgg2006, I just posted the plan:
http://ana-white.com/node/13664
Also if you click the orange highlighted link for Fancy Jewelry Box, it will take you to the plan. The full plan is a .pdf attachment to that post, appearing just below "finish used".
:)
Joanne
entryway shelf plans
This was an anniversary gift, so I wanted it to lean more "chic" than "shabby" and as a result I spent a little extra money. Instead of using different colors of stains, I used different kinds of hardwoods to provide the color contrast. I changed the dimensions to fit our space and my wife's requests. In the end I believe the dresser was 50" wide, 31" tall (not including legs) and 20" deep.
Carcase - The carase is made of 3/4" plywood and the the divider is held in place by a dado groove. I used a roundover bit to soften the edges. I then applied a vinyl spackle to the edges of the plywood so the paint would go on uniformly.
Drawers - The drawers were made with 1/2" plywood for the sides and 1/4" for the bottoms. Isntead of nailing the bottoms to the drawer sides, I routed a dado groove into the sides that holds the bottoms in place. I used full-extension ball-bearing drawer slides, which in hindsight may have been a mistake. Combining the the full-extension with weight of the hardwoods created a decent tipping hazard. As a result, I've needed to add wieght to the backside of the dresser for stability.
Feet - In lieu of casters, I bought some premade 6" legs from a local big box store for about $10-$15. I don't regret this purchase as they worked out very well.
Finish - The paint I used was super thick and covered great but was difficult to brush on with any consistency or finesse. It was like painting with pancake batter. I had impossible visions of being able to sand the finish down to an incredible flat surface but after redoing it twice, I settled for a brushed look.
A fun project to make ending with a functional product to boot! I went all out making sure that each truck/shelf would coordinate with each grandson's theme/decor in their bedrooms. Chase, who will turn one next month, has a super heroes/comics theme for his room. Therefore, I selected Captain America as the star of the big rig shelf. Red, white & blue paints, some wooden shapes and some creativity and Captain America was ready for Mr. Smiles.
I made two of these. One for each granddaughter at the time. (Since then I have another granddaughter and a grandson.) Made with solid oak everywhere except the top. I made the top with oak plywood for strength. I edged the lid with oak. These were the first projects I ever made where things had to fit tightly together and the beginning of my woodworking hobby.
Second project using completely reclaimed wood. The plans were easy to follow and I made a few minor modifications. I swapped out the two 2 X 4's inthe middle of the frame for 2 X 6's and added a center foot to each of them for center support. I had a hard time finding larger shims and was about to make my own when I grabbed a few pieces of scrap 1 X 3 and started to make the design you see on the footboard. My wife like the look so much that I repeated it on the headboard. Looking forward to making some nightstands that will match the look of the bed. The boards used to be nailed together as temporary fencing that is what created some of the color variation in the wood and I tried to create some sort of a pattern by alternating light and dark.
Thu, 10/16/2014 - 14:32
Wow, this is beautiful! I love the pattern you made with your reclaimed wood. What luck to have the varying shades. Great job!
Fri, 10/17/2014 - 05:37
This is really nice. I have to admit I was underwhelmed by the original plan when I saw it, but this is beautiful. Really nicely done.
I changed the plan to match the mattress and it looks great!
Project for corner of stair landing at my house. Made in an afternoon using poplar wood -- no finish, only water based matte finish polycrylic. No plan used, please let me know if you would like plan supplied.
This build is a gift for a friend who is retiring. It is made from scrap wood and left over finishes, so the only things I had to purchase were the moulding, hinges and “bling”.
Used Georgia’s Jewelry Box plan, with these mods: made it a little longer with no overhangs; added stop moulding trim around the top and bottom; added some lattice squares for “feet;” added a small sliding tray in aromatic cedar (1/4” cedar closet lining for the tray, stop moulding for the rails), and some self-adhesive rhinestone flourishes (found these at Michaels).
This would be an afternoon build. The finish took longer than the build - probably 2 or 3 hrs (filling, sanding, painting, and attaching the hinges and “bling”). It took me much longer to decide how to decorate it, than it did to actually build it ;)
Some squares of sticky-back felt were also added to the bottoms of the feet.
I’m very pleased to say that this gift was a big hit!
Fri, 10/31/2014 - 15:24
Thank you for the nice comment! :) I might build some more of these for Christmas gifts.
:)
More difficult build then I'm used too. Modified it to fit a full mattress but I think it turned out great! It's a lot cheaper to build than most Murphy beds to purchase out there on the market. Enjoyed these plans. Thank you Ana!
We loved the Modern Adirondack Chair pattern so much that we adapted it to have a matching love seat. It turned out beautifully!
Tue, 07/06/2021 - 17:08
Did you have to add any additional supports or just make the horizontal supports and seats/ backs longer?? Love this so much!
Tue, 08/31/2021 - 14:04
Yes, I added additional supports underneath. Two 2x4s going running along the 1x10s.