Community Brag Posts
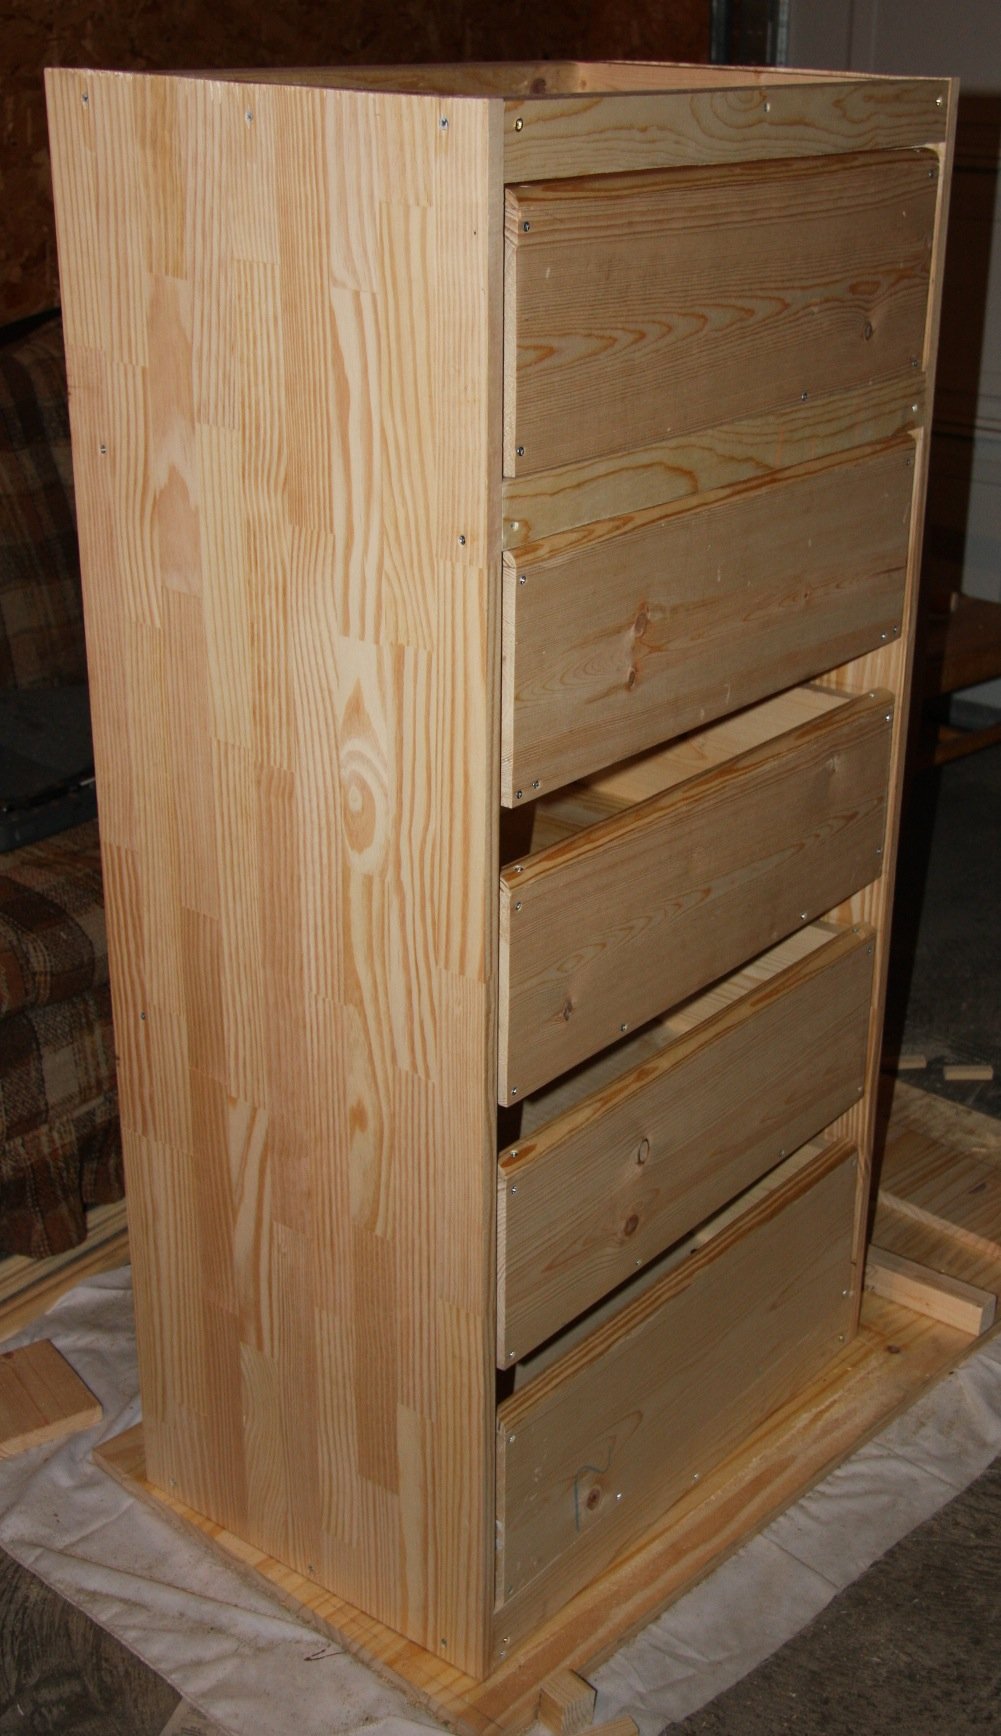
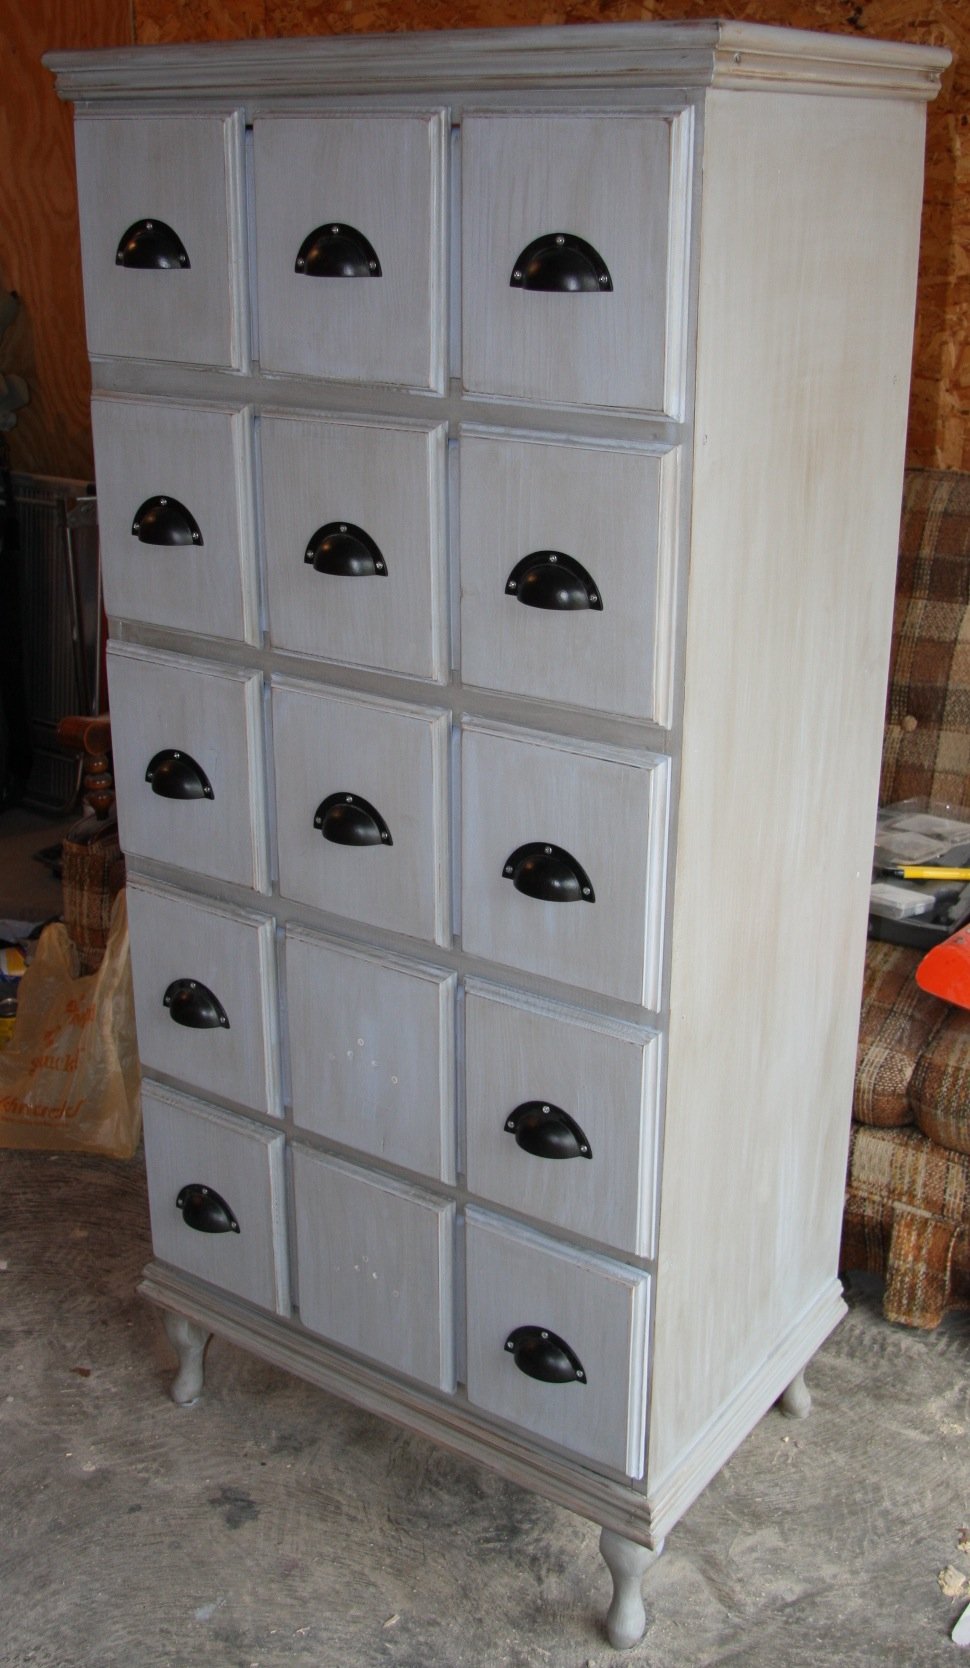
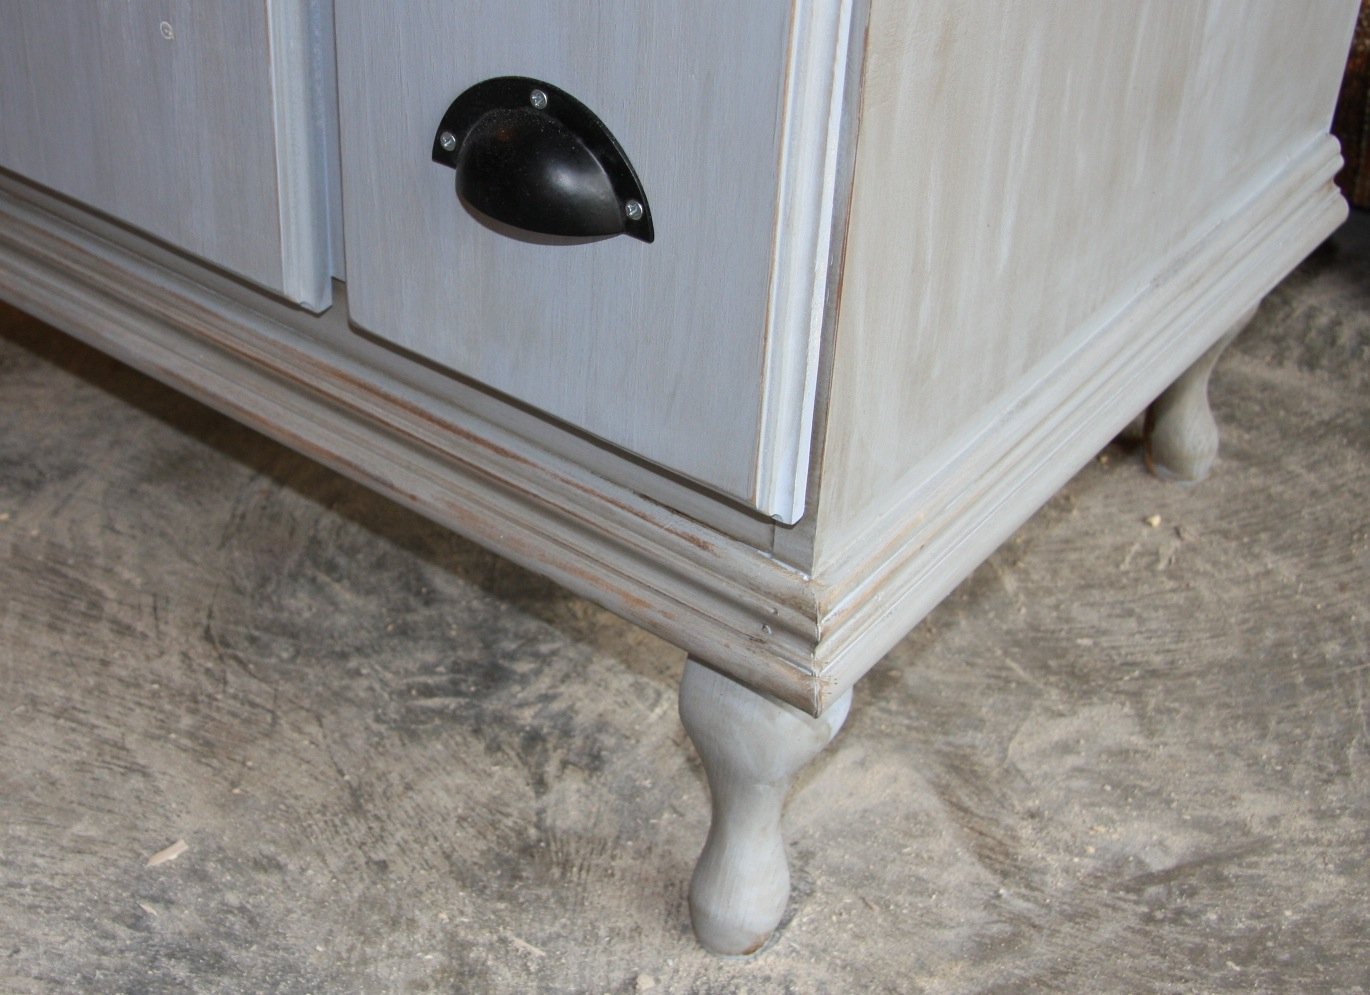
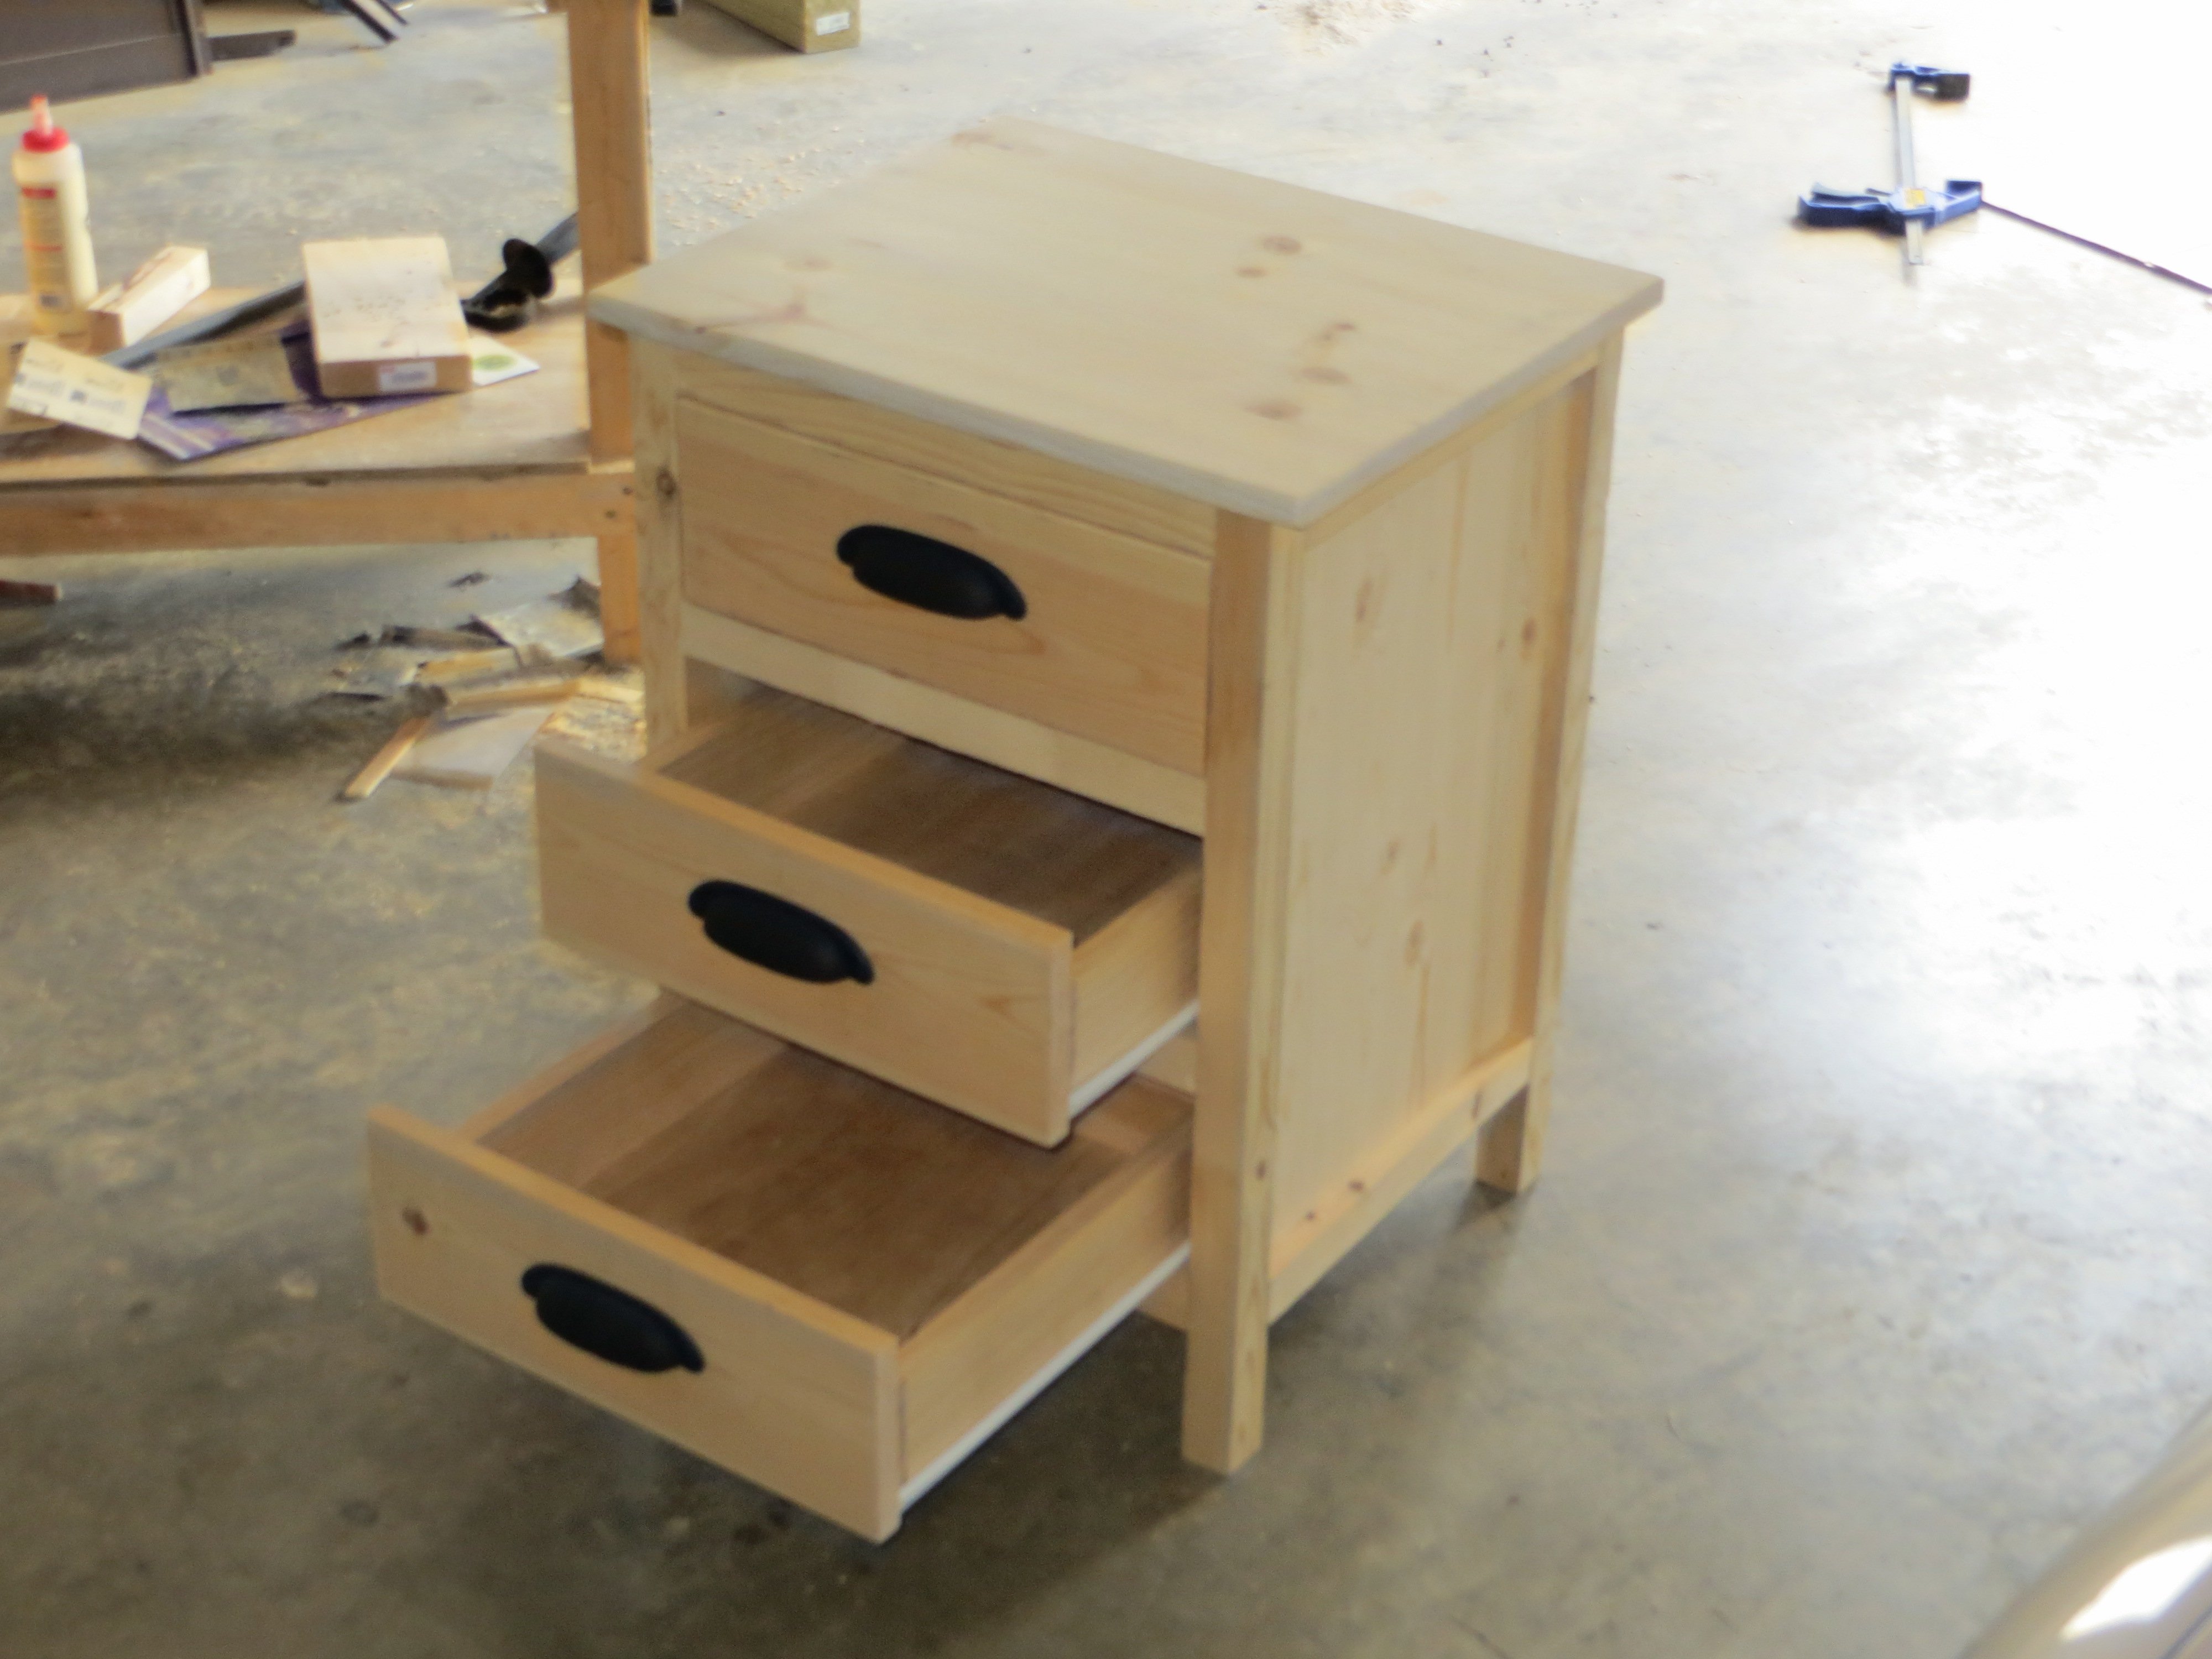
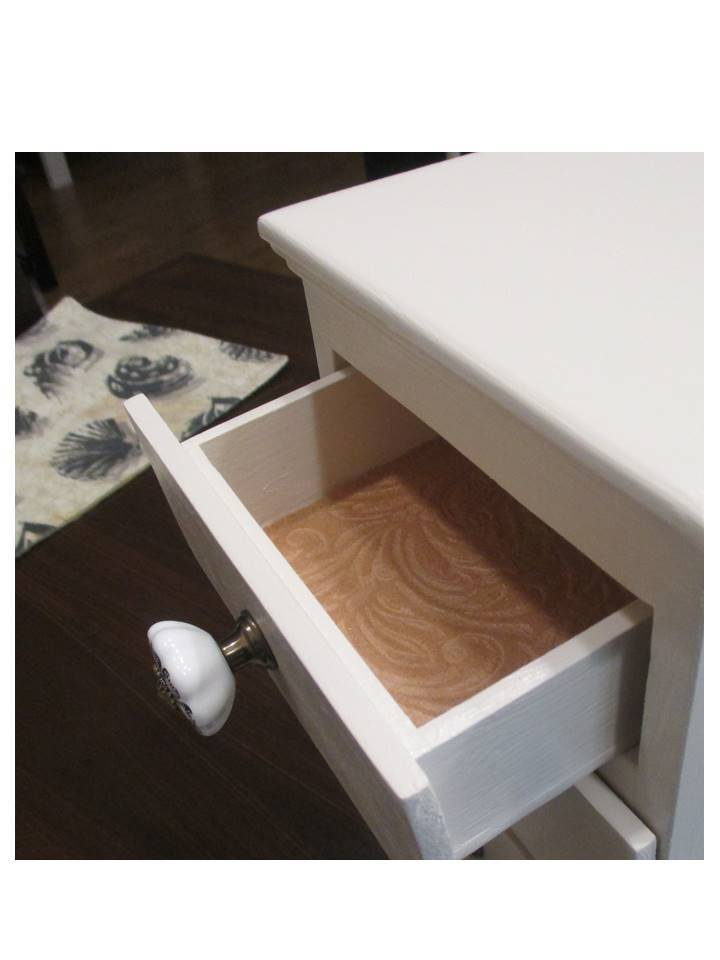
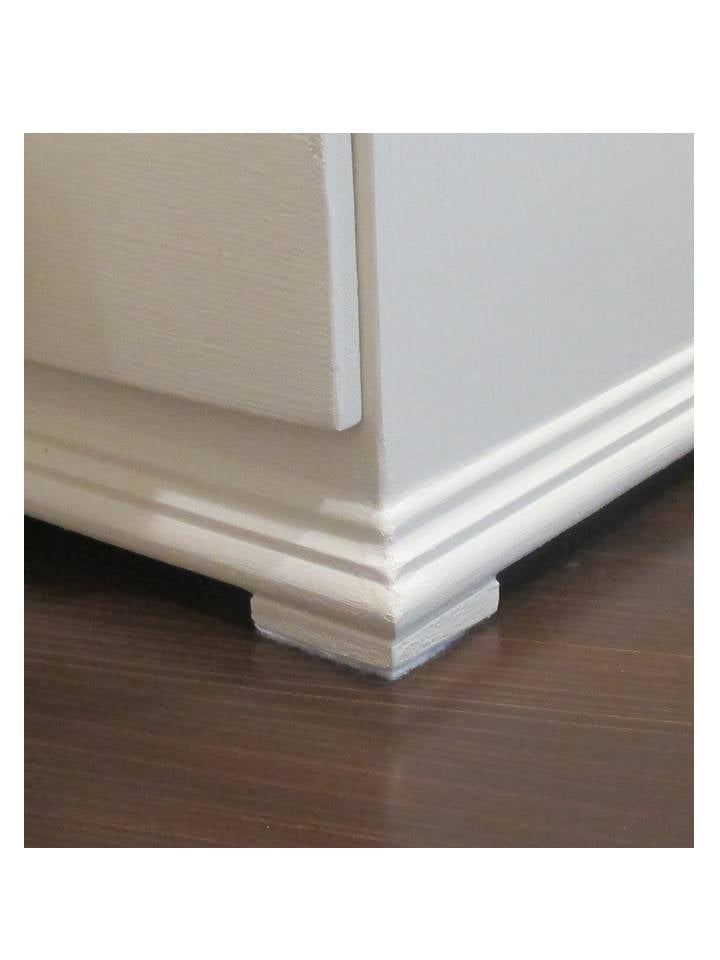
Apothecary dresser
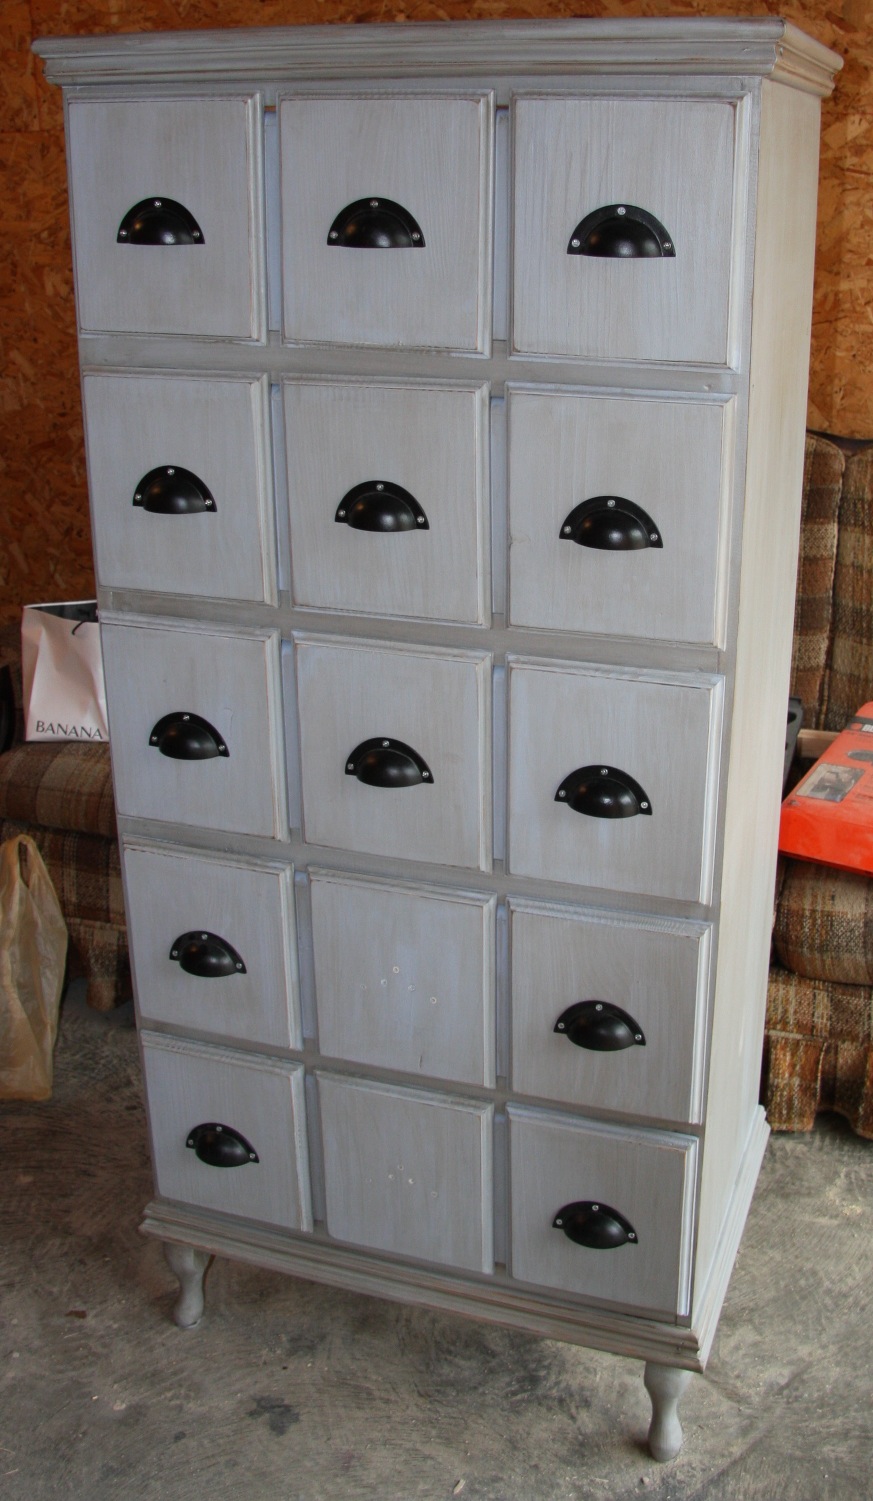
The apothecary console inspired me to make a dresser with faux drawer faces. I have no plan, since I measured and planned as I go along. This took me waaaay longer than I expected, and everything that can possibly go wrong did go wrong, and even some of things that were perfectly fine went wrong too. I'm blaming the wet midwestern stormy weather for mysteriously expanding two of my drawers. I used drawer sliders and they were more tricky than I expected.
I wanted to make an all-wood dresser, so no MDF or plywood.
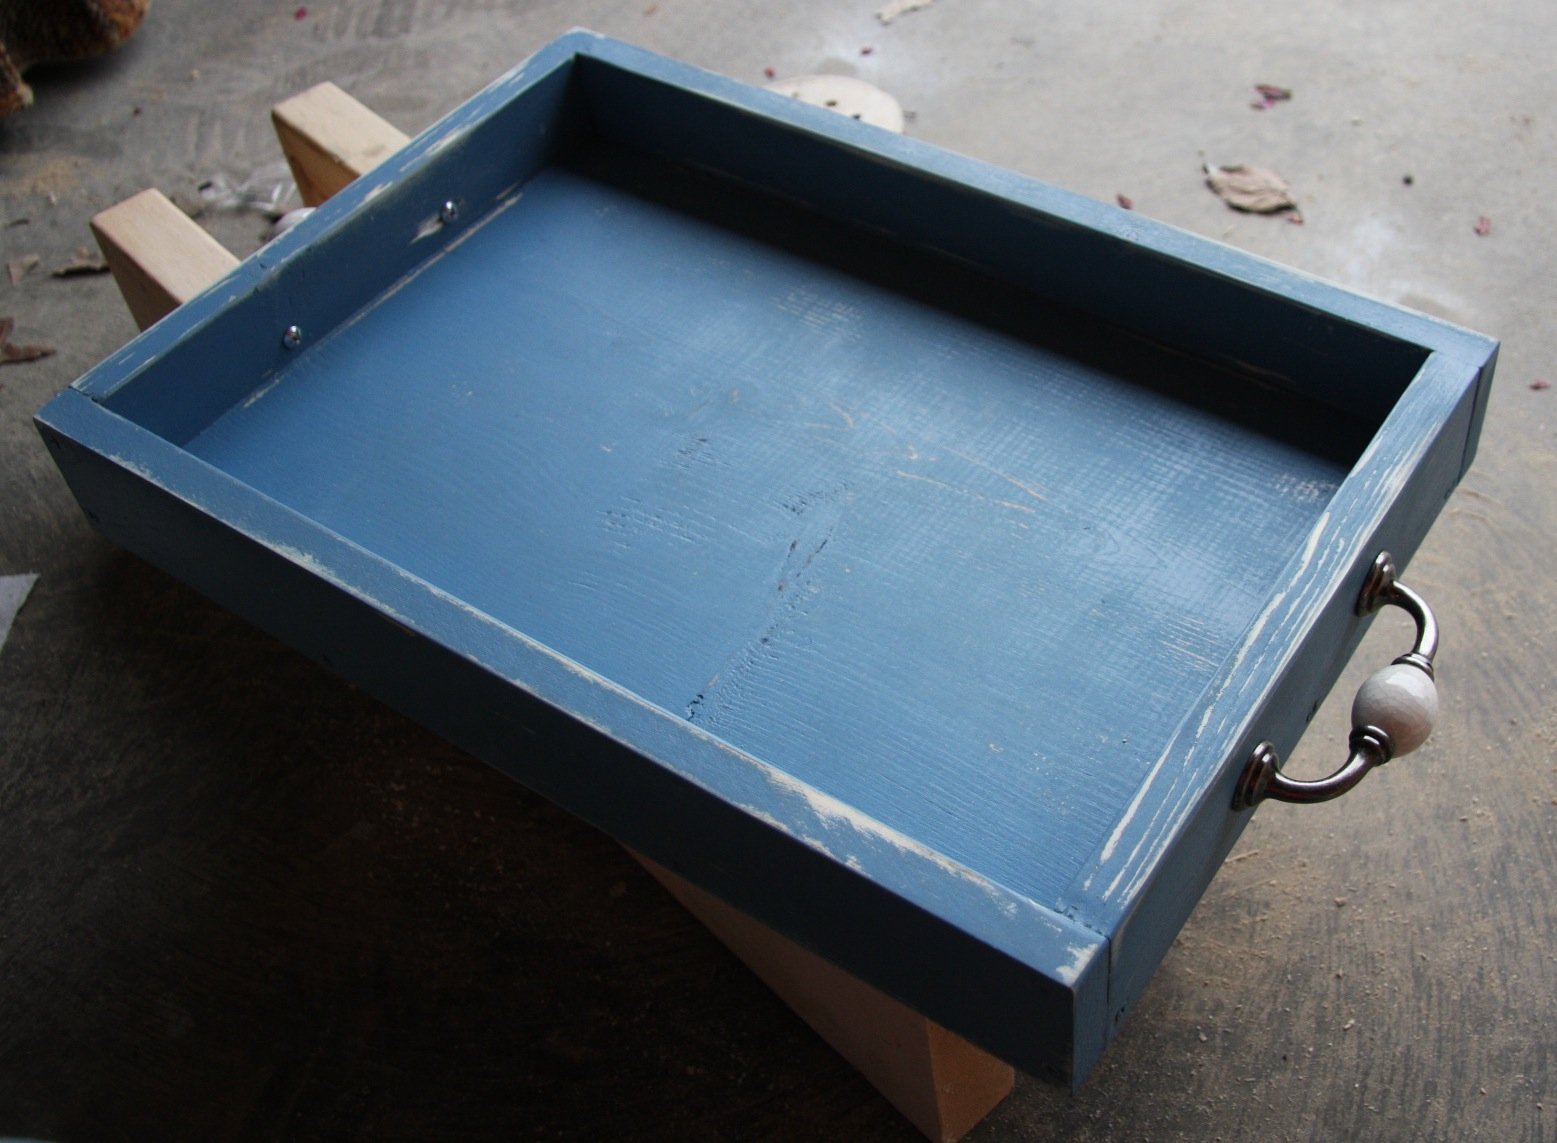
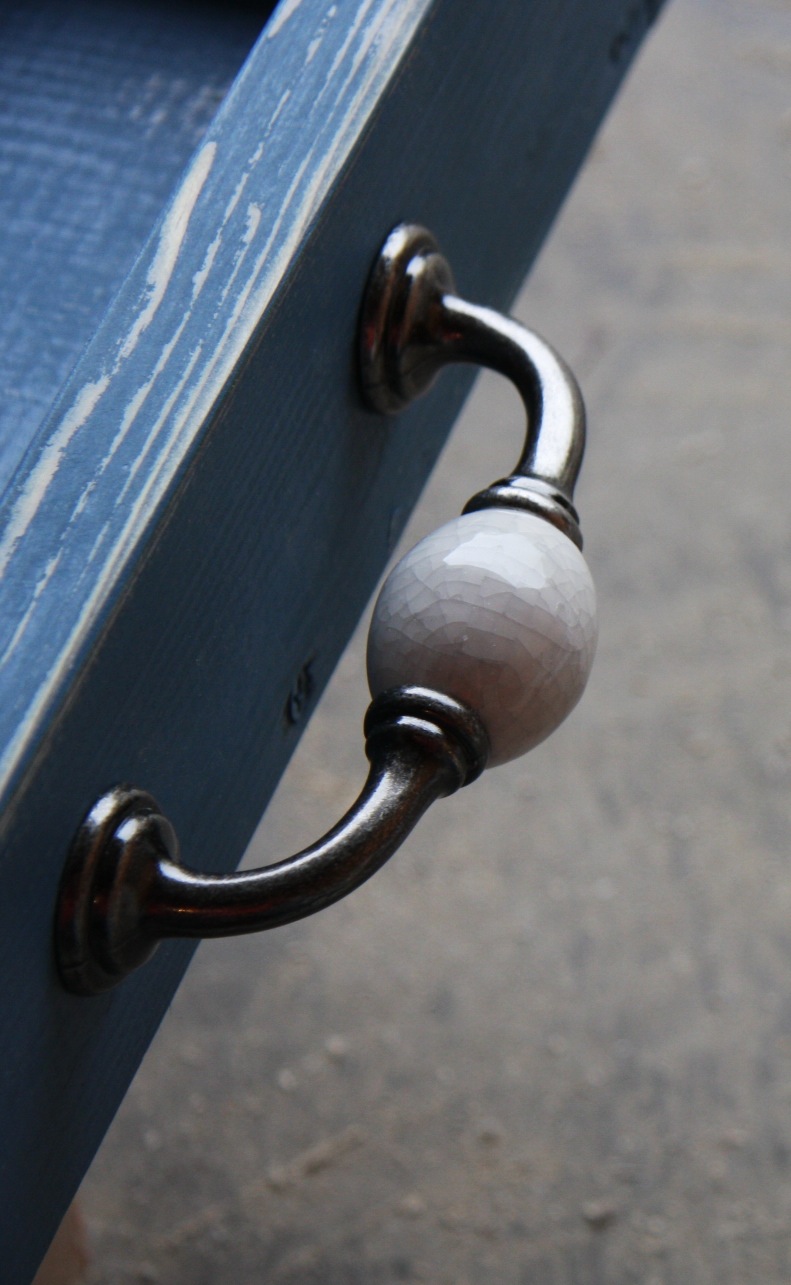
I also made a food tray using scrap pieces. It's a little heavy for a tray, but I think I gained enough muscles building the dresser.
Built from Plan(s)
Estimated Cost
$200
Estimated Time Investment
Week Long Project (20 Hours or More)
Finish Used
Painted with a light blue (french blue) oops paint, sanded and stained to look like an old piece of furniture.
Recommended Skill Level
Beginner
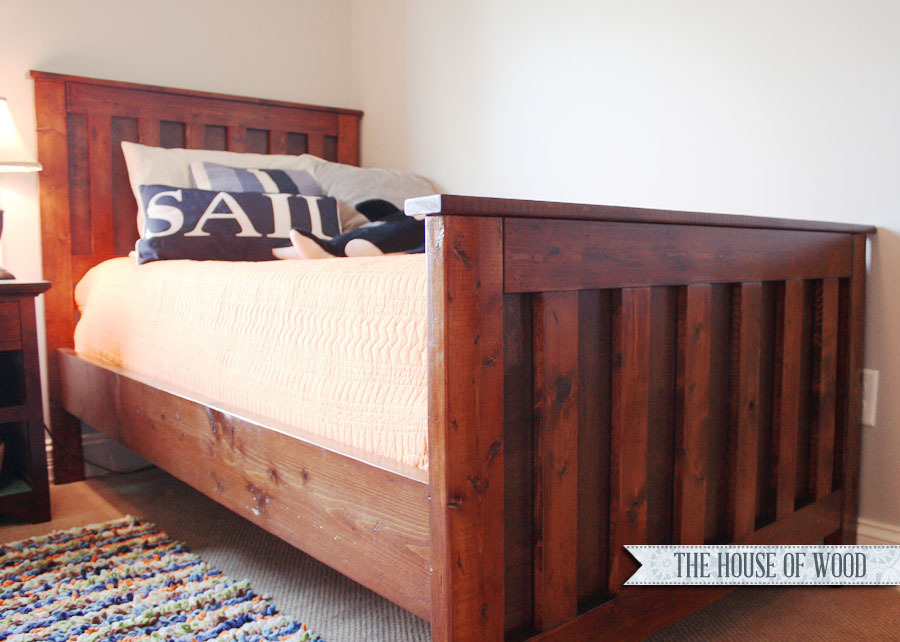
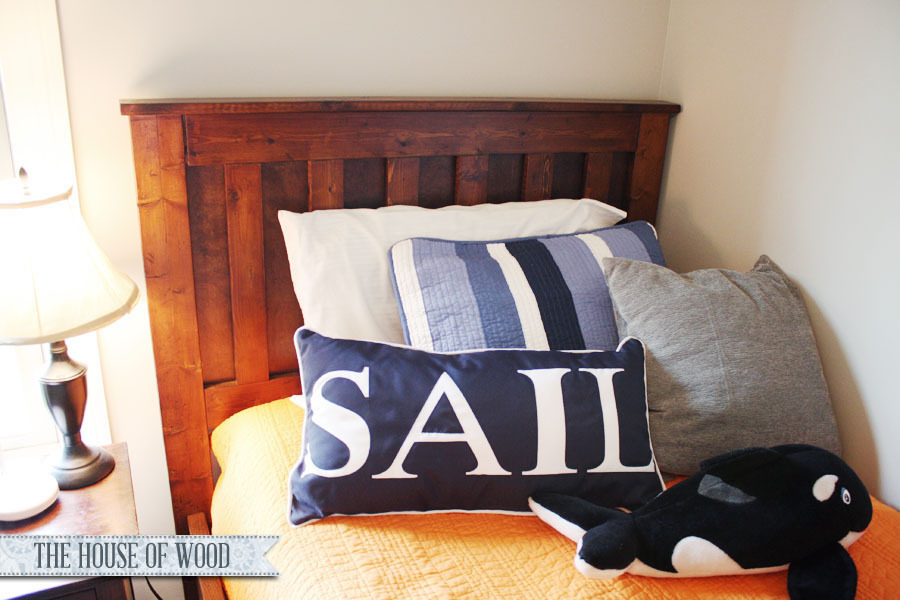
Kentwood Bed for a Friend
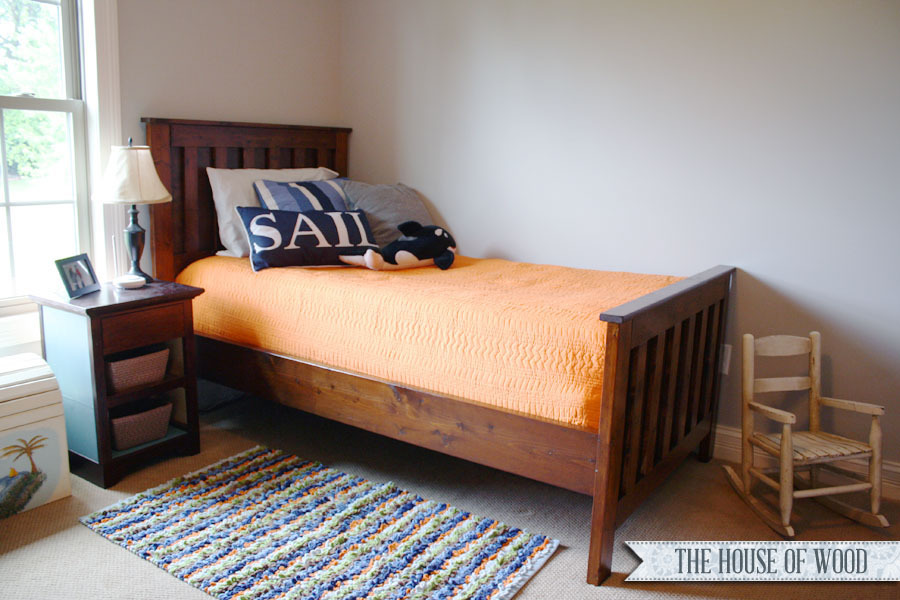
We built this bed in a few hours - so easy! This bed is pretty solid too, with the 2x4s and 2x6s. Read about it here: http://jenwoodhouse.com/blog/2013/06/26/kentwood-bed/
Built from Plan(s)
Estimated Cost
$85.00
Estimated Time Investment
Afternoon Project (3-6 Hours)
Finish Used
Early American stain
Recommended Skill Level
Beginner
Comments

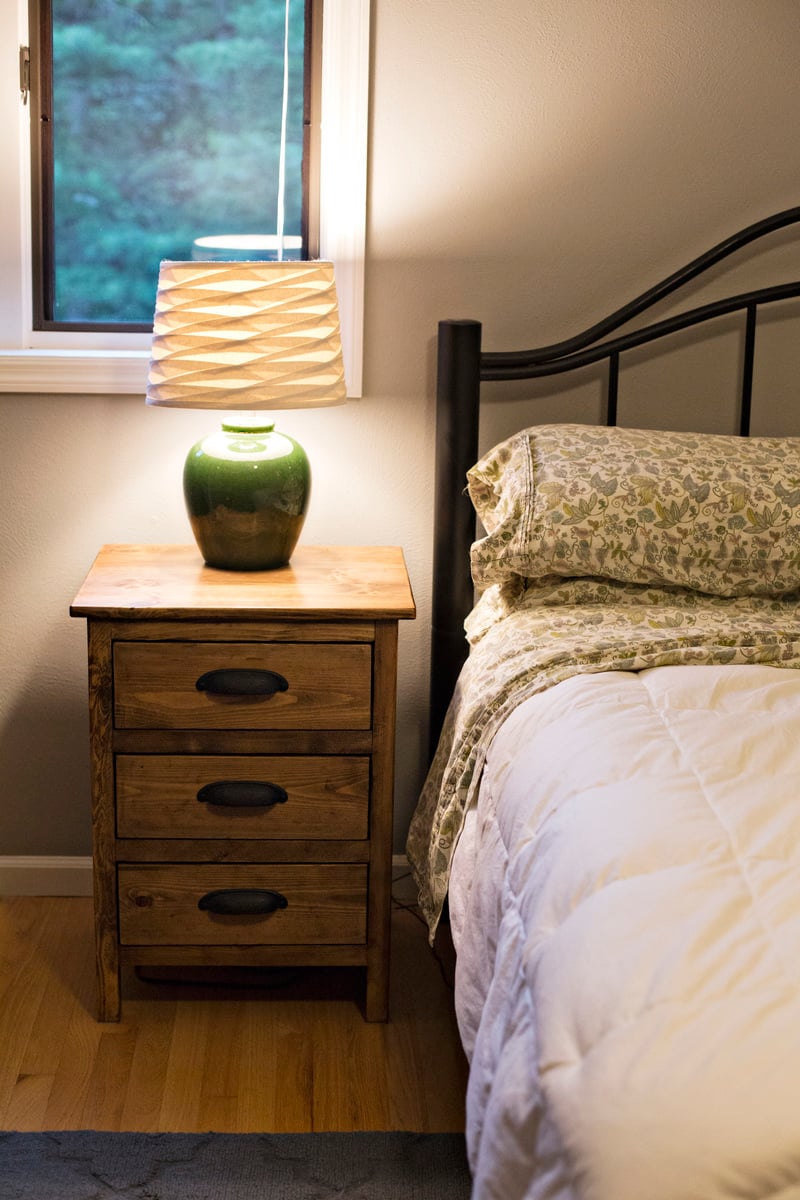
Reclaimed Wood Night Stand
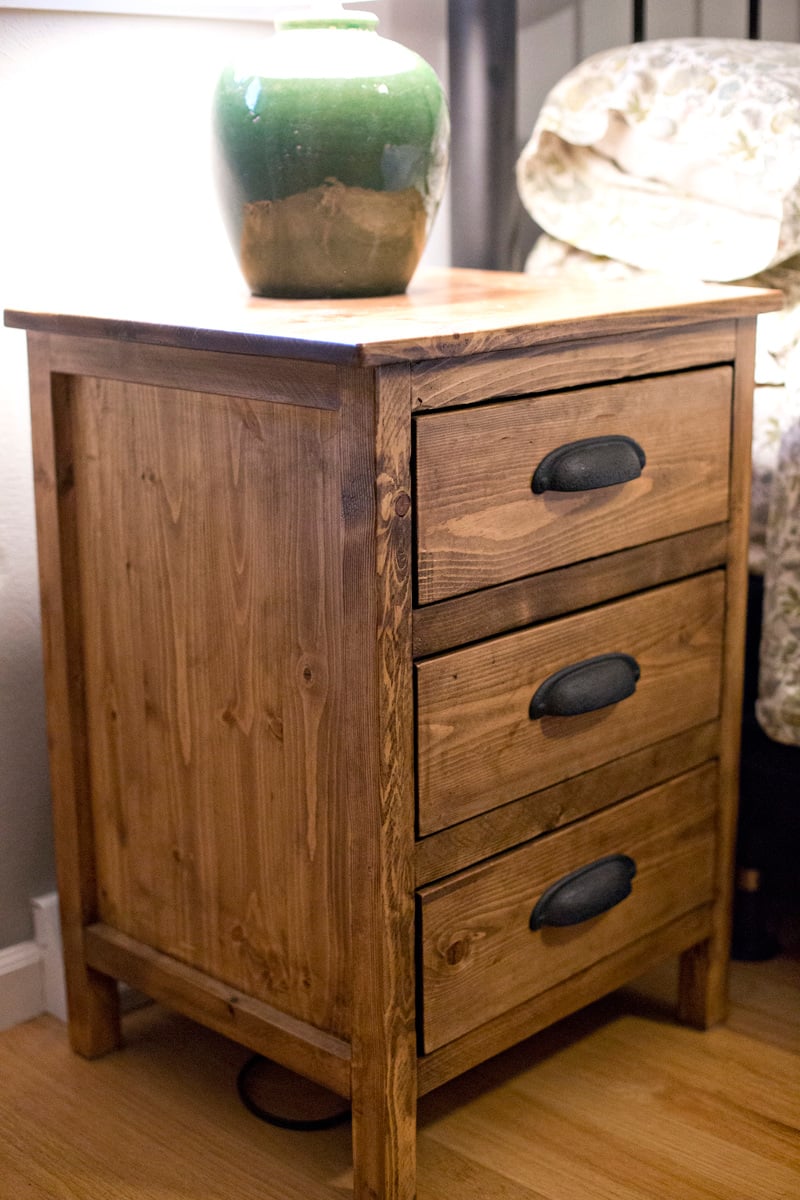
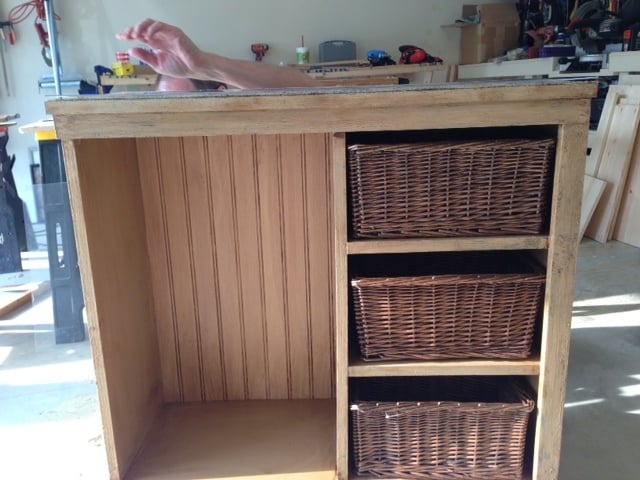
These (matching set) were a pretty straightforward build based on the Reclaimed Wood Night Stands. http://ana-white.com/2011/08/reclaimed-wood-night-stand. The hardware I used was designed to match the Printer's Console that I built previously. I cheaped out on the drawer slides, which I wouldn't recommend doing because it gives the drawers a cheap feel to them. Plus, there's not that much of a price difference.
Built from Plan(s)
Estimated Time Investment
Week Long Project (20 Hours or More)
Finish Used
Rustoleum American Oak
Recommended Skill Level
Beginner
Comments
Fri, 04/08/2016 - 13:54
wood night stands
Hello, your project looks nice. Did you use regular #2 lumber from Home Depot or Lowes? If so how are they holding up?
In reply to wood night stands by blue72vette
Wed, 10/05/2016 - 16:59
Only 6 months late
But yes the lumber was straight outta Home Depot. I would say its doing pretty good at this point. It sees pretty light duty (e.g. alarm clock, books and glasses of water), but no water rings. I did throw a number of coats on the top of it though. It's soft wood, so if you wanted to you could engrave your name with your thumbnail. You just have to resist the urge.
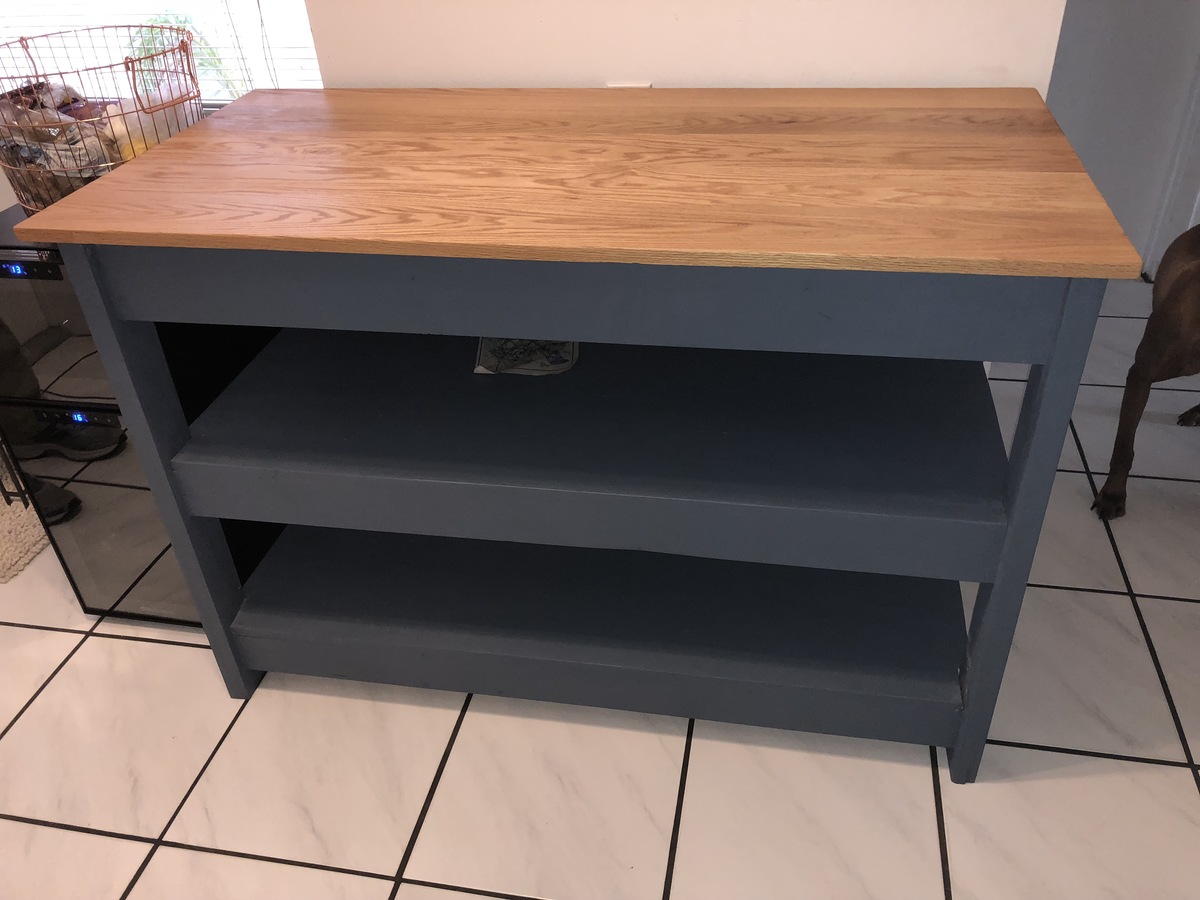
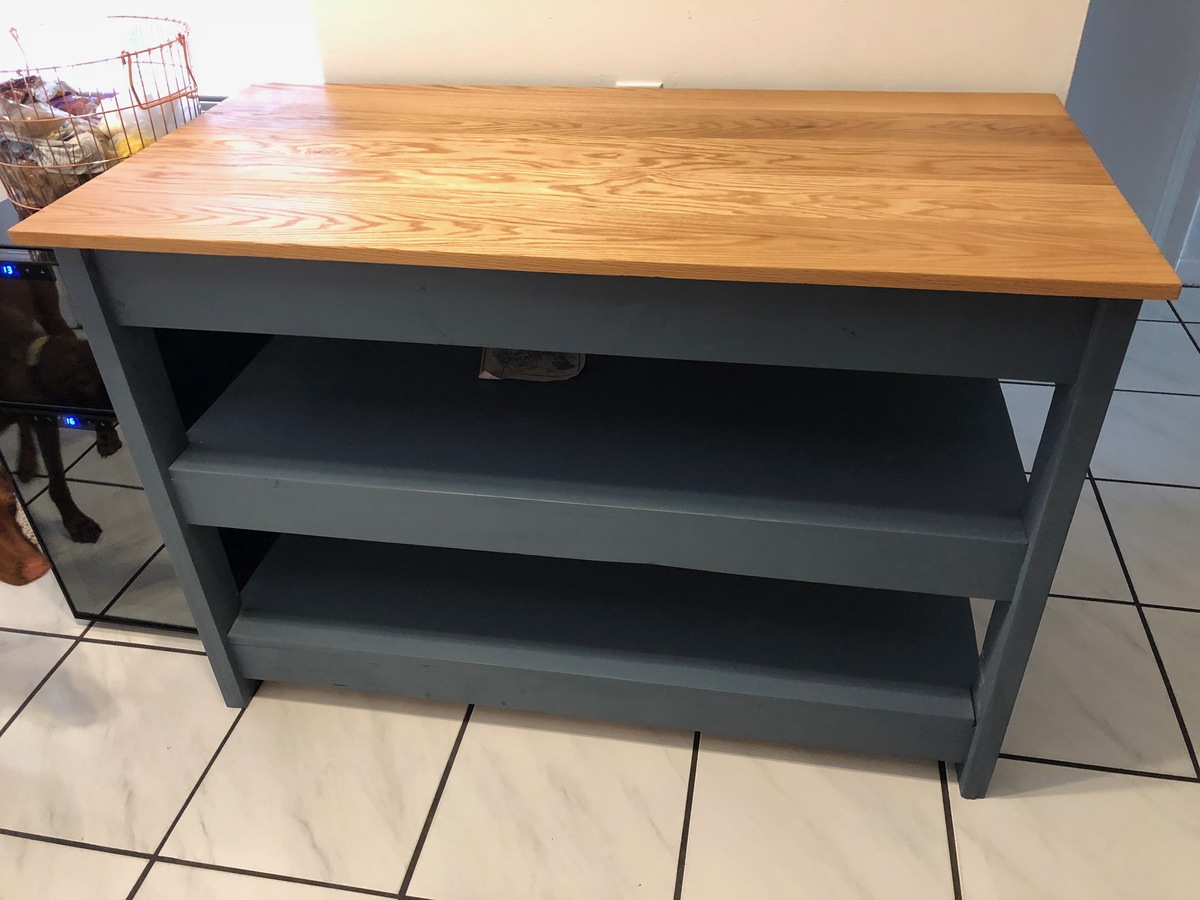
Red Oak Island
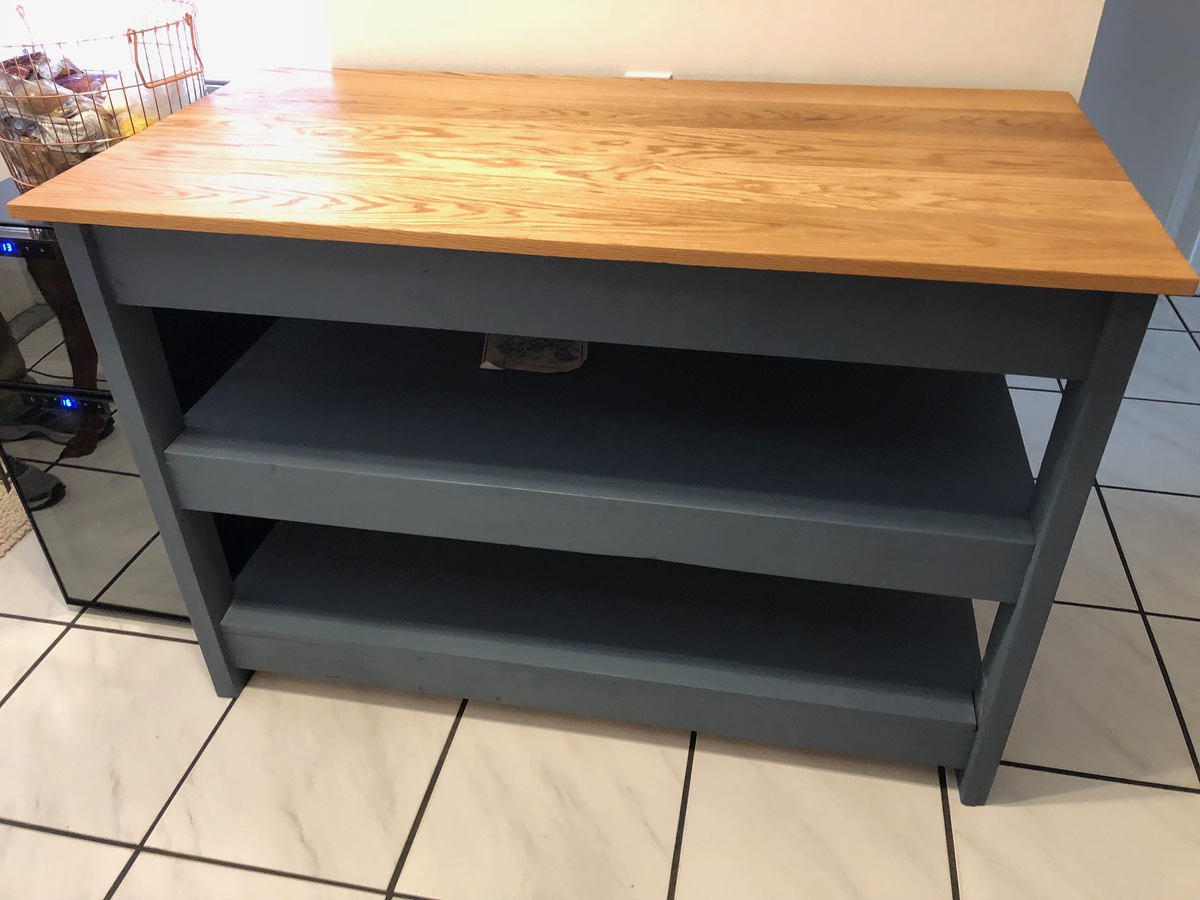
Substituted 1 x 4s for the shelves instead of the slats. Used red oak for the top and treated it with butcher block oils and wax so that it can be used for chopping.
Estimated Cost
$80 for the red oak. $58 for the shelf lumber. $30 for the frame.
Total was around $168.
Total was around $168.
Estimated Time Investment
Afternoon Project (3-6 Hours)
Finish Used
Paint and Butcher Block Oil
Recommended Skill Level
Beginner
Low loft bed...
My son's bed fell apart like a day before this plan came out. Being able to create things with just my chop saw makes it so simple and fun to do with my young son.
Thank you very much Ana.
Kim and Levi
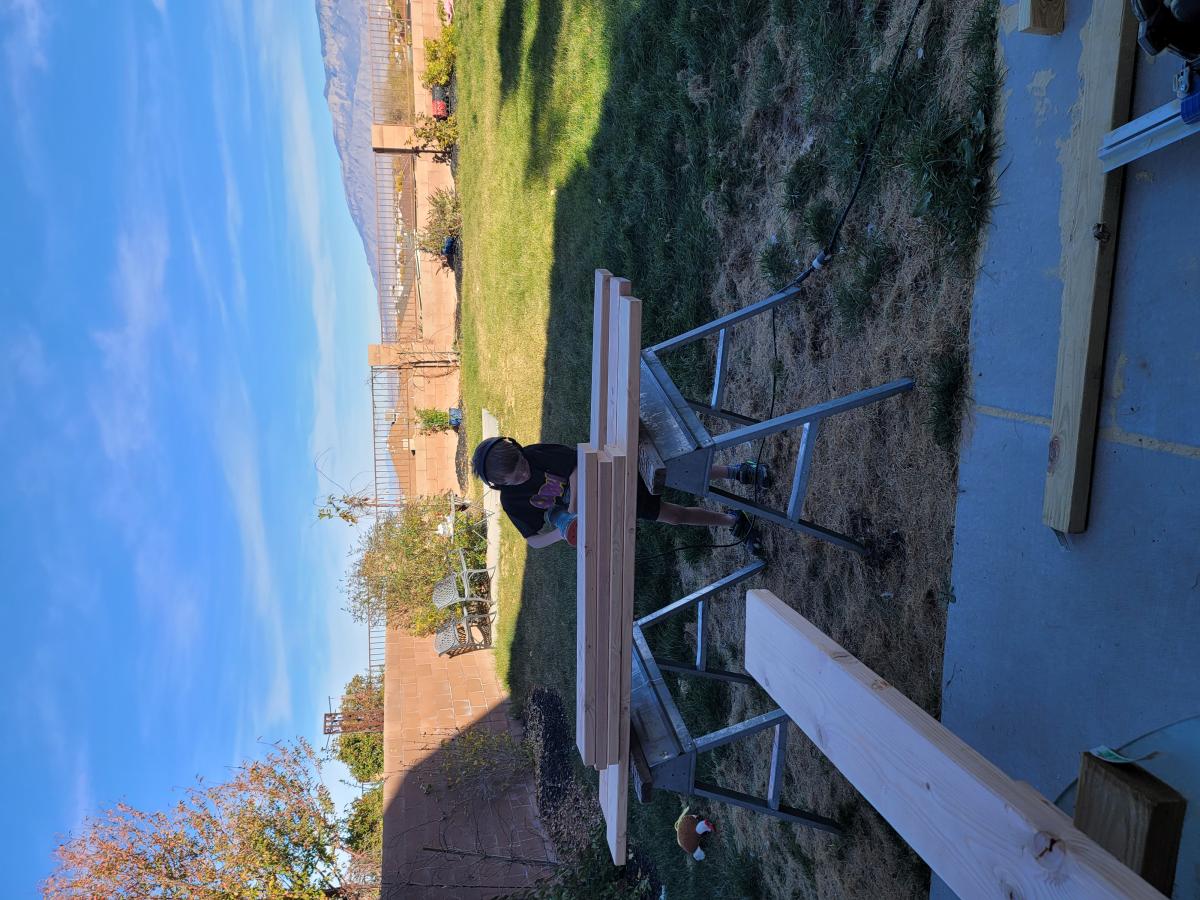
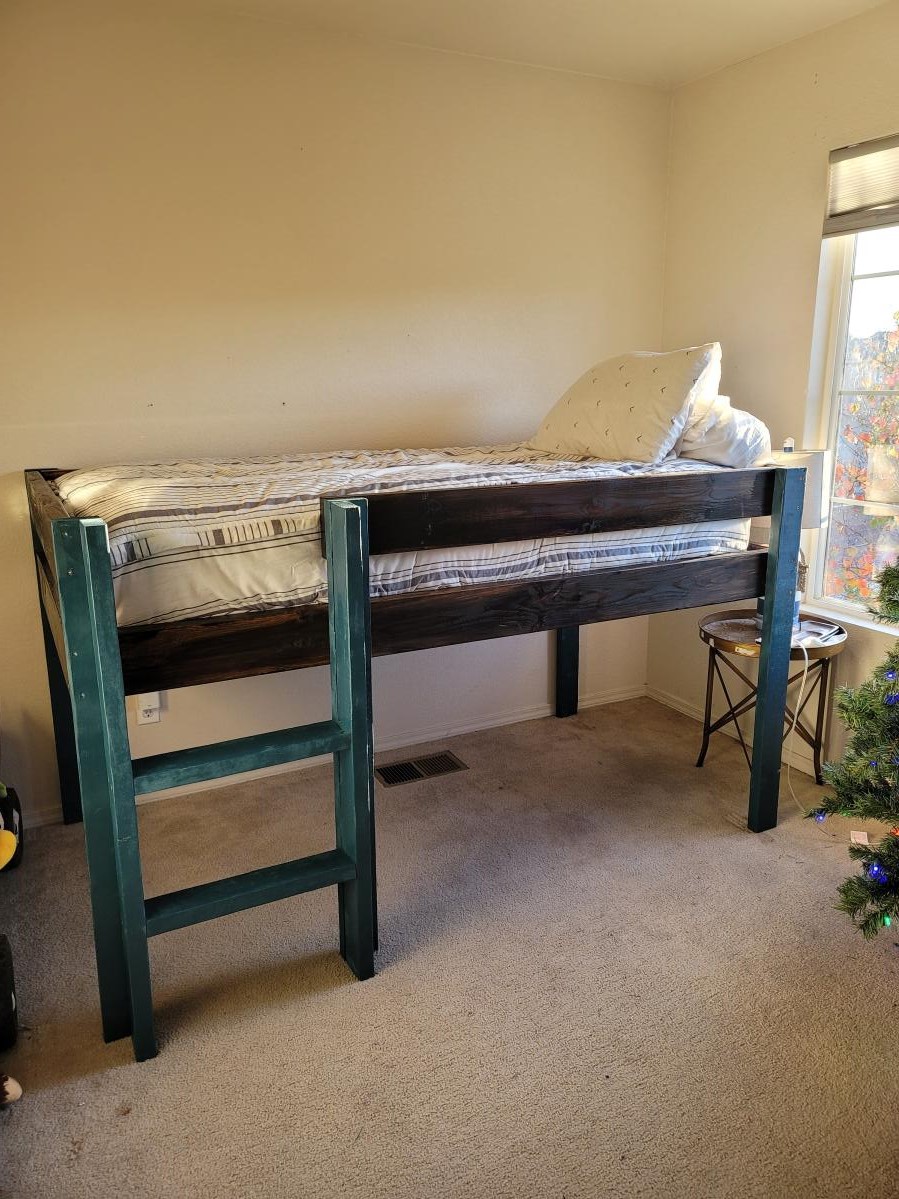
Built from Plan(s)
Comments
Meida center
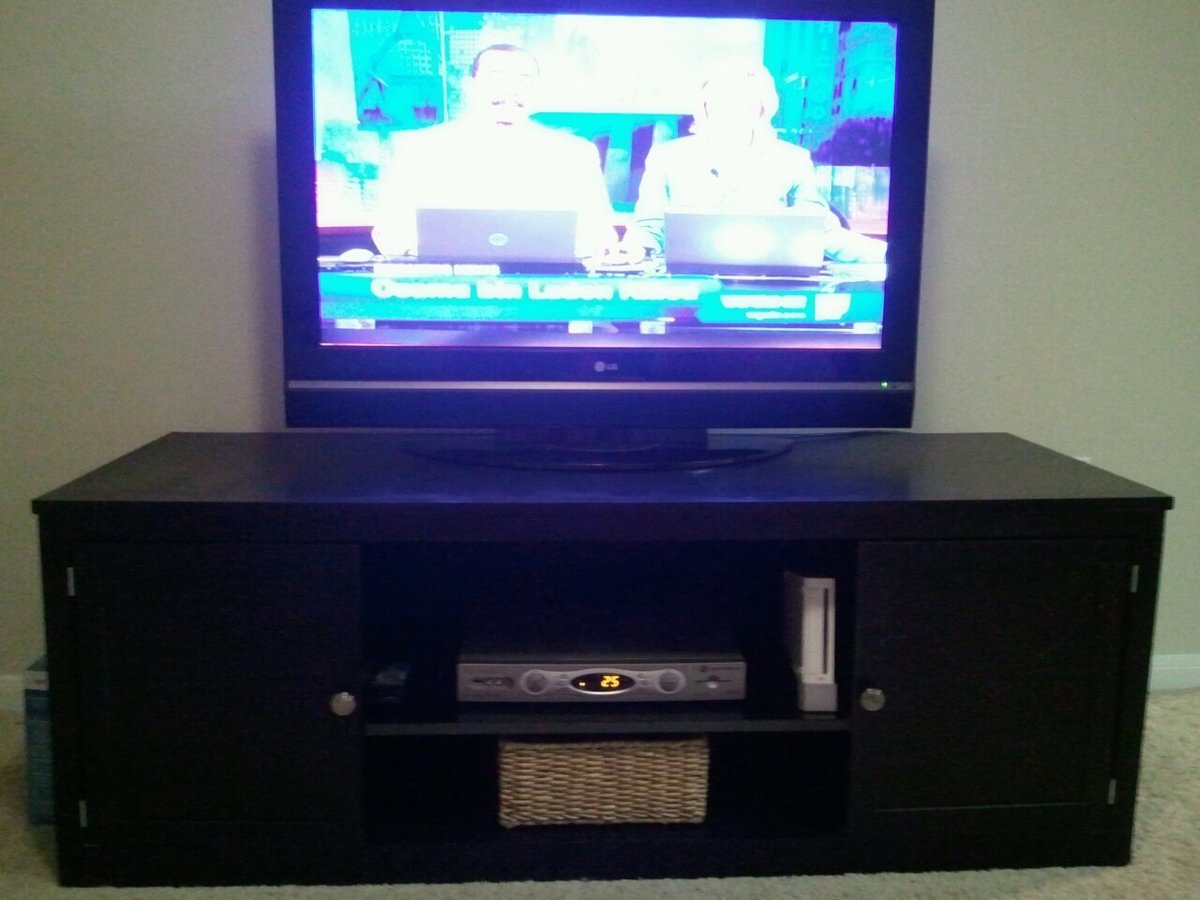
I built this on my own (no help!) in my apartment garage from February 2011 - April 2011. I'm a single mom, so I would work an hour here and there every week or so.
The large pieces had to be cut by HD employees,Small pieces were all cut individually with a hand-saw. The only power tool I own right now is a drill, so this took a while. lol
Built from Plan(s)
Estimated Time Investment
Weekend Project (10-20 Hours)
Finish Used
Black Paint
Recommended Skill Level
Intermediate
Fireplace Remodel

When my husband and I bought our home we knew we wanted to make changes. The fireplace was an eye sore to us, so we decided to change the whole thing. When we researched on the net on how to make a mantel, we didn't find that many how to's. We have had a lot of questions on how we did it, so wanted to share with others how we did ours. Once we figures out how we were going to build it, it didn't take much time to finish the project. My blog has more details on how we accomplished our mantel. http://supersaturdayldscrafts.blogspot.com/2013/06/fireplace-remodel.ht…


Estimated Cost
200.00
Estimated Time Investment
Day Project (6-9 Hours)
Recommended Skill Level
Beginner
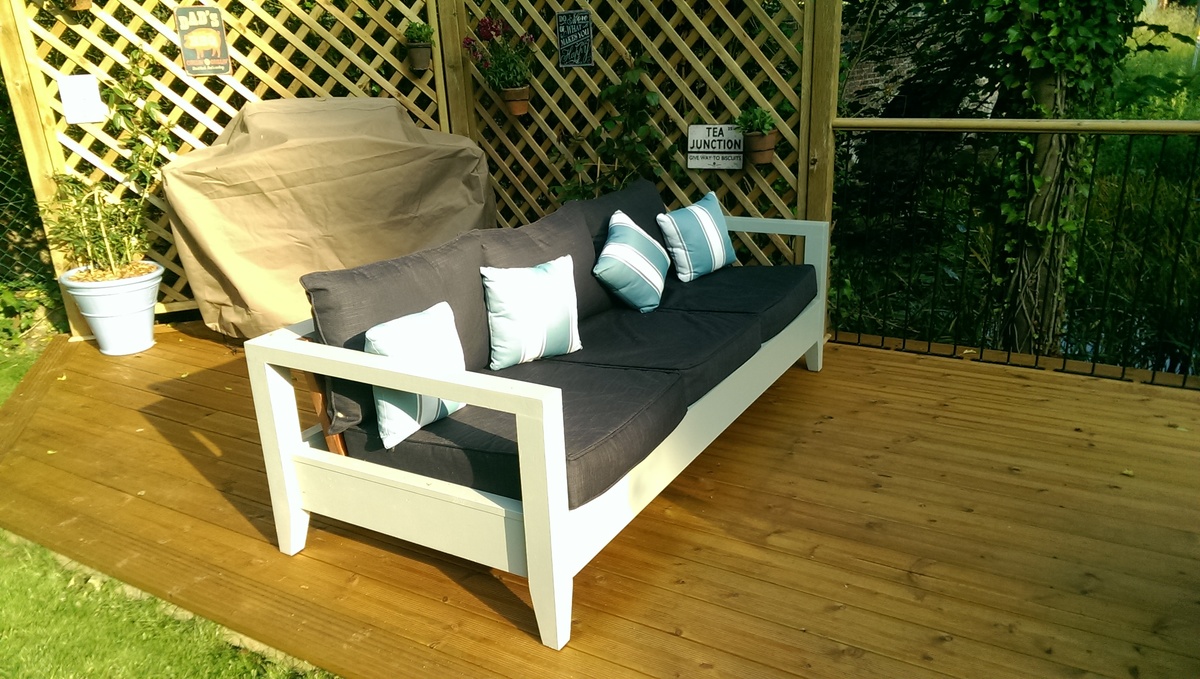
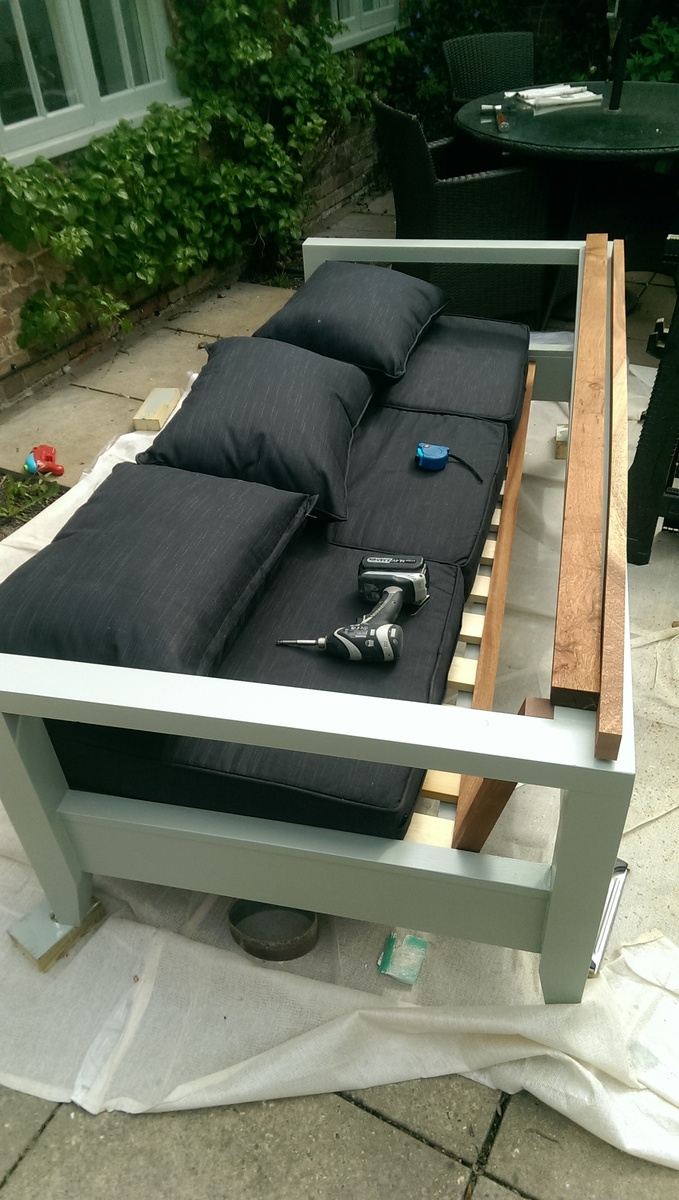
Super Sofa
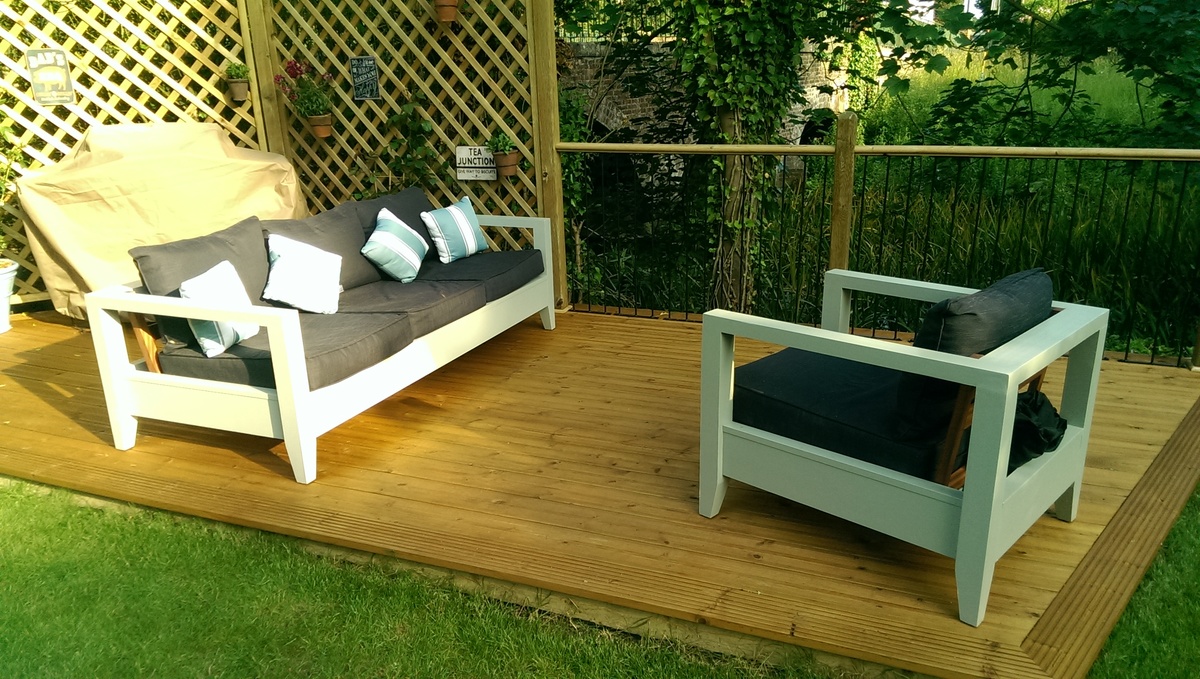
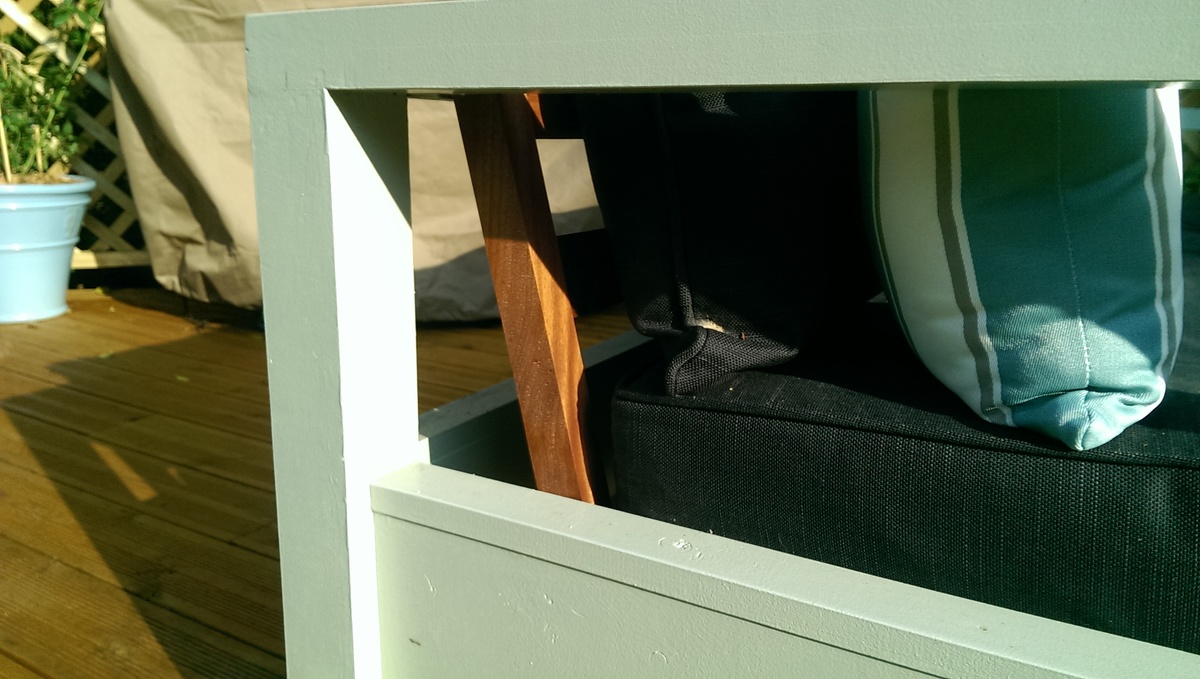
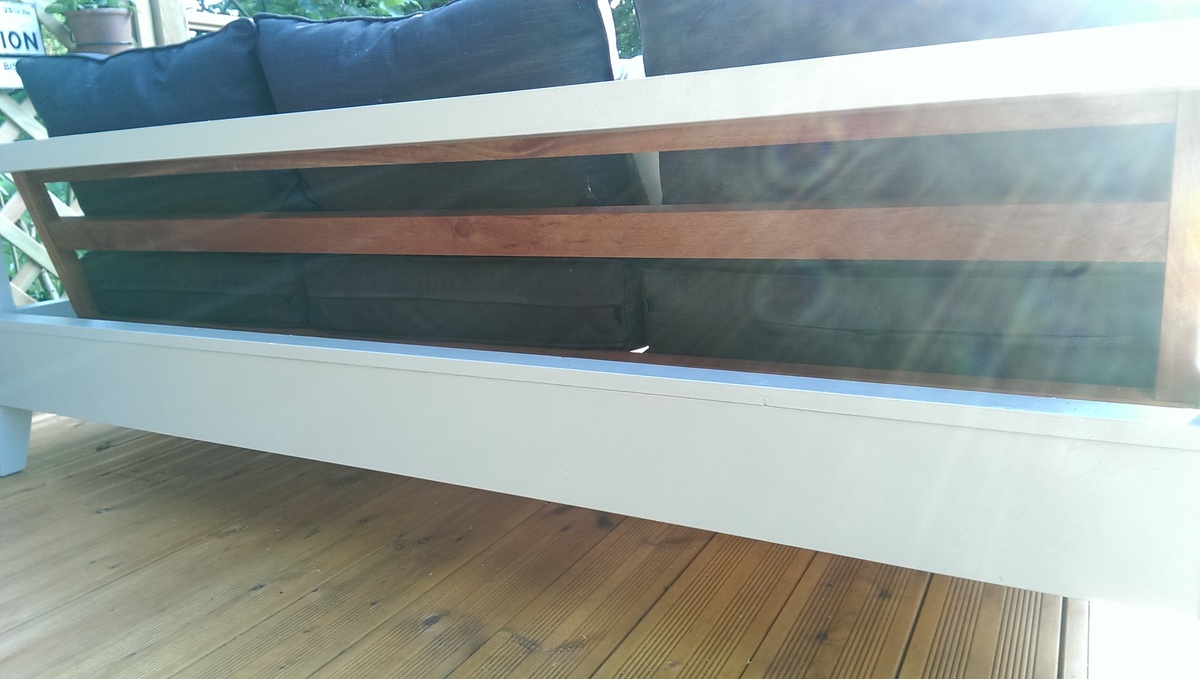
Although Ive done a lot of DIY projects this was my first real furniture build. I modified the plans for the Simple White Outdoor Sofa because my back cushions were quite short and I didn't need the back to be so high to support them. I also liked the idea of having some contrast to the painted finish so used some Sapele I had. I'm really happy with the end result.
I wanted it to be a little more substantial that the original plans and I wanted the arms to be arms to fully support a forearm (and a beer) so I used 3 x 3 for legs and a 4 x 2 ripped down to 3 x 2 for the arms. I also tapered the legs to soften the lines a bit and give it a bit more interest.
The armchair is made in the exact same way but I made the legs a little taller so that the arms were at a more comfortable height to rest both arms on while reading a book or newspaper.
Built from Plan(s)
Estimated Cost
Cushions were $65. Timber costs were around $150 (Pine)
Estimated Time Investment
Weekend Project (10-20 Hours)
Finish Used
It's painted in Farrow and Ball Green Blue and the Sapele is just danish oiled.
Recommended Skill Level
Starter Project
Modified Emily Dresser
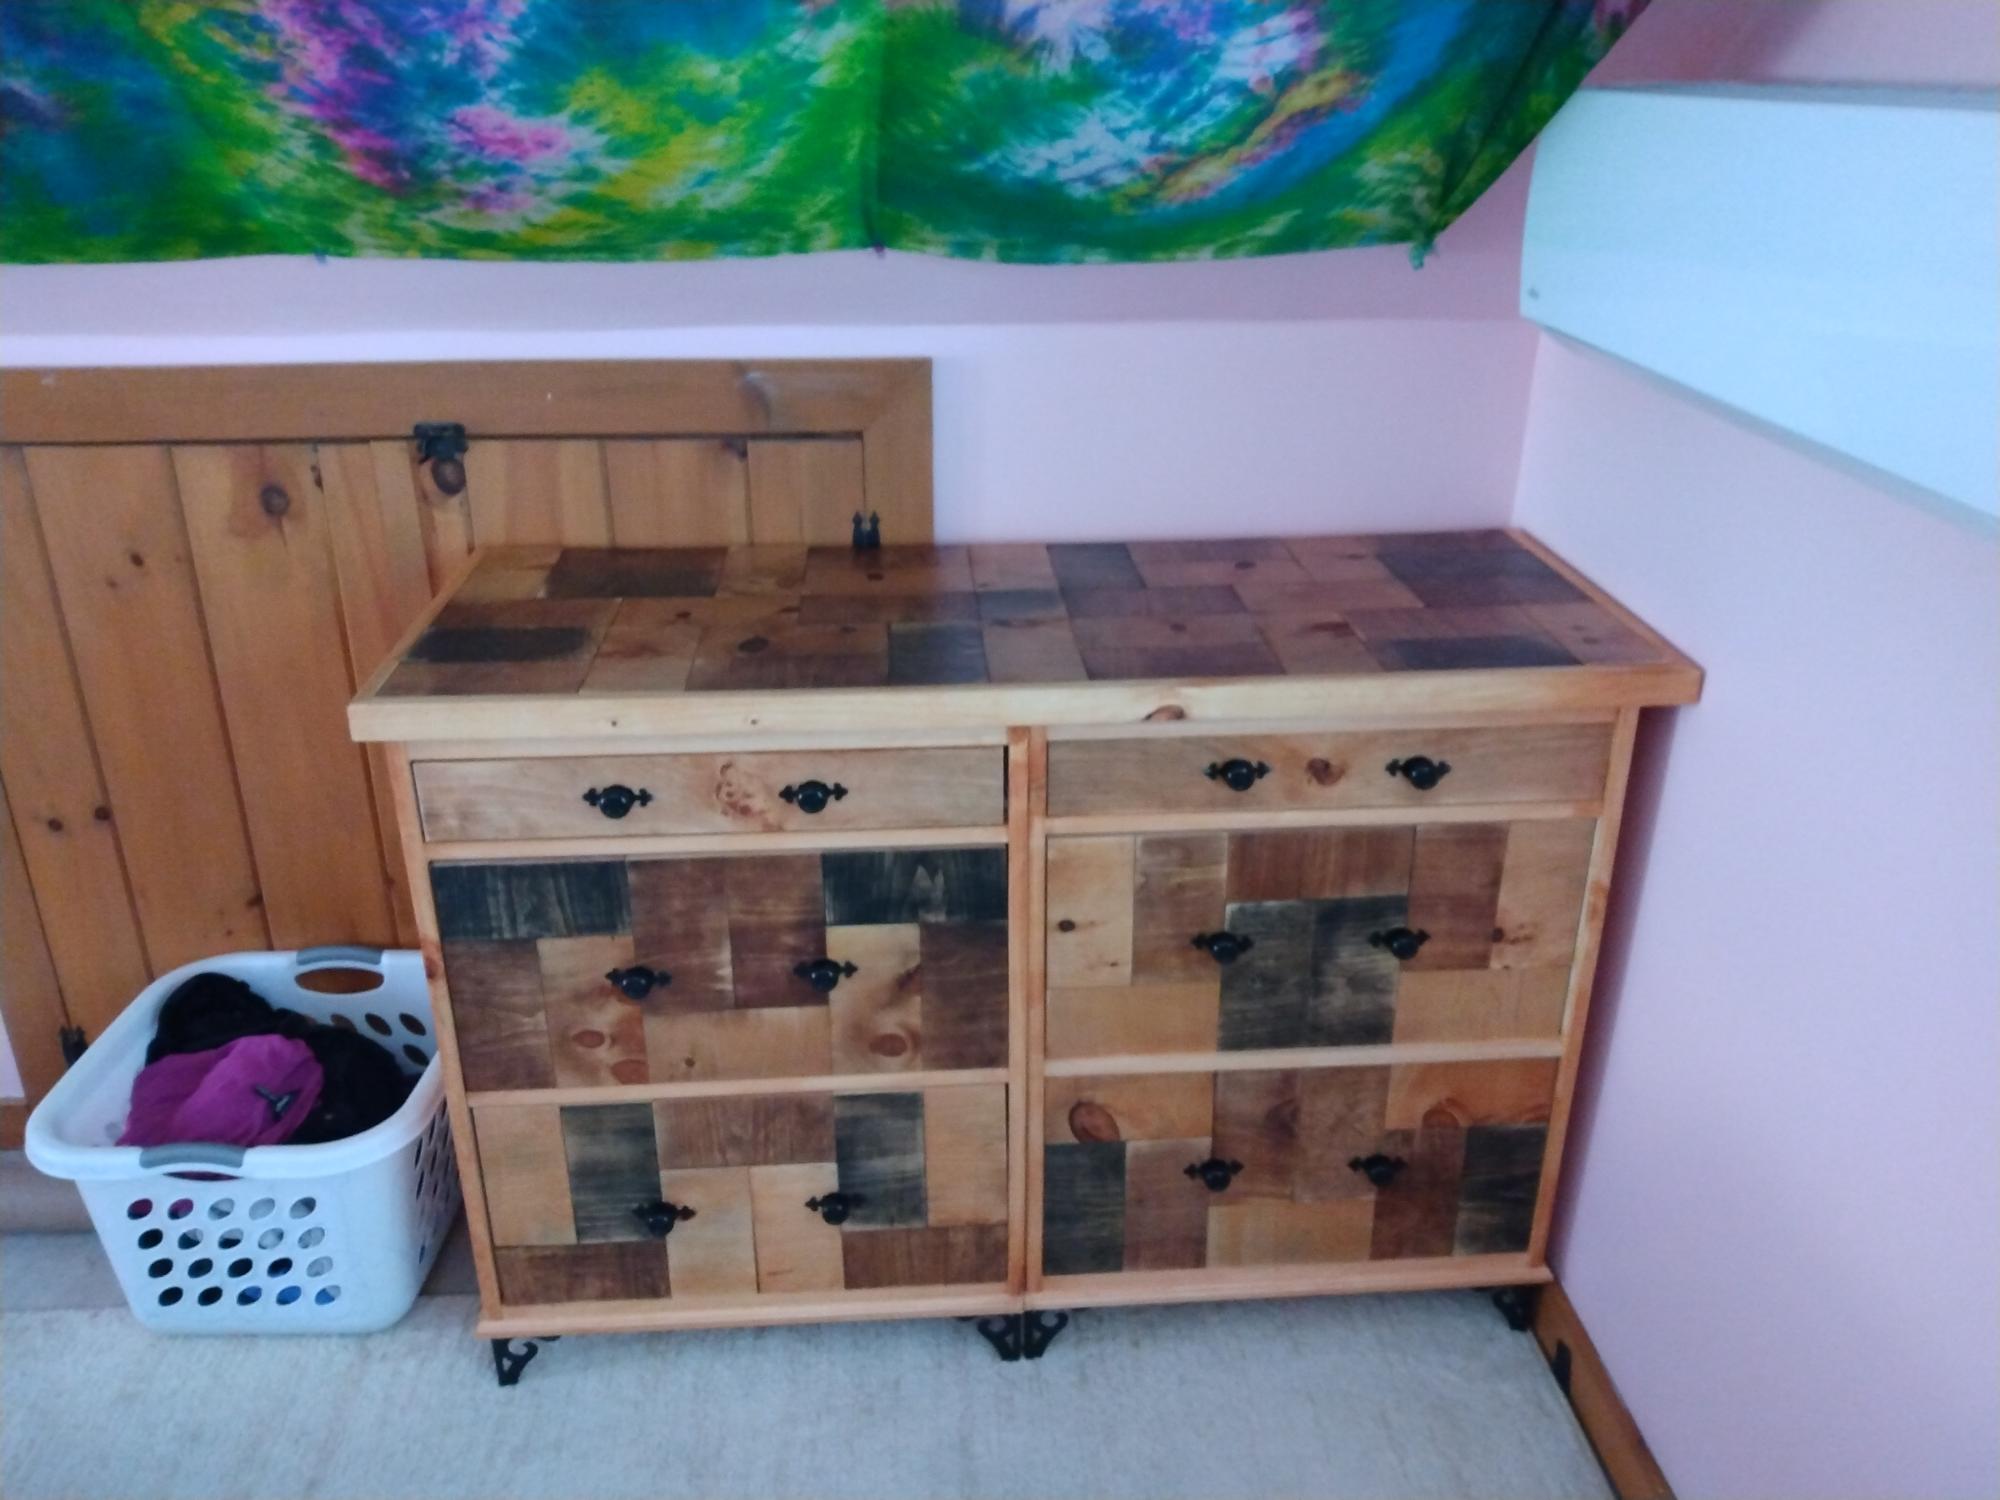
I needed to make the dresser in three pieces so that I could get it into my attic bed room. and I used pine for the "quilt" like pattern on the top and fronts. I would use hardwood if I did it again. But I love the small drawers on top. It is finished in teak oil.
Built from Plan(s)
Comments
Mon, 12/27/2021 - 11:44
Wonderful dresser~
Wow, that is really neat, I really like the quilt like pattern!
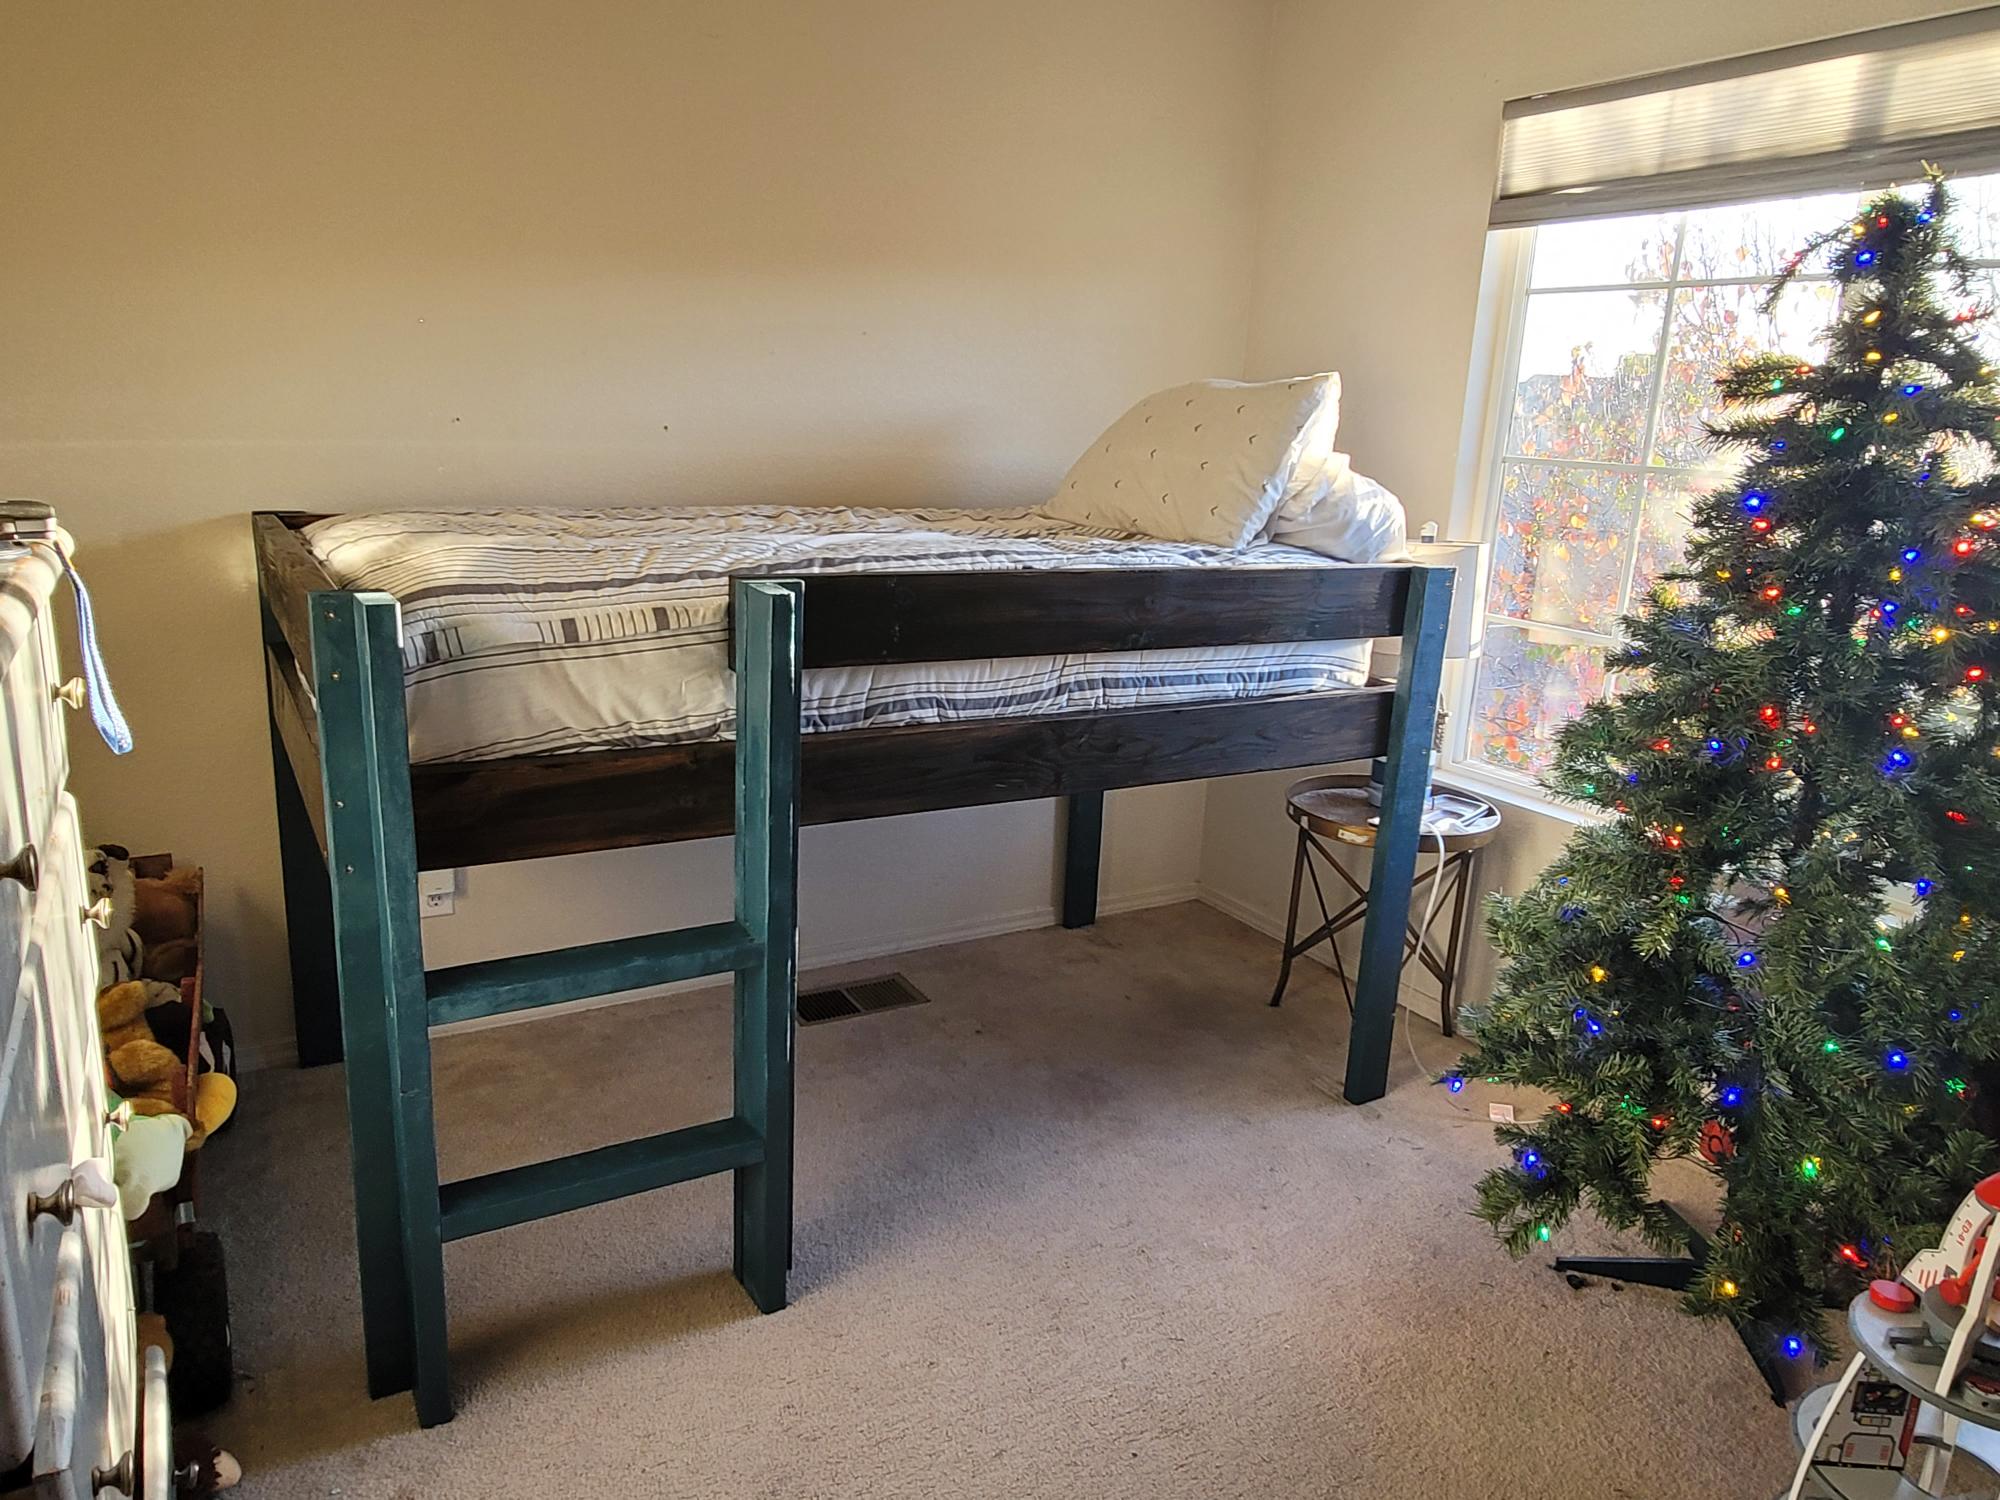
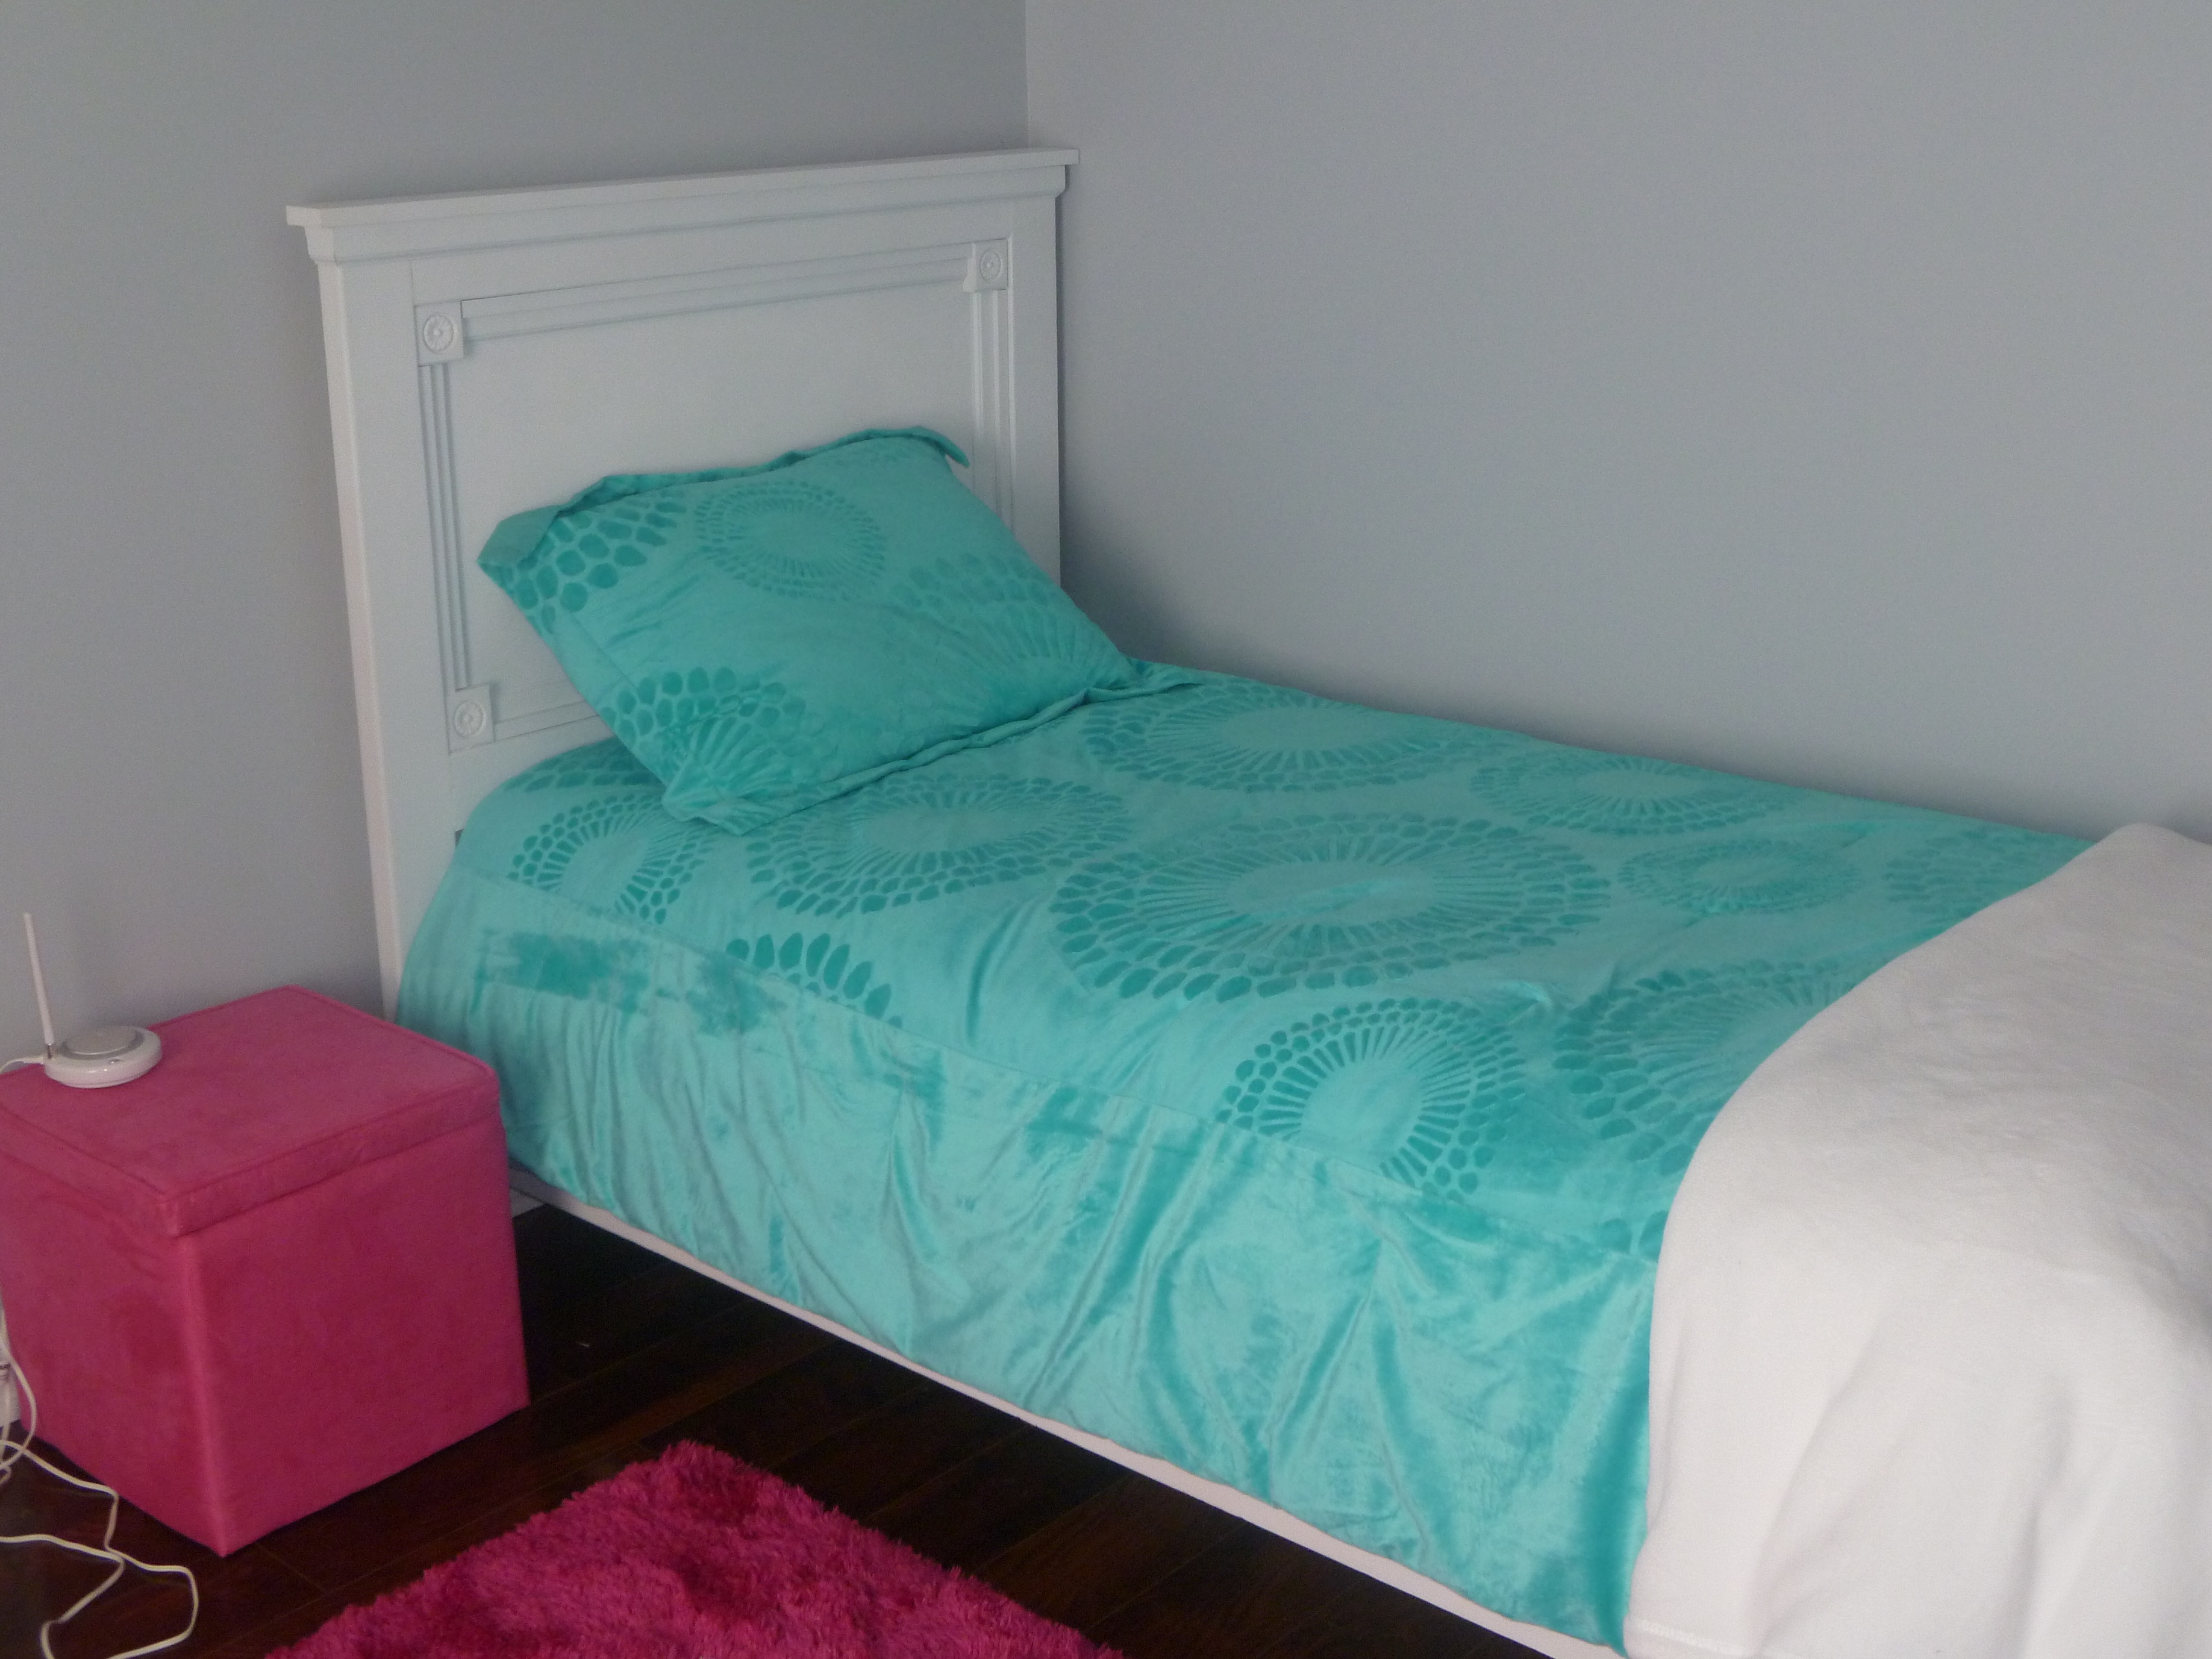
Twin Fancy Farmhouse Bed - Modified

After seeing the farmhouse bed with stenciled headboard, I knew I wanted something similar for my little one. Haven't decided what I want to do with the big empty space in the middle of the headboard yet, but I went ahead and built it. I also changed up some of the decorative pieces just because I wanted her to have a one-of-a-kind bed. The blocks in the corners have little flowers in the middle, the legs at the end have slightly larger flowers on them to mimic the flowers in the blocks. I only made one major mistake on this bed, and that's the height of the headboard. For some reason it looked sooooo tall, so I stupidly decided to cut a few inches off of the legs, and now it's too short. Still mulling over what to do to fix that, but overall I love this bed!! :D It's the second thing I've built, the first being a bench.
Proud note: I built this bed completely and entirely by myself. :) If I can do it, anyone can!

Estimated Cost
$150-175
Estimated Time Investment
Weekend Project (10-20 Hours)
Recommended Skill Level
Beginner
Recycling Center from Ana's Book The Hand Built Home
Recycle bin from Ana's Book. I mod poge glue on burlap to the top, placed on a piece of Plexiglas so I could wipe down, then stained the whole thing with an antique finish over the crackled paint. I also did an L molding around the Plexiglas to keep in place. Came out lovely! Added baskets for my veggies and done!

Built from Plan(s)
Estimated Cost
$65.00
Estimated Time Investment
Day Project (6-9 Hours)
Finish Used
Trash can, potatoes and onion bin and grocery bag holder!
Recommended Skill Level
Intermediate
Comments
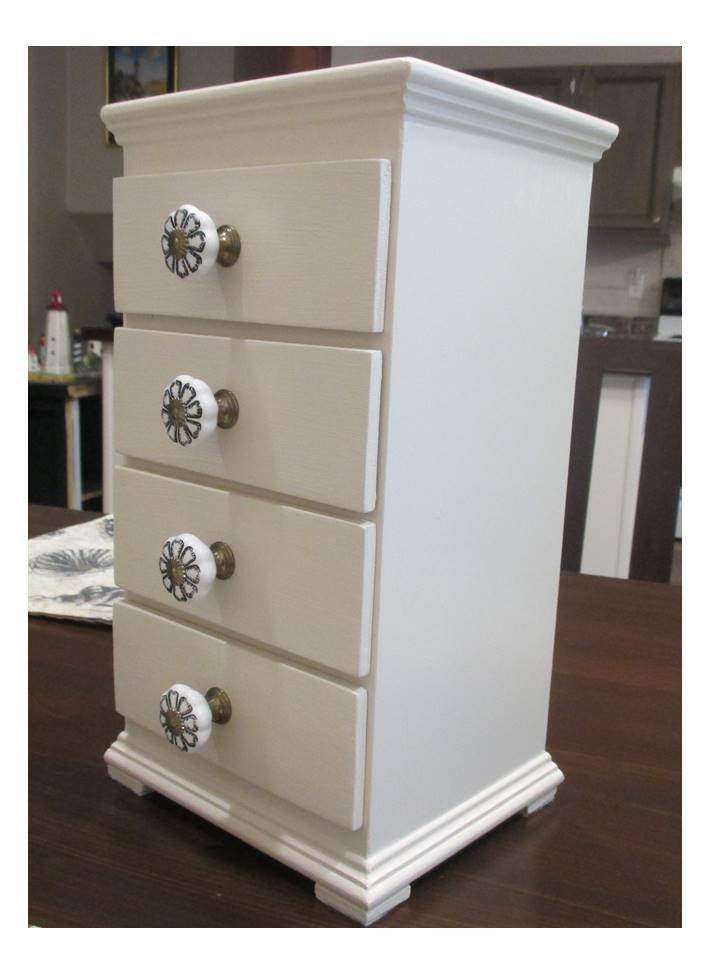
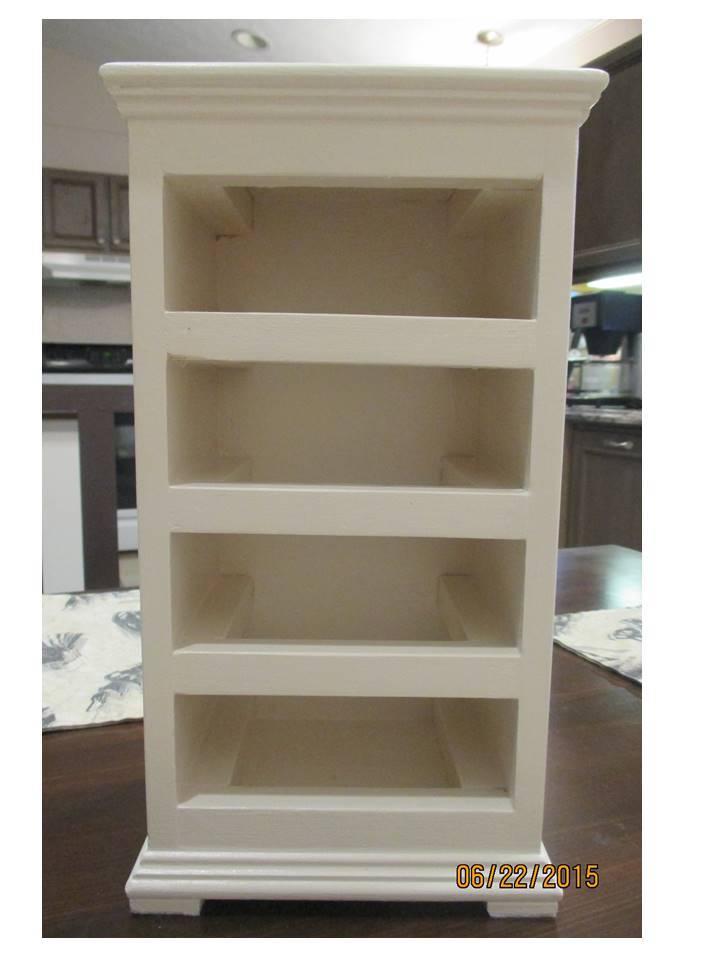
Tower Jewelry Box
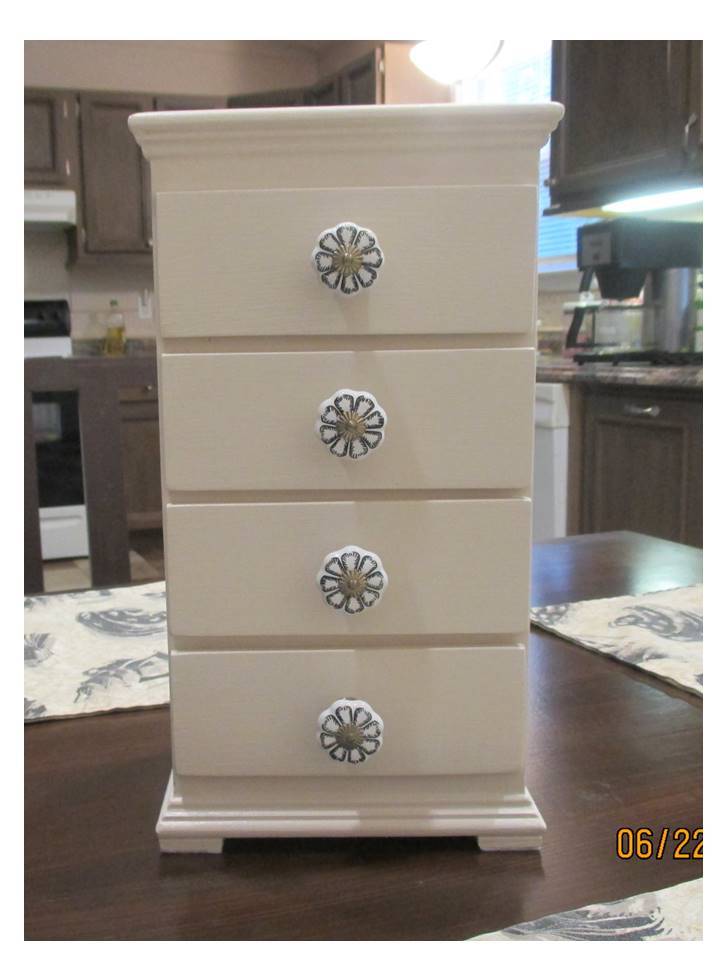
This project is a 4-drawer variation of the Easy Jewelry Box, made with select 1x6 for the top & bottom, craft boards for the box and drawer sides, with craft board overlay drawer faces. No plywood is visible on the outside on this build.
This version has a smaller footprint and is much lighter than the original plan, built using the thinner craft boards, and the drawers slide on S4S instead of full shelves. The drawers are 1/8" shorter than the box depth to ensure they don't touch the box back, so the overlay fronts lay flat to the box. The overhangs are ¾” wide mini colonial moulding, and the feet are squares of 1 1/8” lattice scrap. The design includes a toe-kick and top-kick which allows room for both overlay drawer faces and top/bottom overhang.
I spent a couple of hours redesigning the plan to get this as light as possible, while making the most of the usable space within the footprint, and leaving no plywood edges visible on the outside. The build itself took about 6 hours, including the build, sanding, finishing, and decorating.

Built from Plan(s)
Estimated Cost
Using select pine 1x and craft boards for the box, poplar craft boards for the drawers, and aspen craft boards for the drawer faces, this build cost about $60 for lumber, moulding, knobs, and decorations. Finishing materials were already on hand.
Estimated Time Investment
Day Project (6-9 Hours)
Finish Used
The finish is 2 coats of Clark & Kensington semi-gloss paint + primer in Crushed Peanut. The drawers are lined in embossed felt, and the fancy knobs are ceramic with brass.
Recommended Skill Level
Beginner
Clubhouse Bed
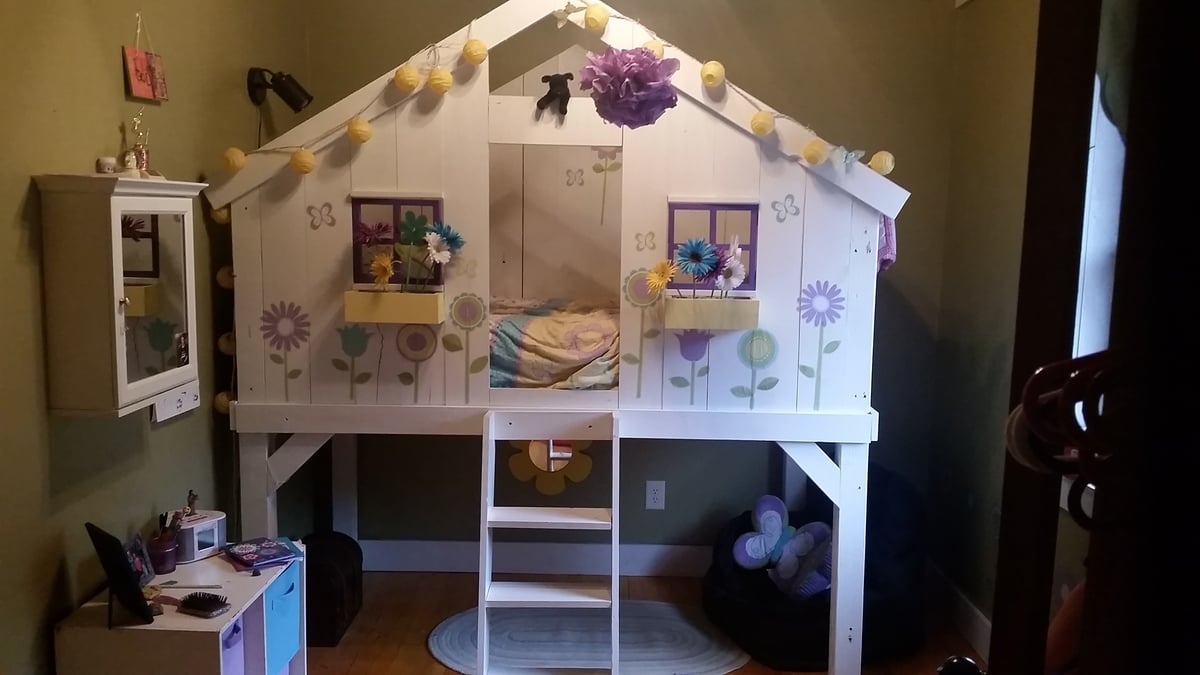
My daughter wanted this for her first bed. I loved how it turned out to match her room!! The plans were super easy to follow. I am so grateful for the time and thought process that went into making these plans. Thank you so much!!
Built from Plan(s)
Estimated Cost
$150.00
Estimated Time Investment
Week Long Project (20 Hours or More)
Finish Used
semi gloss white paint
Recommended Skill Level
Intermediate
Address marker/planter
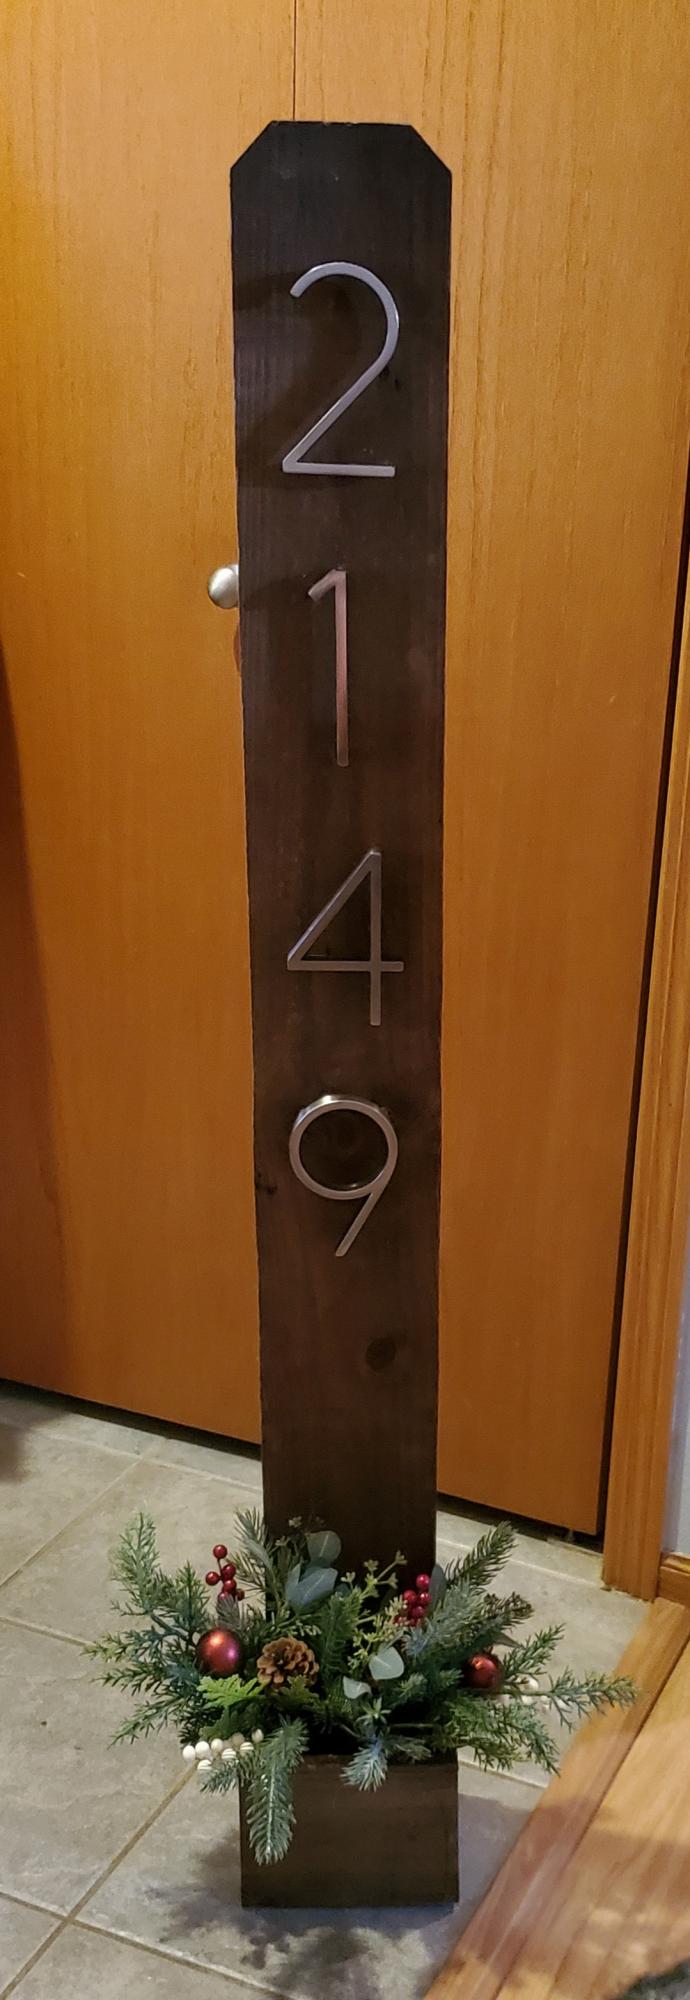
I made this simple but elegant projects for a last minute Christmas gift.
Built from Plan(s)
Comments
Mon, 12/27/2021 - 15:58
Awesome last minute gift!
Looks great, I'm sure the recipient loved it! Thank you for sharing:)
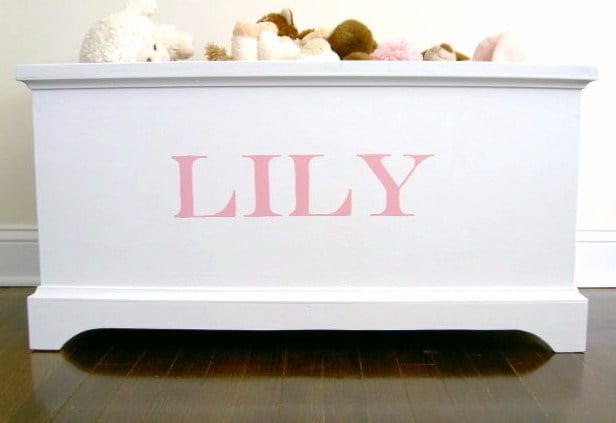
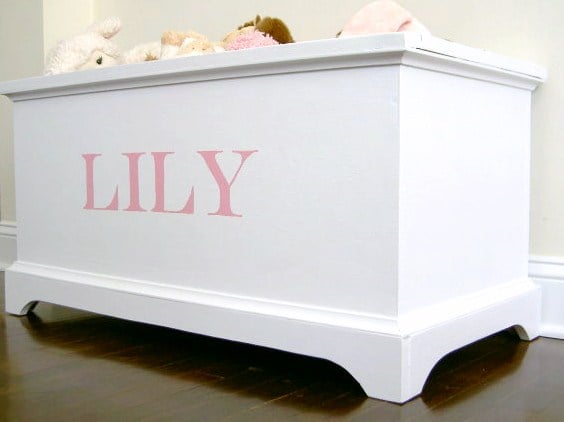
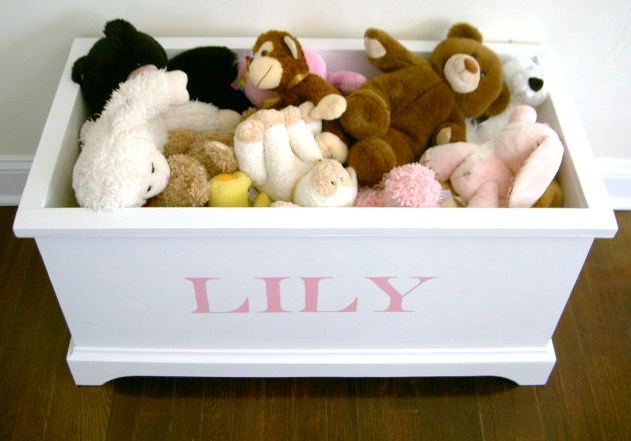
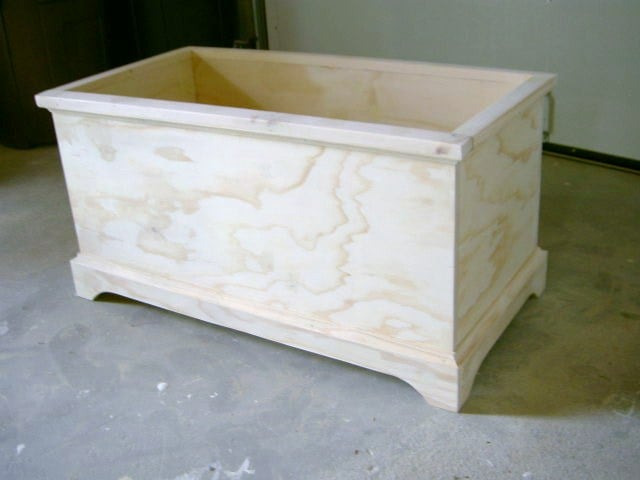
toy box
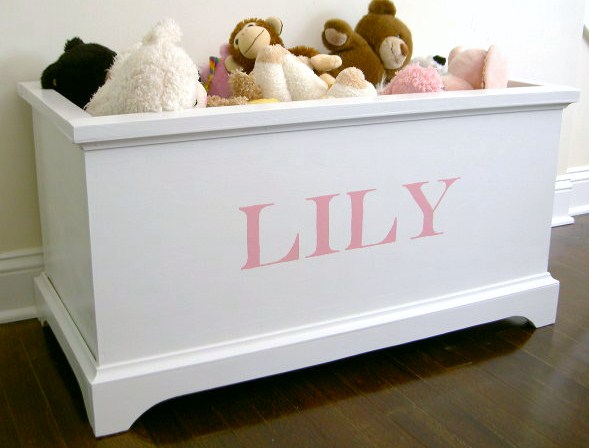
Simple open toy box with moulding detail.

Built from Plan(s)
Estimated Cost
$50.00
Estimated Time Investment
Afternoon Project (3-6 Hours)
Finish Used
1. One coat primer.
2. Two coats semi gloss white.
2. Two coats semi gloss white.
Recommended Skill Level
Intermediate
Medium Dog Kennel / End Table Combo
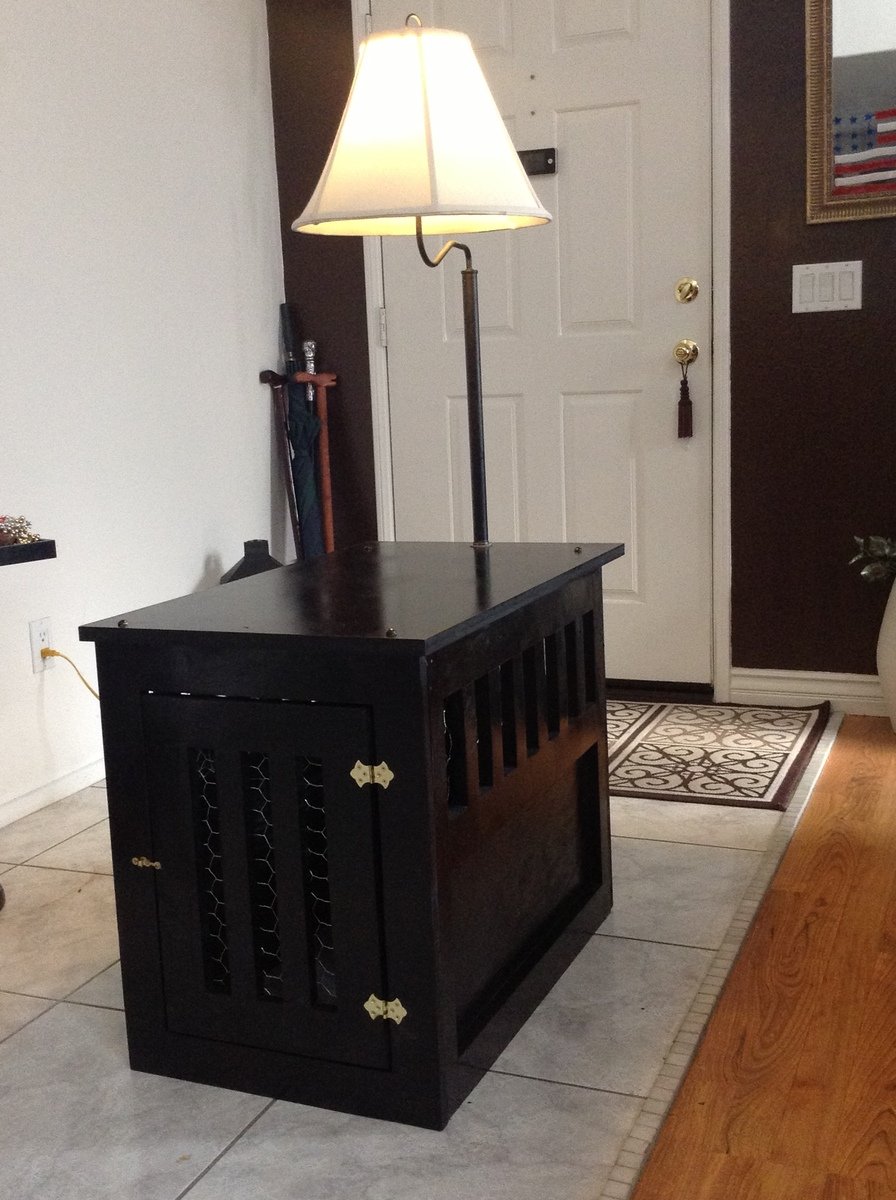
We loved Ana's plans for the large pet kennel / end table combo but we needed a medium-sized one for our Welsh Terrier, Watson. I reduced all the dimensions, ending up with a kennel that's 18"(W) X 24:(H) X 28"(D), perfect for Watson.
To prevent Watson from using the rails as chew toys, I lined the inside of those areas with chicken wire. I also extended the table top an extra 3" to accommodate a swing-arm end table lamp (with the cord outside of the kennel, of course). We painted the kennel black to match our other end table.
This was my first time using the Kreg Jig (80+ times on this project!) and I love it!! In fact, I'm looking for more projects that require the Kreg just so I can play with it some more. :-)

Built from Plan(s)
Estimated Cost
$100
Estimated Time Investment
Weekend Project (10-20 Hours)
Finish Used
Rustoleum spray paint and black semi-gloss spray paing
Recommended Skill Level
Intermediate
Comments
Fri, 09/15/2017 - 18:33
Dog Kennel
I was wondering if you still happen to have the scaled down instructions for this dog kennel and would be willing to share them through email?
Kathy
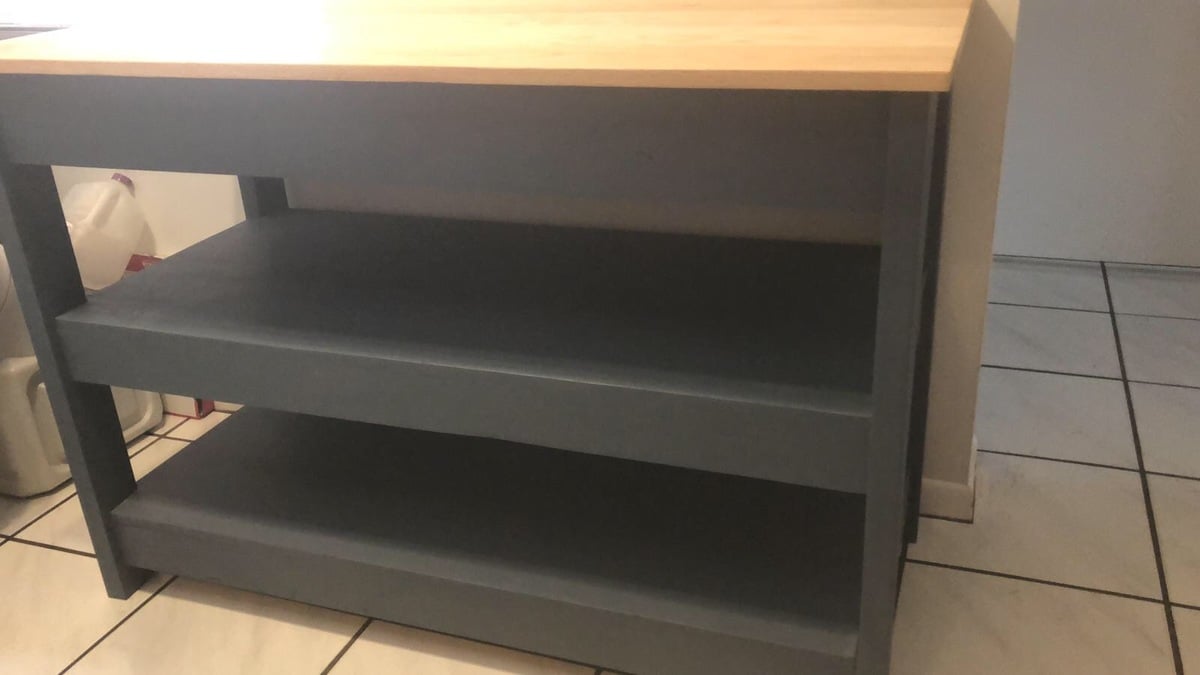
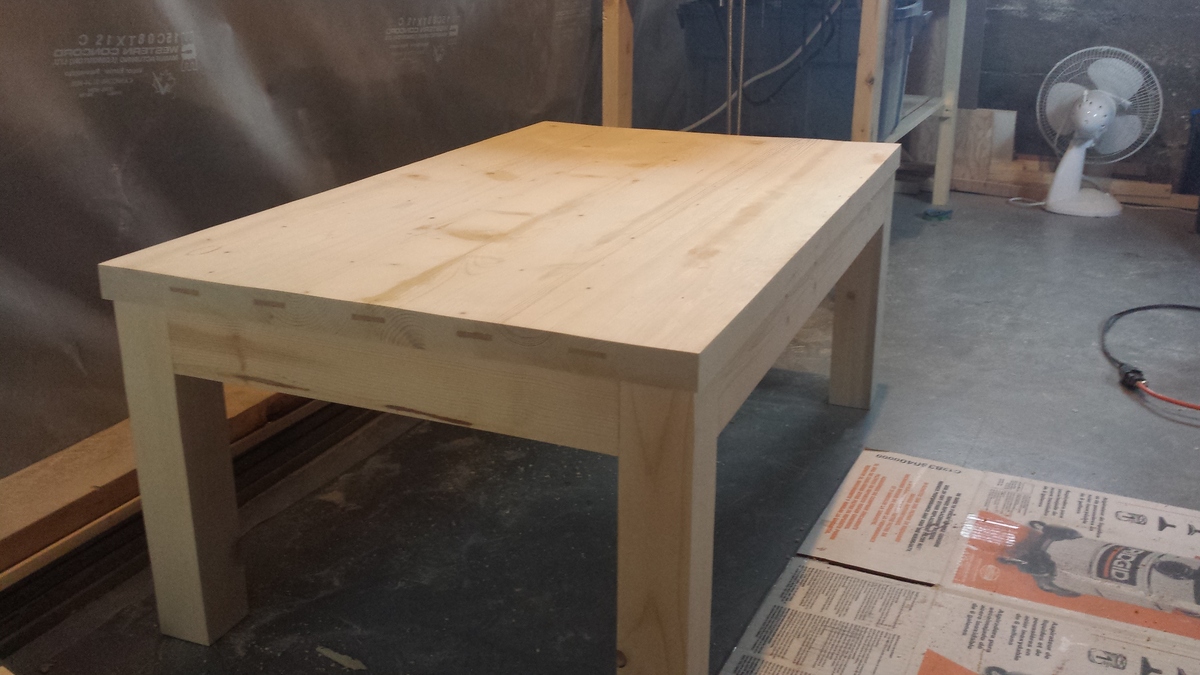
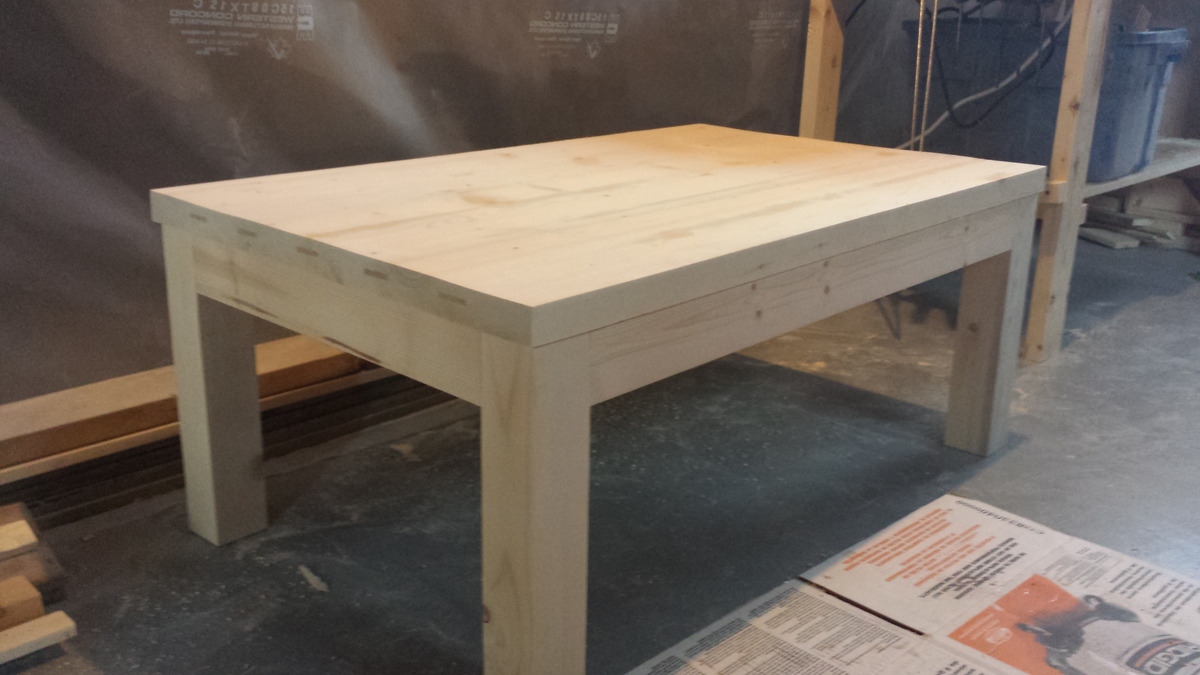
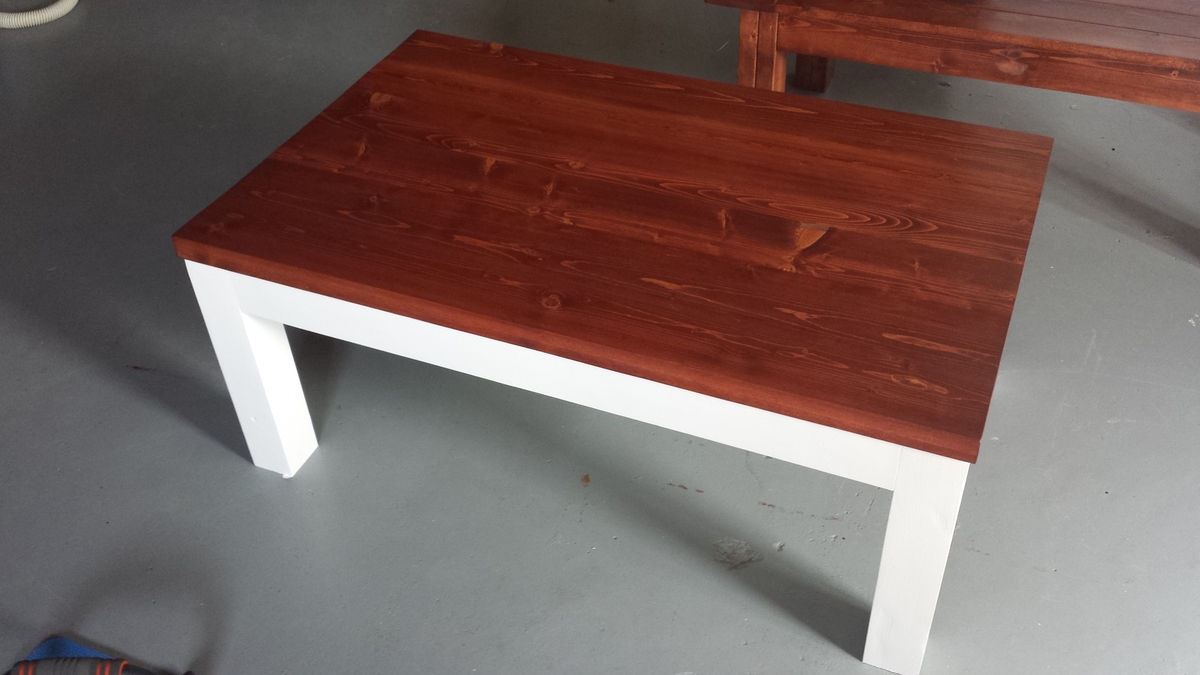
Coffee table
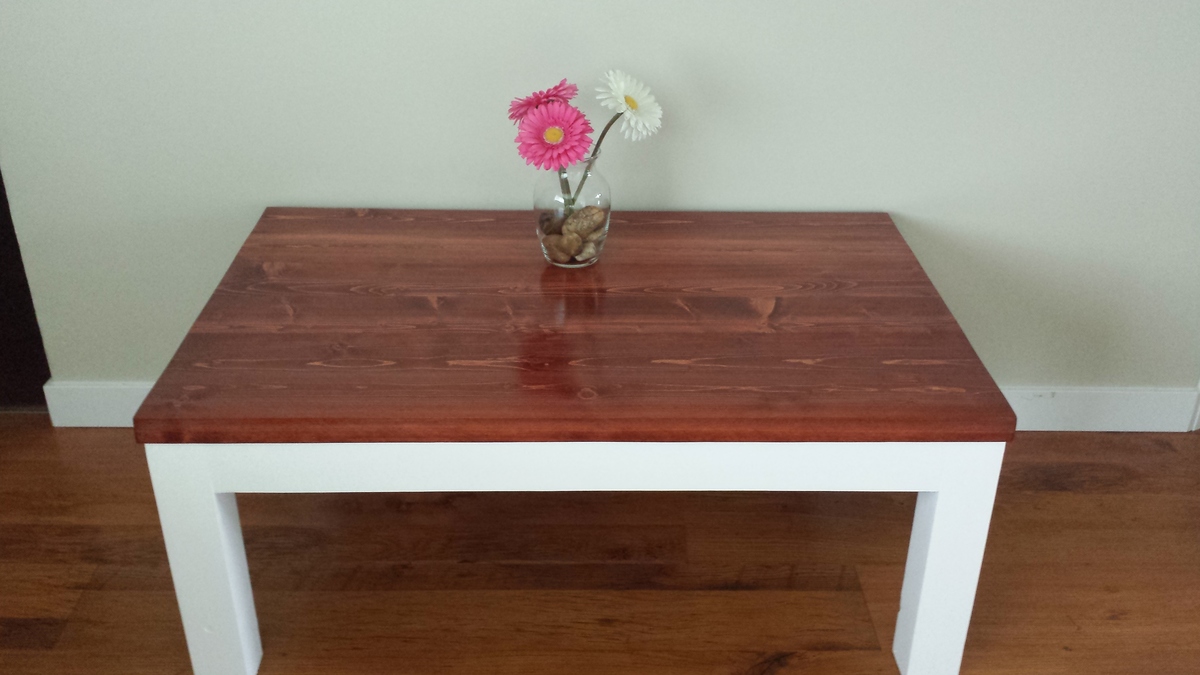
Used the ideas from the kitchen island plan and coffee table plan to come up with a more elegant coffee table.
I made the legs from joined 2x6's cut down to 3x3. Mortised the rails in the legs for a really solid construction, and that way I could also eliminate any excess framing inside the table, and no screws. I was able to salvage all the wood for the legs and rails from a pile of scrap construction lumber.
Joined the top with fir strips between each 2x6 piece. The 2x6's and fir slats were purchased from a hardware store as I don't have a planer to clean up the surface of such wide boards...
Built from Plan(s)
Estimated Cost
$40-80
Estimated Time Investment
Weekend Project (10-20 Hours)
Finish Used
Minwax Red Cherry stain, white furniture paint.
Recommended Skill Level
Intermediate
Comments
Fri, 06/26/2015 - 19:21
Nice looking table. No one
Nice looking table. No one would guess that was made from 2x6's!
My first project - Doll bunk bed!
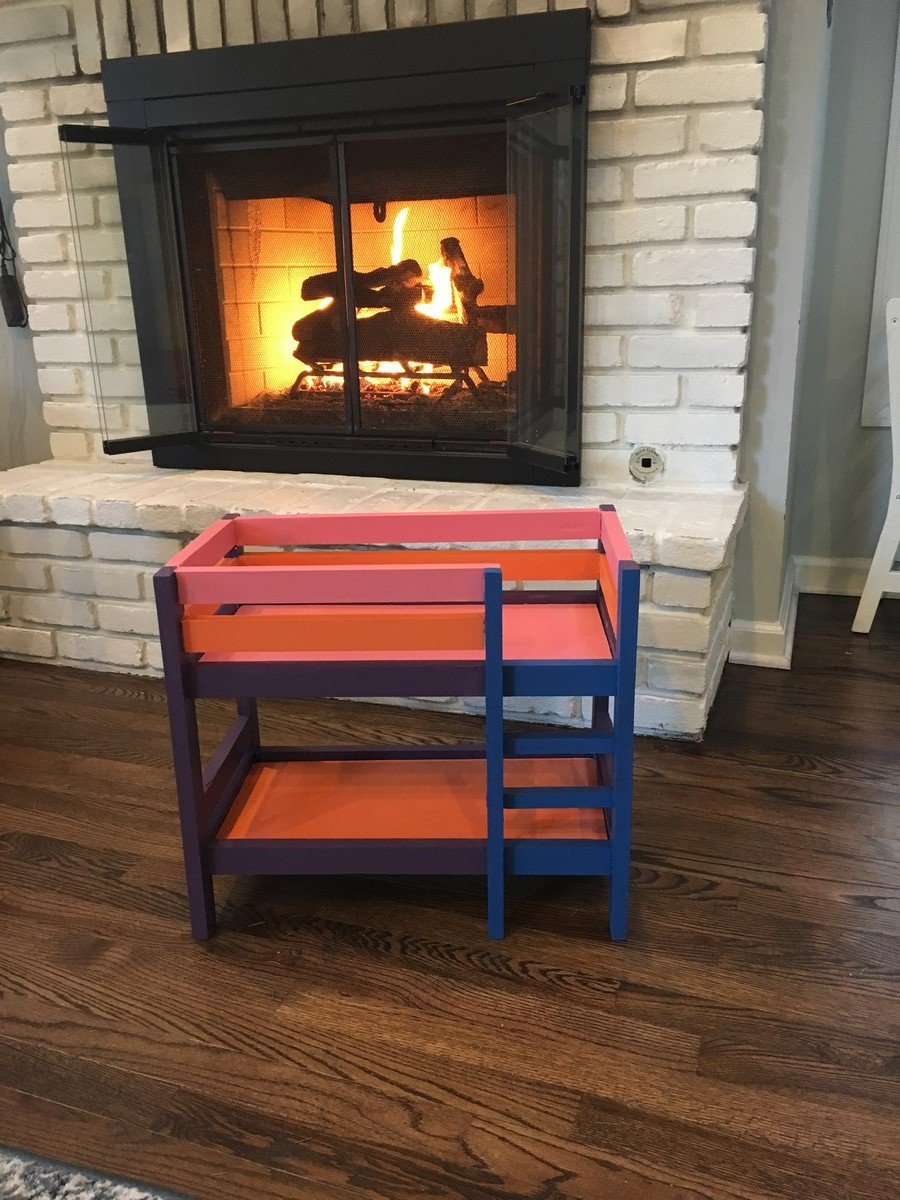
I wanted to do something special for Christmas for my 4 year old daughter. I have no real experience so this was one big lesson. The site and the photos from others made it feel so doable... I got it done in time and we finally painted it. My daughter picked all the colors and we painted it together the last few cold weekend days. What a great experience. Thank you for making DIY feel so doable... now I’m completely hooked and her twin brother told me he wants to build a chair with me.. but a big one ... uh oh.
Built from Plan(s)
Recommended Skill Level
Beginner
My take on the chicken coop design
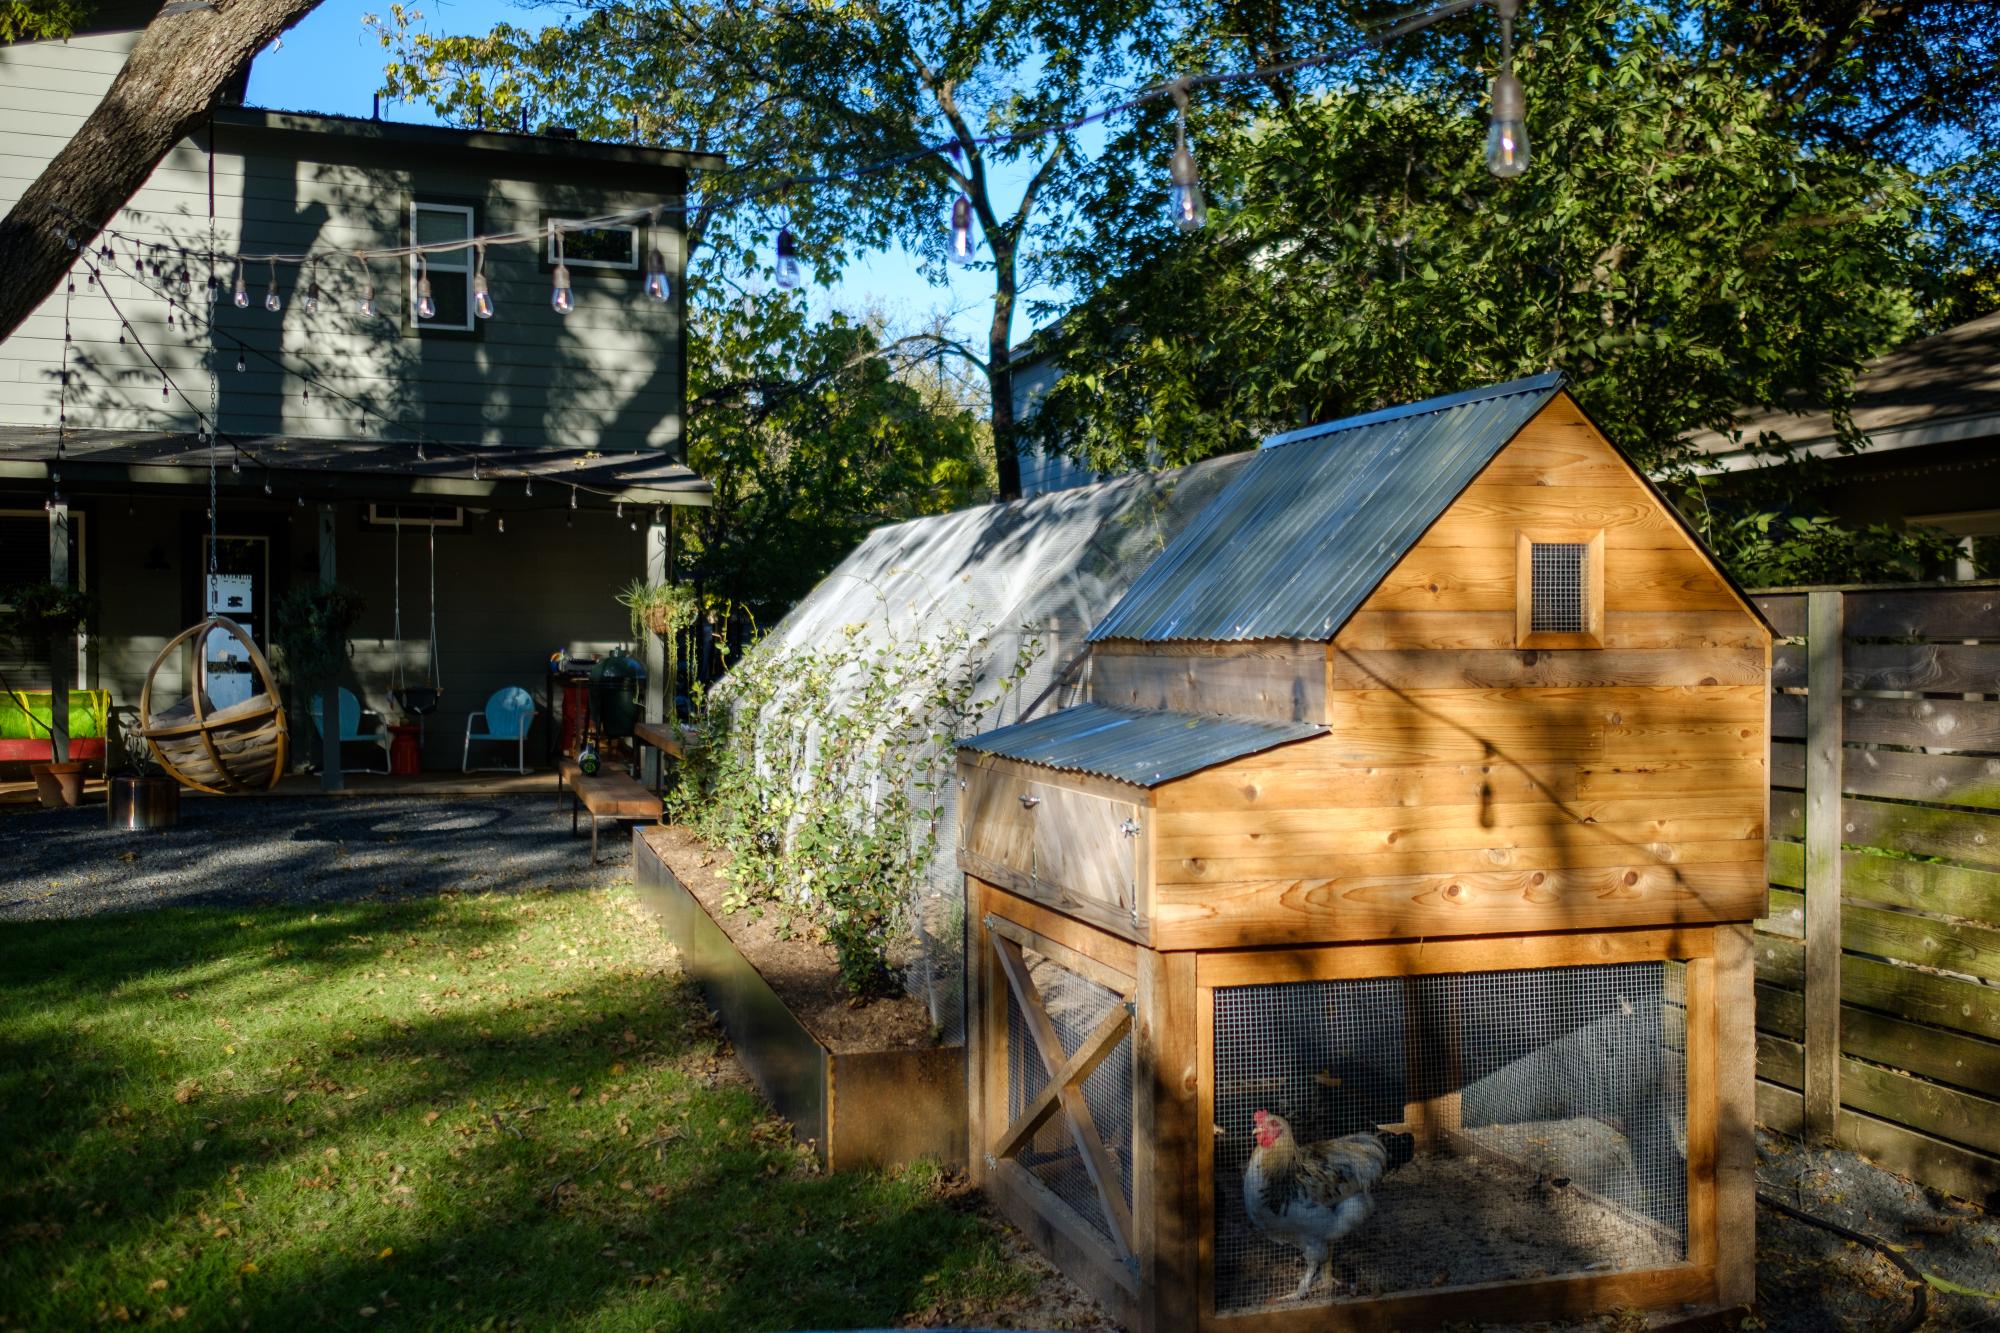
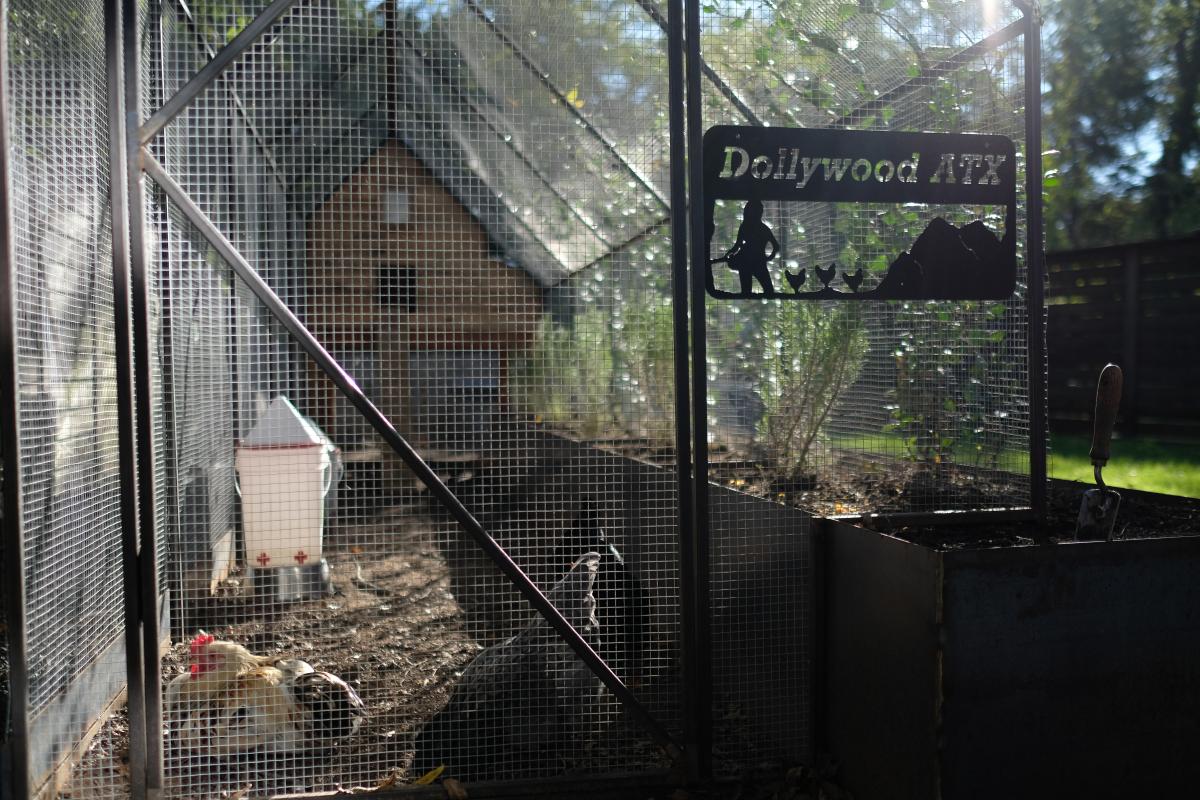
When we became accidental chicken owners, we had to build a coop fast. I found the plans for Ana’s replica of the Williams Sonoma chicken coop and got to work. They were very easy to follow and easy to modify to fit our own needs and aesthetic. We decided to enlarge the coop and remove the planter in the original plans do we could accommodate more chickens while keeping the original footprint. Instead of plywood, we used cedar reclaimed from an old fence we had recently replaced. We also enlarged the rear door to make clean out as easy as possible. I cut pieces of corrugated plastic that fit inside the door and windows to winterize the coop when temps drop below freezing. The run is designed to follow the shape of the coop and is large enough to give our 5 chickens plenty of space. The planter box runs the length of the chicken run, providing some plants to munch on inside and shady vines that will eventually cover the outside. Thanks for the awesome plans!
Built from Plan(s)
Comments
Ana White Admin
Sun, 12/26/2021 - 17:34
Awesome tote!
Perfect use of scraps, it looks super cool too!